1
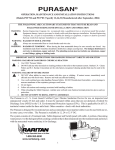
“Gateway I” - 2013 Aspen C90 Power-Proa Catamaran GENERAL DESCRIPTION: Exterior: The Aspen 28' Motoryacht is an innovative yacht design, with fiberglass hulls, cabin, swim step and stainless steel welded fittings and handrails. The window frames have sliding glass panes and screens. The cabin areas are appointed with teak and holly. The starboard hull which accommodates the 150 hp Cummins diesel is 35% larger than the port hull, affording a roomy port side deck trail, enabling safe, secure passage to the fore deck by passengers and crew. The cockpit is especially low for easy boarding, fishing and for handling the dinghy. Side steps facilitate reaching the outside deck trails to go to the fore of the boat as well as stepping out to reach the dock. The boat hook hangs above the aft window in the aft- cockpit. Fuel fills are on each side deck abreast of the aft cabin bulkhead. Water tank fills are on the inside walls of the cockpit, just below the diesel fills. A salt water washdown outlet is located below the port water tank fill. The waste pump-out is located under the transom walk-through gate. While using the electric macerator pump off-shore you can view the pumping by looking aft through the helmsman slider window toward the stern of the boat. The shore power connection is on the outside port deck trail just forward of the helm seat. The boat requires a 30-amp connection. A shore power cable and 20W power adapter is supplied and stored next to the propane locker in the aft port cockpit wall locker. Forward deck has the anchor windlass with foot switches, allowing chain/rope movement both “up” and “down” electrically (be careful this is a very powerfull device with pinch points) also operate solo NEVER have one person run buttons and another holding the chain. A locker on the starboard side of the foredeck stores the chain and rope (extra bumper also located there). When the shore power cable is to be disconnected, the dock breaker should first be turned to the “off” position to avoid arcing which could damage the plug contacts. The boat’s 30-amp shore power cable is 50 feet long and stays with the boat when away from its home dock. Shore power cable must have power from shore if all 110-volt equipment is to be usable. The only exception is power provided via the two 12 volt to 120 volt inverters – one under dinette and one behind dash in master stateroom: max 400 watts. Gateway I is equipped with 2 solar panels on her roof to regenerate the DC system power on sunny days. By carefully managing the load you will have ample power for all DC needs including the refrigerator. The heater can run all night without draining the house batteries, no problem. Gateway Yachts – Adventure Yachting Excellence… Interior: There is an upholstered helmsman's seat to port. It allows storage for 2 lifejackets, flares, first aid kit, bag with instruction manuals for boat equipment, etc. It also flips up and forward to expand counter space for cooking. To starboard is an upholstered first mate's chair. In front of these chairs is the instrument/steering console with a full complement of engine instruments, trim tab and other switches, a VHF radio, stereo CD, and a sophisticated full-featured plotter. In the console face is a storage spot for chart books and navigating accessories. Behind the seats the cabin consists of the dining area settees and food prep areas. The dining table lowers and seat backs cover it to become a double bed – beware that hinges will mark the table, first lay down mat to protect table from cushion hinges. There is a port quarter berth with its own light. Engine Room The engine room is accessed through a door in the aft cockpit, with additional equipment accessed by lifting the aft starboard hatch on the cockpit floor (starboard lazarette), the latter of which is equipped with a pressure strut to hold the hatch open. For more complete inspections the hatch under the dinette can also be removed ( be sure to orient the hatch in the same way as removed so it reseals air tight/noise tight. The engine room door is above and aft of the starboard engine. This area has a light over head (be sure to turn off when done). The engine is the very-reliable 150-horsepower Cummins Diesel. Directly in view of the door are the conveniently-reached on-off switches for the three sets of batteries (starting, house/accessory, and generator) and a parallel switch for emergency engine starting or charging. Note that if the house batteries have been run dead flat, the 110v computerized chargers will not come on until they see some voltage in the batteries. You will need to use the emergency parallel for about 5 minutes to charge the batteries slightly to get the chargers to come on. Be sure to switch parallel off after 5 minutes as extended charging via parallel will damage the batteries. The panel also holds the main fuses and circuit breakers. The Windless breaker is located in the master stateroom hanging locker. Its power is supplied from the bow thruster power supply. The house and start batteries are aft under the starboard cockpit floor hatch. The engine and transmission dipsticks are reached from the doorway and floor hatch. Dinghy: The boat is equipped with an 8'6” Zodiac high pressure floor inflatable dinghy with a quiet, Suzuki 2.5 hp outboard motor, oars, gas can, and a built-in seat. It holds 3 people nicely, with a maximum of 4 when underway. The dinghy is carried on manual davits on the swim platform for easy lowering by line from the cockpit. The motor is stored in the center aft cockpit wall locker. Deck Equipment: The boat has 5 mooring lines; a main anchor with at least 200' of rode and 40 ft of ¼” chain; 4 fenders/bumpers; a hose for fresh water tank filling and boat washing; 2 deck chairs, complete galley equipment, and a boat hook. Safety Equipment: This vessel is equipped with two fire extinguishers. One is forward to the port of the helmsman's chair. The other is on the forward bulkhead of the quarter birth. There are 8 life jackets (captain and first mate's under the captain's seat, 6 in the port locker under master stateroom mattress), flares (port locker under the captain's seat), a throwable float cushion (in the center aft cockpit wall locker by the dingy motor), and a VHF radio. Gateway Yachts – At a Fraction of the Price… Specifications, Capacities, & Important Numbers for Gateway I: Vessel Name: Gateway I Vessel Official Number: Washington State Registration Vessel U.S. Customs Permit Number: Vessel Registration Number: FCC Ships License Call Letters: Washington Parks Permit Number: Hull ID Number: APE101119L113 Capacities: Sleeps up to 5: Two in master stateroom, two on salon settee, and one in quarter birth (entrance port aft of main cabin). Fuel: 80 Gallons in two 40 gallon tanks Fresh water: 50 Gallons Holding Tank: 26 Gallons Dimensions: Length: On Deck: 28', Length Over All: 30’ 4” Beam: 10' Draft: 33" (half tanks) Displacement: 7900 Pounds (Empty) Fluids: Motor Fuel: #2 Diesel Only Motor Oil, mains: Please see manufacturer's manual on board Transmission Oil: Engine Coolant: Operating Parameters: 2200 RPM 12.5 mph 4.2 GPH; 3200 RPM 14 mph 4.6 GPH (All estimated fully loaded) 3500 RPM 18 mph 8.0 GPH (Max Cruise RPM 3700) Note: In larger chop its best to retract the trim tabs and increase the speed. Often 3600-3700 is smoothest. For best economy in small chop extend the trim tabs fully and cruise at 3200-3400 RPM. FILLING THE DIESEL FUEL TANKS Fuel gauges are at the upper port helm console. Start slowly when fueling either tank. Use a standard hose and nozzle (like those on auto gas pumps). Fuel each tank, filling both the tanks completely but do not spill fuel! You can control the flow rate by sound, as the fill pipes make the characteristic “getting to the top of the bottle” pitch change when the fill pipes begin to fill after the tanks themselves are full. The fuel gauges register when the engine is off. In the right light they can be seen while fueling, or someone else can monitor fueling progress. Other than for returning the boat after charter it is most economical to run with less than full fuel and water. We typically fill to 5/8ths tank and refill when at about ¼ tank. There is no reason to carry 300 miles of fuel at all times. Gateway Yachts – Adventure Yachting Excellence… FUEL TANK SWITCHES Fuel tank switches are to port of the helm console. Since Gateway I is a catamaran with a fuel tank in each hull, she will run more evenly in the water if the fuel tanks are switched from time to time to regularize out take. This same logic applies to the water tanks. If you empty one side and create a list that you correct with trim tabs while underway, the boat’s heavy sea handling and tracking will not be ideal. FILLING THE WATER TANKS Water tank inlets are on each side of the cockpit bulkhead near the outside of the cabin bulkhead (caps are labeled). Their capacity is monitored on the gauge to starboard of the AC panel. They are labeled Tank 1 and Tank 2. As with the fuel intakes it is best to start the flow slowly and then speed up to about half speed while listening for indications of the tank becoming full. TRIM TABS The boat is fitted with a set of trim tabs. These are wide “flaps” attached to the aft end of each hull, under the swim step at the trailing edge of each hull. They are operated electrically under the control of the skipper by switches to starboard of the wheel at the helm. At low speeds, up to approximately ten knots, the tabs do little, and should be left in the “Bow Up” position (see below). But at speeds over this range, the tabs begin to take effect and will help the operator lower the bow for more efficient cruising. The best way to adjust the tabs is to lower them while watching the “Speed” indicator to get the highest speed at a given throttle setting by adjusting “Bow Down”. If the tabs are “Bow Down” too much, the steering will get mushy and speed may drop off a little, in which case, the tabs should be adjusted “Bow Up” a little. More details are supplied in the manufacturer’s manual (in the black bag under the helmsman’s seat). Because the trim tabs are large, THEY SHOULD BE IN THE FULLY-BOW-UP POSITION WHENEVER THE BOAT IS TO BE OPERATED FOR EXTENDED DISTANCES IN REVERSE. In addition, having the tabs “Bow Up” draws the hydraulic cylinders in, exposing the pistons less to the effects of the salt water. For the same reason they are susceptible to damage if left in a down position once the vessel is moored or anchored. ENGINE & SEA STRAINER Start engine 5 minutes or so before departure (turn key to right and let go, it will crank until it starts or needs to be turned again; no need to hold it). By the time you are away from port the engine might still not be warm enough for RPM over 2000. Monitor engine temperature on digital gauge. When temperature is 170° you are good to go. Do not run it over 2000 RPM until the temperature gauge reads at least 170° Fahrenheit. There is a blower for the engine compartment. A cool engine is a happy engine. Turn on the blower, lower panel to port of steering - at latest before leaving the harbor. This is not a “planning” boat! It is sensible to operate the boat in the 3100 - 3500 RPM range, and you’ll enjoy smoother, quieter, more pleasant cruising and economy, too! The engine requires a regular, daily check. Once underway you will probably not check it while in use, since it is approached mainly from the cockpit. So, please perform this check each morning (when the engine room is cool!): CHECK THE OIL. The oil level should be between the two marks on the dipstick. Please consult the manufacturer’s manual for details DO NOT OVERFILL the crankcase (above the “full” mark), as the engine will quickly waste excessive lubricant. If oil is required often, check under the engine carefully to be sure there is no oil leak, and if there is, have it corrected promptly. CHECK THE COOLANT LEVEL. If coolant is below 1.5 inches in the reservoir, add till about 2” (½) full. Over filling the tank will cause it to burp into the bilge. Check if there is any sign of a coolant leak (light blue color) under the engine, and if there is, do not run the engine; if no leak; Gateway Yachts – At a Fraction of the Price… add coolant to the tank from the jug of pre-mixed antifreeze/corrosion inhibitor/water supplied on the boat. VISUALLY INSPECT THE ROOM whenever you’re in the engine room, asking yourself, “Does everything look right?” Look at the pans under the engines and transmission. While some drips are normal, there shouldn’t ever be substantial accumulations of any fluids! CHECK THE SEA STRAINER ONCE A WEEK, or immediately if an engine runs “hot”. To check the strainer, shine a flashlight into it. While some “fuzziness” from trapped thin growth is normal, you should see the perforated metal element clearly with no debris in the bowl. If obscured, you should clean the strainer. See below and manufacturer's manual on board. CHECK TRANSMISSION OIL LEVEL ONCE A WEEK, or more often if a transmission shifts erratically, with the dipstick on the starboard side of the transmission (blue line around it). It is unlikely that any oil will need to be added. Be sure to check under the transmission for leaks! Low transmission oil is a serious matter. Manual has details. To check the transmission oil start the engine then let it idle for 1-2 minutes. Turn engine off and directly pull the dip stick laying it on a clean paper towel so the wet clear oil indicated on the towel is its actual level. If it is below the mark add 30 wt oil via the small yellow funnel through the dip stick hole. It only holds 2 qts so it normally would take a ¼ qt or less. Sea Strainer Cleaning If the sea strainer needs cleaning (see above regarding inspection) here is the procedure: 1) Close the large seacock just under the strainer by moving the handle (see picture in manual). 2) Remove the black plastic wing nut securing the clear cover of the sea strainer. Then, remove the strainer by pulling it out from the top of the assembly. Rinse the strainer thoroughly and, if necessary, remove any debris from the glass housing. 3) Reinsert the strainer and carefully reposition the black o-ring gasket in the groove. Replace the top cover, reinstall the wing nut pretty snug but not overly tight as it is a plastic lid!, AND TURN THE VALVE BACK ON — failure to do so will overheat the engine. This entire operation will take 5-10 minutes at most, and will assure you of a cool engine. DINGHY, DAVIT & OUTBOARD MOTOR Dinghy: The dinghy aboard this boat is a Zodiac high pressure bottom inflatable. It has a seat for two; more can sit on the pontoons. For safety, and compliance with U.S. rules, there should be a life jacket aboard the dinghy for each passenger aboard whenever the dinghy is at sea (wearing them is smart!). Please be careful when pulling the dinghy ashore on beaches to minimize damage and scratches to the bottom. It can be lifted by two persons even with the motor attached if one is on each side. Don’t “Ram” the beach; you can bump up to the beach gently and step ashore over the bow, pulling the dinghy a little more ashore as each person off-loads. Don’t forget to raise the outboard when the boat is beached! Keeping the dinghy clean, and carefully stowing its contents will make your trip a safer and more pleasant one! Try to keep rocks and gravel out of the dingy as they migrate to the crevasses and can cause damage. Dinghy Davit: The dinghy is secured on a pair of manual davits. To lower the dinghy, have a crew member assist you as the two of you simultaneously release the support rods and store them on the transom brackets. Be sure to keep the rods in plane as you swing them to the latch position or they will bind up on the hinge side. With the blue tender line push the dingy over center and lower into the water. The blue line is good for tying to docks and the boat. Wait to unclip the dingy from the snap davits on swim platform until the motor is installed and clamped securely. Please consult the manufacturer’s instructions. To bring in the dinghy, reverse the launching procedure. Gateway Yachts – Adventure Yachting Excellence… Outboard Motor: The supplied outboard is a 2.5 hp Suzuki Outboard. It is a reliable, smooth running unit. To start the motor: 1) Be sure it is on, out of gear and the twist grip is in start position. There is a clip that is applied to the on/cut-off switch. This clip is on a curly cord that can be attached to the operator’s life jacket, so the engine will cut off if the operator is away from the engine. 2) Open the tank vent and the fuel supply lever just next to the shifter. 4) Set the choke – Pull twice most often it will start. 5) If the first couple of pulls are not sufficient for starting, push in the choke and pull twice more. Be ready to adjust the choke when one of the next pulls starts the engine. Over choking will flood it. This little motor is very dependable, and it is also sensitive. It may take some coaxing. 6) As soon as it starts, ease the choke to 1/2 while keeping the engine running. Let her warm up a few minutes before pushing in the choke and put it in gear. To stop/storage of the motor: 1) Disengage the RED engine cut-off clip (slips out from under the red button). 2) Re-tighten the fill cap vent and switch the fuel supply OFF. If you don’t it will spill fuel in the storage compartment and smell, also be sure when replacing on travel rack that the tiller handle is DOWN otherwise the engine oil spills out. Outboard Motor Fuel and Fuel Tank: The fuel tank for the outboard is on top of the motor. It uses gas and no mixing of oil is required. There is spare fuel in a 'can' attached to the dinghy. FRESH, SALT & W ASTE W ATER SYSTEMS Hot Water Heater After the water pump, water is distributed directly to the cold water faucet lines. In addition, it goes to the boat’s hot water heater. This heater uses two energy sources: (1) heat from the engine, so that whenever the boat is running or has recently run, there is hot water and, (2) 110 volts AC from shore power, if available and the breaker is “on”. The heater is insulated well enough to keep hot water quite a while without power, provided you haven’t wasted a lot in dishwashing! It should be left on AC power only when needed as it draws 2000 watts. Waste Water Waste water from the sinks and shower (but not from the toilets) is dumped overboard in accordance with U.S. and Canadian law. From sink basins, the water simply flows by gravity overboard. Head Water Supply: The head uses salt water. No attention is necessary. The water from the black water holding tank can either be emptied when far off shore or pumped while in port. See manual for instructions. SYSTEMS, ELECTRICAL: AC & DC Concepts Each year it seems more folks are confused by the operation of electrical systems on yachts than by any other subject! Don’t feel discouraged if something isn’t clear: you’ve got company in your confusion. So let’s try to cover some theory here first. Most of the equipment on any boat is run by 12 volt DC electricity from the boat’s batteries. This is true because DC should always be available, even more so because of Gateway I’s solar panels. Since the batteries are used so much, we have to replenish, or charge them. The most important way we do this is by alternators on the vessel’s engine (125amp). The engine will provide enough electricity in Gateway Yachts – At a Fraction of the Price… most every case to run everything and still have some energy left over to add back to the battery, that is, to charge it. But what if the engine isn’t running, the boat is not plugged to shore power, and/or it is too dark or cloudy for the solar panels to generate? Then, the batteries are slowly depleted until they have “run down” and there is no more electricity stored in them . . . a big problem, because then we can’t run all we want to on the boat. The Aspen C90 is equipped with two battery systems: one for the house and one to start the engine. It is also equipped with a VSR (voltage sensitive relay) that allows the engine battery to help with house loads initially but as soon as the engine battery voltage drops below 12.4 volts the VSR come on and protects the start battery for starting. In any case a good skipper and crew have “electrical power management” in mind whenever they turn an electrical gadget on or off! It is with this in mind that we can cite a reality: If we need more electricity than the batteries alone must provide, and if a propulsion engine isn’t running, we will need to get our electrical power from an alternative source! That’s the most important reason why we plug the boat in to shore power: to keep from running down the batteries. With battery chargers getting their power from shore power, we can keep the batteries charged, or, at least, from getting too low. To keep the batteries from running down, we have alternators run by the engine, solar generators and battery chargers that get their power from shore power. For the large equipment that runs on 110 volts AC, we have shore power or we can make AC out of the batteries’ with the small DC to AC inverter. There are two inverters on board and it is easy to ask too much of them, an example would be an 1800 watt hair dryer is always too much. If the inverter begins to squeal, it needs to be shut off - your load exceeded its capacity. Battery Banks The batteries on this boat are not just one, big all-purpose battery. To have redundancy, there are actually dedicated batteries assigned different tasks. A “starting battery” is only used when starting the engine or underway. That way, we won’t run it down playing the stereo, for instance, and then be unable to start an engine. This battery is charged by the engine alternator when the engine is running, or can be charged by the battery charger when there is shore power. It can be switched “on” and “off” by the battery switch inside the engine room door. However, switching off any of the boat's batteries is not recommended under normal circumstances. A second battery is called the “house” or “accessory” battery(actually two batteries, three total). Connected to this are all the pumps, interior and exterior lights, horns, navigation and radio gear, inverter, etc. This bank runs the boat’s “house”. It is charged by the alternator on the engine, and, when there is shore power, by the charger if it is on. It, too, has an “off” - “on” battery switch in the engine room. In case the starting battery is low, a “crossover” (emergency battery parallel) switch in the engine room can be closed; this switch connects the engine and accessory battery together. Be sure to turn this switch OFF after use! The manufacturer is not fond of using this switch. One must be very careful with it. Since a battery works by making electricity through a chemical reaction, one component of which is water, we need to be sure the batteries have water in them. Such battery servicing is normally done routinely every few weeks by Gateway Yachts. THE DC ELECTRICAL SYSTEM The nerve center of the DC electrical system is the DC circuit breaker panel (below the engine start/stop buttons and keys) at the helm, and, on the front center of the helm, the DC control switches and more breakers. On these panels the circuit breakers and switches control power to the boat’s various systems. There is a main DC breaker; there is also the windlass master switch here, and a meter with a selector switch to let us monitor any of the three batteries. On the circuit breaker panel to port of steering wheel there is a switch which must be engaged to operate the overboard macerator pump used to empty the holding tank. Please note the DC switch panels to the left of the dash have face plate covers that snap off and there are individual fuses for each switched device there under the rubber dust cover. In addition to the circuit breakers, there are a number of fuses on Gateway I, particularly on each piece of electronic gear or bilge pumps. It is rare for one of these fuses to blow! Gateway Yachts – Adventure Yachting Excellence… Some of the main panel DC breakers serve as switches. Others simply send power to the main dash switch panels. Consult the manufacturer's manual for explanation of the switches. Wiring and fuses are aft of main cabin bed (behind the dash snap cover). DC Voltmeter The voltmeter adjacent to the DC circuit breaker panel shows the voltage of house or start battery banks as selected by the switch position. Note: if the house and start batteries are both full the voltage level will be identical with the switch in either position as the VSR noted above has the batteries paired together. Position 3 on the switch is not connected and will typically show 0. Voltages can range from 11.0 volts or less (battery low) to 12.6-12.8 volts (battery normal) to 13.2 volts (battery receiving "float" charge) to 13.5 volts or more (receiving "bulk" charge). Windlass The anchor windlass is controlled by two footswitches on the foredeck, and by switches at the helm. In the event of windlass failure, an emergency handle is stowed in the captain's bag to port under the captain's seat. This same handle is also used to set the tension or pull up torque of the windless by how tight the capstan top is snugged down. If the motor runs but the unit slips this nut/cap needs to be snugged up. If it’s too tight when the anchor is brought up to the roller it will slam the roller and could damage the fiberglass. It’s a good practice to just tap the power button as the last of the chain is brought in. It also good to bounce the line in and out to clear the mud off the anchor while it’s still in the water. Remember: This is a powerful electrical tool with many pinch points. It also consumes considerable electric power. Be sure the engine is idling when using the windlass! THE AC ELECTRICAL SYSTEM AC Breakers The AC Electrical System is controlled at the AC circuit breaker panel to starboard of the throttle lever. In addition to the breakers, there is an AC voltmeter located on the breaker panel, as well as controls for the battery charger, outlets and water heater. The water heater also works off the engines hot water jacket while underway. The AC water heater should not be left on longer than it takes to heat a tank of water (around 30 min.) The manufacturer's manual details these breakers. Connecting/Disconnecting Shore Power The shore power cable connects the boat to shore, and should be stored out of salt water when underway. In our case, it is next to the propane locker in the port cockpit wall storage bin. Connect the cable to the boat, center port side above deck, connect it to the shore box and then turn on the shore box switch/breaker. You can then turn on AC appliances as needed. Watch the AC ammeter to be sure you don't exceed the dock's available supply, typically 30 amps. Here are some estimates of AC power consumption for typical appliances: Water Heater 15 amps Inverter up to 22 amps Hair Dryer 12 amps TV 1.5 amps Coffee maker 10 amps Microwave 10 amps Reverse the connect procedure to disconnect. ELECTRONICS: NAVIGATION EQUIPMENT & RADIOS Overview The boat is equipped with electronic equipment including VHF radio, a GPS chart plotter that also monitors depths and shows bottom contour, HD Radar, and an AM/FM/Cassette stereo. The main DC panel’s electronics breaker must be on for the various units to be used. Then the unit’s own power button or knob must be also turned "on". Gateway Yachts – At a Fraction of the Price… VHF Radio The VHF radio is designed for easy access to Channel 16 which is the hailing and emergency channel in the Northwest. Other buttons allow you to select different channels, weather channels, high and low power, and US/International operation. There is also an emergency switch that notifies Coast Guard of the boats location in an emergency. Note the squelch knob is used to limit noise but it’s like putting cotton in your ears; consider this when using the radio. Monitor channel 16 when underway, use channel 68 or 72 to communicate with other vessels. HEAD & HOLDING TANK Head System Overview The head system on this boat is reliable, straightforward, and easy-to-use. The boat is equipped with a Techma Premium Marine head. This head has a pump which macerates waste and puts it into the 26 gallon holding tank under the port aft cockpit hatch. The volume in holding tank may be monitored by lights on the dash (tank number 3), and is emptied either of two ways: by operating an overboard macerator pump controlled at the DC power panel, or by pumping it out at a pump out station ashore. The Marine Head This head is easy to use, odor free, and reliable. It uses sea water for flushing. To keep it operating properly, use a minimum amount of toilet paper (six “squares” per flush is enough) and never put any foreign matter including facial tissue and/or tampons into the head! The head is operated by a button on the front of the sink cabinet. Press the top of the button adds water for non-liquid excretions and a lower one simply to flush the head. For large jobs its best to pre-wet the bowl and add 4” of water. ONLY THINGS WHICH WERE EATEN OR DRUNK OR THE TOILET PAPER SUPPLIED WITH THE BOAT SHOULD BE PUT IN THE HEADS! FACIAL TISSUES, TAMPONS, AND OTHER FOREIGN MATTER WILL CLOG THE SYSTEM. IF THESE HEADS ARE USED PROPERLY, THEY ARE VERY RELIABLE. FAILURES ARE VIRTUALLY ALWAYS DUE TO MIS-USE! Head Problems The only likely head problem is clogging caused by improper usage, i.e., a clog caused by something put into the head that should not be there! Contact the charter company. If the holding tank is full, the head cannot work! Check the holding tank indicator on the dash and pump the holding tank or dump the tank when required! The Techma head also has a sensor of its own on the holding tank if it senses a full tank it will stop running. After checking the tank visually to see if there is any room left this protection can temporarily be overridden by holding the flush button for 5 seconds. Holding Tank Pumpout & Macerator Pump The holding tank and its macerator pump are located in the port aft cockpit floor locker. The sewage from the head goes to the holding tank. To pump overboard from this tank, the Dash macerator switch is engaged and the effluent passes through a through-hull overboard The boat is equipped with an electronic gauge indicator to starboard of the AC panel, marked Tank 3, so it is easy to tell if the tank is full. Check this indicator from time to time after you use the head, and don’t flush if full! Galley & Main Cabin Equipment Cabin Heater Cabin heater switches are below and to port of the steering wheel. Push and hold the on button for 2 seconds (lower right) until the squiggly lines above it light up. Fan starts immediately. After 3 minutes or so Gateway Yachts – Adventure Yachting Excellence… the red squiggly lines on the left light up. The cabin gets plenty warm in about 15 minutes on low thermostat and low fan (no green fan light icon). If more heat is needed quickly, turn on the defrost blower and point vents aft. When turning off the heater, push the on/off button on the lower right until the squiggly yellow lights above it go off, then leave it alone. Eventually the fan and red squigglies will turn off. It takes longer that you would think. Stove/Oven Turn on the big propane bottle in box in the aft port locker. To turn on the stove, start with the sniffer switches. They are 1) below, and 2) beside the main cabin heater outlet in front and to the fore of the sink. The first switch looks like a black clip. Push the top and it shows red. Then push the lower right button light on the second, Trident switch box starts blinking green, which it does for a couple or three minutes (the unit is sniffing the air for fumes). When it stops blinking and turns solid green, push the on button until it turns green. Then and only then go to the stove or oven. Push and hold in the knob and turn to ign. Keep holding in while pushing the Burner Ignite. It might not work the first time while the fuel is getting to the burner or oven (air purged out). When finished with the stove/oven, make sure and shut off the 2) Trident middle switch, and 1) sniffer switch. Then turn off the propane in box in the aft port locker. Refrigerator There is a refrigerator breaker switch marked with a yellow dot which must be turned on. It is on the breaker panel to port of the chart plotter. In addition the upper Sub Panel switch, on the main DC Panel switches must be on. These need to remain on to keep your food cold. No danger to running down batteries as long as there is sun for the solar panels, and/or the engine has recently been running, and/or shore power is plugged in and the AC Panel battery charger is switched on. There is also a control knob inside the top right corner of the refrigerator for temperature/on/off, once set its best to not change it. Sink Water The bottom switch to the lower port of the steering wheel must be switched all the way right or left to get water from one of the two water tanks. In addition the upper Sub Panel switch, on the DC Panel must be on. The fresh water switch has three positions, Left on, Center off and Right on. Try to switch tank draw back and forth from time to time. If you run one side much lower than the other the boat will list somewhat and may handle funny in heavy seas. Gateway Yachts – At a Fraction of the Price…