1
Notice about the law and the standard High Speed Colour Printer Model: HC5500T This product contains RFID (Radio Frequency Identification) system. Model: 444-59005 Contains FCC ID: RPARFMHL00 This device complies with Part 15 of the FCC Rules. Operation is subject to the following two conditions: (1) this device may not cause harmful interference, and (2) this device must accept any interference received, including interference that may cause undesired operation. The user is cautioned that unauthorised changes or modifications not approved could void the user’s authority to operate the equipment. This equipment has been tested and found to comply with the limits for a Class B digital device, pursuant to part 15 of the FCC Rules. These limits are designed to provide reasonable protection against harmful interference in a residential installation. This equipment generates, uses and can radiate radio frequency energy and, if not installed and used in accordance with the instructions, may cause harmful interference to radio communications. However, there is no guarantee that interference will not occur in a particular installation. If this equipment does cause harmful interference to radio or television reception, which can be determined by turning the equipment off and on, the user is encouraged to try to correct the interference by one or more of the following measures: • • • • Reorient or relocate the receiving antenna. Increase the separation between the equipment and receiver. Connect the equipment into an outlet on a circuit different from that to which the receiver is connected. Consult the dealer or an experienced radio / TV technician for help. Contains Canada IC: 4819A-RFMHL00 Operation is subject to the following two conditions: (1) this device may not cause interference, and (2) this device must accept any interference, including interference that may cause undesired operation of the device. This Class B digital apparatus complies with Canadian ICES-003. Cet appareil numérique de la classe B est conforme à la norme NMB-003 du Canada. Countries of intended use Austria/Belgium/Denmark/Finland/France/Germany/Greece/Iceland/Ireland/Italy/Luxembourg/Netherlands/Norway/Portugal/ Spain/Sweden/Switzerland/U.K. Copyright 2006 RISO KAGAKU CORPORATION i Preface Welcome to the world of this product! This machine is an ink jet printer for high-speed full-colour printing that supports network. This printer allows various functions such as data output and printer monitoring to be used from Windows and Macintosh computers. The following three manuals are provided for this machine. • HC5500 Series User's Manual for Printer Main Body(this manual) • HC5500 Series User’s Manual for Printer Driver • HC5500 Series User’s Manual for Console • RISO HC5500 Navigation Book Before using this machine or when something is not clear during use, read the relevant manual to make good use of this machine for a long period. About This User's Manual Riso shall not be responsible for any damage or expense that might result from the use of this manual. As we are constantly improving our products, the machine may differ in some respects from the illustrations used in this manual. Riso shall not be liable for any direct, incidental, or consequential damages of any nature, or losses or expenses resulting from the use of this product or included manuals. Trademark Acknowledgments Adobe®, Adobe Type Manager®, AdobePS®, ATM®, PostScript®, PostScript®3™, PostScript logo, and PageMaker® are trademarks or registered trademarks of Adobe Systems Incorporated. AppleTalk®, Macintosh® and Mac OS® are registered trademarks of Apple Computer, Inc. in the U.S.A. and other countries. Microsoft® , Windows® are registered trademarks of Microsoft Corporation in the U.S.A. and other countries. ColorTune® is a trademark of Agfa-Gevaert N.V. registered at US Patent and Trademark Office and may be registered in other regions of jurisdiction. ComColor™, and FORCEJET™ are trademarks of RISO KAGAKU CORPORATION. is a registered trademark of RISO KAGAKU CORPORATION in Japan and other countries. All other product names and company names written in this manual are trademarks or registered trademarks of their respective companies. About the Manuals The following manuals are supplied with this machine. z HC5500 Series User's Manual for Printer Main Body Means this manual. This manual explains notes that should be known before starting operation of this machine, actual printing operation on the printer, and printer settings. This manual also explains the method of replacing consumables and troubleshooting. z HC5500 Series User's Manual for Printer Driver This manual explains the method of installing the printer and the installation procedure and the functions of the printer driver. z HC5500 Series User's Manual for Console This manual describes the "Monitoring" function that is used for checking the printer status through a network. z RISO HC5500 Navigation Book Explains useful functions and features in colour. ii How to Read This Manual Notation of Explanation of Operation The following symbols are used in this manual for description of functions, operation, and notes. and are cautions for safety. Be sure to read these items before using this machine. Notation of Number of Sheets of Paper In this manual, A4/85gm2 (22.6-lb bond) is used as a standard for description. Example: Feed Tray 1 1,000 sheets The value varies with the paper. iii Safety Precautions This section describes the items that should be followed for safe use of this machine. Be sure to read this section. Warning Symbols To use the machine properly and to prevent human injury and damage to properties, the following warning symbols are used. Read the meaning of the symbols to understand and then read this manual. Indicates that incorrect handling by ignoring this symbol may cause death or serious human injury. Indicates that incorrect handling by ignoring this symbol may cause human injury or damage to properties. Example of icons The symbol indicates a prohibited action. A concrete prohibited action is drawn in the symbol or near the symbol. (The left figure shows prohibition of disassembly.) The symbol indicates a forced action or an instruction. A concrete instruction is drawn in the symbol. (The left figure shows an instruction to remove the power plug from the electrical outlet.) Location for Installation ! CAUTION z Place the machine on a flat or stable surface. Otherwise, the machine might be inclined or fall down, resulting in human injury. z The machine has vent holes. Install the machine more than 100 mm (315/16”) away from the wall. If the vent holes are blocked, heat is not dissipated and a fire might occur. z Do not place the machine in a dusty or humid location. Otherwise, a fire or an electric shock might occur. z Do not place the unit in a location that is subject to water leak or water splashes. If water enters the unit, a fire or an electric shock might occur. Power Connection ! WARNING z Install the machine near the wall socket to avoid using an extension cord between the machine and the wall socket. If an extension cord is absolutely required, do not use longer than 5m (15ft). Otherwise, a fire or an electric shock might occur. z Do not damage or rebuild the power cord. Placing a heavy object on the cord or pulling or bending forcibly the cord may damage the cord, resulting in a fire or an electric shock. z The power cord supplied with this product can be used only for this machine. Do not use it for another electric product. A fire or an electric shock might occur. z Do not plug or unplug the power cord if your hands are wet. Otherwise, an electric shock might occur. iv ! CAUTION z Do not pull the power cord when unplugging it. Otherwise, it could become damaged and a fire or an electric shock might occur. Be sure securely to hold on to the plug before unpluging it. z If the machine is not used for a long time, for example due to consecutive holidays, unplug the power cord from the electrical outlet for safety. z Pull out the power plug from the electrical outlet more than once a year and clean the prongs of the plug and their surroundings. Dust collected on these areas can result in fire. Handling ! WARNING z Do not place water containers or metallic objects on the machine. If water drips inside the machine or a metallic object drops inside it, a fire or an electric shock might occur. z Do not place any bare fire source such as candle on the unit. z Do not insert or drop any metallic material or flammable substances into the machine through any opening. A fire or an electric shock might occur. z Do not remove the covers. Otherwise, you might be electrically shocked by the high-voltage part inside. z Do not disassemble or rebuild the machine by yourself. Otherwise, a fire or an electric shock might occur. z If the machine emits excessive heat, smokes or foul odour, immediately turn off the power, unplug the electrical (power) cord and contact your service representative because a fire or an electric shock might occur. z If something drops inside the machine, immediately turn off the Main Power Switch, unplug the electrical (power) cord and contact your service representative. If you continue using it, a fire or an electric shock might occur. ! CAUTION z Never stick your hands or fingers in the openings around the Standard Feed Tray and the Paper Receiving Tray during operation. Otherwise, human injury might occur. z Ink may be stuck to the inside of the machine. Take care not to touch it with your hands or clothes. If your hands or clothes are stained with the ink, wash it off immediately with a detergent. z When moving the machine, contact your service representative. If you try to move the machine by force, the machine might turn over, resulting in human injury. Handling of Ink ! CAUTION z Avoid contact of ink with your eyes and skin. If ink gets into your eyes, flush it out immediately with plenty of water. If ink comes into contact with your skin, wash it off thoroughly with soap. z Allow plenty of ventilation during printing. If you feel unwell during use, immediately move to a location with fresh air. z If you feel sick, seek medical advice immediately. z Only use the ink for printing purposes. z When carrying the Ink Cartridge, hold its main body. Otherwise, the cap may be removed and the Ink Cartridge may drop, resulting in stain on your hands or clothes. z Do not put a used Ink Cartridge into fire. Since the ink is flammable, a flame may become large, resulting in a burn. z Keep the Ink Cartridge out of the reach of children. v Before Starting to Use This section explains precautions you have to observe when using the machine. Location for Installation z The location for installation is determined based on consultation with the customer at the time of delivery. z Contact your service representative before moving the machine. z Avoid installing the machine in the locations listed below. Failure to observe this precaution may lead to machine failure or human injury. • • • • • • Locations that are subject to sudden temperature change. Extremely hot and humid locations or cold and dry locations Heated locations or locations to exposed to direct cold air, direct hot air, or direct radiant heat Badly ventilated locations Dusty locations Locations that are subject to frequent vibration Operation Environment z Install the machine in a location of which the levelness meets the following conditions. Front to rear: 3 mm (1/8") or less Side to side: 3 mm (1/8") or less z Appropriate environment conditions are shown below. Temperature range: 15°C - 30°C (59°F to 86°F) Humidity range: 40% - 70%(noncondensing) Overall Dimensions Space for extending the Standard Feed, Paper Receiving and space for pulling out Feed Trays are required. The dimensions are expressed in mm. z Front view vi z Side view Handling of The Machine z Do not turn off the Main Power Switch or unplug the electrical (power) cord during operation. z Do not open any covers during operation. z Do not move the machine. z The machine has precision parts and driving parts inside. Do not handle the machine in other ways than described in this manual. z Contact your service representative before moving the machine. z Do not place heavy objects on or apply shocks to the machine. z Be sure to open and close any cover gently. z When turning off the Main Power Switch of the machine and then turning it on again, wait more than 10 seconds before turning it on. z If the machine will not be used or has not been used for a long time, be sure to perform Ink Head Maintenance (normal cleaning). Otherwise, deterioration or drying of ink occurs in the ink transfer path inside the machine, resulting in clogging at the head. To prevent this problem, periodic use is recommended. z Never touch the print head because a failure or deterioration of images may occur. z Be sure to use always the machine with the four ink cartridges mounted. Even if some ink cartridge is not used, do not leave the machine with an ink cartridge removed. Handling and Storage of Ink Cartridge z Do not shake the Ink Cartridge before use. Air bubbles may occur, resulting in defective printing. z Do not add ink into the Ink Cartridge. z If ink remains for a long time after the cartridge is opened, the ink may be deteriorated because of various components contained in the air. Use of deteriorated ink may cause a failure of the print head or the ink transfer path. z The injection characteristic of the ink jet printer varies with viscosity of the ink. At a low temperature, particularly, the viscosity increases and clogging of the print head may occur. Observe the operation environment and storage temperature, and use the ink earlier checking the date of manufacture. z The adequate operation temperature of the machine is 15°C - 30°C (59°F to 86°F) Use of the machine out of the adequate temperature range may cause defective printing (decrease of discharge). z Do not release the ink left in the cartridge into a sewer. z Do not keep Ink Cartridge with its nozzle downward. z Store under conditions which avoid freezing or direct sunlight, and temperatures of 5°C (41°F) or lower, and 35°C (95°F) or higher. Also use the ink earlier checking the date of manufacture. Handling and Prints of Paper z Be sure to load paper that is not curled. z Be sure to store unused paper to avoid humidity by wrapping it with packing paper. z In duplex printing, the edges of paper may be stained depending on the original. z Prints are discoloured by influence of various components in the air and light. If prints are dried sufficiently and then put in a frame with glass or is laminated for storage, discolouration becomes small. z When storing prints in a clear file, use a file made of PET. z Prints are decolourized by moisture or sweat. Avoid storage in a location exposed to waterdrops. Also writing with an oil-based pen may cause bleeding. z The printing density differs between prints immediately after printing and those 24 hours after printing. Note that the density decreases as the time elapses. z Do not stack prints on other prints that are output with a laser printer or a copier that uses toner. Paper may be stuck to the portions printed with toner or toner may be transferred to the prints. z Store paper flat avoiding high temperature, high humidity, and direct sunlight. Note that the curled paper cannot be used. vii Disposal of Ink Cartridge and Ink Drain Tank z The ink may leak through the ink feed opening of the cartridge. When returning, attach the cap and put the cartridge into the inner bag and the packing material. z Used Ink Cartridges and Ink Drain Tanks are collected by a service representative. After use is complete, close the cap securely. z Ink in the ink drain tank cannot be used for printing. A failure or trouble may occur. Print Area (Image Area) Regardless of the original paper size, printing cannot be performed on a part of paper along the sides of the paper. Since use of paper of the same size as the original leaves margins, the full area of the paper is not used for printing. To print an original on which characters or figures occupy the full area, reduce the full area of the original and then perform printing. When printing onto an envelope, the print area is different. Refer to "Printing onto Envelope." )p.1-20 ~ Guaranteed Print Area (Image Area) Printing can be performed into the area 5 mm (3/16") inside from the sides of paper. viii ~ Maximum Print Area (Image Area) When an original is scanned through the optional scanner, printing can be performed into the area inside 1 mm (0.04") from the sides of paper but deterioration of print quality such as loss of characters or figures and bleeding may occur depending on the original. Even if the paper size is larger than 316mm × 460mm (127/16" × 181/8"), the actual maximum printable area is 314mm × 458mm (123/8" × 185/16"). • "4.10 Image Area" of the menu setting must be set. "4.10 Image Area" )p.2-29 • Depending on the application, it may not be possible to make a margin of 1 mm (0.04") width along the edges of paper. (In most application software, margin width of 5 mm (3/16") is required.) Materials Not to Be Printed Do not use the machine in any manner which violates the law or infringes on established copyrights, even when making copies for personal use. Consult your local authorities for further details. In general, use discretion and common sense. Power Connection z Connect the power plug securely to the electrical outlet to avoid improper connection. z Install the machine near the electrical outlet. z If an optional device is connected to an electrical outlet for option connection on the machine, the optional device is turned on and off at the same time as the machine. z Use only the power cord supplied by the seller of the controller, or use a cord that is earthed, not longer than 4.5m, rated not less than the controller is rated, and authorized by the state or region where it is used. Sleep When the machine is on and is not used for a certain time, the machine enters automatically the energy saving mode. Two types of energy saving mode are provided: Stand-by mode and Sleep mode. • Stand-by mode: Power consumption is 150 W or less. When data is received from a computer, the machine enters the print mode. To turn on the print mode from the operation panel of the printer, press the WAKE-UP Key. • Sleep mode: Power consumption is 200 W or less. To enable reception of data, perform startup operation from a computer. To start up from the operation panel of the printer, press the Sleep Key. The energy saving function is set in "Menu 5 Administration" on the operation panel. If the machine is not used for a long time, turn off the Main Power Switch and remove the power plug from the electrical outlet. (When the Main Power Switch is turned off, the power consumption becomes 0 W.) ix Connecting to a Computer The machine is connected to a computer through network. z When connecting the machine to multiple computers: z When connecting the machine to a single computer: The allowable voltage for all input/output connections is 5V. Use a commercially available S/UTP cable (shielded or non-shielded twisted pair cable) as a LAN cable. x Notice for European Union Member States RISO, the environment and the Waste Electrical and Electronic Equipment Directive "WEEE Directive" What is the WEEE Directive? The purpose of the WEEE Directive is to reduce waste and ensure Electrical and Electronic Equipment is recycled at the end of its useful life. What does the crossed out wheeled bin symbol mean? The crossed out wheeled bin symbol indicates this product must be disposed of separately to normal waste. Please contact your RISO service agent for information about disposal. What does the solid bar symbol mean? The solid bar under the crossed out wheeled bin indicates this product was put on the market after the 13th August 2005. Who should I contact if I want more information about the WEEE Directive? You should contact your local RISO service agent for more information. xi Contents Chapter1 Basic Information on Printing . . . . . . . . . . . . 1-1 Describes names and functions of parts of the printer, preparation for printing, and general printing operation. Names of Parts . . . . . . . . . . . . . . . . . . . . . . . . . . . . . . . . . . . . . . . . . . . . . . . . . . . . . . 1-2 Printer Main Body . . . . . . . . . . . . . . . . . . . . . . . . . . . . . . . . . . . . . . . . . . . . . . . . . . . . . . . . . . . . . 1-2 Main Body (rear view) . . . . . . . . . . . . . . . . . . . . . . . . . . . . . . . . . . . . . . . . . . . . . . . . . . . . . . . . . . 1-4 Control Panel . . . . . . . . . . . . . . . . . . . . . . . . . . . . . . . . . . . . . . . . . . . . . . . . . . . . . . . . . . . . . . . . 1-5 Preparing to Print . . . . . . . . . . . . . . . . . . . . . . . . . . . . . . . . . . . . . . . . . . . . . . . . . . . . 1-6 Usable Paper . . . . . . . . . . . . . . . . . . . . . . . . . . . . . . . . . . . . . . . . . . . . . . . . . . . . . . . . . . . . . . . . 1-6 Power Switch . . . . . . . . . . . . . . . . . . . . . . . . . . . . . . . . . . . . . . . . . . . . . . . . . . . . . . . . . . . . . . . . 1-9 Loading Paper . . . . . . . . . . . . . . . . . . . . . . . . . . . . . . . . . . . . . . . . . . . . . . . . . . . . . . . . . . . . . . 1-10 Setting Up the Paper Receiving Tray . . . . . . . . . . . . . . . . . . . . . . . . . . . . . . . . . . . . . . . . . . . . . 1-15 Basic Printing Operation . . . . . . . . . . . . . . . . . . . . . . . . . . . . . . . . . . . . . . . . . . . . . . 1-17 Print Operation Flow . . . . . . . . . . . . . . . . . . . . . . . . . . . . . . . . . . . . . . . . . . . . . . . . . . . . . . . . . . 1-17 Printing from the Computer (Windows) . . . . . . . . . . . . . . . . . . . . . . . . . . . . . . . . . . . . . . . . . . . 1-17 Printing onto Envelope . . . . . . . . . . . . . . . . . . . . . . . . . . . . . . . . . . . . . . . . . . . . . . . 1-20 Preparation for Printing . . . . . . . . . . . . . . . . . . . . . . . . . . . . . . . . . . . . . . . . . . . . . . . . . . . . . . . . 1-20 Envelope Size and Maximum Print Area (Image Area) . . . . . . . . . . . . . . . . . . . . . . . . . . . . . . . 1-20 How to Print . . . . . . . . . . . . . . . . . . . . . . . . . . . . . . . . . . . . . . . . . . . . . . . . . . . . . . . . . . . . . . . . 1-21 When Printing is Complete . . . . . . . . . . . . . . . . . . . . . . . . . . . . . . . . . . . . . . . . . . . . . . . . . . . . . 1-23 Chapter2 Printer Configuration . . . . . . . . . . . . . . . . . . . . 2-1 Describes the functions that can be set from the Operation Panel and their method of operation. Message Display and Operation Keys . . . . . . . . . . . . . . . . . . . . . . . . . . . . . . . . . . . . 2-2 Message Display . . . . . . . . . . . . . . . . . . . . . . . . . . . . . . . . . . . . . . . . . . . . . . . . . . . . . . . . . . . . . 2-2 Operation Keys . . . . . . . . . . . . . . . . . . . . . . . . . . . . . . . . . . . . . . . . . . . . . . . . . . . . . . . . . . . . . . . 2-4 How to Use the Operation Panel . . . . . . . . . . . . . . . . . . . . . . . . . . . . . . . . . . . . . . . . 2-5 Items That Can Be Set from the Menu . . . . . . . . . . . . . . . . . . . . . . . . . . . . . . . . . . . . . . . . . . . . . 2-5 Basic Operation of Menu Selection . . . . . . . . . . . . . . . . . . . . . . . . . . . . . . . . . . . . . . . . . . . . . . 2-10 Menu 1 Menu 2 Menu 3 Menu 4 Print Position Adjust . . . . . . . . . . . . . . . . . . . . . . . . . . . . . . . . . . . . . . . . . . 2-14 Test Print . . . . . . . . . . . . . . . . . . . . . . . . . . . . . . . . . . . . . . . . . . . . . . . . . . 2-16 Temp Data Retrieve . . . . . . . . . . . . . . . . . . . . . . . . . . . . . . . . . . . . . . . . . . 2-17 Configuration . . . . . . . . . . . . . . . . . . . . . . . . . . . . . . . . . . . . . . . . . . . . . . . 2-18 4.1 Standard Feed Tray/ 4.2 Feed Tray 1/ 4.3 Feed Tray 2 . . . . . . . . . . . . . . . . . . . . . . . . . . 2-19 4.4 Feed Tray Relay . . . . . . . . . . . . . . . . . . . . . . . . . . . . . . . . . . . . . . . . . . . . . . . . . . . . . . . . . 2-21 4.5 Triple-Tray Source . . . . . . . . . . . . . . . . . . . . . . . . . . . . . . . . . . . . . . . . . . . . . . . . . . . . . . . . 2-22 4.6 Job Separation . . . . . . . . . . . . . . . . . . . . . . . . . . . . . . . . . . . . . . . . . . . . . . . . . . . . . . . . . . 2-23 4.7 Print Density . . . . . . . . . . . . . . . . . . . . . . . . . . . . . . . . . . . . . . . . . . . . . . . . . . . . . . . . . . . . 2-24 4.8 Paper Ejection . . . . . . . . . . . . . . . . . . . . . . . . . . . . . . . . . . . . . . . . . . . . . . . . . . . . . . . . . . . 2-25 4.9 Temp Data Clear . . . . . . . . . . . . . . . . . . . . . . . . . . . . . . . . . . . . . . . . . . . . . . . . . . . . . . . . . 2-28 4.10 Image Area (Maximum Print Area) . . . . . . . . . . . . . . . . . . . . . . . . . . . . . . . . . . . . . . . . . . 2-29 4.11 Cover Sheet Tray (For a HC Finisher is connected) . . . . . . . . . . . . . . . . . . . . . . . . . . . . . 2-30 Menu 5 Administration . . . . . . . . . . . . . . . . . . . . . . . . . . . . . . . . . . . . . . . . . . . . . . . 2-31 How to Enter the Administration Menu . . . . . . . . . . . . . . . . . . . . . . . . . . . . . . . . . . . . . . . . . . . . 2-31 xii 5.1 5.2 5.3 5.4 5.5 5.6 5.7 5.8 Paper Size Entry . . . . . . . . . . . . . . . . . . . . . . . . . . . . . . . . . . . . . . . . . . . . . . . . . . . . . . . . . Paper Type Entry . . . . . . . . . . . . . . . . . . . . . . . . . . . . . . . . . . . . . . . . . . . . . . . . . . . . . . . . Separation Paper . . . . . . . . . . . . . . . . . . . . . . . . . . . . . . . . . . . . . . . . . . . . . . . . . . . . . . . . Count Management . . . . . . . . . . . . . . . . . . . . . . . . . . . . . . . . . . . . . . . . . . . . . . . . . . . . . . Head Maintenance . . . . . . . . . . . . . . . . . . . . . . . . . . . . . . . . . . . . . . . . . . . . . . . . . . . . . . . Configuration Information Print . . . . . . . . . . . . . . . . . . . . . . . . . . . . . . . . . . . . . . . . . . . . . . Network Configuration . . . . . . . . . . . . . . . . . . . . . . . . . . . . . . . . . . . . . . . . . . . . . . . . . . . . Initial Setting . . . . . . . . . . . . . . . . . . . . . . . . . . . . . . . . . . . . . . . . . . . . . . . . . . . . . . . . . . . . 2-32 2-33 2-36 2-37 2-40 2-42 2-44 2-45 Menu 6 Feed Tray Selection . . . . . . . . . . . . . . . . . . . . . . . . . . . . . . . . . . . . . . . . . . 2-53 Menu 7 Job Clear . . . . . . . . . . . . . . . . . . . . . . . . . . . . . . . . . . . . . . . . . . . . . . . . . . . 2-54 Chapter3 Troubleshooting . . . . . . . . . . . . . . . . . . . . . . . 3-1 Describes the causes of and measures against trouble indicated with an error message displayed on the Operation Panel or a lighting symbol. Explanation of Set Error Display . . . . . . . . . . . . . . . . . . . . . . . . . . . . . . . . . . . . . . . . . 3-2 Remaining Volume Notice Indicators . . . . . . . . . . . . . . . . . . . . . . . . . . . . . . . . . . . . . . . . . . . . . . 3-2 FORCEJET™ Link Symbol . . . . . . . . . . . . . . . . . . . . . . . . . . . . . . . . . . . . . . . . . . . . . . . . . . . . . 3-3 Error Message and Error Number . . . . . . . . . . . . . . . . . . . . . . . . . . . . . . . . . . . . . . . . . . . . . . . . 3-3 Paper jam occurs . . . . . . . . . . . . . . . . . . . . . . . . . . . . . . . . . . . . . . . . . . . . . . . . . . . . 3-9 (1) Paper Jam in the Standard Paper Feed Tray . . . . . . . . . . . . . . . . . . . . . . . . . . . . . . . . . . . . . 3-9 (2) Paper Jam on the Transfer Roller . . . . . . . . . . . . . . . . . . . . . . . . . . . . . . . . . . . . . . . . . . . . 3-10 (3) Paper Jam in the Paper Receiving Section . . . . . . . . . . . . . . . . . . . . . . . . . . . . . . . . . . . . . 3-10 (4)Paper Jam at the Right of the Transfer Unit . . . . . . . . . . . . . . . . . . . . . . . . . . . . . . . . . . . . . 3-11 (5)Paper Jam in the Duplex Transfer Unit . . . . . . . . . . . . . . . . . . . . . . . . . . . . . . . . . . . . . . . . . 3-11 (6)(7)(8) Paper Jam at the Left of the Transfer Unit . . . . . . . . . . . . . . . . . . . . . . . . . . . . . . . . . 3-13 (17)(18)(19) Paper Jam in Paper Feed Tray 1/ Paper Feed Tray 2 . . . . . . . . . . . . . . . . . . . . . 3-14 (20) Paper Jam in the Transfer Unit . . . . . . . . . . . . . . . . . . . . . . . . . . . . . . . . . . . . . . . . . . . . . 3-15 Ink Cartridge Replacement . . . . . . . . . . . . . . . . . . . . . . . . . . . . . . . . . . . . . . . . . . . . 3-16 Ink Cartridge . . . . . . . . . . . . . . . . . . . . . . . . . . . . . . . . . . . . . . . . . . . . . . . . . . . . . . . . . . . . . . . 3-16 Other Trouble . . . . . . . . . . . . . . . . . . . . . . . . . . . . . . . . . . . . . . . . . . . . . . . . . . . . . . 3-18 The printer does not operate. . . . . . . . . . . . . . . . . . . . . . . . . . . . . . . . . . . . . . . . . . . . . . . . . . . The printer does not operate according to the setting. . . . . . . . . . . . . . . . . . . . . . . . . . . . . . . . Printing is not clean. . . . . . . . . . . . . . . . . . . . . . . . . . . . . . . . . . . . . . . . . . . . . . . . . . . . . . . . . . Others . . . . . . . . . . . . . . . . . . . . . . . . . . . . . . . . . . . . . . . . . . . . . . . . . . . . . . . . . . . . . . . . . . . . 3-18 3-19 3-19 3-20 Chapter4 Appendix . . . . . . . . . . . . . . . . . . . . . . . . . . . . . 4-1 Shows the list of consumables and the specifications. List of Options . . . . . . . . . . . . . . . . . . . . . . . . . . . . . . . . . . . . . . . . . . . . . . . . . . . . . . . 4-2 RISO Scanner HS2000 . . . . . . . . . . . . . . . . . . . . . . . . . . . . . . . . . . . . . . . . . . . . . . . . . . . . . . . . 4-2 Finisher Functions . . . . . . . . . . . . . . . . . . . . . . . . . . . . . . . . . . . . . . . . . . . . . . . . . . . . . . . . . . . . 4-2 Consumables . . . . . . . . . . . . . . . . . . . . . . . . . . . . . . . . . . . . . . . . . . . . . . . . . . . . . . . 4-3 Ink Cartridge . . . . . . . . . . . . . . . . . . . . . . . . . . . . . . . . . . . . . . . . . . . . . . . . . . . . . . . . . . . . . . . . 4-3 Specifications . . . . . . . . . . . . . . . . . . . . . . . . . . . . . . . . . . . . . . . . . . . . . . . . . . . . . . . 4-4 Index . . . . . . . . . . . . . . . . . . . . . . . . . . . . . . . . . . . . . . . . . . . . . . . . . . . . . . . . . . . . . . 4-7 xiii xiv Chapter1 Basic Information on Printing This section describes names and operation of parts that should be known for using the printer and general printing operation. 1-1 Names of Parts Printer Main Body 1-2 1-3 Main Body (rear view) Stack Guide Open Button When removing printed paper from the Paper Receiving Tray, press this button to spread the Stack Guides for easy removal. The guides to be spread can be set. For details, refer to "4.8.4 Shifting Guide" of the menu setting .)p.2-27 1-4 Control Panel The Control Panel includes a message display, setting and trouble display, and operation keys. For description of each display and detailed operation methods, refer to "Chapter 2 Printer Configuration")p.2-1. 1-5 Preparing to Print After connection of the printer to a computer or network is complete, prepare paper and the Paper Receiving Tray for printing. Usable Paper This section describes usable paper and unusable paper. Use of paper that is not adequate for the printer may cause paper jams, stains or a failure. Use paper that conforms to the following specifications. The print quality differs depending on the paper type. Use recommended paper adequate for HC5500. For details, contact your dealer. Basic Specifications of Paper Paper that conforms to the following restrictions can be used for printing. z Paper weight For Standard Paper Feed Tray 46gm2 - 210gm2 (12-lb bond to 56-lb bond) For Paper Feed Trays 52gm2 - 104gm2 (14-lb bond to 28-lb bond) z Paper Sizes That Can Be Used in the Standard Feed Tray When using an envelope, set it in the Standard Feed Tray. "Printing onto Envelope" )p.1-20 Registering Paper Size and Paper Type If non-standard size paper or paper larger than A3/Ledger is used in the Standard Feed Tray, the paper size and the paper type must be registered in advance. "5.1 Paper Size Entry")p.2-32 "5.2 Paper Type Entry")p.2-33 When using paper larger than the A3/Ledger size, set "4.8.2 Stack Guide" of "4.8 Paper Ejection" of the menu setting to "OFF" and fold the stack guides before printing. "4.8.2 Stack Guide")p.2-26 1-6 z Paper Sizes That Can Be Used in Paper Feed Tray 1Paper Feed Tray 2 Registering Paper Size and Paper Type If non-standard size paper is used in Feed Tray 1Feed Tray 2, the paper size and the paper type must be registered in advance. "5.1 Paper Size Entry")p.2-32 "5.2 Paper Type Entry")p.2-33 If a registered paper size is not adequate for the feed tray, the paper will not be displayed as a choice in the menu setting. Note that even if "paper size" and "paper weight" conform to the specifications of this machine, paper may not be properly fed depending on the paper type, environment, and storage conditions. For details, contact your local dealer (or service representative). Unusable Paper Do not use paper shown below because it may cause paper jams. • • • • • • • • • • • • • • Paper thinner than specified in the basic specifications Paper thicker than specified in the basic specifications Chemically treated or coated paper (such as thermal or carbon paper) Warped paper Wrinkled paper Folded paper Torn paper Curled paper (Curled is 3mm (1/8") or more) Front or back coated paper such as art paper and commercially available paper for ink jet printer Paper with serrated edge Paper with adhesive Paper with holes Commercially available matted paper Glossy paper for photo 1-7 Handling of Paper • For printing paper, use recommended paper wherever possible. Recommended paper allows high-quality printing that makes full use of the printer performance and the characteristics of ink. • When loading paper in the Standard Feed Tray, be sure to use paper that has not been unpacked. After completing printing, store paper left in the Standard Feed Tray by wrapping it with packing paper. If the paper is left in the Standard Feed Tray, the paper may be curled, resulting in paper jams. • When using badly cut paper or rough surface drawing paper, fan the paper sufficiently before use. • Store paper in a dry location. 1-8 Power Switch ~ Main Power Switch and Sleep Key The Main Power Switch is used to turn on or off the whole printer. If the printer is not used for a long time, for example due to consecutive holidays, turn off the Main Power Switch. Turn on or off the Sleep key when starting or terminating daily work. If this unit is not used for a certain time with the Sleep Key on, this unit automatically enters the sleep mode for suppressing power consumption. "5.8 Initial Setting")p.2-45 • When Turning on the Power: Turn on the Main Power Switch and then press the Sleep Key. • When Turning off the Power: Press and hold down the Sleep Key more than approximately one second and turn off the Main Power Switch after message "Shutting Down" on the message display disappears. When turning on the Main Power Switch again, wait more than 10 seconds. z Power ONOFF status can be checked with the colour of the Sleep Key. 1-9 Loading Paper The method of loading paper in the Paper Feed Trays and the Standard Paper Feed Tray is described below. ~ Number of Sheets That Can Be Loaded The number of sheets that can be loaded in the Feed Trays and the Paper Feed Tray are shown below. The number of sheets that can be loaded varies with the thickness of paper. When 85gm2 (22.6-lb bond) is used: Paper Feed Tray 1 1,000 sheets Paper Feed Tray 2 500 sheets StandardPaper Feed Tray 1,000 sheets ~ Paper to Be Loaded in the Standard Paper Feed Tray When using paper shown below for printing, load the paper in the Standard Paper Feed Tray with the print face up. • • • • • Special paper such as thick paper Paper for which printing has been performed onto the back side Paper larger than A3/Ledger size Paper smaller than B5 size such as postcard Envelope ~ Registration of the paper After loading paper in the Standard Paper Feed Tray Paper Feed Tray 1 Paper Feed Tray 2, you must register the characteristics of the paper. For registration, use "4.1 Standard Feed Tray" "4.2 Feed Tray 1" "4.3 Feed Tray 2" of the menu setting according to the location of paper setting. The details of setting are shown below. • Paper size • Paper type • Double feed check When loading paper for which printing has been performed onto the back side, envelopes or paper with a dark ground colour, select "OFF." If these items are not set properly, when printing directed, the printer may judge that no paper is loaded and may not print appropriately. Be sure to register these items. "Menu 4 Configuration")p.2-18 1-10 Loading Paper (Paper Feed Tray 1 Paper Feed Tray 2) 1 z Then, set the Paper Top Guide. While pressing the release buttons, insert the Paper Top Guide by adjusting the mark of the Paper Top Guide to the position of the paper size to be set. Pull out the Paper Feed Tray until it stops. 2 Turn down the Side Guide Locking Levers to the "FREE" positions and spread the guides to the outermost positions. When loading A3/Ledger size paper, do not use the Paper Top Guide. Remove the Paper Top Guide and insert it into the holder in the Paper Feed Tray. 4 3 Adjust the Paper Top Guide to the paper size. z First, remove the Paper Top Guide. While pressing the release buttons in the direction shown by the arrow, remove the stopper just above. Load paper by positioning the centre of the paper to the centre mark ( ) inside the Paper Feed Tray. If the front side quality is different from the back side quality, load paper with the print face down. Do not exceed the upper limit label. Take care the paper is not bent at the Paper Top Guide. 1-11 5 Adjust the guides to the paper size. 6 Slide the guides to adjust to the paper width and turn down the Side Guide Locking Levers to the "LOCK" positions to secure the guides. In the menu setting, set the size, paper type, and double feed check. Use "4.2 Feed Tray 1" and "4.3 Feed Tray 2" of Menu 4 for the setting. "Menu 4 Configuration")p.2-18 When loading paper with a dark ground colour, set "Double Feed Check" to "OFF." Loading Paper (Standard Paper Feed Tray) 1 2 Open the Standard Paper Feed Tray in the direction shown by the arrow until it stops. Load paper. Adjust the Feed Tray Paper Guides to the paper size. Slide the Feed Tray Paper Guides to adjust to the paper width and turn down the Feed Tray Paper Guide Levers to the "LOCK" positions to secure the guides. 4 Load paper according to the indication of the Standard Paper Feed Tray. Load the paper with printing side up. 1-12 3 In the menu setting, set the size, paper type, and double feed check. Use "4.1 Standard Feed Tray" of Menu 4 for the setting. "Menu 4 Configuration")p.2-18 When setting paper for which printing has been performed onto the back side or paper with a dark ground colour, set "Double Feed Check" to "OFF." Paper Feed Pressure in Standard Paper Feed Tray In the Standard Paper Feed Tray, the paper feed pressure can be adjusted with the Paper Feed Pressure Adjustment Lever according to the paper that has been loaded. Set the lever to " (NORMAL)" or " (CARD)" according to the paper quality. If " (CARD)" is selected, paper is fed with higher pressure. ~ Paper Feed Pressure Adjustment Lever and Paper Supported paper qualities are shown below. Lever position [ [ Paper quality (NORMAL)] Standard or Thin/Light (CARD)] Card or Special *If paper is not fed properly, set the lever to " Supported printing paper • • • • • Fine RISO PAPER IJ RISO PAPER IJ MATTE RISO IJ Double-Sided Matte Paper Commercially available copy paper • Drawing paper (*) • Postcard (*) • Envelope (*) (NORMAL)." 1-13 When Adding or Replacing Paper in the Standard Feed Tray When adding paper of the same size or replacing it with paper of a different size, use the Feed Tray Descent button. If all sheets of paper is removed from the Standard Feed Tray, the tray lowers automatically. 1 Press the Feed Tray Descent Button to lower the Standard Feed Tray. 2 Add or replace the paper. Press and hold down the button until the tray lowers to the desired position. If feed tray relay is set: In this unit, paper feed can be performed sequentially from Feed Tray 1, Feed Tray 2, and the Standard Feed Tray for high-volume printing if the same size of paper is loaded in these feed trays. If feed tray relay is set, load paper of the same size, same paper quality, and same paper type in these feed trays. "4.5 Triple-Tray Source")p.2-22 "4.4 Feed Tray Relay")p.2-21 When you replace paper with different one, change "4.1 Standard Feed Tray" of the menu setting. How to Close the Standard Feed Tray With the power on, remove the paper from the Standard Feed Tray, spread the Feed Tray Paper Guides, and close the Standard Feed Tray. 1-14 After checking that the Standard Feed Tray is at the lowermost position, close it. If you turn off the printer power before removing paper, the Standard Feed Tray does not lower. Setting Up the Paper Receiving Tray Set the Paper Receiving Tray. Adjusting the Side Guides and Rear Guide Positions The Side Guides and the Rear Guide move automatically to the optimum positions according to the printing paper size. Fine position adjustment can be performed on the Control Panel. For details, refer to "4.8 Paper Ejection")p.2-25 of the menu setting. 1 Open the Paper Receiving Tray in the direction shown by the arrow until it stops. 2 Raise the Side Guides. 3 Adjust the Arrangers. Normally, when printing onto B4 or larger paper, take out the Paper Arrangers. Paper arrangement depends on the paper firmness and so on. Adjust the Paper Arrangers as needed. 4 Raise the End Guide. 5 Adjust the position of the End Guide Cushion. Use the Paper Feed Pressure Adjustment Lever to set the cushion to [NORMAL] or [CARD] according to the paper quality. Do not pull out the Cushion from the Cushion Stand. "Paper Feed Pressure in Standard Feed Tray")p.1-13 When printing onto paper larger than 320 × 432 mm (125/8" × 17"), fold all the guides. At this time, set "4.8.2 Stack Guide" ()p.2-26) of the menu setting to "OFF." 1-15 How to Close the Paper Receiving Tray Close the Paper Receiving Tray as described below. 1 Check that no print remains and press the [Stack Guide Open Button]. The Stack Guide (side) and the Stack Guide (End) move to their storage positions. 1-16 2 Turn down the Stack Guide (End) inward and fold it. 3 Fold the Arrangers. 4 Turn down the Stack Guide (Side) inward and fold them. 5 Close the Paper Receiving Tray. Basic Printing Operation After connection and preparation are complete, perform trial printing. This section describes the basic operation method of “Direct Printing”, namely printing data created in the computer without storing data in the printer. • Required software must be installed in the computer in advance. For details, refer to the separate "HC5500 Series User’s Manual for Printer Driver." • Check that the printer is on and the consumables are set before printing. Print Operation Flow Printing from the Computer (Windows) This section describes a print instruction using RISO Controller HC3R-5000 from Microsoft Word 2000 as an example. 1 Check that the printer and the computer are turned on. If the printer is in the sleep mode or if the RISO console screen cannot be displayed on the computer, use the RISO Wakeup Tool to start the printer and then carry out steps 2 and after. For details, refer to separate "HC5500 Series User's Manual for Printer Driver." 2 Open the file to print. Start the application software to open the original data file to print. 3 Display the [Print] dialog box. 1-17 Select [Print] from the [File] menu. 4 Check the [Printer name]. As the printer name, select the name set when the printer driver was installed. 5 Check the following items. If you click the [Properties] button, you can set the various conditions on the printer driver screen. The settings of [Original image] on the [Main setting] tab and [Paper type] on the [Main setting] tab affect seriously the print quality. When using conditions other than the default settings, click the [Properties] button and adjust the settings. "Chapter 2 Printer Driver Operation for HC3R-5000" of "HC5500 Series User’s Manual for Printer Driver" )p.2-1 "Chapter 3 Printer Driver Operation for PS7R-9000/5000" of "HC5500 Series User’s Manual for Printer Driver" )p.3-1 Print data can be protected with the security function. "HC5500 Series User's Manual for Printer Driver" "Chapter 2 Printer Driver Operation for HC3R-5000" )p.2-27 "Chapter 3 Printer Driver Operation for PS7R-9000/5000" )p.3-27 1-18 6 Click the [OK] button. When the printer receives data sent from the computer, the DATA indicator blinks and message "Receiving Data" is displayed on the Display. When reception is complete, the DATA indicator lights up, message "Printing" is displayed, and printing starts.)p.2-2 If a message indicating that printing cannot be performed is displayed on the screen, the printer may be in the sleep mode. Press the Sleep Key on the operation panel of the printer or use the Wakeup Tool from the computer to start the printer. 7 Press the Stack Guide Open Button and remove the prints from the Paper Receiving Tray. If the button is pressed, the Stack Guides is spread to allow easy removal of prints. The guides to be spread when the Stack Guide Open Button is pressed can be selected. "4.8.4 Shifting Guide")p.2-27 1-19 Printing onto Envelope You can perform printing onto commercially available envelopes. This section describes notes for printing onto an envelope and the printing procedure. • When using envelopes, set "5.1 Paper Size Entry" and "5.2 Paper Type Entry" of the menu setting. At this time, be sure to set the "Paper Type Entry" to "Envelope." • Be sure to set envelopes in the Standard Feed Tray. Up to 100 envelopes can be set at a time. (The maximum height is 100 mm.)j Also follow the orientation of envelopes. If envelopes are set in an incorrect orientation, an envelope may jam in the printer or the print head may be damaged. If the orientation of the data created on the computer is different from the orientation of the envelopes in the tray, set the orientation on the printer driver. • Set the envelopes in the Standard Feed Tray with the flaps spread. (Do not bend the flaps.) • Perform the setting as follows: Set the Paper Feed Pressure Adjustment Lever to "CARD." Set "4.1.2 Paper Type" of the menu setting to "Envelope." • When printing onto envelopes, the following functions cannot be used. Duplex printing Facedown printing set by the printer driver Optional finisher functions Preparation for Printing Set "4.1 Standard Feed Tray" of the menu setting. Paper Size Registered Paper Size 1 - 5 Paper Type Envelope Double Feed Check OFF Envelope Size and Maximum Print Area (Image Area) For printing onto envelopes, "Paper Size Entry" is required. Register the envelope size (length) that includes the flap. The Maximum Print Area (Image Area) for envelopes is different from the area for normal paper and is the area inside 10 mm (3/8") from the edges of the registered size. When creating data for printing onto envelopes, take care so that the print area does not protrude from the flap of the envelopes. If original data is printed in the areas indicated with oblique lines, the belt inside the printer becomes dirty, resulting in trouble. 1-20 How to Print 1 Set "4.1 Standard Feed Tray" of the menu setting to "Envelope." 4 "4.1 Standard Feed Tray" )p.2-19 "Preparation for Printing" )p.1-20 Set the envelopes in the Standard Feed Tray. Set the envelopes with the flap on the left side. Change the position of the Standard Feed Tray. 2 Lower the Standard Feed Tray to the lowest position and open the paper guides fully. 3 Raise the end of the Standard Feed Tray and hang the stopper roller in the main unit side on the hook. 5 Adjust the paper guides according to the envelopes and lock them. 6 Set the Paper Feed Pressure Adjustment Lever to [ (CARD)]. 7 From the computer, open the file to print. 8 Display the [Print] dialog box. The Standard Feed Tray is fixed in an inclined state. From the [File] menu, select [Print]. 9 Click the [Properties] button. 1-21 10 Select [Envelope] at [Paper Type] on the [Main setting] tab. 13 Click the [OK] button in the [Print] dialog box. Printing starts. If a check mark is placed at [Pause after a proof] in step 10, printing stops temporarily after one copy is printed. Check the print result and then press the PRINT/PAUSE key. • If the envelopes cannot be fed properly, return the Paper Feed Pressure Adjustment Lever to [NORMAL] and perform printing. • If double feed or misfeed occurs frequently, adjust the front end of the envelopes (to be fed first) down and set them in the Standard Feed Tray. 11 Select [Standard Feed Tray] at [Paper feed tray] on the [Main setting] tab. 12 Click the [OK] button. The printer driver screen is closed. 1-22 When Printing is Complete Return the Standard Feed Tray to the original position. 1 Lower the Standard Feed Tray to the lowest position and open the paper guides fully. 2 Raise the Standard Feed Tray so that the angle from the horizontal plane exceeds 45 degrees and release the stopper roller from the hook. 3 Gently return the Standard Feed Tray to its original position. If you set another type of paper in the Standard Feed Tray, change the setting of "4.1 Standard Feed Tray" of the menu setting. 1-23 1-24 Chapter2 Printer Configuration This chapter describes the status of the Operation Panel that is displayed during printing. Also this chapter describes the method of setting the printer using the Operation Panel. After sending data to the printer, you can adjust the print position and perform test printing. 2-1 Message Display and Operation Keys This section describes the meaning of each display in the Message Display and operation keys. Message Display In the Message Display, a message indicating printer operation status is displayed. Principal display items and locations are shown below. During Printing In Menu Setting When "Ready" is displayed or the Printing mode is off, pressing the MENU Key displays the menu setting screen. For details, refer to "How to Use the Operation Panel" ()p.2-5). 2-2 When an Error Occurs When an error occurs, an error number and its description are displayed in the Message Display. For error numbers, refer to "Chapter 3 Troubleshooting")p.3-1. ~ Status The status of the printer is displayed. The following messages are displayed. Message Meaning Please Wait a Moment The printer is warming up or is being restored from an error. Printing cannot be performed. Warming Up The printer is warming up because the temperature of the print head is low. Ready The printer is ready to receive data. Receiving Data The printer is receiving data for printing from a computer. (The Data Indicator blinks.) Printing Mode Off The printer is waiting for a print instruction from the Operation Panel. Printing The printer is printing or processing data. Cooling Down The printer is cooling down because the temperature of the print head is high. Shutting Down The printer shuts down. ~ Print Quantity Display The number of printed copies and the preset number of copies for printing are displayed. For collated printing, the preset number of sets and the number of printed sets are displayed. For non collated printing, the preset number of sheets and the number of printed sheets are displayed. ~ Duplex Display This display appears when duplex printing is set. ~ Original Size/Tray Display The selected tray and the size and the orientation of the papers are displayed. If a feed tray is specified individually, the specified tray is displayed. If automatic selection of a feed tray is set, "Auto" is displayed, and during printing, the paper size is displayed. If mixed sizes of originals are set, the largest size is displayed. 2-3 Operation Keys The functions of the keys are shown below. One key may have more than one function. PRINT/PAUSE Key • Turns on or off the Printing mode. When the Printing mode is on, the indicator is lit, and when the Printing mode is off, the indicator is not lit. • If the key is pressed once during printing, printing stops temporarily. While printing stops temporarily, the indicator blinks. If the key is pressed again, printing resumes. • If proof copy is instructed, after proof copy is printed, the printer stops temporarily and the indicator blinks. After adjustment and setting are performed as needed, when the PRINT/ PAUSE key is pressed, printing starts. MENU Key • Press to change the printer initial settings or to exit setting. • If pressed during menu selection, menu setting is cancelled and the Printing mode is turned off. Cursor Keys Use to display the desired menu or change a preset value. (Vertical Movement Keys) … Switch the menu or change the selected value. (Horizontal Movement Keys) … Move to another number on a number entry screen. OK Key Determines the preset content. CANCEL/BACK Key • If pressed during menu selection, the current setting is cancelled and operation returns to one more higher level. • Press to cancel the function of which the setting is currently performed in a menu. 2-4 How to Use the Operation Panel You can set or change the printer environment such as print position and paper type registration using the MENU Key of the Operation Panel. Items That Can Be Set from the Menu The item that can be set from the menu and the details of each setting are shown below. AAA indicates the factory default setting. Item Details of setting (range) Reference Menu 1 Print Position Adjust Adjusts the print position. Horizontal and vertical -20.0mm to +20.0mm (-13/16" to +13/16") )p.2-14 Menu 2 Test Print Prints one sheet for checking the details of setting. )p.2-16 Menu 3 Temp Data Retrieve Retrieves temporary data and prints additionally. 0000 1 to 9999 )p.2-17 Menu 4 Configuration Sets the paper to be set in the feed trays, the print density, and the Paper Receiving Tray. )p.2-18 4.1 Standard Feed Tray Sets the paper to be loaded in the Standard Feed Tray. )p.2-19 4.1.1 Paper Size Auto A3/A4/B4/B5/A4-R/B5-R/Foolscap(Ledger/Legal/Letter/Letter-R/Statement)/000 × 000 mm 4.1.2 Paper Type Standard Paper 1/High-Quality 1/High-Quality 2/ Paper Type 1 - 5/Envelope/Card/Card-IJ 4.1.3. Double Feed Check ON OFF )p.2-19 4.2 Feed Tray 1 Sets the paper to be loaded in Feed Tray 1. 4.2.1. Paper Size Auto A3/A4/B4/B5/A4-R/B5-R/Foolscap(Ledger/Legal/Letter/Letter-R/Statement)/000 × 000 mm 4.2.2 Paper Type Standard Paper 1/High-Quality 1/High-Quality 2/ Paper Type 1 - 5 4.2.3 Double Feed Check ON OFF )p.2-19 4.3 Feed Tray 2 Sets the paper to be loaded in Feed Tray 2. 4.3.1 Paper Size Auto A3/A4/B4/B5/A4-R/B5-R/Foolscap(Ledger/Legal/Letter/Letter-R/Statement)/000 × 000 mm 4.3.2 Paper Type Standard Paper 1/High-Quality 1/High-Quality 2/ Paper Type 1 - 5 4.3.3 Double Feed Check ON OFF 2-5 Item Details of setting (range) Reference 4.4 Feed Tray Relay Sets whether or not to feed paper continuously by changing automatically the feed trays. ON OFF )p.2-21 4.5 Triple-Tray Source Sets whether or not the Standard Feed Tray is selected in automatic tray selection. ON OFF )p.2-22 4.6 Job Separation Selects whether or not to perform Job Separation in printing and selects the type of this function. )p.2-23 OFF Between Jobs Every Division (If this function is set with the printer driver, the value is displayed.) 4.7 Print Density Adjusts the density of overall prints. Density-Level 1/2/3/4/5 (If the density is set with the printer driver, the value is displayed.) )p.2-24 )p.2-25 4.8 Paper Ejection Sets the Paper Receiving Tray. 4.8.1 Eject Wing Auto Sets the shape of the Eject Wing Adjust. Special 4.8.2 Stack Guide Adjusts the Stack Guide position. Auto Adjusted Position OFF 4.8.3 Stack Guide Adjust Sets the Adjusted Position in 4.8.2. Side Guides: -20mm to +20 mm (-13/16" to +13/16") End Guide: -20mm to +20 mm (-13/16" to +13/16") 4.8.4 Shifting Guide Sets the Stack Guides move position when the Stack Guide OpenButton is pressed. End Guide Side Guides End & Side Guides 4.9 Temp Data Clear Clears temporary data. - )p.2-28 4.10 Image Area Sets the maximum print area. Standard Maximum )p.2-29 )p.2-30 4.11 Cover Sheet Tray Sets the paper to be loaded in the Cover Sheet Tray of the optional HC Finisher. 4.11.1 Paper Size Auto A3A4B4B5A4-RB5-R/Ledger/Legal/Letter/Letter-R )p.2-31 Menu 5 Administration Sets the basic information of the printer. 5.1 Paper Size Entry Registers non-standard paper sizes. Up to five sizes can be registered. (5.1.1 - 5.1.5) 5.2. Paper Type Entry Registers paper types. Up to five types can be registered.(5.2.1 - 5.2.5) In addition, registers paper feed control of certain paper.(5.2.6 - 5.2.12) 2-6 000 × 000mm 90mm - 340mm × 148mm - 550mm (39/16" - 133/8" × 513/16" - 215/8") )p.2-32 )p.2-33 Item Details of setting (range) 5.2.1 - 5 Registration (5.2.1.1 - 5.2.5.1) ON OFF 5.2.1 - 5 Paper Type (5.2.1.2 - 5.2.5.2) Standard Paper 1High-Quality 1/High-Quality 2/ Envelope/Card/Card-IJ 5.2.1 - 5 Paper Feed Control (5.2.1.3 - 5.2.5.3) (5.2.6.1 - 5.2.12.1) StandardCard ThinLightCustom/Envelope 5.3 Separation Paper Sets the feed tray for job separation paper. OFF Standard Feed Tray Feed Tray 1 Feed Tray 2 )p.2-36 )p.2-37 5.4 Count Management Displays the number of printed sheets. 5.4.1 Copy Count Displays the total number of printed pages. Reference 5.4.3 Count Pattern Displays the count for each combination of conditions such as size and type. )p.2-40 5.5 Head Maintenance Performs cleaning of the print head. 5.5.4 Hyper-Cleaning Performs powerful cleaning for each head. KCMY 5.5.5 Normal Cleaning Performs cleaning of all heads together. 5.5.6 Cleaning Cycle Sets the cycle of automatic normal cleaning. 500 100 - 3000 (in 100 increments) )p.2-42 5.6 Configuration Information Print Prints the information of the printer such as detailed settings in a list. 5.6.1 System Information Displays the information such as printer memory capacity, firmware version, and IP address in a list for checking. 5.6.2 Menu Setting Displays the menu settings established from the operation panel in a list for checking. 5.6.4 Count Pattern Prints the result of "5.4.3 Count Pattern" and the count of the finisher function (only if an optional finisher is connected) in a list. 5.7 Network Configuration Sets the information concerning the network such as IP address. )p.2-44 5.8 Initial Setting )p.2-45 2-7 Item 5.8.1 Sleep Sets whether or not the printer enters the sleep mode to reduce power consumption when the printer is not used for a certain time. Details of setting (range) ON OFF 60 min. 5.8.2 Waiting Time Sets the time that elapses until the printer 1 - 99 min. enters the sleep mode when "5.6.1 Sleep" is set. 5.8.3 Beep Sound -Key Sets whether or not a beep sounds when a key is pressed. ON OFF 5.8.4 Beep Sound -Status Sets whether or not a beep sounds when an event such as data reception and end of printing occurs. ON OFF 5.8.5 Beep Sound -Error Sets whether or not a beep sounds when an error occurs. ON OFF 5.8.7 Displayed Language * Sets the language to be displayed in the Operation Panel. Japanese/UK English/US English/French/German/Italian/Spanish/Portugese 5.8.8 Metric/Inch Switch Sets the unit of length and the paper size type displayed on the Operation Panel. This setting will be reflected when the power is turned off and then on again. mm inch 5.8.17 Tray Selection Rule Sets the condition for selecting a tray using the auto tray selection function. Size Size & Type ON 5.8.18 Print Mode Auto-ON OFF Sets whether or not the print mode is automatically turned on when the printer is not used for a certain time with the print mode OFF. 5.8.19 Print Auto-ON Time Sets the time that elapses until the print mode is turned on when "Print Mode Auto-ON" is set to "ON." 05 min. 1 - 60 min. ON 5.8.20 Menu Auto-Shut OFF OFF Sets whether or not the print mode is automatically turned off when no operation is made for a certain time on the menu setting screen. 5.8.21 Menu Shut OFF Time Sets the time that elapses until the print mode is turned off when "Menu AutoShut OFF" is set to "ON." 2-8 05 min. 1 - 60 min. Reference Item Details of setting (range) Reference ON 5.8.22 Stand-by Sets whether or not the printer enters the OFF stand-by mode to reduce power consumption when the printer is not used for a certain time. 05 min. 5.8.23 Stand-by Period Sets the time that elapses until the printer 1 - 99 min. enters the stand-by mode when "Standby" is set to "ON." 5.8.50 Head Recovery Performs powerful cleaning of the print head nozzles to restore them to the initial state after the printer is not used for a long time. Menu 6 Feed Tray Selection Selects the feed tray for printing in which required paper is set among multiple feed trays. Auto Standard Feed Tray Feed Tray 1 Feed Tray 2 )p.2-53 Menu 7 Job Clear )p.2-54 * If US English is selected, inch system units and paper sizes will be displayed. 2-9 Basic Operation of Menu Selection How to Enter the Menu Set the menu when the printer is not operating, for example, when printing is suspended or the printer is waiting for data. To perform setting when the printer is printing, press the PRINTPAUSE key to suspend printing (turn off the Printing mode) and press the MENU Key. When the printer enters the menu, the Menu 1 screen appears. 2-10 Menu Selection The menu has a tree-type hierarchical structure. Press the or key to display the desired menu. z Submenu Menu4 “The Configuration” and Menu5 “Administration” include submenus. If you press the OK Key when a menu is displayed, its submenu will be displayed. In some menus, the submenu has multiple levels. A mark is displayed at the currently set items or values. 2-11 To display "4.1.1 Paper Size", operate as follows. The menu hierarchy is listed at the end of this manual. Refer also to the list. 2-12 Menu Setting Select the desired menu and press the OK Key. Menu setting can be performed. Press the or key to select the desired item and press the OK Key. Suspending the Operation To return to the upper level from a submenu, press the CANCEL BACK Key. To cancel and exit the setting, press the MENU Key. Exiting the Menu Setting Starting Printing After menu setting is complete, press the PRINT PAUSE Key to turn on the Printing mode. 2-13 Menu 1 Print Position Adjust Adjusts the print position. Also the positions can be adjusted for punching and stapling after printing. ~ Adjustable Range If you want to shift the print position after checking the printed sheet, use the Cursor Keys on the printer to shift the position. • With reference to the current print position, you can shift the position between 0mm and 20 mm (0" and 13/16") in the vertical (up and down) and horizontal (to the right and the left) directions. • You can adjust the position in 0.5 mm (0.02") increments. • If "4.9 Temp Data Clear" of the menu setting has been executed or if setting of no temporary data has been selected (5.8.6 Temporary Data Retention), message "No Temp Data" is displayed. • In duplex printing, the print position moves to the same adjusted position on both the front and back sides. This function is useful for making margins for binding. • The setting is effective in additional printing performed with "Menu 3 Temp Data Retrieve." 2-14 1 Press the MENU Key. 2 Check that "Print Position Adj" is displayed. 3 Press the OK Key. 4 Press the the print position. keys to adjust Only the arrow that corresponds to the pressed key is displayed and the relevant value changes. 5 After setting is complete, press the OK Key. When the screen in step 2 reappears, you can continue setting. Check the position using Menu 2 "Test Print." To exit the setting, press the PRINTPAUSE key. 2-15 Menu 2 Test Print Prints the data currently retained in the printer for checking. Use this function to check to see if the settings such as print position and density adjustments are reflected properly. • The number of printed sheets with the Test Print function is not counted as the "Number of Copies" that is set on a computer. • If "4.9 Temp Data Clear" of the menu setting has been executed, message "No Temp Data" is displayed and Test Print cannot be performed. • If an optional finisher is connected, test print paper is output to the Top Tray regardless of the settings of finisher functions. 1 Press the MENU Key. 2 Press the Print." 3 Press the OK Key. 4 Check the message and press the OK Key to print. key to display "Test One sheet is printed. If the CANCEL/BACK key is pressed, the screen in step 2 reappears. After Test Print is complete, you can continue setting. To exit the setting, press the PRINTPAUSE key. 2-16 Menu 3 Temp Data Retrieve The data currently retained in the printer can be retrieved and printed again by specifying the number of copies (additional printing). Retained data can be retrieved if a check mark is placed at [Keep the last page of the job in the printer.] in [Controller setting 2] - [Initial setting] of [Administrator] of RISO Console. For details, refer to "HC-5500 Series User's Manual for Console." • The retained data is the last page of the latest printing. In the case of duplex printing, the data of the last sheet (two pages) is retained. • When the printer enters the sleep mode, retained data will be cleared (not retained). • The maximum number of copies that can be set for additional printing is "9999." • If "4.9 Temp Data Clear" of the menu setting has been performed, message "No Temp Data" is displayed. 1 Press the MENU Key. 2 Press the or key to display "Temp Data Retrieve." 3 Press the OK Key. 4 Press the keys to move the cursor, and press the keys to input the number of copies for printing. 5 Press the OK Key. 6 Press the PRINT PAUSE Key. Printing of the set number of copies starts. 2-17 Menu 4 Configuration Functions concerning printing such as size and type of paper to be loaded in the feed trays and the Job Separation function can be set. ~ Functions The functions that can be set are shown below. z 4.1 Standard Feed Tray 4.2 Feed Tray 1 4.3 Feed Tray 2 )p.2-19 Set the size and type of paper to be loaded in the Standard Feed Tray and the other feed trays and turn on or off the Double Feed Check function. z 4.4 Feed Tray Relay )p.2-21 Sets whether or not to enable the Feed Tray Relay function that uses Feed Tray 1 and Feed Tray 2. If "4.5 Triple-Tray Source" is set to "ON," feed trays including the Standard Feed Tray can be used for Feed Tray Relay. z 4.5 Triple-Tray Source )p.2-22 Sets whether or not to include the Standard Feed Tray into feed trays for selection when instructing printing without specifying the tray (Auto tray selection) from the printer driver. z 4.6 Job Separation )p.2-23 Inserts separation paper between jobs or every division such as set or page when printing multiple sets. z 4.7 Print Density )p.2-24 Selects the print density from five levels. z 4.8 Paper Ejection)p.2-25 Sets the adjustment of the Auto Stacking Tray and Eject Wing. z 4.9 Temp Data Clear )p.2-28 Clears temporary data in the printer. z 4.10 Image Area )p.2-29 Sets the maximum print area. z 4.11 Cover Sheet Tray )p.2-30 Sets the paper to be loaded in the Cover Sheet Tray of the optional HC Finisher. 2-18 4.1 Standard Feed Tray 4.2 Feed Tray 1 4.3 Feed Tray 2 Set the size and type of paper to be loaded in the Standard Paper Feed Tray and the other Paper Feed Trays and turn on or off the Double Feed Check function. Be sure to set when you have changed the type or size of paper. ~ Settings 4.1.1/4.2.1/4.3.1 Paper Size Can be selected from Auto, A3, B4, A4, B5, A4-R, B5-R, Foolscap (Ledger, Legal, Letter, Letter-R, Statement) Registered Paper Size 000 × 000 mm (*1). 4.1.2 Paper Type Can be selected from Standard Paper 1, High-Quality 1, High-Quality 2 Registered Paper Type 1 - 5 (*2), Envelope, Card, Card-IJ. 4.2.2/4.3.2 Paper Type Can be selected from Standard Paper 1, High-Quality 1, High-Quality 2 Registered Paper Type 1 - 5 (*2). 4.1.3/4.2.3/4.3.3 Double Feed Check Selects whether or not to detect "double feed" (feeding of multiple sheets of paper at a time). When loading paper for which printing has been performed onto the back side, envelopes or paper with a dark ground colour, turn off "Double Feed Check." OFF: Double Feed Check is disabled. ON: Double Feed Check is enabled. *1 Sizes that have been registered in "5.1 Paper Size Entry" are displayed. *2 Types that have been registered in "5.2 Paper Type Entry" are displayed. An example of method of setting the Standard Feed Tray is used for explanation in the procedure below. For Feed Tray 1 or Feed Tray 2, display "Feed Tray 1" or "Feed Tray 2" in step 4. 1 Press the MENU Key. 2 Press the or "Configuration." 3 Press the OK Key. 4 Press the or key to display "Standard Feed Tray." 5 Press the OK Key. key to display The submenu for the Standard Feed Tray (Feed tray) is displayed. 2-19 4.1.1/4.2.1/4.3.1 Paper Size • To use non-standard size paper, register the size to be used in "5.1 Paper Size Entry" of the menu setting in advance. After the size is registered, paper of the size can be used. • If you use non-standard size paper without paper size entry, a paper jam may occur. • Paper sizes that can be set are different between the Standard Feed Tray and the other feed trays (1 and 2).)p.2-19 • When setting for Feed Tray 1 Feed Tray 2, if a registered size is not adequate for the feed tray, the registered paper will not be displayed. • If an optional HC Finisher is connected, some paper sizes cannot be used. Paper sizes that cannot be used are not displayed in this menu. 1 Check that "Paper Size" is displayed. 2 Press the OK Key. 3 Press the or desired size. 4 Press the OK Key. key to select the When the screen in step 1 reappears, you can continue setting. To exit the setting, press the PRINTPAUSE key. 4.1.2/4.2.2/4.3.2 Paper Type • Paper types that can be set are different between the Standard Feed Tray and the other feed trays.)p.2-19 • When the registered paper is used in the Standard Feed Tray, adjust also the Paper Feed Pressure Adjustment Lever according to the paper thickness. 1 Press the or "Paper Type." 2 Press the OK Key. key to display 3 Press the or key to select the desired paper type. 4 Press the OK Key. When the screen in step 1 reappears, you can continue setting. To exit the setting, press the PRINTPAUSE key. 2-20 4.1.3/4.2.3/4.3.3 Double Feed Check 1 Press the or key to display "Double Feed Check." 3 Press the or OFF. 2 Press the OK Key. 4 Press the OK Key. or key to select ON When the screen in step 1 reappears, you can continue setting. To exit the setting, press the PRINTPAUSE key. 4.4 Feed Tray Relay Sets whether or not to enable the Feed Tray Relay function that uses Feed Trays 1 and 2 and the Standard Feed Tray. Up to 2,500 sheets of printing can be performed continuously without adding paper. Useful Feature In the following cases: The Feed Tray Relay function is useful in the following cases. • Paper of the same size and type is always used. (*) • More than 1,000 sheets of printing is performed at a time. * When using paper of the same size and type, set "5.8.17 Tray Selection Rule" to "Size & Tray." Mechanism of Feed Tray Relay If you set Feed Tray Relay, when Feed Tray 2 becomes empty of paper, Feed Tray 1 will be automatically selected and printing will continue. In addition, if "4.5 Triple-Tray Source" is set to ON, the Standard Feed Tray can also be selected for paper feed with this function. The order of priority of tray selection is Standard Feed TrayoFeed Tray 2 oFeed Tray 1. "4.5 Triple-Tray Source")p.2-22 ~ Settings OFF Feed Tray Relay is disabled. ON Feed Tray Relay is enabled. The feed tray set for separation paper (5.3 Separation Paper) is not selected as a feed tray for Feed Tray Relay or Auto Tray Selection in "Menu 6 Feed Tray Selection.")p.2-53. 1 Press the MENU Key. 2 Press the or "Configuration." 3 4 Press the or "Feed Tray Relay." 5 Press the OK Key. key to display key to display The submenu of Feed Tray Relay is displayed. Press the OK Key. 2-21 6 Press the or OFF. or key to select ON 7 Press the OK Key. When the screen in step 4 reappears, you can continue setting. To exit the setting, press the PRINTPAUSE key. 4.5 Triple-Tray Source Sets whether or not to include the Standard Feed Tray into feed trays for selection when "Auto tray selection" is selected in "Paper feed tray" of the printer driver. Useful Feature Turn ON in the following cases: • If you set paper of different sizes in the feed trays and the Standard Feed Tray respectively and perform printing by automatically selecting the desired paper from three different sizes according to the data. • If you use paper in the Standard Feed Tray for "4.4 Feed Tray Relay" of the menu setting. Turn OFF in the following case: • If you set various types of paper such as postcards, envelopes, and card stock in the Feed Tray each time. ~ Settings 1 2 2-22 OFF The Standard Feed Tray is not selected. ON The Standard Feed Tray is selected. 5 Press the MENU Key. Press the OK Key. The submenu of Triple-Tray Source is displayed. Press the or "Configuration." key to display 3 Press the OK Key. 4 Press the or key to display "Triple-Tray Source." 6 Press the or OFF. 7 Press the OK Key. or key to select ON When the screen in step 4 reappears, you can continue setting. To exit the setting, press the PRINTPAUSE key. 4.6 Job Separation The setting of Job separation (set with the printer driver) can be changed while printing of the current job is performed. ~ Settings OFF Job Separation is not performed. Between Jobs Separation paper is inserted between jobs. Every Division Separation paper is inserted every division. When collated printing is directed by the printer driver, separation paper is inserted between sets. When non collated printing is directed, separation paper is inserted between pages. • When inserting separation paper, specify the feed tray separately. "5.3 Separation Paper")p.2-36 • If "5.3 Separation Paper" is set to "Off," printing stops for a few seconds in place of insertion of separation paper. • Although Job Separation can also be set on the "Options" tab of the printer driver, you can temporarily stop printing with the PRINT PAUSE Key and change or reset this function on the printer. • If an optional HC Finisher is connected, "Punching" and "Add Cover" of the Finisher can also be set with this function. 1 Press the MENU Key. 2 Press the or "Configuration." 3 Press the OK Key. 4 Press the or "Job Separation." 5 Press the OK Key. key to display key to display The submenu of Job Separation is displayed. 6 Press the 7 Press the OK Key. or key to select. When the screen in step 4 reappears, you can continue setting. To exit the setting, press the PRINTPAUSE key. 2-23 4.7 Print Density You can manually change the print density. The density of overall printing is set. To adjust specific colours or to change the halftone reproduction method, use the "Image processing" tab of the printer driver to adjust or process the image using the application software. ~ Settings Density-Level 5 Dark Density-Level 4 Medium dark Density-Level 3 Standard Density-Level 2 Medium light Density-Level 1 Light Although Print Density can also be set on the "Options" tab of the printer driver, you can temporarily stop printing with the PRINT PAUSE Key and change or reset this function on the printer. 1 7 Press the MENU Key. 2 Press the or "Configuration." 3 Press the OK Key. 4 Press the or "Print Density." 5 Press the OK Key. key to display key to display The submenu of Print Density is displayed. 6 2-24 Press the or desired density. key to select the Press the OK Key. When the screen in step 4 reappears, you can continue setting. To exit the setting, press the PRINTPAUSE key. 4.8 Paper Ejection Sets the position and adjustment of the Eject Wing and the Auto Stacking Tray. If an optional HC Finisher is connected, this menu is not displayed. ~ Settings 4.8.1 Eject Wing 4.8.2 Stack Guide Adjusts the Eject Wing so that the position changes for proper paper arrangement when printed paper is ejected. Auto: The Eject Wing is automatically adjusted to optimum position based on the type and size of paper. Special: The Eject Wing can be set according to special paper. For details, contact your local dealer (or service representative). Selects the method of adjusting the positions of the Side Guides and the End Guide. Auto: The positions of the Side Guides and the End Guide are automatically adjusted according to the type, size, and orientation of paper. Adjusted Position: Since the guides of the Auto Stacking Tray move automatically according to the paper size, the set positions cannot be changed by hand. Use this setting when a little wider (narrower) space is desired depending on the paper. Set the positions in 4.8.3. OFF: The Stack Guides are not adjustable. If paper of larger than 320mm × 432 mm (125/8" × 17")is used for printing, set "OFF" and fold the Stack Guide. 4.8.3 Stack Guide Adjust The positions of the Side Guides and End Guide can be specified in 1 mm (0.04") increments when "Adjusted Position" is selected in "4.8.2 Stack Guide." Side Guides: -20 (narrower) mm to +20 (wider) mm (-13/16"(narrower) to +13/16"(wider)) than paper size End Guide: -20 (to left) mm to +20 (to right) mm (-13/16"(to left) to +13/16"(to right)) from paper size 4.8.4 Shifting Guide When printing is complete, if you press the Stack Guide Open Button, the Stack Guides move outward to allow easy removal of prints. The guides to be moved at this time are specified. For the Stack Guide Open Button, refer to )p.1-4. End Guide: Only the End Guide moves outward. Side Guides: Only the Side Guides move outward. End and Side Guides: Both the End Guide and Side Guides move outward. z If "Auto" or "OFF" has been selected in "4.8.2 Stack Guide," when "4.8.3 Stack Guide Adjust" is selected, the setting of "4.8.2 Stack Guide" is changed to "Adjusted Position." z The setting of "4.8.3 Stack Guide Adjust" is cancelled and changed to "Auto" in the following cases. • • • • The power is turned off and then on again. Wake-up from the Sleep mode occurs. Paper of a different size is selected. "Auto" is selected for "4.8.2 Stack Guide." 2-25 1 Press the MENU Key. 2 Press the or "Configuration." 3 4 Press the or "Paper Ejection." 5 Press the OK Key. key to display key to display The submenu of "Paper Ejection" is displayed. Press the OK Key. 4.8.1 Eject Wing 1 Ensure that "Eject Wing" is displayed. 3 Press the 2 Press the OK Key. 4 Press the OK Key. or key to select. When the screen in step 1 reappears, you can continue setting. To exit the setting, press the PRINTPAUSE key. 4.8.2 Stack Guide 1 2-26 Press the or "Stack Guide." key to display 2 Press the OK Key. 3 Press the or key to select the method of adjusting the positions. 4 Press the OK Key. When the screen in step 1 reappears, you can continue setting. If "Adjusted Position" is selected, adjust the amount of movement in 4.8.3. To exit the setting, press the PRINTPAUSE key. 4.8.3 Stack Guide Adjust 1 Press the or key to display "Stack Guide Adjust." 3 To adjust the Side Guide positions, press the or key , and to adjust the End Guide position, press the or key. Only the arrow that corresponds to the pressed key is displayed therefore the relevant value changes. 2 Press the OK Key. 4 After setting is complete, press the OK Key. When the screen in step 1 reappears, you can continue setting. To exit the setting, press the PRINTPAUSE key. 4.8.4 Shifting Guide 1 Press the or "Shifting Guide." 2 Press the OK Key. 3 Press the 4 Press the OK Key. or key to display key to select. When the screen in step 1 reappears, you can continue setting. To exit the setting, press the PRINTPAUSE key. 2-27 4.9 Temp Data Clear If a check mark is placed at [Keep the last page of the job in the printer.] in [Controller setting 2] - [Initial setting] of [Administrator] of RISO Console, the last page of previous printing (last sheet in case of duplex printing) is left in the controller as retained data. If retention of data after printing is not desired because of a confidential document, the data can be cleared. To clear the temporary data when printing stops temporarily, use "Menu 7 Job Clear" to clear the current job and then clear the temporary data. "Menu 7 Job Clear")p.2-54 1 Press the MENU Key. 2 Press the or "Configuration." 3 Press the OK Key. 4 Press the or "Temp Data Clear." 5 Press the OK Key. 6 Check the message. To clear the data, press the OK Key. key to display key to display Message "Executing ..." is displayed and the data is cleared. If the CANCEL Key is pressed, the screen in step 4 reappears. 7 Press the OK Key. When the screen in step 4 reappears, you can continue setting. To exit the setting, press the PRINT PAUSE Key. 2-28 4.10 Image Area (Maximum Print Area) With this machine, a certain area of space is left along the edges of paper regardless of the original size. Normally, use the setting "Standard." If the image is larger than the printable area, the relevant part of the image is not printed. (Reduction is not performed.) ~ Settings Standard Maximum Printing can be performed into the area 3mm (1/8") inside from the sides of paper. Print Area : 310mm × 454mm (123/16" × 177/8") Printing can be performed into the area 1mm (0.04") inside from the sides of paper. Maximum Print Area : 314mm × 458mm (123/8" × 185/16") • If the image is larger than the guaranteed print area ()p.viii), deterioration of print quality such as blur of characters and pictures may occur depending on the original image. • Even if the paper size is larger than 316mm × 460mm (127/16" × 181/8"), the actual maximum printable area is 314mm × 458mm (123/8" × 185/16".) • If "Maximum" is selected, the interior of the machine and the paper may be stained with ink. 1 Press the MENU Key. 2 Press the or "Configuration." 3 Press the OK Key. 4 Press the or "Image Area" 5 Press the OK Key. 7 key to display Press the OK Key. When the screen in step 4 reappears, you can continue setting. To exit the setting, press the PRINT PAUSE Key. key to display The submenu of "Image Area" is displayed. 6 Press the or key to select. 2-29 4.11 Cover Sheet Tray (For a HC Finisher is connected) Set the size and type of paper to be loaded in the Cover Sheet Tray in the optional Finisher. Be sure to set them when you have changed the type or size of paper. ~ Settings 4.11.1 Paper Size Can be selected from Auto, A3, B4, A4, B5, A4-R, B5-R, Ledger, Legal, Letter, Letter-R. 1 Press the MENU Key. 2 Press the or "Configuration." 3 Press the or "Cover Sheet Tray" 5 Press the OK Key. key to display key to display The submenu of "Cover Sheet Tray" is displayed. Press the OK Key. 4.11.1 Paper Size 1 Check that "Paper Size" is displayed. 2 Press the OK Key. 3 Press the or desired size. 4 Press the OK Key. key to select the When the screen in step 1 reappears, you can continue setting.To exit the setting, press the PRINT/PAUSE key. 2-30 4 Menu 5 Administration Sets basic information of the printer such as paper type entry, maintenance, and initial setting. The items set here are effective until the setting is changed regardless of when the power is on or off. ~ Functions The functions that can be set are shown below. z 5.1 Paper Size Entry)p.2-32 Five paper sizes such as non-standard sizes can be registered. z 5.2 Paper Type Entry )p.2-33 Five paper types including printer recommended paper, standard paper, and any other types of paper can be registered. z 5.3 Separation Paper )p.2-36 Set the feed tray to be exclusively used for separation paper. z 5.4 Count Management )p.2-37 The number of printed sheets that can be checked. z 5.5 Head Maintenance )p.2-40 "Ink Cartridge Replacement" )p.3-16 Perform maintenance of the ink head in the following cases: • Part of print image is blurred. • A certain colour is too light. • The printer has not been used for a long time. z 5.6 Configuration Information Print )p.2-42 Print the settings in a list. z 5.7 Network Configuration )p.2-44 Set the DHCP, IP address, subnet mask, and default gateway if the printer is used through network. z 5.8 Initial Setting )p.2-45 Set basic conditions such as details of sleep, beep sound, language, and metricinch switch. How to Enter the Administration Menu 1 Press the MENU Key. 2 Press the or "Administration." 3 Press the OK Key. 4 key to display Check the message and press the OK Key. "5.1 Paper Size Entry" is displayed. If the CANCEL key is pressed, the screen in step 2 will reappear. A confirmation screen is displayed. 2-31 5.1 Paper Size Entry Five non-standard paper sizes can be registered. When using non-standard size paper, be sure to register the size in advance. Registered values are displayed in Paper Size of "4.1.1 Standard Feed Tray," "4.2.1 Feed Tray 1," and "4.3.1 Feed Tray 2." If the paper sizes have been registered, the registered values will be displayed. ~ Range of paper size that can be set Width (Vertical) Length (Horizontal) Printer 90 - 340mm (39/16 - 133/8") 148 - 550mm (513/16 - 215/8") Printer (with finisher installed) 100 - 330mm (315/16 - 13") 148 - 488mm (513/16 - 193/16") • Be sure to set this item before proceeding to "4.1.1 Standard Feed Tray," "4.2.1 Feed Tray 1," and "4.3.1 Feed Tray 2." • The registered sizes can also be changed. • To clear a registered paper size, set the paper size to "000 mm x 000 mm." If a paper size is registered for the Standard Feed Tray or another feed tray and paper of the registered size is actually set, the size cannot be deleted from the choices of "Paper Size." • If an optional HC Finisher is connected, the paper sizes that can be used depend on the Finisher functions to be used. For details, see "HC5500 User's Manual for Printer Driver." 1 Use steps 1 to 4 () )p.2-31) to display "Administration." 2 Press the or "Paper Size Entry". Press the keys to move the cursor, and press the keys to enter the paper size. 7 Press the OK Key. key to display To exit the setting, press the PRINTPAUSE key. 3 Press the OK Key. 4 Press the or key to display the desired number to be registered. 5 Press the OK Key. The submenu of "Paper Size Entry" is displayed. 2-32 6 5.2 Paper Type Entry If any paper other than printer recommended paper is used or paper is not fed properly, it could result in poor print quality. You should register the paper type and feeding according to the paper type specifications. The registered setting is displayed in Paper Type of "4.1.2 Standard Feed Tray," "4.2.2 Feed Tray 1," and "4.3.2 Feed Tray 2." Also if printer recommended paper is used and paper is not fed properly because of operating environment or the like, the setting can be changed. When changing the setting or registering paper other than printer recommended paper, contact your local dealer (or service representative) for consultation. Advice on proper setting will be given. ~ Settings Paper Type 1 - 5 Register required information on z Registration the paper type and paper feed for Sets whether or not the registered paper type is displayed as a paper of which a new size is regischoice when setting a paper type in "4.1.2," "4.2.2" or "4.3.2." tered in "5.1 Paper Size Entry" or ON: This item is displayed. paper other than recommended OFF: This item is not displayed. paper. z Paper Type Determine the image quality (colour matching) by selecting the paper type. Select the same item as the paper to be used for printing. When printing, specify the same item in [Paper type] of the [Main setting] tab of the printer driver screen. • • • • • • Standard Paper 1 High-Quality 1 High-Quality 2 Envelope Card Card-IJ z Paper Feed Control Select the paper thickness. • • • • • Standard Paper 1 High-Quality 1 High-Quality 2 Envelope Card Card-IJ Standard Card Thin/Light Envelope Custom: Can be set in advance. For details, contact your local dealer (or service representative) for inquiry. If paper load in the Standard Feed z Paper Feed Control Tray or another feed tray is not fed Select paper thickness. properly, change the Paper Feed • Standard Control for the relevant paper. • Card If the paper type is Envelope, • Thin/Light Card or Card IJ, Paper Feed • Envelope Control cannot be changed. • Custom: Can be set in advance. For details, contact your local dealer (or service representative) for inquiry. If the following settings are made concerning the paper, the paper type is not displayed at "4.2.2 Feed Tray 1" and "4.3.2 Feed Tray 2." (These types of paper cannot be used in these trays.) • Paper Type: Envelope, Card, Card-IJ • Paper Feed Control: Envelope, Postcard 2-33 5.2.1 Registering a New Paper Type 1 2 Use steps 1 to 4 () )p.2-31) to display "Administration." 8 Press the OK Key. The screen in step 6 appears again. Press the or key to display "Paper Type Entry." Set the Paper Type. 9 3 Press the OK Key. 4 Press the or key to display the desired number to be registered. Press the or "Paper Type." key to display 10 Press the OK Key. The submenu of paper type appears. 5 11 Press the Press the OK Key. The submenu of Registration appears. or key to select the desired paper type. Set whether or not to display the registered paper type (1 to 5) in "Paper Type." 6 Press the OK Key when "Registration" is displayed. 12 Press the OK Key. The screen in step 9 appears again. Perform Paper Feed Control. 7 13 Press the Press the or OFF. or key to select ON or key to display "Paper Feed Control." 14 Press the OK Key. The submenu of paper feed control appears. 2-34 15 Press the or key to select the desired paper type. 16 Press the OK Key. The screen in step 13 reappears, you can continue setting. To exit the setting, press the PRINTPAUSE key. Standard Paper 1 High-Quality 1 High-Quality 2 1 Use steps 1 to 4 () )p.2-31) to display "Administration." 2 Press the or key to display "Paper Type Entry." 3 Press the OK Key. 4 Press the or key to display the desired paper to change the settings. 5 Press the OK Key. 7 Press the or key to select the desired paper feed control. 8 Press the OK Key. When the screen in step 6 reappears, you can continue setting. To exit the setting, press the PRINTPAUSE key. The submenu of standard feed tray appears. Perform paper feed control. 6 Press the OK Key. 2-35 5.3 Separation Paper If you use "4.6 Job Separation", specify the feed tray in which the separation paper is loaded. ~ Settings The separation paper can be used even if the size and the orientation are different from those of the printer paper. OFF The separation paper tray is not specified. Printing stops for a few seconds in place of insertion of separation paper. Standard Feed Tray The Standard Feed Tray is used for separation paper. Feed Tray 1 Feed Tray 1 is used for separation paper. Feed Tray 2 Feed Tray 2 is used for separation paper. • The separation paper tray is used exclusively for Job Separation. If "Menu 6 Feed Tray Selection" is set to "Auto" and "Menu 4.4 Feed Tray Relay" is set, this feed tray is not used for printing. • If the separation paper tray runs out of paper during printing, no-paper error will be displayed and printing stops temporarily. • If a finisher is connected, paper in the separation paper tray can be added as a front cover or a back cover by using the "Add cover" function of the finisher. In this case, specify the tray in which cover sheets are loaded. If "OFF" is set, an error will be displayed when printing is performed. Caution in the following case If paper larger than the paper for printing or paper of a different orientation is specified as separation paper, the stack guides are spread according to the larger paper size. Printed paper, therefore, may not be arranged properly. 1 Use steps 1 to 4 () )p.2-31) to display "Administration." 2 Press the or key to display "Separation Paper." 4 Press the 5 Press the OK Key. or key to set. When the screen in step 1 reappears, you can continue setting. To exit the setting, press the PRINTPAUSE key. 3 Press the OK Key. The submenu of separation paper appears. 2-36 5.4 Count Management The number of printed sheets can be checked. • The number of sheets that have been ejected in the Paper Receiving Tray is displayed. • For copy count, in duplex printing, each side is counted, and therefore one sheet of both sides is counted by two. Since the paper transfer path varies depending on the functions that you use, one sheet in simplex printing may be counted as two. • For Count Pattern, one sheet is counted as one regardless of simplex or duplex printing. ~ Settings 5.4.1 Copy Count The total number of sheets that have been printed until now is displayed. Paper on which printing is not performed such as separation paper is also counted. 5.4.3 Count Pattern Specify a count number for which conditions such as paper size, simplex/duplex, and colour/monochrome are determined. The relevant number of sheets is displayed. Paper on which printing is not performed such as separation paper is not counted. • 5.4.2 is not displayed. • You can print the information that can be seen in "5.4.3 Count Pattern" as a list. "5.6 Configuration Information Print." )p.2-42 In Count Pattern, the number of printed sheets is displayed according to the combined conditions shown below. The Paper Size Number is as follows. Size No.1 A3 (Ledger) Size No.2 A4 (Letter) Size No.3 B4 (Legal) Size No.4 B5 (Statement) Size No.5 Foolscap Size No.6 Irregular paper size of which the length is 320 mm (1213/16") or more for the Standard Feed Tray or 316 mm (125/8") or more for other feed trays Size No.7 Irregular paper size of which the length is less than 320 mm (1213/16") for the Standard Feed Tray or less than 316 mm (125/8") for other feed trays Count No. Paper Size Number 01 Size No.1 02 Size No.2 03 Size No.3 04 Size No.4 05 Size No.5 06 Size No.6 07 Size No.7 08 Size No.1 09 Size No.2 10 Size No.3 11 Size No.4 12 Size No.5 13 Size No.6 14 Size No.7 Simplex/ Duplex Colour/ Monochrome Simplex Colour Duplex 2-37 Count No. Paper Size Number 15 Size No.1 16 Size No.2 17 Size No.3 18 Size No.4 19 Size No.5 20 Size No.6 21 Size No.7 22 Size No.1 23 Size No.2 24 Size No.3 25 Size No.4 26 Size No.5 27 Size No.6 28 Size No.7 Simplex/ Duplex Colour/ Monochrome Simplex Monochrome Duplex 5.4.1 Copy Count 1 2 Use steps 1 to 4 () )p.2-31) to display "Administration." 5 The total number of sheets is displayed. Press the or key to display "Count Management." 6 2-38 Press the OK Key. 3 Press the OK Key. 4 Press the or "Copy Count." After checking is complete, press the OK Key. When the screen in step 4 reappears, you can continue setting. To exit the setting, press the PRINTPAUSE key. key to display 5.4.3 Count Pattern 1 Use steps 1 to 4 () )p.2-31) to display "Administration." 2 Press the or key to display "Count Management." 3 Press the OK Key. 4 Press the or "Count Pattern." 5 Press the OK Key. 6 Press the keys to move the cursor, and press the keys to input the count No. of Count Pattern. 7 After input is complete, press the OK Key. key to display The number of sheets of the specified count pattern is displayed. 8 After checking is complete, press the OK Key. When the screen in step 4 reappears, you can continue setting. To exit the setting, press the PRINTPAUSE key. 2-39 5.5 Head Maintenance Perform maintenance of the print head section. You can also set the cycle of automatic cleaning. Use this function when there is a problem of image quality. For example, if parts of print images are blurred, white lines appear, a specific colour is light and when the printer will not be used or has not been used for a long time. In the factory default setting, the cleaning cycle is set to 500 sheets. ~ Settings 5.5.4 Hyper-Cleaning Performed when a warning message is displayed or the head is actually clogged. This cleaning is stronger than Normal Cleaning. Specify the head of K (black), C (cyan), M (magenta) or Y (yellow) respectively to perform cleaning. 5.5.5 Normal Cleaning Performed to prevent the head section from clogging. Head cleaning for four colours K (black), C (cyan), M (magenta), and Y (yellow) is performed simultaneously. 5.5.6 Cleaning Cycle Normal Cleaning is automatically performed each time the specified number of sheets are printed. The cleaning cycle can be set to 100 - 3000 sheets in 100 sheet increments. 5.5.1 - 5.5.3 are not displayed. 5.5.4 Hyper-Cleaning 1 2 2-40 Use steps 1 to 4 () )p.2-31) to display "Administration." Press the or key to display "Head Maintenance." 3 Press the OK Key. 4 Press the or "Hyper-Cleaning." 5 Press the OK Key. 6 Press the or head to clean. key to display key to select the 7 Press the OK Key. 8 After checking the message, press the OK Key. When message "Cleaning Print Head-K" blinks, cleaning is performed. After cleaning is complete, the screen in step 4 will appear again. To finish cleaning the setting, press the PRINT PAUSE key. 5.5.5 Normal Cleaning 1 2 Use steps 1 to 4 () )p.2-31) to display "Administration." 5 Press the OK Key. 6 After checking the message, press the OK Key. Press the or key to display "Head Maintenance." 3 Press the OK Key. 4 Press the or "Normal Cleaning." When message "Cleaning Print Head" blinks, cleaning is performed. After cleaning is complete, the screen in step 4 will appear again. To exit the setting, press the PRINTPAUSE key. key to display 5.5.6 Cleaning Cycle 1 Use steps 1 to 4 () )p.2-31) to display "Administration." 2 Press the or key to display "Head Maintenance." 6 Press the or key to select the desired cleaning cycle. 7 Press the OK Key. The screen in step 4 will reappear. To exit the setting, press the PRINTPAUSE key. 3 Press the OK Key. 4 Press the or "Cleaning Cycle." 5 Press the OK Key. key to display 2-41 5.6 Configuration Information Print Configuration settings are printed in a list. Current printer settings and menu settings can be checked in a list. ~ Settings 5.6.1 System Information Information such as printer memory capacity, firmware version, and IP address can be checked in a list. 5.6.2 Menu Setting The menu settings made on the operation panel can be checked in a list. 5.6.4 Count Pattern The result of "5.4.3 Count Pattern" and the count of the finisher function (only if an optional finisher is connected) can be checked in a list. Restrictions in configuration information print • Perform configuration information print when printing is not being performed, for exammple, when "Ready" is displayed. • When configuration information print is executed, "Menu 6 Feed Tray Selection" is automatically set to "Standard Feed Tray." The output paper size is A4. If paper is set in the Standard Feed Tray, the information is printed on the paper placed in the Standard Feed Tray regardless of the paper size. If "No Paper" is displayed and printing cannot be executed, set paper in the Standard Feed Tray. 5.6.1 System Information 1 Use steps 1 to 4 () )p.2-31) to display "Administration." 2 Press the or "Config Info Print." 6 When printing is complete, the screen in step 4 will reappear, and you can continue setting. key to display 7 2-42 3 Press the OK Key. 4 Press the or key to display "System Information." 5 Press the OK Key. After checking the message, press the OK Key. Press the PRINT/PAUSE Key. A list of system information is printed. 5.6.2 Menu Setting 1 2 Use steps 1 to 4 () )p.2-31) to display "Administration." Press the or "Config Info Print." 5 Press the OK Key. 6 After checking the message, press the OK Key. key to display To cancel the setting, press the Cancel key. 3 7 Press the OK Key. Press the PRINT/PAUSE key. A list of the settings is printed. 4 Press the or "Menu Setting." key to display 5.6.4 Count Pattern 1 Use steps 1 to 4 () )p.2-31) to display "Administration." 2 Press the or "Config Info Print." 6 After checking the message, press the OK Key. To cancel the setting, press the Cancel key. key to display 7 3 Press the OK Key. 4 Press the or "Count Pattern." 5 Press the OK Key. Press the PRINT/PAUSE key. A list of "5.4.3 Count Pattern" and the count of the finisher function (only if an optional finisher is connected) is printed. key to display 2-43 5.7 Network Configuration If the printer is connected to a network and all the conditions shown below are satisfied, you can register the network configuration. If the conditions below are not satisfied, you can check the settings. • DHCP OFF • IP address is "000.000.000.000" To change the setting, use "Administrator" of RISO Console or supplied software "RISO IP Setting Tool." The settings will be effective after the printer is restored from the sleep mode. For details, consult your network administrator. ~ Settings DHCP ON The IP address, subnet mask, and default gateway are obtained from the DHCP server, and the settings of the printer controller are automatically set and registered.. DHCP OFF Set the following three items on the Operation Panel. IP address Input the IP address of the printer. Set the address in the range of "000.000.000.000" - "255.255.255.255." Subnet mask Input the subnet mask address. Set the address in the range of "000.000.000.000" - "255.255.255.255." Default gateway Input the default gateway address. Set the address in the range of "000.000.000.000" - "255.255.255.255." 1 Use steps 1 to 4 () )p.2-31) to display "Administration." 2 Press the or "Network Config." 3 5 or Press the OK Key. 8 Press the keys to move the cursor, and press the keys to enter the values. 9 Press the OK Key. key to select ON Press the OK Key. If you have selected ON, proceed to step 10. Input the IP address. 2-44 7 Input the subnet mask address. Press the OK Key. Press the or OFF. Press the keys to move the cursor. and press the keys to enter the value. key to display Set the DHCP. 4 6 Input the default gateway address. 10 Press the keys to move the cursor, and press the keys to enter the values. 12 Press the Sleep Key to turn off the power and then on again. After message "Shutting Down" disappears and the Power Key becomes orange, press the Sleep Key again to turn ON the power. 11 After checking the message, press the OK Key. Message "Registered. Restart Printer" is displayed. 5.8 Initial Setting Basic setting such as details of sleep, buzzer sound, language, metric/inch switch, and print head nozzle initialization is made here. AAA indicates factory default setting. ~ Settings 5.8.1 Sleep Set whether or not to use the sleep mode for suppressing power consumption when the printer is not used for a certain time. ON: Sleep is enabled. OFF: Sleep is disabled. 5.8.2 Waiting Time Set the time that elapses until the printer enters the sleep mode if the sleep function is enabled. The time can be set to 1 - 99 minutes. 60 5.8.3 Beep Sound - Key Set whether or not to sound the beeper when a key on the Operation Panel is pressed. ON: Beep sound is enabled. OFF: Beep sound is disabled. 5.8.4 Beep Sound - Status Set whether or not to sound the beeper when, for example, printing is completed. ON: Beep sound is enabled. OFF: Beep sound is disabled. 5.8.5 Beep Sound - Error Set whether or not to sound the beeper when an error such as paper jam occurs. ON: Beep sound is enabled. OFF: Beep sound is disabled. 5.8.7 Displayed Language Set the language displayed on the Operation Panel. Japanese/UK English/US English/French/German/Italian/Spanish/Portuguese 5.8.8 Metric/Inch Switch Select the Metric or Inch unit for display on the Operation Panel. mm: Displayed in mm. inch: Displayed in inch. 5.8.17 Tray Selection Rule Sets the condition for selecting a tray using the auto tray selection function. Size: A tray in which paper of the size specified by the controller is set will be selected with auto tray selection. Size & Tray: A tray in which paper of the size and type specified by the controller is set will be selected with auto tray selection. 2-45 5.8.18 Print Mode Auto-ON Sets whether or not the print mode is automatically turned on when the printer is not used for a certain time with the print mode OFF. ON: The print mode will be automatically turned off. OFF: The print mode will not be turned off. 5.8.19 Print Auto-ON Time Sets the time that elapses until the print mode is turned on when "Print Mode Auto-ON" is set to "ON." The time can be set to 1 to 60 minutes. 5 5.8.20 Menu Auto-Shut OFF Sets whether or not the print mode is automatically turned off when no operation is made for a certain time on the menu setting screen. ON: The print mode will be automatically turned off. OFF: The print mode will not be turned off. 5.8.21 Menu Shut OFF Time Sets the time that elapses until the print mode is turned off when "Menu Auto-Shut OFF" is set to "ON." At this time, the current menu settings will not be retained. The time can be set to 1 to 60 minutes. 5 5.8.22 Stand-by Sets whether or not the printer enters the stand-by mode to reduce power consumption when the printer is not used for a certain time. In the stand-by mode, when the printer receives data from a computer, the printer is automatically started and starts printing. ON: The stand-by mode is enabled. OFF: The stand-by mode is not used. 5.8.23 Stand-by Period Sets the time that elapses until the printer enters the stand-by mode when "Stand-by" is set to "ON." The time can be set to 1 to 99 minutes. 5 5.8.50 Head Recovery Performs powerful cleaning of the print head nozzles to restore them to the initial state after the printer is not used for a long time. 5.8.6, 5.8.9 - 5.8.16, 5.8.24 -5.8.49 are not displayed. 2-46 5.8.1 Sleep 1 2 Use steps 1 to 4 () )p.2-47) to display "Administration." Press the or "Initial Setting." 5 Press the OK Key. 6 Press the or OFF. key to display or key to select ON 7 3 Press the OK Key. 4 Press the "Sleep." or Press the OK Key. When the screen in step 4 reappears, you can continue setting. To exit the setting, press the PRINTPAUSE key. key to display 5.8.2 Waiting Time 1 Use steps 1 to 3 of "5.8.1 Sleep" () )p.2-47) to display "Initial Setting." 2 Press the or "Waiting Time." 3 Press the OK Key. 4 Press the keys to move the cursor, and press the keys to input the Waiting Time. key to display 5 Press the OK Key. When the screen in step 2 reappears, you can continue setting. To exit the setting, press the PRINTPAUSE key. 2-47 5.8.3 Beep Sound -Key 1 Use steps 1 to 3 of "5.8.1 Sleep" () )p.2-47) to display "Initial Setting." 2 Press the or key to display "Beep Sound -Key." 3 5.8.4 Beep Sound -Status 1 Use steps 1 to 3 of "5.8.1 Sleep" () )p.2-47) to display "Initial Setting." 2 Press the or key to display "Beep Sound -Status." 3 Press the OK Key. 4 Press the or OFF. 5 Press the OK Key. key to select ON When the screen in step 2 reappears, you can continue setting. To exit the setting, press the PRINTPAUSE key. 2-48 Press the or OFF. 5 Press the OK Key. or key to select ON When the screen in step 2 reappears, you can continue setting. To exit the setting, press the PRINTPAUSE key. Press the OK Key. or 4 5.8.5 Beep Sound -Error 1 Use steps 1 to 3 of "5.8.1 Sleep" () )p.2-47) to display "Initial Setting." 2 Press the or key to display "Beep Sound -Error." 3 4 Press the or OFF. 5 Press the OK Key. or key to select ON When the screen in step 2 reappears, you can continue setting. To exit the setting, press the PRINTPAUSE key. Press the OK Key. 5.8.7 Displayed Language 1 Use steps 1 to 3 of "5.8.1 Sleep" () )p.2-47) to display "Initial Setting." 2 Press the or key to display "Displayed Language." 4 Press the 5 Press the OK Key. or key to select. When the screen in step 2 reappears, you can continue setting. To exit the setting, press the PRINTPAUSE key. 3 Press the OK Key. 5.8.8 Metric Inch Switch 1 Use steps 1 to 3 of "5.8.1 Sleep" () )p.2-47) to display "Initial Setting." 2 Press the or key to display "Metric Inch Switch." 3 Press the OK Key. 4 Press the unit. 5 Press the OK Key. or key to select the When the screen in step 2 reappears, you can continue setting. To exit the setting, press the PRINTPAUSE key. 2-49 Tray Selection Rule 1 Use steps 1 to 3 of "5.8.1 Sleep" () )p.2-47) to display "Initial Setting." 2 Press the or key to display "Tray Selection Rule." 4 Press the 5 Press the OK Key. or key to select. When the screen in step 2 reappears, you can continue setting. To exit the setting, press the PRINT/PAUSE key. 3 Press the OK Key. Print Mode Auto-ON 1 Use steps 1 to 3 of "5.8.1 Sleep" () )p.2-47) to display "Initial Setting." 2 Press the or key to display "Print Mode Auto-ON." 3 4 Press the or OFF. 5 Press the OK Key. or key to select ON When the screen in step 2 reappears, you can continue setting. To exit the setting, press the PRINT/PAUSE key. Press the OK Key. Print Auto-ON Time 1 Use steps 1 to 3 of "5.8.1 Sleep" () )p.2-47) to display "Initial Setting." 2 Press the or key to display "Print Auto-ON Time." 3 2-50 Press the OK Key. 4 Press the keys to move the cursor, and press the keys to input the desired time. 5 Press the OK Key. When the screen in step 2 reappears, you can continue setting. To exit the setting, press the PRINT/PAUSE key. Menu Auto-Shut OFF 1 Use steps 1 to 3 of "5.8.1 Sleep" () )p.2-47) to display "Initial Setting." 2 Press the or key to display "Menu Auto-Shut OFF." 3 4 Press the or OFF. 5 Press the OK Key. or key to select ON When the screen in step 2 reappears, you can continue setting. To exit the setting, press the PRINT/PAUSE key. Press the OK Key. Menu Shut OFF Time 1 Use steps 1 to 3 of "5.8.1 Sleep" () )p.2-47) to display "Initial Setting." 2 Press the or key to display "Menu shut OFF Time." 3 4 Press the keys to move the cursor, and press the keys to input the desired yime. 5 Press the OK Key. When the screen in step 2 reappears, you can continue setting. To exit the setting, press the PRINT/PAUSE key. Press the OK Key. Stand-by 1 Use steps 1 to 3 of "5.8.1 Sleep" () )p.2-47) to display "Initial Setting." 2 Press the "Stand-by." 3 or Press the OK Key. 4 Press the or OFF. 5 Press the OK Key. or key to select ON key to display When the screen in step 2 reappears, you can continue setting. To exit the setting, press the PRINT/PAUSE key. 2-51 Stand-by Period 1 Use steps 1 to 3 of "5.8.1 Sleep" () )p.2-47) to display "Initial Setting." 2 Press the or "Stand-by Perid." 3 Press the keys to move the cursor, and press the keys to input the desired time. 5 Press the OK Key. key to display When the screen in step 2 reappears, you can continue setting. To exit the setting, press the PRINT/PAUSE key. Press the OK Key. 5.8.50 Head Recovery 1 Use steps 1 to 3 of "5.8.1 Sleep" () )p.2-47) to display "Initial Setting." 2 Press the or "Head Recovery." 3 Press the OK Key. 4 After checking the message, press the OK Key. key to display When the message "Cleaning Print Head ?" blinks, cleaning is performed. After cleaning is completed, the screen in step 2 reappears. To exit the setting, press the PRINT/PAUSE key. 2-52 4 Menu 6 Feed Tray Selection If the paper conditions of data received from a computer and the setting of "5.8.17 Tray Selection Rule" do not match the conditions of any of the Standard Feed Tray and other feed trays, printing will not start. In this case, you can specify the Standard Feed Tray or another feed tray where the printer paper is set and start printing with no trouble. ~ Selectable Feed Trays Selectable feed trays Selectable feed trays are shown below. Auto Normally, set "Auto." A feed tray proper for data from the computer and the setting of "5.8.17 Tray Selection Rule" is automatically selected. Standard Feed Tray Printed onto paper in the Standard Feed Tray. Feed Tray 1 Printed onto paper in Feed Tray 1. Feed Tray 2 Printed onto paper in Feed Tray 2. 1 Press the MENU Key. 2 Press the or key to display "Feed Tray Selection." 3 Press the OK Key. 4 Press the or desired feed tray. 5 Press OK Key. key to select the When the screen in step 2 reappears, you can continue setting. To exit the setting, press the PRINTPAUSE key. 2-53 Menu 7 Job Clear Cancels the currently printed job and clears the data. What is Job? When data is transmitted from a computer to the printer, the controller processes the data and sends the print data to the FORCEJET™ ENGINE. The processed data is called "Job." "Job" means the data shown below. • Data suspended temporarily • Data for which additional printing is set with the Temporary Data Retrieve function. 1 Press the MENU Key. 2 Press the Clear." 3 Press the OK Key. 4 Check the message. To clear, press the OK Key. or key to display "Job Message "Executing" is displayed and the data is cleared. If the CANCEL key is pressed, the screen in step 2 appears again. When the screen in step 2 reappears, you can continue setting. To exit the setting, press the PRINT PAUSE Key. 2-54 Chapter3 Troubleshooting This chapter describes the causes of and measures against trouble indicated with an error message displayed on the Operation Panel or lighting symbol. This chapter also describes how to remove jammed paper and replacing an ink cartridge. 3-1 Explanation of Set Error Display If trouble occurs during printing, printing stops and a symbol lights up on the Operation Panel or an error message appears in the display. You can check the location based on the symbol or number and see the information from the message in the display. Symbol Display on Operation Panel A symbol indicating the relevant portion or type lights up. It may indicate a paper jam or ink cartridge replacement. Error Message A message indicating the detail of the error and the solution appears in the display. If [21] in the panel is lit, an error occurs in the optional HC Finisher. For details, refer to "HC Finisher Maintenance Guide." Remaining Volume Notice Indicators If remaining volume of paper in the Feed Trays (Standard Feed Tray) or when ink is low (approximately 30), the relevant Remaining Volume Notice Indicator will light up. After the indicator lights up, printing can be continued. When the ink runs out, the INK CARTRIDGE Indicator and the cartridge number in which the ink runs out will light up which will cause printing to halt. When paper runs out, a message indicating to add paper will appear in the display and will be stopped. If the indicator lights up, prepare ink cartridges or paper for replacement. "Ink Cartridge Replacement")p.3-16 "Loading Paper")p.1-10 3-2 FORCEJET™ Link Symbol HC5500 Series realizes high speed printing by performing the optimum data processing and colour management with the printer controller and adjusting print speed, paper size, paper quality, and ink quantity totally with the FORCEJET™ ENGINE. The FORCEJET™ Link Symbol indicates whether each printing related section functions properly. If colour management cannot be performed properly because, for example, an ink cartridge is not set, the FORCEJET™ Link Symbol goes out. At this time, check the status of consumables and settings. Error Message and Error Number ~ Error Number Under a message in the display, an error number that consists of alphanumeric characters is displayed. The first letter of the error number indicates the error type. The number of digits in relation to error number depends on the error location. Example of Error Number Description S00-000 System Error Displayed when inspection or repair by service personnel is required. Contact your local dealer (or service representative). U00-000 Unit Error Displayed when repair by service personnel is required. Contact your local dealer (or service representative). You can use the printer except the relevant unit by pressing the Cancel key. X00-000 H00 Paper Jam Displayed when a paper jam occurs. X00-000 F00 Paper Jam Displayed when consumables or parts to be replaced periodically must be replaced soon. Y00-000 Consumables Error Displayed when consumables or parts to be replaced periodically must be replaced soon. Z00-000 Check Settings Error Displayed when a cover or anything related is not securely closed. W00-000 Warning Various warning messages are displayed. M00-000 Maintenance Call Displayed when maintenance of this unit is required. Contact your local dealer (or service representative). 3-3 Y00-000 Ink Replacement Error Lighting location Message Solution The supply in the ink cartridge runs out. Set a new ink cartridge. )p.3-16 Z00-000 Check Settings Error If a cover has not been securely closed or in situation of an ink cartridge or Feed Tray which has not been properly set. Check the location, take proper measures, and close the cover. Lighting location Message Solution If an ink cartridge has not been properly set, make sure to check if the cartridges are securely inserted. )p.3-16 If the colour of an ink cartridge is not correct or a cartridge with a different shape has been set, make sure to check the location and reset the cartridge. )p.3-16 If a cover has not been securely closed, make sure to check the location indicated by an indicator and close the cover securely. 3-4 Lighting location Message Solution If Feed Tray 1 has not been securely closed, be sure to securely close it. If Feed Tray 2 has not been securely closed, be sure to securely close it. If Standard Feed Tray has not been properly opened, open the Standard Feed Tray properly. 3-5 S00-000 System Error Lighting location Message (Nothing is lit.) X00-000 H00 Solution An error occurs in the printer. If the same message appears even when the power is turned off and then on again, contact your local dealer (or service representative). At this time, report also the error number indicated in the Message Display. )p.3-3 Paper Jam Error Lighting location Message Solution If there’s a paper jam in the printer, paper misfeed or paper double feed occurs, be sure to check the location indicated by the indicator and remove the paper. )p.3-9 X00-000 F00 Paper Jam Error This indication is displayed only if an optional HC Finisher is connected. Lighting location Message Solution A paper jam occurs in the optional Finisher. Check the indicated jam location and remove the paper. For details, refer to "HC Finisher Maintenance Guide." 3-6 M00-000 Maintenance Call Lighting location Message Solution The Ink Drain Tank is almost full. Contact your local dealer (or service representative). (Nothing is lit.) (No message.) (Nothing is lit.) W00-000 When the Maintenance Call Indicator lights up, periodical maintenance is required. Contact your local dealer (or service representative). No colour profile corresponding to the installed ink is provided. Contact your dealer (or service representative). Warning Lighting location Message Solution If paper or separation paper runs out, be sure to load more paper. "Loading Paper")p.1-10 Paper in the Interposer Tray has run out or paper that matches the size specified from the printer driver is not loaded. Load the paper. If the guides in the Auto Stacking Tray are not properly set, make sure to check the Auto Stacking Tray. (Nothing is lit.) The hard disk in the controller section is full. Check the data in the hard disk (such as storage data) and delete unnecessary jobs. 3-7 Lighting location 3-8 Message Solution (Nothing is lit.) The system requires cleaning. Carry out the normal cleaning. (Nothing is lit.) There is no paper in any of the Feed Trays and the Standard Paper Feed Tray that corresponds to the paper size and type specified from the printer driver. After loading paper, specify the relevant Feed Tray using "Menu 6 Feed Tray Selection" from the Operation Panel of the printer. "Although paper is set, "No Paper" error can occur." )p.3-20 (Nothing is lit.) With "Paper Feed Control," "Envelope" is set for the tray to which duplex printing or facedown output is specified by the printer driver. Change the setting of Paper Feed Control or the printer driver. "Menu 6 Feed Tray Selection" )p.2-53 "4.1.2 Paper Type" )p.2-20 (Nothing is lit.) For duplex printing, different paper sizes are set for the front page and the back page. Set the same size for both the front and back pages. Paper jam occurs If a paper jam occurs in the printer or paper is not fed, printing stops, the JAM indicator, and the number indicating the jam location will light up. In this case, remove the jammed paper and press the PRINTPAUSE Key, printing will resume. Since this unit performs high speed printing, paper jams may occur at multiple locations. In this case, remove all the jammed paper. If an optional HC Finisher is connected and a paper jam occurs in the Finisher (21 on the Operation Panel is lit), refer to "HC Finisher Maintenance Guide." When removing jammed paper, take care not to leave pieces of paper inside the printer. ~ Paper Jam Location Details of the indicated locations are shown below. For detailed procedure, refer to the respective indicated page. Jam location Page referred to (1) Standard Paper Feed Tray )p.3-9 (2)On Transfer Roller )p.3-10 (3) Paper Receiving Section )p.3-10 (4) Right of Transfer Unit )p.3-11 (5) Duplex Transfer Unit )p.3-11 (6)(7)(8) Left of Transfer Unit )p.3-13 (17)(18)(19) Paper Feed Tray 1 or 2 )p.3-14 (20) Transfer Unit )p.3-15 (1) Paper Jam in the Standard Paper Feed Tray 1 While pressing the Paper Release Lever on the paper feed side to the left, remove the paper. 2 Press the CANCEL BACK Key. The paper jam error is cleared. 3-9 (2) Paper Jam on the Transfer Roller 1 Open the Front Cover. 2 Turn Dial A and remove the paper from the Transfer Roller side. 3 Close the Front Cover. (3) Paper Jam in the Paper Receiving Section 1 Pull out the jammed paper and remove it. Pull out the jammed paper from the side of the Paper Receiving Tray. 3-10 If it is not easy to pull out, do not pull it forcibly because the paper might be torn. Open the Front Cover and remove the paper from the side of the Transfer Roller. (4)Paper Jam at the Right of the Transfer Unit 1 Open the Right Transfer Path Cover. 3 Close the Right Transfer Path Cover. 2 Remove the paper. (5)Paper Jam in the Duplex Transfer Unit 1 Open the Front Cover. 3 Turn Dial B. If the paper is removed, proceed to step 7. 2 Turn Dial B several times to check to see if any paper remains. Multiple sheets of paper may have jammed. Turn the dial repeatedly until no paper can be removed. Lift the tab at the left side of the Reversing Path Cover and lock it. 3-11 4 Pull out the Duplex Transfer Unit. 5 Open the unit and check inside. If paper remains, remove it. 3-12 6 Return the Duplex Transfer Unit to its original position. 7 Return the tab at the left of the Reversing Path Cover to its original position. 8 Close the Front Cover. (6)(7)(8) Paper Jam at the Left of the Transfer Unit 1 2 3 4 Open the Front Cover. 5 If the paper cannot be removed, while turning Dial C in the direction indicated by the arrow, remove the paper. Lift the tab at the left side of the Reversing Path Cover and lock it. While turning Dial B in the direction indicated by the arrow, remove the paper. 6 Return the tab at the left of the Reversing Path Cover to its original position. 7 Close the Front Cover. If the paper cannot be removed, open the Left Transfer Path Cover and remove the paper. 3-13 (17)(18)(19) Paper Jam in Paper Feed Tray 1 Paper Feed Tray 2 3-14 1 Pull out the Feed Tray. 2 Remove the jammed paper. 3 If the paper cannot be removed, open the Transfer section door at the left side of the Feed Tray and remove the paper. 4 Close the door and return the Feed Tray. (20) Paper Jam in the Transfer Unit 1 Open the Front Cover. 5 Close the Front Cover. 2 Turn the Transfer Lock Lever to the left and turn down the tab to the right. 3 Remove the jammed paper. 4 Return the tab to its original position and turn the Transfer Lock Lever to the right. 3-15 Ink Cartridge Replacement If ink runs out, the INK CARTRIDGE indicator and the indicator that shows the location of the empty cartridge will light up, printing will be halted. Be sure to check the colour of the Ink Cartridge and replace it. Black (K) Cyan (C) Magenta (M) Yellow (Y) Ink Cartridge This section describes the notes in handling an Ink Cartridge. Handling of Ink Cartridge is also described in "Safety Precautions" ()p.v) and "Before Starting to Use" ()p.vii, p.viii). Read also the description on these pages. ! CAUTION Ink may be stuck to the ink feed opening. Be careful not to touch it with your hands or clothes. If your hands are stained with the ink, wash it off immediately with a detergent. If ink gets into your eyes, flush it out immediately with plenty of water. • • • • • • Be sure to use dedicated ink specified by our company. Otherwise, a failure or trouble might occur. Do not remove the Ink Cartridge until the INK CARTRIDGE indicator lights up. Do not shake or drop the Ink Cartridge. Do not keep the Ink Cartridge with its nozzle downward. When replacing an ink cartridge, do not leave the printer with an ink cartridge removed. A failure might occur. Do not shake the Ink Cartridge. If the cartridge is shaken, air bubbles are generated and ink may not be discharged properly, resulting in blurred printing. • Do not remove the caps(white) from the ink feed opening and the air intake. • Do not add ink into the Ink Cartridge. • Use as soon as possible after purchase to maintain optimum print quality. 3-16 <Used Ink Cartridge> • Do not release the ink left in the cartridge into a sewer or personal disposal unit. • Used Ink Cartridges are collected by a service representative. After use is complete, attach the cap and put the cartridge into the inner bag and packing material. When attaching the cap or packing, be sure to hold the Ink Cartridge with the cap up. Caution : Do not turn the Ink Cartidge upside down. As an example, procedure for replacing the Yellow (Y) Ink Cartridge ((14) is light) is described. 1 2 Open the Ink Cover. While lifting the Ink Cartridge to be replaced, pull it toward the front side and remove it. 3 Remove the cap from the new Ink Cartridge. 4 Remove the two caps from the ink feed opening and the air intake. 5 6 Hold the surface of the Ink Cartridge with the mark up and insert the cartridge until it stops. Close the Ink Cover. 3-17 Other Trouble The printer does not operate. Problem Cause and Solution Even if the power is turned on, nothing appears on the Operation Panel. Be sure to check the following. Test print is normally output but data from a computer cannot be properly printed. Make sure to check the network setting and the IP address setting before installing the printer driver again. • • • • If the power plug is inserted into the outlet. If the power cord is securely connected to the unit. If the circuit breaker of the mains is disconnected. If the main power switch is turned on. If not, turn on the main power switch and then press the Power Key on the Operation Panel. • If a file of the programme or application software seems not normal, print from another file or other application software. If printing from certain file or application software is impossible, be sure to check the print setting of the application software. • Use the printer driver of the latest version. For the latest version, contact your local dealer or service representative. In addition, try the following operation. If the printer does not operate even after this operation, contact your local dealer or our company. • Turn off the printer and then on again. • Restart the computer that is connected to the printer. 3-18 The printer does not operate according to the setting. Problem Cause and Solution "Job separation" is set in the printer driver screen but job separation cannot be performed. "Separation Paper" is set to "OFF" in the menu setting. If "5.3 Separation Paper" of the menu setting is set to "OFF," job separation paper is not inserted. (If "OFF" is set, printing stops for a few seconds at the time of separation.) To insert job separation paper, select the desired tray at "5.3 Separation Paper" of the menu setting. "4.6 Job Separation" )p.2-23 "5.3 Separation Paper")p.2-36 Unable to print onto paper in the Standard Feed Tray. The Standard Feed Tray is not set as a tray for "Auto tray selection." Set "4.5 Triple-Tray Source" of the menu setting. "4.5 Triple-Tray Source")p.2-22 Alternatively, set "6 Feed Tray Selection" of the menu setting to "Standard Feed Tray." "Menu 6 Feed Tray Selection")p.2-53 Printing is not clean. Problem Printed image is light or blurred. Cause and Solution Type of paper loaded for a Feed Tray (or the Standard Feed Tray) is not correct. Load the correct paper type at [Paper Type] of the menu setting. Print density setting is light. In the printer driver screen or the printer menu setting, set darker print density. "Prinr density" of "HC5500 User’s Manual for Printer Driver")p.2-24 When setting in the printer menu setting: )p.2-24 The print head is clogged. Perform "Normal Cleaning" from the menu setting. If the problem cannot be solved with the method above, specify particularly the head of a lighter colour and perform "Hyper-Cleaning." "5.5 Head Maintenance")p.2-40 Printed image is too dark. Type of paper loaded for a Feed Tray (or Standard Feed Tray) is not correct. Load the correct paper type at [Paper Type] of the menu setting. White stripes appear on images. The print head is clogged. First, perform "Normal Cleaning" from the menu setting. If the problem cannot be solved even if normal cleaning is performed several times, perform "Head Recovery." "5.5 Head Maintenance")p.2-40 "5.8.50 Head Recovery")p.2-52 Paper is stained. Paper that cannot be used is loaded. Check the paper types that can be loaded in the Standard Feed Tray and the other Feed Trays. "Usable Paper")p.1-6 Edge of paper is stained. Curled paper is used. The curled portion hits the print head and is stained. Since the print head may be damaged, do not use curled paper. Performing duplex printing Note that the edges of paper may be stained depending on the original. 3-19 Others Problem Cause and Solution Print speed is too low. The guides in the Standard Feed Tray (Feed Tray) do not fit the paper width. The paper size is judged based upon the guide positions, and print speed depends on specifications of paper size. Adjust the stack guides securely to the width of the paper. A paper jam occurs each time printing is performed. Too much paper is loaded in the Standard Feed Tray or other Feed Trays. When the maximum number of sheets of paper that can be loaded in the Standard Feed Tray or other Feed Trays is exceeded for the number of paper that can be loaded. Please refer to "Loading Paper")p.1-10. Paper is not loaded properly. Check the Stack Guide positions. For proper paper loading, refer to "Loading Paper")p.1-10. Paper that cannot be used is loaded. Check the paper types that can be loaded in the Standard Feed Tray and the other Feed Trays. Do not use particularly wrinkled or curled paper because it may cause a paper jam. "Usable Paper")p.1-6 Non-standard size paper is used. When loading non-standard size paper, you must register the size at "5.1 Paper Size Entry" and "5.2 Paper Type Entry" of the menu setting in advance. "5.1 Paper Size Entry")p.2-32 "5.2 Paper Type Entry")p.2-33 • There’s too much paper powder. • Double feed occurs. • Thick paper such as postcard is misfed. • The back surface of thick paper such as postcard is peeled off. The paper stripper pressure is not properly adjusted. Use a coin to turn the Paper Stripper Dial located in the paper feed side to adjust the pressure. Before starting adjustment, be sure to remove the paper from the Standard Feed Tray and check that the tray lowers to the lowermost position. • If there’s too much paper powder, paper is mis-fed or the back side of postcard curls up, turn the dial counterclockwise. • If double feed occurs, turn the dial clockwise. Paper is not fed at all. The Paper Feed Pressure Adjustment Lever does not fit the paper thickness. When using thick paper, set the Paper Feed Pressure Adjustment Lever to the " (CARD)" position. When printing onto paper other than thick paper, set the lever to the " (NORMAL)" position. If paper mis-feed occurs frequently, however, set the lever to the " (CARD)" position. "Paper Feed Pressure in Standard Paper Feed Tray")p.1-13 Paper feed control is not proper. Change the paper feed control set in the Standard Feed Tray or other Feed Trays at "5.2 Paper Type Entry" of the menu setting. "5.2 Paper Type Entry")p.2-33 3-20 Problem Although paper is set, "No Paper" error can occur. Cause and Solution [Paper size] and [Paper type] set in the printer driver screen do not match those in the menu setting on the printer. Even if proper paper is loaded in the feed tray, if the settings of "Paper Size" and "Paper Type" of the menu setting on the printer are not correct, "No Paper" error occurs. Set the conditions of the feed tray according to the paper in the feed tray. Alternatively, a condition is set at "Tray selection Rule." Ensure that the paper placed in the tray matches the condition of the tray setting. "Configuration 4.1/4.2/4.3" )p.2-19 "5.8.17 Tray Selection Rule" )p.2-50 Press the Cancel/Back key to display the output paper size at the lower left of the operation panel. Check the size and set paper of the correct size or specify the proper tray from the operation panel of the printer to perform printing. If you specify the Feed Tray on the Operation Panel of the printer, printing can be performed. "Menu 6 Feed Tray Selection" )p.2-53 The selected tray is set for "Separation Paper." Set "5.3 Separation Paper" of the menu setting to "OFF." "5.3 Separation Paper" )p.2-36 The Standard Feed Tray is not a feed tray for auto feed tray selection. If "4.5 Triple-Tray Source" is set to "ON", the Standard Feed Tray is included into feed trays for selection when "Auto feed tray selection" is selected in "Paper feed tray" of the printer driver. "4.5 Triple-Tray Source" )p.2-22 3-21 3-22 Chapter4 Appendix 4-1 List of Options A variety of options are available for convenient use of this unit. For purchase, contact your dealer (or service representative) for inquiry. RISO Scanner HS2000 By connecting a scanner and a display monitor (products specified by our company), you can perform high-speed full-colour printer copies. Finisher Functions By connecting an HC Finisher to this machine, you can perform automatically postprocessing of printing such as stapling, punching, booklet creation at a high speed. (As of January 2006) 4-2 Consumables • Note that specifications and types of consumables are subject to change without prior notice. • For the price, contact your local dealer (or service representative) for inquiry. Ink Cartridge Use ink cartridges specifications as directed by our company. Do not use other products because use of improper consumables may cause a failure or trouble. Product name Quantity Unit NET. 1,000ml 1 piece RISO HC Ink Cyan RISO HC Ink Magenta RISO HC Ink Yellow RISO HC Ink Black 4-3 Specifications z Main Body Print Type Line Type Ink Jet System Resolution Normal: 600 dpi or equivalent Fine: 900 dpi or equivalent (Line Smoothing: ON) Print Head Piezo type, Physical Resolution 300 dpi, 8 Gradation Ink Oil-based pigment type, Cyan/Magenta/Yellow/Black, 1,000ml for each Print Speed (*1) 120 ppm, Duplex 48 ppm (A4, Landscape, Normal mode) Duplex Printing Standard Printer Collate Standard Paper Size Paper Feed Tray: Max. A3 (297mm × 432mm)/Ledger(11" × 17") Min. 182mm × 182mm (73/16" × 73/16") Standard Paper Feed Tray: Max. 340mm × 550mm (133/8" × 215/8") Min. 90mm × 148mm (39/16" × 513/16") Paper Weight Paper Feed Tray: 52g/m2 to 104g/m2 (14-lb bond to 28-lb bond) paper Standard Paper Feed Tray: 46g/m2 to 210g/m2 (12-lb bond to 56-lb bond) paper Printable Area Max. 314mm × 458mm (123/8" × 185/16") (margin width of 1mm (0.04")) Guaranteed Print Area (*2) Min. 80mm × 138mm (31/8" × 57/16") (margin width of 5mm (3/16")) Max. 306mm × 450mm (121/16" × 173/4") (margin width of 5mm (3/16")) Feed Tray Capacity (*1) Paper Feed Tray 1: 1,000 sheets Paper Feed Tray 2: 500 sheets Standard Paper Feed Tray: 1,000 sheets Paper Receiving Tray Capacity (*1) 1,000 sheets RISO Extended Print Function Proof copy (set in the driver) / test print (printer) / print position adjustment (20mm (13/16") in vertical and horizontal directions / adjustable in temporary data in printer) / additional print (temporary data retrieve) Printer Memory 640MB Power Source 100 - 240V~, 50/60Hz, 12.0 - 6.0A or more Power Consumption Maximum: 800W or less Ready (*3): 300W or less Stand-by: 150W or less Sleep mode: 20W or less Operating Noise Operating: 68dB or less Operating Environment Temperature: 15°C - 30°C (59°F to 86°F), Humidity: 40% - 70% (no dew condensation) Mass Approximately 266kg (597.7lb) (including stand) (*4) Dimensions (W × D × H) In use: 1,800mm × 695mm × 1,135mm (707/8" × 273/8 × 4411/16") Paper Receiving Tray and Standard Feed Tray folded: 1,220mm × 695mm × 1,135mm (48" × 273/8" × 4411/16") *1 *2 *3 *4 4-4 For A4/85g/m2 (22.6-lb bond) When printing onto an envelope, a margin of 10 mm width is made. The printer is in the print mode but is not printing (at 20°C). Consumables and controller are not included. z Controller Section (If the RISO Controller PS7R-9000 / 5000 is installed) Principal Speci- Controller fications Printer that can be connected RISO Controller PS7R-9000 RISO Controller PS7R-5000 RISO HC5500T CPU Intel® Pentium®4 3.4GHz Intel® Celeron® 2.9GHz Memory Capacity 1024MB 256MB HDD 160GB (user available area: 150GB) 80GB (user available area: 70GB) User available area: Job receiving area, Storage and Form storage, Font installation area OS Linux Interface Ethernet / 1000Base-T, 100Base-TX, 10Base-T Type Outside unit type Power supply / maxi- 100 - 240V~, 50/60Hz, 2.5 - 1.8A or more mum power conMaximum: 300W sumption Principal Functions Web Console Function Dimensions / mass (W × D × H) 180mm × 405mm × 359mm (7" × 1515/16" × 141/8") / approximately 10kg (22lb) PDL (page description language) Adobe® PostScript®3™ Applicable protocol TCP/IP, Apple Talk® Installed font 139 fonts Font download (by installer supplied with font) Applicable OS Windows 2000 (SP2 or later) / XP (SP1 or later) MacOS9 (9.2.2), MacOSX (10.2.6 or later) Colour Management "ComColor™ Standard" colour management is provided. * Auto colour matching function based on output setting and paper setting Pagination Multi-up (single page) / Multi-up (multi-page) / Booklet / Fold Image Processing Gamma control: Contrast / Density Line Smoothing Screening: Error diffusion / Dot screen Image Position Adjustment Image position can be adjusted in the vertical and horizontal directions from -20mm to 20mm (-13/16" to 13/16") on both the front and back sides. Form Function Registration of form, Overlay Function Paper Feed/Ejection Processing Auto tray selection, Duplex printing, Job separation, Printer collate, Support of HC Finisher (optional), Output face setting Clustering Job delegation (up to 4 units of controllers can be registered) Job split (Job split limit: Number of pages / Output volume) Sample page print Configuration, Sample image, PS font list Security print Security code setting, Job name display setting Monitoring Function Engine status display, Remaining volume display, Paper information display Job Manager Function Job status display Job storage management Archive management Form management Scan and Storage management User Function Account record display, Storage of history (monthly/ daily) Administrator Function Network setting, Security setting, Font download, Direct output setting, Storage folder setting, Paper size entry, Initial Setting Applicable Browser Windows: Internet Explorer Ver. 6.0 SP1 or later / J2SE1.4.2 or later MacOS9: Internet Explorer Ver. 5.1.6 for Mac or later / MRJ2.2.6 or later MacOSX: Internet Explorer Ver. 5.2.3 for Mac or later / J2SE1.4.1 or later 4-5 z Controller Section (If the RISO Controller HC3R-5000 is installed) Principal Specifications Principal Functions Web Console Function 4-6 Printer that can be connected RISO HC5500T CPU Intel® Celeron® 2.9GHz Memory Capacity 256MB HDD 80GB (user available area: 70GB) User available area: Job receiving area, Storage area OS Linux Interface Ethernet / 1000Base-T, 100Base-TX, 10Base-T Type Outside unit type Power supply / maximum power consumption 100 - 240V~, 50/60Hz, 2.5 - 1.8A or more Maximum: 300W Dimensions / mass (W × D × H) 180mm × 405mm × 359mm (7" × 1515/16" × 141/8") / approximately 10kg (22lb) PDL (page description language) Original PPL Applicable protocol TCP/IP Applicable OS Windows 2000 (SP2 or later) / XP (SP1 or later) Colour Management "ComColor™ Standard" colour management is provided. * Auto colour matching function based on output setting and paper setting Pagination Multi-up (single page) / Multi-up (multi-page) / Booklet / Poster Image Processing Gamma control: Contrast / Brightness / Chromaticness Line Smoothing Screening: Error diffusion / Dot screen Image Position Adjustment Image position can be adjusted in the vertical and horizontal directions from 20mm to 20mm (-13/16" to 13/16") on both the front and back sides. Paper Feed/Ejection Processing Auto tray selection, Duplex printing, Job separation, Printer collate, Support of HC Finisher (optional), Output face setting Sample page print Configuration, Sample image Security print Security code setting, Job name display setting Monitoring Function Engine status display, remaining volume display, paper information display Job Manager Function Job status display Job storage management Scan and Storage management User Function Account record display Administrator Function Network setting, Security setting, Direct output setting, Storage folder setting, Initial Setting Applicable Browser Windows: Internet Explorer Ver. 6.0 SP1 or later / J2SE1.4.2 or later Index A Error number. . . . . . . . . . . . . . . . . . . . . . . . . . . . . . . 2-3 Every Division . . . . . . . . . . . . . . . . . . . . . . . . . . . . . 2-23 Administration . . . . . . . . . . . . . . . . . . . . . . . . . 2-6, 2-31 Arranger . . . . . . . . . . . . . . . . . . . . . . . . . . . . . . . . . 1-15 Auto-Control Stacking Tray . . . . . . . . . . . . . . . 1-4, 1-15 F B Basic Printing Operation . . . . . . . . . . . . . . . . . . . . . 1-17 Beep Sound -Error . . . . . . . . . . . . . . . . . . . . . 2-8, 2-49 Beep Sound -Key . . . . . . . . . . . . . . . . . . . . . . 2-8, 2-48 Beep Sound -Status . . . . . . . . . . . . . . . . . . . . 2-8, 2-48 Between Jobs . . . . . . . . . . . . . . . . . . . . . . . . . . . . . 2-23 Black (K) Ink Cartridge . . . . . . . . . . . . . . . . . . . . . . . 1-2 C CANCEL/BACK Key . . . . . . . . . . . . . . . . . . . . . . . . . 2-4 Check Settings Error . . . . . . . . . . . . . . . . . . . . . . . . . 3-4 Cleaning Cycle . . . . . . . . . . . . . . . . . . . 2-7, 2-40, 32-41 Configuration . . . . . . . . . . . . . . . . . . . . . . . . . . 2-5, 2-18 Configuration Information Print . . . . . . . . . . . . 2-7, 2-42 Consumables . . . . . . . . . . . . . . . . . . . . . . . . . . . . . . 4-3 Control Panel. . . . . . . . . . . . . . . . . . . . . . . . . . . . . . . 1-5 Copy Count . . . . . . . . . . . . . . . . . . . . . . . . . . . 2-7, 2-38 Count Management. . . . . . . . . . . . . . . . . . . . . 2-7, 2-37 Count Pattern . . . . . . . . . . . . . . . . . . . . . 2-7, 2-39, 2-42 Cover Sheet tray . . . . . . . . . . . . . . . . . . . . . . . . . . . . 2-6 Cover Sheet Tray (only if an HC Finisher is connected) . . . . . . . . . . . 2-30 Cursor Keys. . . . . . . . . . . . . . . . . . . . . . . . . . . . . . . . 2-4 Cyan (C) Ink Cartridge . . . . . . . . . . . . . . . . . . . . . . . 1-2 D Data indicator . . . . . . . . . . . . . . . . . . . . . . . . . . . . . . 2-2 Default gateway. . . . . . . . . . . . . . . . . . . . . . . . . . . . 2-44 Description of error . . . . . . . . . . . . . . . . . . . . . . . . . . 2-3 DHCP . . . . . . . . . . . . . . . . . . . . . . . . . . . . . . . . . . . 2-44 Displayed Language . . . . . . . . . . . . . . . . . . . . 2-8, 2-49 Double Feed Check. . . . . . . . . . . . . . . . . . . . . 2-5, 2-21 Duplex Display. . . . . . . . . . . . . . . . . . . . . . . . . . . . . . 2-3 Duplex Indicator . . . . . . . . . . . . . . . . . . . . . . . . . . . . 2-2 Duplex Transfer Unit . . . . . . . . . . . . . . . . . . . . . . . . 3-11 Feed Tray 1 . . . . . . . . . . . . . . . . . . . . . . . 2-5, 2-19, 2-53 Feed Tray 2 . . . . . . . . . . . . . . . . . . . . . . . 2-5, 2-19, 2-53 Feed Tray Descent Button . . . . . . . . . . . . . . . . 1-2, 1-14 Feed Tray Paper Guide . . . . . . . . . . . . . . . . . . . . . . . 1-2 Feed Tray Relay . . . . . . . . . . . . . . . . . . . 1-14, 2-6, 2-21 Feed Tray Selection . . . . . . . . . . . . . . . . . . . . 2-9, 2-53 Finisher Functions. . . . . . . . . . . . . . . . . . . . . . . . . . . 4-2 FORCEJET™ Link Symbol . . . . . . . . . . . . . 1-5, 3-2, 3-3 Front Cover . . . . . . . . . . . . . . . . . . . . . . . . . . . . . . . . 2-2 Front Cover (left) . . . . . . . . . . . . . . . . . . . . . . . . . . . . 3-4 Front Cover (right). . . . . . . . . . . . . . . . . . . . . . . . . . . 3-4 G Guaranteed Print Area . . . . . . . . . . . . . . . . . . . . . . . . viii H Head Maintenance . . . . . . . . . . . . . . . . . . . . . 2-7, 2-40 Head Recovery . . . . . . . . . . . . . . . . . . . . . . . . 2-9, 2-52 High-Quality 1 . . . . . . . . . . . . . . . . . . . . . . . . 2-19, 2-35 High-Quality 2 . . . . . . . . . . . . . . . . . . . . . . . . 2-19, 2-35 How to Close the Standard Feed Tray . . . . . . . . . . 1-14 Hyper-Cleaning . . . . . . . . . . . . . . . . . . . . . . . . 2-7, 2-40 I Image Area . . . . . . . . . . . . . . . . . . . . . . . . . . . . . . . . 2-6 Image Area (Maximum Print Area) . . . . . . . . . . . . . 2-29 Initial Setting . . . . . . . . . . . . . . . . . . . . . . . . . . 2-7, 2-45 Ink Cartridge . . . . . . . . . . . . . . . . . . . . . . . . vii, 3-16, 4-3 Ink Cartridge Replacement . . . . . . . . . . . . . . . . . . . 3-16 Ink Cover. . . . . . . . . . . . . . . . . . . . . . . . . . 1-2, 3-4, 3-17 Ink Drain Tank . . . . . . . . . . . . . . . . . . . . . . . . . . . . . . 3-7 Ink Replacement Error . . . . . . . . . . . . . . . . . . . . . . . 3-4 Ink Unit . . . . . . . . . . . . . . . . . . . . . . . . . . . . . . . . . . . 1-2 IP address. . . . . . . . . . . . . . . . . . . . . . . . . . . . . . . . 2-44 Items That Can Be Set from the Menu . . . . . . . . . . . 2-5 J E Eject Wing . . . . . . . . . . . . . . . . . . . . . . . . . . . . 2-6, 2-26 End Guide . . . . . . . . . . . . . . . . . . . . . . . . . . . . . . . . 1-15 Envelope . . . . . . . . . . . . . . . . . . . . . . . . . . . . . . . . . 1-20 Error indicator . . . . . . . . . . . . . . . . . . . . . . . . . . . . . . 3-2 Error Message. . . . . . . . . . . . . . . . . . . . . . . . . . 3-2, 3-3 Error Number. . . . . . . . . . . . . . . . . . . . . . . . . . . 3-2, 3-3 Job Clear. . . . . . . . . . . . . . . . . . . . . . . . . . . . . 2-9, 2-54 Job Separation . . . . . . . . . . . . . . . . . . . . . . . . 2-6, 2-23 L LAN cable . . . . . . . . . . . . . . . . . . . . . . . . . . . . . . . . . . . x Left Transfer Path Cover . . . . . . . . . . . . . . . . . . 1-2, 3-4 List of Options . . . . . . . . . . . . . . . . . . . . . . . . . . . . . . 4- 2 4-7 Location for Installation . . . . . . . . . . . . . . . . . . . . . . iv, vi M Magenta (M) Ink Cartridge . . . . . . . . . . . . . . . . . . . . 1-2 Main Display. . . . . . . . . . . . . . . . . . . . . . . . . . . . 1-2, 1-5 Main Power Switch . . . . . . . . . . . . . . . . . . . . . . . 1-4, 1-9 Mainrtenance Door . . . . . . . . . . . . . . . . . . . . . . . . . 1-2 Maintenance Call . . . . . . . . . . . . . . . . . . . . . . . . . . . 3-7 Maximum Print Area. . . . . . . . . . . . . . . . . . . . . . . . . . . ix Menu Auto-Shut OFF . . . . . . . . . . . . . . . . . . . . 2-8, 2-51 MENU Key . . . . . . . . . . . . . . . . . . . . . . . . . . . . . . . . 2-4 Menu name . . . . . . . . . . . . . . . . . . . . . . . . . . . . . . . 2-2 Menu number . . . . . . . . . . . . . . . . . . . . . . . . . . . . . . 2-2 Menu Setting . . . . . . . . . . . . . . . . . . . . . . . . . . 2-7, 2-42 Menu Shut OFF Time. . . . . . . . . . . . . . . . . . . . 2-8, 2-51 Message Display . . . . . . . . . . . . . . . . . . . . . . . . 1-5, 2-2 Metric/Inch Switch . . . . . . . . . . . . . . . . . . . . . . 2-8, 2-49 N Network Configuration . . . . . . . . . . . . . . . . . . . 2-7, 2-44 Normal Cleaning . . . . . . . . . . . . . . . . . . 2-7, 2-40, 2-41 O OK Key . . . . . . . . . . . . . . . . . . . . . . . . . . . . . . . . . . . 2-4 Operation Environment . . . . . . . . . . . . . . . . . . . . . . . . vi Original Size/Tray Display. . . . . . . . . . . . . . . . . . . . . 2-3 Output volume . . . . . . . . . . . . . . . . . . . . . . . . . . . . 1-18 Overall Dimensions . . . . . . . . . . . . . . . . . . . . . . . . . . . vi P Paper Arranger. . . . . . . . . . . . . . . . . . . . . . . . . 1-4, 1-15 Paper Ejection . . . . . . . . . . . . . . . . . . . . . . . . . 2-6, 2-25 Paper Feed Control . . . . . . . . . . . . . . . . . . . . . . . . . . . 7 Paper Feed Pressure . . . . . . . . . . . . . . . . . . . . . . . 1-13 Paper Feed Pressure Adjustment Dial . . . . . . . 1-2, 3-20 Paper Feed Pressure Adjustment Lever . . . . . 1-2, 1-13 Paper Feed Tray . . . . . . . . . . . . . . . . . . . . . . . . 1-2, 1-11 Paper Feed Tray 1 . . . . . . . . . . . . . . . . . . . . . . . . . 3-14 Paper Feed Tray 2 . . . . . . . . . . . . . . . . . . . . . . . . . 3-14 Paper Jam Error . . . . . . . . . . . . . . . . . . . . . . . . . . . . 3-6 Paper Jam in the Standard Paper Feed Tray . . . . . . 3-9 Paper jam occurs. . . . . . . . . . . . . . . . . . . . . . . . . . . 3-9 Paper Receiving Section . . . . . . . . . . . . . . . . . . . . . 3-10 Paper Receiving Tray . . . . . . . . . . . . . . . . . . . 1-15, 1-19 Paper Size . . . . . . . . . . . . . . . . . . . . 2-5, 2-6, 2-20, 2-30 Paper Size Display . . . . . . . . . . . . . . . . . . . . . . . . . . 2-2 Paper Size Entry . . . . . . . . . . . . . . . . . . . . . . . 2-6, 2-32 Paper Top Guide . . . . . . . . . . . . . . . . . . . . . . . . . . 1-11 Paper Type . . . . . . . . . . . . . . . . . . . . 2-5, 2-7, 2-20, 2-34 Paper Type Entry . . . . . . . . . . . . . . . . . . . . . . . 2-6, 2-33 Power Key . . . . . . . . . . . . . . . . . . . . . . . . . . . . . . . . 1-5 Power Switch . . . . . . . . . . . . . . . . . . . . . . . . . . . . . . 1-9 Print Auto-ON Time . . . . . . . . . . . . . . . . . . . . . 2-8, 2-50 4-8 Print Density . . . . . . . . . . . . . . . . . . . . . . . . . . 2-6, 2-24 Print Mode Auto-ON . . . . . . . . . . . . . . . . . . . . 2-8, 2-50 Print Position Adjust. . . . . . . . . . . . . . . . . . . . . 2-5, 2-14 Print Quantity Display . . . . . . . . . . . . . . . . . . . . 2-2, 2-3 Print range . . . . . . . . . . . . . . . . . . . . . . . . . . . . . . . . 1-18 Printer Configuration . . . . . . . . . . . . . . . . . . . . . . . . . 2-1 PRINT/PAUSE Key . . . . . . . . . . . . . . . . . . . . . . 1-5, 2-4 R Registration . . . . . . . . . . . . . . . . . . . . . . . . . . . . . . . . 2-7 Remaining Volume Notice Indicators . . . . . . . . . 1-5, 3-2 Right Transfer Path Cover . . . . . . . . . . . . . . . . . . . . . 3-4 RISO Scanner HS2000 . . . . . . . . . . . . . . . . . . . . . . . 4-2 S Separation Paper . . . . . . . . . . . . . . . . . . . . . . . 2-7, 2-36 Shifting Guide . . . . . . . . . . . . . . . . . . . . . . . . . 2-6, 2-27 Side Guide . . . . . . . . . . . . . . . . . . . . . . . . . . . . . . . . 1-15 Side Guide Locking Levers . . . . . . . . . . . . . . . . . . . 1-11 Sleep . . . . . . . . . . . . . . . . . . . . . . . . . . ix, 1-9, 2-8, 2-47 Sleep Key. . . . . . . . . . . . . . . . . . . . . . . . . . . . . . . . . . 1-9 Specifications. . . . . . . . . . . . . . . . . . . . . . . . . . . . . . . 4-4 Stack Guide . . . . . . . . . . . . . . . . . . . . . . . . . . . 2-6, 2-26 Stack Guide Adjust . . . . . . . . . . . . . . . . . . . . . 2-6, 2-27 Stack Guide (end) . . . . . . . . . . . . . . . . . . . . . . 1-4, 1-15 Stack Guide Open Button . . . . . . . . . . . 1-4, 1-16, 1-19 Stack Guide (side) . . . . . . . . . . . . . . . . . . . . . . 1-4, 1-15 Standard Feed Tray . . . . . . . . . . . . . . . . 2-5, 2-19, 2-53 Standard Paper 1. . . . . . . . . . . . . . . . . . . . . . 2-19, 2-35 Standard Paper Feed Tray . . . . . . . . . . . . . . . . 1-2, 1-12 Stand-by . . . . . . . . . . . . . . . . . . . . . . . . . . . . . 2-9, 2-51 Stand-by Period . . . . . . . . . . . . . . . . . . . . . . . . 2-9, 2-52 Status. . . . . . . . . . . . . . . . . . . . . . . . . . . . . . . . . 2-2, 2-3 Submenu . . . . . . . . . . . . . . . . . . . . . . . . . . . . . . . . . 2-11 Subnet mask . . . . . . . . . . . . . . . . . . . . . . . . . . . . . . 2-44 System Error . . . . . . . . . . . . . . . . . . . . . . . . . . . . . . . 3-6 System Information . . . . . . . . . . . . . . . . . . . . . 2-7, 2-42 T Temp Data Clear . . . . . . . . . . . . . . . . . . . . . . . 2-6, 2-28 Temp Data Retrieve . . . . . . . . . . . . . . . . . . . . . 2-5, 2-17 Test Print . . . . . . . . . . . . . . . . . . . . . . . . . . . . . 2-5, 2-16 Transfer Roller . . . . . . . . . . . . . . . . . . . . . . . . . . . . . 3-10 Transfer Section Door . . . . . . . . . . . . . . . . . . . . 1-2, 3-4 Transfer Unit. . . . . . . . . . . . . . . . . . . . . . . . . . . . . . . 3-15 Transfer Unit (left) . . . . . . . . . . . . . . . . . . . . . . . . . . 3-13 Transfer Unit (right) . . . . . . . . . . . . . . . . . . . . . . . . . 3-11 Tray Selection Rule . . . . . . . . . . . . . . . . . . . . . 2-8, 2-50 Triple-Tray Source . . . . . . . . . . . . . . . . . . . . . . 2-6, 2-22 U Unusable Paper . . . . . . . . . . . . . . . . . . . . . . . . . . . . . 1-7 Usable Paper . . . . . . . . . . . . . . . . . . . . . . . . . . . . . . . 1-6 V WAKE-UP key. . . . . . . . . . . . . . . . . . . . . . . . . . 1-5, 1-9 Warning. . . . . . . . . . . . . . . . . . . . . . . . . . . . . . . . . . . 3-7 Vent Hole. . . . . . . . . . . . . . . . . . . . . . . . . . . . . . . . . . 1-4 W Y Yellow (Y) Ink Cartridge . . . . . . . . . . . . . . . . . 1-2, 3-17 Waiting Time . . . . . . . . . . . . . . . . . . . . . . . . . . 2-8, 2-47 033-03024-009 4-9

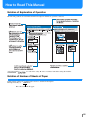
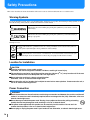
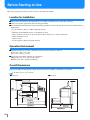
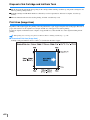
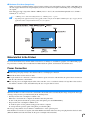
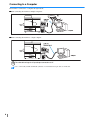


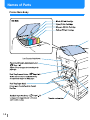
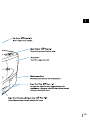
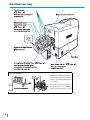
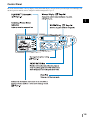
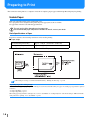
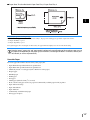

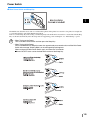
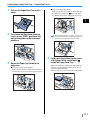
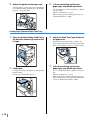
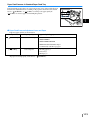
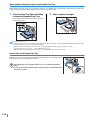
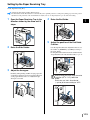
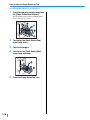
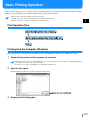

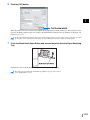
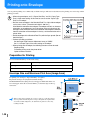
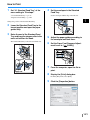
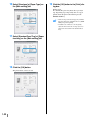


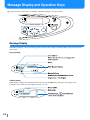
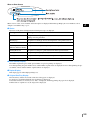

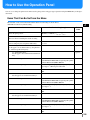
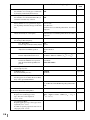
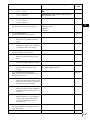
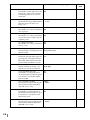
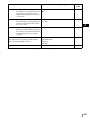
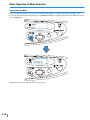


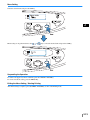

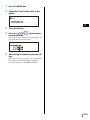
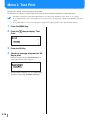
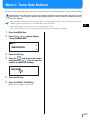
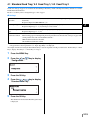
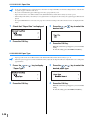

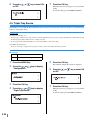
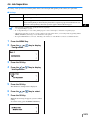
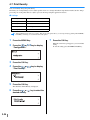
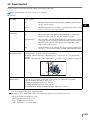
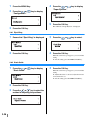
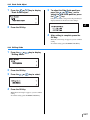
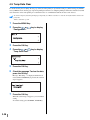
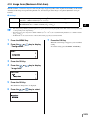
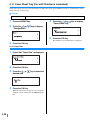

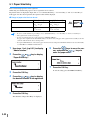
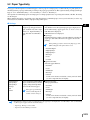


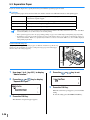
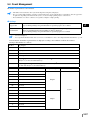
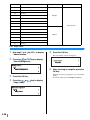
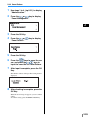
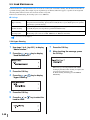
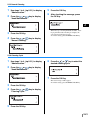
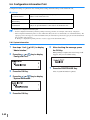
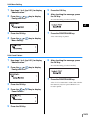
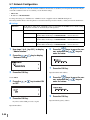
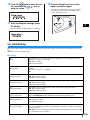
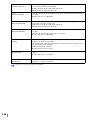
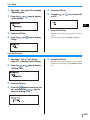
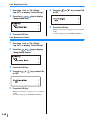
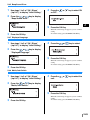
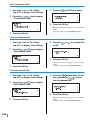
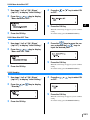
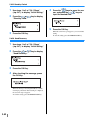
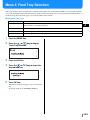
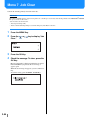

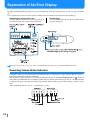
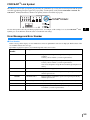


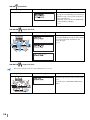
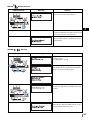
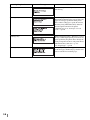
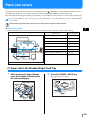
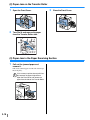
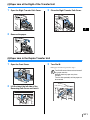

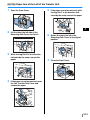
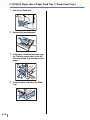
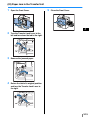
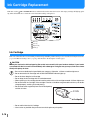
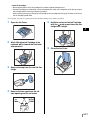
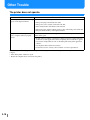
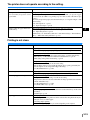
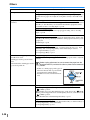
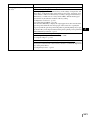


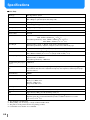
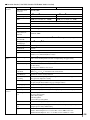


![1 Click the [OK] button.](http://vs1.manualzilla.com/store/data/005894494_1-d1f52ee6fd3b2146a5f252d3f1858c3b-150x150.png)

![2 Haga clic en el botón [Aceptar].](http://vs1.manualzilla.com/store/data/006292855_1-18424f3b5bf7ebf043fd2e6aa576beb6-150x150.png)
![2 Clique no botão [OK].](http://vs1.manualzilla.com/store/data/006043970_1-e2974f1cd0f0465d2cb4d13e53c48ce2-150x150.png)