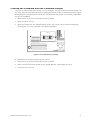
1
MAXDATA PLATINUM 510 Server User‘s Manual 2 Contents Contents 1 Setting up the system 7 2 Features 9 System position ....................................................................................................................... 7 Connecting the system............................................................................................................ 8 Rear Connectors ................................................................................................................. 8 Powering up the system ..................................................................................................... 8 Server Board Connector and Component Locations ............................................................. 11 Back Panel Connectors .......................................................................................................... 12 Processor ............................................................................................................................... 12 Dual Processor Operation ................................................................................................. 12 Memory ................................................................................................................................. 13 Intel® E7505 Chipset.............................................................................................................. 13 MCH.................................................................................................................................. 13 ICH4 .................................................................................................................................. 14 Firmware Hub ................................................................................................................... 14 Video ...................................................................................................................................... 14 AGP Connector ................................................................................................................. 14 ATI Rage XL Video Controller............................................................................................ 15 PCI I/O Subsystem ................................................................................................................ 15 Segment A: 32-bit/33 MHz PCI Subsystem ...................................................................... 15 Segment B: 64-bit/100 MHz PCI-X Capable Subsystem ................................................... 16 Segment C: 64-bit/66 MHz PCI Capable Subsystem ........................................................ 16 Super I/O................................................................................................................................ 17 Serial Ports ........................................................................................................................ 17 Parallel Port ....................................................................................................................... 17 Floppy Disk Connector ...................................................................................................... 17 Keyboard and Mouse Connectors..................................................................................... 17 USB ................................................................................................................................... 17 Storage .................................................................................................................................. 18 Serial ATA Controller ......................................................................................................... 18 IDE Controller.................................................................................................................... 18 Network Interface Controllers (NICs)..................................................................................... 18 NIC Connector and Status LEDs ....................................................................................... 18 Power Management .............................................................................................................. 19 Front Panel Buttons ............................................................................................................... 20 AC Link Mode ........................................................................................................................ 20 Wake on LAN......................................................................................................................... 20 Wake on RTC ......................................................................................................................... 20 Security .................................................................................................................................. 20 Password Protection ......................................................................................................... 21 Using Passwords .............................................................................................................. 21 Password Clear Jumper .................................................................................................... 21 Floppy Write Protection .................................................................................................... 21 3 Configuration Software and Utilities 23 Hot Keys ................................................................................................................................ 23 Power-On Self-Test (POST) ................................................................................................... 23 Using BIOS Setup Utility........................................................................................................ 23 If You Cannot Access Setup ............................................................................................. 23 Starting Setup ................................................................................................................... 24 MAXDATA PLATINUM 510 Server 3 Setup Menus ......................................................................................................................... 24 Hardware Monitoring ............................................................................................................. 26 Serial ATA RAID BIOS Configuration ..................................................................................... 26 RAID Configuration Utility ...................................................................................................... 27 Creating the RAID Set....................................................................................................... 27 Creating a Striped Set (RAID 0)......................................................................................... 28 Creating a Mirrored Set (RAID 1) ...................................................................................... 29 Deleting the RAID Set....................................................................................................... 30 Rebuilding the Mirrored Set .............................................................................................. 30 Resolving Conflicts............................................................................................................ 30 4 Server Board Installations and Upgrades 31 5 Solving Problems 33 6 Technical Reference 43 Safety Cautions...................................................................................................................... 31 Safety and Regulatory Compliance ........................................................................................ 31 Replacing the Backup Battery................................................................................................ 32 Resetting the System ............................................................................................................ 33 Initial System Startup............................................................................................................. 33 Checklist............................................................................................................................ 33 Running New Application Software ....................................................................................... 34 Checklist............................................................................................................................ 34 After the System Has Been Running Correctly ..................................................................... 34 Checklist............................................................................................................................ 34 More Problem Solving Procedures ........................................................................................ 35 Preparing the System for Diagnostic Testing.................................................................... 35 Verifying Proper Operation of Key System Lights............................................................. 35 Confirming Loading of the Operating System................................................................... 35 Specific Problems and Corrective Actions ........................................................................ 35 Power Light Does Not Light .................................................................................................. 36 No Characters Appear on Screen...................................................................................... 36 Characters Are Distorted or Incorrect ............................................................................... 36 System Cooling Fans Do Not Rotate Properly .................................................................. 37 Diskette Drive Activity Light Does Not Light .................................................................... 37 Hard Disk Drive Activity Light Does Not Light .................................................................. 37 CD-ROM Drive Activity Light Does Not Light ................................................................... 37 Cannot Connect to a Server .............................................................................................. 38 The Activity LED does not light......................................................................................... 36 The controller stopped working when an add-in adapter was installed. ........................... 36 Problems with Network ......................................................................................................... 38 Diagnostics pass but the connection fails. ........................................................................ 38 The Activity LED does not light......................................................................................... 38 The controller stopped working when an add-in adapter was installed. ........................... 38 The add-in adapter stopped working without apparent cause. ......................................... 38 PCI Installation Tips ............................................................................................................... 38 Problems with Application Software...................................................................................... 39 Bootable CD-ROM Is Not Detected....................................................................................... 39 Recovering the BIOS ............................................................................................................. 39 Recovering the BIOS with the Crisis Recovery Diskette .................................................. 39 Clearing the Password with the Password Jumper............................................................... 41 Configuration Jumpers .......................................................................................................... 43 Front Panel Header ................................................................................................................ 44 4 Contents 7 Regulatory and Integration Information 45 Product Regulatory Compliance ............................................................................................ 45 Product Safety Compliance............................................................................................... 45 Product EMC Compliance ................................................................................................. 45 Product Regulatory Compliance Markings............................................................................. 45 Electromagnetic Compatibility Notices .................................................................................. 46 FCC (USA) ......................................................................................................................... 46 Europe (CE Declaration of Conformity) ............................................................................. 46 Figures 1. 2. 3. 4. 5. 6. 7. 8. 9. Rear connectors ................................................................................................................ 8 The Controls ...................................................................................................................... 8 Server Board Connector and Component Locations ....................................................... 11 Back Panel Connectors ................................................................................................... 12 Replacing the Backup Battery ......................................................................................... 32 BIOS Recovery Jumper................................................................................................... 40 Password Recovery Jumper ........................................................................................... 41 Configuration Jumper Location ....................................................................................... 43 Front Panel Header Connection Location........................................................................ 44 Tables 1. Server Board Features ........................................................................................................ 9 2. Chipset Components ........................................................................................................ 13 3. NIC1 and NIC2 Rear Panel LED Description ..................................................................... 19 4. Security Operation Summary ............................................................................................ 20 5. Hot Keys............................................................................................................................ 23 6. Keyboard Commands........................................................................................................ 24 7. On-Screen Options............................................................................................................ 25 8. Monitored Headers and Sensors ...................................................................................... 26 9. Configuration Jumper [J4A1] ............................................................................................ 43 10. Front Panel Header Connection Descriptions ................................................................. 44 11. Product Certification Markings ........................................................................................ 45 MAXDATA PLATINUM 510 Server 5 6 Contents 1 Setting up the system System position Please take note of the following criteria for creating a practical and safe workplace when setting up your computer: The system can be used anywhere the temperature is suitable for people. However, rooms with humidity over 70%, and dusty or dirty areas are not appropriate. In addition, do not expose the system to any temperatures over +35° C or under +10° C. Make sure that the cables connecting the system to peripheral devices are not tight. Make sure that all power and connection cables are positioned so that they are not trip hazards. When you save data to your system‘s hard disks or to a floppy disk, they are stored as magnetic information on the media. Make sure that they are not damaged by magnetic or electromagnetic fields. Because the electronics in your computer can be damaged by jarring, no mechanical devices should be placed on the same surface as the system. This is especially important for impact printers whose vibrations could damage the hard disk. ATTENTION In order to fully separate the system from current, the power cord must be removed from the wall outlet MAXDATA PLATINUM 510 Server 7 Connecting the system Rear Connectors � � � � � � � � � Figure 1. Rear connectors A. PS/2-Mouse F. B. PS/2-Keyboard G. USB-Connector 1 NIC 1 C. Parallel port H. USB-Connector 2 D. Serial port A I. NIC 2 E. VGA port Powering up the system At the front of the case, you can find the neccessary controls like power button, reset button and the HDD Leds. Press the power button onte time briefly in order to boot the system. � � � � Figure 2. The Controls 8 A. Power switch B. Reset switch C. Power LED D. HDD LED Setting up the system 2 Features The mainboard offers a “flat” design, with the processors and memory subsystems residing on the board. The server board supports dual-processor operation with Intel® Xeon™ processors and the Intel® E7505 chipset. The board contains embedded devices for video, network, and Serial ATA (SATA) and provides basic monitoring hardware and interrupt control for dual processors and PC/AT-compatible operation. Table 1 lists the features of the mainboard. Table 1. Server Board Features Feature Description Processor Supports dual Intel® Xeon™ processors with 512 KB L2 cache Uses the 604-pin Flipchip Pin Grid Array (FCPGA) socket Memory Four 184-pin Double Data Rate (DDR) Dual Inline Memory Module (DIMM) sockets Support for up to 8 GB of memory Support for single channel, Error Correcting Code (ECC), registered, DDR 266 DIMMs Chipset Intel® E7505 chipset, consisting of: Intel® E7505 Memory Controller Hub (MCH) Intel® 82801DB I/O Controller Hub 4 (ICH4) Intel® 82870P2 PCI/PCI-X 64-bit Hub 2.0 (P64H2) Intel® N82802AC 8 Mbit Firmware Hub (FWH) Supports 533 MHz system bus Video Accelerated Graphics Port (AGP) connector providing AGP 8x Pro 50 support Integrated onboard ATI Rage XL 64-bit SVGA video controller 8 MB SDRAM video memory SVGA video port PCI bus Five PCI expansion slots for add-in boards: Two 64-bit, 100 MHz PCI-X expansion slots One 64-bit, 66 MHz PCI expansion slot Two 32-bit, 33 MHz PCI expansion slots I/O control Support for Winbond W83627HF super I/O controller Network Dual integrated on-board Ethernet connections: Intel® 82540EM Gigabit Ethernet Controller (10/100/1000 Mbps) Intel® 82550PM Fast Ethernet Multifunction PCI/CardBus Controller (10/100 Mbps) continued MAXDATA PLATINUM 510 Server 9 Table 1. Server Board Features (continued) Feature Description Peripheral interfaces Two SATA channels, one device per channel Two IDE interfaces with ATA-100 support Up to four Universal Serial Bus (USB) 2.0 ports Two RJ-45 Ethernet connectors (one Gigabit, one 10/100 megabit) One diskette drive interface One parallel port One serial port PS/2-compatible keyboard and mouse ports RAID RAID 0.1 using the Silicon Image 3112A PCI to Serial ATA controller Power SSI-Entry Electronics Bay (EEB) 3.0 compliant Power/sleep switch with LED indicator Wake on LAN (WOL) Wake on RTC Wake on USB Security BIOS password Keyboard password protection Floppy write protection 10 Server monitoring and control Hardware monitoring using the Winbond W83627HF super I/O controller Form factor SSI-EEB 3.0 – compliant form factor Software monitoring using LANDesk™ Client Manager (LDCM) 6 Features Server Board Connector and Component Locations � � � � � � � � � � ��� � �� � �� ������� �� �� ���� � � �� �� � � �� � � �� � � � � � � � � � � Figure 3. Server Board Connector and Component Locations A. System Fan 3 N. Secondary IDE (ATA 100) AA. 64/100 PCI-X, Slots 3 & 4 B. CPU Fan 1 O. Primary IDE (ATA 100) BB. 32/33 PCI, Slots 1 & 2 C. Main Power P. Floppy Disk Drive Connector CC. AGP Connector D. CPU Fan 2 Q. System Fan 6 DD. System Fan 1 E. Primary Processor (CPU1) R. Hot Swap Backplane EE. NIC 1 (10/100) F. Secondary Processor (CPU2) S. System Fan 5 FF. NIC 2 (1 Gb) G. DIMM sockets T. Serial B GG. System I/O Connectors H. +12 V Processor Power U. Front Panel Connector I. Aux Power V. Serial ATA 1 Connector J. Front Panel USB W. Serial ATA 2 Connector K. System Fan 2 X. 64/66 PCI, Slot 5 L. System Fan 1 Y. Chassis Intrusion Connector M. Jumper Block Z. Battery MAXDATA PLATINUM 510 Server 11 Back Panel Connectors USB � � � � � � � Figure 4. Back Panel Connectors A. USB 1, 2, 3 B. Keyboard/Mouse C. Serial A D. Video E. Parallel F. NIC1 (10/100 Mb) G. NIC2 (Gigabit) Processor The mainboard accommodates one or two 533 MHz system bus Intel® Xeon™ processors with 512 KB L2 cache via two SKT604 604-pin zero-insertion force (ZIF) sockets. When only one processor is installed, it must be in the socket labeled CPU1 and the other socket should be empty. Dual Processor Operation The Intel® Xeon™ interface is dual processor (DP) ready. Each processor contains a local Intel® Advanced Programmable Interrupt Controller (APIC) section for interrupt handling. When two processors are installed, both processors must be of identical revision, core voltage, and bus/core speeds. 12 Features Memory The mainboard contains four 184-pin DIMM sockets and provides support for up to 8 GB of memory when four 2 GB DIMMs are installed. Memory is partitioned as two banks of DDR DIMMs. DIMM 1A and 1B make up Bank 1; DIMM 2A and 2B make up Bank 2. Each bank provides 144 bits of twoway interleaved memory. The mainboard supports up to four registered, ECC, DDR DIMMs that are compliant with the JEDEC DDR266 specification. A wide range of DIMM sizes are supported, including the following: • 128 MB • 256 MB • 512 MB • 1 GB • 2 GB NOTE If the operating environment for your system exceeds 30 degrees Celsius and you are installing either stacked 1 GB DIMMs or 2 GB DIMMs, you will need to install a DIMM cooling duct. Intel® E7505 Chipset The mainboard includes an Intel® E7505 chipset, which consists of the components listed in Table 2. Table 2. Chipset Components Component Functional Area Description E7505 MCH Integrated memory controller Centralized controller for the system, memory, Hub Interface (HI) 2.0, HI 1.5, and AGP buses ICH4 Integrated I/O bridge Centralized controller for the board’s I/O paths P64H2 Flexible I/O subsystem core (PCI/PCI-X) Centralized controller for the 64-bit I/O subsystem core FWH Firmware hub Provides the nonvolatile storage of the BIOS MCH The E7505 MCH integrates the AGP bus. Other features provided by the MCH include the following: • Full support of ECC on the memory bus • Full support of Intel® x4 Single Device Data Correction on the memory interface with x4 DIMMs • Full support of registered, DDR 266, ECC, 2 GB DIMMs MAXDATA PLATINUM 510 Server 13 ICH4 The primary role of the ICH4 is to provide the gateway to all PC-compatible I/O devices and features. The mainboard uses the following ICH4 features: • 32-bit/33 MHz PCI bus interface • Low Pin Count (LPC) bus interface • IDE interface, with ATA-100 capability • USB 2.0 interface • PC-compatible timer/counter and DMA controllers • APIC and 82559 interrupt controller • Power management • System real-time clock (RTC) • General purpose I/O • 32-bit PCI Bus interface Firmware Hub The N82802AC FWH is a high-performance 8 Mbit memory component that provides the nonvolatile storage of the BIOS. It is connected through the LPC bus from the ICH4. Video The mainboard contains two separate, mutually exclusive graphics subsystems. You can use either the AGP connector or the ATI Rage XL video controller. When an AGP card is installed, the integrated 8 MB video controller is disabled. AGP Connector AGP is a high-performance interface for graphics-intensive applications. AGP is independent of the PCI bus and is intended for exclusive use with graphical display devices. The AGP bus follows the AGP 3.0 specification. The AGP connector on the mainboard supports the following: 14 • 2X, 4X, or 8X AGP protocol • AGP Pro50 interface (for a 50 W maximum power draw), using additional power pins in 4X and 8X mode • 1.5 V add-in cards only • USB interface to the AGP connector • Maximum bus bandwidth of 2.13 GB/s NOTES • The AGP connector is keyed for 1.5 V AGP cards only. Do not attempt to install a legacy 3.3 V AGP card. • The AGP connector is not mechanically compatible with legacy 3.3 V AGP cards. • AGP Pro50 add-in cards will require removing the plastic spacer at the front of the slot. Features ATI Rage XL Video Controller The mainboard also includes an ATI Rage XL video controller, 8 MB video SDRAM and support circuitry for an embedded SVGA video subsystem. The SVGA subsystem supports a variety of modes: up to 1600 x 1200 resolution for CRT displays and up to 1024 x 768 resolution for TFT displays, and up to 16.7 million colors. The mainboard provides a standard 15-pin VGA connector. The video controller can be disabled in two ways: • BIOS Setup • Installing an AGP card When the controller is disabled, the BIOS resource manager and operating system will not detect its presence and no system resources will be allocated to it. PCI I/O Subsystem The mainboard provides three PCI bus segments: • Segment A with two 32-bit/33 MHz slots, routed through the ICH4 • Segment B with two PCI-X 64-bit/100 MHz slots, routed through the P64H2 controller • Segment C with one 64-bit/66 MHz slot, routed through the P64H2 controller Segment A: 32-bit/33 MHz PCI Subsystem The 32-bit/33 MHz PCI segment includes the following embedded devices and connectors: • Two 5 V keyed full-length, full height PCI expansion slots (PCI slots 1 and 2) • Integrated Intel® 10/100 fast Ethernet Controller (Intel® 82550PM) • Integrated ATI Rage XL video controller with 8 MB of on-board SDRAM • Integrated dual port Serial ATA controller (Silicon Image 3112A) 32-bit/33 MHz PCI features include: • Bus speed up to 33 MHz • 5 V signaling environment • Burst transfers up to a peak of 132 MB/s • 8-, 16-, or 32-bit data transfers • Plug-and-Play enabled • Parity enabled MAXDATA PLATINUM 510 Server 15 Segment B: 64-bit/100 MHz PCI-X Capable Subsystem The 64-bit/100 MHz PCI segment includes the following embedded devices and connectors: • Two 3.3 V keyed full-length, full height PCI expansion slot (slots 3 & 4) • Backward compatible to 64-bit/66 MHz, 64-bit/33 MHz, and 32-bit/33 MHz PCI cards • Support for PCI-X add in cards 64-bit/100 MHz PCI-X features include: • Bus speed up to 100 MHz • 3.3 V signaling environment • Burst transfers up to a peak of 800 megabytes per second (MB/s) • 8-, 16-, 32-, or 64-bit data transfers • Plug and Play ready • Parity enabled NOTE If you install a slower card into one of the PCI 64-bit/100 MHz connectors, the bus speed for both connectors will be lowered to the speed of the slowest adapter. Segment C: 64-bit/66 MHz PCI Capable Subsystem The 64-bit/66 MHz PCI-X segment includes: • One 3.3 V keyed full-length, full height PCI expansion slots (PCI-X slot 5) • Backward compatible to 64-bit/33 MHz and 32-bit/33 MHz PCI cards • Integrated Intel® gigabit ethernet controller (Intel® 82540EM) 64-bit/66 MHz PCI features include: • Bus speed up to 66 MHz • 3.3 V signaling environment • Burst transfers up to a peak of 528 MB/s • 8-, 16-, 32-, or 64-bit data transfers • Plug-and-Play ready • Parity enabled NOTE The speed of the bus will run at the speed of the adapter installed. 16 Features Super I/O The mainboard uses the Winbond W83627HF Super I/O Plug and Play Compatible with ACPI-Compliant Controller/Extender. This device provides the system with the following: • LPC interface • Two serial ports • One parallel port • Floppy disk controller • PS/2-compatible keyboard and mouse controller The mainboard provides the connector interface for the floppy disk drive, dual serial ports, parallel port, PS/2 mouse, and the PS/2 keyboard. Serial Ports The mainboard provides one DB9 connector on the back panel for serial port A. Serial port A is compatible with 16550A and 16450 modes. The port can be set to one of four different COM ports and each can be enabled separately. When enabled, each port can be programmed to generate edgeor level-sensitive interrupts. When disabled, serial port interrupts are available to add-in cards. An additional serial header is available on the board for an optional serial port B. Parallel Port The mainboard provides a 25-pin parallel port back panel connector. The super I/O provides an IEEE 1284–compliant 25-pin bidirectional parallel port. BIOS programming of the super I/O registers enables the parallel port and determines the port address and interrupt. When disabled, the interrupt is available to add-in cards. Floppy Disk Connector The floppy disk connector on the server board provides the interface to the floppy disk drive from the floppy disk controller. Keyboard and Mouse Connectors The separate keyboard and mouse connectors, found on the back panel of the server board, are PS/2 compatible and are interchangeable. Setup does not include an option to disable the keyboard or mouse. Instead, they are automatically detected and tested at system startup. The system can be booted with either or both disconnected. USB The mainboard supports up to four high-speed USB 2.0 ports through the ICH4. Three ports are routed to the rear panel and one is routed to an internal 9-pin connector on the baseboard that can be cabled to an external connector located on the front or rear of a chassis. All four ports function identically and with the same bandwidth. MAXDATA PLATINUM 510 Server 17 Storage Serial ATA Controller The mainboard provides embedded dual Serial ATA channels using the Silicon Image 3112A PCI-toSerial ATA Controller. The 3112A SATA controller is a PCI-to-SATA controller of individual drives or a RAID configuration. The controller supports the following: • Two SATA hard disk drives • 150 MB/s data transfer • RAID 0 (striping): adjustable stripe size. RAID 0 is used for high-performance applications • RAID 1 (mirroring): RAID 1 is used for data protection • Online mirror rebuilding • Multiple sizes of hard disk drives • Automatic selection of the highest available transfer speed for all ATA and ATAPI drives • Booting from an individual drive or RAID set of drives The SATA drives can be enabled or disabled as a RAID set by running a utility to turn RAID mode on or off and loading the appropriate operating system driver. To use the RAID option, two SATA hard disk drives are required. When RAID is disabled, the drives are treated as individual ATA drives. NOTE Some operating systems will not support RAID mode. IDE Controller The ICH4 acts as a PCI-based Ultra DMA 100 IDE controller that supports programmed I/O transfers and bus master IDE transfers. The ICH4 supports two IDE channels, supporting two drives each for a maximum of four devices. Network Interface Controllers (NICs) The mainboard includes two integrated on-board Ethernet connections: • One 10/100/1000Base-TX network controller based on the Intel® 82540EM Gigabit Ethernet Controller. • One 10Base-T/100Base-TX network controller based on the Intel® 82550PM Fast Ethernet Multifunction PCI/CardBus Controller. As a PCI bus master, the 82550PM can burst data at up to 132 MB/s. Status LEDs are included on the external NIC connectors. You can disable the embedded NICs in BIOS Setup Utility. When disabled they are not visible to the operating system. NIC Connector and Status LEDs The mainboard supports two RJ-45 connectors, 10/100 Mbps Fast Ethernet controller (NIC1) and one for the one for the gigabit ethernet controller (NIC2). As you look at the rear I/O panel of the board, the NICs are in the following locations: • NIC1 (10/100 megabit): The left connector, looking at the system from the back. • NIC2 (1 gigabit): The right connector, looking at the system from the back. The NICs each drive two LEDs on their RJ-45 connectors: one to indicate a link on the Local Area Network (LAN) and the other to indicate the speed of operation. Table 3 describes the functionality of the LEDs. 18 Features Table 3. NIC1 and NIC2 Rear Panel LED Description NIC NIC1 (10/100 Mbit) LED Color Left LED Right LED NIC2 (Gigabit) Left LED Right LED LED State Description Off 10 Mbps Solid Green 100 Mbps On On Blinking Green Transmit/receive activity Off No network connection Solid Amber Network connection in place Blinking Amber Transmit/receive activity Off 10 Mbps connection Solid Amber 100 Mbps connection Solid Green 1000 Mbps connection Power Management The Advance Configuration and Power Interface (ACPI)–aware operating system can place the system into a state where the hard drives spin down, the system fans stop, and all processing is halted. In this state, the power supply is still on and the processors still dissipate some power, so the power supply fan and processor fans are still running. NOTE ACPI requires an operating system that supports this feature. The mainboard supports sleep states S0, S1, S4, and S5. When the server board is operating in ACPI mode, the operating system retains control of the system and the operating system policy determines the entry methods and wake-up sources for each sleep state. Sleep entry and wake-up event capabilities are provided by the hardware but are enabled by the operating system. Following is a summary of the supported sleep states: • S0: Normal running state. • S1: Processor sleep state. No context will be lost in this state and the processor caches will maintain coherency. • S4: Hibernate or Save to Disk. The memory and machine state are saved to disk. Pressing the power button or another wake-up event restores the system state from the disk and resumes normal operation. This state assumes that no hardware changes were made to the system while it was off. • S5: Soft off. Only the RTC section of the chipset is running in this state. CAUTION The system is off only when the AC power is disconnected. MAXDATA PLATINUM 510 Server 19 Front Panel Buttons The power button on the front panel behaves differently depending on whether the operating system supports ACPI. If the operating system supports ACPI, the power button can be configured as a sleep button. The OS causes the system to transition to the appropriate system state depending on the user settings. The front panel provides the following power control buttons at the front of the system: • Power Button (Legacy): In legacy mode, the power button powers the system on or off. When the power is off, the power button turns the system on. • Power Button (ACPI): If an ACPI operating system is loaded, the operating system retains control of the system and determines which sleep state (if any) the system transitions to. If the system is asleep, the power button wakes the system up. • Reset Button: The reset button generates a hard reset to the system. When this button is pressed, the system acts as if it was powered off and then back on. AC Link Mode The AC link mode allows the system to monitor its AC input power so that if AC input power is lost and then restored, the system returns to one of the following preselected settings: • Power On • Last State (Factory Default Setting) • Stay Off The AC link mode settings can be changed by running the BIOS Setup Utility. Wake on LAN Wake on LAN allows system power to be activated through the network when this option is enabled in Setup. If the system is in the S1 or S4 state, it can be turned on remotely by sending a specific packet to the system. Wake on RTC Wake on RTC alarm allows system power to be activated through a real-time clock alarm when this system is enabled in Setup. If the system is in the S1 or S4 state, it can be turned on by an RTC trigger event. Security The mainboard BIOS provides the ability to secure itself. Table 4 summarizes the password options available in the mainboard BIOS. Table 4. Security Operation Summary 20 Mode Entry Method/ Event Entry Criteria Behavior Exit Criteria After Exit User Password on boot (AT style) Power On/ Reset User Password set and password on boot enabled System halts for User Password before booting. The system is not in secure mode. Except for the password, no mouse or keyboard input is accepted. User Password followed by [Enter] Power and Reset switches are enabled. Keyboard and mouse inputs are accepted. The system boots normally. Boot sequence is determined by setup options. Features Password Protection The BIOS uses passwords to prevent unauthorized tampering with the system. Once a password is set up, access to BIOS setup is allowed only after the correct password(s) has been entered. Both user and supervisor passwords are supported by the BIOS. The user password cannot be set unless a supervisor password has been set. When set, a password can be cleared by changing it to a null string. Clearing the supervisor password also clears the user password. Entering the user password permits modification of the time, date, language, user password, and password on boot setup fields; other setup fields can be modified only if the supervisor password is entered. The user password also allows the system to boot, if secure boot is enabled. If a wrong password is entered three times in a row, the BIOS stops validating passwords and the BIOS security engine returns a failure for any further password validation attempt. If the user enters three wrong passwords in a row during the boot sequence (i.e., when entering Setup), the system is placed into a halt state. This feature makes is difficult to break the password by the “trial and error” method. Using Passwords If only the supervisor password is set, you: • Must enter the supervisor password to enter BIOS Setup. • Must enter the supervisor password to boot the server if Password on Boot is enabled in the BIOS Setup. If both passwords are set, you: • May enter the user password to enter BIOS Setup. However, you will not be able to change many of the options. • Must enter the supervisor password if you want to enter BIOS Setup and have access to all of the options. • May enter either password to boot the server if Password on Boot is enabled in the BIOS Setup. • May enter either password to exit secure mode. Password Clear Jumper If the user or supervisor password(s) is (are) lost or forgotten, moving the password clear jumper into the “clear” position clears both passwords. The password clear jumper must be restored to its original position before a new password(s) can be set. The password clear jumper is located on jumper block J4A1 pins 1-2 on the mainboard. Floppy Write Protection When selected in BIOS Setup, the floppy write protection option blocks writes to the floppy disk when the system is in secure mode. Floppy write protection is in effect only while the system is in secure mode. When not in secure mode, write protection is disabled and the floppy diskette drive operates normally. MAXDATA PLATINUM 510 Server 21 22 Features 3 Configuration Software and Utilities Hot Keys Use the keyboard’s numeric pad to enter numbers and symbols. Table 5. Hot Keys To do this: Press these keys: Clear memory and reload the operating system this is a system reset. <Ctrl+Alt+Del> Secure your system immediately. The following keys are configurable as valid hot keys: <Ctrl+Alt>+<A-Z, 0-9> (Set your hot key combination with Setup). Power-On Self-Test (POST) Each time you turn on the system, POST starts running. POST checks the server board, processor, memory, keyboard, and most installed peripheral devices. During the memory test, POST displays the amount of memory that it is able to access and test. The length of time needed to test memory depends on the amount of memory installed. POST is stored in flash memory. 1. Turn on your video monitor and server. After a few seconds POST begins to run. 2. After the memory test, these screen prompts and messages appear: Press <F2> key if you want to run SETUP 3. If you do not press <F2> and do NOT have a device with an operating system loaded, the above message remains for a few seconds while the boot process continues, and the system beeps once. Then this message appears: Operating system not found 4. Press <Esc> during POST to pop up a boot menu when POST finishes. From this menu you can choose the boot device or enter BIOS Setup. What appears on the screen after this depends on whether you have an operating system loaded and if so, which one. If the system halts before POST completes running, it emits a beep code indicating a fatal system error that requires immediate attention. If POST can display a message on the video display screen, it causes the speaker to beep twice as the message appears. Note the screen display and write down the beep code you hear; this information is useful for your service representative. For a listing of common beep codes and error messages that POST can generate, see the “Solving Problems” chapter in this manual. Using BIOS Setup Utility This section describes the BIOS Setup Utility options. Use BIOS Setup to change the server configuration defaults. You can run BIOS Setup with or without an operating system being present. If You Cannot Access Setup If you are not able to access BIOS Setup, you might need to clear the CMOS memory. MAXDATA PLATINUM 510 Server 23 Starting Setup You can enter and start BIOS Setup under several conditions: • When you turn on the server, after POST completes the memory test • When you have moved the CMOS jumper on the server board to the “Clear CMOS” position (enabled) In the two conditions listed above, after rebooting, you will see this prompt: Press <F2> to enter SETUP In a third condition, when CMOS/NVRAM has been corrupted, you will see other prompts but not the <F2> prompt: Warning: CMOS checksum invalid Warning: CMOS time and date not set In this condition, the BIOS will load default values for CMOS and attempt to boot. Setup Menus Each BIOS Setup menu page contains a number of features. Except for those that are provided for informational purposes, each feature is associated with a value field that contains user-selectable parameters. Parameters may be changed depending upon the security option chosen. If a value is not changeable due to insufficient security privileges (or other reasons), the feature’s value field becomes inaccessible. The bottom portion of the BIOS Setup screen provides a list of commands that are used for navigating the Setup utility. Table 6 describes the keyboard commands you can use in the BIOS Setup menus. 24 Configuration Software and Utilities Table 6. Keyboard Commands Press Description <F1> Help - Pressing F1 on any menu invokes the general Help window. ←→ The left and right arrow keys are used to move between the major menu pages. The keys have no affect if a submenu or pick list is displayed. ↑ Select Item up - The up arrow is used to select the previous value in a menu item’s option list, or a value field pick list. Pressing the Enter key activates the selected item. ↓ Select Item down - The down arrow is used to select the next value in a menu item’s option list, or a value field pick list. Pressing the Enter key activates the selected item. F5/- Change Value - The minus key or the F5 function key is used to change the value of the current item to the previous value. This key scrolls through the values in the associated pick list without displaying the full list. F6/+ Change Value - The plus key or the F6 function key is used to change the value of the current menu item to the next value. This key scrolls through the values in the associated pick list without displaying the full list. On 106-key Japanese keyboards, the plus key has a different scan code than the plus key on the other keyboard, but it has the same effect. <Enter> Execute Command - The Enter key is used to activate submenus when the selected feature is a submenu, or to display a pick list if a selected feature has a value field, or to select a sub-field for multi-valued features like time and date. If a pick list is displayed, the Enter key will undo the pick list, and allow another selection in the parent menu. <Esc> Exit - The ESC key provides a mechanism for backing out of any field. This key will undo the pressing of the Enter key. When the ESC key is pressed while editing any field or selecting features of a menu, the parent menu is re-entered. When the ESC key is pressed in any submenu, the parent menu is re-entered. When the ESC key is pressed in any major menu, the exit confirmation window is displayed and the user is asked whether changes can be discarded. <F9> Setup Defaults - Pressing F9 causes the following to appear: Setup Confirmation Load default configuration now? [Yes] [No] If “Yes” is selected and the Enter key is pressed, all Setup fields are set to their default values. If “No” is selected and the Enter key is pressed, or if the ESC key is pressed, the user is returned to where they were before F9 was pressed without affecting any existing field values. <F10> Save and Exit - Pressing F10 causes the following message to appear: Setup Confirmation Save Configuration changes and exit now? [Yes] [NO] If “Yes” is selected and the Enter key is pressed, all changes are saved and Setup is exited. If “No” is selected and the Enter key is pressed, or the ESC key is pressed, the user is returned to where they were before F10 was pressed without affecting any existing values. Table 7 describes the on-screen options you will see in BIOS Setup and what they mean. Table 7. On-Screen Options When you see this: What it means: On screen, an option is shown but you cannot select it or move to that field. You cannot change or configure the option in that menu screen. Either the option is auto-configured or auto-detected, or you must use a different Setup screen. On screen, the phrase Press Enter appears next to the option. Press <Enter> to display a submenu that is either a separate full screen menu or a popup menu with one or more choices. The following sections describe the menus and options available in BIOS Setup. MAXDATA PLATINUM 510 Server 25 Hardware Monitoring The mainboard has an integrated Winbond Heceta 836327HF chip that is responsible for hardware monitoring. Together, the Winbond Heceta chip and the Intel® LANDesk™ Client Manager (LDCM) 6 software provide basic server hardware monitoring that alerts a system administrator if a hardware problem occurs. The LDCM software is for use with Windows® 2000 Server and Windows® 2000 Advanced Server operating systems. Other operating systems supported by the mainboard, such as NetWare 6.0 or Red Hat Linux, will not be monitored with LDCM. Table 8 lists the monitored headers and sensors on the mainboard. Table 8. Monitored Headers and Sensors Sensor Type Item Description Voltage CPU1/2 Monitors processor voltage (one CPU power plane) 1.8 V Chipset VCC3 Monitors VCC3 VCC Monitors VCC +12 V Monitors +12 V 2.5 V Monitors 2.5 V (for DIMM) Vbat Battery pin voltage 5 VSB Monitors 5 VSB (5 V stand-by) CPU1_FAN Monitors primary processor fan speed CPU2_FAN Monitors secondary processor fan speed CHASSIS_FAN Monitors chassis fan speed through chassis fan header 3 only. (Total 4 chassis fans available) CPU1 Monitors primary processor temperature CPU2 Monitors secondary processor temperature CHASSIS Monitors chassis ambient temperature Fan Speed Temperature Serial ATA RAID BIOS Configuration NOTE To use the SATA RAID option, two SATA hard disk drives are required. Serial ATA on the mainboard is set to Base ATA mode by default. It must be changed to RAID mode before the RAID Configuration Utility can be used to configure Serial ATA RAID drives. Follow the instructions that come with this utility to change to RAID mode. 26 Configuration Software and Utilities RAID Configuration Utility The RAID Configuration Utility allows you to perform the following functions on Serial ATA drives: • Create a RAID set using two SATA RAID drives • Delete an existing RAID set • Rebuild an existing mirrored set • Resolve drive conflicts NOTE Before using the RAID Configuration Utility, set the BIOS to RAID mode. See Serial ATA RAID BIOS Configuration above. The RAID Configuration Utility can be entered only at boot-up time, while the system is in POST. To enter the utility, while the system is booting watch for the message: Press <Ctrl+S or F4> to enter RAID utility. While the message is displayed, press either the <F4> key or the <Ctrl> and <S> keys simultaneously to enter the RAID Configuration Utility. NOTE If the message does not display because the splash screen is displayed, use BIOS setup to enable the diagnostic boot screen. After entering the RAID Configuration Utility, the drives will be displayed individually, as shown in the bottom left block of the screen below. RAID Configuration Utility - Silicon Image Inc. Copyright © 2002 ����������������������������� ��� ��������������� ��������������� �������������������� ����������������� ��� ��� ��� ��� ������������������� ������������������� ������� ������� � ���� ������ ������� �� ����������� ������������� ������ ���� ��������� Creating the RAID Set 1. Use the up and down arrow keys to highlight Create RAID set. Press <Enter>. 2. Choose to create a Striped or a Mirrored RAID set. • If a Striped set (RAID 0) is required, follow the instructions in “Creating a Striped Set (RAID 0)”. • If a Mirrored set (RAID 1) is required, follow the instructions in “Creating a Mirrored Set (RAID 1)”. MAXDATA PLATINUM 510 Server 27 Creating a Striped Set (RAID 0) NOTE If the drives are not identical in size, the total size of the striped set will be twice the size of the smallest drive. Automatic Configuration The Auto Configuration option will choose a 16KB stripe size (also referred to as chunk size) and assign the first drive, the drive on the primary SATA channel, as “0”. It will assign the second drive, the drive on the secondary SATA channel, as “1”. If you want to use a different stripe size and/or change the drive assignments, choose the Manual Configuration option. To automatically configure a striped set, use the up and down arrow keys to highlight Auto Configuration. Press <Enter>. Manual Configuration To manually configure a striped set: 1. Use the up and down arrow keys to highlight Manual Configuration. Press <Enter>. 2. Highlight 0 PM or 1 SM as the first drive. Press <Enter>. 3. Press <Enter> again to confirm the second drive. 4. Highlight 4K, 8K, 16K, 32K, 64K, or 128K to choose the chunk size and press <Enter>. NOTE The chunk size affects how the SATA RAID controller sends and receives blocks of data for the hard disk drives. Users should perform their own testing to determine the optimal chunk size for the applications they intend to use. Generally, larger chunk sizes are better when managing larger data transfers with applications such as audio/video editing or graphics design. Smaller chunk sizes are better when dealing with office applications such as e-mail. 5. Confirm the striped set by pressing <Y> or select <N> to cancel the action. If you select <Y> the striped set is created. 6. After confirming the striped set, a summary similar to the following is displayed. RAID Configuration Utility - Silicon Image Inc. Copyright © 2002 ��������������� ����������������������������� ��� ��������������� �������������������� ����������������� ��� ��� ��� ��� ������������������� ������������������� ������� ������� ������������������������� ������� �� ��������������������������������� �� ��������������������������������� � ���� ������ ������� �� ����������� ������������� ������ ���� ��������� 7. Press <Ctrl-E> to exit the RAID Configuration Utility. 8. Press <Y> to confirm exit and proceed with operating system setup. 28 Configuration Software and Utilities Creating a Mirrored Set (RAID 1) NOTE If the drives are not identical in size, the total size of the mirrored set will be the size of the smallest drive. Automatic Configuration The Auto Configuration option will just initialize the mirrored set without copying any data. The mirrored set becomes ‘current’ immediately after. The mirrored set is established directing subsequent write accesses to both hard drives. If the data of a master drive needs to be copied to the other drive, choose the Manual Configuration option. To automatically configure a mirrored set, use the up and down arrow keys to highlight Auto Configuration. Press <Enter>. Manual Configuration To manually configure a mirrored set: 1. Use the up and down arrow keys to highlight Manual Configuration. Press <Enter>. 2. Highlight 0 PM or 1 SM to select the first drive (source). Press <Enter>. 3. Press <Enter> again to confirm the target drive. 4. Select the appropriate Disk Copy choice and then press <Enter>: • If the source drive does not contain data, then select <No>. • If the source drive already has been partitioned and contains data, and the second drive has been added for redundancy, then select <Yes>. 5. If <Yes> was selected to enable Disk Copy, the data on the source drive will be copied to the target drive to ensure that the drives are identical. All subsequent data that is stored to the source drive will be mirrored to the target drive as well. Select the appropriate copy method and then press <Enter>: • <online copy> will copy the disk now. The amount of time required for the disk copy depends on the amount of data being copied. • <offline copy> will copy the disk in the background. 6. Confirm the mirrored set of drives by pressing <Y> at the prompt or select <N> to return to the beginning to create the set. 7. After confirming the mirrored set, a summary similar to the following is displayed: RAID Configuration Utility - Silicon Image Inc. Copyright © 2002 ��������������� ����������������������������� ��� ��������������� �������������������� ����������������� ��� ��� ��� ��� ������������������� ������������������� ������������������������� �� ������������������� �� ������������������� ������� ������� ������� ������� ������� � ���� ������ ������� �� ����������� ������������� ������ ���� ��������� 8. Press <Ctrl-E> to exit the RAID Configuration Utility. 9. Press <Y> to confirm exit and proceed with operating system setup. MAXDATA PLATINUM 510 Server 29 Deleting the RAID Set CAUTION If you are using a striped set, all data will be lost when you delete the RAID set. If you are using a mirrored set, two separate copies of the data will exist, one copy on each drive. To delete a RAID set, do the following: 1. Use the up and down arrow keys to highlight Delete RAID set. Press <Enter>. 2. When Set0 appears, press <Enter>. 3. Confirm the deletion of the RAID by pressing <Y>. Rebuilding the Mirrored Set If a drive is replaced, the mirrored set that the failed drive was a part of will need to be rebuilt. 1. Use the up and down arrow keys to highlight Rebuild Mirrored set. Press <Enter>. 2. Select the appropriate build option and press <Enter>: • <online rebuild> will copy the disk now, which may take some time • <offline rebuild> will copy the disk in the background 3. Confirm the mirrored set rebuild by pressing <Y>. Resolving Conflicts NOTE Resolving conflicts applies only to a mirrored set configuration. If a replacement drive has been part of a RAID array in another system, it may have conflicting drive connection information (Primary or Secondary Master/Slave) that can prevent the RAID set from being rebuilt or created. To prevent problems, the old drive connection information needs to be overwritten with the new connection information as follows: Use the up and down arrow keys to highlight Resolve Conflicts. Press <Enter>. The correct drive information is written to the replacement drive. 30 Configuration Software and Utilities 4 Server Board Installations and Upgrades Safety Cautions CAUTIONs System power on/off: The power button DOES NOT turn off the system AC power. To remove power from system, you must unplug the AC power cord from the wall outlet. Make sure the AC power cord is unplugged before you open the chassis, add, or remove any components. Hazardous conditions, devices & cables: Hazardous electrical conditions may be present on power, telephone, and communication cables. Turn off the server and disconnect the power cord, telecommunications systems, networks, and modems attached to the server before opening it. Otherwise, personal injury or equipment damage can result. Electrostatic discharge (ESD) & ESD protection: ESD can damage disk drives, boards, and other parts. We recommend that you perform all procedures in this chapter only at an ESD workstation. If one is not available, provide some ESD protection by wearing an antistatic wrist strap attached to chassis ground any unpainted metal surface on your server when handling parts. ESD and handling boards: Always handle boards carefully. They can be extremely sensitive to ESD. Hold boards only by their edges. After removing a board from its protective wrapper or from the server, place the board component side up on a grounded, static free surface. Use a conductive foam pad if available but not the board wrapper. Do not slide board over any surface. Installing or removing jumpers: A jumper is a small plastic encased conductor that slips over two jumper pins. Some jumpers have a small tab on top that you can grip with your fingertips or with a pair of fine needle nosed pliers. If your jumpers do not have such a tab, take care when using needle nosed pliers to remove or install a jumper; grip the narrow sides of the jumper with the pliers, never the wide sides. Gripping the wide sides can damage the contacts inside the jumper, causing intermittent problems with the function controlled by that jumper. Take care to grip with, but not squeeze, the pliers or other tool you use to remove a jumper, or you may bend or break the stake pins on the board. Safety and Regulatory Compliance Intended uses: This product was evaluated for use in servers that will be installed in offices, computer rooms, and similar locations. Other uses require further evaluation. EMC testing: Before computer integration, make sure that the chassis, power supply, and other modules have passed EMC testing using a server board with a microprocessor from the same family (or higher) and operating at the same (or higher) speed as the microprocessor used on this server board. Server board diagram label provided: Place the label inside the chassis in an easy-to-see location, preferably oriented similarly to the server board. MAXDATA PLATINUM 510 Server 31 Replacing the Backup Battery The lithium battery on the server board powers the RTC for up to 10 years in the absence of power. When the battery starts to weaken, it loses voltage, and the server settings stored in CMOS RAM in the RTC (for example, the date and time) may be wrong. Contact your customer service representative or dealer for a list of approved devices. WARNING Danger of explosion if battery is incorrectly replaced. Replace only with the same or equivalent type recommended by the equipment manufacturer. Discard used batteries according to manufacturer’s instructions. 1. Observe the safety and ESD precautions at the beginning of this chapter. 2. Open the chassis. 3. Insert the tip of a small flat-bladed screwdriver, or an equivalent, under the tab in the plastic retainer. Gently push down on the screwdriver to lift the battery. 4. Remove the battery from its socket. Figure 5. Replacing the Backup Battery 5. Dispose of the battery according to local ordinance. 6. Remove the new lithium battery from its package and, being careful to observe the correct polarity, insert it in the battery socket. 7. Close the chassis. 8. Run BIOS Setup to restore the configuration settings to the RTC. 32 Server Board Installations and Upgrades 5 Solving Problems This chapter helps you identify and solve problems that might occur while you are using the system. Resetting the System To do this: Press: Soft boot reset from DOS, which clears system memory and reloads the operating system. <Ctrl+Alt+Del> Clear system memory, restart POST, and reload the operating system. Reset button Cold boot reset. Turn the system power off and then on. This clears system memory, restarts POST, reloads the operating system, and halts power to all peripherals. Power off/on Initial System Startup Problems that occur at initial system startup are usually caused by incorrect installation or configuration. Hardware failure is a less frequent cause. Checklist q Is AC power available at the wall outlet? q Are the power supplies plugged in? Check the AC cable on the back of the chassis and at the AC source. q Are all cables correctly connected and secured? q Are the processors fully seated in their sockets on the server board? q Are all standoffs in the proper location and not touching any through hole components, causing a potential short? q Are all add-in PCI boards fully seated in their slots on the server board? q Are all jumper settings on the server board correct? q Are all jumper and switch settings on add-in boards and peripheral devices correct? To check these settings, refer to the manufacturer’s documentation that comes with them. If applicable, ensure that there are no conflicts – for example, two add-in boards sharing the same interrupt. q Are all peripheral devices installed correctly? q If the system has a hard disk drive, is it properly formatted or configured? q Are all device drivers properly installed? q Are the configuration settings made in Setup correct? q Is the operating system properly loaded? Refer to the operating system documentation. q Did you press the system power on/off switch on the front panel to turn the server on (power on light should be lit)? q Is the system power cord properly connected to the system and plugged into a NEMA 5-15R outlet for 100-120 V~ or a NEMA 6-15R outlet for 200-240 V~? MAXDATA PLATINUM 510 Server 33 Running New Application Software Problems that occur when you run new application software are usually related to the software. Faulty equipment is much less likely, especially if other software runs correctly. Checklist q Does the system meet the minimum hardware requirements for the software? See the software documentation. q Is the software an authorized copy? Unauthorized copies often do not work. Obtain an authorized copy. q If you are running the software from a diskette, is it a good copy? q If you are running the software from a CD-ROM disk, is the disk scratched or dirty? q If you are running the software from a hard disk drive, is the software correctly installed? Were all necessary procedures followed and files installed? q Are the correct device drivers installed? q Is the software correctly configured for the system? q Are you using the software correctly? If the problems persist, contact the software vendor’s customer service representative. After the System Has Been Running Correctly Problems that occur after the system hardware and software have been running correctly often indicate equipment failure. Many situations that are easy to correct, however, can also cause such problems. Checklist q If you are running the software from a diskette, try a new copy of the software. q If you are running the software from a CD-ROM disk, try a different disk to see if the problem occurs on all disks. q If you are running the software from a hard disk drive, try running it from a diskette. If the software runs correctly, there may be a problem with the copy on the hard disk drive. Reinstall the software on the hard disk, and try running it again. Make sure all necessary files are installed. q If the problems are intermittent, there may be a loose cable, dirt in the keyboard (if keyboard input is incorrect), a marginal power supply, or other random component failures. q If you suspect that a transient voltage spike, power outage, or brownout might have occurred, reload the software and try running it again. (Symptoms of voltage spikes include a flickering video display, unexpected system reboots, and the system not responding to user commands.) NOTE Random errors in data files: If you are getting random errors in your data files, they may be getting corrupted by voltage spikes on your power line. If you are experiencing any of the above symptoms that might indicate voltage spikes on the power line, you may want to install a surge suppressor between the power outlet and the system power cord. 34 Solving Problems More Problem Solving Procedures This section provides a more detailed approach to identifying a problem and locating its source. CAUTION Turn off devices before disconnecting cables: Before disconnecting any peripheral cables from the system, turn off the system and any external peripheral devices. Failure to do so can cause permanent damage to the system and/or the peripheral devices. Preparing the System for Diagnostic Testing 1. Turn off the system and all external peripheral devices. Disconnect all of them from the system, except the keyboard and video monitor. 2. Make sure the system power cord is plugged into a properly grounded AC outlet. 3. Make sure your video display monitor and keyboard are correctly connected to the system. Turn on the video monitor. Set its brightness and contrast controls to at least two thirds of their maximum ranges (see the documentation supplied with your video display monitor). 4. If the operating system normally loads from the hard disk drive, make sure there is no diskette in drive A. Otherwise, place a diskette containing the operating system files in drive A. Verifying Proper Operation of Key System Lights As POST determines the system configuration, it tests for the presence of each mass storage device installed in the system. As each device is checked, its activity light should turn on briefly. Check for the following: q Does the diskette drive activity light turn on briefly? q If a second diskette drive is installed, does its activity light turn on briefly? Confirming Loading of the Operating System Once the system boots up, the operating system prompt appears on the screen. The prompt varies according to the operating system. Specific Problems and Corrective Actions This section provides possible solutions for these specific problems: • Power light does not light • No characters appear on screen • Characters on the screen appear distorted or incorrect • System cooling fans do not rotate • Diskette drive activity light does not light • Hard disk drive activity light does not light • CD-ROM drive activity light does not light • No connection to a server Try the solutions in the order given. If you cannot correct the problem, contact your service representative or authorized dealer for help. MAXDATA PLATINUM 510 Server 35 Power Light Does Not Light Check the following: q Is the system operating normally? If so, the power LED is probably defective or the cable from the front panel to the server board is loose. q Are there other problems with the system? If so, check the items listed under “System Cooling Fans Do Not Rotate Properly”. If all items are correct and problems persist, contact your service representative or authorized dealer for help. No Characters Appear on Screen Check the following: q Is the keyboard functioning? Check to see that the “Num Lock” light is functioning. q Is the video monitor plugged in and turned on? q Are the brightness and contrast controls on the video monitor properly adjusted? q Are the video monitor switch settings correct? q Is the video monitor signal cable properly installed? q Is the onboard video controller enabled? If you are using an add-in video controller board, do the following: 1. Verify that the video works using the onboard video controller. 2. Verify that the video controller board is fully seated in the server board connector. 3. Reboot the system for changes to take effect. 4. If there are still no characters on the screen after you reboot the system and POST emits a beep code, write down the beep code you hear. This information is useful for your service representative. 5. If you do not receive a beep code and characters do not appear, the video display monitor or video controller may have failed. Contact your service representative or authorized dealer for help. Characters Are Distorted or Incorrect Check the following: q Are the brightness and contrast controls properly adjusted on the video monitor? See the manufacturer’s documentation. q Are the video monitor’s signal and power cables properly installed? If the problem persists, the video monitor may be faulty or it may be the incorrect type. Contact your service representative or authorized dealer for help. 36 Solving Problems System Cooling Fans Do Not Rotate Properly If the system cooling fans are not operating properly, system components could be damaged. Check the following: q Is AC power available at the wall outlet? q Is the system power cord properly connected to the system and the wall outlet? q Did you press the power button? q Is the power on light lit? q Have any of the fan motors stopped (use the server management subsystem to check the fan status)? q Are the fan power connectors properly connected to the server board? q Is the cable from the front panel board connected to the server board? q Are all standoffs in the proper location and not touching any through hole components, causing a potential short? q Are the power supply cables properly connected to the server board? q Are there any shorted wires caused by pinched-cables or power connector plugs forced into power connector sockets the wrong way? If the switches and connections are correct and AC power is available at the wall outlet, contact your service representative or authorized dealer for help. Diskette Drive Activity Light Does Not Light Check the following: q Are the diskette drive’s power and signal cables properly installed? q Are all relevant switches and jumpers on the diskette drive set correctly? q Is the diskette drive properly configured? q Is the diskette drive activity light always on? If so, the signal cable may be plugged in incorrectly. If you are using the onboard diskette controller, use the BIOS setup to make sure that “Onboard Floppy” is set to “Enabled”. If you are using an add-in diskette controller, make sure that “Onboard Floppy” is set to “Disabled”. If the problem persists, there may be a problem with the diskette drive, server board, or drive signal cable. Contact your service representative or authorized dealer for help. Hard Disk Drive Activity Light Does Not Light The hard disk drive activity light is not connected to the mainboard front panel. CD-ROM Drive Activity Light Does Not Light Check the following: q Are the CD-ROM drive’s power and signal cables properly installed? q Are all relevant switches and jumpers on the drive set correctly? q Is the drive properly configured? MAXDATA PLATINUM 510 Server 37 Cannot Connect to a Server q Make sure you are using the drivers that are shipped on the system Configuration Software CD for the onboard network controller. q Make sure the driver is loaded and the protocols are bound. q Make sure the network cable is securely attached to the connector at the system back panel. If the cable is attached but the problem persists, try a different cable. q Make sure the hub port is configured for the same duplex mode as the network controller. q Check with your LAN administrator about the correct networking software that needs to be installed. q If you are directly connecting two servers (no hub), you will need a crossover cable (see your hub documentation for more information on crossover cables). q Check the network controller LEDs that are visible through an opening at the system back panel. Problems with Network Diagnostics pass but the connection fails. q Make sure the network cable is securely attached. q Make sure you specify the correct frame type in your NET.CFG file. The Activity LED does not light. Check the power to the hub or switch to which the system is connected. The controller stopped working when an add-in adapter was installed. q Make sure the cable is connected to the port from the onboard network controller. q Make sure your PCI BIOS is current. Try the “PCI Installation Tips” below. q Make sure the other adapter supports shared interrupts. Also, make sure your operating system supports shared interrupts. q Try reseating the add-in adapter. The add-in adapter stopped working without apparent cause. q Try reseating the adapter first; then try a different slot if necessary. q The network driver files may be corrupt or deleted. Delete and then reinstall the drivers. q Run the diagnostics. PCI Installation Tips Some common PCI tips are listed here. q Certain drivers may require interrupts that are not shared with other PCI drivers. For certain drivers, it may be necessary to alter settings so that interrupts are not shared. 38 Solving Problems Problems with Application Software If you have problems with application software, do the following: q Verify that the software is properly configured for the system. See the software installation and operation documentation for instructions on setting up and using the software. q Try a different copy of the software to see if the problem is with the copy you are using. q Make sure all cables are installed correctly. q Verify that the server board jumpers are set correctly. See Chapter 5. q If other software runs correctly on the system, contact your vendor about the failing software. If the problem persists, contact the software vendor’s customer service representative for help. Bootable CD-ROM Is Not Detected Check the following: q Is the BIOS configured to allow the CD-ROM to be the first bootable device? Recovering the BIOS In the rare event that the BIOS becomes damaged a recovery process needs to be followed to return the system to service. Two methods are available to recover the BIOS. NOTE BIOS recovery is the mode of last resort, used only when the main system BIOS will not come up. Recovering the BIOS with the Crisis Recovery Diskette Automatically Recovering the BIOS If a ROM checksum error occurs during POST, the system will automatically enter BIOS recovery mode. This is indicated by system beeping with one long beep followed by two short beeps. When you hear this beep pattern, use the following steps to initiate an automatic recovery: 1. Insert the Crisis Recovery Diskette into the A: diskette drive. 2. A blue screen will be displayed and the recovery process will automatically run. The system will continue to beep throughout the recovery process. The recovery process is complete when the beeping stops. 3. Remove the diskette and power down the system. 4. Power the system up to restart it and confirm that the recovery was successful. MAXDATA PLATINUM 510 Server 39 Manually Recovering the BIOS A BIOS recovery can also be manually initiated. This option would be used only when the BIOS is corrupt, but the ROM checksum error does not occur during POST. To manually initiate a BIOS recovery, use the following steps: 1. Power down and uplug the system from the AC power source. 2. Move the recovery jumper at J4J1 from the storage position at pins 9 and 10 to cover pins 3 and 4. See the figure below. J4A1 � � �� � Figure 6. BIOS Recovery Jumper 3. Insert the Crisis Recovery Diskette into the A: diskette drive. 4. Plug the system into the AC power source and power it on. 5. A blue screen will be displayed and the recovery process will automatically run. The system will continue to beep throughout the recovery process. The recovery process is complete when the beeping stops. 6. Remove the diskette. 7. Power down and unplug the system from the AC power source. 8. Move the BIOS recovery jumper at J4J1 back to the original position, covering storage pins 9 and 10. 9. Plug the system into the AC power source and power it up to confirm that the recovery was successful. 40 Solving Problems Clearing the Password with the Password Jumper If the user or administrator password(s) is lost or forgotten, moving the password clear jumper into the “clear” position clears both passwords. The password clear jumper must be restored to its original position before a new password(s) can be set. The password clear jumper is located on jumper block J4J1 on the mainboard. 1. Power down the system and disconnect the AC power. 2. Open the server chassis. 3. Move the jumper from the storage location at pins 9 and 10 to the Clear Password position, covering pins 1 and 2 as indicated in the following diagram. J4A1 � � �� � Figure 7. Password Recovery Jumper 4. Reconnect the AC power, power up the system. 5. Power down the system and disconnect the AC power. 6. Return the Password Clear jumper to the storage position, covering pins 9 and 10. 7. Close the server chassis. MAXDATA PLATINUM 510 Server 41 42 Solving Problems 6 Technical Reference Configuration Jumpers A 10-pin block, located between the secondary IDE connector and DIMM 2B, provides four 2-pin jumper blocks that are used for system recovery and update options. During normal operation, jumpers are stored on four pins: pins 7 and 8, and pins 9 and 10. The figure below shows the jumper pins. Their functions are listed in the table below the figure. J4A1 � � �� � Figure 8. Configuration Jumper Location Table 9. Configuration Jumper [J4A1] Jumper Name Pins What happens at system reset… Password Clear 1-2 If these pins are jumpered, administrator and user passwords will be cleared on the next reset. These pins should not be jumpered for normal operation. BIOS Recovery 3-4 If these pins are jumpered, the system will attempt to recover the BIOS by loading the BIOS code into the flash device from a floppy disk. This jumper is typically used when the BIOS has become corrupted. These pins should not be jumpered for normal operation. CMOS clear 5-6 If these pins are jumpered, the CMOS settings will be cleared on the next reset. These pins should not be jumpered for normal operation. BIOS Booblock Write Protect 7-8 These pins, when jumpered, protect the BIOS Boot Block code. If it becomes necessary to update the BIOS Boot Block, this jumper should be removed during the update process. These pins should be jumpered for normal operation. NOTE: This jumper should remain in place for normal BIOS operational code updates. Default 9-10 These pins are for normal operation. NOTE The jumper should remain on pins 7 and 8 at all times until you are instructed to perform a BIOS Boot Block update. At this time, remove the jumper, run the BIOS update, and then replace the jumper when completed. MAXDATA PLATINUM 510 Server 43 Front Panel Header The front panel header provides connection to the front panel for power switching and LED operation. ����� � � � � � � ������� Figure 9. Front Panel Header Connection Location Table 10. Front Panel Header Connection Descriptions 44 Location Pins Name Description A 1&5 Power LED Pressing the sleep button immediately puts the server board into the sleep mode B 7&9 HDD LED Pressing the reset button restarts the boot process C 11 & 13 Power Switch Pressing the power switch removes all by standby power from the board D 15 & 17 NMI Switch Causes an NMI (non-maskable interrupt) occur E 12 & 14 NIC 1 LED LED shows network interface controller activity F 22 & 24 NIC 2 LED LED shows network interface controller activity Technical Reference 7 Regulatory and Integration Information Product Regulatory Compliance Product Safety Compliance The mainboard complies with the following safety requirements: • EN 60 950 (European Union) • IEC60 950 (International) • CE – Low Voltage Directive (73/23/EEC) (European Union) Product EMC Compliance The mainboard has been has been tested and verified to comply with the following electromagnetic compatibility (EMC) regulations when installed a compatible maxdata host system. • FCC (Class A Verification) – Radiated & Conducted Emissions (USA) • CISPR 22, 3rd Edition (Class A) – Radiated & Conducted Emissions (International) • EN55022 (Class A) – Radiated & Conducted Emissions (European Union) • EN55024 (Immunity) (European Union) • CE – EMC Directive (89/336/EEC) (European Union) Product Regulatory Compliance Markings This product is marked with the following Product Certification Markings: Table 11. Product Certification Markings UL Recognition Mark CE Mark MAXDATA PLATINUM 510 Server 45 Electromagnetic Compatibility Notices FCC (USA) This device complies with Part 15 of the FCC Rules. Operation is subject to the following two conditions: (1) this device may not cause harmful interference, and (2) this device must accept any interference received, including interference that may cause undesired operation. This equipment has been tested and found to comply with the limits for a Class A digital device, pursuant to Part 15 of the FCC Rules. These limits are designed to provide reasonable protection against harmful interference in a residential installation. This equipment generates, uses, and can radiate radio frequency energy and, if not installed and used in accordance with the instructions, may cause harmful interference to radio communications. However, there is no guarantee that interference will not occur in a particular installation. If this equipment does cause harmful interference to radio or television reception, which can be determined by turning the equipment off and on, the user is encouraged to try to correct the interference by one or more of the following measures: • Reorient or relocate the receiving antenna. • Increase the separation between the equipment and the receiver. • Connect the equipment to an outlet on a circuit other than the one to which the receiver is connected. • Consult the dealer or an experienced radio/TV technician for help. Any changes or modifications not expressly approved by the grantee of this device could void the user’s authority to operate the equipment. The customer is responsible for ensuring compliance of the modified product. Only peripherals (computer input/output devices, terminals, printers, etc.) that comply with FCC Class A or B limits may be attached to this computer product. Operation with noncompliant peripherals is likely to result in interference to radio and TV reception. All cables used to connect to peripherals must be shielded and grounded. Operation with cables, connected to peripherals, that are not shielded and grounded may result in interference to radio and TV reception. Europe (CE Declaration of Conformity) This product has been tested in accordance too, and complies with the Low Voltage Directive (73/23/ EEC) and EMC Directive (89/336/EEC). The product has been marked with the CE Mark to illustrate its compliance. 46 Regulatory and Integration Information