1
December 2011
Table of Contents
Chapter 1: SAFE USE GUIDELINES .......................................................................... 5
1.1.
Usage Instructions ...................................................................................... 5
1.2.
Important Hearing Safety Information ........................................................... 6
Chapter 2: Sansa® Fuze™+ Overview .................................................................... 8
2.1.
Features .................................................................................................... 8
2.2.
Minimum System Requirements .................................................................... 9
2.3.
What Comes in the Box ................................................................................ 9
2.4.
Sansa Fuze+ MP3 Player at-a-Glance ........................................................... 10
2.5.
Device Inputs & Outputs Overview ............................................................... 10
2.6.
Product Capacities & Playback ..................................................................... 11
Chapter 3: Basic Usage......................................................................................... 13
3.1.
Charging the Device/Connecting to the Computer .......................................... 13
3.1.1.
Connecting to a Computer ................................................................... 13
3.1.2.
Removing the player from your computer .............................................. 15
3.2.
Power Switch ........................................................................................... 16
3.3.
Navigation Overview ................................................................................. 16
3.4.
Eight Core Functions Overview .................................................................... 18
3.5.
Lock Function ........................................................................................... 21
3.6.
Updating the Firmware/Sansa Media Converter ............................................. 21
3.6.1. Formatting the Player ............................................................................. 24
Chapter 4: Loading Content .................................................................................. 25
4.1.
Loading Audio Files (Music, Podcasts, Audiobooks).........................................
4.1.1.
MSC Mode: Drag and Drop ..................................................................
4.1.2.
Mac®: MSC Mode: Drag and Drop ........................................................
4.1.3.
Windows® MTP Mode: Windows Media Player™ ......................................
25
26
26
27
4.2.
Loading Photos and Videos ......................................................................... 30
4.3.
Deleting Content....................................................................................... 32
Chapter 5: Playing Your Media ............................................................................. 33
5.1.
Playing Music ...........................................................................................
5.1.1.
Recently Played Mode .........................................................................
5.1.2.
Shuffle (Play) All Mode ….. ..................................................................
5.1.3.
Options Menu – Music .........................................................................
5.1.4.
Music Content Groupings .....................................................................
5.1.5.
Music Go List .....................................................................................
5.1.6.
Playing Music from a Preloaded microSD™/microSDHC™..........................
2
33
34
34
35
35
36
37
5.2.
Playing slotRadio™ cards ........................................................................... 37
Playing Podcasts & Audiobooks .......................................................................... 39
5.3. ..................................................................................................................
5.3.1.
Instructions to Play a Podcast ..............................................................
5.3.2.
Modifying Podcast Play Mode................................................................
5.3.3. Playing Audiobooks.................................................................................
39
39
39
40
5.4.
Watching Videos ....................................................................................... 40
5.4.1
Video Playback Instructions ................................................................. 40
5.4.2
Video Play Options ............................................................................. 41
5.5.
Viewing Photos & Slideshows ...................................................................... 41
5.5.1
Photo Browsing Instructions ................................................................. 41
5.5.2
Photo Viewing Options ........................................................................ 41
Chapter 6: FM Radio Listening .............................................................................. 44
6.1.
Listening to FM Radio ................................................................................ 44
6.2.
Programming FM Presets ........................................................................... 45
6.3.
Radio Options/Recording ............................................................................ 45
Chapter 7: Voice Recording .................................................................................. 47
7.1
Voice Recording ........................................................................................ 47
7.1.1
Recording a File..................................................................................... 47
7.1.2
Playing Back a Recording ........................................................................ 47
Chapter 8: Settings .............................................................................................. 49
8.1.
Settings .................................................................................................. 49
8.2
Basic Settings .......................................................................................... 49
8.2.1
Background Settings .............................................................................. 50
8.2.2
Backlight .............................................................................................. 50
8.2.3
Brightness ............................................................................................ 50
8.2.4
Customize ............................................................................................ 50
8.2.5
Equalizer .............................................................................................. 50
8.2.6
Info ..................................................................................................... 50
8.2.7
Power Saver ......................................................................................... 50
8.2.8
Sleep ................................................................................................... 51
8.2.9
USB Mode ............................................................................................ 51
8.2.10
Replay Gain .......................................................................................... 51
8.2.11
Volume ................................................................................................ 51
8.2.12
Language ............................................................................................. 52
8.2.13
Date .................................................................................................... 52
8.2.14
Time .................................................................................................... 52
3
8.2.15
Reset Factory Settings ........................................................................... 52
8.2.16
Format ................................................................................................. 52
Chapter 9: Tips & Troubleshooting ....................................................................... 53
9.1 Tips & Troubleshooting ................................................................................... 53
Chapter 10: Learn More, Service & Warranty Information.................................... 55
10.1.
Getting Technical Support ....................................................................... 55
10.2.
SanDisk Limited Warranty....................................................................... 55
10.3.
End User License Agreement ................................................................... 56
10.4.
FCC Regulation...................................................................................... 58
© 2010 SanDisk Corporation. All rights reserved. SanDisk, the SanDisk logo and Sansa are
trademarks of SanDisk Corporation. Sansa Fuze, slotRadio and Your Music Your Way are trademarks
of SanDisk Corporation. microSD and micrSDHC marks and logo are trademarks of SD-3C, LLC. Flip is
a registered trademark of Cisco Systems. Other brand names mentioned herein are for identification
purposes only and may be the trademarks of their respective holder(s).
4
CHAPTER 1: Safe Use Guidelines
This chapter provides important device usage suggestions, general
care instructions, and hearing guidelines for safe enjoyment of your
Sansa® Fuze™+ MP3 player.
Chapter 1: SAFE USE GUIDELINES
1.1. Usage Instructions
PLEASE READ THESE SAFETY INSTRUCTIONS CAREFULLY BEFORE USING YOUR
SANSA MP3 PLAYER!
1. Read this entire manual to ensure proper usage.
2. Keep this User Manual for future reference.
3. Do not use headphones/earphones while driving, cycling, or operating any motorized
vehicle. This may create a traffic hazard and may be illegal in some areas. It can also be
dangerous to play your music with headphones/earphones at high volume while walking,
or engaged in other activities. You should exercise extreme caution and discontinue use
in potentially hazardous situations.
4. Avoid using headphones/earphones at high volume. Hearing experts advise
against continuous loud and extended music play. Keep the volume at a
moderate level, so that you are better able to hear outside sound and to be
considerate of the people around you.
5. Keep your player away from sinks, drinks, bathtubs, showers, rain, and other sources of
moisture. Moisture can cause electric shocks with any electronic device.
6. Follow these tips to keep your player working well for a long time:
•
•
•
Clean your player with a soft lint-free cloth.
•
Do not disassemble, crush, short-circuit or incinerate the battery as it may cause
fire, injury, burns or other hazards.
Do not allow young children to use your player unsupervised.
Never force any connector into the ports of your player or your computer. Make
sure your connectors are the identical shape and size before you connect.
Used Device Disposal Instructions
Do not dispose of this device with unsorted waste. Improper disposal may be harmful to the
environment and human health. Please refer to your local waste authority for information
on the return and collection systems in your area for used electronics goods.
5
For Home and Personal Use Only!
This product is intended to be used for recording and playback for your home and personal
enjoyment. Copying or commercial use of copyrighted material without permission of the
copyright owner may be prohibited by law. Use of your MP3 player, in compliance with all
copyright and applicable intellectual property laws, remains the responsibility of the user of
the product.
1.2. Important Hearing Safety Information
PLEASE READ THESE HEARING SAFETY GUIDELINES BEFORE USING
YOUR SANSA PLAYER!
Congratulations on the purchase of your Sansa Fuze+ MP3 player!
Your MP3 player is equipped with a variety of features. To help you maximize your
listening pleasure, SanDisk would like to advise you that it is important to use
your headphones with your MP3 player at a safe hearing level.
•
•
•
•
•
•
•
•
•
Exposure or repeated exposure for an extended period of time to music and other
sounds that are too loud can cause damage to your hearing resulting in temporary or
even permanent “noise induced hearing loss”. [According to the European
Commission / Studies show that] safe use depends on exposure time and volume
levels. At 80 dB(A), exposure should be limited to 40 hours/week. At 89 dB(A)
exposure should not exceed 5 hours/week.
The default setting of the maximum volume of your MP3 player is set at 80 dB(A),
based on use of the original headphones that come with this product. If the original
set of headphones is replaced with another type, this may cause higher unsafe sound
levels.
For certain uses of this MP3 player, such as with certain replacement headphones
and for use in relation with other devices, it is possible to override the standard
device setting of 80 db(A). SanDisk strongly advises you to always make sure that
the actual volume is at a safe level.
Symptoms of hearing loss increase gradually with prolonged exposure at high levels
of loudness.
Initially, you may not even be aware of the loss unless detected with a hearing test.
Your hearing may adapt to higher volumes of sound. In order to prevent any harmful
impact to your hearing, you must control the sound from your headphones and set
the Sansa MP3 player’s volume to a low setting where you can hear it clearly and
comfortably.
Listen to your Sansa MP3 player at such a level that you can still hear conversation
and other people in your environment without shouting when you attempt to
converse.
It can also be dangerous to play your music with headphones/earphones at high
volume while walking or engaged in other activities. You should exercise extreme
caution and discontinue use in potentially hazardous situations.
Do not use headphones or earphones while driving, cycling, or operating any
motorized vehicle. This may create a traffic hazard and may be illegal some areas.
6
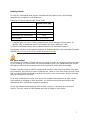
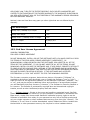
Hearing levels
To help you understand what may be considered a safe hearing level, the following
examples are included for your reference.
Examples of Typical Approximate Sound Level:
Sound Level (dB)
Refrigerator humming
40
Normal conversation
60
City traffic
80
Motorcycles and lawnmowers
Rock concerts
90 #
110-120 #
* A decibel (dB) is a unit of relative measurement of the strength of sound wave. In
decibels (dB), a measured signal level doubles with every additional 3 dB.
# These sound decibel levels are considered harmful with extended exposure.
Information courtesy of the National Institute of Deafness & Other Communication Disorders
(NIDCD) http://www.nidcd.nih.gov/health/hearing/noise.asp.
For your safety!
Your hearing may adapt to higher volumes of sound. In order to prevent any harmful impact
to your hearing, you must control the sound emanating from your headphones and set the
MP3 player volume to a low setting where you can hear it clearly and comfortably.
Studies, including one from NIDCD indicate that sounds of less than 80 decibels, even after
long exposure, are unlikely to cause a hearing loss. Listen to your MP3 player at such a level
that you can still hear conversation and other people in your environment without shouting
when you attempt to converse.
It can also be dangerous to play your music with headphones/earphones at high volume
while walking or engaged in other activities. You should exercise extreme caution and
discontinue use in potentially hazardous situations.
Do not use headphones/earphones while driving, cycling, or operating any motorized
vehicle. This may create a traffic hazard and may be illegal in some areas.
7
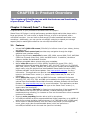
CHAPTER12: Product Overview
CHAPTER
This chapter will familiarize you with the features and functionality
of your Sansa® Fuze™+ player.
Chapter 2: Sansa® Fuze™+ Overview
Congratulations on your purchase of a Sansa Fuze+ MP3 player!
Sansa Fuze+ MP3 player is a high performance portable digital audio/video player with a
large and vibrant 2.4” color screen, a digital FM tuner, a built-in microphone, and a
microSDHC card slot. You can listen to and record FM radio broadcasts and make voice
recordings. Additionally, you can use the microSDHC card slot to expand your storage
capacity and/or read digital media files via microSD/microSDHC cards.
2.1. Features
•
•
•
•
•
•
•
•
•
•
Vibrant 2.4” QVGA LCD screen (320x240) for brilliant views of your videos, photos,
and album art.
Capacitive touch control pad provides easy navigation through the bright
graphical user interface menus.
Supports the following music file formats: MP3, WMA, secure WMA, FLAC, AAC/M4A
(DRM-free iTunes® music files), WAV, and OGG-Vorbis. In addition, the device
supports Audible and audiobook formats.
Displays embedded album art and other song metadata.
Native video file support of H.264, MPEG4, and WMV file types (320 x 240).
Additional file formats including 3gp/3gpp2, ASF, AVI, DAT, DivX(ver 6.0), DVR-MS,
MOV, MP4, MPEG 1, MPEG 2, MJPEG, FLV, and Flip® file formats can be added to the
player easily using the optional free downloadable Sansa Media Converter (SMC)
software available via the Sansa Updater. See www.sandisk.com/smc for more
information. This application can also be used to optimize viewing of native file
types on the Sansa Fuze+ screen (i.e., aspect ratios, frame rate, bit rate, and
resolution).
Native photo file support of JPG and BMP file formats. Additional file formats
including TIFF, GIF, PCX, TGA, and PNG can be added to the player easily using the
optional free downloadable Sansa Media Converter software available via the Sansa
Updater. See www.sandisk.com/smc for more information. This application can also
be used to optimize viewing of native file type on the Sansa Fuze+ screen (i.e.,
aspect ratios and resolution).
Includes an integrated FM radio for listening to and recording of live-broadcast FM
radio stations with up to 40 pre-set channels. Enables pausing of FM radio
broadcasts during recording, for instance to filter out commercials or other unwanted
portions of a broadcast.
Supports voice recording function with a built-in microphone.
microSD/microSDHC card slot supports additional higher capacities, up to 40GB* of
total device content including internal memory (e.g., 8GB player with a 32GB card).
Allows users to read data directly from the card on the player (in the supported
music, photo, and video formats detailed above) which are stored on a
microSD/microSDHC card in the card slot (card not included).
8
•
Rechargeable battery lasts up to 24 hours of audio playback or 5 hours of video
playback**.
* 1 gigabyte (GB) = 1 billion bytes. Some capacity not available for data storage. The device holds
approximately 10,000 songs at its maximum capacity.
** Based on continuous audio playback at 128 kbps MP3; video playback at QVGA 512kbps MPEG4; battery
life and performance may vary depending upon usage and settings; battery not replaceable.
2.2. Minimum System Requirements
•
•
•
•
•
Windows® XP SP2, Mac® OS X10.3, or Linux
Windows Media® Player 10 (for playlist creation and synchronizing library and
device)
Internet access (for downloading content, receiving firmware updates or the optional
Sansa Media Converter software from SanDisk)
CD-ROM drive (for installation of bundled applications; Americas only)
USB port (for battery charging and file transfers; high-speed transfers require a USB
2.0 port)
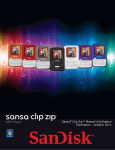
2.3. What Comes in the Box
•
•
•
•
•
•
Sansa Fuze+ MP3 player
micro-USB charge/transfer cable for connecting to a computer
Earphones
Quick Start Guide
eMusic® free trial offer insert (Americas only)
Rhapsody® free trial offer insert, including software CD (Americas only)
9
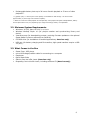
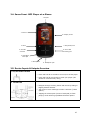
2.4. Sansa Fuze+ MP3 Player at-a-Glance
1. On/Off
7. Volume
10. Display screen
4. Back
3. Play/Pause/Lock
5. microSD
card slot
6. micro-USB
connecting port
2. Navigation
touch pad
9. Microphone
8. Headphone jack
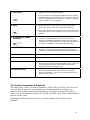
2.5. Device Inputs & Outputs Overview
1. On/Off Power Button
•
Press and hold for 2 seconds to turn on/turn off the player.
•
Press and hold for 20 seconds to reset your player (this
should be used extremely rarely).
•
Navigate through screens, photos and menus by sliding or
tapping desired direction.
Tap center of cross markings to make a selection (“select
option”).
2. Touch Pad
•
•
Tapping the select option (center of touchpad) at “Now
playing” mode will bring up additional feature options.
10
3. Play/Pause
•
Toggle between Play and Pause/Stop.
•
To lock the device to temporarily disable the input buttons,
hold down the play/pause button
for 3 seconds. Locking
the device disables all button actions. To unlock, slide your
finger vertically on the touch pad.
•
Tap Back button to return to a previous screen level. The
back button works in the same way that a back button
works on a web browser such as Internet Explorer®.
•
Press and hold down the Back button for 2 seconds to return
to the main menu level no matter where you are in the user
interface.
5. microSD/microSDHC
Card Slot
•
Located on the left side of the device, this slot is for
inserting a microSD/microSDHC memory card (to expand
capacity, or to read media files you might have stored on it)
or listen to a slotRadio™ card (both sold separately).
6. Micro-USB Connection
•
Connect the included micro-USB cable here to your
computer. This cable both charges the device and also
enables data transfer between the computer and the player.
7. Volume Control
•
Pressing up/down increases or decreases the volume level.
8. Headphone Jack
•
Insert included headphones here.
9. Microphone
•
The voice recording microphone is located at the base of
the player just to the left of the headphone jack. There is a
very tiny gap between top and bottom lids where the
microphone receives its audio input.
10. Display Screen
•
Displays the status of the MP3 player, including user
interface functional section, play mode (e.g., shuffle),
power level (battery), time, and view guide (dots on the
bottom of the screen).
4. Back
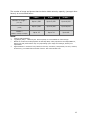
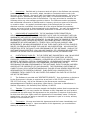
2.6. Product Capacities & Playback
The Sansa Fuze+ comes in 3 different capacities: 4 GB, 8 GB, and 16 GB. The Fuze+ also
has a microSDHC card slot* for expanding your storage possibilities, enabling up to
approximately 40 GB of total data storage capacity (including the storage built into the
device, e.g., 8 GB capacity can take up to a 32 GB microSDHC card) which is approximately
equal to 10,000 songs!
Rechargeable battery lasts up to 24 hours for audio playback and 5 hours of video
playback†.
11
The number of songs and photos that the device holds varies by capacity, (amongst other
factors) as summarized below:
Number of Songs††
(3.5 min)
Number of Photos††
(5 MP)
Videos††
(MPEG-4 video@ 512 Kbps)
4 GB**
8 GB**
16 GB**
Up to 1,000
Up to 2,000
Up to 4,000
Up to 2,400
Up to 4,800
Up to 9,600
Up to 12
Up to 24
Up to 48
Notes:
*
**
†
††
Card(s) sold separately.
1 gigabyte (GB) = 1 billion bytes. Some capacity is not available for data storage.
Based on continuous audio playback at 128 kbps MP3; video playback at 512 kbps/MPEG-4,
battery life and performance may vary depending upon usage and settings; battery not
replaceable.
Approximations: results will vary based on file size, resolution, compression, bit rate, content,
host device, pre-loaded files and other factors. See www.sandisk.com.
12
CHAPTER 3: Basic Usage
This chapter provides you the basic usage instructions for your
Sansa® Fuze™+ MP3 player.
Chapter 3: Basic Usage
Quick Tips:
1. Ensure your player is fully charged before operating for the first time.
2. Updating the player’s firmware is highly recommended. The Sansa Updater will
inform you if the firmware is in need of updating via auto-detention of the player,
but you can also check manually. Visit www.sandisk.com/smc to download the Sansa
Updater.
This chapter provides more information on charging the device, updating the firmware,
and much, much more!
3.1. Charging the Device/Connecting to the Computer
The Sansa Fuze+ MP3 player connects to a computer via an included micro-USB cable,
which is used both for charging the device and also for transferring data back and forth,
such as for loading music, videos, or photo files.
Your player comes with an internal rechargeable battery. The battery is not replaceable.
Before using the player for the very first time, fully charge the battery. To charge the
battery, you need to connect the device to a computer using the included USB cable.
3.1.1. Connecting to a Computer
1. Connect the smaller end of the micro-USB cable to the Sansa Fuze+ MP3 player.
2. Connect the larger end of the micro-USB cable into an available USB port on the
computer (usually found on the side or back of the computer).
3. The computer must be turned on for the USB port to be able to charge the battery.
When connected, the player will show the word “connected” and will display a USB icon.
In addition, the battery icon charging indicator will appear and the battery level indicator
will blink while charging. Note that you will not be able to play music, watch videos, or
view photos while the player is connected to the computer.
4. On a computer running Windows®, your player will appear under My Computer as a
Portable Media Player
5. To stop recharging, simply disconnect the USB cable.
13
If you have a PC running Windows®, and the player is not recognized by your computer,
make sure you have Windows Media™ Player version 10 or higher installed. You can also
change the USB Mode to MSC (“Mass Storage Class”) mode by going to “Settings”,
selecting “USB Mode”, and then selecting “MSC”. See Settings in Chapter 8 for more details.
For a Mac® operating system computer, ensure that USB Mode is set to Auto Detect or
MSC mode.
Auto Detect or MTP (“Media Transfer Protocol”) mode
MSC (“Mass Storage Class”) mode
Battery Level Indicator
The battery level indicator is located at the top-left corner of the screen.
Battery Full
Battery Low
14
You can charge your player using the USB port on your
computer using the included micro-USB cable. You can
also use any micro-USB charger rated to 5V DC output (not
included). When connected properly to the computer for
charging or transferring data, an icon which looks like USB
cable will appear on the screen of the device, with the word
“Connected”. If this icon does not appear in 3-5 seconds,
then the USB connection has not been made successfully.
Quick Tips:
1. If the device does not charge, ensure that your cable is fully inserted firmly into
both the device port and the USB port.
2. Some low-power USB ports may not provide enough power to charge the Sansa
Fuze+ MP3 player. If you are still having problems, use a different USB port.
3. The battery can also be charged using an AC-to-DC 5 Volt (or lower rated)
adapter (not included) or a 5 Volt car adapter (not included), which are available
at most consumer electronics stores. When charging using an AC-to-DC adaptor,
it will be possible to listen to the device while charging, unlike charging while
connected to the computer.
3.1.2. Removing the player from your computer
Windows® – Simply disconnect the micro-USB cable from the player after you have
finished charging, transferring, firmware upgrading, or synchronizing files.
Mac® – Eject the “removable disk” appearing on your screen by dragging the icon to the
Trash, and then disconnect the micro-USB cable.
Caution!
Do not disconnect the player while it’s transferring data. Disconnecting the player from the
computer while data are being transferred may cause a loss of data or possible damage to
the player.
15
3.2. Power Switch
The power switch is used to turn the player on or off as well as resetting it.
Power On/Power Off
Press and hold the Power button on the top of the player for approximately 2
seconds to power it on or turn it off.
Reset
To reset your player, press and hold the Power button for approximately 20
seconds. You should not have to reset the player except in the rare occurrence
when the player does not respond.
3.3. Navigation Overview
The Sansa Fuze+ MP3 player utilizes a unique graphical user interface which works in
conjunction with the capacitive touch pad interface. Instead of using a traditional “home”
screen, the device’s interface is organized in a way that can be thought of as either a film
strip or as a digital book shelf, with the various features organized in a horizontal manner as
shown below:
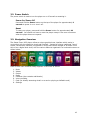
Each of the 8 basic features always appears in the order as shown:
1.
2.
3.
4.
5.
6.
7.
8.
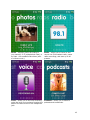
Music
Videos
Photos
Radio
Podcasts (also contains audiobooks)
Voice recording
Card (for directly accessing what’s on a card or playing a slotRadio card)
Settings
16
The user interface is navigated by swiping left-to-right to select
the feature of interest, or by swiping top-to-bottom within
features. The interface can also be navigated for the most part
by simply tapping on the end points of the markings on the
device, much like ends of a compass (East, West, North,
South). For example, tapping on the right side of the touch pad
will advance the screen from Music Æ Videos Æ Photos, and so
forth. Pressing and holding the touch pad compass points is
equivalent to multiple taps. Upon reaching the “ends of the
bookcase” (Music on the left, Settings on the right), the device
will show a bounce back, indicating that it isn’t possible to go
any further (there is no looping around). Thus we speak of the
device as having a “home level” instead of a home button, per
se, which consists of this level of 8 features.
At any time, the number of sub-menus can be determined by
counting the number of dots that appear on the bottom of the
screen. These can be thought of as a quick reference to the
number of “pages in the book” for that particular section of the
digital library. For example, on the main menu you can see that
there are 8 dots on the bottom of the screen, corresponding to
the 8 main features as detailed above, with the current mode
highlighted. Swiping or tapping the touch pad to navigate from
right to left will advance the currently highlighted dot, indicating
where you are at any time.
Similarly, within all of the 8 functions except for “Settings”, you
will find a view guide of dots at the bottom of the screen.
From the home level, you can quickly access any content showing on the screen by pressing
. Alternatively, to select files or functions within any of these 8
the play button
categories, tap or press the select option (center of touchpad) and the device will display
the sub-menus associated with that function.
Quick Tips:
1. When on the home level menu, swiping vertically will give a preview of the content
contained in that area. For example, the Music section will display the album art for
the 10 most recent songs played. Videos, photos, and podcasts will also display
the thumbnails for the 10 most recently played files in those categories.
2. No matter where you are in the user interface, pressing and holding the back
button
on the upper left corner of the touchpad area will return the device to the
home level.
17
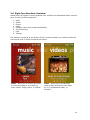
3.4. Eight Core Functions Overview
Sansa Fuze+ MP3 player’s unique graphical user interface has a dedicated home menu for
each of the 8 functional categories.
1.
2.
3.
4.
5.
6.
7.
8.
Music
Videos
Photos
Radio
Podcasts (note: also contains audiobooks)
Voice Recording
Card
Settings
The dots bar view guide at the bottom of every screen indicates your location within the
home menu level or within functional sub-menus.
Music – allows you to browse and listen
to music according to your taste by:
Artist, Album, Songs, Genre, or Playlist.
Video – allows you to browse and
watch videos according to your taste
by: A-Z (alphabetical order), or
Duration.
18
Photo – displays photos according to
your taste by: A-Z (alphabetical order) or
by Date. Also enables slide shows (with
or without music).
Radio – allows you to listen to and
record live FM broadcast radio, pause
radio recordings, and save up to 40
presets.
Voice – allows you to do voice recording
using the built-in microphone found at the
base of the device next to the headphone
jack.
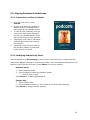
Podcasts – allows you to listen to
podcasts and audiobooks.
19
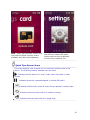
Card – allows you to access content on a
microSD/microSDHC memory card or
slotRadio card (both sold separately).
Settings – allows you to view, set or
customize the Sansa MP3 player
features such as time, brightness,
volume levels, equalizer, etc.
Quick Tips: Screen Icons
The screen displays icons to assist you in knowing the present mode of the
device. The following industry standard icons are used:
Indicates that the device is in “play” mode, either with audio or video
content.
Indicates the device is paused/stopped, or muted (FM Radio).
Indicates shuffle mode, where all music files are played in random order.
Indicates continuous play mode for a number of songs.
Indicates continues play mode for a single song.
20
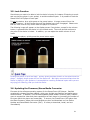
3.5. Lock Function
Sometimes you want to be able to lock the device’s inputs, for instance if listening to music
and carrying the player in your pocket, to avoid unwanted inputs. It is possible to lock the
Sansa Fuze+ MP3 player’s touch pad.
To lock the device, do a quick press on the power button. A longer press will turn the
player off and on. All the function keys will be disabled once lock is engaged. Please note
that the Lock function only works when the player is turned on.
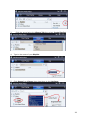
The following image will appear on the display screen if any button, except for the volume
button, is pressed while the device is in the locked mode. The music should continue to
play even if the device is locked. In addition, you can adjust the tactile volume in lock
mode.
To unlock the player, quickly press the power button again.
Locking the device is quick and easy. Quickly press the power button to lock and unlock the
player. A slightly longer press will turn the device off. We highly recommend that when the
device is playing in your pocket or is susceptible to receiving unwanted inputs while you are
enjoying your listening, that you lock the device.
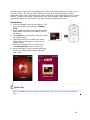
3.6. Updating the Firmware/Sansa Media Converter
Firmware is the software operating system for the Sansa Fuze+ MP3 player. SanDisk
occasionally releases firmware updates, which may include new features and performance
enhancements. In addition, the free downloadable Sansa Media Converter (SMC) enables
users to expand the video and photo capabilities of their player by increasing the number of
file types which the player can access/play. To ensure your Sansa Fuze+ MP3 player has
the latest firmware, please visit www.sandisk.com/smc and download our free Sansa
Updater and Sansa Media Converter (SMC). It is easy to download, install, and use
immediately!
21
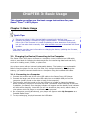
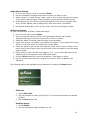
Downloading the Applications
STEP 1 - Download and install Sansa Firmware Updater
Connect your player to your computer. The Sansa Firmware Updater should launch
automatically.
1a. ALTERNATIVELY: On a Windows® PC, Click Start then go to Programs > SanDisk >
Sansa Updater > Sansa Updater to run the installer manually.
.
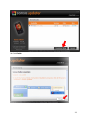
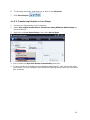
STEP 2 - Download and install the Sansa Media Converter application
Click to select the Sansa Media Converter check box, and then click Download Now.
22
3. Click Finish.
23
STEP 3 - Launch the Sansa Media Converter application
Click Start then go to Programs > SanDisk > Sansa Updater > Sansa Media
Converter
3.6.1. Formatting the Player
To delete all content from the internal memory, you can format the device.
1.
2.
3.
4.
From the main menu, scroll to Settings and click select.
Select Settings.
Select Format.
Choose to format: Internal Memory, External Memory or All
5. Select Yes to start formatting.
Caution!
Ensure you back up all of the media files you use with your Sansa Fuze+ MP3 player before
formatting the device as it will cause the files you have stored on the device to be deleted.
You will have to re-transfer your content to the device after you have formatted it.
24
CHAPTER 4: Transferring Media
This chapter shows you how to transfer music files, photos, and
videos from your computer to your Sansa® Fuze™+ player.
Chapter 4: Loading Content
Your Sansa Fuze+ player comes with an open file platform, enabling you to load it how you
like best. Whether it’s ripping music from your CDs collection, purchasing MP3 songs
online, or downloading DRM-free tracks from iTunes®, it’s Your Media, Your Way!™ In
general, there are three ways to load content: transfer your own files using a computer;
obtain music files from one of the supported media subscription services (Rhapsody®,
eMusic®, or Napster®, all sold separately), or side-load content to the Sansa Fuze+ player
using a microSD/microSDHC memory card or slotRadio™ card (both sold separately).
4.1. Loading Audio Files (Music, Podcasts, Audiobooks)
You can transfer music, playlists, podcasts, or audiobooks from your computer to the player
using the drag-and-drop method or using music management software such as Windows®
Media Player. Specific audiobook files from Audible.com require Audible Manager to transfer
to your player.
As explained in Chapter 3, there are two primary modes for connecting your Sansa Fuze+
player to your computer for file transfers: MSC (“Mass Storage Class”) mode, and MTP
mode (“Media Transfer Protocol”). MSC is also known as “drag and drop”, because the
device will appear as a Removable Disk to the computer. Windows® supports both MSC
and MTP modes. On a Mac® OS system, MSC is the only transfer mode available. Some
Linux systems support MTP mode in addition to MSC mode.
25
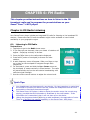
4.1.1. MSC Mode: Drag and Drop
1. Connect your player to your Windows® PC.
2. Open the My Computer icon on your desktop by double-clicking on it.
3. Double-click on the Sansa player icon which will appear there.
4. Double-click Internal Memory or Media (may vary by Windows® version).
5.
Drag and drop music files from your computer to the Sansa player’s MUSIC folder.
You can also drag and drop files to a microSD card inside your player by going to My
Computer > Sansa Fuze+ > External uSD Card. You can only drag and drop files to the
card if you have write permissions for the card.
4.1.2. Mac®: MSC Mode: Drag and Drop
1. Connect your Sansa player to your MAC computer.
2. Double-click on the removable disk named SANSA FUZE+ that appears on your
desktop.
3. Double-click on the Music folder.
4. Drag and drop music files from your computer to the player’s Music folder.
You can also drag and drop files to a microSD card inside your player by double-clicking the
second removable disk that appears when you connect your player.
On a Mac® OS computer, remember to eject the removable disk before disconnecting your player to avoid any data corruption or possible damage to your player.
Quick Tips:
On either a Windows® or Mac OS® computer, the second removable disk folder, which
only appears when a microSD card is loaded inside your player, will display with the
card’s name, just as if you connected it via a card reader. Please be aware that you can
only drag and drop files to the card if you have write permissions for the card.
26
4.1.3. Windows® MTP Mode: Windows Media Player™
MTP or “Media Transfer Protocol” mode is the default setting in your Sansa Fuze+ player if
you live in North America (it is MSC mode for other geographies). MTP mode enables
synchronizing your player with Windows Media Player™, which comes standard as a part of
the Windows® operating system.
However, before you can create a playlist and transfer (or synchronize) it to your player,
you need to show Windows Media Player™ where your songs are located.
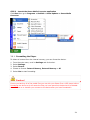
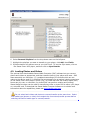
4.1.3.1. Adding Music Files to Your Library
1.
Click the arrow below the Library tab.
2.
Make sure Music is selected then click Add to Library.
3.
In Add to Library dialog box, click one of the following options, and then click OK.
My personal folders:
•
Use this option to monitor the digital media files stored in your personal Music folder
as well as any files stored in the public Music folder that anyone who uses your
computer has access to.
My folders and those of others that I can access:
•
Use this option to monitor the digital media files stored in your personal Music
folder, the files stored in the public Music folder, as well as any files stored in the
personal Music folder that belong to other users on your computer.
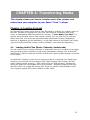
4.1.3.2. Creating Playlists
1.
Launch Windows Media Player™.
2.
Clear the List pane by clicking the Clear List pane button.
27
3.
Click the arrow below the Library Tab then select Create Playlist.
4.
Type in the name of your Playlist.
5.
Click Songs from Library then drag these to the List Pane.
28
6.
To rearrange the songs, drag them up or down in the List pane.
7.
Click Save Playlist.
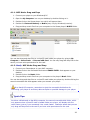
4.1.3.3. Transferring Playlists to Your Player
1.
2.
3.
Connect your Sansa player to the computer.
Select Sync digital media files to this devices using Windows Media Player on
initial connection.
Right-click on Your Sansa Player, then select Set Up Sync.
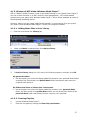
4. Click to select the Sync this device automatically check box.
5. To have the device automatically start Windows Media Player™ and synchronize when
you connect it to your computer, then select the following options when you connect to
your computer
29
6. Select Personal Playlists from the drop down menu on the left pane.
7. Highlight the playlists you want to transfer to your player, click Add, then Finish.
8. Synchronization will start as soon as you click Finish. To see the Sync status, click on
the Sansa Fuze+ MP3 player, and then click on Sync Results.
4.2. Loading Photos and Videos
The optional free downloadable Sansa Media Converter (SMC) software lets you convert
photos and videos as appropriate, and then transfer these to your player with ease. SMC
does essentially two functions: (1) it enables transcoding of file formats which are not
native to the device; and (2) it modifies files as necessary for an optimal viewing experience
on the Sansa Fuze+ MP3 player’s screen (e.g., for video files SMC can modify aspect ratio,
frame rate, bit rate, or resolution; for photos SMC can perform rotating and resizing).
Sansa Media Converter can be used for transferring video or photo files to either your player
or a microSD card. To download the Sansa Media Converter software or to obtain more
information about its capabilities, please see www.sandisk.com/smc.
Do not select both videos and photos to convert/transfer at the same time. Select
one media type (photos or video) and complete the conversion/transfer process before
selecting the second media type to convert/transfer.
30
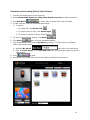
Instructions for Loading Photo/Video Content
1. Connect the Sansa player to the computer.
2. Select Sansa Media Converter using Sansa Media Converter on initial connection.
3. Click Add Media
to select video or photo files to be converted.
4. To edit a picture, select it and follow these steps:
a. To rotate:
i. To rotate left, click Rotate Left.
ii. To rotate photo to right, click Rotate Right.
iii. To resize for optimal viewing, Select Best Fit.
5. To view to original photo setting, click Reset.
after you have completed editing.
6. Click Apply
7. The converted files are stored in My Album by default. To place them in a different
folder, follow these steps:
then type in the new Name.
a. Highlight My Album,
b. Click on Sansa player or the microSD card from the information pane to select a
Save location.
to start.
8. Click
9. Disconnect your player after the files have been transferred to the device.
31
4.3. Deleting Content
Deleting content can be done either from the device within the sub-functions, or through
your media manager. Please be aware that deleting content from the device will not
permanently delete the content if at the next synchronization these files are still on your
computer for transferring back to the player.
32
CHAPTER 5: Playing Your Media
This chapter shows you how to play music and audiobooks, watch
videos, and view photos on your Sansa® Fuze™+ MP3 player.
Chapter 5: Playing Your Media
5.1. Playing Music
Sansa Fuze+ player comes with the versatile capability to play an array of different
audio/music file formats, including MP3, WMA, secure WMA, FLAC, AAC/M4A (DRM-free
iTunes® songs), WAV, OGG-Vorbis, and Audiobooks formats.
Your player is equipped to read the associated digital information which comes with most
audio files (called “ID3 tag” metadata) to automatically associate album art, artist, album,
and genre. This enables your Sansa Fuze+ player to sort your music automatically so you
can enjoy it with ease. Under the “Music” category on your device, this includes featuring
your music sorted by:
•
Artist – presented in alphabetical order (note: ignores any “the” in front of an
artist’s name)
•
Album
•
Song
•
Genre
•
Playlist – either downloaded from your computer or generated on the device
It is also possible to listen to your music via “recently played” (Top-10 most recently played
songs); “Shuffle” mode, which plays all of the songs in your device in random order;
individually by song; or via playlists that you can either create on your computer, or which
you can dynamically create on the fly in a “Music Go List”.
33
5.1.1. Recently Played Mode
The Sansa Fuze+ MP3 player enables quick access to play your most recently played 10
songs.
1. Press and hold the Back button
level of the user interface.
to return to the home
2. Tap/swipe to the Music home menu (as shown at right).
3. At the music home menu you can vertically swipe/tap
to start
your 10 recent played tracks. Press Play
playing. In this mode, all 10 songs will play in a row.
4. At this mode you can tap back
in order to get to the
“now playing” song, which will appear as album art for
the song taking up most of the screen.
5. From the “now playing” mode you can always tap/swipe
to skip or rewind a song, enabling quick navigation
through the 10 most recently played songs.
The “now playing” song will appear
with enlarged album art, taking up
most of the screen. From this screen,
you can swipe/tap either right or left
to forward/rewind. You can also hit
select (hit center of touchpad) to go
to Options (see Section 5.1.3), or hit
to jump back to
the back button
the main menu level, from where it’s
possible to go to another function like
viewing photos while having the
music still playing.
5.1.2. Shuffle (Play) All Mode
1.
2.
3.
On the Music home screen, press select (tap the center of the touchpad).
There are 5 sub-menus under Music, as demonstrated by the five dots to the view
guide on the bottom of the screen. From any of these sub-menus, at the top you
will see the option, shuffle all, followed by a number in parentheses corresponding
to the number of options available in that sub-menu (e.g., number of artists,
number of albums, number of songs, number of genres, number of playlists). If you
select shuffle all in any of these sub-menus, the device will play all of your songs in
random order.
Tap/swipe to the right to skip to the next song, or press-and-hold to fast forward
within the current track.
34
4.
Tap/swipe to the left to skip to the previous played song or press-and-hold to fast
rewind to current track.
5.
Use the volume control buttons on the left side of the player to adjust the volume
level during playback.
6.
in order
To turn off the shuffle all mode, on any song which is playing, tap back
to get to the “now playing” song (you’ll know because the album art for that song
will be enlarged to occupy most of the screen), then hit select (tap the center of the
touchpad), and you’ll see an Options menu. Select “Shuffle” and toggle it from “on”
to “off” by tapping the center of the touchpad. Alternatively, if the device is
displaying the shuffle all icon but nothing is currently playing, go to the Settings
menu, then select “Music Settings”, go to “Shuffle”, and toggle it from “on” to “off”.
Quick Tips:
This icon will appear on the upper right hand corner of the screen next to the
battery indicator when the device is in shuffle mode (play all songs in random order).
In addition, the shuffle all option at the top of the five sub-menus within music will
display an asterisk reminding you that this has been selected: * shuffle all
5.1.3. Options Menu – Music
When listening to a song, the Sansa Fuze+ offers four options for changing your listening
experience:
1. Rate Song – A five star rating system can be used if you subscribe
to the Rhapsody® music service for generating playlists of your
highest rated songs.
2. Shuffle
– for toggling the listening mode.
3. Repeat
– for enabling continuous play of music songs.
4. Add Song to Playlist – adds the currently playing song to the
Music Go List found under “Playlists” (the fifth sub-option) under
the Music menu.
5.1.4. Music Content Groupings
Your Sansa Fuze+ player automatically organizes your music
according to Artist, Album, Song, or Genre to enable you to sort
through your songs as you like. Simply swipe/tap from left to right to
toggle between these options (the dot view guide on the bottom of
the screen will show five options in total, which includes Playlists),
which are laid out like pages in a book. Swipe/tap up/down to select
between content within these sub-sections.
35
5.1.5. Music Go List
In addition to being able to add playlists to your Sansa Fuze+ player, which will be listed
under the “Playlist” sub-menu under “Music” (the fifth “page” in the “Music” book), the
device enables you to create a dynamic “Music Go List” which you can create on the fly.
This appears as a permanent playlist on your device with this name, whether it has content
in it or not!
To create this Music Go List, with any song you are currently listening to, simply press and
hold Select (center of the touchpad) for approximately two seconds, and a dialogue box
saying “{Your Song Name} has been added to the playlist” will appear. To delete this song
from the Music Go List, simply repeat the process and then a dialogue box saying “{Your
Song Name} has been deleted from the playlist” will appear.
To clear the Music Go List, go to Playlist, select “Music Go List”, and the option, “Clear Music
Go List” will be available once you’ve added content to this list. Simply select and it will be
reset as an empty container.
Quick Tips:
Clearing the Music Go List does not delete the actual songs from your player. It merely
clears the playlist you’ve saved locally on the device.
36
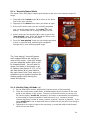
5.1.6. Playing Music from a Preloaded microSD™/microSDHC™
Card Instructions
1. Insert a microSD card with content into the
microSD card slot. The player will display the
message: “Loading card.”
2. The card content will automatically be pulled
into the various menu categories based on the
file types you have loaded on the car (e.g.,
music files into “Music”, photos into “Photos”,
etc.). Individual songs or other content will
display with a card icon (in the left margin) to
indicate they are stored on the external
microSD card.
3. You can choose to play the card from the card
home menu or from each of the categories
(Music, Video, etc.).
Quick Tip:
The maximum amount of digital content that can be played on a Sansa Fuze+ player,
inclusive of internal capacity, is approximately 10,000 songs*. Be aware, however,
that updating the device registry with this much content can take an hour or longer to
fully load into the device! The device will have to start reading a card from scratch once
removed also.
* Approximations: results will vary based on file size, resolution, compression, bit rate, content, host device,
pre-loaded files and other factors. See www.sandisk.com.
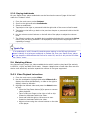
5.2. Playing slotRadio™ cards
A slotRadio card is a product sold separately by SanDisk which consists of hand-crafted,
premium content, pre-loaded playlists of music, making it easy to enjoy your content with no
downloads, no playlist generation, no subscriptions, and no hassle. These cards provide
37
commercial free music from the leading music labels, and enable skipping of songs you do
not care to hear. They are an ideal solution for those people seeking quality music at
reasonable value, enjoy discovering new songs, and don’t enjoy managing their own content
directly. Sansa Fuze+ player is optimized for use with slotRadio cards, displaying vibrant,
high quality album art, artist name, and song title accompanying each song.
Instructions
1. Insert a slotRadio card into the card slot. The
player will display the message: “Loading
card.”
2. Once loaded, the card screen logo will change
and indicate that there is a slotRadio card in
the device.
3. Press Select to see the card’s channels, which
are unique genres.
4. Tap/swipe vertically to choose your genre.
Either select or press play to listen to your
selected genre.
5. Tap/swipe horizontally to view next song.
Press Select/Play to skip to this song.
6. While listening to a song, you can tap/swipe
vertically to change genre without going to
main menu.
Quick Tip:
With a slotRadio card, you cannot rewind a song. Also, you can only skip one song at a
time.
38
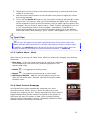
5.3. Playing Podcasts & Audiobooks
5.3.1. Instructions to Play a Podcast
1.
2.
3.
4.
5.
From the main menu, select
Podcast.
Browse your latest 10 podcasts by
swiping up/down, and tap play to
start enjoying your podcast quickly.
To view all your podcasts, from the
home level menu press select and
browse your podcast albums. Press
play to start enjoying your podcast.
Tap/swipe to the right or press-andhold the right side of the arrow to
fast forward.
Tap/swipe to the left to go back to
the previous chapter or press-andhold to the left to rewind.
5.3.2. Modifying Podcast Play Mode
While a podcast is at “Now playing” mode (recall, as with Music files, simply press the
back button
when playing to switch to this mode, where the podcast thumbnail art will
take up most of the device screen), press Select to view your options:
Playback speed
1.
2.
Select playback speed.
Use touchpad to choose the playback speed:
Normal; Fast or Slow
Press Select to change playback speed.
Chapter Skip
1. Select Chapter skip.
2. Use touchpad to choose on/ off to allow or nor allow songs skipping.
Press Select to change chapter skipping.
39
5.3.3. Playing Audiobooks
On your Sansa Fuze+ player audiobooks can be found as the second “page of the book”
under the “Podcast” menu.
1.
2.
3.
4.
5.
From the main menu, select Podcast.
Scroll to the right and select Audiobooks.
Select an audiobook.
Tap/swipe to the right or press-and-hold the right side of the arrow to fast forward.
Tap/swipe to the left to go back to the previous chapter or press-and-hold to the left
to rewind.
6. Use the volume control buttons on the left side of the player to adjust the volume
level.
7. The following options are available during audiobook playback by pressing the Select
button (but not during slotRadio™ card playback, which permits skipping but not
repeating of songs).
Quick Tip:
If an audiobook is a MP3 format file and the genre setting in the ID3 tag information
doesn’t identify it as being an audiobook or podcast file, then your Sansa Fuze+ player
will not be able to differentiate this file from a music file, and so it will put the file under
the “Music” menu.
5.4. Watching Videos
Your Sansa Fuze+ player is a video-enabled device which is able to play back files natively
in MPEG-4, H.264, and WMV file formats. Chapter 4 details how to load video files onto the
device most effectively and also expand the number of file types supported.
5.4.1 Video Playback Instructions
1. From the main menu, select Video.
2. Use the touchpad to highlight and select Videos A-Z to
display the videos alphabetically, or slide to the right to
display videos by duration.
3. Highlight the desired video and press the Select button
to play.
to pause or resume
• Press the Play/Pause button
video playback.
• Tap or slide your finger to the right or left to skip
forward or backward within the video.
• Press and hold the right or left arrows to scan
forward or backward within the video.
• Adjust volume using the volume buttons on the side
of the player.
40
5.4.2 Video Play Options
To adjust the Video Options, press the Select button during video playback.
Adjusting Video Brightness
1. Select Brightness.
2. Slide your finger or tap the touchpad either right or left to increase or decrease
the brightness level.
3. Press the Select button to accept.
Selecting Video Orientation
1. Select Orientation.
2. Tap Select to alternate between Landscape and Portrait views.
5.5. Viewing Photos & Slideshows
Your Sansa Fuze+ player is a photo-enabled device which is able to play back files natively
in JPEG, and BMP file formats. Chapter 4 details how to load photo files onto the device
most effectively and also expand the number of file types supported.
5.5.1 Photo Browsing Instructions
1.
2.
3.
4.
5.
From the main menu, select Photo.
Browse your latest 10 photos by swiping up/down, and tap play
to view an individual photo quickly. From here you can
tap/swipe left/right to view all the latest 10 photos.
To view all your photos, from the home level menu press select
(center of touchpad) on the Photo menu.
There are two sub-menus to Photo: A-Z (alphabetical listing)
and By Date.
After selecting a photo collection, hit play/pause to browse
through photos. Tap/swipe left/right to view all.
Quick Tip:
For minimum capacity use by any photos you load onto your player, it’s advised to have
your photos loaded using the Sansa Media Converter (see Chapter 4.)
5.5.2 Photo Viewing Options
There are many options available for viewing your photos on the Sansa Fuze+ player. You
can view photos as a slide show (“shuffle slideshow photos”), repeat a slideshow, specify
slide viewing duration, and even add music to a slideshow. You can also change the photo
viewing mode from landscape (default) to portrait if you desire.
41
Single Photo Viewing
1. From the main menu, scroll to and select Photo.
2. Use the touchpad to highlight and select the photo you want to view.
3. When a photo is in “Now Playing” mode, which is when it takes up the entire screen,
simply select (tap the center of the touchpad) to open the photo Options screen.
4. Under Options you will find the following parameters which can be changed: Slide
Time; Shuffle; Repeat; Add to Background; Slide Show Music; Orientation.
5. Hit the back button
to return to your photo, with the new settings in effect.
Slideshow Viewing
To view a slideshow of all photos, follow these steps:
1. From the main menu, select Photo.
2. There are two sub-menus to Photo: A-Z (alphabetical listing) and By Date.
Tap/swipe left/right to select how you want to view your photos.
3. Select the album of interest (tap the center of the touchpad).
4. A grid of all photos in the album you selected will appear. If you selected the wrong
to select the correct album.
album, hit the back button
5. Select any photo to get into the “Now Playing” mode, which is when it takes up the
entire screen, then simply select (tap the center of the touchpad) to open the photo
Options screen.
6. Under Options, select “Shuffle” and toggle to “On”. You can also add music to the
slideshow as well as wshown under “Slide Show Music”.
to start the slideshow. Press again to pause.
7. Press the Play button
8. Use the volume control buttons to adjust the volume if music is added to the
slideshow.
The following options are available during slideshow by pressing the Select button.
Slide Time
1. Select Slide Time.
2. Use the touchpad to select 2/4/6/8/10/15 or 30 seconds and select the desired
duration.
3. Tap the back button
.
Shuffling Photos
1. Select Shuffle.
2. Use the touchpad to select Shuffle On or Off.
42
3. Tap the back button
.
Repeating Photos
1. Select Repeat.
2. Press the Select button to turn Repeat On or Off.
Adding photo to Background
1. Highlight and select Add to Background.
Selecting Slideshow Music
1. Select Slideshow Music.
2. Select Current Song (if a song is currently playing) or one of your Playlists.
3. Tap the back button
.
Selecting Photo Orientation
1. Select Orientation.
2. Tap Select to alternate between Landscape and Portrait views.
43
CHAPTER 6: FM Radio
This chapter provides instructions on how to listen to the FM
broadcast radio and to program the preset stations on your
Sansa® Fuze™+ MP3 player.
Chapter 6: FM Radio Listening
Your Sansa Fuze+ player includes an integrated FM radio for listening to live broadcast FM
stations. Please note that FM radio broadcasts might not be available or have limited
availability in your geographic region.
6.1. Listening to FM Radio
Instructions
1. Tap/swipe to get to the Radio home menu.
2. If you have pre-set channels, then your latest 10 stations will
appear. Swipe/tap vertically to browse.
3. Press play to listen to the radio station displayed.
4. Press select (center of touchpad) to browse for other
stations.
5. A radio frequency menu will appear. Slide your finger or tap
up or down on the touchpad to navigate through radio
frequencies.
6. For fast search, press and hold the Up or Down arrows on
the touchpad, or sweep vertically in broad strokes. The radio
will automatically stop on the next station broadcasting with
sufficient signal strength.
7. Use the volume control buttons to adjust the volume level.
Quick Tips:
1.
2.
3.
Your headphones are the antenna for your device. For best reception or maximizing
the number of presets your device can find, extend the headphone chord as much
as possible to maximize the antenna length.
The Sansa Fuze+ MP3 player is able to display the station name, the current song
playing, provided that this information is broadcast by the radio station. If this
information isn’t transmitted, then it will not show up on the device.
Hitting the play/pause button
during a radio broadcast is the equivalent of mute.
There is no dynamic live pausing capability on the Sansa Fuze+ MP3 player.
44
6.2. Programming FM Presets
You can program up 40 preset stations. There are two ways to program presets:
Manually – Presets
1.
2.
3.
4.
From the main menu, select Radio.
Slide your finger or tap up or down on the touchpad to select desired frequency.
Press and hold Select button while listening.
A frequency that been defined as preset will be marked with a small star next to it.
Automatically – Presets
1. From the main menu, select Radio.
2. Anywhere on the radio dial, hit Select again (tap center of navigation pad) to open the
radio Options screen.
3. Scroll down and select “Auto Scanning for Presets”. The device will seek out, find, and
bookmark up to 40 of the strongest signal strength stations in your area.
4. A frequency that been defined as preset will be marked with a small star next to it.
To access your presets quickly, select Radio, then swipe to the second “page of the book”
under this menu to see the pre-sets you currently have programmed.
6.3. Radio Options/Recording
Your Sansa Fuze+ player options include adding/deleting presets, recording a program,
pausing a program while recording it, and deleting a recorded program.
Press the Select button while listening to radio to enter the Radio Options menu. The
following options are available:
1.
2.
3.
4.
5.
6.
7.
Delete Preset
Record Radio
Play Recordings
Auto-scanning for Presets
Seek Mode – can be toggled on/off
Delete All Presets
Delete All Radio Recordings
45
Quick Tips: Recording a FM Station
1.
2.
Your Sansa Fuze+ player can record a FM radio broadcast until one of two events
occurs: (1) the available memory on the device is exhausted; (2) the battery is
drained. However, the device will take a very, very long recording and break it into
individual files of approximately two hours in length.
While recording a FM broadcast, hit the play/pause button
to filter out unwanted
content within a single file, such as commercials, for example. You will still be able
to hear the broadcast when doing this.
46
CHAPTER 7: Voice Recording
This chapter shows you how to use your Sansa® Fuze™+ MP3
player’s built-in microphone to do voice recordings.
Chapter 7: Voice Recording
Your Sansa Fuze+ player includes voice recording capability and is able to store multiple
independent recordings.
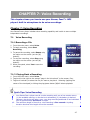
7.1
Voice Recording
7.1.1 Recording a File
1. From the main menu, select Voice.
2. To begin recording, select Start
Recording.
3. To pause the recording, select Pause using
the option on the screen (not the
button!).
4. To stop the recording, select Stop using
the option on the screen (not the
button!).
5. When prompted, select Yes to save the
recording.
7.1.2 Playing Back a Recording
1. From the main menu, select Voice.
2. Tap/scroll to the right to the second “page in the Voice book” to the screen, Play.
3. Tap/scroll vertically to select the file you want to play back. Selecting (tapping the
center of the touchpad) or hitting the play/pause button
will initiate playback.
Quick Tips: Voice Recording
1.
2.
Your Sansa Fuze+ player can do a voice recording until one of two events occurs:
(1) the available memory on the device is exhausted; (2) the battery is drained.
However, the device will take a very, very long recording and break it into individual
files of approximately two hours in length.
The minimum length of time for a voice recording is five seconds. Anything
duration less than this length will not be recorded.
47
This product is intended to be used for recording and playback for your
home and personal enjoyment only. Copying and commercial use of copyrighted
material without permission of the copyright owner may be prohibited by law.
Use of your MP3 player, in compliance with all copyright and applicable
intellectual property laws, remains the responsibility of the user of the product.
48
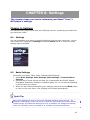
CHAPTER 8: Settings
This chapter shows you how to customize your Sansa® Fuze™+
MP3 player’s settings.
Chapter 8: Settings
Your Sansa Fuze+ player comes with a rich Settings menu for customizing your device to
your particular needs.
8.1. Settings
You can personalize your device by selecting Settings from the main menu level. On the
main menu level, tap/swipe to Settings and tap the Select button to access the many
settings options available.
8.2
Basic Settings
Personalize your Music, Video, Photo, Podcast & Book Settings.
1. Select Music Settings, Video Settings, Photo Settings or Podcast & Book
Settings.
2. Selecting any of these options will allow you to personalize the Shuffle, Repeat,
Orientation, Brightness, Slideshow, Playback speed, etc., of your device depending
on which option you choose.
3. When you are finished personalizing your settings, press and hold the Back button
to return to the main menu. Your changes will be saved automatically.
Quick Tip:
Many basic settings can also be set in the individual function menus as well. For
example, Shuffle play mode can be set in both the Music and Photo menus directly.
The device can only have one setting at a time, so whether you change the settings
under the “Settings” menu or elsewhere, is a matter of personal preference.
49
8.2.1 Background Settings
The Background settings allow you to change the background color and image.
1. Select Color.
2. Use Select button to scroll to the color you like.
3. Select Image to scroll to the photo you would like as your background.
8.2.2 Backlight
After idling for predefined seconds, the player will trigger the timer automatically and
cease the backlight. You can press any button to wake the backlight up. The shorter
your backlight time, the more battery power you will consume, reducing your time
between required battery charges.
1. Select Backlight.
2. Use touchpad to highlight backlight timer (from 5 sec. to 90 sec.).
3. Press the Select button.
8.2.3 Brightness
1. Select Brightness.
2. Use touchpad to adjust the Brightness level (Right= Brighter, Left= Less Bright).
3. Press the Select button to accept the changes.
8.2.4 Customize
1. Select Customize.
2. Remove home features menus if you wish by changing them to off.
3. Tap the return
button.
8.2.5 Equalizer
Depending on which type of music you listen to frequently, you can choose a genre that
enhances the sound of certain music types. Scroll through the options and decide to
leave the equalizer on Normal or find a custom genre.
8.2.6 Info
This displays information regarding your Sansa Fuze+ MP3 player (such as firmware
version, available/free memory, number of contents loaded in the player, and the battery
status).
8.2.7 Power Saver
You can set the timer under Power Saver to automatically turn off the player when the
music is paused or when there is no activity.
1. Select Power Saver.
2. Use touchpad to highlight desired timer (from none to 120 minutes).
3. Press the Select button.
50
8.2.8 Sleep
You can set the timer under Sleep to automatically turn off the player once it reaches
the setting time.
1. Select Sleep.
2. Use touchpad to select desired timer (from none to 120 minutes).
3. Press the Select button.
8.2.9 USB Mode
1. Select USB Mode.
2. Use the touchpad to select a USB mode:
a. Auto detect:
b. MTP (“Media Transfer Protocol”): Microsoft Windows® will recognize the device
and will present it as the Sansa Fuze+.
c. MSC (“Mass Storage Class”): turns the device effectively into a USB drive and will
be seen like any other drive on the computer. This is the only option for certain
Apple® OS computers!
3. Press Select to change to USB Mode.
8.2.10 Replay Gain
Replay Gain is a method for keeping the perceived volume level constant during playback of
diverse content. Typically, music albums are mixed and targeted to differing average
volume levels. During playback in shuffle mode there can be wide differences in the track
output volume, causing the user to make frequent corrections to the volume level.
1. Select Replay Gain.
2. Highlight Mode and tap the select button to choose between Songs, Albums, or Off.
3. Highlight Pre-Gain and tap the select button to choose how many decibels(dB) you
wish to adjust the overall Playback Volume level upward to compensate for the
“average” level of your library’s track adjustment.
For more information, please visit: http://kb.sandisk.com/app/answers/detail/a_id/430
8.2.11 Volume
1. Select Volume.
2. Use touchpad to select Normal or High.
WARNING: Read Safety Instructions Before Making Volume Changes
Safe use depends on exposure time and volume levels. At 80 dB(A), exposure should be
limited to 40 hours/week. At 89 dB(A), exposure should not exceed 5 hours/week. For more
details, carefully review the Important Safety Instructions in Chapter 1.
51
8.2.12 Language
1. Select Language.
2. Use touchpad to highlight the desired language.
3. Press the Select button.
8.2.13 Date
1. Select Date.
2. Use touchpad to highlight the desired setting – Month, Date, or Year.
3. Use touchpad to adjust the selected setting then press the Select button.
8.2.14 Time
1. Select Time.
2. Use touchpad to highlight the desired setting – Hour, Minute, or am/pm.
3. Use touchpad to adjust the selected setting then press the Select button.
8.2.15 Reset Factory Settings
This will restore the player to its original factory settings.
1. Select Restore.
2. Use touchpad to highlight Yes then press the Select button.
8.2.16 Format
1. Scroll down to Format and select it.
2. Choose the formatting options: Internal Memory, External Memory or All
3. Select Yes to format or Cancel to exit.
Caution!
Ensure you back up all of the media files you use with your Sansa Fuze+ MP3 player before
re-formatting the device, as this will DELETE all content you have on the device.
52
CHAPTER 9: Tips & Troubleshooting
This chapter helps you get the most from your Sansa® Fuze™+
MP3 player with tips and troubleshooting.
Chapter 9: Tips & Troubleshooting
The following is a partial list of likely questions you might have. For a more complete and
more up-to-date list, with full knowledge-base algorithmic online search capabilities, please
visit us at www.kb.sandisk.com.
9.1 Tips & Troubleshooting
Why isn’t my Sansa Fuze+ MP3 player being charged or detected by my computer
when I connect it?
Verify that you are using Windows Media® Player version 10 or higher, reset your Sansa
player, and try again.
How do I drag music files to my Sansa Fuze+ MP3 player?
Drag and drop your files into the Music folder. Please see Chapter 4 for more information.
Which bit rates will the Sansa Fuze+ MP3 player support?
The Sansa Fuze+ MP3 player will support 32-320Kbps for MP3 and 32-256Kbps for WMA.
How do I format my Sansa Fuze+ MP3 player?
You can use the device Format command under SettingsÆFormat or using a computer.
Please see Chapter 3 for more information.
Why should I update the firmware?
You should always update the player to the latest firmware to ensure that it functions
correctly and has all the latest features. Please download the Sansa Updater application
from the Sansa Support Website (see www.sandisk.com/smc).
How do I transfer videos and photos to my Sansa Fuze+ MP3 player?
You should install the Sansa Media Converter software (see www.sandisk.com/smc). This
software will convert your video and photo files then transfer them to the player. Refer to
the Sansa Media Converter software for details on file formats supported.
53
What music file formats does the Sansa Fuze+ support?
The Sansa Fuze+ MP3 player supports MP3, WAV, WMA, secure WMA, FLAC, AAC/M4A
(DRM-free iTunes® music files), Ogg-Vorbis, and Audiobook formats.
Is the player compatible with podcasts?
As long as the podcasts are in any of the supported audio formats and an appropriate bit
rate (32-320 kbps), then the player should be capable of playing the files. Any MP3 files
with podcast as a genre in the ID3 tag will appear under Podcasts. Any MP3 files stored in
the Podcasts folder will appear under Podcasts submenu regardless of the genre setting.
Why does my player say unknown artist/album?
Normally this is because the ID3 tags or WMA metadata information are missing. On the
computer, right-click the song, choose Properties, Summary tab then Advanced. Then you
can input the data such as Artist, Album, Song Title, Track Number, Genre, and Year.
Can the Sansa Fuze+ MP3 player read high capacity microSD cards?
Yes, the Sansa Fuze+ MP3 player can read and write to both microSD and microSDHC
cards.
How do I power reset my Sansa Fuze+ MP3 player?
To reset your Sansa Fuze+ MP3 player, press and hold the power button for approximately
20 seconds.
Why won’t my Sansa Fuze+ MP3 player play music?
Check to verify if the audio file type is supported. If the file type is supported, make sure
that the file is not corrupted and that its license is up to date.
54
CHAPTER 10: Learn More, Service, & Warranty
Information
This chapter provides information to help you get service and
support for your Sansa® Fuze™+ MP3 player.
Chapter 10: Learn More, Service & Warranty Information
10.1. Getting Technical Support
Before you contact Technical Support, we encourage you to read the Tips &
Troubleshooting section to see if your question is covered there.
If you have questions about the use or features of your Sansa player as well as other
SanDisk products, please visit our Knowledgebase at www.kb.sandisk.com or use our “ask a
question links” at:
USA: www.sandisk.com/ask
USA: www.sandisk.com/chat
Worldwide: www.sandisk.com/sandisk-support/contact-us
10.2. SanDisk Limited Warranty
SanDisk warrants to the end user, that this product, excluding content and or software
supplied with or on the product, will be free from material defects in manufacture, will
conform to SanDisk's published product specifications and be fit for normal use during the
Warranty Period specified in the table commencing on the date of purchase provided that
the product is legally placed on the market.
To make a warranty claim, please go to www.sandisk.com/ask or www.sandisk.com/chat for
US and kb.sandisk.com for Worldwide, simply select your language preference at the
upper right of the page within the Warranty Period. In addition, provide proof of purchase
(showing date, place of purchase and name of reseller), product name, type and number.
You may return the product after first obtaining a Return Material Authorization number and
following any other guidelines listed. For further information see www.sandisk.com and
select "support".
SanDisk may at its option repair this product or provide you with an equivalent product; and
if unable to repair or replace the product, will refund the purchase price. SanDisk will not be
liable for indirect or consequential damage (including loss of data), or for damage caused by
improper use (including use in an incompatible device and use not in accordance with the
instructions), or by improper installation, unprofessional repair, modification or accident.
This constitutes SanDisk's entire liability which will never exceed the price you paid for it,
plus the necessary costs you made for the warranty claim. SanDisk products must not be
used in applications where failure could threaten injury or life, such as life support systems.
SANDISK DISCLAIMS ALL EXPRESS AND IMPLIED WARRANTIES TO THE FULLEST EXTENT
PERMITTED BY LAW. IF SANDISK CANNOT DISCLAIM IMPLIED WARRANTIES UNDER
55
APPLICABLE LAW, THEN TO THE EXTENT POSSIBLE, SUCH IMPLIED WARRANTIES ARE
LIMITED TO THE DURATION OF THE EXPRESS WARRANTY. THE WARRANTY DURATION ON
ANY REPLACED PRODUCT WILL BE THAT PORTION OF THE WARRANTY PERIOD REMAINING
ON YOUR ORIGINAL PRODUCT.
National, state and local laws may grant you other rights that are not affected by this
warranty.
Audio Visual Players
Sansa® Clip / Sansa® Clip+ Player
1 U.S
Sansa® View Player
1 U.S.
Sansa® Fuze™ / Sansa® Fuze™+ Player
1 U.S.
slotMusic™ Player
90 (days) U.S.
slotRadio™ Player
1 U.S.
10.3. End User License Agreement
SANDISK CORPORATION
END USER LICENSE AGREEMENT
DO NOT DOWNLOAD, INSTALL OR USE THE SOFTWARE UNTIL YOU HAVE CAREFULLY READ
THE TERMS OF THIS END USER LICENSE AGREEMENT (“AGREEMENT”). BY
DOWNLOADING, USING OR INSTALLING THE SOFTWARE, YOU AGREE TO ALL OF THE
TERMS OF THIS AGREEMENT. IF YOU DO NOT AGREE TO ALL OF THE TERMS, DO NOT
DOWNLOAD, INSTALL OR USE THE SOFTWARE AND, IF APPLICABLE, PROMPTLY RETURN IT
TO YOUR PLACE OF PURCHASE FOR A REFUND. IF THE SOFTWARE WAS INCLUDED WITH
YOUR PURCHASE OF HARDWARE, YOU MUST RETURN THE ENTIRE HARDWARE/SOFTWARE
PACKAGE IN ORDER TO OBTAIN A REFUND. IF THE SOFTWARE WAS ACCESSED
ELECTRONICALLY, CLICK “NOT ACCEPT” TO STOP THE DOWNLOAD PROCESS.
The firmware, computer programs, device drivers, data or information (“Software”) is
provided to each person who downloads, uses or installs the Software (“you” or “your”)
under the terms of this Agreement between you and SanDisk Corporation (“SanDisk,” “we,”
or “us”), and may be subject to additional terms and conditions in an agreement between
you and SanDisk’s third party licensors (“Licensors”). The Software is owned by SanDisk or
its Licensors. The Software is protected by copyright laws and international copyright
treaties, as well as other intellectual property laws and treaties.
1.
Software License. Subject to the terms and conditions contained herein, SanDisk
grants to you a limited, non-exclusive, non-sub licensable, transferable in accordance with
these terms, royalty-free license under SanDisk’s intellectual property rights to use the
Software in executable form solely for your personal use only with a SanDisk product and
only on a single computer or other hardware device at any given time (the "License"). The
Software is “in use” when it is either downloaded, copied, loaded into RAM or installed into
the hard disk or other permanent memory of a computer or other hardware device.
56
2.
Restrictions. SanDisk and its Licensors retain all rights in the Software not expressly
granted to you. You may not modify, adapt, translate or create derivative works (new
versions) of the Software. No source code is provided under this Agreement. You may not
reverse engineer, disassemble, decompile, rent, lease, or encumber the Software, or recreate or discover the source code of the Software. You may not embed or combine the
Software within any other software product or device. The Software contains proprietary
and confidential information of SanDisk and its Licensors, which you agree not to discover
or reveal to others. Any and all permitted copies of the Software that you make or
distribute must be unmodified, must contain all of the original Software’s proprietary
notices, and must include or be accompanied by this Agreement. You may not separate the
Software into component parts for sublicense, distribution or transfer to a third party.
3.
DISCLAIMER OF WARRANTIES. TO THE MAXIMUM EXTENT PERMITTED BY
APPLICABLE LAW, THE SOFTWARE IS PROVIDED “AS IS” AND “AS AVAILABLE” WITH NO
WARRANTIES AND NEITHER SANDISK NOR ITS LICENSORS MAKE ANY REPRESENTATION
OR WARRANTY, STATUTORY OR OTHERWISE, IN LAW OR FROM THE COURSE OF DEALING
OR USAGE OF TRADE, EXPRESS OR IMPLIED, INCLUDING WITHOUT LIMITATION, ANY
WARRANTIES OF MERCHANTABILITY, FITNESS FOR A PARTICULAR PURPOSE, NONINTERFERENCE, OR NON-INFRINGEMENT OF ANY THIRD PARTY INTELLECTUAL PROPERTY
RIGHTS, OR EQUIVALENTS UNDER THE LAWS OF ANY JURISDICTION. YOU ASSUME THE
ENTIRE RISK AS TO THE QUALITY AND PERFORMANCE OF THE SOFTWARE. SHOULD THE
SOFTWARE PROVE DEFECTIVE, YOU, AND NOT SANDISK, ITS LICENSORS OR RESELLERS,
ASSUME THE ENTIRE COST OF NECESSARY SERVICING, REPAIR, OR CORRECTION.
4.
LIMITATION OF LIABILITY. TO THE EXTENT NOT PROHIBITED BY LAW, IN NO EVENT
WILL SANDISK OR ITS LICENSORS, OR THEIR RESPECTIVE DIRECTORS, OFFICERS,
EMPLOYEES, CONSULTANTS, LICENSORS, LICENSEES OR AFFILIATES, BE LIABLE FOR ANY
INDIRECT, INCIDENTAL, SPECIAL, CONSEQUENTIAL, OR EXEMPLARY DAMAGES, ARISING
OUT OF OR IN CONNECTION WITH THE DOWNLOAD, DISTRIBUTION, USE OR
PERFORMANCE OR NON-PERFORMANCE OF THE SOFTWARE, EVEN IF SANDISK HAS BEEN
ADVISED OF THE POSSIBILITY OF SUCH DAMAGES. THE FOREGOING LIMITATIONS OF
LIABILITY SHALL APPLY NOTWITHSTANDING ANY FAILURE OF ANY REMEDY PROVIDED FOR
HEREUNDER IN ITS ESSENTIAL PURPOSE. IN NO EVENT WILL SANDISK’S OR ITS
LICENSORS’ TOTAL LIABILITY TO YOU EXCEED THE AMOUNT YOU PAID TO US FOR THE
USE OF THE SOFTWARE.
5.
The Software is provided with “RESTRICTED RIGHTS.” Use, duplication or disclosure
by the Government is subject to restrictions as set forth in FAR 52.227-14 and DFARS
252.227-7013 et seq. Use of the Software by the Government constitutes
acknowledgement of SanDisk’s proprietary rights therein. Contractor or Manufacturer is
SanDisk Corporation, 601 McCarthy Blvd, Milpitas, CA 95035.
6.
Transfer. If you sell or otherwise transfer the SanDisk product that incorporates the
Software as a whole, you may transfer the Software as fully integrated into such product
provided that you also supply this Agreement to the purchaser or recipient of the product,
at which time all of your rights under this Agreement will immediately cease. Except as
stated above, you may not assign or transfer this Agreement in part or in whole, and any
attempt to do so shall be void.
7.
Termination. We may terminate this Agreement and the license immediately and
without notice if you breach it. Upon termination of this Agreement, you must delete or
destroy all copies of the Software.
57
8.
High Risk Activities. The Software is not fault-tolerant and is not designed or
intended for use in hazardous environments requiring fail-safe performance, or any other
application in which the failure of the Software could lead directly to death, personal injury,
or severe physical or property damage (collectively, “High Risk Activities”). SANDISK AND
ITS LICENSORS DISCLAIM ANY EXPRESS OR IMPLIED WARRANTY OF FITNESS FOR HIGH
RISK ACTIVITIES AND SHALL NOT BE LIABLE FOR ANY LIABILITIES OR DAMAGES ARISING
FROM SUCH USE.
General. This Agreement contains the entire understanding between the parties with
respect to your use of the Software. If any part of this Agreement is found void and
unenforceable, it will not affect the validity of the balance of this Agreement, which shall
remain valid and enforceable according to its terms.
This Agreement is governed by and
construed under the laws of the State of California and controlling U.S. federal law without
regard to conflicts of laws provisions thereof. The U.N. Convention on Contracts for the
International Sale of Goods shall not apply to this Agreement. Any action or proceeding
arising from or relating to this Agreement shall be adjudicated in the state or federal courts
of Santa Clara County, California, and the parties hereby agree to the exclusive jurisdiction
and venue of such courts. You will not remove or export from the United States or reexport from anywhere any part of the Software or any direct product thereof to any country
in violation of U.S. Export Administration Regulations, or a successor thereto, except in
compliance with and with all licenses and approvals required under applicable export laws
and regulations including, without limitation, those of the U.S. Department of Commerce.
Any waivers or amendments of this Agreement shall be effective only if made in writing and
signed by an authorized representative of each party. You agree that the Licensors are
third party beneficiaries of this Agreement to enforce your performance of the terms and
conditions of this Agreement. The provisions of Sections 2, 3, 4, 5, 6, 7, 8 and 9 shall
survive the termination or expiration of this Agreement.
10.4. FCC Regulation
This device complies with part 15 of the FCC Rules. Operation is subject to the following two
conditions:
1. This device may not cause harmful interference, and
2. This device must accept any interference received, including interference that may cause
undesired operation.
This equipment has been tested and found to comply with the limits for a Class B digital
device, pursuant to Part 15 of the FCC Rules. These limits are designed to provide reasonable
protection against harmful interference in a residential installation. This equipment
generates, uses, and can radiate radio frequency energy and, if not installed and used in
accordance with the instructions, may cause harmful interference to radio communications.
However, there is no guarantee that interference will not occur in a particular installation. If
this equipment does cause interference to radio or television reception, which can be
determined by turning the equipment off and then on, the user is encouraged to try to
correct the interference by one or more of the following measures:
1. Increase the separation between the equipment and receiver.
2. Correct the equipment to a different outlet so that the equipment and receiver are on
different branch circuits.
3. Consult the dealer or an experienced radio / TV technician for help.
*
*
*
58