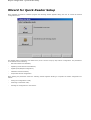
1
Cover
DS6000 Family
Software Configuration Parameter Guide
-
Code Definition
-
Operating Modes
-
Reading System Layout
-
Reading Parameters
-
Data Communication Settings
-
Digital I/O Setting
28/04/2004
Rapid Configuration - Quick Reader Setup
Wizard for Quick Reader Setup
After installing the Genius™ software program the following window appears asking the user to choose the desired
configuration level:
The Wizard option is advised to low skilled users, since it shows a step by step scanner configuration. The parameters
to be defined are the following:
-
Barcode selection and definition;
-
Operating mode selection and definition;
-
Digital Inputs/Outputs configuration;
-
Hardware interface selection;
-
Output data format configuration.
After defining the parameter values the following window appears allowing to complete the reader configuration as
follows:
-
Saving the configuration to disk;
-
Switching to Advanced mode;
-
Sending the configuration to the scanner.
Rapid Configuration - Quick Reader Setup
Test Operating Mode
This operating mode causes the reader to be continuously activated allowing to verify its reading features and its
reading position with respect to the barcode. For this reason, it is particularly advised during the installation phase of
the reader.
After 100 scan, the values relative to an internal counter and the decoded code are displayed and transmitted on the
serial interface. The counter reports the percentage of good reads of the label.
Rapid Configuration - Quick Reader Setup
On Line Operating Mode
This operating mode causes the reader to be connected to an external Presence Sensor using EXT TRIG+ and EXT
TRIG- inputs.
During the active phase of the presence sensor, the DS6500 reader tries to acquire and correctly decode the code.
In case the decoding phase is successful, the barcode characters are transmitted on the serial interface. Otherwise, a no
read message is sent.
Automatic Operating Mode
This operating mode does not require the connection to an external Presence Sensor.
When working in this mode the reader is continuously scanning, while the reading phase is activated each time a
Rapid Configuration - Quick Reader Setup
barcode enters the reader reading zone. The reader stops reading after an N number of scans without a code.
Barcode characters are transmitted on the serial interface. In case of a failed reading phase no message is sent to the
host computer.
Rapid Configuration - Network Wizard
Network Wizard
The Network Wizard allows defining the model and number of slave scanners of the Lonworks network.
Since this tool is available only for the DS6500 Master, it is first necessary to configure your scanner as Master, as
shown in the figure below:
Then, it is possible to define the network settings by starting the network wizard:
1)
if not, activate the cluster configuration by clicking on the
area will appear next to the Parameter Explorer window;
2)
Click on the
icon available on the Toolbar. Then, the “Devices”
button available in the “Devices” area to open the Network Wizard dialog box:
Rapid Configuration - Network Wizard
a.
if the slave scanners have been already configured and wired to the network, click on the Autodetect
button to start a polling procedure of the current network. All found slave scanners will be represented
in the “Current Devices” area. Then, select the desired slave scanner from the “Current Devices” area
and click on the
icon (or drag drop) to transfer it in the “Requested Devices” area where
customizing your network.
b.
3)
if the slave scanners have not been configured and wired to the network, click on the
icon to
add a new device defining its address and model. The added slave scanner will be then displayed in
the “Current Devices” area.
If desired, select the transferred/added slave scanner within the “Requested Devices” area and click on the
icon to customize the scanner label.
4)
Once your network has been customized, close the network wizard. Before closure, the program will show a dialog
box asking whether sending the new configuration to the Master. Choose the “Yes” option to start this procedure.
Code Definition
Code Definition
This group allows defining the following parameters, which are common to all the code symbologies:
Code Combination
Logical Combination Rule
No Read Message
No Read String
Multiple Read String
Multiple Read Message
Associate Same Codes When Coming From Different Slave Scanners
Code Combination
The Code Combination parameter selects the decoding mode for the scanner:
In single label mode only one barcode can be read in each reading
- Single-label
Selections:
phase, however it can be determined automatically from up to 10
enabled codes. The scanner stops decoding as soon as a code is read.
If the code is not read during the reading phase, the No Read message
is produced.
In multi label mode the barcodes selected (up to 10), will all be read in
- Standard Multi Label
the same reading phase. All the selected codes in the reading phase
must be read. If the reading phase terminates before all the codes are
read, a Global No Read message will be produced, unless it is disabled,
in which case a Local No Read will be produced.
NOTE
In case of Multi Label, the codes will be distinguished EITHER by
their symbology, OR by their contents. If two (or more) codes
share the same symbology and content, the scanner will perceive
them as a unique code.
- Logical Combination
- Code Collection
In Logical Combination mode the codes of the groups defined by the
Logical Combination Rule are read in the same reading phase.
In code collection mode all read codes are collected and ordered
according to the enabled code symbologies. The No Read message is
produced only when no code is read.
Logical Combination Rule
It allows editing the rule which the combination of groups of labels is based upon.
Groups and their order define the output message format, while each group identifies an expected code.
When editing the logical combination rule, proceed as follows:
1.
define the “Code Label Settings #n” indicating the type of expected code labels. It is possible to define up to 10
different code types;
2.
define how many code types (groups) are expected by editing the combination rule through the following logical
operators. Each group may include one or more selected code types.
& = AND operator which separates a group from the previous/following one;
^ = XOR operator to be used to combine different code labels within the same group. It allows
reading one
of the defined code labels.
The maximum number of groups to be defined for each rule string is 15.
If setting the Local No Read Message, a further parameter group is displayed requiring to define a Local No Read
String for each group.
NOTE
If the syntax of the combination rule is wrong or the expected Code label settings#n is not defined, the following
message appears after sending a configuration to the reader:
Code Definition
Examples
For all the following examples the No Read Message parameter is set to “Global No Read Message”.
-1Code label setting#1 = Code 128
Logical Combination Rule = 1&1
Defines 2 groups, each of them expecting a Code 128 label.
Decoded Code Symbology
First Label #1
Second Label #1
----X
----X
X
X
Output Message
<Header><Global No Read Message><Terminator>
<Header><Global No Read Message><Terminator>
<Header><Global No Read Message><Terminator>
<Header><Code 128 data><Code Separator><Code 128
data><Terminator>
NOTE
In case the Multiple Read Message is enabled and a third label belonging to the Code 128 symbology is
decoded, the Multiple Read string will be also transmitted. If the Multiple Read Message is disabled, the third
code label is ignored and only the first two codes are transmitted.
-2Code label setting#1 = Code 39
Code label setting#2 = Code 128
Logical Combination Rule = 1^2
Defines a single group expecting a Code 128 label OR a Code 39 label.
Decoded Code Symbology
Label #1
Label #2
----X
----X
X
X
Output Message
<Header><Global No Read Message><Terminator>
<Header><Code 39 data><Terminator>
<Header><Code 128 data><Terminator>
<Header><First decoded code/Multiple Read Message string ><Terminator>
NOTE
In case the Multiple Read Message is enabled and both codes are decoded, the Multiple Read string will be also
transmitted. If the Multiple Read Message is disabled, the first decoded code is transmitted only.
-3Code label setting#1 = EAN 8
Code label setting#2 = UPC-A
Logical Combination Rule = 1&1&1^2
Defines three different groups. The first two groups expects a EAN 8 label while the third one expects an EAN 8 label OR
an UPC-A label.
Decoded Code Symbology
First
Second
Third
Label #2
Label #1
Label #1
Label #1
--------X
--------X
--------X
--------X
X
X
X
--X
X
---
X
X
X
X
X
Output Message
<Header><Global No Read Message><Terminator>
<Header><Global No Read Message><Terminator>
<Header><Global No Read Message><Terminator>
<Header><Global No Read Message><Terminator>
<Header><Global No Read Message><Terminator>
<Header><EAN 8 data><Code Separator><EAN 8 data><Code
Separator><EAN 8 data><Terminator>
<Header><EAN 8 data><Code Separator><EAN 8 data><Code
Separator><UPC-A data><Terminator>
<Header><EAN 8 data><Code Separator><EAN 8 data><Code
Separator><First decoded code/Multiple Read Message
string><Terminator>
Code Definition
NOTE
In case the Multiple Read Message is enabled and both codes are decoded, the Multiple Read string will be also
transmitted. If the Multiple Read Message is disabled, the first decoded code is transmitted only.
-4Code
Code
Code
Code
label
label
label
label
setting#1 = Code 93
setting#2 = Interleaved 2/5
setting#3= EAN-8
setting#4= UPC-A
Logical Combination Rule = 1^2&3^4
Defines 2 groups, each of them expecting one of the defined code types. The first group may expect a Code 93 label or
an Interleaved 2/5 label. The second group may expect an EAN-8 label or an UPC-A label.
Decoded Code Symbology
Label
Label
Label
Label
#1
#2
#3
#4
--------X
--------X
--------X
--------X
X
X
----X
--X
X
X
X
X
---
---
X
X
X
X
---
X
---
X
---
---
X
---
X
X
---
---
X
---
X
X
X
X
X
Output Message
<Header><Global No Read Message><Terminator>
<Header><Global No Read Message><Terminator>
<Header><Global No Read Message><Terminator>
<Header><Global No Read Message><Terminator>
<Header><Global No Read Message><Terminator>
<Header><Global No Read Message><Terminator>
<Header><Code93><Code Separator>< First decoded code/Multiple
Read Message string><Terminator>
<Header><First decoded code/Multiple Read Message string><Code
Separator><EAN 8 data><Terminator>
<Header>< Interleaved 2/5 data><Code Separator>< First decoded
code/Multiple Read Message string ><Terminator>
<Header><Code 93 data><Code Separator><EAN 8
data><Terminator>
<Header><Code 93 data><Code Separator><UPC-A
data><Terminator>
<Header><Interleaved 2/5 data><Code Separator><EAN 8
data><Terminator>
<Header><Interleaved 2/5 data><Code Separator><UPC-A
data><Terminator>
<Header><First decoded code/Multiple Read Message string><Code
Separator>< First decoded code/Multiple Read Message string
><Terminator>
NOTE
In case the Multiple Read Message is enabled and both codes are decoded, the Multiple Read string will be also
transmitted. If the Multiple Read Message is disabled, the first decoded code is transmitted only.
No Read Message
The No Read condition occurs whenever a code cannot be read or decoded.
Selections:
- Disable No Read Message =
the No Read Message is not transmitted
- Global No Read Message =
the No Read String will be sent if the scanner is unable to
decode one or more barcodes in the reading phase.
- Local No Read(s) Message =
this option is useful when one or more codes are not read in
the reading phase. You can define the Local No Read character
to use for each code. Do not use this option when working in
single-label mode.
If working in Logical Combination Rule mode, this option
activates the Local No Read Strings group where setting a
Local No Read String for each group label.
No Read String
It defines the string to be displayed in case of Global No Read Message. It is possible to select either the ASCII or HEX
value.
Code Definition
Multiple Read Message
This string will be sent if, during the reading phase, the scanner reads more than the number of the expected barcodes
set by the configuration parameters. This parameter is not only available when enabling the Single Label operating
mode.
Multiple Read String
It defines the string to be displayed in case of Multiple Read Message. It is possible to select either the ASCII or HEX
value.
If disabled, the scanner transmits the first code read.
Associate Same Codes When Coming From Different Slave Scanners
This parameter is available only when the Code Combination parameter is set to Code Collection and the scanner
Topology Role is Master.
If enabled, it allows transmitting all codes belonging to the same symbology but transmitted by different slave scanners
in a single instance.
Code Definition All Codes
Code Definition
The parameters available in this group define the properties of the code symbology selected. The following table lists all
parameters:
Enable
Minimum Label Length
Maximum Label Length
Code Symbology
Check Digit Tx
Pattern Match String
EAN Add On
Ink Spread Equalization
Decoding Safety
Label Length
Decoding Severity
Min Code Position
Check Digit
Code Label Local No Read String
Max Code Position
Bar Count
Start Char Tx
Stop Char Tx
Enable
Checking this check box allows setting all parameters defining the code to be read.
Code Symbology
You can select the code type to be read in a wide range of symbologies.
The following is the complete list of all the code types that are available:
CODE 128
INTERLEAVED 2 OF 5
CODE 39
EAN 128
EAN-13
EAN-8
UPC-A
UPC-E
All EAN-UPC
CODABAR
CODE 93
EAN Add On
This parameter is available only for EAN/UPC code symbologies. It allows defining the Add On:
the selected EAN/UPC code has no additional digit;
Selections: - No Add On
- 2 digits Add On
the selected EAN/UPC code has 2 additional digits;
- 5 digits Add On
the selected EAN/UPC code has 5 additional digits;
Label Length
The label length (in number of characters/digits) can be specified in order to be accepted for decoding.
Selections: - Variable:
all possible label lengths (in number of characters/digits) allowed for the
code selected are accepted.
- Fixed from 1 to 48:
only the selected length is accepted.
The selection of a fixed label length is advised whenever possible.
NOTE
This parameter is not available for the following code symbologies, since their label length is automatically
defined:
- EAN-8
- UPC-E
- EAN-13
- All EAN-UPC
- UPC-A
Check Digit
The check digit control can be enabled to improve decoding safety: it is generally the last digit aligned to the right of
the code and verifies the validity of the preceding digits. The calculation technique and number of check digits depend
on the code selected.
It is advised to enable the check digit whenever correct code identification is difficult.
The following barcode symbologies include check digits in their definitions:
Code Definition All Codes
-
Code 128
-
EAN/UPC
-
Code 93
For these symbologies the check digit control is not allowed.
Check Digit Tx
This option allows the Check Digit to be included in the code transmitted.
Bar Count
The Bar Count allows to further specify the number of elements in the read code for Code 128 and EAN 128.
For these codes, the same number of barcode elements (bars + spaces) can be associated with a different number of
characters.
Selections:
- Variable:
to select the correct number of characters, set Label Length to the desired
fixed value and Bar Count to Variable.
12
12
Code 128
Code 128
Subset A
Subset C
Digit Number 2, Bar Count variable
- from 25 to 313:
a variable number of characters in step of 6 whose range depends on the code
symbology selected.
To select a particular barcode length in elements, set Bar Count to the desired
fixed value and Label Length to Variable.
12
1234
Code 128
Code 128
Subset A
Subset C
Digit Number variable, Bar Count 31
Min/Max Label Length
Codes, whose lengths are within the range of values specified by these parameters, will be accepted for decoding.
Selections:
- from 1 to 48 =
Label length in number of characters
NOTE
The value set as maximum acceptable label length must always be greater than the value set for the minimum
label length. These parameters are configurable when the Label Length is set to Variable.
Ink Spread Equalization
The Ink Spread Equalization parameter allows the decoding of codes which are not perfectly printed because the page
texture tends to absorb the ink.
This parameter can be enabled for code types EAN/UPC, Code 93 and Code 128.
Decoding Severity
During decoding, poorly printed or damaged codes could be discarded and not transmitted because their image does
not match the expected code image.
Through the Decoding Severity parameter, a ratio between the actual and the expected code image can be considered.
The lower this ratio is, the higher the difference between the images can be.
However, please note that setting a low value for this parameter increases the possibility of decoding errors.
Selections:
- from 1 to 5 =
where 1 and 5 represent respectively the lowest and highest severity level.
Code Definition All Codes
Code Label Local No Read String
This is used when the defined code is not read in the reading phase. The Local No Read String is enabled when setting
the No Read Message parameter to Local No Read Message.
Pattern Match String
A code can also be identified by its content. A pattern matching string is programmable for each code and if the read
codes do not match the defined string, a No Read Event will be returned.
It is possible to define the matching string by inserting:
all printable characters
non printable ASCII characters available in the list which appears by right-clicking on the parameter edit box
* = defining any string consisting of an undefined number of characters (it may be empty)
? = identifying any character to be found in the position indicated within the string
If your application requires inserting ?, * and NUL as characters, it is necessary to use the following syntax:
? character = <NUL>?
* character = <NUL>*
NUL character = <NUL>00
other extended ASCII characters = <NUL>xy, where xy identifies the character hex value
Examples
-1Match a code starting with 123 string and followed by any string of characters:
Match String
= 123*
Example Code
= 123aC53
-2Match a code ending with 123 string preceded by any string of characters:
Match String
= *123
Example Code
= 41pO123
-3Match a code having 123 string in any position:
Match String
= *123*
Example Code
= 41pO123253
-4Match a code starting with 123 string followed by three generic characters and an undefined string of characters, in this
case no character:
Match String
= 123???*
Example Code
= 123ad2
-5Match any code of four characters:
Match String
= ????
Example Code
= gT6k
-6Match a code with 6 characters in any position having 12 as central characters:
Match String
= *??12??*
Example Code
= datal12og35
-7The following is an example of a very complex string where ? and* are used both as commands and as characters:
Match String
= *45<NUL>??*??AC<NUL>*251?*
Example Code
= GEN45?3iusdsAC*2516300
Decoding Safety
This parameter is available only when the Reading Mode parameter is set to Linear. It verifies that an N number of
decodes are performed with the same result before code reading is accepted as valid:
Code Definition All Codes
Selections:
- a number from 1 to 100 (1 = control disabled)
Min/Max Code Position
These parameters specify where in the scan line a particular code can be found. The scan line is divided into 256
physical positions.
The code position is determined at the beginning of the label and is checked to be between the Min and Max
parameters specified in the configuration. These values go from 0 to 255.
Selections:
- a value from 0 to 255
Since the Min and Max values depend on many factors such as: the scanner model, number of mirrors, scan speed,
aperture angle, etc.., typical values are not applicable.
NOTE
You must set a range of positions in which the code will be found. A typical range is 5 positions (i.e. min = 25,
max = 30).
If you want to disable this verification, set Min = 0 and Max = 255, which means the code can occur anywhere in the
scan line.
Start Char Tx
This parameter is available only for Codabar code symbologies. It allows transmitting the code start character:
the character is not selected;
Selections: - Disabled
- Lower Case
the character is transmitted in lower case;
- Upper Case
the character is transmitted in upper case.
Stop Char Tx
This parameter is available only for Codabar code symbologies. It allows transmitting the code stop character:
the character is not selected;
Selections: - Disabled
- Lower Case
the character is transmitted in lower case;
- Upper Case
the character is transmitted in upper case.
Local No Read Strings
Local No Read Strings
This group allows defining a Local No Read string for each group used in the Logical Combination Rule.
This group allows defining the following parameter:
Group Label Local No Read String
Group Label Local No Read String #n
It defines the string to be transmitted when the expected label (group) is not read. It is possible to define up to 15 no
read strings corresponding to the 15 groups to be defined.
Operating Modes
Operating Modes
The available operating modes are listed below:
z On Line
z Automatic
z Continuous
z Test
z PackTrack™
On Line
On Line
This group allows defining the following parameters:
On Line Options
Stop Input Active Level
Reading Phase Timeout
Start Input Number
Serial Start String
Stop Priority
Start Input Active Level
Serial Stop String
Timeout
Stop Input Number
Statistics
Start Input from Bus
In this operating mode, the scanner is connected to an external presence sensor and a reading phase is defined as the
time between the Presence Sensor turning ON and OFF.
Reading Phase
On Line Options
The On Line mode can be activated by choosing one of the following options:
Selections:
- On Line 1 Input:
the reading phase takes place during the active phase of the presence sensor,
when the scanner tries to acquire and correctly decode the code. If the
operation is successful, the barcode characters are transmitted on the serial
interface in the format defined by the current configuration and the right
output event is risen at the end of the PS active phase. If a code cannot be
decoded, a no read message is sent and the no read event is risen at the end
of the PS active phase.
- On Line 2 Input:
the reading phase is defined by 2 inputs. It starts when the Start Input is
activated and stops when the Stop Input is deactivated.
If the operation is successful, the barcode characters are transmitted in the
format defined during the configuration phase on the interface(s) enabled and
the right output event is risen. If a code cannot be decoded, a no read event
is risen.
- Serial On Line:
In Serial-On-Line mode the reading phase starts when the Serial Start String
is received on the serial interface and ends when the Serial Stop String is
received or when a programmed Reading Phase Timeout expires.
If decoding is correct, the data is transmitted on the serial port as defined by
the configuration. The output line selected for the right output event is risen
and the relative message is transmitted on the serial interface.
In case of a wrong read, a no read message is transmitted on the serial
interface. The output line selected for the no read event is risen and the
relative message is transmitted on the serial interface.
Start Input Number
It defines the number of the input starting the reading phase.
Selections:
- from 1 to 4
Start Input Active Level
Allows the selection of the active state of the input.
On Line
Selections:
- Normally Open =
the input is active when there is no current flowing through IN pins.
- Normally Closed =
the input is active when current flows through IN pins.
Stop Input Number
It defines the number of the input ending the reading phase.
Selections:
- from 1 to 4
Stop Input Active Level
Allows the selection of the active state of the input.
Selections:
- Normally Open =
the input is active when there is no current flowing through IN pins.
- Normally Closed =
the input is active when current flows through IN pins.
Serial Start String
The Serial Start string signals the beginning of the reading phase.
Selections: - a character from NUL (00H) to ~ (7EH)
The Serial Start string must be different from the Serial Stop string.
Serial Stop String
The Serial Stop string signals the end of the reading phase.
Selections: - a character from NUL (00H) to ~ (7EH)
The Serial Stop string must be different from the Serial Start string.
Reading Phase Timeout
If checked, it allows defining a timeout for the Serial On Line mode.
Timeout
By setting this parameter the reading phase starts when the Start Input or Serial String is activated and stops when the
selected Timeout expires. The Timeout represents the period of time for the reading phase.
Selections: - from 40 to 15000 ms
Stop Priority
It defines the parameter defining the end of the reading phase:
Selections:
- Input/Serial Stop =
the Stop Input or Serial Stop String define the end of the reading phase.
Timeout has a lower priority.
- Always Timeout =
the reading phase always stops when the selected timeout expires.
Start Input from Bus
This parameter is available only when enabling either the Ethernet or the Profibus interface.
If checked, it allows the Profibus master/Ethernet client to remotely enable/disable the reading phase via bit 7 (MSb) in
Byte 0 (LSB) of the Output Area.
Automatic
Automatic
The device does not require connections with external presence sensors in this operating mode.
In this mode the scanner is continuously scanning. The reading phase is enabled when a barcode enters the reading
zone of the scanner and is terminated after an N number of scans without a code, where N is set using the Automatic
Threshold selection. The next reading phase will begin when a code enters the reading zone of the scanner again.
The N number of scans without a code must be selected to assure code identification in the reading zone.
Code transmission is identical to the other operating modes except that there is no transmission on the serial port in the
case of a No Read condition.
This group allows defining the following parameter:
Automatic Threshold
Code Filter Depth
Automatic Threshold
The Automatic Threshold sets an N number of scans without a code in order to assure code identification in the reading
zone.
Selection:
- a value from 10 to 32765
Code Filter Depth
In Automatic mode, Code Filter Depth is used to avoid multiple reads of the same code. The selected value (other than
zero) defines the number of codes to memorize in a FIFO list.
When a code is read, it is compared to the list. If the list contains a code identical to the current code being read, the
current code is discarded. If not, the current code is accepted and added to the list in either the last available position
or by replacing the oldest code in the list.
Selection:
- a value from 0 to 50
Example
Code Filter Depth = 3
List
Code Read
Accepted
xxx (no codes in list)
A
Yes
Axx
B
Yes
BAx
B
No
BAx
C
Yes
CBA
D
Yes
DCB
A
Yes
ADC
A
No
Continuous
Continuous
The device does not require connections with external presence sensors in this operating mode.
The reading phase is always active and, differently from the Automatic operating mode, it also allows reading two or
more codes when placed along the same scan line.
Code transmission is identical to the other operating modes except that there is no transmission on the serial port in
case of a No Read condition.
This group allows defining the following parameter:
Code Filter Depth
In Continuous mode, Code Filter Depth is used to avoid multiple reads of the same code. The selected value (other than
zero) defines the number of codes to memorize in a FIFO list.
When a code is read, it is compared to the list. If the list contains a code identical to the current code being read, the
current code is discarded. If not, the current code is accepted and added to the list in either the last available position
or by replacing the oldest code in the list.
Selection:
- a value from 0 to 50
Example
Code Filter Depth = 3
List
Code Read
Accepted
xxx (no codes in list)
A
Yes
Axx
B
Yes
BAx
B
No
BAx
C
Yes
CBA
D
Yes
DCB
A
Yes
ADC
A
No
Test
Test
The Test Mode reports information about the reading performance of the laser beam and the code is continuously read.
This operating mode allows defining the following parameter:
Test Mode Send Data
After 100 scans, the following information is transmitted on the serial interface.
The information can be displayed on the Host PC by running a terminal emulator program (ex. Hyper Terminal):
The information reports the read code, the percentage of good reads of the label and the focus position. The format of
the string displayed on the terminal emulator is fixed and cannot be modified through the No Read String parameter
and the Data Format parameter group.
For more details refer to the "Focus Adjustment" paragraph available both in the scanner Installation Quick Reference
and Reference Manual.
Test Mode Send Data
When working in Test mode, this parameter allows activating a further filter for the selection of the transmission
channel in addition to the one provided by the Data Tx parameter available for each communication channel.
Selections:
- Send Data to Aux Serial only
- Send Data to All Selected Channels
- Do Not Send Data
PackTrack™
NOTE
The PackTrack™ operating mode is available only for DS64XX scanner models.
This group allows defining the following parameters:
Physical Encoder
Conveyor Speed
Encoder Step
PS Line
Presence Sensor Input
Presence Sensor Input Level
Distance from PS Line to TX Line
Transmission Edge
The
*
Max Number of Packs
Minimum Distance Error Behaviour
Minimum Distance Between Packs
Minimum Pack Length Error Behaviour
Minimum Pack Length
Window Dimension
NOTE
PackTrack™ parameters are selectable only when setting the Topology Role option to:
Master
Other *
when setting to “Other” it is necessary to set the Device Assignment parameter to “Alone”.
PackTrack™ is a patented operating mode for Datalogic Omni-Directional Reading Stations used to read and correctly
assign codes read on different packs when placed in the scanner Reading Area at the same time.
Working in PackTrack™ mode requires the presence of an encoder and a presence sensor to track the moving packs.
In fact, in the following example, the codes of two or more consecutive packs are found at the same time in the scanner
reading area. Therefore, the condition occurs where, in the sequence of the two packs, the code of the second pack is
read first, just before the code of the previous pack. A system without PackTrack™ would assign the code of the second
pack to the first pack and vice versa, thus causing a gross error in sortation.
For a correct functioning, the PackTrack™ operating mode requires a calibration just after the installation of the
scanners. This operation is absolutely necessary to make the scanner recognize its position in space. Thus, a fixed
reference system is required.
Let’s consider a right-handed reference system (right hand with thumb = X axis; forefinger = Y axis; middle finger = Z
axis) where the Y axis coincides with the pack moving direction and the Z axis is oriented upwards from the conveyor
(see figure below). Three barcodes are placed along the scanline. For each of them, the three coordinates are shown.
(The axis X coincides for example with the PS line).
NOTE
Pay attention to the axis orientation in the reference system.
This coordinate system is absolute for the reading station, i.e. is valid for all the scanners independently from their
position or orientation with respect to the conveyor. For this reason, after the PackTrack™ calibration (and
configuration) has been correctly performed, when a barcode is under the beam to be read by the scanners, its position
is defined by the coordinates of its central point, independently from which scanner is reading.
The calibration procedure asks to place a barcode in different positions:
Typically the 3 “canonical” positions are:
the first at the scanline beginning on the conveyor plane (Z1 = 0)
the second on the approx. at the middle of the scanline and with a height different from zero such as the one of
the highest pack accepted (Z2>0)
and finally the third one towards the end of the scanline at a height = 0 (Z3 = 0).
Actually there are no limitations about the code positions and their order (for ex.: you can start from the central
position which, therefore, will refer to X1, Y1, Z1 and then move towards the ends).
Physical Encoder
If checked, it enables the encoder which is physically connected to Input 2. For correct functioning, define the Encoder
Step parameter (hundredths of a millimeter) and ensure that the Debouncing value for Input 2 is 500 µs.
If unchecked, the conveyor speed is supposed to be constant. Thus, it is only required to define the Conveyor Speed
parameter.
Encoder Step
It defines the value of a single step of the encoder in hundredths of a millimeter. Each front of the Encoder Step signal
is used and therefore the Single step value must be divided by two (see example).
Example:
Encoder circumference = 305 mm
Step per Revolution [or Pulse Per Revolution (PPR)] = 48
Single step is 305/48 = 6.35 mm
Encoder Step is 6.35 /2 = 3.175 mm (318)
Conveyor Speed
This parameter is available only when the Physical Encoder is disabled. It defines the constant speed of the conveyor in
mm/sec.
PS Line
This parameter defines the read signal Y coordinate (mm) referred to the origin of co-ordinates used for PackTrack™
configuration (see image of the reference system).
Presence Sensor Input
It defines the input to be used as presence sensor. It is not possible to select Input 2, if already used for the Physical
Encoder.
Presence Sensor Input Level
It allows selecting the active state of the presence sensor:
Selection:
-
Active Open =
-
Active Closed =
the presence sensor is active when there is no current flowing through IN
pins.
the presence sensor is active when current flows through IN pins.
Distance from PS Line to Tx Line
It defines the distance (mm) between the PS and TX lines allowing to define the tracking area (see image of the
reference system).
Transmission Edge
When a pack reaches the end of reading area, it determines if it is declared exited when it reaches or leaves the TX
Line. This parameter allows defining the object edge used by the scanner as reference for data transmission:
Selection:
-
Trailing =
pack exits when its end leaves TX Line
Leading =
pack exits when its beginning reaches TX Line
Max Number of Packs
It defines the maximum number (>2) of packs that can be managed within the reading area.
Minimum Distance Error Behaviour
It defines the scanner behaviour in case of minimum distance error:
Selection:
-
Ignore Error
=
the occurred error is ignored
Compose
=
composes the read packs and transmits all data in a single message
Discard Last
=
discards the last received packet
Minimum Distance Between Packs
It defines the minimum distance (mm) between consecutive packs.
Minimum Pack Length Error Behaviour
It defines the scanner behaviour in case of minimum pack length error:
Selection:
-
Ignore Error
=
the occurred error is ignored
Discard them
=
discards all received packs
Minimum Pack Length
It defines the minimum length of a pack (mm).
Window Dimension
The measurement of a barcode position in absolute coordinates performed by the scanners may be affected by an error.
PackTrack™ evaluation can fail in assigning the barcode for this reason. With the Window Dimension parameter, the Y
coordinates that delimit the pack can be virtually extended to improve the assigning success rate (see the following
figure).
NOTE
The Window Dimension should be kept as narrow as possible, keeping in mind the minimum distance between
consecutive packs. The minimum distance should be at least twice the value of the Window Dimension . For
instance, if the minimum distance is set to 50 mm, Window Dimension should be set not over 25 mm. If this
rule is not followed, a barcode close to the edge of a pack may be “seen” on the “adjacent” pack.
Reading System Layout
This group is available only when working in On-Line, PackTrack™ and Continuous operating modes.
Available parameters are the following:
Number of Lonworks Slaves
Device Assignment
Number of Slaves (Type A)
The Device Assignment selections and related parameters depend on the Topology Role defined for the current scanner.
In particular:
Topology Role
Master SYNCHRONIZED
Slave SYNCHRONIZED
Master MULTIDATA
Slave MULTIDATA
Other
Device Assignment Selection
Lonworks
Selectable Parameters
None
Lonworks
None
Alone
Master RS232 (Type A)
Master Lonworks and Type A
Slave RS232 (Type A)
Number of Slaves (Type A)
Number of Lonworks Slaves
Device Assignment
The Device Assignment parameter allows to configure the device according to the desired layout.
Selections:
- Lonworks
=
the scanner Topology Role is either Master or Slave.
- Alone
=
the scanner is in a stand-alone configuration connected to a Host
- Master RS232
(Type A)
=
the master configuration varies according to the types of scanners that will
be connected together in the network as Slaves: DS2100, DS2400,
DS4300, DS4600, DS6300, DS6400.
To select this option it is necessary to disable the transmission on the
Auxiliary Serial Port and enable it on the Main Serial Port through the
corresponding Data Tx parameter.
- Master Lonworks
& (Type A)
=
the DS6300 is connected as a scanner in a master slave configuration
where the slaves scanners are both DS6300 working as slaves or other
types of scanners, such as:
DS2100, DS2400, DS4300, DS4600, DS6300, DS6400.
- Slave RS232
(TypeA)
=
the slave configuration varies according to the types of scanners that will
be connected together in the network as Master: DS2100, DS2400,
DS4300, DS4600, DS6300, DS6400.
Number of Slaves (Type A)
This parameter is enabled when the Device Assignment parameter is set to Master RS232 (Type A). It defines the
number of slaves to be connected to the master scanner.
Selections: - a number in the range 1 to 9.
Number of Lonworks Slaves
This parameter is enabled when the Device Assignment parameter is set to Master Lonworks and Type A. It defines the
number of slaves to be connected to the master scanner.
Selections: - a number in the range 1 to 31.
Reading Parameters
Reading Parameters
This group allows defining the following parameters:
Beam Shutter
Overflow Ratio
Reading Mode
Beam Shutter
This parameter is active only when the Operating Mode is set to On Line.
The Beam Shutter turns the laser off.
The Beam Shutter option can be used:
- to increase the overall laser diode life when used in high ambient temperature applications (over 35° C);
- to reduce power consumption;
- to turn off the laser for safety purposes.
Selections:
- Disabled =
- Enabled =
- Triggered =
the laser is always on.
the laser is always off and all operations are suspended.
the laser is turned off as soon as the code(s) are read or when the reading phase
ends. The laser is turned on again when the next reading phase starts.
Overflow Ratio
The Overflow Ratio is used to detect the extreme elements of a barcode through the ratio of the duration of two
barcode elements next to each other (the greater value is the numerator). If this ratio is greater than the value set for
the automatic overflow, a barcode extreme is present.
Selections:
a value between 0 and 50.
Reading Mode
It defines the scanner reading mode:
Selections:
- Linear =
- Reconstruction =
standard reading mode
allows code reconstruction when reading the code
Reconstruction Parameters
Reconstruction Parameters
This group allows defining the following parameters:
Max Scan Gap
Max Stacked Codes
Max Scan Gap
This parameter sets the number of scans without a matching code portion after which the code portion currently
analyzed for reconstruction is discarded.
Selections:
a value between 0 and 1000
Max Stacked Codes
This parameter improves code reconstruction when codes are stacked, one on top of the other with little or no space
between them. If a number of codes greater than the value set for this parameter is detected, the codes in excess will
be discarded.
Selections:
- a value between 1 and 3
Scan Line Amplitude
Scan Line Amplitude
This group allows setting the amplitude of scanner laser line in order to illuminate only the desired reading area.
Available parameters are the following:
Amplitude Settings Enable
Laser Turn On Position
Laser Turn Off Position
Amplitude Settings Enable
If checked, it allows setting all parameters defining the scan line amplitude.
Laser Turn On Position
This parameter specifies the position where the scanner laser turns on. The scan line is divided into 256 physical
positions.
Selections: - a value from 0 to 255
Laser Turn Off Position
This parameter specifies the position where the scanner laser turns off. The scan line is divided into 256 physical
positions.
Selections: - a value from 0 to 255
Flash
Flash
NOTE
The Flash parameter group is available only for DS64XX-10X-0XX models.
Flash allows to configure the parameters relative the autofocus:
Flash Mode
Flash Mode
This parameter defines the operating mode used by the scanner to adjust the focus position automatically to the
reading area containing the barcode:
Selections:
-
Disabled
the scanner focus position is set according to the factory default settings
(if using the scanner for the first time) or to the last saved configuration;
-
Fixed
the scanner focus is positioned at a fixed distance;
Triggered
the scanner focus position varies according to the activation of external
events (inputs);
-
Continuous
the scanner focus position covers a defined reading range;
DFlash
the scanner focus varies according to the ranges into which the global
distance has been discretized.
A dedicated add-on, available in the GENIUS™ configuration tool, provides a graphical indication for a better parameter
setting.
Fixed Flash Mode
Fixed
This Flash Mode allows to position the scanner focus exactly on the object containing the barcode label:
Fixed Distance
Fixed Distance
This parameter fixes the distance at which the scanner will focus the expected object containing the bar code:
Selections:
-
0:
the scanner autofocus is disabled;
a value from 1 to 255:
distance from 1 to 255 cm.
Triggered Flash Mode
Triggered
This Flash Mode allows assigning the desired focus distance to one or more inputs. In this way, upon activation of each
input the scanner focus will be automatically positioned at the associated distance. Available parameters are:
Stand-by Distance
Input 3 Distance
Input 1 Distance
Input 4 Distance
Input 2 Distance
Stand-by Distance
This parameter defines the focus distance when no object is detected by the selected inputs:
Selections:
-
0:
the scanner autofocus is disabled;
a value from 1 to 255:
distance from 1 to 255 cm.
Input 1 Distance
This parameter defines the focus distance to be automatically adopted when an object is detected by Input 1:
Selections:
-
0:
the scanner autofocus is disabled for input 1;
a value from 1 to 255:
distance from 1 to 255 cm.
NOTE
If Input 1 has been already associated to another function (i.e. Presence Sensor), an error message will be
generated when sending the configuration to the scanner. All inputs can manage only a single function at the
time.
Input 2 Distance
This parameter defines the focus distance to be automatically adopted when an object is detected by Input 2:
Selections:
-
0:
the scanner autofocus is disabled for input 2;
a value from 1 to 255:
distance from 1 to 255 cm.
NOTE
If Input 2 has been already associated to another function (i.e. Presence Sensor), an error message will be
generated when sending the configuration to the scanner. All inputs can manage only a single function at the
time.
Input 3 Distance
This parameter defines the focus distance to be automatically adopted when an object is detected by Input 3:
Selections:
-
0:
the scanner autofocus is disabled for input 3;
a value from 1 to 255:
distance from 1 to 255 cm.
NOTE
If Input 3 has been already associated to another function (i.e. Presence Sensor), an error message will be
generated when sending the configuration to the scanner. All inputs can manage only a single function at the
time.
Input 4 Distance
This parameter defines the focus distance to be automatically adopted when an object is detected by Input 4:
Selections:
-
0:
the scanner autofocus is disabled for input 4;
a value from 1 to 255:
distance from 1 to 255 cm.
Triggered Flash Mode
NOTE
If Input 4 has been already associated to another function (i.e. Presence Sensor), an error message will be
generated when sending the configuration to the scanner. All inputs can manage only a single function at the
time.
Continuous Flash Mode
Continuous
This Flash Mode allows the scanner focus to dynamically cover the defined reading range where objects containing bar
codes are expected. Available parameters are:
Max Distance
Min Distance
Frequency (Hz)
Min Distance
This parameter defines the minimum distance value of the reading range where the scanner focuses objects:
Selections:
-
0:
the scanner autofocus is disabled;
a value from 1 to 255:
minimum distance from 1 to 255 cm.
Max Distance
This parameter defines the maximum distance value of the reading range where the scanner focuses objects:
Selections:
-
0:
the scanner autofocus is disabled;
a value from 1 to 255:
maximum distance from 1 to 255 cm.
Frequency
This parameter defines in Hertz a linear shift of the scanner focus.
Selections:
a value from 0.1 to 19.0 Hertz
DFlash Flash Mode
DFlash
This Flash Mode allows discretizing the total focus distance into eight different focus ranges in order to guarantee the
maximum flexibility of the autofocus management. Available parameters are:
Distance 1
Distance 5
Distance 2
Distance 6
Stand-by Distance
Offset Distance
Distance 3
Distance 7
DFlash Behaviour
Distance 4
Distance 8
Distance 1
This parameter defines the first focus distance range.
Selections:
-
a value from 0 to 255:
distance from 0 to 255 cm.
Distance 2
This parameter defines the second focus distance range. It must be greater than Distance 1.
Selections:
-
a value from 0 to 255:
distance from 0 to 255 cm.
Distance 3
This parameter defines the third focus distance range. It must be greater than Distance 2.
Selections:
-
a value from 0 to 255:
distance from 0 to 255 cm.
Distance 4
This parameter defines the fourth focus distance range. It must be greater than Distance 3.
Selections:
-
a value from 0 to 255:
distance from 0 to 255 cm.
Distance 5
This parameter defines the fifth focus distance range. It must be greater than Distance 4.
Selections:
-
a value from 0 to 255:
distance from 0 to 255 cm.
Distance 6
This parameter defines the sixth focus distance range. It must be greater than Distance 5.
Selections:
-
a value from 0 to 255:
distance from 0 to 255 cm.
Distance 7
This parameter defines the seventh focus distance range. It must be greater than Distance 6.
Selections:
-
a value from 0 to 255:
distance from 0 to 255 cm.
Distance 8
This parameter defines the eighth focus distance range. It must be greater than Distance 7.
Selections:
-
a value from 0 to 255:
distance from 0 to 255 cm.
Stand-by Distance
This parameter defines which focus distance, within those defined through parameter Distance 1..8, must be set when
no pack is detected.
Selections:
- the desired value set for Distance 1..8.
DFlash Flash Mode
Offset Distance
According to the relative positioning between scanner and target code, the minimum detected distance could not be
equal to the barcode (placed somewhere on a target face) distance.
Thus, this parameter allows optimizing the barcode tracking, in particular it increases(or decreases) the detected
distance by n mm.
DFlash Behaviour
This parameter defines how the scanner automatically switches the current focus position among the discrete allowed
options (Distance 1..Distance 8).
Selections:
-
Nearest:
-
Background Suppression:
selects the focus Distance X (Distance 1, Distance
2,..Distance 8) which is closer to the actual minimum
distance of the detected pack;
this selection requires that the scanner has been previously
calibrated through the related Add-on in order to memorize
the background where the pack has to be read. When the
scanner detects a distance which is different from the one
memorized, it indicates that an object/pack has been found.
Thus, the scanner sets the focus distance range which is
closer to the minimum distance of the detected pack.
NOTE
If the background calibration has not been performed, the
scanner works according to Nearest selection.
Oscillating Mirror
Oscillating Mirror
NOTE
This parameter group is available only for DS6XXX-105-XXX Oscillating Mirror models.
This group allows defining the oscillating amplitude of the Oscillating Mirror. Available parameters are the following:
Oscillating Mode
Max Angle
Angle
Frequency
Min Angle
Oscillating Mode
This parameter defines the oscillating mode of the scanner mirror:
Selections:
-
Disabled
-
Fixed
the oscillating mirror deflects the scan line according to the factory default
settings (if using the scanner for the first time) or to the last saved
configuration;
the oscillating mirror deflects the scan line at a fixed angle of deflection;
Continuous
the scan line is deflected within a deflection range at a constant frequency.
Angle
This parameter is available only when working in Fixed oscillating mode.
It defines a fixed angle at which the scan line will be deflected:
Selections:
-
a value from 2,5 to 37,5:
Angle of deflection from ±2,5° to ±37,5°
Min Angle
This parameter is available only when working in Continuous oscillating mode.
It defines the minimum value that can be set for the deflection range:
Selections:
-
a value from 2,5 to 37,5:
Angle of deflection from ±2,5° to ±37,5°
Max Angle
This parameter is available only when working in Continuous oscillating mode.
It defines the maximum value that can be set for the deflection range:
Selections:
-
a value from 2,5 to 37,5:
Angle of deflection from ±2,5° to ±37,5°
Frequency
This parameter is available only when working in Continuous oscillating mode.
It defines the oscillating frequency in Hertz:
Selections:
-
a value from 0.1 to 19.0 Hertz
Communication Settings
Data Communication Settings
This group allows defining the following parameter:
Host Application Protocol Type
The communication may occur through:
-
Crisplant Parameters
-
Data Format
-
Main Serial Port
-
Auxiliary Serial Port
-
Ethernet
-
DeviceNet
-
Profibus
Host Application Protocol Type
It defines the protocol type to be used when transmitting the data format.
Selections:
- Standard
- Crisplant:
the Crisplant protocol type can be selected only when the following parameters are set
as follows:
- operating mode = On-Line
- on-line options= On-Line 1 Input or On-Line 2 input
- main port communication mode = Standard
- message TX Trigger selection = After Reading Phase Off
- code combination= Standard Multi Label
- data TX for DeviceNet = disabled
- pass through = disabled
While using the Crisplant protocol the value set for these parameters cannot be
changed.
Crisplant Parameters
Crisplant Parameters
This group allows defining all the parameters managing this communication protocol:
Crisplant Manufacturer ID
HeartBit Message
HeartBit Message Timing
Type of Crisplant Protocol
Crisplant Manufacturer ID
It defines the Crisplant proprietary format.
HeartBit Message
It enables/disables the transmission of the HeartBit telegram.
HeartBit Message Timing
It defines the amount of time between two code transmissions. It the selected timeout expires and no transmission has
occurred, the HeartBit telegram will be transmitted.
Type of Crisplant Protocol
It defines the type of Crisplant protocol to be used:
Selections:
- CSC =
- CMC =
the <CR><LF> characters do not appear at the end of transmitted/received telegrams
the <CR><LF> characters appear at the end of transmitted/received telegrams
Data Format
Data Format
Data Format allows to configure the parameters relative to the message format and the transmission mode:
Header Tx Start
Termination After No Read Message
Message Tx Trigger Selection
Header Tx Start
It selects the transmission of the header after the reading phase activation or with data.
Selections:
- After Reading Phase On =
header will be transmitted after the reading phase activation
- With Data =
header will be transmitted with data
Example
Header Position
Termination After No Read Message
This parameter is available only when the No Read Message parameter is set to "Global No Read Message" or “Local No
Read Message”.
If checked (enabled), a termination string is added to the No Read message string.
Message Tx Trigger Selection
Message Tx selects the transmission of the output message on decoding or after the reading phase.
Selections:
- On decoding
- After Reading Phase Off
Data Format Parameters
Standard Parameters
Available parameters for this group are the following:
Termination String
Data Packet Separators
Code Field Length Setting
Code Field Length
Fill Direction
Fill Character
Header String
Code Direction Identifier Enable
Forward Direction String
Reverse Direction String
Code Identifier
Custom Code ID Strings
Header String
Headers (up to 128 bytes) can be defined and transmitted as a block preceding the barcode(s).
Selections:
- a character from NUL (00H) to ~ (7EH).
Code Direction Identifier Enable
If enabled (checked), it allows defining the forward and reverse strings indicating the scanning direction with respect to
the code direction.
Forward Direction String
A Forward Direction string can be included in the output message to indicate that the current code has been scanned in
the forward direction (scanning from left to right).
This string (“+” is the default value) can be customized by the user including up to 32 characters.
Reverse Direction String
A Reverse Direction string can be included in the output message to indicate that the current code has been scanned in
the reverse direction (scanning from right to left).
The string (“-” is the default value) can be customized by the user including up to 32 characters.
Code Identifier
A Code Identifier string can be included in the output message.
Possible selections are:
Selections:
- Disable:
- Standard AIM ID:
- Custom:
no code identifier is included in the output message
the AIM standard identifier is included in the output message
activates the Custom Code ID strings group allowing to define an identifier
string for each code symbology. The string will be included in the output
message.
Custom Code ID Strings
It allows customizing the desired identifier string for each code type.
Termination String
Terminators (up to 128 bytes) can be defined and transmitted as a block following the barcode(s).
Selections:
- a character from NUL (00H) to ~ (7EH).
Data Packet Separators
The Data Packet Separators (up to 128 bytes) are used to separate barcodes in the reading phase.
For this reason, it is very useful when the Multi Label parameter has been enabled.
If selected, they occur within the Code Field and are transmitted after each decoded code.
Selections:
- a character from NUL (00H) to ~ (7EH).
Data Format Parameters
Code Field Length Setting
The code field length can be (in number of characters/digits) can be specified in order to be accepted for decoding:
Selections:
- Variable:
- Fixed
all possible code field lengths (in number of characters/digits) allowed for the code
selected are accepted.
only the length defined by the Code Field Length parameter is accepted.
Code Field Length
This parameter is only available when the Code Field Length Setting is set to Fixed.
It defines (in number of characters/digits) the length of the code field to be accepted for decoding:
Selections:
- a value in the range from 0 to 48 (in number of characters/ digits)
Fill Direction
This parameter is only available when the Code Field Length Setting is set to Fixed.
It defines the position of the Fill Character within the code:
Selections:
- Left:
- Right:
the Fill Character is left aligned and precedes the code field
the Fill Character is right aligned and follows the code field
Fill Character
This parameter is only available when the Code Field Length Setting is set to Fixed.
The Fill Character is inserted into each character position of a code field that has more characters (as defined in the
Code Field Length) than exist in the barcode read.
Selections:
- a character from NUL (00H) to ~ (7EH)
Example
For barcode “12345” with Fill Character “-“ (2DH) and Code Field Length of 10 characters, the result of the different
alignment will be:
Left aligned =
Right aligned =
...<Code Identifier><12345----->...
...<Code Identifier><-----12345>...
Multidata
When a Master MULTIDATA configuration is selected, this group allows the Slave address to be included before the
Slave message together with its own Header and separator strings.
Address Tx
Header
Separator
The syntax of this message is:
<Slave Address Header>xx<Address Separator><Slave Header><Code1 [Code2....Coden]><Slave Terminator>
...
Address Tx
It enables the Slave Address to be included before the Slave message.
Header
An address Header string (up to 32 bytes) can be defined and transmitted as a block preceding the Slave Address.
Selections:
- a character from NUL (00H) to ~ (7EH).
Separator
It defines the separator string (up to 32 bytes) that will be inserted between the Slave address and the Slave message.
Example:
An example of a message coming from Slave 3 through the Master MULTIDATA scanner is represented below:
<Slave Address Header>03<Address Separator><Slave Header><Code1 [Code2....Coden]><Slave Terminator>
...
Main Serial Port
Main Serial Port
This option determines the communication between the scanner and the Host, or, in a multi-sided layout, between
several scanners and a Host.
The following parameter allows enabling the communication through the Main Port:
Data Tx
All parameters managing the serial communication are available in the following parameter group:
-
Main Serial Port Parameters
Data Tx
If enabled (checked), it selects the Main Serial Port as channel to be used by the scanner for transmitting data and/or
messages.
Main Serial Port Parameters
Main Serial Port Parameters
This group allows defining all parameters managing the serial communication:
Main Port Communication Mode
Main Port Electrical Interface
Handshake
Baud Rate
Parity
Data Bits
Stop Bits
MUX32 Protocol Address
Checksum
Priority
Header Bytes
Filler Character
Filler Position
Main Port Communication Mode
The following communication modes can be selected when using the main serial port.
Selections:
- Standard
- MUX 32 slave
- Siemens 3694
- Siemens RK512
Standard
Standard is the normal mode for the Main Serial Interface. In this communication mode the following physical
connections are allowed:
RS232
RS485 full-duplex
Selecting Standard, the scanner will send out the data using the specified Handshake, but without any special protocol.
MUX32 Slave
MUX32 slave is the communication mode used for connections to a Multiplexer. For such a configuration the scanner
must be set with the same communication parameters (Baud rate, Parity, etc.) as the multiplexer.
In this communication mode, only the RS485 half-duplex physical connection is possible.
The following values are automatically set:
No parity
- 8 data bits
- 1 stop bit
3964
This communication mode is typically used for connections to a PLC. The following physical connections are allowed:
-
RS232
RS485 full-duplex
RK512
For RK512 protocol the following parameters must be set:
Checksum
Filler Character
Priority
Filler Position
Header Bytes
Main Port Electrical Interface
The Main serial interface is compatible with the following electrical standards:
Selections:
-
RS232
-
RS485 full duplex
Handshake
Handshake is a communication control used to protect against data loss, it can be achieved via hardware (RTS\CTS
protocol) or software (Xon\Xoff protocol).
Selections:
-
None
Hardware (RTS/CTS)
-
Software (Xon/Xoff)
Main Serial Port Parameters
Baud Rate
Baud rate is the transmission speed in a communication line.
- from 1200 to 115200
Selections:
Parity
Parity is a parameter indicating the presence of a control bit in the communication protocol frame.
Selections:
-
None
-
Odd
-
Even
Data Bits
Data Bits is a parameter indicating the number of bits composing the data packet of the communication protocol frame.
Stop Bits
Stop Bits is a parameter indicating the number of stop bits in the data packet of the communication protocol frame.
Mux32 Protocol Address
When MUX32 Communication Mode is selected, it is possible to define an address for the connection of the scanner with
a Multiplexer.
Selections:
- a value from 0 to 31.
Checksum
If checked, it enables the Checksum parameter. It is a control byte of the communication protocol. It is the one that
distinguishes the normal protocol from the R version of the Siemens protocol itself (3964 from 3964R).
Priority
Priority is a parameter indicating the priority of the local node with the 3964 link.
Selections:
- Low
- High
Header Bytes
RK512 frame header is composed of 10 bytes. The values of bytes 5, 6, 9 and 10 must be defined.
Filler Character
The Fill character parameter indicates the value of the filler byte added by RK512 protocol if an odd number of bytes
has to be transmitted.
Filler Position
The Fill position parameter indicates the position (at the beginning or at the end of the data packet) of the filler byte
added by RK512 protocol if an odd number of bytes has to be transmitted.
Selections:
- After data
- Before data
Auxiliary Serial Port
Auxiliary Serial Port
This group determines the communication through the Auxiliary Serial Port. For this communication mode, RS232
interface is automatically selected.
The following parameters are available:
Data Tx
Pass Through
All parameters managing the communication and Pass Through are available in the relative parameter groups:
-
Pass Through Options
-
Auxiliary Serial Port Parameters
Data TX
If enabled (checked), it selects the Auxiliary Serial Port as channel to be used by the scanner for transmitting data
and/or messages.
Pass Through
It enables/disables the Pass Through options.
Pass Through Options
Pass Through Options
This group allows defining the following parameters:
String Max Length
Termination String
Pass Through mode allows two or more devices to be connected to a single external serial interface. The scanner
transmits messages received by its auxiliary interface (RS232 only) onto its main interface.
In this configuration a series of scanners can be connected together using RS232 on the main interface and all
messages will be passed through this chain to the host. The reading phase of each scanner is independent from the
others in a Pass Through chain.
Applications can also be implemented to connect a device such as a hand-held reader to the Auxiliary port for additional
manual code reading capability.
For the description of these layouts refer to the scanner Reference Manual under “Typical Layouts”.
When using Pass Through mode, follow these programming notes:
1)
Program the serial ports in the same way regarding baud rate, data bits, stop bits and parity on al the devices in
the Pass Through.
2)
The Termination string must be configured in the same way as the message terminator on the device connected to
the Auxiliary port. The terminator will be forwarded with the message.
3)
The Serial On-Line, Master/Slave and Crisplant protocol parameters are not configurable for the Auxiliary interface.
String Max Length
It defines the maximum length of the expected string to be received. In case the string is longer than the one expected,
it will be discarded.
Termination String
It defines the characters terminating the expected string.
Auxiliary Serial Port Parameters
Auxiliary Serial Port Parameters
This group allows defining the following parameters:
Data Bits
Stop Bits
Baud Rate
Parity
Baud Rate
Baud rate is the transmission speed in a communication line.
Selections:
- from 1200 to 115200
Parity
Parity is a parameter indicating the presence of a control bit in the communication protocol frame.
Selections:
- None
- Odd
- Even
Data Bits
Data Bits is a parameter indicating the number of bits composing the data packet of the communication protocol frame.
Stop Bits
Stop Bits is a parameter indicating the number of stop bits in the data packet of the communication protocol frame.
Ethernet
Ethernet
NOTE
The Ethernet parameter group is available only for DS6XXX-10X-012 models.
Ethernet is the most popular physical layer LAN technology in use today. It is the IEEE 802.3 series standard, based on
the CSMA/CD access method that provides two or more stations to share a common cabling system. This access
method, Carrier Sense Multiple Access with Collision Detection, is the basis for Ethernet systems providing a wide range
of speed.
The design goals for Ethernet are to create a simply defined topology that makes efficient use of shared resources, that
is easy to reconfigure and maintain and provides compatibility across many manufacturer and systems.
Ethernet supports many different network protocols; Datalogic scanners support IP plus TCP or UDP over Ethernet and
802.3 frame format as Ethernet protocol low level. For details refer to "Internetworking with TCP/IP, vol. I", by Douglas
E. Comer.
Two different parameter group are available for the Ethernet communication mode:
- Line Parameters
- Services
Ethernet Line Parameters
Line Parameters
The parameters available in this group define and report the fundamental information about the system. All parameters
are listed below:
Status
DHCP
IP_dns1
Sw_Release
IP_address
IP_dns2
MAC
IP_netmask
Eth_Speed
IP_gateway
Status
It enables/disables the network interface card (NIC). If disabled, no communication is allowed.
Sw_release
This is a read-only parameter, which displays the software release of the network interface card (NIC).
MAC
This is a read-only parameter, which displays the address of the network interface card (NIC).
Eth_speed
It defines the Ethernet speed and the type of physical layer connection.
Selections:
- Auto(matic)
- 10 Mbit Full
- 10 Mbit half
- 100 Mbit Full
- 100 Mbit Half
DHCP
If enabled, it causes the IP address parameters to be inactive. They are only used to display the addresses assigned by
a DHCP server when getting the scanner configuration.
IP_address
It defines the Internet Protocol (IP) network address. Consult your network administrator to obtain a new address.
IP_netmask
It defines the subnet mask address. Consult your network administrator to obtain a new address.
IP_gateway
It defines the gateway address. Consult your network administrator to obtain a new address.
IP_dns1
It defines the address of the Primary Domain Name System (DNS).
IP_dns2
It defines the address of the Secondary Domain Name System (DNS).
Ethernet Service
Services
Three different services are available for the Ethernet communication:
- Modbus Ethernet Client
- Socket
- EthernetIP
Modbus Ethernet Client
It enables the Modbus Application Protocol-TCP/IP allowing to transmit data from the scanner to the Quantum family
PLC (programmer logical controller) server. This Client version of this protocol implements Function Code 10, which
allows coping the application format message into the registers of the Modicon PLC controller. The application format
rules for the Modicon message are the same of the Standard protocol on Serial Line (for example, header and
terminators), but it is recommended not to use Headers and Terminators since the mechanism to bind information is
already native on the Modicon protocol (see Num_Reg parameter for details).
Both the parameters managing respectively the PLC memory register address value and the number of registers can be
modified by using Genius™.
The parameters available are listed below:
Data Tx
Start_reg
Status
Num_reg
Server_address
Data Tx
If enabled (checked), it selects the Ethernet Modbus Client as channel to be used by the scanner for transmitting data
and/or messages.
Status
After enabling the Ethernet Modbus Client channel by checking the Data Tx parameter, it is also necessary to enable
this parameter to activate all Modbus settings.
Server_address
It defines the IP address of the station that receives and handles the modbus commands.
Start_reg
It defines the "Starting Address" field of the Modbus message sent to the Server. For details refer to "Modicon Modbus
Protocol Reference Guide" by AEG Schneider Automation.
Num_reg
It defines the maximum number of registers according to the maximum length of the message to be transmitted. The
size of the message transmitted is constant, thus, it must be big enough to contain the largest barcode information. If
the message received is longer than the one expected, it will be truncated during transmission; if shorter, all unused
characters will be filled with 0 binary. The value inserted also defines the "Number of Registers" field of the Modbus
message sent to the Server. For details refer to "Modicon Modbus Protocol Reference Guide" by AEG Schneider
Automation.
Socket #n
It is another communication interface available for the Ethernet communication. For further details refer to the following
bybliography:
Internetworking with TCP/IP, vol. I (chap. 20), by Douglas E. Comer
UNIX, network programming, by W. Richards Stevens
-
Ethernet Service
The following parameters are available:
Status
Type
Data Tx
Port
Server_address
Protocol
Data Tx
If enabled (checked), it selects the Ethernet User Socket as channel to be used by the scanner for transmitting data
and/or messages.
Status
After enabling the Ethernet User Socket #n by checking the Data Tx parameter, it is also necessary to enable this
parameter to activate all Modbus settings.
Type
It defines the type of the socket:
Selection:
- Server =
the station waits for connections and can communicate with a maximum of 3 clients
simultaneously
- Client =
the station tries a connection towards the server
Server_address
This parameter is available only when the socket is configured as a Client. It defined the IP address of the server to
which the client tries to connect.
Protocol
It defines the protocol to be used for the Ethernet communication.
Selection:
- TCP
- UDP
For details refer to "Internetworking with TCP/IP, vol. I", by Douglas E. Comer.
Port
It defines the port number of the socket.
For details refer to "Internetworking with TCP/IP, vol. I", by Douglas E. Comer.
EthernetIP
Ethernet IP is a high-level industrial application layer protocol for industrial automation applications. Based on the
standard TCP/IP protocol suite, it uses the traditional Ethernet hardware and software to define an application layer
protocol for configuring, accessing and controlling industrial automation devices.
The following parameter is available:
Status
The following parameter group allows defining the conditioning digital Inputs/Outputs:
Digital I/O Conditioning
Status
If checked, it allows defining the Ethernet IP settings.
DeviceNet
(if enabled, Main Port is not available)
NOTE
The DeviceNet parameter group is available only for DS6XXX-10X-015 models.
DeviceNet is a low level network that provides connections between simple industrial devices (sensors, actuators) and
higher level devices (controllers), and eliminates expensive hardwiring.
It allows the transport of control oriented information associated with low level devices and the transport of other
information which is indirectly related to the system being controlled, such as configuration parameters.
DeviceNet is a standard open network allowing the interchangeability of simple devices while making interconnectivity
of more complex devices.
The DeviceNet communication link is based on a broadcast oriented communication protocol: the Controller Area
Network (CAN) for Media Access Control and Physical Signaling.
CAN defines the syntax or form of the data movement.
The following parameter allows enabling a DeviceNet connection and setting its parameters:
Data Tx
NOTE
When the DeviceNet connection is enabled, the Main Serial Port Interface is not available and must not be
physically connected.
Two different parameter groups are available for the DeviceNet communication mode:
-
Internal Parameters
-
Bus Communication
Data Tx
If checked, it enables the DeviceNet channel. If unchecked, no DeviceNet parameter can be modified.
Internal Parameters
Internal Parameters
This group allows defining the following parameter:
Parameter Updating
Parameter Updating
If checked, it stores the current configuration into the DeviceNet board flash upon every power up or when selecting the
“Apply” options from the Device Menu of the Genius™ program.
DeviceNet - Bus Communication
Bus Communication
The parameters available in this group define the fundamental information about the communication:
Protocol
Master Output Area Size
Data Rate
Node Address
Master Input Area Size
Data Rate
It defines the data transmission speed.
Selections:
-
125 K
250 K
500 K
Node Address (MAC ID)
The Media Access Control Identifier (MAC ID) is an integer identification value assigned to each node of DeviceNet. The
defined value distinguishes a node from all other nodes on the same link.
Selections:
-
a value in the range 0 - 63
Protocol
It defines the DeviceNet protocol type to be used:
Selections:
-
Polled
Bit Strobe
Change of State (COS)
Please, refer to the current ODVA (Open DeviceNet Vendor Association, Inc.) DeviceNet Specification for further details.
Master Output Area Size
It defines the size of the message command sent to the DeviceNet board.
Selections:
-
a value in the range 0 - 254
Master Input Area Size
It defines the size of the message command sent from the DeviceNet board to the bus.
Selections:
-
a value in the range 0 - 254
Profibus
Profibus
NOTE
The Profibus parameter group is available only for DS6XXX-10X-011 models.
Profibus is now the world’s most popular Fieldbus. This protocol can handle a large amount of data at high speed and
serve the needs of the majority of automation applications.
The designed goals for Profibus are the realization and establishment of a bit-serial Fieldbus based on the
standardization of the field device interface.
Today it is commonly found in Process Control, large assembly and material handling machines. A single-cable allows
wiring multi-input sensor blocks, pneumatic valves, complex intelligent devices, smaller sub-networks, operator
interfaces and many other devices.
All parameters managing the Profibus protocol are available in the following parameter group:
- Bus Communication
Data Tx
If checked, it enables the Profibus interface allowing to receive/transmit data from/to the Fieldbus network. If
unchecked, no communication is available and no Profibus parameter can be set.
Profibus - Bus Communication
Bus Communication
The parameters available in this group define the fundamental information about the communication:
Output Data Length
Node Address
Baud Rate
Input Data Length
Data Flow Control
Data Consistency
Baud Rate
This is a read-only parameter, which shows the data transmission speed of the Profibus network.
Input Data Length
This is a read-only parameter, which shows the dimension of the Input Area.
Output Data Length
This is a read-only parameter, which shows the dimension of the Output Area.
Node Address
It defines the value which distinguishes a node from all other nodes on the same link. Each node identifies a device
within the network.
Data Flow Control
It implements a reliable transmission protocol between Master (PLC) and Slave (DS6X00) allowing specific
functionalities such as Synchronization, Fragmentation/Reassembling and Data Consistency.
Selections:
- Disable
- DAD Driver
- DPD Driver
Data Consistency
If checked (enabled), it allows improving the overall communication robustness of the Profibus network.
Profibus - Digital I/O Conditioning
Digital I/O Conditioning
This group allows defining the following parameters:
Input
Input
Input
Input
1
2
3
4
Phase Echo
Output 1
Output 2
Output 3
Digital Input Lines
Input 1
If checked, it allows the PLC to get the Input 1 status available in the remote slave scanner main connector.
Input 2
If checked, it allows the PLC to get the Input 2 status available in the remote slave scanner main connector.
Input 3
If checked, it allows the PLC to get the Input 3 status available in the remote slave scanner main connector.
Input 4
If checked, it allows the PLC to get the Input 4 status available in the remote slave scanner main connector.
Phase Echo
If checked, it allows the PLC to remotely get the Reading Phase status.
Digital Output Lines
Output 1
If checked, it allows the PLC to set the Output 1 status available in the remote slave scanner main connector.
Output 2
If checked, it allows the PLC to set the Output 2 status available in the remote slave scanner main connector.
Output 3
If checked, it allows the PLC to set the Output 3 status available in the remote slave scanner main connector.
Digital I/O Setting
This group allows defining the following parameters:
Debouncing
Activation Event
Deactivation Event
Line State
Alternative Activation Event
Alternative Deactivation Event
Deactivation Timeout
Input 1 Active Level Overridden by Input 2 Active Level Overridden by
Operating Mode
Operating Mode
Input 3 Active Level Overridden by Input 4 Active Level Overridden by
Operating Mode
Operating Mode
Digital Inputs
Debouncing
Sets the maximum duration of the pulses which are rejected by the anti-disturbance filter. Pulses exceeding this limit
are recognized as valid commands.
Input 1 Active Level Overridden By Operating Mode
It allows selecting the active state of Input 1.
NOTE
This parameter setting is not valid, if the input has been already defined in On Line or PackTrack™ Operating
Modes.
Selections:
-
Active Closed:
-
Active Open:
Input 1 is active when there is no current flowing through EXT_TRIG
pins.
Input 1 is active when current flows through EXT_TRIG pins.
Input 2 Active Level Overridden By Operating Mode
It allows selecting the active state of Input 2.
NOTE
This parameter setting is not valid, if the input has been already defined in On Line or PackTrack™ Operating
Modes.
Selections:
-
Active Closed:
Input 2 is active when there is no current flowing through IN2 pins.
Active Open:
Input 2 is active when current flows through IN2 pins.
Input 3 Active Level Overridden By Operating Mode
It allows selecting the active state of Input 3.
NOTE
This parameter setting is not valid, if the input has been already defined in On Line or PackTrack™ Operating
Modes.
Selections:
-
Active Closed:
Input 3 is active when there is no current flowing through IN3 pins.
Active Open:
Input 3 is active when current flows through IN3 pins.
Input 4 Active Level Overridden By Operating Mode
It allows selecting the active state of Input 4.
NOTE
This parameter setting is not valid, if the input has been already defined in On Line or PackTrack™ Operating
Modes.
Selections:
-
Active Closed:
Input 4 is active when there is no current flowing through IN4 pins.
Active Open:
Input 4 is active when current flows through IN4 pins.
Outputs
Line State
Allows the selection of the active state of the output.
Each output can be represented with a NPN transistor; this transistor acts like a switch: so, when the transistor is OFF,
it acts like an OPEN switch. On the contrary, when the transistor is ON, it acts like a CLOSED switch.
Selection:
- Normally Open =
the idle state of the output line is open, that is, the NPN transistor is OFF
(like an open switch).When the output is activated, the transistor goes ON
(like a closed switch).
- Normally Closed =
the idle state of the output line is closed, that is, the NPN transistor is ON
(like a closed switch).When the output is activated, the transistor goes OFF
(like an open switch).
Activation Event
Defines the event activating the output.
Selection:
- None =
the output is always in line state.
- Complete Read =
the event occurs, if all selected codes are read.
- Partial Read =
the event occurs, if less than the selected codes are read.
- No Read =
the event occurs, if no code is read.
- Phase On =
the event occurs, when a start event takes place starting the reading phase.
Alternative Activation Event
Defines an alternative event activating the output in addition to the one selected for the Activation Event parameter.
Selection:
- None =
the output is always in line state.
- Complete Read =
the event occurs, if all selected codes are read.
- Partial Read =
the event occurs, if less than the selected codes are read.
- No Read =
the event occurs, if no code is read.
- Phase On =
the event occurs, when a start event takes place starting the reading phase.
Deactivation Event
Defines the event deactivating the output.
Selection:
- Timeout =
indicates the maximum duration of the output pulse.
- Phase On =
the event occurs, when a start event takes place starting the reading phase.
- Phase Off =
the event occurs, when a stop event takes place terminating the reading phase.
- None
Alternative Deactivation Event
Defines the event deactivating the output, in addition to the one selected for the Deactivation Event.
Selection:
- Timeout =
indicates the maximum duration of the output pulse.
- Phase On =
the event occurs, when a start event takes place starting the reading phase.
- Phase Off =
the event occurs, when a stop event takes place terminating the reading phase.
- None
Activate on any Diagnostics Error
If this parameters is checked, the output will activate when a diagnostic error message is sent.
Deactivate when all Diagnostics Errors Recovered
If this parameters is checked, the output will deactivate when there are no more diagnostic error message to send.
Deactivation Timeout
Indicates the maximum duration of the output pulse.
Selection:
- value from 40 to 15000 .
NOTE
All values defined for this parameter will be rounded up to the nearest multiple of 20 ms.
Local Device Network Settings
By selecting the “Local Device Network Settings” from the Device menu, the following dialog box appears allowing to
define the topology role of the local scanner :
SYNCHRONIZED:
The Master SYNCHRONIZED / Slave SYNCHRONIZED configuration is the traditional Lonworks
network configuration in which the On-Line or PackTrack Operating Modes are used.
MULTIDATA:
The Master MULTIDATA / Slave MULTIDATA configuration is a Lonworks network configuration
which allows the Slave scanners to be configured differently and independently from the
Master. In this way the Slave scanners act as Stand Alone Devices which can send their data
not only to their configured communication channels but also to the Master. The Master can be
configured to send this data as a complete message to its configured communication channels
with header, address and separators (see Multidata).
Topology Role
Defines the scanner topology role:
-
Master SYNCHRONIZED:
-
Slave SYNCHRONIZED:
-
Master MULTIDATA:
-
Slave MULTIDATA:
-
Other:
The scanner is connected as a Lonworks Master in a master/slave synchronized
configuration.
The scanner is connected as a Lonworks Salve in a master/slave synchronized
configuration.
The scanner is connected as a Lonworks Master in a master/slave multidata
configuration.
The scanner is connected as a Lonworks Salve in a master/slave multidata
configuration.
This selection is for scanners not supporting the Master and Slave role. Selecting this
role requires setting the Device Assignment parameter (available in the Folder Tree)
to “Alone”.
Lonworks Slave Address
When setting the scanner topology role to Slave, it is necessary to define the slave address within the network (1..31).
Diagnostics
When enabled, this group allows selection of the desired diagnostic messages and definition of the relative diagnostic
management parameters:
Refresh Time
Net
The relative transmission parameters are described in Actions.
The relative data format parameters are described in Format.
Refresh Time
It defines the frequency at which the diagnostic messages are updated. This parameter excludes the network
diagnostics which are updated at a fixed internal frequency.
Net
This parameter enables all diagnostic error messages coming from the network (Master only and SYNCHRONIZED Slave
messages).
Diagnostic Error Messages
Stand Alone / Master/ MULTIDATA Slave
Diagnostic
Error Number
[16]
[81]
[82]
[83]
[84]
[88]
[97]
[98]
[113]
[114]
[129]
[130]
[131] / [133]
[132]
[135]
See Note 2.
Meaning
No Scan: scan signal missing
DIGITIZER: Motor Failure – no motor activity
DIGITIZER: Motor Life End – the motor has surpassed its factory declared functional life.
DIGITIZER: Laser Failure – no laser activity
DIGITIZER: Laser Life End – the laser has surpassed its factory declared functional life.
DIGITIZER: Motor Warning – the motor is operating at a reduced velocity with respect to the
programmed velocity.
OSCILLATING MIRROR: Motor Failure – no oscillating mirror motor activity
OSCILLATING MIRROR: Motor Life End – the oscillating mirror motor has surpassed its
factory declared functional life.
FLASH: Motor Failure – no flash motor activity
FLASH: Motor Life End – the flash motor has surpassed its factory declared functional life.
No Sync: no flash sync signal
Encoder Failure Timeout: no encoder signal for more than the programmed timeout.
Start/Stop Input Failure: the start and/or stop input is not working.
No Phase Timeout: no reading phase for more than the programmed timeout.
Encoder Failure: no encoder signal after two consecutive presence sensor events.
Master only
Diagnostic
Error Number
[1]
[64]
[80]
Meaning
Slave xx No Reply: no response from slave number xx, where xx is the slave address.
Slave Address xx Duplication: two or more slaves have the same address xx.
Slave xx Net Configuration: slave xx has been (re)configured.
NOTE 1
Errors [1] and [80] may be detected whenever any scanner configuration changes.
SYNCHRONIZED Slave only
Diagnostic
Error Number
[16]
[81]
[83]
Meaning
No Scan: scan signal missing
DIGITIZER: Motor Failure – no motor activity
DIGITIZER: Laser Failure – no laser activity
[97]
[113]
[129]
[130]
OSCILLATING MIRROR: Motor Failure – no oscillating mirror motor activity
FLASH: Motor Failure – no flash motor activity
No Sync: no flash sync signal
Encoder Failure Timeout: no encoder signal for more than the programmed timeout.
NOTE 2
All DIGITIZER, OSCILLATING MIRROR, and FLASH errors, except for DIGITIZER Motor Warning, require
that the relative scanner be reset before the error can be cancelled.
Actions
When diagnostics are enabled, this group allows selection of all the parameters managing diagnostic message
transmission by the Stand Alone or Master scanner:
Tx Mode
Tx Refresh
Message Position
Tx Mode
The diagnostic message can be transmitted to the system by the Stand Alone or Master scanner either asynchronously
(at programmed intervals), or synchronously with the code.
Tx Refresh
It defines the time interval in which the diagnostic messages will be transmitted if Tx Mode is asynchronous (On
Timeout).
Interface Transmission
The interface(s) on which the diagnostic messages will be transmitted can be selected (checked) if Tx Mode is
asynchronous (On Timeout). The available selections depend on the scanner model and can be different from the code
transmission interface.
Message Position
If Tx Mode is synchronous (With Code), the diagnostic messages will be transmitted on the same interface used for
code transmission. This selection determines if the messages will replace the code or be appended to it.
Example:
<STX><10DL><CR><LF> code
<STX><00#16><ETX> diagnostic message
Format
This group allows definition of the diagnostic message formatting sent by the Stand Alone or Master scanner to the
system:
Error Message Type
GlobalStr
Header String
Termination String
The format of diagnostic messages in general is <Header><Message><Terminator> where the Message, if Numeric has
the following syntax:
xx#yyy space...
xx is the address of the scanner: 00 = Master; all others = Slaves
yyy is the diagnostic error number as described in the diagnostic tables.
Examples
Stand Alone
<STX>#16<ETX>
Master
numeric diagnostic message – scan signal missing
<STX><Diagnostic Error><ETX>
Global String diagnostic message
<STX>00#16 00#113 01#1<ETX>
numeric diagnostic message – Master (00) scan signal
missing due to digitizer motor failure + Slave 01 not
responding
<STX><Diagnostic Error><ETX>
Global String diagnostic message
Header String
Headers (up to 128 bytes) can be defined and transmitted as a block preceding the diagnostic message.
Selections:
- a character from NUL (00H) to ~ (7EH).
Termination String
Terminators (up to 128 bytes) can be defined and transmitted as a block following the diagnostic message.
Selections:
- a character from NUL (00H) to ~ (7EH).
Error Message Type
It defines whether the message will be sent as a Numeric value or as a Global String.
GlobalStr
It defines the Global String message (up to 32 bytes) that will be sent as a diagnostic message for any detected
diagnostic error.
Statistics
When enabled, this group allows selection of the desired statistical counters and relative counter separator string to be
sent to the system by the Stand Alone or Master scanner:
Separator
Time
Phase Counter
Good Read Counter
Partial Read Counter
No Read Counter
Multiple Read Counter
Separator
It defines the separator string (up to 32 bytes) that will be inserted between the last code and the first statistical
counter.
Time
If enabled (checked), this counter is included in the statistical message and reports the time elapsed in hh, mm from
the last hardware reset.
Phase Counter
If enabled (checked), this counter is included in the statistical message and reports the total number of reading phases
from the last hardware reset.
Good Read Counter
If enabled (checked), this counter is included in the statistical message and reports the total number of good reads from
the last hardware reset.
Partial Read Counter
If enabled (checked), this counter is included in the statistical message and reports the total number of partial reads
from the last hardware reset.
No Read Counter
If enabled (checked), this counter is included in the statistical message and reports the total number of no reads from
the last hardware reset.
Multiple Read Counter
If enabled (checked), this counter is included in the statistical message and reports the total number of multiple reads
from the last hardware reset.
Example:
The statistical message format is fixed and will include only the statistical counters selected. The entire statistical
message is inserted between the Code Field and the Terminator Field. An example of a complete message is
represented below:
<Code Header><Code1 [Code2....Coden]><Statistics Separator><Time hh><Space><Time mm><Space><Reading
Phase><Space><Good Reads><Space><Partial Reads><Space><No Reads><Space><Multiple Reads>