1
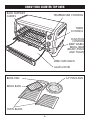
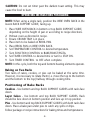
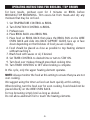
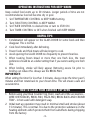
Counter Top Oven
CO606
Owner’s Guide
READ AND SAVE THESE INSTRUCTIONS
IMPORTANT SAFEGUARDS
When using electrical appliances, basic safety precautions should
always be followed including the following:
1. Read all instructions before using.
2. Do not touch hot surfaces. Use handles and knobs.
3. To protect against electrical shock do not immerse cord, plugs or oven
in water or other liquid.
4. Close supervision is necessary when any appliance is used by or near
children.
5. Unplug from outlet when not in use and before cleaning. Allow to cool
before putting on or taking off parts, and before cleaning.
6. Do not operate any appliance with a damaged cord or plug or after the
appliance malfunctions or has been damaged in any manner. Return
appliance to Rival (see warranty) for examination, repair, or adjustment.
7. The use of accessory attachments not recommended by the appliance
manufacturer may cause injuries.
8. Do not use outdoors.
9. Do not let cord hang over edge of table or counter, or touch heated
surfaces.
10. Do not place on or near a hot gas or electric burner, or in a heated oven.
11. Extreme caution must be used when moving an appliance containing
hot oil or other hot liquids.
12. To disconnect, rotate the Timer CONTROL to the OFF position, then
remove plug from wall outlet.
13. Do not use appliance for other than intended use.
14. Oversize foods or metal utensils must not be inserted in the oven as
they may create a fire or risk of electric shock.
15. A fire may occur if the oven is covered or touching flammable material,
including curtains, draperies, walls, or the like, when in operation.
Do not store any item on top of the appliance when in operation.
16. Do not clean with metal scouring pads. Pieces can break off the pad
and touch electrical parts involving a risk of electric shock.
-2-
IMPORTANT SAFEGUARDS (CONT.)
17. Extreme caution should be exercised when using containers
constructed of material other than metal or glass.
18. Do not place any cardboard, paper, plastic or other flammable items
inside the oven.
19. Do not cover crumb tray or any part of the oven with metal foil. This
will cause overheating of the oven.
20. To turn the oven off, rotate the Timer CONTROL to the OFF position.
21. Use extreme caution when removing pan or disposing of hot grease.
22. Failure to clean crumb tray may result in a fire hazard.
23. Do not store any materials other than the manufacturers
recommended accessories in this oven when not in use.
24. Some countertop and table surfaces, such as Corian® and other
surfaces, are not designed to withstand the prolonged heat generated
by certain appliances. We recommend placing a hot pad or trivet
under your Rival® product to prevent possible damage to the surface.
-3-
SAVE THESE INSTRUCTIONS
This appliance is for HOUSEHOLD USE ONLY.
No user-serviceable parts inside. Do not attempt to service this product.
A short power supply cord is provided to reduce hazards resulting from
entanglement or tripping over a longer cord. An extension cord may be
used with care; however, the marked electrical rating should be at least as
great as the electrical rating of the oven. The extension cord should not be
allowed to drape over the counter or tabletop where it can be pulled on by
children or tripped over, unintentionally.
POLARIZED PLUG
This appliance has a polarized plug (one blade is wider than
the other). To reduce the risk of electric shock, this plug is
intended to fit into a polarized outlet only one way. If the
plug does not fit fully into the outlet, reverse the plug. If
it still does not fit, contact a qualified electrician.
Do not attempt to modify the plug in any way. If the plug fits loosely into
the AC outlet or if the AC outlet feels warm do not use that outlet.
-4-
ADDITIONAL IMPORTANT
SAFETY INSTRUCTIONS
• Leave 6 – 8 inches of open surface all around the exterior of the
Counter Top Oven.
• Place the Counter Top Oven on a dry, level heat resistant surface.
• The Counter Top Oven should be operated on a separate electrical
circuit from other appliances. If the circuit is overloaded, this appliance
may not operate correctly.
• Do not use airtight containers inside the oven. Containers must have
room to allow for expansion of liquids.
• Do not touch hot surfaces such as the GLASS DOOR, top and sides.
• Watch the toasting process carefully when toasting items such as
croutons and crackers. Select a light setting for these types of foods.
• Do not use any sharp utensils to clean the GLASS DOOR as this may
cause damage to the glass or breakage. Clean only with a damp cloth.
-5-
KNOW YOUR COUNTER TOP OVEN
RACK SUPPORT
GUIDES
TEMPERATURE CONTROL
TIMER
CONTROL
FUNCTION
CONTROL
(KEEP WARM,
BROIL, BAKE
/ROAST /PIZZA
AND TOAST)
WIRE OVEN RACK
GLASS DOOR
12" PIZZA PAN
BROIL PAN
BROIL RACK
OVEN RACKS
-6-
PREPARING YOUR COUNTER TOP OVEN FOR USE
Your Rival® Counter Top Oven is equipped with all of the options of a fullsize oven in a countertop appliance – it toasts, bakes and broils.
NOTE: Initial start up operation may result in minimal smell and smoke
(about 15 min). This is normal. It is due to the protective substances on the
heating elements, which protect them from salt air effects during shipment
from the factory.
OPERATING INSTRUCTIONS FOR TOASTING
Your new Counter Top Oven has a large capacity for toasting up to 6 slices
of bread, 6 muffin halves, 6 frozen waffles, or 6 frozen pancakes. When
toasting only 1 or 2 items, place food in the center of oven.
1. Set TEMPERATURE CONTROL to TOAST.
2. Turn FUNCTION CONTROL to TOAST.
3. Ensure CRUMB TRAY is in place.
4. Place food to be toasted on Wire Oven Rack
5. Turn TIMER CONTROL to desired darkness.
6. Bell will signal end of TOAST cycle.
NOTE: For the best toasting result, WIRE OVEN RACK should be positioned
in the bottom RACK SUPPORT GUIDE, face up.
IMPORTANT:
When choosing toast color (light, medium or dark) always rotate the timer
past 5 minutes and then rotate back to dark, medium or light. This will
ensure that the timer operates correctly and safely.
• When the toast cycle is finished the bell will ring and the electrical
power will automatically turn off.
• To stop the cycle at any time, turn the timer control counter-clockwise
to the OFF position and the bell will ring.
• Six (6) slices will be lighter than one (1) slice, adjust TIMER CONTROL
accordingly.
• If toasting only one slice, place bread in the center of the WIRE OVEN
RACK, 6 slices should be toasted side by side.
In this cycle, both the top and bottom heating elements operate.
-7-
CAUTION: Do not set timer past the darkest toast setting. This may
cause the food to burn.
OPERATING INSTRUCTIONS FOR BAKING
NOTE: When using a single rack, position the WIRE OVEN RACK in the
lowest RACK SUPPORT GUIDE, facing up.
1. Place WIRE OVEN RACK in bottom or top RACK SUPPORT GUIDE,
depending on the height of pan or according to recipe directions.
2. Preheat oven as directed in recipe.
3. Ensure CRUMB TRAY is in place.
4. Place item to be baked on BROIL PAN.
5. Place BROIL PAN on WIRE OVEN RACK.
6. Set TEMPERATURE CONTROL to desired temperature.
7. Turn FUNCTION CONTROL to BAKE/ROAST/PIZZA.
8. Set TIMER CONTROL to desired time or turn to STAY ON.
9. Turn TIMER CONTROL to OFF when complete.
NOTE: In this cycle, both the top and bottom heating elements operate.
Baking on Two Racks
Two racks of cakes, cookies, or pies can be baked at the same time.
However, it is necessary to rotate them (i.e. move the top to the bottom
and the bottom to the top) halfway through cooking time.
Positioning of Bake Racks
Cookies - Use bottom and top RACK SUPPORT GUIDES with racks face
down.
Layer Cakes - Use bottom and top RACK SUPPORT GUIDES. Rack
should be face down in bottom position and face up in top position.
Pies - Use bottom and top RACK SUPPORT GUIDES with both racks face
down. Place a bake pan under pies to catch any spills or drips.
Follow package or recipe instructions for baking times and temperatures.
-8-
OPERATING INSTRUCTIONS FOR BROILING / TOP BROWN
For best results, preheat oven for 5 minutes on BROIL before
BROILING/TOP BROWNING. Trim excess fat from meats and dry any
moisture that may be on food.
1.
2.
3.
4.
5.
6.
7.
8.
9.
10.
Set TEMPERATURE CONTROL to BROIL.
Turn FUNCTION CONTROL to BROIL.
Preheat oven.
Place BROIL RACK onto BROIL PAN.
Place food on BROIL RACK then place the BROIL PAN on the WIRE
OVEN RACK and slide into RACK SUPPORT GUIDE, face up or face
down depending on the thickness of food you are cooking.
Food should be placed as close as possible to top heating element
without touching it.
Brush food with sauces or oil, if desired.
Set TIMER CONTROL to desired time or turn to STAY ON.
Turn food over midway through prescribed cooking time.
Turn TIMER CONTROL to OFF when broiling is complete.
In this cycle, only the upper heating element operates.
NOTE: Always monitor the food at this setting to ensure that you are not
over cooking.
We suggest using the timer as food can burn quickly at this setting.
When broiling, turn the food over for even cooking. Food should not be
placed directly on the WIRE OVEN RACK.
For top browning simply broil as long as desired.
Do not allow aluminum foil to touch the heating elements.
-9-
BROIL GUIDE
*Fish fillets are delicate and should be broiled directly in BROIL PAN
without BROIL RACK. Turn Fillets over carefully midway through broiling.
OPERATING INSTRUCTIONS FOR ROASTING
1. Place WIRE OVEN RACK in oven at lowest position, facing down.
2. Place food to be cooked on BROIL RACK and then place BROIL RACK onto
BROIL PAN.
3. Place BROIL PAN on WIRE OVEN RACK.
4. Set TEMPERATURE CONTROL to desired temperature.
5. Turn FUNCTION CONTROL to BAKE/ROAST/PIZZA.
6. Set TIMER CONTROL to desired time or turn to STAY ON.
7. Turn TIMER CONTROL to OFF when cooking is complete.
-10-
ROASTING GUIDE
* Beef times are medium doneness. Subtract 15 minutes for Rare; add 15
minutes for Well Done.
NOTE: All roasting times are based on meats at refrigerator temperature.
Frozen meats may take considerably longer. Therefore, use of a meat
thermometer is highly recommended.
OPERATING INSTRUCTIONS FOR PIZZA
1. Set TEMPERATURE CONTROL to 400º F.
2. Turn the FUNCTION CONTROL to BAKE/ROAST/PIZZA.
3. Place the pizza to be cooked on PIZZA PAN and place it on top of
WIRE OVEN RACK.
4. Set TIMER CONTROL to desired time or turn to STAY ON.
5. Follow package or recipe instructions for times & temperatures.
6. For best results rotate the pizza pan 180 degrees midway through the
cooking cycle.
7. Turn TIMER CONTROL to OFF when cooking time is complete.
NOTE: WIRE OVEN RACK should be positioned in the bottom RACK
SUPPORT GUIDE, face up.
-11-
OPERATING INSTRUCTIONS FOR KEEP WARM
Keep cooked food warm up to 30 minutes. Longer periods of time are not
recommended as food will become dry or spoil.
1. Set TEMPERATURE CONTROL to KEEP WARM setting.
2. Turn FUNCTION CONTROL to KEEP WARM.
3. Set TIMER CONTROL to desired time or turn to STAY ON.
4. Turn TIMER CONTROL to OFF when finished with KEEP WARM.
USEFUL TIPS
1. Condensation will appear on the GLASS DOOR for some foods and then
disappear. This is normal.
2. Cook food immediately after defrosting.
3. Frozen foods and thick meats will take longer to cook.
4. Avoid opening the GLASS DOOR too frequently to prevent heat loss.
5. When toasting frozen bread or more than one fresh slice, the toast
preference should be at a darker setting than if you were toasting one fresh
slice.
6. When broiling, smoke will likely appear. Removing excess fat prior to
broiling can reduce this. Always use the BROIL PAN.
IMPORTANT:
When setting the timer for less than 5 minutes, always rotate the timer past 5
minutes and then rotate back to your chosen time. This will ensure a safe and
accurate time.
HOW TO CLEAN YOUR COUNTER TOP OVEN
1. Before using your Rival Counter Top Oven, wash all of the accessories –
WIRE OVEN RACKS, BROIL PAN, PIZZA PAN, BROIL RACK AND CRUMB
TRAY - in hot water with detergent soap.
2. Initial start up operation may result in minimal smell and smoke (about
15 minutes). This is normal. It is due to the protective substance on the
heating elements which protects them from salt effects during shipping
from the factory.
-12-
HOW TO CLEAN YOUR COUNTER TOP OVEN (CONT.)
3. Always make sure that the appliance is unplugged and cooled before
cleaning.
4. The WIRE OVEN RACKS can be removed easily for cleaning. Once the
WIRE OVEN RACKS are removed, clean the interior and exterior with a
damp cloth.
REMEMBER: Do not place the entire unit in water or any liquid.
5. Cleaning the bottom of the crumb tray:
A. This appliance has a slide out CRUMB TRAY at the bottom of the
baking chamber. First, unplug the appliance and allow it to cool.
B. To clean out the crumbs, simply pull out the CRUMB TRAY located
at the exterior center bottom of the baking chamber right below the
glass door.
C. Once the CRUMB TRAY has been removed wash with hot, soapy
water.
D. DO NOT use any abrasive cleaning products.
E. After cleaning, insert CRUMB TRAY back into correct position.
CAUTION
• TO PROTECT COUNTERTOP FROM DAMAGE, THE COUNTER TOP
OVEN MUST BE OPERATED WITH THE CRUMB TRAY IN PLACE,
SECURELY CLOSED AND CLEANED OF EXCESS FOOD.
• NEVER OPERATE YOUR OVEN WITH THE GLASS DOOR OPEN.
• NEVER PUT ANY ACCESSORY DIRECTLY ON THE TOP OF THE LOWER
HEATING ELEMENT.
TAKE CARE
• Always leave at least 1” between the top of food and the top heating
elements.
• Remove all plastic and paper from food, TV dinners, etc. before cooking.
• Always use oven mitts to remove BROIL PAN after cooking.
-13-
COOKING TIME AND TEMPERATURE
FOOD
QUANTITY
COOKING INSTRUCTIONS
Frozen Pizza
2 – 4 Slices
Bake on BROIL PAN at 450ºF
for 15 – 20 minutes.
Bacon
4 – 6 strips
Bake on BROIL PAN at 450ºF.
Use timer set to 7 – 12 minutes
according to taste preference.
Hot Dogs
4 – 8 hot dogs
Broil on BROIL PAN. Set timer to
15 minutes and add time according to
taste. Turn hot dogs often.
Hamburgers
Up to 4 pieces
(1/4 lb. each)
Bake on BROIL PAN at 450ºF for
20 minutes.
Frozen French Fill BROIL PAN
Fries
one layer
Bake in “Stay On” mode for 20 minutes,
then broil for 5 minutes or more only
according to taste preference.
Leftovers
Fill
one layer only
Bake at 250 – 375ºF with timer for
15 minutes. Continue according to
taste.
Chicken
Fill BROIL PAN
one layer only
Bake at 450ºF for 35 minutes,
or until juices run clear,
with the “Stay On” setting.
TV Dinners
Place foil container directly
on WIRE OVEN RACK.
Follow package directions.
Baked Potato
1 – 5 potatoes
Wash and pierce with a fork. Optional
– brush on olive oil. Bake at 450ºF
for 60 – 95 minutes with “Stay On”
setting.
Pork Chops
Up to 4 chops
Place on BROIL PAN and broil for
35 min. Turn over at least two times.
-14-
COOKING TIME AND TEMPERATURE (CONT.)
NOTE: The recipe guide is for suggestion only. Temperatures may vary
depending on the size and consistency of the food. Frozen food will take
longer to cook than thawed food.
QUESTIONS AND ANSWERS
Q
A
Unit smokes during baking or broil function
Initial start up operation may result in minimal smoke or smell (about
15 minutes). This is normal and due to the protective substance on
the heating elements which protects them from salt effects during
shipping.
Smoke in baking function often means the BROIL PAN or interior of
oven is dirty. Clean per instructions.
Smoke almost always appears in broiling and is normal. Cut off excess
fat prior to broiling to reduce smoking.
Stop using the appliance if smoke source is the power cord. Unplug
immediately.
Q
A
Toast is black and smoking or too light.
Choose lighter or darker toast setting.
-15-
RECIPES
SCALLOPS WRAPPED WITH BACON
1 pound sea scallops
1 pound bacon
1 lemon, cut in wedges
Preheat broiler for 10 minutes. Wrap scallops with 1/2 piece bacon and
secure with toothpick. Place scallops in broil pan, not touching, and broil
until bacon is cooked through, about 10-20 minutes, turning halfway
during cooking.
Plate and serve with fresh lemon wedges.
ROASTED PEPPER, GARLIC AND ONION BRUSCHETTA
2 red peppers,
1 bulb garlic, peeled and chopped coarsely
1 onion, peeled and chopped
1/2 loaf crusty bread
olive oil
salt and pepper
Preheat broiler for 10 minutes. Broil peppers, garlic and onion until soft,
approximately 10 minutes. Let cool. Place peppers in paper or plastic bag
to steam off skins for approximately 15 minutes or until cooled. Remove
seeds and skins from peppers and slice in thin strips. Mix peppers slices,
garlic and onions and drizzle with olive oil to taste. Broil pepper, garlic and
onion for 10 minutes. Set aside. Slice and toast bread. Garnish toasts with
roasted vegetables and season to taste. Serves 2-4.
-16-
RECIPES
MEDITERRANEAN PIZZA
Pizza Dough
2 1⁄2 to 3 cups all purpose flour
1 teaspoon Kosher salt
2 tablespoons olive oil
1 package (or 1 T.) active dry yeast
3/4 cup lukewarm water
1 T. honey
In mixer or bowl, pour in water and add yeast and honey. Let sit for
approximately 10 minutes or until small bubbles form on surface top,
ensuring that yeast is alive. Add olive oil and flour. Knead on low speed or
knead by hand until dough is fully incorporated, smooth and elastic,
approximately 5-10 minutes. If dough is still sticking to bowl, add
additional flour sparingly. Let dough rest under damp towel for 10-30
minutes. Roll dough out and continue to shape with hands to fit pizza pan.
Tomato, Basil and Garlic Sauce
1 whole bulb garlic, peeled and coarsely chopped
1 1⁄2 T. extra virgin olive oil
1 28 ounce can plum tomatoes, chopped
1 T. sugar
salt and pepper
1 bunch fresh basil, torn
Saute garlic in extra virgin olive oil for 2 minutes on medium heat until fragrant.
Do not let garlic burn. Add chopped tomatoes and sugar and season with salt
and pepper. Turn up heat and cook until sugar is dissolved and flavors are
incorporated, 2-5 minutes. Remove from heat and add in torn basil.
-17-
RECIPES
ROASTED BELL PEPPER PIZZA
Pizza Dough
Tomato, Garlic, Basil Sauce
6 Assorted Bell Peppers, red, yellow or orange
2 bulbs fresh garlic
Olive Oil
1/2 -1 cup crumbled Pecorino Romano cheese
Garnish with fresh basil
Preheat toaster oven to 400°F. Cut top of garlic bulbs to expose cloves. Place
peppers and garlic cloves in broil pan and drizzle with olive oil. Turn peppers
often to blacken on all sides. Roast until garlic is soft and peppers are charred,
about 10 minutes. Squeeze out garlic from their skins and place peppers in
paper or plastic bag to steam off skins for approximately 15 minutes or until
cooled. Remove seeds and skins from peppers and slice in thin strips.
For pizza, brush with olive oil and spread Tomato, Basil and Garlic Sauce
to edge of dough. Top with roasted peppers, garlic and Pecorino Romano
cheese. Cook in preheated toaster oven set at 475°F until pizza is crispy
and browned, about 20 minutes. Garnish with fresh basil.
BROILED SALMON WITH BALSAMIC ORANGE REDUCTION
This intensely flavored dish is a healthy, lowfat choice.
1/2 cup balsamic vinegar
1/2 cup good dry white wine
1/2 cup orange juice
3 T. brown sugar
4 6-oz. salmon fillets, skinned, approximately 1 inch thick
Salt and pepper
3 T. chopped scallions
Cooking spray
Place first 4 ingredients in sauce pan on medium high heat and cook until
reduced by half and mixture resembles a syrupy glaze.
Place seasoned salmon in broil pan coated with cooking spray. Broil
approximately 6 minutes per side or until fish is no longer translucent in
center. Pour glaze over plated salmon and garnish with scallions. 4 Servings.
-18-
RECIPES
ARTICHOKE, SPINACH AND GOAT CHEESE LASAGNA
Filling:
1 T. olive oil
1 T. butter
1 cup dry vermouth
1 pound mushrooms
3 garlic cloves, minced
2 12 oz. cans artichoke hearts, drained, coarsely chopped
salt and pepper
Tomato, Basil Garlic Sauce: (see recipe above)
1 9-ounce package oven-ready (no-boil) lasagna noodles
1 large log of goat cheese
1 1⁄4 cup Parmesan cheese, grated
Preheat Counter Top Oven to 350°F. Melt butter and olive in large skillet over
medium-high heat. Add mushrooms and garlic; sauté until mushrooms
release juices and begin to brown, about 7 minutes. Add artichokes, spinach
and vermouth. Cook until liquid is absorbed, stirring occasionally, about 10
minutes. Season with salt and pepper. Spread 2/3 cup tomato sauce over
bottom of an 8x8 square baking dish. Top with enough noodles to cover
bottom of dish. Spread 1/4 of artichoke mixture over. Drop crumbled goat
cheese on top of artichoke mixture. Top with 1/4 cup parmesan cheese.
Top with enough noodles to cover. Repeat layering 3 more times, finishing
with a layer of noodles, then remaining parmesan cheese. Cover lasagna
with foil and bake for approximately 1 hour or until juices are bubbling
around the edges. Remove foil. Increase temperature to 450°F. Bake
lasagna until top is browned, about 10 minutes. Makes 8 servings.
-19-
RECIPES
WHOLE ROASTED DUCK WITH RHUBARB GINGER SAUCE
1 whole duck, approximately 5 pounds,
washed and dried
1 1⁄2 cup dry red wine
2 tablespoon fresh lemon juice
3 T. grated ginger
1 bunch rhubarb, all leaves removed
and chopped in 1 inch pieces
1/2 cup honey
Tie legs together using string, then tuck wings under the body. Combine red
wine and lemon juice and marinate duck in refrigerator for 1 hour.
Combine ginger, rhubarb and honey in a small sauce pan. Cook on
medium heat on stove top until rhubarb is soft. Puree with hand blender.
Put oven rack in lower position and preheat toaster oven to 400°F. Place
duck on a baking dish and baste with rhubarb sauce. Roast 15 minutes.
Baste again. Reduce heat to 300 degrees. After 1 hour, cover with foil.
Continue cooking at 300 degrees for 3 more hours. Remove foil and raise
temperature to 400 degrees for last 15 minutes. Breast internal
temperature should register 165°F on a meat thermometer.
Let stand for 10 minutes before carving. Serve duck with Rhubarb Ginger
Sauce. 4 servings.
-20-
RECIPES
DULCE DE LECHE CHEESECAKE
For crust:
For topping:
20 full sized, finely crushed graham crackers
2/3 cup butter, melted
1/4 cup finely chopped walnuts (optional)
1 pint sour cream
1/2 cup sugar
1 1⁄2 teaspoon. vanilla
For cheesecake:
For sauce:
4 8-ounces packages cream cheese,
room temperature
1 cup sugar
4 eggs
1 lemon, juiced
1 teaspoon vanilla
1 cup heavy cream
1 cup brown sugar, packed
1/2 cup sweetened condensed milk
Preheat toaster oven to 325°F. Lightly butter a 9 inch springform pan. Add
walnuts and melted butter to crushed graham crackers and blend with a
fork. Press mixture into bottom of pan and up the side of the pan 1 inch.
Place pan in toaster and cook for 5 minutes to set crust. Whip cream
cheese in mixer until light and smooth. Add sugar and beat for 1 minute.
Add eggs one at a time, incorporating completely each time. Add lemon
juice and vanilla. Blend well. Pour on top of crust. Place in toaster oven.
Cook for approximately 1 hour, ensuring a slight jiggle left to cheesecake
in center. Blend sour cream, sugar and vanilla and smooth over cheesecake
center, leaving 1/2 inch around edge without topping. Cook for an
additional 5 minutes to set sour cream topping. Cool and chill overnight
in refrigerator. For sauce, combine cream and sugar in saucepan and cook,
stirring constantly on medium heat. Bring to boil and cook until sauce is
reduced to approximately 1 cup. Add condensed milk and pour over
cheesecake servings. Serves 12.
-21-
RECIPES
CLASSIC VANILLA SHORTBREAD
1 3⁄4 cups all-purpose flour
1/2 tsp. salt
2 1⁄2 T. vanilla
1 1⁄2 sticks unsalted butter, room temperature
1 1⁄2 cups powdered sugar
1 large egg yolk
1 large egg
pinch salt
Preheat Counter Top Oven to 300°F. Cut parchment paper to fit pizza pan.
Combine flour and salt in bowl. In mixer, cream butter, vanilla, sugar and
egg yolk until light and well incorporated. Add flour mixture and blend.
Remove dough and press into pan lined with parchment paper. To smooth
dough, roll with jar or can. Beat egg with salt and lightly brush dough.
Pierce dough to form uniform wedges and prick with a fork. Bake
approximately 15 minutes, until dough is a light golden brown. Let cool,
remove from pan and slice thoroughly. Makes 12 large wedges.
-22-
RECIPES
OATMEAL CHOCOLATE CHIP COOKIES
3 tbs. and 1/4 tsp. butter, softened
3 tbs. and 1/4 tsp. packed light brown sugar
1 tbs. and 1-1/2 tsp. white sugar
1/4 package instant vanilla pudding mixture
1 egg
(optional)
1/2 tsp. vanilla extract
chips
3 tbs. and 2-1/2 tsp. all-purpose flour
1/8 tsp. baking soda
1/4 tsp. salt
1/2 cup and 1 tbs. quick-cooking oats
3 tbs. and 1/4 tsp. chopped walnuts
3 tbs. and 1/4 tsp. semisweet chocolate
Preheat the Counter Top Oven on the BAKE Setting and set Counter Top
Oven to 350°F.
In a large bowl, cream together the butter, brown sugar, and white sugar
until smooth. Beat in the instant vanilla pudding until well blended. Beat
in egg and then stir in vanilla. Combine the flour, baking soda, and salt;
stir into the creamed mixture until just blended. Mix in the quick oats,
walnuts (if desired), and chocolate chips. Drop by heaping spoonfuls onto
an ungreased cookie sheet.
Bake for 12 minutes in the preheated Counter Top Oven. Allow cookies to
cool on the cookie sheet for 5 minutes before transferring to Wire Oven
Rack to cool completely.
-23-
RECIPES
APPLE PIE
Dough:
2 cups all-purpose flour
1 tsp. salt
1 cup shortening
1/2 cup water
Pie Filling:
5 apples – peeled and thinly sliced 3/4 cup all-purpose flour
1/2 cup brown sugar
9 T. butter
3/4 tsp. ground cinnamon
Vanilla Ice Cream (optional)
1/2 cup white sugar
Crust: In a large bowl, combine flour and salt. Cut in shortening until
mixture forms crumbs. Stir in water until mixture forms a ball. Divide
dough in half and shape into balls. Wrap in plastic and refrigerate for 4
hours. Roll dough on floured counter.
Pie Filling: Preheat Counter Top Oven to 375°F. Arrange bottom crust in
pan. Arrange apple slices in crust shell. Mix 1/2 cup brown sugar and
cinnamon; sprinkle over apples. Mix 1/3 cup white sugar with flour; cut in
6 T. butter until crumbly. Spoon mixture over apples. Cover apple filling
with second pie crust. Melt remaining 3 T. butter and brush over crust.
Bake for 35 to 40 minutes or until crust is golden brown. Remove from
Counter Top Oven, sprinkle 1/4 cup white sugar over pie crust. Add vanilla
ice cream if desired.
-24-
NOTES
-25-
NOTES
-26-
NOTES
-27-
SERVICE INSTRUCTIONS
1. Do NOT attempt to repair or adjust any electrical or mechanical functions on this unit. Doing so will void the Warranty.
2. If you need to exchange the unit, please return it in its original carton, with a sales receipt, to the store where you
purchased it. If you are returning the unit more than 30 days after the date of purchase, please see the enclosed Warranty.
3. If you have any questions or comments regarding this unit’s operation or believe any repair is necessary, please write to our
Consumer Service Department or visit our website at www.rivalproducts.com
RIVAL
c/o THE HOLMES GROUP, INC.
CONSUMER SERVICE DEPARTMENT
13052 JURUPA AVENUE
FONTANA, CA 92337
ONE (1) YEAR LIMITED WARRANTY
SAVE THIS WARRANTY INFORMATION
A. This Warranty applies only to the original purchaser of this product.
B. This Warranty applies ONLY to repair or replacement of any supplied or manufactured parts of this product that,
upon inspection by The Holmes Group, Inc. authorized personnel, is shown to have failed in normal use due to
defects in material or workmanship. The Holmes Group will determine whether to repair or replace the unit. This
Warranty does not apply to installation expenses.
C. Operating this unit under conditions other than those recommended or at voltages other than the voltage
indicated on the unit, or attempting to service or modify the unit, will render this WARRANTY VOID.
D. Unless otherwise proscribed by law, The Holmes Group shall not be liable for any personal injury, property or any
incidental or consequential damage of any kind resulting from malfunctions, defects, misuse, improper
installation or alteration of this product.
E. All parts of this product are guaranteed for a period of 1 year as follows:
1. Within the first 30 days from date of purchase, the store from which you purchased your product should
replace this product if it is defective in material or workmanship (provided the store has in-stock
replacement.) * If you intend to assert any claim in connection with the product, please follow the
instructions in paragraph F.
2. Within the first twelve months from date of purchase, The Holmes Group will repair or replace the product if
it is defective in material or workmanship, subject to the conditions in paragraph G.
F. If you have any other problem or claim in connection with this product, please write to our Consumer Service
Department.
G. IMPORTANT RETURN INSTRUCTIONS. Your Warranty depends on your following these instructions if you are
returning the unit to The Holmes Group, Inc.:
1. Carefully pack the item in its original carton or other suitable box to avoid damage in shipping.
2. Before packing your unit for return, be sure to enclose:
a) Your name, full address with zip code and telephone number,
b) A dated sales receipt or PROOF OF PURCHASE,
c) A check for return prepaid shipping and handling, and
d) The model number of the unit and the problem you are having. (Enclose in an envelope and tape directly to
the unit before the box is sealed.)
3. The Holmes Group recommends you ship the package U.P.S ground service for tracking purposes.
4. All shipping charges must be prepaid by you.
5. Mark the outside of your package:
RIVAL
c/o THE HOLMES GROUP, INC.
13052 JURUPA AVENUE
FONTANA, CA 92337
This Warranty gives you specific legal rights, and you may have other rights which vary from state to state. The provisions of
this Warranty are in addition to, and not a modification of, or subtraction from, the statutory warranties and other rights and
remedies contained in any applicable legislation. To the extent that any provision of this Warranty is inconsistent with any
applicable law, such provision shall be deemed voided or amended, as necessary, to comply with such law.
Printed in China
CO606 / 9100210000100
CO60605EM1