1
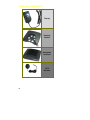
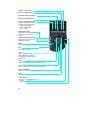
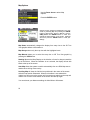
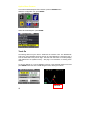
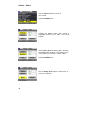
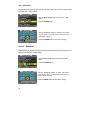
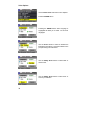
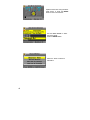
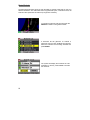
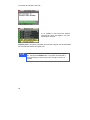
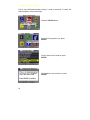
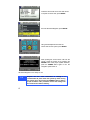
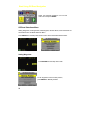
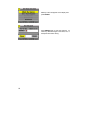
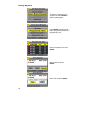
750 VEHICLE NAVIGATION & DRIVER INFORMATION SYSTEMS USER MANUAL 1 Welcome to the world of the Magellan 750NAV driving experience. TM Using GPS (Global Positioning System) satellites and patented VIP (Vehicle Independent Positioning), the 750NAV determines the best destination route, with supporting reliable visual and audio cues. The 750NAV offers easier traveling for users and increased productivity for the professional on the road. The Magellan 750NAV is designed for ease of installation, only requiring one ground and two power connections. No vehicle speed sensor, reverse lights or any other electrical connection is needed; allowing an experienced do-ityourselfer to install the 750NAV system. HOWEVER, PROFESSIONAL INSTALLATION OF THE 750NAV BY AN AUTHORIZED DEALER IS STRONGLY RECOMMENDED. If installed by the user, please refer to the installation section in this manual and read all the directions first, then carefully follow them step-by-step. For technical assistance, please contact our Customer Service Department at 1-877-4-CARNAV (1-877-422-7628). The 750NAV features a powerful routing and guidance system, with audio and visual prompts to provide the experience and pleasure of Driving Made Simple. 2 TABLE OF CONTENTS Important Information Safety Warnings . . . . . . . . . . . . . . . . . . . . . . . . . . . . . . . . . . . . . . . . . . . . . . . 6 Precautions . . . . . . . . . . . . . . . . . . . . . . . . . . . . . . . . . . . . . . . . . . . . . . . . . . . 6 Disclaimers . . . . . . . . . . . . . . . . . . . . . . . . . . . . . . . . . . . ………... . . . . . . . . . 7 General Information How Global Positioning Systems (GPS) Work . . . . . . . . . . . . . . . . . .8 750NAV Technology . . . . . . . . . . . . . . . . . . . . . . . . . . . . . . . . . . . . . . . . . . . .9 Magellan 750NAV Map Information . . . . . . . . . . . . . . . . . . . . . . . . . . . . . . . .9 Using the Magellan 750NAV . . . . . . . . . . . . . . . . . . . . . . . . . . . . . . . . . . . . .9 750NAV Key Components . . . . . . . . . . . . . . . . . . . . . . . . . . . . . . . . . . . . .10 Features Off Road Navigation . . . . . . . . . . . . . . . . . . . . . . . . . . . . . . . . . . . . . . . . . . . 11 Route Exclude . . . . . . . . . . . . . . . . . . . . . . . . . . . . . . . . . . . . . . . . . 11 Transportability . . . . . . . . . . . . . . . . . . . . . . . . . . . . . . . . . . . . . . . . . . . . . . . 11 TM QuickSpell . . . . . . . . . . . . . . . . . . . . . . . . . . . . . . . . . . . . . . . . . . . . . . . . . 11 Display Overview . . . . . . . . . . . . . . . . . . . . . . . . . . . . . . . . . . . . . . . . . . . . . . . 12 Getting Started . . . . . . . . . . . . . . . . . . . . . . . . . . . . . . . . . . . . . . . . . . . . . . . . . 13 Temporary Map . . . . . . . . . . . . . . . . . . . . . . . . . . . . . . . . . . . . . . . . . . . . . . . . . 14 Main Menus Select Destinations . . . . . . . . . . . . . . . . . . . . . . . . . . . . . . . . . . . . . . . . . . . . 15 User Options . . . . . . . . . . . . . . . . . . . . . . . . . . . . . . . . . . . . . . . . . . . . . . . . 15 Product Demo . . . . . . . . . . . . . . . . . . . . . . . . . . . . . . . . . . . . . . . . . . . . . . . . . . 16 Quick Spell . . . . . . . . . . . . . . . . . . . . . . . . . . . . . . . . . . . . . . . . . . . . . . . . . . 17-18 Setup & Configuration of Your 750NAV System ! Product Registration/Map Unlock . . . . . . . . . . . . . . . . . . . . . . . . . . . . . . . . 19 Address Book . . . . . . . . . . . . . . . . . . . . . . . . . . . . . . . . . . . . . . . . . . . . . .20-21 Color Options . . . . . . . . . . . . . . . . . . . . . . . . . . . . . . . . . . . . . . . . . . . . . . . 22 Communications Setup (Not Available) Map Options . . . . . . . . . . . . . . . . . . . . . . . . . . . . . . . . . . . . . . . . . . . . . . . 23 ! Map Selections . . . . . . . . . . . . . . . . . . . . . . . . . . . . . . . . . . . . . . . . . . . . . . . 24 Off Road Navigation . . . . . . . . . . . . . . . . . . . . . . . . . . . . . . . . . . .25-29 Route Preferences . . . . . . . . . . . . . . . . . . . . . . . . . . . . . . . . . . . . . . . . . . . Service Directory . . . . . . . . . . . . . . . . . . . . . . . . . . . . . . . . . . . . . . . . . . . . . Tone Options . . . . . . . . . . . . . . . . . . . . . . . . . . . . . . . . . . . . . . . . . . . . . . . User-Select . . . . . . . . . . . . . . . . . . . . . . . . . . . . . . . . . . . . . . . . . . . . . . . . Vehicle-Select . . . . . . . . . . . . . . . . . . . . . . . . . . . . . . . . . . . . . . . . . User-Edit Name . . . . . . . . . . . . . . . . . . . . . . . . . . . . . . . . . . . . . . . . . . . . . . Vehicle-Edit Name . . . . . . . . . . . . . . . . . . . . . . . . . . . . . . . . . . . . . . . . . . . ! ! 30 31 32 33 34 35 35 Voice Options . . . . . . . . . . . . . . . . . . . . . . . . . . . . . . . . . . . . . . . . . . . . . . . . 36 How to Navigate Using Your 750NAV Different Navigation Views . . . . . . . . . . . . . . . . . . . . . . . . . . . . . . . . . . . . . . 37 Street Address . . . . . . . . . . . . . . . . . . . . . . . . . . . . . . . . . . . . . . . . . . . .38-40 Points of Interest (POI) . . . . . . . . . . . . . . . . . . . . . . . . . . . . . . . . . . . . . . 41-42 Intersection . . . . . . . . . . . . . . . . . . . . . . . . . . . . . . . . . . . . . . . . . . . . . . . .43-45 3 Freeway Entrance / Exit . . . . . . . . . . . . . . . . . . . . . . . . . . . . . . . . . . . . . . 46-50 Address Book . . . . . . . . . . . . . . . . . . . . . . . . . . . . . . . . . . . . . . . . . . . . . . 51Route-Exclude . . . . . . . . . . . . . . . . .. . . . . . . . . . . . . . . . . . . . . . . . . XX Option Setup . . . . . . . . . . . . . . . . . . . . . . . . . . . . . . . . . . . . . . . . . . . . . . . . . . . XX Trip Computer . . . . . . . . . . . . . . . . . . . . . . . . . . . . . . . . . . . . . . . . . . . . . . . XX Service Directory . . . . . . . . . . . . . . . . . . . . . . . . . . . . . . . . . . . . . . . . . . . . . XX Exit Authority . . . . . . . . . . . . . . . . . . . . . . . . . . . . . . . . . . . . . . . . . . . . . . XX POI . . . . . . . . . . . . . . . . . . . . . . . . . . . . . . . . . . . . . . . . . . . . . . . . . . . . . . XX Communications (Not Available, Future Option) . . . . . . . . . . . . . . . XX Off Road . . . . . . . .. . . . . . . . . . . . . . . . . . . . . . . . . . . . . . . . . . . . . . . . . . . XX Unlock/Lock Features . . . . . . . . . . . . . . . . . . . . . . . . . . . . . . . . . . . . . . . . . XX Diagnostics . . . . . . . . . . . . . . . . . . . . . . . . . . . . . . . . . . . . . . . . . . . . . . . . . . . . . XX Product Information . . . . . . . . . . . . . . . . . . . . . . . . . . . . . . . . . . . . . . . . . . . XX Audio Test . . . . . . . . . . . . . . . . . . . . . . . . . . . . . . . . . . . . . . . . . . . . . . . . . . XX Error Log . . . . . . . . . . . . . . . . . . . . . . . . . . . . . . . . . . . . . . . . . . . . . . . . . . . XX GPS Initialize – Set Address . . . . . . . . . . . . . . . . . . . . . . . . . . . . . . . . . . . . XX GPS Initialize – Set Time . . . . . . . . . . . . . . . . . . . . . . . . . . . . . . . . . . . . . . . XX GPS Status . . . . . . . . . . . . . . . . . . . . . . . . . . . . . . . . . . . . . . . . . . . . . . . . . XX Key Test . . . . . . . . . . . . . . . . . . . . . . . . . . . . . . . . . . . . . . . . . . . . . . . . . . . XX Sensor Status . . . . . . . . . . . . . . . . . . . . . . . . . . . . . . . . . . . . . . . . . . . . . . . XX Video Test . . . . . . . . . . . . . . . . . . . . . . . . . . . . . . . . . . . . . . . . . . . . . . . . . . XX Operational Features and Limitations . . . . . . . . . . . . . . . . . . . . . . . . . . . . . . . . . XX Pan & Zoom . . . . . . . . . . . . . . . . . . . . . . . . . . . . . . . . . . . . . . . . . . . . . . . . . XX Locate. . . . . . . . . . . . . . . . . . . . . . . . . . . . . . . . . . . . . . . . . . . . . . . . . . . . . . XX Electronic Map . . . . . . . . . . . . . . . . . . . . . . . . . . . . . . . . . . . . . . . . . . . . . . . XX Detailed Coverage . . . . . . . . . . . . . . . . . . . . . . . . . . . . . . . . . . . . . . . . . . XX Non-Detailed Coverage . . . . . . . . . . . . . . . . . . . . . . . . . . . . . . . . . . . . . . XX Cross Country Navigation . . . . . . . . . . . . . . . . . . . . . . . . . . . . . . . . . . . . XX GPS . . . . . . . . . . . . . . . . . . . . . . . . . . . . . . . . . . . . . . . . . . . . . . . . . . . . . XX Installation . . . . . . . . . . . . . . . . . . . . . . . . . . . . . . . . . . . . . . . . . . . . . . . . . . . . . . XX ! .. Installation Preparation . . . . . . . . . . . . . . . . . . . . . . . . . . . . . . . . . . . . . . XX Read This First . . . . . . . . . . . . . . . . . . . . . . . . . . . . . . . . . . . . . . . . . . . . Part Verification . . . . . . . . . . . . . . . . . . . . . . . . . . . . . . . . . . . . . . . . . . . Determining Component Location . . . . . . . . . . . . . . . . . . . . . . . . . . . . . nd Installation of 750NAV or 2 Vehicle Kit . . . . . . . . . . . . . . . . . . . . . . . . . . . . . . ! .. XX XX XX XX Installing Computer and Docking Station . . . . . . . . . . . . . . . . . . . . . . . . XX Installing Display . . . . . . . . . . . . . . . . . . . . . . . . . . . . . . . . . . . . . . . . . . . . . XX Attaching Antenna . . . . . . . . . . . . . . . . . . . . . . . . . . . . . . . . . . . . . . . . . . . . XX System Connections . . . . . . . . . . . . . . . . . . . . . . . . . . . . . . . . . . . . . . . . . . XX System Connection Diagram . . . . . . . . . . . . . . . . . . . . . . . . . . . . . . . . . XX Completing Installation . . . . . . . . . . . . . . . . . . . . . . . . . . . . . . . . . . . . . . . . . . . . XX ! System Initialization . . . . . . . . . . . . . . . . . . . . . . . . . . . . . . . . . . . . . . . . XX Vehicle Calibration . . . . . . . . . . . . . . . . . . . . . . . . . . . . . . . . . . . . . . . . . . . XX nd Special 2 Vehicle Kit Calibration . . . . . . . . . . . . . . . . . . . . . . . . . . . . . . XX Clean-up . . . . . . . . . . . . . . . . . . . . . . . . . . . . . . . . . . . . . . . . . . . . . . . . . XX Customer Briefing . . . . . . . . . . . . . . . . . . . . . . . . . . . . . . . . . . . . . . . . . . . . . XX 4 Care and Maintenance . . . . . . . . . . . . . . . . . . . . . . . . . . . . . . . . . . . . . . . . . . . . Troubleshooting . . . . . . . . . . . . . . . . . . . . . . . . . . . . . . . . . . . . . . . . . . . . . . . . . Specifications . . . . . . . . . . . . . . . . . . . . . . . . . . . . . . . . . . . . . . . . . . . . . . . . Accessories . . . . . . . . . . . . . . . . . . . . . . . . . . . . . . . . . . . . . . . . . . . . . . . . . . FCC Compliance . . . . . . . . . . . . . . . . . . . . . . . . . . . . . . . . . . . . . . . . . . . . Magellan Map Areas . . . . . . . . . . . . . . . . . . . . . . . . . . . . . . . . . . . . . . . . . . . 5 XX XX XX XX XX XX IMPORTANT INFORMATION This symbol is intended to alert the user of important operating instructions. Failure to follow the instructions could result in personal injury or material damage. TIP This symbol indicates information, which can be helpful in the use of the 750NAV vehicle navigation system. SAFETY WARNINGS The Magellan 750NAV system is a navigational aid to assist in arriving at a selected destination. These safety rules MUST be followed to help prevent accidents while driving. The unit should be programmed only by passengers in the vehicle or by the driver while the vehicle is stopped. While driving, the need to view the display is not necessary. Voice prompts will guide the user to the selected destination. DO NOT place the display where it can obstruct an airbag or any other vehicle safety devices. DO NOT place the display in a location where it is not secure. It is the responsibility of the driver to ensure compliance with all traffic laws. Disregard any unsafe, hazardous, or illegal route suggestions. 6 PRECAUTIONS • • • • • • DO NOT expose the 750NAV to damp locations or any type of fluids. DO NOT paint the GPS Antenna, this could interfere with GPS signal reception. DO NOT extend, pinch, cut, or bend the antenna cable at a sharp 90° angle or less, this will cause intermittent or complete GPS signal loss DO NOT permanently mount the GPS antenna anywhere on the vehicle (use the magnet mount or J-Clip provided). Magellan DOES NOT recommend drilling holes through the car body to route the antenna cable. Magellan DOES NOT recommend installing the OIM cable without easy access to the connection for simple repair or replacement of the OIM. DISCLAIMERS The Global Positioning System (GPS) is controlled, maintained, and operated by the United States Department of Defense. Civilian use of this system is subject to this control, changes to this system will affect all GPS products. While every attempt is made to ensure that the 750NAV database is accurate at the time of delivery, roadways, points of interest, and addresses may change over time. The Magellan 750NAV system is designed to provide accurate navigation data under a variety of conditions. GPS satellite signals may be reached through glass and plastic, but not metal. While driving the vehicle under normal conditions, possible interference could include tree-covered roads, downtown areas between tall buildings, inside tunnels and parking structures. For continued problems with GPS signal loss, refer to the Troubleshooting Guide on page xx or call Magellan Customer Service at 1-877-4-CARNAV (1-877-422-7628). 7 GENERAL INFORMATION HOW GLOBAL POSITIONING SYSTEMS (GPS) WORK The vehicle GPS System Antenna receives signals from 24 satellites orbiting the earth. The vehicle navigation system processes these signals along with other sensor information from the vehicle, to determine the vehicle’s location. 8 MAGELLAN 750NAV MAP INFORMATION The Magellan 750NAV has an extensive network of road information and points of interest, which include restaurants, banks, and many other places where you may want to go. The information for the United States is divided into nine Map Areas, as shown on page xx. Each Magellan 750NAV comes standard with the use of one of these Map Areas. Other Map Areas may be added to the Magellan 750NAV as a purchased option. Call Magellan Customer Service toll free at 1-877-4CAR-NAV for more information. The Magellan 750NAV has detailed mapping, Street Address, and Points of Interest (POI) information for various metropolitan areas throughout the country. This is referred to as detailed coverage. When outside of a detailed covered metropolitan area, use the “City Center” from the Points of Interest menu. General guidance is then possible by using interstate highways, state, and some county roads. Street Address guidance is not possible when outside of a detailed coverage area. USING THE MAGELLAN 750NAV The location of the vehicle is shown on the Display (OIM), which also has a keypad for entering information. The OIM has a detachable bracket for hand held use. To detach the OIM, pull out from the bottom and lift up from the mounting bracket. Normally, the Computer Docking Station (CDS) is attached to the vehicle, as shown in the Installation Guide. To install the Computer System Module (CSM), simply slide it into the CDS until the front edge of the CSM lines up with the front edge of the CDS. Press in the red lock button to latch the CSM in place. If the lock button does not push in, then the CSM is not seated properly. To remove the CSM from the CDS, pull out on the red lock button until the latch releases, and slide out the CSM. 750NAV TECHNOLOGY Using internal sensors, Map-Matching technology, and the Global Positioning System (GPS) satellites, the Magellan 750NAV will find the vehicles current location accurately. Turn-by-Turn route guidance will give directions when to turn and which direction to turn, by providing both visual and audio directions. Magellan’s exclusive VIPTM (Vehicle Independent Positioning) technology provides feedback regarding vehicle speed and direction to an on board navigation computer that calculates a route. VIP technology dramatically improves GPS accuracy and even serves as a backup in the unlikely event of short GPS signal loss. This technology eliminates the need to splice into the vehicle speed sensor or other sensor wires, allowing less installation time than other Vehicle Navigation Systems. 9 750NAV KEY COMPONENTS Display Docking Station Navigation Computer GPS Antenna 10 FEATURES OFF ROAD NAVIGATION Off Road Navigation provides latitude and longitude positioning and heading information. Allows you to set waypoints and route back to them and/or leave a breadcrumb trail to follow back, just like Magellan’s hand-held GPS products. A sensor is included to measure the vehicle’s pitch and roll readings while driving across or up steep inclines. ROUTE EXCLUDE This feature allows the user to eliminate roads from the maneuver list to bypass toll roads and problems such as, traffic jams, construction zones, or other road obstructions. TRANSPORTABILITY This exclusive feature from Magellan allows the system to be easily moved between 3 different vehicle’s which have the 750NAV Optional Install Kit installed. In addition, with the optional Magellan 750NAV Mobility Kit, the user can use the 750NAV in any vehicle. This kit is available from your authorized Magellan Dealer. QUICKSPELLTM This patented technology provides a fast, simple way to input addresses. Select any letter, number, or character on the QuickSpell screen in just three keystrokes or less. 11 DISPLAY OVERVIEW Direction to Destination Distance to Destination Estimated Time to Destination Distance to Next Maneuver Direction and Signal Strength Shows current direction; color Indicates GPS signal strength: Green = strong signal Yellow = weak signal Red = no signal Brightness/Contrast Adjusts screen brightness; Push in and turn to adjust Contrast Volume/Last Message Repeat Adjust voice volume; push in to repeat last message Option Press for User or Setup menus Pwr Turn display on and off View Switch from Map display to TM Select Destination, TrueView , Exit Authority (Interstate only) and Maneuver List Cancel Stops current operation, moves back one menu level Locate Press for current location and nearest cross streets 8-Way Arrow Button Moves cursor left, right, up, down and diagonally Enter Used to input choices + And – Buttons Allows you to zoom the Map in and out - = Zoom in + = Zoom out 12 GETTING STARTED Always read and follow all safety instructions. Turn on the Magellan 750NAV by pressing the PWR button. This screen should appear. When the ball finishes rotating the next screen will appear. Warning screen with User Selections at the bottom. Use the right or left arrows on the 8Way Arrow button on the OIM to select a User. Press the ENTER button to select. Once the User selection has been made or after thirty seconds, a Map Selection screen will appear. Press ENTER to continue. 13 TEMPORARY MAP SELECTION Step 1: Press the Down Arrow on the 8-Way Arrow button to select desired temporary map area. Press the ENTER button. Step 2: Press the Left Arrow on the 8-Way button for YES to confirm Map change. Press the ENTER button. To select a different Map area, Press ENTER for NO and repeat Step 1. Warning screen with User Selections at the bottom. Use the right or left arrows on the 8-Way Arrow button to select a User, then press the ENTER button for selection. Once the User selection has been made or after thirty seconds, a Warning screen will Press ENTER to continue. NOTE: If the 750NAV is not registered within the time span shown on this screen, the system mapping will not be accessible. Refer to page XX for product registration. 14 MAIN MENUS SELECT DESTINATION MENU Restaurants, Airports, Hotels Stores, Police, City Centers Enter destination address Enter Waypoints, etc… Store up to 100 addresses USER OPTION MENU Enter closest intersection to destination Enter closest Freeway Exit or Entrance to destination Press the OPTION button to get the User Option Menu shown below. Use the CANCEL button to return to Select Destination Menu above. Illustrates the basic features of the 750NAV. View businesses located along interstate highways or within cities that have detailed coverage. 15 Keeps track of time, miles, speed and trip information. This feature is not available at this time. Allows the user to set system parameters. Contains information about system initialization, calibration and test parameters. PRODUCT DEMONSTRATION Running the “Product Demo” will show you how to plan a typical route. Press the OPTION button. Press the Left Arrow on the 8-Way Arrow button. Press the ENTER button. Press the ENTER button. You can exit the product demonstration at any time by pressing the CANCEL button. TIP The CANCEL button will always return you to the previous screen. It’s a great way to start over if you make a mistake. TIP Holding the CANCEL button down for two seconds will return you to the Main Menu. 16 QuickSpell The QuickSpell screen is designed, to minimize the number of keypad presses. Any letter in the alphabet, number, character or space can be selected in three key strokes or less by pressing the arrowheads on the 8-Way Arrow button then the ENTER button. In the center of the screen there is a circle with arrows that represent the arrows on the 8-Way Arrow button. Each of the five blue blocks on the screen can be accessed, using the arrow that points to that block. After pressing an arrow, the yellow cursor will jump to the center character of the corresponding blue block. If other than the center character is needed, press the arrow which will move the yellow cursor in the direction of the character needed. Press the ENTER button to move that character to the bottom of the screen. As letters are entered, the list automatically sorts to show only the cities that begin with the selected letters. When there are only a small number of cities remaining the list will be displayed. 17 To backspace after making a mistake, highlight the Back Arrow underneath the LIST icon in the center of the screen. Press the ENTER button. To bypass the QuickSpell function, highlight LIST in the center of the screen. Press the ENTER button. Scroll down the list using the Down Arrow on the 8-Way Arrow button to highlight the desired city. Press the ENTER button. TIP Using the Right Arrow skips down to the next letter in the alphabet. Using the Left Arrow skips up to the next letter. TIP The previous ten cities that have been routed will appear at the top of the list. For quick access, press the ENTER button at the LIST icon. 18 SETUP & CONFIGURATION OF YOUR 750NAV SYSTEM Product Registration / Map Unlock To register the system and unlock the desired Map Areas, call Magellan Customer Service Dept. toll free at 877-4CARNAV (877-422-7628) and be prepared to give the following information: - If registering a 750NAV system, locate the serial numbers inside the Black Vinyl Document Holder on a white sticker. - If registering the 750M, locate the serial numbers on the back of the 750M Installation & Reference Addendum. - Year, make, and model of vehicle the 750NAV system is installed. If registering a 750NAV system please call Customer Service from the vehicle the system is installed. 19 Address Book Press the OPTION button. Press the Left Arrow on the 8-Way button. Press the ENTER button. Press the ENTER button. 20 List the last ten addresses you routed to. List the addresses you have stored. Allows you to enter and store up to 100 addresses. Use the Down Arrow to select New and press the ENTER button to enter an address you want saved in your address book. Use the List to verify your entry. Remember you can store up to 100 addresses. 21 Color Options Use the Down Arrow to select Color Options. Press the ENTER button. The Color Theme is Default only. Use the Down Arrow to select Wallpaper. Use the ENTER button to select either sand, canvas or none for your background wallpaper. Use the Down Arrow to select Save Wallpaper selection or Cancel. Press the ENTER button. Communication Setup Option not available at this time. 22 Map Options Use the Down Arrow to select Map Options. Press the ENTER button. Change the way guidance is displayed on the map screen by selecting Map and pressing the ENTER button to select Smart, Always or Manual. Use the 8-Way Arrow and ENTER button to select and activate the other features on the screen. Highlight Save then press the ENTER button to save your settings. Map Smart automatically changes the display from map view to the 3D True View graphics before each maneuver. Map Always shows only the map view with the highlighted route. Map Manual allows you to select the map view or 3D True View graphic by pressing the VIEW button. Heading Up sets the Map Display so the direction of travel is always toward the top of the screen. When the checkbox is not selected, the display will set with North at the top of the screen. Auto Map allows the system to switch automatically from one DCA Map area to another when driving cross country. Scrolling Map will keep the Vehicle icon positioned in the center of the screen while the map scrolls underneath. When the checkbox is not selected the Vehicle icon will move up the screen until it nears the top edge then the map and vehicle icon will move to the bottom of the screen and start up again. You can also set your distance readings in either Miles or Kilometers. 23 Map Selection Use the Down Arrow to select Map Selection. Press the ENTER button. Use the Down Arrow to highlight the Map Area you are currently located in. Press the ENTER button. Use the Left Arrow to select Yes for map change confirmation. Press the ENTER button. If this Map Area is not desired then press the ENTER button on No then select another Map Area. After this screen is displayed the system will shut down then power back up in the new Map Area. 24 Option Menu Features To access the Off-Road Option menu features, press the OPTION button. Select the Configuration icon, press ENTER. Select Off-Road Navigation, press ENTER. Track On The tracking feature may be used to “backtrack” the vehicle’s route. The “Breadcrumb Trail” left on the map display will be in the form of a blue dashed line. Leaving the user a route to follow back to the point of origin. The blue track will remain on the map display until cleared from the systems memory. See page 7 for instructions on clearing Track History. To turn this feature on or off just highlight Track On in the Off-Road options menu and press ENTER. When the color of the X changes to blue, tracking is turned on. Track On 25 Ext. Detail The Extended Detail feature will display heading and bearing information on the map screen. To turn this feature on or off simply highlight Ext. Detail in the Off-Road options menu and press ENTER. When the color of the X changes to blue the feature is on. Ext. Detail Heading Information Ext. Detail Bearing Information Lat/Long Press ENTER on Lat/Long to change the format for the latitude and longitude coordinates. Advanced Press ENTER on Advanced to access Arrival or XTE Alarm setup. 26 The XTE Alarm is the cross track error alarm. While in route guidance mode, the XTE Alarm will chime when you are off track by the selected distance. The distance is adjustable between off and 1 mile. Or from off to 1.5 kilometers, if using the metric system. Press ENTER on XTE Alarm to adjust the distance for the cross track error. . The Arrival Alarm will chime after driving past each waypoint and upon arrival to the final waypoint in a route. The arrival alarm distance is adjustable from 100 feet to 1 mile. Or from 30 meters to 1.5 kilometers, if using the metric system. To adjust the distance for the Arrival Alarm, press ENTER on Arrival Alarm. After changing the XTE or Arrival Alarms scroll to save and press ENTER. 27 Clear The Clear feature will generate an Off-Road Clear list. From this screen Track History, Routes, or Routes/Waypoints can be cleared from the systems memory. To generate the clear list, press ENTER on Clear. Pressing ENTER on Track History will prompt the user with a yes or no to clear Track History. Pressing ENTER on Routes will prompt the user with a yes or no to clear Routes. 28 Pressing ENTER on Routes/Waypoints will prompt the user with a Yes or No to clear Routes and Waypoints. Pressing ENTER on All will prompt the user with a Yes or No to clear All of the Track History, Routes, and Waypoints. 29 Route Preferences Use the Down Arrow and scroll to Route Preferences. Press the ENTER button. Highlighting the top row and pressing the ENTER button will allow you to select any of the four Route Preferences shown on the left. Use the Up-Down Arrows to highlight Avoid Toll Roads or Automatic Re-route then press the ENTER button to select or deselect these features. Selecting Avoid Toll Roads will automatically eliminate all toll roads from the Route Preference used to calculate a route. Not selecting or Deselecting Avoid Toll Roads in Route Preference will include all toll roads. Selecting Automatic Re-route will automatically calculate a new route when you leave the current calculated route. Not selecting or Deselecting Automatic Reroute will force you to manually request a new route calculation. Using the 8-Way Arrow button highlight Save and press the ENTER button to save your preferences. 30 Service Directory Use the Down Arrow and scroll to Service Directory. Press the ENTER button. Use the ENTER button to select or deselect the Exit Authority feature. Use the 8-Way Arrow button to either Save or Cancel your selection. Selecting Exit Authority will allow you to view what services are available at an Freeway Exit. Such as Gas Stations, Restaurants, Hotels & Motels, ATM’s, Hospitals, Police Departments, R.V. Camps, Truck Service, Car Service and Rest Areas. 31 Tone Options Use the Down Arrow and scroll to Tone Options. Press the ENTER button. Use the 8-Way Arrow button to select the tone you prefer. Press the ENTER button. Use the 8-Way Arrow button to either Save or Cancel your selection. As you are navigating, the Alert Tone sounds as you approach a turn or destination. By selecting Tone Options you can choose the type of tone you want to hear. 32 User – Select Use the Down Arrow and scroll to User - Select. Press the ENTER button. Use the 8-Way Arrow button to select one of three users. Press the ENTER button. Use the 8-Way Arrow button to either Save or Cancel your selection. Each one of the three User’s can have the 750NAV system configured to their personal preferences. 33 Vehicle – Select Use the Down Arrow and scroll to User - Select. Press the ENTER button. Pressing the ENTER button while Vehicle is highlighted will allow you to select one of three vehicles. Use the Down Arrow to select System. Pressing the ENTER button will allow you to select the type of 750 system you are using. (750NAV, 750M ) Press the ENTER button. Use the 8-Way Arrow button to either Save or Cancel your selection. 34 User – Edit Name Before editing a users name you must first select the user name you want to edit from the User - Select option. Use the Down Arrow and scroll to User – Edit Name. Press the ENTER button. Use the QuickSpell feature to enter the user name of your choice. The User name can be up to six characters, no more. Press the ENTER button to save name change. Vehicle – Edit Name Before editing a vehicle name you must first select the vehicle name you want to edit from the Vehicle - Select option. Use the Down Arrow and scroll to Vehicle – Edit Name. Press the ENTER button. Use the QuickSpell feature to enter the vehicle name of your choice. The User name can be up to six characters, no more. Press the ENTER button to save name change. 35 Voice Options Use the Down Arrow and scroll to Voice Options. Press the ENTER button. Pressing the ENTER button while Language is highlighted will allow you to select one of seven languages. Use the ENTER button to select or deselect the Extended Voice feature. This feature allows voice prompts during menu selections. Use the 8-Way Arrow button to select Male or female voice. Use the 8-Way Arrow button to either Save or Cancel your selection. 36 NAVIGATION INSTRUCTIONS Different Navigation Views 3D TrueView 37 Map Display Street Address Select the Street Address icon by using the 8-Way Arrow button. Press the ENTER button. A Street address can be entered in two ways. If you know the city name where the street address is located, select Yes by pressing the ENTER button. If you are unsure of the city name where the street address is located, use the left arrow to select No. Press the ENTER Button. Spell the city name using the Quick Spell Screen, or press the ENTER button to view a list of cities. Spell the street name using the Quick Spell Screen, or press the ENTER button to view a list of streets. Use the Down Arrow to select the desired City. Press the ENTER button. 38 Use the Down Arrow to select the desired street. Press the ENTER button. Spell the street name using the Quick Spell Screen, or press the ENTER button to view a list of streets. Use the Down Arrow to select the desired street. Press the ENTER button. Use the Down Arrow to select the desired street. Press the ENTER button. Use the + - buttons to select the correct number, then use the Right Arrow to move the cursor to the next number. Press ENTER when the correct address is displayed 39 The 750NAV allows four routing options. Use the Down Arrow to select preferred route method. Press the ENTER button. The Shortest Time selection is the route that should take the least amount of time to drive. The Shortest Distance selection is the most direct route, although it may not be the fastest due to lower speed limits, left turns, or many other factors. The Most Use of Freeways selection will route you using as many freeways as possible. The Lease Use of Freeways will route you, using mostly main road and limiting the use of freeways. Wait while the Magellan 750NAV calculates a route from the present location to the destination entered. Begin driving by following the arrows on the magenta colored highlighted road and the clear, concise voice directions. The 750NAV system will tell you when you have arrived at the selected destination. VEHICLE 40 Points of Interest Press the Left Arrow button Press the ENTER button To select by Name. Press the ENTER button Spell destination name or press the ENTER button for list. 41 To select by Category use the Down Arrow button. Press the ENTER button Use the Down Arrow to select a category. Press the ENTER button. Use the Down Arrow to select destination. Press the ENTER button. Use the Down Arrow to select Search type. Press the ENTER button. Spell out Airport name or press the ENTER button for list of Airports. Use the Down Arrow to select an Airport. Press the ENTER button. Select the Route method for Calculation. 42 Intersection Press the Right Arrow button Press the ENTER button 43 If you know the city name where the intersection is located, select Yes by pressing the ENTER button. If you are unsure of the city name where the street address is located, use the Left Arrow to select No. Press the ENTER button. Spell the city name using the Quick Spell Screen, or press the ENTER button to view a list of cities. Spell the street name using the Quick Spell Screen, or press the ENTER button to view a list of streets. Use the Down Arrow to select the desired City. Press the ENTER button. Spell the street name using the Quick Spell Screen, or press the ENTER button to view a list of streets. Use the Down Arrow to select the first street. Press the ENTER button. 44 Use the Down Arrow to select the desired street. Press the ENTER button. Use the Down Arrow to select the city where the intersection is located. Press the ENTER button. Spell the street name using the Quick Spell Screen, or press the ENTER button to view a list of streets. Spell the street name using the Quick Spell Screen, or press the ENTER button to view a list of streets. Use the Down Arrow to select the second street. Press the ENTER button. Select the Route method for Calculation. 45 Freeway Entrance / Exit Press the Arrow on the lower right of the 8-Way Arrow button. Press the ENTER button. If you know the city where the Freeway Entrance or Exit is located, select yes by pressing the ENTER button. Spell the city name by using the Quick Spell Screen, or press the ENTER button to view a list of cities 46 If you are unsure of the city name where the Freeway Entrance or Exit is located, use the Left Arrow to select No. See page xx to continue. Use the Down Arrow to select the desired city. Press the ENTER button. Spell out the name of the Freeway that the Entrance or Exit is on or press the ENTER button to select from a list. Use the Down Arrow to select the desired Freeway. Press the ENTER button. To select Entrance press the ENTER button. 47 To select Exit use the Down Arrow button. Press the ENTER button. Spell out Freeway Entrance cross street or press the ENTER button to select from list. Spell out Freeway Exit cross street or press the ENTER button to select from list. Use the Down Arrow to select a Entrance cross street. Press the ENTER button. Use the Down Arrow to select a Exit cross street. Press the ENTER button. Select the route method for calculation. 48 Freeway Entrance/Exit – continued Spell out the Freeway the Entrance or Exit is on or press the ENTER button to select from a list. Use the Down Arrow to select the desired Freeway. Press the ENTER button. To select Entrance press the ENTER button. 49 To select Exit use the Down Arrow button. Press the ENTER button. Spell out Freeway Entrance cross street or press the ENTER button to select from list. Spell out Freeway Exit cross street or press the ENTER button to select from list. Use the Down Arrow to select a Exit cross street. Press the ENTER button. Select the route method for calculation. 50 Address Book Select the Address Book icon by using the 8-Way Arrow button. 51 By pressing the ENTER button you can select an address from one of the last ten addresses you routed to. Use the 8-Way Arrow button highlight List then press the ENTER button to select an address from your address book. Scroll down to the address you want then press the ENTER button. Scroll down to the address you want then press the ENTER button. Press the ENTER Press the ENTER Highlight the route method you prefer and press the ENTER button 52 Route Exclude The Route Exclude feature gives the user the ability to exclude roads while in route to a selected destination. This will enable users to bypass traffic jams, construction zones, toll roads and other paths that can make a trip longer than necessary. To exclude a maneuver from the route press the VIEW button while in route guidance mode. A maneuver list will generate. To exclude a maneuver from the route, highlight the maneuver below the maneuver that is being excluded and press ENTER. The system will display the maneuver the user would like to remove, press ENTER to exclude the maneuver. 53 The system will calculate a new route. If it is possible to route around the selected maneuver the 750NAV will display a new route excluding the maneuver. Important note: If the system recalculates the route after using the route exclude feature, the route will revert back to the original route. TIP 54 To Route off the road you are currently on just select the maneuver list. Then press the ENTER button. The system will recalculate a new route taking you off the road you are currently on as soon as possible. Off-Road Navigation Great for off-road enthusiasts, the 750NAV’S Off-Road Navigation option allows marking of favorite trails, hunting, and fishing spots. With this option the user can route to points that are not on roads, set landmarks, create trails, and more. Off-Road is a navigation mode separate from turn by turn navigation and provides the user with the feel of being a separate product. Once Off-Road mode is entered, the unit is functionally transformed into a product, which works similar to Magellan’s famous hand held GPS receiver. Features Enter navigation points (waypoints) by marking a waypoint using the systems current position, the systems cursor, or by editing a waypoints latitude and longitude coordinates. The maximum number of waypoints the system is capable of saving into memory is 100. Create routes by inserting waypoints into a route list. The 750NAV, guides the user from point-to-point by visually connecting the waypoints with highlighted lines in the order of the route lists. The navigation system then provides directional instruction to the next waypoint in the route. Waypoint-to-waypoint navigation continues in this fashion progressively through the list of waypoints making up the route. Once the final waypoint in the list is navigated to, the “you have arrived “ voice prompt is heard followed by 3 double chimes. Also a destination screen will be displayed showing the waypoint name and the Lat/Long coordinates of the waypoint. The maximum number of routes the systems can save into memory is 10 with 25 waypoints max. for each route. Reverse Route - Calculate a route from the last waypoint in the list to the first waypoint. Next Waypoint - Navigate to the next waypoint in a route list, allows the user to step through a route list or skip the next waypoint while driving a route. The Inclinometer Sensor shows how aggressive the terrain is by showing graphics with pitch and roll readings of the vehicles current position. 55 Unlocking Off-Road Navigation Prior to using Off-Road Navigation feature, it must be unlocked. To unlock OffRoad Navigation, follow these steps. Press the OPTION button. Select the Configuration icon, press ENTER. Scroll to Unlock/Lock Features, press ENTER. Call Magellan Customer Service, press ENTER. 56 Customer Service will ask for the H/W version to acquire an unlock code, press ENTER. Scroll to Off-Road Navigation, press ENTER. Using the QuickSpell screen enter the unlock code into the system, press ENTER After inputting the correct unlock code into the system, power the system off by pressing the POWER button. After proper system shutdown, press the POWER button again to turn the navigation system back on. Off-Road Navigation is now ready for use. TIP 57 Anytime the user saves information or settings it is recommended to power down the system by either turning the ignition off or by pressing the POWER button to allow a proper shutdown. This procedure ensures the settings will be saved into the 750NAVS memory. Start Using Off-Road Navigation Select the Off-Road Navigation icon from the main menu and press ENTER. Off-Road Selections Menu Setting Waypoints, Creating Routes, Next Waypoint, Reverse Route, and Inclinometer are all accessed in the Off-Road Selections Menu. Press ENTER from the Map View screen to arrive at the Off-Road Selections Menu. Setting Waypoints Press ENTER from the Map View screen. To set waypoints from the current position, press ENTER on Mark By Position. 58 After using the Mark By Position function the user may save the position name as WAY001. The next waypoint saved will be WAY002 and the numbers will increment after each waypoint is saved. The user may choose to name the waypoint to make it easier to identify the waypoint. To perform this function, highlight the waypoint name and press ENTER. Using the QuickSpell screen, delete the current waypoint name and spell the desired name (6-character max.). The waypoint icons are a good way to identify characteristics of specific trails (the default waypoint icon is a red flag). To select a new waypoint icon, select the waypoint icon box and press ENTER. 59 Select the desired waypoint icon and press ENTER. The lower box is for providing a description on a specific waypoint. Highlight the description box and press ENTER. Using the QuickSpell Screen input the desired description (35-character max.) and press ENTER. After making any changes to the waypoint scroll to save and press ENTER. 60 A waypoint may be saved using Lat/Long coordinates. Highlight the Lat/Long coordinates and press ENTER. Using the arrow buttons highlight the value you would like to change then use the + - keys to adjust the values to the desired coordinates. After the desired Lat/Long coordinates are entered, scroll to save and press ENTER. Waypoints may also be entered by using the Mark By Cursor feature. While viewing the map, use the arrow keys to pan the map display for the desired location and press ENTER. 61 Mark By Cursor will appear on the display then press ENTER. Press ENTER again to save the waypoint. Or make any desired changes to the name, icon, or description box before saving. 62 Deleting Waypoints To delete a waypoint from the waypoint list. Press ENTER on Select Route/Waypoint Press ENTER on Waypoints By Name, Waypoints By Distance, or Waypoints By Time. Select the waypoint and Press ENTER. Select Delete and press ENTER. Select Yes and press ENTER. 63 Edit Waypoint To Edit a waypoint from the waypoint list. Press ENTER on Select Route/Waypoint. Press ENTER on Waypoints By Name, Waypoints By Distance, or Waypoints By Time. Select the waypoint and Press ENTER. Select Edit and press the ENTER button. 64 Highlight the line you want to edit and press the ENTER button. After making the desired changes, scroll to Save and press ENTER. 65 Create a Route To save waypoints into a route scroll to Select Route/Waypoint and press ENTER. Select All Routes and press ENTER. Choose an empty Route and press ENTER. Press ENTER on Edit. 66 Press ENTER on Insert Waypoint. Press ENTER on each waypoint that will make up the route. After all the waypoints are inserted for the desired route scroll down to Save and press ENTER. Press ENTER on Route to start Route Guidance. 67 Route guidance screen. Press ENTER from the guidance screen to arrive at the Off-Road Selections menu. To bypass a waypoint select Next Waypoint and press ENTER. Select Yes and press ENTER. 68 To reverse the route select Reverse Route and press ENTER. Select Yes and press ENTER. 69 Off-Road Navigation Route Guidance After creating a route the 750NAV guides the user to each waypoint. As the user drives past each waypoint the arrival alarm will chime. The arrival alarm is adjustable between off and 1 mile. Or between off and 1.5 kilometers. See the off-road options section on page 5 to adjust the arrival alarm. While driving the route an XTE alarm will alert the user with chimes when the user drives off route. See the Advanced feature in the Option Menu on page 5 to adjust the XTE Alarm distance. The True-View feature may be accessed while in Route Guidance mode by pressing the VIEW key. When using True-View mode simply drive in the direction of the arrow to follow the route. The red triangle shows how far to the left or right the vehicle is off route (works as a visual for the XTE Alarm). 70 Once the final waypoint in the list is navigated to, the you have arrived voice prompt is heard followed by 3 double chimes. Also a destination screen will be displayed showing the final waypoint name and the Lat/Long coordinates of the waypoint. To cancel route guidance, press the CANCEL key, move the cursor to yes and press ENTER. If you would like to route to a specific waypoint select Waypoints By Name, Waypoints By distance, or Waypoints By Time and press ENTER. Select a waypoint, Press ENTER. 71 Now select Route and Press ENTER. Inclinometer The inclinometer can be accessed in the Off-Road Selections menu. Press ENTER on Inclinometer. The pitch and roll readings of the vehicle will be displayed while driving. This feature is useful when driving across or up steep inclines, letting the driver know how aggressive the terrain is. Cancel Off-Road Navigation To cancel Off-Road Navigation press the CANCEL key until prompted to Cancel Off-Road, select yes and then ENTER. When the system is in route guidance mode the user will have to cancel route guidance before canceling Off-Road. 72 OPERATIONAL FEATURES AND LIMITATIONS USING THE MAP PANNING FEATURE To view areas of road outside the current display area, simply press the 8-WAY ARROW keys in the desired viewing direction. The map will scroll in the direction that the Arrow keys are pressed. A distance reading from the vehicle’s current location to the systems cursor position will also be displayed. This distance is measured in a straight-line between these points, not the distance using the roads. To Pan the Map Display, use the 8-WAY ARROW keys. Pressing the CANCEL key returns to the normal map display. Map Zoom While in the Map Display mode the + and – keys are used to change the magnification scale from 1/8 to 20 Miles. While viewing the 10 or 20 Mile scale the north up feature will not be active. + key zooms out. – key zooms in. 73 ELECTRONIC MAP The Magellan 750NAV has an electronic map of the contiguous United States and Canada stored on a hard drive. The map is divided into 10 separate regions called Map Areas. Along with the purchase of the 750NAV one Map Area is included (see Magellan Map Areas on page xx). Access to Map Areas is controlled by Unlock Codes that are provided when the product is registered, or when additional Map Areas are purchased or rented (see Unlock Features on page xx). TYPES OF COVERAGE Detailed Coverage Available in many metropolitan areas, this coverage provides complete street and address level detail for the area. As well as, an extensive Points of Interest database containing information about businesses, banks, hotels, airports, restaurants, entertainment venues and many other categories. Inter-town Coverage Available in less populated areas; this coverage level connects the Detailed Coverage Areas with major roads shown on AAA State maps. This type of coverage also includes navigating to City Centers and Points of Interest. Driving Across Map Areas The Magellan 750NAV is currently not capable of routing outside of the chosen Map Area. The system is can only route to a destination inside of each Map Area. Why the Map Database is divided into 10 Map Areas? The contiguous United States and Canada have too much information to store all of the data on a computer hard-drive. The average vehicle owner drives within a hundred-mile radius from their home 99% of the time. To create a route with a navigation system, the computer must perform numerous and complicated calculations in a matter of seconds, virtually impossible if the computer had to sort through the millions of bits of data that make up the U.S. and part of Canada. 74 2950 Waterview Dr. Rochester Hills, MI 48309 Toll-Free 1-877-4-CAR-NAV (1877-422-7628) Web www.magellan gps.com 75