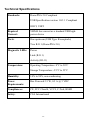
1
D-Link
DHN-120
10Mb Home Phoneline
USB Adapter
User’s Guide
i
Copyright © 1999 D-Link, all rights reserved. D-Link, DHN-920 and DHN120 are registered trademarks of D-Link. Microsoft Windows 95, Windows
98, and Windows 2000 are trademarks of the Microsoft Corporation. All
other trademarks are registered trademarks or trademarks of their respective
holders. All specifications are subject to change without notice.
FCC Certifications
This equipment has been tested and found to comply with the limits for a
Class B digital device, pursuant to Part 15 of the FCC Rules. These limits are
designed to provide reasonable protection against harmful interference in a
residential installation. This equipment generates, uses and can radiate radio
frequency energy and, if not installed and used in accordance with the
instructions, may cause harmful interference to radio communications.
However, there is no guarantee that interference will not occur in a particular
installation. If this equipment does cause harmful interference to radio or
television reception, which can be determined by turning the equipment off
and on, the user is encouraged to try to correct the interference by one or
more of the following measures:
• Reorient or relocate the receiving antenna.
• Increase the separation between the equipment and receiver.
• Connect the equipment into an outlet on a circuit different from that to which the receiver is connected.
• Consult the dealer or an experienced radio/TV technician for help.
Shielded interface cables must be used in order to comply with emission
limits.
You are cautioned that changes or modifications not expressly approved by
the party responsible for compliance could void your authority to operate the
equipment.
This device complies with Part 15 of the FCC rules. Operation is subject to
the following two conditions: (1) This device may not cause harmful
interference, and (2) This device must accept any interference received,
including interference that may cause undesired operation.
ii
CE Mark Warning
This is a Class B product. In a domestic environment, this product may cause radio interference, in which case the
user may be required to take adequate measures.
VCCI Warning
LIMITED WARRANTY
D-Link Systems, Inc. (“D-Link”) provides this limited warranty for its product only to the person or entity who
originally purchased the product from D-Link or its authorized reseller or distributor.
Limited Hardware Warranty: D-Link warrants that the hardware portion
of the D-Link products described below (“Hardware”) will be free from
material defects in workmanship and materials from the date of original retail
purchase of the Hardware, for the period set forth below applicable to the
product type (“Warranty Period”) if the Hardware is used and serviced in
accordance with applicable documentation; provided that a completed
Registration Card is returned to an Authorized D-Link Service Office within
ninety (90) days after the date of original retail purchase of the Hardware. If a
completed Registration Card is not received by an authorized D-Link Service
Office within such ninety (90) period, then the Warranty Period shall be
ninety (90) days from the date of purchase.
Product Type
Warranty Period
Product (excluding power supplies and
fans), if purchased and delivered in the fifty
(50) United States, or the District of
Columbia (“USA”)
As long as the original
purchaser still owns the
product
Product purchased or delivered
outside the USA
One (1) Year
Power Supplies and Fans
One (1) Year
Spare parts and spare kits
Ninety (90) days
D-Link’s sole obligation shall be to repair or replace the defective Hardware at no charge to the original owner.
Such repair or replacement will be rendered by D-Link at an Authorized D-Link Service Office. The replacement
iii
Hardware need not be new or of an identical make, model or part; D-Link may in its discretion may replace the
defective Hardware (or any part thereof) with any reconditioned product that D-Link reasonably determines is
substantially equivalent (or superior) in all material respects to the defective Hardware. The Warranty Period shall
extend for an additional ninety (90) days after any repaired or replaced Hardware is delivered. If a material defect is
incapable of correction, or if D-Link determines in its sole discretion that it is not practical to repair or replace the
defective Hardware, the price paid by the original purchaser for the defective Hardware will be refunded by D-Link
upon return to D-Link of the defective Hardware. All Hardware (or part thereof) that is replaced by D-Link, or for
which the purchase price is refunded, shall become the property of D-Link upon replacement or refund.
Limited Software Warranty: D-Link warrants that the software portion of the product (“Software”) will substantially
conform to D-Link’s then current functional specifications for the Software, as set forth in the applicable
documentation, from the date of original delivery of the Software for a period of ninety (90) days (“Warranty
Period”), if the Software is properly installed on approved hardware and operated as contemplated in its
documentation. D-Link further warrants that, during the Warranty Period, the magnetic media on which D-Link
delivers the Software will be free of physical defects. D-Link’s sole obligation shall be to replace the nonconforming Software (or defective media) with software that substantially conforms to D-Link’s functional
specifications for the Software. Except as otherwise agreed by D-Link in writing, the replacement Software is
provided only to the original licensee, and is subject to the terms and conditions of the license granted by D-Link for
the Software. The Warranty Period shall extend for an additional ninety (90) days after any replacement Software is
delivered. If a material non-conformance is incapable of correction, or if D-Link determines in its sole discretion
that it is not practical to replace the non-conforming Software, the price paid by the original licensee for the nonconforming Software will be refunded by D-Link; provided that the non-conforming Software (and all copies
thereof) is first returned to D-Link. The license granted respecting any Software for which a refund is given
automatically terminates.
What You Must Do For Warranty Service:
Registration Card. The Registration Card provided at the back of this manual must be completed and returned to an
Authorized D-Link Service Office for each D-Link product within ninety (90) days after the product is purchased
and/or licensed. The addresses/telephone/fax list of the nearest Authorized D-Link Service Office is provided in the
back of this manual. FAILURE TO PROPERLY COMPLETE AND TIMELY RETURN THE REGISTRATION
CARD MAY AFFECT THE WARRANTY FOR THIS PRODUCT.
Submitting A Claim. Any claim under this limited warranty must be submitted in writing before the end of the
Warranty Period to an Authorized D-Link Service Office. The claim must include a written description of the
Hardware defect or Software nonconformance in sufficient detail to allow D-Link to confirm the same. The original
product owner must obtain a Return Material Authorization (RMA) number from the Authorized D-Link Service
Office and, if requested, provide written proof of purchase of the product (such as a copy of the dated purchase
invoice for the product) before the warranty service is provided. After an RMA number is issued, the defective
product must be packaged securely in the original or other suitable shipping package to ensure that it will not be
damaged in transit, and the RMA number must be prominently marked on the outside of the package. The packaged
product shall be insured and shipped to D-Link, 53 Discovery Drive, Irvine CA 92618, with all shipping costs
prepaid. D-Link may reject or return any product that is not packaged and shipped in strict compliance with the
foregoing requirements, or for which an RMA number is not visible from the outside of the package. The product
owner agrees to pay D-Link’s reasonable handling and return shipping charges for any product that is not packaged
and shipped in accordance with the foregoing requirements, or that is determined by D-Link not to be defective or
non-conforming.
What Is Not Covered:
This limited warranty provided by D-Link does not cover:
Products that have been subjected to abuse, accident, alteration, modification, tampering, negligence, misuse, faulty
installation, lack of reasonable care, repair or service in any way that is not contemplated in the documentation for
the product, or if the model or serial number has been altered, tampered with, defaced or removed;
iv
Initial installation, installation and removal of the product for repair, and shipping costs;
Operational adjustments covered in the operating manual for the product, and normal maintenance;
Damage that occurs in shipment, due to act of God, failures due to power surge, and cosmetic damage; and
Any hardware, software, firmware or other products or services provided by anyone other than D-Link.
Disclaimer of Other Warranties: EXCEPT FOR THE LIMITED WARRANTY SPECIFIED HEREIN, THE
PRODUCT IS PROVIDED “AS-IS” WITHOUT ANY WARRANTY OF ANY KIND INCLUDING, WITHOUT
LIMITATION, ANY WARRANTY OF MERCHANTABILITY, FITNESS FOR A PARTICULAR PURPOSE
AND NON-INFRINGEMENT. IF ANY IMPLIED WARRANTY CANNOT BE DISCLAIMED IN ANY
TERRITORY WHERE A PRODUCT IS SOLD, THE DURATION OF SUCH IMPLIED WARRANTY SHALL BE
LIMITED TO NINETY (90) DAYS. EXCEPT AS EXPRESSLY COVERED UNDER THE LIMITED
WARRANTY PROVIDED HEREIN, THE ENTIRE RISK AS TO THE QUALITY, SELECTION AND
PERFORMANCE OF THE PRODUCT IS WITH THE PURCHASER OF THE PRODUCT.
Limitation of Liability: TO THE MAXIMUM EXTENT PERMITTED BY LAW, D-LINK IS NOT LIABLE UNDER
ANY CONTRACT, NEGLIGENCE, STRICT LIABILITY OR OTHER LEGAL OR EQUITABLE THEORY FOR
ANY LOSS OF USE OF THE PRODUCT, INCONVENIENCE OR DAMAGES OF ANY CHARACTER, WHETHER
DIRECT, SPECIAL, INCIDENTAL OR CONSEQUENTIAL (INCLUDING, BUT NOT LIMITED TO, DAMAGES
FOR LOSS OF GOODWILL, WORK STOPPAGE, COMPUTER FAILURE OR MALFUNCTION, LOSS OF
INFORMATION OR DATA CONTAINED IN, STORED ON, OR INTEGRATED WITH ANY PRODUCT
RETURNED TO D-LINK FOR WARRANTY SERVICE) RESULTING FROM THE USE OF THE PRODUCT,
RELATING TO WARRANTY SERVICE, OR ARISING OUT OF ANY BREACH OF THIS LIMITED
WARRANTY, EVEN IF D-LINK HAS BEEN ADVISED OF THE POSSIBILITY OF SUCH DAMAGES. THE
SOLE REMEDY FOR A BREACH OF THE FOREGOING LIMITED WARRANTY IS REPAIR,
REPLACEMENT OR REFUND OF THE DEFECTIVE OR NON-CONFORMING PRODUCT.
GOVERNING LAW: This Limited Warranty shall be governed by the laws of the state of California.
Some states do not allow exclusion or limitation of incidental or consequential damages, or limitations on how long an
implied warranty lasts, so the foregoing limitations and exclusions may not apply. This limited warranty provides specific
legal rights and the product owner may also have other rights which vary from state to state.
v
Contents
Chapter 1
Introduction................................................................................... 1
DHN-120 Installation Guide and Networking Basics .................................. 1
Box Contents ............................................................................................ 2
Chapter 2
Installing Adapters and Cables ..................................................... 3
Installing USB Adapters............................................................................... 3
Installing Cables ........................................................................................... 3
Chapter 3
Installing Software........................................................................ 5
Installing Software under Windows 98 ........................................................ 5
Installing Software in Windows 2000 .......................................................... 9
Chapter 4
Networking Basics...................................................................... 13
TCP/IP Protocol.......................................................................................... 13
Computer Identification.............................................................................. 17
Sharing Files ............................................................................................... 19
Sharing Printers .......................................................................................... 26
Playing Network Games............................................................................. 31
Chapter 5
Troubleshooting.......................................................................... 36
Verify Each Computer’s Identification .................................................. 36
Verify Network Adapter Installation ...................................................... 36
Verify Cable Connections....................................................................... 37
Understanding Indicators........................................................................ 38
Getting Technical Support...................................................................... 38
Technical Specifications............................................................................. 39
vi
Chapter 1 Introduction
DHN-120 Installation Guide and Networking Basics
The D-Link DHN-120 is ideal for the small office or home office
environment. The DHN-120 enables you to add your computer to a network.
After completing the steps in this manual, you will have the ability to share
information and resources - such as files and printers - and take full advantage
of a "connected" environment for work and play!
The DHN-120 comes with drivers for the most popular operating systems and
can be integrated into a larger network. This Quick Starter Guide is designed
to help you install the DHN-120 and connect the computer to a network
running Windows 98 or Windows 2000.
The HomePNA standard allows you to connect computers and devices at
speeds up to 10 Mbps. The DHN-120 is based on the newest HomePNA 2.0
standard. Older Network Cards, based on HomePNA 1.0, support speeds up
to 1 Mbps. The DHN-120 is backwards compatible with HomePNA 1.0
products as well.
This Quick Starter Guide will take you through the steps of planning your
network, installing the network hardware and software, and setting up
Windows properly to use basic networking functions like printer and file
sharing and playing network games. Take a moment to read through this
manual and familiarize yourself with the steps necessary to complete the
installation process. The entire process should take from one to two hours of
your time. But, you should also give yourself some time to play with your
new network!
1
Box Contents
You should have the following items:
•
1 DHN-120 10 Mbps HomePNA 2.0 Network Adapter
•
1 Phoneline Cable
•
1 USB Cable
•
DHN-120 Quick Starter Guide (This Manual)
•
DHN-120 Driver CD
2
Chapter 2 Installing Adapters and Cables
If you plan to set up two computers in the same room, you can use a single
phone jack. Keep in mind that at all times at least one of the cards on your
phoneline network must be plugged into a phone jack. Also keep in mind that
the phone jack must be for an active phone line. The phoneline network cards
depend on the small voltage that it is on your phone lines to function properly.
Installing USB Adapters
USB is the simplest way to install a network adapter. It is a simple matter of
using the included USB cable to connect the DHN-120 to an open USB port
on any PC or laptop you wish to connect. Please make sure that each
computer is off before plugging the unit in. Once you have created your
network, you will be able to hot-plug the DHN-120 at will, but for the
purposes of this manual it is best if you initially install the adapters with your
computers powered off.
Installing Cables
The cable included in the box is 15 feet in length. If you need a longer cable,
they are sold at most electronics stores. If you want to use a phone on the
same phone jack, we recommend that you purchase a splitter for the jack.
If you plan to use 2 or more phone jacks, make sure that they are (1) active
and (2) on the same line (the same phone number). The Home Phoneline
adapters will NOT interfere with your normal phone, analog modem, or DSL
modem but they do require an active phone line to work.
With the power off on your computers, run the first cable from your DHN120 USB HPNA 2.0 Network Adapter directly to the phone jack. If you have
two available phone jacks on the same line (telephone number) then simply
repeat this step for any other machines you would like to add to your home
phoneline network like the picture below, Figure 1:
3
Figure 1: Connecting Cables
If you plan to have two computers in the same room and only have one phone
jack, you can "daisy chain" the computers together. Simply run your first
phoneline cable from one of ports on the first DHN-120 to an available, active
phone line. Then run the second cable from the second port of the first DHN120 to one of the ports on the second DHN-120.
If you have a free port available on the DHN-120, it can be used to plug in a
phone or modem. The DHN-120 won't interfere with your phone, DSL, or
modem signal.
Congratulations: The hardware is ready to be configured into a network.
4
Chapter 3 Installing Software
You have completed the hardware installation necessary to start operating
your network. But, before you start sending those print jobs to the printer in
the other room or start playing fast paced network games with your family,
you need to tell your computers that they are connected to a network – that is,
you need to install the Networking System Software. This will consist
primarily of installing device drivers for your Network Adapters. Device
drivers help the operating system on your computer to identify and operate
devices such as printers and Network Adapters.
Installing Software under Windows 98
Since the DHN-120 is Plug-and-Play, Windows 98 recognizes that you have
added a Network Adapter and requests that you provide the necessary device
driver. The Windows 98 installation CD will be needed to complete this
installation.
A.
Power ON your computer.
5
B.
Windows 98 will detect the new hardware, and will launch the
Add New Hardware Wizard. The wizard will find your new "DLink DHN-120", as shown in Figure 2.
Figure 2: Add New Hardware Wizard
C.
Insert the DHN-120 Drivers CD provided with your kit into your
CD-ROM drive and click "Next >" to continue.
6
D.
In Windows 98, the wizard will ask you, "What do you want
Windows to do?" Select "Search for the best driver for your device
(Recommended)" and click "Next >" to continue, as shown in
Figure 3.
Figure 3: Search for Driver
E.
The wizard will now ask you to identify the location to search.
Ensure that "CD-ROM Drive" has a check in Windows 98 and
click "Next >" to continue, as shown in Figure 4.
Figure 4: Specify Driver Location
7
F.
The wizard will find the driver on the CD and state its readiness to
install the driver for the "D-Link DHN-120 10Mb Home Phoneline
USB Adapter" Click "Next >" to continue, as shown in Figure 5.
G.
The wizard will install the driver and additional networking
software from the Windows 98 CD-ROM. If requested, please
provide the Windows 98 CD-ROM.
Figure 5: Driver Installation
8
H.
For Windows 98, the wizard will display that it has finished
installing the driver. Remove the driver CD from the CD-ROM
drive and click "Finish." Windows will ask to reboot click "Yes"
and let your computer reboot, as shown in Figure 6.
Figure 6: Click Finish to complete the installation
Installing Software in Windows 2000
Since the DHN-120 is Plug-and-Play, Windows 2000 will recognize that you
have added a Network Adapter and request that you provide the necessary
device driver. The Windows 2000 installation disks or CD will be needed to
complete this installation.
I.
Power ON your computer.
9
J.
Windows 2000 will detect the new hardware, and will launch the
Add New Hardware Wizard. The wizard will find your new "DLink DHN-120", see Figure 7.
Figure 7: Found New Hardware Wizard
10
K.
Select "Search for a suitable driver for my device (recommended)"
then click "Next>", see Figure 8.
Figure 8: Locate Driver Files
L.
Make sure your DHN-120 installation CD is in your CD-ROM
drive and the box next to "CD-ROM drives" is checked. Press
"Next>", see Figure 9.
Figure 9: Driver Files Search Results
11
M.
Windows will find the appropriate driver. Press "Next>"
Figure 10: Digital Signature Not Found
A.
Press "Yes", see Figure 10.
Figure 11: Completing the Found New Hardware Wizard
N.
To complete the installation, press "Finish", see Figure 11.
12
Chapter 4 Networking Basics
You may have had some ideas about how to use your new network prior to
installing the DHN-120 – sharing files, printing from any computer on the
network, or accessing the Internet on multiple computers with one
connection. This section will help you get started on those ideas or even give
you some new ones. However, this section is not intended to be a
comprehensive guide to networking, it is just an outline of a few networking
basics.
If you are interested in learning more about networking, we have identified
some Internet resources that may be of interest:
D-Link Systems, Inc.
www.dlink.com
D-Link is one of the largest manufacturers of Ethernet products in the world.
D-Link’s technological expertise and dedication to providing quality products
at a low price makes D-Link a good place to watch for the newest in
networking innovations. Or, you may want to get the newest drivers available
for your Network Adapters.
TCP/IP Protocol
Before you start sharing files and printers, you need to set the IP address for
each of your computers. An IP address is just that, an address. It tells other
computers on the network where your computer is so that they can
communicate. For your first computer you will add a fixed IP address. For
each computer you add to the network, you will need to follow these same
steps, but add a different address.
O.
From the Start menu, go to Settings-Control Panel, as shown in
Figure 12.
13
Figure 12: Start > Settings > Control Panel
P.
Double Click the Network icon in the Control Panel, as shown in
Figure 13.
Figure 13: Control Panel
14
This Window will appear, as shown in Figure 14.
Figure 14: Network
Q.
Highlight the line that says "TCP/IP >D-Link DHN-120 10Mb
Home Phoneline USB Adapter" and press the "Properties" button.
15
R.
This will open the TCP/IP properties window. Make sure the "IP
Address" tab is selected and then press the circle next to "Specify
an IP Address". Enter 192.168.0.1 for the IP address, and
255.255.255.0 for the Subnet Mask. After you have done this your
screen should look like this, as shown in Figure 15:
Figure 15: TCP/IP Properties
S.
Now press OK, and press OK again. Your system will probably
prompt you to reboot at this point, just answer "Yes". That's it!
16
For each computer on your network you will need to follow these same steps,
with the exception that you will give each computer its own unique IP
address. So for your second computer enter 192.168.0.2 for the IP address
and 255.255.255.0 for the Subnet Mask. For your third computer set the
address as 192.168.0.3 and so on (192.168.0.4 for the 4th, 192.168.0.5, for the
5th....etc.). It does not matter which computer is which number, just that each
computer has its own unique number starting with 192.168.0.??? and the
same subnet mask of 255.255.255.0, as shown in Figure 16.
Figure 16: Specify an IP Address
Computer Identification
You may need to verify that each computer has a unique name and common
workgroup name.
17
T.
On your Desktop, right-click the icon "Network Neighborhood"
and select "Properties" from the context menu, as shown in Figure
17.
Figure 17: Network Neighborhood
U.
Click the "Identification" tab on the top of the dialog box.
V.
Type a unique, identifying name for this particular computer in the
"Computer name:" box. This will be the name that other
computers on your network will use to communicate with this
computer. Each computer’s name must be unique on a particular
network or confusion will result. (The computer’s name should be
15 or fewer characters with no spaces.)
W.
Type the workgroup name this computer will be a part of in the
"Workgroup:" box. All of the computers on your network should
have an identical Workgroup name.
X.
The "Computer Description:" box is optional. You may enter a
description that will help you identify this computer on your
network. Then click "OK".
18
Y.
Repeat this process for each computer on your network to ensure
that they all have a unique "Computer Name" and identical
"Workgroup", as shown in Figure 18.
Figure 18: Network
Sharing Files
With your computers connected together on a network, you may now open
and save files on another computer. You will be able to specify particular
folders or disk drives to "share" and even password protect them. The steps
below will enable you to share specific files and folders with other computers
on your network.
19
Z.
On your Desktop, right-click the icon "Network Neighborhood"
and select "Properties" from the context menu, as shown in Figure
19.
Figure 19: Network Neighborhood
AA.
This dialog box is where you will come to configure most of your
computers network settings. It is also available through the
"Network" icon in the Control Panel.
20
BB.
Click the "File and Print Sharing…" button, as shown in Figure
20.
Figure 20: Network
CC.
Click to place a check mark next to "I want to be able to give
others access to my files."
DD.
Click "OK" on the "File and Print Sharing" dialog box.
EE.
Click "OK" on the "Network" dialog box.
21
FF.
Provide the Windows 98 installation CD or diskette(s) if prompted
or direct Windows to the proper location of the installation files.
Reboot if prompted, as shown in Figure 21.
Figure 21: File and Print Sharing
GG.
You will now be able to identify a particular folder or disk drive to
share. You may want to share a folder that both you and a
colleague/family member needs to access occasionally. Or, maybe
you want to share a CD-ROM drive so your other computer that
does not have one can read CD’s. Both of these processes are the
same. Only the disk drives and folders that you specifically
identify as shared will be accessible to other computers on your
network.
HH.
Find the disk drive or folder you want to share with Windows
Explorer or the "My Computer" icon on your desktop.
22
II.
Right-click on the disk drive or folder icon and select "Sharing…",
as shown in Figure 22.
Figure 22: My Computer
JJ.
Select "Shared As:" to set the parameters for sharing this particular
disk drive or folder.
KK.
The "Share Name:" box is used to identify the disk drive or folder
you are sharing to other computers on the network. You can give it
any name you wish. However, a specific identification may help as
more resources on your network are shared.
LL.
The "Comment:" box is optional. You can use this box to further
describe the disk drive or folder for others on the network.
MM. "Access Type:" allows you to designate how much someone else
on the network can do with this disk drive or folder. "Read-Only"
allow others to only look at or open the files on the disk drive or in
the folder. "Full" allows other to read, write, open, save, copy,
move, and delete files on the disk or in the folder. "Depends on
Password" gives other computers access conditional upon the
password they provide.
23
NN.
"Passwords:" allow you to apply a level of security to your shared
disk drives and folders. Another computer (user) will be required
to enter the password you designate here before accessing the disk
drive or folder. Two passwords are used to give two levels of
security (or access) to others on the network using the "Depends
on Password" setting. Leaving the "Password" boxes empty gives
everyone on the network access to the disk drive or folder.
OO.
Click "OK" to continue. You will be prompted to enter the
password(s) you provided for verification. Retype the password(s)
just as you entered them the first time, Figure 23.
Figure 23: Properties
PP.
You may now access this disk drive or folder from another
computer on your network. Do so by double-clicking the
"Network Neighborhood" icon on your desktop or inside Windows
Explorer.
24
QQ.
Navigate to the computer with the shared disk drive or folder
(recognized by the "Computer Name" you provided) and doubleclick. You should now see the disk drive or folder, double-click. If
you specified a password when sharing this disk drive or folder,
you will be prompter for the password.
RR.
You can access a disk drive or folder shared over the network
from most Windows 98 applications. To make this process easier,
Windows allows you to map these disk drives and folders to a
drive letter on another computer. For example, on a computer
where you are accessing a shared folder from another computer,
inside Windows Explorer right-click and select "Map Network
Drive…" You will then be able to assign an available drive letter.
Checking "Reconnect at logon" allows Windows to map this
network drive each time you start your computer, as shown in
Figure 24.
Figure 24: Map Network Drive
25
Sharing Printers
"Sharing" a printer connected to one computer with other computers on you
network can be very convenient -– allowing you to print from any computer
on the network. The steps below will enable you to print with other
computers on your network.
SS.
On your Desktop, right-click the icon "Network Neighborhood"
and select "Properties" from the context menu, Figure 25.
Figure 25: Network Neighborhood
TT.
Click the "File and Print Sharing…" button.
UU.
Click to place a check mark next to "I want to be able to allow
others to print to my printer(s)."
VV.
Click "OK" on the "File and Print Sharing" dialog box.
WW. Click "OK" on the "Network" dialog box.
26
XX.
Provide the Windows 98 installation CD or diskette(s) if prompted
or direct Windows to the proper location of the installation files.
Reboot if prompted, as shown in Figure 26.
Figure 26: File and Print Sharing
27
YY.
You may now share any installed printers connected to this
computer with other computers on your network. From the "Start"
button on the Task Bar select "Setting" and then "Printers", as
shown in Figure 27.
Figure 27: Printers
ZZ.
Right-click on the printer you want to share with others on the
network and select "Sharing…"
28
AAA. Click "Share As:" and provide a "Share Name:" to identify the
printer to other computers on the network. "Comment:" and
"Password:" are optional. Then click "OK", as shown in Figure
28.
Figure 28: Printer Properties
BBB. Shared printers become Network Printers for other computers on
the network. For a computer to access a Network Printer, the
device driver or software for that printer must be installed and
pointed to the proper location of the printer. This is done much the
same way you installed the printer on the computer it is connected
to.
29
CCC. Go to the computer that you would like to be able to print from
using the network. From the "Start" button on the Task Bar select
"Settings" and then "Printers".
DDD. Double click the "Add Printer" icon.
EEE. The "Add Printer Wizard" will appear. Click "Next >".
FFF.
Choose "Network printer" and click "Next >", as shown in Figure
29.
Figure 29: Add Printer Wizard
GGG. Now you will identify the location of the Network Printer. If you
know the name of the computer and the share name of the printer,
you can type it into the "Network path or queue name:" box.
However, it is easier to click the "Browse…" button and navigate
to the location of the printer. Click "OK" when you have selected
the desired printer. Finish the installation by continuing the "Add
Printer Wizard" normally.
HHH. You may now use the Network Printer as if it was connected
directly. Note: the computer that the printer is connected to must
30
be on to use the printer. If you find this inconvenient, devices
known as Network Print Servers are available from D-Link. The
DP-101 and DP-301 can each support a single printer. The DP-300
and DP-100 will support up to three. A Network Print Server
would allow you to directly connect your printer to your network,
so you wouldn’t have to worry which computer is turned on, as
shown in Figure 30.
Figure 30: Browse for Printer
Playing Network Games
Part of the fun of having a network, is being able to play some of today's
hottest games against friends and family. While a game may be fun when
played in single player mode, or even against competitors across the Internet,
playing someone in the same room across a network rocks!
If you followed the directions in this guide, you should have TCP/IP installed
already. If you don't or are not sure, jump back to the beginning of the
31
Networking Basics section for a walk through. Some games may require IPX
protocol support as well. To add IPX to each computer follow these steps:
III.
From the Start menu, go to Settings-Control Panel, as shown in
Figure 31.
Figure 31: Control Panel
32
Double Click the Network icon in the Control Panel.
This window will appear, as shown in Figure 32:
Figure 32: Network
33
Next press the “Add” button.
Figure 33: Select Network Component Type
Choose “Protocol” and press “Add”, as shown in Figure 33
Figure 34: Select Network Protocol
Press “OK”, see Figure 34.
Windows may ask you for your original Windows installation CD and then to
reboot. Once completed, the protocol will be available to your network
adapter. Follow these steps for each computer on your network.
34
D-Link has included Shareware versions of two very popular network
playable games from Blizzard, Diablo and WarCraft II. To install these
games, place the accompanying D-Link CD into your CD-ROM drive. Allow
the CD to autostart and you will see a window with links for installing these
games and other software included on the CD. You may also browse the CD
using Windows Explorer.
Before installing Diablo or WarCraft II, please select the installation for
Microsoft DirectX 6.0 if it is not already available on your computer. DirectX
is a multimedia enhancement for Windows 95/98.
To play Diablo or WarCraft II with another computer on the network, you
must install the games on both computers. Each user must select "Multi
Player" and then "Local Area Network (IPX)". Follow the instructions above
to make sure that IPX is installed on each computer..
Have fun!
This CD includes Microsoft DirectX 6.0, Diablo and WarCraft II: Tides of
Darkness. Insert the CD in your CD ROM drive, click on Networking Basics
and then click on Playing Network Games. Click on the links and follow the
instructions to install the game of your choice and Microsoft DirectX. 6.0.
35
Chapter 5 Troubleshooting
A network can be simple to install and maintain. However, occasionally
something might go wrong. The best approach to troubleshooting network
problems is to start at the very simplest level and work your way up.
Verify Each Computer’s Identification
If more than one computer on your network has the same "Computer Name",
communications may be negatively affected. Also, each computer must have
the same "Workgroup" name to communicate properly. Use the steps in
Networking Basics to ensure that each computer on your network has a
unique "Computer Name" and an identical "Workgroup".
Verify Network Adapter Installation
If your Network Adapters were not properly installed, including the Network
System Software or device drivers, your network will not function properly.
Use these steps to verify that your Network Adapters are properly installed,
see Figure 35:
JJJ.
Double-click the "System" icon in the Control Panel.
KKK. Click the "Device manager" tab on top of the "System Properties"
dialog box.
LLL. Double-click "Network adapters" if you do not see any items
branching out. You should see "D-Link DHN-120 10Mb Home
Phoneline USB Adapter" branching out after double-clicking
"Network adapters."
MMM. If you do not see any items branching out after double-clicking
"Network adapters," your Network Adapter has not been properly
installed. Start at the beginning of the guide and follow all the
steps for this computer.
NNN. If you see any kind of symbol such as a yellow exclamation point
or red "X" over the icon adjacent to "D-Link DHN-120 10Mb
Home Phoneline USB Adapter", your adapter is not installed
properly or may have a problem. Double-click "D-Link DHN-120
36
10Mb Home Phoneline USB Adapter" to read the explanation of
the problem. This information will be helpful if you require
technical support from D-Link.
Figure 35: System Properties
Verify Cable Connections
Check to see that the computer(s) you are troubleshooting are properly
connected to the either a phone jack or another computer. Also make sure that
if both computers are connected to phone jacks, that the phone line (and
phone number) is the same for both jacks. You may want to plug a phone
into each phone jack to ensure that it is working properly.
37
Understanding Indicators
Your Network Adapters have indicators or lights that can give you
information about your network traffic and help you determine problems
when troubleshooting.
Your DHN-120’s have three indicators labeled "Link", "Activity", and
"Power" at the front of their top panels. A steady green "LINK" light indicates
a good connection between cards. A flashing green "Activity" light indicates
that the Network Adapter is sending or receiving data. A steady green
"Power" light indicates that the DHN-120 is receiving enough power.
Please note that if the DHN-120 is plugged into a USB hub, or a USB port on
a monitor, that the port must be self-powered. If the "Power" light is not
steady green, you may want to plug the DHN-120 directly to a USB port on
your computer.
Getting Technical Support
D-Link provides free technical support. North American customers can
contact D-Link technical support through our web site, e-mail, or by phone.
North American technical support is available Monday through Friday from
6:00 a.m. to 6:00 p.m. (PST) at 949-788-0805 (option #4).
www.dlink.com
Email at [email protected].
Thank you for purchasing the D-Link DHN-920. We like to receive feedback
from our customers concerning our products. Please take a moment to visit
our web site. You can register your purchase on-line, learn more about the
newest networking products, and let us know the things your new network has
empowered you to do.
38
Technical Specifications
Standards:
HomePNA 2.0 Compliant
USB Specification version 1.0/1.1 Compliant
OHCI, UHCI
Required
Current:
500MA bus current as a standard USB highpower device
Ports:
One upstream (USB Type B receptacle)
Two RJ-11 (HomePNA 2.0)
Diagnostic LEDs:
Power
Link (RJ-11)
Activity (RJ-11)
Temperature:
Operating Temperature: 0°C to 50°C
Storage Temperature: -25°C to 55°C
Humidity:
10% to 90%, non-condensing
Power
Requirements:
Bus Powered 2.5 W, 0.5 A @ 5 VDC
Compliances:
CE, FCC Class B, VCCI, C-Tick, BSMI
Safety:
CSA International
39
Index
Adapter Installation, 36
LED Indicators, 38
Cables, 3
Playing Network Games, 31
Cables Connections, 37
Sharing Files, 19
cabling, ii
Sharing Printers, 26
Computer Identification, 17,
36
TCP/IP Protocol, 13
Technical Specifications, 39
Installing Software, 5
Technical Support, 38
Kit Contents, 1
USB Adapters, 3
Offices
AUSTRALIA
D-LINK AUSTRALASIA
Unit 16, 390 Eastern Valley Way, Roseville, NSW 2069, Australia
TEL: 61-2-9417-7100 FAX: 61-2-9417-1077
TOLL FREE: 1800-177-100 (Australia), 0800-900900 (New Zealand)
URL: www.dlink.com.au E-MAIL: [email protected], [email protected]
CANADA
D-LINK CANADA
2180 Winston Park Drive, Oakville, Ontario L6H 5W1 Canada
TEL: 1-905-829-5033 FAX: 1-905-829-5223 BBS: 1-965-279-8732
FREE CALL: 1-800-354-6522 URL: www.dlink.ca
FTP: ftp.dlinknet.com E-MAIL: [email protected]
CHILE
D-LINK SOUTH AMERICA
Isidora Goyenechea #2934 of.702, Las Condes, Santiago, Chile
TEL: 56-2-232-3185 FAX: 56-2-2320923 URL: www.dlink.cl
E-MAIL: [email protected], [email protected]
DENMARK
D-LINK DENMARK
Naverland 2, DK-2600 Glostrup, Copenhagen, Denmark
TEL:45-43-969040 FAX:45-43-424347 URL: www.dlink.dk
E-MAIL: [email protected]
EGYPT
D-LINK MIDDLE EAST
7 Assem Ebn Sabet Street, Heliopolis Cairo, Egypt
40
TEL: 202-2456176 FAX: 202-2456192 URL: www.dlink-me.com
E-MAIL: [email protected], [email protected]
FRANCE
D-LINK FRANCE
Le Florilege #2, Allee de la Fresnerie
78330 Fontenay Le Fleury France
TEL: 33-1-30238688 FAX: 33-1-3023-8689
URL: www.dlink-france.fr E-MAIL: [email protected]
GERMANY
D-LINK GERMANY
Bachstrae 22, D-65830 Kriftel Germany
TEL: 49-(0)6192-97110 FAX: 49-(0)6192-9711-11
URL: www.dlink.de BBS: 49-(0)6192-971199 (Analog) 49-(0)6192-971198 (ISDN)
INFO LINE: 00800-7250-0000 (toll free) HELP LINE: 00800-7250-4000 (toll free)
REPAIR LINE: 00800-7250-8000 E-MAIL: [email protected], [email protected]
INDIA
D-LINK INDIA
Plot No.5, Kurla-Bandra Complex Road,
Off Cst Road, Santacruz (E), Bombay - 400 098 India
TEL: 91-22-652-6696 FAX: 91-22-652-8914 URL: www.dlink-india.com
E-MAIL: [email protected]
ITALY
D-LINK ITALY
Via Nino Bonnet No. 6/b, 20154 Milano, Italy
TEL: 39-02-2900-0676 FAX: 39-02-2900-1723 E-MAIL: [email protected] URL: www.dlink.it
JAPAN
D-LINK JAPAN
10F, 8-8-15 Nishi-Gotanda, Shinagawa-ku, Tokyo 141 Japan
TEL: 81-3-5434-9678 FAX: 81-3-5434-9868 URL: www.d-link.co.jp
E-MAIL: [email protected]
RUSSIA
D-LINK RUSSIA
Michurinski Prospekt 49, 117607 Moscow, Russia
TEL: 7-095-737-3389, 7-095-737-3492 FAX: 7-095-737-3390 E-MAIL: [email protected]
SINGAPORE
D-LINK INTERNATIONAL
1 International Business Park, #03-12 The Synergy, Singapore 609917
TEL: 65-774-6233 FAX: 65-774-6322
URL: www.dlink-intl.com E-MAIL: [email protected]
S. AFRICA
D-LINK SOUTH AFRICA
Unit 2, Parkside 86 Oak Avenue
Highveld Technopark Centurion, Gauteng, Republic of South Africa
TEL: 27(0)126652165 FAX: 27(0)126652186 CELL NO: 0826010806 (Bertus Moller)
CELL NO: 0826060013 (Attie Pienaar) E-MAIL: [email protected], [email protected]
SWEDEN
D-LINK SWEDEN
P.O. Box 15036, S-167 15 Bromma Sweden
TEL: 46-(0)8564-61900 FAX: 46-(0)8564-61901 E-MAIL: [email protected]
URL: www.dlink.se
TAIWAN
D-LINK TAIWAN
2F, No. 119 Pao-Chung Road, Hsin-Tien, Taipei, Taiwan, R.O.C.
TEL: 886-2-2910-2626 FAX: 886-2-2910-1515 URL: www.dlinktw.com.tw
E-MAIL: [email protected]
U.K.
D-LINK EUROPE
D-Link House, 6 Garland Road, Stanmore, London HA7 1DP U.K.
TEL: 44-20-8235-5555 FAX: 44-20-8235-5500 BBS: 44-20-8235-5511
URL: www.dlink.co.uk E-MAIL: [email protected]
U.S.A
D-LINK U.S.A.
53 Discovery Drive, Irvine, CA 92618 USA
TEL: 1-949-788-0805 FAX: 1-949-753-7033 INFO LINE: 1-800-326-1688
BBS: 1-949-455-1779, 1-949-455-9616
URL: www.dlink.com E-MAIL: [email protected], [email protected]
2
Registration Card
Your name: Mr./Ms______________________________________________________________________________________
Organization: ____________________________________________Dept. _________________________________________
Your title at organization:_________________________________________________________________________________
Telephone: _____________________________________________ Fax:___________________________________________
Organization's full address:________________________________________________________________________________
______________________________________________________________________________________________________
Country:________________________________________ ______________________________________________________
Date of purchase (Month/Day/Year):_____________________________
Product Model
Product Serial No.
* Product installed in type of
* Product installed in
computer (e.g., Compaq 486)
computer serial No.
(* Applies to adapters only)
Product was purchased from:
Reseller's name:____________________________ __________________________________________________________
Telephone: _____________________________________________ Fax:_________________________________________
Reseller's
full address__________________________________________________________________________________________
___________________________________________________________________________________________
Answers to the following questions help us to support your product:
1. Where and how will the product primarily be used?
oHome oOffice oTravel oCompany Business oHome Business
oPersonal Use
2. How many employees work at installation site?
o1 employee o2-9 o10-49 o50-99 o100-499 o500-999 o1000+
3. What network medium/media does your organization use ?
oFiber-optics oThick coax Ethernet oThin coax Ethernet
o10BASE-T UTP/STP o100BASE-TX o100BASE-T4 o100VGAnyLAN
oOthers_________________
4. What category best describes your company?
oAerospace oEngineering oEducation oFinance oHospital oLegal
oInsurance/Real Estate oManufacturing oRetail/Chainstore/Wholesale
oGovernment oTransportation/Utilities/Communication oVAR
oSystem house/company oOther_________________________________________
5. Would you recommend your D-Link product to a friend?
oYes oNo oDon't know yet
6. Your comments on this product?
____________________________________________________________________
_____________________________________________________________________
3
4