1
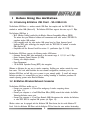
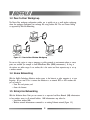
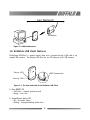
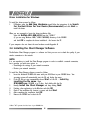
W L I - U S B - L 1 1 G M A N UA L
B U F FA L O T E C H N O L O G Y ( U S A ) I N C .
ii
WLI-USB-L11G Manual
This section explains the symbols, signs and terminology used in this manual.
A PC with the MELCO USB client installed is called the Wireless LAN PC.
The following terminology is used in this manual to distinguish between an Ethernet 10/100BASE-T LAN
and a Wireless LAN and should not be construed as generally accepted terminology outside this context.
• Ethernet LAN: A LAN connected by cables
• Wireless LAN: A LAN connected by radio signal
• The PC to change the AirStation access point settings: The Setting PC.
For your safety be sure to read, understand and follow the instructions below thoroughly before using
the product. This manual contains instructions concerning general operation of the computer to which
the product is connected in addition to those concerning the product itself.
Please take note that our warranty will not cover any failures and problems of the computer, any losses
and failures of data, or failures and problems of the product caused by misuse.
Signs:
WARNING
CAUTION
Symbols:
∆
•
The instructions with this sign indicate prohibited actions. Failure to follow the
instructions shown with this sign may result in death or serious injury to the user.
Failure to follow the instructions shown with this sign may result in injury to the user
or property damage.
This indicates warnings and cautions. (Ex. Exercise care to avoid electric shock.)
This indicates prohibiting actions. (Ex. Do not disassemble.)
This indicates what must be done. (Ex. Disconnect the plug from the outlet.)
WARNING
Strongly recommended: Follow the warning and caution instructions which are issued by the PC and
peripheral manufactures.
Prohibit: Do not attempt to disassemble or repair the WLI-USB-L11G. This may result in fire or
electric shock.
Strongly recommended: Install this product away from children. Failure to do so may result
in injury.
Prohibit: Do not handle the equipment with wet hands while it is in operation. This may result
in electric shock.
Do not bend the cable too much. If the USB cable is damaged, replace it.
iii
CAUTION
Strongly recommended: To prevent damage due to the static electricity touch a metal object such as
a door handle or metal window before touching the device. Static electricity may result in damage
to the equipment.
Strongly recommended: For usage of the PC and peripheral, refer to the product manual.
Strongly recommended: Remove the dust from all connectors. Dust may result in failure
in performance.
Prohibit: Do not locate this product in the following locations. Doing so may result in electric shock
or fire, or may adversely affect this product.
• Locations with strong magnetic fields or static electricity (may result in failure)
• Locations prone to vibration (may result in injury or damage)
• Locations that are not level (may result in injury or damage)
• Locations in direct sunlight (may result in failure or deformation)
• Locations close to fire, or subject to heating (may result in failure or deformation)
• Locations with water leakage or current (may result in failure or electric shock)
• Locations with excessive dust (may result in failure)
Strongly recommended: Be careful not to get your body caught on the cables connected to this
product. Doing so may result in personal injury and/or damage this product.
Strongly recommended: Be sure to back up the contents of the hard disk to other media such
as floppy disks. We recommend that dual backup before and after updating of original data be
created for unrecoverable important data. Data may be damaged or lost in the following cases:
• When the device is used incorrectly
• When the device receives static electricity or electrical noise
• When the device breaks down or is repaired
• When the power is turned on immediately after the PC is turned off
• When the device is damaged by natural disasters
Please note that MELCO INC. shall not be liable for any expenses incurred due to the damage or
loss of hard disk data that may arise in the above cases or in any other case.
Strongly recommended: Be sure to back up the contents of the hard disk before making any
changes to your PC environment such as installing software or installing or removing hardware.
Even if data is damaged or lost due to misuse or faults, backup data can minimize the extent of
such damage. Please note that MELCO INC. shall not be liable for any expenses incurred due to the
damage or loss of hard disk data.
iv
Table of Contents
1
1.1
1.2
1.3
1.4
1.5
1.6
1.7
Before Using the AirStation
1
Introducing USB client (WLI-USB-L11G) . . . . . . . . . . . . . . . . . . . . . . . . .1
AirStation wireless network scenarios . . . . . . . . . . . . . . . . . . . . . . . . . .1
Peer-to-peer workgroup . . . . . . . . . . . . . . . . . . . . . . . . . . . . . . . . . .2
Home networking . . . . . . . . . . . . . . . . . . . . . . . . . . . . . . . . . . . .2
Enterprise networking . . . . . . . . . . . . . . . . . . . . . . . . . . . . . . . . . . 2
AirStation USB client features . . . . . . . . . . . . . . . . . . . . . . . . . . . . . . 3
About the AirStation CD-ROM . . . . . . . . . . . . . . . . . . . . . . . . . . . . . .4
2
2.1
2.2
2.3
2.4
2.5
2.6
2.7
2.8
Installing USB Client
Quick overview . . . . . . . . . . . . . . . .
Verify USB client package contents . . . . .
Install driver . . . . . . . . . . . . . . . . .
Installing the client manager software. . . .
Basic settings for enterprise networks . . . .
Basic settings for peer-to-peer workgroups .
Set windows network properties . . . . . . .
Finish the installation. . . . . . . . . . . . .
3
3.1
3.2
3.3
3.4
Using AirStation and Windows
Introduction . . . . . . . . . . . . . . . . .
Using your USB client. . . . . . . . . . . . .
Viewing other computers . . . . . . . . . . .
Using the client manager . . . . . . . . . . .
4
4.1
4.2
4.3
4.4
Advanced Configurations
Introduction . . . . . . . . . . . .
Encryption parameters . . . . . . .
Advanced parameters . . . . . . . .
Admin parameters . . . . . . . . . .
A
USB Client Specifications
B
B.1
B.2
B.3
B.4
B.5
Troubleshooting
Introduction . . . . . . . . . . . . .
Common Troubleshooting Tips. . . . .
Windows 98 Troubleshooting Tips . .
Windows 2000 Troubleshooting Tips .
Installation of TCP/IP . . . . . . . . .
.
.
.
.
.
.
.
.
.
.
.
.
.
.
.
.
.
.
.
.
.
.
.
.
.
.
.
.
.
.
.
.
.
.
.
.
.
.
.
.
.
.
.
.
.
.
.
.
.
.
.
.
.
.
.
.
.
.
.
.
.
.
.
.
.
.
.
.
.
.
.
.
.
.
.
.
.
.
.
.
.
.
.
.
.
.
.
.
.
.
.
.
.
.
.
.
.
.
.
.
.
.
.
.
.
.
.
.
.
.
.
.
.
.
.
.
.
.
.
.
.
.
.
.
.
.
.
.
.
.
.
.
.
.
.
.
.
.
.
.
.
.
.
.
.
.
.
.
.
.
.
.
.
.
.
.
.
.
.
.
.
.
.
.
.
.
.
.
.
.
.
.
.
.
.
.
.
.
.
.
.
.
.
.
.
.
.
.
.
.
.
.
.
.
.
.
.
.
.
.
.
.
.
.
.
.
.
.
.
.
.
.
.
.
.
.
.
.
.
.
.
.
.
.
.
.
.
.
.
.
.
.
.
.
.
.
.
.
.
.
.
.
.
.
.
.
.
.
.
.
.
.
.
.
.
.
.
.
.
.
.
.
.
.
.
.
.
.
.
.
.
.
.
.
.
.
.
.
.
.
.
.
.
.
.
.
.
.
.
.
.
.
.
.
.
.
.
.
.
.
.
.
.
.
.
.
.
.
.
.
.
.
.
.
.
.
.
.
.
.
.
.
.
.
.
.
.
.
.
.
.
.
.
.
.
.
.
.
.
.
.
.
.
.
.
.
.
.
5
5
5
5
6
7
7
8
8
10
10
10
10
11
.
.
.
.
.
.
.
.
.
.
.
.
13
. 13
. 13
. 13
. 13
14
.
.
.
.
.
.
.
.
.
.
.
.
.
.
.
.
.
.
.
.
v
.
.
.
.
.
.
.
.
.
.
.
.
.
.
.
.
.
.
.
.
.
.
.
.
.
.
.
.
.
.
.
.
.
.
.
.
.
.
.
.
.
.
.
.
.
.
.
.
.
.
.
.
.
.
.
.
.
.
.
.
.
.
.
.
.
.
.
.
.
.
.
.
.
.
.
.
.
.
.
.
.
.
.
.
.
.
.
.
.
.
.
.
.
.
.
.
.
.
.
.
.
.
.
.
.
17
17
17
21
23
24
vi
1 Before Using the AirStation
1.1 Introducing AirStation USB Client - WLI-USB-L11G
The AirStation USB Client is a wireless network USB Client that complies with the IEEE 802.11b
standard on wireless LANs (Revision B). The AirStation USB Client supports data rates up to 11 Mbps.
This AirStation USB Client is:
• Wi-Fi (Wireless Fidelity) certified by the Wireless Ethernet Compatibility Alliance (WECA).
This means that your AirStation hardware will communicate with other vendors’ IEEE 802.11b
compliant wireless LAN products.
• Fully compatible with any other wireless LAN system based on Direct Sequence Spread
Spectrum (DSSS) radio technology that complies with the “IEEE 802.11b standard on wireless
LANs (Revision B)”.
• Compatible with the Universal Serial Bus revision 1.1. specification (Sept. 23, 1998).
The AirStation USB Clients supports the following wireless LAN features:
• Automatic Transmit Rate Select mechanism in the transmit range of 11, 5.5, 2 and 1 Mbps.
• Center Frequency Channel Selection (2.4 GHz)
• Roaming over multiple channels.
• Power Management.
• 128 bit Wired Equivalent Privacy (WEP) data encryption.
Welcome to AirStation, the easy way to wireless computing. Building your wireless network has never
been easier. This book, which describes the most common configurations, introduces you to the
AirStation USB Client, and will help you to connect to your network quickly. To install and manage
AirStation products, it is assumed that you have a working knowledge of installation procedures for
network operating systems under Microsoft Windows.
1.2 AirStation Wireless Network Scenarios
The AirStation USB Client enables you to:
• Connect your computer to a Peer-to-Peer workgroup of wireless computing devices.
(see Figure 1-1)
• Connect your computer to a Small Office/Home Office (SOHO) network that includes the Buffalo
Technology AirStation access point.
• Connect your computer to a Local Area Network (LAN) Infrastructure that includes the AirStation,
or other IEEE 802.11b compliant LAN systems. (see Figure 1-2)
Wireless stations can be equipped with the AirStation USB Client device, but also with AirStation PC
Cards. Both the AirStation USB Client and the AirStation PC Card share the same wireless functionality.
1
1.3 Peer-to-Peer Workgroup
The Peer-to-Peer workgroup configuration enables you to quickly set up a small wireless workgroup,
where the workgroup participants can exchange files using features like “Files and Printer Sharing”
as supported by Microsoft Networking.
Wireless PC
Wireless PC
Wireless PC
Figure 1-1 Peer-to-Peer Wireless Workgroup
You can use this option to setup a temporary or ad-hoc network in environments where no access
points are available (for example in Small Office/Home Office (SOHO) environments.) As long as
the stations are within range of one another, this is the easiest and least expensive way to set up
a wireless network.
1.4 Home Networking
With the Buffalo Technology AirStation, wireless access to the Internet or other computers is at your
fingertips. All you need to do is connect the AirStation to an external CATV or xDSL modems and
you are ready to:
• Share files and printers, and
• Access the Internet
1.5 Enterprise Networking
With the AirStation Access Point you can connect to a corporate Local Area Network (LAN) infrastructure
to have wireless access to all network facilities. LAN Infrastructures may either be:
• Stand-alone wireless LANs
• Wireless network infrastructures connected to an existing Ethernet network (Figure 1-2)
2
Lan Network
AirStation
Figure 1-2 LAN Infrastructure
1.6 AirStation USB Client Features
The AirStation USB Client is a wireless network device that is connected through a USB cable to any
standard USB connector. The AirStation USB Client has two LED indicators and a USB connector.
Power LED
USB Connection
Activity LED
Rear View
Figure 1-3 The front and back of the AirStation USB Client
A. Power ON/OFF LED
• Solid Green - standard operational mode
• Orange - error data
B. Transmit/Receive Activity LED
• Off - No wireless activity
• Blinking - Sensing/transmitting wireless data
3
1.7 About the AirStation CD-ROM
The AirStation CD-ROM contains both software and documentation for all AirStation products that are
used in indoor environments. If you wish to install the AirStation driver software, turn to chapter 2
“Installing your USB Client” and follow the instructions as for installing your AirStation USB Client.
NOTE:
Prior to copying or installing the software, you are advised to read the Software License Agreement
“readme.txt”, located in the root folder of the CD-ROM. By installing, copying or using the AirStation
software, you are consenting to be bound by this agreement. If you do not agree to all of the terms
of the Software License Agreement, do not download, copy or install the AirStation software. It is the
policy of Buffalo Technology to improve products as new technology, components, software and firmware
become available. Before you proceed with the installation of this product, we recommend you to
consult the AirStation website to:
• Verify if newer versions of the software that was shipped with your product are available.
• Download and install the latest software for your purchased product.
You can download the latest software and documentation from the support pages of the AirStation
website at: http://www.buffalotech.com.
4
2 Installing your USB Client
2.1 Quick overview
This chapter describes the installation of the AirStation USB Client for Microsoft Windows operating systems only.
1.
2.
3.
4.
5.
6.
7.
Verify USB package contents (below)
Connect your USB Client to your computer
Follow the instructions on the screen to install the drivers (section 2.3)
Insert the AirStation CD-ROM into your CD-ROM player and install the Client Manager Software
(section 2.4)
Set Windows Network Properties: only necessary if this is the first time Network Support is
being installed onto your computer
Set basic parameters to connect to wireless network
Finish installation: Specify drive and directory for the AirStation software and restart your system
2.2 Verify USB Client Package Contents
Unpack your AirStation USB Client and verify that all items are present. If any of the items are
damaged or missing, please contact your supplier.
a.
b.
c.
d.
e.
One AirStation USB Client, WLI-USB-L11G
One USB Cable (1m)
The AirStation CD-ROM
WLI-USB-L11G user’s manual (this document)
Warranty card
2.3 Install Drivers
Before You Start the Installation
Before you start the installation, you are advised to keep the Windows CD-ROM or software diskettes
close at hand. If your computer came with a factory-installed Windows operating system, these files may
be stored on your computer’s hard disk, in the form of cabinet (*.cab) files.
Check the drive name for the CD-ROM drive at “My Computer” icon. Normally it is D drive. Also,
check if the USB port is installed and working correctly at “Device Manager” under the “My Computer”
– “Property.” It is highly recommended to check for any other than BUFFALO WLI-USB-L11G Wireless
LAN Adapter and if there are other LAN cards disable them.
5
Driver Installation for Windows
To install the driver proceed as follows:
1. If Windows starts the Add New Hardware wizard follow the instructions of the Search
For the Best Driver For Your Device (Recommended) and click Next to
install the driver.
When you are prompted to locate the driver installation files:
Select the Buffalo WLI-USB-L11G from the “\USBL11”
(if you are using Windows 2000, “\USBL11\WIN2000) directory of the CD-ROM
and click OK to complete the driver installation1. And restart the PC.
If your computer does not detect the new hardware consult Appendix B.
2.4 Installing the Client Manager Software
The AirStation Client Manager program is a software tool that you can use to check the quality of your
wireless connection to the network.
NOTE:
It is not mandatory to install the Client Manager program in order to establish a network connection,
but it provides you with more options to:
• View/change the settings of your network connection
• Monitor your network connection
To install the Client Manager software, proceed as follows:
1. Insert the AirStation CD-ROM that came with your USB Client in your CD-ROM drive. Your
operating system will automatically start the CD and display the menu.
2. If the CD did not start automatically, choose Start on the CD – Install by
inputting the file name. Input
D:WLEASY.exe if CD-ROM is in D drive. And double click the file.
3. Identify Install the Client Manager and keep clicking Next
4. Finishing other applications in the Windows and click OK
5. Check if the installation file location is correct and click Start
6. After completing the installation, click OK
7. Remove the CD-ROM and re-boot the PC
1 Where "D:\" represents the drive letter of your CD-ROM drive.
6
2.5 Basic Settings for Enterprise Networks
If you wish to connect to an Enterprise Network, your PC should connect to the nearest AirStation first.
For the connection, start the Client Manager.
1.
2.
3.
4.
5.
After selecting MELCO Wireless LAN Client Manager program click File Menu and Select
Manual. Define the ESS-ID there. •The value “ANY” to connect to any AirStations
network in the vicinity of your computer. Or •An “exact” value of media access
control, MAC address to connect to the exact AirStation of your choice. The MAC
address value that applies to your network can be found on the back of the AirStation access
point and last 6 characters + GROUP. The Network Name can be any alphanumeric string in
the range of “a” to “z”, “A” to “Z” and “0” to “9” with a maximum of 32 characters (case-sensitive.)
Click OK to confirm and return to the verify connection window.
Click OK again after inputting WEP to finish with the installation as described.
The Client Manager will search for the AirStation access point on the network. The connected
AirStation will show up in the window with black font and an antenna mark should be displayed.
The connection is completed and it is ready to configure the AirStation.
2.6 Basic Settings for Peer-to-Peer Workgroups
If you wish to connect to a Peer-to-Peer workgroup, use the Network in the control panel window to:
• Check if it has NetBEUI and/or MS Network Client protocols and MS Network Client should be in
the logon network box. If these protocols are not present, they have to be added using “add”
switch in the Network setting tab.
• Select the file and printer share and click the item. Enabling file and printer share and click OK.
• Set the correct PC name, Network Name and PC type.
• In the field Network Name define the name of the wireless network to which you want to
connect. The Network Name can be any alphanumeric string in the range of “a” to “z”, “A” to
“Z” and “0” to “9” with a maximum of 32 characters (case-sensitive).
• If there is already a Peer-to-Peer group with this name available your computer will
automatically connect to this workgroup.
• If there is not yet such a group available, your computer will automatically start one
with this name.
• Click OK to confirm and return to the Network window. If the PC is not set for the Network,
please see the next section.
∆ Using period “.” may cause the connection problem
∆ Use the same Network name for all PCs in the workgroup
7
1.
2
3.
4.
5.
6.
7.
8.
9.
Start from the AirStation Client Manager.
Select File – Manual Setting.
Select the channel number to be used and peer-to-peer (or ad-hoc) mode in the
communication mode. Click OK.
Double click My Computer icon.
Select the shared drive and right click to define Share in the Share tab.
Share name, Comment, Type of access right, and password may be inputted.
Click OK.
After selecting/double clicking the Entire Network and the specific workgroup name the peer PC
name should show up.
The actual wireless communication starts by double clicking the PC name and the drive you want to use.
2.7 Set Windows Network Properties
If this is the very first time that network support is being installed onto your computer, follow the
next steps. If network support is already installed, continue with “Finish the Installation.” The Windows
operating system will prompt you Start-Setting-Control Panel-Network. Check if NetBEUI and MS Network
Client in the Network setting tab. If these are not in the page, add these by clicking add box and
follow the instructions. It is ready to set MS Network sharing service.
1.
2.
3.
4.
In the Network Setting tab, click the file and printer sharing. Mark file sharing as well
as printer sharing and click OK.
In the Information tab, enter a unique name for your computer in the Computer
name field.
In the Workgroup field, enter the name of your workgroup.
(Optional) Provide a description of the computer in the Computer Description field.
For more information about setting your Windows Network properties, consult your Windows
documentation or the Windows on-line help information.
2.8 Finish the Installation
When you have completed the setting of the Basic Parameters, Windows will finish building the driver
configuration database and copy some files to your computer’s hard disk.
• If the Windows operating system prompts you to identify the location of the Windows files,
specify the drive and directory of the Windows Installation CD-ROM or the CAB files that may be
on your hard drive. If you have had a USB Client installed on your computer before, most of
these files are already available on your hard disk drive. If you do not have the Windows
CD-ROM available, you may try replacing the proposed path in the Copy Files From dialog box
with: “C:\Windows\System” or “C:\Windows\”
8
• If the Windows operating system prompts you to identify the location of the AirStation driver files
(typically file names starting with the characters “WLIL11xx.*” or “NETL11xx.*”) specify the
drive and directory of the AirStation Software:
• If installing from the AirStation CD-ROM specify the drive in one of the following directories on
the AirStation CD-ROM:
Windows 98/ME: D:\USBL11
Windows 2000: D:\USBL11\WIN20001
• If installing files that you downloaded from the Internet, point to the disk drive or directory
where you saved the downloaded files.
When Windows has finished the copying of files, it will prompt you to restart your computer. Click
the Yes button to restart your computer.
After Restarting Your Computer
To verify if the installation of the drivers was completed successfully:
• Check the LEDs on your USB Client. The following should be visible:
•A steady green Power LED to indicate the USB Client is active
•A flickering green Transmit/Receive LED to indicate wireless activity.
For other LED behavior see Appendix B
• (Optional) To check the quality of the network connection, you should use the AirStation Client
Manager program as described in “Installing the Client Manager Software.”
1 Where "D:\" represents the drive letter of your CD-ROM drive.
9
3 Using AirStation and Windows
3.1 Introduction
This chapter provides general information about:
• Using your USB Client
• Viewing Other Computers
• Using the Client Manager
• Viewing Wireless Link Quality
• View/Modifying USB Client Settings
• Finding More Information
3.2 Using your USB Client
Radio Antennas
The built-in radio and antennas of your AirStation USB Client perform best in an open environment with
as few obstacles as possible. To achieve the maximum range for wireless communications do not cover
the USB Client device with any objects.
Removing the USB Client
If you do not need the wireless connectivity of your AirStation USB Client, you can disconnect and
remove the USB Client.
CAUTION:
When removing the AirStation USB Client you will lose your connection to the network. Prior to
removing the USB Client, make sure you have closed all files and network applications (such as e-mail.)
Maintenance of your USB Client
To clean the USB Client, gently wipe it with a soft (damp) cloth. To avoid damage to the USB Client
do not use abrasive materials, or rinse the device with liquids.
3.3 Viewing Other Computers
When multiple AirStations are up-and-running in your wireless network, you can use the procedure
described below to see the other computers:
1. Start Windows Explorer.
2. Scroll down the list of files and folders to look for the item Network Neighborhood.
3. Double-click the Network Neighborhood item to display all stations in your Microsoft
Networking Group.
10
4.
5.
To display other workgroups in the network environment, double-click the Entire
Network icon.
If there is a second network operating system running in your network environment (for example
a Novell NetWare network), the “Entire Network” window, will also display available servers
running under the second network operating system. If you click on these servers, you may be
asked to enter your user name and password that apply to the other network operating system.
If you cannot find other (AirStation) networked computers, verify whether the other AirStation
computers are:
• Powered up and logged on to the network.
• Configured to operate with identical Microsoft Network settings concerning:
•Using the same Networking Protocol
•Share the same Wireless Network Name
•Share the same Workgroup Name
To view or modify the Station Name or Workgroup of your computer, proceed as follows:
1. Click the Start button on the Windows task bar
2. Click on Settings, and then on Control Panel
3. In the Control Panel window, double-click the Network icon
4. In the Network Settings window, select the Identification tab. You can verify and change
the Station Name or Workgroup parameters.
NOTE:
You have to restart your computer before changes to the Network Settings will be effected. To verify
the radio connection with other stations refer to “View Wireless Link Quality.”
3.4 Using the Client Manager
If you installed the AirStation Client Manager, you can use the Client Manager to:
• Verify the quality of your wireless connection to the network.
• View/Modify the configuration settings of your wireless USB Client.
The Client Manager will start automatically every time you power up your computer. The Client
Manager icon is displayed in your Windows screen.
• Click the icon once with your left mouse button to retrieve a more detailed status overview.
• Click the icon once with your right mouse button to display a menu with more options.
View Wireless Link Quality
You can use the Client Manager “test connection” to verify the link quality of your network connection.
11
When the “test connection” shown below is not indicating an excellent or good radio connection, it
follows into two categories of reason.
The radio signal is very weak - Save your files and move closer to the AirStation Access Point.
No radio connection because:
• Looking for initial connection, or
• You have moved out of range of the network
No wireless interface detected or Peer-to-Peer network connection not present
View/Modify USB Client Settings
If you would like to view or modify the AirStation Client Manager parameters, for example because you
would like to connect to another network or type of network, proceed as follows:
1.
2.
3.
4.
5.
Double click on the Client Manager icon on the Windows to start the program. If your Client
Manager icon is not visible, you have to start the Client Manager program again:
Click the Start button on the Windows
Select Programs, and then select the Melco Wireless LAN workgroup
Next select Client Manager to start the Client Manager program
Select File - manual, View or add a new profile or to modify an existing profile
Finding More Information
If you are looking for more information than contained in this manual, please consult one of the
following options:
• The on-line help system of your AirStation wireless system – for information about
software and driver functionality.
• The “AirStation User’s Guide” - a reference guide for LAN Administrators that need to
setup, monitor and manage corporate LANs.
• The AirStation website at: http://www.buffalotech.com - for frequently asked questions
(FAQ’s) and Software Updates.
12
4 Advanced Configurations
4.1 Introduction
Although your AirStation USB Client will work fine in most network environments, you may wish
to explore the Advanced Parameters options as displayed in the Network Properties Edit
Configuration window:
• Encryption Parameters Tab
• Advanced Parameters Tab
• Admin Parameters Tab
NOTE:
The Advanced and Admin Parameter Tabs are not available for peer-to-peer workgroups.
4.2 Encryption Parameters Tab
The Encryption as a form of WEP enables you to define the encryption keys that your AirStation USB
Client should use to:
• Encrypt data that will be transmitted via the wireless interface
• Decrypt wireless messages received via its wireless interface
Input of WEP is possible from the Client Manager windows after completing ESS-ID input. Please refer
to the Basic Settings for Enterprise Networks in section 2.5 for the details.
CAUTION:
Encryption needs to be the same for all AirStation stations.
4.3 Advanced Parameters Tab
On the Advanced parameters tab of the Edit Configuration window you can adjust a number of
parameters. For more information consult your LAN Administrator. You can also refer to the
“AirStation User’s Guide.”
4.4 Admin Parameters Tab
On the Admin parameters tab the following parameters can be specified. For more information consult
your LAN Administrator. You can also refer to the “AirStation User’s Guide.”
13
A. USB Client Specifications
Physical Specifications
Power Characteristics
Dimensions (LxWxH) 63 x 87 x 146 mm
Weight 168 gram
Cable length 100 cm
Temperature & Humidity
Operation 0° to 40° C 1 maximum humidity 95%
Transit -20° to 75° C maximum humidity 95% (no condensation allowed)
Storage -20° to 75° C maximum humidity 95% (no condensation allowed)
Networking Characteristics
Regulatory Information
Wireless communication is often subject to local radio regulations. Although AirStation wireless
networking products have been designed for operation in the license-free 2.4 GHz band, local radio
regulations may impose a number of limitations to the use of wireless communication equipment.
NOTE:
Refer to the flyer “Information to the User” for more regulatory information that may apply in
your country.
Compatibility:
• IEEE 802.11 Standard for Wireless LANS (DSSS)
• Wi-Fi (Wireless Fidelity) certified by the Wireless Ethernet Compatibility Alliance (WECA).
• Universal Serial Bus Revision 1.1. specification (Sept, 23, 1998).
Host Operating System
Microsoft Windows® 98, 2000, and ME:
• NDIS5 Miniport Driver
Media Access Protocol
CSMA/CA (Collision Avoidance) with Acknowledgment (ACK)
1 Although the USB Client may still operate in the range of -20° to 70°C, operation outside the range of 0° to 40° C may no
longer be according to specifications.
14
Data Rate
• High 11 Mb/s
• Medium 5.5 Mb/s
• Standard 2 Mb/s
• Low 1 Mb/s
The USB Client uses an automatic Transmit Rate Select mechanism.
Radio Characteristics
R-F Frequency Band 2.4 GHz (2400-2500 MHz)
Number of selectable sub-channels 11
Modulation Technique Direct Sequence Spread Spectrum
• CCK for High & Medium Transmit Rate
• DQPSK for Standard Transmit Rate
• DBPSK for Low Transmit Rate
Spreading 11-chip Barker Sequence
Bit Error Rate (BER) Better than 10 -5
Nominal Output Power 15 dBm
Range / Transmit Rate High Speed 11 Mb/s
Medium Speed 5.5 Mb/s
Standard Speed 2 Mb/s
Low Speed 1 Mb/s
Open Office Environment
160 m (525 ft.)
270 m (885 ft.)
400 m (1300 ft.)
550 m (1750 ft.)
Semi-Open Office Environment
50 m (165 ft.)
70 m (230 ft.)
90 m (300 ft.)
115 m (375 ft.)
Closed Office
25 m (80 ft.)
35 m (115 ft.)
40 m (130 ft.)
50 m (165 ft.)
Receiver Sensitivity -83 dBm -87 dBm -91 dBm -94 dBm
Delay Spread (at FER of <1%) 65 ns 225 ns 400 ns 500 ns
15
AirStation IEEE 802.11 Channels Sets
The range of the wireless signal is related to the Transmit Rate of the wireless communication.
Communications at a lower Transmit range may travel longer distances.
NOTE:
The range values listed in Table “Radio Characteristics” on page A-3 are typical distances as measured
at the Buffalo Technology AirStation laboratories. These values are provided for your guidance but
may vary according to the actual radio conditions at the location where the AirStation product
will be installed.
Channel ID FCC/World
1 2412
2 2417
3 2422
4 2427
5 2432
6 2437
7 2442
8 2447
9 2452
10 24571
11 2462
• The range of your wireless devices can be affected when the WLI-USB-L11G is placed near metal
surfaces and solid high-density materials.
• Range is also impacted due to “obstacles” in the signal path of the radio that may either absorb
or reflect the radio signal. Table “Radio Characteristics” on page A-3 lists the typical ranges
when used indoors in “office environments” as described as follows:
•In Open Office environments, antennas can “see” each other, i.e. there are no
physical obstructions between them.
•In Semi-open Office environments, work space is divided by shoulder-height,
hollow wall elements; antennas are at desktop level.
•In Closed Office environments, work space is separated by floor-to-ceiling
brick walls.
1 printed in bold is the factory-set default channel
16
B Troubleshooting
B.1 Introduction
This appendix is divided into a number of sections, each with it’s own specific troubleshooting tips:
1. Common Troubleshooting Tips – B.2
•LED Activity – section B.2.1
•Can Not Connect To The Network – section B.2.2
•LEDs Work But Cannot Connect to Network – section B.2.3
•Cannot Edit Configuration Profile – section B.2.4
•Cannot find the LAN card – section B.2.5
•It takes a long time to shutdown – section B.2.6
•WLI-USB-L11G does not operate after returning from the stand-by or sleeping mode – section B.2.7
•The PC cannot restart while WLI-USB-L11G is installed under W98 – section B.2.8
2. Windows 98 Troubleshooting Tips – B.3
•Upgrading the AirStation Driver – section B.3.1
•Upgrading the Driver – section B.3.2
•Removing the Driver – section B.3.3
3. Windows 2000 Troubleshooting Tips – B.4
•Updating USB Client Drivers – section B.4.1
•Remove Existing USB Client Drivers – section B.4.2
•“There is another card installed” message – section B.4.3
•The PC with WLI-USB-L11G cannot access to W2k or NT4.0 logon process – section B.4.4
4. Installation of the TCP/IP – B.5
B.2 Common Troubleshooting Tips
B.2.1 LED Activity
If you encounter difficulty using and/or installing your AirStation product, the error may be related to
various causes:
• Out-of range situation, which prevents the AirStation USB Client from establishing a wireless
connection with the network.
• Configuration mismatch, which prevents the AirStation USB Client from establishing a wireless
connection with the (correct) network.
• Absence of, or conflict of the AirStation Driver.
• A problem or conflict with the USB Client connector which prevents the USB Client from
powering on.
• A conflict of the AirStation hardware with another device.
17
The starting point to troubleshoot problems with your AirStation USB Client is looking at the LED
activity of the AirStation USB Client. Table B.2.1 below provides an overview of the various modes of
operation and the associated LED activity. Table B.2.1 also includes a number of troubleshooting hints,
if required, that may help you solve the problem.
B.2.1 LED Activity Table
Power LED Transmit
Description/Action
Receive LED
Continuous Green
Blinking
Off
Off
Off
Red
Red
Orange or Green
Red
Standard operational mode.
•USB Client is powered on.
•Sensing/transmitting wireless data.
•USB Client is powered on.
•No wireless activity.
No action is required.
USB Client is not powered on, so it can not transmit/receive
data. The cause may be that the USB Cable is not properly connected.
Actions:
•Check USB cable connection.
•Verify the device settings of the USB Client to determine the occurrence
of a conflict with another device. If so, change the settings of either
your USB Client or the conflicting device to resolve the problem.
•Verify the versions of the driver, and the embedded software in the
USB Client (also referred to as Station firmware).
•Consult the AirStation website at: http://www.buffalotech.com/AirStation
to see if newer versions are available and if so, upgrade both the
driver and USB firmware.
Normal behavior at startup indicating startup diagnostics. This LED status
only should last a few seconds and will disappear after Windows
successfully loads the driver.
Device error, please contact your Authorized Reseller for Technical Support.
18
B.2.2 Cannot Connect To The Network
If your USB Client seems to be working fine, but you are not able to connect to the network, this
error might be due to a configuration mismatch. For example if both LEDs of your USB Client blink
once every ten seconds, the problem is likely to be caused by a configuration mismatch of:
• Network Name
• Encryption Key
The AirStation Network Name is case-sensitive. Other causes may be:
• No driver loaded
• Station not authorized to access network
• USB Client defect
B.2.3 LEDs Work But Cannot Connect to Network
If you cannot connect to the network while the LEDs indicate that the network is working properly
(Power LED is on, Transmit Receive LED blinks) probably the TCP/IP settings of your network are
not properly set.
Changing TCP/IP Settings
Consult your LAN Administrator for the values of your TCP/IP settings. If there is no TCP/IP follow
section B.5 to install it.
To change the TCP/IP Settings:
1. On the Windows task bar click the Start button
2. Select Settings and then select Control Panel
3. On the Control Panel window, double-click on the Network icon to view the
Network Properties
4. From the list of installed components, check if the TCP/IP -> Buffalo WLI-USB-L11G
Wireless LAN Adapter protocol is installed
•If this protocol is not yet installed, click the Add button and select the TCP/IP
protocol from the list. Refer to the Windows Help for more information.
•If this protocol is installed, select this protocol and click the Properties button.
Check if the parameters resemble the settings provided by your LAN Administrator.
Make changes if necessary, and click OK when you are done.
5. When prompted, restart your computer
19
B.2.4 Cannot Edit Configuration Profile
If you want to add/edit the Configuration Profile of your USB Client but the Client Manager icon is not
visible, you may do the following:
• If the Client Manager is not running, select the Start button, Programs, MELCO
wireless LAN and select Client Manager to start the Client Manager.
B.2.5 Cannot Find the LAN card
If the WLI-USB-L11G driver is installed into a PC more than once, the Client Manager will indicate,
“cannot find the wireless LAN card.”
WLI-USB-L11G driver must be removed before re-installing it again. For re-installation refer to
section 2.3 “Install Drivers.”
If Client Manager is older than the version 3.21, it is recommended to replace it with version 3.21
or later. To uninstall the Client Manager select Start - Program - MELCO Wireless
LAN - Uninstall Client Manager .
B.2.6 It Takes a Long Time to Shutdown
Unplug the WLI-USB-L11G from the PC before turn off the PC
Me/98: After finishing browsing the Internet, disconnect the WLI-USB-L11G
B.2.7 WLI-USB-L11G Does Not Operate After Returning From the
Stand-by or Sleeping Mode
This happened when the system is old and the host controller is causing this problem. If the PC is using
NEC’s USB controller, our adapter may not work. WLI-USB-L11G should be unplugged and plug back in.
The following PCs will also have the same problem:
Toshiba Dynabook Satellite 2520 and Dynabook SS Protage3010CP
20
B.3 Windows 98 Troubleshooting Tips
B.3.1 Upgrading the AirStation Driver
Upgrading the AirStation Driver may be required in one of the following situations:
• You would like to use new features that have become available for your AirStation USB Client.
• You installed a newer version of the Client Manager tool.
• Your Client Manager “Card Diagnostics” reported a Driver/Firmware mismatch.
CAUTION:
Upgrading the AirStation Driver should only be done by a skilled LAN Administrator or support engineer
who has a working knowledge of the Microsoft Windows 98 operating system. Windows 98 systems
feature an “update driver” function that allows you to easily replace the current driver with a more
recent version.
B.3.2 Upgrading the drivers
1.
2.
3.
4.
5.
6.
7.
8.
9.
10.
On the Windows Taskbar, click the Start button
Click on Settings, and then click Control Panel
In the Control Panel window, double-click the System icon
In the System Properties window, select the tab Device Manager
In the top section of the Device Manager tab, select the option View devices by type
In the list of computer devices, double-click Buffalo WLI-USB-L11G
Wireless LAN adapter
Select the item AirStation USB Client and click the Properties button
In the AirStation USB Client Properties window, select the Driver tab to display the window
•To display information about the currently installed driver, click the Driver File
Details button
•To upgrade your current driver to a newer version click the Update Driver button and
follow the instructions displayed on your screen
Restart your computer to finish the driver upgrade procedure and to have the new driver loaded
by the operating system
(Optional) Upgrade the Client Manager program
B.3.3 Removing the Driver
1.
2.
3.
4.
5.
Close all applications that are currently open
On the Windows Taskbar, click the Start button
Click on Settings, then click Control Panel
In the Control Panel window, double-click the Network icon
Select the Buffalo WLI-USB-L11G Wireless LAN Adapter and click the Remove button
21
The Windows operating system will disable the driver and update the driver configuration files. It will not
delete the driver from your computer’s hard disk. This means that when you would reinstall the
AirStation USB Client, your Windows operating system will attempt to activate the same driver files again.
6.
When prompted to Restart your computer select:
•Yes, if you don’t mind that the driver and configuration files continue to reside on your
hard disk (the restart will finish your procedure to disable the driver.)
•No, if you would like to physically remove the drivers from your hard disk (typically
required to upgrade the driver on a Windows 98/2000 operating system.)
Proceed as described under “Deleting the AirStation Driver Files” below to delete the driver and its
information and configuration files from your hard disk.
Deleting the AirStation Driver Files
The procedure to physically remove the AirStation Driver files from your hard disk is similar for all
Windows operating systems.
CAUTION:
Prior to deleting the files from your hard disk, it is important to remove the drivers as described in
section B.3.3. Failing to do so prevents the Windows operating system from cleaning the Windows
Registry, which might lead to complications if you try to re-install the AirStation driver in the future.
1.
2.
3.
4.
5.
6.
7.
Open the Windows Explorer
In the Explorer menu, click on View and select Options
From the View tab, select Show all files and clear the check-box Hide
MS-DOS file extensions
Click the Apply button to return to the Explorer window
Back in the Explorer, open the Windows System folder:
•“c:\windows\system” for Windows 98
Delete the AirStation driver files listed below:
•WLMEL51.SYS
•WLMEL51.DLL
•WCMEL51.EXE
•WLMEL51.VXD
Close the Windows Explorer and Restart your computer. If deleting the AirStation Driver files was
part of an “Upgrade Driver” routine, you can now (re-)install the new AirStation Driver as
described in Chapter 2 “Installing your USB Client.”
22
B.4 Windows 2000 Troubleshooting Tips
B.4.1 Updating USB Client Drivers
Updating the USB Client Drivers may be required in one of the following situations:
• You would like to use new features that have become available for your AirStation USB Client.
• You installed a newer version of the Client Manager tool.
• Your Client Manager “Card Diagnostics” reported a Driver/Firmware mismatch.
CAUTION:
Updating the USB Client Drivers should only be done by a skilled LAN Administrator or support engineer
who has a working knowledge of the Microsoft Windows 2000 operating system. To update previously
installed USB Client drivers:
1. Remove Existing USB Client Drivers from your Windows 2000 operating system, and
2. (Re-)Install the driver as described in “Install Drivers” in section 2.3
NOTE:
Although the MS-Windows 2000 USB Client Properties window includes a special “update” button, it is
not guaranteed that this button will truly update all driver files. Therefore Buffalo Technology advises
you to remove and re-install the driver(s).
B.4.2 Remove Existing USB Client Drivers
1.
2.
3.
4.
5.
6.
Make sure your USB Client is inserted in the USB Client connector of your computer
On your Windows desktop, right-click the My Network Places icon and choose
Properties from the pop-up menu
In the Network and Dial-up Connections window, right-click the Local Area Connection
icon and select Properties from the pop-up menu
Next click the Configure button to view the USB Client Properties window
Select the Driver tab and click the Uninstall button to finish removing the USB
Client drivers
Finally disconnect the USB Client from its connector and proceed with the instructions as
described under “Install Drivers” in section 2.3
23
B.5 Installation of the TCP/IP
Installation
1.
2.
3.
4.
5.
6.
for TCP/IP on Windows ME/9X:
Re-boot the PC
Select Start-Setting-Control Panel
Double click the Network icon
Click the Add
Selecting Protocol and click Add
Select Microsoft for manufacture and TCP/IP in the Network Protocol and click OK
If the TCP/IP cannot be added this way, the user must refer to the PC manufacture
7. Click Yes when the PC asks for re-start
Installation
1.
2.
3.
4.
5.
6.
7.
8.
for TCP/IP on Windows 2000:
Re-boot the PC and logon as Administrator
Select Start-Setting-Network and dialup connection
Double click the Local Area Connection icon
Click Property
Click Install
Select Protocol and click Add
Select Internet Protocol TCP/IP and click OK
Check if Internet Protocol TCP/IP is added and click Close
24
US Address:
1977 W. 190th Street
Suite 100
Torrance, CA 90504
Website:
www.buffalotech.com
Email:
Sales - [email protected]
Technical Support - [email protected]
Phone:
Sales Tel - 310-965-0448
Sales Tel - 800-508-1110
Sales Fax - 310-965-0497
Tech Support Line: 800-508-1110
M - F 9 AM - 6 PM PST
Tech Support Line: 800-934-2471
M - F 7 AM - 3 PM PST
UK Address:
881 Plymouth Road
Slough, Berkshire SLI 4LP
UK
Tel - 44 (0) 1753 677500
Fax - 44 (0) 1753 677501
[email protected]
Asia Address:
Buffalo Technology (Taiwan), Inc.
7-7F, No. 18, Lane 609, Sec. 5, Chung Hsin Rd.
Sanchung City, Taipei Hsien
Taiwan
Tel - 001-886-2-2999-9860
Fax - 001-886-2-2999-2264
[email protected]
Manual #: PY00-27045-DM10-01
25
26