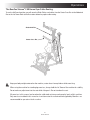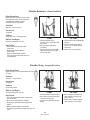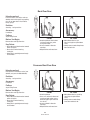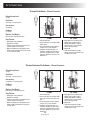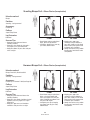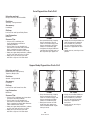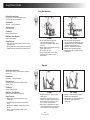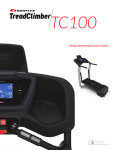
1
O WN E R’ S M A N UA L Manual en Español Latino Americano: www.support.nautilus.com Congratulations / Registration CONGRATULATIONS on your commitment to improving your health and fitness! With the Bowflex Xtreme® 2 SE home gym, you have everything you need to exceed all of your physical fitness, strength, and health expectations! The Bowflex Xtreme® 2 SE home gym’s exceptional resistance and quality is unmatched by any other single piece of home fitness equipment available. You will not believe the amazing results your body will get with the Bowflex Xtreme® 2 SE home gym! Please take your time to read through the entire manual and follow it carefully before attempting to use your Bowflex Xtreme® 2 SE home gym. Also locate and read all warning labels that are posted on the machine. It’s important to understand how to properly perform each exercise before you do so using Power Rod® Resistance. With all of the fitness choices available today, finding the best workout equipment for your needs can be very confusing. Everyone at Nautilus would like to thank you for selecting the Bowflex Xtreme® 2 SE home gym. The Bowflex Xtreme® 2 SE home gym is the finest home fitness product available, and you’re just about to prove it to yourself. To validate warranty support, keep the original proof of purchase and record the following information: Serial Number ___________________________ Date of Purchase ____________________ To register your product warranty, go to: www.bowflex.com/register or call 1 (800) 605–3369. If you have questions or problems with your product, please call 1 (800) 605–3369 Or go to: www.bowflex.com Nautilus, Inc., (800) NAUTILUS / (800) 628-8458, www.NautilusInc.com - Customer Service: North America (800) 605-3369, [email protected] | outside U.S. [email protected] | Printed in China | © 20083 Nautilus, Inc. Table of Contents Arm Exercises: Triceps Pushdown w/ Hand Grips . . . . . . . . . . . . . . . . . . . . . . . . . . 40 Triceps Hammer Pushdown. . . . . . . . . . . . . . . . . . . . . . . . . . . . . . . . 40 Triceps Pushdown w/ Bent Lat Bar. . . . . . . . . . . . . . . . . . . . . . . . . 41 Single Arm Pushdown. . . . . . . . . . . . . . . . . . . . . . . . . . . . . . . . . . . . . 41 Triceps Extension. . . . . . . . . . . . . . . . . . . . . . . . . . . . . . . . . . . . . . . . . 42 Cross Triceps Extension. . . . . . . . . . . . . . . . . . . . . . . . . . . . . . . . . . . 42 Hammer Triceps Extension. . . . . . . . . . . . . . . . . . . . . . . . . . . . . . . . . 43 Rope Pushdown . . . . . . . . . . . . . . . . . . . . . . . . . . . . . . . . . . . . . . . . . . 43 Triceps Kickback . . . . . . . . . . . . . . . . . . . . . . . . . . . . . . . . . . . . . . . . . 44 Hammer Triceps Kickback . . . . . . . . . . . . . . . . . . . . . . . . . . . . . . . . . 44 Resisted Dip. . . . . . . . . . . . . . . . . . . . . . . . . . . . . . . . . . . . . . . . . . . . . . 45 Biceps Curl. . . . . . . . . . . . . . . . . . . . . . . . . . . . . . . . . . . . . . . . . . . . . . . 45 Standing Biceps Curl. . . . . . . . . . . . . . . . . . . . . . . . . . . . . . . . . . . . . . 46 Hammer Biceps Curl . . . . . . . . . . . . . . . . . . . . . . . . . . . . . . . . . . . . . . 46 Concentration Biceps Curl. . . . . . . . . . . . . . . . . . . . . . . . . . . . . . . . . 47 Reverse Curl. . . . . . . . . . . . . . . . . . . . . . . . . . . . . . . . . . . . . . . . . . . . . . 47 Barbell Biceps Curl. . . . . . . . . . . . . . . . . . . . . . . . . . . . . . . . . . . . . . . . 48 Reverse Barbell Biceps Curl . . . . . . . . . . . . . . . . . . . . . . . . . . . . . . . 48 Seated Biceps Curl. . . . . . . . . . . . . . . . . . . . . . . . . . . . . . . . . . . . . . . . 49 Seated Biceps Hammer Curl . . . . . . . . . . . . . . . . . . . . . . . . . . . . . . . 49 Arm Opposition Push-Pull . . . . . . . . . . . . . . . . . . . . . . . . . . . . . . . . . 50 Upper Body Opposition Push-Pull . . . . . . . . . . . . . . . . . . . . . . . . . . 50 Wrist Extension. . . . . . . . . . . . . . . . . . . . . . . . . . . . . . . . . . . . . . . . . . . 51 Wrist Curl. . . . . . . . . . . . . . . . . . . . . . . . . . . . . . . . . . . . . . . . . . . . . . . . 51 Important Safety Instructions. . . . . . . . . . . . . . . . . . . . . . . . . . . . . . . 2 Product Specifications . . . . . . . . . . . . . . . . . . . . . . . . . . . . . . . . . . . . 5 Getting To Know Your Machine . . . . . . . . . . . . . . . . . . . . . . . . . . . . 6 How to Use Your Machine. . . . . . . . . . . . . . . . . . . . . . . . . . . . . . . . . . 9 Maintenance. . . . . . . . . . . . . . . . . . . . . . . . . . . . . . . . . . . . . . . . . . . . . 12 Define Your Goals. . . . . . . . . . . . . . . . . . . . . . . . . . . . . . . . . . . . . . . . . 13 The Workouts . . . . . . . . . . . . . . . . . . . . . . . . . . . . . . . . . . . . . . . . . . . . 16 Chest Exercises: Bench Press. . . . . . . . . . . . . . . . . . . . . . . . . . . . . . . . . . . . . . . . . . . . . . 22 Chest Fly. . . . . . . . . . . . . . . . . . . . . . . . . . . . . . . . . . . . . . . . . . . . . . . . . 22 Decline Bench Press. . . . . . . . . . . . . . . . . . . . . . . . . . . . . . . . . . . . . . 23 Incline Bench Press. . . . . . . . . . . . . . . . . . . . . . . . . . . . . . . . . . . . . . . 23 Decline Chest Fly . . . . . . . . . . . . . . . . . . . . . . . . . . . . . . . . . . . . . . . . . 24 Incline Chest Fly. . . . . . . . . . . . . . . . . . . . . . . . . . . . . . . . . . . . . . . . . . 24 Shoulder Exercises: Reverse Fly. . . . . . . . . . . . . . . . . . . . . . . . . . . . . . . . . . . . . . . . . . . . . . . 25 Crossover Reverse Fly. . . . . . . . . . . . . . . . . . . . . . . . . . . . . . . . . . . . . 25 Crossover Rear Deltoid Rows. . . . . . . . . . . . . . . . . . . . . . . . . . . . . . 26 Crossover High Rear Deltoid Rows . . . . . . . . . . . . . . . . . . . . . . . . . 26 Lateral Shoulder Raise . . . . . . . . . . . . . . . . . . . . . . . . . . . . . . . . . . . . 27 Forearm Lateral Shoulder Raise. . . . . . . . . . . . . . . . . . . . . . . . . . . . 27 Front Shoulder Raise. . . . . . . . . . . . . . . . . . . . . . . . . . . . . . . . . . . . . . 28 Seated Shoulder Press . . . . . . . . . . . . . . . . . . . . . . . . . . . . . . . . . . . . 28 Shoulder Rotator Cuff (internal). . . . . . . . . . . . . . . . . . . . . . . . . . . . 29 Shoulder Rotator Cuff (external) . . . . . . . . . . . . . . . . . . . . . . . . . . . 29 Shoulder Extension . . . . . . . . . . . . . . . . . . . . . . . . . . . . . . . . . . . . . . . 30 Shoulder Shrug. . . . . . . . . . . . . . . . . . . . . . . . . . . . . . . . . . . . . . . . . . . 30 Scapular Protraction. . . . . . . . . . . . . . . . . . . . . . . . . . . . . . . . . . . . . . 31 Scapular Depression. . . . . . . . . . . . . . . . . . . . . . . . . . . . . . . . . . . . . . 31 Abdominal Exercises: Trunk Rotation. . . . . . . . . . . . . . . . . . . . . . . . . . . . . . . . . . . . . . . . . . . . 52 Seated (resisted) Oblique Abdominal Crunch. . . . . . . . . . . . . . . . 52 Seated (resisted) Abdominal Crunch. . . . . . . . . . . . . . . . . . . . . . . . 53 Leg Exercises: Leg Extension . . . . . . . . . . . . . . . . . . . . . . . . . . . . . . . . . . . . . . . . . . . . 54 Squat. . . . . . . . . . . . . . . . . . . . . . . . . . . . . . . . . . . . . . . . . . . . . . . . . . . . 54 Standing Hip Extension (knee bent). . . . . . . . . . . . . . . . . . . . . . . . . 55 Standing Hip Extension (knee extended). . . . . . . . . . . . . . . . . . . . 55 Leg Kickback. . . . . . . . . . . . . . . . . . . . . . . . . . . . . . . . . . . . . . . . . . . . . 56 Hip Flexion. . . . . . . . . . . . . . . . . . . . . . . . . . . . . . . . . . . . . . . . . . . . . . . 56 Dead Lift. . . . . . . . . . . . . . . . . . . . . . . . . . . . . . . . . . . . . . . . . . . . . . . . . 57 Stiff Leg Dead Lift. . . . . . . . . . . . . . . . . . . . . . . . . . . . . . . . . . . . . . . . . 57 Standing Hip Adduction . . . . . . . . . . . . . . . . . . . . . . . . . . . . . . . . . . . 58 Standing Hip Abduction . . . . . . . . . . . . . . . . . . . . . . . . . . . . . . . . . . . 58 Back Exercises: Good Morning. . . . . . . . . . . . . . . . . . . . . . . . . . . . . . . . . . . . . . . . . . . . 32 Standing Low Back Extension. . . . . . . . . . . . . . . . . . . . . . . . . . . . . . 32 Standing Shoulder Pullover w/ Bent Lat Bar. . . . . . . . . . . . . . . . . 33 Standing Shoulder Pullover w/ Hand Grips . . . . . . . . . . . . . . . . . . 33 Narrow Pulldowns w/ Bent Lat Bar. . . . . . . . . . . . . . . . . . . . . . . . . 34 Narrow Pulldowns w/ Hand Grips . . . . . . . . . . . . . . . . . . . . . . . . . . 34 Bent Over Row . . . . . . . . . . . . . . . . . . . . . . . . . . . . . . . . . . . . . . . . . . . 35 Crossover Bent Over Row . . . . . . . . . . . . . . . . . . . . . . . . . . . . . . . . . 35 Reverse Grip Pulldowns w/ Lat Bar. . . . . . . . . . . . . . . . . . . . . . . . . 36 Reverse Grip Pulldowns w/ Hand Grips . . . . . . . . . . . . . . . . . . . . . 36 Crossover Wide Pulldowns w/ Hand Grips . . . . . . . . . . . . . . . . . . 37 Crossover Narrow Pulldowns w/ Hand Grips . . . . . . . . . . . . . . . . 37 Pulldowns. . . . . . . . . . . . . . . . . . . . . . . . . . . . . . . . . . . . . . . . . . . . . . . . 38 Stiff Arm Pulldowns. . . . . . . . . . . . . . . . . . . . . . . . . . . . . . . . . . . . . . . 38 Seated Lat Pulldowns. . . . . . . . . . . . . . . . . . . . . . . . . . . . . . . . . . . . . 39 Seated Wide Lat Pulldowns. . . . . . . . . . . . . . . . . . . . . . . . . . . . . . . . 39 Muscle Chart. . . . . . . . . . . . . . . . . . . . . . . . . . . . . . . . . . . . . . . . . . . . . 59 Exercise Log . . . . . . . . . . . . . . . . . . . . . . . . . . . . . . . . . . . . . . . . . . . . . 61 Bowflex® Weight Loss Guide. . . . . . . . . . . . . . . . . . . . . . . . . . . . . . 62 Buy Back Guarantee. . . . . . . . . . . . . . . . . . . . . . . . . . . . . . . . . . . . . . 72 Warranty. . . . . . . . . . . . . . . . . . . . . . . . . . . . . . . . . . . . . . . . . . . . . . . . . 73 1 Owner’s Manual Important Safety Instructions Indicates a potentially hazardous situation which, if not avoided, could result in death or serious injury. Before using this equipment, obey the following warnings: Read and understand the complete Owner’s Manual. Keep Owner’s Manual for future reference. Read and understand all warnings on this machine. If at any time the Warning stickers become loose, unreadable or dislodged, contact Nautilus ® Customer Service for replacement stickers. • Children must not be let on or near to this machine. Moving parts and other features of the machine can be dangerous to children. • Not intended for use by anyone under 14 years of age. • Consult a physician before you start an exercise program. Stop exercising if you feel pain or tightness in your chest, become short of breath, or feel faint. Contact your doctor before you use the machine again. • Before each use, examine this machine for loose parts or signs of wear. Inspect all cables, pulleys and their connections, making sure they are properly secured and attached, and show no signs of visible wear or damage. Contact Nautilus ® Customer Service for repair information. • Maximum user weight limit: 300 lb. (136 kg). Do not use if you are over this weight. • This machine is for home use only. • Do not wear loose clothing or jewelry. This machine contains moving parts. Do not put fingers or other objects into moving parts of the exercise equipment. • Always wear rubber soled athletic shoes when you use this machine. Do not use the machine with bare feet or only wearing socks. • Set up and operate this machine on a solid, level, horizontal surface. • Do not operate this machine outdoors or in moist or wet locations. •Keep at least 36” (0.9m) on each side of the machine clear. This is the recommended safe distance for access and passage around and emergency dismounts from the machine. Keep third parties out of this space when machine is in use. • Do not over exert yourself during exercise. Operate the machine in the manner described in this manual. • Do not use Dumbbells or other weight equipment to incrementally increase the weight resistance. Use only the weight resistance designed for use with this gym. • Correctly engage the Selector Hook to the Rod End. • Correctly adjust and safely engage all Positional Adjustment Devices. Make sure that the Adjustment Devices do not hit the user. • Keep clear of Power Rod® movement path during operation. Keep any bystanders clear of machine and Power Rod® movement path during operation. • Do not move the machine without aid. Injury to you or damage to the machine can occur. • Do not make any adjustments to the seat while sitting on it. Do not stand on the seat. 2 Owner’s Manual Safety Warning Labels and Serial Number 1 2 5 4 3 Item 1 Type Description WARNING • • • • • • • • Keep children and pets away from this machine at all times. Prior to use, read and understand the User’s Guide, including all Warnings which may not be present on this machine. Before each use, check all snap hooks, cables and pulleys for wear and proper function. Tighten all fasteners as necessary. Do not use if any parts are in need of repair. Use Caution when you use this equipment or serious injury can occur. This machine is for Residential use only. The Maximum User Weight for this machine is 300lbs./136kg. Replace any Warning label that becomes damaged, illegible or is removed. Not intended for use by anyone under 14 years of age. 3 Owner’s Manual Item 2 Type Description [NOTICE] Do not hang from bar. Ne pas pendre de la barre. Nicht von der Stange hängen. No cuelgue de la barra. 3 CAUTION At all times, stay out of the paths of moving rods. MISE EN GARDE Restez toujours à l’écart des tiges mobiles. VORSICHT Halten Sie stets Abstand zu beweglichen Stangen. PRECAUCIÓN En todo momento, manténgase alejado del trayecto de las barras movibles. 4 Product Specifications Product specifications and regulatory information 5 Serial Number Record serial number in the Serial Number field at the beginning of this manual. 4 Owner’s Manual Specifications Product Specifications Product Weight Approximately 174 lbs. (79 kg) Product Dimensions 53" (135 cm) long x 49" (124 cm) wide x 82" (208 cm) high Workout Area 96" (244 cm) long x 78" (198 cm) wide Number of Exercises Over 70 Power Rod® Resistance 210 lbs. (95 kg) Nominal Power Rod® Upgradability 310 lbs. (141 kg) 410 lbs. (186 kg) User Weight Limit 300 lbs. (136 kg) Regulatory Approvals Meets: EN957-1 Class H EN957-2 Class H Meets: ASTM F2276 ASTM F2216 This product, its packaging, and components contain chemicals known to the State of California to cause cancer, birth defects, or reproductive harm. This Notice is provided in accordance with California’s Proposition 65. If you would like additional information, please refer to our website at www.nautilus.com/prop65. 5 Owner’s Manual Features 50” Bent Lat Bar Pulley Storage Hooks for Lat Bar Abdominal Bar Lat Tower Rod Caps Center Cross Bar Power Rod ® Resistance Rods Rod Hook Seat Back Pad Seat Locking Pin Seat Cable Leg Extension Attachment Rod Box Base Frame Platform Lower Pulley/ Squat Station 6 Owner’s Manual Power Rod® Resistance Power Rod® resistance rods are made from a special composite material. Your rods are sheathed with a p rotective black rubber coating. Each rod is marked with its weight rating on the “Rod Cap.” Adjusting and Understanding the Resistance The standard Bowflex Xtreme® 2 SE home gym comes with 210 pounds of nominal r esistance (one pair of 5 lb. (2.25 kg) rods, two pairs of 10 lb. (4.5 kg) rods, one pair of 30 lb. (13.5 kg) rods, and one pair of 50 lb. (22.5 kg) rods. Note: Power Rod® Resistance Rods are manufactured using nylon composite material. The weight resistance measurements are estimates and resistance can vary based on environmental and usage patterns and other factors. Rod resistance will normally degrade over time and after extensive usage. If you have any questions regarding the resistance of your Power Rod® Resistance Rods, contact our Bowflex® Customer Service department for assistance. If you upgraded to a 310 (140 kg) or 410 pound (186 kg) capacity you will have an additional one or two pair of 50 lb. (22.5 kg) rods, respectively. Connecting the Power Rod® Unit to the Cables You may use one rod or several rods in combination, to create your desired resistance level. To hook multiple rods up to one cable, bend the closest rod toward the cable and place the cable hook through that rod cap. You can then hook up the next closest rod through the same cable hook. Hooking up the closest rod first prevents rods from crossing over the top of one another. Safety When hooking the Power Rod® resistance rods to the cable hooks, do not stand directly over the tops of the rods. Stand off to one side when connecting and disconnecting the Power Rod® resistance rods from the cables. When You Are Not Using Your Home Gym Disconnect the cables from the Power Rod® resistance rods when your are not using your Bowflex Xtreme® 2 SE home gym. Keep the cables and Power Rod® units bound with the rod binding strap when not in operation, and be sure and remove the binding strap before beginning any exercises using the rods. To Order Additional Sets of 50 lb. (22.5 kg)Power Rod® Resistance Rods, please Call (800) 628-8458. 7 Owner’s Manual The Bowflex Xtreme® 2 SE Home Gym Pulleys With the versatility to perform over 75 different exercises, the Bowflex Xtreme® 2 SE home gym is designed to give you the best workout possible. And with its innovative, easy-to-use multiple pulley system, you are guaranteed to maximize every exercise for every muscle group. There are a few things you will need to remember to get the most from your Bowflex Xtreme® 2 SE home gym Pulleys: Slider Pulleys The Bowflex Xtreme® 2 SE home gym comes with adjustable “Slider” pulleys which can be personalized for your body by adjusting them to widths that fit your unique physique. There are Slider Pulleys on the Lat Tower (2 positions per side), Center Cross Bars (4 positions per side) and the Squat Pulley Frame (4 positions per side). You will need to determine which Pulley positions are most comfortable for you when performing ‘Standard’ exercises, and then adjust the pulleys outward or inward to perform exercises in ‘Wide’ or ‘Narrow’ positions. Using the Slider Pulleys at wider or narrower positions for an exercise can target different parts of the same muscle group and increases the benefit of each exercise. Pulley Locations Below is a guide to the six different pulley positions used to perform a full workout routine: Center Cross Bar: Standard position – used when performing exercises like a Bench Press or Chest Fly. Squat: Active pulleys are on squat pulley frame and on center cross bar. Lat Tower: Leg Extension: Used for exercises like Pulldowns and Pushdowns. Active pulleys are on the squat pulley frame. Abdominal Crunch position: Active pulleys are on lat tower. 8 Owner’s Manual Rowing Position: Active pulleys are on squat pulley frame. Operations The Bowflex Xtreme® 2 SE Home Gym Cable Routing To use the Ab Crunch position, you will move the Slider Pulleys and cables from the Center Cross Bar to the Abdominal Bar on the Lat Tower. Refer to the illustrations below for proper cable routing. Abdominal Bar Center Cross Bar Keep your body weight centered on the machine, seat or base frame platform while exercising. When using the machine for standing leg exercises, always hold the Lat Tower of the machine for stability. Do not make any adjustments to the seat while sitting on it. Do not stand on the seat. All exercises in this manual are based on the calibrated resistance and capacity levels of this machine. Only exercises included in this manual or in written materials authorized and supplied by Bowflex ® are recommended for operation with this machine. 9 Owner’s Manual Seat Locking Pin The Seat Locking Pin securely fastens the seat bottom bracket to the seat support rail. The locking pin serves to stabilize the seat for all exercises that require sitting or leaning on it. Make sure the seat has been secured before putting weight on it or attaching Power Rod® resistance to cables attached to the Leg Extension attachment. Handgrips and Straps T he handgrips fit snugly around your wrist, ankle, or instep. Attach grips to cables by snapping the cable clip onto the D-ring. Standard Grip:Grasp the handle and cuff together to form a grip without inserting your hand through the cuff portion. Most exercises utilize this grip. The Standard Grip also is used for Hammer Grip exercises, when you need to hold the hand grip vertically for greater wrist support. Hand Cuff Grip:Slip your hand through the cuff so that the foam pad rests on the back of your hand. Then grasp the remainder of the grip that is sitting in your palm. This method of gripping is great for exercises like front shoulder raises or any exercise where your palm is facing down. Ankle Cuff Grip:The cuff opening can be made larger to accommodate the ankle. Simply insert your hand in the cuff and slide it away from the handle. Insert your foot or ankle and tighten the grip by sliding the handle back toward the cuff. Arch Cuff Grip:The cuff opening can also fit securely over the arch of your foot. For this grip, insert your foot through the cuff until it is around the arch of your instep, and tighten the cuff around your heel to secure the grip. Abdominal Crunch Attach the snap hooks to the D-rings on both ends of the harness. Shoulder Harness: Place the harness on your shoulders letting the handles hang over your chest. Grab both handles. With high resistance, a cross arm opposite-handle grip may be used. Lat Pulldown Bar The Lat Pulldown Bar enhances exercises that work back, shoulders and triceps muscles. 10 Owner’s Manual Leg Extension Attachment The leg extension attachment enables you to work the major muscle groups in the legs. Abdominal Crunch Shoulder Harness The ab harness gives you the ability to strengthen the muscles of the abdomen by safely adding resistance to abdominal exercises. When using the ab harness, relocate the pulleys from the chest bar to the short abdominal bar. Squat Bar The Squat Bar enhances exercises that work back, shoulders and triceps muscles. Safety Make sure that the seat has been stabilized with the seat locking pin before sitting or putting weight on the seat. Before using the grips, straps, lat bar, or ab harness, make sure that all fasteners are in place and tightened. ake sure that auxiliary cables for the lat bar and leg extension are securely fastened to the primary cables M on the unit. lways use the lock knob on the slider to secure pulleys. Do not allow pulleys to change position during any A exercise. Always use the bar holders to support the lat bar or remove the bar when not in use. Do not hang from the Lat Tower nor attempt to perform “chin ups” from the bar. Never pull on the bar unless there is resistance attached to it. Always use the Lock Knob to secure the attachment to your Bowflex Xtreme® 2 SE home gym. 11 Owner’s Manual Maintenance Inspect your machine for any worn or loose components prior to use. Tighten or replace any worn or loose components prior to use. Pay close attention to cables, straps, or harness and their connections. Review all warning notices. T he safety and integrity designed into a machine can only be maintained when the equipment is regularly examined for damage and repaired. It is the sole responsibility of the owner to ensure that regular maintenance is performed. The owner is responsible to make sure that regular maintenance is done. Worn or damaged components must be repaired or replaced immediately. Only manufacturer supplied components should be used to maintain/repair the equipment. Clean the bench with a non-abrasive household cleaner after each use. This will keep it looking new. Do not use automotive cleaner, which can make the bench too “slick.” 12 Owner’s Manual Define Your Goals Your body will do what you train it to do. That’s why it’s important to define your goals and focus them. Here are some fitness components that will help you define your goals and choose your fitness program. Body Compositionis the ratio of fat weight (fat) to lean weight (muscles, bones and tissue). As you age, the ratio shifts. The fat weight increases and the lean weight decreases. Training for muscle strength will generally increase muscle size and aerobic conditioning will help burn extra calories. Performing these two forms of exercise, either at different times or together, will create the greatest changes in body fat weight. Muscle Strengthis the maximum force that you can exert against resistance at one time. Your muscle strength comes into play when you pick up a heavy bag of groceries or lift a small child. It is developed when a localized muscle is worked both positively (concentric) and negatively (eccentric) at a resistance– great enough so you can perform only five to eight repetitions of the exercise before the m uscle fails. Each set of repetitions is followed by a rest interval that typically runs three times longer than the set. Later, between exercise sessions, the muscle overcompensates for the stress and usually increases in both strength and size. Balanced Strengthand alignment are the result of equal strength developed in all parts of the body. It comes into play in your standing and sitting posture, and in your ability to perform just about any activity safely and effectively. An over-development of the back will round the shoulders; weak or stretched abdominals can cause lower back pain. You want a balance of muscle strength in front and back. In addition, you need a balance of strength between your middle, lower and upper body. Muscle Enduranceis the ability to perform repeated contractions. It comes into play when you cross-country ski or work on your feet all day. Endurance training addresses the slow twitch, endurance muscle fibers, which depend on oxygen for energy. To develop muscle endurance, use low resistance and high repetitions– about 15-20 repetitions in each set, three sets to each exercise, working the muscle only to fatigue. Flexibility is the ability of a muscle or group of muscles to move the joint through a full range of motion. Flexibility comes into play when you execute an overhand serve or stretch for the top shelf in the kitchen. It is a cooperative movement of opposite muscle groups. When a muscle contracts, its opposite muscle group must relax for the action to occur. Increased flexibility means an increased range of motion, made possible by this simultaneous contracting and relaxing. Good flexibility is important in protecting the body from injury and can be achieved through the balanced strength training programs that are included in this manual. Muscle Poweris the combination of strength and speed of the muscular contraction. This is often misinterpreted as A) being directly associated with certain skill or sport and/or B) meaning that you must move fast. Load is a ctually a more important factor than speed when attempting to improve power. When training to achieve muscular power, pick a resistance that fatigues you in the 3-5 repetition range. When performing these reps, it is more important to think of contracting the muscles faster rather than attempting to move faster. Performing sport simulation exercises usually results in a deterioration of the motor pattern or skill. The biomechanically sound method of improving power in your sport is to train for power using the correct joint movements, as described in this manual. Then practice the skill a ssociated with your sport, learning to apply this newly achieved power. Cardiovascular Enduranceis the ability of the heart and lungs to supply oxygen and nutrients to exercising muscles over an extended period of time. It comes into play when you jog a mile or ride a bike. It is a critical component of overall fitness and health. You may want to design your own personal program specifically geared to your goals and lifestyle. Designing a program is easy, as long as you follow the below guidelines. 13 Owner’s Manual Design Your Own Program Understand fitness and its components.Improperly designed programs can be dangerous. Take some time to review this manual as well as other fitness guides. Training variables.When designing your own program there are several variables that, when mixed properly, will equal the right fitness formula for you. In order to find out the best formula, you must experiment with several combinations of variables. Know your current fitness level.Before you start any fitness program you should consult a physician who will help you determine your current abilities. The variables are as follows: Identify your goals. G oals are critical to choosing and designing an exercise program that fits and enhances your lifestyle, but so is strategy. It’s important not to rush the process and try to accomplish too much too soon. That will lead to setbacks and discouragement. Instead, set a series of smaller achievable goals. •T raining Frequency: The number of times you train per week. We recommend daily activity but not daily training of the same muscle group. Select complementary exercises. Be sure to pair exercises that address compound joint movements and single joint movements. In addition, select exercises that address c ompli-mentary muscle groups. • Training Volume: The number of repetitions and sets performed. •T raining Intensity: The amount of resistance used during your repetition. •R est Intervals: The time you rest between sets and the time you rest between workouts. Put first things first.During each session, first work muscle groups that need the most training. Once you’ve established a base of fitness, follow these basic principles: Remember your cardiovascular component. Any fitness program must contain a cardiovascular fitness component to be complete. So complement your resistance training with aerobic exercise such as walking, running, or bicycling. • I solate Muscle Groups: Focus work on specific muscle groups. •P rogressive Loading: The gradual systematic increase of repetitions, resistance and exercise period. 14 Owner’s Manual Workout Guide Working Out Breathing A workout begins in your mind’s eye. With concentration and visualization you can approach your workout with a positive, constructive attitude. A good pre-workout mental routine is to sit and relax, so that you can focus on what you are about to do and think about achieving your end goal. The most important part of breathing during exercise is, quite simply, that you do it. Breathing in or out during the actual performance is not dependent upon the direction of air flow relative to exertion. It is, in fact, a mechanical process that changes the position of your spine as your rib cage moves. Here are some tips for breathing: Warming Up 1) Be cautious when you are concentrating or exerting effort. This is when you will probably hold your breath. DO NOT hold your breath. Do not exaggerate breathing. Depth of inhalation and exhalation should be natural for the situation. We recommend that you warm up by doing light stretching and performing light exercises on the Bowflex Xtreme® 2 SE home gym. Your Routine The workout portion of your fitness routine is the series of exercises devoted to your particular goals. Remember, make sure to have fun! 2) Allow breathing to occur, naturally, don’t force it. Cool Down An essential part of the exercise routine is the cool down. Gradually reduce the level of exercise intensity so that blood does not accumulate in one muscle group, but continues to circulate at a decreasing rate. Remember to gradually move yourself into a relaxed state. 15 Owner’s Manual The Workouts 20 Minute Better Body Workout Frequency: 3 Days Per Week (M-w-f) Time: About 20 Minutes Start by performing one set of each exercise. Warm up with a light resistance that you can perform easily for 5 -10 reps without fatiguing. Focus on practicing and learning your technique before increasing the resistance. Then move to a more challenging resistance that you can perform no less than 10 reps and no more than 15 reps without your form deteriorating. As you become stronger, you can advance to two sets for each exercise. Complete all sets of each exercise before moving on to the next one. Rest 30 to 45 seconds between sets. Move slowly on each rep. Use a pace that would allow you to stop the movement instantly at any point in the rep. Count three seconds up and three seconds down and work to fatigue during each set. Body Part Exercise Sets Reps Chest Back Bench Press 1-2 10-15 Bent Over Row 1-2 10-15 Shoulders Crossover Rear Deltoid Rows 1-2 10-15 Arms Biceps Curl 1-2 10-15 Triceps Pushdown 1-2 10-15 Legs Leg Extension 1-2 10-15 Trunk Standing Low Back Extension 1-2 10-15 Seated Abdominal Crunch 1-2 10-15 Advanced General Conditioning Frequency: 4 Days Per Week (M-t-th-f) Time: About 35-45 Minutes When you are proficient in performing the exercise techniques of the above routine and are no longer realizing results, or have become just plain bored, it is time to change your program. You can increase your training with this “split system” routine that works opposing muscle groups on different days. To do this, you’ll increase your resistance when you can perform 12 reps perfectly, and you’ll increase your volume by performing more sets and more exercises. Move slowly on each rep. Use a pace that would allow you to stop the movement instantly at any point in the rep. Count three seconds up and three seconds down and work to fatigue during each set. Day 1 & 3 Day 2 & 4 Body Part Exercise Sets Reps Chest Bench Press 1-3 10-12 Shoulders Seated Shoulder Press 1-3 10-12 Arms Triceps Pushdown 1-3 10-12 Biceps Curl 1-3 10-12 Legs Leg Extension 1-3 10-12 Body Part Exercise Sets Reps Back Bent Over Row 1-3 10-12 Seated Lat Pulldowns 1-3 10-12 Shoulders Crossover Rear Deltoid Row 1-3 10-12 Arms Biceps Curl 1-3 10-12 Reverse Curl 1-3 10-12 Standing Low Back Extension 1-3 10-12 Seated Abdominal Crunch 1-3 10-12 Trunk 16 Owner’s Manual 20 Minute Upper/Lower Body Frequency: 4 Days Per Week (M-t-th-f) Time: About 20 Minutes This program provides you with a quick and effective workout that combines muscle conditioning with some cardiovascularbenefits. Do this routine when you are limited in time or just want a variation to your normal routine. Perform this program training 2 days, resting 1 to 2. Perform all exercises to near failure, stopping at the point that your technique starts to deteriorate. Rest only 20-30 seconds between sets. As you get stronger, increase the number of sets you perform. Move slowly on each rep. Use a pace that would allow you to stop the movement instantly at any point in the rep. Count three seconds up and three seconds down. DAY 1 & 3 DAY 2 & 4 Body Part Exercise Sets Reps Chest Bench Press 1-3 12-15 Back Bent Over Row 1-3 12-15 Shoulders Crossover Rear Deltoid Rows 1-3 12-15 Arms Biceps Curl 1-3 12-15 Triceps Extension 1-3 12-15 Body Part Exercise Sets Reps Legs Leg Extension 1-3 12-15 Standing Hip Extension 1-3 12-15 Standing Hip Abduction 1-3 12-15 Standing Low Back Extension 1-3 10-12 Seated Abdominal Crunch 1-3 10-12 Trunk 17 Owner’s Manual Body Building Frequency: 3 Days On, 1 Day Off Time: About 45-60 Minutes Body building requires focused concentration and dedication to training, as well as proper eating habits. Train each muscle group to failure before moving on to the next exercise. Do not neglect any muscle group. If needed, include an aerobic activity to increase your caloric expenditure and help to reduce your body fat levels to achieve a defined muscular look. Rest 30-60 seconds between each set and exercise. Focus on proper form. Tighten the muscle before you move, squeeze the muscle as you move, cramp the muscle at the point of full contraction, and resist the movement as you lower the weight. Move slowly on each rep. Use a pace that would allow you to stop the movement instantly at any point in the rep. Count three seconds up and three seconds down and work to fatigue during each set. DAY 1 Body Part Exercise Sets Reps Chest Bench Press 2-4 8-12 Chest Fly 2-4 8-12 Seated Shoulder Press 2-4 8-12 Crossover Rear Deltoid Row 2-4 8-12 Lateral Shoulder Raise 2-4 8-12 Shoulder Shrug 2-4 8-12 Body Part Exercise Sets Reps Back Bent Over Row 2-4 8-12 Seated Lat Pulldowns 2-4 8-12 Biceps Curl 2-4 8-12 Reverse Curl 2-4 8-12 Triceps Pushdown 2-4 8-12 Triceps Extension 2-4 8-12 Body Part Exercise Sets Reps Legs Squat 2-4 8-12 Leg Extension 2-4 8-12 Standing Hip Extension 2-4 8-12 Standing Low Back Extension 2-4 8-12 Seated Abdominal Crunch 2-4 8-12 Seated Oblique Abdominal Crunch 2-4 8-12 Shoulders DAY 2 Arms DAY 3 Trunk 18 Owner’s Manual Circuit Training– Anaerobic/Cardiovascular Frequency: 2 -3 Times Per Week Time: About 20-45 Minutes Circuit training is a great way to achieve the benefits of strength training and cardiovascular training in one quick, challenging r outine. The idea is to move quickly from exercise to exercise, taking only as much rest between sets as it takes to set up the next exercise (less than 20 seconds). One circuit equals one set of each exercise. Initially, start with completing one round of Circuit 1. Then add an additional round of the same circuit. Once you reach three rounds of Circuit 1, add one round of Circuit 2. Add additional rounds of Circuit 2 as your fitness level increases. Repeat process with Circuit 3. Do not let your heart rate exceed 220 minus your resting heart rate. Perform each rep of each exercise slowly and with perfect technique. Count three seconds up and three seconds down. Circuit 1 Circuit 2 Circuit 3 Body Part Exercise Reps Chest Bench Press 8-12 Legs Squat 8-12 Back Bent Over Row 8-12 Trunk Seated Abdominal Crunch 8-12 Body Part Exercise Reps Shoulders Seated Shoulder Press 8-12 Legs Leg Extensions 8-12 Back Seated Lat Pulldowns 8-12 Trunk Standing Low Back Extension 8-12 Arms Biceps Curl 8-12 Body Part Exercise Reps Shoulders Shoulders 8-12 Arms Arms 8-12 Trunk Trunk 8-12 19 Owner’s Manual True Aerobic Circuit Training Frequency: 2 -3 Times Per Week Time: About 20-60 Minutes Circuit training is a great way to achieve the benefits of strength training and cardiovascular training in one quick, challenging routine. By returning to an aerobic exercise between each set you are increasing your aerobic capacity, endurance and burning fat as energy. The idea is to move quickly from exercise to exercise, taking only as much rest between sets as it takes to set up the next exercise (less than 20 seconds). One circuit equals one set of each exercise. Initially, start with completing one round of Circuit 1. Then add an additional round of the same circuit. Once you reach three rounds of Circuit 1, add one round of Circuit 2. Add additional rounds of Circuit 2 as your fitness level increases. Do not let your heart rate exceed 220 minus your resting heart rate. Perform each rep of each exercise slowly and with perfect technique. Count three seconds up and three seconds down. Any type of aerobic exercise can be used for this routine. Some examples are: jumping jacks, jogging in place or stair climbing. Circuit 1 Circuit 2 Body Part Exercise Reps Chest Bench Press 8-12 Aerobic Exercise 30– 60 Seconds Legs Squat Aerobic Exercise 30– 60 Seconds Back Bent Over Row Aerobic Exercise 30– 60 Seconds Trunk Seated Abdominal Crunch Aerobic Exercise 30– 60 Seconds Body Part Exercise Reps Shoulders Seated Shoulder Press 8-12 Aerobic Exercise 30– 60 Seconds Legs Leg Extension Aerobic Exercise 30– 60 Seconds Back Seated Lat Pulldowns Aerobic Exercise 30– 60 Seconds Trunk Standing Low Back Extension Aerobic Exercise 30– 60 Seconds Arms Biceps Curl 8-12 8-12 8-12 8-12 8-12 8-12 8-12 20 Owner’s Manual Strength Training Frequency: 3 Days Per Week (M-w-f) Time: About 45-60 Minutes This program is designed to emphasize overall strength development. This is an advanced routine to be used only after you have progressed from the advanced general conditioning routine and only after you have perfected your exercise techniques. Work each set to near exhaustion. If you can perform more than 5 to 8 reps, you should increase your resistance 5 pounds and decrease your reps to 5. Rest 60– 120 seconds between each set and exercise. Focus on proper form. Tighten the muscle before you move, squeeze the muscle as you move, cramp the muscle at the point of full contraction, and resist the movement as you lower the weight. Move slowly on each rep. Use a pace that would allow you to stop the movement instantly at any point in the rep. Count two seconds up and four seconds down and work to fatigue during each set. Day 1 Body Part Exercise Sets Reps Chest Bench Press 2-4 5-8 Chest Fly 2-4 5-8 Seated Shoulder Press 2-4 5-8 Crossover Rear Deltoid Row 2-4 5-8 Shoulder Shrug 2-4 5-8 Body Part Exercise Sets Reps Back Bent Over Row 2-4 5-8 Seated Lat Pulldowns 2-4 5-8 Biceps Curl 2-4 5-8 Reverse Curl 2-4 5-8 Triceps Pushdown 2-4 5-8 Triceps Extension 2-4 5-8 Body Part Exercise Sets Reps Legs Squat 2-4 5-8 Leg Extension 2-4 5-8 Standing Low Back Extension 2-4 8-12 Seated Abdominal Crunch 2-4 5-8 Shoulders Day 2 Arms Day 3 Trunk 21 Owner’s Manual Chest Exercises Bench Press– Shoulder Horizontal Adduction (and Elbow Extension) Muscles worked: Chest muscles (pectoralis major). Also involves front shoulder muscles (anterior deltoid and triceps, located on the back of the upper arm. START START FINISH FINISH Position: Seated – facing outward Accessory: Hand Grips Pulleys: Center Cross Bar– wide position Before you begin: Remove Leg Extension and adjust seat height. The pulleys should be in the wide position. Key Points: • Maintain a 90º angle between upper arms and torso throughout exercise. • Limit range of motion so elbows do not travel behind shoulders. • Keep shoulderblades pinched together and maintain good spinal alignment. START • Sit and grasp hand grips. • Straighten arms to front. • Be sure arms are directly in line with cables, palms facing down and wrists straight. • Raise chest and pinch shoulderblades together. Maintain a very slight, comfortable, arch in lower back. ACTION • Slowly move elbows out, simultaneously bending arms, keeping forearms in line with cables. • Stop when upper arms are straight out to the sides, level with shoulders. • Slowly press forward, moving hands toward center. Return to start position with arms straight to front at shoulder width. Keep chest muscles tightened. Chest Fly– Shoulder Horizontal Adduction (Elbow Stabilized) Muscles worked: Emphasizes chest muscles (pectoralis major). Involves front shoulder muscles (anterior deltoid). START START FINISH FINISH Position: Seated– facing outward Accessory: Hand Grips Pulleys: Center Cross Bar– wide position Before you begin: Remove Leg Extension and adjust seat height. The pulleys should be in the wide position. Key Points: • Maintain 90º angle between upper arms and torso throughout exercise. • Limit range of motion so elbows do not travel behind shoulders. • Keep shoulderblades pinched together and maintain good spinal alignment. START ACTION • Sit and grasp hand grips. • Straighten arms to front. • Be sure arms are directly in line with cables, palms facing in and wrists straight. • Raise chest and pinch shoulderblades together. Maintain a slight, comfortable, arch in lower back. • Slowly move arms inward, maintaining the elbows in a slightly bent position throughout movement. • Stop when upper arms are straight out in front, level with shoulders. • Slowly return to start position. Keep chest muscles tightened during motion. 22 Owner’s Manual Decline Bench Press– Shoulder Horizontal Adduction (and Elbow Extension) Muscles worked: Chest muscles (pectoralis major). Also involves front shoulder muscles (anterior deltoid) and triceps. START START FINISH FINISH Position: Seated (seat in lowest position) facing outward Accessory: Hand Grips Pulleys: Center Cross Bar– standard position Before You Begin: Remove Leg Extension and adjust seat to lowest setting. Key Points: • Maintain 90º angle between upper arms and torso at the bottom of the motion, and slightly less than 90º at the top of the motion. • Limit range of motion so elbows do not travel behind shoulders. • Keep shoulderblades pinched together and maintain good spinal alignment. START ACTION • S it and grasp hand grips with cable and grip positioned beneath forearm. • L ower arms 5-6 inches from standard bench press position. • S traighten arms to front. • B e sure arms are directly in line with cables, palms facing down and wrists straight. • R aise chest and pinch shoulderblades together. Keep a gentle arch in lower back. • S lowly move elbows outward, simultaneously bending arms, keeping forearms in line with cables at all times. • Stop when upper arms are straight out to sides, 10º below shoulders. • Slowly press forward, moving hands toward center. Return to start position, arms straight at shoulder width, hands just above knees in line with cables. Keep chest muscles tightened. Incline Bench Press– Shoulder Horizontal Adduction (and Elbow Extension) Muscles worked: Chest muscles (pectoralis major), especially upper portion. Also involves front shoulder muscles (anterior deltoid) and triceps. START START FINISH FINISH Position: Seated– facing outward Accessory: Hand Grips Pulleys: Center Cross Bar– wide position Before You Begin: Remove Leg Extension and adjust seat height. Key Points: • Upper arms will be 90º from sides of torso at the bottom of movement and slightly more than 90º from the front of torso at the top. • Limit range of motion so elbows do not travel behind shoulders. • Keep shoulderblades pinched together and maintain good spinal alignment. START • S it and grasp hand grips. • S traighten arms to front. • Raise arms 6-8 inches above regular bench press position. • K eep arms in line with cables, palms down, wrists straight. • R aise chest and pinch shoulderblades together. Keep a slight, comfortable, arch in lower back. 23 Owner’s Manual ACTION • S lowly move elbows out, simultaneously bending arms. Keep forearms in line with cables. • S top when upper arms are out to sides, 10º above shoulders. • S lowly press forward, moving hands toward center. Return to start position, with arms straight to front at shoulder width and in line with cables. Decline Chest Fly—Shoulder Horizontal Adduction (elbow stabilized) Muscles worked: Pectoralis Major; Anterior Deltoid START FINISH Position: Seated—facing outward Accessory: Hand Grips Pulleys: Center Cross Bar—Wide Position Leg Extension: Removed Success Tips • Maintain a 60-90° angle between upper arms and torso during exercise. • Keep chest muscles tightened. Limit and control your range of motion. • Keep knees bent, feet on Platform, head back against Seat Back Pad. • To improve your pectoralis involvement, pinch your shoulderblades together throughout movement. START ACTION • Grasp Hand Grips in both hands. • Open your arms into a wide, “embrace” position, elbows slightly bent. Press your forearms downward. At full extension, hands should be level with your hips, palms facing forward. • Do not lock your elbows. • Raise chest, pinch shoulderblades together, and maintain a slight, comfortable arch in your lower back. • Slowly press your arms forward and downward, straightening arms and moving your hands together. Hands should be 5-6" lower than standard Chest Fly Finish position. • Rotate your wrists and forearms upward. • Return to start position, slowly bringing your arms in front of you, just below chest level. Incline Chest Fly—Shoulder Horizontal Adduction (elbow stabilized) Muscles worked: Pectoralis Major; Anterior Deltoid START FINISH Position: Seated—facing outward Accessory: Hand Grips Pulleys: Center Cross Bar—Wide Pulleys Leg Extension: Removed Success Tips • Maintain a 60-90° angle between upper arms and torso during exercise. • Keep chest muscles tightened. Limit and control your range of motion. • Keep knees bent, feet on Platform, head back against Seat Back Pad. • To improve your pectoralis involvement, pinch your shoulderblades together throughout movement. START • Grasp Hand Grips in both hands. • Press your arms forward and upward, straightening arms ans moving your hands together. Hands should be 5–6" higher than the standard Chest Fly start position.. • Do not lock your elbows. • Raise chest, pinch shoulderblades together, and maintain a slight, comfortable arch in your lower back. 24 Owner’s Manual ACTION • Open your arms into a wide, “embrace” position, elbows slightly bent. Press your forearms upward. At full extension, your elbows should be level with your ears, palms facing forward. • Rotate your wrists and forearms upward. • Return to Start position, slowly bringing your arms in front of you, just below chest level. Shoulder Exercises Reverse Fly– Shoulder Horizontal Abduction (Elbows Stabilized) Muscles worked: Back portion of shoulder muscles (rear deltoids, rear portion of middle deltoids). START FINISH Position: Standing– facing machine Seat: Removed Accessory: Hand Grips Pulleys: Center Cross Bar– narrow position Before You Begin: Remove Leg Extension. The pulleys should be in the narrow position. Key Points: • Maintain a 90º angle between upper arms and sides of torso throughout exercise. • Keep shoulderblades pinched together and maintain good spinal alignment. START • S tand on platform. • Grasp hand grips with palms facing floor, arms nearly straight. • Stand up straight and bend over slightly from hips until arms are in front of body at a 90º angle to torso. • Lift chest and pinch shoulderblades together. ACTION • M aintaining the same slight bend in arms, move elbows out and back, keeping a 90º angle between upper arms and sides of torso. • Move until elbows are slightly behind shoulders, then slowly reverse the motion, keeping rear shoulder muscles tightened. Crossover Reverse Fly– Shoulder Horizontal Abduction (Elbows Stabilized) Muscles worked: Back portion of shoulder muscles (rear deltoids, rear portion of middle deltoids). START FINISH Position: Standing– facing machine Accessory: Hand Grips Pulleys: Center Cross Bar– narrow position Before You Begin: • Remove seat and leg extension. The pulleys should be in the narrow position. Key Points: • Maintain 90º angle between upper arms and sides of torso throughout exercise. • Keep shoulderblades pinched together and maintain good spinal alignment. START • S tand on platform. • Cross arms in front of body and grasp hand grips (right grip in left hand and vice versa) with palms facing floor and arms nearly straight. • Stand up straight and bend over slightly from hips until arms are in front of body at a 90º angle to torso. • Lift chest and pinch shoulderblades together. 25 Owner’s Manual ACTION • M aintaining same slight bend in arms, move elbows out and back, crossing cables as you pull arms back. • Keep a 90º angle between upper arms and sides of torso. • Move until elbows are slightly behind shoulders, then slowly reverse motion keeping rear shoulder muscles tightened. Crossover Rear Deltoid Rows– Elbow Flexion Muscles worked: Back portion of shoulder muscles (rear deltoids, rear portion of middle deltoids). START FINISH Position: Standing– facing machine Accessory: Hand Grips Pulleys: Center Cross Bar– narrow position Before You Begin: Remove Leg Extension and seat. Center Cross Bar Pulleys should be in narrow position. Key Points: • Maintain a 90º angle between upper arms and sides of torso. • Keep shoulderblades pinched together and maintain good spinal alignment. • To work one arm at a time, place nonworking hand on top of bench for additional stabilization. START ACTION • S tand on platform. • Cross arms in front of body and grasp hand grips (right grip in left hand and vice versa) with palms facing down and arms nearly straight. • Bend over slightly from hips (not spine) and raise arms in front of body, 90º to torso. • Lift chest, stand up straight with spine in good alignment and tighten trunk muscles. • A llowing arms to bend as you go, move elbows outward and backward keeping a 90º angle between upper arms and sides of torso. • A lways point forearms in the direction of cables. • M ove until elbows are slightly behind shoulders, then slowly reverse motion. Keep rear shoulder muscles tightened during entire motion. Crossover High Rear Deltoid Rows– Elbow Flexion Muscles worked: Back portion of shoulder muscles (rear deltoids, rear portion of middle deltoids). START FINISH Position: Standing– facing machine Accessory: Hand Grips Pulleys: Lat Tower Before You Begin: Remove Leg Extension and seat. Key Points: • Keep shoulderblades pinched together and maintain good spinal alignment. START ACTION • S tand on platform, with knees slightly bent. • Cross arms and grab hand grips with palms facing down, arms straight (right hand on left hand grip and vice versa). • Stand up straight and slightly lean back from hips. • Lift chest and pinch shoulderblades together. • A llowing arms to bend as you go, move elbows out and back keeping a 90º angle between upper arms and sides of torso. • A lways point forearms in direction of cables. • M ove until elbows are slightly behind shoulders, then slowly reverse motion. Keep rear shoulder muscles tightened. 26 Owner’s Manual Lateral Shoulder Raise– Shoulder Abduction (Elbows Stabilized) Muscles worked: ide shoulder muscles (middle S deltoids), top muscle of rotator cuff (supraspinatus) and upper trapezius muscles. START FINISH Position: Standing– facing outward Accessory: Hand Grips Pulleys: Squat Pulley Frame– use squat straps Before You Begin: Remove Seat and Leg Extension Key Points: • DO NOT swing arms upward or move trunk. START ACTION • S tand on platform facing outward. Grasp hand grips with palms facing each other. • Attain good spinal posture and bend forward slightly at hip (15 to 20º) by keeping spine straight and sticking rear end out. Do not bend at waist. • Let arms hang directly in line with cables. • Elevate shoulders slightly toward back of head. • R aise arms out to sides to nearly shoulder level. • Keep side of arm/elbow facing out/ up throughout movement. • Slowly bring arms into start position without relaxing. Seated Forearm Lateral Shoulder Raise– Elbows Stabilized Muscles worked: Side shoulder muscles (middle deltoids), top muscle of rotator cuff (supraspinatus) and upper trapezius muscles. START FINISH Position: Seated– facing outward Accessory: Hand Grips over elbows Pulleys: Squat Pulley Frame– narrow position Before You Begin: Remove Seat and Leg Extension Key Points: • DO NOT swing arms upward or move trunk. START • S lide hand grips over forearms until grip is cradled in elbow. • Let upper arms hang in line with cables and bend elbows 90º. • Elevate shoulders slightly toward the back of your head. • Raise chest and pinch shoulderblades together. • M aintain a slight, comfortable, arch in lower back. 27 Owner’s Manual ACTION • R aise arms out to sides to almost shoulder level. • Keep side of forearms/elbows facing out/up throughout movement. • Slowly bring arms to start position without relaxing. Front Shoulder Raise– Shoulder Flexion (Elbow Stabilized) Muscles worked: Front part of shoulder muscles (front deltoids) and front part of middle deltoids. START FINISH Position: Standing– facing outward Accessory: Hand Grips Pulleys: Squat Pulley Frame Before You Begin: Remove Leg Extension and seat. Use platform pulleys. Key Points: • Keep chest lifted and abdominals tightened throughout entire motion and maintain good spinal alignment. • Do not increase arch in lower back while lifting arms. START ACTION • S tand on platform facing outward with knees slightly bent. You may want to lean back against bench. • K eep chest up, ads tight and maintain a slight arch in lower back. • G rasp hand grips with palms facing machine and arms straight at sides. • A rms may be moved alternately or together. • K eeping arms straight, move them forward, then up to shoulder height. • S lowly return arms beside torso and repeat. Seated Shoulder Press– Shoulder Adduction (and Elbow Extension) Muscles worked: Front portion of shoulder muscles (front deltoids and front part of middle deltoids), upper back muscles (upper trapezius), and triceps. START FINISH Position: Seated– facing outward Accessory: Hand Grips Pulleys: Center Cross Bar– wide position Before You Begin: Remove Leg Extension and adjust seat height. Key Points: • Keep abdominals tight throughout entire motion and maintain good spinal alignment. • Do not let the arch increase in the lower back while pressing up. START • S it facing outward, knees bent and feet flat on floor. • Keep chest up, abs tight and maintain a slight arch in lower back. • G rasp hand grips with palms facing away from machine. • R aise hand grips to just above shoulder level, keeping palms facing forward. 28 Owner’s Manual ACTION • S traighten arms overhead, focusing on moving elbows up and in toward head. • S lowly return to starting position keeping tension in front shoulder muscles. Shoulder Rotator Cuff– Internal Rotation Muscles worked: START Front rotator cuff muscle (subscapularis). FINISH Position: Standing– facing left or right Accessory: Hand Grips Pulleys: Center Cross Bar -wide position Before You Begin: Remove Seat and Leg Extension START Key Points: • Motion should be slow and controlled. • Do not rotate spine to get additional range of motion. Try for pure rotation of shoulder joint. More is not better! • Use light resistance only. Pick a resistance that you can perform 12-15 perfect reps. • S tand on platform with one side toward machine. Maintain good spinal alignment. • Grasp hand grip with arm closest to machine and draw upper arm into side, keeping elbow bent 90º. • Distance yourself from tower to eliminate slack in cable. • Use very light resistance. ACTION • R otate forearm toward abdomen, keeping elbow by side. • S lowly return to start position. Shoulder Rotator Cuff– External Rotation Muscles worked: Rear portion of rotator cuff (infraspinatus, teres minor muscles). START FINISH Position: Standing– facing left or right Accessory: Hand Grips Pulleys: Center Cross Bar– wide position Before You Begin: Remove Leg Extension and seat. Key Points: • Motion should be slow and controlled. • Do not rotate spine to get additional range of motion. Try for pure external rotation of shoulder joint. More is not better! • Use light resistance only. Pick a resistance that allows you to perform 12-15 reps. START • S tand on platform with one side toward machine. Maintain good spinal alignment. • U sing arm furthest from rods, reach across body, grasp hand grip nearest you and draw arm back into side. Keep elbow bent 90º. • A llow forearm to rest against abdomen and elbow against side, taking out some of the slack or in cables. 29 Owner’s Manual ACTION • R otate forearm away from abdomen and out to side, keeping elbow/upper arm by side. • Slowly return to start position. Shoulder Extension– Elbows Stabilized Muscles worked: START Upper back (latissimus dorsi, teres major, rear deltoid muscles), muscles between shoulderblades (middle trapezius, rhomboid muscles) and triceps. FINISH Position: Standing– facing machine Accessory: Hand Grips Pulleys: Center Cross Bar– narrow position Before You Begin: Remove Leg Extension and seat. Key Points: • Do not lose spinal alignment, keep chest lifted. • Keep lats tightened throughout entire motion. • Release shoulderblades at end of each rep. Initiate new rep by retracting shoulderblades. START ACTION • S tand on platform, facing machine, knees slightly bent, feet flat on floor. • Grasp hand grips with palms facing floor. • Tighten trunk muscles to stabilize spine while maintaining a slight arch in lower back. • I nitiate by pinching shoulderblades together. • C ontinue movement by moving hands in an arc, down and back toward hips. • S lowly return to start position. Shoulder Shrug– Scapular Elevation Muscles worked: Upper trapezius and associated smaller muscles of region. START FINISH Position: Standing– facing machine Accessory: Hand Grips Pulleys: Squat Pulley Frame Before You Begin: Remove Leg Extension and seat. Key Points: • Do not bend neck backward or forward while raising shoulders. • Do not slouch upon lowering shoulders. • Keep spine in good alignment through entire motion. • Make sure both shoulders raise evenly. • For variation, bend forward slightly from hips, not spine. START • S tand on platform facing machine. • R each down and grasp hand grips with palms facing away. • L et arms hang, extending toward pulleys. 30 Owner’s Manual ACTION • R aise shoulders toward back of head, making sure neck/head does not move. • Slowly reverse motion, keeping upper trapezius muscles tight. Scapular Protraction– Elbows Stabilized Muscles worked: Serratus anterior muscles, the muscles on the side of the rib cage. START FINISH Position: Seated– facing outward Accessory: Hand Grips Pulleys: Center Cross Bar– narrow position Before You Begin: Remove Leg Extension and adjust seat height. Key Points: • Maintain a 90º angle between upper arms and torso throughout the exercise. • Keep elbows straight. • Do not slouch forward in the upper spine to further the motion. Maintain a very slight arch in lower back at all times. START • S it grasp hand grips. • Lie head back on bench and straighten arms to front. • Be sure arms are in line with cables, palms facing down and wrists straight. • Raise chest and pinch shoulderblades. Maintain a slight, comfortable, arch in lower back. ACTION • K eeping arms straight and pointing in the same direction of cables, slowly move shoulderblades forward off bench. • Slowly return to start position. • Movement is subtle and only occurs in shoulder. Scapular Depression Muscles worked: evelops lower trapezius D muscles, which stabilize and move shoulderblades. START FINISH Position: Seated– facing outward Accessory: 50” Bent Lat Bar Pulleys: Lat Tower Before You Begin: Remove Leg Extension and adjust seat height. Key Points: • Do not lose spinal alignment, keep chest lifted. START • S it facing outward, knees bent, feet flat on floor. • Grasp 50” Bent Lat Bar. • Tighten trunk muscles to stabilize spine while maintaining a slight arch in lower back. 31 Owner’s Manual ACTION • K eeping arms straight, slide shoulderblades toward hips. • When shoulderblades are fully depressed, slowly return to start position. • Movement is subtle and only occurs in shoulder. Back Exercises Good Morning Muscles worked: START Latissimus Dorsi; Teres Major; Rear Deltoids FINISH Position: Standing—facing outward Accessory: Handgrips or optional Squat Bar (Squat Bar shown in photos) Pulleys: Squat Pulley Frame Leg Extension: START Removed Success Tips • Keep your chest lifted, spine aligned, abs tight and your back flat with no arch. • Lift with your legs, not lower back or arms. • Use a light resistance for this movement. • Lift your head, keep your knees bent and feet on Standing Platform. • Grasp the handgrips (or Squat Bar) with your palms facing downward. • Keep your legs bent slightly. • Bend over, approximately 90˚ from your hips (not your waist). ACTION • Initiate the movement by pushing your hips forward. • Slowly move your trunk until you are in the standing position. Back should be tightened when reaching upright position. • Slowly return to the start position without relaxing tension in your legs. Standing Low Back Extension– with Hip Extension Muscles worked: Muscles in lower back (erector spinae, deep spinal muscles), lower back muscles, gluteus maximus and hamstrings. START START FINISH FINISH Position: Standing– facing outward Accessory: Hand Grips Pulleys: Squat Pulley Frame– standard position Before You Begin: Remove Seat and Leg Extension Key Points: • Keep chest lifted and a very slight arch in lower back at all times. • Move from hips only, not waist. Do not increase or decrease the arch in lower back during the movement. START • S tand facing out. • Slide hand grips up over forearms to elbows. • Bend knees comfortably, cross arms in front of chest and pull hand grips tightly to chest. • Lift chest, tighten trunk muscles and arch lower back slightly. Pinch shoulderblades together slightly. • Lean forward from hips, slightly letting out tension in the cables. 32 Owner’s Manual ACTION • K eep chest lifted, move entire torso up as a unit by pivoting at hips. • Slowly return to start position without slouching or changing spinal alignment. Standing Shoulder Pullover– with Bent Lat Bar (Elbows Stabilized) Muscles worked: Upper back (latissimus dorsi, teres major, rear deltoid muscles). Also involves chest (pectoralis major muscles) and triceps. START FINISH Position: Standing– facing machine Accessory: 50” Bent Lat Bar Pulleys: Lat Tower Before You Begin: Remove Seat and Leg Extension Key Points: • Do not lose spinal alignment. Relax neck, keep chest lifted, abs tight and maintain a very slight arch in lower back. • Keep lats tightened throughout entire motion. • Release shoulderblades at end of each rep. Initiate new rep by depressing shoulderblades. START • S tand on platform. • Keep knees slightly bent and feet flat on platform. • Extend arms overhead and grasp 50” Bent Lat Bar, palms facing down. • Tighten abs to stabilize spine while maintaining a slight arch in lower back. ACTION • M ove hands in an arc down toward legs. • E nd with arms by sides, pressing shoulderblades down, completely tightening lats. • C ontrol the return to start position by slowly moving arms overhead and releasing shoulderblades. Standing Shoulder Pullover– with Hand Grips (Elbows Stabilized) Muscles worked: START FINISH Upper back (latissimus dorsi, teres major, rear deltoid muscles). Also involves chest (pectoralis major muscles)and triceps. Position: Standing– facing machine Accessory: Hand Grips Pulleys: Lat Tower START Before You Begin: Remove Seat and Leg Extension: Key Points: • Do not lose spinal alignment. Relax neck, keep chest lifted, abs tight and maintain a very slight arch in lower back. • Keep lats tightened throughout entire motion. • Release shoulderblades at end of each rep. Initiate new rep by depressing shoulderblades. • S tand on platform. • Keep knees slightly bent and feet flat on platform. • Extend arms overhead and grasp Hand Grips, palms facing down. • Tighten abs to stabilize spine while maintaining a slight arch in lower back. 33 Owner’s Manual ACTION • M ove hands in an arc down toward legs. • E nd with arms by sides, pressing shoulderblades down, completely tightening lats. • C ontrol the return to start position by slowly moving arms overhead and releasing shoulderblades. Narrow Pulldowns with Bent Lat Bar– Shoulder Extension (with Elbow Flexion) Muscles worked: Latissimus dorsi, teres major and rear deltoid, which make up the large pulling muscles of upper back. Also involves biceps group. START FINISH Position: Seated– facing machine Accessory: 50” Bent Lat Bar Pulleys: Lat Tower Before You Begin: Remove Leg Extension Key Points: • Do not lose spinal alignment. • Keep lats tightened throughout entire motion. START • G rasp 50” Bent Lat Bar, palms facing down, and sit facing machine. • Position thighs under pulleys. Sit upright with arms extending up. You may position hips under pulleys, but you must lean back slightly from the hips. • Maintain good spinal alignment, chest lifted, abs tight and slight arch in lower back. ACTION • P ull shoulderblades down and together while drawing elbows down to front, and then in, toward sides of body. • A t end of motion, arms should be near (not touching) sides, shoulderblades fully depressed toward hips, and forearms in line with cables (not forward). • S lowly return to start position. Allow arms and shoulderblades to move up, w/o relaxing muscles. Narrow Pulldowns with Hand Grips– Shoulder Extension (with Elbow Flexion) Muscles worked: L atissimus dorsi, teres major and rear deltoid, which make up the large pulling muscles of upper back. Also involves biceps group. START FINISH Position: Seated– facing machine Accessory: Hand Grips Pulleys: Lat Tower Before You Begin: Remove Leg Extension Key Points: • Do not lose spinal alignment. • Keep lats tightened throughout entire motion. START • G rasp Hand Grips, palms facing each other, and sit facing machine. • Position thighs under pulleys and sit upright with arms extending up. You may position hips under pulleys but you must lean back slightly from the hips. • Maintain good spinal alignment, chest lifted, abs tight and a slight arch in lower back. 34 Owner’s Manual ACTION • P ull shoulderblades down and together while drawing elbows down and then in, toward sides of body. • A t end of motion, arms should be near (not touching) sides, shoulderblades fully depressed toward hips and forearms in line with cables (not forward). • S lowly return to start position. Allow arms and shoulderblades to move up fully, without relaxing muscles. Bent Over Row Muscles worked: Latissimus dorsi, teres major and rear deltoid, which make up the large pulling muscles of upper back. Also involves biceps group. START FINISH Position: Standing– facing machine Accessory: Hand Grips Pulleys: Squat Pulley Frame Before You Begin: Remove Seat and Leg Extension Key Points: • Do not bend neck backward or forward while raising bar. • Do not slouch when lowering hand grips. • Keep spine in good alignment through entire motion. START • S tand on platform. Reach down and grasp hand grips, palms facing each other. • Let arms extend in direction of pulleys. • K eep back flat and knees bent. ACTION • M ove elbows back as you bring hand grips to a point below chest. • Slowly reverse motion. Keep knees bent and back flat. Crossover Bent Over Row Muscles worked: Back portion of shoulder muscles (rear deltoids, rear part of middle deltoids). START FINISH Position: Standing– facing machine Accessory: Hand Grips Pulleys: Squat Pulley Frame Before You Begin: Remove Seat and Leg Extension Key Points: • Do not bend neck backward or forward while raising bar. • Do not slouch when lowering hand grips. • Keep spine in good alignment through entire motion. START • S tand on platform. • Cross arms and reach down and grasp hand grips, palms facing back (left grip in right hand and vice versa). • Let arms extend in direction of pulleys. • K eep back flat and knees bent. 35 Owner’s Manual ACTION • M ove elbows back as you bring hand grips to a point below chest. • Slowly reverse motion. Keep knees bent and back flat. Reverse Grip Pulldown with Lat Bar Muscles worked: Latissimus Dorsi; Teres Major; Rear Deltoids; Biceps START FINISH Position: Seated—facing machine Accessory: Lat Pulldown Bar Pulleys: Lat Cross Bar Leg Extension: Removed Success Tips • Lift your chest, keep your knees bent and feet on Standing Platform. • Do not bend your neck forwards or backwards during motion. • Keep your spine aligned, abs tight and a slight arch in your lower back. Do not slouch. START • Grasp the Lat Pulldown Bar, keeping your hands at shoulder width with an underhand grip, and then sit, with your arms extending upward, muscles relaxed and ready. • You may position your thighs directly beneath the pulleys, but lean back slightly from hips. ACTION • Initiate the movement by pulling your shoulderblades downward and together, drawing your elbows down toward your hips and then inward into your trunk. • The Lat Pulldown Bar may not touch your chest. • Forearms should stay in line with the direction of the cables. • Slowly return to the start position, without relaxing the tension in your shoulders. Reverse Grip Pulldowns– Lat Tower– Shoulder Extension (with Elbow Flexion) Muscles worked: Latissimus dorsi, teres major and rear deltoid. Also involves biceps group. START START FINISH FINISH Position: Seated– facing machine Accessory: Hand Grips Pulleys: Lat Tower Before You Begin: Remove Leg Extension Key Points: • Do not lose spinal alignment. • Keep lats tightened throughout entire motion. START • G rasp hand grips with an underhand grip, at a comfortable width, then sit on seat. • Position thighs under pulleys and sit upright with arms extending up. You may position hips under pulleys but you must lean back slightly from the hips (not the waist). • Maintain good spinal alignment, chest lifted, abs tight, and a slight arch in lower back. 36 Owner’s Manual ACTION • P ull shoulderblades down and together while drawing elbows down to sides, then in, toward body. • A t end of motion, arms should be drawn near sides (although may not be touching sides), shoulderblades fully depressed towards hips and forearms in line with direction of cables. • S lowly return to start position allowing arms and shoulderblades to move up, without relaxing muscles. Crossover Wide Pulldowns– Shoulder Extension (with Elbow Flexion) Muscles worked: Latissimus dorsi, teres major and rear deltoid. Also involves pectoralis major and triceps. START START FINISH FINISH Position: Seated– facing machine Accessory: Hand Grips Pulleys: Lat Tower Before You Begin: Remove Leg Extension Key Points: • Do not lose spinal alignment. • Keep lats tightened throughout entire motion. • Do not lean backward as you pull. START • C ross arms, then grasp hand grips with palms facing forward (right grip in left hand and vice versa). Sit on seat. • Position thighs under pulleys and sit up with arms extending upward. You may position hips under pulleys but you must lean back from hips (not waist). • Maintain good spinal alignment, chest up, abs tight and a slight arch in lower back. ACTION • P ull shoulderblades down and together while drawing elbows out, away from sides. • A t end of motion, arms should be drawn away from sides, shoulderblades fully depressed toward hips, and forearms in line with direction of cables. • S lowly return to start position. Allow arms and shoulderblades to move fully up, without relaxing muscles. Crossover Narrow Pulldowns– Shoulder Extension (with Elbow Flexion) Muscles worked: Latissimus dorsi, teres major and rear deltoid. Also involves biceps group. START START FINISH FINISH Position: Seated– facing machine Accessory: Hand Grips Pulleys: Lat Tower Before You Begin: Remove Leg Extension Key Points: • Do not lose spinal alignment. • Keep lats tightened throughout entire motion. START • C ross arms, then grasp hand grips with palms facing each other (left grip in right hand and vice versa). Sit on seat. • Position thighs under pulleys and sit up with arms extending upward. You may position hips under pulleys but you must lean back from hips (not waist). • Maintain good spinal alignment, chest lifted, abs tight and a slight arch in lower back. 37 Owner’s Manual ACTION • P ull shoulderblades down and together while drawing elbows down to sides, and then in, toward body. • A t end of motion, arms should be drawn near sides (although not touching sides), shoulderblades fully depressed toward hips and forearms up, in line with cables. • S lowly return to start position allowing arms and shoulderblades to move fully up, without relaxing muscles. Pulldowns—Shoulder Adduction (with elbow flexion) Muscles worked: Latissimus Dorsi; Teres Major; Rear Deltoids; Biceps START FINISH Position: Seated—facing machine Accessory: Lat Pulldown Bar Pulleys: Lat Cross Bar Leg Extension: Removed START Success Tips • Lift your chest, keep your knees bent and feet on Standing Platform. • To determine the appropriate grip width for you, hold your arms straight out to your sides at shoulder height. Bend your elbows approximately 90°. Hands should be no wider apart than your elbows. • Keep your spine aligned, abs tight and a slight arch in your lower back. • Grasp the Lat Pulldown Bar with an overhanded grip (palms facing the floor), at the grip width determined by following the directions in the Success Tips. • Keep your arms extended and muscles relaxed and ready. ACTION • Initiate movement by pulling shoulderblades together while simultaneously drawing elbows down and inward. • The Lat Pulldown Bar may not touch your chest. At the end of the motion, arms should be near your sides, shoulderblades fully depressed. • Keep forearms in line with the Cables. • Slowly return to start position. Stiff-Arm Pulldown—Shoulder Extension (elbow stabilized) Muscles worked: START FINISH Latissimus Dorsi; Teres Major; Rear Deltoids; Lower Trapezius; Biceps Position: Standing—facing machine Accessory: Lat Pulldown Bar Pulleys: Lat Cross Bar Leg Extension: Removed Success Tips • Keep your lats tightened throughout the entire motion. • Keep your chest lifted and maintain spinal alignment, keeping a very slight arch in your lower back. • Release your shoulderblades at the end of each rep. Initiate each new rep by depressing your shoulderblades. • Keep your elbows nearly straight (do not lock elbows) throughout exercise. START • Grasp the Lat Pulldown Bar with your palms facing down. • Step back slightly, making sure that there is enough movement in the cable to complete your sfull range of motion with this exercise. • Bend slightly from hips, lift chest and tighten your abs to stabilize spine. 38 Owner’s Manual ACTION • Initiate the movement by lowering your shoulder blades, bringing them down and together. • Keep your arms straight, moving your hands downward in an arc and slowly in toward your thighs. • Slowly return to the start position without relaxing muscle tension. Seated Lat Pulldowns– Shoulder Adduction (with Elbow Flexion) Muscles worked: Latissimus dorsi, teres major and rear deltoid. Also involves biceps group. START FINISH Position: Seated– facing machine Accessory: Hand Grips Pulleys: Lat Tower Before You Begin: Remove Leg Extension Key Points: • Maintain good spinal alignment, chest lifted, abs tight and a slight arch in lower back. • Keep lats tightened throughout entire motion. • Do not let grips touch chest. START • H old arms out to sides at shoulder height. Bend elbows 90º, hands slightly less than elbow width. • Grasp hand grips at same width as above, then sit down with arms extending upward. • You may position hips under pulleys but only lean back slightly from hips (not the waist). ACTION • Pull shoulderblades down and together while drawing elbows down to sides, then in, toward trunk. • A t end of motion, arms should be drawn near sides (not touching sides), shoulderblades fully depressed toward hips and forearms up in line with cables. • S lowly return to start position. Allow arms and shoulderblades to move up, w/o relaxing muscles. Seated Wide Lat Pulldowns– Shoulder Adduction (with Elbow Flexion) Muscles worked: Latissimus dorsi, teres major and rear deltoid. Also involves biceps group. START FINISH Position: Seated– facing machine Accessory: 50” Bent Lat Bar Pulleys: Lat Tower Before You Begin: Remove Leg Extension Key Points: • Do not lose spinal alignment. • Keep lats tightened throughout entire motion. • If you can’t complete the exercise with hands in the wide position, bring hands closer together. START • G rasp 50” Bent Lat Bar at a comfortable, wide grip, then sit with arms extending up. • You may position hips under pulleys but you must lean back slightly from hips (not the waist). • Maintain good spinal alignment, chest lifted, abs tight and a slight arch in lower back. 39 Owner’s Manual ACTION • P ull shoulderblades down and together while drawing elbows down to sides, then in, toward trunk. • 50” Bent Lat Bar may not touch chest, but, at end of motion, arms should be drawn near sides (not touching sides), shoulderblades fully depressed toward hips and forearms up in line with cables. • Slowly return to start position, Allow arms and shoulderblades to move fully upward, without relaxing muscles. 39 Arm Exercises Triceps Pushdown– Elbow Extension Muscles worked: START Triceps FINISH Position: Standing– facing machine Accessory: Hand Grips Pulleys: Lat Tower Before You Begin: Remove Seat and Leg Extension Key Points: • Keep upper arms motionless. • Keep wrists straight. • Tighten triceps throughout exercise and control motion on the way up. • Maintain good posture by keeping chest lifted and abs tight. Maintain a very slight arch in the lower back. START ACTION • S tand on platform. • Grasp hand grips at shoulder width, palms down. • Bring arms down to sides, elbows straight. This is Start Position. • Bend over slightly from hips, so shoulders are directly over hands. Lift chest and tighten abs to stabilize spine. Maintain a slight arch in lower back. • K eep upper arms stationary and elbows next to sides of torso. Slowly allow elbows to bend, moving hands in arcing motion away from legs and up. • Stop at 90º. • Think about tightening triceps. Slowly reverse arcing motion and straighten arms fully. Triceps Hammer Pushdown– Elbow Extension Muscles worked: Triceps START FINISH Position: Standing– facing machine Accessory: Hand Grips in “Hammer Grip” Pulleys: Lat Tower Before You Begin: Remove Seat and Leg Extension Key Points: • Keep upper arms motionless. • Keep wrists straight. • Tighten triceps throughout exercise and control motion on the way up. • Maintain good posture by keeping chest lifted and abs tight. Maintain slight arch in lower back. START ACTION • S tand on platform. • Grasp hand grips at shoulder width, with grips in vertical hammer position. • Bring arms down to sides, elbows straight. This is Start Position. • Bend over slightly from hips, so shoulders are directly over hands. Lift chest and tighten abs to stabilize spine. Maintain a slight arch in lower back. • K eep upper arms stationary and elbows next to sides of torso. Slowly allow elbows to bend, moving hands in arcing motion away from legs and up. • Stop at 90º. • Think about tightening triceps. Slowly reverse arcing motion and straighten arms fully. 40 Owner’s Manual Triceps Pushdown– with Bent Lat Bar(Elbow Extension) Muscles worked: START START Triceps FINISH FINISH Position: Standing– facing machine Accessory: 50” Bent Lat Bar Pulleys: Lat Tower Before You Begin: Remove Leg Extension and Seat Key Points: • Keep upper arms motionless. • Keep wrists straight. • Tighten triceps throughout exercise and control motion on the way up. • Maintain good posture by keeping chest lifted, abs tight. Maintain a very slight arch in lower back. START ACTION • S tand on platform. • Grasp 50” Bent Lat Bar at shoulder width, palms down. • Bring arms down to sides, elbows straight. This is Start Position. • Bend over from hips, so shoulders are over hands. Lift chest and tighten abs to stabilize spine while maintaining a slight arch in lower back. • K eep upper arms stationary and elbows next to sides of torso. Slowly allow elbows to bend, moving hands in arcing motion away from legs and up. • Stop at 90º. • Think about tightening triceps. Slowly reverse arcing motion and straighten arms fully. Single Arm Pushdown—Elbow Extension Muscles worked: Triceps START FINISH Position: Standing—facing machine Accessory: Hand Grips Pulleys: Lat Cross Bars Leg Extension: Removed Success Tips • Keep your upper arms motionless and your wrists straight. • Keep your chest lifted and maintain spinal alignment, keeping a very slight arch in your lower back. • Tighten the triceps throughout the exercise, using controlled motion. • Keep your knees bent and feet on Standing Platform. START ACTION • Grasp one Hand Grip, palm facing downward. • Stand approximately 1-2 feet from Lat Tower (adjust for comfort), but keeping feet on Standing Platform. • Bring your arm in front of you, Hand Grip at chest level. • Bend over slightly from hips, so that your shoulder is directly over your hand. • Keeping your upper arm stationary, elbow next to trunk, slowly push your arm downward in a gentle arc until your hand is near top of the thigh. • Keeping your triceps tightened, slowly reverse the arcing motion, bringing the Hand Grip back to the start position. 41 Owner’s Manual Triceps Extension– Elbow Extension Muscles worked: Triceps START FINISH Position: Seated– facing outward Accessory: Hand Grips Pulleys: Center Cross Bar– narrow position Before You Begin: Remove Leg Extension and adjust seat height. Key Points: • Keep upper arms/shoulders motionless. • Keep wrists straight. • Tighten triceps throughout exercise and control motion on the way down. START ACTION • B end knees and place feet flat on floor. • Reach behind and grasp one or both of the hand grips, palms facing away. • Keep elbows above shoulders, directly in line with cables, palms facing out, wrists straight. • Raise chest and pinch shoulderblades together. Maintain a slight, comfortable, arch in lower back. • K eep upper arm stationary. Slowly straighten elbows allowing hands to move in arcing motion above head. • S lowly reverse arcing motion until elbows are bent again. Cross Triceps Extension Muscles worked: START FINISH Triceps Position: Seated– facing outward Accessory: Hand Grips in “Hammer Grip” Pulleys: Center Cross Bar– narrow position Before You Begin: Remove Leg Extension Key Points: • Keep upper arm motionless. • Keep wrist straight. • Tighten triceps throughout exercise and control motion on the way down. • Keep knees bent and feet flat on floor. START • R each over shoulder and grasp a hand grip. Using the Hammer Grip, bend elbow until hand is in front of chest, palm down. • Lay head back against bench and straighten arm to front. • W ith free hand, lightly grasp back of arm near elbow, to stabilize working arm. • R aise chest and pinch shoulderblades together. Maintain a slight arch in lower back. 42 Owner’s Manual ACTION • K eep upper arm stationary. Bend elbow, moving hand in arcing motion across chest. • S top motion when arm is straight, then slowly reverse arc motion until elbow is back in start position. Hammer Triceps Extension– Elbow Extension Muscles worked: Triceps START START FINISH FINISH Position: Seated– facing outward Accessory: Hand Grips in “Hammer Grip” Pulleys: Center Cross Bar– narrow position Before You Begin: Remove Leg Extension and adjust seat height. Key Points: • Keep upper arms/shoulders motionless. • Keep wrists straight. • Tighten triceps throughout exercise and control the motion on the way down. START • B end knees. Place feet flat on platform. • R each behind and grasp one or both of the hand grips in the vertical hammer grip position. • K eep elbows above shoulders, directly in line with cables, palms facing down, wrists straight. • R aise chest and pinch shoulderblades together. Maintain a slight, comfortable, arch in lower back. ACTION • K eep upper arm stationary. Slowly straighten elbows, allowing hands to move in arching motion above head. • Slowly reverse arcing motion until elbows are bent again. “Rope” Pushdown—Elbow Extension Muscles worked: START FINISH Triceps Position: Standing—facing machine Accessory: Hand Grips in “Hammer Grip” Pulleys: Lat Cross Bar Leg Extension: Removed Success Tips • Keep your knees bent and feet on Standing Platform. • Keep your upper arms motionless and your wrists straight. • Keep your chest lifted, abs tight and maintain a slight arch in lower back. • Tighten the triceps throughout the exercise, using controlled motion. START • Distance yourself from the Lat Tower, but keep your feet on the Standing Platform. • Cross your arms and grasp the Hand Grips (right Grip in left hand and vice versa), using the hammer grip position. • Bring hands toward each other, in front of you, until they are positioned as if grabbing a rope. • Keep your elbows bent, upper arms at your sides. 43 Owner’s Manual ACTION • Keeping your upper arms stationary, elbows next to trunk, slowly straighten your arms downward, in a gentle arc, until hands are near tops of your thighs, hands and elbows straightened and directly in line with shoulders. • Keeping your triceps tightened, slowly reverse the arcing motion and bring the Hand Grips back to the start position. Triceps Kickback Muscles worked: Triceps START START FINISH FINISH Position: Standing– facing machine Accessory: Hand Grips Pulleys: Center Cross Bar– narrow position Before You Begin: Remove Seat and Leg Extension Key Points: • Maintain spinal alignment. • Keep arm at side and wrist straight throughout entire motion. • Tighten triceps throughout exercise and control motion. • Keep palms facing upward. START • S tand on platform. • Keep chest lifted and maintain a slight arch in lower back. • Support yourself with one arm on the horizontal bar and grasp a hand grip with free hand, palm facing backward. • Draw elbow back so upper arm is beside body, elbow bent approximately 90º. ACTION • S traighten elbow while keeping upper arm completely still. • When arm is straight, slowly return to start position. Hammer Triceps Kickback Muscles worked: Triceps START START FINISH FINISH Position: Standing– facing machine Accessory: Hand Grips in “Hammer Grip” Pulleys: Center Cross Bar– narrow position Before You Begin: Remove Seat and Leg Extension Key Points: • Maintain spinal alignment. • Keep arm at side and wrist straight throughout motion. • Tighten triceps throughout exercise and control motion. • Maintain Hammer Grip throughout exercise. START • S tand on platform. • Keep chest lifted and maintain a slight arch in lower back. • Support yourself with one arm on horizontal bar and grasp a hand grip in the vertical hammer grip position with free hand, palm facing in. • Draw elbow back so upper arm is beside body and elbow bent approximately 90º. 44 Owner’s Manual ACTION • S traighten elbow while keeping upper arm completely still. • When arm is straight, slowly return to start position. Resisted Dip– Elbow Extension Muscles worked: START START Triceps FINISH FINISH Position: Standing– facing outward Accessory: Hand Grips Pulleys: Lat Tower Before You Begin: Remove Seat and Leg Extension Key Points: • Keep back straight and knees slightly bent. • Keep the abdominals tight throughout the entire motion and maintain good spinal alignment. START ACTION • S tand on the platform facing away from machine. Reach back and grab hand grips with thumbs on inside toward body. • C able should be between arm and body. • U pper arms should be at a 90º angle from torso. • S traighten arms down, focusing on moving elbows down and inward toward hips. • Slowly return to start position keeping tension in back shoulder muscles. Biceps Curl– Elbow Flexion (in Supination) Muscles worked: Biceps START START FINISH FINISH Position: Standing– facing machine Accessory: Hand Grips Pulleys: Squat Pulley Frame Before You Begin: Remove Seat and Leg Extension Key Points: • Keep elbows at sides. • Keep wrists straight. • Keep trunk muscles tight and maintain a very slight arch in lower back. START • S tand on platform. • B end down and grasp hand grips with palms forward. • S tand with upper arms by sides. Lift chest, tighten abs and maintain a slight arch in lower back. 45 Owner’s Manual ACTION • C url hand grips forward, then up, and then in toward shoulders while keeping elbows at sides and upper arms completely still. • S lowly lower to start position by performing the same arcing motion. Standing Biceps Curl—Elbow Flexion (in supination) START Muscles worked: FINISH Biceps Position: Standing—facing outward Accessory: Hand Grips Pulleys: Squat Pulley Frame Leg Extension: Removed Success Tips • Keep your knees bent and feet on Standing Platform. • Keep your chest lifted, abs tight and a very slight arch in your lower back. • Keep your elbows at your sides and your wrists straight. START ACTION • Reach down and grasp the Hand Grips, palms facing forward. • Straighten, keeping your arms by your sides, elbows loose. • Keeping your upper arms stationary and your elbows at your sides, slowly curl the Hand Grips forward, then upward and in towards your shoulders. • Slowly reverse the arcing motion bringing your hands back to the start position. Hammer Biceps Curl—Elbow Flexion (in supination) Muscles worked: START FINISH Biceps; Brachialis; Brachioradialis Position: Standing—facing outward Accessory: Hand Grips in “Hammer” Hold (see Page 10) Pulleys: Squat Pulley Frame Leg Extension: Removed Success Tips • Keep your knees bent and feet on the Standing Platform • Keep your chest lifted, shoulders pinched together, and a very slight arch in your lower back. • Keep your upper arms and shoulders motionless and your wrists straight. START ACTION • Reach down and grasp the Hand Grips using the Hammer hold. Press your upper arms into your sides and bend your elbows until they are at 90˚ angles. • Straighten your spine, keeping your upper arms by your sides, elbows loose. • Keeping your upper arms stationary and your elbows at your sides, slowly curl the Hand Grips forward, then upward and in towards your shoulders. • Slowly reverse the arcing motion bringing your hands back to the start position. 46 Owner’s Manual Concentration Biceps Curl– Elbow Flexion (in Supination) Muscles worked: START Biceps FINISH Position: Standing– right or left side facing machine Accessory: Hand Grips Pulleys: Squat Pulley Frame Before You Begin: Remove Seat and Leg Extension START Key Points: • Keep elbow pointing toward floor at all times. • Keep wrist straight. • Bend at hips, not at the waist. • Keep back straight, chest up and maintain a very slight arch in lower back. • S tand on platform, one side toward machine. • With hand closest to Power Rod® resistance rods, grasp hand grip. • K eeping back straight, bend at hips and knees, until trunk is parallel to floor. Place uninvolved hand on thigh to help stabilize. ACTION • C url hand grip away from cable, then up toward shoulder while keeping upper arm completely motionless and elbow pointing toward the floor at all times. • S lowly return to start position performing the same arc of motion. Reverse Curl– Elbow Flexion (in Pronation) Muscles worked: eep arm muscle(brachialis). D Also the front forearm muscle (brachioradialis) and biceps. START FINISH Position: Standing– facing machine Accessory: Hand Grips Pulleys: Squat Pulley Frame– with squat straps Before You Begin: Remove Seat and Leg Extension Key Points: • Keep elbows at sides. • Keep wrists straight. • Keep trunk muscles tight and maintain a very slight arch in lower back. START • S tand on platform. • Bend down and grasp hand grips with palms facing backward. • Stand with arms by sides. • Lift chest, tighten abs and maintain slight arch in lower back. 47 Owner’s Manual ACTION • K eeping palms facing down, slowly curl hand grips forward, then up, then in toward shoulders while keeping elbows at sides and upper arms completely still. • Slowly lower to start position. Barbell Biceps Curl– Elbow Extension Muscles worked: START Biceps FINISH Position: Standing– facing machine Accessory: Handgrips or optional Squat Barwith squat straps Pulleys: Squat Pulley Frame Before You Begin: Remove Seat and Leg Extension START Key Points: • Keep elbows at sides. • Keep wrists straight. • Keep trunk muscles tight and maintain a very slight arch in lower back. • S tand on platform. • B end down and grasp squat bar with palms facing forward. • S tand with upper arms by sides (although not pressed tightly). Lift chest, tighten abs and maintain a slight arch in lower back. ACTION • C url squat bar forward, then up, and then in toward shoulders while keeping elbows at sides and upper arms completely still. • S lowly lower to start position by performing same arcing motion. Reverse Barbell Biceps Curl– Elbow Extension Muscles worked: Biceps START FINISH Position: Standing– facing machine Accessory: Handgrips or optional Squat Barwith squat straps Pulleys: Squat Pulley Frame Before You Begin: Remove Seat and Leg Extension Key Points: • Keep elbows at sides. • Keep wrists straight. • Keep trunk muscles tight and maintain a very slight arch in lower back. START • S tand on platform. • B end down and grasp squat bar with palms facing down. • S tand with upper arms by sides (although not pressed tightly). Lift chest, tighten abs and maintain a very slight arch in lower back. 48 Owner’s Manual ACTION • C url wrists back to bring squat bar forward, then up, and then in toward shoulders while keeping elbows at sides and upper arms completely still. • S lowly lower to start position by performing same arcing motion. Seated Biceps Curl– Elbow Flexion (in Supination) Muscles worked: START Biceps FINISH Position: Seated– facing outward Accessory: Hand Grips Pulleys: Squat Pulley Frame Before You Begin: Remove Leg Extension START Key Points: • Do not rock upper body while bending elbow. • Keep wrists straight. • Keep chest lifted, trunk muscles tight and maintain a very slight arch in lower back. • G rasp hand grips, arms at sides with forearms near thighs. • Maintain correct spinal alignment. ACTION • C url forearms toward upper arms, keeping upper arms completely still. • Slowly return to start position without relaxing biceps. Seated Biceps Hammer Curl– Elbow Flexion Muscles worked: Biceps muscles and brachioradialis. START FINISH Position: Seated– facing outward Accessory: Hand Grips in “Hammer Grip” Pulleys: Squat Pulley Frame Before You Begin: Remove Leg Extension Key Points: • Do not rock upper body while bending elbow. • Keep wrists straight. • Keep chest lifted, trunk muscles tight and maintain a very slight arch in lower back. START • G rasp hand grips in vertical hammer grip position, arms at sides, forearms near thighs. • Maintain correct spinal alignment. 49 Owner’s Manual ACTION • C url forearms toward upper arms, keeping upper arms completely still. • Slowly return to start position without relaxing biceps. Arm Opposition Push-Pull Muscles worked: START Biceps; Brachialis; Brachioradialis FINISH Position: Standing—facing outward Accessory: Hand Grips Pulleys: Lat Cross Bar and Squat Pulley Frame Leg Extension: Removed START Success Tips • Lift your chest and keep your knees slightly bent and feet on Standing Platform. • For this exercise, one Hand Grip is attached to a Lat Cable and one Hand Grip is attached to a Squat Cable. Alternate sides to build muscle evenly. • Keep your upper body motionless, elbows at your sides and your wrists straight. • Keep your trunk muscles tight and maintain a slight arch in lower back. • Grasp the Hand Grips, keeping the one attached to the Lat Tower in an overhand grip and the one attached to the Squat Cable in an underhand grip. • Straighten the Squat Cable arm and bend the Lat Cable arm at a 90° angle from your upper arm. ACTION • Slowly raise the Squat Cable arm while simultaneously lowering the Lat Cable arm, until each arm has reached full possible extension in opposition to each other. • Slowly reverse, returning to start position. Upper Body Opposition Push-Pull Muscles worked: Middle Deltoids; Supraspinatus; Trapezius; Biceps; Abs START FINISH Position: Seated—facing outward Accessory: Hand Grips Pulleys: Lat Cross Bar and Center Cross Bar Leg Extension: Removed Success Tips • Lift your chest and keep your knees bent and feet on Standing Platform. • For this exercise, one Hand Grip is attached to a Lat Cable and one Hand Grip is attached to a Rod Cable. Alternate sides to build muscle evenly. • Keep your upper body motionless, elbows at your sides and your wrists straight. • Keep your trunk muscles tight and maintain a slight arch in lower back. START • Grasp the Hand Grips, keeping the one attached to the Lat Tower in an overhand grip and the one attached to the Rod Cable in an underhand grip. • Bend your forearms at a 90° angle from your upper arms, which should be at 90° angles from your torso. 50 Owner’s Manual ACTION • Slowly raise the Rod Cable arm while simultaneously lowering the Lat Cable arm, until each arm has reached full possible extension in opposition to each other. • Slowly reverse, returning to start position. Wrist Extension Muscles worked: Back and top parts of forearms. START START FINISH FINISH Position: Standing– facing machine Accessory: Hand Grips Pulleys: Squat Pulley Frame Before You Begin: Remove Seat and Leg Extension Key Points: • Move slowly and keep tension in back of forearms at all times. • Perform this exercise one arm at a time to make it easier to focus and isolate the back of forearms, or perform it with both arms simultaneously to save time. START • S tand on platform, knees slightly bent. • G rasp hand grips, palms facing down. Rest mid-forearms against sides with elbows flared out. • R aise chest, tighten trunk muscles and maintain a slight arch in lower back. ACTION • S lowly curl back of fists toward forearms. • Slowly return to start position. Wrist Curl– with Wrist Flexion Muscles worked: Front part of forearms. Also increases the strength of grip and isometrically challenges biceps. START START FINISH FINISH Position: Standing– facing machine Accessory: Hand Grips Pulleys: Squat Pulley Frame Removed Before You Begin: Remove Seat and Leg Extension Key Points: • Move slowly and keep tension in front of forearm at all times. • Do not increase or decrease bend in arms, perform the entire motion at wrist. • Do not rock body. Keep chest lifted, abs tight and maintain a slight arch in lower back. START • S tand on platform. • B end down and grasp hand grips, palms facing forward, fingertips down. • S tand with upper arms and elbows by sides. • L ift chest, tighten trunk muscles and maintain a slight arch in lower back. • B end arms 90º, palms up. Hold position throughout entire exercise. 51 Owner’s Manual ACTION • S lowly curl fists towards front of forearms. • Keeping forearms still, slowly let fists return to start position. Abdominal Exercises Trunk Rotation Muscles worked: ost of trunk muscles. Note: rotation is limited M in the spine and should be performed with minimal resistance, in proper alignment. START START FINISH FINISH Position: Seated, facing outward left or right Accessory: Hand Grips Pulleys: Center Cross Bar– standard position Before You Begin: START Remove Leg Extension Key Points: Failure to perform this exercise correctly could result in injury. Use only low weight rods. • Keep chest lifted and maintain good spinal alignment with a slight arch in lower back. • Keep hands centered in front of middle of chest and shoulderblades pinched together. Make sure all of motion occurs in torso. • Move only as far as muscles will take you and eliminate uncontrolled momentum. • S itting sideways on seat with one side facing machine, grasp hand grip closest to you with both hands. • Raise both arms up to shoulder level, centered in front of middle chest. • Keep elbows slightly bent. • Lift chest, pinch shoulderblades together, tighten abs and maintain a slight arch in lower back. ACTION • T ighten entire ab area and slowly rotate rib cage/arms away from cables (30– 40º), as if rotating with a rod through middle of spine. • Slowly return to start position. Seated (Resisted) Oblique Abdominal Crunch Muscles worked: External obliques on resistance side and internal obliques on opposite side. START START FINISH FINISH Position: Seated– facing outward Accessory: Abdominal Crunch Shoulder Harness Pulleys: Abdominal bar Before You Begin: Remove Leg Extension Key Points: • Allow exhalation up and inhalation down, don’t exaggerate it. • Do not lift head/chin. head should follow rib motion, not lead, allowing you to maintain normal neck posture. • Tighten abs throughout range of motion. Do not let abs relax until set is over. • MOVING SLOWLY to eliminate momentum is critical. START • P lace seat in lowest position. • Attach the Abdominal Crunch Shoulder Harness by snapping a hook to each of the D rings. Place the harness on your shoulders letting the handles hang over your chest. Grab both handles. With high resistance, a cross arm oppositehandle grip may be used. • Lower back can start flat or in a normal arch, knees and hips bent, feet flat on floor. 52 Owner’s Manual ACTION • T ighten abs before you move, focusing on area from side of ribs to front of pelvis on the same side. • Slowly move diagonally, rotating and curling torso, with the side of ribs directed toward front of pelvis. • Move as far as you can, without moving hips or lower back from bench. • Slowly reverse motion returning to start position without resting. Seated (Resisted) Abdominal Crunch– Spinal Flexion Muscles worked: bdominal area including upper and lower A front abs (rectus abdominus) and side abs (obliques). START START FINISH FINISH Position: Seated– facing outward Accessory: Abdominal Crunch Shoulder Harness Pulleys: Abdominal bar Before You Begin: Remove Leg Extension Key Points: • Allow exhalation up and inhalation down, but don’t exaggerate it. • Do not lift head/chin. Your head should follow rib motion, not lead, allowing you to maintain normal neck posture. • Tighten abs throughout range of motion. Do not let abs relax until set is over. • MOVING SLOWLY to eliminate momentum is critical. START ACTION • A ttach the Abdominal Crunch Shoulder Harness by snapping one hook to each of the D rings. Place the harness on your shoulders letting the handles hang over your chest. Grab both handles. With high resistance, a cross arm opposite-handle grip may be used. • L ower back can start out flat or in normal arch, knees and hips bent and feet flat on floor. • T ighten abs and curl only torso, slowly moving ribs toward hips. Move as far as you can without moving hips or neck. LOWER BACK SHOULD NOT LOSE CONTACT WITH BENCH when fully crunched. • Slowly reverse motion returning to start position without relaxing. START FINISH START 53 Owner’s Manual ACTION Leg Exercises Leg Extension Muscles worked: ll muscles on front of upper thigh A (quadriceps muscle group). START START FINISH FINISH Position: Seated– facing outward Accessory: Leg Extension Pulleys: Squat Pulley Frame Before You Begin: Adjust seat height Key Points: • Use slow controlled motion. Do not “kick” into extension. • Do not let knees rotate out during exercise. Keep kneecaps pointing up and forward. START • S it on seat facing away from machine with knees near pivot point and lower roller pads on shins. • Adjust thighs to hip width, pointing knee caps to front. • Grasp sides of seat. • Sit up straight with chest lifted, abs tight and a slight arch in lower back. ACTION • T ighten quads and straighten legs by moving feet forward, then upward until legs are completely straight and kneecaps are pointing up toward the ceiling. • Slowly return to start position keeping tension in quads during movement. Squat Muscles worked: All muscles of legs and buttocks (gluteus maximus). START START FINISH FINISH Position: Standing– facing outward Accessory: Handgrips or optional Squat Barwith squat straps Pulleys: Squat Pulley Frame Before You Begin: Remove Seat and Leg Extension Key Points: • Make sure you do not bend waist or lower back. • Keep abs tight throughout entire exercise. • Keep knees pointed straight out in front of you. • Never step off platform while under resistance. START • S tand on platform, feet shoulder width apart. • Squat down and place squat bar across shoulders. Adjust strap on bar to make sure you have resistance at start of movement. • Keep spine in good posture, with chest lifted, abs tight and maintain a very slight arch in lower back. 54 Owner’s Manual ACTION • S lowly rise to standing position. Keep knees slightly bent. • Slowly return to start position. Do not allow knees to exceed a 90º angle. Standing Hip Extension– Knee Bent Muscles worked: START START Buttocks area (gluteus maximus). FINISH FINISH Position: Standing– facing machine Accessory: Hand Grip on arch Pulleys: Squat Pulley Frame Before You Begin: Remove Seat and Leg Extension Key Points: • Make sure all motion occurs at hip, NOT waist or lower back. • Keep abs tight throughout entire exercise. • Maintain exactly the same bend in the knee of moving leg throughout entire exercise. START ACTION • S ecure hand grip around arch of foot. Keep this leg bent at approximately 90º. • Hold onto seat back pad to stabilize yourself. • Keep spine in good posture, chest lifted, abs tight. Maintain a slight arch in lower back. • T ighten glutes. Extend hip by moving entire leg backward. • S lowly move leg as far as you can, without allowing ANY movement to occur at waist. • S lowly return to start position. Standing Hip Extension– Knee Extended Muscles worked: Buttocks area (gluteus maximus). START START FINISH FINISH Position: Standing– facing machine Accessory: Hand Grip on arch Pulleys: Squat Pulley Frame Before You Begin: Remove Seat and Leg Extension Key Points: • Make sure all motion occurs at hip, NOT waist or lower back. • Keep abs tight throughout entire exercise. • Keep leg in same position– slightly away from body’s midline through entire exercise. START ACTION • S ecure hand grip around arch of foot. Move leg very slightly away from midline– enough to move leg freely. • V ery slightly bend knee of support leg. • H old onto seat back pad to stabilize yourself. • K eep spine in good posture, chest lifted, abs tight. Maintain a slight arch in lower back. • T ighten glutes. Extend hip by moving entire leg backward. • Slowly move leg as far as you can, without allowing ANY movement to occur at waist. • Slowly return to start position. 55 Owner’s Manual Leg Kickback– Hip and Knee Extension Muscles worked: Buttocks area (gluteus maximus). START START FINISH FINISH Position: Standing– facing machine Accessory: Hand Grip on arch Pulleys: Squat Pulley Frame Before You Begin: Remove Seat and Leg Extension Key Points: • Do not allow waist, lower back or supportive hip to move. • Keep abs tight throughout entire exercise. START • S ecure cuff around arch of foot. Keep this leg bent at approximately 90º. • Hold onto seat back pad to stabilize yourself. • Keep spine in good posture, chest lifted, abs tight. Maintain a slight arch in lower back. ACTION • E xtend entire leg backward, straightening knee. • Slowly move leg as far as you can, without allowing ANY movement to occur at waist. • Slowly return to start position. Hip Flexion– Knee Flexion Muscles worked: Muscles on front of hips (iliopsoas, rectus femoris). START START FINISH FINISH Position: Standing to the left or right of machine facing away Accessory: Hand Grip on ankle Pulleys: Squat Pulley Frame Before You Begin: Remove Seat and Leg Extension Key Points: • Make sure all motion occurs at hip, NOT waist or lower back. • Keep chest lifted and trunk muscles tight throughout entire exercise. • Allow lower leg to hang in the direction of cable at all times. START ACTION • U se Center Cross Bar as a stabilizer. • Secure a hand grip around one of ankles. • Straighten, but do not lock, knee of support leg. • Keep spine in good posture, chest lifted, abs tight. Maintain a slight arch in lower back. • L ift knee up and in toward torso. • Allowing knee to bend as you move, bring knee up as far as you can, without allowing ANY movement to occur at waist or lower back. • Slowly return to start position without resting leg muscles. 56 Owner’s Manual Dead Lift Muscles worked: Buttocks area (gluteus maximus). START START FINISH FINISH Position: Standing– facing outward Accessory: Handgrips or optional Squat Bar Pulleys: Squat Pulley Frame Before You Begin: Remove Seat and Leg Extension Key Points: • Make sure to keep back flat– do not arch. • Lift with legs, not your back or arms. • Keep knees bent and head up. START • F acing away from machine, grip squat bar using one hand with an underhand grip and the other hand with an overhand grip. • Keep legs bent at 90º. Bend over 30-45º from hips (not waist). • Keep spine in good posture, chest lifted, abs tight. Maintain a slight arch in lower back. ACTION • P ush up with legs. • Slowly move up until you are in the standing position. • Slowly return to start position. Stiff Leg Dead Lift Muscles worked: Buttocks area (gluteus maximus) and hamstrings. START START FINISH FINISH Position: Standing– facing outward Accessory: Handgrips or optional Squat Bar Pulleys: Squat Pulley Frame Before You Begin: Remove Seat and Leg Extension Key Points: • Make sure to keep your back flat– do not arch. • Your motion is entirely at the hips NOT the waist. • Keep knees slightly bent and head up. • Use light weight. START • S tand on platform. Grasp squat bar with palms facing down. • Keep legs very slightly bent. • Bend 90º from hips (not waist). • Keep spine in good posture, chest lifted and abs tight. Maintain a slight arch in lower back. 57 Owner’s Manual ACTION • P ush hips forward. • Slowly move trunk up until you are in standing position. Glutes should be tight when reaching standing position. • Slowly return to start position. Standing Hip Adduction Muscles worked: Insides of thighs (adductor muscle groups). Also, the outside of hip (gluteus medius) on support leg. START FINISH Position: Stand to left or right of machine– facing outward Accessory: Hand Grip over ankle Pulleys: Squat Pulley Frame Before You Begin: Remove Seat and Leg Extension Key Points: • Do not use exercise for losing fat from thighs. Use it to develop hip strength and stability. • Do not cross attached leg in front of standing/ support leg. Use a small range of motion. More is not better. • Keep spine straight and hips level. Try not to raise hips when raising leg to side or drop the hip when returning to start position. START ACTION • S tand to one side of platform with one side near machine. Slide a hand grip over ankle nearest machine (inside leg). • S tand straight, lift chest, tighten abs and maintain a slight arch in lower back. • A djust position away from machine so there is room to move attached leg toward pulley. • S lowly allow attached leg to move in toward support leg (30-45º), keeping hips and spine still. • Slowly draw leg back to start position. Standing Hip Abduction Muscles worked: Sides of hips (gluteus medius), especially on the standing/support side. START FINISH Position: Stand to left or right of machine– facing outward Accessory: Hand Grip over ankle Pulleys: Squat Pulley Frame START Before You Begin: Remove Seat and Leg Extension Key Points: • Do not use this exercise for losing fat from hips. It will not make hips smaller. Use it to develop hip strength and stability. • Use a small range of motion. More is not better. • Keep spine straight and hips level. Try not to raise hips when raising leg to the side. • S tand to one side of platform with one side near machine. Slide hand grip to ankle furthest from machine (outside leg). • S tand up straight, lift chest, tighten abs and maintain a slight arch in lower back. • A djust position so there is some resistance in cables. 58 Owner’s Manual ACTION • S lowly move attached leg out to side away from pulley (30-45º), keeping hips and spine still. • Slowly return to start position without relaxing muscles. Muscle Chart Sternocleidomastoid Trapezius Pectoralis Major Anterior Deltoid Medial Deltoid Biceps Brachialis External Obliques Serratus Anterior Rectus Abdominus Posterior Deltoid Infraspinatus Teres Major Flexor Digitorum Superficialis Triceps Latissimus Dorsi Brachioradialis Pronator Teres Flexor Carpi Radialis Gluteus Medius Tensor Fasciae Latae Gluteus Maximus Iliopsoas Adductor Magnus Pectineus Rectus Femoris Vastus Lateralis Vastus Medialis Peroneus Longus Extensor Digitorum Longus Adductor Longus Iliotibial Tract Gracilis Sartorius Gastrocnemius Soleus Tibialis Anterior 59 Owner’s Manual Biceps Femoris Semitendinosus Semimembranosus Exercise Log Please feel free to make copies of this chart to continue your exercise log. DATE EXERCISE DATE Sets Reps Resistance Sets Reps Resistance Sets Reps Resistance Sets Reps Resistance Sets Reps Resistance Sets Reps Resistance Sets Reps Resistance Sets Reps Resistance Sets Reps Resistance Sets Reps Resistance Sets Reps Resistance Sets Reps Resistance Sets Reps Resistance 60 Owner’s Manual DATE DATE DATE DATE Exercise Log DATE EXERCISE DATE Sets Reps Resistance Sets Reps Resistance Sets Reps Resistance Sets Reps Resistance Sets Reps Resistance Sets Reps Resistance Sets Reps Resistance Sets Reps Resistance Sets Reps Resistance Sets Reps Resistance Sets Reps Resistance Sets Reps Resistance Sets Reps Resistance 61 Owner’s Manual DATE DATE DATE DATE Bowflex® Body Weight Loss Guide Introduction and Overview Welcome to the Bowflex® Body Weight Loss Guide. This guide is designed to be used with your Bowflex® equipment and will help you: • Lose weight and get lean • Improve your health and wellness • Increase your energy and vitality Consult a physician before you start an exercise program or a new health and diet plan. Stop exercising if you feel pain or tightness in your chest, become short of breath, or feel faint. Contact your doctor before you use the machine again. Use the values calculated or measured by the machine’s computer for reference purposes only. The heart rate displayed on the console is an approximation and should be used for reference only. By focusing on the main three elements of the Bowflex® Body Weight Loss Guide- quality, balance, and consistency- you’ll be able to reach and maintain your weight loss and fitness goals for the next six weeks and beyond. • Quality – The emphasis of this plan is on eating more whole foods and getting the most nutrients from your calories as possible. Making the majority of your diet from foods that have a single ingredient (for example fruits, vegetables, fish, lean protein, eggs, beans, nuts, and whole grains) provides the vitamins, minerals, fiber, protein, and healthy fats your body needs. • Balance – Each of the meals and snacks in this guide have a source of fiber or smart carbohydrate, protein, and healthy fat to keep your energy levels consistent throughout the day to fuel your workouts. By having this balance you’ll feel fuller longer, which is critical to weight loss success. • Consistency – Getting about the same number of calories each day is important for your metabolism and your mindset. If you overdo it one day, don’t try to make up for it the next day by not eating or cutting your calories drastically. Get right back on track by following this guide! Results & Expectations Results will vary depending on your age, starting weight, and exercise level but on average you can expect to lose 1-3 lbs per week and experience increased energy levels. 5 Tips for Long-Term Success 1.Keep a food log including hunger levels and water intake. Free online food logs and mobile apps are available at www.myfitnesspal.com and www.loseit.com 2.Weigh and/or take measurements weekly – no more and no less. Weighing weekly rather than daily or every other day is best. You’ll track your progress and keep yourself in check without getting discouraged if the scale doesn’t move for a few days. And remember, weight is just a number and it’s influenced by muscle gain as well as fat loss. Feeling how your clothes fit can often be a better indicator of progress as your body adapts to exercise and nutrition changes. 3.Measure portions – To avoid portion creep, use measuring cups and spoons for grains (rice, pasta, cereal), beans, nuts, oils, and dairy. Use the Portion Sizes Guide for other foods. 4.Plan ahead – Make a meal plan for the week or log your food a day in advance. Planning sets you up for success, especially for social events and eating out. 5.Practice your desired long-term habits – It’s easy to justify poor eating choices when you’re only focused on the short term. Focus on the long term satisfaction of a slimmer, healthier you rather than the temporary gratification you’ll get from splurging. How to Use this Guide • Eat breakfast within 90 minutes of waking up and balance your meals and snacks throughout the day – Don’t go longer than 5-6 hours without eating – If you’re not used to eating breakfast, start out small with a piece of fruit and have something else 1-2 hours later. Your body adapts to not eating breakfast, but as soon as you start eating early in the day and cutting back on dinner portions you’ll notice your hunger will increase. This is a good sign your metabolism is working! • Mix and match meal options – Select 1 option from the appropriate meal plan (male or female) for breakfast, lunch, and dinner, paying close attention to portion sizes – Select 1-2 snack options per day – You have the option to substitute one snack for one treat under 150 calories – Use the meal plan, sample options, and grocery list to create your own meals for more variety 62 Owner’s Manual – You can swap out any type of protein, vegetables or smart carbs for the suggested meal options. For example: • Turkey for tuna • Any fish or seafood for chicken • Cooked vegetables instead of salad • Eat your calories – Cut out high calorie beverages like soda, juices, coffee drinks, and alcohol – Stick with water, unsweetened tea, and coffee. Aim for a minimum of 64oz (1.9 liters) of water per day to stay well hydrated • If you’re still hungry after or in between meals: – Have a glass of water and wait 15-20 minutes. Many times we mistake thirst (or even boredom!) for hunger. Wait out the initial urge to eat and sometimes it will pass. – If you’re still hungry after waiting 15-20 minutes have a snack or mini-meal with fruit, vegetables, and protein. If your goal is muscle gain or strength: • Use the same meal plan but increase portion sizes in the same ratios to increase the total number of calories you eat every day. For example, increase portion sizes of protein and smart carbs at meals by 50%. Adding a snack is another option to meet your body’s increased calorie needs in order to gain muscle and strength. • Focus on post-workout nutrition by having one of your snacks within 30 minutes after you complete your workout. Make sure to have a combination of carbohydrates such as fruit with protein (yogurt, milk, or protein powder) to promote muscle growth and recovery. Chocolate milk is also a great option. Meal Plan Overview The female meal plan provides about 1400 calories, and the male plan provides about 1600 calories, of high quality nutrition to not only help you lose weight and feel great but get the most out of your calories. The vitamins, minerals, and antioxidants from eating mostly whole foods help support optimal health. These calorie levels will result in healthy weight loss for the majority of people. Keep in mind that everyone’s metabolism is very different depending on age, height, weight, activity level, and genetics. Pay close attention to your weight, hunger levels, and energy and adjust your calories if needed. Follow these guidelines if you’re over 55: • If you’re over 55, you need fewer calories because your metabolism slows as you age. Stick with three meals with one optional snack per day. Follow these guidelines if you’re under 25: • If you’re under 25 you may need more calories. Add another snack if you feel low on energy or are extremely hungry. Breakfast Breakfast includes a smart carb, fruit, and a source of protein, which will also have fat. With a balance of carbohydrates and fiber from the smart carb and fruit combined with protein and fat, you’ll energize your day and help control hunger levels throughout the day. Snacks Each snack is a balance of carbohydrates and protein to keep your blood sugar more consistent, which means you won’t experience hunger and energy level spikes and drops. This happens when you have a high carb-only snack like chips, candy, soda, crackers, or pretzels. Lunch and Dinner Lunch combines filling fiber from vegetables and smart carbs with a lean, or low-fat, protein. The healthy fat can come either from the protein added during cooking (nuts on a salad) or as a dressing or sauce (such as oil and vinegar salad dressing). 63 Owner’s Manual Here’s an overview of what an ideal day looks like: (See Portion Size Guide for proper serving sizes) Breakfast Snack #1 smart rich carbs carb protein fruit smart carb protein veggies protein/fat Snack #2 Lunch smart carb protein healthy fat smart carb veggies Dinner smart carb protein healthy fat veggies 64 Owner’s Manual protein Breakfast Options Fruit Smart Carb Protein/Fat Fruit and Nut Oatmeal Cook plain oats in water. Top with fruit, nuts, milk, cinnamon, and honey. Berries or banana Plain oats (Regular or quick-cook) Nuts and milk Egg Muffin Cook egg/s. Toast bread and top with 1 slice of cheese, 1 slice of ham, and tomato. Tomato English muffin or sandwich thin Egg, ham, and cheese Yogurt Power Parfait Top yogurt with fruit. Sprinkle with 1 serving of nuts, 2-3 tbsp wheat germ, or ground flaxseed, 1 tbsp oats, and cinnamon. Chopped fruit of your choice Oats, wheat germ, and ground flaxseed Plain non-fat Greek yogurt and nuts On the Go PB & Apple Sandwich Toast bread. Spread on peanut butter, thin slices of ½ an apple, and 1 teaspoon of honey. Sliced apple Sandwich thin, bread, or bagel thin Peanut butter Lunch & Dinner Options Lean Protein Smart Carb Veggies Pork Loin, Sweet Potato & Green Beans Grilled or baked pork loin Baked Sweet Potato Green Beans Chicken Stir Fry Flavor with 2 tablespoon teriyaki sauce Chicken breast or boneless skinless thigh Brown or wild rice Mixed stir fry vegetables (fresh or frozen) Steak Tacos with Side Salad (3 for males, 2 for females) Top with salsa, cilantro, and sprinkle of shredded cheese Flank or sirloin steak Corn tortillas Salad Whole Wheat Pasta with Shrimp or Cannellini Beans & Marinara Sauce Shrimp (frozen or fresh) or cannellini beans Whole wheat pasta Steamed broccoli Bunless Burgers with Oven Fries, Corn, & Salad Grill burgers. Bake sliced potatoes on sprayed cookie sheet for 25-30 minutes @ 425°F. 93% lean ground beef or turkey Oven baked fries Corn on the cob + side salad Tuna & Avocado Wrap with Vegetable Soup Use 3oz of tuna (1 can). Top with lettuce, tomato, avocado, and mustard. Tuna High-fiber wrap Vegetable soup (homemade or low-sodium canned) 65 Owner’s Manual Snack Options Smart Carb Protein 1 medium apple 10-15 almonds Baby carrots 2 tbsp hummus 1 serving of crackers* 1 string cheese Energy or protein bar with <200 calories* *See www.Bowflex.com/Resources for brand recommendations Optional Treats You have the choice of replacing Snack #2 with a 100-150 calorie treat. You can have an optional treat every day but for optimal health it is recommended to limit small splurges to 3-4 times per week. Use the approach that works best for you. Here are a few examples: • ½ cup lowfat ice cream • 1 small bag of baked potato chips • 4oz of wine or 12oz light beer • 3 cups of air-popped or light popcorn Sample 3 Day Plan Based on each of the meal options listed above, a typical 3 day plan could look like this: Day 1 Day 2 Day 3 Breakfast Egg muffin Power yogurt parfait Fruit + nut oatmeal Snack 1 Apple with almonds Nut Thins + string cheese Baby carrots and hummus Lunch Tuna & avocado wrap with soup Leftovers from dinner- day 1 Leftovers from dinner- day 2 Optional Snack 2 or Treat ½ cup ice cream bar Energy bar 100 calorie bag of light popcorn Dinner Shrimp pasta Chicken stir fry Bunless burgers ® 66 Owner’s Manual Portion Size Guide Each of the items listed are for one serving MALEFEMALE PROTEIN 2 eggs 5oz chicken, fish, lean meat, or tofu 2/3 cup beans or lentils* 1 cup greek yogurt* 1.5oz cheese* 1 egg 3oz chicken, fish, or lean meat 1/2 cup beans or lentils* 1/2 cup greek yogurt* 1.5oz cheese* HEALTHY FAT 2 Tblspn peanut or nut butter* 2 tspn olive, flax, or walnut oil 1/4 cup of nuts 1/3 medium avocado 1 tblspn peanut or nut butter* 1 tspn olive, flax or walnut oil 1/8 cup or 2 tablespoons of nuts (approx.15 almonds) 1/4 medium avocado SMART CARB 1 cup cooked grains (1/2 cup raw): oats, brown rice, quinoa, pasta 1 medium sweet or regular potato 2 corn tortillas 1 slice of bread (or 2 light slices equaling 120 calories or less) 1 english muffin, sandwich thin, or high-fiber wrap 1/2 cup cooked (1/4 cup raw) grains 1/2 medium sweet potato or regular potato 2 corn tortillas 1 slice of bread (or 2 light slices equaling 120 calories or less) 1 english muffin, sandwich thin, or high-fiber wrap FRUIT 1 cup = baseball 1/2 cup = lightbulb 1 oz or 2 tbsp = golf ball 1/4 cup nuts = Altoids tin 1 medium apple, orange, or pear 1 small banana (length of your hand) 1 cup berries or chopped fruit 1/4 cup dried fruit (fresh or frozen is optimal) Vegetables* You can have unlimited vegetables except for peas and corn; stick with 1/2 cup serving 2 cups spinach or lettuce = 2 cupped hands 1 cup raw vegetables 1/2 cup cooked vegetables 6oz low sodium vegetable juice 3 oz chicken or meat = deck of cards OPTIONAL TREATS 1/2 cup lowfat ice cream 1 small bag of baked potato chips 1oz dark chocolate 4oz of wine or 12oz light beer 3 cups air-popped or light popcorn 1 medium potato = computer mouse * some foods are a combination of protein and carbs or protein and fat 1 medium piece of fruit = tennis ball 1 -1/2 oz cheese = 3 dice 67 Owner’s Manual Grocery List BREAD & GRAINS 100% whole wheat bread Sprouted grain breads Light or whole wheat english muffins Sandwich or bagel thins Corn or low-carb whole wheat tortillas High-fiber wraps Plain oats: 1 minute or old fashioned Whole grains: brown rice, bulgar, barley, quinoa, couscous Tips: Look for 100% whole wheat as the first ingredient. Look for 4g of fiber per slice or 5g per 2 slices of light or diet bread. Aim for bread with less than 100 calories per slice. DAIRY & DAIRY ALTERNATIVES CRACKERS, SNACKS & ENERGY BARS Plain non-fat greek yogurt Kefir (yogurt like drink) Organic low-fat milk Enriched almond or soy milk Cheese: feta, parmesan, mozzarella, light havarti, provolone, swiss, string cheese, or single serving packages Any unsalted nuts or seeds Air-popped or light popcorn Edamame in the pod Energy bars Crackers Hummus Tips: Limit crackers, pretzels, and chips to 2-3 servings per week. Always pair with protein such as hummus, cheese, or nuts. Look for energy bars with less than 200 calories and 20g of sugar and at least 3g of protein and 3g of fiber. Look for crackers with less than 130 calories and 4g or less of fat per serving. MEAT, FISH, POULTRY & PROTEIN Wild game Salmon, halibut, tuna, tilapia, shrimp, catfish, scallops, or crab Pork loin, pork chops, or pork roast Chicken or turkey breast or thighs (no skin) Eggs and 100% egg whites Lean beef: sirloin, chuck, round, tenderloin, 93% lean (organic and grass fed is best) Canned salmon or tuna (in water) Nitrate-free, reduced sodium ham, turkey, chicken, or roast beef lunchmeat Any type of bean, dry or canned low-sodium varieties Tofu and tempeh FATS & OILS Avocado Olive, grapeseed, walnut, sesame, or flaxseed oil Butter/spreads: look for products free of trans fats and partially hydrogenated oils on the ingredient list. Tips: Light olive oil refers to the flavor, not the calorie content. Always measure oil and butter. Even if a fat is considered healthy, it’s still very high in calories and portions need to be controlled. DRESSINGS, CONDIMENTS & SAUCES Tips: Look for “Choice” or “Select” cuts of meat rather than “Prime”. Prime cuts are fattier. Limit intake of highly processed meat and imitation meat products like sausage, bacon, pepperoni, and hot dogs to once a week or less. FROZEN FOODS All vegetables without sauce All fruit Grains and grain medleys Vinegars: rice, wine, balsamic All fresh or dried herbs and spices Mustard Salsa and chili sauce Marinara sauce with no high-fructose corn syrup Lemon and lime juice Bottled minced garlic and ginger Low-sodium soy sauce Tips: Look for products free of MSG, added colors, and high fructose corn syrup. Look for sauces under 50 calories per serving. Avoid cream based sauces and dressings like ranch, bleu cheese, and alfredo. All fruits and vegetables, fresh and frozen, are great choices. Since every meal has one or both, your shopping cart should reflect this. 68 Owner’s Manual Keep It Going Tips for continued weight loss and maintaining changes • Keep weighing yourself weekly, even after you’ve reached your goal weight • Continue keeping a food log. If you have your meal plan well-established, log your food every other week to keep yourself on track. Don’t feel like you have to do it every day. • Prepare for plateaus. The scale might not budge for a few weeks or even months after some initial weight loss. This is normal and to be expected. It’s the body’s natural process for adjusting to your new lower weight. Stay focused on your long-term goal, celebrate your successes and changes, and mix up your workouts to help overcome the plateau. • Calorie adjustments for maintaining weight loss. Once you’ve reached your goal weight, you can increase your calories 100-200 per day as long as your activity level stays the same • Treat yourself. Have a non-food reward for each goal you hit such as a massage, a new outfit, or an outing with friends and family • Use the resources below to find new recipes, get expert advice, and support to stay motivated Resources Downloadable Resources from Bowflex® Website (www.Bowflex.com/Resources) • Grocery Shopping List for Fridge (Blank Form) • 7 Day Meal Planning Form • Additional Dinner Options • Pre and Post Workout Fueling Guide Questions & Support • Ask questions, post suggestions, and connect with our online Bowflex® Dietitian on the Bowflex® Facebook page Recipes • www.wholeliving.com • www.eatingwell.com • www.whfoods.org • www.livebetteramerica.org Online food logs • www.myfitnesspal.com • www.loseit.com 69 Owner’s Manual This page intentionally left blank. 70 Owner’s Manual This page intentionally left blank. 71 Owner’s Manual Buy Back Guarantee We want you to know that your Bowflex Xtreme® 2 SE is a superior product. Your satisfaction is guaranteed. If, for any reason, you are not 100% satisfied with your Bowflex Xtreme® 2 SE, please follow the instructions below to return your merchandise and receive a refund of the purchase price, less shipping and handling. This Bowflex Xtreme® 2 SE Buy Back Guarantee applies only to merchandise purchased by consumers directly from Nautilus, Inc. This guarantee does not apply to sales made by dealers or distributors. 1. Call a Bowflex Xtreme® 2 SE Representative at 1-800-605-3369 for a Return Authorization Number (RMA). An RMA will be granted if: a. The Bowflex Xtreme® 2 SE was purchased directly from Nautilus, Inc. b. The request to return the product is within 6 weeks of the delivery date of your merchandise. 2. If an RMA is granted, the following instructions will prevent delays in the processing of your refund. a. The merchandise must be returned to the address given to you at the time of the Return Authorization Call. b. All returned merchandise must be properly packaged in good condition, preferably in the original boxes. c. The exterior of the boxes should be marked clearly with: Return Authorization Number Your Name Your Address Your Phone Number d. Additionally, a piece of paper with your name, address and phone number or copies of your original invoice should be placed in each box of merchandise. e. Your RMA number is time sensitive. Your shipment must be post marked within two weeks from the date the Bowflex Xtreme® 2 SE Representative issued the Return Authorization Number. Note: You are responsible for return shipping and for any damage or loss to merchandise that occur during return shipment. Nautilus recommends that you obtain tracking numbers and insure your shipment. Unauthorized Returns Nautilus, Inc. defines an unauthorized return as any merchandise returned to our facilities without a valid and current Return Merchandise Authorization (RMA) number issued by Nautilus. Failure to properly mark packages with a valid RMA number, or allowing an RMA number to expire, will cause Nautilus, Inc. to consider a return unauthorized. Any merchandise returned without a RMA number will not be subject to a refund or credit and Nautilus will discard the product. The customer assumes all shipping and handling charges for any unauthorized return. 72 Owner’s Manual Warranty Who Is Covered This warranty is valid only to the original purchaser and is not transferable or applicable to any other person(s). What Is Covered Nautilus, Inc. warrants that this product is free from defects in materials and workmanship, when used for the purpose intended, under normal conditions, and provided it receives proper care and maintenance as described in the Product’s Assembly and Owner’s manual. This warranty is good only for authentic, original, legitimate machines manufactured by Nautilus, Inc. and sold through an authorized agent and used in the United States or Canada. Terms • Machine 7 years • Power Rod® resisitance rods No-Time-Limit How Nautilus Will Support the Warranty Throughout the terms of the warranty coverage, Nautilus, Inc. will repair any machine that proves to be defective in materials or workmanship. Nautilus reserves the right to replace the product in the event a repair is not possible. When Nautilus determines replacement is the correct remedy, Nautilus may apply a limited credit reimbursement toward another Nautilus, Inc. brand Product, at our discretion. This reimbursement may be prorated based on length of ownership. Nautilus, Inc. is not responsible for dealer labor or maintenance charges beyond the applicable warranty period(s) stated herein. Nautilus, Inc. reserves the right to substitute material, parts or products of equal or better quality if identical materials or products are not available at the time of service under this warranty. Any replacement of the product under the terms of the Warranty in no way extends the original Warranty period. Any limited credit reimbursement may be prorated based on length of ownership. THESE REMEDIES ARE THE EXCLUSIVE AND SOLE REMEDIES FOR ANY BREACH OF WARRANTY. What You Must Do • Retain appropriate and acceptable Proof of Purchase. • Operate, maintain, and inspect the product as specified in the Product Documentation (Assembly, Owner’s Manuals, etc.). • Product must be used exclusively for the purpose intended. • Notify Nautilus within 30 days after detecting an issue with the product. • Install replacement parts or components in accordance with any Nautilus instructions. • Perform diagnostic procedures with a trained Nautilus, Inc representative if requested. • This warranty does not cover in home repair costs (labor, etc) or related charges. What Is Not Covered • Damage due to abuse, tampering or modification of the Product, failure to properly follow assembly instructions, maintenance instructions, or safety warnings as stated in the Product Documentation (Assembly, Owner’s Manuals, etc), damage due to improper storage or the effect of environmental conditions such as moisture or weather, misuse, mishandling, accident, natural disasters, power surges. • A machine placed or used in a commercial or institutional setting. This includes gyms, corporations, work places, clubs, fitness centers and any public or private entity that has a machine for use by its members, customers, employees or affiliates. • Damage caused by exceeding maximum user weights as defined in Products Owner’s Manual or on the warning label. • Damage due to normal usage and wear and tear. • Power Rod® warranty covers only breakage and not appearance or diminished resistance due to normal wear and tear. Power Rod® performance and resistance may change over time as a result of normal usage and wear and tear. • This warranty does not extend to any territories or countries outside the United States and Canada. How to Obtain Warranty Support For Products purchased directly from Nautilus, Inc. contact the Nautilus office listed on the Contacts page of the Product’s Owner’s manual. You may be required to return the defective component to a specified address for repair or inspection, at your expense. Standard ground shipping of any warranty replacement parts will be paid by Nautilus, Inc. For products purchased from a retail outlet, you may be asked to contact your retailer for warranty support. Exclusions The preceding warranties are the sole and exclusive express warranties made by Nautilus, Inc. They supersede any prior, contrary or additional representations, whether oral or written. No agent, representative, dealer, person or employee has the authority to alter or increase the obligations or limitations of this warranty. Any implied warranties, including the WARRANTY OF MERCHANTABILITY and any WARRANTY OF FITNESS FOR A PARTICULAR PURPOSE, are limited in duration to the term of the applicable express warranty provided above, whichever is longer. Some states do not allow limitations on how long an implied warranty lasts, so the above limitation may not apply to you. Limitation of Remedies EXCEPT AS OTHERWISE REQUIRED BY APPLICABLE LAW, THE PURCHASER’S EXCLUSIVE REMEDY IS LIMITED TO REPAIR OR REPLACEMENT OF ANY COMPONENT DEEMED BY NAUTILUS, INC. TO BE DEFECTIVE UNDER THE TERMS AND CONDITIONS STATED HEREIN. IN NO EVENT WILL NAUTILUS, INC. BE LIABLE FOR ANY SPECIAL, CONSEQUENTIAL, INCIDENTAL, INDIRECT OR ECONOMIC DAMAGES, REGARDLESS OF THE THEORY OF LIABILITY (INCLUDING, WITHOUT LIMITATION, PRODUCT LIABILITY, NEGLIGENCE OR OTHER TORT) OR FOR ANY LOST REVENUE, PROFIT, DATA, PRIVACY OR FOR ANY PUNITIVE DAMAGES ARISING OUT OF OR RELATED TO THE USE OF THE FITNESS MACHINE EVEN IF NAUTILUS, INC. HAS BEEN ADVISED OF THE POSSIBILITY OF SUCH DAMAGES. THIS EXCLUSION AND LIMITATION SHALL APPLY EVEN IF ANY REMEDY FAILS OF ITS ESSENTIAL PURPOSE. SOME STATES DO NOT ALLOW THE EXCLUSION OR LIMITATION OF CONSEQUENTIAL OR INCIDENTAL TYPE DAMAGES SO THE ABOVE LIMITATION MAY NOT APPLY TO YOU. State Laws This warranty gives you specific legal rights. You may also have other rights, which vary from state to state. Expirations If the warranty has expired, Nautilus, Inc. may assist with replacements or repairs to parts and labor, but there will be a charge for these services. Contact a Nautilus® office for information on post-warranty parts and services. Nautilus® does not guarantee availability of spare parts after expiration of warranty period. International Purchases If you purchased your machine outside of the United States consult your local distributor or dealer for warranty coverage. EN 8001514.091514.D