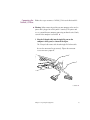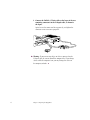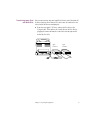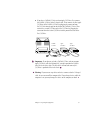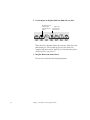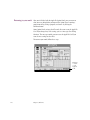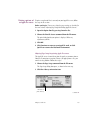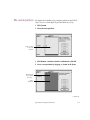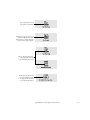
1
Apple IIe Card
Owner’s Guide
K Apple Computer, Inc.
This manual and the software described in it are copyrighted, with all rights reserved.
Under the copyright laws, this manual or the software may not be copied, in whole or
part, without written consent of Apple, except in the normal use of the software or to
make a backup copy of the software. The same proprietary and copyright notices must
be affixed to any permitted copies as were affixed to the original. This exception does
not allow copies to be made for others, whether or not sold, but all of the material
purchased (with all backup copies) may be sold, given, or loaned to another person.
Under the law, copying includes translating into another language or format.
You may use the software on any computer owned by you, but extra copies cannot be
made for this purpose.
The Apple logo is a trademark of Apple Computer, Inc., registered in the U.S. and other
countries. Use of the “keyboard” Apple logo (Option-Shift-K) for commercial purposes
without the prior written consent of Apple may constitute trademark infringement and
unfair competition in violation of federal and state laws.
© Apple Computer, Inc., 1992
20525 Mariani Avenue
Cupertino, CA 95014-6299
(408) 996-1010
Apple, the Apple logo, AppleShare,
AppleTalk, Disk II, DuoDisk,
ImageWriter, LaserWriter, LocalTalk,
Macintosh, ProDOS, and StyleWriter
are trademarks of Apple Computer,
Inc., registered in the U.S. and other
countries.
Apple Desktop Bus, Finder, and UniDisk
are trademarks of Apple Computer, Inc.
Adobe, Adobe Illustrator, and PostScript
are registered trademarks of Adobe
Systems Incorporated.
Dolev PS is a trademark of Scitex
Corporation Ltd.
Exposure is a registered trademark of
Preferred Publishers, Inc.
ITC Zapf Dingbats is a registered
trademark of International Typeface
Corporation.
NuBus is a trademark of Texas
Instruments.
QMS is a registered trademark and
ColorScript is a trademark of QMS, Inc.
QuarkXPress is a registered trademark
of Quark, Inc.
SuperPaint is a registered trademark of
Aldus Corporation.
Simultaneously published in the United
States and Canada.
Mention of third-party products is
for informational purposes only and
constitutes neither an endorsement
nor a recommendation. Apple assumes
no responsibility with regard to the
performance or use of these products.
Contents
Radio and television interference ix
Preface Before You Start
xi
About the Apple IIe Card xii
About this guide xiii
Before you begin xiv
Some visual cues xv
User groups xvi
Chapter 1 Preparing the Equipment 1
Protecting the disks 2
Using a hard disk to store Apple IIe files 2
Deciding where to store your Apple IIe files 3
Why you might want to use the hard disk 3
Why you might not want to use the hard disk 3
Some suggestions 3
The advantage of making your decision right away 4
What to do next 4
iii
Reserving hard disk space for Apple IIe files 4
Backing up your hard disk 5
Partitioning your hard disk 6
Restoring the contents of your hard disk 10
Rebuilding your system 11
What to do next 11
Connecting Apple IIe disk drives 12
Connecting the Apple 5.25 Drive 12
Connecting the UniDisk 3.5 Drive 15
Connecting more than one disk drive 17
Connecting other devices 20
Connecting your old Apple IIe hard disk 22
What’s next 24
Chapter 2 Preparing the Software 25
Checking for late-breaking news 26
Preparing the startup disk for your Apple IIe Card 27
If you have a hard disk 27
If you do not have a hard disk 31
Making a copy of the floppy startup disk 31
Setting up the printer software 32
What’s next 34
Chapter 3 Learning to Use the Apple IIe Card 35
Important details for floppy disk startup people 36
Starting up from the IIe Startup Disk 36
Why you need to start up from the IIe Startup Disk 37
Switching between the Macintosh and Apple IIe environments 38
Switching to the Apple IIe environment 38
Switching back to the Macintosh environment 40
Special note for floppy disk startup people 41
Summary 41
iv
Contents
Running an Apple IIe Program 41
Method 1: Double-clicking a Macintosh icon 41
Can you do the double-click exercise? 41
The double-click exercise 42
Method 2: Restarting the Apple IIe Card 44
Using the Option Panel 46
Opening and closing the Option Panel 46
Exploring the Option Panel 48
Practicing moving the cards in the Option Panel 51
Managing Apple IIe files 54
Naming files on Apple IIe disks 56
Using Macintosh programs with Apple IIe files 56
Chapter 4 Setting Up Cards and Slots 57
Deciding how to arrange the cards in the Option Panel 58
Basing the plan on your original Apple IIe 59
Basing the plan on a typical Apple IIe 63
File servers 64
Modems and other serial devices except for printers 64
Arranging the cards in the Option Panel 65
Setting the options for your cards 67
Chapter 5 Reference 69
Starting up the IIe Startup program 70
Going directly to the Apple IIe Option Panel 73
Double-clicking the IIe Prefs file 73
Using more than one preferences file 74
Starting up an Apple IIe program 75
The Macintosh way 75
The Apple IIe way 76
Printing from Apple IIe programs 78
Choosing a printer 78
Contents
v
Using Apple IIe files with Macintosh programs 81
Copying Apple IIe pictures 83
Using network file servers 84
Starting up from the file server 84
Using files from the file server 85
Personalizing your Apple IIe work environment 86
Changing the processing speed setting 86
Choosing a startup beep sound 89
Setting the keys’ repeat rate 90
Setting the delay before keys repeat 92
Changing the Type Ahead setting 94
Changing the Display setting 95
Changing the character set 96
Changing or adding an Option Panel key 97
Changing the mouse tracking rate 98
Configuring cards and slots 100
Changing the Memory Expansion Card size 100
Setting the Serial Cards 103
Using modems at speeds higher than 1200 baud 106
Making changes to the Printer Card 106
Extending printer timeout 107
Choosing a printer 107
Changing the slot settings 108
Changing the startup device 110
Saving time by making 5.25 Drives inactive 112
Changing the SmartPort settings 112
Ejecting disks 114
vi
Contents
Navigating in the Apple IIe environment 116
Opening the Option Panel 116
A shortcut for opening the Option Panel from the Macintosh
environment 116
Limiting access to the Option Panel 116
Locking the preferences file 116
Purchasing and installing an optional jumper cable 117
Hiding the preferences file 117
Returning to your work 118
Restarting the Apple IIe Card 120
Quitting the Apple IIe environment 122
Using the Apple IIe Card with other Macintosh programs 124
Getting help 125
Saving, printing, and displaying Apple IIe screens 126
Saving a picture of an Apple IIe screen 126
Printing a picture of an Apple IIe screen 127
Adjusting Page Setup for printing Apple IIe screens 127
Copying a picture of an Apple IIe screen 128
Displaying a picture of an Apple IIe screen 128
Formatting ProDOS floppy disks 129
Formatting ProDOS floppy disks in the Macintosh environment 129
Appendix A Troubleshooting 131
Problems with Apple IIe files and disks 132
Problems with IIe Startup 134
Problems starting up an Apple IIe program 136
Problems running an Apple IIe program 139
Problems with the Option Panel 142
Problems with the modem 143
Problems with printing 144
Problems ejecting disks 145
Problems copying files to Apple IIe disks 145
Problems running Macintosh programs 145
Contents
vii
Appendix B Using a Hard Disk 146
Storing Apple IIe files on a hard disk 146
Where to put the software for the Apple IIe Card 147
Manipulating Apple IIe files on the Macintosh desktop 147
Which Apple IIe programs work on a hard disk 148
Appendix C Creating Custom Partitions 149
Preparations 150
The custom partition 151
Appendix D Parts of the Apple IIe Card Software 154
Appendix E Installing Printer Software for the IIe Startup Disk 156
Is your printer’s software already installed? 157
Printers connected to original Apple IIe computers 157
Installing the software for your printer 158
Special instructions for the StyleWriter 160
Glossary 161
Quick Reference Card
viii
Contents
Radio and television
interference
The equipment described in this manual generates and uses radio-frequency energy.
If it is not installed and used properly—that is, in strict accordance with Apple’s
instructions—it may cause interference with radio and television reception.
This equipment has been tested and complies with the limits for a Class B digital device
in accordance with the specifications in Part 15 of FCC rules. These specifications are
designed to provide reasonable protection against such interference in a residential
installation. However, there is no guarantee that the interference will not occur in a
particular installation.
You can determine whether your computer is causing interference by turning it off.
If the interference stops, it was probably caused by the computer or one of the
peripheral devices.
If your computer system does cause interference to radio or television reception,
try to correct the interference by using one or more of the following measures:
■
Turn the television or radio antenna until the interference stops.
■
Move the computer to one side or the other of the television or radio.
■
Move the computer farther away from the television or radio.
■
Plug the computer into an outlet that is on a different circuit from the television or
radio. (That is, make certain the computer and the television or radio are on circuits
controlled by different circuit breakers or fuses.)
If necessary, consult your authorized Apple dealer or an experienced radio/television
technician for additional suggestions. You may find helpful the following booklet,
prepared by the Federal Communications Commission: Interference Handbook (stock
number 004-000-00345-4). This booklet is available from the U.S. Government Printing
Office, Washington, DC 20402.
s
▲ Important: Changes or modifications to this product not authorized by Apple
Computer, Inc., could void the FCC certification and negate your authority to operate
the product.
This product was tested for FCC compliance under conditions that included the use of
shielded cables and connectors between system components. It is important that you
use shielded cables and connectors to reduce the possibility of causing interference to
radios, television sets, and other electronic devices. For Apple peripheral devices, you
can obtain the proper shielded cables from your authorized Apple dealer. For non-Apple
peripheral devices, contact the manufacturer or dealer for assistance. ▲
s
ix
Preface
Before You Start
N
ow you have the best of both worlds. With an Apple IIe Card
installed in your Macintosh computer, you can take advantage of the
newest Macintosh technology and still run the world’s largest collection
of personal computer software—more than 10,000 Apple IIe programs.
This guide tells you how.
xi
About the
Apple IIe Card
The Apple IIe Card is an accessory card that lets you run Apple IIe
programs on a Macintosh LC computer. Once you’ve set a few options
in the card’s Option Panel, turning the Macintosh into an Apple IIe is
as simple as double-clicking an icon on the Macintosh desktop.
While your Macintosh LC is in the Apple IIe environment, it performs
just like an Apple IIe computer. You start up Apple IIe programs, work
with Apple IIe files, use Apple II system utilities—just as you do on an
Apple IIe. And what you see on the Macintosh monitor is exactly what
you’d see on an Apple IIe monitor.
IIe
And you can return to the Macintosh desktop by clicking a button.
xii
Preface: Before You Start
About this guide
This guide contains all the information you need to use the Apple IIe
Card with your Macintosh LC. Here’s what you’ll find in this guide:
■
Chapter 1, “Preparing the Equipment,” tells you how to connect
Apple IIe disk drives and other devices to your Macintosh LC
computer. It also discusses how to prepare your hard disk so it can
store Apple IIe files.
■
Chapter 2, “Preparing the Software,” tells you how to install the
Apple IIe Card software.
■
Chapter 3, “Learning to Use the Apple IIe Card,” contains a brief
tutorial that teaches you step by step how to run Apple IIe programs
on the Macintosh LC.
■
Chapter 4, “Setting Up Cards and Slots,” describes how to use the
special Apple IIe Card software to install and arrange the Apple IIe
cards.
■
Chapter 5, “Reference,” provides instructions for all the features
of the Apple IIe Card and its software program, IIe Startup.
■
Appendix A, “Troubleshooting,” provides important tips to help you
if you run into problems.
■
Appendix B, “Using a Hard Disk,” explains how to store and use
Apple IIe programs and files on your hard disk.
■
Appendix C, “Creating Custom Partitions,” gives technical details on
how to create a ProDOS partition on your hard disk if you need the
partition to be larger or smaller than the standard 10 megabytes (MB).
■
Appendix D, “Parts of the Apple IIe Card Software,” explains what
each of the Apple IIe Card files does.
■
Appendix E, “Installing Printer Software for the IIe Startup Disk,”
describes what to do if you use the IIe Startup Disk but the printer
software you require isn’t installed.
Preface: Before You Start
xiii
You’ll find a glossary and an index at the end of the guide. The book also
has a removable Quick Reference card, which you can detach and use to
remind yourself of the most important hard-to-remember details
concerning the Apple IIe Card.
Before you begin
This guide makes the following assumptions about your computer system
and about your level of experience with Apple products. Before you
begin, make sure the following are true:
■
The Apple IIe Card is installed in your Macintosh LC.
If the card is not installed, don’t try to install it yourself. Only qualified
service technicians should install and remove the Apple IIe Card. If
the Apple IIe Card is not already installed in your computer, contact
your authorized Apple dealer.
■
Your Macintosh LC is set up.
If you haven’t set up your Macintosh LC yet, go now to the setup
instructions that came with your computer.
■
You know how to operate the Macintosh LC.
If you don’t know basic Macintosh skills, see the instructional
materials that came with the Macintosh LC computer.
xiv
Preface: Before You Start
■
You are already familiar with running Apple IIe programs
and utilities.
If you lack Apple IIe experience, and you don’t have access to
Apple IIe manuals, contact your authorized Apple dealer, who can
suggest appropriate books and other instructional materials for you.
Some visual cues
This book uses some special text elements to help guide you. Use them
as visual cues as you read:
❖
By the way: Text set off in this manner presents sidelights or
interesting pieces of information. ❖
s
▲ Important: Text set off in this manner presents important information.
s
▲
▲ Warning: Warnings like this alert you to situations in which you might
damage your equipment or lose data if you don’t follow the instructions
carefully. ▲
Special terms appear in italics when they are introduced; these terms are
defined in the glossary at the back of the guide.
K (Open Apple) key and the K (Solid
You may be familiar with the K
Apple) key on Apple IIe keyboards. On the Macintosh keyboard, use the
K key and the Option key in place of
x (Command) key in place of the K
the K key.
Preface: Before You Start
xv
User groups
No matter what your level of computer experience, you can get lots of
support by joining an Apple user group. Apple user groups are composed
of people who work with Apple computers and who enjoy sharing
what they know with others. Activities may include new product
demonstrations, informal question-and-answer sessions, and regular
classes on using popular software applications or learning to write your
own programs. Many user groups have special beginners’ nights.
Ask your authorized Apple dealer for the name of the user group nearest
you, or call (800) 538-9696 in the United States or (416) 513-5787 in
Canada. For names of user groups outside the United States or Canada,
or if you are interested in starting your own user group, contact
Berkeley Macintosh Users’ Group
1442-A Walnut Street, #62
Berkeley, CA 94709
U.S.A.
(510) 549-2684
Boston Computer Society
One Center Plaza
Boston, MA 02108
U.S.A.
(617) 367-8080
xvi
Preface: Before You Start
Chapter 1
Preparing the Equipment
T
he Apple IIe Card should already be installed in your Macintosh LC
computer. You don’t need to assemble or connect anything else to run
Apple IIe programs on your Macintosh LC.
However, if you want to use a hard disk to store Apple IIe information or
if you want to connect any Apple IIe disk drives or other devices, you’ll
need to follow the instructions in this chapter.
Otherwise, you can skip now to Chapter 2, “Preparing the Software.”
▲ Warning: Before connecting anything to your computer, make sure the
power cord is plugged in and the power is turned off. The power cord
acts as a ground for your computer, protecting you from electrical shock,
even when the computer is turned off. ▲
1
Protecting the disks
Before you do anything else, you should lock the two disks that came
with the Apple IIe Card: the IIe Installer Disk and the IIe Startup Disk.
Locking disks prevents you from accidentally changing or erasing
the files.
To lock a disk, slide the plastic tab on the back of the disk. When you
can see through the hole, the disk is locked.
Locked
Using a hard disk to
store Apple IIe files
Unlocked
This section helps you decide whether you should store your Apple IIe
files on a hard disk or keep them on 3.5-inch and 5.25-inch floppy disks.
If you decide to store Apple IIe files on your hard disk, this section also
tells you how to prepare the hard disk so it can store both Macintosh
and Apple IIe files.
If you don’t have a hard disk, you can go immediately to the next main
section, “Connecting Apple IIe Disk Drives.”
2
Chapter 1: Preparing the Equipment
Deciding where to store
your Apple IIe files
If you have a hard disk, you need to decide whether you want to reserve
part of it for Apple IIe files. The sooner you decide, the easier it will be to
prepare the hard disk.
Why you might want to use the hard disk
The greatest advantage of storing Apple IIe information on a hard disk is
ease of use: you can store all your ProDOS files in one place, so you don’t
have to remember where a particular file is. Also, using a hard disk allows
you to store and retrieve information more quickly.
Why you might not want to use the hard disk
The greatest disadvantage of using your hard disk to store Apple IIe
information is that it reduces the amount of hard disk storage available
for Macintosh files. Also, the process of creating space for your
Apple IIe files is time-consuming, and requires you to erase your hard
disk. Only hard disks manufactured by Apple can store Apple IIe files.
If your Macintosh is connected to a file server, you can store your
Apple IIe files on the file server instead of on your hard disk, if you like.
Some suggestions
If you’ll be using your Apple IIe files a lot, or if your Apple IIe files are too
big to fit on floppy disks, set aside a portion of your hard disk for them. If
a number of people are sharing the computer (in a school for example),
you can store Apple IIe programs on the hard disk while people store
their personal files on their own floppy disks.
If you plan to use your Apple IIe files only occasionally, keep them on
floppy disks and save your hard disk exclusively for Macintosh files.
Chapter 1: Preparing the Equipment
3
The advantage of making your decision right away
You can’t store both Apple IIe files and Macintosh files on the same
hard disk unless you reserve part of the hard disk for Apple IIe files.
Unfortunately, the procedure that reserves the space requires you
to erase all information stored on the hard disk.
If you decide to reserve space for Apple IIe files when you’ve just gotten
your computer, you won’t yet have any personal information on the hard
disk, so erasing the hard disk won’t be too disruptive. Later, if you have a
lot of information stored, you’ll have to take extra steps to copy your data
before you erase the hard disk and then put the data back afterward.
What to do next
If you’ve decided to store Apple IIe files on your hard disk, continue with
this section. Otherwise, skip ahead to the next main section, “Connecting
Apple IIe Disk Drives.”
Reserving hard disk space
for Apple IIe files
This section is for people who have an Apple hard disk connected to
their Macintosh LC and want to use a portion of it to store Apple IIe files.
(The hard disk can be built into the Macintosh or connected by a cable.)
The process of reserving part of the hard disk for Apple IIe files is called
partitioning the hard disk.
Partitioning your hard disk erases everything already stored on it, so
before partitioning you must make backup copies of any files on your
hard disk. This section explains how to
4
■
back up the contents of your hard disk
■
create an Apple IIe partition on your hard disk
■
restore the original contents of your hard disk
Chapter 1: Preparing the Equipment
Backing up your hard disk
To back up your hard disk, follow the steps in this section. (If you
normally use another method of backing up your files, such as copying
them to another hard disk or to a tape cartridge, you can use that
method instead.)
1. Turn on your Macintosh LC computer.
If your computer is already on, quit any programs you might be
running.
2. Insert a blank 3.5-inch floppy disk into the built-in disk drive.
If you see a message asking if you want to initialize the disk, click
Initialize. (If you’re using an 800K disk, click Double-Sided.)
3. Copy your files and folders to the floppy disk.
Drag each icon from your hard disk to the floppy disk’s icon until you
get a message that the floppy disk is full. Then eject the floppy disk
and repeat the procedure until you’ve backed up all the files you want
to save.
Some folders may be too big to fit on floppy disks. If so, you can
open the folder and drag its contents one icon at a time to the floppy
disk icon.
For more information about copying files and folders, see the books
that came with your Macintosh.
4. Label the disks so you can remember what’s on them.
Chapter 1: Preparing the Equipment
5
Partitioning your hard disk
This section explains how to partition your hard disk using a program
called Apple HD SC Setup.
❖
How much space do you need? The procedure described in this
section sets aside 10 MB of space for Apple IIe files. If you need
a different amount, turn now to Appendix C, “Creating Custom
Partitions,” and read the section called “The Custom Partition.”
When you finish, skip to the next section in this chapter, “Restoring
the Contents of the Hard Disk.” ❖
Follow these steps to partition the hard disk:
s
▲ Important: Apple HD SC Setup works only with hard disks
manufactured by Apple. If you have a hard disk manufactured by
another company, contact that company to ask if they have
s
software to partition the hard disk for Apple II files. ▲
Before you begin: This procedure requires 10 MB of hard disk space.
Be sure you can afford to give up that much space.
▲ Warning: Partitioning erases all information stored on your hard disk.
To preserve your information, see the previous section, “Backing Up
Your Hard Disk.” ▲
1. Shut down your Macintosh.
Choose the Shut Down command from the Special menu. You do not
have to turn off the power.
2. Insert the IIe Installer Disk into the built-in disk drive.
6
Chapter 1: Preparing the Equipment
3. Start up the Macintosh.
Click the Restart button if your Macintosh is already on; otherwise,
turn on the power.
If you see a message telling you that the version of system software
isn’t compatible with your computer, start this procedure again with
step 1, but use the Disk Tools disk that came with your computer
instead of the IIe Installer Disk.
4. If necessary, open the disk icon by double-clicking it.
The disk’s window appears.
5. Double-click the Apple HD SC Setup icon.
Double-click here.
The Setup program opens, as shown in the next step.
6. If you have more than one hard disk, click the Drive button
to select the one that you want to partition.
Click the Drive
button . . .
. . . until the name
of the hard disk
you want appears
here.
continues >
Chapter 1: Preparing the Equipment
7
7. Click the Partition button.
A screen appears with all your partitioning options, as shown in the
next step.
8. Click “10MB ProDOS, Maximum Macintosh,” then click OK.
First, use the
scroll bar to
scroll to the
bottom of
the list.
Second, click this
option once to
select it.
Finally,
click OK.
A dialog box appears to confirm that you want to erase your hard disk.
9. Click OK in the dialog box.
The program takes a few moments to partition the disk drive and then
asks you to name the new Apple IIe partition.
8
Chapter 1: Preparing the Equipment
10. Type a name and then click OK.
The dialog box appears with a suggested name in it. As soon as you
start typing, the suggested name is replaced by what you type.
You can give the new partition any legal ProDOS name, and you can
use lowercase letters and spaces. ProDOS names may have any
combination of 15 numbers and letters. (The program will tell you
if you type an illegal name.)
Type a name here . . .
. . . then click OK.
11. Finally, click Quit.
You return to the regular desktop, and your new partition appears:
Your new partition
appears here.
You now have two icons representing the same hard disk. The new
icon, with the symbol for the Apple IIe on it, represents the space
reserved for your Apple IIe files. The original icon represents the rest
of the hard disk, which is reserved for Macintosh files.
continues >
Chapter 1: Preparing the Equipment
9
12. Drag the BASIC.SYSTEM icon from the IIe Installer Disk
to the new Apple IIe partition.
If you started up from the Disk Tools disk, you must eject the
Disk Tools disk and insert the IIe Installer Disk.
13. Drag the PRODOS icon to the new Apple IIe partition.
The file is copied to the new partition.
Restoring the contents of your hard disk
If you backed up the contents of your hard disk, you should now copy
the files back to the Macintosh portion of your hard disk. Follow these
steps to restore your hard disk:
1. Eject the IIe Installer Disk by dragging its icon to the Trash.
Its icon becomes dimmed.
2. Insert one of your backup disks into the disk drive.
The disk’s icon appears on the desktop.
3. Copy all the files and folders back to your hard disk.
Drag each icon from your floppy disk back to the hard disk’s icon.
If you broke up the contents of a folder across more than one disk
when you backed up, don’t forget to put all that folder’s files back in
the folder again.
4. Eject the first disk and repeat steps 2 and 3 for each
backup disk.
10
Chapter 1: Preparing the Equipment
5. Choose Restart from the Special menu.
The Macintosh automatically ejects any disk in its disk drive and
restarts.
❖
Why did the new Apple IIe ProDOS partition disappear? Your
Macintosh can’t display ProDOS files until you’ve installed the
Apple IIe Card software. In the next chapter, you will install the
software for the Apple IIe Card. Meanwhile, even though you
can’t see it, the ProDOS partition is still there. ❖
You can now use your Apple IIe partition to store any Apple IIe files
and programs. For details, see Appendix B, “Using a Hard Disk.”
Rebuilding your system
Sometimes copying a System Folder onto floppy disks and then back to
your hard disk, as you did in the previous sections, can cause problems
such as system crashes. If so, or if you want to prevent such problems,
you may want to rebuild your system.
To rebuild your system, use the Installer program that came with your
Macintosh (or with your most recent version of system software) to
reinstall system software. See the manuals that came with your Macintosh
(or with your most recent version of system software) for instructions.
Check the index and table of contents for entries like “installing system
software” or “reinstalling system software.”
What to do next
If you have any Apple IIe devices to connect to your Macintosh LC, such
as disk drives or joysticks, continue with this chapter. Otherwise, you can
go to Chapter 2, “Preparing the Software.”
Chapter 1: Preparing the Equipment
11
Connecting
Apple IIe disk drives
You need to read this section only if you have an Apple IIe floppy disk
drive to connect to your Macintosh LC. If you have nothing else to
connect to the Macintosh, you can go immediately to Chapter 2,
“Preparing the Software.” If you have devices other than floppy disk
drives to connect, you can skip ahead to the appropriate section in
this chapter.
You can use two types of Apple IIe floppy disk drives with the
Macintosh LC—the gray Apple 5.25 Drive and the white UniDisk
3.5 Drive. Earlier Apple II disk drives—the Disk II, UniDisk 5.25, and
DuoDisk drives, for instance—cannot be used with the Macintosh LC.
▲ Warning: Only two types of Apple II disk drives—the gray Apple
5.25 Drive and the white UniDisk 3.5 Drive—are compatible with the
Macintosh LC. Do not try to use any other type of Apple II disk drive with
the Macintosh LC. Doing so may damage the disk drive or the computer,
and may destroy the contents of your Apple II disks. ▲
Connecting the
Apple 5.25 Drive
Follow these steps to connect an Apple 5.25 Drive to the Macintosh LC:
▲ Warning: Before connecting anything to your computer, make sure the
power cord is plugged in and the power is turned off. The power cord
acts as a ground for your computer, protecting you from electrical shock,
even when the computer is turned off. ▲
12
Chapter 1: Preparing the Equipment
1. Plug the Y-shaped cable into the Apple IIe port on the
computer’s back panel, as shown in the figure.
The Y-shaped cable comes with the other Apple IIe Card materials.
Be sure the connectors line up correctly. Tighten the connector
screws to ensure a proper fit.
continues >
Chapter 1: Preparing the Equipment
13
2. Connect the Apple 5.25 Drive cable to the larger of the two
remaining connectors on the Y-shaped cable, as shown in
the figure.
Again, be sure the D-shaped connectors line up correctly, and tighten
the connector screws to ensure a proper fit.
▲ Warning: If you want to swap drives or devices connected to the
Y-shaped cable, be sure to turn off the computer first. If you change
devices while the computer is on, you may damage the device or
the computer, or both. ▲
14
Chapter 1: Preparing the Equipment
Connecting the
UniDisk 3.5 Drive
▲
Follow these steps to connect a UniDisk 3.5 Drive to the Macintosh LC:
Warning: Before connecting anything to your computer, make sure the
power cord is plugged in and the power is turned off. The power cord
acts as a ground for your computer, protecting you from electrical shock,
even when the computer is turned off. ▲
1. Plug the Y-shaped cable into the Apple IIe port on the
computer’s back panel, as shown in the figure.
The Y-shaped cable comes with the other Apple IIe Card materials.
Be sure the connectors line up correctly. Tighten the connector
screws to ensure a proper fit.
continues >
Chapter 1: Preparing the Equipment
15
2. Connect the UniDisk 3.5 Drive cable to the larger of the two
remaining connectors on the Y-shaped cable, as shown in
the figure.
Again, be sure the connectors line up correctly, and tighten the
connector screws to ensure a proper fit.
▲ Warning: If you want to swap drives or devices connected to the
Y-shaped cable, be sure to turn off the computer first. If you change
devices while the computer is on, you may damage the device or
the computer, or both. ▲
16
Chapter 1: Preparing the Equipment
Connecting more than
one disk drive
You can connect more than one Apple IIe disk drive to the Macintosh LC
by daisy-chaining them. However, the drives must be connected in the
correct order for them to work properly:
■
If you have two Apple 5.25 Drives, connect the first drive to the
Y-shaped cable. Then connect the second drive to the first drive by
plugging the connector from the second drive into the port on the
back of the first drive.
Apple
5.25 Drive
Chapter 1: Preparing the Equipment
Apple
5.25 Drive
17
■
If you have a UniDisk 3.5 Drive and one Apple 5.25 Drive, first
connect the UniDisk 3.5 Drive to the Y-shaped cable. Then connect
the Apple 5.25 Drive to the UniDisk 3.5 Drive by plugging the
connector from the Apple 5.25 Drive into the port on the back of
the UniDisk 3.5 Drive.
UniDisk
3.5 Drive
18
Chapter 1: Preparing the Equipment
Apple
5.25 Drive
■
If you have a UniDisk 3.5 Drive and two Apple 5.25 Drives, first connect
the UniDisk 3.5 Drive to the Y-shaped cable. Then connect the first Apple
5.25 Drive to the UniDisk 3.5 Drive by plugging the connector from
the 5.25 Drive into the port on the back of the UniDisk 3.5 Drive. Then
connect the second 5.25 Drive to the first 5.25 Drive by plugging the
connector from the second 5.25 Drive into the port on the back of the
first 5.25 Drive.
UniDisk
3.5 Drive
Apple
5.25 Drive
Apple
5.25 Drive
s
▲ Important: If you plan to use both a UniDisk 3.5 Drive and one or more
Apple 5.25 Drives with the Macintosh LC, you must position the UniDisk
drive first in the daisy chain. The disk drives will not work correctly if a
s
5.25 Drive is positioned first in the chain. ▲
▲ Warning: If you want to swap drives or devices connected to the Y-shaped
cable, be sure to turn off the computer first. If you change devices while the
computer is on, you may damage the device or the computer, or both. ▲
Chapter 1: Preparing the Equipment
19
Connecting
other devices
You may have an Apple IIe device—such as a joystick or hand
controls—that you’d like to use with the Macintosh LC. (Note: The only
joystick supported by the Apple IIe Card is the one with 9 pins in the
connector.) Follow these instructions:
▲ Warning: Before connecting anything to your computer, make sure the
power cord is plugged in and the power is turned off. The power cord
acts as a ground for your computer, protecting you from electrical shock,
even when the computer is turned off. ▲
1. Plug the Y-shaped cable into the Apple IIe port on the
computer’s back panel, as shown in the figure.
The Y-shaped cable comes with the other Apple IIe Card materials.
Be sure the connectors line up correctly. Tighten the connector
screws to ensure a proper fit.
20
Chapter 1: Preparing the Equipment
2. Connect the device’s cable connector to the smaller of the two
connectors on the Y-shaped cable, as shown in the figure.
Again, be sure the connectors line up correctly, and tighten the
connector screws to ensure a proper fit.
You can connect only one Apple IIe device at a time to the smaller
connector on the Y-shaped cable. If you want to use more than one
device, you’ll need to swap the devices.
▲ Warning: If you want to swap drives or devices connected to the
Y-shaped cable, be sure to turn off the computer first. If you change
devices while the computer is on, you may damage the device or
the computer, or both. ▲
Chapter 1: Preparing the Equipment
21
Connecting your old
Apple IIe hard disk
If you have an Apple SCSI hard disk connected to your original Apple IIe
computer, you can connect it to your Macintosh LC and use it just as you
would any other hard disk.
s
▲ Important: Only Apple SCSI hard disks can be connected to the
Macintosh LC. If the hard disk was manufactured by Apple and its cable
fits into the large SCSI port on the back of the Macintosh, you can
s
connect it. ▲
To prepare the hard disk so your Macintosh can store files on it, you must
erase all the files on it. Follow these steps to make copies of the files,
erase and initialize the hard disk, and connect it to your Macintosh.
22
Chapter 1: Preparing the Equipment
Before you begin: Make sure the hard disk is still connected to your
Apple IIe.
1. Turn on the hard disk and your Apple IIe.
2. Copy all the files on the hard disk to some other place.
You can copy the files to a series of floppy disks or to a file server.
3. Turn off your Apple IIe and the hard disk.
4. Make sure your Macintosh LC is turned off.
5. Connect the hard disk to your Macintosh LC.
If you have another SCSI device connected to your Macintosh LC, see
the manuals that came with your hard disk or your Macintosh for
detailed information on connecting several SCSI devices in a chain.
6. Plug in the hard disk, then turn it on.
7. Initialize the hard disk using Apple HD SC Setup.
You can find complete instructions for preparing the hard disk using
Apple HD SC Setup in the manuals that came with your Macintosh or
with the hard disk.
8. If you like, you can copy the files you backed up in step 2 onto
your hard disk, provided you created an Apple IIe partition, as
described earlier in this chapter.
Chapter 1: Preparing the Equipment
23
What’s next
24
You’ve successfully connected your Apple IIe disk drives and other
devices to the Macintosh LC. Next, you must install the software that
allows you to use the Apple IIe Card so you can start your work.
Chapter 1: Preparing the Equipment
Chapter 2
Preparing the Software
A
ll your equipment should now be ready. Once you install the
software, as described in this chapter, you’ll be ready to start using
Apple IIe software on your Macintosh.
25
Checking for
late-breaking news
You can see if there were any last-minute changes to the instructions
for the Apple IIe Card by checking the Read Me file, as described in
this section.
Before you begin: If your computer is off, turn it on. If your computer
is on, quit any programs you might be running.
1. Insert the IIe Installer Disk into the disk drive.
The disk’s icon appears.
2. If necessary, open the IIe Installer Disk by double-clicking
its icon.
The disk’s window appears.
3. Open the Read Me file by double-clicking its icon.
Double-click to read
late-breaking news.
4. Read the file.
If necessary, use the scroll bar to see the whole document.
5. If you like, print the file.
To print the Read Me file, make sure your printer is on. Then choose
the Print command from the File menu. When the print dialog box
opens, click the Print button.
6. Choose Quit from the File menu.
The file closes.
26
Chapter 2: Preparing the Software
Preparing the
startup disk for
your Apple IIe Card
If you have a hard disk
To use your Apple IIe Card, you must have certain files on your Macintosh
startup disk. (A startup disk is any disk—either a hard disk or a 3.5-inch
floppy disk—that contains a System Folder.)
This section explains how to install the new Apple IIe Card software on
your startup disk and how to create a new startup disk, if necessary.
If you have a hard disk, use it as your Apple IIe Card startup disk. This
section explains how.
Once you finish this section, it’s important to remember that you
installed the software on your hard disk. Many tasks in this book will have
special notes for hard disk startup people. When you see one of these
notes, remember that it applies to you.
❖
Note for people who partitioned their hard disk in Chapter 1:
This installation procedure installs the Apple IIe Card software
on the Macintosh partition of your hard disk. ❖
Before you begin: If your computer is off, turn it on. If your computer
is on, quit any programs you are running.
1. Insert the IIe Installer Disk into the built-in disk drive and
double-click its icon.
The disk’s window opens.
2. Open the Installer program by double-clicking its icon.
Double-click to open
the Installer program.
After a moment, information about the Installer appears on
your screen.
continues >
Chapter 2: Preparing the Software
27
3. Once you’ve read the information, click OK.
The Easy Install screen appears, as shown in the next step.
4. If you have more than one hard disk, click the Switch Disk
button to select the hard disk where you want the software
installed.
Click this
button . . .
. . . until
the name
of the
hard disk
you want
appears
here.
5. Click Install.
The Installer copies the files to your hard disk while displaying its
progress. After it’s finished, it displays a dialog box, as shown in the
next step.
28
Chapter 2: Preparing the Software
6. Click Quit.
7. Notice the three new files installed on your hard disk.
Open your hard disk by double-clicking its icon and notice these
three new icons:
There’s also a fourth new file in your System Folder. It’s called
ProDOS File System.
continues >
Chapter 2: Preparing the Software
29
8. Choose the Restart command from the Special menu.
The computer ejects the IIe Installer Disk and restarts. If you created
a ProDOS partition in Chapter 1, you see its icon on the desktop after
the computer restarts.
9. Find the Quick Reference card in the back of this book and
mark the blank that says you are a hard disk startup person.
It’s vital for you to remember where you installed your software
because many tasks later in this book have different instructions for
hard disk startup people and for floppy disk startup people.
10. Skip ahead to the “What’s Next” section at the end of this
chapter.
30
Chapter 2: Preparing the Software
If you do not have
a hard disk
If you don’t have a hard disk, this section tells you how to prepare a
floppy startup disk you can use instead.
s
▲ Important: If you installed the software on your hard disk in the
previous section, you should skip this section and move ahead to
s
“What’s Next” at the end of this chapter. ▲
Included with your Apple IIe Card is a disk called IIe Startup Disk, which
has the necessary Apple IIe Card software and the correct version of
Macintosh system software already installed. To use it, you need to make
a copy of the disk and make sure you have the correct software for your
printer, as described in the next two sections.
Once you finish this section, it’s important to remember that you have
your Apple IIe Card software on a floppy disk. Many tasks in this book
will have special notes for floppy disk startup people. When you see one
of these notes, remember that it applies to you.
Making a copy of the floppy startup disk
To make sure you always have a safe copy of the IIe Startup Disk, don’t
ever use the original. Instead, make a copy and set the original aside for
safekeeping.
You can find instructions for copying disks in the books that came with
your Macintosh.
When you are finished, put the original away and keep the copy ready for
use. Don’t lock the copy.
Chapter 2: Preparing the Software
31
Setting up the printer software
If you don’t have a printer, skip this section. If you do have a printer,
follow these steps to set up your printer software:
1. Shut down your Macintosh.
If your Macintosh is on, quit any programs you might be running,
then choose Shut Down from the Special menu.
2. Insert your copy of the IIe Startup Disk into the built-in
floppy disk drive.
3. Turn on the computer and the monitor.
If you see a Restart button on the screen, click it.
The computer starts up.
4. Select the Chooser from the Apple menu.
After a moment, the Chooser window appears.
32
Chapter 2: Preparing the Software
5. Click the icon that represents the kind of printer you want
to use.
If your Chooser window looks
different, you may have to use the
scroll bar to see all these choices.
ImageWriter II,
connected over
a network
ImageWriter II,
connected directly
Any LaserWriter
or LaserWriter II,
plus the Personal
LaserWriter NT
ImageWriter LQ,
connected over
a network
Any Personal
LaserWriter, except
the Personal
LaserWriter LS or
LaserWriter NT
ImageWriter LQ,
connected
directly
❖
Your printer isn’t there? If the kind of printer you want to use isn’t in
the Chooser, you need to install the printer software. Turn now to
Appendix E, “Installing Printer Software for the IIe Startup Disk.” ❖
continues >
Chapter 2: Preparing the Software
33
6. If the printer is connected over a network, you need to click
the name of your printer and perhaps also the zone it’s in.
See the reference book that came with your Macintosh for more
information on using the Chooser.
7. Choose Close from the File menu.
8. Find the Quick Reference card in the back of the book and
mark the blank that says you are a floppy disk startup person.
It’s vital for you to remember where you installed your software
because many tasks later in this book will have different instructions
for floppy disk startup people and for hard disk startup people.
What’s next
You have one more step before you’re finished installing the Apple IIe
hardware and software. You must use a software program to arrange
the Apple IIe accessory cards in your Macintosh LC. But first, you must
become better acquainted with the Apple IIe environment on the
Macintosh.
The next chapter, “Learning to Use the Apple IIe Card,” introduces you
to the Apple IIe environment. Chapter 4, “Setting Up Cards and Slots,”
explains how to use the Apple IIe Card software to arrange the cards in
your Macintosh LC.
34
Chapter 2: Preparing the Software
Chapter 3
Learning to Use the
Apple IIe Card
T
his chapter teaches you step by step how to run Apple IIe programs
on your Macintosh LC. You’ll learn how to
■
switch between the Macintosh environment and the Apple IIe
environment
■
run Apple IIe programs on your Macintosh
■
control your Apple IIe environment using the Option Panel
■
organize your Apple IIe and Macintosh files
s
▲ Important: Before you can do the exercises in this chapter, you must
set up your Apple IIe equipment and install the accompanying software
s
as described in Chapters 1 and 2. ▲
35
Important details for
floppy disk startup
people
In the last chapter, you installed special software for your Apple IIe Card,
and you are now either a hard disk startup person or a floppy disk
startup person. ( You recorded which you were on the Quick Reference
card. See the previous chapter if you can’t remember which you are.)
If you’re a hard disk person, this section does not pertain to you.
Skip ahead to “Switching Between the Macintosh and Apple IIe
Environments.”
s
▲ Important: If you are a hard disk startup person, stop reading this
section now and skip to “Switching Between the Macintosh and
s
Apple IIe Environments.” ▲
If you’re a floppy disk startup person, you need to know a crucial
technique—starting up from the IIe Startup Disk—because it’s the only
way to run Apple IIe programs and manipulate Apple IIe files. The
technique is described in the next section, “Starting Up From the
IIe Startup Disk.”
Starting up from the
IIe Startup Disk
To start up from the IIe Startup Disk, you must turn on your computer
with the disk in the disk drive, as shown in these steps.
s
▲ Important: If you are a hard disk startup person, stop reading this
section now and skip to “Switching Between the Macintosh and
s
Apple IIe Environments.” ▲
1. If your Macintosh LC is on, shut it down.
Quit any programs you might be running and choose Shut Down
from the Special menu. You don’t need to turn off the power.
36
Chapter 3: Learning to Use the Apple IIe Card
2. While the computer is shut down, insert your copy of the
IIe Startup Disk into the built-in disk drive.
Make sure the disk is not locked.
3. Turn on the Macintosh LC.
If you see a Restart button on your screen, click it.
You’ve just started up from the IIe Startup Disk, so you can run Apple IIe
programs and manipulate Apple IIe files until you shut down or restart
the Macintosh LC.
Why you need to start up
from the IIe Startup Disk
This section explains why you need to start up from the IIe Startup Disk
to work with Apple IIe files or programs. (If you’re not interested, you
can skip this section.)
Normally, Macintosh computers can’t recognize Apple IIe disks. (In fact,
if you insert an Apple IIe disk into a normal Macintosh, the Macintosh
asks if you want to erase it.) To be able to recognize Apple IIe disks, your
Macintosh needs a special startup document, called ProDOS File System,
in the System Folder it uses to start up.
If you’re a floppy disk startup person, either you don’t have a hard disk
or the System Folder on your hard disk doesn’t contain this special file.
However, the System Folder on the IIe Startup Disk does contain it.
When you restart the computer with the IIe Startup Disk in the disk
drive, the ProDOS File System document is loaded, enabling the
Macintosh to recognize Apple IIe files.
Chapter 3: Learning to Use the Apple IIe Card
37
Switching between
the Macintosh
and Apple IIe
environments
Switching to the
Apple IIe environment
Having a Macintosh LC with an Apple IIe Card is like having two
computers in one. You can easily have the computer switch between
acting like a Macintosh and acting like an Apple IIe. The exercises in
this section explain how.
You enter the Apple IIe environment simply by double-clicking an icon,
as shown in this exercise.
Before you begin: Your Macintosh should be turned on and you should
quit any programs you might be running. Close any windows
on your desktop.
1. If you’re a floppy disk startup person, make sure you’ve
started up from the IIe Startup Disk.
See the instructions in “Starting Up From the IIe Startup Disk,”
at the beginning of this chapter.
2. Open your startup disk by double-clicking its icon.
Double-click
whatever icon
is in this corner.
( Yours may look
different.)
38
Chapter 3: Learning to Use the Apple IIe Card
3. Double-click the IIe Startup icon.
Double-click this
icon to switch to
the Apple IIe
environment.
In a few moments, you see an Apple IIe screen with a BASIC prompt
and a blinking cursor.
BASIC prompt
Congratulations! You’ve turned your Macintosh LC into an Apple IIe.
Once you double-click the IIe Startup program, your Macintosh LC is in
the Apple IIe environment: Now the computer behaves as if it were an
Apple IIe.
You’ll learn more about the Apple IIe environment later in this chapter,
but first you’ll learn how to return to the Macintosh environment.
Chapter 3: Learning to Use the Apple IIe Card
39
Switching back to the
Macintosh environment
Follow these steps to return to the Macintosh environment:
1. Press Control-x-Esc to open the Option Panel.
Press all three keys at once. If you have the standard keyboard, all
three keys are on the same row as the Space bar. Do not press the
Option key.
ctrl
esc
The Option Panel opens, as shown in the next step.
2. Click the Quit IIe button.
Click this button to return to
the Macintosh environment.
You return to the Macintosh environment.
40
Chapter 3: Learning to Use the Apple IIe Card
Special note for floppy disk startup people
If you are a floppy disk startup person, and if you are finished using
Apple IIe programs and files for a while, you may want to return to using
your usual startup disk. To do so, choose Restart from the Special menu.
Summary
Running an
Apple IIe Program
To enter the Apple IIe environment, just start up from the correct
disk and double-click the IIe Startup icon. To return to the Macintosh
environment, open the Option Panel by pressing Control-x-Esc and
then click the Quit IIe button.
There are two ways to start running Apple IIe programs. One way works
if you’re in the Macintosh environment; the other way works if you’re in
the Apple IIe environment.
This section has two exercises—one to illustrate each method.
Depending on your setup, you may be able to complete only one
of them.
Method 1: Double-clicking
a Macintosh icon
When you are in the Macintosh environment, you can launch
Apple IIe programs the same way you launch Macintosh programs—
by double-clicking an icon.
Can you do the double-click exercise?
To do this exercise, you must have an Apple IIe program on a 3.5-inch
ProDOS disk. The program must not be copy-protected.
You must also have one empty disk drive. Consequently, you cannot do
this exercise if you’re a floppy disk startup person who has only one
floppy disk drive.
If you can’t do this exercise, skip ahead to “Method 2: Restarting the
Apple IIe Card.”
Chapter 3: Learning to Use the Apple IIe Card
41
The double-click exercise
Follow these steps to launch an Apple IIe program by double-clicking
its icon.
Before you begin: You’ll need one of your own Apple IIe program disks
to complete this exercise. Also, your Macintosh should be on, you should
be in the Macintosh environment, and you should quit any programs you
might be running.
1. If you’re a floppy disk startup person, make sure you’ve
started up from the IIe Startup Disk.
See the instructions in “Starting Up From the IIe Startup Disk,”
at the beginning of this chapter.
2. Find one of your Apple IIe program disks.
If you want to use one of the Macintosh computer’s built-in disk
drives, the program should be on a ProDOS disk and it should not
be copy-protected.
3. Insert the disk into a built-in disk drive.
The disk’s icon appears on the desktop.
4. Open the icon of the disk you just inserted.
Double-click the icon to open it.
42
Chapter 3: Learning to Use the Apple IIe Card
5. Choose “by Icon” from the View menu.
6. Double-click the icon of the program you want to run.
Look for an icon that has a name that ends with the word “SYSTEM.”
Apple IIe programs
have this icon.
After a moment, the program appears on the screen.
7. Use the program as you wish.
8. When you’re ready to quit, save your work and return to the
Macintosh environment.
Press Control-x-Esc and click the Quit IIe button.
In short, you can run Apple IIe programs by double-clicking their icons.
(Remember, to see the icons you must be in the Macintosh environment,
and the program must be on a ProDOS disk. Some copy-protected
programs may not work.)
Chapter 3: Learning to Use the Apple IIe Card
43
Method 2: Restarting the
Apple IIe Card
You can also run Apple IIe programs in any of the usual Apple IIe ways.
This exercise demonstrates one of these methods.
Before you begin: You’ll need one of your own Apple IIe program disks
to complete this exercise. Also, your Macintosh should be on, you should
be in the Macintosh environment, and you should quit any programs you
might be running. Finally, if you have a floppy disk in a 5.25-inch disk
drive, eject it.
1. If you’re a floppy disk startup person, make sure you’ve
started up from the IIe Startup Disk.
See the instructions in “Starting Up From the IIe Startup Disk,” at the
beginning of this chapter.
2. Open your startup disk—the disk at the upper-right corner of
your screen—by double-clicking its icon.
3. Double-click the icon of the IIe Startup program.
Double-click this
icon to switch to the
Apple IIe environment.
4. Find one of your original Apple IIe program disks.
If you want to use one of the Macintosh computer’s built-in disk
drives, the program should be on a ProDOS disk. Some copyprotected programs won’t work correctly.
44
Chapter 3: Learning to Use the Apple IIe Card
5. If there’s already a disk in your disk drive (or if you have two
disk drives and both are full), press x-Shift-1 to eject a disk.
Press all three keys at once.
6. Insert your Apple IIe program disk into the disk drive.
7. Reset the Apple IIe Card by pressing Control-x-Reset.
Press all three keys at once. The Reset key on a typical Macintosh LC
keyboard has a triangle on it and is above the top row of keys:
Reset key
Pressing these three keys resets the Apple IIe Card. When the
computer resets, the program on the disk starts.
Chapter 3: Learning to Use the Apple IIe Card
45
Using the
Option Panel
The next few sections introduce you to the Apple IIe Option Panel. The
Option Panel allows you to set Apple IIe options and provides a means
of switching between the Apple IIe and Macintosh environments.
❖
Opening and closing
the Option Panel
By the way: For more detailed information about the Option
Panel, see “Personalizing Your Apple IIe Work Environment”
and “Configuring Cards and Slots” in Chapter 5. ❖
As you’ve seen before, while you’re in the Apple IIe environment you just
press Control-x-Esc to open the Option Panel.
Before you begin: Make sure you’re in the Apple IIe environment.
You should either have an Apple IIe program or the BASIC prompt (])
on your screen. (If not, double-click the IIe Startup icon.)
1. If you’re a floppy disk startup person, make sure you’ve
started up from the IIe Startup Disk.
See the instructions in “Starting Up From the IIe Startup Disk,” at the
beginning of this chapter.
2. Press Control-x-Esc to open the Option Panel.
Be careful not to press Option-x-Esc, because that combination of
keys stops the program from running.
The Option Panel appears on the screen, as shown in the next step.
Normally, you would do some work before leaving the Option Panel,
but now the first skill you’ll learn is how to return to your Apple IIe
work.
46
Chapter 3: Learning to Use the Apple IIe Card
3. Click the Continue button.
Click here
to return
to your
Apple IIe
work.
The Option Panel closes and you return to your Apple IIe work.
In short, to open the Option Panel, press Control-x-Esc; to return to
your work, click Continue.
Chapter 3: Learning to Use the Apple IIe Card
47
Exploring the
Option Panel
In this exercise you learn how the Option Panel works.
Before you begin: Make sure you’re in the Apple IIe environment.
1. Press Control-x-Esc to open the Option Panel.
2. Use the large scroll bar to view the different parts of the
Apple IIe environment you can control.
Click the up and
down arrows of
this scroll bar to
see the different
icons.
3. Click the Memory Card icon.
You may have to use the scroll bar to see the icon. The Memory Card
icon is toward the top of the list.
When you click the Memory Card icon, the options you see on the
right side of the Option Panel change. Each icon on the left has a
different set of options associated with it.
48
Chapter 3: Learning to Use the Apple IIe Card
4. Click the General icon at the top of the list.
You may have to use the scroll bar to see the General icon. When you
click the icon you see the options associated with the General icon.
5. Click the Help button at the bottom of the Option Panel.
Information about the General options appears.
6. Click OK to continue.
7. Click “Simple Beep” to change the Apple IIe Card’s beep
sound.
The computer plays the new sound. Now whenever an Apple IIe
program beeps at you, you’ll hear this sound. You can change the
beep to any sound you like, though it’s a good idea to choose a
short beep to avoid delays.
8. Pull down the Apple menu and choose any item.
For example, you can choose the Alarm Clock or the Control Panels.
Whenever you’re in the Option Panel you have full access to the
menu bar. That also means that you can switch between the Apple IIe
environment and any Macintosh programs without quitting either.
9. Close the window by clicking its close box.
10. Scroll down and click the Mouse Card icon.
The Mouse Card options appear.
continues >
Chapter 3: Learning to Use the Apple IIe Card
49
11. Click each setting in turn and move the mouse gently back
and forth to see what effect it has.
Experiment with
these settings.
Changing the setting controls how sensitive the pointer is to the
mouse’s movements. When the setting is slow, a small mouse
movement moves the pointer only a very little; when the setting
is fast, a small movement moves the pointer much more.
12. Click the setting you like best.
50
Chapter 3: Learning to Use the Apple IIe Card
Practicing moving the cards
in the Option Panel
In this section, you’ll practice moving cards. In the next chapter, you
will use these skills to move the cards into the appropriate slots. On
your Macintosh LC, you can install and move Apple IIe cards simply
by dragging icons on the screen.
Before you begin: Make sure the Apple IIe Option Panel is still
displayed on your screen.
1. Scroll down the list of icons and click the Slots icon.
The Slot Configuration panel appears.
These icons
represent Apple IIe
accessory cards.
These bins represent
Apple IIe slots.
These bins hold
spare cards.
In your original Apple IIe computer, you would have had to move the
cards by actually opening the case and physically pulling them out and
putting them into different slots. With the Option Panel, all you have
to do is drag the icons with your mouse. ( Wait until the next step to
try it.)
continues >
Chapter 3: Learning to Use the Apple IIe Card
51
2. Use the mouse to drag the Clock icon from slot 2 to slot 4.
Click this icon and
while holding
. . . drag it here
down the mouse and release the
button . . .
mouse button.
When you release the mouse button, the two icons switch places and
both become gray. (They become gray because the change isn’t
complete until you restart the Apple IIe Card—but don’t worry about
that because this is just practice.)
3. Drag the Mouse icon back to slot 4.
The two icons switch back to their original positions.
52
Chapter 3: Learning to Use the Apple IIe Card
4. Drag the Clock icon from slot 2 to any spare slot.
Drag the Clock
icon from here . . .
. . . to here.
The icon moves.
5. Drag the icon back to slot 2.
6. Return to the Macintosh environment by clicking Quit IIe.
After you return to the Macintosh environment, you may notice that
you have a new icon:
The IIe Prefs file records the choices that you make in the
Option Panel.
Chapter 3: Learning to Use the Apple IIe Card
53
Managing
Apple IIe files
When you’re in the Macintosh environment, you can treat Apple IIe
programs and other files as if they were ordinary Macintosh files,
provided the files are on a hard disk or a 3.5-inch disk. To copy files
to or from a 5.25-inch disk, you must use an Apple IIe copy program.
Follow the steps in this section to see how similar manipulating Apple IIe
files is to manipulating Macintosh files.
Before you begin: Make sure you’re in the Macintosh environment.
Quit any programs you might be running. Also, have at hand any of your
unlocked old Apple IIe program disks. The disk must be a 3.5-inch
ProDOS disk.
1. If you’re a floppy disk startup person, make sure you’ve
started up from the IIe Startup Disk.
See the instructions in “Starting Up From the IIe Startup Disk,” at the
beginning of this chapter.
2. Insert a 3.5-inch ProDOS Apple IIe program disk into a built-in
disk drive.
You can use any 3.5-inch ProDOS disk so long as it isn’t copyprotected.
❖
Don’t have an empty disk drive? Eject a disk by pressing x-Shift-1.
Even though the disk you inserted is an Apple IIe disk, it appears on
the desktop just as Macintosh disks do.
3. Open the disk by double-clicking its icon.
Its window appears.
54
Chapter 3: Learning to Use the Apple IIe Card
❖
4. Choose “by Icon” from the View menu.
For example, the Utilities disk for the Apple IIe looks like this:
Program files and
system files look
like this.
Other files look
like this.
5. Choose “by Size” from the View menu.
The window changes to show a list of all the files. The biggest files
are at the top of the list, the smallest at the bottom.
6. Click the file at the bottom of the list once to select it.
You may have to use the scroll bar to find it.
After you click it, the icon is highlighted.
7. Choose Duplicate from the File menu.
The file is duplicated and the copy’s icon is highlighted.
8. Drag the icon of the new file to the Trash.
9. Drag the icon at the bottom of the list to the icon of your
startup disk.
Your startup disk is at the top-right corner of your screen.
Dragging the icon causes the file to be copied.
10. If you like, drag the new icon to the Trash.
To see the new icon (so you can drag it to the Trash), you may first
have to open your disk by double-clicking its icon.
Chapter 3: Learning to Use the Apple IIe Card
55
Naming files on
Apple IIe disks
Using Macintosh programs
with Apple IIe files
When you’re in the Macintosh environment, you can only give files on
Apple IIe disks legal ProDOS names, with two exceptions:
■
You can use spaces in the names. When you view a filename that
contains spaces in the Apple IIe environment, the spaces are
automatically converted to periods. For example, the name “MY FILE”
in the Macintosh environment would appear as “MY.FILE” in the
Apple IIe environment.
■
You can use lowercase letters in the names. When you view a filename
that contains lowercase letters in the Apple IIe environment, the
letters are automatically converted to uppercase. For example, the
name “File” in the Macintosh environment would appear as “FILE”
in the Apple IIe environment.
You may be able to use your Macintosh programs to view and edit your
Apple IIe files. For example, if you wrote a letter using an Apple IIe
program, you might be able to edit the letter with your Macintosh word
processor.
For more details, see “Using Apple IIe Files With Macintosh Programs”
in Chapter 5.
56
Chapter 3: Learning to Use the Apple IIe Card
Chapter 4
Setting Up Cards and Slots
B
efore you begin using your Apple IIe Card in earnest, you must
go to the Option Panel and set up the cards and slots to reflect your
own needs.
In this chapter you will
■
decide how you want to arrange your cards and slots
■
go to the Option Panel and arrange the cards according to your needs
■
set any options required by the cards you’ve installed
57
Deciding how to
arrange the cards in
the Option Panel
In this section, you will plan which Option Panel cards to put in which
Option Panel slots. To work properly, Apple IIe programs must know
where various cards are installed. For example, in order to print,
Apple IIe programs must know where the Printer Card is. Furthermore,
some programs may require certain cards to be in certain slots.
Your Apple IIe programs may have special requirements; this section
tells you how to convert those special needs into a plan for arranging
the cards.
You can go about creating your plan in one of two ways:
58
■
Base your plan on how accessory cards are installed in your
original Apple IIe. If you have an Apple IIe computer with a number
of accessory cards installed, you should arrange the cards in the
Option Panel similarly, as described in the following section, “Basing
the Plan on Your Original Apple IIe.”
■
Base your plan on the typical arrangement used by a typical
Apple IIe user. If you don’t have an Apple IIe computer or if you
prefer to start from scratch, skip ahead to the next section, called
“Basing the Plan on a Typical Apple IIe.”
Chapter 4: Setting Up Cards and Slots
Basing the plan on your
original Apple IIe
If you already have an Apple IIe computer, you’ve probably taken care
to arrange the cards so that they work well with all your programs.
In this section, you will use paper and pencil to write down the way your
Apple IIe accessory cards are currently installed and then modify
this arrangement to work in your Macintosh LC.
In this section, you only write down your plans. You’ll implement the
plans later in this chapter.
1. Write down the way the accessory cards are arranged in your
Apple IIe.
For example, one Apple IIe owner may have written the following:
Sample User
SLOT 1. Super Serial-Printer
SLOT 2. Super Serial-Modem
SLOT 3. MONITOR (built-in)
SLOT 4. Empty
SLOT 5. Empty
SLOT 6. Empty
SLOT 7. Workstation Card
The third slot in your Apple IIe computer may not have an accessory
card installed in it; but even so, it serves as the monitor accessory card.
continues >
Chapter 4: Setting Up Cards and Slots
59
2. If you have a Super Serial Card connected to a printer, scratch
it out and write “Printer Card” instead.
The Printer Card is a special card that allows you to select the printer
you want by using the Macintosh Chooser desk accessory.
Sample User
SLOT 1. Super Serial-Printer Printer Card
SLOT 2. Super Serial-Modem
SLOT 3. MONITOR (built-in)
SLOT 4. Empty
SLOT 5. Empty
SLOT 6. Empty
SLOT 7. Workstation Card
3. Scratch out the following Apple IIe names and replace them
with the new Option Panel names.
60
Original Apple IIe Name
New Option Panel Name
Apple IIe Workstation Card
AppleShare
Apple IIe Memory
Expansion Card
Memory Card
Apple IIe Mouse Card
Mouse Card
UniDisk 3.5 Interface Card
SmartPort
clock card
Clock Card
Apple 5.25 Drive
Interface Card
5.25 Drive
Chapter 4: Setting Up Cards and Slots
For example, a user who had the Apple IIe Workstation Card in slot 7
would scratch it out and write in “AppleShare” instead:
Sample User
SLOT 1. Super Serial-Printer Printer Card
SLOT 2. Super Serial-Modem
SLOT 3. MONITOR (built-in)
SLOT 4. Empty
SLOT 5. Empty
SLOT 6. Empty
SLOT 7. Workstation Card AppleShare
s
▲ Important: Your new Apple IIe Card can provide the functions of
almost all the standard Apple IIe accessory cards. Unfortunately, there
are a few specialized accessory cards that it cannot replace. If you have
an accessory card not mentioned in this section or listed in this
s
table, you won’t be able to install it in the Macintosh LC. ▲
continues >
Chapter 4: Setting Up Cards and Slots
61
4. Fill in empty slots with any unused Option Panel cards you
think might be useful.
Unlike the accessory cards for your original Apple IIe, the Option
Panel cards are provided at no additional cost, so you should use as
many as you can. Use this chart to decide which Option Panel cards
would be the most useful; use your Apple IIe program manuals to
decide which slots to put them in.
Card name
Why you would want to use it
5.25 Drive
To use an Apple 5.25 Drive
AppleShare
To connect to file servers
Clock
To give Apple IIe programs access to the date and time
Memory Card
To increase the amount of memory your Apple IIe programs
can use
Mouse Card
To use the mouse for Apple IIe programs
Printer Card
To print
Serial Card
(Modem Port)
To connect a device to the modem port of your
Macintosh LC
Serial Card
(Printer Port)
To connect a device to the printer port of your
Macintosh LC
SmartPort
To use the built-in floppy disk drive, an Apple
UniDisk 3.5 Drive, or a hard disk
5. Skip ahead to “Arranging the Cards in the Option Panel”
in this chapter.
62
Chapter 4: Setting Up Cards and Slots
Basing the plan on
a typical Apple IIe
When you first install the Apple IIe Card software, the cards are already
installed in one of the most typical arrangements. You should use this
arrangement as the basis of your plans. Write it down on a piece of paper
(as shown in the figure), and then change it according to the instructions
that follow.
Typical IIe
SLOT 1. Printer Card
SLOT 2. Clock Card
SLOT 3. MONITOR (built-in)
SLOT 4. Mouse Card
SLOT 5. SmartPort
SLOT 6. 5.25 Card
SLOT 7. Memory Card
Many people can use this basic arrangement just as it is. However, if you
have any of the following special requirements, you may have to shuffle
the cards, as explained in the next two sections:
■
File servers. The “File Servers” section explains how to rearrange
your cards if you’re connected to a file server.
■
Modems and other serial devices except for printers. The
“Modems and Other Serial Devices Except for Printers” section
explains how to rearrange your cards if you’re connected to any
non-printer serial device.
If you don’t have either of these special needs, skip to “Setting the
Options for Your Cards,” later in this chapter.
Chapter 4: Setting Up Cards and Slots
63
File servers
If you want to use a file server, you need the AppleShare card. The
AppleShare card is usually installed in slot 7. (See your Apple IIe
program manuals to determine whether your programs have different
requirements.)
To install the AppleShare card, you’ll have to remove one of the others.
Since the AppleShare card typically goes in slot 7, the most tempting
card to remove is the Memory Card, which is already there. If you want
to move it, here are some suggestions where you might move the
Memory Card:
■
Slot 2, replacing the Clock Card. If none of your programs uses it, you
can remove the Clock Card. However, if you have a modem, you’ll
probably need slot 2 for the modem port Serial Card.
■
Slot 4, replacing the Mouse Card. If none of your programs uses a
mouse, you can remove the Mouse Card.
Use this information to change the plans you wrote down earlier.
Modems and other serial devices except for printers
Serial devices are devices, such as a modem, that plug into the printer
port or the modem port on the back of the Macintosh.
❖
64
Why not printers? The most common serial device plugged into the
back of the Macintosh is a printer. However, printers require the
special Printer Card, which is already installed into slot 1—so you
don’t need to do anything special to arrange to print. The only
exception to this rule is old non-Apple serial printers that are
commonly used with Apple IIe computers. These printers still require
the Serial Cards. ❖
Chapter 4: Setting Up Cards and Slots
To support a non-printing serial device, you need either of the two
serial cards:
■
If you have a non-printing device plugged into the modem port,
you need the Serial Card with a phone icon on it.
■
If you have a non-printing device plugged into the printer port, you
need the Serial Card with a printer icon on it. ( You’ll have to make
sure AppleTalk is turned off in the Macintosh Chooser to use your
device.)
Serial Cards are most commonly placed in slot 2. See your Apple IIe
program manuals to determine whether your programs have different
requirements.
Use this information to change the plans you wrote down earlier.
Arranging the cards in
the Option Panel
Now that you have your plans written down, you’ll use the Option Panel
to move the cards according to your plan.
Before you begin: Make sure your Macintosh LC is turned on and
you’re in the Macintosh environment. Also, make sure that you’ve written
down your plans as described earlier in this chapter.
1. If you’re a floppy disk startup person, make sure you’ve
started up from the IIe Startup Disk.
See the instructions in “Starting Up From the IIe Startup Disk,” at the
beginning of Chapter 3.
2. Double-click the IIe Startup icon.
You enter the Apple IIe environment.
3. Press Control-x-Esc to open the Option Panel.
The Option Panel appears.
continues >
Chapter 4: Setting Up Cards and Slots
65
4. Use the big scroll bar to scroll down until you see the
Slots icon.
5. Click the Slots icon.
The slots and cards are displayed.
6. Drag the card icons to the slots where they belong.
If you don’t know how to move the card icons, see “Practicing Moving
the Cards in the Option Panel” in Chapter 3.
This figure shows the names of the icons:
Printer Clock
Card
Card
Monitor Mouse SmartCard
Card
Port
Serial Card
(Printer Port)
Serial Card
(Modem Port)
66
AppleShare
Card
Chapter 4: Setting Up Cards and Slots
5.25
Drive
Memory
Card
7. Click Restart IIe.
Your changes don’t go into effect until you restart the Apple IIe.
Your cards are now installed. However, some of the cards you’ve installed
may not work until you adjust some of their settings, as explained in the
next section.
Setting the options
for your cards
Some cards have settings you can adjust. The two Serial Cards require
special attention: They won’t work until you declare what sort of device
is connected to them.
This chapter does not explain how to adjust the settings. That
information is available in great detail in Chapter 5, “Reference.” ( You can
use the index or table of contents to find the exact page numbers.)
However, the following table lists the ten cards you might have installed
and describes how you can adjust each one of them (if at all). In most
cases, you make the adjustments in the Option Panel.
Chapter 4: Setting Up Cards and Slots
67
Card
Adjustments you can
make in the Option Panel
Other adjustments
you can make
5.25 Drive
None
None
AppleShare
None
Select file servers using the
Apple IIe program Chooser.II
Printer Card
Adjust the amount of time your printer
has to finish printing
Select which printer you want to use
with the Macintosh Chooser program
Clock Card
None
None
Memory Card
Adjust the amount of memory your
Apple IIe programs can use
None
Serial Cards
Define the characteristics of the devices
attached to your Macintosh computer’s
modem and printer ports
None
Monitor Card
Using the General Controls panel, set
whether you want text to appear whiteon-black or vice versa and declare
whether you have a color monitor
None
Mouse Card
Adjust the responsiveness of your mouse
None
SmartPort
Determine the scanning order of your
floppy disk and hard disk drives
None
s
▲ Important: When you click an icon in the Option Panel, if you see a
message telling you that its card is not installed in any slot, you must
install the card before the changes have any effect. To find out exactly
what the problem is, click the Slots icon. If the card you want is not in
one of the seven active slots, drag it to the appropriate slot, then click
Restart IIe. If the card is already in a slot, clicking Restart IIe will finish
s
installing it. ▲
68
Chapter 4: Setting Up Cards and Slots
Chapter 5
Reference
T
his chapter provides instructions for using all the features of the
Apple IIe Card and the IIe Startup program.
This is a task-oriented reference chapter. That is, you don’t need to read
its sections consecutively. When you need some specific information
about using the Apple IIe Card or the IIe Startup program, just look up
the task you want to accomplish and follow the step-by-step instructions
you find there.
s
▲ Important: If you haven’t learned how to use the Apple IIe Card
and the IIe Startup program yet, you might prefer to go first through
Chapter 3, “Learning to Use the Apple IIe Card.” Chapter 3 is a tutorial
that guides you step by step through some exercises in running
s
Apple IIe programs on the Macintosh LC. ▲
69
Starting up the
IIe Startup program
You must start up the IIe Startup program before you can run Apple IIe
programs on the Macintosh LC.
To start up the IIe Startup program, follow these steps:
Before you begin: Turn on your Macintosh LC. If your Macintosh is
already on, return to the Finder (either by quitting any programs you
might be running or by choosing Finder from the Application menu
or the Apple menu).
1. Determine whether you are a floppy disk startup person
or a hard disk startup person.
How you set up the software in Chapter 2 determines whether you’re
a floppy disk or a hard disk startup person. You may have recorded
which you are on the Quick Reference card in the back of the manual.
If you can’t remember, here’s how to tell:
■
If you do not have a hard disk you are a floppy disk startup
person.
■
If you have a hard disk, open the System Folder by double-clicking
it. If the System Folder contains a file called “ProDOS File System,”
you are a hard disk startup person. Otherwise, you are a floppy
disk startup person. The file may be inside the Extensions Folder
within the System Folder.
2. If you are a floppy disk startup person, start up your
Macintosh LC from the IIe Startup Disk.
To start up from the disk, follow these steps: (a) choose Shut Down
from the Special menu, but don’t turn the power off; (b) insert the
IIe Startup Disk; (c) use the mouse to click the Restart button.
70
Chapter 5: Reference
3. Open your startup disk by double-clicking its icon.
The startup disk is the top icon on the right side of the screen.
Double-click
whatever icon is
in this corner.
( Yours may look
different.)
4. Double-click the IIe Startup icon to start the program.
Double-click this
icon to switch to
the Apple IIe
environment.
The IIe Startup program uses the startup setting in the Slot Configuration
panel to locate a program disk. If a specific slot is designated as the
startup slot, IIe Startup goes directly to the first drive assigned to that
slot. If the startup option is set to Scan, the program scans the slots,
in descending order from 7 to 1. The first startup disk it encounters is
loaded into the computer’s main memory, and you see the opening
display for the program on that disk.
Chapter 5: Reference
71
If IIe Startup encounters a non-startup disk in the startup drive, you see
the message “UNABLE TO BOOT FROM STARTUP SLOT.” The program
enters the BASIC programming environment and presents the BASIC
prompt.
If IIe Startup finds no startup disk in any drive, it enters the BASIC
programming environment and presents the BASIC prompt.
See the section “Changing the Startup Device” later in this chapter for
more information on designating a startup drive.
BASIC prompt
72
Chapter 5: Reference
Going directly to the
Apple IIe Option Panel
If you want the Option Panel to open as soon as the IIe Startup program
launches, hold down the Option key just after you double-click the
IIe Startup icon. Keep the Option key held down until the Option Panel
opens.
Double-clicking the
IIe Prefs file
The IIe Startup program creates and maintains a file called the IIe Prefs
file, which records all the choices you make in the Option Panel. Doubleclicking the IIe Prefs icon causes the computer to switch to the Apple IIe
environment, just as double-clicking the IIe Startup icon does.
The icon for the
preferences file
When you double-click a preferences file, it reads the preferences from
that file, which is useful if you have more than one preferences file, as
explained in the next section.
Chapter 5: Reference
73
Using more than one
preferences file
The IIe Prefs file created by the IIe Startup program keeps track of the
settings you make in the Apple IIe Option Panel. You choose settings to
match the requirements of the Apple IIe programs you run. Normally,
one configuration of card and slot settings is sufficient for performing
your work. However, if you use two or more programs that require
different slot configurations, you can create a separate preferences file for
each program. Each preferences file can maintain the configuration of
card and slot settings appropriate for a single program, so you won’t have
to change settings each time you move from one program to another.
Follow these steps to create and maintain more than one preferences file:
1. Start up the IIe Startup program.
Double-click the IIe Startup icon.
2. Open the Apple IIe Option Panel (by pressing Control-x-Esc).
3. Select the settings you want to maintain in the first
IIe Prefs file.
4. Quit the IIe Startup program (by clicking the Quit IIe button).
5. Rename the first IIe Prefs file.
The name you give the file can be anything but “IIe Prefs.” Rename
the file in a way that will help you remember its purpose—“Graphics
Prefs,” “Charts Prefs,” or “Games Prefs,” for instance.
6. Start up the IIe Startup program and open the Option
Panel again.
7. Select the settings you want to maintain in the second
IIe Prefs file.
8. Quit the IIe Startup program (by clicking the Quit IIe button).
74
Chapter 5: Reference
Each time IIe Startup restarts the Apple IIe Card, it creates a new IIe Prefs
file, unless there is already a file named “IIe Prefs” on the disk. You can
create as many different preferences files as you want, as long as you
keep renaming the most recently created IIe Prefs file. Once you’ve made
as many preferences files as you need, you can choose the IIe Prefs file
you want to work with by double-clicking its icon to start the Apple IIe
Card. As long as you don’t change any settings, the file you start from will
remain unchanged when you quit the IIe Startup program.
You can store the IIe Prefs file in one of three places. The IIe Startup
program searches for the IIe Prefs file in this order: in the System Folder;
in the Preferences folder, which is itself in the System Folder; then in the
folder where the IIe Startup program is.
Starting up an
Apple IIe program
You can start up an Apple IIe program either in a standard Macintosh way
or in a standard Apple IIe way, whichever is easier for you.
The Macintosh way
When you’re in the Macintosh environment, you can start up Apple IIe
programs by double-clicking their icons, though this method works only
for ProDOS programs.
s
▲ Important: You can use this method of starting Apple IIe programs only
if you have an empty disk drive while the IIe Startup program is running.
In other words, floppy disk startup people who have only one internal
s
disk drive cannot use this method. All others can. ▲
Chapter 5: Reference
75
Before you begin: Your Macintosh should be on. If you’re a floppy
disk startup person you should start up from the IIe Startup Disk, as
explained in “Starting Up From the IIe Startup Disk” in Chapter 3.
1. Find your Apple IIe program.
If the program is on your hard disk, open the hard disk and folders
so you can see the program’s icon. If the program is on a floppy disk,
insert the disk into an empty disk drive and open the disk so you can
see the program’s icon.
2. Double-click the program’s icon.
Apple IIe program names often have a period and the word “SYSTEM”
after them. Their icons look like this:
Apple IIe programs
have this icon.
(To see full-size icons like this one, choose “by Icon” from the
View menu.)
After you double-click, the IIe Startup program opens and your
Apple IIe program is launched.
The Apple IIe way
When you are in the Apple IIe environment, you start up Apple IIe
programs the same way you would on an Apple IIe:
1. If you have only one disk drive, press x-Shift-1 to eject the
IIe Startup Disk from the built-in disk drive.
If you plan to start up the Apple IIe program from another drive,
you don’t need to eject the IIe Startup Disk.
To eject a disk from a second built-in floppy disk drive, press
x-Shift-2.
76
Chapter 5: Reference
2. Insert the disk containing the Apple IIe program you want to
run into a disk drive.
If a particular slot has already been designated as the startup slot in
the Slot Configuration panel, insert the disk into a drive controlled
through that slot.
3. Press x-Control-Reset.
Pressing x-Control-Reset resets the Apple IIe Card and restarts the
IIe Startup program. IIe Startup uses the startup setting in the Slot
Configuration panel to locate a program disk. If a specific slot is
designated as the startup slot, IIe Startup goes directly to that slot.
If the startup option is set to Scan, the program scans the slots in
descending order from 7 to 1. The first startup disk it encounters is
loaded into the computer’s main memory, and you see the opening
display for the program you’re running.
If IIe Startup encounters a non-startup disk in the startup drive, you
see the message “UNABLE TO BOOT FROM STARTUP SLOT.” The
program enters the BASIC programming environment and presents
a BASIC prompt.
If IIe Startup finds no startup disk in any drive, it enters the BASIC
programming environment and presents a BASIC prompt.
From the BASIC programming environment, you can start up a
program disk by typing a BASIC instruction that directs IIe Startup
to the disk drive you indicate.
4. Type pr# followed by the number of the slot to which the
startup drive is assigned.
The most typical instructions are pr#5 for 3.5-inch disk drives and
pr#6 for 5.25-inch disk drives.
Chapter 5: Reference
77
Printing from
Apple IIe programs
To print Apple IIe files, use the programs’ print commands just as you
would if you were using an Apple IIe. When you print through the Printer
Card, you should set your Apple IIe program to treat the printer as if it’s
an ImageWriter II, even if it’s not. You may notice a pause before printing
begins. If the program has a command that you can use to stop the
printer from printing, it may not stop printing the instant you issue the
command.
s
▲ Important: Macintosh screen saver programs may interfere with
Apple IIe programs while they are printing. If the screen saver causes a
problem, turn off the screen saver or increase the amount of time before
it turns on. Also, you should avoid opening the Option Panel when
s
printing. ▲
Choosing a printer
To select the printer you want to use, or to change printers, use the
Macintosh desk accessory called the Chooser.
Before you begin: Your Macintosh should be on. If you’re a floppy
disk startup person you should start up from the IIe Startup Disk,
as explained in “Starting Up From the IIe Startup Disk” in Chapter 3.
1. If you’re in the Apple IIe environment, open the Option Panel
by pressing Control-x-Esc.
If you’re in the Macintosh environment, you need to do nothing.
78
Chapter 5: Reference
2. Select the Chooser from the Apple menu.
3. Click the icon that represents the kind of printer you want
to use.
If your Chooser window looks
different, you may have to use
the scroll bar to see all these choices.
ImageWriter II,
connected directly
ImageWriter II,
connected over
a network
Any LaserWriter
or LaserWriter II,
plus the Personal
LaserWriter NT
ImageWriter LQ,
connected over
a network
ImageWriter LQ,
connected directly
Personal
LaserWriter SC
❖
Your printer isn’t there? If the kind of printer you want to use isn’t in
the Chooser, you need to install the printer software on your startup
disk. Turn now to Appendix E, “Installing Printer Software for the
IIe Startup Disk.” ❖
continues >
Chapter 5: Reference
79
4. If the printer is connected over a network, you’ll have to select
the printer you want and perhaps also the zone it’s in.
See the reference book that came with your Macintosh for more
information on using the Chooser.
5. Choose Close from the File menu.
6. If you’re in the Option Panel, click the Continue button.
❖
80
Note: In most cases, you should print using the Printer Card.
However, some Apple IIe programs may require you to print using the
AppleShare card. If so, you can select which printer you want using
the Apple IIe program Chooser.II. (If you don’t use Chooser.II, the
Apple IIe prints to the printer selected in the Macintosh Chooser, so
long as the printer is either a network ImageWriter or a network
LaserWriter.) ❖
Chapter 5: Reference
Using Apple IIe files
with Macintosh
programs
Sometimes you may wish to transfer information from Apple IIe
programs to Macintosh programs. You can do so, provided you can find
a file format that both programs understand or you have a Macintosh
program that can read Apple IIe files directly.
For example, say you typed a long text passage using an Apple IIe
program and now you want to use the same text in a speech you’re
writing using a powerful Macintosh word processor. Most word
processors can read “text-only” files (also called ASCII files). To transfer
the text, you could (a) use an Apple IIe program to save the file in
text-only format, then (b) use the Macintosh program to open the file.
In general, follow these steps:
Before you begin: Your Macintosh should be on. If you’re a floppy
disk startup person you should start up from the IIe Startup Disk, as
explained in “Starting up From the IIe Startup Disk” in Chapter 3.
1. Check the manuals of both the Apple IIe and Macintosh
programs to determine what file format, if any, the two
programs share.
Typical file types that Apple IIe and Macintosh programs might
share depend on what the programs do. For example, spreadsheet
programs might share a tab-delimited type and word-processing
programs might share a text-only type.
Unfortunately, you may not find shared file formats to exchange
pictures. If you can’t find one, see the next section, “Copying
Apple IIe Pictures,” which offers an alternative strategy.
continues >
Chapter 5: Reference
81
2. Open the Apple IIe file using an Apple IIe program.
Switch to the Apple IIe environment and use your Apple IIe program
to open the file.
3. Save the file in the shared format, giving it a new name.
See the program’s instructions for information on how to save files in
different formats.
4. Return to the Macintosh environment.
Press Control-x-Esc and click the Quit IIe button.
5. Open the Macintosh program you want to use.
6. Choose the Open command from the File menu.
7. Use the Open dialog box to select the Apple IIe file.
Click the Drive or Desktop button to select the correct disk and
double-click folders to open them. For more information on using
the Open dialog box, see the reference book that came with your
Macintosh.
❖
82
Can’t see your file? If you can’t see the file, you may not be looking in
the correct folder or on the correct disk. If you are, you may not have
saved the Apple IIe file in a format that your Macintosh program can
understand. Some Macintosh programs have special ways of opening
so-called “foreign” files. See the manual that came with the Macintosh
program for more details. ❖
Chapter 5: Reference
Copying Apple IIe pictures
If you want to transfer an Apple IIe picture to a Macintosh program, you
can copy and paste the picture as described in these steps:
1. Use your Apple IIe program to display the picture on your
screen.
2. Save your work, if necessary.
3. Press Control-x-Esc to open the Option Panel.
The Option Panel opens.
4. Choose the Copy IIe Screen command from the Edit menu.
5. Click the Quit IIe button.
When asked if you really want to quit, click Quit IIe again.
6. Open the Macintosh file in which you want to place the
picture.
7. Choose the Paste command from the Edit menu.
The picture is pasted in.
If you have more than one Apple IIe picture to transfer at the same time,
you may wish to use the Macintosh desk accessory called the Scrapbook.
For more information, see the reference book that came with your
Macintosh.
Chapter 5: Reference
83
Using network
file servers
If your Macintosh LC is connected to a file server over a network, you
can use it just as you did with your original Apple IIe: you can start
up from the file server and access files on it, as the next two sections
explain. Note, however, that you cannot start up from a private
Macintosh computer, even if it is sharing its files. (File sharing is a
new feature in version 7 of Macintosh system software.)
Starting up from
the file server
With your Apple IIe computer, you could start up from a file server.
When you’re in the Apple IIe environment, you can do the same with
your Macintosh LC and your Apple IIe Card. In fact, the method is
the same as before.
Before you begin, make sure the following preparations have been made:
84
■
Your network administrator, the person who installs and maintains
your network and your file server, has connected everyone to the
network and prepared the file server as described in the instructions
that come with the AppleShare Workstation Card and the AppleShare
File Server server software.
■
You have used the Option Panel to install the AppleShare card into
one of the slots, as explained in Chapter 4, “Setting Up Cards and
Slots.”
■
You have set the startup device either to Scan or to the slot in which
the AppleShare card is installed. The AppleShare card is usually
installed in slot 7.
Chapter 5: Reference
The AppleShare
card should
be installed
(usually in slot 7).
Startup should be
set either to Scan
or to the slot in
which AppleShare
is installed
(usually slot 7).
From now on, whenever you start or restart the Apple IIe, you’ll follow
the usual network log-on procedure, as described in the instructions that
come with the AppleShare Workstation Card and the AppleShare File
Server software.
Using files from
the file server
Using Apple IIe files on a network file server with a Macintosh LC and the
Apple IIe Card is the same as using them on an Apple IIe computer. You
simply use the Logon program, as described in the instructions that come
with the AppleShare Workstation Card.
Chapter 5: Reference
85
Personalizing your
Apple IIe work
environment
You use the Apple IIe Option Panel to adjust some aspects of the
Apple IIe Card’s operation. Most of the adjustments are made in the
General Controls panel, the panel that appears automatically whenever
you open the Option Panel.
Most of the settings in the General Controls panel take effect
immediately and remain active whenever you start up the IIe Startup
program, until you change them again.
Changing the
processing speed setting
You can change the processing speed of the Apple IIe Card. The Option
Panel provides two Speed settings: normal and fast. The Normal setting
represents the normal processing speed for an Apple IIe computer. The
Fast setting is up to twice as fast as the Normal setting. (The actual speed
varies among programs, depending on a number of factors—principally,
the amount of graphics processing a program requires.)
Depending on the type of program you’re running, you may benefit from
changing the Speed setting. For instance, a spreadsheet program would
benefit from the added processing speed by performing calculations
more quickly. Other programs, however, may be less effective running
under the Fast setting. For instance, many games may run too quickly.
And programs that require precise time-interval measurements—such as
music programs— may need the normal Apple IIe processing speed to
run properly.
If you’re uncertain what Speed setting is most appropriate for the
program you want to run, try the Fast setting first. If the program doesn’t
run as expected, change the setting back to Normal.
86
Chapter 5: Reference
To change processing speed, follow these steps:
1. Press Control-x-Esc.
The Option Panel appears, with the General Controls panel displayed.
The pointer changes to a crosshair when you place it in the General
Controls panel.
Choose a
processing
speed here.
continues >
Chapter 5: Reference
87
2. Click the button for the speed you want.
When you close the Apple IIe Option Panel, you see a message
indicating that the changes you made in the General Controls panel
will not take effect until you restart the Apple IIe Card.
3. Click the Restart IIe button to restart the Apple IIe Card.
The Apple IIe Card restarts, with the new Speed setting in effect.
If you don’t want the new setting to take effect yet, click the
Continue button.
▲ Warning: Be sure to save your work on a floppy disk before clicking
the Restart IIe button. Any work that has not been saved on a disk
will be lost. ▲
88
Chapter 5: Reference
Choosing a
startup beep sound
Your computer beeps when you start up the Apple IIe Card. Also,
many programs are designed to play a sound when an alert message
is displayed, or when you give a command that the computer
cannot recognize.
You can choose one of several options for the beep sound. You can
choose the same beep sound you hear on an Apple IIe computer, the
standard Macintosh beep, or any other sound that appears in the Startup
Beep Sound box. To avoid annoying delays, it’s a good idea to choose a
short sound. The Apple IIe Option Panel is preset to use the standard
Apple IIe beep.
To choose a startup beep sound, follow these steps:
1. Press Control-x-Esc.
The Option Panel appears, with the General Controls panel displayed.
The pointer changes to a crosshair when you place it in the General
Controls panel.
Choose a startup
beep sound here.
If you are a floppy disk startup person, you have only two beeps to
choose from.
continues >
Chapter 5: Reference
89
2. Scroll if necessary to find the name of the beep sound you
want, then click the name.
The sounds displayed in the box represent the sound files contained
in the Macintosh System file. Any sound you add to your Macintosh
System file is available as an Apple IIe beep.
When you release the mouse button, the selected sound plays.
After you close the Option Panel, your choice remains in effect until you
choose a different beep sound.
You can add your own beep sounds by using the Macintosh Sound
control panel and the microphone that came with your Macintosh LC.
s
▲ Important: If the speaker volume setting in the Macintosh General
Controls panel is set to zero (that is, if it is turned off ), the computer will
s
not beep while in the Apple IIe environment. ▲
Setting the keys’ repeat rate
On all Macintosh keyboards, holding down a character key causes the
character to appear repeatedly on the screen until you release the key.
You can adjust the rate of repetition from very slow to quite fast. (To turn
off the key repeat option, see the next section, “Setting the Delay Before
Keys Repeat.”)
The repeat rate you choose in the Apple IIe Option Panel is in effect only
while the computer is in the Apple IIe environment. When you switch to
the Macintosh environment, the repeat rate is determined by the key
repeat rate setting in the Macintosh Keyboard control panel.
The key repeat rate in the Apple IIe General Controls panel is preset to
the rate setting in the Macintosh Keyboard controls panel.
90
Chapter 5: Reference
To set the key repeat rate, follow these steps:
1. Press Control-x-Esc.
The Option Panel appears, with the General Controls panel displayed.
The pointer changes to a crosshair when you place it in the General
Controls panel.
Choose a
key repeat
rate here.
2. Click the button for the repeat rate you want.
After you close the Option Panel, your choice remains in effect until you
change the setting again.
Chapter 5: Reference
91
Setting the delay
before keys repeat
You can adjust the keyboard’s operation to your “touch” by setting the
delay before a character begins repeating when a key is held down. You
can also turn off the key repeat feature entirely.
The delay setting you choose in the Apple IIe Option Panel is in effect
only while the computer is in the Apple IIe environment. When you
switch to the Macintosh environment, the delay is determined by the
delay setting in the Macintosh Keyboard control panel.
The delay setting in the Apple IIe General Controls panel is preset to the
delay setting in the Macintosh Keyboard control panel.
To set the delay until a character repeats when a key is held down, follow
these steps:
1. Press Control-x-Esc.
The Option Panel appears, with the General Controls panel displayed.
The pointer changes to a crosshair when you place it in the General
Controls panel.
92
Chapter 5: Reference
Choose a delay
setting here.
2. Click the button for the repeat delay you want.
Clicking the Off button turns off the key repeat feature.
After you close the Option Panel, your choice remains in effect until you
change the setting again.
Chapter 5: Reference
93
Changing the
Type Ahead setting
You use the Type Ahead feature to type text and commands while the
Apple IIe program is busy with some other activity. Even though you may
not see the text immediately on the screen, what you type is stored in a
type-ahead buffer, an area of memory reserved for keeping track of what
you type.
Some programs do not perform correctly when the Type Ahead feature
is on. If the keyboard seems unresponsive in a particular program,
or if certain keys don’t work as expected, try turning the Type Ahead
feature off.
To change the Type Ahead setting, follow these steps:
1. Press Control-x-Esc.
The Option Panel appears, with the General Controls panel displayed.
The pointer changes to a crosshair when you place it in the General
Controls panel.
Choose a
Type Ahead
setting here.
2. Click the button for the setting you want.
Clicking the Off button turns off the Type Ahead feature; clicking the
On button turns it on.
After you close the Option Panel, your choice remains in effect until you
change the setting again.
94
Chapter 5: Reference
Changing the
Display setting
If you have a color monitor, you can choose between a color or
monochrome display. Even with a color monitor, however, there are
times when working in monochrome is an advantage. First, because of
the manner in which the Apple IIe produces color, you may see “color
fringing”—a slight color cast around the edges of text characters. If so,
switching to monochrome avoids the problem.
❖
By the way: You can improve the computer’s processing
performance in the Apple IIe environment if you set the Display
setting to Monochrome in the Option Panel. ❖
To change the Display setting, follow these steps:
1. Press Control-x-Esc.
The Option Panel appears, with the General Controls panel displayed.
The pointer changes to a crosshair when you place it in the General
Controls panel.
Choose
a display
setting
here.
2. Click the button for the setting you want.
After you close the Option Panel, the Display setting you chose remains
in effect until you change the setting again.
Chapter 5: Reference
95
Changing the character set
Apple IIe programs normally display text with a light character set on a
dark background. You can change this to dark text on a light background
by choosing the inverse character set.
To change the character set, follow these steps:
1. Press Control-x-Esc.
The Option Panel appears, with the General Controls panel displayed.
The pointer changes to a crosshair when you place it in the General
Controls panel.
Choose a
character
set here.
2. Click the button for the character set you want.
After you close the Option Panel, your choice remains in effect until you
change the setting again.
❖
96
By the way: Regardless of which character set you choose, flashing
text appears as black characters on a red background on a color
monitor, or dark characters on a light background on a monochrome
monitor. ❖
Chapter 5: Reference
Changing or adding
an Option Panel key
You can always open the Option Panel by pressing the combination
keystroke Control-x-Esc. If you like, you can add a second key or
combination of keys to open the Option Panel.
To add a second way of opening the Option Panel, follow these steps:
1. Open the Option Panel by pressing Control-x-Esc.
The Option Panel appears, with the General Controls panel displayed.
The pointer changes to a crosshair when you place it in the General
Controls panel.
Click here to
change the
Additional Option
Panel key.
2. Click the Change button.
A dialog box appears.
3. Press the key or combination of keys you want to use to open
the Option Panel.
If instead you want to remove the second Option Panel key, click the
None button.
4. Click OK.
Chapter 5: Reference
97
Changing the
mouse tracking rate
You can adjust the correlation between mouse and pointer movement,
called mouse tracking, so that the pointer moves the same distance on
the screen as the mouse moves, or so that the pointer moves up to two
times as far on the screen as the mouse moves, depending on how fast
you move the mouse.
The mouse tracking rate you choose in the Apple IIe Option Panel is in
effect only while the computer is in the Apple IIe environment. When
you switch to the Macintosh environment, the mouse tracking rate is
determined by the rate setting in the Macintosh Mouse control panel.
The mouse tracking rate in the Apple IIe Option Panel is preset to the
rate setting in the Macintosh Mouse control panel.
The options for tracking are
■
Slow—the mouse and the pointer move the same distance
■
Fast—the pointer moves twice as far as the mouse
■
Buttons between Slow and Fast—gradations between one-for-one and
two-for-one pointer and mouse movements
■
Very Slow/Tablet—the pointer moves at a constant speed when the
mouse is moved, a useful setting for drawing with the mouse or using
a graphics tablet
To change the mouse tracking rate, follow these steps:
1. Press Control-x-Esc.
The Option Panel appears, with the General Controls panel displayed.
98
Chapter 5: Reference
2. Scroll if necessary to locate the Mouse Card icon, then click it
to display the Mouse Card panel.
The Mouse Card panel appears. The pointer changes to a crosshair
when you place it in the panel.
Mouse Card icon
3. Click the button for the tracking speed you want.
The new tracking speed takes effect immediately; you can test it by
moving the mouse.
After you close the Option Panel, your choice remains in effect until you
choose a different tracking speed.
Chapter 5: Reference
99
Configuring
cards and slots
Many Apple IIe programs are designed to look for certain kinds of
hardware, or cards, in specific locations, or slots, in the computer. Since
the Macintosh LC isn’t an actual Apple IIe, it doesn’t provide these slots,
nor does it contain the cards. Instead, the Macintosh LC uses software
representations of the slots and cards to simulate the hardware
configurations of an Apple IIe.
The settings in the Apple IIe Option Panel are preset to the
configurations most commonly used by Apple IIe programs. You may
never need to change any of these settings.
Changing the Memory
Expansion Card size
Many Apple IIe programs work more efficiently with access to additional
memory. The Apple IIe Option Panel lets you add additional memory by
designating a portion of the Macintosh LC computer’s available memory
for Apple IIe programs. Apple IIe programs interpret this extra memory
as an Apple II Memory Expansion Card.
The Memory Expansion Card panel lets you set the size of the Apple II
Memory Expansion Card. The size may be set in 256K increments up to a
maximum size of 1024K (1 megabyte).
100
Chapter 5: Reference
1. Press Control-x-Esc to open the Option Panel.
2. Click the Memory Card icon to display the Memory Expansion
Card panel.
The Memory Expansion Card panel appears. The pointer changes to a
crosshair when you place it in the panel.
❖
Warning message? If you get a message telling you the Memory Card
is not installed, you can continue with this section, but changing the
memory will not have any effect until you install the Memory Card,
as explained in “Changing the Slot Settings,” later in this chapter. ❖
The Memory
Card icon
continues >
Chapter 5: Reference
101
3. Click the small up and down arrows to change the size of
the card.
4. Click the Restart IIe button to restart the Apple IIe Card.
The Apple IIe Card restarts, with the new Memory Expansion Card
setting in effect.
If you see a message telling you there wasn’t enough memory to install
the Memory Expansion Card, you need to adjust the application memory
size as follows:
102
■
Save your work and return to the Macintosh environment by pressing
Control-x-Esc to enter the Option Panel, then click the Quit IIe
button.
■
Select the IIe Startup icon by clicking it once.
■
Choose the Get Info command from the File menu. The Info window
opens.
■
Press Tab to select the current memory size.
■
Type the new memory size, which you can calculate as follows: Take
the number you put in the Apple IIe Memory Card and add 350 to it.
For example, if you set the size to 1024, type 1374. (In any case, don’t
set the size to be less than the suggested size of 600.)
■
Click the close box of the Info window.
■
Double-click the IIe Startup icon to return to the Apple IIe
environment.
Chapter 5: Reference
Setting the Serial Cards
The Macintosh LC has two serial ports on the back of the computer, one
marked with a picture of a printer and one marked with a picture of a
telephone. They are called the printer port and the modem port.
Modem port
Printer port
Despite the names, you can plug any serial device into either port. The
Option Panel has two icons for Serial Cards (called Super Serial Cards in
the Apple IIe world), one representing whatever is plugged into the
modem port and the other representing whatever is plugged into the
printer port.
s
▲ Important: In general, you shouldn’t use either Serial Card for your
printer, even if the printer is plugged into one of these ports. Instead,
s
use the Printer Card. ▲
The changes you make to the settings for either Serial Card take effect
only if that card is installed in an active slot. Neither Serial Card is
installed in an active slot when you first install the Apple IIe Card
software.
❖
Note: The illustrations in this section show how to change settings in
the Serial Card for the modem port. The steps are exactly the same for
changing the settings in the Serial Card for the printer port. ❖
continues >
Chapter 5: Reference
103
To change the settings, follow these steps:
1. To open the Option Panel, press Control-x-Esc.
The Option Panel appears, with the General Controls panel displayed.
2. Scroll if necessary to locate the Serial Card icon representing
the port your device is plugged into.
If the device you want to configure is plugged into the modem port,
click the modem port icon; if the device is plugged into the printer
port, click the printer port icon. Remember, if the device is a printer,
you should be using the Printer Card, not a Serial Card.
Serial Card icons
Select
a device
here.
❖
104
Warning message? If you get a message telling you the Serial Card
is not installed, you can continue with this section, but changing the
settings will not have any effect until you install the Serial Card in an
active slot, as explained in “Changing the Slot Settings,” later in this
chapter. ❖
Chapter 5: Reference
3. Click the button for the device you want to assign to this
Serial Card.
Clicking either of the top two buttons—Apple Data Modem 2400
or Apple Personal Modem 1200—automatically sets the Serial
Card parameters. If you click the Other Device button, the Port
Characteristics box in the lower portion of the panel becomes active.
Use this part of the panel to select the settings required by the device
you’re connecting. (See the manual that came with the device for the
appropriate settings.)
4. For each setting you want to change, position the pointer over
the small triangle to the right of the setting, and then press the
mouse button.
A pop-up menu of settings appears with the current setting
highlighted.
continues >
Chapter 5: Reference
105
5. Drag through the menu until the setting you want is
highlighted, then release the mouse button.
The setting you choose appears in the box.
6. Click the Restart IIe button to restart the Apple IIe Card.
The Apple IIe Card restarts, with the new slot settings in effect.
If you don’t want the new settings to take effect yet, click the
Continue button.
▲ Warning: Be sure to save your work on a floppy disk before clicking
the Restart IIe button. Any work that has not been saved on a disk
will be lost. ▲
Using modems at speeds higher than 1200 baud
The maximum baud rate at which you can transmit data using Apple IIe
communication programs with the Apple IIe Card varies from program
to program. If you use modems at a baud rate of 2400 or above
and experience problems receiving data (if data is missing after a
transmission, for instance), you may be able to solve the problem and
still use a higher baud rate by opening the Option Panel and selecting
Monochrome in the General Controls panel.
Making changes to
the Printer Card
If you are connected to a printer, even if the printer is connected over
a network, you should install the Printer Card.
The only change you can make to the Printer Card is to extend printer
timeout. Doing so allows your Apple IIe programs more time to finish
printing before the computer lets another document print.
106
Chapter 5: Reference
Extending printer timeout
To extend printer timeout, follow these steps:
1. Press Control-x-Esc to open the Option Panel.
2. Click the Printer Card.
The Printer Card panel appears. The pointer changes to a crosshair
when you place it in the panel.
This
section
tells you
which
printer
you’ve
selected.
Printer Card icon
3. Click the Extend Printer Timeout checkbox so that an X
appears in the box.
Choosing a printer
You do not use the Printer Card to choose your printer. Instead, use the
Macintosh desk accessory called the Chooser. For details, see “Printing
From Apple IIe Programs,” earlier in this chapter.
Chapter 5: Reference
107
Changing the slot settings
The Slot Configuration panel is where you indicate the location of
Apple IIe cards. These are not real cards installed in the Macintosh LC.
They are software representations of cards that are commonly installed
in Apple IIe computers. The settings you make in this panel provide the
information necessary for most Apple IIe programs to run correctly on
the Macintosh LC.
The slot settings are preset to the most common slot configurations
recommended in Apple II documentation. Some cards can only be
installed in a specific slot. For instance, the SmartPort Card is always in
slot 5; the 5.25-inch disk drive controller card is always in slot 6. If you try
to move such a card to a slot where it does not belong, the program will
alert you with a dialog box.
❖
Where should the cards go? See Chapter 4, “Setting Up Cards and
Slots,” for a discussion of how to decide which cards should go in
which slots. ❖
When you change a slot setting in the Slot Configuration panel, the icon
representing the card you moved appears dimmed. This indicates that
the new setting is inactive until you click the Restart IIe button.
To change a slot setting, follow these steps:
1. Press Control-x-Esc.
The Option Panel appears, with the General Controls panel displayed.
2. Scroll if necessary to locate the Slots icon, then click it to
display the Slot Configuration panel.
The Slot Configuration panel appears. The pointer changes to a
crosshair when you place it in the panel.
108
Chapter 5: Reference
These icons
represent Apple IIe
accessory cards.
These bins represent
Apple IIe slots.
These bins hold
spare cards.
3. Drag the icon of the card you want to move to its new
location.
When you release the mouse button, the icon appears in the new slot.
If another icon is already in that slot, it exchanges places with the first
icon when you release the mouse button.
4. Click the Restart IIe button to restart the Apple IIe Card.
The Apple IIe Card restarts, with the new slot settings in effect.
If you don’t want the new settings to take effect yet, click the
Continue button.
▲ Warning: Be sure to save your work on a floppy disk before clicking
the Restart IIe button. Any work that has not been saved on a disk
will be lost. ▲
Chapter 5: Reference
109
Changing the
startup device
Whenever you start or restart the Apple IIe Card, it scans all the available
disk drives for a program disk, if you’ve set it to do so. If you’ve
designated a particular disk drive as the startup drive, the Apple IIe Card
goes directly to that drive.
When the Apple IIe Card is set to scan all available disk drives, it scans
the slots—in descending order from slot 7 to slot 1—for a disk drive
containing a startup disk. If you always start up from the same drive,
you can save time by changing the startup setting to the particular slot
number assigned to that drive. After you’ve made the setting active (by
clicking the Restart IIe button), the next time you start up a program,
the Apple IIe Card goes directly to the slot you’ve chosen.
To change the startup setting, follow these steps:
1. Press Control-x-Esc.
The Option Panel appears, with the General Controls panel displayed.
2. Scroll if necessary to locate the Slots icon, then click it to
display the Slot Configuration panel.
The Slot Configuration panel appears. The pointer changes to a
crosshair when you place it in the panel.
Slots icon
110
Choose
a startup
slot here.
Chapter 5: Reference
3. Position the pointer over the small triangle to the right of the
Startup setting, and then press the mouse button.
A pop-up menu of settings appears with the current setting
highlighted.
4. Drag through the menu until the slot you want is highlighted,
then release the mouse button.
The setting you choose appears in the box.
5. Click the Restart IIe button to restart the Apple IIe Card.
The Apple IIe Card restarts, with the new slot settings in effect.
If you don’t want the new settings to take effect yet, click the
Continue button.
▲ Warning: Be sure to save your work on a floppy disk before clicking
the Restart IIe button. Any work that has not been saved on a disk
will be lost. ▲
Chapter 5: Reference
111
Saving time by making 5.25 Drives inactive
Some Apple IIe programs scan all the disk drives connected to your
computer whenever they need to write information on a disk. If you have
one or more 5.25 Drives connected to your computer, these programs
will start up each 5.25 Drive, even when the drives are empty. When you
are not working with 5.25-inch disks, you can speed up your work by
temporarily disabling your 5.25 Drives. To do so, open the Apple IIe
Option Panel, and click the Slots icon to open the Slot Configuration
panel. Then drag the icon representing the disk controller card from
slot 6 to a Spare Card slot. This makes the drives controlled through
slot 6 (that is, all the 5.25 Drives connected to your computer) inactive.
You must click Restart IIe to make the change take effect. To make the
drives active again, drag the icon from the Spare Card slot back to slot 6.
Changing the
SmartPort settings
SmartPort is the feature that lets you use 3.5-inch disk drives to run
Apple IIe software. Apple IIe programs access all 3.5-inch drives—
whether built-in disk drives or UniDisk 3.5 Drives connected to the
Macintosh LC—through SmartPort.
SmartPort also increases the number of drives accessible per slot in the
Apple IIe. The ProDOS operating system can normally access only two
disk drives per slot. However, with a SmartPort device in slot 5, ProDOS
can “borrow” two slot assignments from slot 2, provided there are no
storage devices in slot 2.
You can have up to four disk drives in active slot/drive locations. But
only one SmartPort device can be the startup device: the device in slot 5
drive 1. You change your startup drive by moving a disk drive icon from
another slot/drive assignment into slot 5 drive 1.
Although you can place disk drive icons in any slot and drive, SmartPort
automatically fills any gaps in the drive assignments, from left to right.
SmartPort does not allow any empty slots between disk drive icons.
112
Chapter 5: Reference
To change the SmartPort drive and slot assignments, follow these steps:
1. Press Control-x-Esc.
The Option Panel appears, with the General Controls panel displayed.
2. Scroll if necessary to locate the SmartPort icon, then click it to
display the SmartPort panel.
The SmartPort panel appears. The pointer changes to a crosshair
when you place it in the panel.
SmartPort icon
continues >
Chapter 5: Reference
113
3. Drag the icon of the device you want to move to its new
location.
If another icon is already in that location, it exchanges places with the
first icon when you release the mouse button.
When you release the mouse button, the icon appears in the new
slot/drive location.
4. Click the Restart IIe button.
The Apple IIe Card restarts, with the new SmartPort settings in effect.
▲ Warning: Be sure to save any work on floppy disks before clicking
the Restart IIe button. Any work that has not been saved on disks
will be lost. ▲
Ejecting disks
To eject disks from their drives, use the Eject buttons. Two Eject buttons
appear in the bottom-left corner of the Apple IIe Option Panel. Either
one or both buttons are active, depending on the number of disk drives
you have in your computer system.
■
If your Macintosh LC contains only one built-in floppy disk drive, only
the right Eject button is active. The other button is dimmed.
■
If your Macintosh LC contains a second built-in floppy disk drive,
both Eject buttons are active. The left button represents the second
built-in drive.
To eject a disk from an external floppy disk drive connected to your
Macintosh LC, press the Disk Eject button on the UniDisk 3.5 Drive,
or open the disk drive door on the Apple 5.25 Drive.
114
Chapter 5: Reference
To eject a disk from a built-in disk drive, follow these steps:
1. Press Control-x-Esc.
The Option Panel appears, with the General Controls panel displayed.
Eject buttons.
(A dimmed button
means you have
only one disk drive.)
2. Click the Eject button for the disk drive that contains the
disk you want to eject.
Click the right Eject button to eject a disk from the first
(rightmost) built-in drive; click the left Eject button for the
second (leftmost) drive.
The disk is ejected.
Another way to eject disks is to use a combination keystroke. Pressing
x-Shift-1 ejects a disk from the first built-in floppy disk drive; pressing
x-Shift-2 ejects a disk from the second built-in floppy disk drive, if your
Macintosh LC contains one.
Chapter 5: Reference
115
Navigating in
the Apple IIe
environment
You use the Apple IIe Option Panel to navigate through the Apple IIe
environment, and between the Apple IIe environment and the Macintosh
desktop.
Opening the
Option Panel
To open the Option Panel from the Apple IIe environment, you must
press three keys at once: the Control key, the x (Command) key, and the
Escape key. This key combination is usually written Control-x-Esc. On
typical Macintosh keyboards, all three keys are on the bottom row.
s
▲ Important: Don’t open the Option Panel while Apple IIe programs are
s
printing. Sometimes opening the Option Panel can disrupt printing. ▲
A shortcut for opening the Option Panel from the Macintosh
environment
If you want the Option Panel to open as soon as the IIe Startup
program launches, hold down the Option key just after you double-click
the IIe Startup icon. Keep the Option key held down until the Option
Panel opens.
Limiting access to
the Option Panel
If you need to protect the Apple IIe Option Panel—in school labs
or in work areas where several users share the same computer, for
instance—you can do so in one of three ways, as explained in the next
three sections.
Locking the preferences file
While the preferences file is locked, users will not have access to any of
the panels used to change Option Panel settings, though they can still
click the Option Panel buttons. You can lock and unlock the preferences
file as often as you like.
116
Chapter 5: Reference
To lock the IIe Prefs file, follow these steps:
Before you begin: Make sure you’re in the Macintosh environment.
1. Select the IIe Prefs file by clicking its icon once.
2. Choose Get Info from the File menu.
3. Click the Locked checkbox until an X appears in it.
4. Close the Info window.
Click the close box.
Purchasing and installing an optional jumper cable
To protect the Option Panel settings more permanently, you can
purchase an optional jumper to use with the Apple IIe Card. Once your
dealer installs the jumper on the Macintosh LC logic board, users will still
have access to the Apple IIe Option Panel buttons, but they will not have
access to any of the panels used to change Option Panel settings. See
your authorized Apple dealer for more information.
Hiding the preferences file
To prevent someone from accidentally throwing away the IIe Prefs file,
you can move the file to the System Folder on your startup disk or to
the Preferences folder inside your System Folder.
If you’re a floppy disk startup person, drag the IIe Prefs file into the
System Folder on the IIe Startup Disk; if you’re a hard disk startup
person, drag the file into the System Folder on your hard disk.
Chapter 5: Reference
117
Returning to your work
After you’re finished with the Apple IIe Option Panel, you can return to
what you were doing before you opened the Option Panel—running a
program or utility, writing a program, and so on—by clicking the
Continue button.
Some Option Panel settings take effect only after you restart the Apple IIe
Card. If you changed any such settings, you see a message after clicking
Continue. The message reminds you to restart the Apple IIe Card if you
want the new settings to take effect.
To return to your work, follow these steps:
Click here
to return
to your
Apple IIe
work.
118
Chapter 5: Reference
1. From the Option Panel, click the Continue button.
You return to where you were before opening the Apple IIe Option
Panel.
or
You see a message indicating that the Option Panel settings you made
will not take effect until you restart the Apple IIe Card.
2. If you see a message, click the button for the action you want
to take.
Clicking the Restart IIe button restarts the Apple IIe Card.
Clicking the Continue button returns you to what you were doing
before opening the Option Panel; the new settings will not take effect
until you restart at a later time.
Clicking the Cancel button returns you to the Apple IIe Option Panel;
the new settings will not take effect until you restart at a later time.
Chapter 5: Reference
119
Restarting the
Apple IIe Card
Clicking the Restart IIe button performs a “cold” reset of the Apple IIe
Card. Clicking the Restart IIe button has the same effect as pressing
KK-Control-Reset on the original Apple IIe keyboard, except that clicking
the Restart IIe button also causes any changes you made in the Option
Panel to take effect.
Clicking the Restart IIe button is only one way to restart the Apple IIe
Card. Whenever the Macintosh LC is in the Apple IIe environment,
pressing x-Control-Reset immediately resets the Apple IIe Card.
The Reset key on a typical Macintosh LC keyboard has a triangle on it
and is placed above the top row of keys:
Reset key
▲ Warning: Use x-Control-Reset with caution. When you press
x-Control-Reset, the Apple IIe Card resets immediately, without warning
you to save your work on a floppy disk. Pressing x-Control-Reset
from the Apple IIe Option Panel, or in the Macintosh environment,
immediately restarts your Macintosh LC—with no warning to save
your work. ▲
120
Chapter 5: Reference
To restart the Apple IIe Card, follow these steps:
1. Press Control-x-Esc.
The Option Panel appears, with the General Controls panel displayed.
Click this button to restart
the Apple IIe Card.
2. Click the Restart IIe button.
The Apple IIe Card restarts.
Chapter 5: Reference
121
Quitting the
Apple IIe environment
At any time while you’re in the Apple IIe environment, you can quit the
Apple IIe environment and return to the Macintosh desktop by opening
the Option Panel and clicking the Quit IIe button.
To quit the Apple IIe environment, follow these steps:
1. Press Control-x-Esc.
The Option Panel appears, with the General Controls panel displayed.
▲ Warning: The Apple IIe RAM disk is erased when you leave the Apple IIe
environment. ▲
Click this button to
quit the Apple IIe
environment.
122
Chapter 5: Reference
2. Click the Quit IIe button.
You see a dialog box reminding you that any work you haven’t saved
will be lost.
3. Click the Quit IIe button.
You return to the Macintosh desktop.
Clicking the Cancel button cancels the quitting and returns you to the
Apple IIe Option Panel. It does not cancel any changes you may have
made in the Option Panel.
❖
By the way: You can also quit the Apple IIe environment while using
the Option Panel by pressing x-Q. ❖
Chapter 5: Reference
123
Using the Apple IIe
Card with other
Macintosh programs
This section explains how to switch to other programs while using the
Apple IIe Card. Follow these steps:
1. Press Control-x-Esc to open the Option Panel.
The Option Panel is displayed.
2. How you switch between programs depends on which version
of system software you use.
If you are using version 7 of system software, pull down the
Application menu at the right side of the menu bar and choose the
program you want to switch to.
If you are using an earlier version of system software, pull down the
Apple menu at the left side of the menu bar and choose the program
you want to switch to.
3. When you’re ready to return to your Apple IIe work, repeat
step 2, but this time choose IIe Startup.
4. Click Continue to resume your work.
124
Chapter 5: Reference
Getting help
If you need help while using the Option Panel, use the Help button.
Clicking the Help button displays a window that explains the purpose of
the active panel and tells you how to choose the settings in that panel.
To get help while using the Apple IIe Option Panel, follow these steps:
1. From the Option Panel, click the Help button.
The Help window for the active panel appears.
Click Help for more
information about the
panel you are viewing.
2. Click OK when you’ve finished reading the Help message.
You return to the active panel.
❖
By the way: You can also get help while using the Option Panel by
pressing x-? ❖
If you still need help after using the Help button, see the
“Troubleshooting” appendix for more suggestions.
Chapter 5: Reference
125
Saving, printing,
and displaying
Apple IIe screens
Sometimes you may wish to have a “snapshot” of something that’s on
your Apple IIe screen. You might want to save an image to use in a
Macintosh program, to illustrate an instructional manual you are writing,
or to show someone a problem you’re having with an Apple II program.
The Option Panel has several commands in the File and Edit menus that
allow you take snapshots of your Apple II screens, as explained in the
next three sections.
Saving a picture of
an Apple IIe screen
To save a snapshot of what’s currently on your Apple IIe screen, follow
these steps:
1. Open the Option Panel by pressing Control-x-Esc.
2. Choose the Save IIe Screen command from the File menu.
3. Type a name for the file.
You can also use the usual ways to specify which disk and folder the
file should be saved in.
4. Click Save.
The file is saved on your disk. The files can be opened by any program
that can understand PICT files. Most Macintosh drawing programs can
understand PICT files. (Most painting programs cannot.)
5. Click Continue to return to your Apple IIe work, or click
Quit IIe to return to the Macintosh environment.
126
Chapter 5: Reference
Printing a picture of
an Apple IIe screen
To print a snapshot of what’s currently on your Apple IIe screen, follow
the steps in this section.
Before you begin: If necessary, adjust the page settings as described in
the next section, “Adjusting Page Setup for Printing Apple IIe Screens.”
1. Open the Option Panel by pressing Control-x-Esc.
2. Choose the Print IIe Screen command from the File menu.
The print dialog box for your printer is displayed. Make any
adjustments you like.
3. Click OK.
4. Click Continue to return to your Apple IIe work, or click
Quit IIe to return to the Macintosh environment.
Adjusting Page Setup for printing Apple IIe screens
The Apple IIe screen is too wide to print the usual way on most printers.
However, if your printer can print sideways (all Apple printers can), you
won’t have any problem. Follow these steps:
1. Choose the Page Setup command from the File menu.
The Page Setup dialog box opens, as shown in the next step.
2. Click the sideways orientation icon.
Click here to
print sideways.
Chapter 5: Reference
continues >
127
3. Click OK.
Your screen snapshots should now fit on a page.
❖
Copying a picture of
an Apple IIe screen
Have a LaserWriter? If you have an Apple LaserWriter, you can fit the
image on a single sheet without printing sideways. Choose Page Setup
from the File menu and click the Options button to display more
printing options. Then click the Larger Print Area checkbox until an X
appears and click the OK button in each of the two dialog boxes. ❖
To copy a snapshot of what’s currently on your Apple IIe screen to the
Clipboard, follow these steps:
1. Open the Option Panel by pressing Control-x-Esc.
2. Choose the Copy IIe Screen command from the Edit menu.
The snapshot is placed on your Clipboard. You can now paste the
picture into any Macintosh program that understands PICT files.
3. Click Continue to return to your Apple IIe work, or click
Quit IIe to return to the Macintosh environment.
Displaying a picture
of an Apple IIe screen
To see your Apple IIe screen without leaving the Option Panel, follow
these steps:
Before you begin: Make sure the Option Panel is open.
1. Choose the Show IIe Screen command from the File menu.
A miniature version of the Apple IIe screen is displayed in a small
window.
2. When you’re finished viewing the picture, click the close box.
The window closes.
128
Chapter 5: Reference
Formatting ProDOS
floppy disks
Formatting ProDOS
floppy disks in the
Macintosh environment
Apple IIe programs can read files from 3.5-inch floppy disks only if the
disks are formatted as ProDOS disks. You can format ProDOS floppy disks
by using the Apple IIe programs on the System Utilities disk. See the
instructions that came with the System Utilities disk for details.
If you have version 7 of system software, you can also format ProDOS
floppy disks in the Macintosh environment. Follow these steps:
1. Insert the disk you want to format.
If you see a message asking if you want to initialize the disk, skip
to step 4.
2. Click the disk’s icon once to select it.
The disk’s icon is highlighted.
3. Choose the Erase Disk command from the Special menu.
4. Type a name for the disk.
Type the disk name here.
continues >
Chapter 5: Reference
129
5. Select ProDOS from the Format pop-up menu.
Pull down this menu
and choose ProDOS.
6. Click the Erase button.
130
Chapter 5: Reference
Appendix A
Troubleshooting
I
f you have problems running Apple IIe programs on your
Macintosh LC, look in this appendix for a description of your problem.
You will find more than one suggested solution for the problems
outlined in this appendix. Try each solution one at a time until
the problem is solved.
▲ Warning: If you have a problem with your Apple IIe Card and nothing
presented in this chapter solves it, take the Apple IIe Card to your
authorized Apple dealer or service provider. Attempting to repair the
Apple IIe Card yourself may void the limited warranty. Contact your
authorized Apple dealer or service provider for additional information
about this or any other warranty question. ▲
131
Problems with I can’t see the Apple IIe partition I created on my hard disk
Apple IIe files and disks
If you’re a floppy disk startup person, make sure you started up from
■
the IIe Startup Disk.
■
If you’re a hard disk startup person, make sure that you still have the
ProDOS File System document in your System Folder. (It should have
been installed automatically when you followed the instructions in
Chapter 2.)
I get a message saying no file servers were found
132
■
If you want to start up from a file server, make sure you’re properly
connected to the network.
■
If you don’t want to start up from a file server, make sure you’ve
correctly selected your startup device in the Slot Configuration panel.
If AppleShare is in slot 7, the startup device should not be set to Scan.
Appendix A: Troubleshooting
The Macintosh says my ProDOS floppy disk is unreadable or the
disk does not appear on the Macintosh desktop
■
Eject the disk and make sure it’s unlocked.
■
Eject the disk and make sure it has at least 2K of free space on it.
You can see how much free space it has by entering the Apple IIe
environment, inserting the disk again, and checking the disk’s
directory.
■
If you’re a floppy disk startup person, make sure you started up from
the IIe Startup Disk.
■
If you’re a hard disk startup person, make sure that you still have the
ProDOS File System document in your System Folder. (It should have
been installed automatically when you followed the instructions in
Chapter 2.)
■
Wait until you’re in the Apple IIe environment before inserting
the disk.
I just installed version 7 of Macintosh system software and the
Apple IIe partition on my hard disk disappeared
■
The partition and the files are still there, but you need to follow these
steps to make them visible again: (1) shut down your Macintosh;
(2) insert the IIe Installer Disk; (3) turn on your Macintosh; (4) open
the IIe Installer Disk by double-clicking its icon; (5) open the
HD SC Setup program by double-clicking its icon; (6) click the
Update button; (7) if you have more than one hard disk, click
the Drive button and then the Update button for each hard disk;
(8) click Quit; (9) choose Restart from the Special menu.
Appendix A: Troubleshooting
133
Problems with IIe Startup The settings I make in the Option Panel don’t take effect
■
Make sure the settings you’ve made in the Option Panel apply to cards
installed in active slots. If the cards are not in active slots, reassign
them to active slots.
■
Click the Restart IIe button to restart the Apple IIe Card. (Be sure to
save your work on a floppy disk before restarting.)
The settings don’t work after I connect a new device
■
Connecting a new device to your Apple IIe can cause all the Option
Panel settings to change. Open the Option Panel and change them
back again.
IIe Startup tells me there’s not enough memory for the Memory
Expansion Card
134
■
Increase the current memory size for the IIe Startup program. In the
Macintosh environment, select the IIe Startup icon, choose Get Info
from the File menu, and check the current memory size. To calculate
the correct memory size, take the number you want to put in the
Memory Card and add 350 to it. (See “Changing the Memory
Expansion Card Size” in Chapter 5 for instructions.)
■
Quit any Macintosh programs you are running.
■
Open the Option Panel and reduce the size allocated to the Memory
Expansion Card.
Appendix A: Troubleshooting
The IIe Startup Disk complains that it can’t create the
IIe Prefs file
■
If you started up from the IIe Startup Disk, make sure the disk is
unlocked.
After launching IIe Startup, my screen displays blocks of different
colors or shades
■
This display of colors or shades is the Apple IIe Self-Test. To quit the
self-test and enter the Apple IIe environment, press x-Control-Reset.
I get a message telling me to turn off 32-bit addressing
■
Turn off 32-bit addressing in the Memory control panel in the
Macintosh environment.
I get a message telling me that file sharing is enabled
■
Turn off file sharing in the Sharing Setup control panel in the
Macintosh environment.
Appendix A: Troubleshooting
135
Problems starting up I can’t start up my Apple IIe program
an Apple IIe program
Make sure the disk you’re using is the correct program disk.
■
■
Make sure the Apple IIe disk you want to start up from is an Apple IIe
startup disk. The disk should contain the appropriate operating
system files to allow the program to start. (See the manual that came
with the program you want to run for more information.)
■
Make sure you’ve set the startup slot correctly in the Slots portion of
the Option Panel.
■
Check the SmartPort portion of the Option Panel to make sure you
have the disk drives in the correct slots.
I can’t start up my Apple IIe program by double-clicking its
Macintosh icon
136
■
If you’re a floppy disk startup person, make sure you started up your
computer from the IIe Startup Disk.
■
If you’re a hard disk startup person, make sure that you installed the
Apple IIe Card software according to the instructions in Chapter 2.
■
Make sure the Apple IIe program is either on a ProDOS floppy disk or
on the Apple IIe partition of your hard disk.
■
Try starting up the program from the Apple IIe environment instead.
Appendix A: Troubleshooting
My Apple IIe program won’t start up from the built-in
3.5-inch disk drive
■
Make sure you’ve designated the built-in drive as the startup drive.
Use the SmartPort panel and the “Changing the SmartPort Settings”
section in Chapter 5 to confirm or change 3.5-inch drive
configurations.
■
Make sure you’ve set the SmartPort panel correctly so that the drive
you’ve chosen as your startup drive is slot 5 drive 1.
■
Make sure the Startup option in the Slot Configuration panel is set
to Scan or to slot 5.
■
Make sure the disk is not copy-protected. Some copy-protected
program disks won’t work in a built-in drive. If the disk is copyprotected, try using it in an external UniDisk 3.5 Drive.
My Apple IIe program won’t start up from a UniDisk 3.5 Drive
■
Make sure the disk drive is connected correctly to the Macintosh LC.
(See Chapter 1 for instructions.)
■
If you are using a UniDisk 3.5 Drive and an Apple 5.25 Drive, make
sure the disk drives are correctly daisy-chained together, with the
UniDisk 3.5 Drive first in the chain. (See Chapter 1 for instructions.)
■
Make sure you’ve designated the UniDisk 3.5 Drive as the startup
drive. Use the SmartPort panel and the “Changing the SmartPort
Settings” section in Chapter 5 to confirm or change 3.5-inch drive
configurations.
■
Make sure you’ve set the SmartPort panel correctly so that the drive
you’ve chosen as your startup drive is slot 5 drive 1.
■
Make sure the Startup option in the Slot Configuration panel is set
to Scan or to slot 5.
Appendix A: Troubleshooting
137
My Apple IIe program won’t start up from an Apple 5.25 Drive
138
■
Make sure the disk drive is a gray Apple 5.25 Drive. (The earlier beige
models are not compatible with the Apple IIe Card.)
■
Make sure the disk drive is connected correctly to the Macintosh LC.
(See Chapter 1 for instructions.)
■
If you are using a UniDisk 3.5 Drive and an Apple 5.25 Drive, make
sure the disk drives are correctly daisy-chained together, with the
UniDisk 3.5 Drive first in the chain. (See Chapter 1 for instructions.)
■
Make sure you’ve assigned the Apple 5.25 Drive to the correct
location in the Slot Configuration panel—slot 6.
■
Change the Speed setting in the General Controls panel to Normal.
(Some copy-protection schemes prevent a program from running at
the Fast setting.)
Appendix A: Troubleshooting
Problems running an My Apple IIe program won’t work correctly
Apple IIe program
If the program is on a hard disk, try running it from its original floppy
■
disk instead.
■
Consult the program’s manual for any required slot assignments, and
then change the appropriate slot settings in the Option Panel to
correspond to the required slot assignments. (Some programs require
Apple IIe cards to be in specific slots and will not work if those cards
are not installed in the appropriate slots.)
■
If the program runs correctly on an Apple IIe computer, but not on
the Macintosh LC with an Apple IIe Card, make sure the Option Panel
Slot Configuration settings are consistent with the slot assignments in
the Apple IIe computer.
■
Change the Speed setting to Normal in the General Controls panel.
■
Change the Type Ahead setting to Off in the General Controls panel.
■
Move the Clock Card to a Spare Card slot in the Slot Configuration
panel.
■
Move the Memory Card to a Spare Card slot in the Slot Configuration
panel.
■
Move all other unnecessary cards to Spare Card slots in the Slot
Configuration panel.
■
Some programs don’t work well with both the joystick and the mouse
installed. If you have a joystick connected, try disconnecting it.
My Apple IIe program can’t open an Apple IIe file
■
If you ever opened the Apple IIe file with a Macintosh program, the
file may have been converted to a Macintosh format. Try opening a
backup copy of the file.
Appendix A: Troubleshooting
139
My keyboard doesn’t work properly
■
Make sure the keyboard and mouse are correctly connected to the
Apple Desktop Bus port on the back panel of the Macintosh LC.
(See the instructions that came with your computer.) Make sure the
computer is turned off before you connect or disconnect any cables.
■
If you changed the keyboard and mouse configuration after starting
the computer, turn off the computer and then restart it.
■
Change the Type Ahead setting to Off in the General Controls panel.
(Some programs are not compatible with the Type Ahead feature.)
I can’t hear the beep
■
Turn up the volume using the Macintosh Sound control panel.
I can’t control the volume of sounds my Apple IIe program makes
■
You can control only the sound of the Apple IIe beep. There’s no way
to control the volume of other sounds.
My Apple IIe program runs too slowly
140
■
Change the Speed setting to Fast in the General Controls panel.
■
Change the Display setting to Monochrome in the General
Controls panel.
■
Change the Key Repeat Rate in the General Controls panel to
a faster setting.
■
Change the Type Ahead setting to On in the General Controls panel.
Appendix A: Troubleshooting
My Apple IIe program runs too fast
■
Change the Speed setting to Normal in the General Controls panel.
■
If the program uses color graphics, make sure the Display option is
set to Color in the General Controls panel.
■
Change the Key Repeat Rate in the General Controls panel to a slower
setting.
■
Change the Type Ahead setting to Off in the General Controls panel.
The text on my screen is unreadable
■
If the text is readable when you run the program on an Apple IIe, but
not on a Macintosh LC, adjust the Macintosh monitor’s brightness,
contrast, and color (if you are using a color monitor).
■
If the text is unreadable because of a color “fringe” around text
characters, change the Display setting in the General Controls panel
to Monochrome.
My program won’t run in color
■
Make sure you are using a color monitor.
■
Make sure the Display option is set to Color in the General
Controls panel.
The mouse is difficult to control
■
Adjust the sensitivity of the mouse in the Mouse Card panel.
■
If the program offers other options for controlling the program,
such as using the keyboard or a joystick, try them.
■
If you have a joystick connected, try disconnecting it.
Appendix A: Troubleshooting
141
Problems with the The Option Panel opens unexpectedly
Option Panel
Someone may have set a new keyboard shortcut for opening the
■
Option Panel. Use the Additional Option Panel Key feature (in the
General Controls portion of the Option Panel) to remove or change
the key.
When I try to open the Option Panel, the Apple IIe
environment quits
■
Instead of pressing Control-x-Esc, which opens the Option Panel,
you may have accidentally pressed Option-x-Esc, which causes the
Apple IIe environment to quit. You can return to the Apple IIe
environment by double-clicking the IIe Startup icon again.
I can’t see any of the controls or panels
142
■
Someone may have locked the IIe Prefs file. Use the Get Info
command in the Macintosh Finder to unlock it.
■
Someone may have installed special hardware for the Apple IIe Card
to prevent tampering with the Option Panel. See an authorized Apple
dealer to have it removed.
Appendix A: Troubleshooting
Problems with the modem My Apple IIe program won’t recognize my modem
■
Make sure the modem is connected correctly to its power source and
that the modem is turned on.
■
Make sure the modem cable is connected to the correct port. The
modem can be connected to either the modem or printer port, but
make sure the panel for that port’s Serial Card is set to Modem in
the Option Panel.
■
Make sure the Serial Card assigned to the port you are using is
installed in an active slot—usually slot 1 for the Printer Port Super
Serial Card, slot 2 for the Modem Port Super Serial Card.
■
Make sure the AppleTalk option is turned off in the Macintosh
Chooser if the modem is connected to the computer’s printer port.
■
Make sure the program’s communication options are consistent with
the slot settings in the Option Panel. (See the manual that came with
the telecommunication program you want to run.)
My modem doesn’t work properly
■
Go to the modem Serial Card panel or the printer Serial Card panel in
the Option Panel—depending on which port your modem is attached
to—and turn on the Interrupts feature in the Port Characteristics
portion of the panel.
My modem doesn’t work properly at speeds greater
than 1200 baud
■
Select Monochrome in the General Controls portion of the
Option Panel.
Appendix A: Troubleshooting
143
Problems with printing I can’t print a document
■
Make sure the printer’s power cord is plugged in and the printer’s
power switch is turned on.
■
Make sure the printer cable is connected to the correct port.
■
Make sure the AppleTalk option is turned off in the Macintosh
Chooser if the printer is directly connected to the Macintosh LC
(that is, if it is not connected via a network).
■
Make sure the Printer Card is in a slot that your program can print to,
usually slot 1 (and sometimes slot 7).
■
Make sure the program’s print options are consistent with the slot
settings in the Option Panel. (See the manual that came with the
program you want to run.)
■
If you’re printing through the Printer Card, make sure your Apple IIe
program is set to print to an ImageWriter II. No matter what printer
you’re actually using, the Printer Card treats it like an ImageWriter II.
■
Turn on the Extend Printer Timeout feature in the Printer Card
portion of the Option Panel.
An Apple IIe document stops printing before it should
■
Don’t open the Option Panel while printing. Opening the Option
Panel can interrupt printing.
The pages don’t break right or another document prints
in the middle of mine
■
144
Turn on the Extend Printer Timeout feature in the Printer Card
portion of the Option Panel.
Appendix A: Troubleshooting
Problems ejecting disks I can’t eject the disk from the built-in disk drive
■
■
Use the Eject buttons in the Option Panel, or press x-Shift-1.
(Press x-Shift-2 to eject a disk from a second built-in disk drive.)
The disk label may be sticking, or the disk may be in backward.
Call your authorized Apple dealer to help fix these problems.
I can’t eject the disk from an external disk drive
■
If the drive is a UniDisk 3.5 Drive, make sure the drive is properly
connected and that the Macintosh is turned on. Make sure the
computer is turned off before you connect or disconnect any cables.
■
If the drive is a UniDisk 3.5 Drive, press the Eject button on the drive.
If the drive is an Apple 5.25 Drive, open the disk drive door.
■
The disk label may be sticking, or the disk may be in backward.
Call your authorized Apple dealer to help fix these problems.
Problems copying files to I get the message “File couldn’t be written and was skipped.”
Apple IIe disks
Make sure that all the files you are copying have fewer than
■
15 characters in their names.
Problems running I’m a floppy disk startup person and sometimes I have trouble
Macintosh programs launching Macintosh programs after I’ve started up from the
IIe Startup Disk
■
Make sure the IIe Startup Disk has not been ejected before you
launch the program.
Appendix A: Troubleshooting
145
Appendix B
Using a Hard Disk
Y
ou can use your hard disk to store Apple IIe files and programs, but
only if you create a ProDOS partition, as explained in “Reserving Hard
Disk Space for Apple IIe Files” in Chapter 1.
This appendix explains how to use the partition once you’ve created it.
Storing Apple IIe files
on a hard disk
If you’ve partitioned your hard disk as described in Chapter 1, storing
Apple IIe files on a hard disk is much like storing regular Macintosh files
on a hard disk.
Here’s a rule to help you avoid trouble using the two parts of your hard
disk: Store Macintosh files on the Macintosh partition and store Apple IIe
files on the Apple IIe partition.
146
Technically, the Macintosh will let you store either sort of file on either
sort of partition, but Apple IIe programs can’t see anything stored on a
Macintosh partition and Macintosh programs may not work well if they’re
stored on an Apple IIe partition.
In short, you’ll always be safe if you store Macintosh files on Macintosh
partitions and Apple IIe files on Apple IIe partitions.
Where to put
the software for
the Apple IIe Card
Manipulating
Apple IIe files on the
Macintosh desktop
The Apple IIe Card itself requires some software, which you installed in
Chapter 2. That software, including the IIe Startup program, belongs on
the Macintosh partition. You should also have a copy of BASIC.SYSTEM
and PRODOS on the Apple IIe partition.
You can copy, move, and throw away Apple IIe files just like other
Macintosh files, but only when you start up from a disk that has the
startup document ProDOS File System in the System Folder. ( You
learned how to install this file in “Installing the Software on Your Hard
Disk” in Chapter 2.)
In fact, you can only see your Apple IIe files if the ProDOS File System
icon is in the System Folder on your startup disk. If you are a floppy disk
startup person, as explained in Chapter 2, you must start up from the
IIe Startup Disk to see and manipulate Apple IIe files when in the
Macintosh environment.
If you create an Apple IIe partition on your hard disk as described in
Chapter 1, you will have two copies of the files BASIC.SYSTEM and
PRODOS—one copy on your Macintosh partition and one copy on your
Apple IIe partition. The copies on your Macintosh partition allow you to
start Apple IIe programs by double-clicking their icons. The copies on
your Apple IIe partition allow you to set the partition to be your Apple IIe
startup volume.
Appendix B: Using a Hard Disk
147
Which Apple IIe
programs work
on a hard disk
Not every Apple IIe program works well on a hard disk. The best way to
find out if a particular program works on your hard disk is to copy it
(and all of its accompanying files) to a folder on your Apple IIe partition
and try it.
Here’s some guidelines about which programs work well and which
don’t work at all on a hard disk:
148
■
If the manual for the program includes instructions for installing it
on a hard disk, it will probably work well on your Apple IIe partition.
■
If the program is copy-protected, it probably won’t work on a
hard disk.
■
DOS 3.3 and Pascal programs will not run on a hard disk.
Appendix B: Using a Hard Disk
Appendix C
Creating Custom Partitions
T
he section “Reserving Hard Disk Space for Apple IIe Files” in
Chapter 1 explains the easiest way to partition hard disks to store
Apple IIe files. However, that way creates a 10 MB Apple IIe partition.
If you need a larger or smaller partition, use the Custom feature of
Apple HD SC Setup, explained in this appendix.
These instructions work only for hard disks manufactured by Apple.
If your hard disk was manufactured by another company, contact the
company to see if they have similar software that can reserve space
for Apple IIe files.
149
Preparations
Before you can create a custom partition, you must back up your hard
disk and then start up the program called Apple HD SC Setup, as follows:
1. Back up your hard disk, as described in “Backing Up Your
Hard Disk” in Chapter 1.
2. Turn off your Macintosh.
3. Insert the IIe Installer Disk.
4. Turn on the Macintosh.
5. Open the IIe Installer Disk.
6. Double-click the Apple HD SC Setup icon.
7. Click the Drive button until you see the name of the hard disk
you want to partition.
8. Click Update.
9. Click the Partition button.
You’re now prepared to create the custom partition.
150
Appendix C: Creating Custom Partitions
The custom partition
You should now be looking at the partitioning window in Apple HD SC
Setup. To create a custom Apple IIe partition, follow these steps:
1. Click Custom.
2. Select the main partition.
Click once here
to select the
partition.
3. Click Remove, and when asked for confirmation, click OK.
4. Create a new partition by dragging, as shown in the figure.
Hold down the
mouse button
here and . . .
. . . drag to
about here.
continues >
Appendix C: Creating Custom Partitions
151
5. Click “Macintosh Volume.”
6. Type a number to indicate the size you want your Macintosh
partition to be.
For example, if you wanted to split a 40 MB hard disk into two equal
partitions, you would type 20000.
7. Click OK.
8. Create a second new partition by dragging.
Hold down the
mouse button
here and . . .
. . . drag all
the way to
the bottom.
152
Appendix C: Creating Custom Partitions
9. Click “ProDOS Volume,” then click OK.
10. When prompted, type a name for the partition.
ProDOS names can contain only numbers and letters. If you want to
create a second ProDOS partition, repeat steps 8 through 10.
You can have up to four separate ProDOS partitions. You must
always have one Macintosh partition. (If you don’t have a Macintosh
partition, you won’t be able to see the the hard disk’s icon when
you’re in the Macintosh environment.)
11. Click Done.
12. Click Quit.
You’re now ready to restore your files as described in “Restoring the
Contents of Your Hard Disk” in Chapter 1.
s
▲ Important: If you add a new ProDOS partition after you’ve started to
use the Apple IIe Card, check the SmartPort portion of the Apple IIe
Option Panel to make sure the old icons are still in the correct bins and
s
the new icon is where you want it. ▲
Appendix C: Creating Custom Partitions
153
Appendix D
Parts of the Apple IIe Card
Software
W
hether you’re a hard disk startup person or a floppy disk startup
person, your Apple IIe Card software is made up of the five files shown
in this appendix.
154
The program that starts up
the Apple IIe environment
The file that stores the choices you
make in the Option Panel. (The
IIe Prefs file is created the first time
you run the IIe Startup program.)
The two files that allow you to
start up Apple IIe programs
by double-clicking their icons
The file that you must have in
your System Folder in order
to see Apple IIe files and disks
on your Macintosh desktop
Appendix D: Parts of the Apple IIe Card Software
155
Appendix E
Installing Printer Software
for the IIe Startup Disk
I
f you are a floppy disk startup person, you must have the correct
printer software installed on the IIe Startup Disk. The disk has the
software for many Apple printers already installed. If your printer’s
software is not on the disk, you need to install it according to the
instructions in this appendix.
156
Is your printer’s
software already
installed?
The IIe Startup Disk comes with software for the following printers:
■
ImageWriter II (with or without AppleTalk)
■
All LaserWriter and LaserWriter II printers (except the LaserWriter SC
and the Personal LaserWriter printers)
If you have any of these printers, you do not have to continue with this
appendix. If your printer is not in this list, continue with the next section.
Printers connected to
original Apple IIe
computers
This section explains the details associated with using printers that have
previously been connected to an Apple IIe computer. If your printer was
purchased specifically for use with a Macintosh, skip this section and go
to “Installing Software for Your Printer.”
Some printers connected to your original Apple IIe can readily be
connected to your Macintosh LC, while others cannot:
■
Apple printers. If you have an ImageWriter printer or other printer
manufactured by Apple, it can be connected to your Macintosh in the
standard way. Go now to “Installing Software for Your Printer.”
■
Other printers. Other printers require special attention. Apple does
not recommend using these printers, but if you do, take into account
the following three points: (1) you can only use the printer when
you’re in the Apple IIe environment; (2) you must have a special
cable made so you can plug the printer into either the modem port
or the serial port on the back of your Macintosh; and (3) to use the
printer in the Apple IIe environment, you may have to print through
one of the Serial Cards instead of the Printer Card.
This appendix pertains only to printers designed for use with the
Macintosh, so if the only printer you’re connecting is an Apple IIe
printer manufactured by a company other than Apple, you should
skip the rest of this appendix.
Appendix E: Installing Printer Software for the IIe Startup Disk
157
Installing the
software for
your printer
To install the software for your printer, you must first make room on the
IIe Startup Disk and then follow the software installation instructions
that came with your printer, as described in these steps:
Before you begin: Turn your Macintosh LC off.
1. Insert the IIe Startup Disk.
2. Turn on your Macintosh.
3. Open the IIe Startup Disk by double-clicking its icon.
4. Open the System Folder by double-clicking its icon.
You may have to use the scroll bars to see the System Folder.
5. Drag the following four icons to the Trash.
These icons represent the software for several printers. By throwing
them away, you’ll make room for your printer software.
If you have a LaserWriter or an ImageWriter connected to your
Macintosh, you can leave the appropriate icon or icons on the disk.
158
Appendix E: Installing Printer Software for the IIe Startup Disk
6. If you have an Apple StyleWriter, see the section that follows,
“Special Instructions for the StyleWriter.” Otherwise, see the
instructions that came with your printer to install the
software.
Some manuals might call this “installing the print driver.” Usually it
involves dragging one or two icons from the disk supplied with the
printer into the System Folder. Many Apple printers use the Installer
program to do the copying.
s
▲ Important: Remember, you are installing the software on the IIe Startup
s
Disk, not on your hard disk (if you have one). ▲
7. When you’re finished, select the printer in the Chooser, as
described in “Setting Up the Printer Software” in Chapter 2.
Special instructions
for the StyleWriter
The installation method described in the owner’s manual for the
StyleWriter requires more disk space than is available on the IIe Startup
Disk. Follow these instructions to prepare the IIe Startup Disk for
printing on a StyleWriter.
Before you begin: Make sure you’ve thrown away the appropriate files,
as described in the previous section, “Installing the Software for Your
Printer.”
1. Find the disks that came with your StyleWriter printer.
continues
Appendix E: Installing Printer Software for the IIe Startup Disk
>
159
2. Find the StyleWriter printer file on the StyleWriter disks.
The StyleWriter printer file icon looks like this:
3. Eject the StyleWriter disk by choosing the Eject command
from the File menu. (If you have System 7, the Eject command
is in the Special menu.)
The disk is ejected and its icon and windows are dimmed.
4. Insert your copy of the IIe Startup Disk.
5. Open the IIe Startup Disk by double-clicking its icon.
6. Arrange the windows so you can see both the System Folder
icon on the IIe Startup Disk and the StyleWriter printer
file icon.
7. Drag the StyleWriter icon into the System Folder icon and
insert disks as requested.
8. Choose Restart from the Special menu.
9. When you’re finished, select the printer in the Chooser, as
described in “Setting Up the Printer Software” in Chapter 2.
160
Appendix E: Installing Printer Software for the IIe Startup Disk
Glossary
Apple IIe Option Panel An important feature
A
of IIe Startup that you use to personalize your
Apple IIe work environment, configure slot
settings, and navigate through the Apple IIe
environment. To open the Option Panel, you
press Control-x-Esc.
accessory card A card that, when installed in the
computer, lets you perform specialized functions
not built into the computer. The Apple IIe Card
is an accessory card.
Apple HD SC Setup A Macintosh program that
formats hard disks. See also partitioning.
Apple IIe Card An accessory card that you use to run
Apple IIe programs on a Macintosh LC computer.
Apple IIe environment The environment established
when you run the IIe Startup program. When you
are in the Apple IIe environment, your Macintosh LC
performs as if it were an Apple IIe.
B
BASIC programming language A programming
language built into Apple II computers. The BASIC
programming language is also built into the
Apple IIe Card.
BASIC prompt A square bracket that appears on the
screen when you are in the BASIC programming
environment. It indicates the location of the next
instruction you type.
161
C
D
cards See accessory card.
daisy-chain To link together sequentially.
Character Set setting A setting in the General
Delay Until Key Repeat setting A setting in the
Controls panel that you use to choose between
normal text (light characters on a dark background)
and inverse text (dark characters on a light
background).
x key The Command key. A key on the bottom row of
the Macintosh keyboard that, when held down while
another key is pressed, causes a command to take
K (Open
effect. The x key is equivalent to the K
Apple) key on Apple IIe keyboards.
x-Shift-1 A combination keystroke that ejects any disk
from the built-in floppy disk drive. With Macintosh
computers that have two built-in disk drives,
x-Shift-1 ejects any disk from the first built-in
drive.
General Controls panel. You use it to set the length
of the delay before a character begins repeating
when its key is held down. See Key Repeat rate.
desktop See Macintosh desktop.
Display setting A setting in the General Controls panel
that you use to choose between a monochrome and
color display. (The Color setting works only if you
have a color monitor.)
E
Eject buttons Two buttons in the lower portion of the
Apple IIe Option Panel that you use to eject disks
from the built-in floppy disk drive or drives. If your
computer has two built-in drives, both buttons are
active. If your computer has only one built-in drive,
only the rightmost button is active; the inactive
button appears dimmed.
x-Shift-2 A combination keystroke that ejects any disk
from the second built-in floppy disk drive, on
Macintosh computers that have two built-in drives.
Continue button A button in the lower portion of the
Apple IIe Option Panel. You click it to return to what
you were doing prior to opening the Option Panel.
environment A particular manner or method in which
the computer functions. The Apple IIe Card allows
the Macintosh LC to have an Apple IIe environment—
that is, to act in a manner that conforms to Apple IIe
conventions.
Control Panel See Macintosh control panels.
Control-x-Esc A combination keystroke that opens
the Apple IIe Option Panel. Press Control-x-Esc
whenever you need to use the Option Panel.
F
Finder See Macintosh Finder.
floppy disk startup people People who must start up
from the IIe Startup Disk to use the Apple IIe Card,
generally because they do not have a hard
disk or because the hard disk contains a version of
system software incompatible with the Apple IIe
Card. Compare hard disk startup people.
162
Glossary
G
M, N
General Controls panel A panel in the Apple IIe
Option Panel that you use to set preferences for
personalizing your Apple IIe work environment.
The General Controls panel appears whenever
you open the Apple IIe Option Panel.
H, I, J
hard disk startup people People who can use the
Apple IIe Card without restarting from a special
floppy disk. Hard disk startup people install the
Apple IIe Card software directly on their hard disk.
Compare floppy disk startup people.
Help button A button in the lower portion of the
Apple IIe Option Panel that, when clicked, presents
a Help window that explains the current panel.
Help window A window that appears when you click
the Help button in the Apple IIe Option Panel.
The Help window explains the current panel.
K, L
Key Repeat rate A setting in the General Controls
panel. You use it to adjust the rate at which a
character appears repeatedly on the screen while
you hold down its key. See Delay Until Repeat
setting.
Macintosh control panels Macintosh programs
that you use to personalize your Macintosh work
environment.
Macintosh desktop The Macintosh working
environment—the menu bar and the gray area
on the screen.
Macintosh Finder The Macintosh program that
maintains the Macintosh desktop. You use the Finder
to start up other programs, manage documents and
programs, and move information to and from disks.
Memory Expansion Card panel A panel in the
Apple IIe Option Panel. You use it to add additional
memory by designating a portion of the Macintosh
LC computer’s available memory for Apple IIe
programs. Apple IIe programs interpret this extra
memory as an Apple II Memory Expansion Card.
Modem Port Serial Card panel A panel in the
Apple IIe Option Panel that you use to configure
the Macintosh LC modem port as if it were a
Super Serial Card installed in an Apple IIe.
Mouse Card panel A panel in the Apple IIe Option
Panel that you use to adjust the mouse tracking rate
(the speed at which the pointer responds to your
movement of the mouse).
Mouse Tracking rate A setting in the Mouse Card
panel. You use it to adjust the rate at which the
pointer responds to your movement of the mouse.
Glossary
163
ProDOS An Apple II operating system used by many
O
Apple II programs.
Option key A key on the Macintosh keyboard that
gives an alternate interpretation to another key you
press. You use it to type international characters or
special symbols. The Option key is equivalent to
the K (Solid Apple) key on the Apple IIe keyboard.
ProDOS File System A startup document that allows
you to see Apple IIe files and disks on your
Macintosh desktop. The ProDOS File System
document goes in your System Folder.
Option Panel See Apple IIe Option Panel.
Q
Quit IIe button A button in the lower portion of the
P
Apple IIe Option Panel that you click to quit the
Apple IIe environment.
partitioning Preparing a hard disk so it can store certain
sorts of files. You can use the Macintosh program
Apple HD SC Setup to partition your hard disk so
it can store Apple IIe files.
prefs file See IIe Prefs.
Printer Card A software representation of an Apple IIe
Card you need to install in the Slots Configuration
panel if you want to print. The Printer Card generally
goes in slot 1.
Printer Port Serial Card panel A panel in the
Apple IIe Option Panel that you use to configure the
Macintosh LC printer port as if it were a Super Serial
Card installed in an Apple IIe.
printer timeout An error that can stop printing if a
printer takes too long to finish. You can extend the
amount of time your printer can take before causing
a printer timeout error by clicking the Extend
Printer Timeout box in the Printer Card panel.
164
R
Read Me document A document included on a
program disk to provide you with late-breaking
information about the program or product. You will
find a Read Me document on the IIe Startup Disk.
Reset key A key in the upper portion of the Macintosh
keyboard identified by a triangular icon. In the
Apple IIe environment, the Reset key is used in
exactly the same manner as the Reset key on an
Apple IIe keyboard.
Restart IIe button A button in the lower portion of
the Apple IIe Option Panel. You click it to reset the
Apple IIe Card and restart IIe Startup.
Glossary
S
T, U, V, W, X, Y, Z
Slot Configuration panel A panel in the Apple IIe
Option Panel that you use to configure the Apple IIe
slot settings for the Apple IIe programs you run on
the Macintosh LC. The slot settings you choose
in the Slot Configuration panel are software
representations of the actual Apple IIe slots and
cards.
IIe Prefs A file created automatically the first time you
run IIe Startup. The IIe Prefs file maintains the
settings in the Apple IIe Option Panel. Any changes
you make in the Option Panel are automatically
saved in the IIe Prefs file when you quit the IIe
Startup program.
IIe Startup The program that you use to run Apple IIe
slots The receptacles inside an Apple IIe computer that
accept accessory, peripheral, and controller cards
that allow the computer to operate. The IIe Startup
program uses software representations in place of
the actual Apple IIe slots and cards.
programs with the Apple IIe Card. The IIe Startup
program starts up the Apple IIe Card, controls the
Apple IIe work environment according to your
settings in the Apple IIe Option Panel, and provides
a means of navigating within the Apple IIe
environment.
SmartPort panel A panel in the Apple IIe Option Panel
that lets you increase by two the number of drives
accessible to Apple IIe programs. You use the
SmartPorts panel to designate a startup drive among
the 3.5-inch floppy disk drives included in your
computer system.
Type Ahead setting A setting in the Apple IIe Option
Panel that you use to turn on and off Type Ahead, an
option that lets you type text or commands while the
computer is busy performing a task.
Speed setting A setting in the Apple IIe Option Panel
that you use to set the processing speed of the Apple
IIe Card. You use this setting to slow down or speed
up Apple IIe programs running on the Macintosh LC.
Two settings are available: Normal and Fast.
Startup Beep setting A setting in the Apple IIe Option
Panel that you use to choose a startup beep sound.
The startup beep sound is also used by many
programs as an alert sound.
Glossary
165
Index
x (Command key) xv
x-Control-Reset, caution about, 120
x-Q, for quitting Apple IIe environment 123
x-Shift-1, for ejecting a disk 45, 76, 115
x-Shift-2, for ejecting a disk 76, 115
KK (Open Apple key) xv
K (Solid Apple key) xv
A
accessory cards xii. See also cards, in Option Panel
Additional Option Panel Key setting, in Option Panel 97
Apple 5.25 Drive
configuring for startup 110–112
connecting 12–14
ejecting disks from 114–115
problems with 145
startup problems 138
Apple HD SC Setup icon 7
Apple HD SC Setup program 6–9
creating custom partitions with 149–153
Apple SCSI hard disk, connecting to Macintosh LC 22–23
AppleShare card
adjustments to 68
installing 64, 84
Printer Card vs. 80
problems with 132
starting up with 84–85
AppleShare Card icon, in Option Panel 66, 85
AppleShare Workstation Card, using Apple IIe files with 85
AppleTalk
modem problems and 143
printer problems and 144
Apple IIe Card xii. See also Apple IIe environment
changing beep sound for 49
checking for changes to 26
installing xiv
installing software for 25–34
on a floppy disk 31–34
on a hard disk 27–30, 147
modem baud rate with 106
restarting 44–45, 120–121
with IIe Prefs icon 73
switching to Macintosh programs from 124
using 35–56
warranty problems 131
167
Apple IIe devices, connecting 20–22
Apple IIe disk drives
configuring for startup 110–112
connecting 12–19
daisy-chaining 17–19
startup problems 137–138
Apple IIe environment xii. See also Apple IIe Card
changing startup device for 110–112
closing Option Panel in 47, 118–119
configuring for. See configuring cards and slots
customizing. See customizing
filenames in 56
getting help in 125
managing files in 54–56
moving back to Macintosh desktop from 40–41,
122–123
opening Option Panel in 40, 46, 97, 116
quitting 122–123
restarting Apple IIe Card 44–45, 120–121
running programs in 44–45, 76–77
switching to and from 38–41, 73
Apple IIe files. See also Apple IIe programs; IIe Prefs file
copying 54, 55
deciding where to store 3–4
on a file server 84–85
managing 54–56
manipulating 147
naming 56
partitioning hard disk for 4, 6–11
problems with 132–133
storing on hard disk 146–147
using from file server 85
using with Macintosh programs 81–83
viewing by icon 55
viewing by size 55
168
Apple IIe Option Panel. See Option Panel
Apple IIe partition
naming 8–9
problems with 11, 132, 133
Apple IIe partition icon 9
Apple IIe pictures, copying to Macintosh programs 83
Apple IIe port
connecting disk drives to 13, 15
connecting other devices to 20–22
Apple IIe programs
configuring startup slot for 110–112
Memory Expansion Card for 100–102
printing from 78–80
problems with 136–141
starting up 136–138
running 41–45, 75–77
in the Apple IIe environment 44–45, 76–77
from a hard disk 148
in the Macintosh environment 41–43, 75–76
run-time problems, Speed setting and 86
starting 36–37
from a floppy disk 36–37
problems with 136–138
Apple IIe screens, pictures of
copying 128
displaying 128
printing 127–128
saving 126
Apple IIe Self-Test 135
Apple IIe Startup program. See IIe Startup program
Apple user groups, finding xvi
arranging cards in Option Panel 51–53, 65–67, 108–9
ASCII (“text-only”) files, transferring from Apple IIe to
Macintosh 81–82
Index
B
C
backing up a hard disk 5
backing up the IIe Startup Disk 31
backup disks, restoring from 10–11
BASIC prompt 39, 72
opening Option Panel from 46
starting up a program disk from 77
BASIC.SYSTEM icon 29, 155
beep sound
choosing 49
problems with 90, 140
Berkeley Macintosh Users’ Group xvi
black-and-white monitor
changing setting for 95
flashing text on 96
problems with 141
Boston Computer Society xvi
buttons
Install 28
in Option Panel
Continue 47, 118–119
Eject 114, 115
Help 125
Quit IIe 40, 122, 123
Restart IIe 67, 121
Switch Disk 28
cables
connecting 13–22
jumper 117
cards, in Option Panel. See also configuring cards and slots;
customizing; Option Panel
Apple IIe names 60
arranging 51–53, 65–67, 108–109
making adjustments to 67–68
planning arrangement of 59–65
setting options for 67–68
uses for 62
changing settings. See configuring cards and slots;
customizing
character set, changing display of 96
Chooser
installing printer software 32–33
selecting printer in 78–80
Chooser.II program, selecting printer in 80
Clock Card icon, in Option Panel 66
Clock icon, changing position of 52–53
color monitor
changing setting for 95
flashing text on 96
problems with 141
Color setting, in Option panel 95
Command (x) key xv
configuring cards and slots 57–68, 100–114.
See also cards, in Option Panel; customizing
Memory Expansion Card 100–102
Printer Card 106–107
Serial Cards (Super Serial Cards) 103–106
slot settings 51–53, 108–109
SmartPort settings 112–114
startup device 110–112
Super Serial Cards 103–106
Index
169
connecting devices 12–22
Apple 5.25 Drive 12–14, 17–19
Apple SCSI hard disk 22–23
Apple IIe disk drives 12–19
file servers 64
hand controls 20–22
joysticks 20–22
modems 64–65, 103–106
multiple disk drives 17–19
other types of 20–22
power cord warning 1
problems with 134
serial devices 64–65, 103–106
UniDisk 3.5 Drive 15–16
Continue button, in Option Panel 47, 118–119
Control-x-Esc, to open Option Panel 40, 46, 116
Control-x-Reset 45, 121
control panels, Macintosh
beep sound and 90, 140
mouse tracking rate and 98
copying
to Apple IIe disks, problems with 145
Apple IIe files 54, 55
to Macintosh programs 81–82
Apple IIe pictures, to Macintosh programs 83
Apple IIe screen snapshots 128
Copy IIe Screen command (Edit menu) 128
crosshair pointer 87
customizing 86–99. See also configuring cards and slots
beep sound 49
display (color vs. monochrome) 95
display of text 96
hard disk partitions 149–153
key repeat delay 92–93
key repeat rate 90–91
mouse tracking rate 50, 98–99
Option Panel key changes 97
processing speed 86–88
startup beep sound 89–90
Type Ahead feature 94
170
D
desktop. See Macintosh desktop
daisy-chaining disk drives 17–19
Delay Until Key Repeat setting, in Option Panel 92–93
disk drives, floppy. See also disks, hard
compatibility with Macintosh LC 12
configuring for startup 110–112
connecting 12–19
Apple 5.25 Drive 12–14
multiple 17–19
UniDisk 3.5 Drive 15–16
daisy-chaining 17–19
startup problems 136–138
swapping 14, 19
disks, floppy. See also IIe Installer Disk; IIe Startup Disk
backing up to 5
displaying contents of 55
duplicating files in 55
ejecting 45, 76, 114–115
keyboard shortcuts 115
problems with 145
formatting as ProDOS disks 129–130
installing Apple IIe Card software on 33–35
locking 2
opening icon 54
starting up from 36–37
disks, hard
Apple SCSI, connecting to Macintosh LC 22–23
as Apple IIe file storage 3–4
backing up 5
installing Apple IIe Card software on 27–30, 147
partitioning 4, 6–11, 149–153
problems with 132, 133, 136
restoring contents of 10–11
running Apple IIe programs from 148
storing Apple IIe files on 146–147
using 146–148
as startup device 27–30
Index
Disk Tools disk, IIe Installer Disk vs. 7, 10
Display setting, in Option Panel 95
problems with 141
double-click exercise 40–43
drawing
mouse tracking rate for 98–99
problems with 141
duplicating files 55
E
Easy Install screen 28
Edit menu, Copy IIe Screen command 128
Eject buttons, in Option Panel 114, 115
ejecting disks 45, 76, 114–115
environments, switching between 38–41, 122–123.
See also Apple IIe environment; Macintosh
environment
error messages. See troubleshooting
Extend Printer Timeout setting, in Option Panel 107
external drives, ejecting disks from 114–115
problems with 145
F
File menu
Page Setup command 127–128
Print IIe Screen command 127
Save IIe Screen command 126
Show IIe Screen command 128
files. See also Apple IIe files; icons; IIe Prefs file
duplicating 55
managing 54–56
shared formats 81–82
transferring from Apple IIe to Macintosh 81–82
file servers. See also network
as Apple IIe file storage 3
problems with 132
slot configuration for 64
starting up from 84–85
file sharing, turning off 135
5.25 Drive icon, in Option Panel 66
flashing text, appearance of 96
floppy disk drives. See disk drives, floppy
floppy disks. See disks, floppy
floppy disk startup people 30, 31, 34, 70
printer software installation for 156–160
problems running Macintosh programs for 145
restarting Macintosh desktop for 41
starting IIe Startup program for 70–72
“foreign” files, opening Apple IIe files as 82
formatting ProDOS disks 129–130
G
General Controls panel, in Option Panel 86
buttons in
Continue 118–119
Eject 115
Help 125
Quit IIe 122, 123
Restart IIe 121
display of text 96
flashing text, appearance of 96
settings in
Additional Option Panel Key 97
Color 95
Delay Until Key Repeat 92–93
Inverse Text 96
Key Repeat Rate 90–91
Monochrome 95
Normal Text 96
Speed 86–88
Startup Beep Sound 89–90
Type Ahead 94
General icon, in Option Panel 49
graphics
mouse tracking rate for 98–99
problems with 141
Index
171
H
hand controls, connecting 20–22
hard disk. See disks, hard
hard disk startup people 27, 30, 70
hardware. See connecting devices; modem; printer
Help button, in Option Panel 125
hiding the preferences file 117
I
icons
Apple HDSC Setup 7
Apple IIe partition 9
Apple IIe program 76
BASIC.SYSTEM 29, 155
double-clicking 41–43
Installer 27
in Option Panel 66
AppleShare Card 66, 85
changing position of 52–53
Clock Card 66
5.25 Drive 66
General 49
Memory Card 48, 66, 101
Monitor Card 66
Mouse Card 49–50, 66, 99
Printer Card 66, 107
Serial Card 66, 104
Slots 51, 66, 108, 110
SmartPort 66, 113
printer, in Macintosh Chooser 79
PRODOS 29
ProDOS File System 155
“Read Me” 26
Slots 51, 66
IIe Prefs 53, 155
IIe Startup 29, 39, 155
viewing Apple IIe files by 55
172
Install button 28
Installer icon 27
installing
AppleShare card 84
Apple IIe Card xiv
Apple IIe Card software 25–34
on a floppy disk 31–34
on a hard disk 27–30, 147
printer software 32–34, 156–160
interference, radio or television ix
Inverse Text setting, in Option Panel 96
J
joystick, problems with 141
joysticks, connecting 20–22
jumper cable, limiting Option Panel access with 117
K
keyboard
problems with 94, 140
repeat delay rate, setting 92–93
repeat rate, setting 90–91
Reset key 45, 120
special keys, defined xv
typing ahead 94
keyboard shortcuts
ejecting disks 45, 76, 115
getting help 125
opening Option Panel 97, 116
quitting Apple IIe environment 122–123
restarting Apple IIe Card 75, 120, 121
key repeat delay, defined 92
Key Repeat Rate setting, in Option Panel 90–91
Index
L
locking floppy disks 2
locking IIe Prefs file 116–117
M
Macintosh Chooser, selecting printer in 78–80
Macintosh desktop, moving back to 40–41, 122–123
Macintosh environment
filenames in 56
formatting ProDOS floppy disks in 129–130
Memory Expansion Card size and 134
running Apple IIe programs in 41–43, 75–76
screen saver problems 78
switching from and to 38–41
turning off file sharing in 135
turning off 32-bit addressing in 135
using Apple IIe files in 81–82
Macintosh General Controls panel, beep sound and
90, 140
Macintosh LC computer. See also Macintosh environment
connecting Apple IIe devices to 12–23
ejecting disks on 114, 115
setting up for Apple IIe files 4–11
Macintosh LC logic board, jumper cable for 117
Macintosh Mouse control panel, mouse tracking rate and
98
Macintosh programs
copying Apple IIe pictures to 83
problems with 145
switching to, from Apple IIe Card 124
using Apple IIe files with 81–83
Macintosh Sound control panel, beep sound and 90, 140
memory capacity, increasing 100–102
problems with 134
Memory Card. See also Memory Expansion Card
adjustments to 68
moving 64
Memory Card icon, in Option Panel 48, 66, 101
Memory Expansion Card
configuring 100–102
problems with 101, 134
Memory Expansion Card panel, in Option Panel 100–102
menu bar access, in Option Panel 49
messages. See troubleshooting
modem
connecting 64–65, 103–106
problems with 106, 143
slot configuration for 64–65
using at over 1200 baud 106
modem port, on Macintosh LC computer 103
Modem Port icon, in Option Panel 66, 104
monitor, problems with 141. See also color monitor;
monochrome monitor; screen display
Monitor Card, adjustments to 68
Monitor Card icon, in Option Panel 66
monochrome monitor
changing setting for 95
flashing text on 96
problems with 141
Monochrome setting, in Option Panel 95
mouse, problems with 141
Mouse Card icon, in Option Panel 49–50, 66, 99
Mouse Card options 49–50, 68
Mouse Card panel, in Option Panel 99
mouse tracking, defined 98
mouse tracking rate, changing 50, 98–99
moving cards in Option Panel 51–53, 108–109
N
naming Apple IIe files 56
naming the Apple IIe partition 8–9
network. See also file servers
installing printer for 80, 33–34
limiting Option Panel access on 116–117
Normal Text setting, in Option Panel 96
notation conventions xv
Index
173
O
Open Apple (K
K) key xv
Option key xv
Option Panel 46–53, 116
buttons in
Continue 118–119
Eject 115
Help 125
Quit IIe 122, 123
Restart IIe 67, 121
cards in
Apple IIe names 60
arranging 51–53, 65–67, 108–109
making adjustments to 67–68
planning arrangement of 59–65
setting options for 67–68
uses for 62
closing 47, 118–119
customizing work environment with 86–99.
See also customizing
icons in 66
AppleShare Card 66, 85
Clock Card 66
5.25 Drive 66
General 49
Memory Card 48, 66, 101
Monitor Card 66
Mouse Card 49–50, 66, 99
Printer Card 66, 107
Serial Card 48, 104
Serial Card (Modem Port) 66, 104
Serial Card (Printer Port) 66, 104
Slots 51, 66, 108, 110
SmartPort 66, 113
limiting access to 116–117
menu bar access in 49
mouse tracking rate in 50, 99
opening 40, 46, 116
changing or adding key for 97
problems with 142
174
panels in
General Controls 86
Memory Expansion Card 100–102
Mouse Card 99
Slot Configuration 51–53, 108–109
problems with 134, 142–144
returning to work from 118–119
settings in
Additional Option Panel Key 97
Color 95
Delay Until Key Repeat 92–93
Extend Printer Timeout 106–107
Inverse Text 96
Key Repeat Rate 90–91
Monochrome 95
multiple IIe Prefs files for 74–75
Normal Text 96
Speed 86–88
Startup Beep Sound 89–90
Type Ahead 94
setting up cards and slots in 57–68
IIe Startup problems 134
P
Page Setup command (File menu) 127–128
partition, hard disk
creating 4, 6–11
custom partitions 149–153
problems with 132, 133
storing Apple IIe files in 146–147
using 146–147
partition icon 9
performance
Color/Monochrome settings and 95
5.25 Drives and 112
problems with 86, 140–141
Speed setting and 86–88
personalizing. See customizing; configuring
pictures, Apple IIe, copying to Macintosh programs 83
Index
pointer
crosshair 87
mouse tracking rate and 98
ports, on Macintosh LC computer
modem 103
printer 103
preferences file. See IIe Prefs file
printer
choosing in the Chooser 78–80
serial 64
setting up software for 32–34, 156–160
Printer Card 64
adjustments to 68
AppleShare Workstation Card vs. 80
configuring 106–107
Printer Card icon, in Option Panel 66, 107
printer icons, in Macintosh Chooser 79
printer port, on Macintosh LC computer 103
Printer Port icon, in Option Panel 66, 104
printer software, installing 156–160
printer timeout, setting 106–107
Print IIe Screen command (File menu) 127
printing
from Apple IIe programs 78–80
Apple IIe screen snapshots 127–128
configuring for 103–107
installing software for 32–34, 156–160
problems with 80, 144
problems. See troubleshooting
processing speed. See performance
ProDOS disks
formatting 129–130
problems with 133
ProDOS File System 29, 37
role of 155
SmartPort devices and 112–114
PRODOS icon 29, 155
ProDOS names, legal 9
programs. See Apple IIe programs; icons; IIe Startup
program
Q
Quit IIe button, in Option Panel 40, 122, 123
R
radio interference ix
“Read Me” icon 26
rebuilding the system 11
repeat delay rate, setting for keyboard 92–93
repeat rate, setting for keyboard 90–91
Reset key 45, 120
Restart IIe button, in Option Panel 67, 121
restarting the Apple IIe Card 44–45, 120–121
restoring hard disk contents 10–11
running Apple IIe programs 41–45, 75–77
in the Apple IIe environment 44–45, 76–77
from a hard disk 148
in the Macintosh environment 41–43, 75–76
problems with 139–141
Speed setting and 86
starting from a floppy disk 36–37
running Macintosh programs, problems with 145
running IIe Startup program 70–73
problems with 72, 134–135
S
Save IIe Screen command (File menu) 126
screen display
Apple IIe screen snapshots
copying 128
displaying 128
printing 127–128
saving 126
color vs. monochrome 95
flashing text on 96
problems with 78, 141
screen saver problems 78
Serial Card icons, in Option Panel 48, 104
Modem Port 66, 104
Printer Port 66, 104
Index
175
Serial Cards
adjustments to 68
configuring 65, 103–106
installing 64–65
serial devices, connecting 64–65, 103–106
servers. See file servers
setup. See installing; partition, hard disk
shared file formats 81–82
Show IIe Screen command (File menu) 128
size, viewing Apple IIe file list by 55
Slot Configuration Panel, in Option Panel 51–53, 108–109
slots. See configuring cards and slots
Slots icon 51, 66, 108, 110
SmartPort icon, in Option Panel 66, 113
SmartPort settings, changing 68, 112–114
software, Apple IIe Card. See also Apple IIe programs;
IIe Startup program
installing 25–34
on a floppy disk 31–34
on a hard disk 27–30, 147
parts of 154–155
software, printer, installing 32–34, 156–160
Solid Apple (K) key xv
sound volume, problems with 140
Speed setting
in Option Panel 86–88
problems with 86
starting up
Apple IIe programs 41–45
in the Apple IIe environment 44–45, 76–77
from a floppy disk 36–37
from a hard disk 147
in the Macintosh environment 41–43, 75–76
problems with 132, 136–138
from a file server 84–85
problems with 132
IIe Startup program 70–73
problems with 72, 134–135
176
Startup Beep Sound setting, in Option Panel 89–90
startup device
changing 110–112
using file server as 84–85
using floppy disk as 31–34
using hard disk as 27–30
startup disk 27. See also IIe Startup Disk
Startup pop-up menu 111
startup program. See IIe Startup program
Super Serial Cards, configuring 103–106
swapping
floppy disk drives 14, 19
other devices 21
Switch Disk button 28
.SYSTEM, at end of icon names 76
system crashes 11
rebuilding after 11
System Folder
hiding IIe Prefs file in 117
ProDOS File System in 29
system software requirements 37
system software version
Apple IIe partition problems and 133
floppy disk formatting and 129
startup problems and 132, 133
switching between environments and 124
T
television interference ix
text, changing display of 96
“text-only” (ASCII) files, transferring from Apple IIe to
Macintosh 81–82
32-bit addressing, turning off 135
3.5-inch disks. See disks, floppy
3.5-inch drive, problems with, 137. See also UniDisk
3.5 Drive
tracking rate (mouse), changing 50, 98–99
Index
troubleshooting 131–145
Apple IIe partition 11, 132, 133
Apple IIe programs
running 139–141
running by double-clicking 43
starting 136–138
beep sound 90, 140
card not installed 68
disk drive compatibility 12
disks, Apple IIe
ejecting 145
recognizing 37, 133
files, copying 145
file server 132
finding Apple IIe files in Macintosh programs 82
keyboard 94, 140
Memory Expansion Card, 101, 134
messages
“File couldn’t be written and was skipped” 145
“UNABLE TO BOOT FROM STARTUP SLOT” 72, 77
modem 106, 143
mouse 141
Option Panel 134, 142–144
printing 80, 144
processing speed 86, 140–141
screen display 141
screen saver problems 78
Serial Card not installed 104
sound volume 140
system crashes 11
system software incompatibility 7
IIe Prefs file, creating 135
IIe Startup 72, 134–135
IIe files. See Apple IIe files; IIe Prefs file
IIe Installer Disk 27
checking Read Me file on 26
installing Apple IIe Card software with 27–30
locking 2
partitioning hard drive with 6–9
IIe Prefs file 53, 73
hiding 117
limiting Option Panel access with 116–117
problems creating 135
role of 155
using more than one 74–75
IIe Prefs icon 53, 73, 155
IIe programs. See Apple IIe programs
IIe Startup Disk 31
copying 31
installing printer software for 32–34, 156–160
locking 2
problems with 135
starting up from 36–37, 70–71
IIe Startup icon 29, 39, 155
restarting Apple IIe card with 44
IIe Startup program
problems with 72, 134–135
role of 155
starting up 70–73
Type Ahead setting, in Option Panel 94
problems with 94, 140
U
UniDisk 3.5 Drive
configuring for startup 110–112
SmartPort settings 112–114
connecting 15–16
daisy-chaining 17–19
ejecting disks from 114–115
problems with 145
startup problems 137
unlocking floppy disks 2
user groups xvi
V
volume control, problems with 140
Index
177
W, X
warranty problems 131
work environment, customizing. See customizing
write-protecting disks. See locking floppy disks
Y, Z
Y-shaped cable, connecting devices with 13–22
178
Index
Apple IIe Card Quick Reference
Startup Method
How you install the Apple IIe Card software determines how you start up
the Macintosh. Check the box that describes how you installed the
software. (The installation instructions are in Chapter 2 of the Apple IIe
Card Owner’s Guide.)
■ Floppy Disk Startup
n
1.
2.
3.
4.
Turn off the Macintosh LC.
Insert your copy of the IIe Startup Disk.
Turn on the Macintosh LC.
Find and double-click the IIe Startup icon.
■ Hard Disk Startup
n
1. Turn on the Macintosh LC.
2. Find and double-click the IIe Startup icon.
Opening the
Option Panel
To make certain changes to your Apple IIe environment or to return to
the Macintosh environment, you must open the Option Panel.
When you’re in the Apple IIe environment, you open the Option Panel
by pressing these three keys at the same time:
ctrl
Resetting the
Apple IIe Card
esc
To perform a “cold reset” of your Apple IIe, press these three keys at the
same time:
ctrl
(If you press these keys while in the Option Panel, you will reset the
Macintosh, not the Apple IIe Card.)
Option Panel Cards
Icon
Name
Replaces old
Apple IIe
Accessory Card
Comments
5.25-inch
Drive Card
Apple 5.25 Drive
Interface Card
Only needs to be installed if you have a 5.25-inch disk drive
connected to your Macintosh LC.
AppleShare Card
Apple IIe
Workstation Card
Only needs to be installed if you are connected to a file server.
Then it’s usually installed in slot 7.
Clock Card
Any clock card
Only needs to be installed if you have Apple IIe programs that
use a clock card.
Memory Card
Apple IIe Memory
Expansion Card
Used to increase the amount of memory available for your
Apple IIe programs.
Monitor Card
Any Apple IIe
monitor card
Cannot be moved from slot 3. You control the monitor settings
in the Apple IIe Option Panel and the Macintosh Monitors
control panel.
Mouse Card
Apple IIe
Mouse Card
Only needs to be installed if you have Apple IIe programs that
can use a mouse.
Printer Card
Super Serial Card
connected to
a printer
Used instead of Serial Cards to control all printers. Choose
the printer and set options using the Macintosh program
called the Chooser.
Serial Card
(Modem Port)
Super Serial Card
Used to control a modem or any other serial device (except
a printer) connected to the modem port of the Macintosh.
Serial Card
(Printer Port)
Super Serial Card
Used to control a modem or any other serial device (except
a printer) connected to the printer port of the Macintosh.
SmartPort Card
UniDisk 3.5
Interface Card
Controls the scanning order of the disk drives attached to your
Macintosh LC.
Apple, the Apple logo, and Macintosh are registered trademarks of Apple Computer, Inc. UniDisk is a trademark of Apple Computer, Inc.
Limited Warranty on Media and Replacement
If you discover physical defects in the manuals distributed with an Apple product or in the media on which a software
product is distributed, Apple will replace the media or manuals at no charge to you, provided you return the item to be
replaced with proof of purchase to Apple or an authorized Apple dealer during the 90-day period after you purchased the
software. In addition, Apple will replace damaged software media and manuals for as long as the software product is
included in Apple’s Media Exchange Program. While not an upgrade or update method, this program offers additional
protection for two years or more from the date of your original purchase. See your authorized Apple dealer for program
coverage and details. In some countries the replacement period may be different; check with your authorized Apple dealer.
ALL IMPLIED WARRANTIES ON THE MEDIA AND MANUALS, INCLUDING IMPLIED WARRANTIES OF
MERCHANTABILITY AND FITNESS FOR A PARTICULAR PURPOSE, ARE LIMITED IN DURATION TO NINETY (90) DAYS
FROM THE DATE OF THE ORIGINAL RETAIL PURCHASE OF THIS PRODUCT.
Even though Apple has tested the software and reviewed the documentation, APPLE MAKES NO WARRANTY OR
REPRESENTATION, EITHER EXPRESSED OR IMPLIED, WITH RESPECT TO SOFTWARE, ITS QUALITY, PERFORMANCE,
MERCHANTABILITY, OR FITNESS FOR A PARTICULAR PURPOSE. AS A RESULT, THIS SOFTWARE IS SOLD “AS IS,” AND
YOU, THE PURCHASER, ARE ASSUMING THE ENTIRE RISK AS TO ITS QUALITY AND PERFORMANCE.
IN NO EVENT WILL APPLE BE LIABLE FOR DIRECT, INDIRECT, SPECIAL, INCIDENTAL, OR CONSEQUENTIAL
DAMAGES RESULTING FROM ANY DEFECT IN THE SOFTWARE OR ITS DOCUMENTATION, even if advised of the
possibility of such damages. In particular, Apple shall have no liability for any programs or data stored in or used with Apple
products, including the costs of recovering such programs or data.
THE WARRANTY AND REMEDIES SET FORTH ABOVE ARE EXCLUSIVE AND IN LIEU OF ALL OTHERS, ORAL OR
WRITTEN, EXPRESSED OR IMPLIED. No Apple dealer, agent, or employee is authorized to make any modification,
extension, or addition to this warranty.
Some states do not allow the exclusion or limitation of implied warranties or liability for incidental or consequential
damages, so the above limitation or exclusion may not apply to you. This warranty gives you specific legal rights, and you
may also have other rights which vary from state to state.
Warning
This equipment has been tested and found to comply with the limits for a Class B digital device in accordance with the
specifications in Part 15 of FCC rules. See instructions if interference to radio or television reception is suspected.
DOC Class B Compliance This digital apparatus does not exceed the Class B limits for radio noise emissions from digital
apparatus set out in the radio interference regulations of the Canadian Department of Communications.
Observation des normes—Classe B Le présent appareil numérique n’émet pas de bruits radioélectriques dépassant les
limites applicables aux appareils numériques de la Classe B prescrites dans les règlements sur le brouillage radioélectrique
édictés par le Ministère des Communications du Canada.
K
Apple Computer, Inc.
20525 Mariani Avenue
Cupertino, California 95014
(408) 996-1010
TLX 171-576
030-1930-A
Printed in U.S.A.