1
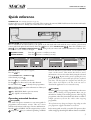
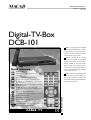
USER MANUAL DCB-101
ENGLISH 1:ST EDITION
980805: 00270
Digital-TV-Box
DCB-101
DCB-101 is the key to the new digital
technology with transmission of multimedia services via the cable-TV-network. It opens up to a whole new world
of information in your home.
DCB-101 can apart from receiving
ordinary TV-programmes and digital
radio also be used as a modern information medium for the entire family.
Bank errands, home shopping, games
and Internet are all functions that you
in the near future will be able to handle
on the cable-TV-box.
Quick reference
On/Off (standby).
DCB-101 develops constantly as your
cable-TV-operator automatically upgrade your box with new software and
functions.This happens automatically via
the cable-TV-network.
Numeric keys to select programmes and to change
menu values.
(P+) Step to the next programme position.
(P-) Step back to the prior programme position.
(GUIDE) Opens a menu guide for programmes and
interactive services.
(INFO) Display on-screen information of what you
are viewing just now.
(RADIO) Direct access to the radio menu.
In radio mode the present time is displayed on the
screen.
Access to the basic technical menus.
These 4 buttons are used for navigating in the menus.
SEE, FEEL AND HEAR
Confirms choice in menus.
(QUIT) Exit menu/service.
(RETURN) Back to previous menu.
(MUTE) Audio On/Off.
(VOLUME) Increase or decrease audio volume.
Shift between the Box, TV and VCR.
CABLE- TV
QUALITY YOU
2
USER MANUAL DCB-101
1:ST EDITION
Content
1
PREFACE
Network configuration ................................................................ p. 14
Introduction ...................................................................................... p. 4
Frequency ........................................................................................ p. 14
Safety instructions ........................................................................... p. 4
Network number .......................................................................... p. 14
Mains connection ............................................................................ p. 4
Symbol rate ..................................................................................... p. 14
The enclosed parts ......................................................................... p. 4
Modulation ...................................................................................... p. 14
TV and VCR installations ............................................................. p. 15
2
QUICK REFERENCE
TV screen size ................................................................................ p. 15
Connect up ....................................................................................... p. 5
RGB brightness level .................................................................... p. 15
Installation ......................................................................................... p. 5
VCR standard ................................................................................. p. 15
Daily use ............................................................................................ p. 5
Modulator installation .................................................................. p. 16
Operating extended functions ..................................................... p. 5
Output standard mode ................................................................ p. 16
G-button (GUIDE) .......................................................................... p. 5
Channel output selection ............................................................ p. 16
i-button (INFO) ............................................................................... p. 5
Installation ....................................................................................... p. 16
Change installation code ............................................................. p. 17
3
THE DIGITAL-TV-BOX
Enter new code ............................................................................. p. 17
Front panel ........................................................................................ p. 6
Confirm new code ........................................................................ p. 17
Front panel display .......................................................................... p. 7
Failed confirmation ....................................................................... p. 17
Rear panel ......................................................................................... p. 8
Operating indicators .................................................................... p. 18
Language selection ........................................................................ p. 18
4
REMOTE CONTROL HANDSET
Local time settings ........................................................................ p. 19
Installing batteries ........................................................................... p. 9
Updating the box ........................................................................... p. 20
Using the remote control ............................................................. p. 9
Keys .................................................................................................... p. 9
8 MAIN MENU
Main menu ...................................................................................... p. 21
5
CONNECT UP
Channel list ..................................................................................... p. 21
Basic installation ............................................................................ p. 10
Radio list .......................................................................................... p. 22
External amplifier .......................................................................... p. 11
Information ..................................................................................... p. 23
Modem ............................................................................................. p. 11
Subscription information ............................................................. p. 23
Parallel interface ............................................................................ p. 11
Digital decoder information ....................................................... p. 24
Serial interface ............................................................................... p. 11
Installation ....................................................................................... p. 24
Other external equipment ......................................................... p. 11
9 VCR RECORDING .......................................................... p. 25–26
6
VIEWING CARD
Viewing card (Smart card) .......................................................... p. 12
10 TRACING A PROBLEM ................................................. p. 27–28
On screen messages ..................................................................... p. 12
11 TECHNICAL SPECIFICATIONS ........................................
7
INSTALLING THE DIGITAL-TV-BOX
Installation ....................................................................................... p. 13
Installation code ............................................................................. p. 13
p. 29
12 THE SCART CONNECTOR ................................................ p. 30
13 MENU TREE ........................................................................... p. 31
3
USER MANUAL DCB-101
SECTION 1
Foreword
The DCB-101 is in general terms designed and operates as
a computer, where basic functions for keys, remote control,
menu system etc. are factory downloaded.
This manual describes the basic functions of the digitalbox. As the software that is controlling the digital-box can
be upgraded via the cable-TV-network, we reserve ourselves
against the fact that functions described in this manual in
time may change.
The manual is only scraping on the surface when describing
all connection possibilities and multimedia services that
the digital-box can handle. This because all services are
changeable and completely dependent on what functions
and services your cable-TV-operator chooses to provide.
SAFETY INSTRUCTIONS
Place your digital-box on a protected, dry and wellventilated spot. Never put anything on top of the digitalbox as this prevents the necessary ventilation. Like all
electronic devices the digital-box contains sensitive,
hazardous electronic components and should therefore be
placed away from children’s reach and placed so that it can’t
fall down.
Clean the exterior of your digital-box with a dry and soft
cloth. Never let any form of liquid come in contact with
the digital-box as this can damage sensitive components
and destroy it. Never use abrasive pads, scouring-powder
or solvents like alcohol or turpentine. This will damage the
digital-box’s finish.
WARNING !!!
The digital-box has a built in decoder and card reader. To
view and use encrypted programmes and services a viewing
card “smart card” is required. This card is subscribed from
your cable-TV operator. Furthermore the digital-box have
a software memory where your cable-TV-operator can
download additional functions and services.
When connecting to the cable-TV-network, your service
provider automatically download software containing their
specific programmes and services. These functions are
described in more detain in the manual provided by your
cable-TV-operator. To get the most out of your cable-TVbox we recommend that you carefully read this manual
before installation.
4
Never remove the digital-box’s cover - risk of an electric shock!
MAINS LEAD CONNECTION
The digital-box should be connected directly to the mains
outlet socket. The use of an extended mains lead is not
recommended. To turn the digital-box off completely, first
put it in stand-by mode then disconnect the mains plug
from the outlet socket.
THE ENCLOSED PARTS
Following parts are enclosed:
Digital-TV-box
Remote control handset
Two LR3 batteries
Mains lead
SCART cable
Coaxial cable (UHF connection)
Telephone cord
Telephone plug
External amplifier lead
User manual
USER MANUAL DCB-101
SECTION 2
Quick reference
CONNECT UP (More detailed information on page 10)
Connect the box to your TV with the scart cable. Then connect the antenna (UHF) lead between the antenna wall-outlet
and the input of the box. Finally you connect the box to the mains.
004
INSTALLATION (More detailed information on page 13–20)
Prior to installation the smart-card has to be placed in the left hand card reader with the arrow and the gold coloured
contact pad faced upwards and inwards. Press the
-button. Select INSTALLATION
. Enter the installation code
. Along with your smart-card certain information is enclosed. This
0000 . Select NETWORK CONFIGURATION
information is to be verified or changed.
Press the
Press the
FREQUENCY IN KHZ...
NETWORK NUMBER...
MAIN MENU
INSTALLATION
CHANNEL LIST
RADIO LIST
INFORMATION
INSTALLATION
MOVE
OK CONFIRM
-button to confirm your entry.
-button to confirm your entry.
Enter code
0000
ENTER YOUR INSTALLATION CODE
THEN PRESS OK TO CONFIRM
––––
Q QUIT
OK CONFIRM R
RETURN
M001-4Fh
Q QUIT
-key.
Select CHANNEL LIST or RADIO LIST
Select desired program
Press the
Use the
.
.
-key to confirm your choice.
-key for direct access to the radio channels.
Use the numeric keys
FREQUENCY IN KHZ
NETWORK NUMBER
SYMBOL RATE
MODULATION
NETWORK CONFIGURATION
TV AND VCR INSTALLATION
MODULATOR INSTALLATION
CHANGE INSTALLATION CODE
OPERATING INDICATORS
LANGUAGE SELECTION
LOCAL TIME SETTINGS
MOVE
OK CONFIRM R
RETURN
to directly select programmes.
-key (INFO) display on-screen information of what you
are viewing just now.
-key (RETURN) Back to previous menu.
-key (QUIT) exit menu/service.
Operating extended functions
-KEY (GUIDE)
Your cable-TV-operator transmits its own menu guide for
programmes and interactive services. This one is more
exclusive and contains a wide range of services and functions.
Press the -key (GUIDE). Use the navigation keys to select
and press the -key to confirm. Depending on Which
Verify/change
frequency and
network number
according to
information
given by your
cable-TV-operator.
362000
41000
68750
64
IN CASE OF PROBLEM
PLEASE CONTACT YOUR RETAILER
Q QIUT
M008-1Fh
DAILY USE (How to view or listen to a program)
Press the
NETWORK CONFIGURATION
INSTALLATION
M009-1Fh
MOVE
OK CONFIRM
M010-5Fh
functions and choices you have made, coloured symbols may
occur on the screen. This means that there is more
information to be seen. You select this by using the coloured
keys
. Be patient when you are operating the menu
guide. You may have to wait a while after you have confirmed
your choice. The box operate as a computer and each time you
make a choice and confirm it, the box needs some time to
download the application in to its internal memory.
-KEY (INFO)
With the -key you get a range of information on the screen
while you are viewing a TV-programme. Here you get
information of what you are viewing just now, other ongoing
programmes, when they started and end, theme etc. With a
simple operation you can also select other ongoing
programmes.
These functions may change and improve depending on what
your programme supplier downloads in to the box.
In the menu guide served by your cable-TV-operator, there
will be a help page describing the different functions available.
5
USER MANUAL DCB-101
SECTION 3
Front panel
005
USING THE BUTTONS
On/Off (stand-by). With this button you alter
between Off (standby)-mode and the programme
number that you last viewed.
Display a banner on the screen with information
of what you are viewing just now.
Press once to display the main menu and to confirm
choices. Press twice to save and exit the menu.
Step through programmes. Step through menu
lines.
Adjust volume. Select menu options.
6
FRONT PANEL INDICATORS
Green. Blink when receiving signal from the remote
control.
Red. Indicate that the box is in standby.
Yellow. No present function.
USER MANUAL DCB-101
SECTION 3
Front panel display
As a supplement to the menu and on screen messages some information is also shown in the front panel display. Se
examples bellow:
006
Clock in standby mode
(The clock is automatically
set via the cable*)
007
012
Radio programme number
Programme number
013
Initiate software download
Menu mode
014
Downloading
009
VCR mode
015
Error occurred during download
010
TV-mode
016
Initiate (starting up) the box
011
Audio off (mute)
008
* See page 19 how to manually adjust the clock.
7
USER MANUAL DCB-101
SECTION 3
Rear panel
F
A
B
G
C
H
I
D
E
017
A Mains input connector
(Excessive Voltage as specified in standard EN41003)
F Socket for modem connection to the telephone line
(for coming services)
(TNV)
B Serial interface (for coming services)
(SELV)
G Parallel interface
(for coming services)
C External amplifier connector (L+R)
(SELV)
(SELV)
H SCART connector for TV
D SCART connector for VCR
(SELV)
(SELV)
I
E Cable-TV-network connector
(SELV)
8
TV coaxial connector (UHF connection)
(SELV)
USER MANUAL DCB-101
SECTION 4
Remote control handset
INSTALLING BATTERIES
USING THE REMOTE CONTROL
Put the two LR3-type batteries in the compartment covered
by a lid on the back of the handset. Observe how the
batteries are to be positioned.
The remote control gives you access to all functions of the
digital-TV-box. Make sure that the remote is aimed towards
the digital-box when you operate it.
KEYS
On/Off (standby). With this key you alter between Off
(standby)-mode and the programme number that you last
viewed.
Give access to the basic technical menus with channel list,
radio list, information and installation menus.
Shift between the Box, TV and VCR
(INFO) Display on-screen information of what you are
viewing just now.
(GUIDE) Opens the channel list or the menu guide for
programmes and interactive services that your cable-TVoperator provides.
(RETURN) Step back to previous menu.
(QUIT) Exit menu/service
Confirms choice in menus
(VOLUME) Increase audio volume +
(VOLUME) Decrease audio volume (P+) Step to next programme position
(P-) Step back to the prior programme position
(MUTE) Audio On/Off
These 4 keys are used for navigating the menus and to select
between alternative menu settings.
Aimed for interactive services.
Aimed for interactive services.
Aimed for interactive services.
Aimed for interactive services.
Numeric keys to select programmes and to change menu
values.
(RADIO) Direct access to the radio menu.
In radio mode the present time is displayed on screen.
003
OBSERVE: The functions on certain keys may change depending on what
services your cable-TV-operator download into the digital-box.
9
USER MANUAL DCB-101
SECTION 5
Connect up
Wall-outlet
Cable-TV
SCART lead (Enclosed)
Digital-TV-box
TV
SCART lead (Extra)
UHF coaxial cable
(Enclosed)
UHF coaxial cable
(Extra)
VCR
UHF coaxial cable (Extra)
018
CABLE-TV WALL-OUTLET
Connect between the wall-outlet and CABLE IN on the back
panel of the digital-box using the enclosed UHF coaxial cable.
Then connect the digital-box to your VCR with another UHF
coaxial cable, connect between TV OUT on the digital-box and
ANT IN/RF IN on your VCR. After that you connect the VCR
to your TV with yet another UHF coaxial cable, this between TV
OUT/RF OUT on the VCR and the aerial input on your TV.
TV
If your digital-box is connected with UHF coaxial cables as
described above, turn the digital-box on. Select an unused
programme button on your TV and tune until the digital-box’s
menu is visible on the screen. Store the setting on the selected
programme button. The digital-box is factory pre-set to UHF
channel 22. The output UHF channel from your digital-box can
if needed be changed between 22–69. See instruction on page
16.
VCR
If your VCR is connected with UHF coaxial cables, install this in
the same way as described in the TV chapter on this page. Avoid
10
tuning the digital-box and VCR to the same UHF channel. If the
UHF channel happens to be the same or close on both the digitalbox and VCR interference in the picture may be the result. If this
is the case the UHF channel from your digital-box can be moved.
See instruction on page 16.
Observe: It is not advisable to mute, adjust volume or open any
menus while recording a programme on your VCR. This because all
on-screen messages and menus will be reflected on the recording.
SCART
If your TV and/or VCR have a SCART connector, we recommend
that you connect it by a SCART lead to this connector. This will
improve audio and picture quality and there is no need for UHF
tuning. To avoid disturbing a video recording, the audio on the
VCR scart is not affected by the volume and mute functions.
USER MANUAL DCB-101
SECTION 5
Telephone/Modem
Computer
Printer
HiFi
019
EXTERNAL AMPLIFIER
SERIALPORT
Connecting the digital-box to an external amplifier or home
cinema equipment will improve the sound considerably. A
connection cable is enclosed. The volume can be adjusted
directly from your remote control.
To connect, for example an exernal printer.
(Aimed for future services)
MODEM
Socket to connect modem to the public telephone line.
(Aimed for future services)
PARALLEL PORT
For example to connect a personal computer.
(Aimed for future services)
OTHER EXTERNAL EQUIPMENT
Which sort of external equipment connectable to your
digital-box is in large controlled and decided by your cableTV-operator, who downloads the various functions and
applications in to your digital-box. Contact your cable-TVoperator for information about what sort of equipment that
can be connected.
11
USER MANUAL DCB-101
SECTION 6
Viewing card
020
To install the digital-box and to be able to view encrypted
programmes a valid viewing card “smart card” is required.
Place the card in the designated card reader. Always leave
your card in the card reader to avoid that it gets lost or
damaged and so that it continuously can be updated.
To place the card: open the lid on the left-hand side of the
front panel. Carefully push the card into the card reader
slot. The arrow and the gold coloured contact pad are faced
upwards and inwards when the viewing card is placed in
the slot. The viewing card is placed in the left-hand slot
(CARD A). The right hand slot (CARD B) is aimed for
coming services such as cash money cards etc.
ON SCREEN MESSAGES
When starting the digital-box from standby, initially a start
up picture is displayed showing an hour-glass or similar. At
the same time the message “init” is shown on the front
panel display. This to indicate that the digital-box is busy
connecting to the cable-TV network and downloading
necessary data to its internal memory.
If anything goes wrong, one of the three messages on the
right may come up.
M050Fh
INDSÆT DERES KORT
I TV-BOKSEN. PLEASE INSERT YOUR SMART CARD
IN THE DIGITAL DECODER
IN CASE OF PROBLEM
PLEASE CONTACT YOUR RETAILER
M051Fh
INVALID SMART CARD
CHECK IF IT IS
INSERTED CORRECTLY
IN CASE OF PROBLEM
PLEASE CONTACT YOUR RETAILER
WARNING
Never extract and insert your card unnecessarily.
Do not bend the card.
Do not clean the card with liquid of any kind.
M052Fh
THIS CHANNEL IS NOT INCLUDED
IN YOUR SUBSCRIPTION
TO SUBSCRIBE
PLEASE CONTACT YOUR RETAILER
Development and design of basic software and menus are made by Sagem SA
12
M053Fh
USER MANUAL DCB-101
SECTION 7
Installing the digital-TV-box
The first time you install your digital-TV-box or when you move to another
region or move the box to another cable-TV-provider, a few settings under
the menu “Installation – Network configuration” need to be changed. The
two settings that are to be changed are Network number and Frequency.
Information about these two settings is obtained from your cable-TV-operator.
OBSERVE! To be able to set up the box, a valid smart card needs to be placed
in the left-hand card reader.
The digital box is ready to be used as soon as the installation procedure
described on the following pages is completed.
INSTALLATION
Press the MENU-key to display the basic menu.
Select INSTALLATION with the navigation keys up/down.
Press the OK-key to confirm your choice.
To protect the installation menus, these are locked and can only be opened
with a so-called “secret code”. This code is factory pre-set to “0000”.
MAIN MENU
CHANNEL LIST
RADIO LIST
INFORMATION
INSTALLATION
MOVE
Q QUIT
OK CONFIRM
M001-4Fh
INSTALLATION CODE
Enter your secret code, the factory-set default code is “0000”. The first
segment flashes until a digit is entered and the second begins to flash
etc. As soon as the digit is entered a star replaces the segment.
INSTALLATION
ENTER YOUR INSTALLATION CODE
THEN PRESS OK TO CONFIRM
––––
Using the left arrow button on the remote control, it is possible to
return and modify a digit already entered before the complete code is
confirmed by pressing the OK- key. In this case the digit becomes a
flashing segment again, indicating that a new digit may be entered.
If the code entered is incorrect, the following error message is displayed
on the screen. Then re-enter the code and press OK to confirm.
OK CONFIRM R
RETURN
Q QUIT
M008-1Fh
CHANGE INSTALLATION CODE
PLEASE RE-ENTER YOUR NEW CODE
THEN PRESS OK TO CONFIRM
You may change the default code “0000”: se on page 17.
––––
FALSE ENTRY
CONFIRMATION
START AGAIN
When the correct code is entered you gain access to the installation
menu.
OK CONFIRM R
RETURN
Q QUIT
M016-3Fh
INSTALLATION
INFORMATION
If you have displayed a menu and not made any changes for a
while, the brightness is automatically turned down to save the TVscreen from wear. Press any key to get the picture back to normal.
NETWORK CONFIGURATION
TV AND VCR INSTALLATION
MODULATOR INSTALLATION
CHANGE INSTALLATION CODE
OPERATING INDICATORS
LANGUAGE SELECTION
LOCAL TIME SETTINGS
MOVE
OK CONFIRM R
RETURN
Q QIUT
M009-1Fh
13
USER MANUAL DCB-101
SECTION 7
Installing the digital-TV-box
At the point of installation, the menu “Network configuration” is very
important in order to get the digital-box to operate correctly. Certain specific
data related to your cable-TV-provider needs to be entered according to
description bellow.
NETWORK CONFIGURATION
INSTALLATION
NETWORK CONFIGURATION
TV AND VCR INSTALLATION
MODULATOR INSTALLATION
CHANGE INSTALLATION CODE
OPERATING INDICATORS
LANGUAGE SELECTION
LOCAL TIME SETTINGS
Select NETWORK CONFIGURATION with the navigation-keys up/down.
Press the OK-key to confirm your choice.
MOVE
OK CONFIRM R
Q QIUT
RETURN
M009-1Fh
FREQUENCY
Select FREQUENCY IN KHZ with the navigation-keys up/down.
Use the numeric keys and enter the frequency number given to you by
your cable-TV-operator.
NETWORK CONFIGURATION
FREQUENCY IN KHZ
NETWORK NUMBER
SYMBOL RATE
MODULATION
362000
41000
68750
64
IN CASE OF PROBLEM
PLEASE CONTACT YOUR RETAILER
NETWORK NUMBER
MOVE
OK CONFIRM
Select NETWORK NUMBER with the navigation-keys up/down.
Use the numeric keys and enter the network number given to you by
your cable-TV-operator.
SYMBOL RATE
This value is factory pre-set. Make sure that your digital-box have the
same setting as shown on the right-hand picture. If not, enter the correct
value with the numeric keys.
M010-1Fh
NETWORK CONFIGURATION
FREQUENCY IN KHZ
NETWORK NUMBER
SYMBOL RATE
MODULATION
362000
41000
68750
64
IN CASE OF PROBLEM
PLEASE CONTACT YOUR RETAILER
MOVE
OK CONFIRM
M010-2Fh
MODULATION
This value is factory pre-set. Make sure that your digital-box have the
same setting as shown on the right-hand picture. If not, enter the correct
value with the numeric keys.
NETWORK CONFIGURATION
YOUR NETWORK NAME
IS: …WAITING FOR ACKNOWLEGE
When all settings are made press OK to confirm.
After pressing OK the digital-box will start to search for the network
information.
OK CONFIRM R
RETURN
M011-1Fh
When the digital-box have found and established contact with your
cable-TV-operator the name of the operator will be displayed on the
screen. Press OK to confirm. The digital-box is now ready to be used.
If the digital-box does not find any network information, a question
mark is displayed instead of the operator name. Go back and doublecheck the above settings. Make sure that the coaxial-cable (UHF) between
the digital-box and the cable-TV wall outlet is properly connected.
NETWORK CONFIGURATION
YOUR NETWORK NAME
IS: ?
OK CONFIRM R
RETURN
M012-1Fh
14
USER MANUAL DCB-101
SECTION 7
TV AND VCR INSTALLATION
Select TV AND VCR INSTALLATIONS with the navigation-keys up/down.
Press OK to enter this menu.
TV SCREEN SIZE
Select TV SCREEN SIZE with the navigation-keys up/down.
INSTALLATION
NETWORK CONFIGURATION
TV AND VCR INSTALLATION
MODULATOR INSTALLATION
CHANGE INSTALLATION CODE
OPERATING INDICATORS
LANGUAGE SELECTION
LOCAL TIME SETTINGS
MOVE
OK CONFIRM R
RETURN
Q QIUT
M009-2Fh
Select the alternative that correspond to the screen format of your TV.
Press OK to confirm.
TV AND VCR INSTALLATION
4:3
16:9
Normal TV-screen
Wide screen
TV SCART OUTPUT
TV SCREEN SIZE
TV SCART OUTPUT
RGB BRIGHTNESS LEVEL
VCR STANDARD
TO CHANGE DATA IN THE RIGHT HAND COLUMN
USE < > THEN PRESS OK TO SAVE
YOUR CHOICE
MOVE
Select TV SCART OUTPUT.
Select the alternative that works best together with the equipment connected
via scart-lead from the TV-SCART output on your digital-box.
Press OK to confirm.
RGB
C-VIDEO
TV or other equipment that can handle RGB.
-Extra VCR connected to the TV-scart output.
-Older TV with scart connector but without RGB.
-TV that can handle RGB but gives you problems
when using Tele-text.
4:3
RGB
LOW
VHS
OK CONFIRM R
RETURN
Q QUIT
M013-1Fh
TV AND VCR INSTALLATION
4:3
RGB
LOW
VHS
TV SCREEN SIZE
TV SCART OUTPUT
RGB BRIGHTNESS LEVEL
VCR STANDARD
TO CHANGE DATA IN THE RIGHT HAND COLUMN
USE < > THEN PRESS OK TO SAVE
YOUR CHOICE
MOVE
OK CONFIRM R
RETURN
Q QUIT
M013-2Fh
Select RGB if you have a scart-lead connected to a TV or other equipment
that can handle RGB.
RGB BRIGHTNESS LEVEL
TV AND VCR INSTALLATION
Select RGB BRIGHTNESS LEVEL.
Select the brightness that meets the eye.
Press OK to confirm.
LOW
HIGH
TV SCREEN SIZE
TV SCART OUTPUT
RGB BRIGHTNESS LEVEL
VCR STANDARD
4:3
RGB
LOW
VHS
TO CHANGE DATA IN THE RIGHT HAND COLUMN
USE < > THEN PRESS OK TO SAVE
YOUR CHOICE
MOVE
OK CONFIRM R
RETURN
Q QUIT
M013-3Fh
VCR STANDARD
TV AND VCR INSTALLATION
Select VCR STANDARD.
Select the type of video recorder that you have.
Press OK to confirm.
VHS – Normal video recorder
SVHS – Super VHS recorder
4:3
RGB
LOW
VHS
TV SCREEN SIZE
TV SCART OUTPUT
RGB BRIGHTNESS LEVEL
VCR STANDARD
TO CHANGE DATA IN THE RIGHT HAND COLUMN
USE < > THEN PRESS OK TO SAVE
YOUR CHOICE
MOVE
OK CONFIRM R
RETURN
Q QUIT
M013-4Fh
15
USER MANUAL DCB-101
SECTION 7
Installing the digital-TV-box
MODULATOR INSTALLATION
Select MODULATOR INSTALLATION using the navigation keys up/down.
Press OK to enter this menu.
INSTALLATION
NETWORK CONFIGURATION
TV AND VCR INSTALLATION
MODULATOR INSTALLATION
CHANGE INSTALLATION CODE
OPERATING INDICATORS
LANGUAGE SELECTION
LOCAL TIME SETTINGS
MOVE
OK CONFIRM R
RETURN
Q QIUT
M009-3Fh
OUTPUT STANDARD MODE
Select OUTPUT STANDARD MODE.
Select which type of broadcasting standard your TV is built for.
Press OK to confirm.
Output standard for Scandinavian TV-equipment is PAL B/G
PAL B/G
SECAM-L
MODULATOR INSTALLATION
OUTPUT STANDARD MODE
CHANNEL OUTPUT SELECTION
INSTALLATION
PAL B/G
22
YES
TO CHANGE DATA IN THE RIGHT HAND COLUMN
USE < > THEN PRESS OK TO SAVE YOUR CHOICE
MOVE
OK CONFIRM R
RETURN
Q QUIT
M014-1Fh
CHANNEL OUTPUT SELECTION
Select CHANNEL OUTPUT SELECTION.
Select an appropriate output channel that does not interfere with the
picture from your VCR or other TV-programmes.
MODULATOR INSTALLATION
OUTPUT STANDARD MODE
CHANNEL OUTPUT SELECTION
INSTALLATION
PAL B/G
22
YES
Press OK to confirm.
TO CHANGE DATA IN THE RIGHT HAND COLUMN
USE < > THEN PRESS OK TO SAVE YOUR CHOICE
Factory pre-set to channel 22.
MOVE
OK CONFIRM R
RETURN
Q QUIT
M014-2Fh
Channel 22–69
OBSERVE!
If you change to another output channel, again you have to search
on your TV and VCR to find the picture.
Read more on page 10,TV and VCR.
INSTALLATION
Select INSTALLATION.
Select if the modulator (channel output) is to be activated or not.
Press OK to confirm.
MODULATOR INSTALLATION
OUTPUT STANDARD MODE
CHANNEL OUTPUT SELECTION
INSTALLATION
PAL B/G
22
YES
TO CHANGE DATA IN THE RIGHT HAND COLUMN
USE < > THEN PRESS OK TO SAVE YOUR CHOICE
OBSERVE!
Never select “NO” if the digital-box is only connected with a
coaxial (UHF) cable (not scart) to your TV. If you do, the picture
disappears and you must use a TV with a scart connector to be
able to view the picture and change back the setting.
16
MOVE
OK CONFIRM R
RETURN
Q QUIT
M014-3Fh
USER MANUAL DCB-101
SECTION 7
CHANGE INSTALLATION CODE
Select CHANGE INSTALLATION CODE with the navigation keys up/down.
Press OK to enter this menu.
INSTALLATION
NETWORK CONFIGURATION
TV AND VCR INSTALLATION
MODULATOR INSTALLATION
CHANGE INSTALLATION CODE
OPERATING INDICATORS
LANGUAGE SELECTION
LOCAL TIME SETTINGS
MOVE
OK CONFIRM R
RETURN
Q QIUT
M009-4Fh
87
ENTER NEW CODE
Use the numeric keys to enter your new 4-digit code.
Press OK to confirm.
CHANGE INSTALLATION CODE
ENTER YOUR NEW CODE
THEN PRESS OK TO CONFIRM
––––
OK CONFIRM R
RETURN
Q QUIT
M015-1Fh
CONFIRM NEW CODE
You are asked to enter the new code once more to confirm the new code.
Press OK to confirm.
CHANGE INSTALLATION CODE
PLEASE RE-ENTER YOUR NEW CODE
THEN PRESS OK TO CONFIRM
––––
OK CONFIRM R
RETURN
Q QUIT
M016-2Fh
FAILED CONFIRMATION
If you did not enter the same code the second time this message comes
up. Repeat the procedure and confirm the new code once again.
CHANGE INSTALLATION CODE
PLEASE RE-ENTER YOUR NEW CODE
THEN PRESS OK TO CONFIRM
––––
FALSE ENTRY
CONFIRMATION
START AGAIN
OK CONFIRM R
RETURN
Q QUIT
M016-3Fh
CHANGE INSTALLATION CODE
ENTER YOUR NEW CODE
THEN PRESS OK TO CONFIRM
––––
CORRECT
OBSERVE!
If you change to your own secret code it is important to remember
this code. If you forget it you need to contact your cable-TVoperator.
OK CONFIRM R
RETURN
Q QUIT
M016-4Fh
17
USER MANUAL DCB-101
SECTION 7
Installing the digital-TV-box
OPERATING INDICATORS
Select OPERATING INDICATORS with the navigation-keys up/down.
Press OK to enter this menu.
This menu is for service purposes and not aimed to the user.
INSTALLATION
NETWORK CONFIGURATION
TV AND VCR INSTALLATION
MODULATOR INSTALLATION
CHANGE INSTALLATION CODE
OPERATING INDICATORS
LANGUAGE SELECTION
LOCAL TIME SETTINGS
MOVE
OK CONFIRM R
RETURN
Q QIUT
M009-5Fh
Not aimed to the user.
OPERATING INDICATORS
I AND Q SUBCARRIER SWAPPED
RHYTHM LOCK
EQUALISER LOCK
CARRIER LOCK
FRAME LOCK
BIT ERROR RATE
SIGNAL STRENGTH
FREQUENCY OFFSET
R
RETURN
NO
YES
YES
YES
YES
10E-08
16200
0 KHz
Q QUIT
M017-1Fh
LANGUAGE SELECTION
Select LANGUAGE SELECTION with the navigation-keys up/down.
INSTALLATION
NETWORK CONFIGURATION
TV AND VCR INSTALLATION
MODULATOR INSTALLATION
CHANGE INSTALLATION CODE
OPERATING INDICATORS
LANGUAGE SELECTION
LOCAL TIME SETTINGS
Press OK to enter this menu.
Select MENU LANGUAGE.
Select desired menu language.
Press OK to confirm.
MOVE
OK CONFIRM R
RETURN
Q QIUT
M009-6Fh
Do the same procedure to select FAVOURITE AUDIO
and SUB-TITLE LANGUAGE.
LANGUAGE SELECTION
MENU LANGUAGE
Swedish
English
Danish
Norwegian
Finish
AUDIO AND SUB-TITLES
Swedish
Danish
Norwegian
Finnish
English
German
French
Italian
Spanish
Dutch
None (only on sub-titles)
MENU LANGUAGE
ENGLISH
FAVOURITE AUDIO LANGUAGE
ENGLISH
FAVOURITE SUB-TITLE LANGUAGE ENGLISH
MOVE
OK CONFIRM R
RETURN
Q QUIT
M018-1Fh
OBSERVE!
If the favourite language that you have chosen is not available, the
digital-box will automatically present the default language transmitted
on each specific programme.
18
USER MANUAL DCB-101
SECTION 7
LOCAL TIME SETTINGS
A specific time descriptor for each country is normally transmitted by
the cable-TV-operator. You set the country that you are in and the digital box will automatically register and display the correct local time.
Select LOCAL TIME SETTINGS with the navigation-keys up/down.
Press OK to enter this menu.
INSTALLATION
NETWORK CONFIGURATION
TV AND VCR INSTALLATION
MODULATOR INSTALLATION
CHANGE INSTALLATION CODE
OPERATING INDICATORS
LANGUAGE SELECTION
LOCAL TIME SETTINGS
MOVE
OK CONFIRM R
RETURN
Q QIUT
M009-7Fh
Select COUNTRY using the navigation keys up/down.
Select the country you are in, using the navigation-keys left/right.
LOCAL TIME SETTINGS
Press OK to confirm.
AVAILABLE COUNTRIES
Sweden
Denmark
Norway
Finland
England
Germany
France
Italy
Spain
Other
Netherlands
COUNTRY
TIME OFFSET
LOCAL TIME:
MOVE
OK CONFIRM R
ENGLAND
+01 H
13H01
RETURN
Q QUIT
M019-1Fh
Your cable-TV-operator may for some reason not transmit any time descriptor
for the selected country. In this case you have the option to adjust to the
correct time yourself as follows:
Select TIME OFFSET with the navigation-keys up/down.
Adjust the “LOCAL TIME” displayed, using the navigation-keys left/
right. (+/–12 hours)
LOCAL TIME SETTINGS
COUNTRY
TIME OFFSET
LOCAL TIME:
ENGLAND
+01 H
13H01
Press OK to confirm.
MOVE
OK CONFIRM R
RETURN
Q QUIT
M019-2Fh
LOCAL TIME SETTINGS
COUNTRY
TIME OFFSET
LOCAL TIME:
MOVE
OK CONFIRM R
ENGLAND
+01 H
13H01
RETURN
Q QUIT
M019-3Fh
19
USER MANUAL DCB-101
SECTION 7
Installing the digital-TV-box
In order to improve the functions and services offered, your digital-box may
be updated directly via the cable-TV-network. The digital-box may only be
updated when it is switched on (not in stand-by). Do not turn off the digital-box during updating.
When new software is available for updating your box, this is normally
presented to you when the digital-box is started from stand-by to on position.
It is therefore recommended that you once in a while turn the box off (standby) and then on again to check if there is any update available.
UP TO DATE OF DECODER
UPDATE THE BOX
As soon as new functions and services become available, an on screen
message will be displayed which offers you to complete the update.
You can accept by pressing OK or ….
…. postpone the update by pressing QUIT. If you select to postpone, the
update message will appear each time you start the box from stand-by.
IN ORDER TO IMPROVE
THE DECODER OPERATION
A SOFTWARE UP TO DATE IS NECESSARY.
IT TAKES A FEW MINUTES.
DURING THE UP TO DATE
YOUR SCREEN WILL BE BLACK.
DO NOT TURN OFF YOUR DECODER
DURING THIS TIME.
TO RECEIVE THIS UP TO DATE
PRESS OK OTHERWISE Q TO EXIT
OK CONFIRM
Q QUIT
OBSERVE!
There are no costs or obligations involved in doing an update.
This is a free service to improve the functionality of your digitalbox.
Do not touch any keys or try to turn the digital-box off during the
update. The screen will be black during the update but the front-panel
display will keep you informed about the progress. If anything should
go wrong during the process an error message will be displayed. Se page
27–28.
A new screen message will inform you that the update was completed
successfully.
Press OK to return to normal use.
UP TO DATE OF DECODER
UP TO DATE COMPLETED
THE UP TO DATE OF YOUR DECODER
WAS SUCCESSFUL
TO RETURN TO YOUR PROGRAMME
PRESS OK
OK CONFIRM
20
USER MANUAL DCB-101
SECTION 8
Main menu
In the main menu you can access the channel and radio list. These lists will
give you an over view of all the programmes available, here you can also
directly select the programme you wish to view or listen to. Further more you
can get information about your subscription, information about your digital-box and move further in to the installation menus.
MAIN MENU
Press the MENU-key to display the basic menu.
Use the navigation keys up/down to select a menu option.
Use the navigation keys left/right to change values in the menus.
Press OK to move on to the selected sub-menu. The OK-key is also used
to confirm and save each setting you have made.
Press the RETURN-key to move back to the previous menu.
MAIN MENU
CHANNEL LIST
RADIO LIST
INFORMATION
INSTALLATION
MOVE
Q QUIT
OK CONFIRM
M001-1Fh
Press QUIT to leave the menu without saving the changes.
CHANNEL LIST
Press the MENU-key to display the basic menu.
Select CHANNEL LIST with the navigation-keys up/down.
Press OK to confirm.
MAIN MENU
CHANNEL LIST
RADIO LIST
INFORMATION
INSTALLATION
MOVE
Q QUIT
OK CONFIRM
M001-1Fh
A list of available channels will be displayed on the screen.
CHANNEL LIST
Use the navigation-keys to select a programme and press OK to view.
Another option to select programmes is to press the GUIDE-key
where you enter the more extended and detailed menu guide
with TV-programmes, interactive services etc.This guide is provided
by your cable-TV-operator.
to get information about
You can also press the INFO-key
ongoing programmes as well as programmes comming up, and
with a quick manoeuvre step to another programme.
1
2
3
4
5
6
7
8
SVT 1
SVT 2
TV 3
TV 4
–
–
–
–
NEXT
MOVE
OK CONFIRM
Q QUIT
M002-1Fh
21
USER MANUAL DCB-101
SECTION 8
Main menu
RADIO LIST
Press the MENU-key to display the basic menu.
Select RADIO LIST with the navigation-keys up/down.
Press OK to confirm.
MAIN MENU
CHANNEL LIST
RADIO LIST
INFORMATION
INSTALLATION
MOVE
Q QUIT
OK CONFIRM
M001-2Fh
09:19
A list of available radio channels will be displayed on the screen.
RADIO LIST
Use the navigation-keys to select a channel to listen to.
The easiest way to access the radio list is to press the RADIOon the remote control.
key
1
2
3
4
5
6
BBC 1
MEGAPOL
BLANDADE HITS
P3
–
–
NEXT
INFORMATION
In radio mode present time is displayed in the upper right corner.
22
MOVE
R
RETURN
Q QUIT
M003-1Fh
USER MANUAL DCB-101
SECTION 8
INFORMATION
Press the MENU-key to display the basic menu.
Select INFORMATION with the navigation-keys up/down.
Press OK to confirm.
A menu where you can get information about your subscription and about
your digital box in general is displayed on the screen.
MAIN MENU
CHANNEL LIST
RADIO LIST
INFORMATION
INSTALLATION
MOVE
Q QUIT
OK CONFIRM
M001-3Fh
SUBSCRIPTION INFORMATION
Select SUBSCRIPTION INFORMATION with the navigation-keys up/down.
Press OK to confirm.
INFORMATION
SUBSCRIPTION INFORMATION
DIGITAL DECODER INFORMATION
MOVE
Q QUIT
OK CONFIRM
M004-1Fh
A menu is displayed where you can select which subscription to get information about.
SUBSCRIPTION INFORMATION
SUBSCRIPTION TYPE
Select subscription with the navigation keys left/right.
TELIA
Press OK to confirm.
TO ENTER YOUR EVENTUAL
DIFFERENT SUBSCRIPTIONS, USE < >
OK CONFIRM R
RETURN
Q QUIT
M007-1Fh
Information about your subscription, smartcard number, subscription
period, theme etc. will be displayed on the screen.
SUBSCRIPTION INFORMATION
SUBSCRIPTION :
CARD No :
START
–
–
–
END
–
–
–
TELIA
3200000578
CLASS
–
–
–
THEME
–
–
–
LEVEL
–
–
–
CONFIRM TO SHOW NEXT PAGE
OK CONFIRM R
RETURN
Q QUIT
M007-2Fh
23
USER MANUAL DCB-101
SECTION 8
Main menu
DIGITAL DECODER INFORMATION
Select DIGITAL DECODER INFORMATION with the navigation-keys up/down.
Press OK to confirm.
INFORMATION
SUBSCRIPTION INFORMATION
DIGITAL DECODER INFORMATION
MOVE
Q QUIT
OK CONFIRM
M004-2Fh
A menu with technical information about your digital-box is displayed on
the screen.
DIGITAL DECODER INFORMATION
HARDWARE :
SYSTEM :
VM 1
B 409 L101 A267
R
RETURN
Q QUIT
M005-1Fh
INSTALLATION
Press the MENU-key to display the basic menu.
Select INSTALLATION with the navigation-keys up/down.
MAIN MENU
CHANNEL LIST
RADIO LIST
INFORMATION
INSTALLATION
Press OK to confirm.
MOVE
Q QUIT
OK CONFIRM
M001-4Fh
A menu where you are asked to enter a secret code is displayed. See special
section about installation on page 13.
CHANGE INSTALLATION CODE
ENTER YOUR NEW CODE
THEN PRESS OK TO CONFIRM
––––
OK CONFIRM R
RETURN
Q QUIT
M015-1Fh
24
USER MANUAL DCB-101
SECTION 9
VCR recording
Following is a description of how to record a programme from the digitalbox. There are different sections describing a number of ways of how to
record a programme and at the same time view this or another programme.
To be able to use all the recording alternatives, a complete installation
of scart and coaxial (UHF)-leads is required. Even the switching facilities
on your TV determine if all alternatives are possible.
AU-mode is the mode where you choose to view or record via the scartlead. Something that enhances the picture and audio quality in
comparison to the ordinary coaxial (UHF)-lead. In the information
box to the right, it is described how different types of TV’ s and VCR’s
can name the AU-mode on the remote control and in the user manuals.
INFORMATION BOX
The AU-mode can be named
differently on various TV and VCR
remote handsets. Following are the
most common names:
AU/0
AV (A1 and A2)
Line in (L1 and L2)
Key 0 on the remote
To switch between digital-box, TV or VCR-mode you use the TV/VCR-key on the
remote control.
NORMAL
The digital-box have priority and the programme
selected on this is shown.
VCR
The VCR has priority and the programme selected
on the VCR is shown. If the VCR is put in PLAYmode, the digital-box will automatically go into
AU-mode and the movie will be shown.
TV
The TV has priority and you can use the TV-remote
to select among the basic channels tuned on your TV.
NECESSARY SETTINGS
Basic channels
(analogue channels) that must be tuned and saved at
the respective channel button on your TV and VCR.
Output channel
(factory pre-set to ch 22) from the digital-box must
be tuned and stored on the TV and VCR.
OBSERVE!
When the digital-box is started and is connected with a scartlead between TV and VCR, the digital-box takes priority and show
the selected programme directly on the TV. If then the VCR is put
in PLAY-mode, this will take priority over the TV and show the
videotape instead.
25
USER MANUAL DCB-101
SECTION 9
VCR recording
1
RECORDING A DIGITAL PROGRAMME
Start the digital-box and select a digital programme.
Recording via scart-lead. Select AU-mode on your VCR to record the
programme received on your digital-box. (See information box)
Recording via coaxial (UHF) –cable. Select the channel number on
your VCR where the digital-box output channel is saved.
2
RECORDING BASIC PROGRAMMES (analogue programmes)
Start the digital-box and select a basic programme.
Recording via scart-lead. Select AU-mode on your VCR to record the
programme received on your digital-box. (See information box)
Recording via coaxial (UHF) –cable. Select the channel number on
your VCR where the digital-box output channel is saved.
The digital-box in stand-by
Receive and record directly on the VCR. Select desired pre-programmed
analogue channel on your VCR.
3
RECORDING A DIGITAL PROGRAMME AND AT THE SAME TIME
VIEW A BASIC ANALOGUE PROGRAMME
Start the digital-box and select a digital programme.
(Do not switch channel during the recording)
Recording with coaxial (UHF) -cable
Select the channel number on your VCR where the digital-box
output channel is saved and start the recording.
Select the basic analogue channel you wish to view using your TV-remote.
Recording with scart-lead
Select AU-mode on your VCR to record the programme received on
your digital-box. (See information box)
Switch to TV-mode with the TV/VCR-key on your digital-box remote.
Select the basic analogue channel you wish to view using your TV-remote.
4
RECORDING A BASIC ANALOGUE PROGRAMME AND AT THE
SAME TIME VIEW A DIGITAL PROGRAMME
Recording with coaxial (UHF) -cable
Start the digital-box and select a digital programme.
Select desired pre-programmed basic analogue channel on your VCR
and start the recording.
Select desired digital programme to view using your digital-box remote.
Recording with scart-lead
Start the digital-box and select a digital programme.
The digital programme will automatically be shown on your TV-screen.
Select desired pre-programmed basic analogue channel on your VCR.
(See section 2)
Start the recording.
26
INFORMATION BOX
The AU-mode can be named
differently on various TV and VCR
remote handsets. Following are the
most common names:
AU/0
AV (A1 and A2)
Line in (L1 and L2)
Key 0 on the remote
USER MANUAL DCB-101
SECTION 10
Tracing a problem
All indications on the front panel are out.
Make sure that the mains lead is connected properly.
The digital-box is not responding to the remote control.
Aim the remote towards the front panel of the digital-box. Make sure
that the batteries are turned the right way around.
The red indicator is constantly shining.
Start the digital-box from stand-by to on
The message “Invalid smartcard” is displayed on the screen.
Make sure that the smartcard is inserted. Make sure that the smartcard
is placed with the gold coloured contact pad faced upwards and inwards.
Make sure that the card is fully inserted.
The message “A problem in the signal reception” is displayed on the
screen.
Make sure that the Installation – Network configuration is correct. See
page 14. Make sure that the coaxial (UHF) cable is properly connected.
The message “Your network name is: ?” is displayed on the screen.
Make sure that the Installation – Network configuration is correct. See
page 14. Make sure that the coaxial (UHF) cable is properly connected.
-The digital-box is stuck on one programme and will not respond when
any of the keys are pressed.
-No audio or distorted audio.
-Impossible to enter the basic menu.
-Other peculiar phenomena’s.
A temporary network or broadcasting problem may cause these types
of phenomena’s. Press the OK-button on the front panel. Alternatively
unplug the mains connector for 10 seconds and then re-start the digitalbox.
.
27
USER MANUAL DCB-101
SECTION 10
Tracing a problem
ERROR
CAUSE
MEASURE
Er00
The software that was available for upgrading was of an
older or of the same version as the one already in the
digital-box.
Press the OK-button on the front panel, alternatively unplug the
mains connector for 10 seconds.
Er01, Er02
The upgrade failed. Some information was missed out.
Press the OK-button on the front panel, alternatively unplug the
mains connector for 10 seconds. If you have requested an upgrade,
repeat the request.
Er03
The internal memory is not large enough to receive the
upgrade.
Press the OK-button on the front panel, alternatively unplug the
mains connector for 10 seconds. If you have requested an upgrade,
repeat the request.
Er04
The signal was disturbed during the upgrade.
Press the OK-button on the front panel, alternatively unplug the
mains connector for 10 seconds. If you have requested an upgrade,
repeat the request.
Er05
Wrong type of data was received during upgrade.
Press the OK-button on the front panel, alternatively unplug the
mains connector for 10 seconds. If you have requested an upgrade,
repeat the request.
Er06
Not used.
Er07
Access problem in back-up memory (EEPROM).
Press the OK-button on the front panel, alternatively unplug the
mains connector for 10 seconds. If you have requested an upgrade,
repeat the request. If the problem persists, contact your retailer.
Er08
Access problem in video memory.
Press the OK-button on the front panel, alternatively unplug the
mains connector for 10 seconds. If you have requested an upgrade,
repeat the request. If the problem persists, contact your retailer.
Er09
Can not find any data to do an upgrade.
Press the OK-button on the front panel, alternatively unplug the
mains connector for 10 seconds. If you have requested an upgrade,
repeat the request.
Er10
Poor or no cable-TV signal.
Inspect all connections. If the problem persists, contact your cableTV-operator.
Er11, Er12
Not used.
Er13
Unauthorised data signals received by the digital-box.
If the error message persists, contact your cable-TV-operator.
Er14
Faulty data signals received by the digital-box.
If the error message persists, contact your cable-TV-operator.
Pb01
A problem in the ROM memory is detected.
Contact your retailer. The digital-box is damaged.
Pb02
Memory size is too small.
Press the OK-button on the front panel, alternatively unplug the
mains connector for 10 seconds. Try to upgrade again by turning
the digital-box off and on again.
Pb03
A problem occurred during start up (initialisation
problem).
Press the OK-button on the front panel, alternatively unplug the
mains connector for 10 seconds. If the problem persists, contact
your retailer.
Pb04
Internal communication failure.
Press the OK-button on the front panel, alternatively unplug the
mains connector for 10 seconds. If the problem persists, contact
your retailer.
PbF9
Hardware error identified during start-up.
Press the OK-button on the front panel. Alternatively unplug the
mains connector for 10 seconds and then re-start the digital-box.
If the problem persists, contact your retailer.
OK-button
28
RESET THE DIGITAL-BOX
If an error occurs that can not be cured according to description on this
page, the final measure is to make a complete reset by unplugging the
mains-lead and re insert it again after approximately 10 seconds.
USER MANUAL DCB-101
SECTION 11
Technical specifications
IN GENERAL
Front panel
Mains
Power consumption
Dimensions
Weight
Remote control
Standard functions
VIDEO DE-SCRAMBLING
Red LED for ”stand-by” indication
Green LED for indicating IR-reception
2 smart card readers
4-digit display
7 keys for basic functions
IR sensor
220–240V AC 50Hz
30W max, 5W in standby
H=70mm, W=380mm, D=260mm
2,7 Kg
ICX 303 694–4442
High resolution menus (OSD)
Multi language menus
Open TV operating system*
CVBS & RGB / audio stereo
CVBS & Y/C / audio stereo
2 x RCA R/L channel
RS232
IEEE 1284 high speed data
Integrated modem V32bis
Connection: Delta PRI MOD 6/4 connector.
The modem is made to be connected to the
telephone line with or without a telephone.
The user can not directly command the modem.
(TNV)
Mains
Class II / 220-230 VAC
RECEPTION
Frequency range digital
Input level digital
Frequency range analogue
Input level analogue
Input impedance
UHF loop
110–862MHz
44–70dBµV
47–862MHz
57–77dBµV
75Ω
In-out
MODULATOR
Output level
Output channel
Pre-set
Setting
71 ±4dBµV
E 22 to 69
E 22
Menu controlled
1V p-p (±3dB) in 75Ω
75Ω
25Hz–4,8MHz (±2dB)
PAL (CCIR 405-1)
AUDIO
Frequency range
Output level
Output impedance
Distortion
S/N
Crosstalk 2 channels
Analogue decoding in
accordance to
Audio processing
Dolby Pro-Logic
Phono connector
Volume control
Mute
Screen format
16:9 by 4:3 conversion
AUDIO DE-SCRAMBLING
In accordance to
Bitrate
Number of audio tracks
Sampling frequency
Mode
CD ISO/IEC 13818-3
MPEG-2 Layers I & II
128 kbit/s per mono channel
Variable in accordance to MPEG-standard
32 kHz, 44 kHz, 48 kHz
Mono, stereo, joint stereo
In accordance to
Viaccess system
CD ISO/IEC 13818-1
DVB scrambling
Smart-card based
CHANNEL DECODING
In accordance to
Demodulation
Symbol rate
DVB
16, 32 and 64 QAM
Variable 5-7 MBaud
PROCESSOR & MEMORY
Host processor
Flash EEPROM
RAM
Power PC™
2 MByte
2,5 MByte
OTHER
Operating temperature
Operating humidity
Storage temperature
Storage humidity
Approval
10–40°C
20–80% at 25°C
–20 to +50°C
10–90% at 25°C
PTS, CE (LVD, EMC)
The DCB-101 is built and corresponds to the following standards:
Eurobox standard, specified by ECCA (European Cable Communications Association)
VIDEO
Video output level
Video impedance
Video frequency
Video de-emphasise
Picture resolution
CD ISO/IEC 13818-2
MPEG-2 Main Profile @ Main Level
720×576, 704×576, 544×576
480×576, 352×576, 352×288
4:3 and 16:9
PAN & SCAN
DE-MULTIPLEXING & DE-SCRAMBLING
CONNECTIONS
TV SCART
VCR SCART
HiFi output
Serial interface
Parallel interface
Telephone modem
In accordance to
20Hz–20 kHz ±1,5dB
0,5 V r.m.s. ±1dB
600Ω
<2%
≥ 72dB, weigh
≤ –50dB, 20Hz–15kHz
Operating system, Open TV is a registered trademark of
THOMSON multimedia and/its subsidaries and is used under
exclusive licence by THOMSON SUN Interactive, LLC.
Standard for digital broadcasting. The DVB standard is
specified by EBU. (DVB: Digital Video Broadcasting. EBU: European Broadcasting Union)
SAGEM SA in France manufactures this product exclusively
for MACAB AB.
ITU-R BT.470-3,B/G-system
Digital and analogue
Compatible – transparent
IEC48B
Via remote handset
Via remote handset
29
USER MANUAL DCB-101
SECTION 12
The scart connector
PIN
VCR
TV
1
Right Audio Out
Right Audio Out
2
Right Audio In
Right Audio In
3
Left Audio Out
Left Audio Out
4
Audio Ground
Audio Ground
5
Ground
Blue Ground
6
Left Audio In
Left Audio In
7
Not connected
Blue Out
8
AV Status In (0/6/12V)
AV Status Out (0/6/12V)
9
Ground
Green Ground
10
Not connected
Not connected
11
Not connected
Green Out
12
Not connected
Not connected
13
Ground
Red Ground
14
Not connected
Not connected
15
S-VHS chroma
Red Out
16
Not connected
RGB Status Out
17
Video Ground
Video Ground
18
Ground
Ground
19
Video Out
Video Out
20
Video In
Not connected
21
Ground (Casing)
Ground (Casing)
30
21 19 17 15 13 11
9
7
2
4
6
8
20 18 16 14 12 10
5
3
1
026
USER MANUAL DCB-101
SECTION 13
Menu tree
MAIN MENU
CHANNEL LIST
RADIO LIST
INFORMATION
INSTALLATION
MOVE
Q QUIT
OK CONFIRM
M001-1Fh
09:19
INFORMATION
INSTALLATION
SUBSCRIPTION INFORMATION
DIGITAL DECODER INFORMATION
RADIO LIST
ENTER YOUR INSTALLATION CODE
THEN PRESS OK TO CONFIRM
1
2
3
4
5
6
––––
CHANNEL LIST
BBC 1
MEGAPOL
BLANDADE HITS
P3
–
–
1
2
3
4
5
6
7
8
SVT 1
SVT 2
TV 3
TV 4
–
–
–
–
NEXT
NEXT
MOVE
Q QUIT
OK CONFIRM
OK CONFIRM R
RETURN
Q QUIT
M004-1Fh
DIGITAL DECODER INFORMATION
HARDWARE :
SYSTEM :
RETURN
RETURN
Q QUIT
MOVE
M002-1Fh
NETWORK CONFIGURATION
NETWORK CONFIGURATION
TV AND VCR INSTALLATION
MODULATOR INSTALLATION
CHANGE INSTALLATION CODE
OPERATING INDICATORS
LANGUAGE SELECTION
LOCAL TIME SETTINGS
Q QUIT
MOVE
OK
CONFIRM
Q QUIT
OK CONFIRM
M003-1Fh
INSTALLATION
VM 1
B 409 L101 A267
R
R
MOVE
M008-1Fh
R
RETURN
FREQUENCY IN KHZ
NETWORK NUMBER
SYMBOL RATE
MODULATION
TV AND VCR INSTALLATION
Q QIUT
M005-1Fh
M009-1Fh
TV SCREEN SIZE
TV SCART OUTPUT
RGB BRIGHTNESS LEVEL
VCR STANDARD
362000
41000
68750
64
IN CASE OF PROBLEM
PLEASE CONTACT YOUR RETAILER
4:3
RGB
LOW
VHS
MOVE
OK CONFIRM
M010-1Fh
TO CHANGE DATA IN THE RIGHT HAND COLUMN
USE < > THEN PRESS OK TO SAVE
YOUR CHOICE
MOVE
SUBSCRIPTION INFORMATION
OK CONFIRM R
RETURN
Q QUIT
CHANGE INSTALLATION CODE
SUBSCRIPTION TYPE
M013-1Fh
TELIA
––––
MODULATOR INSTALLATION
OUTPUT STANDARD MODE
CHANNEL OUTPUT SELECTION
INSTALLATION
TO ENTER YOUR EVENTUAL
DIFFERENT SUBSCRIPTIONS, USE < >
OK CONFIRM R
RETURN
Q QUIT
OK CONFIRM R
NETWORK CONFIGURATION
YOUR NETWORK NAME
IS: …WAITING FOR ACKNOWLEGE
ENTER YOUR NEW CODE
THEN PRESS OK TO CONFIRM
RETURN
PAL B/G
22
YES
Q QUIT
M015-1Fh
M006-1Fh
OK CONFIRM R
TO CHANGE DATA IN THE RIGHT HAND COLUMN
USE < > THEN PRESS OK TO SAVE YOUR CHOICE
MOVE
OK CONFIRM R
RETURN
RETURN
M011-1Fh
Q QUIT
M014-1Fh
SUBSCRIPTION INFORMATION
SUBSCRIPTION :
CARD No :
START
–
–
–
END
–
–
–
CHANGE INSTALLATION CODE
TELIA
3200000578
CLASS
–
–
–
THEME
–
–
–
LEVEL
–
–
–
RETURN
Q QUIT
M007-2Fh
CORRECT
FALSE ENTRY
CONFIRMATION
START AGAIN
OK CONFIRM R
RETURN
YOUR NETWORK NAME
IS: ?
OPERATING INDICATORS
––––
CONFIRM TO SHOW NEXT PAGE
OK CONFIRM R
NETWORK CONFIGURATION
PLEASE RE-ENTER YOUR NEW CODE
THEN PRESS OK TO CONFIRM
Q QUIT
I AND Q SUBCARRIER SWAPPED
RHYTHM LOCK
EQUALISER LOCK
CARRIER LOCK
FRAME LOCK
BIT ERROR RATE
SIGNAL STRENGTH
FREQUENCY OFFSET
M016-1Fh
R
RETURN
NO
YES
YES
YES
YES
10E-08
16200
0 KHz
OK CONFIRM R
Q QUIT
RETURN
M012-1Fh
M017-1Fh
LANGUAGE SELECTION
MENU LANGUAGE
ENGLISH
FAVOURITE AUDIO LANGUAGE
ENGLISH
FAVOURITE SUB-TITLE LANGUAGE ENGLISH
MOVE
OK CONFIRM R
RETURN
Q QUIT
M018-1Fh
LOCAL TIME SETTINGS
COUNTRY
TIME OFFSET
LOCAL TIME:
MOVE
OK CONFIRM R
ENGLAND
+01 H
13H01
RETURN
Q QUIT
M019-1Fh
31
Skogs 89700-1
Macab AB (publ)
Vannhögsgatan 7, SE-231 66 Trelleborg, Sweden. Tel: +46 410 36 36 00
Fax: +46 410 36 36 01. E-mail: [email protected] – www.macab.com