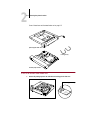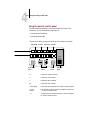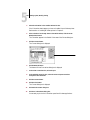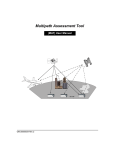
1
Colorwriter LSR 2000 Printer Getting Started Printing Systems InfoCenter http://www.printers.digital.com EK-LCPLE-GS .A01 Digital Equipment Corporation Maynard, Massachusetts This document was created with FrameMaker 4.0.4 First Printing, August 1996 Possession, use, or copying of the software described in this publication is authorized only pursuant to a valid written license from Electronics for Imaging, Inc. Electronics for Imaging, Inc. 1996. All rights reserved. Legal Notices ELECTRONICS FOR IMAGING, INC. MAKES NO WARRANTIES, EXPRESS OR IMPLIED, INCLUDING WITHOUT LIMITATION THE IMPLIED WARRANTIES OF MERCHANTABILITY AND FITNESS FOR A PARTICULAR PURPOSE, REGARDING THE APPLE SOFTWARE. ELECTRONICS FOR IMAGING DOES NOT WARRANT, GUARANTEE, OR MAKE ANY REPRESENTATIONS REGARDING THE USE OR THE RESULTS OF THE USE OF THE APPLE SOFTWARE IN TERMS OF ITS CORRECTNESS, ACCURACY, RELIABILITY, CURRENTNESS, OR OTHERWISE. THE ENTIRE RISK AS TO THE RESULTS AND PERFORMANCE OF THE APPLE SOFTWARE IS ASSUMED BY YOU. THE EXCLUSION OF IMPLIED WARRANTIES IS NOT PERMITTED BY SOME STATES. THE ABOVE EXCLUSION MAY NOT APPLY TO YOU. IN NO EVENT WILL ELECTRONICS FOR IMAGING, ITS DIRECTORS, OFFICERS, EMPLOYEES OR AGENTS BE LIABLE TO YOU FOR ANY CONSEQUENTIAL, INCIDENTAL OR INDIRECT DAMAGES (INCLUDING DAMAGES FOR LOSS OF BUSINESS PROFITS, BUSINESS INTERRUPTION, LOSS OF BUSINESS INFORMATION, AND THE LIKE) ARISING OUT OF THE USE OR INABILITY TO USE THE APPLE SOFTWARE EVEN IF ELECTRONICS FOR IMAGING HAS BEEN ADVISED OF THE POSSIBILITY OF SUCH DAMAGES. BECAUSE SOME STATES DO NOT ALLOW THE EXCLUSION OR LIMITATION OF LIABILITY FOR CONSEQUENTIAL OR INCIDENTAL DAMAGES, THE ABOVE LIMITATIONS MAY NOT APPLY TO YOU. Electronics for Imaging’s liability to you for actual damages from any cause whatsoever, and regardless of the form of the action (whether in contract, tort [including negligence], product liability or otherwise), will be limited to $50. Restricted Rights Legends For defense agencies: Restricted Rights Legend. Use, reproduction, or disclosure is subject to restrictions set forth in subparagraph (c)(1)(ii) of the Rights in Technical Data and Computer Software clause at 252.227.7013. For civilian agencies: Restricted Rights Legend. Use, reproduction, or disclosure is subject to restrictions set forth in subparagraph (a) through (d) of the commercial Computer Software Restricted Rights clause at 52.227-19 and the limitations set forth in Electronics for Imaging’s standard commercial agreement for this software. Unpublished rights reserved under the copyright laws of the United States. Trademarks The following are trademarks of Digital Equipment Corporation: OpenVMS, VAX, PATHWORKS, Digital, and the DIGITAL logo. The following are trademarks of Electronics for Imaging, Inc.: EFI, the EFI logo, Fiery XJ, Fiery Driven, the Fiery Driven Signature, EFICOLOR, the EFICOLOR logo, and Fiery Print Calibrator. Fiery, EFICOLOR, and the EFICOLOR logo are registered with the U.S. Patent and Trademark Office. All other trademarks and registered trademarks are the property of their respective holders. The software described in this guide is furnished under a license agreement or nondisclosure agreement. The software may be used or copied only in accordance with the terms of the agreement. Printed in U.S.A. Electronics for Imaging Software License Agreement Electronics for Imaging, Inc. grants to you a non-exclusive, non-transferable license to use the software and accompanying documentation + (“Software”) included with the Colorwriter LSR 2000 Color printer you have purchased, including without limitation the PostScript software provided by Adobe Systems Incorporated. This document was created with FrameMaker 4.0.4 You may: + a. use the Software solely for your own customary business purposes and solely with Colorwriter LSR 2000 + b. use the digitally-encoded machine-readable outline and bitmap programs (“Font Programs”) provided with Colorwriter LSR 2000 in a special encrypted format (“Coded Font Programs”) to reproduce and display designs, styles, weights, and versions of letters, numerals, characters and symbols + (“Typefaces”) solely for your own customary business purposes on the screen of the Colorwriter LSR 2000 or Macintosh monitor used with + Colorwriter LSR 2000 c. use the trademarks used by Electronics for Imaging to identify the Coded Font Programs and Typefaces reproduced therefrom (“Trademarks”); and + d. assign your rights under this Agreement to a transferee of all of your right, title and interest in and to Colorwriter LSR 2000 provided the transferee agrees to be bound by all of the terms and conditions of this Agreement. You may not: a. make use of the Software, directly or indirectly, to print bitmap images with print resolutions of 600 dots per inch or greater, or to generate fonts + or typefaces for use other than with Colorwriter LSR 2000 b. make or have made, or permit to be made, any copies of the Software, Coded Font Programs, accompanying documentation or portions thereof, + except as necessary for use with the Colorwriter LSR 2000 printer purchased by you; provided, however, that under no circumstances may you + make or have made, or permit to be made, any copies of that certain portion of the Software which has been included on the Colorwriter LSR 2000 hard disk drive. You may not copy the documentation; c. attempt to alter, disassemble, decrypt or reverse engineer the Software, Coded Font Programs or accompanying documentation. d. rent or lease the Software. Proprietary Rights You acknowledge that the Software, Coded Font Programs, Typefaces, Trademarks and accompanying documentation are proprietary to Electronics for Imaging and its suppliers and that title and other intellectual property rights therein remain with Electronics for Imaging and its suppliers. Except as stated above, this Agreement does not grant you any right to patents, copyrights, trade secrets, trademarks (whether registered or unregistered), or any other rights, franchises or licenses in respect of the Software, Coded Font Programs, Typefaces, Trademarks or accompanying documentation. You may not adapt or use any trademark or trade name which is likely to be similar to or confusing with that of Electronics for Imaging or any of its suppliers or take any other action which impairs or reduces the trademark rights of Electronics for Imaging or its suppliers. The trademarks may be used only to identify printed output produced by the Coded Font Programs. At the reasonable request of Electronics for Imaging, you must supply samples of any Typeface identified with a trademark. The MacApp software is proprietary to Apple Computer, Inc. and is licensed to Electronics for Imaging, Inc. for distribution only for use in combination with Colorwriter LSR software utilities. Confidentiality You agree to hold the Software and Coded Font Programs in confidence, disclosing the Software and Coded Font Programs only to authorized users having a need to use the Software and Coded Font Programs as permitted by this Agreement and to take all reasonable precautions to prevent disclosure to other parties. Remedies Unauthorized use, copying or disclosure of the Software, Coded Font Programs, Typefaces, Trademarks or accompanying documentation will result in automatic termination of this license and will make available to Electronics for Imaging other legal remedies. Export Controls You agree that you will not export or re-export the Software or Coded Font Programs in any form without the appropriate United States and foreign government licenses. Your failure to comply with this provision is a material breach of this Agreement. Government Use Use, duplication or disclosure of the Software by the United States Government is subject to restrictions as set forth in subdivision (c) (1) (ii) of the Rights in Technical Data and Computer Software clause at DFARS 252.227-7013 or in subparagraphs (c) (1) and (2) of the Commercial Computer Software—Restricted Right Clause at 48 CFR 52.227-19, as applicable. Third Party Beneficiary You are hereby notified that Adobe Systems Incorporated, a California corporation located at 1585 Charleston Road, Mountain View, California 94039-7900 (“Adobe”) is a third-party beneficiary to this Agreement to the extent that this Agreement contains provisions which relate to your use of the Fonts, the Coded Font Programs, the Typefaces and the Trademarks licensed hereby. Such provisions are made expressly for the benefit of Adobe and are enforceable by Adobe in addition to Electronics for Imaging. General This Agreement will be governed by the laws of the State of California. This Agreement is the entire agreement held between us and supersedes any other communications or advertising with respect to the Software, Coded Font Programs and accompanying documentation. If any provision of this Agreement is held invalid, the remainder of this Agreement shall continue in full force and effect. FCC (Federal Communications Commission) Notice WARNING: FCC Regulations state that any unauthorized changes or modifications to this equipment not expressly approved by the manufacturer could void the user’s authority to operate this equipment. This equipment has been tested and found to comply with the limits for a Class B digital device, pursuant to Part 15 of the FCC Rules. These limits are designed to provide reasonable protection against harmful interference in a residential installation. This equipment generates, uses, and can radiate radio frequency energy and, if not installed and used in accordance with the instructions, may cause harmful interference to radio communications. However, there is no guarantee that interference will not occur in a particular installation. If this equipment does cause harmful interference to radio or television reception, which can be determined by turning the equipment off and on, the user is encouraged to try to correct the interference by one or more of the following measures: • Reorient or relocate the receiving antenna. • Increase the separation between the equipment and the receiver. • Connect the equipment into an outlet on a circuit different from that to which the receiver is connected. • Consult a dealer or an experienced radio or television technician for help. Modifications: The FCC requires the user to be notified that any changes or modifications made to this device that are not expressly approved by Digital Equipment Corporation may void the user’s authority to operate the equipment. Cables: Connections to this device must be shielded cables with metallic RFI/EMI connector hoods in order to maintain compliance with FCC Rules and Regulations. DOC Compliance Notice This equipment does not exceed the Class B limits for radio noise emissions as described in the Radio Interference Regulations of the Canadian Department of Communications. DOC Avis de Conformation Le présent appareil numérique n’émet pas de bruits radioélectriques dépassant les limites applicables aux appareils numériques de la classe B préscrites dans le Règlement sur le brouillage radioélectrique édicté par le Ministère des Communications du Canada. CDRH Regulations The Center for Devices and Radiological Health (CDRH) of the U.S. Food and Drug Administration implemented regulations for laser products on August 1, 1976. These regulations apply to laser products marketed in the United States. The label on the printer indicates compliance with the CDRH regulations and must be attached to laser products marketed in the United States. Acoustics Declared values per ISO 9296 and ISO 7779: Sound Power Level LWAd, B Product LNC01 (color) LNC01 (b&w) (1 B = 10 dBA) Idle 6.2 6.2 Sound Pressure Level LpAm, dBA (bystander positions) Idle Operate 44 53 44 52 Operate 7.0 6.9 Current values for specific configurations are available from Digital representatives. Schallemissionswerte Werteangaben nach ISO 9296 und ISO 7779/DIN EN27779: Schalleistungspegel Schalldruckpegel LWAd, B LpAm, dBA (bystander positions) Gerät Leerlaug Betrieb Leerlauf Betrieb LNC01 (color) 6,2 7,0 44 53 LNC01 (b&w) 6,2 6,9 44 52 (1 B = 10 dBA) Aktuelle Werte für spezielle Ausrüstungsstufen sind über die Digital Equipment Vertretungen erhältlich. Class 1 Laser Product (100-120V/220-240V models) Laser radiation could be hazardous to the human body. For this reason, laser radiation emitted inside this printer is hermetically sealed within the protective housing and external cover. In the normal operation of the product by the user, no radiation can leak from the machine. This printer is certified as Class 1 laser product under the U.S. Department of Health and Human Services (DHHS) Radiation Performance Standard according to the Radiation Control for Health and Safety Act of 1968. (This means that the printer does not emit hazardous laser radiation.) The label shown below is attached to this printer. DANGER - Invisible laser radiation when open. AVOID DIRECT EXPOSURE TO BEAM. INVISIBLE LASER RADIATION WHEN OPEN. AVOID EXPOSURE TO BEAM. RAYONNEMENT LASER INVISIBLE EN CAS D'OUVERTURE. EXPOSITION DANGEREUSE AU FAISCEAU. UNSICHTBARE LASERSTRAHLUNG, WENN ABDECKUNG GEÖFNET. NICHT DEM STRAHL AUSSETZEN. RADIAZIONE LASER INVISIBLE IN CASO DI APERTURA. EVITARE L'ESPOSIZIONE AL FASCIO. RADICION LASER INVISIBLE CUANDO SE ABRE. EVITAR EXPONERSE AL RAYO. AAVATTAESSA OLET ALTTIINA NÄKYMÄTTÖMÄLLE LASERSÄTEILYLLE. ÄLÄ KATSO SÄTEESEEN. CAUTION ATTENTION VORSICHT - ATTENZIONE PRECAUTIONVARO! - VARNING! - OSYNLIG LASERSTRÅLNING NÄR DENNA DEL ÄR ÖPPNAD. BETRAKTA EJ STRÅLEN. ADVARSEL! - USYNLIG LASER STRÅLING, NÄR DENNE ER ÅBEN. UNDGÅ BESTRÅLING. ADVARSEL - USYNLIG LASERSTRÅLING, NÄR DEKSEL ÅPNES. UNNGÅ EKSPONERING FOR STRÅLEN. RS5-8169 WARNING: When servicing the machine or laser module, follow the procedures specified in the manual so that there are no hazards from the laser. The use of controls, adjustments, or performance of procedures other than those specified in this manual may result in hazardous laser radiation exposure. WARNING: The label shown above is intended as a warning to persons disassembling the Raster Laser Scanner unit for internal alignment or repair purposes. It does not apply to any of the maintenance procedures specified in this manual. Contents Preface About the Colorwriter LSR 2000+ ! xi About this guide xii Related documentation xiii Important safety information xiv Handling the Colorwriter xiv Choosing a location for the Colorwriter xiv Unpacking and setting up the Colorwriter xv Operating the Colorwriter xv Protecting the LCD display xvi Ozone emission xvii Energy Star compliance xvii Chapter 1: Overview System requirements 1-1 Using the Colorwriter with a Macintosh 1-1 Using the Colorwriter with a Windows computer 1-2 Using the Colorwriter with UNIX workstations 1-3 Specifications for the Colorwriter 1-4 Colorwriter memory configurations 1-5 Chapter 2: Preparing to Use the Printer Checking the contents of the box 2-1 Unpacking the printer 2-3 Choosing the printer location 2-5 Attaching the optional paper feeder unit 2-8 This document was created with FrameMaker 4.0.4 viii Contents Installing consumables 2-15 Installing the toner cartridges 2-15 Installing the drum cartridge 2-20 Installing the waste toner bottle 2-24 Installing the silicone oil bottle 2-26 Packing the printer for shipping 2-29 Chapter 3: Printing the First Page Connecting the printer to an AC outlet 3-1 If you have an optional paper feeder unit 3-2 If you do not have an optional paper feeder unit 3-3 Tips on handling the power cord 3-4 Turning the printer on or off 3-5 Status messages 3-5 Loading the paper cassette 3-7 Printing pages on the printer 3-12 Printing a test page 3-12 Printing additional pages 3-13 Adjusting the side margin 3-14 Chapter 4: Using the Control Panels Printer control panel functions 4-1 Activity lights 4-1 Control panel display 4-2 Buttons 4-2 ix Contents Setting up the printer 4-3 Accessing Setup 4-3 Selecting the language 4-3 Configuring the printer 4-3 Specifying system information 4-4 Specifying printer information 4-6 Specifying network information 4-9 Specifying job log information 4-15 Specifying password information 4-15 Clearing job logs and printer queues 4-16 Using the density control panel 4-17 Density adjustments from the density control panel 4-18 Chapter 5: Connecting to the Colorwriter Parallel cable connection 5-1 Verifying the parallel port connection 5-2 Ethernet cable connection 5-3 Verifying the network connection 5-4 Setting up TCP/IP printing 5-4 Setting up the Colorwriter printing environment 5-5 UNIX server print queues 5-5 Setting up lpr from Digital UNIX, Ultrix, and TCP/IP Services for OpenVMS 5-9 Setting up DEC TCP/IP Services for OpenVMS 5-12 Verifying the TCP/IP connection 5-14 Setting up the TCP/IP client 5-15 Printing to the Colorwriter 5-15 Administering Colorwriter print jobs 5-15 Setting up IPX (Novell) printing 5-17 IPX printing to the Colorwriter 5-17 Printing from DCPS to the Colorwriter 5-31 Configuring the DCPS queue 5-32 x Contents Chapter 6: Installing User Software User software 6-1 Installing Macintosh software 6-4 Setting up printing from a Macintosh 6-4 Installing Colorwriter LSR Macintosh user software 6-9 Installing the Color Reference files 6-10 Using the Macintosh CMYK Color Reference 6-10 Using the Macintosh PANTONE Color Reference 6-10 Installing the Color Printer Profiles 6-10 Installing the Macintosh utilities 6-13 Installing the Fiery Print Calibrator 6-13 Installing the Monitor Setup file and Separation Tables 6-14 Installing the Colorwriter screen fonts 6-15 Installing Windows software 6-17 Setting up printing with Windows 95 6-18 Completing Windows 95 printing setup 6-22 Setting up printing from Windows NT 6-26 Setting up printing with Windows 3.x or Windows for Workgroups 3.11 6-40 Copying the printer description files if you use QuarkXPress or PageMaker 6-49 Installing the Color Reference files and Color Profiles 6-50 Using the Windows CMYK Color Reference 6-52 Using the Windows PANTONE Color Reference 6-53 Using the Color Printer Profiles for Windows 95 6-54 Installing the Windows utilities 6-55 Using the Colorwriter LSR Manager 6-60 Installing the Monitor Setup file and Separation Tables 6-70 Index xi Preface About the Colorwriter LSR 2000+ In today’s business environment, the pressure is on to produce professional, polished documents and sharp, color-specific renderings and presentations. The pressure is compounded by the need to produce these materials in a fast and costeffective manner. Generating them in your own efficient environment results in higher productivity, especially when crisp output and color quality is of paramount concern. About the Colorwriter LSR 2000+ The Digital Colorwriter LSR 2000+ represents the highest standards in continuous tone color laser technology. Equipped with a Fiery XJe controller, and combined with Digital’s well-known product reliability and support, the Colorwriter LSR 2000+ provides top performance and photographic quality for large, complex files consisting of text, graphics, and images. The Colorwriter not only performs at speeds up to five times faster than typical desktop models, it does so with print quality previously found only in more expensive color laser printers. With its AdobePostScriptlevel 2 capabilities, Kodak Precision and ICC color profiles, and flexibility in page layout, the Colorwriter fits extremely well into graphic arts, prepress, and desktop publishing environments. The complex images necessitated by computer-aided design and engineering are similarly well met with this printer’s high-resolution reproduction. Furthermore, word processing documents, spreadsheets, and other presentations all reflect the highest quality output when the Colorwriter LSR 2000+ is the source. The Colorwriter LSR 2000+ offers four different color rendering dictionaries (CRDs) to allow a wide range of color output and to assure that whatever is being printed looks as it should, from photographs to computer-designed presentations. Switching between CRDs is effortless; the LCD control panel makes it possible to use a new CRD without restarting the Colorwriter. The Colorwriter is also Energy Star compliant, which means it can be left on between print jobs without wasting electricity. A customizable power saver mode allows the user to specify when the printer will power-down its mechanical parts. After a brief warmup, the Colorwriter is ready to receive jobs, allowing you to concentrate on your print jobs, instead of your printer. This document was created with FrameMaker 4.0.4 xii About this guide About this guide This guide describes how to install the Colorwriter and the user software for the Colorwriter, and how to set up printing from the printer control panel. N OTE : When referring to the printer, the terms Colorwriter, Colorwriter LSR, and Colorwriter LSR 2000+ are used interchangeably in this manual. The audience for this guide is a system administrator or user who needs to set up and install the printer at your site. If you are a user and the printer has already been installed, read Chapter 1, “Overview,” and then Chapter 3, “Printing the First Page.” PCK N OTE : In this manual, software or features that are part of the Professional Color Kit (PCK) are indicated with a small PCK icon. The Professional Color Kit is an optional feature set available for the Colorwriter. The following major topics are included: • Overview and system requirements • Unpacking and setting up the printer • Loading paper and printing the first page • Using the control panels • Connecting to the Colorwriter • Installing user software xiii Related documentation Related documentation This guide is part of a set of printed documentation (Order Number: EK-LCPLE-DK) that includes the following. • The Colorwriter LSR 2000 +Printer User Guide provides an introduction to desktop color printing, an overview of the printer and how to operate it, how to use the software provided, and what you need to know about using the printer in a networked environment. The User Guide also outlines routine maintenance procedures, includes troubleshooting information, and explains how to order accessories and supplies. Specifications are also included. • The Quick Reference Card shows how to load paper trays, clear paper jams, replace toner, and use the drum cartridge kit. A clear plastic pocket is included in the documentation pack. If you adhere it to the side of the printer, you can use it to keep the Quick Reference Card with the printer. • Printed Release Notes describe last-minute additions and changes to the documentation or software. • Return the Printer Registration Card to register your Colorwriter and receive special offers and new product information. • Warranty Card For information about ordering documentation, see Appendix G of the User Guide. In addition to the printed documentation, you should read the online Read Me files on the CD that contains user software, printer files, and screen fonts. The following manual is included on the CD: • The PostScript Language Printer Addendum describes the parameters and resources present in the implementation of the PostScript interpreter for the Colorwriter, which has PostScript language features and capabilities that might not be present in other PostScript output devices. xiv Important safety information Important safety information This printer is a high-precision electronic device. Therefore be sure to read these safety instructions carefully before you begin. Follow all warnings and instructions marked on the printer and consumables, such as the toner cartridges and silicone oil bottles. Handling the Colorwriter • Do not place this printer on an unstable cart, stand, or table. ! • The printer alone weighs approximately 110 lb (50 kg). Do not attempt to move it by yourself. It should always be moved by two or more people. • When installing the printer, carefully observe the location requirement described in this manual. • When the printer is in use, the fixing assembly and delivery areas become extremely hot. Be careful not to touch these areas. • Before moving the printer, be sure to turn it off and then unplug the power cable. Choosing a location for the Colorwriter • Do not expose the printer to a wet environment. • Make sure the printer is level (at less than a 1% angle); otherwise, a REPLACE FIXING UNIT PUMP message will be displayed on the control panel. • Do not directly expose the printer to a chemical environment, for example, an experimental laboratory. The exterior of the printer is made of plastic, and the outside covering may fade, become deformed, or melt. xv Important safety information Unpacking and setting up the Colorwriter • Before connecting the printer to a power source, check the voltage rating label on the back of the printer to ensure that the printer voltage matches that of the power source. If the voltage label is missing, contact the nearest authorized dealer or your place of purchase. • Avoid using an extension cord. If it is unavoidable, be sure to take the following precautions. Failure to do this may lead to overheating, fire, or cause flickering due to a drop in voltage. • Be sure not to exceed the allowed rating current of the extension cord. Make sure that the total ampere rating of the products plugged into the extension cord does not exceed the extension cord ampere rating. • Use a short extension cord. Do not connect several extension cords together. • When connecting cables or disconnecting cables from the printer, make sure that the power switch is in the off position. • Be sure to turn off the power before unplugging or plugging in the printer power cord or interface cable. Operating the Colorwriter • Slots and openings in the cabinet are provided for ventilation. To ensure reliable operation of the printer and protect it from overheating, these openings should never be blocked or covered. Air ventilation slots (back) Inhalation slot (right side) xvi Important safety information • The printer is equipped with a 3-wire grounding type plug, which has a third (grounding) pin. This plug will fit into only a grounding-type power outlet. If you are unable to insert the plug into the outlet, contact your electrician to replace your obsolete outlet. Do not defeat the purpose of the grounding type plug. • Unplug the printer from the wall outlet before cleaning. Use a damp cloth for cleaning. Do not spray liquid or aerosol cleaners directly on the cabinet or the openings, as the spray could penetrate the printer and damage internal parts. • Do not attempt to service this printer by yourself, except as instructed in this manual. Opening or removing covers that are intended to be removed only by qualified service personnel may expose you to dangerous voltage points or other risks. Refer all servicing in those compartments to qualified service personnel. ! • Operation of this printer should always be supervised by a responsible adult. To avoid injury, do not allow children access to the interior of any electrical product and do not let them touch any electrical contacts or gears that are exposed. • This symbol warns the user that uninsulated voltage within the unit may have sufficient magnitude to cause electric shock. • Do not make contact with any inside part of this unit while it is plugged in. • Avoid operating the printer when the waste toner bottle and/or silicone oil bottle is not installed; otherwise, the printer may be damaged. • Do not attempt to modify the printer. • Do not remove the warning or instruction labels on the printer. • Do not dispose of the used waste toner box or the silicone oil box into a fire. Protecting the LCD display Do not subject the Colorwriter to strong shocks. The Colorwriter has a liquid crystal display (LCD) that is made of glass and can break. If the display window breaks and the liquid crystal material leaks out, do not inhale, ingest, or touch it. If the material gets on your skin or clothing, wash it off with soap and water immediately. xvii Energy Star compliance Ozone emission This printer meets the requirements for ozone emission of the applicable standard published by Underwriters’ Laboratories, Inc. (UL). Ozone (O3) is a colorless gas by-product of the electrophotographic process. Ozone is discharged only while the printer is printing, and is emitted through the exhaust port on the rear, left side of the printer. Only service personnel should replace the ozone filter. ! Those who are particularly sensitive to ozone odor may feel sick if exposed to it for long periods of time. To avoid this, make sure that the following measures are taken: • Install the printer in a large, well ventilated room. • Avoid facing the exhaust port directly toward users. • Be sure that the ozone filter is replaced periodically by the service person. • Avoid using the printer without a filter. Energy Star compliance The Colorwriter comes equipped with a power saver mode that can reduce the total power consumption of the printer to less than 45 watts—a 65 percent reduction in electricity use. This option turns off the fan and fuser after a userdefined period of inactivity. With the new power saver feature, the Colorwriter complies with EPA guidelines set for an Energy Star compliant device. 1 1-1 Chapter 1: Overview System requirements This chapter provides information about: • System requirements • Specifications for the Colorwriter For information on installing Colorwriter user software on TCP/IP (UNIX), IPX (Novell), or Windows NT networks, see the User Guide. For general information on using your computer, your application software, or your network, see the manuals that accompany those products. N OTE : When referring to the printer, the terms Colorwriter, Colorwriter LSR, and Colorwriter LSR 2000+ are used interchangeably in this manual. System requirements This section describes the hardware and software required to use the Colorwriter and utilities. Using the Colorwriter with a Macintosh To use the Colorwriter with a Macintosh computer, you need: • Any Macintosh computer in the Macintosh II, Quadra, Centris, Performa, or Power Macintosh families that has at least 4MB of RAM and Ethernet hardware with EtherTalk Phase 2 installed. • Apple System software version 7.0 or later. • Appropriate interface cables for your network and printer connection. Macintosh printing software For printing to the Colorwriter, each Macintosh should have: • Adobe PostScript Printer Driver version 8.0 or later or Apple LaserWriter driver version 7.0 or later. Adobe PostScript Printer version 8.3.1 is included on the Colorwriter LSR 2000+ User Software CD. This document was created with FrameMaker 4.0.4 1 1-2 System requirements • Along with the driver, the Colorwriter PPD (PostScript Printer Description) file provided with the user software. The PSPrinter Installer included with the user software installs this PPD automatically. Using the Colorwriter with a Windows computer To use the Colorwriter with an IBM PC or compatible computer, your hardware requirements depend on the operating system and the networking software being used. The basic configuration includes: • An IBM PC or compatible computer with a 386 processor or higher. • A mouse that is supported by Windows. • MS-DOS version 5.0 or later. • Microsoft Windows 95, Windows 3.x, or Windows NT. • Appropriate interface cables for your network or printer connection. To print to the Colorwriter, your PC must be connected to a network file server running Windows NT or Novell NetWare software. Alternatively, you can print from a single PC connected to the printer’s parallel port. If you have installed Windows 95 or Windows NT, there are no additional requirements for using the Colorwriter. Check the documentation for the operating system and applications you want to use for recommended configurations. You will need your system software in order to install the Colorwriter as a PostScript printer. Using the Colorwriter over an IPX (Novell) network In addition to the basic configuration listed above, to print to the Colorwriter over an IPX (Novell) network, you need: • A Novell server running NetWare software version 3.11 or later, that supports Ethernet Frame type 802.2, 802.3, or Ethernet II. 1 1-3 System requirements Using the Colorwriter over a TCP/IP network In addition to the basic configuration listed above, to print to the Colorwriter from a client PC on a TCP/IP network, you need: • A UNIX workstation or a Windows NT Server running TCP/IP protocol software that conforms to RFC1179 (Berkeley lpd protocol). Printing software for Windows 3.1 To print to the Colorwriter, you need to use a Windows PostScript Printer driver. You should install: • The Adobe PostScript Printer Driver for Windows version 3.0.1. • Along with the driver, the Colorwriter PPD (PostScript Printer Description) file is provided with the Colorwriter user software. The Adobe Printer Driver Installer included with the user software installs this PPD automatically. You can use the Windows PostScript Printer Driver that came with your Windows 3.x System software, together with the Microsoft Windows Printer Description (WPD) file included with the Colorwriter user software, but not all Colorwriter printing features will be available, so this driver is not recommended. Printing software for Windows 95 or Windows NT To print from computers running Windows 95 or Windows NT, you should install the printer using the PostScript driver delivered with the operating system, together with the Colorwriter PPD provided with the user software. Using the Colorwriter with UNIX workstations To use the Colorwriter with UNIX workstations, you need: • Standard TCP/IP connectivity (for example, Digital’s Alpha workstation, Sun’s SPARCstation, or a Silicon Graphics workstation). • TCP/IP printing software that conforms to RFC1179 (Berkeley lpd protocol). 1 1-4 Specifications for the Colorwriter Specifications for the Colorwriter The Colorwriter printer has the following features: • 16MB, 32MB, or 48MB RAM (memory upgrade kits are available) • 100 MHz R4600 CPU • Internal hard disk drive with a minimum of 341MB • Centronics parallel port • Contone 4-color (CMYK) print engine with built-in self-calibration • Adobe PostScript Level 2 support • 39 resident Adobe Type 1 PostScript fonts • 600 x 600 dots per inch (dpi) print resolution • Letter, A4, B5, and legal-size paper support • Energy Star compliant • Printer drivers and files for remote users • Color reference files PCK N OTE : In this manual, software or features that are part of the Professional Color Kit (PCK) are indicated with a small PCK icon. The Professional Color Kit is an optional feature set available for the Colorwriter. In addition, some models include: PCK • Colorwriter LSR Downloader, Colorwriter LSR Spooler, Colorwriter LSR Manager (Windows only), and Fiery Print Calibrator (Macintosh only) Network features include: • Support for thicknet, twisted pair, and thinnet (by optional DECXM-AA or equivalent transceiver) cabling to network computers • Support for IPX, TCP/IP, and AppleTalk (EtherTalk Phase 2) protocols simultaneously • Novell certification 1 1-5 Specifications for the Colorwriter For complete specifications, see Appendix E of the User Guide. Colorwriter memory configurations The Colorwriter can be configured with either 16MB, 32MB, or 48MB of RAM. The default configuration is 16MB, and upgrade kits are available if you wish to increase the memory in your Colorwriter. The following table explains what features available on your Colorwriter are supported with different memory configurations: PCK Memory Utilities Queues # of servers Quality 16MB No utilities Direct queue 1 Novell server Excellent for business graphics 32MB or 48MB (Professional Color Kit) Colorwriter LSR Spooler, Colorwriter LSR Downloader, and Fiery Print Calibrator Direct, Print, and Hold queues 1, 2, or 3 Novell servers Excellent for professional color images 2 2-1 Chapter 2: Preparing to Use the Printer Checking the contents of the box This chapter provides information about: • Checking the contents of the box • Unpacking the printer • Choosing the printer location • Installing consumables • Packing the printer Checking the contents of the box While unpacking the box, check the contents against the following list (illustrations of some of the items appear on the next page). If anything is missing, contact your dealer. • Printer, including a universal paper cassette • Documentation, user software, and registration and warranty cards • Power cord • Drum cartridge • Two waste toner bottles • Four toner cartridges (one each of cyan, yellow, magenta, and black) • Silicone oil bottle • Oil pump • Oil recycle bottle • Caution sheet • Safety information sheet N OTE : The box does not include an interface cable or a parallel cable. If there is a memory upgrade kit in the box, you can upgrade your printer by following the instructions in the kit. N OTE : If possible, keep all packaging in case you need to ship the printer. Also keep the oil pump and oil recycle bottle. This document was created with FrameMaker 4.0.4 2 2-2 Checking the contents of the box Drum cartridge Toner cartridges (cyan, yellow, magenta, black) Power cord for 120V model S-H1 31 0ml LOT N O. Silicone oil bottle (with a seal) Printer (paper cassette installed) Oil recycle bottle Oil pump ion Caut on auci Prec icht Vors on auci Prec n ntio Atte N ATIO FORM TY IN SAFE ety r Saf Lase Caution sheet on Cauti Waste toner bottles (with sealing cap) Safety information sheet 2 2-3 Unpacking the printer Unpacking the printer When you unpack the printer, perform the following steps: N OTE : If possible, keep all the packaging in case you need to ship the printer. To ship the printer, reverse the order of these steps and see Appendix C of the User Guide. 1. Cut the two packaging straps that secure the main carton to the pallet. 2. Open the packaging by opening the top flaps of the box according to the graphic instructions on the outside of the box. 3. Remove the box that contains the accessories. 4. Remove the packaging; that is, the large piece of cardboard that has styrofoam attached to it. 5. Lift up the printer box and remove it from the pallet. 6. Remove the vinyl bag from the printer. N OTE : Before moving your printer, pay careful attention to Steps 7 through 9. 7. Determine the location for your printer. See page 2-5 for information on choosing your printer location. 8. If you have an optional paper feeder unit, see page 2-8 for information on setting up the paper feeder unit and placing the printer on top of it. 9. Move the printer to the desired location. See page 2-7 for instructions on moving the printer. The printer weighs approximately 110 pounds. It should always be moved by two or more people When moving the printer, keep in mind that one side is heavier than the other side. ! 10. Remove the tape from the side and front doors. 11. Open the front door and remove the cardboard between the bottom of the front door and the top of the main cassette tray. 12. Pull the main cassette out from the printer. Remove the tape and cardboard packing material from the lifting plate. 2 2-4 Unpacking the printer 13. With a Phillips screwdriver, unscrew the transfer drum locking screw; it is an orange plastic knob with a label. 14. Remove the transfer drum locking screw by pushing the orange knob up and out toward you. RE MO VE W IT H T IR SC ER RE W. AV E ZU C SA LA SC MME HR V IS AU N M . BE IT S AQ D EN TFE ER E LT U E RN JU OR EN . N IL N T O L O. TO C O GL IE R E CO ÉlÉ N W ǢŠÇ∆Ç∆LJ LA B Ç…é V IS ÊÇË äOÇ µÇƒ Ç≠Ç æÇ≥ RE 15. Open the fixing unit cover, which is identified in Appendix C of the User Guide. 16. Remove the orange left and right pressure release spacers by lifting them up and out toward you. 2 2-5 Choosing the printer location Choosing the printer location The location should provide ample space for ventilation and easy servicing of the printer. Make sure the surface is flat, level, and sturdy so that the gum pegs on the printer body or on the optional paper feeder unit (if used) can rest securely on it. The graphics below illustrate the space requirements of the Colorwriter. 56"1400 (1400 mm) more mm oror more 8" (200 mm) or mm moreor more 200 66" (1650 mm) or more 1650 mm or more 8" or more 200(200 mmmm) or more Top view 16" or more 400(400 mm mm) or more 34" (850 mm) more 850 mm or or more Side view 16" (400 mm) or more 400 mm or more Be sure to follow these guidelines when choosing a location for the Colorwriter: • Room temperature should be between 59 and 86 degrees Fahrenheit (15 to 30 degrees Centigrade). Relative humidity should be in the 10 to 80 percent range with no condensation. • The printer should never be placed near or over a radiator or heat register. 2 2-6 Choosing the printer location • The printer should not be placed in a built-in installation unless proper ventilation is provided. • Do not install the printer where it is exposed to smoke, steam, an open flame, or direct sunlight. If the printer will inevitably be exposed to direct sunlight, use a heavy curtain to shade the printer. • Do not expose the printer to a chemical environment, such as an experimental laboratory. The exterior of the printer is made of plastic, and the outside covering may fade, become deformed, or melt. • Do not place the printer at any of these locations: • A location near magnets or equipment generating a magnetic field • A place with constant vibration If exposed to vibration, the optical and electrophotographic systems of the printer may not operate properly. • A dusty or wet area Handling abrupt temperature changes When the room is quickly heated or the printer is moved from a cool, dry place to a warm, humid one, let the printer remain idle for more than one hour before using it to allow it to adjust to the temperature to change. Otherwise, condensation may form inside, causing paper delivery problems and/or deterioration in print quality. In some cases this may be detected as an error. Using a supersonic humidifier If tap water or well water is used in a supersonic humidifier, the impurities in the water will be released into the air and become attached to the inside of the printer, causing the image quality to deteriorate. When using a supersonic humidifier, we recommend using purified water. Additional warnings ! Never push objects of any kind into the printer through openings in the enclosure, as the objects may touch dangerous voltage points or short out parts. This could result in a fire or electrical shock. 2 2-7 Choosing the printer location The printer weights about 110 lb (50 kg) and therefore requires two or more people to carry it. Do not attempt to lift the printer by yourself. TO MOVE THE PRINTER : 1. With a person on each side, reach into the two fingerholds at the bottom of the two sides of the printer. 2. Lift up both sides at the same time and carry the printer to the location selected. Note that the right side of the printer is heavier than the left side. This side is heavier When carrying the printer, be sure to hold it horizontally. Tilting the printer may cause the silicone oil to spill. For instructions on removing the oil from the printer, see Appendix C of the User Guide. 2 2-8 Choosing the printer location Attaching the optional paper feeder unit If you did not purchase the optional paper feeder unit, skip this section and go to the instructions for “Installing consumables” on page 2-15. After choosing a location for the printer, attach the optional paper feeder unit. Checking the package contents The optional paper feeder unit package includes the following items: • Paper feeder unit • Two locking pins • Universal cassette • Safety information sheet • Caution sheet 2 2-9 Choosing the printer location Some of these items are illustrated below and on page 2-2. Optional paper feeder unit Locking pins (2) Universal paper cassette TO SET UP THE OPTIONAL PAPER FEEDER UNIT : 1. Remove all packing tape and set aside the two locking pins for later use. Locking pins in vinyl 2 2-10 Spacer Choosing the printer location 2. Push up the handle on the underside of the universal cassette and pull out the cassette. 3. Turn over the universal cassette and remove the packing tape and the spacer. 2 2-11 4. Choosing the printer location Turn the cassette upright and remove the two spacers inside the cassette. 1 2 5. Move the paper feeder unit to the selected location. N OTE : The paper feeder unit weighs about 20 lb (9.2 kg) and can be carried by one person. 2 2-12 Choosing the printer location 6. While pushing up the handle on the underside of the cassette, pull the paper cassette out of the printer. 7. Position the front of the printer above the front of the feeder unit. Use the two positioning poles on the feeder unit for alignment. Follow the instructions on page 2-7 to lift the printer. Positioning poles ! The printer weights about 110 lb (50 kg) and, therefore, requires two or more persons to carry it. Do not attempt to lift the printer by yourself; otherwise an injury may result. N OTE : When installing the printer, make sure the power cord and plug are not caught between the printer and feeder. 2 2-13 Choosing the printer location 8. Insert the two locking pins into the printer body, as shown below, to secure the feeder unit to the printer body. 9. Make sure the printer body and the feeder unit are correctly aligned. 2 2-14 Choosing the printer location 10. While pressing the handle upward, slide the universal cassette (removed in Step 2) all the way into the optional feeder unit until it snaps into place. 11. While pressing the handle upward, slide the universal cassette (removed in Step 6) all the way into the printer until it snaps into place. 2 2-15 Installing consumables Installing consumables The following items must be installed before you turn on the printer: • Toner cartridges (see below) • Drum cartridge (see page 2-20) • Waste toner bottle (see page 2-24) • Silicone oil bottle (see page 2-26) N OTE : The optional paper feeder unit is included in many of the illustrations in this chapter. If you do not have the optional paper feeder unit installed, your printer will not look exactly like the illustrations. Installing the toner cartridges The Colorwriter requires four toner cartridges: cyan, magenta, yellow, and black. Each toner cartridge contains the dry powder that the printer uses to transfer images onto paper in a print cycle. Each toner cartridge fits into a specific place inside the rotary unit, so you can’t place cartridges in the wrong location. Colored tabs indicate which cartridge belongs in each position. TO INSTALL THE TONER CARTRIDGES : 1. Open the door by pulling on the tab on the right side of the door. 2 2-16 2. Installing consumables Remove one of the toner cartridges from its protective bag. N OTE : Avoid touching the windows on the top and bottom of the cartridge. 3. Remove the two pieces of protective tape on the toner cartridge. 2 2-17 4. Installing consumables Rock it up and down five or six times to distribute the toner evenly. N OTE : Do not try to redistribute the toner in a used or unsealed cartridge—the toner may leak. 5. Place the toner cartridge on a flat surface, and then pull the sealing tape completely out in the direction indicated. N OTE : The tape may break if not pulled out in the direction indicated. 2 2-18 6. Installing consumables While pressing in the rotary knob ➀, turn it in the direction of the arrow ➁ until the color markers that match the toner cartridge appear in the opening. Make sure the two color markers are fully visible before installing the toner cartridge. Color markers 1 2 3 M Rotary cycle Bk C Y The rotary knob pops out and is locked ➂ at each of the toner positions. 2 2-19 7. Installing consumables Using the mark as a guide, hold the cartridge with the arrow label facing up, then slide it completely into the rotary unit until it snaps into place. Color markers Toner cartridge mark Arrow label 8. Press the toner cartridge two or three times to ensure that it is inserted all the way into the printer. Make sure the end of the cartridge is aligned with the marks indicated below. When the cartridge is properly inserted, there is a small gap between the cartridge and the marks. Marks 9. Repeat the steps above to install the remaining three toner cartridges. N OTE : Each toner cartridge typically prints about 4,000 A4 or Letter size pages (when printing at 5% print density). The actual cartridge life, however, depends on how much each toner cartridge is used for each print. For information about replacing toner cartridges, see Appendix C of the User Guide. 2 2-20 Installing consumables Installing the drum cartridge The drum cartridge contains the photosensitive drum, on which the toner is deposited before it is transferred onto the paper. The drum cartridge is extremely sensitive to light and may deteriorate if exposed to light. Therefore, do not open the protective bag or the drum cartridge cover until you are ready to install the drum cartridge, as follows. ! TO INSTALL THE DRUM CARTRIDGE : 1. Make sure the toner cartridge rotary is in a locked position. See page 2-18 for instructions on locking the rotary. 2. Push down the transfer drum release handle. 2 2-21 Installing consumables 3. Push the handle on the drum cartridge door in the direction of the arrow to open the door. 4. Remove the drum cartridge from its protective bag. N OTE : Do not open the protective bag or drum cartridge cover until you are ready to install it. Do not expose the drum cartridge to direct sunlight. 2 2-22 5. Installing consumables Insert the end of the cartridge with the shown below. mark into the V-shaped opening, as N OTE : Be sure your transfer drum release handle is in the down position, to avoid scratching the photosensitive drum. 6. While holding the cover with one hand and the cartridge horizontally, gently slide the drum into the compartment, letting the drum rest on the rails of the compartment. 2 2-23 7. Installing consumables When the drum cartridge is completely inside the printer, remove the cover. Avoid touching the surface of the photosensitive drum with your fingers when removing the drum cartridge cover. ! N OTE : Keep the cover to protect the used drum later. 8. Push the drum all the way in and make sure the latch is in the locked position. Latch This completes the drum cartridge installation. 2 2-24 Installing consumables Installing the waste toner bottle The waste toner bottle collects any excess toner remaining on the photosensitive drum surface. After the toner image is transferred onto the paper, the drum surface is scraped and any excess toner is forwarded to the waste toner bottle. Two waste toner bottles come with the printer and each drum cartridge kit. After you have installed the drum cartridge, immediately take out the new waste toner bottle from the drum cartridge package and install the bottle. Read the caution label on the waste toner bottle and then install it as follows. TO INSTALL THE WASTE TONER BOTTLE : 1. With the opening facing the printer, attach the new waste toner bottle as shown below. N OTE : Before attaching the waste toner bottle to the printer, make sure the transfer drum release handle is pushed all the way down. 2 2-25 Installing consumables 2. Close the drum cartridge door to hold the waste toner bottle in place. 3. Push up the transfer drum release handle to lock the transfer drum in position. This completes the waste toner bottle installation. 2 2-26 Installing consumables Installing the silicone oil bottle The oil bottle supplies silicone oil to the fixing assembly, which fixes the toner on the paper. S-H1 31 0ml LOT NO . Follow these guidelines when you install silicone oil: • Use only the recommended silicone oil (see Appendix F of the User Guide for information on ordering consumables). • Do not operate the printer unless a silicone oil bottle is installed; otherwise, the printer may be damaged. • Do not incinerate the used silicone oil bottle. TO INSTALL A SILICONE OIL BOTTLE : 1. Read the caution label on the bottle, and peel off the seal from a new silicone oil bottle. 2 2-27 Installing consumables Do not shake the bottle or the oil may spill. The oil is very slippery, and may present a skidding or slipping hazard. After a spill or leak, use absorbent material to contain and collect excess oil for disposal. Thoroughly clean the floor or other surface of all traces of the oil. Use an all-purpose alkaline cleaner, or have the surface (including carpeting) cleaned commercially. Petroleum distillates may be used, except on plastic or vinyl surfaces. Dispose of absorbed material in accordance with applicable federal, state and local requirements. ! 2. Open the stopper ➀ completely and then insert the bottle into the compartment with the label facing you ➁. ml 310 1 S-H 2 1 3. Press the bottle ➀ securely into the compartment, and then close the stopper ➁. 1 2 2 2-28 4. Installing consumables Close the front door. N OTE : You cannot close the front door unless the silicone oil bottle stopper, the drum cover, and the transfer drum release handle are in their original positions. This completes the installation of the printer consumables. For information on ordering supplies, see Appendix F of the User Guide. 2 2-29 Packing the printer for shipping Packing the printer for shipping Pack the printer in the original packing materials, if possible. If you do not have the original packaging, pack the printer with highly protective shipping material. TO PACK THE PRINTER FOR SHIPPING : 1. Remove the silicone oil, toner cartridges, drum cartridge and waste toner bottle from the printer. It is important that the above procedures are performed properly, so as not to damage the printer or cause bodily harm. Refer to Appendix C of the User Guide for complete instructions on how to complete these procedures. ! 2. Tape the front and side doors of the printer shut so they will not open during shipping. 3. Wrap the printer in the plastic bag that came with the unit or with a new one if the original was damaged. Use tape similar to the one originally shipped with the unit to seal the plastic bag. 4. Place the bottom sheet of cardboard on the shipping pallet, and place the bottom corner protectors on the cardboard, matching up the numbers on the corner protectors with the numbers on the cardboard. Each corner protector is unique and is numbered from 1 to 4. 5. Place the printer on the protectors. 6. Place the top cardboard and corner protectors on top of the printer. The protectors are numbered 1 to 4 and coincide with the numbers on the top cardboard. The protectors slide into the slots. 7. Place the accessory tray on top of the printer. 8. Place the documentation and media pack in the accessory tray. 9. Slide a new overpack box on top of the entire assembly. This overpack box has the Digital logo on it. Make sure that the overpack box seats properly on the pallet. The pallet has corners for aligning the overpack box. 2 2-30 Packing the printer for shipping 10. Apply the shipping labels to the overpack box. 11. Tie the entire assembly to the pallet with bands. Tighten the bands until the corners of the box begin to crush slightly. 3 3-1 Chapter 3: Printing the First Page Connecting the printer to an AC outlet This chapter provides information about: • Connecting the printer to an AC outlet • Turning the printer on or off • Loading the paper cassette • Printing pages on the printer • Adjusting the side margin N OTE : In many of the illustrations in this chapter, the optional paper feeder unit is included. If you do not have the optional paper feeder unit installed, your printer will not look exactly like the illustrations. Connecting the printer to an AC outlet ! Before plugging the printer into an AC outlet, make sure the rating indicated on the printer matches the voltage of the AC outlet. If the voltage label is missing or you are not sure of the type of power available, contact an authorized dealer, local power company, or the place of purchase. Make sure the power switch is turned off (that is, the switch is not pressed in). Operation of the printer should always be supervised by a responsible adult. To avoid injury, do not allow children access to the interior of any electrical product and do not let them touch any electrical contacts or gears that are exposed. This document was created with FrameMaker 4.0.4 3 3-2 Connecting the printer to an AC outlet If you have an optional paper feeder unit If you have installed the optional paper feeder unit, you can connect the printer to an AC outlet as follows: TO CONNECT THE PRINTER TO AN AC OUTLET : ( WITH AN OPTIONAL PAPER FEEDER UNIT ) 1. Plug the short AC power cord attached to the paper feeder unit into the power receptacle on the printer body. 2. Plug the supplied power cord into the power receptacle on the paper feeder unit. To prevent damage to the optional paper feeder unit, make sure the optional feeder AC cable is connected to the printer’s AC power receptacle before connecting the power cable to an AC outlet. 3. Connect the other end of the power cord to an AC outlet. 3 3-3 Connecting the printer to an AC outlet If you do not have an optional paper feeder unit If an optional paper feeder unit is not installed, you can connect the printer to an AC outlet as follows: TO CONNECT THE PRINTER TO AN AC OUTLET : ( WITHOUT AN OPTIONAL PAPER FEEDER UNIT ) 1. Plug the supplied AC power cord into the power receptacle on the printer body. 2. Connect the other end of the power cord to an AC outlet. 3 3-4 Connecting the printer to an AC outlet Tips on handling the power cord To operate the printer with maximum safety, always observe the following precautions: • Avoid using an extension cord. However, if this is unavoidable, be sure to take the following precautions. (Failure to do this may result in overheating, fire, or flickering due to a drop in voltage.) • Be sure not to exceed the allowed current rating of the extension cord. • Use only a short extension cord. Do not connect several extension cords together as this is dangerous. • Disconnect the printer by pulling on the plug, not the cord. • Turn off the printer and disconnect the power plug in the following situations: • The printer produces smoke, odor, or excess noise. • The cord or plug is damaged or gets frayed. • A liquid is spilled onto the printer or into the interior. • The printer is exposed to water or excess moisture. • The printer falls or any damage is caused to the exterior. • Service or repair is required. • The printer needs to be cleaned. (Use only the recommended cleaning procedure.) • Keep the outlet free from any obstacles to allow easy access to it. • Do not overload the AC outlet and extension cords as this causes a risk of fire or electrical shock. 3 3-5 Turning the printer on or off Turning the printer on or off The power switch is located on the lower righthand side of the front door. Pressing the power switch turns the printer on and the switch remains pressed in. Pressing it one more time turns the printer off and releases the switch is released. Wait 30 seconds before turning the printer back on. ! Never turn on the printer without a silicone oil bottle and a waste toner bottle installed. Otherwise, serious damage to the printer may occur. Status messages The startup messages that appear on the control panel are in the following order: • TESTING • DIAGS (Diagnostics) PASSED • SCANNING BOOT DEVICE • PRESS MENU FOR SETUP (Press the Menu key to access setup menus) • LOADING SYSTEM (software) • INITIALIZING (the system) After startup is complete, the status information appears in the display window. • READY—Appears when the printer is ready to print but not processing or printing a job. • PROCESSING—Appears during a print job; also displays the name of the job currently processing. • PRINTING—Appears during a print job; also displays the name of the job currently printing. • POWER SAVER MODE The initial Status messages are always displayed in English. If the Colorwriter detects a problem, an error message appears on the printer control panel. See Appendix A of the User Guide for a complete list of error messages and their description. 3 3-6 Turning the printer on or off On Off On/Off switch N OTE : If the installation is not complete, a message appears on the printer control panel and you need to check the installation. Before you check the installation, be sure to turn off the printer and unplug it from the AC outlet. TO RESET THE PRINTER : 1. Turn off the printer. 2. Wait 30 seconds or more before turning the printer on again. Otherwise, proper initialization may not be obtained. N OTE : Never turn off the printer while printing. If the power to the printer is lost accidentally, the LEDs will turn off. Open the printer to see if there is any paper left inside. If so, remove it before turning the printer back on. 3 3-7 Loading the paper cassette Loading the paper cassette The universal paper cassette included in the printer package can hold about 250 sheets of 20 lb plain paper (75 g/m2). The paper sizes supported are Letter, A4, B5, and Legal. ! The Colorwriter is not designed to print on envelopes or labels. Attempting to print on those materials could damage the printer. Before printing in an application, specify the correct paper size. If you specify a paper size other than what is in the printer, an error message appears on the printer control panel and the job will not print. For information on loading paper into the optional paper feeder unit, see Chapter 2 of the User Guide. For a description of paper requirements and how to handle and store paper and printouts, see Appendix E of the User Guide. This section describes how to use the paper cassette. Before loading paper into the cassette, always fan the paper first to loosen any sheets that are stuck together. N OTE : Do not load transparency film into the paper cassette. Use the multipurpose tray instead. For information, see Chapter 2 of the User Guide. 3 3-8 TO Loading the paper cassette REMOVE THE PAPER CASSETTE : • While pushing up the handle on the underside of the cassette, pull out the paper cassette. N OTE : To increase the paper supply, you can also add the optional paper feeder unit which comes with a universal paper cassette as well. For installation of the feeder unit, see page 2-8. 3 3-9 TO Loading the paper cassette SET THE PAPER SIZE : 1. Place the cassette on a flat surface. 2. While pressing the release button, slide the paper width guide until the desired paper width is selected (as marked on the tray), then release the button to lock. 3. While lifting the paper length guide slightly, slide it until the desired paper length is selected (as marked on the tray), then release the guide to lock it. 4. Set the size guide on the front of the cassette to the corresponding paper size. Release button L LG A4 R LT B5 Paper width guide L LG A4 R LT Paper length guide B5 The size guide provides a visual indication of the paper size loaded in the cassette. LGL A4 LTR B5 3 3-10 TO Loading the paper cassette LOAD PAPER : 1. Place the cassette on a flat surface. Then place a stack of paper into the paper cassette, with the print side facing up and the bottom edge going into the cassette first. 2. Check to see that the paper stack does not exceed the paper limit mark, otherwise a paper jam may result. 3. Press down on the paper so that the edges lie under the two retaining clips, otherwise a paper jam may result. 3 3-11 Loading the paper cassette 4. Align the paper cassette so that it rests on the rails inside the paper feeder unit. 5. While pressing the handle upward, slide the cassette all the way into the paper feeder unit until it clicks into place. Rails The cassette is now ready to supply paper. TO READ THE PAPER AMOUNT INDICATOR : • The blue bar goes out of view as the paper is used. When the blue bar is completely out of view, refill the cassette. Blue bar FULL EMPTY With optional paper feeder unit 3 3-12 Printing pages on the printer Printing pages on the printer A start page is printed automatically when you power on the printer unless you disable the printing of a start page in System Setup on the printer control panel. (See page 4-5 for details.) There are a number of different pages you can print from the Colorwriter without sending a file from your computer. This section and the next contain instructions for printing the following pages from the printer control panel: • Test page • Job log • Configuration page • Help map • Color pages • Demo page 1 • Demo page 2 Printing a test page Printing a test page enables you to confirm that the Colorwriter is properly installed and to view color and grayscale samples to troubleshoot any problems. It takes approximately 5 minutes to power up the printer and print a test page. N OTE : If you have trouble printing a test page, see Appendix D of the User Guide. TO PRINT A TEST PAGE : 1. Turn on the printer and allow it to warm up. Messages will appear on the control panel display window as the Colorwriter runs through its power-up tests (see page 3-5 for a listing of power-up test messages). 2. At the READY screen press the Menu button on the printer control panel once. 3. Press the up or down button until you see TEST PAGE in the window. 4. Press the Enter button. The Colorwriter prints a test page. 3 3-13 5. Printing pages on the printer Examine the quality of the test page. The test page contains color samples, grayscale patterns, color percentages, registration marks, and a measurement grid. The following information also appears: printer name, product name, version of system software, installed memory, Ethernet address, default paper size, and whether the optional cassette is installed. Printing additional pages In addition to the test page, you can also print a job log, configuration page, help map, color charts, and demo pages. You will find out more about the job log in the User Guide, and more about the color charts in Chapter 6, “Installing User Software” of this guide. The configuration page lists information about the printer and all of its current setup options. Before you change the setup, print a configuration page in case you need to restore some settings later. The help map contains a brief description of the printer control panel and a detailed outline of the setup screens. All three pages of the Help map are reproduced in Appendix B of the User Guide. The Demo pages give users an idea of the printing ability of the Colorwriter. Demo page 1 shows a representation of a page that might be produced in a corporate printing environment. Demo page 2 explains the function and benefits of the features “rip-while-print” and “continuous print.” TO PRINT PAGES FROM THE PRINTER CONTROL PANEL : 1. Press the Menu button on the printer control panel once. 2. Press the up or down button until you see the name of the page(s) you want to print. 3. Press the Enter button. The Colorwriter prints the page(s). 3 3-14 Adjusting the side margin Adjusting the side margin After installing the optional paper feeder unit, be sure to check and adjust the side margin. Print a test print from both the printer cassette and the optional paper feeder unit, and adjust to the width of the left margin of the printer cassette (approximately 2mm). See “Printing pages on the printer” on page 3-12. Currently set value 7 89 23 45 6 0 1 Side margin adjustment dial The side margin adjustment dial can be set from 0 to 9. The value on the top is the currently set value. The dial is set to 5 at the factory. When the dial value is increased by 1, the left margin increases by approximately 0.4mm (10 dots). When the dial value is decreased by 1, the left margin is decreased by approximately 0.4mm. TO ADJUST THE SIDE MARGIN : 1. Make sure the paper feeder unit is attached to the printer. 2. Load the paper feeder unit’s paper cassette with Letter, A4, Legal, or B5 paper. For details, see “Loading the paper cassette” on page 3-7. 3. Turn on the printer and wait until it is ready to print. For details, see “Turning the printer on or off ” on page 3-5. 4. In your application’s Print dialog box, change the paper source to the paper feeder unit. 3 3-15 5. Adjusting the side margin Print a test page from the printer control panel. For details, see “Printing pages on the printer” on page 3-12. 6. Measure the left margin of the test page. If the left margin is 2mm, it is not necessary to adjust the side margin. If the left margin is wider or narrower than 2mm, calculate the difference. Use this measurement to adjust the margin with the side margin adjustment dial. For example, if the left margin is 2.8mm: 2.8mm – 2.0mm = 0.8mm Decrease the margin by 0.8mm. 0.8mm ÷ 0.4mm = 2 Decrease the dial value by 2. In the above example, you would reset the dial from 5 to 3. To turn the dial, use a screw driver or your hand. 0 1 7. 7 89 23 45 6 Print another test print and measure to see if the left margin is 2mm. If the margin is still not 2mm, repeat the above procedure. 4 4-1 Chapter 4: Using the Control Panels Printer control panel functions The printer control panel on the front of the Colorwriter enables you to set options and view the status of print jobs and the printer. The density control panel on the back of the printer can be used to adjust the color quality of the Colorwriter. This chapter provides information about: • Printer control panel functions • Setting up the printer • Using the density control panel Printer control panel functions This section describes the functions of the printer control panel, illustrated below: Processing Printer is processing or printing a job Fault Press Enter to view fault message Main Cassette LCD Tray light indicates default paper source, or paper source requested by current print job Multipurpose Tray READY 292MB Colorwriter LSR Optional Cassette Activity lights The activity lights indicate printer status. They have the following meanings: Lit when the printer is online and ready to print new jobs. Flashes when the printer is receiving data, processing, printing, or when the Downloader or Spooler is connected. Lit when the printer requires operator intervention. Flashes when the printer is warming up or there is an error that prevents printing. The upper cassette light is lit when the main (upper) paper cassette is selected as the default tray or requested by the current print job. This document was created with FrameMaker 4.0.4 4 4-2 Printer control panel functions The lower cassette light is lit when the optional (lower) paper cassette is selected as the default tray or requested by the current print job. The multipurpose tray light is lit when the multipurpose tray is selected as the default tray or requested by the current print job. Control panel display The LCD window on the printer control panel displays status messages and information about the printer. For information on the control panel, see page 2-2 of the User Guide. For a list of messages displayed on the control panel, see Appendix A of the User Guide. Buttons The buttons have the following meanings: Suspends and resumes printing. Brings the printer offline for setup or for changing the language of LCD screens. Cancels the “oldest” job processing or printing. This button is active only when the PROCESSING or PRINTING message appears. Menu button. At startup, or at the PRINTER OFFLINE screen, accesses the setup menus. In the setup menus, takes you back to the SELECT FUNCTION screen. When the Colorwriter is online, switches between the status windows and the Print Pages menu (and the warning window if a message is being displayed). Enter button. Selects the currently displayed choice on the second line of the display window and proceeds to the next option. Takes you to the next entry in the list. In a fixed-length list, takes you to the next item in the list. When entering text, decrements to the previous character in the alphabet. Hold down the ↓ button to decrement rapidly. Takes you to the previous entry in the list. In a fixed-length list, takes you to the previous item in the list. When entering text, increments to the next character in the alphabet. Hold down the ↑ button to increment rapidly. In the setup menus, backspaces the cursor to the previous text-entry position. In a text field, deletes the current character as it backspaces. In the setup menus, advances the cursor to the next text-entry position. 4 4-3 Setting up the printer Setting up the printer This section describes how to set up the printer using the printer control panel. After you set up the printer the first time, you may later need to change setup information. For example, your network may change, or you may decide you don’t want to print a start page when you turn on the printer. To change the setup at any time, follow the procedures in this section. Accessing Setup To set up the printer, from the READY screen or POWER SAVER MODE screen, press the Offline button, and then press the Menu button. The SELECT FUNCTION menu is displayed. The second line of the SELECT FUNCTION menu is RUN SETUP. Press the ↓ or ↑ button to toggle between the two setup menus: LANGUAGE and RUN SETUP. Selecting the language You can select the language the Colorwriter uses in the printer control panel and the language in which info is printed on the test pages. From the SELECT menu, choose LANGUAGE, and press Enter. Press the ↓ button again to display the languages available on the system. Choose the language you wish to use and press Menu. (If PRINTER OFFLINE is displayed, press the Online button.) The system will update its settings. Messages that are created during bootup (such as built-in diagnostic test names and service options), before the system loads the language you selected, are always displayed in English. Configuring the printer To view the Setup menus described in the table below, press the ↓ and ↑ buttons. To select a menu, press Enter. The first option for that menu is displayed. Scroll through available settings, and press Enter to accept a particular setting. To exit the Setup menu, press the Menu button. 4 4-4 Setting up the printer The following table lists the setup menus and their functions. PCK Choose To do this SYSTEM SETUP Specify system settings for the Colorwriter. PRINTER SETUP Specify printer settings for the Colorwriter. NETWORK SETUP Specify settings for the network connections to the Colorwriter, including active ports and network protocols. JOB LOG SETUP Specify job log settings for the Colorwriter. CHANGE PASSWORD Change the existing password. This password is used to limit access to the Setup menus and to some administrator functions in the Colorwriter LSR Spooler. CLEAR JOB LOG or CLEAR LOG/QUEUES Clear the job log, and (systems with the PCK option installed) clear all jobs from the Print, Hold, and Printed queues. Generally, you should not have to use this option. N OTE : Before you change the setup, it’s a good idea to print the current printer configuration, in case you need to restore the original settings later. For information on printing a configuration page, see page 3-13. Specifying system information The System Setup menu enables you to specify system information about the Colorwriter. (Default values, where applicable, are shown in square brackets.) PRINTER NAME [COLORWRITER LSR] Use this option to give the Colorwriter a name on the network. The printer name can be up to 16 characters. DATE (MM/DD/YY) Use this option to change the system date. Enter the date in the form MM/DD/YY (Month/Day/Year). SYSTEM TIME Use this option to change the system time. Enter the time in the form HH:MM (Hours:Minutes). 4 4-5 Setting up the printer PRINT START PAGE YES/NO [YES] Use this option to specify whether the Colorwriter should print a start page when it is restarted. The start page verifies that the Colorwriter is working properly. It contains color samples and the following information: printer name, amount of memory installed, software and hardware version, enabled network protocols and connections, color mode, print queues enabled, and font samples. PRINT TO PSERROR YES/NO [NO] Use this option to specify whether the Colorwriter should print the available portion of a print job when it encounters a PostScript error. Select YES to print the portion of the job that was processed before the error occurred; select NO to cancel printing when a PostScript error is encountered. PRINT COVER PAGE YES/NO [NO] Use this option to specify whether the Colorwriter should print a cover page (job summary) at the end of each print job. If you select YES, each print job is followed by a page containing the name of the user who sent the job, the document name, the Colorwriter name, the time the job was printed, the number of pages printed, and the status of the job. If a PostScript error occurred and PRINT TO PSERROR is set to Yes, the error message will appear for the job status. Cover pages are printed on the paper size selected as the Default Size in the Printer Setup in the printer control panel—letter or A4. If you have set the Colorwriter to Print Cover Page (in System Setup in the printer control panel) but you do not have the default size paper available in the main or optional cassette when you print, at the end of the job you will see a message LOAD (SIZE) PAPER indicating that you should load the correct paper size for the cover page. N OTE : If you are not using letter-size or A4 paper, do not print cover pages. LOW TONER ERROR YES/NO [NO] Select YES if you want the Colorwriter to stop printing a job as soon as the engine reports a low toner condition. Select NO if you want the Colorwriter to display the low toner warning but continue to print. 4 4-6 Setting up the printer POWER SAVER MODE 15/30/45/60/TIMER OFF [30] Select the number of minutes during which there is no printer activity before the Colorwriter switches to Power Saver Mode. Full power mode is automatically restored when the printer receives a network job or when you press the Menu button and print a page at the printer. The Printer has to warm up before it can print the job. Select TIMER OFF if you do not want to use Power Saver Mode. LOCAL MESSAGES YES/NO (ENGLISH) [YES] This setting only affects you if you have selected a language other than English on the LCD. Select YES if you want status and printer error messages displayed on your workstation and on the LCD in the same language (the language you selected from the SELECT LANGUAGE option). Select NO (ENGLISH) if you want messages displayed in your selected language on the LCD, but you want status and printer error messages displayed on your workstation in English. Specifying printer information The Printer Setup menu enables you to set printer-specific information. (Default values, where applicable, appear in square brackets.) N OTE : The first five setup options only appear if you have the PCK option installed PCK ENABLE DIRECT YES/NO [YES] Use this option to enable or disable users’ ability to connect directly to the Colorwriter, bypassing the queues. If you select Yes, users can print to the direct connection and download and delete printer fonts. Note that jobs printed to the direct connection cannot be reprinted from the Printed queue. N OTE : The direct connection must be enabled to download fonts or view a font list in the Colorwriter LSR Downloader. 4 4-7 PCK Setting up the printer ENABLE QUEUES YES/NO [YES] Select YES to enable users to print to the Colorwriter queues. Only queues enabled in the Printer Setup are visible to users. PCK ENABLE HOLD YES/NO [YES] This option appears only if ENABLE QUEUES is set to YES. Use this option to enable users to print to the Hold queue. Users can print jobs in the Hold queue by moving them to the Print queue in the Colorwriter LSR Spooler. PCK ENABLE PRINTED YES/NO [YES] This option appears only if ENABLE QUEUES is set to YES. Use this option to save jobs to the Printed queue. Users can print jobs in the Printed queue by moving them to the Print queue in the Colorwriter LSR Spooler. PCK JOBS TO SAVE 1-99 [10] This option appears only if ENABLE PRINTED is set to YES. Use this option to specify the number of jobs to be stored in the Printed queue. Note that jobs in the Printed queue take up space on the Colorwriter’s hard drive. COLOR MODE CMYK/GRAYSCALE [CMYK] Use this option to specify whether you will be printing color (CMYK) or grayscale images by default. DEFAULT SIZE LETTER/A4 [LETTER] Use this option to specify what paper size to print on by default. PAPER SOURCE AUTO CASCADE/MAIN CASS/OPT CASS/MP TRAY [AUTO CASCADE] Use this option to specify the paper cassette to use when none is specified by the job. If you select Auto Cascade, the Colorwriter will automatically switch to another tray containing the same paper size when the current cassette runs out of paper. 4 4-8 Setting up the printer PostScript printer drivers and PPDs allow Macintosh and Windows users to select the paper cassette used for printing on a job-specific basis. These selections override any setting on the printer. When users do not have access to these options, such as when they use lpr to print PostScript files, the paper source used depends on the PAPER SOURCE setting in Printer Setup in the printer control panel. Paper is drawn from the following cassettes when the user cannot indicate paper source or size, or when the PostScript file doesn’t indicate these choices: Paper Source setting in Printer Setup on the printer control panel AUTO CASCADE Cassette/tray used first When cassette is out of paper Cassette used last (current cassette) Automatically switches to another cassette containing the same size paper. If there is no such cassette, error message appears: LOAD (SIZE*) PAPER MAIN CASS Main Cassette OPT CASS (Optional Cassette) MP TRAY (Multipurpose Tray) Error message: LOAD (SIZE*) PAPER (Main Cassette) Optional Cassette if one is installed. If there is no Optional Cassette, Main Cassette is used. Error message: Multipurpose Tray Note: Be sure paper is loaded or the printer will not print the start page. Error message: LOAD (SIZE*) PAPER LOAD (SIZE*) PAPER * The size specified is the current DEFAULT SIZE (in Printer Setup) unless specifically indicated within the PostScript file When you see the LOAD (SIZE*) PAPER message, load the paper you wish to use in any cassette. 4 4-9 Setting up the printer If you wish to keep special media in a cassette and prevent Macintosh and Windows users from selecting it inadvertently, make sure that the Paper Source setting is not AUTO CASCADE or the cassette containing the special media. For instance, to keep special media in the Optional cassette, select MAIN CASS as the Paper Source and store the paper you use routinely in the Main cassette. DEFAULT CRD PHOTOGRAPHIC/MONITOR/PRESENTATION/SOLID COLOR [PHOTOGRAPHIC] Select the custom CRD (color rendering dictionary) that the Colorwriter should use by default when it receives RGB color data for printing. The PostScript interpreter uses the CRD to convert RGB data to the CMYK data used by the print engine. Users who have access to PostScript Level 2 printer drivers and the Colorwriter PPD can override this setting for particular jobs. CRDs are not used when printing CMYK data. Select PHOTOGRAPHIC to optimize the reproduction of continuous tone images. Select PRESENTATION to optimize the rendering of bright saturated colors such as those you might use in graphs for business presentations. Select SOLID COLOR to accurately represent particular colors used in logos and products. Select MONITOR to give the best match between colors rendered on a monitor and printed output. Specifying network information The Network Setup menu enables you to set network-specific information. (Default values, where applicable, appear in square brackets.) ENABLE APPLETALK YES/NO [YES] Select YES if you have an AppleTalk network connected to the Colorwriter. Note that you can enable AppleTalk, TCP/IP, and IPX (Novell) communication simultaneously. 4 4-10 Setting up the printer APPLETALK ZONE This option appears only if ENABLE APPLETALK is set to YES and your network is divided into zones. Scroll through the list to select the AppleTalk zone in which you want the Colorwriter to appear. If you do not enter a zone, the Colorwriter is assigned to the default AppleTalk zone. If the Colorwriter is set up by allowing it to reach READY using default settings, AppleTalk is enabled and a default AppleTalk zone is selected. However, the name of this zone does not appear on the configuration page. To see the zone on the configuration page, run Network Setup in the printer control panel, select the AppleTalk zone, and save changes. After the printer settings are updated, the configuration page will list the selected AppleTalk zone. N OTE : Before you complete the following selections, you must first set up the Novell file server. ENABLE IPX YES/NO [NO] Select YES if you have an IPX (Novell) network connected to the Colorwriter. Note that you can enable AppleTalk, TCP/IP, and IPX (Novell) communication simultaneously. IPX FRAME TYPE ETHERNET 802.2/ETHERNET 802.3/ETHERNET II [ETHERNET 802.2] Select the Ethernet frame type used for communication between your NetWare file server and the Colorwriter LSR 2000+. IPX SETTING VIEW/CHANGE [VIEW] Select VIEW to see a list of NetWare File Servers that are currently connected to the Colorwriter LSR 2000+. Select CHANGE if you wish to change the configuration of a file server that is already connected. N OTE : If you select CHANGE, you must reselect all the NetWare File Servers and reconnect them to the Colorwriter. 4 4-11 Setting up the printer CONNECTED SERVRS list CONNECTED SERVRS appears only if you selected VIEW for IPX SETTING. You can use the scroll arrows to see the NetWare File Servers that are currently connected to the Colorwriter LSR 2000+. + PCK For a Colorwriter LSR 2000 configured with 32MB or 48MB of memory, there may be up to three file servers on the list. If the printer is configured with 16MB of memory, it can connect to a single file server. If you press Menu or Enter, ENABLE TCP/IP is displayed. AVAILABLE SERVRS list AVAILABLE SERVRS appears only if you selected CHANGE for IPX SETTING. This option allows you to select a NetWare File Server. Select a NetWare File Server that you have already configured to handle Colorwriter print jobs. You can use the scroll arrows to select the server from a list of NetWare File Servers on the IPX network. N OTE : If you have a guest account that does not require a password, the next screen is not displayed; instead, the PRINT SERVER screen is displayed. FILE SERV LOGIN ADMIN/SUPERVISOR/LOGIN NAME [SUPERVISOR] This option appears only if the NetWare administrator has not enabled a guest login to the selected file server, or if the guest login requires a password. Use this option to specify a file server login. Select LOGIN NAME to enter your own login name and password or to log in as a guest. LOGIN NAME [GUEST] This option appears only if you selected LOGIN NAME in the previous screen. Enter your login name or select GUEST. PASSWORD This option appears only if your NetWare file server is set up to require you to log in with a password. Enter your file server password. 4 4-12 Setting up the printer PRINT SERVER list This option appears only if the NetWare file server you logged into has more than one print server defined. From the list of printer server names, select the NetWare print server that you or your network administrator configured especially to handle Colorwriter print jobs. IPX network users (clients) will print to NetWare print queues defined for the selected NetWare print server. Jobs in any NetWare Print Queue defined on this Print Server will be routed to the Colorwriter. PASSWORD This option appears only if your NetWare print server is set up to require you to log in with a password. Enter your print server password. IPX POLL INT 0-99 [15] Use this option to specify the interval, in seconds, at which the Colorwriter communicates with the Novell server. If you specify 0, the Colorwriter polls the server as frequently as possible for your network configuration. N OTE : If you select a short interval, the amount of network traffic increases; this may slow down other network jobs. PCK SELECT QUEUE connections enabled in Printer Setup Specify the queue on the Colorwriter to which jobs from the currently selected NetWare print server will be directed. The available connections are Direct, Print queue, and Hold queue, but you must choose a connection that you enabled in Printer Setup. If your Colorwriter has the 16MB memory configuration, this option does not appear. 4 4-13 PCK Setting up the printer SELECT FS YES/NO [NO] This option appears only if your Colorwriter still has an unused IPX connection. If your Colorwriter has a 32MB or 48MB memory configuration, you may set up as many as three NetWare file server connections to the Colorwriter. Otherwise, you may set up only one IPX connection, and this option is not displayed. Choose YES if you wish to configure another NetWare File Server connection to the Colorwriter. (This choice displays the AVAILABLE SERVRS screen, from which you may select another file server.) Choose NO when you have finished configuring the IPX connections. ENABLE TCP/IP YES/NO [NO] Select YES if you have a TCP/IP network connected to the Colorwriter. Note that you can enable AppleTalk, TCP/IP, and IPX (Novell) communication simultaneously. IP ADDRESS [127.0.0.1] This option appears only if ENABLE TCP/IP is set to YES. Use this option to specify the IP address for printing with TCP/IP. The Colorwriter is shipped with an invalid IP address. If you plan to print with TCP/IP, you must first assign the Colorwriter a unique, valid IP address. This IP address is all that is required to identify the Colorwriter on your network; you do not need to give the Colorwriter a hostname. For information on setting up printing with TCP/IP, see Chapter 5 of this manual. SUBNET MASK [255.255.255.0] This option appears only if ENABLE TCP/IP is set to YES. Use this option to specify the subnet mask for printing with TCP/IP. If you notice that some, but not all, users can print to the Colorwriter using TCP/IP, you might need to change the subnet mask. If you are unsure about this option, leave it set to the default. The subnet mask is related to the IP address. If you did not change the IP address for the Colorwriter, the subnet mask is 255.255.255.0 by default. If you changed the IP address, check with your system administrator. 4 4-14 Setting up the printer GATEWAY ADDRESS This option appears only if ENABLE TCP/IP is set to YES. Use this option to specify the gateway address for printing with TCP/IP. By default, no default gateway address is set. If your TCP/IP network has a gateway or is segmented into subnets and you plan to print using TCP/IP, you must enter the gateway address. Note that you need to enter only one gateway address. ENABLE PARALLEL YES/NO [YES] Select YES if you want to print through the Colorwriter’s parallel port. You can connect a single PC or compatible computer to the Colorwriter’s parallel port and print directly to the Colorwriter. TIMEOUT (S) 5-60 [15] This option appears only if ENABLE PARALLEL is set to YES. Use this option to specify how long the Colorwriter waits without receiving data from the parallel port before deciding that the current job is complete. During the timeout, the Colorwriter cannot receive new jobs through the parallel port, but it continues to receive network print jobs. If you are experiencing a lot of job time-outs, try increasing this value. IGNORE EOF YES/NO [YES] This option appears only if ENABLE PARALLEL is set to YES. Use this option to specify whether the Colorwriter should ignore end-of-file (EOF) messages in a file. To print PostScript files in binary format (not ASCII), this option must be set to YES. When this option is set to YES, the Colorwriter uses the value you entered for the parallel port timeout to determine when it has reached the end of the file. 4 4-15 Setting up the printer Specifying job log information The Job Log Setup menu enables you to control the Colorwriter job log. (Default values, where applicable, appear in square brackets.) AUTO PRINT YES/NO [NO] Use this option to specify whether the Colorwriter should print the job log after every 40 jobs. The job log displays a list of the last 40 jobs processed, with accounting information about each one including the user name, document name, time and date printed, and number of pages. AUTO CLEAR YES/NO [NO] Use this option to specify whether to clear the job log after every 40 jobs. If you leave this option set to NO, the Colorwriter saves a record of all jobs. This option only appears if you selected YES for AUTO PRINT. To return to SELECT FUNCTION press the Menu button. N OTE : The job log file takes up space on the Colorwriter’s hard drive and could eventually cause PostScript errors. You may want to clear the job log periodically to avoid this problem. If you have a printer with the 32MB or 48MB memory configuration, you can delete the job log from the Colorwriter LSR Spooler. Specifying password information The Change Password option enables you to change the password for the Colorwriter. This password determines whether a user can modify the Setup options, and whether a user has system administration control over jobs in the Colorwriter LSR Spooler queues. In most cases, only the system administrator should have access to this password. When the Colorwriter is installed, there is no password. If you do not create a password, users are not required to enter a password to modify the Setup options or use the administrator functions in the Colorwriter LSR Spooler. When you select CHANGE PASSWORD, you are prompted to enter the old password if you have already created one. To enter the password, use the left and right buttons to move from character to character, and the up and down buttons to 4 4-16 Setting up the printer select the characters. The password can be any combination of letters and numbers up to 16 characters. When you are finished, press the Enter button. You are then prompted to enter the new password again to verify that you entered it correctly. N OTE : The password is case-sensitive. You must enter exactly the same password both times. If you make a mistake, you will be prompted to enter the password again. The new password is effective until you change it. Clearing job logs and printer queues PCK The CLEAR LOG/QUEUES option enables you to delete the job log and all queued jobs on the Colorwriter. When you select this option, you are prompted to CONFIRM CLEAR. Press ↑ for YES or ↓ for NO. If you choose YES, the job log is cleared, all queued jobs are deleted, and the system reboots. PCK If a job fails to print and you are unable to cancel it, restart the Colorwriter and then choose CLEAR LOG/QUEUES. If your Colorwriter has the 16MB memory configuration, spooled jobs are not stored on the printer, and the menu displays CLEAR JOB LOG. When you select CLEAR JOB LOG, you are prompted to CONFIRM CLEAR. Press ↑ for YES or ↓ for NO. If you choose YES, the job log is cleared. 4 4-17 Using the density control panel Using the density control panel This section describes the density control panel located on the back of the Colorwriter. You can use the density control panel to • Change color density settings • Change test pattern pages The parts of the density control panel are shown in the following illustration: Magenta LED Cyan LED M COLOR SELECT indicators C Yellow LED Y Black LED Bk Density gauge COLOR SELECT COLOR SELECT button DEFAULT CHANGE buttons TEST PRINT ENTER ENTER button TEST PRINT button M Lights when magenta is selected. C Lights when cyan is selected. Y Lights when yellow is selected. Bk Lights when black is selected Density gauge Indicates the currently selected color density or test print pattern. COLOR SELECT Press this button to select one of the color selection indicators (M, C, Y, Bk) to change the density. –/+ Use these buttons to change the density or to select a test pattern for the TEST PRINT function. 4 4-18 Using the density control panel ENTER After you select a new density for one of the color selection indicators (M, C, Y, Bk), press this button to save the new density for the selected color indicator. TEST PRINT Prints a built in test pattern (solid color, solid white, gradation, horizontal lines, vertical lines, or grid). Use the test print to check the results of a density change. Density adjustments from the density control panel Density adjustments made from the density control panel are similar to manual overrides that are applied just before printing. Therefore, these adjustments do not enter into the automatic calibration that occurs during Colorwriter engine warmup. Obtaining consistent results when you use CRDs requires that you use a calibrated printer. We recommend setting the density control panel to the neutral (center) position before you calibrate the Colorwriter with the Fiery Print Calibrator. 5 5-1 Chapter 5: Connecting to the Colorwriter Parallel cable connection This chapter describes how to connect your Colorwriter to a network. You can connect the Colorwriter to your network with thicknet, twisted pair, parallel cable, or thinnet (with the use of the adapter DECXM-AA). This chapter provides information about: • Parallel cable connection hardware • Ethernet cable connection hardware • Setting up TCP/IP printing • UNIX server print queues • Setting up IPX (Novell) printing After you have connected the Colorwriter to the network, follow the setup instructions in “Setting up the printer” on page 4-3. Parallel cable connection In addition to receiving print jobs over Ethernet, the Colorwriter can accept print jobs from a Windows computer or server through its high-speed Centronics parallel port. This connection is also advantageous for workstations that use dedicated networks using protocols other than AppleTalk, TCP/IP, or IPX. The parallel port connection can be enabled concurrently with the Ethernet port. TO CONNECT A PARALLEL CABLE TO THE 1. C OLORWRITER : With the Colorwriter and the Windows computer or server turned off, attach the Centronics-type parallel cable to the parallel port. Ethernet AUI 10BaseT Parallel SCSI This document was created with FrameMaker 4.0.4 5 5-2 Parallel cable connection 2. Connect the other end of the cable to the parallel port on the computer. 3. Turn on the computer and turn on the printer. Verifying the parallel port connection Before you begin this procedure, run Setup and verify that the ENABLE PARALLEL option is set to YES. You should also verify that the Colorwriter can print a test page from the printer control panel. Perform the following steps from the DOS prompt of the PC or the PC-based server that is connected to the Colorwriter’s parallel port. T O VERIFY PC- BASED THE PARALLEL PORT CONNECTION FROM A SERVER : 1. PC OR A Insert your disk containing a sample PostScript file in the floppy disk drive of the PC connected to the Colorwriter parallel port. The PostScript file must be saved on an MS-DOS formatted disk. N OTE : The PostScript file must begin with a percentage sign followed by an exclamation point (%!); otherwise, it will be treated as a text file. 2. From the DOS prompt on the host PC, type: print a:filename.ps lpt1: The floppy disk drive may be assigned as drive b on some computers. If the Colorwriter does not print the file but does print a test page from the printer control panel: • Check the parallel port cable connections • Verify that Setup options are set correctly 5 5-3 Ethernet cable connection Ethernet cable connection The Colorwriter supports the following types of Ethernet cables: • Thinnet (thin coaxial Ethernet cable or 10Base2) Uses an optional external transceiver (media attachment unit, or MAU), such as the DECXM-AA, to attach to the AUI (attachment unit interface) connector on the Ethernet interface of the Colorwriter. • Thicknet (thick coaxial Ethernet cable or 10Base5) Cable connects directly to the AUI connector on the Ethernet interface of the Colorwriter. • Twisted pair (unshielded twisted pair cable or 10BaseT) Uses 8-pin RJ-45 connectors that plug into the RJ-45 socket on the Colorwriter. N OTE : Shut off the Colorwriter before connecting it to any network device. Do not attach cable to more than one Ethernet connector on the Colorwriter at one time. TO TO CONNECT A THINNET CABLE TO THE 1. With the Colorwriter turned off, connect the transceiver to the AUI connector on the back of the Colorwriter. 2. Connect the thinnet cable to the BNC connector on the transceiver. CONNECT A THICKNET CABLE TO THE • TO C OLORWRITER : C OLORWRITER : With the Colorwriter turned off, connect the thicknet cable connector to the AUI connector on the back of the Colorwriter and slide the latch. CONNECT A TWISTED PAIR CABLE TO THE • C OLORWRITER : With the Colorwriter turned off, connect the RJ-45 cable to the RJ-45 socket on the back of the Colorwriter. 5 5-4 Verifying the network connection Verifying the network connection Print a sample document. If the document fails to print, verify the setup and check the printer control panel for error messages. Print a few test documents from a networked computer that will use the Colorwriter. Information on verifying the network connection can be found on the following pages: • For IPX (Novell) networks, see page 5-17 • For other networks used by Windows systems, see page 6-17 • For AppleTalk networks, see page 6-4 • For TCP/IP networks, see the next section of this chapter • For DCPS information, see page 5-31 Setting up TCP/IP printing TCP/IP provides network services for high-speed local and wide area networks and heterogeneous environments, including PC compatibles, Macintosh computers, minicomputers, and mainframes, running diverse operating systems. The Colorwriter supports the lpd protocol for printing over TCP/IP networks. Network users simply submit print jobs to a named printer. Windows NT users can also use the Colorwriter LSR Spooler and Downloader by way of the TCP/IP protocol. Before you install the Colorwriter on your TCP/IP network, you need to obtain the Internet address you will be using on the Colorwriter. N OTE : Every machine (host) on a TCP/IP network, including the Colorwriter, must have a unique 32-bit internet address (IP address). If the network is being set up for the first time, it’s a good idea to start out with addresses that can be used with the public Internet. For a new IP network installation, address information can be obtained from the InterNIC at 505 Huntmar Drive, Herndon, VA 22070, telephone (703) 742-4777. If you already have an Internet account, contact your Internet service provider for an additional address for the Colorwriter. 5 5-5 UNIX server print queues Setting up the Colorwriter printing environment To set up Colorwriter printing on TCP/IP networks, the network administrator must follow these steps: • Specify the appropriate settings in the Colorwriter Printer Setup and Network Setup on the printer control panel. The administrator must enter a valid IP address for the Colorwriter. In addition, if the TCP/IP network uses a gateway, enter the gateway address. If it uses a subnet mask, enter the value of the subnet mask. For information on printer control panel setup, see Chapter 4. • Add the Colorwriter to the network’s IP host table. A superuser must add the Colorwriter name and IP address to the system’s database of network printers. If your site is using NIS (Network Information Services), this step must be performed on the master NIS (server) machine. After adding the Colorwriter entry, the updated database must be released to network users. • For the Colorwriter name, specify the print server protocol, the queue, and the spool file. • Activate the Colorwriter connection. Depending on your system, you may restart the printer daemon. UNIX server print queues The lpd protocol is a printer spooling system. It is a set of programs that accepts printing requests from many users on a network, routes them to the proper print server (in this case, the Colorwriter), and accepts requests to display a queue’s status or to remove jobs from a queue. The lpd system is included in the standard installation of Berkeley-based UNIX systems, Digital UNIX, Ultrix, SunOS 4, and Solaris, and is an option for the SGI IRIX system. Use the examples that follow as a guide in helping you set up your network for printing to the Colorwriter. 5 5-6 UNIX server print queues N OTE : In these examples, we’ll use colorwriter as the printer name (the IP host name), and colorwriterq as the name of the Colorwriter Print queue. Since the Colorwriter supports only one queue at a time, you can use the same name for the hostname and the queuename. However, the examples indicate where you should make a distinction if you want to use different names. N OTE : For SGI workstations running IRIX 5, first load the lpd package from the IRIX installation CD. The default installation includes only the lp printing subsystem, which does not have networking capabilities. You need to load the following items: eoe2.sw.bsdlpr and eoe2.man.bsdlpr TO ADD THE C OLORWRITER AS A NETWORK PRINTER TO ALL UNIX SYSTEMS : 1. Log in to your UNIX host as the root user. 2. Edit your /etc/hosts file to include the Colorwriter as a network device. The following is a sample entry for the Colorwriter: 192.9.228.1<TAB>colorwriter<TAB>#comments The internet address is followed by the official host name, followed by aliases, if any. N OTE : If a site is using NIS, after adding the Colorwriter entry, the superuser releases the updated information by typing: cd /var/yp make N OTE : For sites that use DNS (Domain Name Services) or that use NIS+, consult the documentation or the network administrator for instructions on publishing the Colorwriter entry. 3. Confirm the connection with the ping command: ping v <IP address> For more information, see “Verifying the TCP/IP connection” on page 5-14. 4. If your UNIX system uses SunOS 4 or another BSD-based variant, go to the next section. If your system uses Solaris 2, follow the steps on page 5-8. 5 5-7 UNIX server print queues T O SET UP C OLORWRITER PRINTING ON A UNIX UNIX OR OTHER BSD- BASED VARIANT : SYSTEM RUNNING D IGITAL 1. On a workstation that will print to the Colorwriter, log in to your UNIX host as the root user. 2. Create an entry for the Colorwriter in your /etc/printcap file. The following is a sample printcap entry for the Colorwriter. Note that the remote host name you enter in the rm line must exactly match the name you entered in the /etc/hosts file. N OTE : The name used in the rp line for configuring the Colorwriter (xjprint) is an internal name that the Colorwriter requests. It must be xjprint; it is not a userselectable name. This is the only place where it is entered. colorwriterq:\ :lp=:\ :rm=colorwriter:\ :rp=xjprint:\ :lf=/var/spool/lpd/colorwriterq/log:\ :sd=/var/spool/lpd/colorwriterq:\ :mx#0:sf:sb The spool directory colorwriterq is specified here, and the directory itself is created in Step 3. Similarly, the log file is specified here and created in Step 4. The spool directory is write-protected (from everyone but a daemon user and daemon group); users cannot modify or remove files other than their own. N OTE : When setting up an lpr queue to the Colorwriter, the system name for the remote printer—xjprint—must be specified in lowercase letters. 3. Create a spool directory for the Colorwriter in the /var/spool directory. For example, enter the following: mkdir -p /var/spool/lpd/colorwriterq chown daemon /var/spool/lpd/colorwriterq 4. Create the log files. For example, enter the following: cp /dev/null /var/spool/lpd/colorwriterq/log 5. Reboot the machine. 5 5-8 TO SET UP UNIX server print queues C OLORWRITER PRINTING ON A UNIX SYSTEM RUNNING S OLARIS 2: 1. On each workstation that will print to the Colorwriter, log into the UNIX system as the root user. 2. At the UNIX prompt, type: lpsystem -t bsd colorwriter This tells your system that the Colorwriter is a print server of bsd (Berkeley Software Distribution) type. 3. Type: lpadmin -p colorwriterq -s colorwriter!xjprint This command creates an internal queue on the workstation and points it to the Colorwriter. The general format of this command is: lpadmin -p <queuename> -s <hostname>!xjprint N OTE : The name xjprint after the exclamation point is for configuring the Colorwriter; it is an internal name that the Colorwriter requests. It must be xjprint; it is not a user-selectable name. This is the only place where it is entered. N OTE : When setting up an lpr queue to the Colorwriter, the system name for the remote printer—xjprint—must be specified in lowercase letters. 4. Type: accept colorwriterq This command tells the Colorwriter to accept print requests from your workstation. You are now ready to print from the workstation to the Colorwriter. PCK If your Colorwriter has the 32MB or 48MB memory configuration, you can create up to three independent network connections. The three internal names are xjprint, xjdirect, and xjhold. Each connection points to a queue on the Colorwriter disk. 5 5-9 UNIX server print queues Setting up lpr from Digital UNIX, Ultrix, and TCP/IP Services for OpenVMS To create your printcap entry, use /usr/sbin/ lprsetup or SYS$SYSTEM:lprsetup A sample lpr setup script for Digital UNIX follows: # /usr/sbin/lprsetup Digital OSF/1 Printer Setup Program Command < add modify delete exit view quit help >: add Adding printer entry, type '?' for help. Enter printer name to add [3] : color For more information on the specific printer types Enter `printer?' Enter the FULL name of one of the following printer types: la50 la70 la75 la324 la424 lg02 lg06 lg12 lg31 lj250 ln03 ln03s ln05 ln06 ln07 ln08 ln09 lf01r ln03r ln05r ln06r ln07r ln08r ibmpro nec290 fx80 fx1050 hpIIP hpIIIP hpIIID hpIV hp4M remote unknown or press RETURN for [unknown] : remote Enter printer synonym: Set spooler directory 'sd' [/usr/spool/lpd3] ? /var/spool/lpd/color Set printer error log file 'lf' [/usr/adm/lp3err] ? /usr/adm/color.log Set remote system name 'rm' [] ? printer.pname Set remote system printer name 'rp' [] ? xjprint 5 5-10 UNIX server print queues Enter the name of the printcap symbol you wish to modify. Other valid entries are: 'q' to quit (no more changes) 'p' to print the symbols you have specified so far 'l' to list all of the possible symbols and defaults The names of the printcap symbols are: af br cf ct df dn du fc ff fo fs gf ic if lf lo lp mc mx nc nf of op os pl pp ps pw px py rf rm rp rs rw sb sc sd sf sh st tf tr ts uv vf xc xf xs fo ic nc ps uv Da Dl It Lf Lu Ml Nu Or Ot Ps Sd Si Ss Ul Xf Enter symbol name: mx Enter a new value for symbol 'mx'? [1000] 0 New 'mx' is '0', is this correct? [y] Enter symbol name: sf Enter a new value for symbol 'sf'? [off] on New 'sf' is 'on', is this correct? [y] Enter symbol name: sb Enter a new value for symbol 'sb'? [off] on New 'sb' is 'on', is this correct? [y] Enter symbol name: q Printer #3 -----------Symboltypevalue --------------------lf STR/usr/adm/color.log lpSTR mxINT 0 printeripname:\STRprinteripname rpTRxjprint 5 5-11 UNIX server print queues sb BOOLon sd TR/var/spool/lpd/color sfBOOLon Are these the final values for printer 3 ? [y] Adding comments to printcap file for new printer, type '?' for help. Do you want to add comments to the printcap file [n] ? : y Enter comments below - Press RETURN on empty line to exit # Printcap entry for Digital Colorwriter LSR 2000+ Color Laser Printer # Setup activity is complete for this printer. Verify that the printer works properly by using the lpr(1) command to send files to the printer. Command < add modify delete exit view quit help >: q Below is the printcap entry for the Digital LSR 2000+ as it appears in /etc/ printcap: # Printcap entry for Digital Colorwriter LSR 2000+ Color Laser Printer color|lp3:\ :lf=/usr/adm/color.log:\ :lp=:\ :mx#0:\ :rm=printeripname:\ :rp=xjprint:\ :sb:\ :sd=/var/spool/lpd/color:\ :sf: 5 5-12 UNIX server print queues Setting up DEC TCP/IP Services for OpenVMS To create the printcap entry for UCX, use: sys$system:ucx$lprsetup A sample script for the UCX follows. UCX Printer Setup Program Command < add delete view help exit >: a Adding printer entry, type '?' for help. Enter printer name to add : MAGENTA Enter the FULL name of one of the following printer types: remote local : remote NOTE: Remote must be entered as lower case as shown. Enter printer synonym: LNC01 Enter printer synonym: COLORWRITER Enter printer synonym: Enter full file specification for spool directory SPOOLER DIRECTORY 'sd' : [SYS$SPECIFIC:[UCX_LPD.MAGENTA]] ? Set LPD PrintServer extensions flag 'ps' [] ? Set remote system name 'rm' [] ? DGDP03 Set remote system printer name 'rp' [] ? xjprint Set printer error log file 'lf' [SYS$SPECIFIC:[UCX_LPD]MAGENTA.LOG] ? Enter the name of the printcap symbol you wish to modify. Other valid entry is: q' to quit (no more changes) l' to list all the possible symbols and defaults p' to list the symbols you have specified so far The names of the printcap symbols are: sd for the printer spool directory lf for the printer error log file lp for the name of the local printer ps for the LPD PrintServer extensions flag rm for the name of the remote host rp for the name of the remote printer fm for the printer form field pa for the /PASSALL flag 5 5-13 UNIX server print queues p1-p8 for the /PARAMETER=(p1,...,p8) field Most systems do not require additional symbols to be setup so do the following: Enter symbol name: q Symbol type value ------------Error log file: if STR /SYS$SPECIFIC/UCX_LPD/MAGENTA.LOG Printer Queue: lp STR MAGENTA PS extensions flag: psSTR Remote Host: rm STR DGDP03 Remote Printer: rp STR xjprint Spool Directory: sd STR /SYS$SPECIFIC/UCX_LPD/MAGENTA Parameter fields: p1 STR Are these the final values for printer MAGENTA ? [y] y Adding comments to printcap file for new printer, type '?' for help. Do you want to add comments to the printcap file [n] ? : n # Printcap entry for MAGENTA MAGENTA|LNC01|COLORWRITER:\ :lf=/SYS$SPECIFIC/UCX_LPD/LNC01_LM30.LOG:\ :lp=MAGENTA:\ :rm=dgdp03:\ :rp=xjprint:\ :sd=/SYS$SPECIFIC/UCX_LPD/MAGENTA: Command < add delete view help exit >: e 5 5-14 Verifying the TCP/IP connection Verifying the TCP/IP connection The Colorwriter is shipped from the factory with an invalid IP (Internet Protocol) address assigned in the setup. The IP address is used on all TCP/IP networks and must always be assigned before the Colorwriter can be verified across the network. Setup also provides options to change the subnet mask and gateway address. Only some customer sites will require these values to be entered in Setup. The network administrator must enter the required TCP/IP values in Setup before the connection between the Colorwriter and a TCP/IP network can be verified. Because TCP/IP networks require some UNIX setup by the network administrator, you may not be able to send a test page across the network to the Colorwriter immediately after installation. The following procedure enables you to verify that there is a proper connection between the Colorwriter and the customer’s network without printing a test page. Before you begin this procedure, verify that the Colorwriter can print a test page from the control panel. TO VERIFY A 1. C OLORWRITER INSTALLED ON A TCP/IP NETWORK : Have the network administrator run Network Setup and enter the IP address that has been assigned to the Colorwriter. Only the network administrator should assign UNIX addresses in Network Setup. Assigning an incorrect UNIX address can cause serious and unpredictable network problems. 2. With the Colorwriter in a ready state, go to a remote UNIX workstation on the network and enter the command ping <IP address> where IP address is the Colorwriter IP address that the network administrator assigned in Network Setup. The server should respond with a message such as <IP address> is alive. If the server informs you that the Colorwriter is not on the network with a message such as Host server not responding, try the following steps. After each step, send a ping command to the printer. • Check the connections between Colorwriter and the network. Verify that all network connections are terminated. Restart the Colorwriter. 5 5-15 Verifying the TCP/IP connection • Have the network administrator reenter the Colorwriter IP address in Network Setup. Setting up the TCP/IP client If the Colorwriter is being added to an existing network, each TCP/IP client is already running TCP/IP client software. Colorwriter supports TCP/IP client software on UNIX workstations, PC compatibles, and Macintosh computers. With Macintosh computers however, it is easiest to use the built-in AppleTalk protocols to communicate directly with the Colorwriter. If the client workstation is a PC running Windows, set up the Colorwriter as a Windows PostScript printer by installing the driver and the Colorwriter PPDs, as described in Chapter 6. For setting up your networking software, see the documentation for your networking application. Printing to the Colorwriter Once the Colorwriter has been properly installed on the TCP/IP network, users should be able to send print jobs to a Colorwriter from most applications. UNIX clients also commonly use UNIX printing commands to print PostScript files and text files to the Colorwriter. Administering Colorwriter print jobs If you have superuser privileges you can remove any lpd jobs from the Colorwriter queue; removing your own jobs doesn’t require special privileges. TO REMOVE JOBS FROM THE • C OLORWRITER QUEUE : On a UNIX system running SunOS 4 or other BSD-based variant, use the lprm command to remove jobs from the queue. lprm -P<printername> <job #…> To find out the job number, use the lpq command described above . For example, to remove job number 123 from the print queue of your Colorwriter named printer, you would type 5 5-16 Verifying the TCP/IP connection lprm -Pprinter 123 The lprm command reports the names of any files it removes. • On a UNIX system running Digital UNIX, use the cancel command to remove jobs from the queue. Type: cancel <job ID> For example, to remove a job whose ID is printer-123 from the print queue of your Colorwriter, type: cancel printer-123 To find out the job ID, use the lpstat command. For information on the lpstat command, see Chapter 5 of the User Guide. Once lpd print jobs are spooled to the Colorwriter hard disk, you have some options for monitoring print jobs. 5 5-17 Setting up IPX (Novell) printing Setting up IPX (Novell) printing IPX, Novell’s Internetwork Packet Exchange protocol, runs on networks that include a Novell NetWare server. The server, typically a dedicated PC, is usually configured to control workstation access to shared resources. PCK Colorwriters with the PCK option installed support simultaneous connections with up to 3 different NetWare servers. In addition to other services, NetWare servers can provide spooling, queue management, and print services to computers (including Macintosh, DOS, UNIX, and OpenVMS) whose operating software is compatible with the IPX protocols. This section describes network setup for the IPX (Novell) network. IPX printing to the Colorwriter NetWare file servers support the creation of print queues, storage areas for print jobs. When a user on a network workstation prints a job, the job is sent to a print queue on the NetWare server. The job is spooled to the NetWare file server disk, freeing up the workstation. When the Colorwriter is connected to a NetWare print server, that is defined on the NetWare file server, the Colorwriter polls the print server queues for jobs and transmits them over the network for processing and printing by the Colorwriter. PCK Colorwriters with the 32MB and 48MB memory configurations that are connected to three NetWare servers can print to as many as three queues on the Colorwriter (Print, Hold, or Direct). Configuring the NetWare server This section explains how to set up a NetWare server so that networked users can print to the Colorwriter from their workstations. There are two stages to this setup: • Setting up a Colorwriter print queue on the NetWare server so users can print to it, and the Colorwriter can fetch print jobs from it. 5 5-18 Setting up IPX (Novell) printing • Setting up the server for network installation of PostScript printer drivers and the printer’s PPDs (PostScript printer description files) on client workstations. Setting up the NetWare server Before configuring a NetWare file server for printing to the Colorwriter, make sure that it is connected to a functioning IPX network. Then, log in as the Supervisor on a PC connected to the NetWare file server, and configure the file server as described in the following sections. Before you begin, you’ll need to determine the following names: • The name of the NetWare file server on which you will define the Colorwriter as a new print server. • The name for the NetWare print server. This name (or the equivalent ID that NetWare assigns) is used for communication between the Colorwriter and the NetWare file server. • The name to assign to the Colorwriter Print queue. You need to set up one print queue on the NetWare server for jobs that will be printed by the Colorwriter. Users will see and print to the name you assign to the Colorwriter Print queue. N OTE : Names should be as brief and descriptive as possible. Server names cannot begin with a period and cannot include spaces or punctuation characters other than periods. • To complete Colorwriter network setup, you will need to log in to the NetWare file server and the new print server from the Colorwriter. You will need a login name and, if access to the server is restricted, you will need a login password. Setting the NetWare 4.x bindery context If your server is using NetWare 3.x, proceed to “Setting up a Colorwriter print queue” on page 5-22. Novell 4.x servers use a different environment setup than Novell 3.1x servers. The native structure for Novell 4.x objects is known as Directory Services (DS). To provide backward compatibility with Novell 3.1x services, Novell 4.x servers use Bindery Emulation to “act” like a Novell 3.1x server. 5 5-19 Setting up IPX (Novell) printing To set up the NetWare 4.x server for printing to the Colorwriter, you must do the following: • Determine the Directory Services path to the container in which the print server and the print queue for the Colorwriter will be created. The container defines the “bindery context” for your network structure. Network devices that are not NetWare 4.x-aware need a bindery context to work with NetWare 4.x. • Edit the network startup file to set the bindery context. • Activate the new bindery context. This section describes the second and third steps. Given the variety of possible network structures, we can’t suggest a bindery context that applies to every network. TO SET THE BINDERY CONTEXT : 1. At the NetWare drive prompt, change directories to the System directory, and type rconsole. 2. Establish a connection with the server that will have the Colorwriter queue. 3. At the NetWare prompt type load install. The NetWare Server Installation window is displayed. 5 5-20 4. Setting up IPX (Novell) printing Use the down arrow key to select Maintenance/Selective Install. The Installation Options menu is displayed. 5. Select NCF Files Options. 6. In the menu of available NCF files, select EDIT AUTOEXEC.NCF file. 5 5-21 7. Setting up IPX (Novell) printing Type a new line anywhere in the file as follows: set Bindery Context = O=xx (Note that O in this line is the letter O, not the digit zero). N OTE : Instead of xx, type the bindery context obtained from the system administrator. (In this example from a relatively simple directory structure, the Bindery Context is “TS”.) TO 8. Press Esc to close the window, and save changes. 9. Proceed to the next section. ACTIVATE THE BINDERY CONTEXT : 1. If you cannot reboot the NetWare server at this point, type the set command manually at the server’s colon prompt. Use the same command that you entered in the autoexec.ncf file (see Step 7 in the previous procedure). 2. If you can reboot the NetWare server, the set command is loaded automatically. You are ready to set up the Colorwriter print server and print queue. See the next section for details. 5 5-22 Setting up IPX (Novell) printing Setting up a Colorwriter print queue The NetWare print server and print queue for the Colorwriter are created and configured from the NetWare Print Console, a NetWare utility that is stored in NetWare’s PUBLIC directory. To setup three Novell connections to the Colorwriter, repeat the following procedure, using three different NetWare file servers. TO SET UP THE N ET W ARE SERVER FOR PRINTING TO THE C OLORWRITER : 1. Log in to the NetWare server as the Supervisor. 2. At the NetWare MS-DOS prompt, type PCONSOLE. The Available Options menu is displayed. 3. Choose Change Current File Server and press Enter. 4. Using the arrow keys, select the file server name and press Enter. You must select this file server later as the NetWare File Server in Colorwriter Network Setup. 5. Choose Print Server Information from the Available Options menu. 5 5-23 6. Setting up IPX (Novell) printing Press the Insert key, type a name for the new print server, and press Enter. Then press Esc. You must select this print server later as the NetWare Print Server in Colorwriter Network Setup. 7. Choose Print Queue Information from the Available Options menu. 8. Press the Insert key and type a name for a new Colorwriter print queue. Press Enter. The print queue name you entered will be highlighted in the Print Queues list. If the print server manages more than one print queue, you’ll have to select this name later in the Colorwriter Network Setup. 5 5-24 9. Setting up IPX (Novell) printing Make sure the print queue name you created is selected in the Print Queues menu, and press Enter. The Print Queue Information menu is displayed. 10. In the Print Queue Information menu, choose Queue Servers, and press Enter. A blank Queue Servers list is displayed. 11. Press the Insert key. The Queue Server Candidates list is displayed. 12. Use the arrow keys to select the name of the print server you created in Step 6 and press Enter. The server name you select will appear in the Queue Servers list. You have associated the selected Colorwriter queue with the print server you created in Step 6. 13. Press Esc to exit all PCONSOLE windows. 14. Choose Yes or press Return to save changes to PCONSOLE. 5 5-25 Setting up IPX (Novell) printing Setting up NetWare Windows clients Before setting up client workstations, make sure you perform Colorwriter Network Setup, and that the settings reflect the entities you created in PCONSOLE. Client setup has three parts: • Distributing the client software • Installing and configuring the Colorwriter as a Windows printer on each Windows workstation • Installing Colorwriter printer files for particular applications Setting up printing on Windows 3.x workstations Setting up printing to the Colorwriter with IPX is summarized below: • Specify Novell NetWare as your network type (see the next section) • Install the Colorwriter as a Windows printer. • Select the printer port in the Network Printer Connections window, connect to the Novell network in Windows, and specify the Colorwriter as the default printer (see “Connecting to a Novell network” on page 5-27) • Click Setup and set printing options from the Printers Control Panel • Install additional printer files as needed (see Chapter 6). Specifying Novell as the network type Verify that the network is specified correctly in Windows Setup before you install the Colorwriter printer files. 5 5-26 TO SPECIFY Setting up IPX (Novell) printing N OVELL AS THE NETWORK TYPE : 1. In the Main group of the Windows Program Manager, double-click the Windows Setup icon. 2. Choose Change System Settings from the Options menu. 3. From the Network menu, choose Novell NetWare (shell version 3.26 and above). 4. Click OK. 5. When prompted, restart Windows. Windows Setup icon 5 5-27 Setting up IPX (Novell) printing Connecting to a Novell network If you will be printing over a Novell network, you must select a network port and connect to it. TO CONNECT TO A N OVELL NETWORK : 1. In the Main group, double-click the Control Panel icon. 2. Double-click Printers from the Control Panel. Control Panel icon Printers icon The Printers dialog box is displayed. Connect button 5 5-28 3. Setting up IPX (Novell) printing Select the Colorwriter in the Installed Printers list box. If the Colorwriter doesn’t appear, you have not installed it as a Windows printer. See the section on installing Windows printers in Chapter 6. 4. If the Colorwriter isn’t already shown as the Default Printer, click the Set As Default Printer button. The Colorwriter appears in the Default Printer area of the Printers dialog box. 5. Click the Connect button. The Connect dialog box is displayed. Network button 6. Click the Network button. The Network Printer Connections dialog box is displayed. 7. In the Printer connections box, select the port. 8. In the Available queues list box, select the server and queue name that correspond to the Colorwriter. 9. Click the Connect button. 10. Click the Close button. The Connect dialog box is displayed. 11. Click OK in the Connect dialog box. 12. Click Close in the Printers dialog box. You are ready to print to the Colorwriter queue from Windows applications. 5 5-29 Setting up IPX (Novell) printing Setting up printing on Windows 95 workstations Before you set up IPX printing on your Windows 95 workstation the Novell network and file server should be set up. The NetWare file server should be configured with a print server and print queue for the printer. For details see page 5-17 or refer to your NetWare documentation. You can also print directly to the Colorwriter from Windows 95 with IPX. TO SET UP IPX PRINTING : 1. Open the Windows 95 Control Panel. 2. Double-click the Network icon. 3. Make sure that IPX -compatible Protocol and TCP/IP protocol are both listed in the Installed Network Components section. See your Windows 95 documentation for instructions. 5 5-30 Setting up IPX (Novell) printing N OTE : You must enable TCP/IP printing to ensure that all files required by IPX will be installed. You can select it and click Remove after you set up IPX if you do not need to use the TCP/IP protocol. IPX protocols are required for printing; both IPX and SPX are required for running the Colorwriter LSR Utilities. 4. Double-click the IPX/SPX Protocol. 5. Click Advanced. 6. In the Property list, click Frame Type and select the Frame Type that corresponds to the one set during Colorwriter control panel setup. If necessary, print the Configuration Page from the Colorwriter control panel to see the Frame Type. 7. Click OK and close the Network control panel. 8. Click the Start button, point to Settings, and then click Printers. 9. Click the icon for the printer and choose Properties from the File menu. 10. Choose the Details tab in the Properties window and click Add Port. A list of connection options is displayed. 5 5-31 Printing from DCPS to the Colorwriter 11. In the Add Port dialog box, specify the network path, or click Browse for a display of your network environment. 12. Double-click the icon of the NetWare file server you want to use for printing to the printer and click OK. 13. Click the printer icon labeled with the NetWare print queue you will use and click OK. If guest login is not enabled, you may have to enter your password to log into the server. 14. Click the queue you want to print to. 15. In the Add Port dialog box, verify that the network path is updated and click OK. You are ready to print from the workstation. Your print jobs will be transmitted to the specified print queue on the Novell file server. The printer will poll the file server, and if jobs are present, they will be transmitted to the Colorwriter. 16. Click OK in the Properties window. 17. To confirm the connection, you can print a Windows 95 Test Page. Choose the General tab in the Properties dialog box of the Colorwriter. 18. Click Print Test Page. 19. Click OK. Printing from DCPS to the Colorwriter This section provides information about printing to the Colorwriter from DECprint Supervisor for OpenVMS (DCPS) on VMS systems. DCPS (version 1.3) is the print client used on OpenVMS systems. To print from DCPS to the Colorwriter you must use the AppleTalk (Ethertalk) network interconnect. To use the Colorwriter from an OpenVMS system, you need: • An OpenVMS system running AppleTalk for OpenVMS network software. 5 5-32 Printing from DCPS to the Colorwriter This software is a component of the PATHWORKS for OpenVMS (Macintosh) product (SPD 35.09.xx). • An Ethernet Controller Interface on the OpenVMS system. • The AppleTalk protocol enabled on the Colorwriter. This protocol is enabled by default. You can install just AppleTalk for OpenVMS network software from the PATHWORKS for OpenVMS (Macintosh) product. See the installation instructions in the PATHWORKS for OpenVMS (Macintosh) Server manual. Configuring the DCPS queue To configure the DCPS queue, you must know the following about your Colorwriter and your AppleTalk network: • The name of the printer. The default name is Colorwriter LSR, but it may have been changed to avoid name collision if there is more than one Colorwriter on the AppleTalk network. • The name of the zone in which the Colorwriter is located. This information is required if your AppleTalk network is divided into zones, and if the zone in which your printer is located is different from the zone in which the OpenVMS system is located. For complete instructions on using DCPS, see the following: • DECprint Supervisor for OpenVMS Software Installation Guide • DECprint Supervisor for OpenVMS System Manager’s Guide • DECprint Supervisor for OpenVMS User’s Guide • DECprint Supervisor for OpenVMS Release Notes In the examples that follow, note the format of P2, which supplies the Interconnect type and address. When using DCPS, the correct AppleTalk connection is the Direct connection (not Hold or Print), so the AppleTalk address is the printer name followed by _Direct. 5 5-33 Printing from DCPS to the Colorwriter Also note the value for P5. These DCPS print queues are configured to print jobs without any job separation pages. The first example shows you how to define the queue using the file SYS$STARTUP:DCPS$STARTUP.COM if the printer and the OpenVMS system are in the same zone. Information specific to setting up DCPS to use the Colorwriter is shown in the following examples: $ @sys$startup:dcps$execution_queue Colorwriter_A - ! P1 - Execution queue name """appletalk/Colorwriter LSR_Direct""" - ! P2 - Interconnect - ! type and address dcps_lib - ! P3 - Logical name for library(ies) ""- ! P4 - Default queue parameters "/separate=(noflag,noburst,notrail)"- ! P5 - Default queue qualifiers ""- ! P6 - Communication speed(serial - ! ""- ! P7 - Device characteristics "" ! P8 - Verify on/off devices only) The following example shows you how to define the queue if the printer and the OpenVMS system are in different zones. In this case the printer is in zone walden pond: $ @sys$startup:dcps$execution_queue Colorwriter_B - ! P1 - Execution queue name """appletalk/Colorwriter LSR_Direct@walden pond""" - ! P2 - Interconnect - ! type and address dcps_lib - ! P3 - Logical name for library(ies) ""- ! P4 - Default queue parameters "/separate=(noflag,noburst,notrail)"- ! P5 - Default queue qualifiers 5 5-34 Printing from DCPS to the Colorwriter ""- ! P6 - Communication speed(serial - ! devices only) ""- ! P7 - Device characteristics "" ! P8 - Verify on/off 6 6-1 Chapter 6: Installing User Software User software This chapter provides information about: • Installing Macintosh software • Installing Windows software N OTE : If you are upgrading to the Colorwriter LSR 2000+ from version 1.0 of the Colorwriter, be sure to install new user software, as described below. User software The Colorwriter LSR 2000+ user software is provided on a CD that contains files for both Windows and Macintosh computers, together with two floppy disks. The CD comes in two configurations, one for Colorwriter printers with the 16MB memory configuration, and one for Colorwriter printers with the 32MB or 48MB memory configuration. PCK N OTE : In this chapter, software that is part of the Professional Color Kit (PCK) is indicated with a small PCK icon. Installation instructions for this software are marked with an icon in the margin. The top level of the CD has language folders containing localized software and a Read Me file. In addition, the top level includes folders that contain software that is not localized but can be used on localized systems. The two floppy disks that supplement the User Software CD are: • Macintosh Disk 1—installs the Adobe PostScript printer driver (PSPrinter) and the Colorwriter PPD (PostScript Printer Description) on Macintosh computers. • Windows Disk 2—Installs the Colorwriter on Windows NT and Windows 95 systems. The following tables summarize the Colorwriter user software on the CD. N OTE : Items marked with the PCK icon are available only on the CD for the 32MB and 48MB printer configuration. This document was created with FrameMaker 4.0.4 6 6-2 User software User software for Macintosh computers Macintosh User Software Description Printer Filesab Printer Files folder contains: PSPrinterb folder, including the installer for the Adobe PostScript Printer Driver (version 8.3.1 for English (US and Canada), version 8.3 for all others). Printer Filesab folder containing the Rev4 PPD folder and the QuarkXPress (PDF) folder Installersa folder containing: Screen Fonts Installer installs: Screen Fonts Installer Macintosh screen fonts for PostScript printer fonts that are resident on the Colorwriter Digital Colorwriter LSR (PCK) Digital Colorwriter LSR installs Color Reference (including CMYK Reference and PANTONE Reference) Standard Profiles (Kodak Precision Transforms and ColorSync 2.0 profile) PCK Calibrated Profiles (Kodak Precision Transforms and ColorSync 2.0 profile) PCK PCK Colorwriter LSR Spooler Colorwriter LSR Downloader PCK Print Calibratora PCK Fiery Print Calibrator and supporting files PCK Separation Tables PCK Adobe Photoshop Separation Tables and the Calibrated RGB Monitor setup file PCK Online Documentationa PCK PCK PCK Adobe Acrobat Reader 2.1 Installer Fiery Print Calibrator User Guide Adobe PostScript Language Printer Addendum ReadMe-Reader 2.1 a. Inside language folder b. Contents of these folders are also on Macintosh Disk 1 (Printer Files) 6 6-3 User software User software for PC compatible computers Windows User Software Description Installra folder Installer Disk Images. Setup on Disk 1 installs: Color Reference (CMYK Reference and PANTONE Reference) Standard Profiles (Kodak Precision Transforms) for Windows 95 PCK Calibrated Profiles (Kodak Precision Transforms) for PCK PCK PCK PCK Utilities, consisting of: Colorwriter LSR Downloader Colorwriter LSR Manager Colorwriter LSR Spooler Windows 95 Win95_nt folderc contains: Prntdrv folderab Alpha folder for installing the Colorwriter with the PostScript printer driver for Alpha-based Windows NT Intel folder for installing the Colorwriter with the PostScript printer driver for Intel-based Windows NT The setup information file and Colorwriter PPD file for installing the Colorwriter with the Windows 95 PostScript printer driver Win31 folder contains: Setup.exe, which installs the Adobe PostScript Printer Driver (version 3.0.1 for Windows 3.1), and the Colorwriter PPD file Pslev1 folder containing the setup information file and Colorwriter WPD file for installing the Colorwriter with the Microsoft PostScript printer driver Apps folder containing: Colorwriter PDF file for QuarkXPress v. 3.3x for Windows 3.1, Windows 95, or Windows NT PCK Sep_tabl folder PCK Adobe Photoshop Separation Tables and the Calibrated RGB Monitor setup file PCK Doc folder PCK PCK PCK Adobe Acrobat Reader 2.1 Installer Adobe PostScript Language Printer Addendum README_R.TXT a. Inside language folder b. For English only, this folder contains two folders: Intl_eng and Us_eng c. Contents of this folder are also on Windows Disk 2 (Windows NT and Windows 95) 6 6-4 Installing Macintosh software Installing Macintosh software All the files and software you need for printing to the Colorwriter from a Macintosh computer are included on the CD-ROM and the PSPrinter disk. Setting up printing from a Macintosh PostScript printer drivers provide a way to communicate information on print jobs between your applications and the Colorwriter (and any other PostScript printer connected to your computer). To set up the Colorwriter as a PostScript printer, install the Adobe PostScript Printer Driver (from the Macintosh Disk 1), or install the Apple LaserWriter 8 driver. Adobe PSPrinter version 8.3.1 is delivered for English (North American) users, version 8.3 for all other users. These drivers support PostScript Level 2 and provide access to CRDs. We recommend that you use the Adobe PostScript Printer Driver that we provide because it allows you to access all of the Colorwriter’s features. Installing the Adobe PostScript Printer Driver If your system already uses Adobe PSPrinter version 8.3 or later, drag the Colorwriter PPD file “Colorwriter LSR 2000 v2015.108” to the Printer Descriptions folder in the Extensions folder inside the System Folder on your startup disk. Otherwise, install the Adobe driver as described below. The Colorwriter PPD file is found in the Printer Descriptions folder on the CD-ROM. The full path is: English:Printer Files:English:Printer Files:Rev 4 PPD or English:Printer Files:Int’l English:Printer Files:Rev 4 PPD The files on Macintosh Disk 1 are also located in the PSPrinter folder on the User Software CD in case you need to create another floppy disk. If you do create a new disk, be sure to name it PSPrinter. 6 6-5 TO Installing Macintosh software INSTALL THE A DOBE PSP RINTER D RIVER : 1. Insert Macintosh Disk 1 in the Macintosh on which you want the printer driver installed. 2. Double-click the PSPrinter disk icon, and double-click the Installer icon. 3. Click OK. 4. Click Install. 5. Click Accept to accept the terms of the license agreement. The Installer proceeds to install PSPrinter, checks your Chooser version, checks your Printer Descriptions folder, and installs the Colorwriter PPD file. At the end of the installation, a help screen shows you how to select the Chooser and select the PSPrinter driver in the Chooser. 6. Click OK to dismiss the help screen, and then click Quit to end the installation. 7. Eject the floppy disk. Use Macintosh Disk 1 to install the driver on other Macintosh computers. Setting up the Colorwriter in the Chooser After you install the printer driver and printer description file, you need to set up the Colorwriter in the Chooser to take full advantage of its features. This section describes how to verify the connection and set up the Colorwriter with the Adobe PSPrinter Driver v8.3.1. Some options are different when you use other versions of the driver. TO VERIFY THE A PPLE T ALK CONNECTION AND SET UP THE C OLORWRITER : To verify the network connection, use a Macintosh on the same network as the Colorwriter. With the networked Macintosh, perform the following operations: 1. Choose the Chooser from the Apple menu. Make AppleTalk active by clicking the “Active” button. 2. Select the PSPrinter icon in the Chooser. The upper right scroll list in the Chooser window lists the names of available devices after you select the device type. 6 6-6 3. Installing Macintosh software If the network has multiple zones, select the AppleTalk Zone that you selected in Network Setup on the Colorwriter control panel. Zones are listed only if the network has designated zones. The network connection is functional if the Colorwriter (or the name you gave to the Colorwriter in Printer Setup) appears in the list of PostScript printers. 4. In the scroll list of PostScript Printers, select the printer name you gave to the Colorwriter, or select a Colorwriter connection. PCK If the Colorwriter is configured with 32MB or 48MB memory, queues are supported, and the printer name is followed by an extension indicating a connection you enabled in Printer Setup. For example, Colorwriter LSR_Direct, Colorwriter LSR_Print, and Colorwriter LSR_Hold. 5. Click Setup. The Adobe PSPrinter Driver automatically selects the correct PostScript printer description (PPD) file for your Colorwriter. The PPD file should have been automatically installed with the driver. If you did not install the new driver and the Colorwriter PPD file is not present, you need to drag it to the Printer Descriptions folder in the Extensions folder inside the System Folder. PCK 6. At the end of the setup, a dialog box prompts you to select installable options. 7. From the Optional Cassette menu, choose Installed or Not Installed, according to your printer configuration. 8. Click OK. 9. Select another Colorwriter connection, and click Setup again. 10. When you have set up all the Colorwriter connections, close the Chooser. 6 6-7 TO Installing Macintosh software PRINT A TEST PAGE FROM A M ACINTOSH : 1. From the Macintosh Finder, double-click any folder on the desktop to display a directory window. 2. From the File menu, choose Page Setup. Make sure the paper size that is displayed is loaded in your Colorwriter. Click OK. 3. From the File menu, choose Print Window. The Print dialog box appears. 4. From the Print dialog box, click Options, and choose Color/Grayscale (not Black and White) from the Print pop-up menu. The Adobe PSPrinter driver v8.3.1 displays other color options depending on the software you have installed. 5. Click the Print button. If the Colorwriter prints a copy of the selected window, your AppleTalk connection is operational. V ERIFYING THE A PPLE T ALK CONNECTION ON A MIXED NETWORK : For Macintosh computers on a mixed network with computers using Windows NT Server or Windows NT Workstation, the steps for installing the PSPrinter driver, verifying the connection, and making a test print are the same as for pure Macintosh networks. If the Colorwriter does not remain available from the Macintosh Chooser on such a mixed network, the Windows NT administrator probably elected to “capture” the Colorwriter. This hides the Colorwriter from Macintosh users who wish to print directly to it. Digital recommends that you do not select the capture option. To make the Colorwriter available in the Macintosh Chooser, the administrator needs to change the setting on the Windows NT Server, as follows: 1. Open the Windows NT Print Manager. 2. Choose Properties from the Printer menu. 6 6-8 3. Installing Macintosh software Select the “Print to” entry that you wish to change. Select the AppleTalk zone and the name for the Colorwriter. 4. Click Settings. 5. In the AppleTalk Port Connection dialog box, turn off “Capture this AppleTalk printing device.” 6. Click OK. 7. Shut down and reboot the Colorwriter. Moving printer description files to the appropriate location In some Print or Page Setup dialog boxes (printing from within applications), you can designate a particular PPD by the name of the file, or you can choose printer features from information provided by the PPD file. PostScript Printer Descriptions give your driver and application access to all the features of the printer. To print with: This file: Should be in this location: Applications that support PostScript Level 2 (such as Adobe Photoshop or PageMaker 6.0), using PSPrinter 8.0 or later or LaserWriter driver version 8.0 or later Colorwriter LSR 2000 v2015.108 (the Colorwriter PPD file) found in the English:Printer Files:English:Printer Files:Rev 4 PPD folder on the User Software CD Printer Descriptions folder in the Extensions folder inside the System Folder QuarkXPress N OTE : To ensure that you are using the latest version of the Colorwriter printer description file, install the one on the CD rather than any PDF files supplied with QuarkXPress. Colorwriter LSR 2000.PDF (the Colorwriter PDF file) found in the English:Printer Files:English:Printer Files:QuarkXPress (PDF) folder on the User Software CD For QuarkXPress version 3.3, drag to the PDF folder inside the QuarkXPress folder (If you installed the PSPrinter driver with the Installer, the PPD file was automatically placed here.) For version 3.1 or 3.2, drag to the QuarkXPress folder N OTE : If you print documents to file (which saves a PostScript file) or print off- site, make sure you have the printer description files (PPD and PDF) installed on your Macintosh. This ensures that the documents you save are properly formatted for downloading or printing to the Colorwriter. 6 6-9 Installing Macintosh software Installing Colorwriter LSR Macintosh user software The User Software CD gives you options to install the utilities, the Color Reference files, Color Profiles, and Screen Fonts. You can also install the Fiery Print Calibrator, and Separation Tables for Adobe Photoshop. In addition, you can install the Adobe Acrobat viewing application, so you can view and print the included online documentation (Fiery Print Calibrator User Guide and Adobe PostScript Language Printer Addendum). TO INSTALL M ACINTOSH USER SOFTWARE : 1. Insert the User Software CD. 2. Double-click to open the folder for the language you use. 3. Double-click to open the Installers folder. To install the screen fonts, see page 6-15. 4. Double-click the Digital Colorwriter LSR icon. 5. Click to select the items you want to install, then click Install. You can install: PCK • Utilities (Colorwriter LSR Spooler and Colorwriter LSR Downloader) • Color Reference (CMYK Reference and PANTONE Reference) • Standard Profiles (ColorSync 2.0 and Kodak Precision Transforms) PCK • Calibrated Profiles (ColorSync 2.0 and Kodak Precision Transforms) 6. When prompted, specify where to install the software, and click Install. The Installer creates folders on your destination disk, and copies software into those folders. 7. When installation is complete, click OK. You may keep the Colorwriter LSR utilities and Color Reference files anywhere on your disk. Color Profiles and Screen Fonts must be moved to a folder where applications and printer drivers can access them. 6 6-10 Installing Macintosh software Installing the Color Reference files Install the Color Reference files as described on page 6-9. The Installer places these files into the Color Reference folder in the Colorwriter LSR folder. You can keep them anywhere on your disk. You can print these PostScript files from any system as you would any other PostScript file, or download them using the Colorwriter LSR Downloader when the Downloader is installed as described in this manual. Using the Macintosh CMYK Color Reference Download the CMYK Color Reference PostScript file to print CMYK color patches to use as a reference for graphics applications that allow you to specify color as CMYK values. By downloading these pages to your Colorwriter, you can see how these CMYK patches print on your particular printer. Using the Macintosh PANTONE Color Reference You can download CMYK representations of PANTONE numbered color swatches, both coated and uncoated, and use the pages as a reference to see how these colors print on your particular Colorwriter printer. Each swatch is identified by PANTONE number and its equivalent CMYK value (for example PANTONE 108 CHC C:0 M:10 Y: 98 K:0). The file PANTONE C.ps prints swatches for the PANTONE coated library. The file PANTONE U.ps prints swatches for the uncoated library. Installing the Color Printer Profiles Color Profiles can be used together with a color management system to manage printer color output. Two types of printer profiles are provided for Macintosh users: • Kodak Precision Transforms (Standard and Calibrated), to be used with applications that have licensed the Kodak Color Management System (KCMS), including Adobe PageMaker 6.0 and Adobe Photoshop 3.0. You can select a precision transform for the Colorwriter when you print from one of these applications. 6 6-11 Installing Macintosh software • ColorSync Profiles (Standard and Calibrated), to be used with the ColorSync 2.0 color management system, provided with Macintosh System 7.5 software. You can select ColorSync Color Matching and the Colorwriter profile from the Print Options dialog box when you print using the Adobe PSPrinter driver v8.3.1 provided with the user software (see the User Guide, page 3-3). Install the Color Profiles as described on page 6-9. The Installer places them inside folders as follows: Colorwriter LSR (or the folder you designate) Color Profiles Kodak Precision Transforms PCK Calibrated Standard ColorSync 2.0 PCK Calibrated Standard N OTE : Use the Standard Color Profiles when you first install your Colorwriter printer. Use the Calibrated Color Profiles only if you have used the Fiery Print Calibrator to calibrate your printer. Using the wrong profile may result in incorrect color matching. 6 6-12 Installing Macintosh software After installation, drag the profiles to the folders indicated in the table. To use: Drag these files: To this location: Kodak Precision Transforms: PCK Calibrated Standard decCmc01.pt decCmc02.pt decPmc01.pt decPmc02.pt decPmc03.pt decSmc01.pt decSmc02.pt dec_cm01.pt dec_cm02.pt dec_pm01.pt dec_pm02.pt dec_pm03.pt dec_sm01.pt dec_sm02.pt KPCMS folder in the System Folder. If this folder doesn’t exist, the Kodak Color Management System is not installed on your Macintosh. If you use an application that supports the KCMS, you must install the KCMS from the application disks. To use a Colorwriter precision transform, drag one set of precision transforms to the KPCMS folder. If you do not use an application that supports the KCMS, the precision transforms cannot be accessed, therefore there is no reason to install them on your system. ColorSync 2.0 Profiles: PCK Calibrated Colorwriter LSR 2000 (calib) Standard Colorwriter LSR 2000 (std) The ColorSync Profiles folder in the Preferences folder inside the System Folder. If this folder does not exist, ColorSync is not installed. To use these profiles, reinstall ColorSync from your Macintosh system disks. Then drag the profiles into the ColorSync Profiles folder. 6 6-13 Installing Macintosh software PCK Installing the Macintosh utilities Install the Colorwriter Macintosh utilities as detailed on page 6-9. The utilities, provided with the Professional Color Kit (PCK), provide additional functionality to any Macintosh on an AppleTalk network. Colorwriter LSR Downloader Enables you to send PostScript and Encapsulated PostScript files directly to the Colorwriter without using the application in which they were created. The Colorwriter LSR Downloader also enables you to manage the printer fonts installed on the Colorwriter. Colorwriter LSR Spooler Enables you to view the order and priority of print jobs, customize printer settings for jobs, delete jobs, and move jobs between queues. You can also use it to view printer status and job accounting information. The Installer creates a folder (default name is Colorwriter LSR) on your destination disk, and copies the Colorwriter LSR Downloader and the Colorwriter LSR Spooler into a Utilities folder inside that folder. You may keep the Colorwriter LSR utility files anywhere on your disk. PCK Installing the Fiery Print Calibrator Fiery Print Calibrator TO INSTALL THE Enables you to calibrate your Colorwriter LSR 2000+ from your workstation. Refer to the online documentation for more information. F IERY P RINT C ALIBRATOR : 1. Copy the Print Calibrator folder from the top level of the User Software CD to your hard disk. 2. Open the Read Me file in the Print Calibrator folder and drag the files to the locations specified in the Read Me file. To use the Fiery Print Calibrator, you will need a Status T densitometer, such as an X-Rite DTP 32. Documentation for the Fiery Print Calibrator is provided online as a PDF (Adobe Acrobat Portable Document Format) file. To view and print the Fiery Print Calibrator User Guide, install Acrobat Reader. The Acrobat Reader Installer and 6 6-14 Installing Macintosh software the Fiery Print Calibrator User Guide files are in the Online Documentation folder at the top level of the User Software CD. The Acrobat Reader installation includes an online help file for Acrobat Reader. Installing the Monitor Setup file and Separation Tables The files in the Separation Tables folder are for use with Adobe Photoshop. They provide EFICOLOR data conversions when you use Photoshop to convert images from one mode to another, such as color data between RGB, Lab color, and CMYK color spaces. Mode conversions are commonly used when you use Photoshop to print an image specified in RGB mode to a printer (such as the Colorwriter) that uses CMYK toner colors. They are also used when you use Photoshop to save separations. EFICOLOR color conversions that involve RGB data should start with a standardized RGB color space. This is provided by the Calibrated RGB file, which is loaded into Photoshop’s Monitor Setup. TO INSTALL THE FILES FOR A DOBE P HOTOSHOP : 1. Double-click the Separation Tables folder. Drag the contents of the folder into your Adobe Photoshop folder on your hard disk. 2. Start Photoshop. 3. Choose Preferences from the File menu, and choose Monitor Setup from the submenu. 4. In the Monitor Setup dialog box, click Load. In the dialog box that appears, select Calibrated RGB and click Open. 5. Choose High from the Ambient Light pop-up menu, and click OK to apply the settings. 6. Choose Preferences from the File menu, and choose Separation Tables from the submenu. 6 6-15 7. Installing Macintosh software Click Load, and in the dialog box that appears, select the separation table you want to load. Click Open to load it. The two separation tables for the Colorwriter are for Photographic rendering (Colorwriter LSR 2000.P100) and for Solid color rendering (Colorwriter LSR 2000.S100). Photographic rendering is best for photographs and other images where tonal relationships are important. Solid color rendering is best when rendering individual colors accurately is more important than preserving tonal relationships. When you click OK, the Separation Tables dialog box appears with the name of the separation table you loaded. 8. Click OK. With the Calibrated RGB file and the separation table you loaded, the EFICOLOR conversion will be used for all separations until you load a different monitor setup and separation table, even if you quit Photoshop and reopen it. Installing the Colorwriter screen fonts The Colorwriter screen fonts correspond to the printer fonts resident on the Colorwriter. When the screen fonts are installed on your disk, you can specify the Colorwriter’s resident fonts from your applications. Colorwriter screen fonts will be placed into a Screen Fonts folder on your Macintosh hard disk. The fonts provided are Regular, Bold, Italic, and Bold Italic versions of Courier, Times, Helvetica, Helvetica Condensed, Helvetica Narrow, ITC Avant Garde Gothic, ITC Bookman, New Century Schoolbook, and Palatino. Also included are ITC Zapf Chancery, Symbol, and ITC Zapf Dingbats. TO INSTALL THE C OLORWRITER SCREEN FONTS : 1. Insert the User Software CD. 2. Double-click to open the folder for the language you use. 3. Double-click to open the Installers folder. 4. Double-click the Screen Fonts Installer. Click Continue. 5. Indicate a folder for installation of the screen fonts, and click Install. 6 6-16 Installing Macintosh software Install the folder anywhere on your hard disk. 6. Click Quit. 7. After the installation is finished, open the Screen Fonts folder and drag the font suitcases you want to use to the System Folder of your startup disk. Normally the system will place them in the Fonts folder. If you use a font management utility such as Suitcase II or Font Juggler, follow the instructions included with the utility. 6 6-17 Installing Windows software Installing Windows software This section describes the installation of printing software in the following environments: • Windows 95, using the parallel port connection or running on IPX networks with a Novell NetWare server. Instructions begin on page 6-18. • Windows NT Workstation or Windows NT Server, using the parallel port connection, running on IPX networks with a Novell NetWare server, using TCP/IP and lpr protocols, or using Windows NT Services for Macintosh. Instructions begin on page 6-26. In a mixed network environment you can configure a Windows NT server to provide printing services to clients. The network protocol connecting the Windows NT server and its clients may be different from the protocols supported by the Colorwriter. For Windows NT Server setup information, see page 6-35. • Windows 3.1 or Windows for Workgroups, using the parallel connection, or running on IPX networks with a Novell NetWare server. Instructions begin on page 6-40. With PCs running Windows NT or Windows 95, use the User Software CD together with the PostScript printer driver delivered with the operating system to set up printing with the Colorwriter. For computers running Windows 3.1 or Windows for Workgroups 3.11 install the Adobe PostScript Printer Driver and the printer files provided on the CD. With each operating system, installation is divided into two main sections: • Setting up printing, which includes installing the PostScript driver and the Colorwriter PPD file • Completing the printer setup by configuring the port for a network connection or a parallel connection with the printer 6 6-18 Installing Windows software Setting up printing with Windows 95 You can print to the Colorwriter from your Windows 95 workstation over the parallel port connection, as a client of a NetWare server, or as a client of a Windows NT workstation or server. In most cases you need to install a PostScript printer driver and the Colorwriter PPD file on your computer, and set up the Colorwriter to accept your print jobs. For IPX installation, the NetWare server must be set up before you set up the Colorwriter and finish setting up the client workstation. Windows 95 printing setup is found on the following pages. For this connection to the Colorwriter: Use the driver installation on pages: Complete the connection on pages: Parallel Port 6-18 to 6-21 6-22 to 6-23 IPX (Novell) 6-18 to 6-21 6-25 to 6-25 Make sure that you have the Windows 95 installation CD or diskettes available for completing the Colorwriter installation. If you don’t have the installation CD, ask your administrator to let you access a Windows 95 CD over the network. TO INSTALL THE C OLORWRITER AS A W INDOWS 95 P OST S CRIPT PRINTER : 1. On your Windows 95 computer, click the Start button, point to Settings, and then click Printers. 2. Double-click Add Printer, and then click Next to let the Add Printer Wizard help install the printer. 3. When prompted for the type of printer, select Local Printer, and then click Next. This is a general installation. You can modify the port connection later, according to your network type. 6 6-19 4. Installing Windows software From the dialog box displaying the list of printers, click Have Disk. The Install From Disk dialog box prompts you to insert the disk. 6 6-20 5. Installing Windows software Insert the Windows NT and Windows 95 disk (Windows Disk 2), and click OK. The Colorwriter LSR 2000 is shown in the Printers box. 6. Click Next. 7. When prompted for a port type (the default is LPT1:), click Next. You’ll configure the port later, according to your network type. 8. When prompted for a name, enter a descriptive name for the printer or accept the default name, which comes from the PPD. The name will be used with the icon in the Printers and Queue windows. 9. Select Yes when prompted to use this printer as the default printer. Then click Next. 6 6-21 10. Installing Windows software When prompted, specify No, you do NOT want a Test Page and then click Finish. (You can print the Windows 95 test page later, when the configuration is finished.) N OTE : You may be prompted to insert the Windows 95 system disks and click OK. You may have to browse to the drive and directory containing the WIN95 subdirectory. Windows 95 copies the necessary files from the installation disk to the hard disk. An icon for the newly installed printer appears in your Printers window, with the name you gave it. Double-clicking the Colorwriter icon displays the Queue window for this printer. 11. Connect your printer according to your network type. See “Completing Windows 95 printing setup” below. 6 6-22 Installing Windows software Completing Windows 95 printing setup To print from Windows 95 you need to: • Set up network servers, if any. • Set up the Colorwriter to accept print jobs from your computer. • Configure the port on each Windows 95 computer for the network or connection type. Completing the Windows 95 parallel port connection In the section “Setting up printing with Windows 95” on page 6-18, you installed the Windows 95 PostScript driver and the Colorwriter PPD. Complete the setup for parallel port printing as follows: TO SET UP PARALLEL PORT PRINTING FOR PCK W INDOWS 95: 1. Shut down your computer by selecting Shut Down from the Start menu. 2. Turn off the printer. 3. Attach a Centronics cable from the parallel port of your computer to the parallel port of the printer. 4. Turn on the Colorwriter. Press the Menu button, select Printer Setup, and confirm that ENABLE DIRECT Q or ENABLE PRINT Q is set to Yes. If the Colorwriter does not have the PCK option, parallel port jobs are sent directly to the printer without spooling. 5. Select Network Setup and confirm that the parallel port setting is ENABLE PARALLEL. 6. You can leave the default settings for parallel port timeout, and ignoring EOF character. For information on these and other setup options, see the User Guide. 7. Exit the Colorwriter Network Setup and save changes. The printer reboots. 8. Turn on your computer, click the Start button, point to Settings, and then click Printers. 6 6-23 9. Installing Windows software Click the Colorwriter icon and choose Properties from the File menu. (Alternatively, you can click the right mouse button on the Colorwriter icon and click the left button on Properties.) 10. Choose the Details tab. In the Details tab, confirm that LPT1 is displayed in the list under Print to the following port. 11. Click OK to return to the Properties window. You are now ready to print from your applications to the Colorwriter by means of the parallel port. You can print a test page first to verify the connection (see page 6-24). 6 6-24 TO Installing Windows software PRINT A TEST PAGE FROM W INDOWS 95: 1. With the Colorwriter selected, choose Properties, and choose the General tab. 2. Click Print Test Page and click OK. When you select Print, your PostScript files are transmitted to the Colorwriter over the currently selected port connection, using the Windows 95 PostScript printer driver and the Colorwriter PPD. Completing the Windows 95 IPX (Novell) connection Use the following procedure to prepare a Windows 95 system for printing to the Colorwriter over IPX after you have finished the section “Setting up printing with Windows 95” on page 6-18. Before you continue, the Novell network and file server should be set up. The file server should be configured with a print server and print queue for the Colorwriter. For details see your NetWare documentation and Chapter 5, “Connecting to the Colorwriter.” 6 6-25 PCK TO SET UP Installing Windows software N OTE : If the Colorwriter has the 16MB memory configuration you can attach a single NetWare file server to the Colorwriter. If the Colorwriter has the 32MB or 48MB memory configuration, you can attach up to three file servers to the Colorwriter, provided a print server and print queue for Colorwriter jobs has been set up on each file server. IPX (N OVELL ) PRINTING WITH W INDOWS 95: 1. With the printer turned off, connect it to the network. 2. Select NETWORK SETUP. Enable IPX and enter the appropriate IPX settings. Details of these steps are in Chapter 4, “Using the Control Panels.” NetWare client software should already be installed on the client workstation. 3. After installing the Colorwriter PPD file as described previously (in “Setting up printing with Windows 95” on page 6-18), click the Start button, point to Settings, and then click Printers. 4. Click the icon for the printer and choose Properties from the File menu. 5. Choose the Details tab in the Properties window and click Add Port. A list of connection options is displayed. 6. In the Add Port dialog box, specify the network path, or click Browse for a display of your network environment. 7. Enter the path or click the icon of the NetWare file server you want to use for printing to the Colorwriter. 8. Click the printer icon labeled with the NetWare print queue you will use and click OK. In the Add Port dialog box, the network path is updated. 9. Click OK. You are ready to print from the workstation. Your print jobs will be transmitted to the specified print queue on the Novell file server. The printer will poll the file server, and if jobs are present, they will be transmitted to the Colorwriter. 10. To confirm the connection, you can print a Windows 95 test page (see page 6-24). 6 6-26 Installing Windows software Setting up printing from Windows NT All the setups described here begin with installation of the Windows NT PostScript printer driver and the Colorwriter PPD, and finish by configuring a particular type of connection between the workstation and the Colorwriter. Windows NT version 3.5.1 supports printing to the Colorwriter. Note that Colorwriter printer files support the Intel and Alpha versions of Windows NT. Windows NT printing setup is found on the following pages. For this connection to the Colorwriter: Parallel Port Use the driver installation on pages: Complete the connection on pages: 6-26 to 6-30 6-30 to 6-31 TCP/IP with lpr 6-31 to 6-33 AppleTalk Services 6-33 to 6-37 IPX (Novell) 6-38 to 6-40 For information on configuring a Windows NT Server to support clients printing to the Colorwriter, see page 6-35. You can set up queues for the Colorwriter on a computer running Windows NT Server, using AppleTalk, IPX, and the lpr (TCP/IP) protocols. To print using Windows NT and lpr, we recommend that you establish a connection directly between the Colorwriter and each client computer that is running Windows NT Workstation. TO INSTALL THE C OLORWRITER AS A W INDOWS NT P OST S CRIPT PRINTER : 1. Start your computer running Windows NT. 2. Insert Colorwriter Windows Disk 2 (Windows NT and Windows 95) into the floppy drive. This disk is part of the User Software package. 3. From the File Manager, select the floppy disk drive. Double-click the folder for your particular Windows NT processor (ALPHA or INTEL). 6 6-27 4. Installing Windows software Drag the PRINTER.INF file from the folder to the top level of the floppy disk. For Digital Alpha versions of Windows NT, use the PRINTER.INF file from the Alpha folder. For Intel versions of Windows NT, use the PRINTER.INF file from the Intel folder. 5. Insert the Windows NT Installation CD-ROM in an attached or built-in CD-ROM drive, or have the set of installation disks ready. 6. In the Main group, double-click the Print Manager icon. 7. In the Print Manager window, choose Create Printer from the Printer menu. The Driver box displays the first entry in the list of drivers. 8. In the Printer Name box in the Create Printer dialog box, type a name for the printer. 9. In the Driver box, scroll down the list of drivers and select Other. The Install Driver dialog box is displayed, prompting you to insert the disk. 6 6-28 10. Installing Windows software Make sure the Windows Disk 2 (Windows NT and Windows 95) is still in the floppy drive, and click OK. The Select Driver dialog box displays the name of the printer described on the disk. 11. Click OK. Windows NT Setup asks you to supply the path to the Windows NT distribution files. 12. Starting with the disk drive letter, type the path to the i386 or Alpha directory (as appropriate) on your System disks or the letter of the drive containing your System CD, and then click Continue. 13. In the Create Printer dialog box, turn on Share this printer on the network if you wish to share the printer with Windows clients. Click OK. Usually, Windows NT clients are workstations on the Microsoft network running Windows for Workgroups or Windows 95. 6 6-29 Installing Windows software The first eight letters of the Printer Name are automatically entered as the default Share Name for Windows NT clients. You can change this name if you wish. You can share the Colorwriter on the network if your Windows NT workstation is connected to the printer over the network, or by means of the parallel port. 14. When the PostScript Printer Setup dialog box appears, click OK. Even though the Colorwriter does not use halftoning, do not turn off Use Printer Halftoning. The Colorwriter LSR 2000+ now appears in its own Printer window in the Print Manager window. 15. Print Manager window Colorwriter Printer window In the Print Manager toolbar, select the Colorwriter as the Default printer. 6 6-30 Installing Windows software If you minimize the printer window, the icon view indicates the type of printer. Printer created on the local workstation Printer created on the local workstation being shared with network clients Printer being shared by a server on the network and available to this workstation 16. Connect the printer to a port or a network connection. • For a parallel port connection, proceed to the next section. • For a TCP/IP connection using lpr, see page 6-31. • For an AppleTalk connection, see page 6-34. • For an IPX (Novell) connection, see page 6-38. Completing the Windows NT parallel port connection In the section “Setting up printing from Windows NT” on page 6-26, you installed the Windows NT PostScript driver and the Colorwriter PPD. Complete the setup for parallel port printing as follows: • Set up the Colorwriter to accept print jobs over the parallel port. • Attach a cable between the workstation and the printer. • Configure default settings for the port on the workstation. TO SET UP PARALLEL PRINTING FOR W INDOWS NT: 1. In the Program Manager, choose Exit Windows from the File menu. 2. Turn off the printer. 6 6-31 Installing Windows software 3. Attach a Centronics cable from the parallel port of your computer to the parallel port of the Colorwriter. 4. Turn on the Colorwriter. Press the Menu button, select Network Setup and confirm that the parallel port setting is ENABLE PARALLEL. 5. You can leave the default settings for parallel port timeout, and ignoring EOF character. For information on these and other setup options, see the User Guide. 6. Exit the Colorwriter Network Setup and save changes. The printer reboots. 7. Turn on your computer. Choose Print Manager from the Main group. 8. Double-click the Colorwriter icon and choose Properties from the Printer menu. In the Printer Properties dialog box, confirm that LPT1 appears in the Print to box. 9. Click Details to check and configure the defaults. Select Print Directly to Port and click OK. Since parallel port jobs are spooled on the Colorwriter, this bypasses Windows NT Print Manager spooling. 10. Click OK to exit the Printer Properties dialog box. The Colorwriter is ready to accept parallel print jobs from your computer, using the Windows NT PostScript printer driver and the Colorwriter PPD. When you select Print, your PostScript files are transmitted over the parallel port connection to the Colorwriter. The network administrator should verify the parallel port connection by printing a simple document to LPT1, the designated port. Completing the Windows NT TCP/IP connection In the section “Setting up printing from Windows NT” on pages 6-26 to 6-30, you installed the Windows NT PostScript driver and the Colorwriter PPD. Complete the setup for the TCP/IP and lpr connection as follows: • Set up the Colorwriter to accept print jobs using TCP/IP and lpr protocols. • Configure the Windows NT system for the TCP/IP connection. 6 6-32 Installing Windows software Before you continue, ask the system administrator for the IP address assigned to the Colorwriter, as well as the subnet mask and the gateway address, if they are used. TO SET UP TCP/IP AND LPR PRINTING FOR W INDOWS NT: 1. With the printer turned off, connect it to the network. 2. Turn on the printer and from the printer control panel, select Network Setup. Enable TCP/IP and enter the appropriate settings for IP address, subnet mask, and gateway address. Details of these steps may be found in Chapter 4, “Using the Control Panels.” 3. Exit the Colorwriter Network Setup and Save Changes. 4. Make sure you have installed the the Colorwriter as a Windows NT PostScript printer as explained on page 6-26. TCP/IP Protocol software should already be installed on the Windows NT system. 5. On the Windows NT system, in the Main group, double-click the Print Manager icon. 6. Click the Colorwriter icon and choose Properties from the Printer menu. 7. In the Print to list, scroll to Other. The Print Destinations dialog box is displayed. 8. Select LPR Port and click OK. 6 6-33 9. Installing Windows software In the “Add LPR compatible printer” dialog box, enter the IP address of the Colorwriter. Press Tab and type the internal name of the printer in lowercase letters: xjdirect N OTE : Type this name exactly as shown; it is required for communication with the Colorwriter. PCK N OTE : If your Colorwriter has the 32MB or 48MB memory configuration, then you may enter one of three different internal names. These names are xjprint, xjdirect, and xjhold. 10. Click OK. The Print to: box in the Printer Properties dialog box shows the Colorwriter printing to a port consisting of the IP address and the internal name. 11. Enter a name for the Colorwriter in the Printer Name box in the Create Printer dialogue. Then click OK. 12. Click OK. You have configured your system to use TCP/IP to communicate with the printer. When you select Print, your PostScript files will be transmitted over the LPR Port connection to the Colorwriter. To verify the connection, the network administrator should print a test document from each networked computer that will use the Colorwriter. Completing the Windows NT AppleTalk connection In the section “Setting up printing from Windows NT” on pages 6-26 to 6-30, you installed the Windows NT PostScript driver and the Colorwriter PPD. Complete the setup for the AppleTalk connection as follows: • Set up the Colorwriter to enable AppleTalk protocols. • Configure the Windows NT system for the AppleTalk protocol (see page 6-35). 6 6-34 Installing Windows software • Configure the Windows NT system for the AppleTalk connection with the printer. TO SET UP A PPLETALK PRINTING FOR W INDOWS NT: 1. From the printer control panel, select Printer Setup. Enable the Direct connection or the Print queue. 2. Select Network Setup. Enable AppleTalk and select the preferred AppleTalk zone, if your network has zones. Details of these steps may be found in Chapter 4, “Using the Control Panels”. 3. Exit the Colorwriter Network Setup and Save Changes. 4. If the AppleTalk protocol is not already loaded on your Windows NT system, load it now (see page 6-35). 5. Install the the Colorwriter as a Windows NT PostScript printer as explained on page 6-26. 6. On the Windows NT system, in the Main group, double-click the Print Manager icon. 7. Click the Colorwriter icon and choose Properties from the Printer menu. 8. From the Print to pop-up menu, choose Other. The Print Destinations dialog box is displayed. 9. Select AppleTalk Printing Devices, and click OK. You are notified that Windows NT is searching for AppleTalk printers. The Available AppleTalk Printing Devices window is displayed. For each zone found, the window displays a multiple-device icon with the zone name beside it. 6 6-35 Installing Windows software If no zones are found, you are alerted that “No zones were detected on the network. Searching for AppleTalk printing devices in the default zone.” The window displays one multiple-device icon with no name beside it to represent the default zone, and lists the attached printers beneath the icon. 10. If the network has no zones, go to step 11. If it has zones, double-click the Colorwriter zone name to perform an AppleTalk lookup. You’ll see a list of AppleTalk printers in that zone. 11. Select the name of the printer connection. Click OK. PCK With PCK, you may see up to three entries for the Colorwriter: Colorwriter_Direct, Colorwriter_Print, and Colorwriter_Hold, if you enabled these queues in Printer Setup on the printer’s control panel. A dialog box appears, asking if you want to capture this device. 12. Do not Capture. Choose NO. Choosing capture tells a printer to hide itself on the network, which forces all users to print to the server rather than directly to the printer. The Colorwriter does not support the capture feature. 13. Click OK. You have configured your system to communicate with the printer over AppleTalk. When you select Print, PostScript files will be transmitted from the Windows NT server to the Colorwriter over the AppleTalk connection. To verify the connection, the network administrator should print a test document from each networked computer that will use the Colorwriter. Configuring a Windows NT server to use AppleTalk and share printing A Windows NT server can be configured to provide Colorwriter printing services to networked Windows 95, Windows 3.1, Windows for Workgroups, and Windows NT workstation clients. You must have a 3.51 Windows NT Server for printing to the Colorwriter. This example uses the AppleTalk protocol for communication between the Windows NT server and the Colorwriter. Other networking protocols are described in your Windows NT documentation. Log in to the Windows NT server as an Administrator and follow the steps outlined below. 6 6-36 TO ADD Installing Windows software M ACINTOSH 1. NETWORK SERVICES : In the Control Panel, double-click the Network icon. The Network Settings dialog box appears. 2. Click Add Software. 3. Select Services for Macintosh and click OK. 4. Insert Windows NT disks as prompted. When the installation is complete, Services for Macintosh is listed under Installed Network Software in the Network Settings dialog box. 5. With Services for Macintosh selected, click Configure. 6 6-37 Installing Windows software A configuration dialog box appears. 6. If you have only one zone in your AppleTalk network, do not enable AppleTalk routing. Click OK. If the AppleTalk network has zones, select the desired zone. 7. Exit Windows and follow the directions specified by the server. It is usually not necessary to reboot the server on Windows NT. 8. Install the Colorwriter on the server as a Windows NT printer, as described on page 6-26. 9. Check the box to share the printer on the network (see step 13, page 6-28). When you have finished installing the Colorwriter as a shared printer, a new document log window is displayed. The document log window has columns for Status, Doc Name, Owner, Printed At, Pages, Size, and Priority. Client workstations running Windows for Workgroups, Windows NT, or Windows 95 on the network can print to the Colorwriter by connecting to the Colorwriter Print queue on the Windows NT server. They do not have to use AppleTalk Services. See your Windows documentation for instructions that apply to the clients on your network. Setting up a Windows NT connection with IPX (Novell) Complete the setup for the IPX (Novell) connection as follows: • Configure the Novell NetWare file server with a Colorwriter print server and print queue. 6 6-38 Installing Windows software • Set up the Colorwriter to poll the NetWare server and obtain print jobs from the print queue set up for the Colorwriter. • Configure the Windows NT system so that print jobs are directed to the Colorwriter print queue on the NetWare server. • Install the Colorwriter PPD on your computer as explained on page 6-26. Before you continue, the Novell network should be set up. The NetWare file server should be configured with a print server and print queue for the Colorwriter. For details, see your NetWare documentation and the section beginning on page 5-17. TO SET UP IPX (N OVELL ) PRINTING FOR W INDOWS NT: 1. Make sure you have installed the the Colorwriter as a Windows NT PostScript printer as explained on page 6-26. 2. Open the Print Manager. In the Print Manager toolbar, verify that the Colorwriter is the Default printer. 3. Choose Connect to Printer from the Printer menu. Print Manager window Colorwriter Printer window 6 6-39 4. Installing Windows software In the dialog box, select NetWare or Compatible Network. A list of NetWare file servers is displayed. 5. Double-click the server on which the Colorwriter print queue is defined. The list of print queues defined for the selected server is displayed beneath the server icon. 6. Select the name of the Colorwriter print queue and click OK. 7. If you see an alert saying that no suitable driver is installed on the NetWare server, click OK. The Select Driver dialog box is displayed. 8. In the Driver box, scroll to the Colorwriter driver; leave the default printer name (the server and print queue name) and click OK. 6 6-40 Installing Windows software You are ready to print from Windows NT to the NetWare print queue for the Colorwriter. When you select Print, jobs are routed to the Colorwriter queue on the NetWare file server, and then transmitted to the queue on the Colorwriter that was assigned in Network Setup on the printer control panel. The network administrator can verify the network connection by printing a test document from each networked computer that will use the Colorwriter. Setting up printing with Windows 3.x or Windows for Workgroups 3.11 When you choose a PostScript printer for printing a document, you are really choosing an association between a PostScript printer driver, a printer description file, and a printer. The setup process creates this association. The Adobe PostScript Printer Driver (included in the Win31 directory on the User Software CD) supports Windows 3.x and Windows for Workgroups 3.11. You can also use the standard Windows PostScript printer driver that came with your Windows software. Both setups are described in the following sections. The procedures that follow apply equally to Windows 3.x and Windows for Workgroups 3.11. We recommend that you use the Adobe PostScript Printer Driver because it supports PostScript Level 2, which allows you to access all printer features. The Windows 3.x PostScript printer driver supports only PostScript Level 1. For this connection to the Colorwriter: Parallel Port IPX (Novell) Use the driver installation on pages: Complete the connection on pages: Adobe Driver 6-41 to 6-43 and /or 6-46 to 6-47 Windows Driver 6-43 to 6-45 6-47 to 6-49 6 6-41 Installing Windows software Installing the Adobe PostScript Printer Driver 3.0.1 For this installation, you need the Colorwriter User Software CD. TO INSTALL THE A DOBE P OST S CRIPT PRINTER DRIVER 3.0.1: 1. Power up the computer and run Windows. 2. Insert the Colorwriter User Software CD into the CD-ROM drive. 3. From the Windows Program Manager, choose Run and then click Browse. The Browse window appears. 4. Choose the CD-ROM drive, navigate to the Win31 directory, and select the setup.exe file. An example of the file location is: d:\English\Prntdrv\Us_eng\Win31\ 5. Click OK in the Browse window and then click OK in the Run window. 6. Select Read to view the Read Me file before installing the driver. N OTE : If you have already installed an earlier version of the Adobe Driver, you should delete that first before you install 3.0.1. Follow instructions given in the Read Me file. If you delete an earlier version, proceed again from step 3. 7. After reading the Read Me file, select Exit from the File menu. 8. In the PostScript Printer Driver Setup dialog box, select Continue. After you finish installing the driver, you are prompted to restart Windows. 6 6-42 9. Installing Windows software Click Restart Windows. After Windows restarts, the Install PostScript Printer from PPD dialog box appears and prompts you to install the Colorwriter LSR 2000 PostScript Printer Description file. 10. Select Colorwriter LSR 2000 v2015.108 and click Install. 11. Click OK and then click Close. The PostScript Printers dialog box alerts you to use Control Panel Printers to connect and set up the printers you installed. 12. Click OK. The Windows Control Panel window now contains a new Adobe icon. 13. In the Main group, double-click Control Panel and double-click Printers. 14. In the Printers window, select the printer you want to use from the list of Installed Printers. 15. Click Set as Default Printer to make the selected printer the default printer for Windows 3.x and Windows for Workgroups. The Colorwriter you selected appears in the Default Printer area of the Printers window. 6 6-43 16. Installing Windows software Connect your printer according to your network type. See “Completing Windows PostScript printing setup” on page 6-46. Installing the Windows 3.x PostScript printer driver file This is an optional installation that is provided for compatibility. This PostScript driver can be installed on the same system as the Adobe driver. You only use one at a time when you print. Installing the Colorwriter from the Windows Control Panel associates the printer with the Windows PostScript printer driver and the Windows Printer Description (WPD). TO INSTALL THE W INDOWS P OST S CRIPT PRINTER DRIVER : 1. In the Main group, double-click Control Panel. 2. Double-click the Printers icon. Printers icon The Printers window appears. 6 6-44 3. Installing Windows software Click Add. The Printers window expands to show available printers. 4. Make sure Install Unlisted or Updated Printer is selected and click Install. The Install Driver window appears and prompts you for the printer driver disk. 5. Insert the Colorwriter User Software CD into the CD-ROM drive. 6. Click Browse. The Browse window appears, prompting you to select a path to the print driver. 7. Under Drives, select the drive that contains the User Software CD, navigate to the PSLEV1 directory, and then double-click it. The correct path on the User Software CD is as follows: d:\English\Prntdrv\Us_eng\Win31\Pslev1\ 8. Click OK in the Browse window, and click OK in the Install Driver window. The Add Unlisted or Updated Printer window appears. 6 6-45 Installing Windows software 9. Select your printer and click OK. The Install Driver window appears and prompts you for the PSCRIPT.DRV file. 10. Click Browse and select the location of the PSCRIPT.DRV file (usually \WINDOWS\SYSTEM). Click OK in the Browse window. The Install Driver window reappears with your selected path. 11. Click OK. Windows installs the Colorwriter WPD (Windows Printer Description) file from the CD. When installation is complete, the Colorwriter appears in the Printers window. 12. To see which printer driver is being used with a print device, select the print device, click Setup, and click About. 13. In the Printers window, select the printer you want to use from the list of Installed Printers. 14. Click Set as Default Printer to make the selected printer the default printer for Windows 3.x and Windows for Workgroups. The Colorwriter you selected appears in the Default Printer area of the Printers window. 6 6-46 Installing Windows software Completing Windows PostScript printing setup When you install a printer, Windows assigns it to a default printer port. If the Colorwriter is connected to your computer through a network or you want to assign it to a different port, you need to change the port assignment. TO SET UP PARALLEL PORT PRINTING FOR WINDOWS : 1. In the Printers Control Panel window, click Connect to connect the printer to the appropriate port. 2. If you are printing to the parallel port, select LPT1, LPT2, or LPT3. 3. Shut down your computer by selecting Shut Down from the Start menu. 4. Turn off the printer. 5. Attach a Centronics cable from the parallel port of your computer to the parallel port of the Colorwriter. 6. Turn on the Colorwriter. In the printer control panel, select Network Setup and confirm that the ENABLE PARALLEL setting is YES. You can leave the default settings for parallel port timeout, and ignoring EOF character. For information on these and other setup options, see Chapter 4, “Using the control panels.” 7. Exit the Colorwriter Network Setup and Save Changes. The printer reboots. 6 6-47 8. Installing Windows software Turn on the computer. When you select Print, your PostScript files are transmitted over the parallel port connection to the Colorwriter, using the PostScript printer driver you have associated with the printer in the Printers Control Panel. The network administrator should verify the parallel port connection by printing a simple document to LPT1 or the port designated for the Colorwriter. TO SET UP IPX (N OVELL ) PRINTING FOR WINDOWS 3. X : 1. In the Main group of the Windows Program Manager, double-click the Windows Setup icon. 2. Choose Change System Settings from the Options menu. 3. From the Network menu, choose Novell NetWare (shell version 3.26 and above). 4. Click OK. When prompted, restart Windows. Windows Setup icon 6 6-48 Installing Windows software 5. In the Main group, double-click Control Panel, then double-click Printers. In the Printers Control Panel window, click Connect to connect the printer to the appropriate port. 6. Select Network. If you select Network, the next window depends on the NetWare client driver version. 7. If the Network Printer Connections dialog box is displayed, select the port in the Printer connections box. 8. In the Available queues list box, select the server and queue name that correspond to the Colorwriter. 9. Click the Connect button. 6 6-49 10. Installing Windows software Click the Close button. The Connect dialog box is displayed with the network path to the printer. 11. Click OK in the Connect dialog box. 12. Click Close in the Printers dialog box. You are ready to print to the Colorwriter from Windows applications. When you select Print, jobs are routed to the Colorwriter queue on the NetWare file server, and then transmitted to the Colorwriter. The network administrator should verify the network connection by printing a test document from each networked computer that will use the Colorwriter. 13. Click OK. The Printers window appears again, with the selected port next to the highlighted printer name in the Installed Printers list box. 14. Print a file from an application to verify the Novell connection. Copying the printer description files if you use QuarkXPress or PageMaker The User Software CD contains two Windows printer description files for compatibility with certain Windows 3.1, 3.11, or Windows for Workgroups applications. Some applications do not support automatic installation of printer description files from the Printers Control Panel. To make the Colorwriter available in the Print and Page Setup dialog boxes of these applications, copy printer description files to the location shown in the table on the next page. If you operate the Colorwriter in a copy shop, quick print shop, or service bureau, you might want to provide copies of the printer description files to customers. This ensures that jobs they create and print to files are set up properly for printing to the Colorwriter. TO COPY THE PRINTER DESCRIPTION FILES : 1. From the Windows Program Manager, click the File Manager icon. 2. Insert The User Software CD into the CD-ROM drive. 6 6-50 3. Installing Windows software Copy the printer description file for your Colorwriter to the appropriate location. If you use: Copy this file: To this location: PageMaker 5.0 or later DCLNC1_1.PPD \ALDUS\USENGLSH\PPD4 QuarkXPress DCLNC1_1.PDF For QuarkXPress 3.1 or 3.2, the QuarkXPress home directory, usually \XPRESS For QuarkXPress 3.3 or later, the PDF folder, usually \XPRESS\PDF Installing the Color Reference files and Color Profiles The Windows Color Reference files and Color Profiles can be installed from any Colorwriter User Software CD, as described below. The Installer places the Color Reference files into a COLORREF folder in the Colorwriter LSR folder. After installation, you can keep them anywhere on your disk. TO INSTALL C OLORWRITER COLOR PROFILES : LSR C OLOR R EFERENCE FILES AND 1. Turn on the CD-ROM drive and insert the User Software CD into your CD-ROM drive. 2. Use either the Windows Explorer (Windows 95) or the File Manager (Windows NT) to open the following folders: English\Installr\Disk1 3. Double-click the Setup icon or the file called Setup.exe. 6 6-51 PCK Installing Windows software 4. Click Next in the Welcome dialog box. 5. If you are using the User Software CD for the 16MB system, select Color Reference and Standard Profiles and then click Next. If you are installing software for the Colorwriter LSR with PCK, install the utilities at the same time, beginning with step 5, page 6-57. 6 6-52 Installing Windows software 6. Specify the name of the Program Folder in which to install the files, or click Next to use the default name. 7. Verify the information in the Start Copying Files dialog box and then click Next. The selected files are placed on your disk. The Color Reference files are placed in a COLORREF folder within the folder whose name you specified; the profiles are installed in the folder containing your other KCMS profiles. Using the Windows CMYK Color Reference Download the CMYK Color Reference PostScript file to print CMYK color patches to use as a reference for graphics applications that allow you to specify color as CMYK values. By downloading these pages to your Colorwriter, you can see how these CMYK patches print on your particular printer. You can print these PostScript files from any system as you would any other PostScript file. Download them using the Colorwriter LSR Downloader when the Downloader is installed as described in this manual 6 6-53 Installing Windows software Using the Windows PANTONE Color Reference You can download CMYK representations of PANTONE numbered color swatches, both coated and uncoated, and use the pages as a reference to see how these colors print on your particular Colorwriter printer. Each swatch is identified by PANTONE number and its equivalent CMYK value (for example PANTONE 108 CHC C:0 M:10 Y: 98 K:0). The file PANTONE C.ps prints swatches for the PANTONE coated library. The file PANTONE U.ps prints swatches for the uncoated library. You can print these PostScript files from any system as you would any other PostScript file. They can also be downloaded using the Colorwriter LSR Downloader when the Downloader is installed as described in this manual 6 6-54 Installing Windows software Using the Color Printer Profiles for Windows 95 When you select Standard Profiles in the Software Installer dialog box shown on page 6-51 or page 6-57, the Installer checks your hard disk for a KPCMS configuration file (KPCMS.INI), which contains a path to other Kodak PT profiles. The Installer then copies the Colorwriter profile files to the folder specified in the configuration file. N OTE : Use the Standard Color Profiles when you first install your Colorwriter printer. Use the Calibrated Profiles only after you have calibrated your printer using the Fiery Print Calibrator. Note that the Fiery Print Calibrator is only available for the Macintosh. Using the wrong profile may result in incorrect color matching. Depending on the profiles you select, the installer copies the following files to your disk. To use: The Installer places these files: In this location: Kodak Precision Transforms: Standard dec_cm01.pt dec_cm02.pt dec_pm01.pt dec_pm02.pt dec_pm03.pt dec_sm01.pt dec_sm02.pt OR PCK Calibrated deccmc01.pt deccmc02.pt decpmc01.pt decpmc02.pt decpmc03.pt decsmc01.pt decsmc02.pt The folder specified in the KCMS.INI file. If this folder doesn’t exist, the KCMS is not installed on your computer. If you use an application that supports the KCMS, you must install the KCMS from the application disks. To use a Colorwriter precision transform, install the Colorwriter profiles after you install the KCMS. Color Profiles can be used together with a color management system to manage printer color output. The Kodak Precision Transforms (Standard and Calibrated) that come with the Colorwriter can be used with applications that have licensed 6 6-55 Installing Windows software the Kodak Color Management System (KCMS), including Adobe PageMaker 6.0 and Adobe Photoshop 3.0. You can select a precision transform for the Colorwriter when you print from one of these applications, provided you installed the color management system with the application. If the KCMS is not present on your system, the Colorwriter Software Installer alerts you and does not copy the profiles to your disk. Installing the Windows utilities PCK Colorwriter LSR utilities for managing jobs and downloading files are available for computers that use Windows 95 or Windows NT. PCK Colorwriter LSR Downloader Enables you to print PostScript and Encapsulated PostScript files directly to the Colorwriter without using the application in which they were created. Colorwriter LSR Downloader also enables you to manage the printer fonts installed on the Colorwriter. Colorwriter LSR Spooler Enables you to view the order and priority of print jobs, customize printer settings for jobs, delete jobs, and move jobs between queues. You can also use it to view printer status and job accounting information. Colorwriter LSR Manager Enables you to configure your workstation so that the utilities can communicate with the printer, without requiring you to use a text editor. The Colorwriter LSR Manager also provides shortcut buttons to the other Colorwriter LSR utilities. N OTE : The Colorwriter LSR utilities are available for printers that have the Professional Color Kit (PCK) features installed. To run the Colorwriter LSR utilities using Windows, the computer must be running Windows 95, Windows NT Server or Windows NT Workstation, and must be connected to a TCP/IP network or to an IPX/SPX network with a Novell server. 6 6-56 TO INSTALL Installing Windows software C OLORWRITER LSR UTILITIES FOR W INDOWS : 1. Turn on the CD-ROM drive and insert the User Software CD into your CD-ROM drive. 2. Use either the Windows Explorer (Windows 95) or the File Manager (Windows NT) to open the following folders: English\Installr\Disk1 3. Double-click the Setup icon or the file called Setup.exe. 4. Click Next in the Welcome dialog box. 6 6-57 PCK 5. Installing Windows software In the Software dialog box, select Color Reference, Standard Profiles, and Utilities, and then click Next. N OTE : Use the Standard Color Profiles when you first install your Colorwriter printer. Use the Calibrated Color Profiles only if you have used the Fiery Print Calibrator to calibrate your printer. Using the wrong profile may result in incorrect color matching. 6. Specify the name of the Program Folder in which to install the files, or click Next to use the default name. 6 6-58 7. Installing Windows software Specify either IPX or TCP/IP in the Network dialog box and then click Next. If you are not sure which type of network you have, check with your network administrator before proceeding. If you choose the wrong protocol, you will have to run the Installer again or rename a disk file later (see page 6-68). 8. Verify the information in the Start Copying Files dialog box and then click Next. 6 6-59 Installing Windows software The next dialog box refers to a configuration file (NET_WSCK.INI) that enables the utilities to communicate with the Colorwriter using a particular network protocol. The Colorwriter LSR Manager, a utility included with the user software, makes it a simple task to edit the default configuration file. In most cases, you should install the default file and then run the Colorwriter LSR Manager to edit it. 9. Click Next. If you do not have a NET_WSCK.INI file on your system, the installer will ask for confirmation before copying one into the active Windows directory. 10. Click Yes and then click OK. Refer to the following section for information on configuring your network settings to enable the utilities that you have just installed. 6 6-60 Installing Windows software Using the Colorwriter LSR Manager The Colorwriter LSR Manager customizes the NET_WSCK.INI configuration file to enable the Colorwriter utilities to communicate with your printer. You will need to supply additional network information when you run the Colorwriter LSR Manager. Configuration is described first for IPX networks, and then for TCP/IP networks (see page 6-64). Using the Colorwriter LSR Manager with IPX networks To use Colorwriter LSR utilities with IPX/SPX networks, make sure that: • IPX protocols are loaded and bound to the network driver on your workstation. • There is a NetWare server on the network, configured with a print server and a print queue to handle Colorwriter print jobs (see page 5-17). • IPX is enabled in Network Setup on the Colorwriter control panel, and a NetWare connection is chosen (see page 4-9). T O ENTER YOUR IPX NETWORK C OLORWRITER LSR UTILITIES : 1. SETTINGS FOR USE WITH THE If you are working on an IPX network with a Novell NetWare server, print a Configuration page from the Colorwriter. For information on printing a Configuration page, see “To print pages from the printer control panel:” on page 3-13. 6 6-61 2. Installing Windows software Double-click the Colorwriter LSR Manager icon in the Digital Colorwriter LSR folder or program group. This folder or group is already open if you just installed the Colorwriter LSR utilities. The introductory window for the Colorwriter LSR Manager is displayed. 3. Click Next to begin the setup process. 6 6-62 Installing Windows software This window lists the Colorwriter printers in the current configuration file. If the Colorwriter LSR utilities have not been previously configured for a network, the Printers section of this window is blank. You can either add one or more Colorwriters to the network or modify a current network configuration. 4. Click Add to enter a new network configuration. If you are modifying an existing setting, select the currently installed Colorwriter and then click Modify to change its configuration. You are prompted to select a network type. Choose the same network type as you selected when you ran the Installer (see page 6-58). N OTE : The Colorwriter LSR Manager enables you to configure the utilities to use the IPX/SPX protocol or the TCP/IP protocol, and it also enables you to switch from using one protocol to the other. However, before you switch protocols, be sure to use the Installer to install the Colorwriter LSR utilities with the protocol you are planning to use, and then configure them with the Colorwriter LSR Manager. This ensures that the necessary files are on your disk and helps you avoid network conflicts. If you have already run the Installer twice, once with each protocol, you can switch protocols using the Colorwriter LSR Manager alone. 6 6-63 Installing Windows software 5. Select IPX and then click Next. 6. Enter the printer name exactly as it appears on the Configuration page, and then click Next. This entry is case-sensitive. The next window requests the printer’s IPX address. 7. Enter the IPX address exactly as it appears on the Configuration page. You can use the checkbox in this dialog box to set the Colorwriter as the default printer for the utilities. 6 6-64 8. Installing Windows software Click Finish. The LSR Manager’s main menu is redisplayed. To activate the Spooler or Downloader, either click the Spooler or Downloader button, or close the LSR Manager (by clicking Close) and then double-click one of the utility icons in the application group window. You are now ready to connect to the printer using the utilities. For more information on the utilities, see the User Guide. For information on the Color Reference files and the Color Profiles, see page 6-52. N OTE : If you are using a single network protocol, the utilities are now installed and configured; you can run them in other sessions without additional preparation. Using the Colorwriter LSR Manager with TCP/IP To configure the utilities for TCP/IP networks, the Colorwriter LSR Manager requires one additional item of network information: the DNS (Domain Name Services) or host name that your network administrator has given to the Colorwriter LSR. To use Colorwriter LSR utilities with TCP/IP networks, make sure that: • TCP/IP protocols are loaded and bound to the network driver of your computer. • TCP/IP is enabled in Network Setup in the Colorwriter control panel, and you have entered a valid IP address, with a gateway address and subnet mask, if they are used. • There is a domain name server on the network, configured with a host name and the IP address of the Colorwriter. If the network does not use Domain Name Services or a central name server, you must have a local hosts file with the same information on each Windows computer that will be running the utilities. A sample hosts file is supplied with the Windows operating system. 6 6-65 Installing Windows software T O ENTER YOUR TCP/IP NETWORK C OLORWRITER LSR UTILITIES : 1. SETTINGS FOR USE WITH THE Ask your network administrator for the domain server name or TCP/IP host name that was assigned to the Colorwriter. If there is no central name server, you can create a hosts file on your workstation and enter the Colorwriter IP address, together with a host name you assign to the Colorwriter. To create a local hosts file, follow the guidelines in the sample hosts file that came with your Windows operating system. Add the Colorwriter IP address and name to the end of the file. Do not enter any space characters on the line before your IP address entry. 2. Double-click the Colorwriter LSR Manager icon in the Digital Colorwriter LSR folder or program group. This folder or program group is already open if you just installed the Colorwriter LSR utilities. 6 6-66 3. Installing Windows software Click Next to begin the setup process. This window lists the Colorwriter printers in the current configuration file. If the Colorwriter LSR utilities have not been previously configured for a network, the Printers section of this window is blank. You may add the Colorwriter to the network, modify its current network configuration, or configure multiple 4. Click Add to enter a new network configuration. If you are modifying an existing setting, select the currently installed Colorwriter and then click Modify to change its configuration. You are prompted to select a network type. 6 6-67 Installing Windows software N OTE : The Colorwriter LSR Manager enables you to configure the utilities to use the TCP/IP protocol or the IPX/SPX protocol, and it also enables you to switch from using one protocol to the other. However, before you switch protocols, be sure to use the Installer to install the Colorwriter LSR utilities with the protocol you are planning to use, and then configure them with the Colorwriter LSR Manager. This ensures that the necessary files are on your disk and helps you avoid network conflicts. If you have already run the Installer twice, once with each protocol, you can switch protocols using the Colorwriter LSR Manager alone. 5. Select TCP/IP and then click Next. A dialog box requests the TCP/IP name of the printer. 6. Enter the TCP/IP name of the printer. Enter the DNS name or host name you obtained from your network administrator in step 1 of this procedure. Do not enter the IP address. You can use the checkbox in this dialog box to set the Colorwriter as the default printer for the utilities. 7. Click Finish. The LSR Manager’s main menu is redisplayed. To activate the Spooler or Downloader, either click the Spooler or Downloader button, or close the LSR Manager (by clicking Close) and then double-click one of the utility icons in the 6 6-68 Installing Windows software application group window. You are now ready to connect to the printer using the utilities. For more information on the utilities, see the User Guide. For more information on the Color Reference files and the Color Profiles, see page 6-52. N OTE : If you are using a single network protocol, the utilities are now installed and configured; you can run them in other sessions without additional preparation. Understanding the Colorwriter LSR Manager and the NET_WSCK.INI file The Colorwriter LSR Manager enables you to configure your Windows system so that the Colorwriter LSR utilities can function from your workstation. Information about your network is written to a configuration file (NET_WSCK.INI), and stored in the active System folder on your hard disk. When you run the Installer, a copy of NET_WSCK.INI is initially placed on your disk in one of two ways: • From the Install configuration file dialog box shown below, when you click Next (also see page 6-59). This places a default configuration file on your disk, which you can edit automatically with the Colorwriter LSR Manager, or you can edit manually. • When you click Browse from the same window, and select the file from another source. That source can be a floppy disk prepared by your network administrator. Using an administrator floppy disk ensures that all workstations on the network use the same configuration file. 6 6-69 Installing Windows software The NET_WSCK.INI is installed to the active Windows directory on your hard disk: For Windows 95 systems: c:\windows\ For Windows NT systems: c:\winnt35\ Running the Colorwriter LSR Manager automatically edits the NET_WSCK.INI file, adding network information about your printer that is necessary for running the Colorwriter LSR utilities. You can also edit the NET_WSCK.INI file by opening it in a text editor such as Microsoft Notepad. The NET_WSCK.INI file is annotated to explain the entries. After the Colorwriter LSR Manager edits a NET_WSCK.INI, the entries for a single Colorwriter are similar to one of the following examples: • For utilities on IPX networks: [ConfigServers] Server1=Colorwriter LSR [Colorwriter LSR] IPXAddr=00 00 FF FF 00 C0 85 FF FF FF Device1=DECcolor • For utilities on TCP/IP networks: [ConfigServers] Server1=Colorwriter LSR [Colorwriter LSR] ;IPXAddr=00 00 00 00 00 00 00 00 00 00 Device1=DECcolor N OTE : DECcolor is the required device name for this file. Do not change it. If the Colorwriter LSR utilities connect to the Colorwriter successfully, it means that the NET_WSCK.INI is correctly configured, and you can copy the file to other workstations that will run the utilities. 6 6-70 Installing Windows software N OTE : The utilities require one additional file, depending on the network type. When you run the Installer, it places a .DLL file for the network type you chose, in the system directory of your hard disk: • Utilities on IPX networks require a NET_WIPX.DLL file in the System directory. • Utilities on TCP/IP networks require a NET_WSCK.DLL file in the System directory. N OTE : If you run the Installer a second time, and choose a different network protocol, the second .DLL file is placed on your disk. Only one of these .DLL files should be active in your system at any time. If both files exist in your system directory with their original names, they conflict, and the Colorwriter LSR utilities do not function. N OTE : To manage the use of two network protocols, you should run the Colorwriter LSR Manager right after you install the utilities. When you run the Colorwriter LSR Manager, you choose the active network protocol for the utilities. If both .DLL files are present, the Colorwriter LSR Manager substitutes a tilde (~) for the last character in the .DLL filename for the network protocol you did not choose, making that .DLL file inactive and eliminating any conflict. If you decide later to switch protocols, run the Colorwriter LSR Manager again. If both .DLL files are present on your system, the Manager updates the configuration file and also switches the active network protocol. Installing the Monitor Setup file and Separation Tables The files in the Sep_tabl folder on the User Software CD are for use with Adobe Photoshop for Windows. These files provide EFICOLOR data conversions when Photoshop converts images from one mode to another, such as when it converts color data between RGB, Lab color, and CMYK color spaces. Mode conversions are commonly used when you use Photoshop to print an image specified in RGB mode to a printer (such as the Colorwriter) that uses CMYK toner colors. They are also used when you use Photoshop to save separations. 6 6-71 Installing Windows software EFICOLOR color conversions that involve RGB data should start with a standardized RGB color space. This is provided by the Calibrated RGB file, CALRGB.AMS, which is loaded into Photoshop’s Monitor Setup. TO INSTALL THE FILES FOR P HOTOSHOP : 1. Insert The User Software CD into the CD-ROM drive. 2. In the Windows File Manager, drag the three disk files (CLSR_P.AST, CLSR_S.AST, and CALRGB.AMS) into the Adobe Photoshop folder on your hard disk. 3. Start Adobe Photoshop. 4. Choose Preferences from the File menu, and choose Monitor Setup from the submenu. 5. In the Monitor Setup dialog box, click Load. In the dialog box that appears, select CALRGB.AMS and click Open. 6. Choose High from the Ambient Light pop-up menu, and click OK to apply the settings. 7. Choose Preferences from the File menu, and choose Separation Tables from the submenu. 8. Click Load, and in the dialog box that appears, select the separation table you want to load, and click Open to load it. The two separation tables for the Colorwriter are for Photographic rendering (CLSR_P.AST) and for Solid color rendering CLSR_S.AST). Photographic rendering is best for photographs and other images where tonal relationships are important. Solid color rendering is best when rendering individual colors accurately is more important than preserving tonal relationships. When you click OK, the Separation Tables dialog box appears with the name of the separation table you loaded. 9. Click OK. With the Calibrated RGB file and the separation table you loaded, the EFICOLOR conversion will be used for all separations until you load a different monitor setup and separation table, even if you exit Photoshop and reopen it. Index Symbols –/+ buttons, on density control panel 4-17 ↓ button, on printer control panel 4-3 ↑ button, on printer control panel 4-3 Numerics 10Base2 Ethernet cable 5-3 10Base5 Ethernet cable 5-3 10BaseT Ethernet cable 5-3 A A4 paper 1-4, 4-7 access limiting printer password 4-15 limiting Setup menu 4-4 accessories, ordering xiii AC outlet, plugging printer into 3-1 to 3-4 active ports, specifying 4-4 adaptor, for connecting to network 5-1 address, for TCP/IP printing 4-13 Adobe Photoshop installing separation tables files 6-14 to 6-15, 6-70 to 6-71 printer description file for 6-8 Adobe PostScript Level 2 1-4 Adobe PostScript Printer Driver 1-1, 1-3 installing for Macintosh 6-4 to 6-5 installing for Windows 6-41 to 6-43 Adobe Type 1 PostScript fonts 1-4 advancing cursor in printer control panel 4-2 Aldus PageMaker printer description file for 6-8 printing with 6-8 Windows version, printer description files for 6-50 Apple LaserWriter driver 1-1 Apple System software version supported 1-1 AppleTalk enabling 4-9 verifying connection from a Macintosh 6-5 verifying connection from a PC 6-7 AppleTalk network 1-3, 5-1 AppleTalk Zone setup option 4-10 applications Page Setup dialog box 6-49 Print dialog box 6-49 specifying paper source in 3-14 Windows, printer description files and 6-49 to 6-50 ASCII format, printing in 4-14 audience for this manual xii Auto Cascade paper source option 4-7 Auto Clear setup option 4-15 Auto Print setup option 4-15 Available Servrs setup option 4-11 B B5 paper 1-4 backspacing cursor in printer control panel 4-2 Berkeley lpd protocol 1-3 binary format, printing in 4-14 bindery context, activating 5-21 Black LED, on density control panel 4-17 blue bar, on universal paper cassette 3-11 buttons density control panel 4-17 to 4-18 printer control panel 4-2 This document was created with FrameMaker 4.0.4 I-2 Index C cables connecting/disconnecting xv interface 2-1 parallel 2-1 types supported 1-4 calibrated RGB file 6-14 to 6-15, 6-71 Cancel button 4-2 canceling printing jobs 4-2 carrying optional paper feeder unit 2-11 printer 2-7 caution sheet 2-1, 2-2 Centris. See Macintosh computers Centronics parallel port 1-4 CHANGE PASSWORD menu 4-4 Change Password option 4-15 changes, to documentation and software xiii changing system date/time 4-4 characters, deleting in text fields on printer control panel 4-2 chemicals, exposing printer to 2-6 Chooser, setting up printer in 6-5 to 6-6 cleaning oil spills 2-27 printer xvi clearing, job logs 4-15, 4-16 Clear Job Log option 4-16 CLEAR LOG/QUEUES menu 4-4 Clear Log/Queues option 4-16 Clear Queues 4-16 closing printer door 2-28 CLSR_P.AST separation table 6-71 CLSR_S.AST separation table 6-71 CMYK printing 4-7 color, specifying as default printing mode 4-7 color markers, in rotary unit 2-18 Color Mode setup option 4-7 color printing introduction xiii Color Reference files installing 6-9, 6-50 using 6-10, 6-52 color rendering dictionaries xi, 4-9 Color Select button, on density control panel 4-17 color select indicators, on density control panel 4-17 COLOR SELECT key 4-17 Colorwriter LSR 2000.P100 separation table 6-15 Colorwriter LSR 2000.S100 separation table 6-15 Colorwriter LSR 2000 v2015.108 PPD file, installing 6-4 Colorwriter LSR Downloader utility 1-5, 6-2, 6-3, 6-13, 6-55 Colorwriter LSR Manager utility 6-55, 6-60, 6-65, 6-68 using to launch utilities 6-64, 6-68 using with IPX networks 6-60 using with TCP/IP networks 6-65 Colorwriter LSR Spooler queues, user control of 4-15 to 4-16 Colorwriter LSR Spooler utility 1-5, 6-2, 6-3, 6-13, 6-55 configuration page, use of 4-4 configuring NetWare server 5-17 to 5-18 Connected Servrs option 4-11 connecting cables xv to printer 4-6 Windows 95 by IPX 5-29 connecting printer 5-1 to 5-2, 5-3 connector, parallel port 5-1 consumables, installing 2-15 to 2-28 See also drum cartridge; silicone oil bottle; toner cartridges; waste toner bottle I-3 Index contents optional paper feeder unit package 2-8 controller xi controlling job log 4-15 control panels. See density control panel; printer control panel copying printer description files 6-49 to 6-50 cover pages (job summaries), printing 4-5 covers, opening xvi CPU, in printer 1-4 CRDs xi, 4-9 cursor, moving in setup menus 4-2 customers, providing printer description files to 6-49 customizing printer settings 6-13, 6-55 Cyan LED, on density control panel 4-17 D date, changing 4-4 decrementing text characters on printer control panel 4-2 DECXM-AA adaptor 5-1 Default (page) size setup option 4-7 Default CRD setup option 4-9 deleting print jobs 6-13, 6-55 queued jobs 4-16 density control panel 4-17 to 4-18 See also printer control panel Density gauge, on density control panel 4-17 disconnecting power cord 3-4 disk space, for job log file 4-15 displaying setup menus 4-2 disposing of consumables’ packaging xvi distributing toner 2-17 DNS (Domain Name Services) name 6-64, 6-67 documentation xiii, 2-1 door closing 2-28 opening 2-15 dots per inch (dpi), of printer 1-4 downloading Encapsulated PostScript files 6-13, 6-55 drivers Adobe PostScript Printer Driver 6-2, 6-3 installing for Windows 95 6-18 to 6-25 installing for Windows NT 6-26 to 6-30 drum cartridge 2-1 door, opening 2-21 exposure to light 2-20 illustrated 2-2 installing 2-20 to 2-23 preventing scratches on 2-22 dust, exposing printer to 2-6 E electric shock symbol xvi Enable AppleTalk setup option 4-9 Enable Direct setup option 4-6 Enable Hold (queue) setup option 4-7 Enable IPX setup option 4-10 Enable Parallel (port) setup option 4-14 Enable Printed queue setup option 4-7 Enable Queues setup option 4-7 Enable TCP/IP setup option 4-13 enabling/disabling connecting to printer 4-6 printing to Printed queue 4-7 queues 4-7 Encapsulated PostScript files, downloading to printer 6-13, 6-55 end-of-file (EOF) messages, ignoring 4-14 Energy Star compliance xvii Enter button 4-3 I-4 Index Enter button, on density control panel 4-17, 4-18 Enter button, on printer control panel 4-2 envelopes, printing on 3-7 error, printer control panel activity light 4-1 error reporting, language of 4-6 /etc/printcap file 5-7 Ethernet cable, types supported 5-3 Ethernet Frame Type 4-10 EtherTalk Phase 2 1-1 exiting Setup menu 4-3 extension cords, using xv, 3-4 Extensions folder 6-8 exterior of printer xiv H F IBM personal computer. See Windows computer Ignore EOF setup option 4-14 ignoring end-of-file (EOF) messages 4-14 incrementing characters on printer control panel 4-2 inhalation slot xv inserting locking pins 2-13 installation, verifying parallel interface 5-2 installer 1-2 for Macintosh CMYK Color Reference PostScript file 6-2 for Macintosh printer files 6-2 for Windows CMYK Color Reference PostScript file 6-3 installing Adobe PostScript Printer Driver (Macintosh) 6-4 Adobe PostScript Printer Driver (Windows) 6-41 to 6-43 calibrated RGB file 6-14 to 6-15, 6-71 drum cartridge 2-20 to 2-23 optional paper feeder unit 2-9 to 2-14 printer 2-15 to 2-28 Fiery controller xi Fiery Print Calibrator 6-13 file server password 4-11 specifying login 4-11 File Server Login setup option 4-11 filling paper tray. See loading paper filter, ozone xvii fixing assembly 2-26 flame, avoiding exposing printer to 2-6 fonts Adobe Type 1 PostScript 1-4 enabling access by users 4-6 installing for printer 6-15 to 6-16 See also screen fonts Frame Type, IPX for Windows 95 5-30 G Gateway Address setup option 4-14 gauging amount of paper in universal cassette 3-11 grayscale, specifying as default printing mode 4-7 grounding type plug xvi handling printer xiv silicone oil bottle 2-27 toner cartridges 2-16 heat, avoiding placing printer near 2-5 Hold queue clearing jobs from 4-4 enabling/disabling users to print to 4-7 host name 6-64 hosts file 6-64, 6-65 humidifiers, effect on printer 2-6 humidity 2-5 I I-5 Index installing (continued) separation tables 6-14 to 6-15, 6-70 to 6-71 silicone oil bottle 2-26 to 2-27 software (Macintosh) 6-4 to 6-16 software (Windows) 6-17 to 6-71 toner cartridges 2-15 to 2-19 utilities (Macintosh) 6-9 to 6-13 utilities (Windows) 6-55 to 6-70 waste toner bottle 2-24 to 2-25 Windows 3.x printer driver file 6-43 to 6-45 Windows 95 PostScript driver 6-18 to 6-25 Windows NT PostScript driver 6-26 to 6-30 Windows NT printing with IPX 6-38 interface cables 1-1, 1-2, 2-1 internet address, obtaining 5-4 interpreter xiii IP Address obtaining 5-4 relationship to subnet mask 4-13 IP Address setup option 4-13 IPX (Novell) available file servers 4-11 connected file servers 4-11 file server list 4-10 Frame Type 4-10 NetWare client setup 5-25, 6-47 to 6-49 NetWare server setup 5-18 to 5-21 overview 5-17 printing with 6-24 to 6-25 selecting Colorwriter queue 4-12 setting bindery context 5-18 to 5-21 Windows 95 IPX/SPX 5-29 IPX (Novell) networks 1-3, 4-10, 5-1 IPX (Novell) printing specifying a file server login 4-11 specifying poll interval 4-12 specifying print server for 4-12 with Windows NT 6-37 IPX Frame type setup option 4-10 IPX Setting option 4-10 IRIX5 5-6 J jams. See paper jams job accounting information 6-13, 6-55 job log clearing automatically 4-15 controlling 4-15 printing automatically 4-15 specifying settings from printer control panel 4-4 JOB LOG SETUP menu 4-4 Job Log Setup menu 4-15 job name, of current print job 3-5 jobs canceling oldest 4-2 deleting from printer queues 4-16 Jobs To Save setup option 4-7 job summaries, printing 4-5 L label, voltage rating xv labels, printing on 3-7 latch, on photosensitive drum cartridge 2-23 LCD, precautions for handling liquid xvi LCD window 4-2 legal size paper 1-4 letter size paper 1-4 specifying as default 4-7 life expectancy, of toner cartridges 2-19 lifting optional paper feeder unit 2-11 printer 2-7 light, exposing drum to 2-20 lights, on printer control panel 4-1 to 4-2 liquid crystal display. See LCD I-6 Index loading paper 3-10 to 3-11 transparency film 3-7 Local Messages setup option 4-6 location, choosing for printer xiv, 2-5 locking pins illustrated 2-9 inserting 2-13 login, specifying for file server 4-11 logs, clearing 4-16 lower/upper paper cassette selected light 4-2 Low Toner Error setup option 4-5 lpd (TCP/IP) 5-4 displaying the queue 5-15 for Silicon Graphics workstations 5-6 platforms supporting printer 5-4 printing 5-15 print queues 5-5 setting up system 5-6 setup summary 5-5 memory upgrade kit 2-1 Menu button 4-2, 4-3 menu entry, displaying next/previous 4-2 messages end-of-file (EOF), ignoring 4-14 Microsoft Windows Printer Description (WPD) file 1-3 Microsoft Windows system software 1-2 moisture, exposing printer to xiv, 2-6 Monitor Setup file 6-14, 6-70 mouse devices 1-2 moving optional paper feeder unit 2-11 PostScript Printer Description files 6-8 printer xiv, 2-7 printer description files 6-8 MS-DOS 1-2 multipurpose tray, using for transparency film 3-7 multipurpose tray activity light 4-2 M N Macintosh computers installing software on 6-4 to 6-16 printing test page from 6-7 selecting printer from 6-5 to 6-6 on TCP/IP network 5-15 using printer with 1-1 verifying AppleTalk connection from 6-5 Macintosh files, on User Software CD 6-2 Magenta LED, on density control panel 4-17 magnetic fields, exposing printer to 2-6 Main Tray paper source option 4-7 managing printer fonts 6-13, 6-55 manuals xiii, 2-1 Manual Tray paper source option 4-7 margin (side), adjusting 3-14 to 3-15 media attachment unit (MAU) 5-3 media pack 2-1 names, server 5-18 NetWare network port with Windows 95 5-31 NetWare 4.x bindery context 5-18 NetWare client setup Windows 95 5-29 NetWare File Server 5-22 NetWare Print Console 5-22 NetWare Print Server 5-23 NetWare queue 5-23 NetWare server 4-13 configuring 5-17 to 5-18 setting up 5-22 to 5-24 network protocols 5-1 choosing for utilities 6-62, 6-66, 6-67 RFC1179 1-3 specifying 4-4 supported 1-4 I-7 Index networks connecting to Novell 5-27 to 5-28 Enable AppleTalk option 4-9 printer port selection and 6-46 to 6-47 specifying printer name on 4-4 verifying (Macintosh) 6-5 verifying (PC) 6-7 network settings, specifying from printer control panel 4-4 NETWORK SETUP menu 4-4 Network Setup menu 4-9 to 4-14 Enable AppleTalk option 4-9, 4-10 Enable IPX option 4-10 Enable Parallel option 4-14 Enable TCP/IP option 4-13 File Server Login option 4-11 Gateway Address option 4-14 Ignore EOF option 4-14 IP Address option 4-13 Password option 4-11, 4-12 Poll Interval option 4-12 Print Server option 4-12 Subnet Mask option 4-13 Timeout option 4-14 network-specific information, setting 4-9 to 4-14 NET_WSCK.INI file 6-59, 6-60, 6-68 Next button 4-2 Novell NetWare software See also NetWare Novell network, connecting to 5-27 to 5-28 Novell server, specifying poll interval for printer 4-12 O oil bottle. See silicone oil bottle oil pump 2-1, 2-2 oil recycle bottle, illustrated 2-2 Online activity light 4-1 Online button 4-2 on/off switch 3-6 opening drum cartridge door 2-21 printer covers xvi printer door 2-15 operator intervention, printer control panel activity light 4-1 optional paper feeder unit 3-8 adjusting side margin 3-14 to 3-15 attaching 2-8 to 2-14 illustrated 2-9 installing 2-9 to 2-14 plugging into printer 3-2 positioning poles on 2-12 removing spacers from 2-10 weight of 2-11 Optional Tray paper source option 4-7 options, selecting on printer control panel 4-3 ordering accessories xiii overheating xv ozone emission xvii P PageMaker. See Aldus PageMaker Page Setup dialog boxes, PostScript Printer Description files 6-8 pages. See test pages paper avoiding jams 3-10 estimating amount in cassette 3-11 increasing supply of 3-8 loading into universal paper cassette 3-10 to 3-11 multipurpose tray activity light 4-2 printer control panel activity lights 4-1 setting size of 3-9 sizes supported 1-4 specifying default size 4-7 specifying source of 3-14, 4-7 I-8 Index paper amount indicator, reading 3-11 paper cassette (lower/upper) selected, printer control panel activity light 4-1, 4-2 paper feeder unit. See optional paper feeder unit paper jams, avoiding 3-10 paper length guide, in universal paper cassette 3-9 paper limit mark 3-10 Paper source setup option 4-7 paper width guide, in universal paper cassette 3-9 parallel cable 2-1, 5-1 to 5-2 parallel interface, verifying installation of 5-2 parallel port 1-4 printing with 4-14, 6-22 to 6-24 parallel port connector 5-1 password changing for printer 4-15 to 4-16 changing on printer control panel 4-4 Password (NetWare file server) setup option 4-11 Password (NetWare print server) setup option 4-12 PC, verifying AppleTalk connection from 6-7 PC computers printing test page from 6-24 PDF. See printer description files Performa. See Macintosh computers personal computers. See Windows computers photosensitive drum. See drum cartridge Photoshop. See Adobe Photoshop plug xvi plugging in printer 3-1 to 3-4 Poll Interval setup option 4-12 positioning poles 2-12 PostScript errors, printing up to 4-5 PostScript interpreter xiii PostScript Language Printer Addendum xiii PostScript Level 2 installing features 6-24 to 6-25, 6-41 to 6-45 PostScript Printer Description (PPD) files 5-18 installing 6-4 Macintosh 1-2 purpose of 6-8 Windows 1-3 PostScript Printer Driver version 8.x 6-8 power cord 2-1 disconnecting 3-4 illustrated 2-2 plugging in 3-1 to 3-3 powering down printer 3-5 Power Macintosh. See Macintosh computers Power Saver Mode setup option 4-6 power switch, using 3-5 PPD files. See PostScript Printer Description (PPD) files precautions xiv to xvii Previous button 4-2 printcap file 5-7 Print Cover Page setup option 4-5 Print dialog boxes, and PostScript Printer Description files 6-8 Printed Queues clearing jobs from 4-4 enabling/disabling 4-7 specifying number of jobs stored in 4-7 printer control panel activity lights 4-1 to 4-2 buttons 4-2 Change Password option 4-15 to 4-16 changing password to Setup menus 4-4 I-9 Index printer control panel (continued) clearing jobs from queues from 4-4 Clear Log/Queues option 4-16 illustrated 4-1 Job Log Setup menu 4-15 Network Setup menu 4-9 to 4-14 Printer Setup menu 4-6 to 4-7 specifying job log settings from 4-4 specifying network settings from 4-4 specifying printer settings from 4-4 specifying system settings from 4-4 System Setup menu 4-4 to 4-5 See also density control panel printer description files for Adobe Photoshop 6-8 for Aldus PageMaker 6-8 and applications 6-49 to 6-50 appropriate location 6-8 copying 6-49 to 6-50 moving 6-8 providing to customers 6-49 for QuarkXPress 6-8 printer drivers installing 6-4 Macintosh 1-1 and printer description files 6-8 Windows 1-3 See also Adobe PostScript Printer Driver printer files, Read Me files for xiii printer fonts, managing 6-13, 6-55 printer name, specifying 4-4 Printer name setup option 4-4 printer port, selecting 6-46 to 6-47 printer settings customizing 6-13, 6-55 specifying on printer control panel 4-4 Printer Setup menu 4-6 to 4-7 Color Mode option 4-7 Default Size option 4-7 Enable Direct option 4-6 Enable Hold (queue) option 4-7 Enable Printed (queue) option 4-7 Enable Queues option 4-7 Jobs To Save option 4-7 Paper Source option 4-7 PRINTER SETUP menu, option in printer control panel 4-4 Printers window (Windows) 6-44 printing configuration page before changing setup 4-4 cover pages (job summaries) 4-5 on envelopes 3-7 to Hold queue 4-7 ignoring end-of-file (EOF) messages 4-14 indicated by printer control panel activity light 4-1 job log 4-15 job won’t print 3-7 with parallel port 4-14, 6-22 to 6-24 PostScript errors in 4-5 to Printed queue 4-7 to queues 4-7 specifying default paper size 4-7 specifying paper source 4-7 start page 4-5 suspend/resume 4-2 test page from a Macintosh 6-7 test page from Windows 95 6-24 test pages 3-12 to 3-15 with IPX (Novell) 6-24 to 6-25 Printing, status message on printer control panel 3-5 I-10 Index printing software Windows 1-3 Windows 95/Windows NT 1-3 print jobs deleting from queue 4-16, 6-13, 6-55 moving between queues 6-13, 6-55 PostScript errors in 4-5 and timeout 4-14 viewing order/priority of 6-13, 6-55 Print message 4-2 Print Pages menu 4-2 print queues clearing jobs from 4-4 defined 5-17 NetWare server 5-23 Print Server (NetWare) setup option 4-12 print server password 4-12 print side of paper 3-10 print speed xi Print Start Page setup option 4-5 Print to PS Error setup option 4-5 privileges 5-15 processed jobs clearing record of 4-15 printing 4-15 processing, printer control panel activity light 4-1 Processing, status message on printer control panel 3-5 Process message 4-2 productivity xi protocols, network 5-1 lpd (TCP/IP) 5-4, 5-5 RFC1179 1-3 PSCRIPT.DRV file 6-45 Q Quadra. See Macintosh computers QuarkXPress printing with 6-8 Windows version, printer description files for 6-50 queued jobs, deleting 4-16 queues clearing on printer control panel 4-4 deleting jobs from 4-16 enabling/disabling users to print to 4-7 moving jobs between 6-13 on NetWare server 5-23 Quick Reference Card xiii R rails, in drum compartment 2-22 RAM. See random access memory random access memory in printer 1-4 requirements for Macintoshes 1-1 reading paper amount indicator 3-11 Read Me files xiii Ready, status message on printer control panel 3-5 receiving data, printer control panel activity light 4-1 redistributing toner 2-17 registration card 2-1 release button, in universal paper cassette 3-9 Release Notes xiii removing printer covers xvi universal paper cassette 3-8 I-11 Index requirements Macintosh 1-1 printer 1-1 to 1-3 space for printer 2-5 for TCP/IP network 1-3 for UNIX workstations 1-3 Windows 1-2 to 1-3 Windows 95/Windows NT 1-2 Windows printer driver 1-3 resetting printer 3-6 resolution, of printer 1-4 resume/suspend printing button 4-2 RFC1179 protocol 1-3 RJ-45 connector 5-3 rocking toner cartridges 2-17 room temperature 2-5 rotary cycle 2-18 rotary unit 2-15, 2-18 S safety information xiv to xvii safety information sheet 2-1, 2-2 safety instructions xiv to xvii sample color files 6-2, 6-3 scratches, preventing on drum cartridge 2-22 screen fonts installing for Macintosh 6-16 Read Me files for xiii Scroll up/down buttons 4-2 Select FS setup option 4-13 selecting choices in printer control panel 4-2 options on printer control panel 4-3 printer from a Macintosh 6-5 to 6-6 Select Queue, IPX setup option 4-12 separation tables installing 6-14 to 6-15, 6-70 to 6-71 server names 5-18 servers polled by printer 4-12 specifying login 4-11 servicing printer xvi setting paper size 3-9 Power Saver Mode 4-6 printer-specific information 4-6 to 4-7 system date 4-4 system time 4-4 setting up NetWare server 5-22 to 5-24 PostScript Level 2 printing 6-41 to 6-45 printer xv to xvi, 6-5 to 6-6 printer to use PostScript Level 2 6-24 to 6-25 printer to use PostScript Level 2 features 6-40 to 6-45 Setup menu exiting 4-3 scrolling through options 4-3 setup menus displaying 4-2 moving cursor 4-2 setup options, enabling users to modify 4-15 to 4-16 side margin, adjusting 3-14 to 3-15 side margin adjustment dial 3-14 silicone oil cleaning spills 2-27 precautions for moving printer 2-7 silicone oil bottle xvi, 2-1 illustrated 2-2 installing 2-26 to 2-27 silicone oil box, disposing xvi silicone oil recycle bottle, illustrated 2-1 Silicon Graphics workstations 5-6 I-12 Index size guide, in universal paper cassette 3-9 smoke, avoiding exposing printer to 2-6 software changes to xiii Macintosh, installing 6-4 to 6-16 Read Me files for xiii TCP/IP requirements 1-3 Windows, installing 6-17 to 6-71 See also user software disks; user software CD space requirements of printer 2-5 spacers, removing 2-10 specifications, printer 1-4 specifying AppleTalk zone 4-10 color/grayscale mode 4-7 file server login 4-11 file server password 4-11 Gateway Address 4-14 IP Address option 4-13 IPX option 4-10 number of jobs stored in Printed Queues 4-7 paper size (default) 4-7 paper source 4-7 password for IPX networks 4-12 printer name 4-4 print server for IPX networks 4-12 subnet mask for TCP/IP printing 4-13 time printer waits for data 4-14 speed, printer xi spool directory, UNIX server 5-7 start page, printing on startup 4-5 startup, printing start page 4-5 steam, avoiding exposing printer to 2-6 Subnet mask setup option 4-13 sunlight, avoiding exposing printer to 2-6 superuser privileges 5-15 supplies, ordering xiii suspend/resume printing button 4-2 swatches 6-2, 6-3 system administrators xii, 5-15 system date, changing 4-4 System Date setup option 4-4 System Folder 6-8 system requirements 1-1 to 1-3 system settings, specifying on printer control panel 4-4 SYSTEM SETUP menu 4-4 System Setup menu 4-4 to 4-5 Date setup option 4-4 Print Cover Page option 4-5 Printer Name option 4-4 Print Start Page option 4-5 Print To PS Error option 4-5 System Time option 4-4 system software requirement Apple 1-1 Windows 1-2 system time, changing 4-4 System time setup option 4-4 T TCP/IP 5-4 TCP/IP network 1-3, 5-1 enabling/disabling 4-13 requirements 1-3 TCP/IP printing specifying gateway address 4-14 specifying subnet mask for 4-13 temperature, of room 2-5 temperature changes, effect on printer 2-6 10Base2 Ethernet cable 5-3 10Base5 Ethernet cable 5-3 10BaseT Ethernet cable 5-3 test pages printing 3-12 to 3-15 printing from a Macintosh 6-7 printing from Windows 95 6-24 using to adjust side margin 3-15 I-13 Index Test Print button, on density control panel 4-17, 4-18 test print page, printing 4-18 text, deleting in text fields on printer control panel 4-2 thicknet cable 1-4, 5-3 thinnet cable 1-4, 5-3 tilting printer 2-7 time, changing 4-4 Timeout setup option 4-14 toner 2-15 distributing/redistributing 2-17 excess 2-24 printer behavior when low 4-5 toner cartridges 2-1 handling 2-16 illustrated 2-2 inserting in rotary unit 2-15 installing 2-15 to 2-19 life expectancy 2-19 verifying correct insertion 2-19 transfer drum release handle, illustrated 2-20 transparency film, loading 3-7 troubleshooting xiii file doesn’t print 5-2 job won’t print 3-7 turning on/off printer 3-5 twisted pair cable 1-4, 5-3 connecting to printer 5-3 Type 1 PostScript fonts 1-4 UNIX workstations printing from 5-15 setting up 5-6 system requirements 1-3 unpacking printer xv to xvi, 2-3, 2-29 upgrades, memory 2-1 upper/lower paper cassette selected, printer control panel activity light 4-1 User Guide xiii users xii user software CD contents of 6-1 to 6-3 user software disks 1-1 utilities 1-5 avoiding network conflicts 6-62, 6-67 Colorwriter LSR Downloader (Macintosh) 6-13 Colorwriter LSR Downloader (Windows) 6-55 Colorwriter LSR Manager (Windows only) 6-55, 6-60, 6-65, 6-68 Colorwriter LSR Spooler (Macintosh) 6-13 Colorwriter LSR Spooler (Windows) 6-55 Macintosh, installing 6-9 to 6-13 for printing Aldus PageMaker files 6-8 for printing QuarkXPress files 6-8 Windows, installing 6-55 to 6-70 V U universal paper cassette 2-1 blue bar indicator 3-11 illustrated 2-9 loading paper 3-10 to 3-11 paper length guide 3-9 paper sizes and amounts 3-7 paper width guide 3-9 removing 3-8 setting paper size 3-9 valid IP address 4-13 ventilation xvii, 2-5 ventilation slots xv verifying AppleTalk connection from a Macintosh 6-5 AppleTalk connection from a PC 6-7 parallel interface installation 5-2 vibration, exposing printer to 2-6 I-14 Index viewing job accounting information 6-13, 6-55 order/priority of print jobs 6-13, 6-55 voltage rating, checking 3-1 voltage rating label xv voltage symbol xvi W warnings xiv to xvii warranty card 2-1 waste toner bottle xvi, 2-1 illustrated 2-2 installing 2-24 to 2-25 waste toner box, disposing xvi weight optional paper feeder unit 2-11 printer xiv, 2-7 Windows 3.x printer driver file installing 6-43 to 6-45 Windows 95 IPX/SPX 5-29 Windows 95 printing software 1-3 setting up printing with 6-18 to 6-25 system requirements 1-2 user software files for 6-17 Windows computers printer use with 1-2 to 1-3 Windows files, on User Software CD 6-3 Windows NT adding Services for Macintosh to server 6-36 setting up printing with 6-26 to 6-40 setting up server to print to a Colorwriter 6-35 to 6-37 user software files for 6-17 Windows NT printing software 1-3 system requirements 1-2 Windows PostScript printing setup, completing 6-46 to 6-49 Windows printer, setting up IPX (Novell) 5-25, 5-28 Windows printing software 1-3 Windows software, installing 6-17 to 6-71 Windows system software 1-2 WPD file. See Microsoft Windows Printer Description (WPD) file Y Yellow LED, on density control panel 4-17 Z zones, AppleTalk 4-10