1
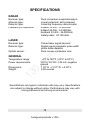
PHONES
(044) 360-7-130
(050) 336-0-130
(063) 788-0-130
(067) 233-0-130
(068) 282-0-130
Internet store of
autogoods
ICQ
294-0-130
597-0-130
SKYPE
km-130
CAR RECEIVERS — Receivers • Media receivers and stations • Native receivers • CD/DVD changers • FM-modulators/USB adapters • Flash memory • Facia plates and adapters • Antennas • Accessories |
CAR AUDIO — Car audio speakers • Amplifiers • Subwoofers • Processors • Crossovers • Headphones • Accessories | TRIP COMPUTERS — Universal computers • Model computers • Accessories |
GPS NAVIGATORS — Portable GPS • Built-in GPS • GPS modules • GPS trackers • Antennas for GPS navigators • Accessories | VIDEO — DVR • TV sets and monitors • Car TV tuners • Cameras • Videomodules
• Transcoders • Car TV antennas • Accessories | SECURITY SYSTEMS — Car alarms • Bike alarms • Mechanical blockers • Immobilizers • Sensors • Accessories | OPTIC AND LIGHT — Xenon • Bixenon • Lamps
• LED • Stroboscopes • Optic and Headlights • Washers • Light, rain sensors • Accessories | PARKTRONICS AND MIRRORS — Rear parktronics • Front parktronics • Combined parktronics • Rear-view mirrors
• Accessories | HEATING AND COOLING — Seat heaters • Mirrors heaters • Screen-wipers heaters • Engine heaters • Auto-refrigerators • Air conditioning units • Accessories | TUNING — Vibro-isolation
• Noise-isolation • Tint films • Accessories | ACCESSORIES — Radar-detectors • Handsfree, Bluetooth • Windowlifters • Compressors • Beeps, loudspeakers • Measuring instruments • Cleaners • Carsits
• Miscellaneous | MOUNTING — Installation kits • Upholstery • Grilles • Tubes • Cable and wire • Tools • Miscellaneous | POWER — Batteries • Converters • Start-charging equipment • Capacitors
• Accessories | MARINE AUDIO AND ELECTRONICS — Marine receivers • Marine audio speakers • Marine subwoofers • Marine amplifiers • Accessories | CAR CARE PRODUCTS — Additives • Washer fluid •
Care accessories • Car polish • Flavors • Adhesives and sealants | LIQUID AND OIL — Motor oil • Transmission oil • Brake fluid • Antifreeze • Technical lubricant
In store "130" you can find and buy almost all necessary goods for your auto in
Kyiv and other cities, delivery by ground and postal services. Our experienced
consultants will provide you with exhaustive information and help you to chose
the very particular thing. We are waiting for you at the address
http://130.com.ua
CRUNCH 217B
13
0.
co
m
.u
a
All BLACK line Crunch radar-detectors are made on
the basis of the newest SAMSUNG microprocessors,
which makes possible to significantly decrease
percentage of false alarms
OPERATION MANUAL
VG2, X-, K-, Superwide Ka-Band
Radar and Laser detector
Autogood products «130»
CONGRATULATIONS!
.u
a
You have acquired the CRUNCH 217B, the newest
radar/laser detector.
The CRUNCH 217B incorporates the advanced new
antenna technology and extremely low power-consuming
circuitry to ensure top-class performance.
The CRUNCH 217B is a complete integrated laser/radar
detector, which detects all police radar guns, including
Ultra-X and Ultra-K pulse mode radars, as well as laser guns.
Besides, CRUNCH 217B is able to detect signals of VG-2
(devices detecting radar-detectors).
m
CONTENTS
13
0.
co
PACKAGE CONTENTS ....................................................2
IDENTIFYING PARTS OF THE UNIT ...............................3
BASIC FEATURES............................................................3
INSTALLING THE UNIT ....................................................4
RADAR OPERATION ........................................................6
TROUBLESHOOTING ....................................................13
SPECIFICATIONS ..........................................................14
PACKAGE CONTENTS
Your CRUNCH 217B package includes the following
components:
•
The CRUNCH 217B radar/laser detector
•
Coiled 12-volt DC power cord
•
Windshield mounting bracket with 3pcs suction cups
2
Autogood products «130»
•
•
Dashboard mounting hook and loop fasteners (1ea)
Operation manual
co
Compass
periscope
m
.u
a
IDENTIFYING PARTS OF THE UNIT
13
0.
Detector
display
Mounting bracket
Radar receiver
Front Laser
Suction cups
Hook-and-loop
Power cord fastener
3
Autogood products «130»
BASIC FEATURES
0.
co
m
.u
a
• protection against all radar bands (X, K, and superwide
Ka)
• 360° laser coverage against all laser guns
• invisible to all radar detector sensing devices (VG-2 and
Specter)
• POP™ Mode and PULSE signal Detection capabilities
• four separate modes: Highway1(H1) - Highway2(H2) City1(C1) - City2(C2) to eliminate false radar alerts
• user selectable brightness and mute on/off
• Volume control wheel with power on/off switch
• LED-BACKLIT text display
• tutorial mode to demonstrate operations
• memory to retain previously set operational modes after
power-off
• corded power connection into 12-volt car lighter socket
13
INSTALLING THE UNIT
Mounting guidelines
The CRUNCH 217B can be mounted on your windshield or
dashboard using the mounting bracket or hook and loop
fastener provided.
• Mount on the windshield in a centered location that will
not obstruct the view of the driver and is within reach, so
the buttons can be easily accessed.
• Do not mount behind windshield wipers, metal surfaces,
ornaments, or mirrored sunscreen glass, as these affect
radar/laser signals. Tinted glass does not affect
radar/laser signal reception.
4
Autogood products «130»
Conceal the CRUNCH 217B when you leave your vehicle to
prevent theft and to minimize the unit's exposure to extreme
temperatures, which can temporarily impair performance.
Windshield mounting
2.
6.
13
0.
5.
co
4.
m
.u
3.
Install the suction cups onto the
windshield mounting bracket by sliding
them into their holes (if not
pre-installed).
Press the bracket base firmly against
the
windshield
until
the suction cups securely take hold.
Slide the unit up to the bracket until the
bracket arms click into the slots on both sides of the
unit.
Bend the angle of the windshield mounting bracket, if
necessary, to adjust for best viewing and detection
angle.
When you want to connect power from your vehicle,
plug the small connector of the power cord into the
12-voltDC power input jack located on the side of the
detector.
Plug the large adapter of the power cord into the lighter
socket of your vehicle.
a
1.
Dashboard mounting
1.
2.
Select an area relatively level, clean, and dry. Adhere
one part of the enclosed hook-and-loop fastener to this
area and the other part to the bottom of the unit.
Fasten the unit to the area by placing the hook-and-loop
pieces together.
Connecting the Power
5
Autogood products «130»
a
The detector is designed to operate on most DC12V
negative ground vehicle electrical systems. The power cord
provided with the detector has a cigarette lighter socket plug
at one end and a small connector at the other.
1. Insert the small connector into the jack on the side of the
detector.
2. Insert the other end into the cigarette lighter socket of
your vehicle.
If the detector does not operate when you turn it on, remove
the adapter from the cigarette lighter socket and carefully
check the socket for debris. Also, check the fuse in the
adapter and your vehicle's fuse box.
.u
Replacing the Fuse
13
0.
co
m
If the detector CRUNCH stops operating, the fuse in the
cigarette lighter plug might be blown. If it has blown, follow
these steps to replace it:
1. To replace the fuse, unscrew the top of the plug.
2. Remove the fuse and check the fuse to see if it has
blown. If it has, replace it.
RADAR OPERATION
Power & Volume control
Plug the adapter of the provided 12V DC power cord into
the lighter of your vehicle, and plug the small connector at the
other end of the 12V DC power cord into the power jack of
your detector. This will send power to the detector when your
vehicle is running. To turn on the detector, rotate the wheel
6
Autogood products «130»
controller (located on the side of the detector) until you hear it
click. To turn off the detector, rotate the wheel controller in the
opposite direction until it clicks again. You can also use the
controller to adjust the volume level by turning it up or down
within the range that it does not click.
Brightness Control
.u
a
Press DIM repeatedly to toggle between 4 different display
brightness levels: BRIGHT - DIM - DIMMER - DARK
When signals are detected, alerts are always displayed in
BRIGHT
mode.
The display returns to the previously selected brightness
level after alerts disappear.
m
Mute on/off selection (mute mode)
13
0.
co
Press the MUTE button repeatedly for less than two
seconds each time to toggle between mute on and mute off.
Mute on will silence the audio alarm for the remainder of an
existing signal and for any new alert received within 30
seconds of the last signal. Then the unit automatically resets
itself to mute off, so the next signal threat can be received.
Mute off manually restores the audio alert.
You may also adjust the audio level by using the volume
thumb wheel.
Auto Audio Control
With AUTO AUDIO, the detector reports with reduced audio
alarms for any alerts that last longer than 5 seconds. It holds
the reduced audio level for any new alerts that follow within
60 seconds of the alert that turned AUTO AUDIO on.
7
Autogood products «130»
Highway/city mode selection
.u
a
Press the CITY button repeatedly for less than two seconds
each time to toggle through four signal sensitivity modes.
They are: Highway1(H1) - Highway2(H2) - City1(C1) City2(C2). The factory default mode is H1. H2 is activated
with one beep, C1with two, C2 with three, and H1 is reset with
four beeps.
The detector detects all radar band (X, K, Ka) signals at
H1and C1, while it detects only K and Ka band signals at H2
and C2. Also, it detects with full sensitivities in both highway
modes and with reduced sensitivities in both city modes. It
detects laser signals at all times regardless of these highway
and city modes.
See following illustrations:
Н
co
Н
Highway mode 2
m
Highway mode 1
City mode 2
С
2
13
C
0.
City mode 1
2
X-band, occupied by police radar, is also shared for other
uses, such as automatic door openers like the ones used at
supermarkets, burglar alarms, terrestrial microwave
emission, RF braking systems, and other devices. In addition,
other radar detectors in close proximity may falsely alert your
detector.
Compass Calibration
Press and hold the CALIBRATE button (= CITY button) for
more than 2 seconds to access compass calibration mode.
The calibration mode starts with one beep. The detector
8
Autogood products «130»
flashes the 4 compass LEDs one after another (clockwise)
until the calibration is completed.
Perform the calibration on a level surface, following these
steps:
13
0.
co
m
.u
a
• Turn the detector on. (See Power & Volume Control.)
• Mount the detector on the windshield or the dashboard in
your vehicle. (See INSTALLING THE DETECTOR.)
• Press and hold the CALIBRATE button (CITY button)
until you see the detector flashing the compass LEDs
clockwise, one after another.
• Drive your vehicle in two circles. The size of the circles
and the direction that you drive does not matter. The
circles do not need to be perfect circles but must be
completed in the same direction. Each circle should take
a minimum of 20 seconds but no more than 1 minute to
complete.
• Press the CALIBRATE button (CITY button).The detector
will end the compass calibration in two beeps and with
the 4 compass LEDs flashing twice altogether. The
compass screen will indicate which direction your
vehicle is pointing. Calibration is now complete.
While the detector is calibrating, the front screen will remain
completely blacked out.
• When to Calibrate: The compass must be calibrated:
- When the detector is used for the first time in a vehicle,
and
- When the detector is mounted in a new location.
• Compass Display: The compass periscope displays 8
cardinal points.
Tutorial mode
9
Autogood products «130»
The CRUNCH 217B has a tutorial mode intended to
familiarize you with the various visual displays and distinct
audible alerts the unit performs. Perform the following steps
to begin the tutorial mode:
1. Turn the detector on while holding the CITY button and
the detector will demonstrate how it operates when
each radar and laser band signal is detected. The
detector
demonstrates various alerts with the
corresponding audio tones and levels
X-band Constant-On signal
detected operation
K-band Constant-On signal
detected operation:
Х
Х
3
2
К
3
4
0.
Х
К
m
2
co
Х
.u
a
К
Х
13
X-band Instant-On or POP
signal detected operation.
К
4
K-band Instant-On or POP
signal detected operation.
К
234
10
Autogood products «130»
234
Ka-band Constant-On signal
detected operation.
Laser band detected
operation.
Ка
L234
Ка 2
Ка 3
All LEDs on
.
Ка 4
Н С Х К Ка L 2 3 4
.u
Press any button to exit the all-LEDs-on status that is
the end of tutorial mode. The detector automatically
enters detection mode and begins detecting signals.
co
2.
234
m
Ка
a
Ka-band Instant-On or POP
signal detected operation.
13
0.
Your CRUNCH 217B uses the same audio alarms and
visual displays as for the tutorial mode when it detects signals
and reports alerts.
Signal Strength Meters
The numbered LEDs are called signal strength meters
when they are displayed together with radar band’s LEDs (X,
K, or Ka) to indicate the strength of a detected signal. The
higher the number, the stronger the radar signals. When the
numbered LEDs are used together with H or C LED, they
demonstrate the level of the highway or city mode you've set.
11
Autogood products «130»
CARE AND MAINTENANCE
m
.u
a
Here are some tips to help you care for your CRUNCH
217B:
•
To deter theft, remove your CRUNCH 217B from your
windshield or dashboard when you leave your vehicle.
•
Avoid extended exposure to direct sunlight. Remove
your CRUNCH 217B from your windshield when your
vehicle is parked for an extended period of time. On hot
days the temperature inside your vehicle can reach
levels that could damage your CRUNCH 217B.
•
Do not expose the CRUNCH 217B to rain, moisture,
spray cleaners, or liquids that could damage the internal
circuitry of the detector.
13
0.
co
Fuse replacement
The lighter socket adapter of the power cord has a
replaceable 2-Amp SAG fuse located below the silver tip. To
check or replace the fuse, slowly and carefully unscrew the
tip of the plug, making sure the spring and silver tip located
inside the plug do not fly out when you remove the cap.
Check fuse and replace if necessary.
12
Autogood products «130»
TROUBLESHOOTING
The CRUNCH 217B does not power up when powered
from the vehicle.
• Check all power cord connections.
• Check fuse in lighter socket adapter and replace if
necessary.
• Check lighter socket. Clean if dirty.
• Check your vehicle's fuse panel. (Refer to your vehicle's
manual.)
a
The CRUNCH 217B did not alert when passing an officer.
m
.u
• Not all police cars have radar/laser detectors or it may not
be in use at that time.
co
The CRUNCH 217B shows erratic or frequent alerts.
• Use one of the city modes.
13
0.
The CRUNCH 217B shows partial or no display.
• Disengage dim mode and set the unit to bright display.
The CRUNCH 217B alerts weak.
• Set the unit to highway mode.
• Make sure the unit is level to the road.
• Make sure the radar window and the top laser receiver
are not obstructed. Move the CRUNCH 217B if necessary.
13
Autogood products «130»
SPECIFICATIONS
RADAR
Receiver type:
Antenna type:
Detector type:
Frequency of Operation:
Dual conversion superheterodyne
Linear polarized, self-contained
Scanning frequency discriminator
X-Band 10.500 -10.550GHz
K-Band 24.050 - 24.250GHz
Ka-Band 33.400 - 36.000GHz
Safety radar: 24.100 GHz
LASER
Pulsed laser signal receiver
Digital signal processor pulse width
photo diode detector
Dual convex condenser lens
.u
a
Receiver type:
Detector type:
m
Optical sensor:
GENERAL
co
13
Dimensions:
Weight:
C
-4°F to 140 F (-20°C to 60°С)
12V to 16V DC, 120 mA, negative
ground
1.30" H x 3.31" W x 4.50" L
5.50 ounces
0.
Temperature range:
Power requirements:
Specifications are typical, individual units may vary. Specifications
are subject to change without notice. Performance may vary with
driving behaviors and driving environments.
14
Autogood products «130»