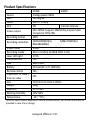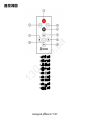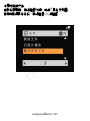
1
PHONES
(044) 360-7-130
(050) 336-0-130
(063) 788-0-130
(067) 233-0-130
(068) 282-0-130
Internet store of
autogoods
ICQ
294-0-130
597-0-130
SKYPE
km-130
CAR RECEIVERS — Receivers • Media receivers and stations • Native receivers • CD/DVD changers • FM-modulators/USB adapters • Flash memory • Facia plates and adapters • Antennas • Accessories |
CAR AUDIO — Car audio speakers • Amplifiers • Subwoofers • Processors • Crossovers • Headphones • Accessories | TRIP COMPUTERS — Universal computers • Model computers • Accessories |
GPS NAVIGATORS — Portable GPS • Built-in GPS • GPS modules • GPS trackers • Antennas for GPS navigators • Accessories | VIDEO — DVR • TV sets and monitors • Car TV tuners • Cameras • Videomodules
• Transcoders • Car TV antennas • Accessories | SECURITY SYSTEMS — Car alarms • Bike alarms • Mechanical blockers • Immobilizers • Sensors • Accessories | OPTIC AND LIGHT — Xenon • Bixenon • Lamps
• LED • Stroboscopes • Optic and Headlights • Washers • Light, rain sensors • Accessories | PARKTRONICS AND MIRRORS — Rear parktronics • Front parktronics • Combined parktronics • Rear-view mirrors
• Accessories | HEATING AND COOLING — Seat heaters • Mirrors heaters • Screen-wipers heaters • Engine heaters • Auto-refrigerators • Air conditioning units • Accessories | TUNING — Vibro-isolation
• Noise-isolation • Tint films • Accessories | ACCESSORIES — Radar-detectors • Handsfree, Bluetooth • Windowlifters • Compressors • Beeps, loudspeakers • Measuring instruments • Cleaners • Carsits
• Miscellaneous | MOUNTING — Installation kits • Upholstery • Grilles • Tubes • Cable and wire • Tools • Miscellaneous | POWER — Batteries • Converters • Start-charging equipment • Capacitors
• Accessories | MARINE AUDIO AND ELECTRONICS — Marine receivers • Marine audio speakers • Marine subwoofers • Marine amplifiers • Accessories | CAR CARE PRODUCTS — Additives • Washer fluid •
Care accessories • Car polish • Flavors • Adhesives and sealants | LIQUID AND OIL — Motor oil • Transmission oil • Brake fluid • Antifreeze • Technical lubricant
In store "130" you can find and buy almost all necessary goods for your auto in
Kyiv and other cities, delivery by ground and postal services. Our experienced
consultants will provide you with exhaustive information and help you to chose
the very particular thing. We are waiting for you at the address
http://130.com.ua
.u
a
GS300/GS600 USER MANUAL
13
0
.c
om
GS300/GS600 產品操作說明
www.dod-tec.com
Autogood products “130”
.c
om
.u
a
DOD GS300/GS600 CAR BLACK BOX
13
0
.FULL HD 1920 x 1080@30FPS
.Loop recording
.Wide vision angle 120 degree
.AV OUT or HDMI output
.Collision Data protection
Autogood products “130”
Contents
13
0
.c
om
.u
a
Instructions before use ·························································································· 03
Preface ············································································································· 03
Product Guarantee ·························································································· 03
Copyright infringement Warning ····································································· 03
Check Product Accessories··············································································· 04
Product Structure ··································································································· 05
Front View ······································································································· 05
Bottom View ···································································································· 05
Rear View ········································································································ 06
Top View ·········································································································· 06
Remote Controller Image ················································································· 07
Installation ············································································································· 08
Holder Installation ··························································································· 08
Memory Card Installation (Optional Purchase) ················································ 08
Installation on Your Vehicles ············································································ 09
Transmit the video to the vehicle monitor ······················································· 11
Transmit the video to LCD TV ··········································································· 12
Component Descriptions ······················································································· 13
Menu Operation····································································································· 15
Image Param ···································································································· 15
System Setup ··································································································· 25
Language·········································································································· 36
Playback ··········································································································· 37
Connecting to PC ···································································································· 42
Q&A ························································································································ 43
Related Parameters ································································································ 46
Light indication guide······················································································· 46
Video Recording Time (For Reference) ···························································· 47
Product Specifications ····················································································· 48
2
Autogood products
“130”
目錄
13
0
.c
om
.u
a
使用前須知 ············································································································ 50
前言 ············································································································· 50
產品保證 ····································································································· 50
侵犯版權警告······························································································ 50
檢查產品附件······························································································ 50
產品結構 ················································································································ 51
前視圖 ········································································································· 51
下視圖 ········································································································· 51
後視圖 ········································································································· 52
上視圖 ········································································································· 52
遙控器圖 ····································································································· 53
安裝方法 ················································································································ 54
安裝支架 ····································································································· 54
安裝記憶卡(選購) ······················································································· 54
安裝於您的車上 ·························································································· 55
將畫面輸出於車用螢幕 ·············································································· 57
將畫面輸出於液晶電視 ·············································································· 58
各部件介紹 ············································································································ 59
選單操作 ················································································································ 60
圖像參數 ····································································································· 60
系統設置 ····································································································· 70
語言選擇 ····································································································· 81
影片回放 ····································································································· 82
與 PC 連接 ·············································································································· 87
常見問題 Q&A ······································································································· 88
相關參數 ················································································································ 90
燈號提示指南······························································································ 90
影片錄影時間(供參考)················································································ 91
產品規格 ····································································································· 92
3
Autogood products
“130”
Preface
Instructions before use
This user manual will describe the usage of this product in details and
at the same time provide comprehensive information including usage,
operation, installation instructions and specification, etc. Please read
the manual carefully and keep it properly. We hope our product will
satisfy your need and provide you with long-term services.
Product Guarantee
om
.u
a
This product is approved by ISO9001:2000 International Quality
Standard and certified with FCC, CE and SGS. Our customers can use
this product free of apprehension.
Copyright infringement Warning
13
0
.c
Please note this product is for personal use only. The forms of usage
should not offend or infringe international or domestic copyright laws
and regulations. All recorded videos should be for personal use only.
Please note that using this product for recording of occasions like
shows, exhibitions or commercial activities will infringe others’
copyrights or legislation rights.
4
Autogood products
“130”
Check Product Accessories
13
0
.c
om
.u
a
Please check whether the following accessories are present before
use
1. Vehicle Power Cable (4M) x1
2. Holder x1
3. AV Video Cable x1
4. USB Cable x1
5. Remote Controller x1
6. User Manual x1
5
Autogood products
“130”
Product Structure
Front View
.c
om
.u
a
Bottom View
13
0
1. Laser light
2. Lens
3. Microphone
4. Remote Controller Receptor
5. HDMI Port
6. Format Button
7. Forced Shutdown Button
8. DC Power Port
9. USB Port/AV Output
6
Autogood products
“130”
Rear View
13
0
.c
om
.u
a
Top View
1. Micro-SD Card Slot
2. Halt Recording/USB Switch
3. Laser Ray Button
4. Blue Indicator Light (GPS)
5. Red Indicator Light (Recording)
6. Audio Switch
7. Data Protection Button
7
Autogood products
“130”
om
.u
a
Remote Controller Image
13
0
.c
1. Recording Button
2. Mode Button
3. Menu Button
4. Playback Button
5. Up Button
6. Down Button
7. Left Button
8. Right Button
9. OK Button
8
Autogood products
“130”
Holder Installation
Installation
om
.u
a
Combine the suction cup holder with the host device
.c
Memory Card Installation (Optional Purchase)
13
0
Install the Micro SD card into the drive recorder in the specific
direction.
9
Autogood products
“130”
Installation on Your Vehicles
om
.u
a
. Step 1
Install the suction cup holder by having it sucked onto the windshield
with the lens facing forward.
13
0
.c
. Step 2
Plug the vehicle power cable in the cig lighter, and plug the other end
to the DC port of the drive recorder.
10
Autogood products
“130”
om
.u
a
. Step 3
After installation, you may arrange the surplus power cable and hide
it inside Column A.
13
0
.c
. Step 4
Switch ON the power, a red light blinking means it is under recording
mode; press the infrared-red laser ray button and adjust the lens
direction according to the position of the red dot to complete the
installation.
11
Autogood products
“130”
Transmit the video to the vehicle monitor
Video can be transmitted through AV IN interface if there are video
equipments (vehicle monitor, GPS, and Satellite TV, etc.). The
following is an example on transmitting the video to the monitor by
using GPS with build-in AV IN function.
Please skip the steps if you do not have these equipments.
13
0
.c
om
.u
a
. Step 5
Insert the AV terminal to the video equipment, plug the other end to
PC/AV port of the drive recorder, adjust the video equipment to AV
channel, and insert the vehicle power cable to complete the
installation.
12
Autogood products
“130”
Transmit the video to LCD TV
You can also transmit the video from the drive recorder to your LCD
TV at home to playback the data or adjust the setting. The steps are
as follows:
om
.u
a
1. Your video equipment should have AV IN or HDMI ports.
2. Connect AV cable or HDMI cable (optional purchase) to the video
equipment and the drive recorder.
3. Connect the home use transformer (optional purchase) to the drive
recorder and the house power socket.
4. Adjust the channel of the video equipment to AV or HDMI.
5. Installation completed.
13
0
.c
Remote controller can be used after completing installation, please
see page 08
13
Autogood products
“130”
Component Descriptions
.u
a
1. SAVE - Data Protection Button
Press SAVE button, and you can manually set the data under
recording to protection mode, so as to prevent it from being
overwritten.
Audio Button
Press Audio button to select whether to record the sound during
recording.
3.
Laser Ray Button
Pressing and holding the button, the red dot projected is the area
which is being recorded; it is used for adjusting the installation
position of the drive recorder.
13
0
.c
om
2.
14
Autogood products
“130”
Halt recording / USB switch
Pressing and holding for 2~3 sec., the red light will stop blinking
and become constant indicating recording stopped. Pressing and
holding again for 2~3 sec., red light will start blinking again and
recording will continue.
Connect the drive recorder to the computer with USB cable, and
press for 2~3 sec. to change to USB mode to proceed with data
access.
.u
a
4.
13
0
.c
om
5. Format -Format Button
Pressing and holding for 2~3 sec., the red and blue lights will start
blinking simultaneously indicating formatting. All data in the
memory card will be cleared; after finishing clearing, the red light
will blink and continue recording.
6. Reset - Forced Shutdown Button
Press the RESET button if crash occurred owing to improper
operation. The drive recorder will be forced to shut down and all
indicator lights will be switched off. Plugging the power out and in
again will resume recording.
15
Autogood products
“130”
Menu Operation
Transmit the video to the monitor (Page12,13) before proceeding to
menu operation, and use the remote controller to operate (Page08).
Image Param
13
0
.c
om
.u
a
◆Video resolution
Video resolution can be configured during recording. Higher value
means higher resolution and better picture quality, and the storage
capacity consumption will be relatively higher.
FPS is Frame Per Second during recording. Higher FPS means
smoother video.
Remove Controller MENU Button→【Image Param】Menu→【Video
resolution】→【1920x1080 30P】*/【1440x1080 30P】/【1280x720
30P】/【848x480 60P】/【848x480 30P】/【640x480 30P】
*Setting Value
16
Autogood products
“130”
◆Scene
Scene setting can be done to allow shooting to be more conformed to
the surroundings and achieve optimum shooting effect. Select [AUTO]
to allow the recorder to choose the setting automatically.
Remove Controller MENU Button→【Image Param】Menu→【Scene】
→【Auto】*/【Night Portrait】
【
/ Night Scenery】
【
/ Sports】
【
/ Landscape】
/【Portrait】/【Sunset】
13
0
.c
om
.u
a
*Setting Value
17
Autogood products
“130”
◆Digital effect
This effect produced by this setting can achieve certain playfulness,
and changes in color are more apparent.
Remote Controller MENU Button→【Image Param】Menu→
【Digital effect】→【Off】*/【Art】/【Sepia】/【Negative】/
【Monochrome】/【Vivid】
13
0
.c
om
.u
a
*Setting Value
18
Autogood products
“130”
◆White Balance
Selecting [AUTO] under normal circumstances can choose white
balance. If [AUTO] mode cannot produce natural colors, please use
appropriate light conditions to change White Balance setting.
Remote Controller MENU Button→【Image Param】Menu→【White
Balance】→【Auto】*/【Incandescent】/【Sunny】/【Cloudy】/
【Fluorescent】
13
0
.c
om
.u
a
*Setting Value
19
Autogood products
“130”
◆ISO
According to the brightness during shooting, selecting [AUTO] can set
optimum ISO sensitivity.
Remote Controller MENU Button→【Image Param】Menu→【ISO】
→【Auto】*/【100】/【200】/【400】/【800】/【1600】
13
0
.c
om
.u
a
*Setting Value
20
Autogood products
“130”
◆EV
If “EV” is adjusted to + side, you can avoid under-exposure, or dark
objects as shooting against a bright background. If “EV” is adjusted
to – side, then you can avoid over-exposure, or bright objects as
shooting against a dark background or at night.
.u
a
Remote Controller MENU Button→【Image Param】Menu→【EV】
→【-2.0】/【-1.7】/【-1.3】/【-1.0】/【-0.7】/【-0.3】/【0】*/
【+0.3】/【+0.7】/【+1.0】/【+1.7】/【+2.0】
13
0
.c
om
*Setting Value
21
Autogood products
“130”
◆Contrast
Contrast indicates the degree of black color in proportion to white
color on the screen. The higher the contrast, dark color will appear
darker, and bright color will appear brighter. It is suitable for
identifying the number plate in the driving record.
Remote Controller MENU Button→【Image Param】Menu→
【Contrast】→【Soft】/【Standard】*/【Hard】
13
0
.c
om
.u
a
*Setting Value
22
Autogood products
“130”
◆Sharpness
Sharpness means the significant degree of contour image during
shooting. The higher the sharpness the more obvious the contour
image of characters and scene, it is very useful for face recognition
during drive recording.
Remote Controller MENU Button→【Image Param】Menu→
【Sharpness】→【Soft】/【Standard】*/【Hard】
13
0
.c
om
.u
a
*Setting Value
23
Autogood products
“130”
◆Recycle record(GS600)
Setting Recycle record can, under limited memory card, repeatedly
use the new data to overwrite the old data, in order to achieve
non-interrupted recording result.
Remote Controller MENU Button→【Image Param】Menu→【Recycle
record】→【No】/【1 minute】/【5 minutes】*/【10 minutes】/
【15 minutes】/【30 minutes】/【45 minutes】
13
0
.c
om
.u
a
*Setting Value. It means saving data every 5 minutes, relatively each
cycle will overwrite 5 minutes of old data.
24
Autogood products
“130”
◆Video flip
Turn the menu and image vertically to 180 degree. You can also install
the drive recorder upside down 180 degree to fit your requirement.
Remote Controller MENU Button【Image Param】Menu→【Video flip】
→【No】*/【Yes】
13
0
.c
om
.u
a
*Setting Value
25
Autogood products
“130”
System Setup
◆Volume
Adjust the volume of build-in speakers of the host device.
Remote Controller MENU Button→【System Setup】Menu→【Volume】
→【0】/【1】/【2】/【3】/【4】/【5】*/【6】/【7】/【8】/【9】
/【10】
13
0
.c
om
.u
a
*Setting Value
26
Autogood products
“130”
◆Flicker
Select 50Hz if the power voltage of the country is 220V. Select 60Hz if
the power voltage is 50Hz.
Remote Controller MENU Button→【System Setup】Menu→【Flicker】
→【50Hz】*/【60Hz】
13
0
.c
om
.u
a
*Setting Value
27
Autogood products
“130”
◆Auto power off
When the drive recorder stop recording, if “AUTO POWER OFF” was
set, it will automatically shut off after going through the set time.
Remote Controller MENU Button【System Setup】Menu→【Auto
power off】→【Off】*/【1 minute】/【3 minutes】/【5 minutes】
13
0
.c
om
.u
a
*Setting Value
28
Autogood products
“130”
◆Time zone(GS600)
Please set your area time zone according to Greenwich Mean Time.
Taiwan is GMT +8, please set GMT to +8.
13
0
.c
om
.u
a
Remote Controller MENU Button→【System Setup】Menu→【Time
zone】→【-12】/【-11】/【-10】/【-9】/【-8】/【-7】/【-6】/
【-5】/【-4】/【-3】/【-2】/【-1】/【0】/【+1】/【+2】/【+3】
/【+4】/【+5】/【+6】/【+7】/【+8】*/【+9】/【+10】/【+11】
/【+12】
*Setting Value
29
Autogood products
“130”
13
0
.c
om
.u
a
◆G Sensor sens. X.Y.Z(GS600)
When there is a collision, with the help of the changes in XYZ curves,
G Sensor or Gravity Sensor can determine the direction of the
collision and simultaneously set the recorded data to protection
mode, and the data will not be overwritten by circulated recording.
Adjust the sensitivity parameter of XYZ axles. [OFF] sensitivity means
G Sensor function is OFF, so the drive recorder will not automatically
set the data to protection mode, and manual setting will be needed.
X:Left and right changes during acceleration.
Y:Back and forth changes during acceleration.
Z:Up and down changes during acceleration.
Remote Controller MENU Button→【System Setup】Menu→
【G Sensor sens. X.Y.Z】→【Off】/【1】/【2】/【3】/【4】/【5】
*/【6】/【7】/【8】/【9】/【10】
*Setting Value
30
Autogood products
“130”
◆TV out
This setting can be adjusted when you use AV cable or HDMI cable to
transmit the video to the monitor. Select local video specifications
NTSC or PAL to solve the problem of flicking pictures owing to
inappropriate video format.
Remote Controller MENU Button→【System Setup】Menu→【TV out】
→【NTSC】*/【PAL】
13
0
.c
om
.u
a
*Setting Value
31
Autogood products
“130”
◆Stamp
Through this function, you can select whether to show time and date
during recording.
Remote Controller MENU Button→【System Setup】Menu→【Stamp】
→【On】*/【Off】
13
0
.c
om
.u
a
*Setting Value
32
Autogood products
“130”
◆Date & Time
Adjust the current date and time. (Drive recorder with GPS feature
will automatically sync the standard date and time after positioning,
no setting is required).
13
0
.c
om
.u
a
Remote Controller MENU Button→【System Setup】 Menu→【Date
& Time】→Press “OK” key on Remote Controller to enter setting →
Press the remote controller, select Year, Month, Day, Time, Minute→
Press the remote controller▲▼to adjust values→Press OK Button on
the remote controller to save the setting.
33
Autogood products
“130”
◆Format Storage card
This function will delete all data in the memory card including
protected data.
When the memory card is used for a long time, too much data will
reduce the access efficiency. This function will optimize the access
speed of the memory card.
.u
a
Remote Controller MENU Button→【System Setup】 Menu→【Format
Storage card】→【No】*/ 【Yes】 →Press OK Button on the remote
controller to process
13
0
.c
om
*Setting Value
34
Autogood products
“130”
◆Reset
This function will reset all settings on the drive recorder to default
factory settings.
Remote Controller MENU Button→【System Setup】 Menu→【Reset】
→【No】*/ 【Yes】 →Press OK Button on the remote controller to
process
13
0
.c
om
.u
a
*Setting Value
35
Autogood products
“130”
◆Version
View the firmware version of the drive recorder.
Remote Controller MENU Button→【System Setup】Menu
→【Version】*
13
0
.c
om
.u
a
*The version number during factory shipment will be considered as
the original version.
36
Autogood products
“130”
Language
Use this setting to adjust the menu to your preferred language.
Remote Controller MENU Button→【Language】 Menu→【English】
*/【简体中文】/【繁體中文】/【한국의】/【日本語】/【Pусск
ий】→Press OK Button on the remote controller to process
13
0
.c
om
.u
a
*Setting Value
37
Autogood products
“130”
Playback
Before video playback, please transmit the picture to your monitor
(Page12,13), and use the remote controller to operate (Page 08).
Up
Down
Left
Right
OK
13
0
.c
om
.u
a
Press playback on remote controller to enter video playback mode.
◆Preview
Normal Play/Tuned Play
Video Index
Previous Clip
Next Clip
Play Video
38
Autogood products
“130”
.c
Play forward / Play Backward
Stop
Slow Play 1/2X、1/4X、1/8X、1/16X、1/32X
Fast Play 2X、4X、8X、16X、32X
Pause
13
0
Up
Down
Left
Right
OK
om
.u
a
◆Play
39
Autogood products
“130”
◆Delete file
Delete the single video clip currently selected.
13
0
.c
om
.u
a
Playback button on the remote controller→Select video with the
remote controller→Press Menu button on the remote controller→
【Delete file】 →【No】/【Delete】→Press OK button on the remote
controller to process.
40
Autogood products
“130”
◆Slideshow
Video clips can be played continuously. Setting [1 second] means,
after the video is over, it will pause for 1 second before playing the
next video clip.
13
0
.c
om
.u
a
Playback button on the remote controller→Select video clips with the
remote controller→Press menu button on the remote controller→
【Slideshow】→【No】/【1 second】/【2 seconds】/【3 seconds】
/【5 seconds】/【10 seconds】→Press OK button on the remote
controller to process.
41
Autogood products
“130”
13
0
.c
om
.u
a
◆Display all files
During video preview, press ▼key on the remote controller to enter
video clips index. Select video clip and press OK key on the remote
controller to confirm.
42
Autogood products
“130”
Connecting to PC
.c
.Step 3
om
.u
a
.Step 1
Insert the memory card into drive recorder (Page09), and take out the
short USB cable provided.
.Step 2
Connect the USB cable with the drive recorder, and connect the other
end to the USB port of PC. The red light will start blinking.
.Step 4
13
0
Press and hold the USB switch
on the host device for 2~3 seconds to change to
USB mode, now the red and blue lights will start blinking simultaneously.
The computer will show a removable disk, you can use this disk for data access in the
memory card.
43
Autogood products
“130”
Q&A
om
.u
a
Q: Why does the blue light on the drive controller not light up (or
sometime)?
A: Please check if your drive recorder has GPS function. Blue light will
stay OFF for the host device without GPS function; this is a normal
phenomenon. For the host device with GPS function, blue light not
lighting up means GPS is positioning. GPS signal will be affected by
such factors as weather conditions, tunnels, and basements; the
signal might be strong, weak or no signal, and this phenomenon will
not affect the function of drive recorder, please be patient or go to
open space to complete positioning.
13
0
.c
Q: Why does the red light on the drive recorder keep blinking?
A: This is the signal indicating error on the memory card. Please check
whether your memory card is installed properly (See page09);
otherwise, the data of the memory card is possibly full, please switch
on the Recycle Record of the host device (See page24), and press
FORMAT button on the host device (See page34) to solve the issue.
44
Autogood products
“130”
Q: How to achieve the best quality resolution?
A:
1. Keep the windshield and the lens clean (Please see page46).
2. Please adjust the following parameters in Image Param (Please
see page15).
1920x1080 30P
Vivid
-1.0
Hard
Hard
om
.u
a
Video resolution
Digital effect
EV
Contrast
Sharpness
13
0
.c
Q: Why doesn‘t lights of the drive recorder react after inserting the
power?
A: Possibly it could be caused by the following circumstances:
1.Vehicle not started. 2. Vehicle power cable falls off, or bad
connection. 3. Check if the fuse of the vehicle power is broken. If the
abovementioned methods do not solve the problem, please contact
our dealer or factory for product repair.
Q: How to play MOV file? Why is there only audio but no video?
A: It is because your computer does not have the encoder needed to
play high definition video. Please search “K-Lite Codec Pack” in search
engines, download and install the encoder; you will be able to play
the file after installation.
45
Autogood products
“130”
13
0
.c
om
.u
a
Q: How to maintain the lens? Can we use alcohol on it?
A: Please do not use toilet paper, alcohol, stain cleaner, and gasoline,
etc. to rub the lens. On the lens is a thin plating film, which is to
prevent unnecessary light wave from entering the camera. Improper
rubbing will cause tear or scar on the lens.
Please use lens wiper or clothe with minimum clean liquid specified
for lens and wipe in concentric circles.
46
Autogood products
“130”
Related Parameters
Light indication guide
Blue
light
Red light
Description
◑
blink simultaneously
◑
◐
blinking alternately
○
----
----
om
.c
Constant blue light
13
0
----
Memory card is full
Memory card not
inserted
USB mode
.u
a
◑
Function
Formatting
GPS positioning
completed
◑
Red light blinking
Recording
○
Constant red light
Recording stopped
47
Autogood products
“130”
Video Recording Time (For Reference)
1280x720(30FPS)
848x480(60FPS)
640x480(30FPS)
.u
a
1440x1080(30FPS)
2G
34
mins
54
mins
68
mins
70
mins
210
mins
om
1920x1080(30FPS)
1G
17
mins
27
mins
34
mins
35
mins
105
mins
Memory card(GB)
4G
8G
68
136
mins
mins
108
216
mins
mins
136
272
mins
mins
140
280
mins
mins
420
840
mins
mins
13
0
.c
※Recording time will be different based on different host devices,
memory card brands and other settings.
48
Autogood products
“130”
Product Specifications
Recording resolution
13
0
Video Codec
Recording media
Laser LED Light
File protection
USB
Battery
Remote control
Imposition of date /
time on video
Size
Weight
Nutrition
Working humidity
Temperature
.u
a
Recording format
om
Video output
GS300
GS600
5 Mega pixels CMOS
120 degree
10cm – infinity
NO
Internal antenna
Mini HDMI: Support 1080i/720p output mode
Composite: NTSC/PAL
MOV
1920x1080(30fps) 、 1280x720(30fps) 、
848x480(60fps)
H.264
Micro Card(Up to 64GB SDHC Card)
1 PCS
YES
Micro USB
Internal(DC 3.7V 190mAh)
YES
.c
Sensor
Lens
Focus
GPS
YES
113mm X 24.1mm X 30mm
122g
DC 12-24V
10%~80%
-10℃~70℃
※Actual specifications depend on factory announcement. No further notice will be
provided in case of any change.
49
Autogood products
“130”
使用前須知
前言
本用戶手冊將詳細說明如何使用,同時提供給您的詳細訊息,包
括使用、操作、安裝注意事項及技術規格等;使用前請仔細閱讀
本手冊並請妥善保存本手冊,我們希望本產品能滿足您的需求並
且長期為您服務。
產品保證
om
侵犯版權警告
.u
a
本產品通過 ISO9001:2000 國際品質管理體系認證及經 FCC CE 和
SGS 等機構認證,顧客可以安心使用。
13
0
.c
請注意本產品僅供個人使用,其使用方式不得觸犯或侵害國際或
國內的版權法規。即使所錄置的影像僅供個人使用,請注意在某
些狀況下運用本產品錄置表演、展覽、或商業活動的影像可能侵
犯別人的版權或其它法律權益。
檢查產品附件
請先行檢查以下產品附件是否完整
1.車用電源線(4M)*1
2.支架 *1
3.AV 視訊線 *1
4.USB 連接線 *1
5.遙控器 *1
6.使用說明書 *1
50
Autogood products
“130”
產品結構
前視圖
.c
om
.u
a
下視圖
13
0
1.雷射燈
2.鏡頭
3.麥克風
4.遙控器接收
5.HDMI 埠
6.格式化按鍵
7.強制關機鍵
8.DC 電源孔
9.USB 埠/AV OUT 輸出
51
Autogood products
“130”
後視圖
13
0
.c
om
.u
a
上視圖
1.Micro-SD 卡插槽
2.暫停錄影/USB 開關
3.雷射燈按鍵
4.藍色指示燈(GPS)
5.紅色指示燈(錄影)
6.聲音開關
7.檔案保護鍵
52
Autogood products
“130”
om
.u
a
遙控器圖
13
0
.c
1.錄影鍵
2.模式鍵
3.選單鍵
4.回放鍵
5.向上鍵
6.向下鍵
7.向左鍵
8.向右鍵
9.確認鍵
53
Autogood products
“130”
安裝方法
安裝支架
.c
om
.u
a
將吸盤支架與主機結合
13
0
安裝記憶卡(選購)
將 Micro SD 卡,依照指定方向裝入行車紀錄器。
54
Autogood products
“130”
安裝於您的車上
om
.u
a
.步驟一
將行車紀錄器的吸盤支架,吸附在您的擋風玻璃上,鏡頭朝前。
13
0
.c
.步驟二
將車用電源線插入車上的點煙器,另一端則插入行車紀錄器的 DC
孔。
55
Autogood products
“130”
.u
a
.步驟三
安裝完成後,可將多餘的電源線隱藏於 A 柱內。
13
0
.c
om
.步驟四
發動電源,行車紀錄器紅燈開始閃爍表示錄影中;此時可按下紅
外線雷射按鈕,依照所射出的紅點位置,微調鏡頭方向,完成安
裝。
56
Autogood products
“130”
將畫面輸出於車用螢幕
車上若有可視訊輸入(AV IN)之視訊設備(車用螢幕、衛星導航、衛
星電視等),可將行車紀錄器的畫面輸出至螢幕上觀看,此處以內
建 AV IN 功能的衛星導航為例,將行車紀錄器畫面輸出至其螢幕
上。
若無此視訊設備,以下步驟可略過。
13
0
.c
om
.u
a
.步驟五
將 AV 端子插入視訊設備,另一端插入行車紀錄器的 PC/AV 位置,
將視訊設備調整到 AV 輸入的頻道,插入車用電源即完成安裝。
57
Autogood products
“130”
將畫面輸出於液晶電視
您也可以將行車紀錄器的畫面輸出到家中的液晶電視,用來觀賞
回放資料或設定值調整;步驟如下:
.u
a
1.您的視訊設備需含有 AV IN 或 HDMI 端子
2.將 AV 線或 HDMI 線(選購)連接視訊設備與行車紀錄器
3.將家用變壓器(選購)連接行車紀錄器與家用電源
4.將視訊設備調整到 AV 或 HDMI 的頻道
5.安裝完成
13
0
.c
om
安裝完成後可使用遙控器進行選單操作,請參考第 53 頁
58
Autogood products
“130”
各部件介紹
13
0
.c
om
.u
a
1. SAVE 檔案保護鍵
按壓一下 SAVE 按鈕,可手動將當前正在錄置的影片設定成保
護,不被循環錄影所覆蓋。
2.
聲音開關
按壓一下聲音開關鈕,可選擇您的錄影資料是否要保留聲音。
3.
雷射燈按鍵
緊壓不放,所投射出來的紅點即為攝影的拍攝位置,用以校正
行車紀錄器的安裝位置。
4.
暫停錄影/USB 開關
按壓約 2~3 秒,紅燈停止閃爍,保持恆亮,此時錄影暫停;重
覆按壓約 2~3 秒,紅燈開始閃爍,此時繼續錄影。
使用 USB 線,將行車紀錄器連接電腦,按壓 2~3 秒切換到 USB
模式,可進行資料存取。
5. Format 格式化按鍵
按壓約 2~3 秒,紅藍燈同時閃爍,表示正在格式化,記憶卡中
的資料將被全部清除;清除完畢後,紅燈閃爍,繼續錄影。
6. Reset 強制關機鍵
若操作不當導致當機時,可按一下 RESET 鈕,行車紀錄器將被
強制關機,燈號全滅;插拔電源後可重新開機錄影。
59
Autogood products
“130”
選單操作
在進行選單操作之前,請先將畫面輸出至螢幕中(第 57,58 頁),使
用遙控器操作(第 53 頁)
圖像參數
.u
a
◆圖像分辨率
可以設定行車紀錄器在錄影時的錄影解析度,數值越大則解析度
越高,畫質越清晰,相對消耗的容量也越大。
FPS 為錄影時的每秒張數,張數愈高則影像越流暢。
.c
13
0
*預設值
om
遙控器 MENU 鍵→【圖像參數】選單→【圖像分辨率】→【1920x1080
30P】*/【1440x1080 30P】/【1280x720 30P】/【848x480 60P】/
【848x480 30P】/【640x480 30P】
60
Autogood products
“130”
◆場景
可以設定此設定值,符合當前的拍攝周遭狀態,以達到最佳拍攝
效果。或者選擇【自動】
,由行車紀錄器自動進行設定。
遙控器 MENU 鍵→【圖像參數】選單→【場景】→
【自動】*/【夜間人像】/【夜景】/【運動】/【風景】/【人像】
/【日落】
13
0
.c
om
.u
a
*預設值
61
Autogood products
“130”
◆特效
藉由此設定所產生的效果,可以達到一定的趣味性,在色彩上的
改變會較為明顯。
遙控器 MENU 鍵→【圖像參數】選單→【特效】→
【關閉】*/【藝術】/【懷舊】/【負片】/【黑白】/【鮮豔】/
13
0
.c
om
.u
a
*預設值
62
Autogood products
“130”
◆白平衡
一般情況下選擇【自動】
,可以選擇最佳白平衡。如果【自動】無
法產生自然色彩,請使用適合光源條件的設定改變白平衡。
13
0
.c
om
.u
a
遙控器 MENU 鍵→【圖像參數】選單→【白平衡】→
【自動】*/【鎢絲燈】/【晴天】/【多雲】/【螢光燈】
*預設值
63
Autogood products
“130”
◆感光度
根據拍攝時的亮度,選擇【自動】,可以設定最佳的 ISO 感光度
遙控器 MENU 鍵→【圖像參數】選單→【感光度】→
【自動】*/【100】/【200】/【400】/【800】/【1600】
13
0
.c
om
.u
a
*預設值
64
Autogood products
“130”
◆曝光
如果將曝光調至+側,則可以避免背光或背對明亮背景拍攝時主體
過暗的情況;如果將曝光調至-側,則可以避免夜晚或黑暗背景拍
攝時主體過亮的情況。
遙控器 MENU 鍵→【圖像參數】選單→【曝光 】→【-2.0】/【-1.7】
/【-1.3】/【-1.0】/【-0.7】/【-0.3】/【0】*/【+0.3】/【+0.7】/
【+1.0】/【+1.7】/【+2.0】
13
0
.c
om
.u
a
*預設值
65
Autogood products
“130”
◆對比度
對比度指畫面中黑色與白色相對的程度。對比度越高,暗色所呈
現的更暗,亮色所呈現的更亮,適合在行車紀錄中用來辨識車牌
號碼。
遙控器 MENU 鍵→【圖像參數】選單→【對比度】→
【柔和】/【標準】*/【高】
13
0
.c
om
.u
a
*預設值
66
Autogood products
“130”
◆銳度
銳度指在攝影中,影像的輪廓明顯的程度。銳度越高,人物與景
物相鄰的輪廓線越明顯,適合在行車紀錄中用來辨識人臉。
遙控器 MENU 鍵→【圖像參數】選單→【銳度】→
【柔和】/【標準】*/【高】
13
0
.c
om
.u
a
*預設值
67
Autogood products
“130”
◆循環攝影(GS600)
設定循環攝影可在有限的記憶卡容量中,重覆性的將新資料覆蓋
舊資料,以達到錄影不中斷的效果。
遙控器 MENU 鍵→【圖像參數】選單→【循環攝影】→【否】/【1
分鐘】/【5 分鐘】*/【10 分鐘】/【15 分鐘】/【30 分鐘】/【45
分鐘】
13
0
.c
om
.u
a
*預設值。代表每 5 分鐘存檔 1 次,相對每次循環會覆蓋掉 5 分鐘的舊資料
68
Autogood products
“130”
◆圖像翻轉
將選單與影像垂直 180 度翻轉。所以您也可以將行車紀錄器依您
的需求,顛倒 180 度來安裝。
遙控器 MENU 鍵→【圖像參數】選單→【圖像翻轉】→
【否】*/【是】
13
0
.c
om
.u
a
*預設值
69
Autogood products
“130”
系統設置
◆音量
用以調節主機內建喇叭的音量大小。
遙控器 MENU 鍵→【系統設置】選單→【音量】→
【0】/【1】/【2】/【3】/【4】/【5】*/【6】/【7】/【8】/【9】
/【10】
13
0
.c
om
.u
a
*預設值
70
Autogood products
“130”
◆光頻
如果所在國家的電壓為 220V,請選擇【50Hz】
。電壓為 110V,請
選擇【60Hz】
。
遙控器 MENU 鍵→【系統設置】選單→【光頻】→
【50Hz】*/【60Hz】/
13
0
.c
om
.u
a
*預設值
71
Autogood products
“130”
◆自動關閉
當行車紀錄器停止錄影時,若設定【自動關閉】
,則會在經過所設
定的時間後自動關機。
遙控器 MENU 鍵→【系統設置】選單→【自動關閉】→
【關閉】*/【1 分鐘】/【3 分鐘】/【5 分鐘】
13
0
.c
om
.u
a
*預設值
72
Autogood products
“130”
◆時區(GS600)
請依格林威治標準時間,輸入您所在地區的【時區】
。
台灣為 GMT+8,請設定為【+8】。
遙控器 MENU 鍵→【系統設置】選單→【時區】→
【-12】/【-11】/【-10】/【-9】/【-8】/【-7】/【-6】/【-5】/【-4】
/【-3】/【-2】/【-1】/【0】/【+1】/【+2】/【+3】/【+4】/【+5】
/【+6】/【+7】/【+8】*/【+9】/【+10】/【+11】/【+12】
13
0
.c
om
.u
a
*預設值
73
Autogood products
“130”
◆G Sensor sens. X.Y.Z(GS600)
G Sensor 重力感應器,可在發生碰撞時,透過 XYZ 曲線的變化判
斷碰撞的方向,同時將所正在錄置的檔案設成保護,不被循環錄
影所覆蓋。
調整此參數可改變 XYZ 軸感應的靈敏度;【關閉】靈敏度等同於
將 G Sensor 功能關閉,行車紀錄器便不會自動將檔案設成保護,
需改由手動設定。
.u
a
X:加速時的左右變化
Y:加速時的前後變化
Z:加速時的上下變化。
.c
13
0
*預設值
om
遙控器 MENU 鍵→【系統設置】選單→
【G Sensor sens. X.Y.Z】→【關閉】/【1】/【2】/【3】/【4】/【5】
*/【6】/【7】/【8】/【9】/【10】
74
Autogood products
“130”
◆TV 輸出
當您在使用 AV 線或 HDMI 線,將畫面輸出至螢幕後,可調整此
設定,選擇您當地的視訊規格 NTSC 或 PAL,以解決輸出時因制
式不同而畫面跳動的問題。
遙控器 MENU 鍵→【系統設置】選單→【TV 輸出】→
【NTSC】*/【PAL】
13
0
.c
om
.u
a
*預設值
75
Autogood products
“130”
◆時間戳
透過此設定,您可以選擇影片中是否顯示時間日期。
遙控器 MENU 鍵→【系統設置】選單→【時間戳】→
【開啟】*/【關閉】
13
0
.c
om
.u
a
*預設值
76
Autogood products
“130”
◆時鐘
調整成當前的時間日期。(有 GPS 功能的行車紀錄器,在定位完成
後會自動抓取標準時間與日期,可不必設定)。
13
0
.c
om
.u
a
遙控器 MENU 鍵→【系統設置】選單→【時鐘】→
遙控器 OK 鍵進入設定→按遙控器選擇年、月、日、時、分→
按遙控器▲▼調整數值→按遙控器 OK 鍵儲存設定
77
Autogood products
“130”
◆格式化
此功能將會把記憶卡中的資料全部清除,包含受保護的資料。
當記憶卡使用時間過久,資料太多,造成存取效能降低時,使用
此功能可以優化記憶卡的存取速度。
遙控器 MENU 鍵→【系統設置】選單→【格式化】→
【否】*/【是】→按遙控器 OK 鍵執行
13
0
.c
om
.u
a
*預設值
78
Autogood products
“130”
◆重設系統
此功能將會把行車紀錄器當前的全部設定值,回復成原廠預設值。
遙控器 MENU 鍵→【系統設置】選單→【重設系統】→
【否】*/【是】→按遙控器 OK 鍵執行
13
0
.c
om
.u
a
*預設值
79
Autogood products
“130”
◆版本號
可觀看當前行車紀錄器的韌體版本。
遙控器 MENU 鍵→【系統設置】選單→【版本號】*
13
0
.c
om
.u
a
*版本號以原廠出貨為主
80
Autogood products
“130”
語言選擇
可從此設定調整成您所喜愛的語言介面。
遙控器 MENU 鍵→【語言選擇】選單→
【English】*/【简体中文】/【繁體中文】/【한국의】/【日本語】
/【Pусск ий】→按遙控器 OK 鍵執行
13
0
.c
om
.u
a
*預設值
81
Autogood products
“130”
影片回放
在進行影片回放之前,請先將畫面輸出至螢幕中(第 57,58 頁),使
用遙控器操作(第 53 頁)。
請按遙控器回放鍵,進入影片回放模式。
13
0
.c
om
.u
a
◆預覽
上鍵
下鍵
左鍵
右鍵
OK 鍵
正常播放/微調播放
影片索引圖
上一段
下一段
播放影片
82
Autogood products
“130”
上鍵
下鍵
左鍵
右鍵
OK 鍵
13
0
.c
om
.u
a
◆播放
正轉/倒轉
停止播放
慢速播放 1/2X、1/4X、1/8X、1/16X、1/32X
快速播放 2X、4X、8X、16X、32X
暫停播放
83
Autogood products
“130”
◆刪除文件
將會刪除目前所選擇到的單一影片
13
0
.c
om
.u
a
遙控器回放鍵→按遙控器選擇影片→按遙控器 menu 鍵→
【刪除文件】→【取消】/【刪除】→按遙控器 OK 鍵執行
84
Autogood products
“130”
◆幻燈片播放
可將影片片段連續播放,設定為【1 秒】表示影片在播放結束後,
暫停 1 秒鐘自動播放下一段的影片。
13
0
.c
om
.u
a
遙控器回放鍵→按遙控器選擇影片→按遙控器 menu 鍵→【幻燈
片播放】→【否】/【1 秒】/【2 秒】/【3 秒】/【5 秒】/【10 秒】
→按遙控器 OK 鍵執行
85
Autogood products
“130”
13
0
.c
om
.u
a
◆顯示所有文件
在影片預覽時,按遙控器▼鍵,可進入影片索引圖。
此時可跳選影片片段,按遙控器 OK 鍵確認。
86
Autogood products
“130”
與 PC 連接
.步驟一
請將記憶卡插入行車紀錄器(第 54 頁),並且拿出隨附的短 USB 線。
約 2~3 秒,切換到 USB 模式,此時
13
0
.c
.步驟三
按壓主機上的 USB 開關
紅藍燈同時閃爍。
om
.u
a
.步驟二
將 USB 線與行車紀錄器連接,另一端則連接到 PC 的 USB 孔,此時
紅燈閃爍。
.步驟四
此時電腦中會出現一個卸除式磁碟,您可以透過此磁碟進行記憶
卡的資料存取。
87
Autogood products
“130”
常見問題 Q&A
Q:為何行車紀錄器上的藍燈遲遲不亮燈(或偶爾才亮)?
A:請先確認您的行車紀錄器是否含有 GPS 功能;無 GPS 功能的主
機在行車中藍燈為熄滅狀態,此為正常現象;含 GPS 功能的主機,
藍燈熄滅為 GPS 定位中。GPS 訊號會因天氣狀況、山洞、地下室
等因素,訊號有強有弱甚至無訊號,此現象並不影響您的行車錄
影功能,請您耐心等候,或者到空曠處即可完成定位。
om
.u
a
Q:為何行車紀錄器上的紅藍燈一直在閃爍?
A:此為記憶卡錯誤的提示燈號,請先檢查您的記憶卡是否安裝正
確(請參考第 54 頁);另外,可能是記憶卡的資料已滿,請開啟主
機的循環攝影(請參考第 68 頁),並且按壓主機上的 FORMAT 鈕(請
參考第 78 頁)即可解決。
13
0
.c
Q:如何可以達到最佳畫質?
A:
1.保持擋風玻璃與鏡頭的清潔(請參考第 89 頁)。
2.請您在圖像參數中(請參考第 60 頁),調整成以下設定。
圖像分辨率
特效
曝光
對比度
銳度
1920x1080 30P
鮮豔
-1.0
高
高
88
Autogood products
“130”
Q:為何行車紀錄器上的燈號在插電後完全無反應?
A:有可能是以下幾種情況而造成;1.汽車未發動。2.車用電源脫
落或接觸不良。3.檢查車用電源的保險絲是否斷裂。若以上方式皆
無法排除,請您聯絡經銷商或原廠進行產品維修。
.u
a
Q:如何撥放 MOV 檔案?為何有聲無影?
A:因為您的電腦缺少了播放高畫質影像所必需的編碼器。請至各
大入口網站,搜尋”K-Lite Codec Pack”,下載此影音編碼包並且安
裝,完成安裝後使用其播放器即可播放檔案。
13
0
.c
om
Q:如何保養鏡頭,可以用酒精嗎?
A:請勿使用衛生紙、酒精、去漬油、汽油等擦拭鏡頭;鏡頭表面
均有一層鍍模,作用是阻擋不必要的光波進入鏡頭內,如果不當
擦拭會磨損鏡面或產生擦痕。
請使用拭鏡紙或拭鏡布沾少許鏡頭專用的清潔液,以同心圓擦出
即可。
89
Autogood products
“130”
相關參數
燈號提示指南
藍燈
紅燈
描述
◑
◑
同時閃爍
◑
◐
○
----
藍燈恆亮
GPS 衛星定位完
成
◑
紅燈閃爍
錄影中
○
紅燈恆亮
停止錄影
----
記憶卡已滿
未插記憶卡
USB 模式
.u
a
om
交互閃爍
.c
13
0
----
作用
90
Autogood products
“130”
格式化處理中
影片錄影時間(供參考)
1280x720(30FPS)
848x480(60FPS)
640x480(30FPS)
Memory card(GB)
4G
8G
68
136
mins
mins
108
216
mins
mins
136
272
mins
mins
140
280
mins
mins
420
840
mins
mins
.u
a
1440x1080(30FPS)
2G
34
mins
54
mins
68
mins
70
mins
210
mins
om
1920x1080(30FPS)
1G
17
mins
27
mins
34
mins
35
mins
105
mins
13
0
.c
※根據拍攝主機、記憶卡品牌以及其它設定的不同,影片錄影的
時間將會有所不同。
91
Autogood products
“130”
產品規格
錄影解析度
13
0
影像壓縮
儲存媒介
雷射燈
檔案保護
USB
電池
遙控器
時間日期顯示
尺寸
重量
工作電壓
工作溼度/溫度
.u
a
錄影格式
om
影像輸出
.c
感應元件
鏡頭角度
焦距
GPS
GS300
GS600
5 百萬畫素 CMOS 感光元件
廣角 120 度
10cm –無限遠
無
內建天線
Mini HDMI: 支援 1080i/720p 輸出模式
制式: NTSC/PAL
MOV
1920x1080(30fps) 、 1280x720(30fps) 、
848x480(60fps)
H.264
Micro SD Card(最高可支援 64GB)
1 PCS
有
Micro USB
DC 3.7V 190mAh(內建)
有
有
113mm X 24.1mm X 30mm
122g
DC 12-24V
10%~80%/-10℃~70℃
※實際規格以原廠公怖為主,如有更改,恕不另行通知
92
Autogood products
“130”
.u
a
om
.c
13
0
www.dod-tec.com
TEL 0800-880865
© 2011 DOD Tech Co., LTD
93
Autogood products
“130”
PRINTED IN TAIWAN