1
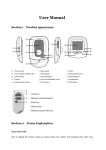
LCD ADVERTISING
DISPLAY DSPL7M/DSPL7MS/DSP102M/DSP104M
User Manuals
Please read this instruction before installation.
Interlink Americas Inc.
IMPORTANT SAFETY INSTRUCTIONS
Read this user manual
All safety and operating instructions in this user manual should be read before operating the
product
Keep this user manual
This user manual should be retained for future references.
Head Warnings
Be cautious about warning signals on the product.
Follow Instructions
Please follow instructions in this user manual
Attachments
To avoid danger, please do not use attachments not recommended by the product
manufacturer.
Mounting
Do not place the product on any unstable cart, stand, tripod or table to avoid injury on
children and adult. Please only use attachments indicated by product manufacturer.
Temperature
1
Please use this product within operating temperature 32°F ~ 100°F (0°C ~ 45°C),
relative humidity 20%-80%. The product should be situated away from any heat source such
as radiators, heat registers, stoves or other products (including amplifier) to product heat.
Avoid Liquid Invasion
Avoid the invasion of any liquid. Avoid placing it near bathtub, sink, kitchen, wet basement
or swimming pool. Do not place product on any uneven surfaces and keep a distance of at
least 6 inches from wall. Do not place heavy objects on top of the unit and at sealed areas
to avoid heat ventilation problems.
Product Protection
Please do not place any attachment or parts inside the product to avoid contacts with
voltage points that could result an electric shock or fire.
Heat Ventilation
There is no heat ventilation on the upper and lower part of the product, therefore to avoid
over heating, please do not block any ventilation openings with objects (e.g. carpet). Please
allow the opening to have 10cm distance for ventilation.
Grounding or Polarization
This product could be equipped with an alternate plug.
Power –Cord Protection
Power supply cords should be routed so that they are unlikely to be walked on or pinched by
items placed upon them. Pay attention to the connection of plugs.
Power Sources
This product should be operated only from the type pf power source indicated on the rear
panel. If you are unsure of the type of power supply to your home, consult your product
purchaser or local power company.
IMPORTANT SAFETY INSTRUCTIONS
Lightning and storms
Unplug the outlet during lightning, storms or long unused periods. This will prevent damages
and power surges to the product.
Overloading
Do not overload wall outlets, extension cords or integral convenience receptacles as this can
result in a risk of fire or electric shock.
Damage Handling
Unplug this product from the outlet of wall and request qualified service personnel under the
following conditions:
• when the power supply cord or plug is damaged
• when the picture display gets dimmer
• when liquid has been spilled or objects have fallen on to the product
• when the product has been exposed to rain or water.
• Adjust only those controls that are in the instruction manual. For improper adjustments may
result in damage and will often require extensive work by a qualified technician to restore the
product to its normal operation.
• When the product exhibits a distinct change in performance-this indicates a need for repair
service.
Replacement parts
When replacement parts are required, be sure that the technician uses replacement parts
specified by the manufacturer or parts with same features. Unauthorized substitution may result
in fire, electric shock or other hazards.
Safety Check
Upon completion of any service or repair to this product, ensure technician for proper operating
condition performs safety checks.
Warnings
If the battery of remote control is incorrectly replaced, there will be a danger of explosion.
Storage
Keep the product in dim areas,, room temperature and low humidity to maintain original
condition. This will avoid danger.
Transportation
Since the product consists of glass and delicate electronic components, excessive shock or
drop will result damages. Please handle the product carefully to minimize shock during
transportation.
Recycling
The product utilizes tin-lead solder, and has a fluorescent lamp containing a small amount of
mercury. For environmental considerations, disposal of these materials may be regulated in
your community. For disposal or recycling information, please contact your local authorities, or
Electronics Industries Alliance: http://www.eiae.org/
Cleaning
Unplug the product from the wall outlet before cleaning. Do not use liquid cleaners or aerosol
cleaners. Use damp cloth for cleaning.
2
Spec. & Package
Package included:
MOD
E
1
4
STOR
AGE
2
MUTE
VOL+
6
8
VOL-
9
+10
ERAS
ONE E
3
5
7
0
ERAS
ALL E
COP
ONE Y
SETU
ENTE
P
R
INDE
X
SENS
OR
COP
ALL Y
TIME
R
ASPE
OSD
DISPL
AY
CT
SUB
MEN
U
DOW
N
UP
FN
Remote
Control
LCD ADVERTISING DISPLAY
Adapter & power cord
*Please check the battery before operating
CR2025
3V
Remove the plastic sheet
Remove the plastic sheet
3
Spec:
Model
Resolution
7”
(800 x 480 pixels)
Brightness
Contrast
Support card
Document support
10.2”
10.4”
(800 x 480 pixels)
(800 x 600 pixels)
250cd/㎡
500:1
350cd/㎡
300:1
400:1
CF CARD or SD CARD , USB 2.0 ( PLUG N PLAY)
JPEG, MPEG4-Xvid/Divx (.avi) 720x480/ 25fps/ 3000kpbs
Adapter input
Adapter output
Nrp
12V ___2A
9W
12W
Int. Standard
CE, FCC, RoHS
6
14W
Please use a screwdriver to
remove the metal cover before
inserting the CF card.
CF CARD
Vol- MENU Vol+
USB
4
ON
OFF
SENSOR
VOLUME CONTROL
SPEAKER
OPERATION INDICATOR
R/C RECEIVER
INTRODUCTION - Remote Control
2
3
4
MODE
STORAGE
MUTE
1
2
3
VOL+
4
5
6
VOL-
7
8
9
ERASE
ALL
0
+10
1
5
14
15
5
ERASE
ONE
6
7
COPY
ONE
SETUP
8
INDEX
10
COPY
ALL
11
12
9
ENTER
7
7
16
SENSOR
TIMER
ASPECT
SUB
MENU
OSD
DISPLAY
DOWN
UP
FN
13
17
19
18
1 Power On/off
3 Storage Switch
5
Volume up/down
8
Setup
Pg.7
11
Copy all
15
Erase one
18
OSD Setting
Pg.7
Pg.7
*Function not supported
Pg.7
Pg.6
6 Erase all
Pg.6
Pg.6
4 Sound mute
7 Playback
9 Copy one
Pg.7
10 Index
12 Sub menu
Pg.7
14 Keypad
16
Sensor
Pg.7
17 Timer
Pg.6
Pg.6
Pg.7
Pg.6
Pg.6
Basic Control
Connection
Insert your data source.
Point the remote control
towards towards sensor to
get better reception.
MODE
STORAGE
1
2
3
4
5
6
VOL-
7
8
9
ERASE
ALL
0
+10
COPY
ONE
SETUP
ERASE
ONE
ENTER
MUTE
VOL+
INDEX
COPY
ALL
SENSOR
TIMER
ASPECT
SUB
MENU
OSD
DISPLAY
DOWN
UP
FN
Turn on the main power
Green light is on when
device is on
Please ensure the AC adapter
is plugged in.
Power ON/OFF
Use the remote ocontrol to turn on the power.
Storage Switch
Press the storage switch button to select between the data source.
Sound Mute and Volume control
Press the sound mute button to turn off the sound. And press the
to turn down the volume.
Erase
VOL+
to turn up or press
VOL-
(CF card supported only)
To erase a video in the list or when playing, Press the
Erase
one
button to prompt the confirmation
screen. Or to erase ALL of the video in the data souces, press
Use
to select between YES or NO, and press
Enter
Erase
all
to prompt the confirmation.
to confrim delete.
Playback
Press
to stop the video when its playing. Press
to pause the video, press again to
resume.
To skip the video, please use
to skip the video.
Hold
to start fast forward or backward.
6
Setup
Please refer to advanced control. Pg.8
Index and sub menu
Press
Index
to call the file list out. When you on the file list, you can press
Sub
Menu
to the file.
Sub-menu
COPY
Press this button to copy a file/ multiple files/folder.
TARGET
Press this button to paste the file that on the clipboard.
DELETE
Press this to delete the file that being select
RENAME
Press this to call up a keyboard and start to rename.
SELECT
Press this button to select between a single and multiple files.
NEW FOLDER
Press this button to create a new folder.
PROPERTIES
Press this button to call up the properties of the files.
CANCEL
Press this buttton to leave the sub-menu.
Copy
7
Press
COPY
ONE
to copy a specific file to another CF card. Press
COPY
ALL
to copy a specific file to
another CF card. ( same file name in both memory card is not supported)
Keypad
To select the video in the list, you can directly press the number instead of searching.
Timer
Press
Timer
to go to the clock setup, for further information, please go to page 12.
Sensor
Please refer to advanced control. pg.12
OSD Display
Press
OSD
Display
to call the color, the brightness, and the contrast. Press
UP
COLOR:
DOWN
-
+
UP
BRIGHTNESS:
DOWN
-
+
UP
CONTRAST:
DOWN
-
+
UP
DOWN
to adjust it.
Advanced Control
Setup Menu
- To enter the setup menu, press
button and press
Setup
on the controller.
• General Setup
GENERALSETUP
PHOTO SETUP
PLAYBACK MODE
CLOCK SETUP
PLAY MODE
PREFERENCES
OSD MESSAGE
EXIT SETUP
UPDATE MODE
PASSWORD
MAIN PAGE
1. Playback Mode
SINGLE REPEAT
To repeat
REPEAT ALL
Select this to repeat all of the files
2. Play Mode
PHOTO
Select this to play photo only
MUSIC
Select this to play music only
MOVIE
Select this to play movie only
SLIDESHOW
Select this to play photo and music only
ALL FILE
3. OSD Message
ON
Select to turn on this function
OFF
Select to turn off this function
8
4. Update Mode
UPDATE OFF
Select this to turn off the auto update when USB drive is plugged in.
30 SECONDS
Select this to update 30seconds after the device restarts.
KEYLOCK FILE
This function is designed to add / re-write file on the CF card
without the remote control.
ADD/OVERWRITE
1. To add files,
- Create a file named “VIDEOADD.FLG” on your computer.
- Type “add” inside the document and save in ASCII format.
- Copy “VIDEOADD.FLG” and the files you want to add onto a
USB drive.
- The system will start update once you plug in the USB drive.
(New file will be added to the CF card, file with same name will
be overwritten )
2. To re-write the CF card,
- Create a file named “VIDEOUPDATE.FLG” on your computer.
- Type “RE-WRITE” inside the document and save in ASCII format.
- Copy “VIDEOUPDATE.FLG” and the files you want to add onto a USB drive.
- The system will start re-writting the card once you plug in the USB.
(All files will be re-written by this function )
This functon is designed to add / re-write file with the remote control.
9
ADD
New file will be added to the CF card when you select this.
OVERWRITE
CF card will be re-written when you select this.
5. Password
ON
Password required when memory card detected, update and
setup button pressed
OFF
Select this to turn off password protection
NEW PASSWORD
Select to change your password
INPUT OLD PASSWORD
SURE
CANCE
Input the old password and press sure.
(Default is 1234)
INPUT
SURE
NEW
CANCE
Input the new password and press sure
to confirm.
• Photo Setup
GENERALSETUP
PHOTO SETUP
TRANSITION
CLOCK SETUP
INTERVAL TIME
PREFERENCES
EXIT SETUPMAIN PAGE
1. Transition
FULL SCREEN
Normal
RIGHT -> LEFT
TOP -> BOTTOM
L/R -> CENTER
BOTTOM -> TOP
CENTER -> L/R
T/B -> CENTER
IMPLODE
CENTER-> T/B
BLIND -> L/R
BLIND:T->B
CROSS FADE
LEFT -> RIGHT
RANDOM
2. Interval Time
1 SECOND
3 SECONDS
5 SECONDS
10 SECONDS
Set your interval time between 1, 3, 5 and 10 seconds.
10
RANDOM
• Clock Setup
GENERALSETUP
PHOTO SETUP
CLOCK SETUP
PREFERENCES
SHOW REAL CLOCK
EXIT SETUP
SET TIME MODE
MAIN PAGE
1. Show real clock
ON
OFF
Set turn ON to display the clock and turn OFF to disable the clock.
2. Set time mode
11
DAILY
Set device to turn ON/OFF daily at the same time.
WEEKLY
Set device to turn ON/OFF daily at different times.
OFF
Turn off this function
TIMER
2008:11:19
03:34:57
WED
TIME0
Present time
START
Turn the timer
ON/OFF
Store timer name
END
Set the turn off time
OFF
CONFIRM
CANCEL
Set the turn on time
Confirm the setting
Cancel the setting
• Preferences
GENERALSETUP
PHOTO SETUP
CLOCK SETUP
PREFERENCES
EXIT SETUP
OSD LANG
AUTO PLAY
SENSOR
DEFAULTS
MAIN PAGE
1. OSD Lang
ENGLISH
FRENCH
GERMAN
ITALIAN
SWEDISH
12
DANISH
PORTUGUESE
SPANISH
Select to change the language of the interface.
2. Auto Play
ON
Turn on to play contents on CF card automatically once its plugged in.
OFF
Turn off to play CF card content manually.
3. Sensor
POWER ON
Select this option to keep the device on.
30 SEC
Device will standby after 30sec., and
wake up when sensor is activated
Device will turn off the sound after 45sec.,
and wake up when sensor is activated.
Device will standby after 90sec., and
wake up when sensor activated
Device will standby after 360sec., and
wake up when sensor is actived
45 SEC MUTE
90 SEC
360 SEC
4. Defaults
FACTORY SET
• Exit Setup
Select this to leave the menu setup.
13
Press ENTER to go back to factory setting
Trouble shooting
• The image is too dark or fuzzy
-Please inspect brightness, contrast and the color levels for optimum conditions.
-Reload the file on the CF card.
-Check for damage to the LCD.
• File doesn’t play back
-Please make sure the file is supported (see compatible files).
-Please make sure the file is not damages.
-Reload the file onto the CF card , restart the device and try again.
• Remote Control has no response
-Please make sure the battery has a charge/ Point at IR sensor on device.
- To test remote, use digital camera LCD to look at IR sensor for light when pressing buttons.
-Please double check there is no third party signal affect the sensor.
Please contact our customer service if you face any problems on operating the device.
14