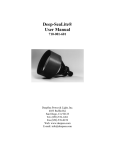
1
few seconds, as it relies on the surrounding water to provide cooling. When an underwater light is burned in air, the resulting heat buildup can pose a fire hazard. If the light is operated for testing purposes in air, be sure to let it cool down for a couple of minutes before immersing it in water. It is also a good idea to turn the light off a few seconds prior to removing it from the water. Deep Multi-SeaLite® User Manual, Rev. 10/17/11 DeepSea Power & Light, Inc. 4033 Ruffin Rd. San Diego, CA 92123 USA Tel (858) 576-1261, Fax (858) 576-0219 E-mail [email protected], Web Page http://www.deepsea.com GENERAL NOTES AND WARNINGS Do not burn a Deep Multi-SeaLite® out of water for more than about 30 seconds. Do not operate any high voltage electrical equipment without using a Ground Fault Interrupt circuit for safety, especially when divers are in the water! Do not operate a lamp at higher than recommended voltage. The lamp filament will melt with severe over-voltage, and slight over-voltage drastically reduces lamp life. Be sure that any fingerprints are cleaned off the lamp with isopropyl alcohol before use. (Use reagent grade alcohol if possible, contaminated alcohol will damage the lamp – insure that all alcohol has evaporated before reassembling the lamp). DEEP MULTI-SEALITE® PRE- AND POST-DEPLOYMENT CHECKLIST: Each Deep Multi-SeaLite® is shipped ready for immediate use. To ensure that the light will perform reliably, please observe the following maintenance guidelines: 1. Try to rinse the light with fresh water after use in salt water. 2. Always check to make sure that the rear bulkhead connector assembly is secure before deployment. 3. Check for condensation inside the glass dome, especially after changing lamps. If any condensation is evident, unscrew the connector/socket assembly from the body and remove the lamp. Place the connector/socket assembly and lamp inside a warm oven (at least 100 C or 212 deg F) for at least 30 minutes to bake out any moisture that may present. If possible, purge with dry nitrogen while reassembling the light. 4. After each deployment, examine the power cable and rear connector for damage. Warning: After each deployment, carefully check to make sure the light has not flooded. It is possible for the light to partially flood and then reseal itself while underwater. Upon surfacing, the light can become internally pressurized, which may be potentially dangerous. Additionally, if the power remains on when the light has partially flooded, it is possible for electrolytic generation of an explosive mixture of hydrogen and oxygen gases. If a light appears flooded upon removal from the water, it should be treated as potentially dangerous. Point the light away from persons and valuable equipment and verify whether or not it is internally pressurized. Make sure that the power is disconnected as soon as a flooded condition is suspected. CONNECTOR OPTIONS: Four different industry standard underwater connectors can be used with the Deep Multi-SeaLite®: BH3MP, LPBH3MP, XSG3BCL, and 1503. The standard connector pin-outs are illustrated below. LAMPS (LOW VOLTAGE BI-PIN LAMPS AND HIGH VOLTAGE MINI-CAN SCREW BASE): Model Number Part Number Volts Watts Hours Color Temp Lumens BP-12/50* 460-00019 12 50 2000 3000K 950 BP-12/100* 460-00027 12 100 1000 3100K 2,200 BP-24/100* 460-00032 24 100 2000 3000K 1,800 BP-24/150* 460-00035 24 150 70 3400K 5,000 BP-24/250* 460-00038 24 250 300 3400K 8,100 BP-24/300* 460-00041 24 300 50 3100K 9,900 MC-120/100 460-00053 120 100 1500 2700K 1,600 MC-120/150 460-00055 120 150 750 2850K 2,400 MC-120/250 460-00059 120 250 2000 2900K 4,750 MC-120/325 460-00061 120 325 500 3100K 7,800 MC-220/150** 460-00079 220 150 1300 2800K 2,100 MC-220/250** 460-00080 220/230 250 2000 2900K 4,500 MC-240/250** 460-00082 240 250 2000 2900K 4,200 MC-LV-LA*** 714-001-001 Mini-Can low voltage lamp base adapter * Replace old style mini-can low voltage lamps but require the low voltage lamp base adapter. ** 220/230V, 230V, and 240V lamps are used to meet a nominal 240V requirement. *** Required for use with low voltage lamps. DEEP MULTI-SEALITE® SPECIFICATIONS: Mechanical Housing Material: Hard anodized 6061 aluminum; titanium optional Diameter: 79 mm (3.1 inches) Length: 155 mm (6.1 inches) (with BH3MP connector) Lens: Clear tempered borosilicate Air Weight: 519 g (18 oz.) Water Weight: 170 g (6 oz.) Depth Rating: 6,000 meters (20,000 feet) of seawater Optical Beam patterns (full angle measured to half power point using 120V/250W lamp): Wide Flood (WFL): 60 degrees conical Medium Flood (MFL): 40 degrees conical Spot (SP): 15 degrees conical TROUBLESHOOTING: PROBLEM Light doesn't turn on. 1 1 3 2 BH3MP 1 = Hot 2 = Neutral 3 = Ground to shell 1 2 3 LPBH3MP 1 = Hot 2 = Neutral 3 = Ground to shell 2 3 1 2 3 XSG3BCL 1503 1 = Ground to shell 2 = Neutral 3 = Hot 1 = Hot 2 = Neutral 3 = Ground to shell ELECTRICAL AND THERMAL WARNINGS: A Ground Fault Interrupt should be used whenever high voltage lights are being utilized; when divers are in the water this is especially critical! Do not operate AC-powered lights without a GFI! Additionally, all high voltage lights should be case grounded for safety. It is also important not to burn the Deep Multi-SeaLite® in air for more than a POSSIBLE CAUSE Not plugged in. GFI tripped. Lamp burned out. Cable defective. Insufficient voltage Light flooded. Connector loose. Damaged O-ring. Glass cracked or chipped. RECOMMENDED ACTION Secure all connections. Reset GFI. Change lamp. Check continuity from one end to the other. Meg test if possible. Make sure battery is fully charged. Verify power supply is adequate. Tighten. If still leaking, replace. Replace as required. Return to DeepSea. FLOODED LIGHT REPAIR If the light is leaking, first suspect that there is a damaged O-ring, or that the glass envelope is cracked or has a chipped edge. When looking for the source of a leak, first check if the rear connector is loose. If the connector is secure, check for a sliced or otherwise damaged O-ring; make sure the O-ring sealing surfaces are clean. If there is no apparently damaged O-ring, remove the glass dome and inspect the edge of the glass. If the edge is chipped, this is probably the source of the leak, and the dome should be replaced. If a light is flooded and/or damaged, we recommend that the light be returned to DeepSea Power & Light for repair or replacement; DeepSea Power & Light cannot be responsible for any damage incurred during emergency field repairs. Such repairs should be undertaken only as a last resort and by qualified personnel. Spares kits are available from DeepSea Power & Light. DEEP MULTI-SEALITE® EMERGENCY FIELD REPAIR PROCEDURE Note: Due to the pressure that the Deep Multi-SeaLite® operates at (10,000 psi) and the exacting assembly procedure, it is not recommended that users perform a repair themselves (except for changing the DS4 connector/socket assembly). Repair should be done at DeepSea Power & Light. If, however, time or logistics prevent a repair at DeepSea, users may use the following procedure. Users are warned that they should test the light in a pressure chamber before re-deploying. 1. Unscrew the cowl. Remove the 3 kapton seats, 3 titanium seats, glass dome, die cut retaining ring, and dome seal. Clean all parts, and inspect for damage. Remove lamp and connector. Discard all damaged parts. 2. Install die cut retaining ring in cowl. Sparingly lubricate the inside (ribbed) edge of the rubber seal; DeepSea recommends Dow Corning 111 lubricant. Install rubber seal in cowl, with twin ribs toward housing; the single rib edge will be toward the front of the cowl. (The rubber seal has twin ribs [two ribs side by side] on one edge, and a single rib on the other edge.) Insert new dome into cowl, making sure dome is straight. Check where dome is sitting relative to the rubber seal, and make sure it is in the same position relative to the seal all the way around. 3. Install one titanium seat against the glass dome, then a kapton seat, followed by the second titanium seat and second kapton seat, then the third titanium seat and third kapton seat. Both titanium and kapton seats must by clean and flat. They must not have any particulate or lubricant residue, and must be completely dry. They should be cleaned with alcohol prior to assembly. The glass dome, titanium seat, and kapton seats must be completely flat against each other or else they will pop out. They must also be in the same position relative to the seal all the way around. 4. Next screw the cowl onto the housing. Hand tighten until only the outside face of the last thread is visible on the housing. Do not overtighten. 5. Install the connector into the housing without a lamp. Pressure test to 10,000 psi. If you do not have a pressure chamber, put it in a bucket to perform a leak test. This should at least indicate water integrity. If the light passes pressure testing, remove the connector, install a lamp, and reinstall the connector assembly. LAMP CHANGING PROCEDURE: To change the lamp, first disconnect the cable by unscrewing the plastic locking sleeves and pulling the connector halves apart. Unscrew the socket/connector assembly from the light body and remove the old lamp by twisting counter-clockwise. When installing the new lamp, be sure to get any fingerprints on the surface of the lamp. Use a piece of tissue or other clean paper to hold the lamp while installing it. Fingerprints can be cleaned from the surface of the lamp with Isopropyl (rubbing alcohol). OPTIONS Model No. IL3FS LPIL3FS RMG3FS YMB SPARE PARTS Model No. DML-BOD DML-BOD-S DML-BOD-T Part No. 706-000-0220002 140-00094 706-005-003208 774-000-016 Part No. 710-041-010-02 710-041-010-03 710-041-010-01 Description BH3MP mating connector with male locking sleeve on 18” (0.5m) whip LPBH3MP mating connector with locking sleeve on 18” (0.5m) whip XSG3BCL mating connector with female locking sleeve on 18” (0.5m) whip Yoke mounting bracket (also attaches to UHMB) Description Aluminum body Stainless steel body Titanium body DML-CWL DML-OR DML-SR DML-TS ML-GD ML-FGD ML-SP ML-MFL ML-WFL ML-RS DS4-3WC DS4-3XS DS4-3LP DS4-1503 ML-MR ML-FLS ML-MLS ML-DMC ML-SG 710-041-007-0A 710-041-604-0A 710-04106 710-04105 772-002-054 772-002-053 710-03002-01 710-03002-02 710-03002-03 400-00004 705-00014 705-00053 705-00048 705-00069 710-040-104 140-00031 140-00032 710-040-605-01 710-04062 Ultem plastic cowl O-ring kit (incl 3 kapton wafers; does not include DML-SR) Sealing ring (not included in DML-OR) Titanium ring Glass dome Frosted glass dome Spot reflector Medium flood reflector Wide flood reflector Reflector spring BH3MP connector/socket assy with female locking sleeve XSG3BCL connector/socket assembly with male threads LPBH3M connector/socket assembly Burton 1503 connector/socket assembly Rubber mounting ring Female Delrin locking sleeve for bulkhead connector Male Delrin locking sleeve for mating connector Delrin plastic mounting collar Spring guide for titanium housing