1
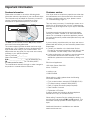
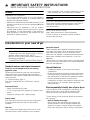
en-us Use and Care Manual, Installation Instructions
Dryer
WTG86401UC
Welcome to Your New Dryer!
Congratulations on your selection of a new Bosch dryer
for your laundry needs. We are confident you will enjoy the
superior performance and reliability.
Please do not hesitate to contact our Customer Service
department if you have any questions or comments about
your new dryer.
Thank you for choosing Bosch.
Visit our web site at www.bosch-home.com for more
information and to view a selection of our products.
2
Table of contents
enu-sUseandCrMoaniuIstlc,
Important information ................................................... 4
Purchase information ........................................................... 4
Customer service ................................................................. 4
Your dryer is intended for ............................................. 5
Importance and meaning of symbols .......................... 5
IMPORTANT SAFETY INSTRUCTIONS ........................ 6
Introduction to your new dryer ..................................... 7
Standard features and helpful information ...................... 7
Special features .................................................................... 7
Environmentally friendly use of your dryer ...................... 7
Dimensions and clearances required .......................... 8
Installation for best performance ....................................... 8
Appliance dimensions ......................................................... 8
Length of power cord and drain hose .............................. 8
Minimum clearances ............................................................ 9
Installation Instructions .............................................. 10
Introduction ......................................................................... 10
Before installing the dryer ................................................ 11
Waste disposal .................................................................. 11
Parts provided with your dryer ........................................ 11
Accessories for your appliance ...................................... 12
Installation - step by step ................................................. 12
Electrical Connections ...................................................... 14
Leveling the dryer .............................................................. 15
Check heating system ...................................................... 16
Preparing to transport the dryer - step by step ........... 16
Reversing the door - step by step ................................. 17
Getting to know your appliance ................................. 19
Control panel ...................................................................... 19
Operating Instructions ................................................ 20
Your new dryer ................................................................... 20
Before using the dryer for the first time ....................... 21
Temporary disconnection of the dryer .......................... 21
Using the program selector to choose a drying cycle 22
Program selection ............................................................. 22
Selecting program settings and additional options .... 22
Loading the laundry .......................................................... 23
Starting the program ......................................................... 23
Indicator of program sequence ...................................... 24
Childproof lock .................................................................. 24
Selecting a different program ......................................... 24
Cancel program ................................................................. 24
Program end ...................................................................... 24
Removing laundry/switching the appliance off ........... 24
Signal ............................................................................ 24
Laundry ........................................................................ 25
Preparing the laundry ....................................................... 25
Sorting the laundry ............................................................ 25
Drying tips .......................................................................... 25
Program selection table ............................................. 26
Default Program and Option settings ....................... 27
Dry Level ............................................................................. 27
Time Dry .............................................................................. 27
Finish in ............................................................................... 27
Additional Program Option settings .......................... 27
Wrinkle Block ..................................................................... 27
Low Heat ............................................................................. 27
Spin speed ................................................................... 27
Cleaning and care ....................................................... 28
Cleaning the housing and control panel ...................... 28
Cleaning the lint filter ........................................................ 28
Cleaning the heat exchanger .......................................... 29
Cleaning the moisture sensors ...................................... 30
Cleaning the lint filter area .............................................. 30
Maintenance of drain hose ............................................. 30
Troubleshooting .......................................................... 31
Introduction ........................................................................ 31
General Troubleshooting ................................................. 31
STATEMENT OF LIMITED PRODUCT WARRANTY ... 33
Bosch Clothes Dryer ........................................................ 33
Additional information on products, accessories,
replacement parts and services can be found at
www.bosch-home.com and in the online shop
www.bosch-eshop.com
4XHVWLRQV"
ZZZERVFKKRPHFRP
0DLQ6WUHHW6XLWH
,UYLQH&$
:HORRNIRUZDUGWRKHDULQJIURP\RX
3
Important information
Purchase information
Customer service
Please take a moment to record the following basic
information about the purchase of your new Bosch dryer.
This information will be helpful in the event you need to
contact Customer Service or would like to order
accessories or replacement parts for your dryer.
Your dryer does not require any special care other than
the maintenance and care mentioned in this manual. If
you have a problem with your dryer, please consult
~ Troubleshooting; Page 31.
(1U
)'
(1
U
)'
The E-Nr. (model number) and the FD (serial) number
are found on the rating plate label.
The model number includes the slash and a two digit
number (eg: "/01"). Please be sure to include the final 2
digit number when filling in your model number. This
helps make sure any parts you may need are correctly
matched to your specific machine.
Date of Purchase:___/___/_____
Where Purchased:___________________________
E-Nr. :_______________/____ (ex: WTG86402UC/01)
FD :__________-_________ (ex: FD 9304|90007,
provides production date)
The manufacturer reserves the right to make changes in
the product or manual without notification.
This may save you money. If a technician comes out to
advise you of information that is in the Troubleshooting
table you may be charged, even if your dryer is still under
warranty.
If problems persist and service becomes necessary,
contact your dealer, installer or an authorized service
center. Do not attempt to repair the appliance yourself.
Any work performed by unauthorized personnel may void
the warranty.
If you are having a problem with your dryer and are not
pleased with the service you have received, please follow
these steps:
1. Contact your installer or the Authorized Service
Provider in your area and explain to them why you are
not satisfied. This will usually correct the problem.
2. If after working with your installer or service technician
the problem still has not been resolved to your
satisfaction, please let us know either by writing to us
at:
BSH Home Appliances
1901 Main Street, Suite 600
Irvine, CA 92614
or calling us at:
1-800-944-2904
When writing or calling please have the following
information available:
▯ E-Nr. (model number, example: WTG86402UC/01)
▯ FD (serial number, example: 9304|90007)
▯ Date of Original Purchase (receipt required)
▯ Date Problem Occurred
▯ Explanation of Problem
If writing, please also include a daytime telephone
number and a copy of the sales invoice.
When calling Customer Service, please be ready to
provide the model number E-Nr. and FD number. This
information will help provide the best support for your
dryer.
Additional information is available at our website:
www.bosch-home.com
4
Your dryer is intended for
▯
▯
▯
▯
▯
Only household use and in a non-commercial
environment.
Household use only for drying washable textiles.
Children must not do any laundry without supervision.
Keep pets away from the dryer.
Recommended operating conditions:
Ambient temperature: 41-95°F / 5-35°C
Relative humidity: under 95%
▯
▯
Installation by qualified installers.
Installation in accordance with all regulatory
requirements; if in doubt have the appliance installed
by a specialist familiar with these requirements.
Read the use and set-up instructions and all other
information included with the dryer and act accordingly.
Keep documents for future use.
Importance and meaning of symbols
Important safety information is contained in this manual
and on the warning labels located on your dryer.
Standard symbols and headings are used to identify
areas where you should take precautions to avoid injury
or damage. Please take a moment to become familiar
with each of these symbols and what they mean before
proceeding.
9
WARNING
This indicates that death or serious injuries may
occur as a result of non-observance of this warning.
9
CAUTION
This indicates that minor or moderate injuries may
occur as a result of non-observance of this warning.
NOTICE: This indicates that damage to the appliance or
property may occur as a result of non-observance of this
warning.
Tip: This symbol is used to draw the user's attention to
important matters.
5
9
S N I
Y T E F A S
IMPORTANT SAFETY INSTRUCTIONS
READ AND SAVE THESE INSTRUCTIONS
T N A T R OD PA ME RI
D N A
WARNING
When properly cared for, your new appliance has been
designed to be safe and reliable. Read all instructions
before using the appliance. These precautions will
reduce the risk of burns, electric shock, fire, and injury to
persons. When using laundry appliances, basic safety
precautions must be followed, including those in the
following pages.
Examine the appliance after unpacking it. In the event of
transport damage, do not plug it in.
E V A S
▯
▯
▯
▯
▯
▯
WARNING
TO REDUCE THE RISK OF FIRE, ELECTRIC SHOCK,
SERIOUS INJURY OR DEATH WHEN USING YOUR
DRYER, FOLLOW BASIC PRECAUTIONS INCLUDING
THE FOLLOWING
▯ Bosch dryers are provided with an Use and Care
Manual with Installation Instructions. Read and
understand all instructions before using the dryer.
▯ Do not dry articles that have been previously cleaned,
washed, soaked, or spotted with gasoline, dry cleaning
solvents, other flammable or explosive substances as
they give off vapors that could ignite or explode.
▯ Before the appliance is removed from service or
discarded, remove the door (to the drying
compartment) to prevent children from playing or
hiding inside. Also remove the power cord/plug.
▯ Do not allow anyone to climb, lean or hang on any part
of the dryer including any protruding components such
as the appliance door or a pullout shelf.
▯ Do not reach into the appliance if the drum is moving.
▯ Do not tamper with the controls.
▯ Do not repair or replace any part of the appliance or
attempt any service unless specifically recommended
in the user maintenance instructions or in published
user-repair instructions that you understand and have
the skills to carry out.
▯ Do not use fabric softeners or products to eliminate
static unless recommended by the manufacturer or the
fabric softener or product.
▯ Always unplug the dryer from the power supply before
attempting any service. Disconnect the power cord by
grasping the plug, not the cord.
▯ To reduce the risk of fire, clothes, cleaning rags, mop
heads and the like which have traces of any flammable
substance, such as vegetable oil, cooking oil,
petroleum based oils or distillates, waxes, fats, etc.,
must not be placed in the dryer. These items may
contain some flammable substance(s) even after
washing, which may smoke or catch fire by itself.
▯ Do not place items exposed to cooking oils in your
dryer. Items contaminated with cooking oils may
contribute to a chemical reaction that could cause a
load to catch fire.
6
▯
▯
▯
▯
▯
▯
▯
▯
▯
▯
▯
▯
▯
▯
▯
E S E H T
Do not use heat to dry articles containing foam rubber
(may be labeled latex foam) or similarly textured
rubber-like materials or equivalent. Foam rubber
materials can ignite by spontaneous combustion.
Keep flammable materials and vapors, such as
gasoline, away from the dryer.
Clean lint filter before or after each load.
Do not install or store this appliance where it will be
exposed to the weather. Hoses and internal parts may
be damaged if exposed to freezing temperatures.
Do not use the dryer if it has a worn power cord or
loose plug.
The dryer must only be used for its intended purpose.
Always
follow
the
fabric
care
instructions
recommended by the clothing manufacturer.
Do not operate the dryer if parts are missing or broken.
Do not sit on top of the dryer.
To reduce the risk of fire or electrical shock, DO NOT
use an extension cord or an adapter to connect the
dryer to the electrical power supply.
Use the integrated socket only for listed appliances.
Always check pockets and remove any objects.
Cigarette lighters are particularly hazardous.
Do not operate the dryer if any guards and/or panels
have been removed.
Do not bypass any safety devices.
Do not operate this dryer until you are sure that:
▯ All services connected to the dryer (power, drain,
etc.) have been installed according to the
Installation Instructions.
▯ Installation and grounding are in compliance with all
local regulations and/or other applicable
regulations and requirements.
Failure to install, maintain and/or operate the dryer
according to the manufacturer’s instructions may result
in injury and/or damage.
To avoid floor damage and mold growth, do not let
spills or splashout cause standing water around or
under the appliance.
See the Installation Instructions section in this manual
for grounding requirements.
~ Electrical Connections; Page 14
The IMPORTANT SAFEGUARDS and WARNINGS
presented in this manual do not cover all possible
conditions that may occur. Common sense,
caution and care must be exercised when
installing, maintaining or operating the dryer.
Always contact your dealer, distributor, service agent or
the manufacturer about any problems or conditions
that you do not understand.
Follow the Safety Information in the INSTALLATION
INSTRUCTIONS and the OPERATING INSTRUCTIONS.
S N O I T C U R T S N I
9
IMPORTANT SAFETY INSTRUCTIONS
READ AND SAVE THESE INSTRUCTIONS
WARNING
WARNINGS FOR CHILDREN
▯ Do not allow children to play on or in the appliance.
Close supervision of children is necessary when the
appliance is used near children.
▯ Make sure to utilize all child lock/safety features of your
appliance, and be sure to turn the appliance Off when
not in use.
▯ Appliances are not intended for use by children,
however when children become old enough to operate
the appliance, it is the responsibility of the parents or
legal guardians to ensure they are instructed in safe
practices by qualified persons.
▯
Keep all laundry aids (including detergents, bleach,
fabric softeners, etc.) out of the reach of children.
WARNING
STATE OF CALIFORNIA PROPOSITION 65 WARNINGS
This product contains chemicals known to the State of
California to cause cancer, birth defects or other
reproductive harm.
SAVE THESE INSTRUCTIONS!
Keep These Instructions for Future Reference.
In case of change of ownership, manual should be
conveyed with the dryer.
Introduction to your new dryer
9
WARNING
RISK OF FIRE, ELECTRIC SHOCK OR INJURY
To reduce the risk of fire, electric shock or injury to
persons, read the IMPORTANT SAFETY
INSTRUCTIONS of this manual before installing or
operating this appliance.
~ IMPORTANT SAFETY INSTRUCTIONS; Page 6
Standard features and helpful information
Thank you for choosing Bosch for your laundry
appliance needs.
Please read and follow the use and care, important
safety instructions and troubleshooting information
contained in this manual. Please retain this manual for
future reference.
~ Troubleshooting; Page 31
This dryer complies with UL 2158 Electric Clothes
Dryers.
Standard features
▯ Sensor controlled auto cycles.
▯ 17.7 lb (8 kg) large drum capacity (for regular cotton
loads).
▯ Large door opening, 180° opening angle.
Quality tested
Each dryer which leaves our factory has undergone a
thorough performance test and is in full working
condition.
Web Site
Visit our web site at www.bosch-home.com for more
information and to view a selection of our products.
About this manual
These operating and installation instructions apply to
more than one model of dryer. Illustrations used may
show details that differ from your particular model.
Read your user manual. It contains valuable information
about safety, installation and operation of your new
appliance.
This can save you time, make it easier to correctly install
and use your dryer, and improve your overall satisfaction
with your new appliance.
Special features
▯
▯
▯
A distinctive feature of your dryer is low energy
consumption.
Bosch dryers feature advanced operation philosophy,
customized drying programs and a solid touch and
feel making them a user-friendly household assistant.
Bosch load sensing feature controls power
consumption for each cycle based on the amount and
type of laundry. This automatic feature optimizes
energy efficiency.
Environmentally friendly use of your dryer
Your new Bosch dryer is designed to use energy in a
highly efficient way to help reduce operating costs,
conserve resources and protect the environment.
To save energy, money and time, Bosch recommends
the following:
▯ Spin the laundry thoroughly
Before drying, spin the laundry thoroughly in the
washing machine. Use the highest possible spin
speed for the type of laundry. Higher spin speeds
reduce the drying time and the energy consumption.
7
▯
▯
Use optimum load
Utilize the maximum amount of laundry for the
appropriate cycle. However, do not exceed
recommended loads.
Clean filter
Clean the lint filter before or after each drying process.
~ Cleaning the lint filter; Page 28
▯
▯
Air inlet on the dryer
Do not cover or allow any articles/items to restrict the
air inlet on the front of the dryer.
Energy-saving mode
The display panel lighting goes out after a few minutes
and Start/Pause flashes. To activate the display, touch
any button.
Energy-saving mode is not activated if a program is
running.
Dimensions and clearances required
Installation for best performance
9
CAUTION
DO NOT INSTALL THE DRYER:
▯ outdoors,
▯ in an environment with dripping water,
▯ near flammable materials,
▯ in rooms which are at risk of frost,
▯ in rooms which may contain gas or other fuels,
▯ on carpets.
The dryer should be installed in an open area with no
restrictions to ambient air for the best drying results.
Space allowances to fully open the door should also be
considered.
Do not operate the dryer at temperatures above 95°F
(35°C) or below 41°F (5°C). Low temperatures affect
the drying process and may prolong the drying times.
The installation surface (floor) must be level and
structurally sound. Using the bubble level and the heightadjustable feet installed on the appliance, level the
appliance side to side and front to back.
Appliance dimensions
E
D
H
F
G
8
Label Dimension
U.S.
Metric
Inches cm
a
b
c
Width
Depth (to front of door)
Height (minimum)
Height (maximum)
Side clearance
(door open 180°)
23.6
25
33.2
34
16
60
63.5
84.3
86.4
40.6
Depth (door open 90°)
42.9
109
d
e
Length of power cord and drain hose
To Left*
U.S.
Inches
To Right*
Metric
cm
Power Cord
42
106.7
Drain Hose
76
193
* Facing the front of the dryer
U.S.
Inches
Metric
cm
60
55
152.4
139.7
Minimum clearances
Label Dimension
U.S.
Metric
Inches cm
Closet: Stacked
E & F are minimum area size!
E
Top Vent
63 sq. 404 sq.
F
Bottom Vent
63 sq. 404 sq.
Vent spacing is actual (not minimum dimensions)
G
37
94
H
26
66
J
3
7.6
K
29
73.6
%
(
+
Under counter (Preferred)
)
&
$
*
$
'
&
Closet: Stand alone (shown) or Side by Side
%
Front of the appliance fully open.
No doors or coverings.
Minimum opening dimensions
A
B
C
28 in.
23.8 in.
35.5 in.
71.1 cm
60.5 cm
90.2 cm
(
&
$
.
)
-
'
Label Dimension
U.S.
Metric
Inches cm
A
B
C
D
0.6
6.3
2.5
2.4
Both Sides
Top
Rear
Front
1.5
16
6.2
6
9
Under counter (Less Desirable)
(
If front of the appliance is covered ventilation openings
must be installed.
E & F are minimum area sizes
E
63 sq.in.
404 sq. cm
F
63 sq.in.
404 sq. cm
G&H
actual spacing dimensions for min. open area sizes
G
3 in.
7.6 cm
H
14 in.
35.6 cm
+
*
)
Installation Instructions
READ AND SAVE THESE INSTRUCTIONS
Introduction
Read these installation instructions completely and
carefully before starting to install your new dryer. The
information contained can save you time and effort and
will help to ensure optimum performance of your new
dryer. Be sure to observe all warnings and cautions.
9
CAUTION
▯
▯
▯
▯
9
WARNING
RISK OF FIRE, ELECTRIC SHOCK OR INJURY TO
PERSONS
▯ To reduce the risk of fire, electric shock or injury
to persons, read the Important Safety Instructions
at the beginning of this manual before installing
or operating this appliance.
▯ To reduce the risk of severe injury or death, follow
all installation instruction.
▯ Clothes dryer installation must be performed by a
qualified installer, according to these instructions
and according to all local codes.
▯ In addition to the installation and safety
information in this manual, the local water and
electric authorities (services) may have special
requirements that must be followed.
▯ Install the clothes dryer according to the
manufacturer’s instructions and local codes.
10
▯
▯
Dryer is heavy. Do not lift it by yourself, use
additional help and care when lifting and
positioning.
If in doubt, have the appliance installed by an
authorized technican.
Take care to not damage the appliance. Do not
hold on to protruding parts (e.g. door) when
lifting. Do not push against the appliance door
glass due to risk of damage.
Do not install the appliance outdoors or in an
area exposed to freezing condtions.
If freezing conditions exist where appliance is
located all drain water must be removed from
hoses, sumps, pumps, etc.
Hidden surfaces may have sharp edges. During
service use caution when reaching inside the
dryer housing.
These installation instructions are intended for use by
qualified installers. In addition to these instructions, the
installation must comply with:
▯ for the United States - National Electrical Code, ANSI/
NFPA70 - and latest editions of the State and
Municipal and/or local regulations.
▯ for Canada - Canadian Electrical Code C22.1 - and the
latest editions of the Provincial, Municipal and/or local
regulations.
Before installing the dryer
Parts provided with your dryer
Unpacking the appliance
Back side of the dryer
9
CAUTION
Remove the appliance packaging carefully to
prevent damage to the surfaces.
After removing the packaging, immediately remove
any objects from the drum.
Check the dryer for transportation damage. Do not
connect the utilities (power or drain) to a dryer which is
visibly damaged. If in doubt, contact your dealer.
Waste disposal
Disposal of Packaging Materials
After unpacking your new appliance dispose of the
protective packaging materials in an environmentally
friendly way. Ask your dealer or inquire with your local
authority regarding currently acceptable means of
disposal.
9
WARNING
WARNINGS FOR CHILDREN
Do not let children play with packaging and
associated parts to avoid risk of choking or
suffocation.
Disposal of Your Old Appliance
Your old appliance can be recycled if it is no longer to be
used. Prior to disposing of your old appliance observe
the following precautions to reduce safety risks.
9
( power cord with plug
0 drain hose connected to the dryer
8 elbow to form the hose to fit the drain
Dryer drum contents
A literature pack and drain hose pack are shipped in the
dryer drum. Be sure to remove these items before using
the dryer.
WARNING
TO AVOID RISK OF INJURY OR DEATH, DO THE
FOLLOWING
▯ after unplugging the old appliance, remove the
electric power cord and dispose of properly.
▯ remove the door or permanently disable the door
lock to prevent children from being locked inside.
:7
;
;
;8
&
11
@ drain hose pack contents:
(2) plastic ties for securing drain hose
▯ plastic connector
▯ summary of drain hose installation instructions
H literature pack contents:
▯ User manual
▯ Warranty
NOTICE: If any parts are missing please notify your
dealer immediately.
▯
(QVXUHWKHGUDLQKRVH
UHPDLQVFRQQHFWHG
WRVXPSSXPSRXWOHW
Accessories for your appliance
Pedestal
The dryer can be mounted on a special pedestal for
easier loading and unloading.
Pedestal item number: WMZ 20500
Stacking kits
The dryer can be stacked on a Bosch washer of the
same dimensions to save space.
Stacking kit without a shelf: WTZ20410
Stacking kit with a shelf: WTZ11400
Drying rack
A drying rack placed inside the dryer for drying wool
items, shoes, etc. is available.
Drying rack item number: WMZ20600
Accessories can be purchased from customer service or
your local dealer.
~ Customer service; Page 4
Installation - step by step
1. Unpack the dryer.
2. Remove all objects from the dryer drum.
3. Check the dryer for visible damage.
4. Position the dryer near the installation location.
5. Disconnect the power cord and drain hose from their
clips on the back of the dryer.
9
CAUTION
Do not disconnect the drain hose from the sump/
pump connection at the bottom of the dryer.
12
NOTICE: Do not reuse an old or different drain hose.
Only use the drain hose included with the dryer.
6. Connect the outlet end of the drain hose to a
standpipe or other drain inlet. Examples are shown
below.
CAUTION
9
▯
▯
▯
▯
APPLIANCE DAMAGE COULD OCCUR IF DRAIN
WATER FLOWS BACK INTO THE APPLIANCE
In all drain conditions, scenarios, or connections
you must ensure:
The drain water from the hose is free flowing and
not obstructed allowing adequate water flow.
Drain opening is not sealed in any way and
ventilated enough not to cause a back siphon.
The end of the drain hose does not protrude into
the pumped out or standing water.
Be sure to follow all local codes and regulations
in draining the condensate water to a suitable
drain.
Examples of connections:
▯ Plumbing box or Standpipe connection:
For most plumbing box installations (with adjacent
washer) the plastic elbow supplied with the dryer will
not be used and must be removed from the dryer
drain hose.
1. Fasten the dryer drain hose to the washer drain/elbow
as shown in picture “A”. Secure with plastic ties
supplied.
9
'
CAUTION
Do not over tighten plastic ties pinching or
causing a restriction in the drain hose.
PD[LQ
FP
$
(
2. Place drain hose assembly into standpipe as shown in
picture “B”.
%
Maximum height of drain is 39 in. (100 cm).
▯
▯
Sink Drain Pipe:
Attach and secure drain hose as shown below in
picture “F”.
Use a standard hose clamp which can be purchased
from your local hardware store.
Sink/Basin or Floor drain:
If using the elbow supplied on the hose re-position
elbow closer to the drain end of hose and fasten with
the plastic ties as shown in picture “C”.
&
)
NOTICES
▯
Secure hose and/or elbow as shown below. Sink “D”
or floor “E”.
NOTICE: Examples shown are for reference only. Not all
fittings, connectors, nuts, brackets, ties, etc. are supplied
to accommodate every application.
▯
▯
Examples shown are for reference only. Not all fittings,
connectors, nuts, brackets, ties, etc. are supplied to
accommodate every application.
Ensure there are no kinks or crimps along the entire
lenght of hose.
If installed in an upper floor of a multi-story building,
the dryer should be installed on a drained floor to
prevent water damage to lower floors in the event of a
leak.
13
Electrical Connections
Power Cord
The attached power cord is a standard 4-wire dryer cord
and is UL approved and listed in the USA and Canada. It
meets the following requirements:
▯ 208-240 volt rated (minimum);
▯ 30 amps;
▯ Type SRDT or DRT (UL 2158).
NOTICE: If your specific installation requires a 3-wire
power cord follow the installation instructions for such in
the next section of this manual.
9
ELECTRIC SHOCK HAZARD
To reduce the risk of electrical shock:
▯ Only pull out the power cord by the plug end and
never by the cord, as this could damage it.
▯ Never touch or hold the plug end or power cord
with wet hands.
▯ Never unplug the plug end during operation.
9
WARNING
▯
▯
14
ELECTRIC SHOCK HAZARD
▯ Do not pull on the power cord to unplug the
dryer.
▯ Protect the power cord from physical damage
such as being twisted, kinked, pinched, or walked
on for example.
▯ DO NOT use an extension cord or an adapter to
connect the dryer to the power supply.
▯ Make sure:
The power cord fits into the outlet/receptacle.
The home’s internal power supply circuit wire size is
sufficient and electrically grounded.
▯ The outlet/receptacle used to power the dryer
must be connected to an individual 30 amp
Branch Circuit.
▯ Do not cut, remove or bypass the grounding
prong on the power cord end.
▯ Do not modify the plug provided with the
appliance; if it will not fit the outlet, have a proper
outlet installed by a qualified electrician.
▯ The power cord must only be replaced by a
qualified technician or licensed electrician to help
avoid a fire/electric shock hazard.
Replacement power cords can be purchased
through our Customer Service department.
▯ Use only a UL listed 30 amp power cord.
▯ Do not reuse old power cord.
▯ Do not make a sharp bend or crimp wiring or
conductors at connections.
▯ Use only a 4-wire/conductor power cord when
the appliance is installed in a mobile home,
recreational vehicle, in a new branch-circuit
installation or where the local codes do not
permit grounding through the neutral.
WARNING
ELECTRIC SHOCK HAZARD
Improper connection of the equipment-grounding
conductor may result in electric shock. Have the
appliance checked by a qualified technician or
licensed electrician if you are in doubt as to whether
the dryer has been properly grounded.
ALL ELECTRICAL CONNECTIONS AND CIRCUITS
9
WARNING
GROUNDING INSTRUCTIONS
9
WARNING
ELECTRIC SHOCK HAZARD
This appliance must be electrically grounded. In the
event of malfunction or breakdown, grounding will
reduce the risk of electric shock by providing a path
of least resistance for electric current.
This appliance is equipped with a cord that has an
equipment grounding conductor and a grounding
plug.
The plug must be plugged into an appropriate outlet
that is properly installed and grounded in
accordance with all local codes and ordinances.
If a ground fault circuit breaker is used, ensure it
has this symbol: z.
This symbol guarantees compliance with all current
regulations.
SAVE THESE INSTRUCTIONS!
Connecting a 3-wire power supply cord
9
WARNING
ELECTRIC SHOCK HAZARD
To reduce risk of fire, electric shock, serious injury,
or death follow the installation instructions below
carefully or have work done by an qualified
electrician.
The power cord must meet the following requirements:
▯ 208-240 volt rated (minimum);
▯ 30 amps;
▯ Type SRDT or DRT (UL 2158).
terminal ends) come in contact with connection box
enclosure.
1. Unplug the current power cord being used from the
outlet/receptacle.
2. To disconnect and/or reconnect a new power cord
you must remove the top cover of the appliance as
shown below.
A. Remove the two T20 torx head screws.
B. Push the top cover toward the rear of the appliance
and lift up.
NOTICE: Use only open-end spade lugs.
9. Ensure the terminal ends are long enough and are
formed (bent) so they will align with the terminal block
fastening locations (screw holes).
10. Reinstall the 2 terminal block screws (Philips head) at
locations L as shown below.
11. If the ground wire shown below from N to PE is not
part of the 3-wire cord assembly you have it must be
obtained/purchased separately and it must be
installed.
12. Install the last terminal block screw (Philips) and 1
grounding screw (T20 torx) at locations N and PE.
3. Open the connection box toward the rear of the
appliance by removing the T20 torx head screw
fastening the cover.
13. Tighten the strain relief screw ensuring the power
4. Remove the 4-wire power cord (as supplied):
A. Remove the 3 Philips screws (2 labeled L and one
labeled N).
B. Remove the green grounding screw PE (T20 torx).
NOTICE: Be careful not to drop the screws into the
dryer.
cord cannot be pulled out of the connection box but
not so tight as cut the power cord insulation.
14. Reinstall the connection box cover making sure all
wires are routed so they do not touch any part of the
enclosure and are secure.
15. Reinstall the appliance top cover as previously
described in “2” above.
Integrated electrical receptacle
This appliance is equipped with a 208/240V 15A
receptacle for use ONLY with Bosch washer.
9
CAUTION
Do not use this receptacle to power any other
device.
If any other electrical device is plugged into this
receptacle Bosch assumes no liability.
9
5. Loosen the strain relief clamp screw (Philips head) on
rear of the connection box.
6. Pull the old power cord out of the connection box.
7. Install the new power cord back through the strain
relief clamp.
NOTICE: Ensure the strain relief clamp has not been
moved and its clamping screw(s) are outside the rear
of the connection box.
8. Ensure the terminal ends are long enough and are
formed (bent) so that no part of them (wires or
CAUTION
Use integrated electrical receptacle only for 208/
240V Bosch washers.
Leveling the dryer
Importance of leveling the dryer
It is important that your dryer is level and that all four
dryer feet press with equal pressure against the floor.
This will help assure the quietest, most vibration-free use
of your dryer.
15
To adjust the dryer feet:
1. Install the dryer on a level and solid surface, preferably
in a corner of a room.
2. If the floor is uneven (or not level) adjust the dryer feet
as required to level the dryer. Do not place anything
under the dryer feet to help level the dryer.
3. Extend the dryer feet no more than is necessary. The
more the feet are extended, the more vibration the
dryer will experience. Start with the dryer feet turned all
the way in and adjust each foot as necessary.
4. Use a bubble level to check the top of the dryer to
make sure it is level side to side and front to rear.
5. Press down on each corner of the dryer top to make
sure the dryer does not “wobble“. There should be no
"give" or movement. All four dryer feet should press
equally against the floor. This is just as important as
the dryer being level to prevent vibration.
Check heating system
1. Check that the drum is empty.
2. Close the dryer door.
3. Switch the dryer to Cotton Extra Dry and then touch
the Start/Pause button.
4. After 2-3 minutes touch the Start/Pause button and
open the door.
▯ If the interior of the dryer feels warm, the dryer has
been connected properly. Switch the dryer to Off.
▯ If the dryer does not work, switch the dryer to Off.
Look in the Troubleshooting section of this user
manual for hints in solving the problem.
Preparing to transport the dryer - step by
step
1. Rotate the program selector to Off.
2. Pull out power supply plug.
3. Place any accessories in the drum.
4. Close the door and secure with adhesive tape.
5. Screw the height-adjustable feet of the dryer into the
housing to prevent them from being damaged during
transportation.
16
Reversing the door - step by step
Tip: To reverse your dryer door side:
▯ Use only T20 (Torx) type screw driver to remove and
reinstall door screws.
▯ Do not use any other tools to reverse the door (hinge
or latch).
5. Remove screws from the hook insert and then remove
it from the door.
1. Rotate the program selector to Off, pull out power
supply plug and open the door fully.
6. Follow the instructions at images bellow to unlock the
door ring.
2. Remove the screws from the door and pull out the
door from the dryer.
7. Separate the door and ring then reverse the ring and
fit the door and ring back together.
3. Put the door on a flat, smooth, but secured surface,
e.g. on a towel or dishcloth lying down on the floor or
table.
4. Remove screws from the hinge insert and then remove
it from the door.
8. Follow the instructions at images bellow to lock the
door ring.
17
9. Prepare the hinge insert and the hook insert to install
and then screw them following the instructions below.
11.Remove the door lock from the dryer.
12.Install the door lock (1) and then door lock cover (2)
at the opposite site of the door seal.
10.Remove screws from the door lock cover and then
remove it from the dryer.
13.Screw the door to the dryer.
14.You can now put in the power supply plug and close
the door to start operating the dryer.
18
Getting to know your appliance
Control panel
( Dry Level, Time Dry, Finish in
Selectable Option Settings for customizing Programs as desired.
Indicator Symbol lights or desired time is displayed
if setting is active.~ Default Program and Option
settings; Page 27
0 Wrinkle Block, Low Heat, Signal
@ Program Selector
Selecting a program and switching on/off;
turns in both directions.
H Display area for settings and information.
Additional option settings.
Indicator Symbol lights if setting is
active.~ Additional Program Option
settings; Page 27
8 Start/Pause
▯
▯
▯
starts or pauses the selected cycle;
indicator lamp on (steady) - cycle running, can
be paused;
indicator lamp blinking - options can be
changed; cycle can be started; door is closed;
childproof lock is active; cycle is in Pause mode.
19
Operating Instructions
9
WARNING
RISK OF FIRE, ELECTRIC SHOCK, OR INJURY
To reduce the risk of fire, electric shock, or injury to
persons, read the IMPORTANT SAFETY
INSTRUCTIONS and Operating Instructions before
operating this appliance.
Your new dryer
#
3
+
( Control panel, display area, program selector
0 Drum with interior light (depending on model)
The interior light activates after the door is opened and after the program starts, it switches off automatically.
Close the door
8 Open the door
20
@ Lint filter
H Air inlet
P Open the maintenance flap
Close the maintenance flap
Heat exchanger
9
WARNING
BEFORE INSTALLING OR USING YOUR DRYER
Read and follow all installation and operating
instructions.
Check the machine. Never connect the utilities (power or
water) to or start a damaged machine! Contact customer
service!
~ Customer service; Page 4
Check to be sure the dryer drain hose is installed
properly.
Turning the dryer on and off
The rotating Program Selector turns the dryer on as
drying cycle is selected and off when the selector is later
turned to the vertical Off position.
Before using the dryer for the first time
4. Check the dryer for visible damage. If damage found
contact your dealer.
5. Wipe the inside of the drum with a damp cloth.
6. Check heating system.
~ Check heating system; Page 16
7. If the dryer does not work, switch the dryer to Off.
Look in the Troubleshooting section of the operating
instructions for support.
~ Troubleshooting; Page 31
Temporary disconnection of the dryer
Operate your dryer only when you are at home. If you
intend going on vacation or are not using your dryer for
an extended period of time, you should:
1. Turn off the circuit breaker.
2. Pull out the power supply plug if possible.
3. Clean the lint filter.
1. Read these operating instructions carefully.
2. Check that the supply voltage corresponds with the
voltage specifications on the rating plate on the dryer,
see top rear side of the dryer and/or rating plate label
inside of the dryer door.
~ Electrical Connections; Page 14
3. Remove all objects from the drum.
21
Using the program selector to choose a
drying cycle
NOTICE: If you have activated the childproof lock, you
must deactivate it before you can set a program.
~ Childproof lock; Page 24
Use the program selector to select the desired drying
cycle. This dial turns in both directions, switches the
machine on and when a drying cycle is selected the time
duration appears in the display.
Special programs
The programs Sanitize, Jeans, Anti Shrink, Super Quick
15, Towels, Bulky/Large Items and Heavy Duty
(depending on model) are made for special type fabric
loads.
~ Program selection table; Page 26
Program selection
For optimum drying results your dryer offers several
program groups and additional options.
Select the required drying program from the program
table according to the examples.
~ Program selection table; Page 26
Automatic programs
There are automatic programs for different types of
textiles (regular/cotton, permanent press).
Time programs
Time programs run at specific temperatures. Suitable for
pre-dried, multi-ply, delicate textiles or individual small
items. Also for subsequent drying.
~ Default Program and Option settings; Page 27
The program sequence of automatic programs is
controlled by sensors. The duration of the program
depends on the measured degree of moisture in the
laundry and on the selected degree of dryness (e.g.
Cotton Dry or Cotton Extra Dry).
▯
Regular/Cotton
Selecting program settings and additional
options
▯
Permanent Press
By selecting program settings and additional options,
you can adjust the drying process to better suit the items
you are drying.
The settings can be selected and deselected depending
on the cycle progress.
The indicator lamps of the buttons light up if the setting is
active.
For Time Dry, Finish in, Wrinkle Block, Low Heat and
Signal the settings are not retained after the appliance is
switched off.
~ Default Program and Option settings; Page 27
~ Additional Program Option settings; Page 27
For Dry Level the setting is retained after the appliance is
switched off.
~ Dry Level; Page 27
22
Loading the laundry
9
Load the laundry
WARNING
RISK OF EXPLOSION
Do not dry laundry that has ever been in contact
with solvents, oil, wax, grease or paint (e.g. hair
styling products, nail varnish remover, stain
remover, cleaning solvent, etc.).
1. Check lint filter.
Place laundry in the empty drum. Put each piece of
laundry into machine separately.
For best results the laundry to be dried must be sorted
according to type of laundry and desired degree of
drying.
~ Program selection table; Page 26
~ Sorting the laundry; Page 25
~ Dry Level; Page 27
Starting the program
The filter should be cleaned after or before every
drying process. Cleaning the filter reduces the drying
time and saves energy.
~ Cleaning the lint filter; Page 28
2. Load the laundry into the drum and close the door.
1. Rotate program selector to the desired program.
Select the program which corresponds to the laundry
in the dryer from Program selection table.
~ Program selection table; Page 26
Tip: If the door has not been closed properly, the dryer
will not start.
L
The Start/Pause indicator light starts flashing.
2. Touch the Start/Pause button. Indicator lamp lights up
and the cycle starts.
Tips
After loading, close the door carefully so as not to trap
any items between the door and the rubber seal. The
door should close until a click is heard.
Foreign objects left in the drum may damage laundry.
Before inserting any laundry, check to make sure no
foreign objects are in the drum.
Recommended Load Size
Recommended maximum load size can be found in the
program selection table in this manual.
~ Program selection table; Page 26
During the cycle, the display area indicates the
estimated remaining time and, after starting the drying
cycle, the cycle duration and the symbols for the cycle
progress are flashing.
NOTICES
▯ If you want to protect the cycle against inadvertent
adjustment, select the Childproof lock.
~ Childproof lock; Page 24
▯ If é indicator lights up, clean the lint filter and/or
heat exchanger.
~ Cleaning the lint filter; Page 28
~ Cleaning the heat exchanger; Page 29
23
If DR indicator lights up, check the drain hose and
its connection.
~ Maintenance of drain hose; Page 30
3. If required, select Low Heat by pressing the button.
~ Additional Program Option settings; Page 27
4. If required, select Wrinkle Block by pressing the
button.
~ Additional Program Option settings; Page 27
▯
Tip: The estimated remaining time will be updated.
Indicator of program sequence
Bosch dryers use an advanced control system with a
moisture sensor continually monitoring the laundry’s
remaining moisture.
The current state of the process and status of the
program is shown by indicator lights (Damp, =, Dry,
End).
Childproof lock
You can secure the dryer against inadvertent changing of
the set functions. To do this, activate the childproof lock
after cycle start.
To Activate/Deactivate, touch Time Dry and Finish in
buttons at the same time for 3 seconds. In the display
field, you will see the D symbol light indicating the
childproof lock is active.
NOTICE: The childproof lock will remain activated until
the next cycle start even after switching the machine off.
You must deactivate the childproof lock before the next
cycle and, if necessary, activate it again after starting the
cycle.
Selecting a different program
If you have inadvertently started the wrong program, you
can change this as follows:
1. Touch Start/Pause.
2. Select another program.
3. Touch Start/Pause. The new drying cycle starts from
the beginning.
Cancel program
If required, you can cancel the selected program:
1. Touch Start/Pause.
2. Rotate the program selector to Off.
Program end
End appears in the display area and the Start/Pause
button indicator lamp is off.
After the program end, rotate the program selector to
Off.
Removing laundry/switching the
appliance off
1. Open the door and remove the laundry.
2. Turn the program selector to the Off position.
Appliance is switched off and dryer light goes out.
3. Clean lint filter.
~ Cleaning the lint filter; Page 28
4. Close the door.
Tip: If at the end of the drying cycle the display does not
light, the energy-saving mode is active. To see diplay,
e.g. press any button.
~ Environmentally friendly use of your dryer; Page 7
Signal
For switching the buzzer on and off touch the Signal
button.
The buzzer indicates program end if it is activated.
Other alarms are not influenced by this option.
Activate adjustment mode
2II
You can also change the following settings:
▯ volume for buzzer
▯ volume for button signals
To change these settings always activate adjustment
mode first.
1. Select Cotton Extra Dry on position 1.
The appliance is on.
24
2. Hold down Start/Pause and turn the program selector
to the right (position 3). Release Start/Pause button.
Adjustment mode is now activated and the default
volume for buzzer appears in the display.
Changing the volume
You can set the volume by touching the Time Dry
(volume up) or Finish in (volume down) button with the
program selector in the following positions:
▯
Position 3 for buzzer volume
0 = off, 1 = soft,
2 = mid, 3 = loud,
4 = very loud
▯
Position 4 for button signals volume
0 = off, 1 = soft,
2 = mid, 3 = loud,
4 = very loud
Quit adjustment mode
Turn the program selector to Off position. The settings
were saved.
Laundry
Preparing the laundry
▯
delicate fabrics (silk, synthetic curtains).
NOTICE: Damage to the appliance/fabrics.
Foreign objects (e.g. coins, paper-clips, needles, nails)
may damage the laundry or components in the dryer.
Drying tips
Therefore, note the following tips when preparing your
laundry:
▯ Empty all pockets to ensure no loose debris (coins,
keys, other hard objects and cigarette lighters) are
placed in the dryer drum. The drum must be empty
prior to drying.
▯
▯
▯
▯
▯
▯
▯
▯
▯
Close any fasteners (such as zippers, hooks and
eyelets) that could cause laundry to catch or become
entangled. Button up covers. Tie cloth belts, apron
strings, etc. together or use a laundry bag.
Remove any foreign objects or non-washable parts.
Always dry very small items (such as socks and
handkerchiefs) and underwired bras together with
large items of laundry or in a laundry bag.
▯
▯
To ensure a uniform drying result, sort the laundry
according to fabric type and drying program.
Do not over-dry easy-care laundry - risk of wrinkling!
Allow laundry to finish drying in the air.
Do not iron laundry immediately after drying. Place the
laundry in a pile for a short while. Residual moisture
will then be distributed uniformly.
Knitted fabrics (e.g. T-shirts, jerseys) often shrink when
tumble-dried for the first time. Do not use the Extra
Dry program.
Only dry wool fabrics with the use of drying rack. To
refresh or fluff up wool articles use the Hand Wash/
Wool program and remove load from dryer and layout
on flat surface to finish drying.
Starched laundry is not always suitable for dryer.
Starch leaves behind a coating that reduces the drying
effect.
When washing laundry that is to be tumble-dried
afterwards, use the correct amount of fabric softener
as specified in the manufacturer’s instructions.
For pre-dried, multi-layered fabrics or small, individual
items of laundry, use the Time program.
~ Program selection table; Page 26
Also suitable for subsequent drying.
Sorting the laundry
Check the care labels on each laundry item prior to
drying. They provide valuable information as well as
limitations about the temperature of drying process.
Choose an appropriate drying cycle.
Do not dry the following textiles in the dryer:
▯ air-tight textiles (e.g. rubberized),
25
Program selection table
Programs
Standard programs
Cotton Dry
Cotton Extra Dry
Perm P Damp
Perm P Dry
Perm Press Extra Dry
Delicates
Quick 40
Time Dry Variable
Hand Wash/Wool
Air Fluff/No Heat
Quick Dry Auto
Special programs
Towels
Sanitize
Jeans
Bulky/Large Items
Max.
load up
to:
Type of laundry (For laundry which is:)
full load Normal cotton and linen type load (bed linen, cotton clothes, etc.)
full load Terry bathrobes and terry bed linen (particularly thick or multi-ply)
1/2 load Trousers, dresses, skirts, shirts, blouses, leggings, sports clothing with syntheticrich fibers, lingerie (not to be or only lightly ironed)
1/2 load Shirts, blouses, sports clothing (not to be ironed)
1/2 load Bed linen and table linen, track suits, paraks, blankets (not to be ironed, thick or
multi-ply)
1/4 load Lingerie made of synthetic fibers, cotton or blended fabric
1/3 load Multi-layered, sensitive fabrics made of acrylic fibers
or separate small items of laundry
also for subsequent drying
1/3 load Pre-dried, multi-layered, sensitive fabrics made of acrylic fibers
or separate small items of laundry
also for subsequent drying
1/3 load Wool fabrics suitable for washing
used to refresh or fluff up wool articles but not dry completely
remove fabrics after program end, lay on flat surface and allow to dry
1/3 load All type of fabrics
for freshing up or airing of items of laundry that have been worn for a short period
of time
1/4 load Laundry made of synthetic fibers, cotton or blended fabrics (for example) that
needs to be dried quickly
Values may differ from those specified depending on the type of fabric, mixture of
laundry to be dried and residual moisture in the fabric
1/2 load
1/2 load
1/2 load
full load
Terry-towelling laundry e.g. towels and bathrobes
Cotton fabrics for drying in higher temperatures to keep them more hygienic
Fabrics made from jeans/denim
Garments with down feather fillings, pillows and blankets but not quilts
only dry one article at a time
Tip: For best results it is recommended to load the drum
depending on the fabric type:
▯ full load: Cottons and Linens
▯ 1/2 load: Permanent Press, Synthetic Blends and Poly
Knits
▯ 1/3 load: Wool, Mixed
▯ 1/4 load: Delicates
26
Default Program and Option settings
At the factory initial settings are pre-set for all cycles.
You can change some program settings as follows.
Dry Level
The dryness level can be increased in 3 steps (i.e. the
laundry is drier) by touching the Dry level button for
certain programs.
Default setting = 0 (No LED Symbol shown)
Selectable values: 0, +1, +2, +3
After the dryness level for a program is set, it is retained
until changed again.
Time Dry
Available only for Time programs,
~ Program selection table; Page 26
can be selected from minimum 20 minutes to maximum
3 hours, in 10-minute steps.
Finish in
The program end (Finish in) time can be set in one hour
increments to a maximum of 24 h (hours).
After selecting the desired drying program (at the dial)
but before touching the Start button, touch the Finish in
button until the desired time is displayed, e.g. 8 h, then
touch the Start button to start the dryer.
NOTICE: The cycle duration is included in the set Finish
in time.
Here is an example of 2hr:30 min cycle time and an 8 h
Finish in time. 8 h is displayed (until Energy-Saving mode
activates) and counts down (approximately 5hr:30min)
until the drying cycle begins (at 2hr:30min) then the cycle
duration 2:30 is displayed and drying begins. Total time
approximately 8 hours.
Additional Program Option settings
Wrinkle Block
Low Heat
To prevent the laundry from creasing or wrinkling, the
dryer drum rotates at specific intervals following the
drying process.
If the Wrinkle Block button is touched, this function is set
to 60 (+60m) or 90 (+90m) minutes.
The laundry remains loose and fluffy until it is removed.
The laundry should be removed before this time has
elapsed.
Reduced temperature for delicate fabrics, e.g.
polyacrylic, polyamide or elastane, with longer drying
time.
Observe the care information or symbols on the textile’s
label.
Spin speed
The Spin Speed setting is based on your washer’s
normal spin speed. Adjusting this setting allows the
dryer’s displayed time to be as close as possible to the
actual drying time.
NOTICE: The spin speed is not the same as the rotation
speed of the dryer drum.
Activate adjustment mode
2II
To change the dryer’s Spin Speed setting follow the
instructions below.
1. Select Cotton Extra Dry on position 1.
The appliance is on.
2. Touch and hold Start/Pause and turn the program
selector to the right (position 2). Release Start/Pause
button.
Adjustment mode is now activated and the default value
(1000 rpm) appears in the display.
27
Change spin speed
Press the Time Dry or Finish in button to change the
setting (allowable values are between 600 and 1800 in
increments of 100).
Quit adjustment mode
Turn the program selector to Off position. The settings
were saved.
Cleaning and care
USER-MAINTENANCE INSTRUCTIONS
9
WARNING
RISK OF EXPLOSION
Never use solvents or highly flammable liquids for
cleaning.
9
To clean the lint filter:
1. Switch off the dryer. Rotate the program selector to
Off.
9
CAUTION
The inside of the door heats up during the drying
process. The drum, the door and the laundry may
be hot.
CAUTION
Improper cleaning may damage the dryer or cause
injury.
Do not spray with a hose or pressure washer.
Do not use scouring agents or all-purpose cleaners.
Do not use steam cleaners.
Do not use bleach-based wipes.
2. Open the door.
Cleaning the housing and control panel
Wipe the housing and fascia with a soft cloth and soapy
water only.
Wipe the drum, door seal and inside of the door with a
damp cloth only.
3. Pull out filter.
NOTICE: Do not clean with a water jet.
Remove detergent and cleaning agent residue
immediately.
During drying, water may occassionally accumulate
between the window and the seal. This does not affect
the proper operation of your dryer.
Cleaning the lint filter
A dirty filter extends the drying time and increases
energy consumption.
The filter should be cleaned before or after each drying
process.
If é indicator lights up during a drying program, clean
the filter immediately.
Tip: The program interrupts automatically.
28
4. Open the filter.
5. Remove fluff (run hand over filter).
To clean the heat exchanger:
1. If the dryer is hot, run on Air Fluff/No Heat program to
allow the dryer to cool down.
2. Residual water may escape, place an absorbent cloth
under the maintenance flap.
3. Unlock the maintenance flap and open it completely.
6. Close the filter and re-insert it.
4. Turn both locking levers towards each other.
7. Close the door.
5. Pull out the heat exchanger cap.
NOTICE: Severely dirty or clogged lint filter should be
rinsed under warm running water.
6. Remove the heat exchanger.
NOTICE: Do not damage the heat exchanger! Clean
with warm water only. Do not use hard or sharp edged
objects!
The filter must be dried thoroughly before being placed
back into dryer.
Cleaning the heat exchanger
The heat exchanger requires periodic cleaning
(recommended once per month under normal drying
conditions). The frequency of cleaning depends on the
amount and type loads being dried.
29
7. Rinse the heat exchanger and the cap on all sides with
a jet of water to completely remove all of the lint and
fluff.
8. Remove all lint and fluff from the seals on the dryer
and heat exchanger.
9. Allow the cap and the heat exchanger to dry fully.
10. First insert the heat exchanger, then the cap.
11. Turn back both locking levers.
To clean the moisture sensors:
1. Open the door.
2. The deposit on the sensors can easily be removed by
wiping the sensors (the two bars next to the lint filter)
with a cloth and a little white vinegar.
NOTICE: Use white vinegar only!
Clean the moisture sensors once a month.
12. Close the maintanance flap until it locks into position.
Cleaning the lint filter area
Over time, lint from the drying process collects in the lint
filter area.
This lint can be easily removed using a vacuum cleaner.
13. Look in the Troubleshooting table to reset the
maintenance indication.
~ Troubleshooting; Page 31
Cleaning the moisture sensors
Occasionally the moisture sensors have to be cleaned
because a fine layer of transparent buildup is deposited
on the sensors.
Maintenance of drain hose
If DR indicator lights up check the drain hose for kinks,
restrictions or blockage.
NOTICE: If DR indicator still lights up after the
maintenance, you should contact customer service or
your local dealer.
30
Troubleshooting
Introduction
NOTICE: Before doing maintenance work or trying to fix
a problem, rotate the program selector to Off.
The program will not continue running when the power
supply has been restored. Desired program must be
selected again and start button pressed.
9
WARNING
RISK OF INJURY TO SKIN
The door, the drum and the laundry may be hot.
9
WARNING
RISK OF ELECTRIC SHOCK! EXPLOSION HAZARD
Repairs or replacement of parts should be carried
out by authorized technicians only.
Before calling customer service, check whether you can
rectify the fault yourself by means of the following table.
If a fault cannot be rectified or a repair is required:
1. Set program selector to Off.
2. Disconnect the dryer from the power outlet.
3. Call customer service.
~ Customer service; Page 4
General Troubleshooting
Often when you encounter a problem it will be something
minor. Before you call customer service, consider the
suggestions and instructions below:
NOTICE: The troubleshooting items listed below can
help you resolve minor issues with your dryer quickly and
without the necessity of waiting for a service call.
Service calls for issues that could have been resolved
by using this table may not be covered under the
Warranty. Please rule out any of these issues before
calling customer service.
Determing the Problem
Problem
Possible cause(s)
Solution(s)
Dryer does not start.
Start/Pause indicator
light does not illuminate.
Power cord end not inserted at all
or not inserted correctly.
A fuse is blown or breaker is
tripped.
Start/Pause button not touched.
Door not closed properly.
Insert power cord end correctly.
Program not selected.
The display panel and
indicator lights go out,
Start/Pause indicator
light flashes.
The display panel
switches off.
é indicator light up.
DR indicator light up.
Water has not drained
completely.
Energy-saving mode is activated.
Replace fuse or reset breaker.
Touch Start/Pause button.
Check if laundry is caught in the door. Close the door
until a click is heard.
Rotate the program selector to desired program.
~ Program selection table; Page 26
Touch any button to activate the display.
~ Environmentally friendly use of your dryer; Page 7
Sleep mode after setting the Finish Touch any button to activate the display.
in option is activated.
Lint filter dirty.
Clean lint filter.
~ Cleaning the lint filter; Page 28
Touch the Start/Pause button to reset the displayed
indication and then touch Start/Pause button again to
reset the appliance if necessary.
Heat exchanger dirty.
Clean heat exchanger.
~ Cleaning the heat exchanger; Page 29
Touch the Start/Pause button to reset the displayed
indication and then touch Start/Pause button again to
reset the appliance if necessary.
Drain hose is blocked.
Check drain hose.
~ Maintenance of drain hose; Page 30
Check drain hose connection conditions.
31
Problem
Possible cause(s)
Solution(s)
Water is leaking out.
Dryer is not leveled.
Level the dryer.
~ Leveling the dryer; Page 15
Clean the heat exchanger seal.
~ Cleaning the heat exchanger; Page 29
Check entire length of drain hose for leaks; replace if
necessary.
Check that hose is clamped on hose barb at back of
the dryer securely.
Load the laundry.
~ Loading the laundry; Page 23
Use time program.
~ Program selection table; Page 26
Check the loaded laundry. If it is dry, open the door,
remove laundry and turn program selector to Off.
Close the door until a click is heard.
The heat exchanger seal is dirty.
Drain hose is leaking.
Program terminates
shortly after starting.
Laundry is not loaded.
Load too small for selected program.
Loaded laundry is too dry.
The door opens by
itself.
Creasing.
The door not closed properly.
Do not exceed the maximum load for selected program. Remove items of laundry immediately after the
end of the program, hang them up and pull into shape.
Turn program selector to Off.
~ Program selection table; Page 26
Drying result is not sat- Warm laundry may feel more damp Remove items of laundry immediately after the end of
isfactory (laundry feels than it really is.
the program and turn the program selector to Off.
too damp).
The selected program does not suit Use another drying program or, in addition, select the
the load.
time program.
~ Program selection table; Page 26
Dryness level is not adjusted.
Use Dry Level to adjust the dryness level.
~ Dry Level; Page 27
Fine layer of limescale on the mois- Clean the moisture sensors.
ture sensors.
~ Cleaning the moisture sensors; Page 30
Program termination e.g. main
See the problem(s) mentioned in this table.
power supply failure, door open or
maximum drying time reached.
Initial load is too wet.
Spin laundry at higher speed in the washing machine,
before drying.
Switch off the dryer, and than turn it on again.
Drying time too long.
Lint filter and/or Heat Exchanger is Clean lint filter
dirty.
~ Cleaning the lint filter; Page 28
and/or Heat Exchanger.
~ Cleaning the heat exchanger; Page 29
Insufficient supply of air.
Ensure that air can circulate.
Air inlet possibly blocked.
Do not obstruct the air inlet on the front of the dryer.
Ventilate the room.
Ambient temperature higher than
95°F/35°C.
Program does not start A delayed starting time has been
Drying cycle will begin at proper time to complete at
Finish in (remaining)
selected and activated.
the selected Finish in time.
time is displayed.
Program does not start Childproof look is activated.
Deactivate Childproof look.
~ Childproof lock; Page 24
- D symbol lit up.
32
Laundry load exceeded.
Unsuitable program selected.
Problem
Possible cause(s)
Solution(s)
One or more indicator
lights are flashing.
Lint filter or/and heat exchanger is
dirty.
Installation conditions are not adequate.
Fault in program sequence or malfunction.
Clean lint filter or/and heat exchanger (see solution of
the problem(s) in this table above).
Check the installation conditions.
~ Electrical Connections; Page 14
Switch off the dryer, allow it to cool down, switch back
on and restart the program.
Remove laundry from the dryer immediately and
spread out. This allows the heat to dissipate. Be careful as the door, the drum and the laundry may be hot.
Power failure.
STATEMENT OF LIMITED PRODUCT WARRANTY
Bosch Clothes Dryer
What this Warranty Covers & Who it Applies to:
The limited warranty provided by BSH Home Appliances
(“Bosch”) in this Statement of Limited Product Warranty
applies only to the Bosch appliance sold to you, the first
using purchaser, provided that the Product was
purchased:
▯ For your normal, household (non-commercial) use,
and has in fact at all times only been used for normal
household purposes.
▯ New at retail (not a display, “as is”, or previously
returned model), and not for resale, or commercial
use.
▯ Within the United States or Canada, and has at all
times remained within the country of original purchase.
The warranties stated herein apply only to the first
purchaser of the Product and are not transferable.
Please make sure to return your registration card; while
not necessary to effectuate warranty coverage, it is the
best way for Bosch to notify you in the unlikely event of a
safety notice or product recall.
Limitation for Third Party Accessories:
Third party accessories, other than those shipped with
your Bosch appliance, and any consequential damages
resulting therefrom, are not covered by this warranty. This
limitation expressly includes the implied warranties of
merchantability and fitness for a particular purpose,
which are also expressly excluded with respect to third
party accessories, other than those shipped with your
Bosch appliance. Use of third party accessories, other
than those shipped with your Bosch appliance, does not
void this warranty on any other part, and all other
provisions of this warranty remain in effect.
How Long the Warranty Lasts:
Bosch warrants that the Product is free from defects in
materials and workmanship for a period of three hundred
sixty-five days (365) days from the date of purchase. The
foregoing timeline begins to run upon the date of
purchase, and shall not be stalled, tolled, extended, or
suspended, for any reason whatsoever. This product is
also warranted to be free from cosmetic defects in
material and workmanship (such as scratches of
stainless steel, paint/porcelain blemishes, chips, dents,
or other damage to the finish) of the Product, for a period
of thirty (30) days from the date of purchase or closing
date for new construction. This cosmetic warranty
excludes slight color variations due to inherent
differences in painted and porcelain parts, as well as
differences caused by kitchen lighting, product location,
or other similar factors. This cosmetic warrannty
specifically excludes any display, floor, “As Is”, or “B”
stock appliances.
Repair/Replace as Your Exclusive Remedy:
During this warranty period, Bosch or one of its
authorized service providers will repair your Product
without charge to you (subject to certain limitations
stated herein) if your Product proves to have been
manufactured with a defect in materials or workmanship.
If reasonable attempts to repair the Product have been
made without success, then Bosch will replace your
Product (upgraded models may be available to you, in
Bosch’s sole discretion, for an additional charge). All
removed parts and components shall become property
of Bosch at its sole option. All replaced and/or repaired
parts shall assume the identity of the original part for
purposes of this warratny and this warranty shall not to
be extended with respect to such parts. Bosch’s sole
liability and responsibility hereunder is to repair
manufacturer-defective Product only, using a Bosch
authorized service provider during normal business
hours. For safety and property damage concerns, Bosch
highly recommends that you do not attempt to repair the
Product yourself, or use an un-authorized servicer; Bosch
will have no responsibility or liability for repairs or work
performed by a non-authorized servicer. If you choose to
have someone other than an authorized service provider
work on your Product, THIS WARRANTY WILL
AUTOMATICALLY BECOME NULL AND AVOID.
Authorized service providers are those persons or
companies that have been specially trained on Bosch
products, and who possess, in Bosch’s opinion, a
superior reputation for customer service and technical
ability (note that they are independent entities and are
not agents, partners, affiliates or representatives of
Bosch). Notwithstanding the foregoing, Bosch will not
incur any liability, or have responsibility, for the Product if
it is located in a remote area (more than 100 miles from
an authorized service provider) or is in a reasonably
inaccessible, hazardous, threatening, or treacherous
33
locale, surroundings, or environment; in any such event,
if you request, Bosch would still pay for labor and parts
and ship the parts to the nearest authorized service
provider, but you would still be fully liable and
responsible for any travel time or other special charges
by the service company, assuming they agree to make
the service call.
SCOPE OF EXTENDED LIMITED WARRANTY
Bosch will repair or replace, free of charge, any printed
circuit boards, drive motor or component part of the drive
motor that proves defective under conditions of normal
home use during the first seven hundred thirty (730)
days from the date of purchase, labor charges excluded.
Out of Warranty Product:
Bosch is under no obligation, at law or otherwise, to
provide you with any concessions, including repairs,
prorates, or Product replacement, once this warranty has
expired.
Warranty Exclusions:
The warranty coverage described herein excludes all
defects or damage that are not the direct fault of Bosch,
including without limitation, one or more of the following:
Use of the Product in anything other than its normal,
customary and intended manner (including without
limitation, any form of commercial use, use or storage
of an indoor product outdoors, use of the Product in
conjunction with air or water-going vessels).
▯ Any party’s willfull misconduct, negligence, misuse,
abuse, accidents, neglect, improper operation, failure
to maintain, improper or negligent installation,
tampering, failure to follow operating instructions,
mishandling, unauthorized service (including self
performed “fixing” or exploration of the appliance’s
internal workings).
▯ Adjustment, alteration or modification of any kind.
▯ A failure to comply with any applicable state, local,
city, or county electrical, plumbing and/or building
codes, regulations, or laws, including failure to install
the product in strict confirmity with local fire and
building codes and regulations.
▯ Ordinary wear and tear, spills of food, liquid, grease
accumulations, or other substances that accumulate
on, in, or around the Product.
▯ Any external, elemental and/or environmental forces
and factors, including without limitation, rain, wind,
sand, floods, fires, mud slides, freezing temperatures,
excessive moisture or extended exposure to humidity,
lightning, power surges, structural failures surrounding
the appliance, and acts of God.
In no event shall Bosch have any liability or responsibility
whatsoever for damage to surrounding property,
including cabinery, floors, ceilings, and other structures
or objects around the Product. Also excluded from this
warrany are Products on which the serial numbers have
been altered, defected, or removed; service visits to
teach you how to use the Product, or visits where there is
nothing wrong with the Product; correction of installation
problems (you are solely responsible for any structure
and setting the Product, including all electrical, plumbing
▯
34
or other connecting facilities, for proper foundation/
flooring, and for any alterations including without
limitation cabinetry, walls, floors, shelving, etc.); and
resetting of breakers or fuses.
TO EXTENT ALLOWED BY LAW, THIS WARRANTY SETS
OUT YOUR EXCLUSIVE REMEDIES WITH RESPECT TO
PRODUCT, WHETHER THE CLAIM ARISES IN
CONTRACT OR TORT (INCLUDING STRICT LIABILITY,
OR NEGLIGENCE) OR OTHERWISE. THIS WARRANTY
IS IN LIEU OF ALL OTHER WARRANTIES WHETHER
EXPRESS OR IMPLIED. ANY WARRANTY IMPLIED BY
LAW, WHETHER FOR MERCHANTABILITY OR FITNESS
FOR A PARTICULAR PURPOSE, OR OTHERWISE,
SHALL BE EFFECTIVE ONLY FOR THE PERIOD THAT
THIS EXPRESS LIMITED WARRANTY IS EFFECTIVE. IN
NO EVENT WILL THE MANUFACTURER BE LIABLE FOR
CONSEQUENTIAL, SPECIAL, INCIDENTIAL, INDIRECT,
“BUSINESS LOSS”, AND/OR PUNITIVE DAMAGES,
LOSSES, OR EXPENSES, INCLUDING WITHOUT
LIMITATION TIME AWAY FROM WORK, HOTELS AND/
OR RESTAURANT MEALS, REMODELLING EXPENSES
IN EXCESS OF DIRECT DAMAGES WHICH ARE
DEFINITELY CAUSED EXCLUSIVELY BY BOSCH, OR
OTHERWISE. SOME STATES DO NOT ALLOW THE
EXCLUSION OR LIMITATIONS ON HOW LONG AN
IMPLIED WARRANTY LASTS, SO THE ABOVE
LIMITATIONS MAY NOT APPLY TO YOU. THIS
WARRANTY GIVES YOU SPECIFIC LEGAL RIGHTS, AND
YOU MAY ALSO HAVE OTHER RIGHTS WHICH VARY
FROM STATE TO STATE.
No attempt to alter, modify or amend this warranty shall
be effective unless authorized in writing by an officer of
BSH.
How to Obtain Warranty Service:
To obtain warranty service for your Product, you should
contact Bosch Customer Service Department.
BSH Home Appliances Corporation - 1901 Main Street,
Irvine, CA 92614 / 800-944-2904
*9000991494*
9000991494
9503
1901 Main Street, Suite 600 • Irvine, CA 92614 • 1-800-944-2904
www.bosch-home.com • © 2012 BSH Home Appliances