1
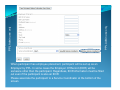
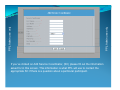
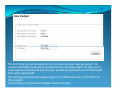
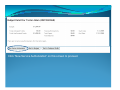
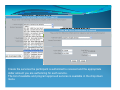
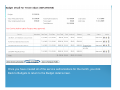
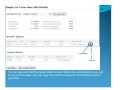
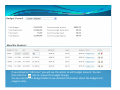
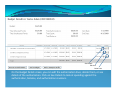
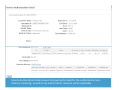
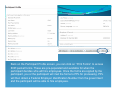
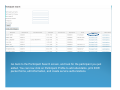
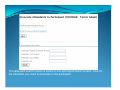
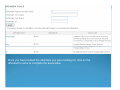
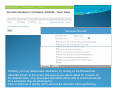
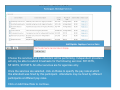
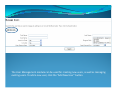
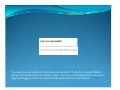
Enter your username and password to log in
Select the Agency you work for, from the drop down list. Click “Go” to continue
Once you have logged in, you will be brought to the Participant Search page. Enter your
participant’s information to search for the person. You may enter information into one
or more search fields. You may also click Search without entering anything in the search
Fields and the search will return all Participants associated with your Agency.
If you would like to enroll a new participant, click the button on the bottom of the
screen. We recommend searching for the participant first in case the information has
already been entered.
Enter the participant’s demographic information here. You must enter the AAA name
(your agency’s name) and chose a Yes or No in the Employee Placement field. Yes
means participant will be hiring his/her own employees. No means all services will be
sought through the AAA.
Continued on next page…
PPL Admin use only
PPL Admin use only
When participant has employee placement, participant will be set up as an
Employer by PPL. In some cases the Employer Of Record (EOR) will be
someone other than the participant. Regardless, EOR information must be filled
out even if the participant is also an EOR.
Please associate the participant to a Service Coordinator at the bottom of the
screen
PPL Admin use only
PPL Admin use only
If you’ve clicked on Add Service Coordinator, (SC) please fill out the information
asked for in this screen. This information is what PPL will use to contact the
appropriate SC if there is a question about a particular participant.
Go back to the Participant Profile and click on Service Authorizations to enter the
participant’s budget and service authorizations.
The first thing you will be asked to do is to enter the new “savings period”. All
unused authorized funds will be pooled into the “savings budget” for later use to
cover past-due timesheets and invoices, as well as purchases over $1200/month
limit, when appropriate.
The savings period should always begin on 7/1/2009 and end on 3/31/2010 for
this program.
Click Continue to proceed to budget creation screens
Click on New Budget to create the new monthly budget for the participant. This is
where you can authorize how much money the participant may spend in a
month.
The maximum amount that you can authorize per month is $1,200, per rules of
the program. The budgets must begin and end within the same month (so if the
begin date is in September, the end date must also be in September). Unused
funds in the budget will be swept into the Savings Budget 45 days after the end
of the budget month. Attendants and Agencies are instructed to submit all
timesheets and invoices for that month by that date.
Once the budget entry is completed, click Create to proceed to set up service
authorizations.
To authorize services to be purchased with the budgeted funds, click on Budget
Detail.
Click “New Service Authorization” on this screen to proceed.
Create the services the participant is authorized to received and the appropriate
dollar amount you are authorizing for each service.
The list of available and program approved services is available in the drop down
menu.
detail
edit
delete
Once you have created the authorization line, you may use the buttons on the
right of the screen to view detail, edit, or delete the line. You will not be able to
delete the line once services are billed against it. You also will not be allowed to
edit the dollar amount to less that what has been billed against the authorization
to date.
Once you have created all of the service authorizations for the month, you click
Back to Budgets to return to the Budget detail screen.
Copy
budget
Copy
Budget
Edit line
Line
Edit
You can see now that the budget detail screen reflects the authorizations you just
set up in the budget. You can copy the month’s budget for the following month if
you’d like.
Once you click “copy budget” button, you will be asked to enter the date range
for the next budget. Again, the budget must begin and end within the same
calendar month. After entering the date range for the new budget, click Copy to
copy the budget.
If you clicked on “Edit Line”, you will see the option to edit budget amount. You can
then click the
icon to accept the budget change.
You can also click on Budget Detail to see detailed information about the budget and
usage to date.
See Details
Edit Line
Delete Line
On the Budget Detail screen, you can edit the authorization lines, delete them, or see
details of the authorization. Click on See Details to look at spending against the
authorization, balance, and authorization revisions.
Service Authorization Detail screen lists payments made for the authorized service,
balance remaining, as well as any authorization revisions, when applicable.
Back on the Participant Profile screen, you can click on “Print Forms” to access
EOR packet forms. These are pre-populated and available for when the
participant decides s/he will hire employees. Once the forms are signed by the
participant, you or the participant will mail the forms to PPL for processing. PPL
will then obtain a Federal Employer Identification Number from the government
and the participant will be able to hire employees.
You may save the forms and email them to the participant, or print them to be
mailed by regular mail. PPL must receive the packet in its entirety, with original
signatures.
Go back to the Participant Search screen, and look for the participant you just
added. You can now click on Participant Profile to add attendants, print EOR
packet forms, edit information, and create service authorizations.
Once in the Participant Profile, click on Associated Attendants to add attendants
who will be working for the participant.
The attendant search screen is similar to the participant search screen. Look for
the attendant you need to associate to the participant.
Once you have located the attendant you were looking for, click on the
attendant’s name to complete the association.
Similarly, you may disassociate attendants, by clicking on the Disassociate
Attendant button. In the screen that pops up you will be asked for a reason for
the disassociation. Only associated attendants will be able to submit timesheets
for a participant they are employed by.
Click on Services to specify which services the attendant will be performing.
Choose the services that the attendant will be performing. Independent providers
will only be able to submit timesheets for the following services: S5136TS,
S5126TS, S5150TS. All other services are for agencies only.
Once the services are selected, click on Rates to specify the pay rate at which
this attendant was hired by this participant. Attendants may be hired by different
participants at different pay rates.
Click on Add New Rate to continue.
Enter the pay rate and the time period for which the rate is valid. This can be
edited in the future. You may enter multiple rates for different time periods, if a
pay increase was negotiated by the attendant at the time of hire.
The User Management module can be used for creating new users, as well as managing
existing users. To add a new user, click the “Add New User” button.
Enter the individual’s First name, Last name, desired username, email address, and
password. Passwords should be at least 8 characters in length, and contain at least 1
upper case letter, 1 number, and one special character (!@#$%^&*)
Check off the correct box under “Assign to Program Role” and start typing the person’s
name or Agency name under “Linked to External Account”. The name table will
populate and you will be able to select the correct individual from the list that will
appear below. Click Submit when finished.
You have now successfully created a new user account. Please test it yourself before
giving it to the individual who will be using it. You can test it by going back to the log in
page, and logging in with the user ID and password you have just created.