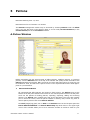
1
Version 6
Basic Teacher’s
Manual
Copyright Notice
Copyright ©2012 Schjelderup LTD, All Rights Reserved.
Distributed under license by COMPanion Corporation.
Under the copyright laws, this manual or the software may not be copied, in whole or in part without written consent of Schjelderup LTD, except in the normal use of the software and as described
in the Software License Agreement. The same proprietary and copyright notices must be affixed
to any permitted copies as were affixed to the original.
NOTE: Unauthorized use of these materials can result in civil damages and criminal penalties.
Trademarks
COMPanion Corp7, Akademus7, Alexandria7, eLunchroom7, Lancaster7, MacLunchroom7,
SmartMARC7, SmartScan7, Textbook Tracker7, Peripheral Vision7 and their associated logos
and icons are registered trademarks of Schjelderup LTD used under license by COMPanion Corporation. Apple, AppleTalk, ImageWriter, and LaserWriter are registered trademarks of Apple
computer, Inc. Macintosh is a registered trademark of Apple Computer, Inc. Other trade names
are the property of their respective corporations.
Updated 1/15/12 - Alexandria version 6.21.2
Printed in the United States of America
Printed by COMPanion7 Corporation
1831 Fort Union Boulevard
Salt Lake City, Utah 84121-3041 USA
(801) 943-7277 Voice, worldwide
(800) 347-6439 Voice — Sales, US & Canada
(800) 347-4942 Voice — Technical Support - US & Canada
(801) 943-7752 FAX, worldwide
email: [email protected]
Web: http://www.companioncorp.com, http://www.goalexandria.com
Listservs: [email protected]
[email protected]
[email protected]
i
Preparation
A. Read the entire teacher’s manual before training and
PRACTICE, PRACTICE, PRACTICE the presentation
beforehand.
Your attendees will appreciate the training more if you are prepared and know your material
thoroughly.
B. Arrange a date and time.
Normally training will last 7 hours, but should be scheduled for approximately 8 1/2 hours to
allow for two 15-minute breaks and a one-hour lunch.
C. Verify the number of attendees.
The best training is usually done in small groups, generally 12 people or less per session. If
more than 12 people are to be trained, either divide the users by ability and perform multiple
sessions or match new users with advanced users who can help them master the basics and
stay on task.
D.Arrange a location.
Ideally, training will be done in a lab or library with enough computers for only 1-2 people per
computer. Make sure that you and the attendees know how to get to the training site. If driving
to the training site, ask beforehand about parking to ensure that you park in a reasonable location that will not require leaving class to attend to parking meters or to move your vehicle.
E. Verify that the computers meet the minimum requirements.
F. Install the demo on the computers before the attendees
arrive.
Be sure to arrive with sufficient time to install. It will generally take 30 minutes to install on 12
machines. If you will be installing the demo personally, verify that no security software will prevent installation or ask that someone with the appropriate security clearance be in attendance
to disable the security. If necessary, send the demo ahead and have a technician or a librarian
install before you arrive.
G. Prepare and provide sufficient materials for each
attendee.
Alexandria v6 Basic Teacher’s Manual
1
Each attendee should receive a training manual and a circulation commands sheet (with command barcodes). Optional: an evaluation form and the trainer’s business card.
H.Provide either name tents or name tags for attendees.
Name tags or name tents are very beneficial for the trainer and the attendees to learn each
other’s names. Name tents are made by folding a piece of paper in thirds; the attendees should
write their names on two sides of the paper and stand the tent on the computer monitor.
2
Alexandria v6 Basic Teacher’s Manual
1
Introduction
Estimated teaching time: 1/2 hour
A. Introductions -- Trainer and Attendees
B. Training Outline and Manual
C. Safe Seven
Table 1:
Single-User
MultiDataStation
Central
Union
Hosted
Backup
Librarian
Controller
Manager
Person in
Charge
Host Staff
Archive
Librarian
Librarian
Person in
Charge
Host Staff***
System Maintenance
Librarian
Techs
Techs
Host Staff
Alex Maintenance
Librarian
Librarian
Person in
Charge
Host Staff***
UPS
Librarian
Controller
Manager
Person in
Charge
Host Staff
Security
Librarian
Librarian
Librarian or
Person in
Charge
Librarian or
Person in
Charge
Always Watch Your Screen
Library Staff
Library Staff
Library Staff
Library Staff
Call Tech Support
Library Staff
Library Staff
Library Staff
Library Staff
*** May be changed by Librarian; however, suggest that these be left as set by Host Staff.
1. BACK UP, BACK UP, BACKUP
COMPanion recommends that you keep a minimum of NINE backups at any given time.
Backups are saving complete copies of your Data folder to some external medium be it on CDROM, an external hard drive, a flash drive or a file server. You should keep at least one backup
per day of the week, plus four previous Fridays. We never discourage customers from keeping
additional backups. If you are using the same drive to store all the backups, remember to
rename the Data folder to include the date (i.e. 04092009Data, 04102009Data).
Alexandria v6 Basic Teacher’s Manual
1
You do not need to back up the software. COMPanion can quickly replace the software if your
library is current on its subscription. What COMPanion cannot replace is your data — so BACK
IT UP!
It is strongly recommended that at least one copy of your data be stored off-site (e.g. take the
Friday backup home). Libraries have been burglarized and all computer equipment including
the backup discs have been stolen. Libraries have also burned down and the backups have been
instrumental in obtaining a quick and settlement from the insurance company.
Central Union Systems: Only one person needs to do the backup.
Alexandria Controller Systems: This can only be done by a person with administrative rights
to Alexandria Controller, so individual librarians will not be able to perform this function.
2. Perform standard machine maintenance.
Ideally, every machine should be scanned each month for viruses and for file damage. Run
either Norton Disk Doctor (Macintosh) or Scandisk (PC) on a frequent basis. On Windows,
Defragmentation of the hard drive should also be done regularly. Alexandria cannot be
expected to run correctly when the operating system or file structure is damaged.
3. Perform Alexandria maintenance.
Twice month you should run Rebuild on your Database which can take several hours to run
depending on the strength of your machine and the size of your collection. Rebuild checks that
the indexes used for sorting, browsing, and selecting match the data, that the records are keyworded appropriately, and that the status counters are correct. Always archive before running
Rebuild or any other major utility or import. Rule of thumb: If it might take longer to correct a
problem caused by a bad import or running a utility incorrectly than it will take to run an
Archive, you should archive your data before performing the Rebuild or import.
Alexandria Controller Systems: Scheduling a Rebuild can only be done by a person with
administrative rights to Alexandria Controller; however, there is a Rebuild Now feature
available under File on the menu bar.
Central Union Systems: Rebuild should be done once a week.
NOTE: Alexandria’s Data Station must be running for Rebuild to be run.
2
Alexandria v6 Basic Teacher’s Manual
To set up scheduled Rebuilds:
•
Click on Tools on the menu bar and select Utilities.
•
Click on Database in the left frame and, then, click on the Saved tab in the main (right)
frame.
•
Click on Database Rebuild.
•
Click on the Schedule tab.
•
Click on the Calendar icon in the Run next on field and select a date. It is suggested that
you set it for a Friday. Next, set the time of day for a time when no one is likely to be using
Alexandria. Change the Repeat drop-down menu to Weekly and click on Friday. Set the
Every field to the value suggested for your type of system. (Stand-alone -- 4, Central
Union -- 1, and Alexandria Controller -- 2).
•
If you wish to be notified when a Rebuild is run, check the box and fill in your email
address in the Send Email Notification To field. Check the box for Perform Archive
Before Running Operation.
•
Click on Save All in the upper-right corner of the window.
NOTE: You might want to set your Archive schedule while you are in Utilities.
To set up scheduled Archives:
•
Click on Tools on the menu bar and select Utilities.
•
Click on Database in the left frame, then, click on the Saved tab in the main (right) frame.
Alexandria v6 Basic Teacher’s Manual
3
•
Click on Database in the left frame and, then, click on the Saved tab in the main (right)
frame.
•
Click on Database Archive.
•
Click on the Schedule tab.
•
Click on the Calendar icon in the Run next on field and select a date. It is suggested that
you set it for a Friday. Next, set the time of day for a time when no one is likely to be using
Alexandria AND a time that is at least 10 minutes before your Rebuild is scheduled to run.
Change the Repeat drop-down menu to Daily.
•
If you wish to be notified when an Archive is run, check the box and fill in your email
address in the Send Email Notification To field. Do not check the box for Perform
Archive Before Running Operation.
•
Click on Save All in the upper-right corner of the window and close the Utilities window.
•
Go to Edit on the menu bar and select System Preferences.
•
In the System Administration section, click on Site Information.
•
Click on the Scheduled Events tab and set the number of Archives to Keep to at least
10.
•
Click on Save in the upper-right corner of the window.
To run a Rebuild immediately.
•
Go to File on the menu bar.
•
Select Rebuild Now.
•
Select both Run an Archive before rebuilding and Restart after a successful rebuild.
Rebuild looks at every record and pointer in Alexandria’s database. If it encounters any problems in the record, Alexandria will do everything possible to correct the problems; however, if
the problems cannot be resolved, the record is deleted. The following procedures are recommended in conjunction with Rebuild:
At the end of the day on which Rebuild will be run:
•
Click on the Special tab in the middle of the Circulation window.
•
Click on the System Info subtab.
•
Write down the first four figures (number of patrons, titles, copies, and transactions) that
are shown in the left pane of the tab.
•
Go home.
The first thing in the morning on the first work day after Rebuild has been run:
4
•
Click on the Special tab in the middle of the Circulation window.
•
Click on the System Info subtab.
•
If the figures are the same, no problems were found.
Alexandria v6 Basic Teacher’s Manual
•
If the figures are different, there were problems found in your database that could not be
repaired. Call Alexandria Tech Support (1-800-347-4942) and tell them and they will be
able to help you restore from an Archive and bring your data up to date so that you have all
your records.
4. Have a UPS (Uninterruptable Power Supply) or battery backup on the Data Station and
test it.
Alexandria 5 uses TCP/IP technology for its communication and operation procedures. The
server program, called the Data Station, must be running for any clients, also known as workstations, to search, circulate, run reports, etc. For Alexandria, there is one type of workstation
— Alexandria Librarian Workstations. If the Data Station program is not running, NO ONE
can view or change the data. (In case there is an extended power failure over the weekend, it
is essential that you back up your data before leaving on Friday.)
In addition, the Data Station does all the work with the data; the clients simply ask the Data
Station to perform various procedures. As such, the Data Station should be on the best
machine available.
Since the Data Station does all the work, it has the ability to prioritize requests from the clients.
Some procedures will be postponed temporarily while other more pressing procedures are
addressed. The Data Station will, therefore, hold some things in memory to take care of when it
is not so busy. If there is an interruption of power, your data can become corrupt if you do not
have a UPS to protect it.
A UPS is an Uninterruptable Power Supply and is only meant to give you enough time to get to
the Data Station, quit Alexandria, and shut down the machine appropriately. Do not connect
unnecessary machines or appliances to a UPS since they will drain critical energy from the UPS.
5. Enable Security.
The Alexandria program comes without any security protocols activated. As such, unless you
install an additional security program or enable security within Alexandria, anyone can launch
Alexandria and have full privileges to add, remove, and change patrons, items, orders, budgets, vendors, subscriptions or routes or to check items in and out, assign and forgive fines,
etc. It is strongly recommended that you enable security within your Alexandria preferences.
In addition, if your Data Station is publicly accessible and without some form of system security, someone could delete, move, or rename your data file. It is, therefore, strongly recommended that you install and enable a system security program. Some operating systems come
with such security built in.
To enable security:
•
Go to Edit on the menu bar and select System Preferences.
•
Click on Operators in the System Administration category.
Alexandria v6 Basic Teacher’s Manual
5
•
Click on the Add (+) icon at the bottom-left of the window.
•
Fill in the Username and Password. Fill the same password in the confirm Password
field. Enter the Email Address of the user.
•
Set the Group of security using the drop-down menu. The first person entered must be the
Library Administrator or District Administrator level person. More than one person
may be given these groups.
•
If you are in a Central Union system, check the Site ID Codes for which the operator will
be granted privileges.
•
Click on OK.
•
Check the box for Require User Login.
•
Click on Save on the System Preferences window, then, close the System Preferences
window.
To customize the privileges of a security group:
•
Go to Edit on the menu bar and select System Preferences.
•
Click on Security in the System Administration category.
•
Click on the Security tab.
•
Double click on the Security Group you wish to customize.
•
Using the drop-down menus on all Sections tabs, consider the options given and set privileges as you wish for operators with the security level.
•
When finished, click on Save in the upper-right corner of the window.
6. Watch your screen at all times.
Alexandria offers audio clues to alert you to special circulation and program messages, this
function isn’t helpful if, for some reason, the computer sound is not working. Alexandria is also
streamlined for certain procedures based upon assumptions that are often made in the library
environment. Those assumptions may differ from what you desire. Always, ALWAYS watch your
screen. Fully read each message and ensure that what you thought you did was exactly what
the program claims you did.
6
Alexandria v6 Basic Teacher’s Manual
7. When in doubt, contact Technical Support.
If your library is current on its support subscription, when you have a problem or a question,
please contact Technical Support. You may call Technical Support 24 hours a day, 7 days a
week, 365 (or 366) days of the year. Phone number: 1-800-347-4942.
During the busy time of the year (beginning of school, beginning of the calendar year, and
inventory season), you may be asked to leave a voice message. Tech support will contact you
as soon as they are available. The goal is to return these calls in less than an hour.
You can email Technical Support directly from Alexandria 6.0.1. Emailing from the program not
only sends your message or question to Technical Support, but also informs them about your
machine, its hardware, memory, your data, and the version of Alexandria you are running.
To email Technical Support:
•
Click on the Support tab on the middle-right side of the Circulation window.
•
Click on the Email subtab.
•
Type the subject and the desired message in the fields provided on the Email Tech Support tab. If this isn’t the current pane, click on the Letter icon to bring this pane to the
front.
•
Click on Send Message to send the message.
NOTE: You cannot email Technical Support if you do not have a return email specified in your Site
Information Preferences and if you do not have an Internet connection.
D.Alexandria Help
Alexandria provides built in Help documents. These can be accessed in either of two ways.
In the upper-right corner of each Alexandria module window is a ? in a circle. This is the Help
icon. If you click on this icon, it will open the help document associated with that window.
The second method is to view an index of all the help documents at one time. The Alexandria
Help Index gives a list of the help documents grouped in categories. If you would like to view
the help documents in an alphabetical listing, there is a link on the Alexandria Help Index
that will take you to a help index that is in alphabetical order.
To view the Help Index:
•
Click on Help on the menu bar.
•
Select Alexandria Help.
•
Click on the desired Help document.
E. ListServs and Tech Notes
1. Alex-Net
Alex-Net is a friendly forum that allows Alexandria customers to post questions, problems, and
product ideas. Posted messages are then sent by email to the members of Alex-Net. This forum
Alexandria v6 Basic Teacher’s Manual
7
enables users to help other users, share tips and tricks, or ask and answer questions about
Alexandria.
To subscribe to Alex-Net:
2.
•
Go to Alexandria’s website, http://www.goalexandria.com
•
Click on Support at the top of the web page.
•
Select Librarian’s Corner from the Support drop-down menu.
•
Select Alex-Net & Other ListServs.
•
Check Alex-Net and fill in the form.
•
Click Submit.
Tip of the Week
Tip of the Week is a part of the Alexandria web page that features a new tip for using Alexandria each week. The archives for Tip of the Week are a collection of tips for running Alexandria
more smoothly. These tricks of the trade are written by the Alexandria staff librarians. You may
view them every week both via email or on our website.
To receive the weekly Tip of the Week emails:
•
Go to Alexandria’s website, http://www.goalexandria.com
•
Click on Support at the top of the web page.
•
Select Librarian’s Corner from the Support drop-down menu.
•
Select Alex-Net & Other ListServs.
•
Check Tip of the Week and fill in the form.
•
Click Submit.
To view the current and past Tip of the Week documents:
8
•
Go to Alexandria’s website, http://www.goalexandria.com
•
Click on Support at the top of the web page.
•
Select Librarian’s Corner from the Support drop-down menu.
•
Click on Tip of the Week.
•
The current Tip of the Week is in the main frame of the window.
•
To view previous tips, click on TOTW by Subject in the Tip Archive box on the right side
of the window.
•
Click on the desired Subject.
•
Click on the desired tip in the list.
Alexandria v6 Basic Teacher’s Manual
3.
Tech Notes
Our Tech Support personnel have written many excellent Tech Support documents for your benefit. These can be found on our Alexandria website.
To view Tech Notes:
•
Go to http://www.goalexandria.com
•
Click on Tech Notes under User Favorites on the left side of the window.
•
Select the appropriate Tech Notes group.
•
Select the desired Tech Note document from the list given.
Alexandria v6 Basic Teacher’s Manual
9
10
Alexandria v6 Basic Teacher’s Manual
2
Circulation
Estimated teaching time: 1 hour
Estimated time for Let’s Practice: 5 minutes
Circulation is the main window of Alexandria. Before proceeding to teach Circulation, have the
attendees view the window to familiarize themselves with the layout. If the Circulation window is
not active, click on Show and select Circulation.
A. Menu Bar
1.Alexandria (Macintosh Only)
This menu is found on the left-side of your screen between the Apple and File menus. Here you
can E-mail Technical support and view the About Alexandria splash screen which lists the version
you are running. This is also where you will find the Quit Alexandria command along with an
option to access System Preferences.
2.File
Note that you can create a new word processing document, open a file, save a file, save a file as
text, import a transaction script, Archive Now, Rebuild Now, print, log out, and quit Alexandria
(Windows only) from the File menu.
3.Edit
Here you will see the standard editing options of Cut, Copy, Paste, Undo, Redo, and Find as well
as being able to access Alexandria’s Preferences. We will look at Preferences at the end of the
class.
4.Show
All major database modules are located under Show. Choose Patrons to add or modify patron
records. Choose Items to catalog books, audio-visual materials, equipment, etc. Subscriptions
and Routes are used for managing periodicals. Orders, Budgets, and Vendors are for acquisition
purposes. Also notice the hot keys that are listed on the right of the Show menu. From anywhere
in the program, these hot keys will open the indicated module. Nothing is more than three clicks
away in the program, but it could be extremely shorter with hot keys.
5.Tools
From the Tools drop-down menu, you may access Authority Control, Map Editor, Reports,
Utilities, use Explore Builder, SIF Management or the Super Summary Template Editor,
view Circulation Statistics or the Report Queue, Import, Export, and run Utilities.
6.Links
This is a launcher. Just place any program or document (or its shortcut or alias) you want to be able
to launch on this machine in the Link Menu folder and it will appear here. For instance, you may
wish to put your substitute instructions in the Link Menu folder on the Circulation computer.
Alexandria v61 Basic Teacher’s Manual
9
7.Window
Every currently open window will be listed under this menu. If you have several saved lists from
searching that you are using, but you cannot view them all at once, you will find them under the
Window menu so that you can switch between windows.
8.Help
Here you may view the release notes or the Alexandria Help. (On Windows, you can also email
Technical Support form here, update your registration information, and view the About Alexandria splash screen which lists the version you are running. On Macintosh, you can also update your
registration information here.)
B. Circulation Window
1.Circulation Menu (Gear icon)
When you click on the Gear icon, the Circulation menu opens. This contains a few additional
commands for Advanced Bookings and displaying all connected clients and broadcasting a
message to all clients. Although some common Circulation commands also appear on this
menu, they are readily available in the Circulation Mode drop-down menu immediately to the
right of this icon.
2.Circulation Mode
Located at the top left next to the command line, it is a drop-down menu for selecting the procedure or process for the program to perform. The selected mode will remain visible.
3.Command Line
The Command Line is the field at the top of the Circulation window in which commands are
typed or barcodes are scanned or typed.
4.Current Patron Pane
This pane shows the patron whose record is being viewed or modified. The subtabs at the bottom
of this pane enable you to view the patron’s Details (items checked out, reservations, holds,
charges, payments, etc.), Notes (General Notes, Contact Notes, Patron Alert Notes, etc.)
and open the Patron Lookup window by clicking on the Lookup button.
5.Current Item Pane
This pane shows the item and copy record which is currently being viewed or modified. The subtabs at the bottom of the pane enable you to view the Details for the item Details (publication
information, copy information, etc.), Copy Stats (current status, previous checkouts, etc.),
Notes (view Summary, other item and copy notes), and Lookup (search for titles using the
Item Lookup window).
6.Tabs
1.Circulation Tab
The first tab at the bottom of the window is the Circulation tab. Visible on the bottom half of the
window, the Transaction Log is a running record of the transactions or changes made to the
database. You cannot change anything in the log. If you make a mistake, you can correct it, but
you cannot delete it from the log just as you cannot go back in time and undo a mistake.
10
Alexandria v61 Basic Teacher’s Manual
There are two other options for the Circulation tab. If you click on Renewals at the top of the
tab, the Renewals pane for the current patron will be displayed which will allow you to renew
one, some or all of the items checked out to the patron, change the due date for an item or
declare an item lost. If you click on an item in the Renewal window, that item will be displayed
in the Current Item pane.
Homeroom is the last option. If you click on Homeroom, the window will display a list of the
homerooms you have used for your patrons on the left side of the tab. When you click on one of
the homerooms listed, the patrons in that homeroom will be listed in the right pane of the tab. If
you double click on a patron in the list, that patron will be shown in the Current Patron pane.
2.Command Help
This is the second tab at the bottom portion of the window. It provides detailed information about
the Circulation commands. If you would like to learn how to place holds or reservations, change
patron locations or copy locations from the Circulation window, you can click on the Command
Help tab, find the appropriate command, read the description and even use the command at the
bottom of the tab. There are three different views of the Command Help that can be selected -All Commands which presents a list of all Circulation commands, Common Commands which
lists the most commonly used commands; and Data Manipulation Commands which gives
those commands used to make changes to patron or item records.
3.Holds Tab
The Holds tab shows either the patron holds or item holds depending on which subtab is chosen
at the top of the tab. When a patron or item is current, you may view, edit or remove holds.
4.Reservations Tab
The Reservations tab shows either the patron reservations or item reservations depending on
which subtab at the top of the tab is chosen. Reservations can be removed quickly and easily
using the Remove button.
5.Charges Tab
The Charges tab is used for charging fees, accepting payments, making refunds and managing
credits. There are four options for viewing information on the Charges tab all of which are
accessed by clicking on the desired subtab at the top of the window. Clicking on Charges at the
top of the window will enable you to see a list of the charges for the Current Patron. The Payments subtab opens the Payments pane showing a list of payments made by the patron and
these can be edited, forgiven, or receipts printed for the payments. The Refunds subtab opens a
pane showing any refunds or forgiven charges made to the patron and these can be edited or
receipts printed using this pane’s functions. The Credits subtab opens the Credits pane and
enables you to view and manage credits due the patron.
6.Support Tab
The Support tab is used to email Alexandria’s Technical Support staff, send data files to and
retrieve data files from COMPanion Technical Support via FTP.
7.Special Tab
The Special tab provides circulation statistics and Cash Drawer functions on the Status tab.
The other subtab options are System Info which gives a detailed information on your operating
system, available memory, and the number of records in various categories such as Patrons,
Item Titles, Item Copies, Transactions, Statistics Records, etc.; License Information
which provides information on the product registration; and Activity Monitor which shows the
current connections to your Alexandria Data Station.
Alexandria v61 Basic Teacher’s Manual
11
C. Check Out
To check out an item:
•
Make sure the mode is set to Check Out.
•
ALWAYS bring up the patron first (even though, in real life, the patrons usually hand you
their items before they give you their library cards or tell you their names).
•
Set the Override date, if necessary.
•
Type or scan the barcodes of the items to check out.
•
Respond to any Circulation Alert messages.
•
When typing barcodes rather than scanning barcodes, always follow the barcode with an
<enter>.
•
If using an override date, clear it by typing a period (.) and pressing <enter>.
1. Check out A Child Called “It” (3187) to Camille Arnold (1003).
Look at Camille’s record in the Current Patron pane. It shows her name, her barcode, the policy
she is on (9th grade), her location (or homeroom), and her picture. It also shows a summary of her
account — how many copies she has checked out, how many of those copies are overdue, how
many holds, in-stock holds, reservations and reserves she has, and the total amount she owes in
fines.
If you would like to change the Location term, homeroom, to teacher, room number, location, district, department, cell, etc., you change it in the Terminology Preferences which are found in the
System Administration category of System Preferences. Click on System Preferences under
the Edit menu to open the System Preferences window. On Macintosh, you can also access Preferences from the Alexandria menu.
12
Alexandria v61 Basic Teacher’s Manual
Pictures are not required.
Policies govern how many items can be checked out by the patron, for how long, what fines are
charged, can holds be placed and, if so, how many, etc. The demo data has policies for each grade
in the demo. The only Patron Policies that exist when you first launch Alexandria are Standard
Patron and System Patron. You need to establish a policy for each patron and item group that
differs.
Look at the item information for A Child Called “It” in the Current Item pane. It shows the title,
the copy barcode, its policy (Non-Fiction), the call number, the status of the copy, replacement
cost, condition code, number of copies available and total number of copies.
Look at the Transaction Log. Note that it shows that Camille Arnold on today’s date and at the
indicated time, checked out A Child Called “It”, barcode 3187. Note the due date at the far right.
This due date is calculated by the policy assigned to that item.
2. Check out Across a Dark and Wild Sea (3064) and The Complete Dog Book for Kids (3129) to
Rebecca Eckhoff (1032).
Inform the attendees that as long as the patron barcodes are never the same as the item barcodes,
there is no need to clear the previous patron in order to switch to a new patron. Just scan the new
patron’s barcode.
If patron barcodes are the same as item barcodes, you must always put a “P” in the command line
before scanning the patron barcode. It is recommended that you change either the patron or the
item barcodes to remove the conflict.
Look at the Transaction Log and you will see the new entries for Rebecca checking out Across a
Dark and Wild Sea and The Complete Dog Book for Kids. The entry for Camille is still listed. The
Transaction Log will help you to remember what you did last if you are interrupted in the middle
of the process.
D.Override Dates
Override dates are used for exceptions to the rules. They can be used to extend or shorten the
checkout period for just one item, for all the patron’s current transactions, or with multiple patrons.
Override dates stay until you change modes or clear them. To clear an Override Date, type a
period (.) and press <enter>. (Make sure every attendee clears the override date before proceeding to the next example.)
Override dates perform different functions in different modes. In Check Out, it is the new due
date. In Renew mode, it is the new due date for the item being renewed. In Bookdrop mode, it is
the date the item was returned. In Statistics mode, it is the date used to mark the usage. In
Inventory mode, it is the last date the item was seen or inventoried.
To set an override date:
•
First, enter the desired mode.
•
Type period (.), then the desired date in MMDDYY format and press <enter>.
To clear an override date:
•
Type a period (.) and press <enter>.
In doing this exercise, put in the override date first, then change the patron. Point out that changing the patron did not get rid of the override date. Point out that the good thing about this is that
Alexandria v61 Basic Teacher’s Manual
13
the override date is in there until you take it out. The bad thing about it is that it is in there until
you take it out.
3. Check out Azerbaijan (3430) and The American Spirit: Meeting the Challenge of September 11
(3207) to Jami Stark (1009) until the end of the school year. (Remember to clear override date when no longer needed.)
E. Circulation Messages
4. Check out The Last Book of the Universe (3191) and B. Franklin, Printer (3027) to Marijane
Lou Coots (1036). Choose Yes to check out the second item. Note the Transaction Log.
Note the message that appears is accompanied by a special sound. Remember that sounds may
not always be available so they should watch their screens for messages such as these.
This copy somehow managed to get back on the shelf without being checked in. Since it is in Marijane’s hands, choose the default Yes to check in the item.
Notice that the Transaction Log shows that it was checked in from Todd Malta and then immediately checked out to Marijane. The item was not overdue, but if it had been and fines were accruing, a Fine window would appear.
It is important to note that the default in this message was Yes, check in the item. Scanning any
barcode — patron or item — would have selected the Yes choice and checked the copy in from
Todd. If your sounds did not work AND you were not paying attention to the screen, if you had
scanned a third item that Marijane wanted, it would not have been checked out to her because the
message was still on the screen at the time. Remember to ALWAYS watch the screen.
5. Check out 3520, 3523, and 3072 to Joseph Todd Berol (1014). (Choose Override and then
choose Cancel.)
The first item checks out to Joseph without incident, but checking out the second item to Joseph
would exceed the policy which only allows him to check out a maximum of three items at a time.
If you are on the appropriate security level, you will see the message that allows you to cancel the
transaction or to override the policy and check the item out to him anyway.
Cancel is the default. Pressing <enter> would cancel the checkout. Scanning a third item would
also cancel the transaction. Items CAN walk out of your library without being checked out if
you are not paying attention to the screen.
Override is the non-default action on this message. To perform the non-default action, click on
Override.
Type the third barcode and watch as the message reappears. Just because you selected to override
the maximum number for the previous item, Alexandria does not assume that you want to override
all items for that patron, that session, or that day. You must override each item you desire to check
out when the policy limit has been reached or exceeded.
Click on Cancel or press <enter> to cancel the transaction. The item scanned appears in the Current Item pane, but it still shows as Available.
F. Patron Details (Q)
Joseph has more items checked out than the items we just did. Click on Details in the Current
Patron pane to see the other items that are checked out to him.
14
Alexandria v61 Basic Teacher’s Manual
The Patron Details shows you the patron’s name, barcode, picture (if any), titles, barcodes, call
numbers and due dates for items checked out, the fines and cost for overdue items, the titles on
hold, the copies on in-stock hold, reservation, or reserve, and all the fines. In addition, some basic
patron and statistic information and any attachments or notes are at the bottom.
The Patron Details window may be unlocked by clicking on the White Ruler icon, then clicking on
the Lock icon and selecting Unlock Document; then, it is a word processing document with all the
word processor tools available in COMPedit, COMPanion Corporation’s own word processing program. This allows you to remove things you do not wish to print such as notes, the picture, etc. or
to add comments such as “Parents, please sign and return” to the document before printing.
Adding or deleting information in the word processor version of the Patron Details does not
change the information permanently. Closing the window and reopening it by clicking on Details
again will return the report to its original format. There is no way to permanently modify a report in
Alexandria. Close the Patron Details window.
You may save this document as a .txt file or in RTF format so that it can be opened in another word
processor.
G. Item Details (Q=)
H.Bookdrop Mode (B)
6. Check in 3129.
There are times when a patrons may check out an item and decide that they prefer a different item.
When this happens, it is easiest to use the single bookdrop method to check in the one item
because it will leave you in Check In mode with the patron current so that you are ready to scan
the new item. To do this, type B and scan the barcode of the item.
Notice that the patron to whom the item was checked out is shown in the Current Patron pane.
For the remaining exercises, we will enter Bookdrop mode by typing a B and pressing <enter>.
7. Check in 3013.
When an item is overdue and fines are charged, the Fine window opens. You may just process the
fine or you may add additional charges, forgive the fine or a portion of it, or take a payment.
8. Check in 3085.
Notice that when this barcode is scanned, no patron is shown in the Current Patron pane. Look at
the entry in the Transaction Log. This indicates that the item was already checked in and that the
item was inventoried (the inventory date changed to the current date).
9. Check in 3193.
This item has a hold on it and you are notified of the hold so that the item may be set aside and a
notice printed to inform the patron who placed the hold.
Alexandria v61 Basic Teacher’s Manual
15
10. Check in 3430.
This item was checked out using an override date. Notice that it does show the date that it was
due.
To check in a single item:
•
In the Command Line, type B and, then, scan or type the barcode of the item to be
returned. (This will check the item in without changing the Circulation mode.)
To check in multiple items:
•
To enter Bookdrop mode, there are three methods:
In the Command Line, type B and press <enter>.
OR
Choose Start Bookdrop from the Circulation Actions (gear) menu.
OR
Click on the drop-down menu next to the Command Line field and select Bookdrop.
•
Set the Override date for the date the copies were or should be listed as returned if different from today’s date.
•
Type or scan the barcodes of the copies to check in.
•
Respond to any Circulation Alert messages that appear.
•
When finished using the Override date, clear it by typing a period (.) and pressing
<enter>.
NOTES:
•
If patron barcodes are the same as item barcodes, you must always put a P in the Command Line before scanning the patron barcode. (It is recommended that you change
either the patron barcodes or the item barcodes to remove the conflict.)
•
When typing barcodes rather than scanning barcodes, always follow the barcode with an
<enter>.
Let’s Practice
16
•
Check out the item, Above & Beyond (3051) to Michelle Sciera (1026).
•
Check out the item, The Life of a Nazi Soldier (3205) to Luann Larimer (1033).
•
Check out the items, Aladdin (3151), The Adventures of Tom Sawyer (3087) and The Autobiography of Meatball Finklestein (3426), to Derrick Pichon (1006).
Alexandria v61 Basic Teacher’s Manual
3
More Circulation
Estimated teaching time: 1/2 hour
Estimated time for Let’s Practice: 15 minutes
A. Locate a Patron by Last Name (L)
NOTE: Always put a space between the L and the text for your search. Although the space
is not required, there are other commands such as LM (Lost Mode) and LF (Locate
by First Name) which will cause confusion -- if you type LFRAN, are you searching
for a first name beginning with RAN or a last name beginning with FRAN? Alexandria
will consider it to be the LF command instead of a last name search. So, it is recommended that you use the <space> between the command and the text.
1. Locate Tom Tekippe and make him the Current Patron.
To look up a patron by name:
•
Either click on the Command Help tab and choose Locate Patron or type L.
•
Type as much of the patron’s last name as needed and press <enter>.
•
When searching for a patron or item, you need only type as much of the title or last name
as is needed to get to the general area on the Browse window (i.e. Tek for Tekippe). Use
the two More arrow buttons to show you more selections prior to or after your search
entry.
•
Click on the correct name to highlight it and then click Select or double click on the correct
name.
Alexandria v6 Basic Teacher’s Manual
17
B. Locate an Item by Title (T)
2. Locate the title, Leonard Nimoy : a Star’s Trek.
To look up an item by title:
•
Click on the Command Help tab and choose Find Title or type T.
•
Type the first part of the title and press <enter>.
•
When searching for a patron or item, you only need to type as much of the title or last
name as is needed to get to the general area on the Browse window. (i.e. Leon for Leonard
Nimoy : A Star’s Trek). Use the two More arrow buttons to show you more selections prior
to or after your search entry.
•
Click on the correct title to highlight it and then click on Select or
on the correct title.
C. Place a Hold on a Title (H)
3. Place a hold on Leonard Nimoy : A Star’s Trek for Tom.
To place a hold:
•
First, scan or type in the patron’s barcode to make that person the Current Patron.
•
Next, type the command, T, and type enough of the title to take you to the correct part of
the title list.
•
Select the title from the list. Double click on the title or click on Select to make the selected
title the Current Item.
•
Type H (for Hold) and = (for the Current Item) (e.g. H=) and press <enter>. NOTE: You
may also type H and the barcode of the item (e.g. H1234).
Although a barcode must be used to place a hold from Circulation (either by typing the
barcode number or using the = command), a hold is against the item title record. If multiple
18
Alexandria v6 Basic Teacher’s Manual
items have the same title, the hold is only against the title with the barcode used when placing the hold.
If one copy of that title is available, the hold becomes an in-stock hold waiting for the
patron to pick up the item.
To place multiple holds for a single patron:
•
First, scan or type the patron’s barcode to make that patron the Current Patron.
•
Next, type the H command and press <enter> in the command line. This changes the
mode to Hold mode.
•
Now type T and the title. Select the appropriate title. This makes the item the Current
Item.
•
Type = and press <enter>. A hold will be placed on the Current Item.
NOTE: Instead of the title search and the H= command, you may type H {barcode}.
NOTE: For Central Union customers, the HC commands allows you to place a hold on a particular copy. This ensures the hold is from your collection.
D.Place a Reservation on a Specific Copy (G).
4. Create a reservation for Keri Dobbins for the item, African American Inventors (3040) for
the second full week of next month.
You will have to search for Keri Dobbins by last name.
In this exercise, you have both the title and the barcode of the item Keri wants. You may choose
any of the three sets of directions to teach depending on which you feel is more appropriate for
your attendees.
Reservations are against specific copies for specific days. Only the patron who placed the reservation can check out that copy. If a copy with a reservation is not checked out before the reser-
Alexandria v6 Basic Teacher’s Manual
19
vation end date, the copy reservation will be automatically removed after the end date by the
program and the copy will be available for checkout.
Related Commands: GP (Reservation by Patron), GA (Place reservation on any copy), GB (Place
reservation on a copy), GPP (Patron Reservations Check Out).
To create a forward reservation:
•
Scan or type the patron’s barcode to make the person the Current Patron.
•
Type G (think -- “Get it later”) and type or scan the barcode of the item on which to place
the reservation.
•
Select the desired Month and Year.
•
Click, hold and drag to highlight the dates for the patron’s reservation for that item.
•
Click Save when finished.
NOTE: You can replace the G{barcode} command with a title search and then type G=
and press <enter>.
NOTE: To place reservations on multiple copies of the same item title, simply change
the copy barcode drop-down menu to a different copy and place the same reservation. Repeat for as many copies as are needed.
NOTE: To place reservations on multiple copies of different item titles, type G and press
<enter> to go to Reservation mode. Then, scan the barcode of the first copy to
have a reservation. Place the reservation and save. Scan the copy or type the barcode (or do the title search and use the = command) for the second copy to have a
reservation. Place the reservation and Save. Continue for all the other copies to
place reservations on them for the current patron.
E. Renewing an Item (R, RA and Renewal Icon)
5. Renew The American Spirit : Meeting the Challenge of September 11 (3207) by typing R and
the barcode.
To renew an item:
•
If the item is present, simply type R for renew, then type or scan the item barcode number.
Notice that it shows that it was renewed by Jami Stark and it lists the new due date.
Notice that the mode was not changed.
6. In Renewal mode, renew items 3190 and 3167.
To renew multiple items:
20
•
Type R and press <enter> or select Renew Patron Items from the Actions menu.
•
Notice that the mode was changed this time.
•
Scan the barcodes of the items to be renewed.
•
When you are finished renewing, type a period (.) and press <enter> to return to Check
Out mode.
Alexandria v6 Basic Teacher’s Manual
•
Notice that the two items have been renewed.
7. Mark Arias would like to renew three of his books, but did not bring them with him.
Renew Bar Graphs, Baseball’s Boneheads, Bad Boys, and Just Plain Crazy Guys, and The Baltic
States : Estonia, Latvia, Lithuania using the Renewal window.
To renew items not present:
•
Enter the patron’s barcode number.
•
Click on Renewal on the Circulation tab.
•
Select the titles to be renewed. (NOTE: You may select individual titles by holding down the
<Cmd> key (Macintosh) or <Ctrl> key (Windows) and clicking on the desired titles.)
•
Click on Renew at the bottom of the window.
•
Respond to any circulation messages that appear.
8. Todd Malta (1013) would like to renew all of his books, but did not bring them with him.
renew them using the RA command.
To renew all items for a patron:
•
Make the patron the Current Patron.
•
Type RA and press <enter>.
patron.
•
Respond to any circulation messages that appear.
Alexandria v6 Basic Teacher’s Manual
This will automatically renew all items checked out to that
21
NOTE: These same functions may be accomplished using the Renewal window. Simply
click on Renewal on the Circulation tab, then use the buttons at the bottom of the
pane.
F. Declaring a Copy Lost
9. Darla Anderson (1001) has lost the book, Puerto Rico. Declare it lost.
To declare an item lost:
•
In Check Out mode, scan or type the barcode of the patron with the lost item(s). If the
barcode was typed, press <enter>.
•
Click on Renewal on the Circulation tab to open the Renewal pane.
•
Highlight the item(s) to be marked lost.
•
Click on the Declare Lost button.
•
Complete the process in the Charges window on which you may forgive a portion or all of
the charge, add an additional charge, take a payment, and print a receipt as desired.
This will automatically check the item out to Patron barcode 1, the Lost Copies patron,
and mark the item as lost.
Notice the Transaction Log shows the item was lost and how much the patron was
charged.
When declaring a copy lost by a specific patron, DO NOT check the item in first. When the
item is declared lost from the Renewal window or by using the Lost Copies patron (1) and
22
Alexandria v6 Basic Teacher’s Manual
typing the barcode of the lost item without bookdropping the item ties the charge for the
lost item to the patron.
Lost items are not automatically deleted. They show to the patrons as Lost in the Search
Results (if the only copy) and Lost in the Item Details unless you set your Researcher
System Preferences on the Auto-Hide tab.
When you are ready to permanently remove lost copies, use the Remove Lost Copies utility found in Copy Utilities.
NOTES:
•
When searching for a patron or item, you only need to type as much of the title or last
name to get to the general area on the Browse window (e.g. And for Anderson). Use the
two More arrow buttons to show you more selections prior to or after your search entry.
•
When using the T command, if you type in a leading article or leading punctuation, Alexandria will search using that article and will not find the title if the # of Non-filing Characters field is set to ignore those characters. To find the title, it might be necessary to try the
search with and without the leading article or punctuation. Leading characters in title tags
other than the 245 tag are ignored based upon MARC record standards. See Alexandria
Help -- Leading Articles for more information.
•
In-stock holds are removed when the copy is checked out. Checking out a different copy of
the same title does not remove the in-stock hold.
•
For Central Union customers, the HC command allows you to place a hold on a particular
copy. This ensures the hold is from your collection.
•
Using the Lost Copies patron tags copies for removal later. This feature enables you to
account at the year’s end for how many copies were lost and the value of those items.
Alexandria v6 Basic Teacher’s Manual
23
•
You may set your preferences to automatically hide lost and discarded items in
Researcher..
•
Go to Edit on the menu bar and select System Preferences.
•
Click on Researcher in the Management section.
•
Click on the Auto-Hide tab.
•
Click on any of the types of copy status that you do not want to show in the
Researcher.
•
Click on Save.
Let’s Practice
24
•
Paul Rockwell forgot his library card. Locate his record and check out the item, American
Heroes (3199), to him.
•
Mitchell Miller (1034) wants to know if you have the item, Basketball. Check to see if you
have that item and check it out to Mitchell.
•
Bill Shelton (1004) called you and really wants the item, The Colony (3520). Place a hold on
that item for Bill.
•
Michelle Sciera’s (1026) best friend just checked out the item, B. Franklin, Printer. Michelle
wants it after her friend is finished. Place a hold on that item for Michelle.
•
Keri Dobbins (1020) is teaching a unit on European history next month. She always uses
the item, Brave Deeds : How One Family Saved Many from the Nazis (3252). She wants to
reserve it so that she is sure it will be available for the first full week next month.
•
Renew The Baltic States : Estonia, Latvia, Lithuania (3462).
Alexandria v6 Basic Teacher’s Manual
4
Special Circulation
Estimated teaching time: 15 minutes
A. Statistics Mode (Y and Y@)
Statistics mode is used to add usage statistics to items that are used in-house and not
checked out. Not only does the increase in statistics indicate that the library is being used, but,
because you can record usage on reference items, it will enable you to know what reference
items have been used and which have not been used.
The Y command is used for single usage of items and the Y@ is used to easily record multiple
uses of a single item.
1. A class has just finished doing research in the library during which many books were
used “in house.” You want to record usage of these books not only to increase your circulation statistics, but to track usage of these items — Bury Me Not in the Land of Slaves
(3800), Bound for the North Star (3713), and Harriet Tubman (5473). Growing Up in Slavery
(5407) was used 8 times.
To use Statistics mode:
•
Type Y and press <enter>.
•
Scan the barcodes of the item(s).
•
When finished, type a period (.) and press <enter>.
To record multiple statistics for items:
•
Type Y@ and the number of usages to record and press <enter>.
•
Scan the barcodes of the item(s).
•
When finished, type a period (.) and press <enter>.
B. Charging Damages (DL) and Fees (F)
2. Maryjane Lou Coots returned B. Franklin, Printer (3027) with slight water damage. Charge
her $3 for the damage.
Alexandria v6 Basic Teacher’s Manual
25
Damage Codes are preset amounts to charge for certain damages. These codes and the
amounts associated with them are set in the Rules System Preferences.
To add a new damage code:
•
Go to Edit on the menu bar and select System Preferences.
•
Click on Rules in the Circulation category and then click on the Damage Codes tab.
•
Click on the Add (+) icon in the bottom-left corner of the window.
•
Enter a Damage Code (this must be very short), a Description, and a Fine amount.
•
Click on OK, then click on Save.
To edit a damage code:
•
Double click on the Damage Code you wish to edit.
•
Make any changes needed.
•
Click on OK, then click on Save.
To charge damage using the Damage Codes command, the patron and item must be the Current Patron and the Current Item. Make the patron current by typing or scanning the
patron’s barcode or using the L command to locate the patron by last name or Bookdrop the
item.
To charge for damage:
3.
•
Type the DL command either with the appropriate Damage Code or without and press
<enter>. If you have typed the DL command and a Damage Code (i.e DL INK), then the
patron will be charged the assigned amount. If you only type DL and press <enter>, you
may then select one of the pre-defined Damage Codes or select Custom Damage.
•
If you select Custom Damage, then enter a short description of the damage in the Notes
field and the amount in the Fine Amount field. Lastly, click on OK.
Terry Tekippe lost his library card. Charge him $1.00.
Fees may be charged in two ways. One way is quick and easy while the other is easy to remember. The simple method uses the F command entered in the command line along with the
amount and reason. The longer, yet easier to remember method uses the Charges tab of the
Circulation window.
To charge a fee using the F command:
26
•
First, make the patron current by typing or scanning the patron’s barcode or using the L
command to locate the patron by last name.
•
Type the F command (for Fee), then the fee amount, and, lastly, the description of the fee.
Press <enter> when finished. (i.e. F 1 Lost library card)
Alexandria v6 Basic Teacher’s Manual
NOTE: Alexandria saves you key strokes because it recognizes a non-decimal number to represent a dollar amount (e.g. 3 for $3.00) and single decimal figures are converted appropriately (e.g. 3.5 is recognized as $3.50).
To charge a fee using the Charges tab.
•
The patron being charged must be the Current Patron.
•
Click on the Charges tab, then click on the Charge Fee button at the bottom-right corner
of the window.
•
Fill in the Fee Comment and Fee Amount fields. If a payment is being made or a credit is
being applied, fill in the Payment and/or From Credit fields.
•
Click on OK, Cancel, or Charge Fee/Print Receipt at the bottom of the window.
To pay or forgive a fee or fine:
•
First, make the patron current by typing or scanning the patron’s barcode or using the L
command to find the patron locate the patron by last name.
•
Click on the Charges tab and make certain that the Charges pane is the one being
viewed.
•
Highlight the fee or fine to pay or forgive.
•
Click on the appropriate button — Forgive Charge or Make Payment.
Alexandria v6 Basic Teacher’s Manual
27
•
If you click on Make Payment, enter the amount the patron is paying, select method of
payment, etc.
•
Click on Process with Receipt or Process (to process without printing a receipt).
To add a note to an item record:
•
The item copy must be the Current Item.
•
Type ++ and then the comment (i.e. ++ Ink writing on p. 75).
•
Press <enter>.
C. Discard a Copy (2)
Items are discarded for many reasons -- damage, overuse, no use, out of date, objectionable
materials, mold, etc. Some of these items may need to be replaced with more recent publications, others may need to be reordered to meet the needs of the patrons while others will never
be reordered. Using the Discarded Notes, it is possible to mark these items so that a list can
be produced of items discarded for a particular reason.
Using the Discarded Copies patron provides a quick way to mark items as discarded and it
has many benefits. First, you are able to easily identify items to reorder, secondly, you are able
to print statistical reports showing how many items were discarded. Lastly, it is much faster to
28
Alexandria v6 Basic Teacher’s Manual
use the Discarded Copies patron and then a utility to remove the discarded copies than it is to
remove each copy and/or title individually.
4. You have spent a busy day weeding. The following books are out dated: History and the
History Teacher (3507) and Discipline and the Classroom Teacher (3496). You also found several items that have been worn out through such heavy use that they must be discarded
— Bill Nye’s Great Big Dinosaur Dig (3604), Harry Potter and the Chamber of Secrets (5480), and
Famous Bears and Friends (4877).
To discard an item:
•
In Check In / Out mode, type 2 and press <enter>.
•
The Discarded Copies patron will be the Current Patron.
•
Scan the item’s barcode.
•
Select the reason for discarding the item, then click Discard and change mode button.
Use Other to be able to enter specific reasons for discard (e.g. No Use, Out Dated,
Loved to Death, etc.) These reasons will be of great value if you need to reorder or
replace certain titles.
•
Scan the rest of the items being discarded for the same reason.
•
When finished with the items being discarded for that reason, type a period (.) and press
<enter>.
•
Scan first item with a different reason and enter the new reason for discarding the item.
•
Scan the rest of the items being discarded for that reason.
•
When finished discarding, type a period (.) and press <enter>.
•
Type an X to clear the Circulation window.
To permanently remove lost or discarded items:
•
Click on Tools on the menu bar and select Utilities.
•
Click on Copies in the left frame.
•
Double click on the Remove Discarded Copies in the list in the main (right) frame.
Alexandria v6 Basic Teacher’s Manual
29
•
Click on the Selections tab and enter the appropriate dates in the Starting Date and
Ending Date fields..
•
If you want to remove titles for which there are no copies, check the Remove Titles without Copies box.
•
Click on Run. When asked if you want to Archive, the answer is always Yes.
NOTES:
30
•
Use the Discarded Copies patron to maintain a record of discarded items until the end of
the school year if you must report the numbers of items discarded and the value of the
items discarded.
•
Using the Discarded Copies patron instead of just removing the discarded copies from
each item record is faster and also provides information for reports that can be generated
to assist in reordering items or in ordering more up-to-date items to replace discarded
items. (See Reports chapter.)
•
When discarding a copy that is checked out to a specific patron because of damage to the
item, DO NOT check the item in first. Just check it out to the Discarded Copies patron
and, when the Discarded Copies Charges window opens, charge the patron accordingly
for the cost of the item.
•
Whenever running any utility, run an archive or make a backup prior to running
the utility.
Alexandria v6 Basic Teacher’s Manual
5
Patrons
Estimated Teaching time: 1/2 hour
Estimated time for Let’s Practice: 15 minutes
The Patrons management module may be accessed by choosing Patrons under the Show
menu. You may also click on the patron’s name or on the words, No Current Patron, in the
Current Patron pane of the Circulation window.
A. Patron Window
Before proceeding with the actual process of adding patrons, modifying patrons, or removing
patrons, view the Patrons menu at the top of the window and quickly review the fields of the
Patrons management windows. Make sure that you know what each field is for, how they can
be modified or used, and which are required. Focus on the required fields and the fields appropriate to your attendees.
1.
Patrons Actions Menus
All commands that affect patrons are located in these menus. The Actions menu at the
bottom of the left pane contains menu items for use with the patrons listed in the left pane.
You’ll see the options for finding patrons, importing, exporting, adding and removing
patrons. The Actions menu located at the top of the right pane next to the lock enables
you to unlock the record, show the patron’s details or history, take, browse for, paste or
remove patron pictures and access Patron Utilities.
The Find (magnifying glass) icon or Find on the Actions menu for the left pane opens the
Patron Selection Window. The Search Result Cap drop-down menu in the upper-right
corner of the window allows you to set a maximum number of results to show for your
Alexandria v6 Basic Teacher’s Manual
31
search. In the bottom-left corner of the Patron Selection Window is another Actions icon.
In order to have more options for selecting the patron(s), click on Advanced on this menu.
Using the drop-down menu and the available Boolean operators, you may be very specific in your selection criteria.
Once a list of patrons appears in the left pane, use the up and down arrows on your keyboard. The highlighted patron’s record is shown in the right pane.
2. Unlocked/Locked
When the Locked icon is displayed, changes cannot be made to the record. When the
Unlocked icon is displayed, almost any field can be changed. An option to Lock or Unlock
is also located on the Actions menu at the top of the window or you can just click on the
icon to toggle between Locked and Unlocked. In addition, a hot key of <cmd-U> (on
Macintosh) or <ctrl-U> (on Windows) will toggle between Locked and Unlocked.
3. Patron First Name
Enter the patron’s first name and any middle initials in this field.
4. Patron Last Name
The patron’s last name is a required field. It may contain multiple words or hyphens.
5. Barcode
Barcode is a required field. Barcodes can be alphanumeric (all letters, all numbers, or a
combination of both.) They cannot contain punctuation or spaces. Barcodes must be unique
and are required for both patrons and copies. Remember to keep the patron and item barcodes in separate ranges.
6. Patron Policy
Policy is a required field. Policies govern how many items can be checked out, how many
overdue and still be allowed to check out, fine amounts, which items can be checked out or
placed on hold, etc. Only two patron policies come with the system -- Standard Patron
and System Patron. System Patron is the policy for the special patrons such as Lost
Copies and Discarded Copies. You must establish a patron policy each time the rules differ for a patron group.
Personal Information Tab
7. Picture
When desired, either take the patron’s picture or paste it from a file. When that patron is
current in Circulation, the picture will display in the Current Patron pane and on the
Patron Details. Patron pictures may be imported from the Circulation window using the
“zzpp” command if the pictures are in jpg format, are named with the patrons’ barcode
numbers and are located in the same folder or drive.
8. Site
Site is the Alexandria generic term for the primary location identification and the terminology connected with this field may be modified to School, Library, Branch of whatever is
desired. This field should be used to indicate the school or branch connected with the
patron.
32
Alexandria v6 Basic Teacher’s Manual
9. Location
Location is the Alexandria generic term for a sublocation for the patron. The term for this
field may be customized using the Patrons Management System Preferences. It may
be a room number, a teacher, department, etc.. In the demo, we have labeled this field
Homeroom. While it is not a required field, this field appears in most circulation reports
and on the Current Patron pane.
10. Sublocation
This field name can be customized in the Patrons Management System Preferences
and, in the demo, it is labeled 2nd Location. This field may be used as a secondary location such as a Language Arts teacher and period (i.e. Jones 4) or it may be used for other
information that is short such as AUP status. The information recorded in this field shows in
the Current Patron window immediately after the Location information. It does not appear
on most major patron or circulation reports, but it is a selection for patron reports, circulation reports, and patron utilities. Sometimes, it is also a sort option.
11. Community ID
This field is not required but must only contain information unique to this patron. Customize
the field name for your organization or library needs in the Patrons Management System
Preferences. This field is used to match and update patrons during import if no barcode or
Government ID match can be found. In the demo this field is labeled Student # and is
usually used for the district-assigned student number.
12. Government ID
This field is not required but must only contain information unique to this patron. Customize
the field name for your country or needs in the Patrons Management System Preferences. This field is used to match and update patrons during import, if no barcode match is
found. In the demo, the field has been labeled SSN.
13. Card Expiration Date
This field is required and is based upon the default patron policy. If you do not want to have
cards expire or have to renew them frequently, change the patron policies to expire in 9999
days rather than the default of 365 days. Expiration dates can be changed or renewed
through the Patron utilities. If you have selected Disable Expiration Date in Patrons
System Preferences, this field will not be shown in the patron’s record.
14. Suspension End Date
If the patron’s status is set to Suspended, enter the date the suspension will expire in this
field.
15. Birthday
When desired, enter the birthdays here. The birthdate only appears on detailed patron
reports. This information may be useful if you have two patrons with the same name.
16. Graduation Date
This field only appears if registration codes indicate that you are a school library. When the
registration codes indicate a school library, this is the date this patron will graduate from
the last grade of school as specified in the Patrons System Preferences. When the graduation date is set or changed, the grade will be calculated to match based upon the Last
Grade preference under Patrons System Preferences.
Alexandria v6 Basic Teacher’s Manual
33
17. User ID
This field is automatically populated with the barcode for the patron. If you allow patrons to
place holds or check status and details in Alexandria’s Researcher, then the patrons will
enter their barcodes (User ID) and Password (Last Name).
18. Password
Passwords are required and by default will be the patron’s last name. System Preferences for the Alexandria Researcher will determine if patrons are allowed to change
their passwords. If the patron forgets his password, simply change it on this window and
inform the patron of the change. Passwords are required for patrons to place their own
holds or reservations, to check the status of their accounts, to renew their own items, and
to update their addresses, phone numbers, or E-mail addressees. (Which changes are
allowed are all based on the Alexandria Researcher System Preferences.)
19. Reading Level
The Reading Level field is provided for the reading level as determined by the study program tests. If you do not use a study program such as Reading Counts or Accelerated
Reader, then ignore this field.
20. Gender
Defaults to Unknown for new patrons. Gender may be set to Male, Female, or
Unknown. Gender only shows on detailed reports and it may be imported and exported.
21. Status
All new patrons default to Active. Any active patron may check out based upon the
patron’s policy. When a patron with a status other than Actives tries to check out, a warning message will appear to alert the librarian and provide the option of allowing checkout or
canceling.
22. Level
This field name may be customized in the Patrons System Preferences. For school libraries, if usually should be called Grade or Year. When the Level equals PS (for Preschool) or
JK (for Junior Kindergarten), K (for Kindergarten) or 1 through 12, the Alexandria program
will advance the patron to the next level when the Advance Levels utility is done.
Contact Info Tab
23. Parent / Guardian
Enter the name of the primary parent or guardian. Letters to parents will be addressed
directly to parents if this field is populated.
24. Phone
This is the primary phone number for contacting the patron. Additional phone numbers can
be entered in the contact notes. This phone number will appear on many circulation
reports.
25. Fax
If desired, enter the fax number here. This field only prints on detailed patron reports.
34
Alexandria v6 Basic Teacher’s Manual
26. E-mail
Although this field is not required, it is helpful since it allows overdue notices, in-stock hold
notices, or recall notices to be E-mailed.
27.Address 1 and Address 2
The address fields allow for a multi-line address such as a PO Box and street address or a
suite number.
28. City
This should be the city of the patron’s mailing address. However, on creation of a new
patron from the Patrons management window, this field will default to the city specified in
the Site Information System Preferences.
29. State or Province
Enter the state or province as it should be printed on a mailing label. On creation of a new
patron, this field will default to the same state or province specified in the Site Information System Preferences.
30. Postal Code or ZIP Code
Enter the postal code or ZIP code for this patron. By default, when you are adding a new
patron, this field will be filled with the same postal code or ZIP code from the Site Information System Preferences.
31. Country
When needed, fill in the Country field for the patron.
32. Contact Notes
This field is for additional contact information. Such information might include cell numbers,
beeper numbers, additional E-mail addresses, guardians, parents’ names and numbers,
etc.
Notes Tab
33. Categories
Categories are a way to track patron groups or information that Alexandria does not currently provide a field for.
34. Alert Notes
Alert Notes appear in the Circulation window any time that patron is the current patron,
whether that be for checking out a copy, returning or renewing a copy, or simply for viewing. The Alert Notes appear at all levels of security access that are allowed to circulate.
35. General Notes
General Notes only appear in the Patrons management window, the Patron Details and
when the Patrons Notes button is clicked. They are only accessible with the security level
of Library Staff or higher by default.
Alexandria v6 Basic Teacher’s Manual
35
Statistics Tab
36. Statistics
This tab shows basic information on the number of copies the patron has out, how many
are overdue, how many holds, reservations, and reservations the patron has, and monthly
checkout statistics.
37. Keep Patron History
When checked, Alexandria will record all copies the patron checks out and when those copies are returned. In Patrons System Preferences, you can specify to keep history for all
patrons in the database or you can check it here to keep it only for this patron. This box
needn’t be checked for Alexandria to track the last three people who checked out a copy or
title.
Lexile Tab
The Lexile tab contains the Lexile field. For those libraries that have purchased the Student
Lexile option, the bottom portion of the tab allows for the entering of 13 years of Lexile scores,
testing sources and the date of the test.
38. Lexile
Enter the Lexile reading level for this patron in this field.
1. Add yourself as a new staff member.
To add a patron record:
•
Go to Show on the menu bar and choose Patrons from the drop-down menu. (TRICK: You
may also click on the Current Patron’s name or on the words, No Current Patron.)
•
Click on the Add (+) icon at the bottom of the left pane. A blank new patron record will
open.
•
Tab from field to field as you enter the information about this patron.
•
Use the drop-down menus to indicate Policy, Status, and Gender for the patron.
•
Click on the Notes tab to add notes.
•
If you wish to keep Patron History, click on the Statistics tab and check the Keep
Patron History box.
NOTE: You can use your Patrons System Preferences to set Alexandria to Keep
Patron History on all patrons if that is what you want.
•
36
When finished, click on the Save button.
Alexandria v6 Basic Teacher’s Manual
B. Importing Patron Records
Patron records may be imported into Alexandria from a tab-delimited file. If you have a student information system that can export the data on the students in a tab-delimited format,
please look the Patrons management window to determine what fields you wish to have
included in the export from your student information system.
To import patron records:
•
Go to Tools on the menu bar and select Import or drag the file from your desktop and
drop on top of Alexandria.
•
On the Quick tab, click on the Patron tab.
•
Click on the Add (+) button at the bottom of the large field in the top section of the window
in order to add a file to the list.
•
Use the window that opens to find and select the file to be added.
click on Open to add it to the list.
•
Set your selections for the options at the bottom of the window.
•
Click on Start under the large field at the top of the window to begin the patron import.
Highlight the file, then
C. Modifying Patrons
2. Change Mitchell Miller’s phone number to 253-3534.
To modify a patron record:
•
Go to Show on the menu bar and choose Patrons from the drop-down menu.
Alexandria v6 Basic Teacher’s Manual
37
•
Click on the Find icon (magnifying glass) at the bottom of the left pane or click on the
Actions icon (gear) and select Find. The window below will open.
•
Enter the patron’s last name in the Last Name field and press <enter>. Then, highlight
the desired patron in the list in the left pane.
•
Unlock the patron’s record by clicking on the Lock icon or by choosing Unlock Record
from the Patron menu.
•
Make changes to the patron’s record and click on the Save button.
D.Deleting Patrons
3. Delete yourself from your patron list.
To remove a patron record:
•
Go to Show on the menu bar and choose Patrons from the drop-down menu.
•
Use the Find icon at the bottom of the left pane and search for the patron you wish to
remove. You may also use the L command in Circulation and then click on the patron’s
name in the Current Patron field.
•
Highlight the patron’s name in the left pane and click on the Remove (-) icon at the bottom
of the pane.
NOTE: If the patron has outstanding items or fines, a dialog box will open informing you
of this. Click on OK. Patrons cannot be removed if they have items checked out
or if they owe fines or charges. You must declare any items lost, forgive any
charges or fines and, then, you will be able to remove the patron.
NOTES:
•
38
The only required fields for a patron record are Barcode, Last Name, Policy, Status, and
Gender.
Alexandria v6 Basic Teacher’s Manual
•
Alexandria will fill in the User ID and Password using the patron’s last name as the Password and the barcode for the User ID.
Let’s Practice:
•
Add your favorite movie star as a patron.
•
Assign him/her to the Staff policy.
•
Include an Alert Note that indicates that the patron left a jacket in the library.
•
Go back into the patron record and remove the Alert Note.
•
Remove the patron.
Alexandria v6 Basic Teacher’s Manual
39
40
Alexandria v6 Basic Teacher’s Manual
6
Items
Estimated teaching time: 1 hour
The Items management module can be accessed by choosing Items under the Show menu.
You may also click on the current item’s title or the words, No Current Item. Options to modify item and copy records, add new items and copies, and remove items and copies are located
here. Since Alexandria can be used to track and inventory more than just books, the term item
and title are generally used interchangeably. The Items management module is where cataloging occurs for all items and all media types (i.e. books, videos, equipment, etc.). Multimedia
items, electronic files, and websites are also cataloged here.
A. Item Window and Item Menus
Before proceeding with the actual process of adding items, modifying items, or removing items,
view the Items Actions menus at the bottom of the left column and at the top of the right
pane next to the Lock icon. Next, look at the fields of the Items window. Make sure that you
know what each field is for, how they can be modified or used, and which are required. Focus
on the required fields and what fields are appropriate to your attendees.
1. Actions Icon (Left Pane)
All commands that affect items are located in this menu or in the menu accessed by clicking
on the Actions icon at the top of the right pane. You’ll see the options for browsing through
you items, finding items, adding, modifying, removing, duplicating items or copies, importing, exporting, and viewing the details.
Alexandria v6 Basic Teacher’s Manual
41
2. Find Icon
The Find icon (magnifying glass) is used to find items using a specific criteria. The results
of a search are shown in the left pane of the Items management window. When this icon is
clicked, the Item Selection window opens. The primary view of this window is the Simple
search view; however, clicking on the Actions icon in the bottom-left corner of the Item
Selection window shows two other selections for searching — Advanced Title Search
and Advanced Copy Search which provide additional searching options. When the desired
field(s) are filled in, click on Search in the bottom-right corner of the window.
3. Up/Down Arrows
Click on the left arrow to go up to the previous item in the order shown in the left pane.
Click on the right arrow to go to the down to the next item in the left pane. The <up
arrow> and <down arrow> keys on your keyboard will also move you up and down in
the list.
4. Actions Menu (Right Pane)
This Actions menu may be used to unlock the record, switch to MARC view, access Item
Utilities and Copy Utilities, access Mitinet Management, add a copy, Assign a new barcode or show any of the editors or the details, the ISBN Calculator or Search Details.
5. Lock and Unlock
An item or copy record cannot be modified if the record is locked. This security feature can
be disabled in your Display Settings System Preferences if desired. When enabled, it
will prevent you and others from making unintended changes. To unlock a record, click on
the Lock icon at the top-left of the right pane.
6. Title
Put the title on the first line. If the title has a subtitle, enter it on a separate line starting
with a colon (:). If the title has a statement of responsibility (i.e. edited by Isaac Asimov.
Illustrated by Paul Zelinsky), enter it on a separate line starting with a forward slash (/). The
Title Editor can also be used to enter title information. This field is keyworded as are other
variant titles in the MARC record; however, this is the only title that will appear on the item
details. Title is a required field when cataloging.
7.
Call Number
The call number can be either the Dewey or LC classification for the item. All portions of the
call number — prefix, classification, and suffix — go into the field. (This field is keyworded.)
8. Policy
The item policy for the item governs who can check out, place holds, etc. for this item. Each
new copy will default to the same policy as the item, but can be changed. This is a required
field.
9. Copies and Status Statement
Under the Policy drop-down menu is a statement showing the number of copies attached
to the item record and how many are available.
There are two tabs for the item record — Title Information and Copy Information. Depending upon which tab is chosen, the sub-tabs and fields change.
42
Alexandria v6 Basic Teacher’s Manual
Title Information
Publication Tab:
10. Author
This is the primary author of this item. Click on the Author editor link to enter additional
authors or illustrators (700 tag). This field is keyworded as are the additional authors or
illustrators. All author tags are displayed in the Item Details.
11. Volume
The volume can be a number, letter, etc. but this field is not keyworded. It is visible in the
Item Details for the librarian and the patrons.
12.LCCN
The Library of Congress Catalog Number field is keyworded.
13. Edition
The edition description (large print, 1st, American, etc.) is not keyworded but is visible on
the Item Details.
14. ISBN/ISSN
The International Standard Book Number field is keyworded. This field shows the first
ISBN/ISSN entry. By clicking on the blue field name, the ISBN/ISSN Editor can be
opened where multiple ISBNs may be entered and viewed. This feature has been added in
preparation for the change from 10-13 digit ISBNs.
15. Lexile
Enter the Lexile level in this field. The Lexile is a number assigned to the item that reflects
the reading difficulty level of the book.
16. Lexile Code
Enter the Lexile code in this field. This is the letter code that is given to books which,
because of their writing style, cannot be assigned a Lexile number.
17. Title Match
This field is checked if the Lexile level was not determined by an exact match on the author,
title, publisher and year, but only using the author and title for the match.
18. Don’t Show in Researcher
If this box is checked, the item will not be shown in the Researcher.
19. Place
This is the city, state, or country where published. This field is not keyworded.
20. Publisher
Enter the name of the publishing company or division. This field is keyworded.
Alexandria v6 Basic Teacher’s Manual
43
21. Year
Enter the publication or copyright year. This field is keyworded.
22. Extent
This is the physical description of the work; it can include the number of pages, illustrations, etc.
23. Series
This is the traced series that will appear on the Item Details and on catalog cards. This
field is keyworded. Other series tags in the MARC records are keyworded, but do not display in the simple Items management window or on the Item Details.
24. Generic Medium Type
This is the format of the item. The only medium that comes with Alexandria is book; to add
a different type, click on the drop-down menu and select Add NEW Medium; to remove a
medium type, use catalog utilities to change all instances of that medium type to a different
medium type. If you add a new medium in this field, that medium will then appear in the
Medium drop-down menu. This field is keyworded and used for selections and sorts. This is
a required field.
25. Magnetic Medium
Check this box if the medium of this item is magnetic to prevent your security hardware
from erasing the data on this item.
Subjects Subtab:
26.Subjects
This tab offers the ability to select the appropriate subject MARC tags. Enter desired subjects using the Add (+) icon and the Actions icon at the bottom of the Subjects pane. The
topical (_a) field is required when a subject exits. Here are examples of subjects and the
fields in which they should appear:
Costume — History — 1861-1865, Civil War — Georgia
_a — Topical (Example: Costume)
_x — General (Example: History)
_y — Chronological (Example: 1861-1865, Civil War)
_z — Geographic (Example: Georgia)
•
For further MARC information, see the Library of Congress web page at http://
www.loc.gov/marc/.
Categories Tab:
27. Bibliography
Use this field for local lists — reading lists for various classes, new items, etc. This field is
keyworded.
28. Curriculum
44
Alexandria v6 Basic Teacher’s Manual
Use this field is for local classes or units that use the item. This field is keyworded.
29. Interest Code
Use this field for the ages or grade levels where these items are appropriate reading material. In order to be searchable, any terms must be at least 2 characters long (i.e. grade 01,
grade 02, Level 3.4 etc.) This field is keyworded.
Notes Tab:
30. Content Notes
Enter the names of titles and authors included in an anthology or compilation. This field is
keyworded in the All Words index.
31. General Notes
This field is usually used for information such as “Includes index and bibliography.” This
field is also keyworded in the All Words index.
32. Award Notes
Use this field to enter notes as to awards associated with the item. (i.e. Utah Children’s
Book Awards, 2010 or Caldecott Award, 2009). This information is stored in the 586 tag.
Summary Tab:
33. Summary
The summary, abstract or annotation of this title — what this item is about written in one to
three sentences — belongs here.
34. Statistics Tab
The title statistics tab shows the number of copies and how many are available, lifetime
checkouts, last use date, accession date, and first use date.
35. Links Tab
Drag and drop OR click and type to add URLs. Double click on any attachment to edit the
description. Links show on the Item Details window, Circulation, and Items management window. When a user clicks on an attachment in any Item Details window, the helper
application indicated in your system will launch and display that attachment. The description in this field is keyworded in the All Words index.
Web URL’s may be imported when they are in the 856 tag.
36. Study Programs Tab
Choose the appropriate study program that your library or organization is using. Alexandria
is preconfigured to work with Accelerated Reader and reading Counts. Others can be added.
Copies Information Tab
Copy Info Tab:
37. Browse By
This drop-down menu enables you to select the browse order for viewing the copies.
Alexandria v6 Basic Teacher’s Manual
45
38. Barcode
This is the unique identifier for the copy. Alexandria automatically enters the next available
barcode based upon what has been entered in your System Preferences; however, you
may change the barcode as desired. This is a required field for a copy.
39. Copy ID
The Copy ID is what is usually called the copy number. Alexandria will automatically fill in
this field.
The call number, policy and volume are duplicated on both the title and the copies. Each copy
will inherit this information and changes to it from the title so that the librarian will not have to
enter it or change it manually for each copy. The copies, however, can be changed individually
to something different. Once a copy has been changed to differ from the title in any of these
fields, it will always be labeled as different for that field. This means that changes to the same
filed for that title will never affect the changed copy. Use this feature when most copies circulate, but one copy is reference. Give that one copy a reference call number and policy.
40. Volume
If there is a volume associated with the copy, enter the information in this field.
Since volumes are not keyworded, do not use copy volumes for subtitles of volumed sets
(i.e. The Encyclopedia of Mammals may have Aardvark to Cheetah as its subtitle and not
have a designated volume number. Do not put “Aardvark to Cheetah” in the copy volume —
put 1 in the volume of the title and enter the volume designations as contents notes.
41. Call #
The call number field for the copy will automatically be entered in this field; however, since
you may have copies with different call numbers and policies from the item (title) call number, you may enter the appropriate call number in this field.
42. Serial #
This field is for recording the serial number for a piece of equipment
43. Policy
The policy drop-down menu for the copy will automatically be set; however, since you may
have copies with different policies from the item (title) policy, you may select the appropriate policy for the copy.
44. Condition
If you want to use condition codes for your items, then set the drop-down menu to indicate
the correct Condition Code for your item. If not, leave it set to Unknown.
45. Vendor
If you wish to track the source of an item, enter the vendor’s name in this field.
46. Accession Date
This field is automatically filled in to show the date the item was added to your database. If
you wish to change the date to more accurately reflect when the item was received rather
than added to your collection, you may change the date.
46
Alexandria v6 Basic Teacher’s Manual
47. Last Library
In a Central Union system where items are shared amongst the libraries, this field indicates
where the item was “seen” last.
48. Change Status
This drop-down menu will allow you to change the status of a copy to one of the System
Patrons (i.e. Lost, Discarded, On Repair, etc.). The change in status will not be
reflected until the record is saved. If an item is checked out, you will not be able to change
the status using this menu.
49. Copy Site
This field is to designate your library and should match the Site ID Code field in the Site
Information System Preferences.
50. Copy Location
While this field is not required, it can be helpful to use this field if your library has more
than one floor or has more than one room.
51. Copy Shelving
Use this field, if desired, to indicate the collection to which the item belongs.
52. Purchase Cost
Record the cost of the item in this field, if desired.
53. Replacement Cost
This field is used to indicate what it will cost to replace this copy. Be sure to consider processing, shipping, cataloging costs and inflation.
54. Funding Source
This field is used to indicate the budget or source for the funding for this item. You may
enter such notations as Donation, PTA, Birthday Book, or Book Budget 2010.
55. Inventory Date
This date indicates when the item was last inventoried. Remember that Alexandria changes
this date whenever the item is checked out, checked in, or inventoried.
56. Security Device
If you are using a security device such as Whisper-Tape, select the appropriate type from
the drop-down window.
57. Desensitize
This option is for self-service terminals. When this box is checked, the self-service terminals
will desensitize the indicated security tag on checkout and resensitize it upon checkin.
58. Don’t Show in Researcher
There are times when you may not want a copy to show in the Researcher, but you do want
the title to show. For instance, if you have a circulating copy of a title and a classroom set.
Alexandria v6 Basic Teacher’s Manual
47
You would not want the classroom set to show, but you do want patrons to be able to see
that you have a copy that may be checked out. In that case, you would check this box for
any copy that you do not want to show.
Copy Notes Tab:
59. Copy Notes
Use this field to record notes specific to this copy but not specific to the item. For instance,
damage notes, recording when an item was lost and by whom.
60. Alert Notes
Alert Notes are those notes that are shown in a dialog window any time the item is checked
in or out. Use this field to indicate such things as “CD in Librarian’s Office.”
61. Copy Stats Tab
This tab shows the circulation history for the item including the number of checkouts, days
in circulation, last use date, present status, and the last six checkouts.
62. Transit History Tab
For Central Union systems, the Transit History tab is used to record the movement of the
item between libraries in the system. The library of origin, destination and date and time
are shown as well as the description of the type of transit activity that the entry represents.
B. Finding Items
1. Find The 7 Habits of Highly Effective Teens.
To find an item record:
48
•
Go to Show on the menu bar and choose Items from the drop-down menu.
•
Click either the Find icon or the Actions icon at the bottom-left of the window.
Selection window will open.
•
Enter your search information and click on Search in the bottom-right corner of the
Search window.
The Item
Alexandria v6 Basic Teacher’s Manual
OR
•
Click on the Actions icon in the bottom-left corner of the window and select either
Advanced Title Search or Advanced Copy Search. Then, enter search text and click on
Search.
•
Your results will be listed in the left pane of the Items management window.
C. Title Assistant/MARC Search
First, you must go to the System Preferences to set your MARC Search options and to select
the z39.50 servers that you want to search.
To set MARC Search preferences:
•
Go to Edit on the menu bar and select System Preferences.
•
Click on z39.50 Services in the Network Services category of the System Preferences
window.
•
Set the Timeout drop-down menu to the amount of time you want. (5 seconds really is
sufficient!)
•
Set the Max Results drop-down menu to the desired number. (50 is usually more than
sufficient.)
•
If you are not going to be searching for non-book items, take the check mark out of that
box.
•
Click on Save in the upper-right corner of the window.
To select z39.50 addresses to search:
•
Go to Edit on the menu bar and select System Preferences.
Alexandria v6 Basic Teacher’s Manual
49
•
Click on the Address Books in the System Administration category of the System
Preferences, then click on Standard z39.50 Address Book in the left pane of the window.
•
Double click on the server you want to activate and the Edit Address window will open for
that z39.50 address.
•
Change the Availability to Available (will be seen also in Researcher) or Hide in
Researcher (only available for Title Assistant) using the drop-down menu and click on
OK.
•
Repeat the previous step until you have selected all the servers that you want. NOTE:
There is a limit of 20!!!
•
Click on Save in the upper-right corner of the window and close the System Preferences
window.
2. Add the book, Parallel Journeys by Eleanor H. Ayer with one copy.
To catalog using Title Assistant:
•
•
50
Go to Show on the menu bar and choose Items from the drop-down menu.
Click on the Add (+) icon.
Alexandria v6 Basic Teacher’s Manual
•
Enter the ISBN or Title and press <enter>.
Alexandria will search your own database first and show any potential matches. Look at
the titles shown and, if one is a match, highlight that title and click Add Copy to Found
Title.
If there are no matches in your database, Alexandria will go directly to MARC Search.
•
If none of the results from your database match the item for which you are searching, click
the MARC Search Results button.
•
Look at the results that are returned. Highlight the one that matches or best matches your
item and click on Save.
•
Add the Call Number and select the Policy for the item.
Show the attendees that when they select a new title, Alexandria inserts a policy and
medium type. These defaults are set in the Items System Preferences. Although Title is
the only field that they must fill in for the item to be valid, they may want to fill in more
information and change the policy and medium to something different.
Alexandria v6 Basic Teacher’s Manual
51
Look at the Policy drop-down menu. Remind the users that policies govern who can check
out this item, for how long, if fines accrue, or holds are allowed for this item. The only two
policies that come with Alexandria are Standard Item and System Item. Any other policies must be created and entered in the Policies System Preferences.
Click on the Medium drop-down menu and show the users that they can add new mediums
here. Alexandria only supplies the medium, Book. All other mediums must be added by the
user or imported with their data. Mediums are pulled from the 245 _h field in the MARC
record.
•
Modify any fields that you wish to modify. When finished, click on the Save button in the
upper-right corner of the window.
•
You will be asked if you want to add a copy. If so, click Yes and fill in the fields on the Copy
window. Click Save when finished on both the Copy window and the Item record window.
•
When all copies have been added, click on Save in the upper-right corner of the Item window.
D.Cataloging a Website
Adding websites which meet the needs of your patrons is a very inexpensive way to increase
the resources available to your patrons.
When a patron selects the website item in
Researcher, there is a link at the bottom of the item record that when it is clicked will launch
an internet browser and go to the website.
3. You have found a wonderful website on Japanese-American internment camps that you
want to your database.
To catalog a website:
52
•
go to Show on the menu bar and select Items from the drop-down menu.
•
Click on the Actions (gear) icon at the bottom of the left pane and select New Record
(Manually) from the drop-down menu.
•
Enter the name of the website in the Title field, change the policy to Web and the medium
to URL.
•
Enter any other information that you desire on the Title Information subtabs (Publication, Subjects, Categories, Notes, and Summary).
•
Click on the Links tab and then click on the Add (+) icon at the bottom of this tab in the
right pane of the window.
•
In the URL Attachment Definition window, enter the name of the website in the URL
Name (Description) field and type or paste the URL in the URL Location field (http://
www.asianamericanmedia.org/jainternment.html). Then, click on OK.
•
Click on Save.
•
When asked if you want add a copy to the title, click on No.
Alexandria v6 Basic Teacher’s Manual
E. Duplicating Copies or Titles
The Duplicate feature enables the user to duplicate either the title or copies depending upon
which tab has been selected on the record. This feature saves you time in adding multiple copies or when adding titles that are very similar (i.e. Encyclopedia Brown and the . . . ).
NOTE: In a Central Union system, if the original item is at another library location, the Security
level of the person using the Duplicate feature must allow them to perform this command on items with the holding site’s code.
To duplicate copies:
•
Open the item record in the Items management window.
•
Unlock the Item record.
•
Click on the Copy Information tab to duplicate a copy or click on the Title Information tab
to duplicate the title.
•
Click on Actions icon at the bottom of the left pane and select Duplicate.
•
On the Duplicate window, Duplicate Copy should already be selected.
•
Fill in the Beginning Barcode field and / or enter the number of additional copies you
want to add in the Number of Volumes field.
•
If duplicating copies, then check any of the boxes that you want to apply.
•
Click OK.
F. Assigning Keywords from Circulation (V)
The V command enables you to quickly and easily add an entry for the same subject, bibliography, curriculum to multiple items.
To assign keyword using the V command:
•
In the command line, type V <space> the letter code for the desired field (such as B for
Bibliography, C for Curriculum, etc.) <space> and the text you want entered in that field
(i.e. V B 8th Grade English Reading List 2010) and press <enter>.
•
Scan the barcodes of the items to have this keyword(s) assigned.
•
When finished, type a period (.) and press <enter>.
Alexandria v6 Basic Teacher’s Manual
53
NOTE: Possible areas to use with this command are:
A — Awards
B — Bibliography
C — Curriculum
I — Interest/Reading Code
S — Subject
R — Study Program
P — Point Count
T — Test Number
H — Holding Code
G. Importing Items from a Vendor File
To import item records from a vendor file:
Item records may be imported into Alexandria in MARC, Microliff, or tab-delimited formats.
54
•
Go to Tools on the menu bar and select Import. You may also drag a file from your desktop on top of Alexandria.
•
Check the Archive First option checked on the Status tab..
•
Click on the Add (+) icon under the File field in order to add a file to the list. If you
dragged and dropped your file, then it should already be showing and you may skip the
next step.
Alexandria v6 Basic Teacher’s Manual
•
Use the window that opens to find and select the file to be added.
click on Open to add it to the list.
Highlight the file, then
•
Click on the Item Settings tab and set your selections for the options on this tab.
•
Click on Start under the File field to begin the item import.
•
NOTES:
•
Minimum fields for an item are Title, Number of Non-filing Characters, Policy and
Medium. All fields except Title will have defaults supplied by the program. The only
required field for a copy added to a title is Barcode.
• The Title, Author and Series Editor Action (gear) icons are in the bottom-right corner of
the respective entry fields. Using these editors, you can easily enter multiple detailed fields
and add new tags to any item’s MARC record.
•
Clicking the + icon brings up a selection of additional types of title tags that can be added to
the item record.
•
Clicking the a icon brings up fields that can be added to the selected tag. A field can be
changed to another field designation by clicking on the letter of the subfield and typing the
desired field indicator.
•
The - icon removes a tag completely. Leaving a field blank removes that field when the
record is saved. The Q icon allows for quick entry of secondary authors and subject headings; however, use this only when entering information in the _a field.
•
On the Subjects tab and in the various editors, the Up and Down Arrow icons allow you
to move from field to field in each tag.
•
You cannot remove items that have copies checked out until they are declared lost or discarded.
•
Since the MARC record is very particular, it is not recommended for the novice cataloger to
use the MARC Editor when cataloging. All the fields on the simple Item management window are linked to specific MARC record tags. Modifying, adding or removing information
from the simple fields will change the MARC record. A basic rule-of-thumb is that if you
don’t know a 245 from a 600 from a 740, then you should not use the MARC Editor.
•
To learn more about MARC records, tags, and subfields, go to http://www.loc.gov/marc and
click on Bibliographic, then select the desired tag.
Alexandria v6 Basic Teacher’s Manual
55
56
Alexandria v6 Basic Teacher’s Manual
7
Researcher (OPAC)
Estimated teaching time: 45 minutes
Choose Researcher from the Show menu. Alexandria automatically launches an internet
browser which opens to the Researcher.
Although elementary and children’s libraries may prefer the Simple Search, it is extremely
limited and will only offer a brief overview. You should focus on the Boolean search instead
since it contains features like And, Or, And Not, and Through searching, WAN searching and
the Browse feature.
A. Types of Search Interfaces
a. Simple Search
1.
Search Term Box
Enter the word or terms here.
2. Iconic Buttons
The icons are used to limit the search to specific indexes — Author, Titles, Series, Subject. In addition to these icons, additional icons have been provided — Explore, Most
Popular, What’s New, Award Winners, and eBooks. If your library has an A license or
has an M license and has purchased Explore as an add-on, then you may customize the
Explore search that this button controls as well as what other buttons are available in this
area.
Alexandria v6 Basic Teacher’s Manual
57
3. Help
Clicking on this button opens a document that will help the user learn how to search Alexandria.
4. Lists
This area to the left of the Search portion of the window contains the Temp Basket, Past
Searches and Past Items Lists.
Temp Basket — This area is used to store the items from which you want to create a list.
Past Searches — Alexandria keeps a running record of past searches you have conducted
so that you are able to revisit any of those searches that you have conducted.
Past Items — When you view an item’s details, that item is then listed in the Past Items
list so that you can easily view those items again.
5. netTrekker
This add-on allows patrons to search teacher-reviewed websites related to the topic being
searched for.
6. SearchAll
SearchAll is the federated search add-on that is available for Alexandria.
7. Bulletin Board
Using the Bulletin Board feature, the librarian is able to post announcements or other
information for patrons to view.
8. Vendor Links
The Capstone Interactive and Pebble Go links will only be shown if your library has
ebooks from Capstone Interactive and if these vendor links have been activated.
b. Boolean Search
To switch to the Boolean Search, click on the toggle in the upper right corner of the main
search field.
1. Search Selection Drop-Down Menus:
While the Simple Search is limited to All Words, Author, Titles, Series and Subject,
many more options are available in Boolean Search by using the Search Selection dropdown menus — Accession (date added), Awards, Barcodes, Bibliographies, Call
Numbers, Curriculum Codes, Subject Keywords, Interest Code, ISBN-ISSN-LCCN,
Location, Lexile Score, Medium, Publisher, Publication Year, Series and Shelving.
2. Boolean Operators
Use the Boolean Operators drop-down menus to select the appropriate Boolean operator.
Available Boolean Operators are: And, And Not, Or and Through.
58
Alexandria v6 Basic Teacher’s Manual
B. Search Filters
Below the main search icons, is the Search Filters option. Clicking on this option expands
the area to show the available search filters -- Medium, Awards, Publication Year, Lexile, and Study Program filters.
Medium — If only a particular type of medium is desired, then use this filter to select that
specific medium.
Awards — From this drop-down menu, a patron may select an award category.
Publication Year — This filter is used to indicate a year of publication that is desired.
Lexile — Use the slider to select a Lexile to limit the search results.
Study Program — If you support a study program such as Reading Counts or Accelerated Reader, use the filters available in this area to set the Study Program, Interest
Level, Reading Level and Point Count to apply to the search.
In the upper-right corner of the window is the Sites drop-down menu in library systems
with multiple libraries.
C. Rules of Searching
The four rules of searching Alexandria are:
•
Put a period at the end of the search term. Remember that the “period/dot” command says
“I’m done, this is all I want, get me out of here.” Alexandria is a “begins with search.” Using
the period makes it an exact match search.
Enter “cat” in the Search box and press <enter>. Notice the first title is 100 award-winning science fair projects. When you click on Details and read through the summary, you
notice the word “category.” In the record for A horse named Seabiscuit, one of the author’s
is Cathy Dubowski. Again, the begins with search returned both these records because they
contained words beginning with c-a-t.
Alexandria v6 Basic Teacher’s Manual
59
1. Search for “cat.”
•
If you can’t spell, use the Browse feature.
The Browse feature is helpful when you can’t spell a word. Go to the Boolean Search by
clicking on the toggle. Now type “civ” in the first Search field and click on the Browse icon.
The Browse window opens to the first word beginning with c-i-v, find the word “civilization”, highlight it and click on Select. Then press <enter> to perform the search.
2. A student can’t spell civilization. Using Browse, enter civ.
3. Using Browse, search for “brown” -- All Words, Title, Author, etc.
•
Two words typed in the same search field is the equivalent of a Boolean AND search with
both words being exact match searches.
This particular feature makes it easy for patrons to conduct a Boolean “AND” search without
having to understand how to use Boolean operators or having to remember to use the
period (.) to make the words exact match. Simply type multiple words in the same Search
field.
4.
You want items about the Civil War.
•
If you are combining Boolean AND and OR searches, the term that has to go with all (the
AND search) goes last.
Boolean searches allow the person searching to narrow or expand the search easily. Multiple Search fields are provided and Boolean Operator drop-down menus are available for
each additional Search field.
5.Search for items about Greek or Roman mythology.
To conduct a search:
60
•
Enter search term(s) in the Search field.
•
If you desire to use any filters, click on the Search Filters option and set the desired filters.
•
Click on the appropriate search icon or just press <enter> to conduct an All Words
search.
Alexandria v6 Basic Teacher’s Manual
D.Results Screen
a. Types of Results
Notice that at the top of the Search Results page, the number of netTrekker results were
found is shown if the library has subscribed to netTrekker. The number of results is shown
below the search. Next is a drop-down menu that enables the patron to decide how many
results will be shown per page and the page indicator is shown at the far right of the top of the
page.
There are three types of Search Results — Brief, Full and Cover Art view. Both show the
Call Number, Medium, and Main Author. Lexile and Reading Level are also displayed if
these last two options have been checked in System Preferences.
While the Brief view allows more titles to be seen at one time, it also shows the number of copies available. If this link is clicked, it reveals to which library the copy or copies belong in a Central Union system.
The Full view gives the additional options of links to view the item Details, Add to List, Place
Reservation, Place Hold, and Link and shows the Status, all Authors, Medium and Publication Year.
The Cover Art display looks like the items displayed as books on a shelf with the covers showing. A similar-looking display is found under the Item Details and is called View on Shelf
which shows the item on the shelf but shows the cover art for the items that precede and follow
it in shelf list order.
To return to the Search field page, the user merely clicks on New Search.
Alexandria v6 Basic Teacher’s Manual
61
b. Ordering Results
The results may be shown in several different orders — Title, Author, Call Number, Awards,
Medium, Series, Year and Accession Date — and the selection is made using the drop-down
menu in the upper-left corner right above the first item entry.
c. Results Filters
Once the results of the search are displayed, the Results Filters options display in the left
frame of the page. When a patron clicks on one of the Results Filters, the breakdown for the
results based upon that filter are shown in its “window” and the patron may click on the desired
result in that window to view the items that fit that criteria.
d. Printing Results
To print a record or records:
•
Click on the Printer icon in the top-right corner of the window. The Print window will open.
•
Decide whether you want all records printed or only the selected records and click on the
appropriate radio button.
•
Choose the Format in which the information should be printed.
•
Click on Run.
e. Temp Basket
The Temp Basket is a holding list for records that the patron wishes to save temporarily to a
location so that at the end of the search, the list may be printed or just viewed. Items are
added to this list by dragging and dropping them on the list’s name or by clicking Add to List in
Full or Details Display.
6. Search for dogs. Using the Search Results List, select the first 5 titles, then select every
other title from the remaining titles on the list. Add these items to the Temp Basket. Perform a new search for Cats and select 6 items to add to the Temp Basket.
To pick items for the Temp Basket, click, drag and drop on the Temp Basket.
62
Alexandria v6 Basic Teacher’s Manual
E. Item Record
When the patron selects an item by clicking on the title or on the Details link, the item details
is shown in a scrolling display. The user may move from one item record to another by using
the forward and back arrows at the ends of the scroll area.
Within the item record, notice that there are blue links. If the user clicks on one of these links,
Alexandria will do the search for those areas.
To exit the Item Details view, click on the X in the upper-right corner of the window.
F. Reviews
a. Preference Settings:
•
Go to Edit on the menu bar and select System Preferences.
•
Click on Security in the System Administration category.
•
Double click on a Security Level for which you want to set the ability to Add, Edit or
Remove reviews.
•
Set the Reviews drop-down menu as desired. Click on Save.
•
Repeat for all Security Levels.
•
Click on Show All button in the top-left corner of the window.
•
Click on Rules in the Circulation category.
Alexandria v6 Basic Teacher’s Manual
63
•
Click on the Rules tab and check the box for Enable Reviews if you wish to allow patrons
to review items.
•
Save and, then, exit System Preferences.
b. Patrons Management
•
Click on Show on the menu bar and select Patrons.
•
Note the check box in the lower-right corner, Can Review Items. if this option is checked,
then that patron can review items.
7. Darla Anderson wants to put a review on A Child Called It. Username: 1001 Password:
Anderson.
For a patron to add a review:
64
•
Patron must log in in the Researcher.
•
Perform search to locate title.
•
Click on “Stars”, then, click on Add Review.
•
Click on number of stars and fill in text for the review. Click on Submit.
Alexandria v6 Basic Teacher’s Manual
8. As the librarian, review Darla’s review and decide whether to accept it or reject it.
•
Log in as an operator in the Web Librarian. (Username: Alex
•
Click on the Alexandria symbol and select Review Management.
•
Unlock the Review Management window, select the review, click on the desired action.
•
Save.
Alexandria v6 Basic Teacher’s Manual
Password: Alex)
65
G. Researcher Preferences
What the patron is able to do, what items can be seen based upon status, and what is seen in
the Researcher are all determined by settings in the Researcher Preferences in the Management category of the System Preferences.
To set these preferences:
•
Go to Edit on the menu bar and select System Preferences.
•
Click on the Researcher icon in the Management category.
•
Working through all of the tabs, set your preferences for the Researcher as you desire.
•
When finished, click on Save in the upper-right corner of the window.
NOTES:
66
•
You can move between fields on a Boolean search using the <tab> key.
•
You can change the Boolean operator for an And to an Or, And Not, or Through by clicking on the arrow in the field with the And operator and highlighting the operator of your
choice.
•
Use the Through operator to select a range of search terms such as authors starting with A
- AD or call numbers 500 - 525.
•
Holds and reservations may be made from the list in the Full Results view. When a Brief
Results view list is generated, holds and reservations must be done from the Item
Details window.
Alexandria v6 Basic Teacher’s Manual
8
Reports
Estimated teaching time: 1 hour
Reports are divided into groups and are accessed by clicking on Tools on the menu bar and
selecting Reports. On the Reports window, click on the category in the left frame which represents the type of report you want. Each category has subcategories that further divide the possible report types.
When the Reports window opens, the Reports tab is in focus in the main (right) frame. Note
that there are two subtabs — Reports and Saved. The Reports tab lists all possible reports in
the category and the Saved tab lists all reports that have been saved. Clicking on any of the
listed reports will open the report editing tabs for that report.
Remember that reports print first to the screen, so you will waste no paper if the resulting
report is not exactly what you want.
To set up a report:
•
Go to Tools on the menu bar and select Reports.
•
Click on the appropriate category in the left frame that represents the type of report you
want.
•
Click on the arrow before the category to reveal the subcategories for that category that
represents the best choice for the report you want to generate.
•
Click on report in the main (right) frame that fits your needs.
•
If the Format drop-down menu appears for that report giving you a choice of formats,
select the desired one.
•
Select the Sort By option from that drop-down menu.
•
If you want to narrow the results, from the Select By drop-down menu, select the first
selection option. (If you are in a Central Union system, this should be Site, Library, or
School depending on which option is listed.)
•
If additional selection options are needed, click on the Add Selection button above the
Boolean List field. Set the Boolean Operator drop-down menu as desired and change the
Select By drop-down menu to your second selection choice. Repeat for as many selection
options as you need for the report.
•
Click on Print to print and the report will be generated in PDF format. To have the report
generated in VWP format so that it is editable, click on the arrow following the Print button
to have this option. To print a hard copy of the report, click on File on the menu bar and
select Print.
•
If the report generated meets your needs and you want to save it for use in the future, click
on the Overview tab.
•
Give the report a Name, Description and add Notes. Also, check the Favorite box if you
want the report listed in your Favorites.
•
Click on Save.
Alexandria v6 Basic Teacher’s Manual
65
NOTE: We will cover the other tabs in the Edit New Report window later in this chapter.
With over 15,000 possible reports, it’s impossible to talk about all of them. The reports highlighted
in this chapter are those we feel will have the most value to libraries.
A. Special Reports
Special Reports are those reports that don’t really fit into any of the other categories. The
Command Barcodes is particularly useful because it make your circulation almost totally
scanner driven. By printing a copy of this report, you will have a sheet of barcodes that represent many of the major circulation commands. Keep a copy of this report on your Circulation
Desk in a plastic sheet protector so that you can just scan the appropriate command barcodes
instead of having to type the commands.
66
Alexandria v6 Basic Teacher’s Manual
B. Patron Reports
Patron Cards
The Patron Cards report produces cards for your patrons complete with barcode and picture.
The formatting should allow these cards to be printed on business card stock that has been precut and is held together by tape. Realize that these need to be printed using a laser printer and
will need to be laminated to keep the barcode from becoming unusable due to wear. You might
want to try laminating some to see if the ink bleeds or stays fixed.
Alexandria v6 Basic Teacher’s Manual
67
Patron Barcodes by Homeroom
This particular report works extremely well for elementary schools where a teacher has the
same students all day. It does take a little longer to print this report one homeroom at a time,
but the result is well worth it. No patron cards to deal with, you just keep these pages in a plastic protector sheets in a notebook and turn to the proper homeroom’s sheet when the class
comes in and just scan away. If a new student is added to the homeroom, just reprint the
report.
To print this report:
68
•
Go to Tools on the menu bar and select Reports.
•
Click on the Patrons in the left frame, then, click on the arrow before Patrons.
•
Click on the Labels subcategory.
•
Click on the one of the barcode reports listed in the main (right) frame selecting one of the
Barcode reports depending upon whether you want last name first or first name first.
•
Select the Sort By option from that drop-down menu.
•
From the Select By drop-down menu, select Homeroom and fill in the name of the homeroom in both the Starting With and Ending With fields. (If you are in a Central Union system, the first Select By should be Site, Library, or School depending on which option is
listed.) Enter Homeroom name in the Custom Text field. Click on Print . . . or
•
If the report generated meets your needs and you may want to save it for use in the future,
click on the Overview tab.
•
Give the report a Name, Description and add Notes. Also, check the Favorite box if you
want the report listed in your Favorites.
•
Click on Create New Saved Report and, then, click on OK.
Alexandria v6 Basic Teacher’s Manual
C. Items Reports
Weeding List
The Weeding List report is most helpful when you want to weed quickly and effectively. This
report is found on the Copies category, then, under the General subcategory. In setting up
this report, you will need to set two Select By options — Copy Call Number and Publication
Year. The call number selection enables you to limit the items reported to a small portion of
your library collection. Using publication year as one of the Select By options allows you to limit
the items reported to those older than a certain year. Because the resulting report also shows
the LTD (life-to-date) usage and last-use date, you will be able to identify those items that have
never been used or that have not been used for a significant period of time.
Alexandria v6 Basic Teacher’s Manual
69
Barcode Labels
The Barcode Labels report allows you to print “smart” barcodes for the items in your collection. In this example, you will see how you can print the barcodes for items added to your collection during a particular period of time; however, realize that you are able to print
replacement barcodes by using the Select By option, Barcode List and manually entering the
barcode numbers for the barcodes that need to be made. Notice that you may use the Skip
Some Labels option if you are going to print using a sheet of barcodes that has already been
partially used.
70
Alexandria v6 Basic Teacher’s Manual
Spine Labels
The other part of processing items is to print spine labels. This report is also found in the Copies category and the Labels subcategory. The rest of the setup is much the same as the Barcode Labels report.
Reordering Details
When you are discarding items and use detailed reasons in the Discard mode, this report
enables you to print a list of items discarded for a specific reason such as Worn Out, Outdated, etc. which facilitates reordering those titles or replacing them with more current items
Alexandria v6 Basic Teacher’s Manual
71
since the report not only gives the publication information but also the call number. Remember
that you must print this report before you run the utility to completely remove the discarded
items from your database. Notice that the Select By option used is Discarded Note, so
remember to be consistent in the reasons you give for discarding items. This report is found in
the Copies category under the General subcategory.
Top Circulated Items
The Top Circulated Items report is found in the Titles category under the Usage subcategory. You determine the number of results by setting the Number of Titles drop-down menu
to the desired number. You will need to enter the Starting Month and Ending Month in the
two-digit month and four-digit year format with a / between the two elements. If you want to
limit the results to a particular area of your collection such as the fiction books, then use Copy
Call Number as the Select By selection.
72
Alexandria v6 Basic Teacher’s Manual
Super Summary
The Super Summary reports are part of the Copies category under the Collection Analysis
subcategory. There are many formats for this report, so be aware of what the simple statement “Ignore Super Summary Call Numbers” means in the Format options. If you have
non-standard call number prefixes (i.e. BB for Big Books, CR for Circulating Reference), using a
format that states Ignore Super Summary Call Numbers will cause the report to show these
call number groups. If you choose a format without this option, then these non-standard call
numbered items will be lumped together under a category called Other.
This report looks at your items from three different aspects -- numbers, age, and usage. It then
reports that information based upon call number groups, item policies, and by medium type.
This information can be very helpful in determining where you have been ordering, how many
items (titles and copies) in each category, where you need to order, where you need to weed
most and what areas of your collection are being used and how much.
Alexandria v6 Basic Teacher’s Manual
73
D.Circulation Reports
Loaned Items
The Loaned Items report has several uses. Perhaps, you have a teacher that wants a list of
the items checked out to her class to make certain that each child has a book to read. A more
standard use for this report, however, is to run it at the end of the school year just before your
Period Due date in order to remind the students what items they have checked out and must
return on or before that date. This report is found in the Circulation category under the General subcategory.
74
Alexandria v6 Basic Teacher’s Manual
Circulation Posting List — Detailed
The Circulation Posting List — Detailed is a wonderful report to send to teachers to inform
them and to let them inform their students of overdue items, fines and fees. It is found in the
Circulation category under the Listings subcategory.
With the new feature in available starting with version 6.0.0 that allows you to schedule reports
and send them as email attachments, setting up this report to be sent out automatically makes
management of overdue notifications to teachers so simple. Yes, it will take a little bit of time
initially, but the rewards will be endless.
After the initial report has been set up, let’s add the Select By option of Homeroom and enter
a homeroom in the Starting With and Ending With fields. For this example, we will enter
Johnson in both of these fields.
•
If you are part of a Central Union system, select your library from the Available Sites list
on the Sites tab and use the > to Selected Sites list.
•
Go to the Schedule tab and fill in the date that you want the report to run next, then, set
the Time drop-down menus. We suggest that you set this for a time of day early in the
Alexandria v6 Basic Teacher’s Manual
75
morning so that it will be there when the school day begins and the teacher checks his or
her email.
76
•
Set the Repeat drop-down menu to Weekly and click on the Day of the week for it to run
and set the Every field to 1.
•
Check the Send Email Notification box and fill in your email address in the field provided.
•
Click on the Locations tab and set the Output to drop-down menu to Email Attachment
and fill in the email address of the teacher. You may send the report to more than one person, just separate the email addresses with a comma. (We suggest that you send a copy to
yourself.) If a user name and password are necessary in order to send the email, enter
those things in the fields provided.
Alexandria v6 Basic Teacher’s Manual
•
Set the Output Format drop-down menu to PDF and give it a name such as Johnson
Overdues. Set the Append Prefix to Date if you want the file dated.
•
Click on the Overview tab and fill in a Name, Description and Notes (i.e. Weekly Overdues for Johnson’s class, PDF sent by email on Fridays at 4 a.m). Check Favorite if you
want the report as a favorite.
•
Click on Save.
Circulation Letters to Parents
When an item is more than a certain number of days overdue, you may wish to notify the parents. This is easily accomplished by using the Circulation Letters to Parents. This report is
found under the Circulation category and the Notices subcategory. The check boxes allow you
to determine what information is to be included in the report. If you are going to send these to
the parents’ emails, you might want to include the Patron’s Barcode so that you will be able
to help parents know which child has the overdue if they have more than one child in the
school.
Alexandria v6 Basic Teacher’s Manual
77
E. Statistics Reports
Usage by Period
The Usage by Period provides information on how many items were checked out, checked in,
renewed, and how many holds were placed during the period of time selected. Use the Select
By option of Date Range and fill in the Starting Date and Ending Date for the period.
Usage by Item-Patron Policy
78
Alexandria v6 Basic Teacher’s Manual
Perhaps the most informative report of all is the Usage by Item-Patron Policy. This report is
also found on the Statistics category under the Item Usage subcategory. When you look at
this report, you will either see very unimpressive information if you have only used Standard
Patron policy and Standard Item policy; however, if you have established detailed policies for
both patrons and items, you will be able to tell who is reading what and how much. For
instance, if there are separate policies for each grade in the school even if you have the exact
same rules for all grades, you are then able to see statistics for each grade. You might want to
have simple item policies such as Fiction, Non-Fiction, Reference, and Easy or your might want
to have more detailed item polices such as 000s, 100s, 200s, etc. instead of Non-Fiction.
Imagine how informative it would be to see that your 000s were not being read by anyone or
that 7th graders were reading many biographies while 8th graders (who are required by state
standards to have a biography unit in Language Arts) have not read any biographies. What you
get is dependent upon what policies you have established.
NOTES:
Alexandria v6 Basic Teacher’s Manual
79
80
Alexandria v6 Basic Teacher’s Manual
9
Policies and Preferences
Estimated teaching time: 30 minutes to 2 hours
Since preferences are a strongly personal area and may provide endless variety of options and
combinations, only a few of the major areas are covered in this manual. Refer to the Getting
Started Guide for more detail on other preferences. Be prepared to adjust your training to
answer the questions of the attendees or to cover areas that are not mentioned here, but are
appropriate to their situation.
To access policies and other preferences, choose System Preferences from the Edit dropdown menu. Only System Preferences will discussed in this chapter.
A. Site Information, Email, Security, Operators.
Be certain to fill in the library’s name, address, Site ID Code, language setting and email settings. (The email settings must be entered in order to email Technical Support from within
Alexandria and to email notifications to the patrons.)
Security preferences determine what can and can not be done when using Alexandria for those
persons with the specific security level.
In Operators, operators are assigned a personal login and password as well as a security level.
Each operator that logs on will be listed in the Transaction Log. At least one library administrator and one Researcher login should be created for security purposes.
Remember that the Data Station must be running in order for people to search. If the patrons
have access to the Data station when the librarian is not present in the library, they should
restart Alexandria and log in as a Researcher so that people may only search and may not
add, remove, or modify patrons, items, or transactions.
None of these take affect until Require Operators to log in is checked and Alexandria is
restarted.
Alexandria v6 Basic Teacher’s Manual
79
B. Policies (Patrons, Items, Exceptions) and Call Number
Policy Mapping
Policies govern how many items a patron can check out, how long they can be checked out
and what the fines are, etc. A patron policy must be created for each patron group that differs
in their circulation rules. (i.e. Staff have a different Period Due Date and longer checkout
time). An item policy must be created for each item group that differs in their circulation rules
(i.e. Reference does not check out while Fiction does.) Policies are also used in the Usage Statistics reports; so, even if there is no difference between the circulation rules, if you need statistics based upon time, patron or item, policies are the best way to obtain those statistics.
On the Patrons side, you would create and enter the general rules for each patron group. On
the Items side, you create and enter the general rules for each item group (what applies for the
majority of patrons using items with this policy. Clicking on the Exceptions button enables you
to make exceptions for certain patron-item policy combinations. For example, Teachers may
check out Reference items, but the majority of the patrons may not check out Reference items.
1. Set up a Patron Policy for 6th grade students with a Policy Code of S06.
To create a new policy:
80
•
Click on Edit on the menu bar and select System Preferences.
•
In the Circulations category, click on Policies. A Patron Policy is in the left pane and an
Item Policy is in the right pane. Use the drop-down menus at the top-left and top-right to
change to a different policy for that pane.
•
Click on the Add (+) icon at the bottom of the side to which you want to add a policy.
•
In the window that opens (Add Patron Policy or Add Item Policy)
Alexandria v6 Basic Teacher’s Manual
2.
•
Give the policy a Policy Name and a Policy Short code in the Policy Name field and the
Policy Short Code field and click on OK.
•
Work your way through each tab and the policy options on each tab making the selections
you want.
•
When finished, click on the Save button in the upper-right corner of the window.
Give those persons on Staff policy a 28 days transaction period for items on Fiction policy, but limit them to only 4 items on that policy.
To make exceptions to the policy for a particular policy:
•
Click on Edit on the menu bar and select System Preferences.
•
In the Circulations category, click on Policies. A Patron Policy is in the left pane and an
Item Policy is in the right pane. Use the drop-down menus at the top-left and top-right to
change to a different policy for that pane. Have the patron policy for which the exceptions
will be made showing in the left pane and an item policy to which exceptions will be made
for that patron policy group showing in the right pane. (i.e. Staff on Patron Policy side and
Fiction on the Item Policy side).
•
Click on the Exceptions button in the top-middle of the window. When it turns red, click on
the tab(s) and then the field(s) where you want to make the exception(s) and fill in the new
value.
Alexandria v6 Basic Teacher’s Manual
81
•
Click Save when finished with that patron-item policy combination. Then click on the
Exceptions button which should then turn yellow. An Alert icon will appear on the tab
where the exceptions have been made, but you will not be able to see the exception without having that tab in focus and clicking on the Exceptions button again. Then the field
with the red outline will mean that that is where the exception is and the exceptions value
is the one showing.
•
Repeat on all patron-item policy combinations until you have made all the exceptions that
you want.
Once a policy has been created, it must be assigned to a patron or item in order for it to be of
any use. It may be assigned in the Patrons or Items management windows on a one-by-one
basis or from Circulation using the UI or UP Circulation commands, or globally using Utilites.
Call Number Policy Mapping preferences allow you to enter the call number range associated
with an item policy. Otherwise, Alexandria will not automatically assign policies based upon call
number range or medium type to the items as the records are imported. Items are assigned the
default policy specified in the System Preferences or Import window when they are added.
Just to reiterate, if you create a Fiction policy, Alexandria will not put any of the fiction items on
that policy unless you have set up the Call Number Policy Mapping Preferences. If not, you
must either find each fiction title, unlock the title and change the policy yourself, OR choose to
replace the policy in Utilities, selecting by call numbers starting with FIC, OR go to Circulation, type UI and press <enter>, select the Fiction policy and scan each copy to change to that
policy. Also, running the utility will not apply to future fiction items entered; it only applies to
items currently in the data.
To set call number mapping:
82
•
Go to Edit on the menu bar and select System Preferences.
•
Click on Call Number Policy Mapping in the System Administration category.
•
Click on the Add (+) icon in the bottom-left corner of the window.
•
Fill in the Starting With and Ending With fields with call numbers to represent the range
of the call numbers to be assigned to a certain policy
•
Fill in the Library if you are in a Central Union system.
•
Select the appropriate policy from the drop-down menu at the bottom of the window.
•
Click on Save on the window.
•
Repeat until you have set all call number mappings that you want to set.
•
Click on Save on the System Preferences window.
Alexandria v6 Basic Teacher’s Manual
C. Calendars
Calendars govern when items are due. Except for manually set override due dates and overnight checkouts, items cannot be due on a closed day. To close a single day, click once on the
day to close. To open a day, click on the day until Closed and Period Due disappear. To close
all the Wednesdays for the month, select the month desired using the drop-down menu (make
certain that you are in the right year) and click on the column header Wed. To close all Fridays
for the year, go to January of the appropriate year, then hold down the <alt> (Windows) or
<alt / option> (Macintosh) key and click on the column header Fri and answer the question
appropriately.
Period Due Dates may be set for the end of the year when all items must be returned. Items
will circulate normally until the due date would pass the Period Due Date. If the policies state
that Period Due Dates apply, then the due date will be adjusted to the Period Due Date.
(This feature may also be used to ensure that most items are returned before major holidays,
before inventory season or before a major move.)
Notice that there is a button for creating new calendars. You may specify in the patron policies
which calendar to use for each policy. If you have a staff or faculty policy, they may have different open and closed days or need a different Period Due Date. When you create a new calendar, choose whether to duplicate the current calendar, and set the dates appropriately. Don’t
forget to set the corresponding policies to use the correct calendars.
1. On the Standard Calendar, for next year, close every Saturday and Sunday for the entire
year, Labor Day and all of July and August. Set a Period Due Date for the fourth Friday in
May.
To set calendar closed days:
•
Go to Edit on the menu bar and select System Preferences.
•
In the Circulation category, click on Calendars.
•
If you have more than one calendar, select the correct one in the left pane.
Alexandria v6 Basic Teacher’s Manual
83
•
To close the same day of the week for the whole year:
•
Change the Month drop-down menu to January and the Year drop-down menu to the
desired year.
•
Holding down the Alt (Windows) or Alt/Option (Macintosh) key, click on the day label
at the top of the calendar.
•
When asked if you want to close the day for the rest of the year, click on Yes.
•
To close consecutive days, click, hold and drag from the first date through the last date.
•
To close one day, click once on the desired date.
•
To set a Period Due Date, click twice on the date.
•
To clear a date, click through the cycle -- once closes the date, second click sets a
Period Due Date, third click clears the date.
•
Click on Save in the upper-right corner of the window to save changes.
D.Circulation Rules, Barcodes
The Circulation Rules System Preferences controls how things work in Circulation. For
instance, on the User Interaction tab, you decide if the Current Patron and Current Item,
and Transaction Log areas of the Circulation window clear on timeout and how many minutes before the timeout takes place. In addition, you decide whether or not patron Lexile and
reading levels will be visible and if there will be Patron Alerts displayed for overdue items, instock holds or upcoming reservations. The Rules tab governs such things as renewals, reservations, overdue notices, email notifications and charges. The Receipts tab allows you to set
rules for printing receipts while the Letters tab is the place where you will set the text for the
standard notices. Condition Codes and Damage Codes are set using the tabs designated for
these functions.
The Barcodes System Preferences are part of the System Administration category of the
System Preferences. Use these tabs to set your preferences governing the type of barcodes
and barcode numbers for Alexandria to use.
E. Patrons, Items, z39.50
The Patrons System Preferences are part of the Management category. Using these preferences, you set whether or not to keep patron history for all patrons and whether or not to disable expiration dates. On the Grade Table for this preference group, you enter the grades that
are in your school. On the Management tab, enter the next barcode for Alexandria to use for
patrons if Alexandria is to assign barcodes to patrons.
The Items management System Preferences are also part of the Management category.
Here you set the Next Barcode if Alexandria is to assign item barcodes. You will also set the
Default Policy and Default Medium to be used when adding items to your collection. Additional preferences in this group allow you to dictate if the call numbers should all be in uppercase and whether or not to Enable Add Title Assistant.
In the Network Services category of the System Preferences, the z39.50 Services preferences are found. The main preference settings in this area are for the MARC Search preferences. Here you will set the number of seconds for the search to run, the maximum number of
84
Alexandria v6 Basic Teacher’s Manual
results, and the types of items (books and/or non-books) that should be returned when using
MARC Search.
F. Researcher
Use these preferences to allow only those things that you want patrons to be able to do when
using Alexandria and whether or not the items checked out to the System Patrons should
show in Researcher.
G. Authority Control
Authority Control allows you to set what information you would like authority-controlled as
well as how changes made in the Authority Control module should affect your records.
NOTES:
Alexandria v6 Basic Teacher’s Manual
85
86
Alexandria v6 Basic Teacher’s Manual
10 Alexandria Quick Start Checklist
For those who have not set up Alexandria, the following is an ordered checklist of what to do in
the order you should do these things.
A. Install Alexandria
B. Utilities — Archives and Rebuilds
a. Set Archives Schedule
b. Set Rebuild Schedule
C. Set System Preferences
a. Site Information
b. Email
c. Security
d. Operators
e. Calendars
f. Policies (Patrons, Items, Exceptions) and Call Number Policy
Mapping
g. Circulation Rules, Barcodes
h. Patrons, Grades, Items
i. Researcher
D.Import Patrons
E. Import Items
Alexandria v6 Basic Teacher’s Manual
87
F. Run Utilities
Remember, you must have your policies established before you can run the utility to change
items or patrons to a different policy.
a. Patron utility to put patrons on correct policies
To change patrons to a new policy:
•
Go to Tools on the menu bar and select Utilities.
•
Click on the Patrons category and, then, click on Replace Information in the main
(right) frame.
•
Set the Replace drop-down menu to Patron Policy, the With drop-down menu to the policy you want used for the selected items.
•
Set Select By drop-down menu to the desired criteria and fill in the Starting With and
Ending With fields with the appropriate information.
•
Click Run.
NOTE: Remember, if you are asked whether or not you want to Archive, the answer is always
Yes.
88
Alexandria v6 Basic Teacher’s Manual
b. Item utilities to put items on correct policies
To change items to a new policy:
•
Go to Tools on the menu bar and select Utilities.
•
Click on the Copies category, then, click on Replace Information in the main (right)
frame.
•
Set the Replace drop-down menu to Copy Policy, the With drop-down menu to the policy
you want used for the selected items. Leave the Modify drop-down menu set to Titles
and Copies.
•
Set Select By drop-down menu to the desired criteria and fill in the Starting With and
Ending With fields with the appropriate information.
•
Click Run.
NOTE: Remember, if you are asked whether or not you want to Archive, the answer is always
Yes.
G. Questions or Problems? — Call Tech Support
Tech Support is available 24 hours a day, 7 days a week, 365 days a year.
Just call 1-800-347-4942.
Alexandria v6 Basic Teacher’s Manual
89
NOTES:
90
Alexandria v6 Basic Teacher’s Manual