1
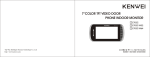
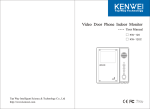
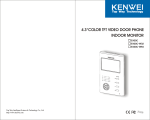
10.2"
COLOR TFT VIDEO DOOR PHONE
INDOOR MONITOR
SA20C
SA20C-W80
SA20C-W200
SA20C-PH
SA20C-PH80
SA20C-PH200
Top Way Intelligent Science & Technology Co., Ltd
http:// www.kenwei.com
Content
Products introduction
4
Feature and parts
5
Menu operation
7
Menu function
8
Operation
19
Special function
26
Introduction for color image memory ( W80/PH80)
28
Operation for color image memory (W80/PH80)
29
Introduction for color image memory ( W200 / PH200 )
31
Operation for color image memory (W200/PH200)
33
Instruction of voice status
35
Instruction of light indicators
35
Operation for OSD menu
36
Troubles shooting guide
37
Specifications
38
3
Feature and parts
Products introduction
Thank you for purchasing our product of building intercom system series. Please read the instructions
carefully and follow the directions before installing the products. Any problem of the products, please
inquire your supplier.
General features
10.2"high-definition digital screen
CAUTION: To avoid the risk of
16:9 widescreen design, enrich your vision
electric shock, please don't
Hands free full duplex talk
remove cover or back. Please
ask professional person if
Touch button
maintenance needed.
Monitor and remote unlock
Kinds of chord ring and DIY ring (optional)
Color, brightness and contrast etc., adjustable
Remind users that important
4 grade ring volume adjustable
operation and maintenance
guide are included in the
0-100 grade talk volume adjustable
attached user's manual.
No bother (mute) function
W80, PH80 indicate the color image memory (optional)
W200, PH200 indicate the color memory for both image and video, which been saved in SD card up to 16G.
Intercom and call transfer between indoor monitors (support max. to 4 monitors)
4 way CCTV cameras connectable
Video signal output
*
reserves the right to change or modify
Message function (optional)
design, features functions and specifications
Voice and video record function (optional)
without any prior notice for the improvement and
Extension switch for multi-function (optional)
promotion of products' quality. Please refer to the
Extension ring output (optional)
real products.
Pedal control and 2nd door calling function (optional)
4
Remote control by telephone (optional)
LED area
LED area
MIC
Function button area
Function button area
2nd door calling LED
No bother LED
Menu button / Shift button / Away LED
Home message LED
Right
Message record / play LED
Up
Down
on telephone / telephone calling LED
Left
Extension switch
Intercom
Monitor outdoor / CCTV camera
Unlock
Talk / Stop
Remark
1.During operation, please touch the center of buttons as the picture shows.
2.To avoid operation invalid, don’t wear anything in your hand, such as glove.
5
Menu operation
Feature and parts
Menu operation:
Telephone line slot
Speaker
SD card slot
Connection
terminal
1.Enter into the main menu: Hold“
2.Exit the main menu: Touch“
3.Select the item: Touch“
”till the unit sound DI
”or“
”or“
4.From main menu to sub menu: Touch“
Reset
”
”
”
5.From sub menu return to main menu: Touch“
6.Exit the sub menu: Touch“
7.Function setup: Touch“
”
”
”
SD card
VD-R ON OFF position
Insert SD card: insert the SD card to the slot according
to the picture indicated position.
Take out SD card: push the SD card by hand, it will be
pulled out automatically.
6
7
Menu function
Menu function
MUSIC SET
Hold“
”to enter
MAIN MENU
MUSIC
SYSTEM
FUNCTION
MESSAGE
MANAGE
TELEPHONE
SHORTCUT KEY
EXIT
SYSTEM SET
SET
SET
SET
SET
SET
SET
MUSIC
MUSIC
RING
RING
RETURN
EXIT
MUSIC MENU
CH1
CH2
TIME
VOLUME
1
1
5S
1
Hold“
”to enter
MAIN MENU
MUSIC
SYSTEM
FUNCTION
MANAGE
MESSAGE
TELEPHONE
SHORTCUT KEY
EXIT
SET
SET
SET
SET
SET
SET
SYSTEM MENU
PEDAL
CONTROL
2nd
DOOR CALL
VIDEO
MODE
CCTV
MODE
ROOM NO. SET
RETURN
EXIT
OFF
ON
JPG
1
1
PEDAL CONTROL FOR TALK (Turn on / off)
nd
2nd DOOR CALLING (Turn on / off)
Optional
The 2nd door calling is default to turn on
When the screen is off, if the 2 door calls in, the indoor unit will sound the ring and“
8s to turn off
nd
MUSIC CH1 / CH2 (12 chord rings for option)
The 12 one is the DIY music, this function is available for W200 / PH200 only
th
RING TIME (5S, 10S, 15S, 20S for option)
RING VOLUME (1, 2, 3, 4 grade for option)
1 is the min. sound, 4 is the loudest sound
8
”LED flashes about
When the screen is on, if the 2nd door calls in, the“
”LED flashes about 8s to turn off
VIDEO MODE ( JPG / AVI)
JPG: for W80 / PH80 & W200 / PH200
AVI: for W200 / PH200 only
CCTV MODE ( Mode 1 / Mode 2)
Mode 1: All the indoor units could monitor their own connecting CCTV Camera.
Mode 2: All the indoor units could monitor the CCTV Camera which connected to the main indoor unit, which
means just need to connect the CCTV camera on the main unit, it is unnecessary connect to the sub units
Attention: If the system has more than 1pc indoor unit, this function should be set on the main indoor unit.
Room No. set (1, 2, 3, 4 for option)
Attention: When the system has more than 1pc indoor unit, the SYSTEM SET is available on the main unit
only, if the operation is on sub unit, the screen will show “please set up on the main unit”.
9
Menu function
Menu function
MESSAGE MANAGE SETⅠ
FUNCTION SET
Hold“
”to enter
MAIN MENU
MUSIC
SYSTEM
FUNCTION
MANAGE
MESSAGE
TELEPHONE
SHORTCUT KEY
EXIT
SET
SET
SET
SET
SET
SET
FUNCTION MENU
AWAY
SET
MUTE
SET
AUX.SERVICE TIME
OPEN TIME
RETURN
EXIT
OFF
OFF
3S
3S
Away set (Turn on / off)
Turn on:The unit sound“DI”and the“
”LED turns on
Turn off:The unit sound“DI DI”and the“
”LED turns off
Mute set---No bother setup (Turn on / off)
Turn on:The“
”LED turns on
Turn off:The“
”LED turns off
Aux.service time—Extension switch time setup (3S, 10S, 20S, 30S for option)
The system is default to 3S
OPEN TIME --- Unlock time setup (1S, 3S, 5S, 10S for option)
Hold“
”to enter
MAIN MENU
MUSIC
SYSTEM
FUNCTION
MANAGE
MESSAGE
TELEPHONE
SHORTCUT KEY
EXIT
SET
SET
SET
SET
SET
SET
MESSAGE MENU
DIY
MUSIC
GUEST
MESSAGE
HOME
MESSAGE
GUEST
MESSAGE OFF
HOME
MESSAGE OFF
RETURN
EXIT
PLAY
START
REC
START
STOP
DELETE
RETURN
DIY MUSIC (Record, Play, Stop, Delete)
Attention
: The input music should be close to the MIC position during recording
Attention:a.
.
b. Recording time is about 12S.
GUEST MESSAGE---Leave the message for visitors (Record, Play, Stop, Delete )
Attention
:
Attention:The
recording time is about 12S.
HOME MESSAGE---Leave the message for family members (Record, Play, Stop, Delete )
Attention
:
Attention:The
recording time is about 35S.
Start recording: the unit sound DI and the“
”LED turns to red.
Finish recording: the unit sound DI DI and the“
”LED turns off.
Start playing: the“
”LED turns to blue.
Finish playing: the“
”LED turns off.
Delete the recorded music / message: if the unit is on playing, should be STOP playing first and then to delete.
Attention: Message manage function is available on W200 / PH200 only
10
11
Menu function
Menu function
TELEPHONE SET Ⅰ
MESSAGE MANAGE SETⅡ
Hold“
”to enter
MAIN MENU
MUSIC
SYSTEM
FUNCTION
MESSAGE
MANAGE
TELEPHONE
SHORTCUT KEY
EXIT
SET
SET
SET
SET
SET
SET
MESSAGE MENU
DIY
MUSIC
GUEST
MESSAGE
HOME
MESSAGE
GUEST
MESSAGE OFF
HOME
MESSAGE OFF
RETURN
EXIT
PLAY
START
REC
START
STOP
DELETE
RETURN
Hold“
”to enter
Attention
Attention:From main menu
MAIN MENU
MUSIC
SYSTEM
FUNCTION
MESSAGE
MANAGE
TELEPHONE
TELEPHONE
SHORTCUT KEY
EXIT
SET
SET
SET
SET
SET
SET
TEL MENU
TEL
OFF
CALL EN
TEL
OFF
CTRL EN
TEL1
TEL2
TEL3
PASSWORD
SET
PASSWORD
RESET
RETURN
telephone set,it needs to take about 1~2s to read the date(screen off)
GUEST MESSAGE (ON / OFF)
Turn on:If the“Away”and“Guest message”function is turned on, when the visitor calls in, after ringing
(suggest to set the ring time to 5S), the visitor will hear the message which you recorded. This function is
available on the main indoor unit only if the system has more indoor units.
Friendly reminder: If you purchase PH200, you can leave the message to visitors to remind them that the call
will transfer to your phone after short waiting.
HOME MESSAGE (ON / OFF)
Turn on:The“
”LED turns on (reminding), when the people be back home, they could check the
message which you recorded (manually play).
TEL CALL EN OFF---Transfer the call from outdoor unit to the telephone (TEL1, TEL 2, TEL 3, OFF for option)
Choose the phone which you want to connected from the listed (TEL 1, TEL 2, TEL 3) or if this function is unnecessary,
you can choose OFF to turn off this function.
Attention:
a.If the function is turned on, when outdoor unit calls in and nobody answer it, the call will transfer to your phone
after 30S’ ringing. The talking time between outdoor unit and your phone is 3 minutes.
b.The connected telephone line should with CID which with FSK standard, otherwise the telephone could not be
connected.
c.During the outdoor unit talking with the telephone, indoor unit could switch the talk to outdoor unit by
touching“
”.
d.The unit will sound “DI DI” on every 1 minute during the outdoor unit talking with the telephone (the max. talking
time is 3 minutes).
Attention: Message manage function is available on W200 / PH200 only
12
13
Menu function
Menu function
TELEPHONE SET Ⅱ
Hold“
”to enter
MAIN MENU
MUSIC
SYSTEM
FUNCTION
MESSAGE
MANAGE
TELEPHONE
TELEPHONE
SHORTCUT KEY
EXIT
SET
SET
SET
SET
SET
SET
TELEPHONE SET Ⅲ
TEL MENU
TEL
OFF
CALL EN
TEL
OFF
CTRL EN
TEL1
TEL2
TEL3
PASSWORD
SET
PASSWORD
RESET
RETURN
TEL CTRL EN OFF--- Transfer the telephone call to the indoor unit while no one to answer the
MAIN MENU
MUSIC
SYSTEM
FUNCTION
MESSAGE
MANAGE
TELEPHONE
TELEPHONE
SHORTCUT KEY
EXIT
”to enter
Hold“
Phone number input method (The input number in 12 digits at max. ):
telephone after 7 times ringing ( ANY, LIST, OFF.)
By touching“
ANY: after 7 times ringing, the indoor unit will answer it and need to input the correct administration
when all the number have been chose and correct, to choose“
password to remote control the indoor unit.
LIST (TEL 1, TEL 2, TEL 3): after 7 times ringing, the indoor unit will answer it and no need to input the
administration password to remote control
the indoor unit.
OFF: to turn off this function.
TEL MENU
TEL
OFF
CALL EN
TEL
OFF
CTRL EN
TEL1
TEL2
TEL3
PASSWORD
SET
PASSWORD
RESET
RETURN
SET
SET
SET
SET
SET
SET
”or“
”to choose the number and touch“
”to confirm the chose number,
”&“
”to confirm.
Phone number deleted method:
By touching“
”or“
”&“
”to delete.
PASSWORD SET (Administration and unlock password setup)
Administration password (4 digits): The default password is 8888, if you want to change it, the input method
like the phone number input
Unlock password (3 digits): The default password is 888, if you want to change it, the input method like the
TEL1—input the phone number which you wish connected when you are not at home
phone number input.
TEL2--- input the phone number which you wish connected when you are not at home
Attention: The password display is use **** to instead of exact number, the exact number will be
TEL3- --input the phone number which you wish connected when you are not at home.
displayed while you change the password.
(TEL 1, TEL 2, TEL 3 means you could input three different telephone number that you wish)
PASSWORD RESET ---After resetting, the Unlock & Administration password will be back to the
defaulted one.
14
15
Menu function
Menu function
TELEPHONE SET Ⅳ
MAIN MENU
MUSIC
SYSTEM
FUNCTION
MESSAGE
MANAGE
TELEPHONE
SHORTCUT KEY
EXIT
SET
SET
SET
SET
SET
SET
SHORTCUT KEY MENU
UP
KEY
SET
DOWN
KEY
SET
LEFT
KEY
SET
RIGHT
KEY
SET
RETURN
SHORTCUT KEY SET---Set the function which you wish to enter quickly on“
AWAY
MUTE
HOME
HOME
MESSAGE
PLAY
TEL CALL
RETURM
SET
SET
MESSAGE PLAY
MESSAGE SET
MENU
ON
EN
Password and control code for telephone’s calling:
When the telephone calls in, after hearing the“Du”, then you could input the password to control the indoor unit. The unit will
sound“Du”after inputting the correct password or control code (play home message without “Du” reminding).
Administration password“*----#”,
Unlock password“*----#”, (The unit should under talking or monitoring mode)
Available for W200/PH200 only
*08#
listening to door 1
*09# listening to door 2
*07# talk to door 1
*20# talk to door 2
*15#
turn on no bother mode
exit the no bother mode
*10#
setup the home message
*16#
*12#
listening the home message
*17#
*13#
turn on home message
*18#
exit the AWAY mode
*14#
exit the home message
*86#
hang up
UP KEY SET----- “
”
DOWN KEY SET ----- “
LEFT KEY SET----- “
RIGHT KEY SET---- “
”
”
”
SET
SET
SET
SET
SET
SET
SHORTCUT KEY MENU
UP
KEY
SET
DOWN
KEY
SET
LEFT
KEY
SET
RIGHT
KEY
SET
RETURN
AWAY
MUTE
HOME
HOME
MESSAGE
PLAY
TEL CALL
RETURM
”,“
”,“
”
SET
SET
MESSAGE PLAY
MESSAGE SET
MENU
ON
EN
To choose the below functions to enter quickly
AWAY SET
MUTE SET (No bother setup)
HOME MESSAGE PLAY
HOME MESSAGE SET (Turn on / off)
MESSAGE MENU (Enter into message manage interface)
PLAY (Enter into video menu)
TEL CALL EN---Outdoor call transfer to telephone (turn on / turn off)
turn on AWAY mode
Attention:
1. Telephone set is available on the main indoor unit only when the system has more than 1pc indoor unit. If the main and sub units are both
“please set up on the main unit
”and if the sub unit doesn’t equip with telephone
equip with telephone function, the screen will display
display“please
unit”and
“No such function
”when you try to setup on the sub unit(s).
function, the screen will display
display“No
function”when
“
”
.
2. If the TEL CALL EN and TEL CTRL EN are set to OFF, the telephone function and the
will be turned off
the“
”will
off.
“DI”for 6 times and the
“
”
.
3. If the unit sounds
keeps flashing which means that the telephone line is not connected well
sounds“DI”for
the“
”keeps
well.
16
MAIN MENU
MUSIC
SYSTEM
FUNCTION
MANAGE
MESSAGE
TELEPHONE
SHORTCUT KEY
EXIT
”,“
Attention:
.If the above function which you plan to setup to shortcut key, but the unit which you purchased doesn’t equip
a
a.If
“No such function
”
with it, the screen will display
display“No
function”
.The functions which you set with shortcut key, should hold the
“
”,“
”,“
”,“
” till the
b
b.The
the“
“DI”to enter into, hold it again till the unit sound “DI DI” to exit.
unit sound
sound“DI”to
.After initialization, the system default to:
cc.After
“
”
” : Mute (No bother)
”:: Away “
“
”
”:: memory review (available for the model with image memory function)
17
Operation
Menu function
”to enter)
Monitor channel interface (Hold“
MONITOR
CCTV
MONITOR
MONITOR
MONITOR
MONITOR
MONITOR
MONITOR
CHANNEL
CHANNEL
CH1
CH2
CCTV1
CCTV2
CCTV3
CCTV4
1.ON/OFF
1.ON/OFF
a.After connecting the power, the unit will enter into standby mode automatically, then all
buttons' backlight turn on.(Buttons' backlight will be off automatically after 1s and power LED light on .)
1
1
ON
OFF
OFF
ON
ON
ON
Under Off mode, touch“
b.Under standby mode, touch and hold“
When outdoor camera calls in, indoor monitor's screen will display its image automatically, and power LED
flash, meanwhile sound the ring.
3.Talk/Stop
a.Talk (when outdoor camera calls in)
Touch“
CCTV1
ON
CCTV2
ON
CCTV3
ON
CCTV4
ON
EXIT
If turn “OFF” the CH2 or CCTV1, the monitor image will turn to the next CCTV2 automatically.
CH1
ON
CH2
OFF
CCTV1
OFF
CCTV2
ON
CCTV3
ON
CCTV4
ON
EXIT
”button (pic.1) to enter into talk mode, outdoor unit can talk with indoor monitor.
b.Monitor to talk
Under monitor mode, touch“
”button (pic.1) to enter into talk mode, indoor monitor can talk with the
monitored outdoor unit.
c.Standby to talk (Between indoor monitor and Door1)
Under standby mode, touch“
18
Pic.1
2.Call reminding
The default set is “ON”.
CH2
ON
”, till it sounds DI DI , all buttons' backlight
turn off, means the unit enter into OFF mode.
Monitor channel---Switch between CH1 / CH2
CCTV channel---Switch between CCTV1 / CCTV 2 / CCTV 3 / CCTV4
Monitor CH 1 ----To turn on / off monitoring
Monitor CH 2----- To turn on / off monitoring
Monitor CCTV 1---- To turn on / off monitoring
Monitor CCTV 2---- To turn on / off monitoring
Monitor CCTV 3--- To turn on / off monitoring
Monitor CCTV 4---- To turn on / off monitoring
CH1
ON
”button (pic.1) , it will sound DI, means the unit is turning on
and under standby mode, power LED on.
”button (pic.1) to talk with Door 1.
19
Operation
Operation
.more than 1pc indoor unit
bb.more
d.Stop
Under talk mode, touch“
”button (pic.1) to stop talk and back to standby mode.
If the CCTV mode is set to mode 1 on the main unit (Main menu---System set---CCTV mode) and all the
Or wait 90s, it will automatically stop.
monitor channels have turned on, the operation to monitor the outdoor units and CCTV cameras is the same as
Pic.1
4. Unlock
a. Under talk mode, touch“
point a, but if one of indoor unit is on monitoring the CH1 / CH2, the others could monitor the CCTV camera
which connected to their owns only and if the CCTV mode is set to mode 2 on the main unit, one of indoor unit
”button (pic.2) to open the door. Under monitor mode, the door could not be
opened. (To reach the unlock function, the outdoor camera should be equipped with electronic lock.)
b. Unlock pulse time is what you set on Main menu
time (1S, 3S, 5S, 10S). If the“
Function set
Open
”button is holding all the time, the max. opening
time is 10S.
MAIN MENU
MUSIC
SYSTEM
FUNCTION
MESSAGE
MANAGE
TELEPHONE
SHORTCUT KEY
EXIT
SET
SET
SET
SET
SET
SET
FUNCTION MENU
AWAY
SET
MUTE
SET
AUX.SERVICE TIME
OPEN TIME
RETURN
EXIT
OFF
OFF
3S
3S
Pic.2
is on monitoring, others could not be monitored both to outdoor cameras as well as to the CCTV Cameras.
MAIN MENU
MUSIC
SYSTEM
FUNCTION
MESSAGE
MANAGE
TELEPHONE
SHORTCUT KEY
EXIT
SET
SET
SET
SET
SET
SET
SYSTEM MENU
PEDAL
CONTROL
2nd
DOOR CALL
VIDEO
MODE
CCTV
MODE
ROOM NO. SET
RETURN
EXIT
OFF
ON
JPG
1
1
6. Extension ring (Extra speaker)
When outdoor unit calls in, the indoor unit and extension ring will ringing at the same time if the indoor unit has
connected with extension ring.
5. Monitor outdoor units and CCTV Cameras
When the main indoor unit wants to transfer the call to sub unit, the sub unit and extension ring will ringing at
.1pc indoor unit only
aa.1pc
the same time if the sub unit has connected with extension ring.
“
st
nd
rd
”(pic.3):Under standby mode, 1 touch for CH 1, 2 touch for CH 2, 3 touch for
CCTV 1, 4th touch for CCTV 2, 5th touch for CCTV 3, 6th touch for CCTV 4, 7thtouch to exit.
(All monitor channels have turned on).
20
Pic.3
21
Operation
Operation
7.Intercom function (more than 1pc indoor unit)
8.Call transfer (suitable for more monitor)
a. 2pcs indoor units connected: Under standby mode, touch and hold“
”button (pic.4)
When outdoor camera calls in, monitor A touch“
till the unit sound DI and the screen will display another indoor unit’s room number, then
touch“
”(pic.1) to call it.
Pic.4
b. more than 2pcs indoor units connected: Under standby mode, touch and hold“
”button
After successful transferring, only monitor B will sound ring, others will get into
busy mode. (For example, you need transfer the call to No. 3 monitor, touch“
(pic.1) till the unit sound DI and the screen will display the relevant indoor unit’s room
(pic.4), when the screen display“3”, touch“
number, and you can by touching“
monitor.)
want to call, then touch“
”(pic.1) to choose the room number which you
”(pic.1) to call it.
Pic.1
Attention:
”(pic.1) to transfer to No. 3
Pic.1
9. Busy mode (suitable for more indoor units)
b. When two monitors are on talking, others will be in busy mode, After finishing talking, all the monitors are
off after 10s.
2.To exit the intercom operation by touching“
back to standby mode.
”
(pic.5)
”(pic.5)
3.If the room number doesn’t exist or the call is failed, the screen will display
“CONNECTION FAILED”.
Pic.5
”(pic.1) will flash, when answered, the screen will be turned on and the screen will
display“INTERCOM”, then you could talk with each other.
d. During calling, by touching and holding“
22
Pic.4
”
a. When one of monitor is under monitoring or talking mode, others will be in busy mode
1.The each step of intercom operation should be within 10s, the screen will be turned
c. During calling, the“
”(pic.1) to start talking.
If you need transfer this call to monitor B, operation method is same as intercom.
”(pic.1) for 2s to stop.
10. Talk volume adjust
During talking, touch“
”or“
”(pic.6) to adjust talk volume. The adjustable
range is 0-100. Auto reserve after exit.
Pic.6
23
Operation
Operation
11. Outdoor call reminding
14. Navigation buttons’ allocating
a. When the indoor monitor is under standby, monitor, intercom mode, if the outdoor unit calls in, both the indoor
When the unit under talking or monitoring mode,“
the talk volume,“
and outdoor unit will sound the ring.
b. During the indoor unit talking with door 1, if door 2 calls in, the indoor unit’s screen will display“
”to
”&“
”&“
”is default to adjust
”to adjust the picture quality, then by touching“
”
to switch to image memory mode.
Pic.6
instead of ring.
15. Buttons’ backlight indication
12. Same room number alarm (suitable for more indoor units)
The backlight will keep on lighting at 6s’, if without any operation within 6s’, the
When two indoor units are with the same room number, the unit will sound“DI---DI---DI”, then you need to
backlight will be lighted off and you could by touching any button to light on the backlight.
Pic.7
change the room number and after changing, if the alarm is still in, you need to re-start the unit.
13. Communication problem (for more indoor units)
Pic.5
If the unit sound“DI DI”every 3s, it means the problem is between this monitor
and main monitor, please check the connection as well as the power connection for the
main unit. After solving the problem, touch“
”or“
”(pic.7) to connect
with outdoor unit again, then the alarm will be disappeared automatically. (The
alarm will appear if the connection between the sub unit and main unit is failed in 6
times continuously)
24
Pic.7
25
Special function
Special function
If the system can work properly, please don't reset or initialize room number, or it will cause the system improperly
3. Automatically setup room number
working.
a. When the system only have 1 monitor, after connection and call from outdoor, room number will be
automatically setup.
1. Unit initialization
RESET
Under standby mode, insert the needle into the“RESET”hole
until the unit sound“DI”, Which means the
successfully ringing, stop the call. Then the room number will automatically setup.
initialization is successful. After resetting, the system will default to:
Ring for Door 1: DINGDONG ; Ring time: 20S ;“
“
”: Away ; “
b. When the system have 2 monitors, initialize 2 monitors first, then call from outdoor, after both monitors are
c. When the system have more than 2 monitors, initialize all indoor monitors, then connect the power of main
”: Mute (No bother)
” : memory review (available for the model with image memory function)
monitor and monitor 2 you need, call from outdoor, after successfully ringing on two monitors, stop the call.
CCTV MODE: 1 ; Aux.service time: 3S;
Then connect the power of monitor 3 you need, call from outdoor, after successfully ringing on all monitors ,
Home & Guest message: turned off
stop the call. Do the same operation for monitor 4.
The recorded data for DIY music, home message and guest message will be deleted.
2. Manually setup room number
Main menu
System set
Room number set, after the successfully setup, the screen will display
“ROOM SET OK”, but if the two units with the same room number, the unit will sound“DI”to alarm.
MAIN MENU
MUSIC
SYSTEM
FUNCTION
MANAGE
MESSAGE
TELEPHONE
SHORTCUT KEY
EXIT
26
SET
SET
SET
SET
SET
SET
SYSTEM MENU
PEDAL
CONTROL
2nd
DOOR CALL
VIDEO
MODE
CCTV
MODE
ROOM NO. SET
RETURN
EXIT
OFF
ON
JPG
1
1
27
Introduction for color image memory ( W80/PH80)
Operation for color image memory (W80/PH80)
The unit ( W80/PH80) which with color image memory has the following functions:
1.Auto/manual taken photos
.Photo taken
11.Photo
a.Under away mode, when outdoor calls in, the unit will take the photo automatically.
The unit can take the photo with time information, max to 80pcs (W80/PH80 model)
b.During the talking between outdoor and indoor unit, touch“
”&“
”to take the photo with time
information.
.Review
22.Review
The users can review the taken photos under monitor or talk mode
2.Review / Delete taken photos
Touch“
.Auto-off
33.Auto-off
During reviewing, if without any operation within 15s, the review function will be turned off automatically.
”(screen on)---“
”(till there have time and date display at upper right corner on screen)---
“
”to enter into 6 photos reviewing interface, by touching“
“
”/“
”to review the photos in full screen,
”to review the last / next one. If want to delete the photo, touch and hold“
”for 3s to delete
.Time information display and edit
44.Time
When the system under memory mode, the screen will display the time and date information and you can edit the
time as well.
2012-01-01 001
2012-01-01 002
2012-01-01 003
2012-01-01 004
2012-01-01 005
2012-01-01 006
.Away management
55.Away
When the unit is under Away mode, the system will automatically to take the photos of each calling.
28
29
Operation for color image memory (W80/PH80)
Introduction for color image memory ( W200 / PH200 )
3.Time setting / Format image memory
Touch“
“
”(screen on)---“
The unit (W200 / PH200) which with color image memory has the following functions:
”(till there have time and date display at the upper right corner on screen)---
”(touch and hold for 3s), to enter into the below interface:
Set Date / Time: Touch“
”to enter, touch“
item, when setting finished, touch“
Format image memory: Touch“
choose“
”or“
”/“
The unit could take the photo or record the video for 10s in AVI format to save to SD card
”to set the value, touch“
”again to the next
22.Review
.Review the taken photo / recorded video
”to exit.
”/“
”to select and touch“
”to format, then touch“
Photo taken / Video recording
1.
1.Photo
”to exit.
”to enter, touch“
”/“
”to
The users can review the taken photos or recorded video under monitor or talk mode, and the data could be saved
even the power is cut off suddenly.
3. Auto-off
PEDAL
2nd
VIDEO
CCTV
ROOM NO.
RETURN
EXIT
CONTROL
DOOR CALL
MODE
MODE
SET
2012-01- 01
During reviewing, if without any operation within 15s, the review function will be turned off automatically.
4. Time information display and edit
00 00
When the system under memory mode, the screen will display the time and date information and you can edit the
time as well.
5. Away management
When the unit is under Away mode, the system will automatically to take the photos / recorded video of each
calling.
30
31
Operation for color image memory (W200/PH200)
Operation for color image memory (W200/PH200)
The operation for Auto/manual taken photos & Review and delete taken photos is the same as W80/PH80
4. Time setting / Format image memory and SD card
1.
Manual video recording
1.Manual
Touch“
”---“
Touch“
”(till there have time and date display at the upper right corner on screen, touch“
---“
”
”(screen on)---“
”(till there have time and date display at upper right corner on screen)
”(touch and hold for 3s), to enter into the below interface:
to record the video for 10s in AVI format.
Remark:
SD
1.During recording, “
”、“
”、“
”、“
”are invalid, touch“
PEDAL
2nd
VIDEO
CCTV
ROOM NO.
RETURN
EXIT
”to stop the
recording.
2.For manual recording, the picture and voice could be recorded at the same time under talk mode,
2011/09/06
15:19:06
PEDAL
2nd
VIDEO
CCTV
ROOM NO.
RETURN
EXIT
CONTROL
DOOR CALL
MODE
MODE
SET
Set Date/Time
2010/09/06
15:19:06
if in other modes, could recorded the image only.
PEDAL
2nd
VIDEO
CCTV
ROOM NO.
RETURN
EXIT
CONTROL
DOOR CALL
MODE
MODE
SET
CONTROL
DOOR CALL
MODE
MODE
SET
2012/01/01
2010/09/06
15:19:06
2. Auto video recording (When the system has more than 1pc indoor unit, only the main unit could record the video)
To turn on the Away function (Main menu---Function set---Away set) and choose the Video mode to AVI format
Set Date / Time: Touch“
(Main menu---System set---Video mode, suggest to set the ring time to 5S), when visitor calls in, the unit will
item, when setting finished, touch“
”to enter, touch“
Format image memory and SD card: Touch“
record the video automatically.
“
”/“
”to choose“
”/“
”to set the value, touch“
”again to the next
”to exit.
”or“
”/“
”to select and touch“
”to format, then touch“
”to enter, touch
”to exit.
3.Review / Delete the recorded video
Touch“
---“
”(screen on)---“
”(till there have time and date display at the upper right corner on screen)
”to the review mode, touch“
”/“
”to review the photo and when there have“
display at the upper right corner on screen, to touch“
video, touch and hold“
32
”icon
”to play the video. If you want to delete the recorded
”for 3s to delete.
33
Instruction of voice status/Instruction of light indicators
Operation for color image memory (W200/PH200)
Remark:
Instruction of voice status:
1.Please format the SD card for the first time using.
1.“DI---DI---DI…”: 2 indoor units with the same room number.
2.In the process of recording / playing photos or video, the SD card can’t be taken out. When cut off the
power, the pre set time will be lost in 7 days.
3.If the unit without SD card, the screen will display “NO SD CARD” when enter into the memory mode.
2.“DIDI---DIDI---DIDI…”: communication problem.
3.“DU”: The function is disable.
4. DI for 6 times: telephone line is not connected well.
4.If the displayed pictures are abnormal during reviewing the photo or video, please format the SD card
and try again.
5.The capacity of 2G SD card: save over 1000pcs photos or record video for 80 minutes and each
video is 10s.
Instruction of light indicators:
1.“
”LED lights on: Away function is turned on.
2.“
”LED lights on: The 2nd door calls in.
3.“
”LED lights on: Mute (No bother) function is turned on.
4.“
”LED lights on: The home message function is turned on.
5.“
”LED keep flashing: remind you to check the home message.
6.“
”LED lights on: recording the message.
7.“
”LED lights on: playing the message.
8.“
”LED lights on: guest message is being played to visitor.
9.“
”LED lights on: telephone function is on working.
10.“
34
”LED keep flashing: the telephone line is not connected well.
35
Troubles shooting guide
OSD menu operation
The items(Brightness,Contrast,Color,Impact,Color SYS,Language,Scale,Volume & Reset)which show in
menu A & menu B could be adjusted in OSD menu.
BRIGHTNESS
50
COLOR SYS
AUTO
PEDAL
CONTROL
LANGUAGE
2nd
DOOR CALLENGLISH
VIDEO
MODE
SCALE
16:9
CCTV
MODE
VOLUME
50
ROOM NO. SET
RESET
RETURN
EXIT
EXIT
PEDAL
CONTROL
CONTRAST
48
2nd
DOOR CALL
VIDEO
COLOR MODE
50
CCTV
IMPACT MODE
MANUAL
ROOM NO. SET
EXIT
RETURN
EXIT
Menu A
Touch“
“
”/“
”/ “
”
“
Menu B
”to enter into OSD menu interface:
”to choose the item, “
”/“
”to adjust the value
From menu A enter into menu B: Choose“Exit”then touch“
36
”
Problem
Possible reason
Solution
Totally cannot work
The unit haven't connected power.
The unit is under OFF mode.
Check if the power is ON.
Refer to OPERATION point “1.ON” .
Outdoor unit cannot call
The connection between indoor and outdoor
unit is cut.
The main monitor is OFF.
Check the connection between indoor and
outdoor unit.
Refer to OPERATION point “1.ON”.
Can not monitor outdoor camera
Room number haven't setup.
Outdoor camera line fault
Refer SPECIAL FUNCTION point “3.
Automatically setup room number” to setup the
room number again.
Check outdoor camera's connection
Indoor monitor sound“DI DI”at
intervals ( more monitors)
The main monitor is OFF.
The connection between this monitor and main
monitor is cut.
Refer to OPERATION point “1.ON”.
Check the connection between this monitor
and main monitor
Indoor monitor sound“DI”continuously
(more monitors)
There are two monitors have a same room
number.
Refer SPECIAL FUNCTION point “2. Manually
setup room number” to setup the room number
again .
Talk voice normal but have double
or abnormal image
Last extension monitor's VD-R switch is in
wrong position.
Dial last extension monitor's VD-R switch to ON
position and others to OFF.
Talk voice normal but image is dark or twist
(more monitors)
More monitors' VD-R switch in ON.
Put last extension monitor's VD-R switch to ON
position and others to OFF.
Outdoor camera can not call in, indoor unit can
not monitor outdoor and sound “DI DI”at
intervals
Main monitor is OFF.
There is no main monitor
Refer to OPERATION point “a.ON”.Initialized the monitor,
refer to SPECIAL FUNCTION point “3. Automatically setup
room number”.
Outdoor can hear indoor, but the voice from
outdoor is too small
Talk volume is too small.
Refer to OSD menu operation “talk volume
adjust”, adjust the talk volume to the best
quality.
When the system only have one monitor, outdoor
camera can not calls in and indoor monitor can
not monitor/ talk with outdoor
This monitor is not main monitor.
Initialized the monitor, refer SPECIAL
FUNCTION to setup the room number to 1.
37
Specifications
Model
Item
SA20C
SA20C-PH
SA20C-W80
SA20C-PH80
SA20C-W200
Screen
10.2" color TFT
Power supply
AC100-240V ~50HZ/60HZ 15W or DC13.5V /1.5A
Connection with
extension unit
In series
Talk
Hands-free
Power consumption
13.5V, 700mA(max.)
13.5V, 850mA(max.)
CCTV video input
Typical value 1Vp-p(75 ohm)
Video output
Typical value 1Vp-p(75 ohm)
Optional ring tone
Connection wire
length and wire
requirement
SA20C-PH200
Chord ring / Dingdong
30m
50m
100m
RVV4*0.3
RVV4*0.5
RVV4*0.75
Remark: In order to make sure the
best quality, the wire length from
outdoor unit to the last extension
unit should be less than 100m.
Operation temperature
-10℃ to +55℃
Optional extension unit
KW-128C, KW-730C, KW-125C, S700C, S701C, S702C, S704C etc.
Optional outdoor camera
All of KENWEI 4-wired outdoor cameras
(Suggest to connect the outdoor panel that the horizontal resolution of lens is 600TV lines)
Telephone connected
mode
Telephone decoding
mode
Non-polarity, 2-wired
Dialing mode
DTMF
38
FSK or DTMF