Download GSM home alarm system User manual
Transcript
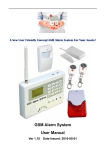
GSM home alarm system
User manual
1
Visit our eBay Store
http://stores.ebay.com/Homepageshop
2
1. System Foreword
Wireless GSM intelligent commercial/household guard system employs imported
microprocessor together with advanced GSM digital signal handling technology to creatively
research and produce GSM wireless mobile intelligent alarming system. It is a high integration of
digital speech, Chinese short messages, study-mode wireless coding, long-distance home
appliances controlling, short messages identification and other technologies. When alarming, it
will automatically inform the theft condition and location through speech or short messages. It is
stable, reliable and safe. With humanization manipulation and telecom phone line removed, it can
be comprehensively applied to shops, offices, villas, residence community, garage, storage and
other places at which wire phone network can NOT cover protection needed. It is able to protect
users property and personnel safety.
2. General introduction of functions
■Two groups of timing arming and disarming function, which leave out frequent manual
arming and disarming;
■ten zones, can be set as normal, at-home, intelligent or closed types, etc.;
■Using phone (cellphone) or SMS to set the host in long-distance.
■ Four wired zones, six wireless zones, each zone can be equipped with many accessories.
■ Six groups of speech phone, three groups of SMS receiving alarm phone, 10 seconds ISD
automatic voice recording.
■one group of normally open signal output, which can be externally linked to appliances
linkage alarming output.
■many built-in speeches, letting alarming receivers know the accurate alerting location.
■many built-in short message contents. Short message content from alarming Defense zone can
be amended.
■Wireless intelligent study coding, compatible with 2,262 normal encoding and million group
encoding, convenient and flexible for adding or reducing accessories.
■Telephone (phone) long-distance telecontrol for arming, disarming, monitoring, talkback,
shouting, and controlling home appliances, etc.
■EEPROM information protection, information will never be lost.
■built-in NI=HI pile ricaricabili automatically transferred to stand-by battery after outage with
short message prompting.
■Both AC and DC, twenty-four-hour normal guarding and unbroken service.
■The host using double GSM/GPRS wireless industry module, which is stable and reliable.
3. Manipulation specification
3.1 Arming
Arming means that when there are no persons at home, and need to all-around guarded. All
detectors are working. When something triggers the detectors, the alerting system will alarm at
once. After arming operation, arming light in the host will be always on.
Remote control operation: pressing on the arming key in the remote-control-unit once is OK.
3.2. At-home arming
At-home arming means that when there are some body at home, for the sake of security, it is
needed to make the outside doors, windows, balconies, and around detectors of the alerting system
3
work. But, it is also needed to avoid the person at home from triggering the domestic detectors to
alert wrongly. At that time, we choose at-home arming, letting some detectors work and the other
not. At-home arming function needs to be settled for normal usage. The arming light in the host
will flicker when at-home arming is open.
Remote control operation: pressing on the at-home arming key in the remote-control-unit once is
OK.
3.3 Disarming operation
Disarming means that when host alerts, it can stop the alerting or make the system on the
disarm status. After disarming, even triggering detectors can NOT make the host alert, except the
detectors in emergency Defense zone or emergency key in the remote-control-unit. After
disarming, arming light dies out.
3.4 Emergency alerting
When emergency happens, press on the emergency key in the remote-control-unit.
4. Installation and debugging
■host and SIM card installation
We should try our best to install the host in the central zone of the guarding place so as to
make sure that all wireless detectors can five the best receiving effect. Take care and keep away
from large-scale metal objects or household appliances with high-frequency interference. And at
the meantime, the host should be away from the steel-bar concrete wall and anti-fire door, and
other barriers.
The control panel in the host:
4
5. The host settling
■ indicating information
function
Signal
Interpretation
Buzzer
Short “Beep” once
Key-pressing indication
Long “Beep” once
Confirm received of a key stroke
Continuousshort “Beep” for 2 times
Correct command received
Continuousshort “Beep” for 3 times
Error in command
“Beep”at moderate intervals
SIM card not found
Defense Zone
Always lit
Defense zone alerting
LED
Blinking
Defense zone coming into delayed
alerting
Arming LED
Always lit
Arming status
Blinking quickly
Coming into At-home arming status
Blinking slowly
Coming into delayed arming status
GSM signal
Blinking every 1 second
GSM signal weak, or SIM card not found
LED
Blinking every 3 seconds
GSM module, and SIM card working
properly
Not lit
Without electricity
■first-time energization
Upon correctly installed SIM card, all wired sensors (if applicable) and antenna, the AC adapter can
be connected. Upon power up, the alarm panel will carry a self-test as sequence below:
•
Six Defense Zones’ LED and two Functional LEDs on front panel will flash in order once and
end with a buzzer long “Beep”.
•
•
The Signal LED flashes with one second interval for checking the GSM signal.
If GSM network detected all right, “Beep” sound stops and Signal LED becomes flashing every
three seconds, the GSM signal and SIM card are all confirmed normal, system is READY.
At last, putting the stand-by battery switch to be “ON” is OK.
■remote control coding
5
Remote control coding
Upon the alarm panel at the state of disarming, follow the steps below to add remote control to
panel.
1. Press the [SET] key once and release immediately, alarm panel returns one short “Beep”
and all Defense zone LED lid, this is the configuration mode for remote control coding.
2. Press any key on the remote to trigger a wireless signal to the Panel.
3. When panel receives signal and “Beep” twice, it means remote control (keyfob) has been
added to panel successfully, this remote control can be used to control the panel.
4. If panel receives signal and “Beep” only once, it means remote control (keyfob) has been
learnt before.
5. You can take out all remote controls required to configure and trigger them one by one by
repeating step (3) above.
6. Pressing [SET] key again and again until all Defense zone LED off to exit the configuration
model and system READY again.
Note: The Panel allows a maximum of 20 remote control (keyfob).
Remote control deletion
Upon the alarm panel at the state of disarming, follow the steps below to delete remote control to
panel.
1. press the [SET] key once and release immediately, alarm panel returns one short “Beep”
and all Defense zone LED lid, this is the configuration mode for remote control coding.
2. Then press and hold the [SET] key for 3 seconds, panel “Beep” for a long time and all
Defense zone LED vanished means all remote control deleted.
Note: For the remote control (keyfob) deletion operation, one operation will delete all remote
control (keyfob).
■Defense zone coding
Defense zone coding
Upon the alarm panel at the state of disarming, follow the steps below to add sensors or
detectors to panel.
1. Press the [SET] key once and release immediately, alarm panel returns one short “Beep”
and all Defense zone LED lid, this is the configuration mode for remote control coding.
2. Press [SET] key once and release immediately, Defense Zone 1 LED on, this is the
configuration mode of zone 1.
3. Trigger the detectors send a wireless signal to the Panel.
4. When panel receives signal and “Beep” twice, it means remote control (keyfob) has been
added to panel successfully, this remote control can be used to control the panel.
5. If panel receives signal and “Beep” only once, it means remote control (keyfob) has been
learnt before. If panel receives signal and “Beep” for 3 times, it means error.
6. You can take out all remote controls required to configure and trigger them oneIby one by
repeating step (3) above.
7. Pressing [SET] key again and again until all Defense zone LED off to exit the configuration
model and system READY again.
6
Note:A Panel can learn up to 32 detectors of different types.
Defense zone code deletion
Upon the alarm panel at the state of disarming, follow the steps below to delete remote control to
panel.
1. press the [SET] key once and release immediately, alarm panel returns one short “Beep”
and all Defense zone LED lid, this is the configuration mode for remote control coding.
2. press [SET] key once and release again until the LED of the Defense wanted is on, this is
the configuration mode of your target zone.
3. Then press and hold the [SET] key for 3 seconds, panel “Beep” for a long time and all
Defense zone LED vanished means all remote control deleted.
Guideline for Installing Door or WindowSensor
1. The surface for door sensor installation should be clean so door sensor can be attached
to the door and frame firmly with double faced adhesive.
2. Each door sensor is a pair of sensor and magnet. The sensor should be installed on the
fixed door frame and the magnet should be placed on the movable door with a distance
not exceeding 1 cm.
Guideline for Installing PIR Motion Sensor
1. Installation height is about 2.2 meters above ground and the optimized detection angle
for most motion detector is 90 degree. The sensor should face the detected area with
this consideration for best coverage.
3. Within coverage of detection, there should be no any objects for obstruction.
4. There should be no two infrared detectors in the same as they will possibly intervene
with each other.
5. Avoid the detector facing window, cooling or warming machines, or other appliances
that cause the temperature changing sharply and thus cause false alarm.
6. Most infra-red detector needs about 5 minutes to heat up before READY for normal
operation.
7. Unless specifies otherwise, most infra-red detector are indoor use and not reliable to
use outdoor.
6. Cell phone long-distance-control programming
■All programming for this host are completed through cellphone or fixed phone call host
GSM card, pressing on the keys in fixed phones or cellphones or sending short messages via
cellphone.
On working status, and GSM network detection is normal. Use cellphone or fixed phone to
dial SIM card number in the host, it will automatically receive the call. After pick up the phone,
please enter the passwords, the default password is 1234, then press # key to enter phone
long-distance function settling.
■General Command Syntax
There are two methods to configure the alarm panel, they aresending SMS command to panel
via mobile phone and interactive setup using any analog phone set.
1) general command pattern sent via SMS is
7
[password] + [command] + [parameter] + #
e.g. setting SMS phone no.
1234379999999#
2) general input sequence sent via phone interactively is
- call in
- key in password
- key in #
- key in [command]
- key in [parameter]
- key in #
using the above same example, no. need to key in one by one after receipt the confirmation beep
1234#37999999#
Number setting and function setting command as follow:
[12]+[0/1]+[#]
Disable and enable SMS Messages function
0 means not activated.
1 means activated
Default: activated
Example: to disable SMS Messages function, send SMS Messages
1234120#, or using phone should input 1234 # 12 0 #
[31]+[phone number]+[#]
Add (or delete) 1stgroup of phone number for voice calling upon alarm
triggered
Example: if the user wants to add phone number 12345678, send
SMS Messages 12343112345678#, or using phone should input
1234 # 31 12345678 #
Example: if the user wants to delete 1stgroup number, send SMS
Messages 123431#, or using phone should input 1234 # 31 #
[32]+[user number]+[#]
Add (or delete) 2ndgroup of phone number for voice calling upon alarm
triggered
[33]+[user number]+[#]
Add (or delete) 3rd group of phone number for voice calling upon alarm
triggered
[34]+[ user number]+[#]
Add (or delete) 4thgroup of phone number for voice calling upon alarm
triggered
[35]+[ user number]+[#]
Add (or delete) 5thgroup of phone number for voice calling upon alarm
triggered
[36]+[ user number]+[#]
Add (or delete) 6th-group of phone number for voice calling upon alarm
triggered
[37]+[ user number]+[#]
Add (or delete) 1stgroup of phone number for receiving SMS messages
Example: if the user wants to addphone number 12345678, send
SMS Messages12343712345678#, or using phone should input
1234 # 37 12345678 #
Example: if the user wants to delete second-group number, send
SMS Messages 123437#, or using phone should input 1234 # 37 #
8
[38]+[ user number]+[#]
Add (or delete) 2nd groupof phone number for receiving SMS messages
[39]+[ user number]+[#]
Add (or delete) 3rdgroup of phone number for receiving SMS messages
[50]+[new password]+[#]
Modify user operation password
For example: if user wants to set new user password as 4321,
please send SMS Messages 1234504321# , or using phone should
input 1234 # 50 4321 #
[51]+[00-99]+[#]
Set Delayed Arming, when press the arming key from the remote
control, it will not enter into arming status immediately but delay for a
certain number of second
Range: From 0 to 99 seconds.
For example: set delayed arming for 10 seconds, send SMS
Messages 12345110#, or using phone should input 1234 # 51 10 #
[52]+[00-99]+[#]
Set Delayed Alarming, on the arming status, if a detector is triggered,
the Panel will not alarm at once. It will delay a certain time
beforemaking voice calling, sending SMS message or sound the siren.
Range: The time can be set from 0 to 99 seconds.
For example: set delayed alarming time as 10 seconds, send SMS
Messages 12345210#, or using phone should input 1234 # 52 10 #
[53]+[00-20]+[#]
Setting the siren sounding time when the Panel triggered.
Default time is 1 minutes
Range: From 1-20 minutes.
For example: if you want to set the siren alerting time 5 minutes,
send 12345305#, , or using phone should input 1234 # 53 05 #
[54]+[0/1]+[#]
Open and close of alerting linkage. If the Panel alerts, need the relay
open linkage or not, 1 means linkage needed, and 0 not.
For example: Panel relay output is connected to flashlight and
other equipment. If output alerting, it needs linkage blinking. Send
SMS Messages 1234541#. When the Panel triggered, the output
relay at the back of the Panel will be connected, and external
equipment will start up. Telephone setting: just press those key on
the phone.
[55]+[0/1]+[#]
Used to set when use remote control to arm and disarm, the siren makes
sound or not.
Value: 1 means sound, and 0 not.
Default is: making sound.
For example: send SMS Messages 1234551#, meaning siren
without indicating voice when arming and disarming by remote
control (keyfob). Telephone setting: just press those key on the
phone.
[56]+[AAAA]+[#]
Used to set system time.
For example: to set system time as half past 20 o’clock, send SMS
Messages 1234#562030#. This means to set system time as half
past 20 o’clock. Telephone setting is just press those key on the
phone.
9
[57]+[AAAA]+[BBBB]+[#]
Used to set first group of timing arming and disarming.
For example: send SMS Messages 12345722000700# to Panel.
This means from 22 o’clock at night, it automatically enters into
arming status, and automatically disarms at 7 o’clock in the
morning. Telephone setting is just press those key on the phone.
[58]+[AAAA]+[BBBB]+[#]
Used to set second group of timing arming and disarming.
For example: send SMS Messages 12345812001300# to Panel.
This means from 12 o’clock at noon, it automatically enters into
arming status, and automatically disarms at 13 o’clock in the
afternoon, telephone setting just press those key on the phone.
[60]+[AA]+[B]+[C]+[#]
This command is used to set six Defense zones status.
AA is double subarea and 01 to 06 means Defense zones 1 to 6.
B means the type of Defense zone.
1 means NORMAL Defense Zone,
2 means STAY Defense zone,
3 means INTELLIGENT Defense zone,
4 means EMERGENCY Defense zone,
5 means CLOSED Defense zone.
C has two types of status.
0 means siren no sound when alarming,
1 means siren sound when alarming.
For example: to set 5thDefense zone as NORMAL Defense Zone,
and the 5thDefense zone alarming requires siren sounding, send
SMS Messages 1234600511#
[61]+[AA]+[B]+[C]+[D]+[#]
This command is used to set the status of the four wired Defense zones.
AA is double subarea, use 07 to 10 to refer to Defense zones 7 to
10.
B means the type of Defense zone.
1 means NORMAL Defense Zone,
2 means STAY Defense zone,
3 means INTELLIGENT Defense zone,
4 means EMERGENCY Defense zone,
5 means CLOSED Defense zone.
C has two types, 0 and 1.
0 means no rings in that Defense zone when alerting.
1 means ringing in that Defense zone when alerting.
D has two types, 0 and 1.
0 means open circuit alerting and
1 means short circuit alerting.
For example: set Defense zone 7 as EMERGENCY Defense zone,
no siren ringing when the 7thDefense zone alerts, and short circuit
alarming, send SMS Messages 12346107101#
10
[13]+[0000]+[#]
This command to restore the factory default setting.
This command will only delete the password, but not delete the
remote control and sensors already programmed.
For example: if need to restore the factory default setting, send
1234130000# to the main unit.
If the users forget password, to restore the device need to
useForced Restore.Steps are
Turn off the back-up battery switch and AC power
Press and hold RESET button at the back while turn on the
power
Keep press and hold the RESET button for about 5 seconds
until the buzzer gives one long “Beep” and all LED flash in
sequence, then release RESET button, all setting deleted,
phone number deleted, password return to 1234, all remote
control and sensors deleted, alarm panel fully returned to
factory setting.
Operation Commands
Following commands only for SMS Messages long-distance operation and settlement:
0#
Long-distance SMS Messages disarming, send SMS Messages 12340#
1#
Long-distance SMS Messages arming, send SMS Messages 12341#
2#
Long-distance SMS Messages STAY arming, send SMS Messages 12342#
3#
Long-distance SMS Messages Relay opening, send SMS Messages 12343#
4#
Long-distance SMS Messages Relay closing, send SMS Messages 12344#
[20]+[#]
To inquire arming and disarming status. send SMS Messages 123420#
[21]+[#]
To inquire alerting number and alert-receiving number configured in the panel.
send SMS Messages 123421#
[80]+[#]
Used to inquire SMS Messages contents from all Defense zones.
For example: send SMS Messages 123480#
[81]+[Defense zone one,
Used to set SMS Messages content given by Panel when the first Defense zone
SMS Messages content]+[#]
alerts. SMS Messages content can NOT exceed twelve characters.
For example: send SMS Messages “123481 the front door is opened # ”
At that time, when the first Defense zone is triggered, the SMS Messages
of “the front door is opened” will be sent to the short-message alarming
number.
[82]+[Defense zone two,
Used to set SMS Messages content given by Panel when the second Defense
SMS Messages content]+[#]
zone alerts. ditto
[83]+[Defense zone two,
Used to set SMS Messages content given by Panel when the third Defense zone
SMS Messages content]+[#]
alerts. ditto
The forth to ninth Defense zone can be inferred as above.
[90]+[Defense zone ten, SMS
Used to set SMS Messages content given by Panel when the tenth Defense zone
11
Messages content]+[#]
alerts. ditto
■Telephone alert-receiving
After host alerts, it will automatically dial all pre-set telephones and cellphones in sequence.
When the user picks up the phone, it will immediately broadcast alerting record and let user obtain
the alarming information. After phone received, if only listen to alerting voice without
long-distance control, please directly hang up, the host will continuously dial the latter phone for
alerting, until someone picks up. If there is no person receiving calls, the host will dial all phones
in circulation for three times, then automatically hang up and at the same time, it conducts
long-distance remote control on the alerting host through telephone and cellphone keyboard
operation:
【1】key: Arming
【2】key: Disarming
【3】key: Monitoring 【4】key: Monitoring closed
【5】key: Talkback open
【6】key: Talkback closed
【7】key: Siren ringing
【8】key: Siren closed
【9】key: Relay open
【0】key: Relay Closed
【*】key; Quits from the status and hang up, the system will not dial the next group of
numbers.
NOTE: monitoring time is 20 seconds. If continue to monitor, user needs press “3”key again. To
support talkback function, the host needs to connect to another passive loudspeaker, which are 8
ohm and its power above 0.5W.
■Telephone long-distance operation
Dial the phone number connected to the alerting host through telephone or cellphone. After a
cycle of ringing, input password, default password is 1234, then pressing phone or cellphone keys.
Concrete operation is as follows:
【1】key: Arming
【2】key: Disarming
【3】key: Monitoring
【4】key: Monitoring closed
【5】key: Talkback open
【6】key: Talkback closed
【7】key: Siren ringing
【8】key: Siren closed
【9】key: Relay open
【0】key: Relay Closed
【*】key; Quits from the status and hang up, the system will not dial the next group of
numbers.
【#】key: Enter the system settling.
If without any operations, the host will automatically hang up and quit after 20 seconds.
7. Note: Difference between Defense Zone Types:
NORMAL Defense Zone: the Panel only works on the arming status. When disarming, there is
no response.
STAY (at-home) Defense zone: can be shut off solely through the remote control (keyfob) to
avoid the Infrared Detectors and other in-room detectors from misinformation when master is
resting at home.
INTELLIGENT Defense zone: if the detector in the Defense zone is triggered only once, it
will not immediately alarm. But if being triggered once again within 30 seconds after the first
12
triggering, it will not alarm immediately.
EMERGENCY Defense zone: no matter on arming or disarming status, if detector is triggered
it will alert. Usually used in connecting with Smoke Detectors, Gas Detectors and emergency
button, etc.
CLOSED Defense zone: no matter arming or disarming status, detectors will not alert even
being triggered.
8. Leaving-factory default
Password:
1234
Long-distance control:
Open
Ringing times:
once
Siren timing:
1minute
Aural remote control siren:
open
Delayed arming:
0second
Delayed alerting:
0 second
9. System Specification
Input voltage: DC 9V – 12V
Standby current: <25mA
Alerting current: <450 mA
Wireless frequency: 315/433/868/915MHZ, 2262/1.5--4.7M, EV1527/300K.
GSM SYSTEM: supporting GSM850/900/1800/1900MHz
Standby battery: NI-HI AAA*6
DC7.4V
Siren loudness: 110dB
Accessories parameters: this annunciator is compatible with PT2262 code; PT2240 code and
EV1527 shorten code. In use of PT2262 code, timing resistor is suggested 1.5M to 4.7M. In
use of EV1527 shorten code, timing resistor is 300K. The address code A0-A7 of door status
switch, infrared and other accessories can be any code. We do not suggest it is all empty.
Data code D3-D0 is any code except 0001, 0010, or 0100. It is suggested to use 1010.
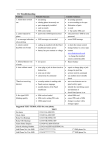
11. Troubleshooting
Problem
Probable Reasons
Available Solutions
1. cannot dial for alarm
• no arming
• do arming operation
• alerting phone unsetted
• re-set according to the
• parts improperly installed
• code no match
specification
• coordinating the location of
parts
• SIM card overdue
• re-coding
• 5. pay to the SIM card
2. cannot long-distance
operation
3. no record indication
• password input wrongly ( or
forgotten )
• retry password or reset
password
• voice message not recorded
• record voice message
4. remote control
• coding un-matched with the Panel
• re-learn the remote control
(keyfob) out of order
• insufficient battery power
• change battery to correct type
when alerting
13
• battery pieces poor contact or
voltage un-matched with Panel
• contact the local dealer to
change the matched remote
control (keyfob)
5. infrared detector out
• low power
• change to the same type
of order
6. siren without sound
battery
• siren plug or jack in short circuit or • repair or change plug or jack
broken-line
• change the jack line
• siren out of order
• activate siren by command
• closed siren by command
• use another siren to double
• positive and ground wires of siren
reversed
check
• reverse the wires to try
7. the transmission
• a nearby emitter is sending code
distance of detector to
• Panel receiver stoppage
panel shorten
• standby battery of the Panel
insufficient
• move one detector next to
panel and try
• identify the interfering source
and eliminate it
• check Panel power whether
plugged well
8. the signal LED
• SIM card un-loaded
• reload SIM card
blinking quickly
• SIM card is setting PIN code
• cancel PIN code of SIM
• GSM signal weak
• change to place with strong
signal
14


