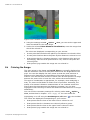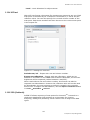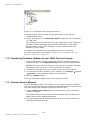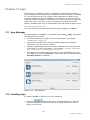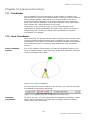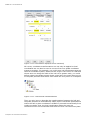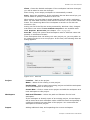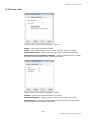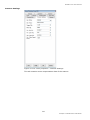
1
SCENE LT 5.5 USER MANUAL SEPTEMBER 2015 SCENE LT 5.5 User Manual ©FARO Technologies Inc., 2015. All rights reserved. No part of this publication may be reproduced, or transmitted in any form or by any means without written permission of FARO Technologies, Inc. FARO TECHNOLOGIES, INC. MAKES NO WARRANTY, EITHER EXPRESS OR IMPLIED, INCLUDING BUT NOT LIMITED TO ANY IMPLIED WARRANTIES OF MERCHANTABILITY OR FITNESS FOR A PARTICULAR PURPOSE, REGARDING THE FAROARM, FARO LASER TRACKER, FARO LASER SCANNER AND ANY MATERIALS, AND MAKES SUCH MATERIALS AVAILABLE SOLELY ON AN “AS-IS” BASIS. IN NO EVENT SHALL FARO TECHNOLOGIES INC. BE LIABLE TO ANYONE FOR SPECIAL, COLLATERAL, INCIDENTAL, OR CONSEQUENTIAL DAMAGES IN CONNECTION WITH OR ARISING OUT OF THE PURCHASE OR USE OF THE FAROARM, FARO LASER TRACKER, FARO LASER SCANNER OR ITS MATERIALS. THE SOLE AND EXCLUSIVE LIABILITY TO FARO TECHNOLOGIES, INC., REGARDLESS OF THE FORM OF ACTION, SHALL NOT EXCEED THE PURCHASE PRICE OF THE MATERIALS DESCRIBED HEREIN. THE INFORMATION CONTAINED IN THIS MANUAL IS SUBJECT TO CHANGE WITHOUT NOTICE AND DOES NOT REPRESENT A COMMITMENT ON THE PART OF FARO TECHNOLOGIES INC. ACCEPTANCE OF THIS DOCUMENT BY THE CUSTOMER CONSTITUTES ACKNOWLEDGMENT THAT IF ANY INCONSISTENCY EXISTS BETWEEN THE ENGLISH AND NON-ENGLISH VERSIONS, THE ENGLISH VERSION TAKES PRECEDENCE. Trademarks FARO and FARO Laser Scanner Focus3D are registered trademarks or trademarks of FARO Technologies Inc. All other brand and product names are trademarks or registered trademarks of their respective companies. Microsoft, Windows, Windows Vista, Windows XP, Windows 7 and Windows 8 are either registered trademarks or trademarks of Microsoft Corporation in the United States and/or other countries. Autodesk and AutoCAD are registered trademarks or trademarks of Autodesk, Inc., and/or its subsidiaries and/or affiliates in the USA and/or other countries. Cyclone, High-Definition Surveying and HDS are either registered trademarks or trademarks of Leica Geosystems. NVIDIA, NVIDIA Quadro, NVIDIA Tesla and 3D Vision are trademarks and/or registered trademarks of NVIDIA Corporation in the United States and other countries. Adobe, Shockwave and Flash are either registered trademarks or trademarks of Adobe Systems Incorporated in the United States and/or other countries. AMD, FirePro, and combinations thereof are trademarks of Advanced Micro Devices, Inc. Pointools is a trademark of Pointools Ltd. FARO Technologies Inc. Internal Control File Locations: \CONTROL\RECORDS\05MANUFA\PARTSPEC\7 Software\E1368_SCENE LT 5.5 User Manual_EN.pdf 2 SCENE LT 5.5 User Manual Table of Contents 1. Introduction - Welcome to SCENE LT ........................................................................................ 1.1 System Requirements.......................................................................................................... 1.2 Installing the Software......................................................................................................... 1.3 Licensing the Software........................................................................................................ 1.3.1 2. 3. 4. 1 1 2 3 Network Licenses (Floating Licenses) ......................................................................................3 Starting the Software .................................................................................................................. 7 2.1 Working with the Project Selector ..................................................................................... 7 2.1.1 Default Project Location ...........................................................................................................8 2.3.1 2.3.2 2.3.3 2.3.4 2.3.5 2.3.6 Adding Existing Projects ............................................................................................................9 Creating New Projects ..............................................................................................................9 Project Previews .........................................................................................................................9 Favorites ......................................................................................................................................9 Ignore Projects ...........................................................................................................................9 Edit Project Details ...................................................................................................................10 2.7.1 Scan Project File Structure ......................................................................................................12 2.2 2.3 Opening scan projects ....................................................................................................... 8 Managing Projects .............................................................................................................. 9 2.4 2.5 2.6 2.7 Filtering, Sorting, Searching .............................................................................................. Remote Server Connection ............................................................................................. Switch Off Project Selector............................................................................................... Local Workspace and Scan Project File Structure ........................................................ 11 11 11 11 Working with Scan Projects, Workspaces and Scans ........................................................... 15 3.1 Composition of the SCENE LT Window............................................................................ 15 3.2 Project Workspace ............................................................................................................ 16 3.2.1 3.2.2 3.2.3 3.2.4 Scans .........................................................................................................................................16 Scan Point Clouds ...................................................................................................................16 Project Point Cloud .................................................................................................................16 SCENE WebShare Cloud and WebShare Data ....................................................................17 3.3.1 3.3.2 3.3.3 3.3.4 Creating New Workspaces ....................................................................................................17 Workspace Structure ...............................................................................................................17 Finding Objects in the Workspace ........................................................................................19 Merging Workspaces ..............................................................................................................19 3.4.1 3.4.2 3.4.3 3.4.4 3.4.5 3.4.6 3.4.7 Typical workflow of processing a scan project ....................................................................19 Creating Scan Projects ...........................................................................................................20 Working Collaboratively on a Scan Project .........................................................................21 Save Scan projects ..................................................................................................................25 Scan Project Revisions ............................................................................................................26 Reverting to a Previous Revision ............................................................................................27 Restoring an Auto Save ..........................................................................................................28 3.5.1 3.5.2 3.5.3 3.5.4 3.5.5 Importing Scans and Scan projects ......................................................................................29 Initial Scan Alignment Derived from the Scanner’s Sensor Data .......................................30 Loading Scans .........................................................................................................................31 Unloading Scans ......................................................................................................................32 Single Scan Points ....................................................................................................................32 3.6.1 Modifying Scan Point Clouds .................................................................................................33 3.3 Workspaces........................................................................................................................ 17 3.4 Scan Projects ..................................................................................................................... 19 3.5 Working with Scans ........................................................................................................... 29 3.6 Working with Scan Point Clouds ...................................................................................... 33 Exploring Scan Data and Objects .......................................................................................... 4.1 Quick View ......................................................................................................................... 4.2 Planar View ........................................................................................................................ 4.3 3D View............................................................................................................................... 4.3.1 35 35 36 37 Navigating in the 3D View ......................................................................................................39 1 SCENE LT 5.5 User Manual 5. 6. 7. 4.3.2 4.3.3 4.3.4 4.3.5 Navigating in the 3D View ......................................................................................................43 Objects in the 3D View ...........................................................................................................46 3D Clear View ..........................................................................................................................47 Managing Viewpoints .............................................................................................................47 4.4.1 4.4.2 4.4.3 4.4.4 4.4.5 View (3D View and Quick View) ...........................................................................................49 Representation (3D View only) ..............................................................................................51 Scan Points (3D View only) .....................................................................................................52 Layer .........................................................................................................................................54 Extra ..........................................................................................................................................54 4.5.1 4.5.2 Material .....................................................................................................................................55 Layers ........................................................................................................................................55 4.4 Visibility Settings ................................................................................................................. 48 4.5 Object Visualization .......................................................................................................... 55 4.6 4.7 Locating Objects in the Views ......................................................................................... 57 Overview Map ................................................................................................................... 58 Importing Data.......................................................................................................................... 59 5.1 CAD data ........................................................................................................................... 59 5.1.1 5.1.2 IGES ...........................................................................................................................................59 VRML .........................................................................................................................................59 5.2.1 Survey Data .csv ......................................................................................................................60 5.3.1 5.3.2 5.3.3 5.3.4 5.3.5 General Scan Data Format .xyz ............................................................................................60 Binary Scan Data Format .xyb ...............................................................................................60 Scan Data Format .ptx ............................................................................................................61 Scan Data Format .ptz ............................................................................................................61 Scan Data Format .e57 ...........................................................................................................62 5.2 Survey data........................................................................................................................ 60 5.3 External scan data of other producers........................................................................... 60 Registering Scans ..................................................................................................................... 65 6.1 Background knowledge................................................................................................... 65 6.1.1 6.1.2 6.1.3 6.1.4 Natural and artificial targets ..................................................................................................65 External References ................................................................................................................65 Overall coordinate system .....................................................................................................65 Reference scan .......................................................................................................................66 6.2.1 6.2.2 6.2.3 6.2.4 6.2.5 6.2.6 6.2.7 GPS Information .......................................................................................................................67 Compass ..................................................................................................................................68 Altimeter ...................................................................................................................................68 Inclinometer ............................................................................................................................68 Level Scan ................................................................................................................................69 Manual Creation of Correspondences with the Correspondence Split View ................70 Deleting Correspondences ....................................................................................................72 6.3.1 6.3.2 6.3.3 6.3.4 6.3.5 Scan Manager .........................................................................................................................73 Scan Results ..............................................................................................................................74 Target tensions .........................................................................................................................75 Scan Point Tensions .................................................................................................................77 Lock and Unlock the Scan Manager ...................................................................................78 6.2 Using Sensor Data.............................................................................................................. 67 6.3 Checking Results ............................................................................................................... 73 Working with Scan Data and Objects .................................................................................... 81 7.1 Selecting Scan Points........................................................................................................ 81 7.1.1 7.1.2 Selecting Scan Points in the Planar View or the Quick View .............................................81 Selecting Scan Points in 3D View ...........................................................................................82 7.2.1 7.2.2 7.2.3 7.2.4 7.2.5 Creating a Clipping Box .........................................................................................................84 Manipulating a Clipping Box .................................................................................................85 Hiding and Displaying Points by Means of Clipping Boxes .................................................88 Deleting Points by Means of Clipping Boxes ........................................................................89 Enabling / Disabling Clipping .................................................................................................90 7.2 Tailor a Point Cloud View with the Clipping Box............................................................ 83 2 SCENE LT 5.5 User Manual 8. 7.2.6 7.2.7 7.2.8 7.2.9 7.2.10 Working with Multiple Clipping Boxes ...................................................................................90 Toggling Visibility of Clipping Boxes .......................................................................................93 Creating Multiple Clipping Boxes Along an Axis of an Existing Clipping Box ...................93 Working with Clipping Box Containers ..................................................................................95 Exporting Scan Points by Means of Clipping Boxes .............................................................96 7.3.1 7.3.2 7.3.3 7.3.4 7.3.5 7.3.6 Geometric Object Types ........................................................................................................97 Creating Geometric Objects ...............................................................................................107 Documentation Object ........................................................................................................110 Regions ...................................................................................................................................112 Exporting Objects in DXF, IGES and VRML data formats ..................................................112 Importing Objects in VRML data format .............................................................................113 7.3 Working with Objects ........................................................................................................ 96 7.4 Creating Scans from Selected Scan Points.................................................................. 115 Analyzing Scan Points............................................................................................................ 117 8.1 Inspection......................................................................................................................... 117 8.2 Measuring Distances ....................................................................................................... 117 8.2.1 8.2.2 8.3 8.4 8.5 8.6 9. Point-to-Point Measurements ...............................................................................................118 Object Measurements ..........................................................................................................119 Visualizing Scales and Distances ................................................................................... Visualizing Scales and Distances ................................................................................... Surface Analysis ............................................................................................................... Coloring the Range......................................................................................................... 122 125 129 130 Exporting Data ........................................................................................................................ 9.1 Exporting scan points ...................................................................................................... 9.2 Exporting scan point clouds........................................................................................... 9.3 Exporting project point cloud ........................................................................................ 9.4 Exporting cluster .............................................................................................................. 9.5 Exporting scan point clouds........................................................................................... 9.6 Exporting project point cloud ........................................................................................ 9.7 Exporting cluster .............................................................................................................. 9.8 Exporting slices................................................................................................................. 133 133 134 134 134 134 134 135 135 9.8.1 9.8.2 9.8.3 Single slice ..............................................................................................................................135 Several slices ..........................................................................................................................136 Tomograph .............................................................................................................................136 9.9.1 9.9.2 General export settings ........................................................................................................137 Exporting Slices ......................................................................................................................138 9.10.1 9.10.2 9.10.3 9.10.4 9.10.5 DXF ..........................................................................................................................................140 VRML .......................................................................................................................................141 IGES .........................................................................................................................................141 XYZ text ...................................................................................................................................143 POD (Pointools) ......................................................................................................................143 9.9 Export Settings.................................................................................................................. 137 9.10 File Format Related Export Settings ............................................................................... 140 10. Working with the Project Point Cloud ................................................................................... 145 11. FARO Focus3D Scanner Administration ................................................................................. 147 11.1 Items in the Structure View of the Scanner Administration ........................................ 147 11.1.1 Scanner Snapshots ................................................................................................................147 11.3.1 11.3.2 11.3.3 11.3.4 11.3.5 Editing the Automatic Scanner Snapshot on the Inserted SD Card ................................148 Creating a New Scanner Snapshot ....................................................................................149 Restoring and Editing Manually Created Scanner Backups ............................................149 Restoring the Local Copy of the Automatic Scanner Snapshot .....................................150 Transferring a New, Modified or Restored Snapshot to Your Scanner ............................151 11.2 Administration View ........................................................................................................ 148 11.3 Managing Snapshots ...................................................................................................... 148 11.4 Transferring Firmware Updates to your FARO Focus3D Scanner ............................... 152 11.5 Scanner Service Request................................................................................................ 152 3 SCENE LT 5.5 User Manual 12. Apps ........................................................................................................................................ 12.1 App Manager .................................................................................................................. 12.2 Installing Apps .................................................................................................................. 12.3 Updating Apps ................................................................................................................ 12.4 Activating / Deactivating Apps .................................................................................... 12.5 Uninstalling Apps ............................................................................................................. 153 153 153 154 154 154 13. Advanced Functions.............................................................................................................. 155 13.1 Coordinates ..................................................................................................................... 155 13.2 Local Coordinates........................................................................................................... 155 13.2.1 Global Coordinates ..............................................................................................................156 13.4.1 13.4.2 Predefined Commands ........................................................................................................164 Adjusting the 3D Mouse Behavior .......................................................................................164 13.3 Exemplary Driver Configuration for the Stereoscopic Mode ..................................... 161 13.4 3DConnexion 3D Mouse Support .................................................................................. 163 14. Hotkeys.................................................................................................................................... 167 15. Reference Handbook ............................................................................................................ 169 15.1 Meaning of the symbols in the Structure View ............................................................ 169 15.2 Menu Bar .......................................................................................................................... 170 15.2.1 15.2.2 15.2.3 15.2.4 15.2.5 15.2.6 File ...........................................................................................................................................170 Edit ...........................................................................................................................................173 View ........................................................................................................................................173 Tools ........................................................................................................................................174 Window ...................................................................................................................................189 Help .........................................................................................................................................189 15.3.1 15.3.2 15.3.3 15.3.4 15.3.5 15.3.6 15.3.7 15.3.8 Standard Toolbar ...................................................................................................................190 Planar View Toolbar ..............................................................................................................190 Point Selection Toolbar .........................................................................................................191 Measurement Toolbar ...........................................................................................................191 Identify Objects Toolbar .......................................................................................................192 3D View and Quick View Toolbar ........................................................................................192 Project Toolbar .......................................................................................................................194 Correspondence Split View .................................................................................................195 15.4.1 15.4.2 15.4.3 15.4.4 15.4.5 15.4.6 15.4.7 15.4.8 15.4.9 15.4.10 15.4.11 15.4.12 15.4.13 15.4.14 15.4.15 15.4.16 15.4.17 15.4.18 15.4.19 15.4.20 15.4.21 15.4.22 15.4.23 Frequently Used Commands for Objects ...........................................................................196 Commands for Fit Objects ...................................................................................................197 3D View ..................................................................................................................................198 3D View – Point Selection .....................................................................................................201 Planar View and Quick View ...............................................................................................201 Planar View or Quick View – Point Selection .....................................................................201 Picture .....................................................................................................................................203 Plane .......................................................................................................................................204 Plane Fit ..................................................................................................................................205 Constraints Object ................................................................................................................205 Constrained Plane Fit ............................................................................................................205 Slab .........................................................................................................................................205 Slab Fit .....................................................................................................................................205 Sphere .....................................................................................................................................206 Sphere Fit ................................................................................................................................206 Region .....................................................................................................................................206 Point ........................................................................................................................................207 Point Fit ....................................................................................................................................207 Pipe .........................................................................................................................................207 Pipe Fit .....................................................................................................................................207 Line ..........................................................................................................................................207 Line Fit .....................................................................................................................................207 Rectangle ...............................................................................................................................207 15.3 Toolbars ............................................................................................................................ 190 15.4 Context Menus ................................................................................................................ 196 4 SCENE LT 5.5 User Manual 15.4.24 15.4.25 15.4.26 15.4.27 15.4.28 15.4.29 15.4.30 15.4.31 Rectangle Fit ..........................................................................................................................207 Scan ........................................................................................................................................208 Scan Fit ...................................................................................................................................209 Scans Folder / Cluster ...........................................................................................................210 Scan Manager .......................................................................................................................211 Workspace .............................................................................................................................212 Snapshot (Focus3D Scanner Administration) .....................................................................213 Viewpoint ...............................................................................................................................213 15.5.1 15.5.2 15.5.3 15.5.4 15.5.5 15.5.6 15.5.7 15.5.8 15.5.9 15.5.10 15.5.11 15.5.12 15.5.13 15.5.14 15.5.15 15.5.16 15.5.17 15.5.18 15.5.19 15.5.20 15.5.21 15.5.22 15.5.23 15.5.24 Frequently Used Properties ...................................................................................................214 3D Picture Fit ..........................................................................................................................216 Constraints Object ................................................................................................................217 Constrained Plane Fit ............................................................................................................218 Measurement .........................................................................................................................219 Picture .....................................................................................................................................220 Pipe .........................................................................................................................................220 Pipe Fit .....................................................................................................................................221 Plane .......................................................................................................................................222 Plane Fit ..................................................................................................................................223 Limited Plane Fit .....................................................................................................................224 Slab .........................................................................................................................................225 Slab Fit .....................................................................................................................................225 Point ........................................................................................................................................227 Point Fit ....................................................................................................................................227 Sphere .....................................................................................................................................228 Sphere Fit ................................................................................................................................229 Clipping Box ...........................................................................................................................231 Documentation Object ........................................................................................................232 Scan Folder ............................................................................................................................233 Scan Manager .......................................................................................................................234 Scan ........................................................................................................................................236 Scan Fit ...................................................................................................................................248 Virtual Scan (3D Picture) .......................................................................................................251 15.5 Properties.......................................................................................................................... 214 16. Error Messages........................................................................................................................ 253 17. Frequently Asked Questions ................................................................................................. 255 18. Glossary......................................................................................................................................... i 19. Technical Support ...................................................................................................................... iii Software Licence Agreement ........................................................................................................... v Purchase Conditions .......................................................................................................................... vii 20. Implementation Notes ............................................................................................................. xiii Industrial Service Policy.................................................................................................................. xxvii Industrial Products Service Policy .................................................................................................. xxxi 5 SCENE LT 5.5 User Manual Chapter 1: Introduction - Welcome to SCENE LT SCENE LT is a comprehensive 3D point cloud processing and managing software tool for the professional user. It is specially designed for the viewing, administration, and working with extensive 3D scan data obtained from high resolution 3D laser scanners like the FARO Focus3D X. SCENE LT processes and manages scanned data both highly efficiently and easily by offering a wide range of functions and tools, like filtering, automatic object recognition, scan placement (registration) as well as automatic scan colorization. Once SCENE LT has prepared the scan data, you can commence evaluation and further processing right away. For this, it offers functions from simple measuring to 3D visualization through to meshing and exporting your scan data into various point cloud and CAD formats. With SCENE LT you may also create WebShare data from your scan projects. With SCENE WebShare your scan projects can then be published on the Internet and viewed with a standard Internet browser. If you have any questions or need further instructions for any procedure, contact your Customer Service Representative by Phone, Fax or E-Mail. See “Technical Support” on page iii . You can also reach the Customer Service Applications and Training group via e-mail at the following addresses: • [email protected] • [email protected] • [email protected] Visit the FARO Customer Service area on the Web at www.faro.com to search our technical support database, which is available 24 hours a day, 7 days a week. You may also find various online tutorials in the Internet at http:// tutorial.faroeurope.com. 1.1 System Requirements In order to use SCENE LT seamlessly, your computer should have the following specifications: Minimal Specifications Recommended Specifications Processor 64-bit (x64) with at least 2-gigahertz (GHz) Quad-core x64 Graphics Card OpenGL 2.0 or higher Dedicated graphics card At least 256 MB memory. At least 512 MB memory Main Memory At least 4 GB At least 8 GB Hard Disk Standard Solid state for maximum performance. OpenGL 2.0 1 Chapter 1: Introduction - Welcome to SCENE LT SCENE LT 5.5 User Manual Operating System 64-bit Windows 7 64-bit Windows 7 Accessories Mouse with 2 buttons and a scroll wheel 64-bit Windows 8, 8.1 Network card as it is required for licensing SCENE LT 1.2 Installing the Software You have to belong to the group of administrators to install the software. 1. Insert the installation DVD supplied with the scanner. 2. Select the product and follow the installation instructions on the screen. An installation wizard will guide you during installation. Figure 1-1: SCENE LT installation startup 3. Read and accept the license. 4. Select, if you would like to have the User’s Manual installed with the software. 5. If desired, create a new default folder. 2 Chapter 1: Introduction - Welcome to SCENE LT SCENE LT 5.5 User Manual Figure 1-2: Select Additional Tasks 6. Install Adobe FlashPlayer: You may clear the checkbox, if you’ve already installed the latest version. In cases of doubt, e.g. if you’re not sure about the installed version we recommend to install FlashPlayer. 7. Create a desktop icon: Select, if you would like to have the SCENE LT button shown on your computer’s desktop. 8. Register file extensions (.lsproj,.fws, .fls): Select, if you want to open scan projects by clicking the file name in Windows Explorer. 1.3 Licensing the Software Once installed, you may fully test SCENE LT for 30 days without the need of a software license. After the trial period, you need a permanent license to further use SCENE LT. 1.3.1 Network Licenses (Floating Licenses) Network licenses are hosted by a license server computer and will be shared to client computers over the network. If you start SCENE LT on any computer in your network it will search the network for available licenses. If one is found, it will use this license for the time it is executed. When closing SCENE LT, the license will be released again and will be available to other SCENE LT installations in the network. Network licenses can either be locked to a dongle attached to the server’s USB port or to the computer where the licensing software is installed. For more information on network licensing, please read chapter “Network Licensing” on page 229. This license is free of charge. Request the free license key from FARO with the license manager that is available in the main menu under Help Licensing. 3 Chapter 1: Introduction - Welcome to SCENE LT SCENE LT 5.5 User Manual Figure 1-3: License manager 1. Press the Send button to generate a license request file. This file does not contain any private data. It only contains the product name and your system ID (MAC address of your network adapter). This information is needed to generate the key for your system. o In case an E-Mail client is properly installed on your system an automatically generated E-Mail with the license request file attached will be opened. Just send this E-Mail to the provided address. o In case an E-Mail client is not installed on your system, you will have to manually send the generated license request file to FARO. You may find this file in your local user folder under “C:\Users\YOUR_USER_NAME\AppData\Local\FARO\SCENE LT\Data\Licensing”. It is the file with the extension .lr. Attach it to an E-Mail and send it to: SCENE [email protected] 2. Once the E-Mail with the license request file has been sent to FARO you will receive an automatic E-Mail with your valid license key. Copy this key to the Add new license input field in the license manager, press the Add button, and then OK or Apply. SCENE LT should then be licensed for your system and the license should appear in the list. 4 Chapter 1: Introduction - Welcome to SCENE LT SCENE LT 5.5 User Manual Figure 1-4: License manager with SCENE LT license If you change your hardware or if you want to use SCENE LT on a different computer, you will need a new license, as the license is bound to a system ID. 5 Chapter 1: Introduction - Welcome to SCENE LT SCENE LT 5.5 User Manual 6 Chapter 1: Introduction - Welcome to SCENE LT SCENE LT 5.5 User Manual Chapter 2: Starting the Software When you first default project dedicated spot default project start the program, SCENE LT will prompt you to choose a location. If you already have existing scan projects in a on your hard drive, you may pick this directory as your location. You can change the default project location or add further locations at any time under Tools Options Tab Folder. After having set up a project location, SCENE LT starts with the Project Selector window by default. The Project Selector presents all the scan projects known to SCENE LT at that time. 2.1 Working with the Project Selector The Project Selector is a visual tool for managing and accessing scan projects in SCENE LT. An internal database is maintained by SCENE LT to provide a quick and convenient access to all your scan projects and project workspaces. Starting SCENE LT will bring up the Project Selector window, presenting to you all the scan projects known to SCENE LT at that time. Projects that were created or imported when SCENE LT was opened the last time, are marked with NEW. The Project Selector requires Adobe Flash Player. The Adobe Flash Player can be installed during the SCENE LT installation process. Figure 2-1: Project selector window 7 Chapter 2: Starting the Software SCENE LT 5.5 User Manual 2.1.1 Default Project Location When you first open SCENE LT, it will prompt you to set up a default project location. If you already have existing scan projects saved on your computer, you can select the location of the scan projects as the default project location.. You can change the default project location and add additional locations at any time by clicking Tools Options, clicking the Folder tab, and entering the location in the Project Locations field. Figure 2-2: Change default project location Multiple default project locations can be used. The first entry in the list will be used for the creation of new projects. SCENE LT will scan the directories and subdirectories for existing scan projects and immediately show up the results in the Project Selector window. In addition, it will also display the projects that the user once opened on this computer. Scan Projects are identified by their “ProjectName.lsproj” file (or the ‘ScanProject.dat’ file when a workspace was saved with a SCENE LT version below version 5). Known projects 2.2 SCENE LT will verify all known projects at startup and show only existing projects in the Project Selector view. • The displayed project names are based on the scan project file (with the extension .lsproj). In case two projects with the same name exist, the name of the scan project’s folder will be added to the name to make the projects distinguishable. • It is not recommended to manually change or delete these files except when deleting the whole scan project. Opening scan projects To open a scan project, you can either double-click on the project's preview image, or you can click on the preview image and then click the appropriate workspace from the menu that appears. Figure 2-3: Open projects If SCENE WebShare data is available for a project, then SCENE WebShare appears in the menu. Select this option to open a SCENE WebShare view of the project. 8 Chapter 2: Starting the Software SCENE LT 5.5 User Manual 2.3 Managing Projects The features of the Project Selector provide powerful tools for quick and easy project administration. 2.3.1 Adding Existing Projects You can add existing projects to the Project Selector by clicking the Add Additional Project Location button Selector view. in the top left corner of the Project This will bring up a directory selection dialog, asking for the project location. Pick the desired directory and confirm your selection. The Project Selector will be updated with all valid projects from the selected location. 2.3.2 Creating New Projects New projects can be created by clicking the Create a new project button . You will be asked for the scan project location and a unique name. The resulting project will be created in the selected project location. 2.3.3 Project Previews Each project preview offers several icons in the top right corner. Figure 2-4: Project preview 2.3.4 Favorites Favorites are your most popular projects. You can add a project to your favorites by clicking the Add to Favorite button . You can remove a project from the favorite list any time later. To show only favorites, simply select the Favorites option in the Filter drop-down menu. 2.3.5 Ignore Projects You can add a project to the Ignore List by clicking the Ignore List button . Ignored projects are hidden from the Project Selector. They will never show up except you select the Ignore List option from the Filter drop-down menu. To remove projects from the Ignore List, select Ignore List from the Filter drop-down menu. All the hidden projects are displayed. Click the green cross list. to remove a project from the ignore 9 Chapter 2: Starting the Software SCENE LT 5.5 User Manual A hidden scan project is still available in the scan project folders on your computer. You can not delete a scan project in SCENE LT. 2.3.6 Edit Project Details Clicking the Project Details button Figure 2-5. will bring up the screen shown in Project information such as project name, project description or keywords can be monitored and changed here. Information like the project’s location on your hard disk drive or the project’s ID cannot be changed. Figure 2-5: Project properties Key words Key words can be defined for every project. These key words are utilized by the search for quick access to all your data. Add position Add a position to your project to make the Google Earth View feature available. The coordinates have to be entered in decimal notation. Here are some example coordinates: Google Earth Moscow: Latitude: 55.758032 Longitude: 37.617188 Sidney: Latitude: -33.870416 Longitude: 151.204834 Rio de Janeiro:Latitude: -22.902743 Longitude: -43.214722 Seattle: Longitude: -122.332764 Latitude: 47.606163 If positional information is provided for a project, the Google Earth View button becomes available in the project’s preview. Clicking this button will open a Google Earth view of the project’s location in your default web browser. 10 Chapter 2: Starting the Software SCENE LT 5.5 User Manual 2.4 Filtering, Sorting, Searching The Project Selector allows you to apply several filters and sorting mechanisms. Projects can be filtered to show projects with SCENE WebShare data only, projects without SCENE WebShare data only, your favorite projects or ignored projects. Both methods can be combined to reduce or increase the number of projects shown by the project selector. Figure 2-6: Sorting and filtering projects The search field can be used to search for specific scan projects or key words and will refine the search results on-the-fly while you type. 2.5 Remote Server Connection Connections to remote SCENE WebShare servers can be made by entering the server address into the Server URL text filed on the right hand side of the Project Selector view. By pressing the Connect button, SCENE LT attempts to connect to the remote server and stores the server’s address in the history list for quick access. Figure 2-7: Remote server access If the connection was successfully established, a SCENE WebShare View will be opened showing the content of the remote server. 2.6 Switch Off Project Selector The Project Selector can be switched off in regular SCENE LT options at Tools Options General. 2.7 Local Workspace and Scan Project File Structure Local workspaces are saved in the file system as a file with the extension .fws. In the folder where a local workspace file is saved, SCENE LT maintains another folder called Workspaces. Each local workspace has one 11 Chapter 2: Starting the Software SCENE LT 5.5 User Manual dedicated folder inside Workspaces. This folder contains all the local scan files, local scan point clouds, local scan meta information and other local data that are part of the local workspace. This data is organized in several folders: • 3Scans: Local scan point clouds • Scans: Local scans • ScansMeta: Local scan meta information • Revision.dat: Revision information Local workspaces may be saved anywhere on your local hard disk drive and do not necessarily have to be saved inside the scan project folder. Workspaces may contain scans from different manufacturers; however, they are uniformly saved in the much-compressed FARO Laser Scan format, to use the capacity of the data medium efficiently. The hierarchical structure of the scan within the workspace is not mirrored in the Windows file system. The separation between the workspace and the scans was introduced because, despite their compressed format, the scans take up a great deal of space on the hard disk drive. It is therefore possible to create several workspaces that contain the same scans without the space requirement on the data medium increasing too greatly. You can use this, for example, if you have made changes in the local workspace. You can save the different versions as separate files without duplicating all scan files. 2.7.1 Scan Project File Structure Scan projects are represented by a number of folders in the Windows file system. Figure 2-8: Scan project in a Windows file system • RawScans: Contains a copy of the initial state of all scans of the scan project. Each scan is kept in the condition it was when it was added to the project. Consider this as a backup of the unmodified scan data of your scan project. • Revisions: All revisions of the scan project will be saved in this folder. A typical revision may contain the following data folders: o 3PointData: Project Point Cloud data is stored here. o 3Scans: Scan Point Clouds are stored here. o Scans: Contains all scans with modified point data. 12 Chapter 2: Starting the Software SCENE LT 5.5 User Manual • o ScansMeta: Contains information about transformation changes of scans. o WebShareData: Contains all data that is exclusively generated for WebShare. WorkspaceData: Local workspace data from local workspaces saved in the scan project folder (same as described above). For more information on local workspaces and scan projects, see chapter “Working with Scan Projects, Workspaces and Scans” on page 15. 13 Chapter 2: Starting the Software SCENE LT 5.5 User Manual 14 Chapter 2: Starting the Software SCENE LT 5.5 User Manual Chapter 3: Working with Scan Projects, Workspaces and Scans This chapter describes how to work with scan projects, workspaces, scans and scan point clouds. 3.1 Composition of the SCENE LT Window The newly created scan project is initially empty and has to be filled with scans. Once you have opened a scan project, the typical SCENE LT window appears. This window is made up of the following areas: Figure 3-1: Composition of the SCENE LT window Menu bar – contains all the menus with commands for the general operation. Toolbars – provide a quick and easy way to access common menu features with the mouse. Structure View – displays the structure of the Workspace, including all sub-folders and objects. The small arrow button at the top right of the Structure View window opens a menu which offers several displaying options. Whether the Structure View stays visible or is folded away automatically as soon as you click into the Scan View window, may be controlled by the pin needle button. Scan and object views – the visual presentation of the scan data and other objects. Scans and objects can either be displayed in a Quick View, a detailed Planar View or in 3D View. Status bar – displays command and scan point data details, tool tips and responses to the last command executed. 15 Chapter 3: Working with Scan Projects, Workspaces and Scans SCENE LT 5.5 User Manual The scan and object views can be displayed • as tabbed • or as unanchored windows. Tabbed windows are the standard display option and allow you to maneuver between multiple windows by clicking at the tabs of the windows. This is intended to free more space on your screen. You can change between the two display options under View Tabbed Documents. Views displayed as unanchored windows can be minimized by clicking on the minimize icon in their title bar. Views displayed as tabbed documents have additional display options that can be accessed by rightclicking on their tab or title bar. A further display option is the presentation mode. SCENE LT is minimizing all menus and toolbars to provide maximum space on the screen for scan data. This feature is controlled via the View menu or by using CTRL-F11 or ALT-ENTER as short cut command. 3.2 Project Workspace The project workspace contains all the objects required to process the scans, making the analysis comprehensible. This typically includes: • Links to the scan files. • Scan folders or clusters which define the structure of a scan project. They organize many scans into a manageable arrangement. • Geometric objects identified in the scans as well as their fit objects. • Reference to external coordinate systems. • Documentation objects, which provide information about user defined points of interest in the scans or in the point cloud. • Measurements • CAD models for comparing scanned reality with the existing plans. 3.2.1 Scans Scans are the scan files as they are recorded by the scanner with their millions of data records that include position, reflectance, and color for single scan points. Scans consist of scan points that were recorded from a single scanner location. They are organized in a row column order. 3.2.2 Scan Point Clouds Scan point clouds are an alternative representation of the scans and have to be created from the single scans. Scan point clouds are organized in a spatial data structure that facilitates fast visualization of scan points and automated point loading based on point visibility. They may facilitate and accelerate the processing of the scan points. For more information on working with scan point clouds, please see chapter “Scan Projects” on page 19. 3.2.3 Project Point Cloud The result of a scan project in SCENE LT typically is a comprehensive project point cloud of the scanned object. Unlike scans and scan point clouds, the project point cloud consists of the points of all the scans within your scan project and can be seen as a comprehensive point cloud of the complete scan project. It is typically created from all the single scans in your project after they have been preprocessed, colorized and registered. 16 Chapter 3: Working with Scan Projects, Workspaces and Scans SCENE LT 5.5 User Manual For more information on working with the project point cloud, please see chapter “Working with the Project Point Cloud” on page 145. 3.2.4 SCENE WebShare Cloud and WebShare Data SCENE WebShare Cloud and WebShare data is created from the scans and consists of panoramic scan images which can be put on the Internet, thus enabling you to share scan information of your scan project with others. 3.3 Workspaces 3.3.1 Creating New Workspaces You can create a new and empty workspace by • the command New New Workspace from File menu, • or by double clicking on a scan file (with the extension .fls). SCENE LT will then open a new workspace which contains only this scan. A new workspace initially only exists in SCENE LT and not as a file in the file system nor is it associated to a scan project. For this, you have to explicitly save the workspace. Workspaces without associated scan projects are associated to a scan project when they are saved. The Save or Save As dialog offers these options for all workspaces that do not have a link to an existing scan project. Figure 3-2: Save as Create New - create a new scan project for this workspace. You will be asked to specify the name and the location of this new scan project. Use Existing - associate the workspace to an existing scan project. You will be prompted to specify the location of that scan project. In both cases, the workspace will be treated as a local workspace of that scan project and be saved to the folder specified under Path and Filename. Initially, a new workspace has to be filled with scans or CAD models first. 3.3.2 Workspace Structure All objects in the workspace are arranged in a hierarchy so that they are easier to find. This is similar to the file system, where the files are placed in folders, which can also be nested hierarchically. On the top level of the workspace hierarchy, you can find the following folders: Documentation – contains the documentation objects. 17 Chapter 3: Working with Scan Projects, Workspaces and Scans SCENE LT 5.5 User Manual References – contains survey data and any self made reference points. Measurements – contains the measurement logs. Models – contains CAD models. Scans Folder Contains scans. This folder is usually named according to the name of your scan project and might have several scan subfolders depending on the structure of your scan project. In the Structure View, you can see the hierarchy of the objects. Figure 3-3: Structure View Cluster folders The Scans folder may contain folders which again contain scans. Such a folder is called Cluster. A cluster again may contain other cluster folders. Scan A scan is also essentially a folder which, apart from scan points, can also contain additional information, like objects (however, no further scans). You can rearrange the objects within the hierarchy. To do this, select an object and using drag & drop, move it to the folder in which you require it to be located. You can do this in the Structure View and in the Planar View. If you use the left mouse button, the properties of the object will not change. Especially the local coordinates will not change. But because of the hierarchy of coordinates it may have changed its global coordinates (see chapter “Coordinates” on page 155 for a detailed description of coordinates). If you use the right mouse button, an additional context menu opens with which you can decide what should happen with the object. Figure 3-4: Structure View: Drag & drop object with right mouse button Here you can not only choose between copy and move, but also select that the object should keep its global position. Layers Apart from this hierarchy, the objects are also assigned to layers. Layers are used to group objects independently of their hierarchy and to control the visibility of these object groups. For example, in your CAD model, you 18 Chapter 3: Working with Scan Projects, Workspaces and Scans SCENE LT 5.5 User Manual can place the interior walls of a building on a separate layer. If you then make this layer invisible, you very easily obtain an impression of the available floor space in the building. The visibility settings are explained in chapter “Visibility Settings” on page 48. You can give most objects their own names, which may only contain letters, numbers, the point ‘.’ and the underscore ‘_’. Scans cannot be renamed. The References folder should not be renamed because it is used for registering the scans. 3.3.3 Finding Objects in the Workspace SCENE LT offers a search functionality to search for objects within the current workspace. This search can be found in the menu bar under Tools Find and Locate Object. A dialog will open where you can enter the name of the object to search for. If an object with the given name is available in the workspace, it will be expanded in the Structure View of the workspace and located in the currently opened and active view. The search is non-case sensitive and takes substrings into account (for example, if you search for “sphere”, an object named “Sphere_123” will be found as well). In case multiple objects are found, all of them are expanded in the workspace tree and the location of the containing bounding box will be shown in the active view. 3.3.4 Merging Workspaces If you are working on a local workspace you may want to merge it with another workspace. Import the other workspace with the command File Import, select FARO Workspaces with the file extension .fws and then select the workspace file. When merging, all objects of the imported workspace that do not yet exist in the currently loaded workspace are imported. If an object already exists, it is replaced by the object from the imported workspace. It is also possible to import entire scan projects (with the file extension .lsproj) or local workspaces related to a different scan project. In those cases, objects, scans and scan point clouds will be imported as mentioned above; project point clouds are explicitly excluded from the import process. When importing workspaces and scan projects, data will be imported from the current revision. 3.4 Scan Projects 3.4.1 Typical workflow of processing a scan project A typical workflow of processing a scan project might be as follows: 1. Preparing the scan project: o Create a new scan project in SCENE LT. o Define the project structure by creating scan folders and clusters. For more information, see chapter “Creating Scan Projects” on page 20. 19 Chapter 3: Working with Scan Projects, Workspaces and Scans SCENE LT 5.5 User Manual o Transfer the scan project to the scanner. For more information, see chapter “FARO Focus3D Scanner Administration” on page 147. 2. Scanning. For more information, see the laser scanner manual. 3. Transferring / importing the recorded scans from the scanner to SCENE LT. For more information, see chapter “Importing Scans and Scan projects” on page 29. 4. Processing the scan points: o Filtering of the scans in order to remove disturbing scan points. o Manual deletion of unwanted scan points. o Identifying objects in the scans and creating reference objects for the scan registration. o Adding color to the scan points (if they were recorded with color). For more information, see chapter “Analyzing Scan Points” on page 117. 5. Registering the scans and locking clusters. SCENE LTScan point inspection and analysis. For more information, see chapter “Analyzing Scan Points” on page 117. 6. Exporting the scan points into different formats: o Exporting your scan data into various point cloud and CAD formats in order to continue processing in third party software products. o Creating the comprehensive project point cloud. o Creating SCENE WebShare Cloud data. For more information, see chapters “Exporting Data” on page 133. 3.4.2 Creating Scan Projects Creating a new scan project There are different ways to create new scan projects: • With the Create new project button in the standard toolbar. • With File New • With the scanner administration. For more information, see chapter “FARO Focus3D Scanner Administration” on page 147. Project. When creating a new scan project, the following creation dialog appears: Figure 3-5: Create a new project Enter a location and project name and proceed by clicking Create. All necessary files and structures will automatically be created at the selected location. When creating a new scan project from scratch, it will have an empty project workspace and you have to fill it first with the appropriate scan 20 Chapter 3: Working with Scan Projects, Workspaces and Scans SCENE LT 5.5 User Manual files. See chapter “Importing Scans and Scan projects” on page 29 for more information on this. The scan project can be identified by the .lsproj file which is accessible in the folder of the scan project. It is usually named like the scan project itself. See chapter “Local Workspace and Scan Project File Structure” on page 11 for information on the folder structure of a scan project. Creating a new scan project from a scan folder Creating a new scan project from a scan folder, a so-called cluster can be a useful operation when only a part of a large scan project is needed for another task or for splitting up large projects into several smaller projects. 1. In the Structure Window, right-click the scan folder, then select Import / Export Create Project. 2. Select, if the new scan project will be used in SCENE LT or in ReCap. 3. Select the target location and a project name. Creating a new scan project from a scan folder Creating a new scan project from a scan folder, a so-called cluster can be a useful operation when only a part of a large scan project is needed for another task or for splitting up large projects into several smaller projects. 1. In the Structure Window, right-click the scan folder, then select Import / Export Export as Project. 2. Select, if the new scan project will be used in SCENE LT or in ReCap. 3. Select the target location and a project name. The newly created scan project will start with a fresh revision which will be created of all scans in the cluster. The new scan project does not contain any point cloud, local workspaces or WebShare data the original project might have had. When opening a workspace that has been created prior to SCENE LT version 5, SCENE LT will ask you to create a new scan project from the workspace. If multiple workspaces exist for the same scan data in the folder of the opened workspace, you can select one of these workspaces to be the project workspace for the new scan project. In this case, you may select the workspace that represents the latest state of your project. The selected workspace will be used as a blue print for the new scan project. Once the correct workspace has been selected, you only need to enter a name for the project and proceed. The new scan project will be saved to the folder of the initial workspace and the project workspace will be created from the selected workspace; the initial workspace will be kept as well as possible other workspaces in the folder. To associate these workspaces with the scan project and convert them to local workspaces of the scan project, you simply have to open and save them in SCENE LT. 3.4.3 Working Collaboratively on a Scan Project Shared data SCENE LT distinguishes between the shared data of a scan project – the data that every member of a team can access – and local data, which is owned by individual users. Even if you are working on scan projects only by yourself, it is important to read this chapter to understand the fundamental difference. The scan project is considered to be the current “ground truth” of a project, the state of a project all contributors agreed on. All unmodified point data typically is shared data and belongs to the scan project. This means that all the row-column based scans and the point clouds that exist 21 Chapter 3: Working with Scan Projects, Workspaces and Scans SCENE LT 5.5 User Manual in the project workspace are shared among all users of the scan project. This data is shown in local workspaces as long as it is not modified. Local workspace vs. central storage server When working collaboratively with others on a scan project you typically maintain a local workspace of the scan project and conduct all your work on the basis of this local workspace. From time to time you may then share your changes to the centrally provided scan project and share your changes with the other project collaborators. Sharing your changes to the scan project will update the project workspace and the scans or point clouds maintained in the scan project. Typically, local workspaces are saved on your local hard disk and the scan project is saved to a central storage server to which all project collaborators have access. When working alone, you may work directly on the scan project without maintaining a local workspace. All your work will then have immediate effect on the project workspace. SCENE LT does not offer a check-out/check-in functionality as you may know it from file systems. So, if you and your partners want to save data to your local workspaces, you have to organize in advance who will work with which scans. We recommend that everyone copies the scan project into his local workspace and deletes the scans he will NOT work on. Otherwise it may happen that someone accidentally overwrites newer data by older ones while sharing his data with the scan project. Local data Local data is owned and maintained by users and is not visible to others until changes are shared with the scan project. Scan data becomes local data once it is modified and stays local until the changes are shared with the scan project. The following diagram illustrates the difference between shared data of the scan project and local data. Local Data Local Data Local Data Scan Modified Scan Scans Scan Modified Scan Scans Scan Modified Scan Scans Local Scan Point Clouds Local Scan Point Clouds Local Scan Point Clouds Local Workspace Local Workspace Local Workspace Scan Project Project Workspace Scan Scan Scans Figure 3-6: Shared and local data 22 Chapter 3: Working with Scan Projects, Workspaces and Scans Shared Scan Point Clouds Project Point Cloud SCENE LT 5.5 User Manual Shared data can (and will) be read and visualized by every user. The project point cloud is an excellent example for this. Once created, it will be visualized in every (local) workspace associated with the scan project but stays part of the shared data in the scan project. Only the changes (for example, deleting scan points) to the project point cloud done on the basis of a local workspace are maintained locally until the changes are shared to the scan project. In the further course of this document the general term “workspace” is used, when the described functionality covers both, the local workspace as well as the project workspace; else it will be distinguished between both and the terms “local workspace” or “project workspace” will be used. Working with the project workspace Working with the project workspace means working on the scan project directly; you can modify, create, add or delete any kind of data a scan project can have. Saving your changes will immediately modify the data of the centrally provided scan project. Scan projects maintain a history of changes of their data. Every save operation will create a new revision of the project. To work with the project workspace, open the scan project file (with the extension .lsproj) or use the project selector (see chapter “Project Workspace” on page 16). A write lock for all shared data of the scan project will assure that only one user is able to modify shared data at a time. All modifications made to the scan project will be visible to other users once they are saved. For example, if you create a new project point cloud, it will be shown to other users once they open up the project next time (in this case even if they open up a local workspace). When scan points are deleted from a rowcolumn based scan these changes will be visible in all local workspaces that do not have local modifications on the same scan and so on. When users try to access the scan project while a write lock already exists, the scan project will only be opened in read-only mode and modification can only be saved as a local workspace. When working on a project by yourself, you can directly work on the project workspace all the time. Of course you can also create local workspaces at any time, for example to experiment with your data and being able to save experiments without having to modify the scan project. In single user environments, it is recommended to work with the project workspace at all times, mainly because deleting objects is much easier this way. For more information, check Sharing Local Modifications. Local workspaces Local workspaces can be created from the current version of the project workspace. For this, click the Save workspace as button in the project toolbar or use File Scan Project Create Local Workspace instead. A local workspace is saved in the file system as a file with the extension .fws (scan files have the extension .fls). Each local workspace has an associated folder in which local changes to scan project data will be stored. This folder has the same name as the local workspace and is created in the sub-folder “Workspaces” of the folder of the local workspace file. After creating a new local workspace, this folder will contain a predefined folder structure but otherwise will be empty. No project data is copied until changes have been made and saved. 23 Chapter 3: Working with Scan Projects, Workspaces and Scans SCENE LT 5.5 User Manual By default the local workspace will access the shared data of the latest revision of the associated scan project. For more information on scan project file structure, please refer to chapter “Scan Projects” on page 19. Modify data from within your local workspace Once you modify data from within your local workspace, these changes are stored inside the aforementioned dedicated local workspace folder. For example, if you remove scan points from a scan and save your local workspace, this scan will be copied from the scan project into your local workspace folder and the changes are applied to this local copy of the scan. The shared scan project data will not be changed. As stated above, the project point cloud is part of the shared data of a scan project. It can be accessed by all local workspaces of the scan project. The project point cloud can also be modified from within a local workspace. However, when saving a local workspace, the modifications to the project point cloud are saved as part of the local workspace but unlike scans, the project point cloud will not be copied to the local folder of the local workspace. Sharing Local Modifications All modifications made in the local workspace are not visible in other local workspaces or in the project workspace until they are shared with the scan project. As soon as they have been shared, they become part of the project workspace and are visible to other users. Share your modifications If you want to share your modifications done in your local workspace with the scan project, click the Share Changes button in the project toolbar. You can also share changes via File Scan Project Share Changes. A dialog opens to provide information about the changes that have been made and about the author of these changes. Figure 3-7: Add revision information Every sharing of data will create a new revision of the scan project and the provided information will be displayed in the project history of the scan project. This information can be extremely valuable when working with a scan project for some time. It helps you to understand changes over time, enables you to return to certain stages of the project and documents changed by all users of the scan project. All of this information is optional. For more information, please see chapter “Working Collaboratively on a Scan Project” on page 21. Sharing your local changes will update the project workspace and appropriate scans or point clouds of the scan project. Sharing changes from local workspaces is equal to importing the local workspace into the project workspace (via the command File Import). 24 Chapter 3: Working with Scan Projects, Workspaces and Scans SCENE LT 5.5 User Manual • It is not possible to share the deletion of objects from local workspaces. For example, if you deleted a scan from your local workspace and share this change with the scan project, the scan will still be present in the project workspace. Since sharing is equal to an import into the project workspace, object deletions can never be shared. • To delete objects from the scan project you have to open the project workspace and work directly on the shared data. This way objects can be deleted. • When sharing modifications, point data and transformation information for scans may be stored in separate revisions. If you want to copy single scan files with transformation information to another location, please make sure to use Save Copy of Scan(s) in the context menu of the scans or scan folders to yield a version of the scans that includes the latest transformation information. 3.4.4 Save Scan projects To save your work from time to time, click the Save button standard toolbar. Create a copy of a scan in the If you want to create a copy of a scan including modifications that were made to the scan, for example changes to its transformation, it might not be sufficient to just copy the related scan file. This is due to the fact that point data and transformation information are often stored in separate project revisions and thus in different locations on your hard disk. Do not copy a scan project in your file system (like Windows Explorer). Then, the scans will keep their ID, and it may happen that those scans are mixed up with their original versions. Do not copy a scan in your file system (like Windows Explorer). Then, the scans will keep their ID, and it may happen that those scans are mixed up with their original versions. When creating a copy of a scan, it is best to use the command Export as Project This exports a version of the scan that includes all the changes that have been made to it (including transformation changes). 1. In the Structure Window, right-click the scan folder, then select Import / Export Export as Project. 2. Select, if the new scan project will be used in SCENE LT or in ReCap. 3. Select the target location and a project name. Create a copy of a scan If you want to create a copy of a scan including modifications that were made to the scan, for example changes to its transformation, it might not be sufficient to just copy the related scan file. This is due to the fact that point data and transformation information are often stored in separate project revisions and thus in different locations on your hard disk. 25 Chapter 3: Working with Scan Projects, Workspaces and Scans SCENE LT 5.5 User Manual Do not copy a scan project in your file system (like Windows Explorer). Then, the scans will keep their ID, and it may happen that those scans are mixed up with their original versions. When creating a copy of a scan, it is best to use the command Create New Project. This exports a version of the scan that includes all the changes that have been made to it (including transformation changes). 1. In the Structure Window, right-click the scan folder, then select Import / Export Export as Project. 2. Select, if the new scan project will be used in SCENE or in ReCap. 3. Select the target location and a project name. Auto Save SCENE LT has an auto save functionality that helps to recover unsaved changes which have been lost due to an unplanned application exit such as an application or system crash or a power outage. This functionality is not designed to replace normal save operations. Auto save does not cover changes to the point data itself, like deleting scan points, filtering or colorization. All other changes, like scan registration, object operations or project structure changes will be covered by the auto save functionality. Therefore you should use the regular save command in frequent intervals in order to preserve all the changes you have applied to your current workspace. The auto save configuration is managed under Tools Options General. Here you may enable or disable the auto save functionality and set the time interval for the automatic save operations. For more information, see chapter “Tools” on page 174. 3.4.5 Scan Project Revisions Scan projects maintain a history of changes of their data. For every sharing operation (this includes regular save operations when working on the project workspace directly) a new revision of the project is created. Every time a project is opened with write access, a new revision folder is created for this project. All the changes that are applied to the project during that session are stored inside this new revision folder. Once the project is saved, this folder will be permanently stored in the revision folder of the project. If the changes are dismissed, this revision folder will be deleted. For more information on the file and folder structure of scan projects, see chapter “Local Workspace and Scan Project File Structure” on page 11. To avoid storing massive amounts of redundant data, there are mechanisms in place to optimize the number of files and file size when storing data for a new revision. For example, if the transformation of a scan is changed, the scan does not need to be saved in that revision, because the actual point data did not change. In this case, only the information about the transformation change needs to be stored. This data is much more compact. If the point data of that scan is changed – for example by applying a scan point filter - the whole scan needs to be stored in that new revision because there are now two different versions of the scan points of that scan. This way it is assured that going back to any of the previous revisions will work properly. 26 Chapter 3: Working with Scan Projects, Workspaces and Scans SCENE LT 5.5 User Manual Scan project revisions All revisions of a scan project are available in the project history. You may open the history of a scan project • • • with the Project History button in the project toolbar or via the File menu under Scan Project Project History. The project history shows all revisions of a scan project with the appropriate information. Figure 3-8: Project history The project history is a powerful tool that lets you track changes, export revisions and even allows you to go back to a certain revision and revert all the changes after a certain revision was created. Performing a double click on a revision in the list or clicking the Load Revision button will load the project workspace at that revision. This will not revert the current scan project to the selected revision. This will load the revision in read only mode and lets you view the state of a scan project at the time the revision was created. You may export this revision as a new scan project. Some operations may automatically create new revisions without user interaction. In this case the author of the revision is always “SCENE LT”. This will happen for example when updating the project point cloud. 3.4.6 Reverting to a Previous Revision Reverting to a previous revision will delete all changes made by later revisions. A revert operation will restore the state of a scan project at the 27 Chapter 3: Working with Scan Projects, Workspaces and Scans SCENE LT 5.5 User Manual time the revision was created. This can be useful to return to a state before a certain change was made. To revert to a certain revision, select the revision in the project history and click Revert. All data and changes made after the selected revision will be lost. To proceed, you have to confirm the reversion by typing the word “revert” into the text box. Figure 3-9: Revert to revision 3.4.7 Restoring an Auto Save During startup, SCENE LT automatically detects all auto saves available from SCENE LT instances which exited due to an unplanned event. Whenever SCENE LT detects auto saves ready to be restored, it will display a dialog listing all available auto saves. You can identify the correct auto save based on the name of the original file for which the auto save was created and the time and date of its creation. Auto saves will be available until explicitly deleted or until an auto save is loaded. In this case you can choose to save or dismiss (by closing the workspace or scan project without saving) any changes that were stored in the auto save file. Figure 3-10: AutoSave detection dialog 28 Chapter 3: Working with Scan Projects, Workspaces and Scans SCENE LT 5.5 User Manual 3.5 Working with Scans A scan contains a variety of information for the storage and display of the captured measurement points, such as: • Individual measurement points (scan points) with intensity value (rf value). The scan points of a scan are organized in a row column order. • A preview picture (.jpg). • Compensation information. Exact position and orientation information. • Information about the settings used to record the scan. • Scan related objects created with SCENE LT, such as geometric objects or documentation objects. For more information, see chapter “Working with Objects” on page 96. Pictures captured by the scanner’s photo camera if the scan was recorded with color. All this data is combined in the scan file but it is handled separately in SCENE LT. It is therefore possible to access additional scan data without the scan points having to be loaded in the memory. In the Structure View, the scans in the workspace are listed under a scan folder. A scan is identified by the cloud symbol are marked with a star in the cloud symbol . Modified unsaved scans . A scan may be examined with the Quick View, the Planar View or the 3D View. Learn more about this in chapter “Exploring Scan Data and Objects” on page 35. 3.5.1 Importing Scans and Scan projects The FARO laser scanner Focus3D saves the scans to a removable SD card. It initially generates several files for one scan and puts them all into one folder on the SD card. This folder is named according to the specified scan name. During the import process SCENE LT combines all the files of this folder to one .fls scan file. You may import those scans automatically or manually. Do the following to import scans automatically: 1. Start SCENE LT. 2. Insert the Focus3D SD card into the memory card slot of your computer or a connected memory card adapter. The SD card will automatically be recognized by SCENE LT and you will be asked whether to import the scans or not. Clicking yes starts the transfer and import process of the scans. • If the scans belong to a scan project that is unknown to SCENE LT, a new folder in your regular project location (specified under Tools Options Folder Project Locations) will be created and the scans will be transferred to this folder. • If the scans belong to an existing scan project that is already known to SCENE LT, they will be transferred to the corresponding project folder on the harddisk and imported to the existing project workspace. 3. Do one of the following to import scans manually: • Drag and drop the appropriate scan folder from the SD card to the currently opened workspace in SCENE LT. • Use File Import: navigate to the folder of the appropriate scan and select the scan’s identification file. This identification file bears the name of the scan and has the extension .fls. 29 Chapter 3: Working with Scan Projects, Workspaces and Scans SCENE LT 5.5 User Manual This file may not be confused with the .fls scan file that is created by SCENE LT during the transfer and import process as described above. Importing files If you already have scan files on your hard disk, then start their import either with the command File Import or by Drag & Drop. Do one of the following to import scans manually: 1. Drag and drop the appropriate scan folder from the file folder to the currently opened workspace in SCENE LT, or, 2. Use File Import. 3. Select Laser scans (*.fls) from the dropdown menu 4. Navigate to the folder of the appropriate scan. 5. Select the scan’s identification file. This identification file bears the name of the scan and has the extension .fls. 6. Click Open. Importing scans If you already have scan projects on your hard disk, then start their import either with the command File Import or by Drag & Drop. 1. Use File Import. 2. Select Workspaces (*.lsproj, *.fws) from the dropdown menu 3. Navigate to the folder of the appropriate scan project. 4. Select the scan’s identification file. This identification file bears the name of the scan and has the extension .lsproj or.fws. 5. Click Open. Importing scan files from different manufacturers SCENE LT can import scan files from different scanner manufacturers. For more information on the available file formats, see chapter “General Scan Data Format .xyz” on page 60. You may adjust the settings for the import of XYZ text files under Tools Options Import. For more information, see chapter “External scan data of other producers” on page 60. 3.5.2 Initial Scan Alignment Derived from the Scanner’s Sensor Data Scans from the FARO Laser Scanner Focus3D might have positional data derived from the different sensors in the scanner. This can be a GPS position from the GPS sensor, an altitude from the height sensor, an orientation from the compass and an inclination from the three axis compensator. This information, if available, is used for a rough initial and automatic alignment of the scans after their import. The first imported scan with GPS coordinates is selected as a reference, its coordinates in the overall coordinate system will be set to x=0, y=0, z=altitude from height sensor. This position is then the base for the corresponding alignment of the remaining scans. The absolute positional values of the scans as they were measured by the scanner’s sensors can still be viewed in the properties of the scan. For more information, see chapter “Scan” on page 236. As this initial alignment is only a rough placement of the scans, a scan registration has still to be applied to the scans of the project to refine their placement. The information derived from the sensor data thereby greatly facilitates the registration process. 30 Chapter 3: Working with Scan Projects, Workspaces and Scans SCENE LT 5.5 User Manual Figure 3-11: Initial scan alignment of project after import 3.5.3 Loading Scans To view and process the scan points of a scan, the scan has to be loaded into the memory first. A scan is either loaded automatically when opened in one of the above mentioned views, or it is loaded explicitly. To do this, open the context menu of the scan and select Loaded. In the context menu you will also see a small check mark if the scan is loaded. A scan may contain several million scan points and loading scans into the memory of your computer may have large memory requirements, especially if the scans were recorded with high resolutions. For this reason, you should avoid loading a lot of large scans simultaneously and remove their scan points from the memory by unloading the scans if they are no longer required. For more information about this, please see chapter “Tools” on page 174. In some cases, depending on the memory of your computer, you might not be able to load large scans completely, for example if they were recorded with full resolution. In this case you may load these scans in reduced size. You can set the maximal size for a scan under Tools Options Scan Data (see chapter “Tools” on page 174). • If a scan is loaded in reduced size and its scan points have been manipulated (for example by applying filters or by deleting scan points), it will be saved with the loaded (and reduced) resolution when saving the workspace. Hence, it is recommended to make a backup copy of your raw scan files. • If you would like to record scans in full resolution, but the memory of your computer is limited, you may have to limit the horizontal and vertical scanning area to the area of interest before scanning. 31 Chapter 3: Working with Scan Projects, Workspaces and Scans SCENE LT 5.5 User Manual If a scan is loaded in full size it is marked with a in reduced size it is marked with symbol, if it is loaded . Figure 3-12: Structure View of a workspace 3.5.4 Unloading Scans If the scan points of a scan are no longer required for what you are currently working on, you should remove them from the memory. To do this, open the context menu of the scan and select Scan Loaded. The check marks by the entry and by the cloud symbol will disappear. All Planar Views of the scan are closed and the scan points of the scan are removed from the 3D views. Quick views are not affected. Closing a view of the scan does not remove it from the memory. 3.5.5 Single Scan Points Figure 3-13: Scan point data in the status bar If you open the planar or the Quick View of a scan, you can view the data of single scan points. To do this, move the mouse pointer over the Planar View. In the status bar, you will find the following details for the scan point that is currently under the mouse pointer: • Row, Column – The row and column within the Planar View. • Polar Coordinates – Horizontal angle from 0° to 360°, the vertical angle from +90° to -90°, and distance from the scanner. Polar coordinates have their origin in the scanner position. • Cartesian Coordinates – Coordinates along the three axes x, y, and z. Cartesian coordinates take into account the placement of the scanner within the coordinate system. • Reflection or Color Value – For a scan point with color, the red, green, and blue values are displayed. Otherwise the reflection value is displayed. Dark scan points have a small reflection value, bright scan 32 Chapter 3: Working with Scan Projects, Workspaces and Scans SCENE LT 5.5 User Manual points a high one. The reflection value of scanners from different manufacturers is not necessarily comparable. There are for example scanners with a brightness range from 0 to 255, and there are scanners with a range from 0 to 2047. 3.6 Working with Scan Point Clouds Scan point clouds are optimized for fast visualization of large amounts of scan points. Scan point clouds have to be created from the single scans and thus consist of points from only a single scanner position, but are fundamentally different from traditional row-column based scans. Scan point clouds are not organized in a row-column order; they are organized in a spatial data structure that facilitates fast visualization of scan points and automated point loading based on the camera position and point visibility. Scan points clouds do not have to be loaded prior to be visualized in the 3D view. This empowers you to actually see all scans of a project at once. However, the row-column based scan data will still be used for Planar View visualization and for operations in the Quick View and can be used for visualization in 3D views if needed. To switch from scan point cloud visualization to row-column based scan points in 3D views, simply load the scan as described in chapter “Loading Scans” on page 31 and the view will draw the row-column based points instead of the scan point cloud. Unload the scan, to see the points of the scan point cloud again. Scan point clouds behave very similar to scans. They can be transformed and moved around like the scans. However, scan point clouds do have some significant advantages: • Fast visualization without manually loading scans. • Highly interactive registration in Correspondence View. • Visualization of large amounts of scans at once. • Transformable like traditional scans. • Advanced 3D point selection tools like the Brush selector (See chapter“Selecting Scan Points in 3D View” on page 82 ) 3.6.1 Modifying Scan Point Clouds Scans and scan point clouds are closely related to each other. Certain changes to the related scans will also have an effect on the scan point clouds and vice versa: • Transformation changes for scans are applied to both, scan and scan point cloud. • The deletion of points in a scan point cloud will also be applied to the associated scan. When points are deleted or otherwise modified in the scan, the scan point cloud of this scan will be removed. If the scan point cloud is part of the shared data of a scan project, it will be automatically recreated after the next sharing (when working on a local workspace) or saving (when working on the scan project). To apply point modifications in a scan to the scan point cloud without sharing, when working on a local workspace, recreate the scan point cloud manually. 33 Chapter 3: Working with Scan Projects, Workspaces and Scans SCENE LT 5.5 User Manual 34 Chapter 3: Working with Scan Projects, Workspaces and Scans SCENE LT 5.5 User Manual Chapter 4: Exploring Scan Data and Objects There are various views to display and explore scans and point clouds: • Quick View – The standard scan view to examine single scans. For this, the scan does not have to be loaded. The Quick View is available within a few seconds; in the meanwhile the scan data will be loaded in the background. You can manipulate the scan points as soon as background loading is finished. Until then you are only able to view and navigate. • Planar View – Used to examine single scans. The scan must be loaded; this will happen automatically if required. • 3D View – The 3D View is not limited to display the scan points of a single scan or scan point cloud, it also offers the combined viewing of all the scans and objects in your project point cloud or workspace. • Overview Map – The Overview Map shows a top view of your complete scan project. The Overview Map is only accessible if WebShare data of your scan project is available. In the views, you take a position as an observer in the room and look in a certain direction to observe the scanned area with a freely selectable scale. Depending on the type of view, your selection of position may be limited; in the Quick View and the Planar View, you can only assume the position of the scanner, i.e. you cannot move freely in the room as an observer. This is only possible in the 3D View (see chapter “3D View” on page 37). Line of sight and scale are freely adjustable in all types of view. When you open the view of a single scan, at first you are in the position of the scanner when it recorded the scan. You will see the scan points of the scanned area all around you. To change the scale, use the scroll wheel of your mouse. If you turn the wheel towards you, you increase the scale; the displayed area becomes smaller. This is similar to using a telephoto lens on a camera. If you turn the wheel away from you, you decrease the scale. The displayed area becomes larger, similar to using a wide-angle lens. 4.1 Quick View 35 Chapter 4: Exploring Scan Data and Objects SCENE LT 5.5 User Manual Figure 4-1: Quick View The Quick View is the standard view and displays the content of a single scan. Start the Quick View by double clicking on the scan in the Structure View or via the command View Quick View in the context menu of the scan. The scan points do not have to be loaded Quick View to be displayed. Therefore, the Quick View of a scan is available within a few seconds. Once the Quick View has been opened and is displayed, the scan point data will be loaded in the background. However, until then you can view the scan and navigate but you cannot access and thus not manipulate the scan points. As soon as the scan data has been fully loaded, all the scan point manipulation functionality is available. The following restrictions apply in the Quick View: • You always see the scanned area from the scanner position, which means you cannot leave this position. However, you can of course change your line of sight and scale. • The field of view cannot exceed 180°. You can adjust the line of sight by holding the left mouse button down and moving the scan points in the direction required. In Quick View, the Examine mode 4.2 is the standard viewing mode. Planar View Figure 4-2: Planar view Like the Quick View, the Planar View displays the content of a single scan only. Start the Planar View with the command View Planar View in the context menu of the scan. At first glance, the Planar View may appear very strange because the scanned area seems to be distorted. Straps and supports do not run in a straight line but are curved. For the Planar View, SCENE LT uses the same technique as it is used for depicting the earth's surface on a map where the area around the poles appears to be magnified, and the flight route between two distant cities is not straight but bent. 36 Chapter 4: Exploring Scan Data and Objects SCENE LT 5.5 User Manual The consequence of the distortion is that it only succeeds approximately in displaying other objects congruent with the scan points. If a scanned reference sphere already appears in the view more like an ellipsoid than a sphere, do not be surprised that the added reference object does not cover the reference sphere completely. For this reason no CAD models are displayed in the Planar View; use the 3D View for this instead. The Planar View is useful because of the fact that with some scanners, it is the most natural display format of the scan points. A lot of scanners process the horizontal and vertical angles step by step; it is therefore practical to display the scan points in a column and row oriented manner accordingly. The view starts at the left margin with the first column the scanner recorded. In the local coordinate system of the scanner, this column normally has the horizontal angle of 0°. The subsequent columns then come to the right, with an increasing horizontal angle until 360° is reached with a circumferential scan. In the top row, the scan points with the greatest vertical angle reached are displayed, for example, the zenith with +90°, which is directly over the scanner. From top to bottom, the vertical angle decreases, reaching 0° at the horizontal line and then becoming a negative value. The smallest possible vertical angle is –90°. As in the Quick View, you always view the scanned area from the scanner position - you cannot leave this position. However, you can of course change your line of sight and scale. As in all views, you can set the scale using the scroll wheel of your mouse. There are also further buttons in the toolbar for the Planar View which you can use to change the scale. By clicking on the Zoom Out button you decrease the scale to see a larger area. The Zoom In button increases the scale so you can see more details. You can see the scale set at any time as a number in the toolbar . 100% stands for the 1:1 correlation between a scan point and a pixel. You can also set any scale you wish by entering a number directly in this field. Furthermore, you can also select the required scale from a list of scales available. For this, click on the arrow next to the field with the scale and then click on the scale you require. You can adjust the line of sight either by using the scroll bars, or in navigation mode, by holding the left mouse button down and moving the scan points in the direction required. To switch into navigation mode, click on the Camera Pan button ; the mouse pointer indicates it is in navigation mode . When moving the mouse, the pointer changes to . The mouse movement is object-based, i.e. if you move the mouse to the right; the objects appear to move from the center of the image to the right margin. Moreover, you can also change the line of sight using the keyboard, with the left arrow, right arrow, up arrow and down arrow keys. The keyboard entries are observer-based, i.e. if you press the right arrow key; your head seems to turn to the right and the objects from the right margin move towards the center of the image. 4.3 3D View With the 3D View, you can achieve the most easily comprehensible view of the scan points and CAD models. The 3D View is normally set up with the field of view corrected, so that you get an impression close to reality. Unlike the Quick View and the Planar View, scan points manipulation and analysis is limited in the 3D View. 37 Chapter 4: Exploring Scan Data and Objects SCENE LT 5.5 User Manual On systems with NVIDIA Quadro graphics processors, rendering performance in the 3D View might be slow or intermitted. In order to improve rendering performance, start the NVIDIA Control Panel application (available in the Windows Control Panel) and select the global preset 3D App – Game Development from the Global Settings tab. Start the 3D View of a single scan via the command View 3D View in the context menu of the scan. If the scan is not loaded or no scan point cloud is available for the scan, only its objects are displayed. Figure 4-3: 3D View of a single scan You can also open the 3D View for all the scans within a scan folder with the command View 3D View in the context menu of the folder. If scan point clouds for the single scans are not available, only the points of the loaded scans will be displayed. If scan point clouds of the scans are available, the scans do not have to be loaded to be displayed. In the 3D View, the points of scans have priority over the points of scan point clouds, which means that the points of loaded scans will be displayed instead of the points of the related scan point clouds. 38 Chapter 4: Exploring Scan Data and Objects SCENE LT 5.5 User Manual Figure 4-4: 3D View of a complete scene If a project point cloud is available, open its 3D View with the Create 3D View button from the toolbar or via the command View 3D View in the context menu of the workspace. If no project point cloud is available, this button or command will open the 3D View of the scans in the workspace. Displaying the scans of a workspace behaves like displaying the 3D View of a scan folder as described above. Normally, the 3D View displays the scan points and objects with the correct field of view, in other words, objects of the same size appear smaller with increasing distance (Perspective View). You can also change the view to an orthographic representation. Then, objects of the same size always appear the same size, regardless of how far away they are. This type of representation is common in a lot of CAD systems. You can switch between these two representations in the context menu of the 3D View under Camera or in the visibility settings (see chapter “Object Visualization” on page 55). • If you would like to see and work on the original scan points organized in a row-column order the scan has to be loaded and the scan points organized in a spatial data structure (points from scan point clouds) will not be displayed. Operations on the points made in the 3D View will then be applied to the row-column organized scan points. • If there are scan point clouds and if you want to see and work on the points organized in a spatial data structure you have to unload the scan first. Operations made in the 3D View will then be applied to the points of the scan point clouds. • When working on the scan points in the 3D View of a scan folder, please keep in mind that you see the row–column organized points for the loaded scans and the points organized in a spatial data structure for those scans that are not loaded. 4.3.1 Navigating in the 3D View The 3D View is used just like the other views. In addition, in the 3D View you can position yourself at arbitrary positions in space and have a look at the scan points and CAD models. The mouse is used to define the turning 39 Chapter 4: Exploring Scan Data and Objects SCENE LT 5.5 User Manual movements you want to perform, and with the keyboard you define the actual movement in space. There are several navigation modes available. Select them from the 3D View toolbar: Fly mode • The Fly Mode of the observer-based navigation simulates flying through the 3D world. o Clicking and dragging the 3D View with the mouse simulates a flight around the scanner’s position. o The cursor keys left, right, up, and down move you to the left, the right, forward, and backwards. The keys page-up and page-down move you up and down. In addition, you can press the shift key to accelerate these movements. Walk mode • The Walk Mode of the observer-based navigation is similar to the fly mode but you are constrained by the XY plane, you travel along the XY plane. For example, the walk mode is useful to limit movement to a floor of a building. Examine • Examine button – starts the object-based navigation, it seems as if the objects move while you stand still. The center of rotation (rotation point) is fixed in the center of the scan. Camera pan • Camera pan button – There is no turning available in this navigation mode. Mouse movements are interpreted as observer movements. Center of rotation • The center of rotation (rotation point) is somewhere in the 3D world. It is set automatically by some functions, for example, when using the object-based navigation (see above). It can also be set manually by clicking the Set rotation point button of the 3D View toolbar and then the scan point or object. Fly to point Double click on a scan point to fly to a location. SCENE LT will then zoom into the scene and close to the selected scan point. The Fly to point feature is available in all navigation modes (Examine, Fly, Walk, Pan). It corresponds to Move camera to 3D point Navigation settings . Adjust the speed of movement, the variability of rotation, the behavior of the mouse wheel and the setting of the rotation point under Tools Options Navigation: 40 Chapter 4: Exploring Scan Data and Objects SCENE LT 5.5 User Manual Figure 4-5: Navigation options General Settings Default Speed - change the speed of the left, right, forward and backwards movement triggered by pressing the cursor keys. Accelerated Speed - determine the speed of the accelerated left, right, forward and backwards movement triggered by pressing the cursor keys in combination with the shift key. Invert Mouse Wheel - changes the forward and backwards movement by the mouse wheel. The default behavior of the mouse wheel is: spinning it forward will move you backwards in space and vice versa. Default Navigation Mode – set if you prefer to work in Examine Mode or in Fly Mode. Examine Mode Settings Snap to Z-Axis (enabled by default) – if enabled the rotation is stabilized by a locked z-axis. Disabling this option will result in an unlocked z-axis and thus in a completely free rotation. If Snap to Z-axis is turned off, you can rotate the 3D View around the line of sight. To do this, click near to the left or right border of the open 3D View and drag the mouse in any direction. A circle will appear in the middle of the view indicating the rotation angle. 41 Chapter 4: Exploring Scan Data and Objects SCENE LT 5.5 User Manual Figure 4-6: Rotation around the line of sight Setting of rotation point • Set rotation point automatically during movement – Automatically sets the rotation point to the point or object that is currently nearest to the center of the current field of view. This will be done dynamically while navigating in the view. • Set rotation point automatically after movement – Automatically sets the rotation point to the point or object that is nearest to the center of the current field of view. This will be done after movement has stopped. • Don’t set rotation point automatically – The rotation point will not be set automatically. You may set it manually with the Set rotation point button from the 3D View toolbar Use selected object as rotation center– Uses the center of the currently selected object as the rotation point. In case the automatic setting of the rotation point and Use selected object as rotation center are both enabled, Use selected object as rotation center has the precedence. Visibility of rotation point • Always show rotation point– Always show the rotation point (the rotation point is visualized as a red dot in the view). • Show rotation point during movement – Show the rotation point only when the point cloud is being moved. • Always hide rotation point – Never show the rotation point. 42 Chapter 4: Exploring Scan Data and Objects SCENE LT 5.5 User Manual You can also find the rotation point settings in the context menu of the 3D view. Find more functions that are available in the 3D View in chapter “3D View and Quick View Toolbar” on page 305. For an overview of the available navigation hot keys in the 3D view, see chapter “Network Licensing and License Manager” on page 265. 4.3.2 Navigating in the 3D View The 3D View is used just like the other views. In addition, in the 3D View you can position yourself at arbitrary positions in space and have a look at the scan points and CAD models. The mouse is used to define the turning movements you want to perform, and with the keyboard you define the actual movement in space. There are several navigation modes available. Select them from the 3D View toolbar: Fly mode • The Fly Mode of the observer-based navigation simulates flying through the 3D world. o Clicking and dragging the 3D View with the mouse simulates a flight around the scanner’s position. o The cursor keys left, right, up, and down move you to the left, the right, forward, and backwards. The keys page-up and page-down move you up and down. In addition, you can press the shift key to accelerate these movements. Walk mode • The Walk Mode of the observer-based navigation is similar to the fly mode but you are constrained by the XY plane, you travel along the XY plane. For example, the walk mode is useful to limit movement to a floor of a building. Examine • Examine button – starts the object-based navigation, it seems as if the objects move while you stand still. The center of rotation (rotation point) is fixed in the center of the scan. Camera pan • Camera pan button – There is no turning available in this navigation mode. Mouse movements are interpreted as observer movements. Center of rotation • The center of rotation (rotation point) is somewhere in the 3D world. It is set automatically by some functions, for example, when using the object-based navigation (see above). It can also be set manually by clicking the Set rotation point button of the 3D View toolbar and then the scan point or object. Fly to point Double click on a scan point to fly to a location. SCENE LT will then zoom into the scene and close to the selected scan point. The Fly to point feature is available in all navigation modes (Examine, Fly, Walk, Pan). It corresponds to Move camera to 3D point . Navigation settings Adjust the speed of movement, the variability of rotation, the behavior of the mouse wheel and the setting of the rotation point under Tools Options Navigation: 43 Chapter 4: Exploring Scan Data and Objects SCENE LT 5.5 User Manual Figure 4-7: Navigation options General Settings Default Speed - change the speed of the left, right, forward and backwards movement triggered by pressing the cursor keys. Accelerated Speed - determine the speed of the accelerated left, right, forward and backwards movement triggered by pressing the cursor keys in combination with the shift key. Invert Mouse Wheel - changes the forward and backwards movement by the mouse wheel. The default behavior of the mouse wheel is: spinning it forward will move you backwards in space and vice versa. Default Navigation Mode – set if you prefer to work in Examine Mode or in Fly Mode. Examine Mode Settings Snap to Z-Axis (enabled by default) – if enabled the rotation is stabilized by a locked z-axis. Disabling this option will result in an unlocked z-axis and thus in a completely free rotation. If Snap to Z-axis is turned off, you can rotate the 3D View around the line of sight. To do this, click near to the left or right border of the open 3D View and drag the mouse in any direction. A circle will appear in the middle of the view indicating the rotation angle. 44 Chapter 4: Exploring Scan Data and Objects SCENE LT 5.5 User Manual Figure 4-8: Rotation around the line of sight Setting of rotation point • Set rotation point automatically during movement – Automatically sets the rotation point to the point or object that is currently nearest to the center of the current field of view. This will be done dynamically while navigating in the view. • Set rotation point automatically after movement – Automatically sets the rotation point to the point or object that is nearest to the center of the current field of view. This will be done after movement has stopped. • Don’t set rotation point automatically – The rotation point will not be set automatically. You may set it manually with the Set rotation point button from the 3D View toolbar Use selected object as rotation center– Uses the center of the currently selected object as the rotation point. In case the automatic setting of the rotation point and Use selected object as rotation center are both enabled, Use selected object as rotation center has the precedence. Visibility of rotation point • Always show rotation point– Always show the rotation point (the rotation point is visualized as a red dot in the view). • Show rotation point during movement – Show the rotation point only when the point cloud is being moved. • Always hide rotation point – Never show the rotation point. You can also find the rotation point settings in the context menu of the 3D view. 45 Chapter 4: Exploring Scan Data and Objects SCENE LT 5.5 User Manual Find more functions that are available in the 3D View in chapter “3D View and Quick View Toolbar” on page 192. For an overview of the available navigation hot keys in the 3D view, see chapter “Network Licensing and License Manager” on page 229. 4.3.3 Objects in the 3D View Figure 4-9: CAD object in 3D View of a scan The 3D View is usable even without scan points if you want to view CAD models. The most interesting view is the combination of CAD model and scan points. With this you can very easily compare the CAD model with the scanned reality. If desired, selected scan points may be compared with each other or with the CAD model. Start with the 3D View of your CAD model or a selected area of the scan points. Then arbitrarily select other scan points. This selection may also belong to a different scan! Add the selected scan points to the 3D View with the command Add Scan Points in the context menu. If you start the overall 3D View in the context menu of the workspace or with the Create 3D View button Models folder will be displayed. from the toolbar, all objects in the With observer-based navigation, you are always the center of rotation. With object-based navigation it is different: When you start a 3D View on a scan, the scanner position itself is the initial center of rotation. When you start the 3D View on a CAD model or a selection of scan points, their center will be the initial center of rotation. You can select a different center of rotation by simply selecting a visible CAD object and using the command Set Rotation Point in its context menu. Very often, CAD objects are hierarchically structured. For example a robot may consist of a platform, an arm, and a tool. When you now click with the mouse on the platform, it isn’t evident whether you want to select the whole robot or just the platform. In SCENE LT, you’ll start on the highest level of the hierarchy, in this case the whole robot. If you want to select an object at a lower level of the hierarchy, simply click again without moving the mouse in between. By this you can descend the hierarchy step-by-step until you have reached the part of the object you are interested in. You can also ascend in the hierarchy when you press the shift-key while clicking. In the context menu of a CAD object in the 3D View you can also set individual objects to be visible or invisible. To do this, place a check mark 46 Chapter 4: Exploring Scan Data and Objects SCENE LT 5.5 User Manual by the entry Visible. This setting works in combination with the visibility of the layer and the visibility of the object type. This means an object is only visible if it is set to visible on all three levels. 4.3.4 3D Clear View The 3D View also has another representation, the Clear View Mode. The Clear View mode gives an improved and high-quality presentation of scan points in 3D View. It adds transparency to the otherwise completely opaque point cloud rendering. This allows for viewing through walls or ceilings and may give a much better impression of the spatial structure of the underlying point cloud. Points in areas with low point density will be displayed more transparently and points in areas with a high point density will be displayed more brightly. 1. Select View 3D View to open the 3D View. 2. Right-click into the view and select Clear View Mode. The Clear View mode is only available if • 32 bit color depth has been selected in the display properties of Windows, • Advanced Textures and Offscreen Renderingunder Tools Options View is enabled. For more information, see chapter “Tools” on page 174. Figure 4-10: Clear view 4.3.5 Managing Viewpoints You may save the current camera position and line of sight in the 3D View as a viewpoint. This enables you to return to saved viewpoints later at any time. When you have moved the camera in the 3D View to a position that you would like to keep for later use, you can create a viewpoint from it • with Ctrl + F2 or • with the Manage Viewpoints button from the 3D View toolbar. Viewpoints are added to a folder called Viewpoints in the Structure View. Viewpoints are part of the workspace and will be saved when saving the workspace or project. 47 Chapter 4: Exploring Scan Data and Objects SCENE LT 5.5 User Manual Figure 4-11: Viewpoints in Structure View • To go to a viewpoint select Activate in its context menu in the Structure View. All viewpoints can also be successively activated in the order of their creation by using the hotkey F2 or in reverse order by using Shift+F2. In the Structure View, you can organize the viewpoints into folders: Figure 4-12: Viewpoints grouped into folders 4.4 Visibility Settings The views can also show objects other than the scan points, such as: • The positions of the other scans in the workspace. • The simple objects assigned to a scan that were created by a fit, for example spheres, and 3D points. • CAD models. Not all views can display all these objects. For further information, please see the more detailed description of views. 48 Chapter 4: Exploring Scan Data and Objects SCENE LT 5.5 User Manual You can decide whether or not to display the objects using the visibility settings, which are arranged in three levels: • The visibility of the layer to which the object is assigned. • The visibility according to the prominence of the object. • The distance of the object from the observer. An object is only visible if the visibility on the first two levels is set accordingly and it is located in the set range. The visibility settings are maintained separately for each view. It is therefore possible that an object is visible in one view and not in another. When you open a new view, this view initially takes over the default values of the visibility settings. You can also change these default values. In the context menu of the Workspace, select Planar View Visibility Settings for the default visibility settings of the Planar View, or 3D Visibility Settings for the default visibility settings of the Quick View and the 3D View. • Press the Visibility settings button dialog. to get the visibility settings 4.4.1 View (3D View and Quick View) Figure 4-13: Visibility settings -View Camera Perspective / Orthographic – Switch between the perspective and orthographic camera. For more information, see chapter “3D View” on page 37. Frustum Culling – Enable to draw only the objects that are within the view frustum. Back Face Culling – Enable to skip rendering the (not visible) back face of objects. Navigation Hint - Display or hide the small coordinate system in the view. Render Mode Wireframe – Show objects as wire frames. 49 Chapter 4: Exploring Scan Data and Objects SCENE LT 5.5 User Manual Smooth Shading – Perform smooth shading on surfaces. Accelerated Rendering – Accelerates the rendering of scan points in 3D view. This option is only available if scan points of scan point clouds or project point clouds are visualized. Background Settings - Select either a single or gradient background color. As single background color the selected top color will be used. The gradient background color starts with the selected top color and transitions linearly to the selected bottom color. Statistics - Displays the number of frames per second Stereoscopic Mode - SCENE LT supports viewing the scan points in a 3D stereoscopic mode which is only available in the 3D view. This mode greatly enhances the 3D perception of the viewed point cloud by representing two offset images to the viewer, one for each eye. Viewing the point cloud in the stereoscopic mode greatly improves the orientation in your scan project and facilitates to distinguish between near and far objects; stray points are perceived as less disturbing. This mode is only available in the 3D View and has no effect on the other views. To fully benefit from this mode, several system requirements have to be fulfilled: • For generating the stereoscopic output, SCENE LT uses the Quad Buffering technology, so your graphic card and the installed graphic card driver have to support OpenGL quad buffering. AMD FirePro and NVIDIA Quadpro (except NVIDIA Quadpro NVS) are examples of the types of graphic cards that support this technology. • You need a 3D Stereo capable output device. Depending on the graphic card, different output devices are supported, for example 120Hz monitors with shutter glasses, HDMI 1.3 capable DLP devices or 60Hz monitors with anaglyph glasses. We recommend using a bundle consisting of a NVIDIA Quadpro series graphic card, a NVIDIA 3D vision kit (shutter glasses) and a 120Hz Monitor. To switch to the stereoscopic mode, please follow these steps: • Enable OpenGL quad buffering in the settings of your graphic card driver. For more information on setting up the graphic card driver, please read the manual of your graphic card or see chapter “Exemplary Driver Configuration for the Stereoscopic Mode” on page 161. This chapter describes the driver configuration for an exemplary hardware system. • Start SCENE LT and open your scan project. • Switch to the 3D View and open the visibility settings from its context menu. • Enable the stereoscopic mode and use the slider on the right to adjust the depth effect of the 3D visualization. This setting changes the perceived distance of the focal point. You might have to adjust this repeatedly until you get the best 3D viewing results. It is recommended to enable SCENE LT’s presentation mode under View Presentation Mode in the main menu (see also chapter “View” on page 173) when viewing the point cloud in stereoscopic mode as interface elements such as the menus and the toolbars are still displayed in 2D and this may affect your 3D viewing experience. 50 Chapter 4: Exploring Scan Data and Objects SCENE LT 5.5 User Manual • The stereoscopic mode is for examining the point cloud, operations such as point selection or measurements are disabled in this mode. • If the stereoscopic mode is not available, Offscreen Rendering under Tools Options View might be disabled. Offscreen Rendering must be enabled for the stereoscopic mode. For more information, see chapter “Tools” on page 174. 4.4.2 Representation (3D View only) If Auto apply changes is selected, new settings are visible immediately; you do not need to click on the Apply button. Figure 4-14: Visibility settings –Representation Clear View Settings - In the clear view mode, points in areas with low point density will be displayed more transparently and points in areas with a high point density will be displayed more brightly. Enable Clear View – check if you want to use Clear View. By changing the settings with the slider you can intensify or weaken this effect. Subsample Settings - Reduce of the point density during navigation in 3D View. For example, a value of 30 means that at least every thirtieth point will be displayed when moving the point cloud. Lower values mean that more scan points will be displayed, which could, depending on the performance of your computer system, result in a slower animation of the point cloud. Enable Subsampling - Clear this function if you want that all points are displayed during navigation. 51 Chapter 4: Exploring Scan Data and Objects SCENE LT 5.5 User Manual Gap Filling - The gap filler fills gaps between scan points that are physically close to each other. Figure 4-15: Gap filling turned off (left) and turned on (right) If clear view and gap filling are greyed out, Offscreen Rendering under Tools Options View might be disabled. Offscreen Rendering must be enabled for Gap Filling and Clear View. For more information, see chapter “Tools” on page 174. Supersampling – Supersampling renders the point cloud with a resolution higher than the resolution of your screen and then shrinks the point cloud to fit the screen resolution. This reduces anti-aliasing effects and gives the point cloud a smoother visual appearance. Fine and filigree structures look sharper and stray points will appear less annoying. Set the resolution of the initially rendered point cloud compared to the screen resolution by selecting one of the options 2x2, 3x3, or 4x4. For example, choosing 2x2 means that the point cloud will be rendered with a resolution that is 4 times the resolution of your screen. Figure 4-16: Supersampling turned off (left) and turned on (right) Objects like walls might appear transparent when using small point sizes in combination with supersampling. High supersampling resolutions like 4x4 require large amounts of graphics card memory. 4.4.3 Scan Points (3D View only) If Auto apply changes is selected, new settings are visible immediately; you do not need to click on the Apply button. 52 Chapter 4: Exploring Scan Data and Objects SCENE LT 5.5 User Manual Figure 4-17: Visibility settings –Scan Points Point Size – Set the size of the scan points in the 3D View. You can select between Fixed – each point is displayed in a fixed size, set in pixels. Use the slider to adjust a value between 1 and 10 pixels. Fixed size means, that the point size always stays the same, no matter if the observers view changes. Adaptive – the points have a physical size, set in mm. Use the slider to adjust a value between 0 and 20mm. Adaptive size means that the displayed size of each point adapts to its distance to the observer. Color Settings – Select the color for the scan point. You can select between: Measured Value – Grey value according to the measured value. White – White points. Black – Black points. Unique for Scans– The scan points of each scan are displayed in unique colors. Unique for Clusters – The scan points of the scans within each cluster are displayed in unique colors. 53 Chapter 4: Exploring Scan Data and Objects SCENE LT 5.5 User Manual 4.4.4 Layer Figure 4-18: Visibility settings -Layer Toggle the visibility of the available layers and their related objects and the object names in the view. See chapter “Layers” on page 55 for more information. 4.4.5 Extra Figure 4-19: Visibility settings -Extra Objects – Display or hide certain types of objects: 54 Chapter 4: Exploring Scan Data and Objects SCENE LT 5.5 User Manual Models Folder – Display CAD models. References Folder – Display reference objects. Scan positions – Display the scanner positions in the view. If enabled, the positions will be visualized by this symbol: Figure 4-20: Scanner position Cameras – Display the camera positions of other views. Scan objects – Display or hide the objects that are assigned to the scans in the view. You may display these objects only if the scan is loaded. Visibility – Set the minimum and maximum distance at which objects are shown. Documentation Objects – Set the maximum distance at which documentation objects are shown. 4.5 Object Visualization 4.5.1 Material The appearance of objects is determined by their shape, color, the composition of their surfaces and the basic material characteristics. For example, glass has the basic material characteristic of being transparent. Independent of that, it can be clear or colored, smooth ground or abraded. In SCENE LT, all these characteristics are included in the term material, so in this example, material does not simply mean glass, but a particular abraded green glass. Objects that are created from a fit have a material that reflects the quality of the fit in its color. Of course, imported objects have the material that is preset in the VRML model. The objects created directly by you initially have a material with a neutral grey as the color. You can change the material of an imported object. To do this, open the Material dialog in its context menu. You will find further explanations in chapter “Frequently Used Commands for Objects” on page 196. It is possible that several objects can share the same material definition. For example, imagine the model of a car. Here it makes sense for all tires to have the same material definition so that they all have the same color. You can also make use of the hierarchical structure and change the material characteristics of several objects at the same time. To do this, open the Material dialog for the appropriate folder (see chapter “Frequently Used Commands for Objects” on page 196). 4.5.2 Layers Layers are used to group objects independently of their hierarchy and to control the visibility of these object groups. For example, in a CAD model, you can put buildings and machines on different layers. If you then make the layer with the machines invisible, you can view the cleared building. In its basic state, the workspace contains the following layers: 55 Chapter 4: Exploring Scan Data and Objects SCENE LT 5.5 User Manual MatchedObjects – The layer for objects that were created by a fit. Measurements – The layer for measurements. Models – The layer for CAD models. When importing CAD models, they are automatically attached to this layer. ObjectMarker – The layer for object markers. References – The layer for reference objects. Scans – The layer for the scan points of a scan. PointCloud – The layer for the scan points of the scan point clouds and the project point cloud. Text – The layer for text fields. Trajectories – The layer for trajectories. InternalObjects – The layer for internal objects. AncillaryObjects – The layer for lines or objects that belong to category 2 and for corner points that are categorized as children of nearby corner points. Deleting a layer You can delete a layer by selecting the command Delete in its context menu. If there are still objects in these layers, they automatically move to the layer that is currently active. The active layer cannot be deleted. Visibility of layers You can set the visibility of the layers in the views, rename layers, create more layers and delete layers that are no longer required. To do this, start the command Layer Manager... in the context menu of the Workspace. Figure 4-21: Layer Manager The Layer column shows the existing layers. You can change the active layer in the Active column. The active layer is marked with a blue box. Click into the box of the layer which shall now be active. Add a layer 1. To add a layer, select Edit Properties General. 2. Click into the Layer field. 3. Enter the name of the new layer. Click Apply and confirm the question with Yes. 56 Chapter 4: Exploring Scan Data and Objects SCENE LT 5.5 User Manual Add a layer 1. To add a layer, select Edit Properties General. 2. Click into the Layer field. 3. Enter the name of the new layer. 4. Click Apply and confirm the question with Yes. Change layer assignment The layer assignment of an object can be changed in its General tab: Figure 4-22: Layer assignment By using the Select active layer button, the object is assigned to the currently active layer. You can also set the layer assignment for a folder and can then choose whether this layer assignment should apply to all objects from the hierarchy of the folder. Generally, the hierarchy and the layer assignment are independent of each other, which means an object does not have to be assigned to the same layer as the folder it is in. Figure 4-23: Layer assignment for a folder 4.6 Locating Objects in the Views Objects can be visible in both the Structure View and scan views. To find objects in the scan views, use the command Locate in the context menu of the objects. If, for example, you have an object in the Structure View in front of you and now want to see its embedding within the scan points in 57 Chapter 4: Exploring Scan Data and Objects SCENE LT 5.5 User Manual another view, first activate this other view and then call the command Locate in the Structure View in the context menu of the object. The field of view and scale of the other views are then set so that you can view the object required. In the same way, you can also select an object in a different view than the Structure View and call the command Locate in the context menu of the object. The field of view and scale are then reset in this view and the object is also selected in the Structure View. 4.7 Overview Map The Overview Map is only available in SCENE LT if WebShare data of your scan project is available. This means that a WebShare export of your scan project has to be processed in order to access the Overview Map. SCENE LT can display an Overview Map of your complete scan project that helps orienting in the project. Figure 4-24: Overview Map The Overview Map in SCENE has nearly the same functionality as the Overview Map in SCENE WebShare. For example, it also supports Pointto-point measurements (start them with the measurements (start them with the button) and area button). Hide and display the measurements with the button. Measurements created in SCENE LT’s Overview Map are added as a child to the “Overview Map” object in the Structure View of the workspace. To open the property dialog of measurements, double-click on it in the map or in the Structure View. The circular icons represent the various scanner positions. A double-click on them opens the Quick View of the related scan. 58 Chapter 4: Exploring Scan Data and Objects SCENE LT 5.5 User Manual Chapter 5: Importing Data This chapter gives an overview which formats are supported by SCENE LT to import objects or scan points. 5.1 CAD data 5.1.1 IGES IGES is a multivendor-capable standard for the exchange of CAD drawings. SCENE LT uses IGES version 5.3 with the following objects: • Scan point: IGES type 116 (Point Entity) • Point: IGES type 116 (Point Entity) • Sphere: IGES type 158 (Sphere Entity) • Plane (idealized): IGES type 108, form 0 (Plane Entity, unbounded); • Plane (as a square): IGES type 108, form 1 (Plane Entity, bounded); edge as IGES type 106, form 63 (Simple Closed Planar Curve Entity) • Limited plane: IGES type 108, form 1 (Plane Entity, bounded); edge as IGES type 106, form 63 (Simple Closed Planar Curve Entity) • Object name: IGES type 212 (General Note Entity) Unfortunately not all CAD systems convert the IGES standard completely and correctly. For example, CATIA and Autodesk Mechanical Desktop do not import IGES type 158. Therefore, you cannot display any spheres in these systems. CATIA does not import IGES type 212 either, so the object names are also dropped. 5.1.2 VRML To compare the scanned reality with the models from the CAD system, you can import the model into SCENE LT. For this, the model must be in the multivendor-capable VRML (Virtual Reality Modeling Language) data format. A lot of CAD systems give you the option of exporting models in this format. For this, please read the instructions for your CAD system. Although the VRML standard recommends a specific coordinate system and a specific unit of length, not all VRML files are modeled that way. The standard defines the unit of measure of the world coordinate system to be meters, and a coordinate system in which the y axis points upwards. Because many VRML files are modeled differently, you can select different settings. When importing a VRML model, you can ask SCENE LT to combine any meshes in the model into a single one. This will increase the performance. SCENE LT does not support all objects or object properties that are available in VRML. The following parameters are not transferred: • Light sources • Textures with 8 or 16 bit per pixel (use 24 bit per pixel instead) • The Inline node Chapter “Working with Objects” on page 96 describes in detail how objects can be imported. 59 Chapter 5: Importing Data SCENE LT 5.5 User Manual 5.2 Survey data 5.2.1 Survey Data .csv Each row of the file contains one single reference point with the following specifications: name, x coordinate, y coordinate, z coordinate and measurement quality. All four specifications have to be given and have to be separated by the same separator, which can be a blank space, a colon, a semicolon or a tab. The coordinates are specified in the unit that has been defined in Tools Options Units. SCENE LTuses a right handed coordinate system. 5.3 External scan data of other producers SCENE LT can import scan files from different scanner manufacturers. You can import the scan files in FARO Laser Scan format, E57, Leica PTZ, PTX format or as an XYZ text file. With the last two formats listed, however, you have to make sure that the scan points in the scan file are arranged so that they correspond to the row or column-oriented recording process of the scanner. You also have to make sure that the scan was not registered. Scans are always saved in FARO Laser Scan format. Therefore, if the scan does not originate from a scan file in FARO Laser Scan format, a new file is created in this format when saving the workspace. 5.3.1 General Scan Data Format .xyz Each row of the file contains one scan point. There are two variants: With the first variant, the x coordinate, y coordinate, z coordinate and the reflection value are specified for each scan point. With the second variant, two additional specifications are made for each scan point: the row and the column in the planar representation. When exporting, the coordinates are converted into the export unit selected at the time; when importing it is assumed that the coordinates will be received in the selected import unit. When exporting, the reflection value that was also used for the screen representation is taken, so it lies between 0 and 255. When importing a xyz file that contains both, RGB and intensity values, the RGB values are used. 5.3.2 Binary Scan Data Format .xyb The file starts with details in ASCII format. The first line reads: # FARO XYZ binary format v1.0 The second row contains the specification ScanPosition, made up of the x coordinate, y coordinate and z coordinate of the scan position. The third row contains the specification Rows followed by the number of rows. The fourth row contains the specification Cols followed by the number of columns. This is followed by 4 bytes with 0 displayed to mark the start of the binary data. 60 Chapter 5: Importing Data SCENE LT 5.5 User Manual This is then followed by the binary data for each scan point: x, y, and z as the double and the reflection value as the unsigned short. There is no separator between scan points. All scan points of the area are exported, the values are metric. 5.3.3 Scan Data Format .ptx This format is especially suited for exchanging scan points and their corresponding coordinate transformation. All values are given in ASCII and are metric. The first line states the number of columns, the second line the number of rows. In the next line, the translation part of the transformation is given (a 3D vector). After that, 3 lines with the rotation part follow (a 3x3 matrix). The next 4 lines contain the full transformation (a 4x4 matrix). Finally the scan points are written, one scan point per line: x, y, z, and a reflection value. In addition, 3 RGB values may follow. The reflection value is between 0 and 1. When importing a PTX file, the following dialog pops up: Figure 5-1: PTX import dialog Row/Column Orientation Rows per column - The input file contains the data column-wise, i.e. it starts with all the rows of the first column, then all rows of the second column, and so on. Good when importing FARO PTX files. Columns per row - The input file contains the data row-wise, i.e. it starts with all columns of the first row, then the second row, and so on. Intensity Mapping Linear - A linear mapping of intensity values to grey values. Non-linear - A non-linear mapping of intensity values to grey values. Good when importing for example Leica PTX files. If the PTX file contains RGB values, intensity mapping is not done. The RGB values are used instead. If the PTX file contains both, RGB and intensity values, the RGB values are used. If your input looks like garbage in the Planar View, but seems to be OK in the 3D View, then try the import again with a different row/column orientation. 5.3.4 Scan Data Format .ptz PTZ is the binary data format of Leica HDS scan files, which are usually created with the scan software Leica Cyclone. When importing a PTZ file, the following dialog pops up: 61 Chapter 5: Importing Data SCENE LT 5.5 User Manual Figure 5-2: PTZ import dialog Intensity Mapping Linear - A linear mapping of intensity values to grey values. Non-linear - A non-linear mapping of intensity values to grey values. Good when importing for example Leica PTZ files. If the PTZ file contains colors, intensity mapping is not done. The colors are used instead. 5.3.5 Scan Data Format .e57 This scan data format is a vendor-neutral standard for storing point cloud data produced by 3D imaging systems. The “ASTM E57 3D file format” (officially ASTM E2807) is a format for three dimensional imaging data such as laser scans. The E57 file used as shorthand for “ASTM E57 3D file format” and is a combination of binary data and XML (extensible Markup Language). An E57 file can store 3D point data, attributes associated with 3D point data such as RGB and/or intensity values.1 When exporting scans to the E57 file format, the following information will be stored in the exported file: • For each scan point, the xyz-coordinate, RGB and/or intensity values and the corresponding index of row and column. This information is part of the binary section of the E57 file. It is possible to store several scans in one E57 file. • Additional Meta information like the scan name, the unique ID (Uuid) of a scan and the software version that is used for the export2. This information is stored in the XML-part of the E57 file. SCENE LT supports the import of several features of the E57 file. When importing, the E57 file has to contain xyz or spherical coordinates as well as RGB and/or intensity values for each scan point. If the E57 file contains RGB and intensity values, the RGB values are used. If the E57 file doesn’t contain information about row/column ordering, the following dialog pops up asking you to manually select the correct ordering of the file. 1. The specification of the new format is available on http://www.astm.org/Standards/ E2807.htm. SCENE LT uses the library libE57 V1.0.224 to write and read E57 files. 2. For more detailed information we refer to http://www.libe57.org www.astm.org/Standards/E2807.htm 62 Chapter 5: Importing Data or http:// SCENE LT 5.5 User Manual Figure 5-3: E57 import dialog Row/Column Orientation Rows per column - The input file contains the data column-wise, i.e. it starts with all the rows of the first column, then all rows of the second column, etc.. Columns per row - The input file contains the data row-wise, i.e. it starts with all columns of the first row, then the second row etc.. Currently, SCENE LT doesn’t support import or export of associated 2D images. 63 Chapter 5: Importing Data SCENE LT 5.5 User Manual 64 Chapter 5: Importing Data SCENE LT 5.5 User Manual Chapter 6: Registering Scans 6.1 Background knowledge Registration means what? Scan points are recorded and saved in a coordinate system which is relative to the scanner. The point of origin for this scan coordinate system is the position where the laser meets the mirror. The coordinates of this point are x = 0, y = 0, z = 0. If you have two or more scans taken at different locations in a room, right after scanning they will only know their own scan coordinate systems. But of course in reality the origins of these scan coordinate systems have been at different positions in the room, and therefore it is necessary to determine the spatial relationship between them. This is called registering the scan, and the step from the scan coordinate system into the overall coordinate system is called transformation. The scans of your scan project might have a rough initial placement derived from the sensors of the laser scanner (GPS, Altimeter, Inclinometer or Compass), but, in general, it is still necessary to perform a scan registration to get a more precise spatial relationship between the scans. This initial scan placement thereby facilitates scan registration. The basic principle behind scan registration is very simple: so called reference objects are identified for which not only the scan based coordinates can be determined, but for which also their coordinates in a more general overall coordinate system are known. If there are at least 3 reference objects in a scan (scan reference object), it is mathematically sufficient to calculate the transformation, i.e. the exact position and orientation of the scan. Then not only the selected reference objects, but all scan points get their coordinates in the overall coordinate system. 6.1.1 Natural and artificial targets In SCENE LT various types of targets objects can be used for the registration. Common are natural targets, such as planes, slabs, pipes, corner points, or rectangles, and manually placed artificial targets, such as spheres or paper targets (circular flat or checkerboard targets). 6.1.2 External References Usually, external reference objects are measured with survey equipment like total stations. This data can be imported into a scan project. External references, for example from an imported CAD or a layout plan can be used as references. See chapter “External scan data of other producers” on page 60 for more information. In addition, scanner sensors like the inclinometer can be used as a reference. 6.1.3 Overall coordinate system It is possible let a surveyor establish an overall coordinate system, and to put the scans into it. For example, you may place the scans of a plant into the plant wide coordinate system that is used by the facility management. And also this overall coordinate system can be very simple: It might be sufficient that all the scans have their correct spatial relationship to each other, but it is not really important where the origin of the overall coordinate system is. Then simply one of the scans is selected as a reference, and its scan coordinate system will be the base for the overall coordinate system. 65 Chapter 6: Registering Scans SCENE LT 5.5 User Manual As the same reference object may appear in more than one scan, it is useful to use their combined information for scan registration. This is the default behavior in SCENE LT, and called cluster registration with bundle adjustment. If you like, you may also switch to a pure pair wise assignment of scan reference objects to their external equivalent (external reference object). Then the appearance of this reference in other scans will not influence the registration result of this scan. 6.1.4 Reference scan When registering without or with an insufficient number of external references, a reference scan has to be determined. This reference scan will then define the coordinate system. You can mark a scan as a reference scan by enabling the “Reference Scan” attribute in its context menu under Operations Registration or in its properties dialog on tab Scan. If you do not set a reference scan manually, SCENE LT automatically determines one of the scans as a reference scan. Figure 6-1: Scan properties Reference scans are marked with a special icon in the Structure View. If you have sufficient corresponding external references, setting a reference scan is not required. The coordinate system will then be defined by the external references. 66 Chapter 6: Registering Scans SCENE LT 5.5 User Manual 6.2 Using Sensor Data 6.2.1 GPS Information Scans of the Focus3D X scanner can have a GPS position obtained from the scanner’s GPS sensor, but you can also manually add GPS information to point objects or spheres . This GPS information consists of the position (latitude / longitude or UTM coordinates), the altitude above sea and the position accuracy. The manually added GPS data as well as the GPS data of the scanner’s GPS sensor is not only used for correspondence search (see chapter “GPS Information” on page 67 for more information) but also for the target-based scan placement, where the GPS information of objects in the scans is used for the placement. You can enable or disable the use of GPS information for registration in the Place Scans Settings under Tools Options Matching (see chapter “Tools” on page 174 for more information). While SCENE LT uses a plane coordinate system, GPS takes the earth’s curvature into account. Using GPS information for the registration of scans located very far away from one another may affect the registration accuracy as great distances on the surface of the earth are different than on a flat map. To prevent such registration inaccuracies, SCENE LT defines a GPS reference position for the workspace. GPS information of objects within a certain radius (10.000m) from this reference will be used for scan registration; GPS information of objects further away will be ignored. The reference GPS position is derived from the GPS information that was provided at first in your scan project. This can be the GPS information of a point object or the GPS information of the first imported scan with a GPS position that was recorded with the GPS sensor of the Focus3D X scanner. The GPS reference position can be seen in the workspace’s properties on tab GPS Reference. Figure 6-2: GPS reference You may optimize the GPS reference position for all the available GPS positions in the workspace using the Optimize button. In this case, the GPS reference position will be set to an adequate mean position of all the available GPS positions in the workspace. To check which point object’s GPS information is too far away from the GPS reference position and will be excluded from registration, go to Operations 67 Chapter 6: Registering Scans SCENE LT 5.5 User Manual Registration Check GPS Consistency in the context menu of the workspace. If external references are available, GPS information will not be used for registration. 6.2.2 Compass If the scans were recorded with a FARO Focus3D Scanner equipped with a built-in compass, orientation information is available for the single scans. Enable this option to use this information as auxiliary information for the correspondence search. If the correspondence search cannot find any correspondences that are consistent with the compass data, this may be an indicator that the compass was influenced by environmental interference and the compass data will be ignored. If you disable this option, no compass data will be used for correspondence search at all. To use the compass data for certain scans only, you may enable or disable the use of the compass data for the single scans in their properties on tab Sensors (see chapter “Scan” on page 236 for more information). 6.2.3 Altimeter If the scans were recorded with a FARO Focus3D Scanner equipped with a built-in altimeter, height information from this sensor is available for the single scans. Enable this option to use this information as auxiliary information for the correspondence search. If the correspondence search cannot find any correspondences that are consistent with the information from the altimeter, its data will be ignored. If you disable this option, no altimeter data will be used for the correspondence search at all. You may enable or disable the use of the altimeter data for single scans in their properties on tab Sensors (see chapter “Scan” on page 236 for more information). 6.2.4 Inclinometer Normally inclinometer data is available, and this is used by default to level the scans during registration. Leveling ensures that the z-axis of the registered scan corresponds to the z-axis defined by the inclinometer. By this technique one reference can be replaced during registration. When registering with inclinometer data, this will be used as fully trusted information and all other registration objects will be used with lower priority. You can change this behavior in Tools Options Matching Place Scan Settings. This setting will not apply on already existing registrations; in these cases the properties of the Scan Fit objects determine the behavior. You can enable or disable the use of the inclinometer data for single scans in their properties on tab Sensors (see chapter “Scan” on page 208 for more information). To get best results with a FARO Laser Scanner Photon, the inclinometer should be calibrated after every startup of the scanner (see the FARO Photon or FARO LS manual for more information). This is not required for a FARO Laser Scanner Focus3D. 68 Chapter 6: Registering Scans SCENE LT 5.5 User Manual 6.2.5 Level Scan If no inclinometer data is available, you can level a scan manually. To do that, a horizontal plane is required. There are two possibilities to level a scan: • by picking one point, if the plane has an even surface. • by picking three points, if the plane is uneven, or if you need a high accuracy. Picking three points for planes makes sense for outdoor scans, or for a scans of an old building in which floors or ceilings often are more or less curved. • Level is only available when a 3D View of a scan is open. If you try Level in Quick View or Planar View, a new 3D View window will be opened. • Level always works top down. For example, if you have a room ceiling as a reference, you have to select a view in which the ceiling is shown in top view. It works like follows: 1. Open a scan from which you know that it contains a horizontal plane. Figure 6-3: Scan with horizontal plane In this example we have the courtyard which can be used as horizontal reference. 2. In the Structure View, right-click the scan’s name, then click Operations Registration Level, then click either Level with one click, or Level with three clicks. 69 Chapter 6: Registering Scans SCENE LT 5.5 User Manual Figure 6-4: Picking three scan points for levelling 3. Pick either one point, or pick three points of the horizontal plane. After picking the points, SCENE LT immediately starts to level the scan. Figure 6-5: Scan after levelling, in topdown view Click the Top view button in the 3D View toolbar to check if the scan is levelled correctly. The scan should be displayed in topdown view. 6.2.6 Manual Creation of Correspondences with the Correspondence Split View 1. Click the Correspondence Split View button. The screen splits up in two windows. 2. Drag and drop the scan to be displayed into the left window. 3. Drag and drop the scan to be displayed into the right window (or steps 2 and 3 vice versa, that does not matter). 70 Chapter 6: Registering Scans SCENE LT 5.5 User Manual Both scans have to have target references. If not, use Find .... or pick targets manually. 4. Rotate, move, zoom the two scans until you have them in a useful position, i.e. they show the same part of the scenery. 5. Click the Find Correspondences button . SCENE automatically starts to search for corresponding objects and will mark them with a label. A label shows a name with a maximum of 9 characters. If the name has more characters, only the last 8 will be displayed and an asterisk (*) will replace the missing characters. As soon as you click on a label, the name is shown completely. Figure 6-6: Correspondence Split View with automatically detected targets The label then has a small green field with a “C” which indicates that those correspondences were found automatically. The frame around the label symbolizes the quality of the correspondence: o Green: good quality o Yellow: compromised quality o Red: seriously compromised quality A field on the lower right side of the split view informs about the number of found correspondences and the quality of the result, shown by a traffic light. 6. Check if there are corner points or planes which could be useful and which are not marked yet. Select to mark a point, to mark a plane, 71 Chapter 6: Registering Scans SCENE LT 5.5 User Manual to mark a circular flat target, to mark a checkerboard target, to mark a sphere, to mark a slab. Mark the objects by hopping and clicking between the windows. If SCENE detects that the newly marked objects are correspondences, or one of the newly marked objects corresponds to an earlier marked object, it will mark them with a label as well. Force correspondences 7. Check if there are more objects which could be useful and which are not marked yet. 8. Click the Force Correspondences button . 9. Select the first object in the left view. 10.Select the corresponding object in the right view. 11.Select the second object in the left view. 12.Select the corresponding object in the right view, and so on. If SCENE detects that the newly marked objects are correspondences, it will mark them with a label. 13.Click the Force Current Correspondences between shown scans button . Figure 6-7: Correspondence Split View with corresponding and forced targets SCENE will now force the corresponding objects. Their label do now show a small blue field with a “C” in it which indicates that those correspondences are forced. 6.2.7 Deleting Correspondences Delete all current correspondences Click the Clear Correspondences button All correspondences will be deleted. The target objects remain. 72 Chapter 6: Registering Scans . SCENE LT 5.5 User Manual Delete specific correspondences In order to delete the current correspondences of a single object, of all objects in a scan or scan folder, select the command Operations Correspondences Delete Correspondences in the context menu of the object, scan or scan folder. You will be prompted to specify the types of correspondences to be deleted. Delete correspondences 6.3 Checking Results If there are a lot of scans in the workspace, it is sometimes difficult to maintain an overview of which scans have already been registered and what quality was achieved. The Scan Manager can help with this; it clearly displays the current status of the registration and indicates the registration results. 6.3.1 Scan Manager When placing scans within a scan folder or a cluster, a Scan Manager will automatically be created. You can also create a Scan Manager manually with the command New Scan Manager in the context menu of each scan folder or cluster. Figure 6-8: Scan Manager dialog Name – The name of the Scan Manager. Managed by – Name of the super ordinate Scan Manager. 73 Chapter 6: Registering Scans SCENE LT 5.5 User Manual Sub Manager – List of the subordinate Scan Managers. Used Settings button: Click the Used Settings button to check which type of registration generated this result. Get – Click the Get button to return to your old values after you changed something with the settings, or executed another registration while the Scan Manager was still open. Apply – Click the Apply button to apply changes made in the dialog. The Scan Manager also informs whether external references were used for the registration or not. The traffic lights next to the Scan Manager indicate whether it contains good or failed Scan Fits. If a traffic light next to a Scan Manager is red, this means that this Scan Manager contains bad Scan Fits. Green means that all the quality criteria are met. Amber shows that at least one quality criterion is somewhat compromised. If there is a symbol next to a Scan Manager or a Scan Fit, this means that registration could not be executed, for example because of missing references. A Scan Fit displays the deviation of a scan’s objects against the objects of the neighboring scans. The Scan Manager displays a summary of individual Scan Fits. It doesn’t calculate how uncertainty propagates from scan to scan. Especially when building a chain of scans, the overall uncertainty might be much larger than that of the individual Scan Fits. If you want to see the critical fits of a subordinate Scan Manager, double click onto this Scan Manager (in this example the Scan Manager of cluster “floor1”) to open it. Switch to the tab Scan Results. 6.3.2 Scan Results Figure 6-9: Scan Results dialog 74 Chapter 6: Registering Scans SCENE LT 5.5 User Manual Scan Results gives you a list of all Scan Fits managed by the Scan Manager and shows the overall quality of each registration (see also chapter “Scan Fit” on page 248). This is symbolized by a traffic light too. Double-clicking on a fit object in the list opens its properties dialog. The average tension of each registration is calculated in the second column of this table: the lower the value, the better the registration result. Here you can easily see which registrations failed or which registration results are bad. To identify the critical reference pairs which are responsible for the bad fit, you can switch to tab Target Tensions. If the results are not satisfying, you can select Correspondence View or Correspondence Quick View to alter or add references. Get – Click the Get button to return to your old values after you changed something with the settings, or executed another registration while the Scan Manager was still open. Apply – Click the Apply button to apply changes made in the dialog. 6.3.3 Target tensions Figure 6-10: Target Tensions dialog Target Tensions shows all reference pairs used for the scan registration, sorted by their tension. The value Tension describes the discrepancy in the overall coordinate system between the position and the orientation of the two corresponding reference objects in Scan 1 and Scan 2. With reference points the distance between the positions of the two reference points serves as input for the calculation of the tension. With planes, slabs or pipes the position and the direction of the objects serve as input for the calculation of this value. Values close to zero indicate a good registration result. Here you can easily identify reference pairs which are causing problems in the registration. Clicking on the scan name selects the corresponding reference in this scan, double clicking opens the reference’s properties. Weighted Tensions – External references and inclinometer data have higher weightings in the registration algorithm. When you activate this option, these different weightings will be considered in the calculation of the tensions. 75 Chapter 6: Registering Scans SCENE LT 5.5 User Manual Full Hierarchy – When activated, the reference pairs of the selected Scan Manager and those of its subordinated Scan Managers will be displayed. Weighted Statistics Mean – Mean value over all tensions. Deviation – Deviation over all tensions. Min. – Minimum tension Max. – Maximum tension Get – Click the Get button to return to your old values after you changed something with the settings, or executed another registration while the Scan Manager was still open. Apply – Click the Apply button to apply changes made in the dialog. The use of Weighted Tensions also implies that the shown tension cannot be interpreted as a distance in common units of length! As external references are weighted differently from scan references, their tensions are much higher. Locate If you are not sure which correspondence stands for which object, you can prompt the Scan Manager to locate the correspondence. 1. Right-click on the entry. 2. Select Locate in the context menu. The view of the scan will change in a way that the correspondence is easy to find. Set Anti Correspondence The Scan Manager can also be used to mark certain correspondences as invalid. 1. Right-click on the offending entry. 2. Select Set Anti Correspondence in the context menu. These two objects are now no longer considered as being corresponding to each other, and the next registration will achieve a different result. You can re-execute the registration of scans with the command Update Scans in the context menu of the Scan Manager. This update will not refresh the values in opened Scan Manager windows. To see the updated values you have to open a new Scan Manager window. 76 Chapter 6: Registering Scans SCENE LT 5.5 User Manual 6.3.4 Scan Point Tensions Figure 6-11: Scan Point Tensions dialog Tab Scan Point Tensions shows all reference cluster pairs used for the scan registration. Mean – this value describes the discrepancy between the two corresponding scans. <4 mm – Number of points with a failure <4mm, displayed in percent. Overlap – Shows the amount of scan points which overlap in the two scans in percent. Used points – Shows the number of scan points that are used for statistics calculation. Details – this overview shows the values listed in the Scan Point Tensions dialog , and, in addition, a histogram showing the point distances. 77 Chapter 6: Registering Scans SCENE LT 5.5 User Manual Figure 6-12: Scan Point Tensions details Full Hierarchy – When activated, the reference pairs of the selected Scan Manager and those of its subordinated Scan Managers will be displayed. Overall Statistics Mean – Mean value over all tensions. <4 mm – Mean value of points <4mm in percentage. You can re-execute the registration of scans with the command Update Scans in the context menu of the Scan Manager. This update will not refresh the values in opened Scan Manager windows. To see the updated values you have to open a new Scan Manager window. Get – Click the Get button to return to your old values after you changed something with the settings, or executed another registration while the Scan Manager was still open. Apply – Click the Apply button to apply changes made in the dialog. 6.3.5 Lock and Unlock the Scan Manager If you finished your work with all scans in a cluster, you can lock its Scan Manager. The relative position of this scans to each other will not be changed anymore. The cluster itself is still used for the registration with other clusters or scans outsides the locked cluster. If there are Scan Managers in a lower level to the selected Scan Manager, this Scan Managers will not be locked. You can lock and unlock a Scan Manager in • its dialog (see chapter “Scan Manager” on page 73). • its context menu. Here, you can lock or unlock the Scan Manager you currently selected, 78 Chapter 6: Registering Scans SCENE LT 5.5 User Manual Figure 6-13: Locked Scan Manager Lock All and Unlock All If there are Scan Managers in a lower level to the selected Scan Manager, this Scan Managers will be locked or unlocked as well. Figure 6-14: Scan Manager after executing Lock All 79 Chapter 6: Registering Scans SCENE LT 5.5 User Manual 80 Chapter 6: Registering Scans SCENE LT 5.5 User Manual Chapter 7: Working with Scan Data and Objects This chapter describes how you can adapt scan data to your needs. 7.1 Selecting Scan Points 7.1.1 Selecting Scan Points in the Planar View or the Quick View In the Planar View and in the Quick View, it is possible to select scan points and then apply a variety of commands to this group of points. For example you may apply an object fit on this group .(see chapter “Working with Objects” on page 96), • • delete them, • export them into a CAD system (see chapter “Exporting Objects in DXF, IGES and VRML data formats” on page 112), • or create a new scan from the selected scan points (see chapter “Creating Scans from Selected Scan Points” on page 115). Selected scan points are colored yellow. There can only be one selection simultaneously in all views, in other words, if you make a selection in one view, the selection disappears from the view worked on before. First, choose an appropriate button from the toolbar to select scan points: • Rectangular selection button – Select a rectangular area by first defining a corner of the rectangle by clicking the left mouse button and holding it down. Then drag the mouse to define the opposite corner of the rectangle. You can then release the mouse button. • Linear selection button – Select an arbitrarily shaped line of scan points by first defining the starting point of the line with the left mouse button. If you now release the mouse button, you can move the mouse to the next point of the line and click to fix the point. A straight connection is drawn automatically between these two points. You can also hold the mouse button down - then all the scan points that you move over with the mouse are selected. Lock the selection by doubleclicking with the left mouse button. The linear selection has a thickness of one point. • Polygonal selection button – Select an arbitrarily shaped area of scan points using the same technique as for linear selection. However, when completing the selection, the line will be closed; in other words, the last fixed point is connected to the starting point. The selection comprises all the scan points that are enclosed within the outline. • Circular selection button – Select a circular area of scan points. Start the selection process by clicking with the left mouse button; a circle with the radius just set is displayed. You can change the radius by turning the scroll wheel on the mouse. Click with the left mouse button again to place the selection in the chosen location and to end the selection process. • Polygonal edge selection button – Select an arbitrarily shaped area of scan points, with the polygon following the visible edge in the scan points. The selection behaves like the polygonal selection. If you reach an edge, i.e. an area in which there is a noticeable difference in the reflection value, the selection will automatically follow this edge. If 81 Chapter 7: Working with Scan Data and Objects SCENE LT 5.5 User Manual there is no such edge, a straight connection is drawn. If you are not confident with the polygon, you can undo the last part of the polygon by backtracking it in the opposite direction. You can always backtrack to the last fixed point. With a click on the right mouse button, you switch edge detection on or off, and you can cancel the selection. • Elliptical selection button - Select an elliptical area of scan points. Start the selection process by clicking with the left mouse button on the starting point of the desired elliptical selection. An ellipse with the starting point of the major axis just set is displayed. You can change the length of the minor axis (i.e. the “width”) by turning the scroll wheel on the mouse. Click with the left mouse button again to select the end point of the major axis (i.e. the “length”) and to end the selection process. If you wish to select an area that you cannot see with the set line of sight, you can also switch into navigation mode during the selection process. Simply press the control key. There are different types of selection combinations, which determine what effect the next selection to be executed has on the selection that already exists. Select the required combination type from the toolbar: • New selection button selection. – The next selection replaces the existing • Add selection button – Combination mode whereby the next selection is added to the existing selection. • Subtract selection button – Combination mode, whereby the next selection is removed from the existing selection. • Intersect selection button – Combination mode whereby the difference of the two selections is retained. You can also store selections temporarily in region objects and reactivate them when required. You can then use a saved selection, such as a selection just made with the mouse; in other words, you can add to the existing selection, remove it or cut it. To create a region, simply select Create Objects Region from the context menu of the selection. 7.1.2 Selecting Scan Points in 3D View Compared to the Quick View and the Planar View, operations applicable to point selections in the 3D View are limited; you may • delete the selected scan points, • export them into a CAD system (only available for 3D selections made on the basis of points from scan point clouds and the project point cloud; not available for points of scans; see chapter “Exporting scan points” on page 133), • for point clouds: create objects, • for point clouds: create objects, • or create an object fit (only available for planes and mean points on 3D selections made on the basis of points from scan point clouds and the project point cloud; not available for points of scans). For more information on creating objects from point selections, see chapter “Working with Objects” on page 96. The available selection tools are: 82 Chapter 7: Working with Scan Data and Objects SCENE LT 5.5 User Manual • The polygon selection known from the Planar View or the Quick View is also available in the 3D View. The polygon selection only applies to scan points organized in a row-column order. If the points of scans and scan point clouds or the project point clouds are visualized in the same 3D View (combined viewing of the point cloud and scan points of scans), it only applies on the scan points of the loaded scans. • The 3D polygon selection is similar to the polygon selection tool above, but only selects points that are organized in a spatial data structure (points from scan point clouds and the project point cloud). • The 3D brush selection can be used similar to brush tools known from 2D image processing programs and works with scan- or project point clouds only. Traditional row-column based scan points cannot be selected with the 3D brush selector. The brush works in three dimensional spaces, meaning that you can use the mouse to literally paint points which are going to be selected. Drag the mouse while holding down the left mouse button in order to paint the points. The 3D brush has the shape of a sphere. A transparent red circle will highlight the area where the selection sphere is currently located. Moving the cursor around while having the brush selector tool activated will highlight the scan points that are currently within the selection sphere. Use the mouse wheel to modify the radius of the sphere. Hold the shift key to modify the sphere radius more quickly. Points that are currently within the selection sphere are highlighted. The color of point highlighting depends on the current selection mode: o New Selection : Yellow o Add to selection o Subtract from selection : Red o Intersect with selection : Blue : Green The selection modes add, subtract, and intersect can be used to create complex selections. Brush selections can be combined with polygon selections this way, too. 7.2 Tailor a Point Cloud View with the Clipping Box Clipping boxes provide an easy access to areas of interest of a 3D point cloud. They allow slicing the point cloud and clipping away specific areas which enables you to display or hide certain points of the 3D point cloud. There are two types of Clipping Boxes: • Clipping boxes with the points outside of the box hidden. Only the points inside the box are displayed. • Clipping boxes with the points outside the box displayed, points inside the box are hidden. Clipping boxes may also be used to select scan points in the 3D View in order to perform certain operations on these points. • Clipping boxes can be applied to the points of scan point clouds and the project point cloud, not to the points of scans. • Clipping Boxes only work with unloaded scans. 83 Chapter 7: Working with Scan Data and Objects SCENE LT 5.5 User Manual Figure 7-1: 3D View without (upper picture) and with Clipping Box (lower picture) 7.2.1 Creating a Clipping Box Open a 3D View and navigate to the area of interest. There are various ways to create a Clipping Box: Automatically (default) • Click the Create a new Clipping Box button in the 3D View toolbar. A Clipping Box will be created close to the center of the current 3D View. The created Clipping Box will be scaled so that it covers roughly two thirds of the screen. Create ClippingBox attached to Surface with one click • Click the Create a new Clipping Box button in the 3D View toolbar, or select this option from the drop down menu of the Create a new Clipping Box button • . Then select a point in the view in order to determine the surface. A Clipping Box will then be created with one of its faces being coplanar to the defined surface, and with the selected point in the center. The created Clipping Box will be scaled so that it covers roughly two thirds of the screen. 84 Chapter 7: Working with Scan Data and Objects SCENE LT 5.5 User Manual Create ClippingBox attached to Surface with three clicks • Select this option from the drop down menu of the Create a new • Then select three points in the view in order to determine the surface. A Clipping Box will then be created with one of its faces being coplanar to the surface defined by the three picked points. The Clipping Box will be scaled in such a way as it exactly encloses the picked points. Aligned to a limited or unlimited plane object • Select New Aligned Clipping Box in the context menu of a plane object to align a Clipping Box to the object: Clipping Box button in the 3D View toolbar. o Unlimited plane: The new Clipping Box will be created as a unit cube centered on the reference point of the plane. Its faces will be parallel to the selected plane. o Limited plane: The new Clipping Box will tightly enclose the boundary polygon of the limited plane. The created Clipping Boxes are saved to the workspace for later use and will be added to the folder ClippingBoxes in the Structure View. Once created, you can reposition and resize the Clipping Box. See chapter “Manipulating a Clipping Box” on page 85 for more information. • Once created, the rotation point of the view will be set to the center of the Clipping Box. • Creating Clipping Boxes does not delete any points from the point cloud. The points outside or within the Clipping Box are simply hidden and may be displayed again at any time. 7.2.2 Manipulating a Clipping Box You may change the transformation of a Clipping Box by rotating, moving or changing its size. For this, select the Clipping Box in the 3D View or in the Structure View. A floating tool bar will appear providing the manipulation functionality. Figure 7-2: Clipping box toolbar Scale button Select the Scale button from the toolbar to resize the Clipping Box. Handles will appear on the Clipping Box allowing you to resize it. 85 Chapter 7: Working with Scan Data and Objects SCENE LT 5.5 User Manual Figure 7-3: Resizing a Clipping Box Dragging one of the red, blue or green handlers allows resizing the Clipping Box by moving the corresponding face of the box. Dragging the grey cubes at the corners allows proportional resizing of the Clipping Box. When dragging one of the handlers, the length of the movement will be indicated in the view as shown in the picture below. Figure 7-4: Length of movement 86 Chapter 7: Working with Scan Data and Objects SCENE LT 5.5 User Manual Rotate button Select the Rotate button from the toolbar to rotate the Clipping Box. Handles will appear on the Clipping Box allowing you to rotate it around different axes. Figure 7-5: Rotating a Clipping Box Dragging one of the red, blue or green handlers allows rotating the Clipping Box along the corresponding axis. Move button Select the Move button from the toolbar to move the Clipping Box. Handles will appear on the Clipping Box allowing you to change the position of the box. Figure 7-6: Moving a Clipping Box 87 Chapter 7: Working with Scan Data and Objects SCENE LT 5.5 User Manual Dragging one of the handlers (white arrows) allows moving the Clipping Box within two dimensions. The dimensions depend on the used handler. You may also use the keys 2, 4, 6 or 8 on the number pad instead. • Change the size of the handlers with “+” key (increase size) and “-” key (decrease size). • You may undo (and reapply) your transformation changes with the following buttons of the Clipping Box toolbar: o Undo the last transformation change with . o Redo the last transformation change with . o Restore the initial transformation of the Clipping Box with 7.2.3 Hiding and Displaying Points by Means of Clipping Boxes Hide button You may select which points are displayed or not with the Hide button of the Clipping Box toolbar. Hide exterior: Hide the points outside the selected Clipping Box (this is the default setting). Hide interior: Hide the points inside the selected Clipping Box. This does not have an effect on the visible objects in the 3D View. 88 Chapter 7: Working with Scan Data and Objects . SCENE LT 5.5 User Manual Figure 7-7: Exterior hidden (left) and interior hidden (right) Depending on this setting the boundaries of the Clipping Box as well as the icon in the Structure View will be displayed in different colors: • transparent blue when the exterior is hidden. • transparent orange when the interior is hidden, This setting will be saved in the Clipping Box properties for later use and may also be changed in the properties dialog. 7.2.4 Deleting Points by Means of Clipping Boxes You may delete points of all active Clipping Boxes. 1. Execute Hide exterior or Hide interior to the Clipping Boxes. 2. Right-click an active Clipping Box, then select o Delete visible points of all active clipping boxes: All visible points of all active Clipping Boxes will be deleted, no matter if they are inside or outside the Clipping Boxes. 89 Chapter 7: Working with Scan Data and Objects SCENE LT 5.5 User Manual o Delete invisible points of all active clipping boxes: All invisible points of all active Clipping Boxes will be deleted, no matter if they are inside or outside the Clipping Boxes. 7.2.5 Enabling / Disabling Clipping Enable/Disable clipping button You may enable or disable clipping of the selected Clipping Box with the Enable/Disable clipping button of the Clipping Box toolbar. When disabled, the points hidden by this box will be displayed again; the color of the Clipping Box boundaries and its icon in the Structure View change to grey. Figure 7-8: Disabled Clipping Box This setting will be saved in the Clipping Box properties for later use and may also be changed in the properties dialog. Toggle application of Clipping Boxes button You may also enable or disable clipping of all available Clipping Boxes globally with the Toggle application of Clipping Boxes button of the 3D View toolbar. This setting will not be saved in the properties of the individual Clipping Boxes. 7.2.6 Working with Multiple Clipping Boxes You can combine the point visibility settings of several Clipping Boxes. For this, the following rules apply: • • Adding a Clipping Box with hide exterior enabled to already available and active Clipping Boxes: o The points inside this box will always be added to the currently visible points, even if this box intersects with boxes that have their interior hidden. o The points outside this box will not be hidden. In that case the clipping settings of the already available Clipping Boxes have the precedence. Adding a Clipping Box with hide interior enabled to already available Clipping Boxes: 90 Chapter 7: Working with Scan Data and Objects SCENE LT 5.5 User Manual o This will cut out the points that are inside of this box from the points that are visible at that time, even if this box intersects with boxes that have their exterior hidden (and their interior displayed). o The points outside this box will not be displayed. In that case the clipping settings of the already available Clipping Boxes have the precedence. The order of creation of the Clipping Boxes thus matters and has an effect on which points are displayed or not. Example: Assume you have a large point cloud of a building and its surrounding area, similar to this: Figure 7-9: Example: Complete point cloud Now you add the first Clipping Box around the main building that has its exterior hidden (Clipping Box 1). 91 Chapter 7: Working with Scan Data and Objects SCENE LT 5.5 User Manual Figure 7-10: Example: First Clipping Box with hide exterior added All the points outside the Clipping Box are now hidden, only its interior is displayed. But now you would like to display the points of the smaller buildings in front f the main building. So you add a new Clipping Box with hide exterior enabled (Clipping Box 2). Figure 7-11: Example: Second Clipping Box with hide exterior added The points within Clipping Box 2 are now added to the SCENE LT and displayed, too. But now you would like to hide the points of the trees and roads in front of the buildings that are now also visible. So you add three new Clipping Boxes but this time with hide interior enabled (Clipping Boxes 3 to 5). Figure 7-12: Example: Clipping boxes 3 to 5 with hide interior added 92 Chapter 7: Working with Scan Data and Objects SCENE LT 5.5 User Manual The points in the overlapping areas between Clipping Boxes 3 to 5 and Clipping Box 2 are now removed from the scene. But now you realize that one of these new Clipping Boxes also removed a small building that you would like to have displayed in the view. So you add a new Clipping Box with hide exterior enabled (Clipping Box 6). Figure 7-13: Example: Sixth Clipping Box with hide exterior added The points inside this box will now be added to the scene no matter whether they overlap with the Clipping Boxes that have their interior hidden (Clipping Boxes 3 to 5). If you would have added this Clipping Box before adding Clipping Boxes 3 to 5, the overlapping points between them and Clipping Box 6 would be hidden; the order of the creation of the Clipping Boxes would matter in this case. If you would like to have one or more of the available Clipping Boxes not being regarded in the current scene, you may disable them (see chapter “Enabling / Disabling Clipping” on page 90) or delete them from the workspace. 7.2.7 Toggling Visibility of Clipping Boxes Clipping box visibility button Toggle the visibility of a Clipping Box • With the Clipping box visibility button • in its context menu, • or in its properties dialog in the Clipping Box toolbar, Disabling the visibility of a Clipping Box will only hide its boundaries; the Clipping Box is still active (if clipping is enabled) and it still has effect on the visibility of the points in the 3D View. 7.2.8 Creating Multiple Clipping Boxes Along an Axis of an Existing Clipping Box You can create multiple Clipping Boxes along one of the three axes of an already available Clipping Box which also serves as a template for the new Clipping Boxes. This allows slicing the point cloud into specific areas of interest and can be a useful feature, for example to divide a building into its several floors. 93 Chapter 7: Working with Scan Data and Objects SCENE LT 5.5 User Manual Do the following to create multiple Clipping Boxes along an axis of an already available Clipping Box: 1. Open the 3D View. 2. Navigate to the Clipping Box which should serve as the template. This Clipping Box must have the clipping mode Hide Exterior. 3. Select Create Clipping Boxes Along an Axis in context menu of this Clipping Box. 4. Make your settings in the appearing dialog: Figure 7-14: Clipping boxes along an axis - settings dialog Axis – Select the axis of the existing Clipping Box along which the new Clipping Boxes will be generated. A preview of the new Clipping Boxes will be available in the current 3D View. Disable Clipping - Disable clipping in the preview. Sign of Axis – Select the direction of the axis in which the Clipping Boxes will be created. Settings - Define the number of Clipping Boxes to be created and the distance between the Clipping Boxes. There are two ways to define the distance, either between the origins of the Clipping Boxes or between the adjacent faces of the boxes. 94 Chapter 7: Working with Scan Data and Objects SCENE LT 5.5 User Manual Figure 7-15: Clipping boxes along an axis - preview 5. Click OK to create the Clipping Boxes with the selected settings. The initial Clipping Box will be moved to the new Clipping Box folder / container and will be renamed according to the folder’s name. The other Clipping Boxes will get the name of the folder and an enumeration. 7.2.9 Working with Clipping Box Containers A Clipping Box container contains all the Clipping Boxes which were created along an axis of an existing Clipping Box (see chapter “Creating Multiple Clipping Boxes Along an Axis of an Existing Clipping Box” on page 93). It has a transformation which consists of scale, rotation and translation. You change change the transformation of a Clipping Box container by rotating, moving or changing its size, similar to manipulating the transformation of single Clipping Boxes. For more information, see chapter “Manipulating a Clipping Box” on page 85. Figure 7-16: Clipping box container with resize handlers 95 Chapter 7: Working with Scan Data and Objects SCENE LT 5.5 User Manual The transformation changes will be proportionally applied to the Clipping Boxes within the container. • All Clipping Boxes within a Clipping Box container have constrained functionality. The single Clipping Boxes cannot be rotated individually, their clipping mode cannot be changed. Scaling and translation of each Clipping Box is also restricted. The Clipping Boxes cannot leave the volume of the Clipping Box container. • Change the visibility of the Clipping Box container and the Clipping Boxes in the container with the Clipping box visibility button in the Clipping Box toolbar or in its context menu. The visibility state of the Clipping Box container is a global state and not view specific. This state will be saved with the workspace. 7.2.10 Exporting Scan Points by Means of Clipping Boxes You may also export 3D points into different file formats using the active Clipping Boxes. For this, use the command Import / Export Export 3D selection using active Clipping Boxes in the context menu of the 3D View or a Clipping Box. SCENE LT will then create a 3D selection as described in chapter “Exporting Scan Points by Means of Clipping Boxes” on page 96 and export the selected points afterwards. Additionally, you may export the points in a local coordinate system defined by one of the available Clipping Boxes. For this, select Use Local Coordinates in the export dialog and select the Clipping Box from the available list. For more information on exporting scan points, see chapter “Exporting Data” on page 187. 7.3 • Only the points of scan point clouds or the project point cloud will be exported. • The Export menu shows the Color/grey option as well as the Full scan option greyed out, because they don't make sense for a point cloud. Working with Objects Within SCENE LT, a variety of objects are available that help analyzing the scans, that may be used to enrich the scan data with additional information or that may be used as reference objects for scan registration, especially, if you wish to use the Target based registration. These are: • Documentation objects, which provide information about user defined points of interests in the scan. • Simple geometric objects identified in a scan, like spheres, planes, slabs, lines, points, pipes or rectangles. • CAD models for comparing scanned reality with the existing plans. • Pictures taken with a digital camera. 96 Chapter 7: Working with Scan Data and Objects SCENE LT 5.5 User Manual 7.3.1 Geometric Object Types Point Objects Point The point is the simplest geometric object. It is identified by its name and its position in the room. Points can be fitted in the Quick View, the Planar View and the 3D View using the Point Object Marker . Figure 7-17: Point object Sphere When registering scans, another geometric object is of particular importance: the sphere. A sphere is determined by its position and its radius, and its central point is used for the registration. Hence, you can add global position information to spheres as well (see chapter “Geometric Object Types” on page 97 for more information). There are two types of fit: • Fit with a free radius Apart from the position, the radius of the sphere is also calculated from the scan points. Use the command Create Objects Sphere. • Fit with preset radius This type is particularly well suited to fitting survey spheres, because their radius is known in advance. Use one of the following to create spheres with a preset radius: o the command Create Objects Sphere Radius, o the Sphere object marker , the automatic recognition of objectsYou can predefine one or more sphere radiuses under Tools Options Matching Match Sphere Settings (see chapter “Tools” on page 174). The automatic detection of sphere points brings best results if the scans are loaded with their original grey values. If the scan is loaded in color, it is best to unload the scan first and reload it with its grey values. Change the loading options under Tools Options Scan Data to Use grey first. For more information, please see chapter “Tools” on page 174). 97 Chapter 7: Working with Scan Data and Objects SCENE LT 5.5 User Manual Figure 7-18: Fitted survey sphere Checkerboard Points A further, often used type of paper targets is the checkerboard target. A checkerboard target fit determines the center point of the target’s four quadrants. This point is used for scan registration. Figure 7-19: Checkerboard target and fitted checkerboard point To create such checkerboard points, use the Object Marker tool .. Mean Point You can determine the mean point of the selected scan points using Create Objects Mean Point. The mean point is very useful for determining a point on a level surface. Creating a mean point guarantees that the point is situated in the center of mass of the selection. In the 3D View, mean points can only be created from a point selection that was made on the points of a scan point cloud or the project point cloud. Mean points created in the 3D View will not be used for registration. Contrast Mean Point The circular flat target is one type of paper targets which may be used for scan registration. The circular flat target usually consists of a white circle on a dark background. The mean point of the circle is used for the scan registration. 98 Chapter 7: Working with Scan Data and Objects SCENE LT 5.5 User Manual Figure 7-20: Circular flat target In order to determine this mean point, select the target in the scan and use the object marker tool or the command Create Objects Contrast Mean Point in the context menu of the selection. The selection should contain the complete circle and the selection should be made on the dark background. The shape of the selection is not important; only that it contains the complete circle. In general, it is recommended to use checkerboard targets instead of circular flat targets. The recognition of checkerboard targets is usually more precise and SCENE LT is able to automatically identify those targets in the scans. This makes reference creation and registration less time consuming. Corner Point Corner points are formed by two intersecting perpendicular lines. Additionally to the position of the corner point it also contains a planarity that describes the evenness of the point’s environment. Adding GPS Information to Point Objects Figure 7-21: Point properties Once created, you may add GPS information to any point object. This information will be used for the correspondence search and for registering the scans. 1. Open the properties dialog of the point object or its fit object. 2. On tab Point Properties, use the Add GPS Position button. 99 Chapter 7: Working with Scan Data and Objects SCENE LT 5.5 User Manual The properties dialog will be extended by an additional tab GPS Reference to enter the required information. Figure 7-22: GPS reference, format GPS Figure 7-23: GPS reference, format UTM Format – Use the drop down menu to choose whether to specify the GPS information in the form of GPS or UTM coordinates. Position - For the GPS coordinates latitude and longitude, please use the decimal degree notation; separate both by space. Altitude – Enter the altitude above sea level. Accuracy – Specify the accuracy for the given GPS position. Correspondence search will only accept such potential corresponding objects that do not conflict with this given accuracy. Once GPS information is available for the point object, the Add GPS Position button on tab Point Properties will be replaced by a button to remove the coordinates. Planes There are two types of plane in SCENE LT: • Infinite planes as idealized planes; they are infinitely large and have no border. • Limited planes as planes with a defined border. 100 Chapter 7: Working with Scan Data and Objects SCENE LT 5.5 User Manual Figure 7-24: Properties of a plane In both cases the position and orientation are described by the position of a point of the plane and a so-called normal. A plane is identified by the fact that it is level, i.e. there is precisely one direction that the plane stands perpendicular to (actually, there are two such directions; however, they are exactly opposite one another). This direction is called the normal of the plane. You can flip the direction of the normal by using the Flip command in the plane’s properties. Planes can be used for registering scans by using walls, floors or ceilings as a reference. With plane objects two scans facing to the same side of a wall can be aligned to each other. If you want to align two scans from opposite sides of a wall you have to use the slab object instead of the plane object. Infinite planes Infinite planes can be created from a point selection in the Planar View, the Quick View or the 3D View. To create an infinite plane mark the scan points in the view and select Create Objects Plane in the context menu of the selection. In the 3D View, planes can only be created from a point selection that was made on the points of a scan point cloud or the project point cloud. Planes created in the 3D View will not be used for registration. Limited Plane – Expand Plane There are several ways to create limited planes: • Manually with Create Objects Expand Plane in the context menu of a points selection in the Planar View or the Quick View. • With the Object Marker tool. • From an infinite plane with New Plane with Border from the context menu of the infinite plane • A limited plane is created in combination with an automatic plane expansion. With automatic plane expansion, a plane is created that continues to enlarge until the adjacent scan points fail to meet the expand plane parameters. You can set these parameters in the Expand Plane Settings which can be found under Tools Options Matching (see below). In so doing, not only the scan point itself is examined, but also its direct surrounding area. For example, if the scan point is situated in a surrounding area which is clearly not flush with the expanding plane, this point would not be added to the plane. In addition, the border line for the plane is also calculated. When 101 Chapter 7: Working with Scan Data and Objects SCENE LT 5.5 User Manual recording, since the scan points were not explicitly oriented to the border of the plane, it is also not practical conversely, for the border line to follow each scan point of the border area. You would then get a very jagged border line. Therefore, the calculated border line does not compulsively follow every single scan point but is smoothed out. You can set the smoothing parameters in the Expand Plane Settings. Figure 7-25: Expand plane settings Automatic Detection – Setting for the automatic detection of limited planes. This feature is not available and disabled in SCENE LT LT. Max. Distance – The maximum distance of a scan point from the plane. Max. Normal Diff. – The maximum deviation of the normal in the area surrounding a scan point from the normal of the plane to be expanded. Max. Local Normal Diff. – The maximum standard deviation of the normal in the surrounding area of a scan point. Planar Test Size – The size of the analyzed surrounding area. Min. Border Split [m] – Smoothing parameter for the border line in the 3-dimensional space. Min Border Split [px] – Smoothing parameter for the border line in the Planar View. You can set the defaults using the Defaults button. Intersection Point The intersection point is formed by the intersection of a plane with the virtual laser beam of the scanner. To create an intersection point, you first of all need a plane. 1. In the context menu of the plane, select the command New Intersection Point. 2. Move the mouse pointer to the place in the scan where you want the intersection point to be. 3. Click with the left mouse button. You therefore select the direction in which the intersection point lies from the scanner. The distance to the scanner does not, however, come from the scan point now under the 102 Chapter 7: Working with Scan Data and Objects SCENE LT 5.5 User Manual mouse pointer, but from the intersection of this direction with the plane selected beforehand. Figure 7-26: Fit object of the intersection point The fit object of the intersection point shows with which plane the intersection took place. If the parameters of the plane were changed, perhaps by a new fit of the plane, the intersection point is automatically recalculated! Slab A slab is similar to a plane and may also be used as a reference for the scan registration. Like planes, slabs can be created from floors, walls or ceilings; but in contrast to a plane, the slab object will be used to align two scans recorded from the opposite sides of the slab. For this purpose you need to specify the slab’s thickness and the side of view in its properties dialog. There are various ways for fitting a slab. You can create slabs • with the object marker tool (for more information see chapter “Working with Objects” on page 96.), • from a selection of scan points (with the command Create Objects Slab in the context menu of the selection) or • from a plane object (New Slab by Plane in the context menu of the plane object). 103 Chapter 7: Working with Scan Data and Objects SCENE LT 5.5 User Manual Figure 7-27: Slab properties To define the slab, you have to specify its name, its visible face (Face A or Face B) and its thickness either in its properties dialog or in the slab fit dialog. When registering scans which were recorded from the opposite sides of the same wall, you may use this wall as a reference by defining it as a slab object. In both scans, the corresponding slab objects must then have the same Thickness but a different value for the Face. Pipe The pipe represents a cylindrical object. It is specified by its outside diameter and length. To create a pipe, go to Tools Pipe Fit. First, you have to draw a line along the pipe’s axis, and then draw a line to indicate the pipe’s circumference. SCENE LT will then automatically match a pipe object into your scan. Figure 7-28: Pipe creation 104 Chapter 7: Working with Scan Data and Objects SCENE LT 5.5 User Manual Figure 7-29: Pipe in 3D View Another way to create a pipe is from a selection of scan points. To create a pipe object from a selection of scan points, use the command Create Objects Pipe in the context menu of the selection. If necessary you can adjust the pipe’s diameter and length in its properties dialog (see also chapter “Pipe” on page 220 and “Pipe Fit” on page 221). Pipes can be used as references for registering scans. Lines Line detection is based on a combination of reflectance contrast and distance discontinuity. Lines are in particular a useful visualization for main structures of the scan and can help to orient oneself in the 3D View when not all scans are displayed. Lines may also be used as natural references for the registration of scans. The automatic detection of lines brings best results if the scans are loaded with their original grey values. If the scan is loaded in color, it is best to unload the scan first and reload it with its grey values. Change the loading options under Tools Options Scan Data to Use grey first. For more information, please ssee chapter “Tools” on page 174). 105 Chapter 7: Working with Scan Data and Objects SCENE LT 5.5 User Manual Figure 7-30: Lines in the scan Rectangles Rectangle detection is based on line detection and searches for rectangular structures in the line detection’s result. A rectangle consists of its midpoint (position), the normal and a major- and minor axis that define the extent of the rectangle. Mesh When an object is scanned, the scan points represent individual spots on the surface of the object. If you want to reconstruct the surface itself, you can create a mesh which takes the scan points as a basis and approximates the surfaces within certain limits. This approximation is done with a set of triangles. Depending on the curvature of the real surface and the required approximation quality, the number of triangles can vary between a few and a huge number. The approximation quality can be controlled by a set of parameters, which you can enter when you create a mesh: Figure 7-31: Mesh generation parameters 2nd level simplification – Activate 2nd level simplification based on the distance between scan point and nearest triangle. Distance threshold – A triangle approximates all scan points within this distance threshold. The smaller the value, the more triangles you’ll get. Activate triangle removal – If an object is in front of a different object, neighboring scan points shouldn’t be connected by triangles. Here you can activate the removal of triangles which match both following requirements. Angle below – The angle between the triangle and the scanner. The larger the value, the more triangles will be removed. Edge length above – The edge length of the triangle. The smaller the value, the more triangles will be removed. Although the resulting mesh may be a relatively small collection of triangles, its appearance can show more details. This is done by a texture, which is similar to a photo glued onto the triangles. By default the display is with textures. 106 Chapter 7: Working with Scan Data and Objects SCENE LT 5.5 User Manual Figure 7-32: Mesh with and without texture 7.3.2 Creating Geometric Objects SCENE LT supports the creation and fitting of a variety of simple geometric objects, like points, planes, spheres, pipes or lines. The creation of geometric objects is also important for scan registration as they may be used as reference objects to register the scans. So, in most cases, the creation of such reference objects is an essential work step in processing your scan project. You may create geometric objects from scratch or from the scan points. Create Geometric Objects from Scratch 1. In the Structure View, right-click a scan or scan folder and select the object type under New. 2. In the dialog, enter the geometric parameters of the object, such as the object’s position, location in the room or its size. The creation of objects from scratch is seldom used. Normally you get their parameters from the scan points. Creating Geometric Objects from Scan Points Geometric objects exist in the scans, too; therefore it is far more interesting to get their parameters from the scan points. There are several possibilities to fit objects from the scan points. 1. Select an area of scan points in the Quick View or in the Planar View of a scan. 2. Selecting the appropriate command in the context menu of the selection under Create Objects. SCENE LT will fit the geometric object. 107 Chapter 7: Working with Scan Data and Objects SCENE LT 5.5 User Manual Figure 7-33: Context menu: Scan point selection The manual creation of planes and mean points is also available from a 3D selection in the 3D View. Note that this selection must be made on the basis of the points of a scan point cloud or the project point cloud. In the 3D View, objects cannot be created on the basis of the row-column organized points of a scan. Objects created in the 3D View will be added to the workspace into folder MatchedObjects; they will not be used for registration. With the Object Marker Tools With the object marker tools you may quickly create certain geometric objects from scan points. Follow these steps to create objects with the object marker: 1. Choose the object type that you want to create from the object marker tool bar. Figure 7-34: Object marker tool bar o Spheres o Circular Flat Target o Plane o Checkerboard Points o Slab o Scan Point 2. Mark the corresponding scan point in the planar or the Quick View of the scan. A selection is then automatically created that starts from the marked scan point and extends into the surrounding scan points. The selected geometric object will then be created. Figure 7-35: Mark the object (here sphere) in the scan points 108 Chapter 7: Working with Scan Data and Objects SCENE LT 5.5 User Manual Figure 7-36: Sphere object fitted with the object marker Object Fit When fitting a geometric object, not only the geometric object but also a related fit object is created. This fit object describes the origin of the object more closely and contains some quality criteria which allow conclusions about the accuracy of the object fit. Figure 7-37: Fit objects in the Structure View If you change the parameters of the geometric object after the fit, the fit object is no longer active. You can reactivate an object fit by selecting the command Active in its context menu. The changed parameters will then be replaced by the parameters of the object fit. If a geometric object has an active object fit, the overall quality of the fit with the object is symbolized by a traffic light: • Green: all the individual quality criteria of the fit are met. • Amber: at least one quality criterion is somewhat compromised • Red: at least one individual criterion of the fit is seriously compromised. Objects are displayed in the views in the appropriate color. Objects without an active object fit are shown in blue. You can find more information on the individual quality criteria of the different object fits in the chapters “3D Picture Fit” on page 216 to “Sphere Fit” on page 229. You can delete the fit object if you do not require it. 109 Chapter 7: Working with Scan Data and Objects SCENE LT 5.5 User Manual 7.3.3 Documentation Object You can create documentation objects for keeping records of points of interest in a workspace or in a scan. A point of interest may be an existing object in the workspace – like a scan, a sphere or a model – or a single scan point in a scan. Documentation objects allow enriching scan data with additional information like comments or links to external documents or web sites. Documentation objects for objects To add a documentation object to an object in the workspace, select the command New Documentation in the context menu of this object. The Documentation Properties dialog is displayed (see below). The documentation object is then stored underneath the referenced object in the workspace. Deleting the referenced object will also delete its documentation objects. The origin of the documentation object corresponds to the center of the referenced object. Figure 7-38: Documentation object Documentation object for scan point (3D View) To attach a documentation object to a certain scan point, Open a scan or a scan project in 3D View, 1. select the documentation tool from the 3D View tool bar, then click on the point of interest in the view. 2. The Documentation Properties dialog is displayed (see below). Figure 7-39: Documentation object in 3D View Documentation Properties Detailed information can be entered in the Documentation Properties dialog: 110 Chapter 7: Working with Scan Data and Objects SCENE LT 5.5 User Manual Figure 7-40: Documentation Properties Dialog Position - determines the position of the documentation object in the workspace. Description – detailed information about the documentation object. Hyperlinks – hyperlinks to files or web sites. General tab • Add a new hyperlink by entering its address into the lower text field, then press Add. • Change the order of the hyperlinks with Up / Down. • Delete them with Remove. • Open them by double clicking on the list item or by selecting the Open button. You can enter the name of the documentation object in the General tab. Since a documentation object usually consists of a text string, its Layer should be defined as Text. 111 Chapter 7: Working with Scan Data and Objects SCENE LT 5.5 User Manual Figure 7-41: General dialog 7.3.4 Regions A region is used to mark a particular selection of scan points and to save them in the workspace in order to examine it more closely later. To create a region, select the scan points in the Quick View or in the Planar View and use the appropriate command under Create Objects in the context menu of this selection. 7.3.5 Exporting Objects in DXF, IGES and VRML data formats In order to use points, planes, pipes and spheres in CAD systems, with SCENE LT you can export these objects in different formats as a file and then import this file into your CAD system. 1. Open the context menu of the scan, or if you want to export the objects of all scans in a scan folder, open the context menu of the scan folder. 2. Select the command Import/Export Export Objects. 112 Chapter 7: Working with Scan Data and Objects SCENE LT 5.5 User Manual Figure 7-42: Exporting objects Format – The following formats are available: DXF, IGES, and VRML. Depending on the format selected, you can set further settings on a separate tab. DXF SCENE LT uses DXF 12. Textures of meshes are not supported. IGES IGES is a multivendor-capable standard for the exchange of CAD drawings. SCENE LT uses IGES version 5.3. IGES doesn’t support the textures of meshes. VRML SCENE LT uses VRML 2. When exporting meshes, the textures are stored in separate files. For more information on these file formats, please see chapter “Exporting Slices” on page 138. 7.3.6 Importing Objects in VRML data format To compare the scanned reality with the models from the CAD system, you can import the model into SCENE LT. For this, the model must be in the multivendor-capable VRML (Virtual Reality Modeling Language) data format. A lot of CAD systems give you the option of exporting models in this format. For this, please read the instructions for your CAD system. The way exporting in the CAD system MicroStation works is described at the end of this chapter. 1. Import the model via the command File Import.... 2. In the dialog, select file type VRML, which has the file extension .wrl. After entering the file name, the VRML Import dialog opens: 113 Chapter 7: Working with Scan Data and Objects SCENE LT 5.5 User Manual Figure 7-43: Settings for VRML import Although the VRML standard recommends a specific coordinate system and a specific unit of length, not all VRML files are modeled that way. The standard defines the unit of measure of the world coordinate system to be meters, and a coordinate system in which the y axis points upwards. Because many VRML files are modeled differently, you can select different settings. When importing a VRML model, you can ask SCENE LT to combine any meshes in the model into a single one. This will increase the performance. SCENE LT does not support all objects or object properties that are available in VRML. The following parameters are not transferred: • Light sources • Textures with 8 or 16 bit per pixel (use 24 bit per pixel instead) • The Inline node • In these cases, when importing the data, you will get a warning that the VRML model was not transferred completely. • The transformations of the Workspace and the Models folder apply to imported VRML models. This means that they don't end up at the coordinates which are written in the file. After importing, in the Structure View under the Models Don’t translate folder, you will see a new folder which contains your imported model. The model can only be viewed in 3D View and Quick View; Planar View will not display CAD models. How to export CAD models from MicroStation in VRML format 1. Select the command File Export VRML World... 2. Click in the view you want to export. The Export VRML World file dialog appears. 3. In the dialog, set the version number to 2 and select Export Linear Geometry and Export Higher Order Surfaces. 4. Select Y Axis Up if you want to achieve a standard conformant file. Please make sure that Drop Cells To Components and Drop Text To Components are not selected; this would cause the data volume to increase considerably. 114 Chapter 7: Working with Scan Data and Objects SCENE LT 5.5 User Manual Figure 7-44: VRML export in MicroStation 7.4 Creating Scans from Selected Scan Points If you would like to reduce scans to their important sections without losing the original data, you may select the relevant scan points of these scans and create new scans from the selections. 1. Open the planar or the Quick View of the scan. 2. Select the scan points for which you would like to create a new scan. 3. In the context menu of the selected area, click on Scan Points Create Scan. The following dialog opens: Figure 7-45: New scan 4. Assign a name. Please make sure that there is no other scan in the workspace that has the same name. With a noise compression rate of 2:1 or 4:1, the number of rows and columns will be reduced accordingly. So with a rate of 4:1, the resulting scan will only have 1/16 as many scan points as the original selection. It is recommended to use the integrated smoothing filter when reducing the noise in a ratio of 2:1 or 4:1. Dist. Threshold is the threshold for calculating the mean value. If the distance between the center scan point and a scan point of the surrounding area is beyond the threshold, this scan point will not be used when 115 Chapter 7: Working with Scan Data and Objects SCENE LT 5.5 User Manual calculating the mean value. The smoothing filter never removes scan points but rather alters their respective position. A new independent scan is created and you will be prompted to give the new scan a name. The scan initially only exists in the workspace; no scan file exists in the file system at this stage. When you save the workspace, the corresponding scan file is also created. 116 Chapter 7: Working with Scan Data and Objects SCENE LT 5.5 User Manual Chapter 8: Analyzing Scan Points You can use the scan for many different purposes. For one, scans document the geometric reality completely in three dimensions. In SCENE LT, there is an efficient technique for using this documentation characteristic with the views. For another, because they are three dimensional, scans also enable you to copy the reality faithfully to the computer and to easily analyze them there. At the same time, SCENE LT provides you with both visual and mathematical based procedures. 8.1 Inspection You can use the 3D View to compare scanned reality with existing CAD models. When doing this, we recommend that you start from the CAD model and open a 3D View from there. Then add the selected scan points from the scan one by one and compare whether the CAD model matches the reality. Figure 8-1: Discrepancy between scanned reality and CAD model In the example shown, you can see that the pipe from the CAD model does not match the reality. When carrying out renovations which rely on the correct position of the pipe, this could lead to unpleasant surprises. With the 3D View, you can also compare new construction proposals to the current project environment. This overlaying comparison gives you the ability to identify problems such as collisions and poor optimization of space. 8.2 Measuring Distances With renovations, you are often confronted with the question of whether there is still enough space in the building for the intended machinery. Since you can only rely on the CAD model of the building to a certain extent, you will probably have to examine and take measurements of the critical places on site. Using scanned reality, you can easily address queries at your computer, such as: What is the clearance height of this gate? How great is the distance between these supports? This chapter describes the measurements that can be done in the planar, quick and the 3D View. For measurements in the Overview Map, please see chapters “Overview Map” on page 58 or “Measurements” on page 236. There are two different approaches for measuring distances, either between scan points or between objects such as spheres or planes. 117 Chapter 8: Analyzing Scan Points SCENE LT 5.5 User Manual 8.2.1 Point-to-Point Measurements To start a measurement between two or more scan points, click on the Measure between scan points in the toolbar. Point-to-point measurements are available in the Planar View, the Quick View and the 3D View. Figure 8-2: Point-to-point measurement Select measure points 1. Select valid scan points in the respective view with the left mouse button. 2. Select the last measure point and finalize the measurement by a double-click with the mouse. 3. To cancel the current measurement, click the right mouse button or press the Esc key. 4. To leave the measurement process, click the right mouse button or press the Esc key. Several keyboard commands are available in the Quick View and the 3D View: • Return key: Finalize the measurement without adding a last measure point. • Backspace key: Remove the last measure point. • Home key: Add a last measure point at the start position and finalize the measurement. A new point-to-point measurement gets added as a child to the current scan when measuring in the Planar View or Quick View and to the Measurements folder of the workspace when measuring in the 3D View. A point-to-point measurement made in the 3D View is only visible in the 3D View. It is not linked to any individual scan. If the involved scans are later altered or transformed, the measurement stays in the same place. In this case you could delete the measurement and create a new one. Point-to-point measurements may be susceptible to single noisy scan points. In the Quick View and the 3D View, a yellow dashed line is drawn between the measure points. Labels show the overall distance and the length of each measure segment. In the Planar View, only the overall distance is shown. 118 Chapter 8: Analyzing Scan Points SCENE LT 5.5 User Manual Figure 8-3: Measurement with invalid measure points Invalid measure points of point-to-point measurements are indicated by a red outline as illustrated in Figure 8-3. While it is not possible to select invalid scan points as measure points in SCENE LT, this may happen in SCENE LT WebShare when the sky or an area with heavily filtered scan points is selected. Therefore, invalid measure points may exist in workspaces downloaded from SCENE LT WebShare. An invalid measure segment is indicated by a red dashed line. Two additional lines show the vertical and horizontal distance between the first and last measure point. 8.2.2 Object Measurements Probably you frequently have to measure distances to level surfaces, for example to the wall, the floor or the ceiling. In this case you should fit a plane through the wall and measure from the plane to the point you are interested in. When using a plane, the measurement is automatically taken perpendicular to this plane. Object measurements are available in the Planar View, the Quick View, the 3D View, and the Structure View. Figure 8-4: Object measurement You can measure between objects of the following types: 119 Chapter 8: Analyzing Scan Points SCENE LT 5.5 User Manual Point objects (type 1) Laminar objects (type 2) • Sphere (A sphere is a point object because its central point is used for measurement). • Checkerboard. • Point Object, Corner Point. • Scan. This means, the scanner icon which stands for a scanner position. • Plane, including Plane Extension, Rectangle, Slab. • Pipe. Figure 8-5: Checkerboard point – plane measurement 1. Click on the Measure between objects button start a measurement between objects. in the toolbar to 2. To select objects for your measurement, select them with the left mouse button. You can also select objects in the Structure View this way. 3. It may happen that objects superpose. In this case, a small dialog opens which lists these objects. Double-click the one you want to use, and continue measuring. 4. You can measure the distance between more than two objects if you hold down the Shift key when clicking on the next object. However, an object measurement can only contain one object of type 2. A new object measurement gets added to the Measurements folder of the workspace. Figure 8-6: Object measurement in the Quick View 120 Chapter 8: Analyzing Scan Points SCENE LT 5.5 User Manual Figure 8-7: Object measurement in the Planar View Figure 8-8: Object measurement in the 3D View If the position or location of the objects used for the measurement change, for example, by a new fit or by updating the registration, the measurement is automatically updated. Measure Object The representation of a measurement is called a measure object. To open the Properties dialog of a measure object, double-click on it in the Structure View, on its label or near a measure line. The property dialog provides distance information and a list of the involved objects of an object measurement. It is also possible to hide the lines for the vertical and horizontal distances and the label for the overall distance by selecting the corresponding checkboxes. For more information, see chapter “Measurement” on page 219. 121 Chapter 8: Analyzing Scan Points SCENE LT 5.5 User Manual Figure 8-9: Properties of measurement object 8.3 Visualizing Scales and Distances SCENE LT allows to visualize dimensions and distances in the 3D View by displaying a customizable two dimensional grid. This tool is only available in the 3D View. The grid is a set of visible lines that serve as a visual distance reference and can be seen as a two dimensional ruler. The grid can be positioned anywhere in the scene and gives a good impression of distances and scales in the point cloud. Figure 8-10: Regular grid in 3D View 122 Chapter 8: Analyzing Scan Points SCENE LT 5.5 User Manual Figure 8-11: Polar grid in 3D View Displaying and customizing the grid 1. Click the Grid button in the 3D View toolbar to activate the grid function. By default, the grid is located in the coordinate origin and lies in the XY plane. 2. Customize the grid. Use the drop down menu of the grid button in the 3D toolbar to make your adjustments. Figure 8-12: Drop down menu of the grid The grid can be displayed in two different styles: • The regular grid divides the space in axially parallel and evenly spaced rectangular areas. Both scales in x and y direction show the distance in relation to the grid’s origin (see Figure 8-10). • The polar grid consists of concentric rings and radial dividers. The concentric rings show the distance to the grid’s origin. With the radial dividers one can estimate the angles between two points of interest (see Figure 8-11). Increase Resolution - Increase the resolution of the grid by decreasing the distance between the displayed lines by a factor of 2. Decrease Resolution - Decrease the resolution of the grid by increasing the distance of the displayed lines by a factor of 2. 123 Chapter 8: Analyzing Scan Points SCENE LT 5.5 User Manual Attach to Surface - Activates a tool to align the grid to a surface. There are two possibilities to align a grid: • by picking one point, if the plane has an even surface. • by picking three points, if the plane is uneven, or if you need a high accuracy. Picking three points for planes makes sense for outdoor scans, or for a scans of an old building in which floors or ceilings often are more or less curved. Attach to Point - Change the position of the grid’s origin. Pick a point in the SCENE LT and the grid’s origin will be moved to that point. Properties - Opens the properties dialog of the grid. Figure 8-13: Grid properties Style - choose between the regular and the polar grid. Define the dimensions of the displayed grid in both directions by entering a start and an end value. Define the resolution of the grid by changing the distance between the displayed grid lines for both directions. 124 Chapter 8: Analyzing Scan Points SCENE LT 5.5 User Manual Colors - Change the color of the lines for the two directions. Figure 8-14: Grid properties – Display Options On tab Display Options you may toggle the visibility of certain visible grid elements: Direction X - x-axis (colored line) Direction Y – y-axis (colored line) Labels X – labeling of lines parallel to the x-axis Labels Y – labeling of lines parallel to the y-axis Primary Scale X – labeled lines of the grid in x direction Primary Scale Y – labeled lines of the grid in y direction Secondary Scale X - non-labeled lines visible at certain zoom levels in x direction Secondary Scale Y - non-labeled lines visible at certain zoom levels in y direction. 8.4 Visualizing Scales and Distances SCENE LT allows to visualize dimensions and distances in the 3D View by displaying a customizable two dimensional grid. This tool is only available in the 3D View. The grid is a set of visible lines that serve as a visual distance reference and can be seen as a two dimensional ruler. The grid can be positioned anywhere in the SCENE LT and gives a good impression of distances and scales in the point cloud. 125 Chapter 8: Analyzing Scan Points SCENE LT 5.5 User Manual Figure 8-15: Regular grid in 3D View Figure 8-16: Polar grid in 3D View Displaying and customizing the grid 1. Click the Grid button in the 3D View toolbar to activate the grid function. By default, the grid is located in the coordinate origin and lies in the XY plane. 2. Customize the grid. Use the drop down menu of the grid button in the 3D toolbar to make your adjustments. 126 Chapter 8: Analyzing Scan Points SCENE LT 5.5 User Manual Figure 8-17: Drop down menu of the grid The grid can be displayed in two different styles: • The regular grid divides the space in axially parallel and evenly spaced rectangular areas. Both scales in x and y direction show the distance in relation to the grid’s origin (see Figure 8-10). • The polar grid consists of concentric rings and radial dividers. The concentric rings show the distance to the grid’s origin. With the radial dividers one can estimate the angles between two points of interest (see Figure 8-11). Increase Resolution - Increase the resolution of the grid by decreasing the distance between the displayed lines by a factor of 2. Decrease Resolution - Decrease the resolution of the grid by increasing the distance of the displayed lines by a factor of 2. Attach to Surface - Activates a tool to align the grid to a surface. There are two possibilities to align a grid: • by picking one point, if the plane has an even surface. • by picking three points, if the plane is uneven, or if you need a high accuracy. Picking three points for planes makes sense for outdoor scans, or for a scans of an old building in which floors or ceilings often are more or less curved. Attach to Point - Change the position of the grid’s origin. Pick a point in the SCENE LT and the grid’s origin will be moved to that point. Properties - Opens the properties dialog of the grid. 127 Chapter 8: Analyzing Scan Points SCENE LT 5.5 User Manual Figure 8-18: Grid properties Style - choose between the regular and the polar grid. Define the dimensions of the displayed grid in both directions by entering a start and an end value. Define the resolution of the grid by changing the distance between the displayed grid lines for both directions. Colors - Change the color of the lines for the two directions. 128 Chapter 8: Analyzing Scan Points SCENE LT 5.5 User Manual Figure 8-19: Grid properties – Display Options On tab Display Options you may toggle the visibility of certain visible grid elements: Direction X - x-axis (colored line) Direction Y – y-axis (colored line) Labels X – labeling of lines parallel to the x-axis Labels Y – labeling of lines parallel to the y-axis Primary Scale X – labeled lines of the grid in x direction Primary Scale Y – labeled lines of the grid in y direction Secondary Scale X - non-labeled lines visible at certain zoom levels in x direction Secondary Scale Y - non-labeled lines visible at certain zoom levels in y direction. 8.5 Surface Analysis When fitting scan points to a plane, as a result, you also obtain the quality criteria of the fit which tells you how well the scan points actually converge through a plane. Using the quality criteria, you can see a color representation of the evenness of a surface in relation to a proposed plane. 1. Identify which plane you want to use to compare the scan points. 2. Select an area of scan points. 3. Select View Point Distance in the context menu of this plane. The selected scan points are then colored in. 129 Chapter 8: Analyzing Scan Points SCENE LT 5.5 User Manual Figure 8-20: Surface analysis 4. Using the settings in Tools Options View, you can set the upper and lower threshold for the color range. 5. Under the column Plane Distance Visualization, enter the range that should be colored in. The colors are displayed corresponding to your entries: 8.6 • A scan point that lies below the plane by this distance is colored in blue. • A scan point that lies above the plane by this distance is colored in red. • Scan points that lie in between assume a color between blue and red accordingly, while the scan points that lie very close to the plane are colored green. • Scan points lying outside this range are not colored in. Coloring the Range The scan points in the planar and Quick View are normally displayed so that the reflection value of a scan point determines the brightness of the pixel. You can also display the scan points so that the pixel assumes a different color depending on the distance of the scan point from the scanner. You can also then choose to either have all scan points in a range assume the same color or have the color reflect the actual distance. This type of visualization is appropriate, for example, when analyzing a scan, if it must not fall below a certain level of precision. Generally, the quality of a scanner's distance measurement is not constant across the entire range but decreases as the distance increases. You can then highlight in color the range in which the distance measurement is no longer satisfactory. You can find the necessary settings for coloring under Tools Options View, as described in chapter “Tools” on page 174. You can switch the highlighting on or off using the Mark Range on/off button in the toolbar. The colors are displayed corresponding to your entries: • Scan points that lie close to the lower limit is colored in red. • Scan points that lie in between are colored yellow to green. • Scan points that lie close to the upper limit is colored in blue. • Scan points lying outside this range are not colored in. 130 Chapter 8: Analyzing Scan Points SCENE LT 5.5 User Manual Figure 8-21: Scan points colored depending on distance You can also do it the other way around, i.e. color the usable scan points. Ambiguity interval boundary Another practical use of this function is with scanners that only have a very small ambiguity interval. With some scanners, the distance measurement is limited to a certain range, depending on the specifications of the model. If an object is measured and its true distance lies outside the range, the measured value is depicted incorrectly, i.e. too close. In such a case, it is useful to color the boundaries of the range so that the observer can identify them immediately. Figure 8-22: Ambiguity interval boundary 131 Chapter 8: Analyzing Scan Points SCENE LT 5.5 User Manual 132 Chapter 8: Analyzing Scan Points SCENE LT 5.5 User Manual Chapter 9: Exporting Data In order to use scan points from the scans in other applications such as CAD systems, SCENE LT provides the possibility to export scan points in various data formats and write them to a file. You can then import this file into the desired application. You may change certain settings prior to the export of the scan points. The settings available in the export dialog will be described in the further chapters. You may export the scan points of an entire scan, a selection of scan points or the scan points of several scans at once, like the scans within a scan folder or cluster. Applying Clipping Boxes 9.1 • Due to the nature of the underlying data, the export of points from 3D selections provides only a reduced set of export settings. The mismatching settings will be grayed in the export dialog when exporting points of a 3D Selection. • Not all export formats are available when exporting points from a 3D selection. The supported formats are E57, VRML, DXF, XYZ Text, XYZ Binary, IGES, FLS, and PTS. • The export of scan point clouds and of the project point cloud will consider activated clipping boxes in the same way as they are applied in the 3D views (what you see is what you get). If clipping boxes exist in the project, but should temporarily not be considered during the export, please deactivate the clipping boxes individually or via the global clipping box setting, see also chapter “Enabling / Disabling Clipping” on page 128. • The export of multiple scan point clouds of a scan folder does not support to export all points into a single file. The export of scan point clouds and of the project point cloud will consider activated Clipping Boxes in the same way as they are applied in the 3D Views (what you see is what you get). If Clipping Boxes exist in the project, but should temporarily not be considered during the export, please deactivate the Clipping Boxes individually or via the global Clipping Box setting, see also chapter “Enabling / Disabling Clipping” on page 90. Exporting scan points To export the scan points of an entire scan: • In the Structure Window, right-click the scan, then select Import / Export Export Scan Points. Or: • Open the scan in Planar View or the Quick View. • Select the command Export Direct Export or Export Export Scan Points in its context menu. o Select Export Scan Points to open the settings dialog to make certain settings prior to exporting the points. The available settings are explained in the next sections. o Select Direct Export to export the scan points without opening the settings dialog. The prior settings will be used and the data will be saved directly to a file. 133 Chapter 9: Exporting Data SCENE LT 5.5 User Manual You may export the scan points of a point selection in the Planar View and in the Quick View as well as in the 3D View. • To export the points of a point selection in the Planar View or the Quick View, select the command Export Direct Export or Export Export Scan Points in the context menu of the selection. See above for a description of these two commands. • To export the scan points of a selection in the 3D View (a selection made on the points of scan point clouds or the project point cloud), select Export 3D Selection in the context menu of the 3D View that contains this selection. The command Direct Export will use the storage location and filename prior specified. In case a file with that name already exists at that location, it will be overwritten. 9.2 Exporting scan point clouds Export one scan point cloud To export the points of a scan point cloud: Export several scan point clouds To export the points of several scan point clouds of a scan folder: 9.3 • • In the Structure Window, right-click the scan, then select Import / Export Export Scan Point Cloud. This command will be grayed if a scan point cloud of the respective scan does not yet exist. In the Structure Window, right-click the scan, then select Import / Export Export Scan Point Clouds. This command will be grayed if the respective scan folder does not contain any scan point clouds. Exporting project point cloud To export the project point cloud of a scan project: • 9.4 Select the command File Scan Project Export Project Point Cloud. Exporting cluster To export a cluster of a scan project: In the Structure Window, right-click the scan folder, then select Import / Export Export as Project. 9.5 Exporting scan point clouds Export one scan point cloud To export the points of a scan point cloud: Export several scan point clouds To export the points of several scan point clouds of a scan folder: 9.6 • • In the Structure Window, right-click the scan, then select Import / Export Export Scan Point Cloud. This command will be grayed if a scan point cloud of the respective scan does not yet exist. In the Structure Window, right-click the scan, then select Import / Export Export Scan Point Clouds. This command will be grayed if the respective scan folder does not contain any scan point clouds. Exporting project point cloud To export the project point cloud of a scan project: • Select the command File Scan Project Export Project Point Cloud. 134 Chapter 9: Exporting Data SCENE LT 5.5 User Manual 9.7 Exporting cluster To export a cluster of a scan project: • 9.8 In the Structure Window, right-click the scan folder, then select Import / Export Create Project. Exporting slices 9.8.1 Single slice If, for example, you want to very quickly create the floor plan of a building from the scan points, it is practical to use the slice export. When exporting slices, only those scan points are exported, which are between the top and the bottom limit you have specified. Therefore, if you select a slice where there is hardly any furniture or machines blocking the view, you obtain the floor plan of the building very easily. Figure 9-23: Slice of scan points 135 Chapter 9: Exporting Data SCENE LT 5.5 User Manual 9.8.2 Several slices If you want to export several slices at the same time, you can define the slices with a set of planes. In contrast to the export of a single slice, here each plane directly defines the location of the slice. Instead of having a plane and a top and a bottom distance, each plane defines the center of the slice. All slices have the same thickness which you can input into the dialog. Also in contrast to the export of a single plane, here only those points of a slice are exported which are located within a given radius around the center point of the slice. The center point of each slice is defined by the position of the corresponding plane (see chapter “Plane” on page 222). You can create planes either by fitting (see chapter “Working with Objects” on page 96) or manually. Please observe that all planes of the workspace will be used as reference planes - even if they are defined in other scans or in completely different folders of the workspace. In the figure below you can see an example of an export with a set of equidistant planes that had been defined manually. This figure shows the exported scan points after they have been imported back into SCENE LT. Figure 9-24: Slices defined by a set of equidistant planes 9.8.3 Tomograph When exporting slices, of course scan points from horizontal surfaces in the slice are also exported, which can make it difficult to define the floor plan. The Tomograph resolves this: it brings out vertical surfaces and hides horizontal surfaces, thereby allowing walls and supports to stand out. Figure 9-25: Tomograph 136 Chapter 9: Exporting Data SCENE LT 5.5 User Manual The Tomograph works like an X-ray apparatus - the X-ray goes through the slice (see chapter “Single Slice” on page 138) from above and comes out on a photo plate below. The photo plate is covered with a fine raster and a raster field now either turns black or it remains white. If the X-ray hits sufficient scan points on its way through the slice, the raster field turns black. This occurs predominantly with vertical surfaces. If the X-ray hits only very few scan points, as is the case with horizontal surfaces, the raster field remains white. 9.9 Export Settings 9.9.1 General export settings Figure 9-1: Export tab Format – Select the file format required. The following formats are available: E57, VRML, DXF, XYZ text, XYZ binary, IGES, PTS, PTX, FLS, and POD (Pointools). Some file formats support additional settings. These settings are available on the third tab of the settings dialog. If the third tab is not available, the selected file format does not support additional settings. The additional settings are explained in chapter “File Format Related Export Settings” on page 140. File name – Name and location of the file to be created. Full scan – Export the entire scan. Selection – Export the selection. Full Scan and Selection become available only when exporting from a single scan within the tree or from a point selection. Subsample - Since even small selections of a scan can contain a great number of scan points it may be necessary to reduce or thin out the exported scan points. Thinning out is achieved by only exporting every second, third ... scan point of a row or column. Therefore, thinning out is done according to the arrangement of the scan points in the planar or Quick View. Rows – Reduction by thinning out the rows 137 Chapter 9: Exporting Data SCENE LT 5.5 User Manual Columns – Reduction by thinning out the columns With the value 1, every column/row is exported, with 2 every second, and so on. For example, if you enter the value 10 in both fields, you will thin out of a tenth of the columns and a tenth of the rows, therefore in total you will have a reduction of one hundredth of the scan points. For further reduction, you can indicate the distance threshold a scan point may be away from the scanner: Min. Distance – The minimum distance the exported scan points can be from the scanner. Scan points situated closer are not exported. Max. Distance – The maximum distance at which the exported scan points can be from the scanner. Further away scan points are not exported. Color and Grey – Export RGB and greyscale (intensity) values of each scan point if available. This function is enabled for the formats E57, XYZ text, POD, PTX and PTS. To export both values, the scan will be unloaded first and re-loaded with both values. After the export, the scan will be unloaded again and the initial scan status will be restored. Use Local Coordinates - Enable to export the points in the local coordinate system of an available Clipping Box. Select the box from the drop down list. This option is only available if points of scan point clouds or the project point cloud will be exported and if there is at least one Clipping Box in the workspace. It is not available for exporting points of scans. 9.9.2 Exporting Slices Single Slice When exporting slices, only those scan points are exported, which are between the top and the bottom limit you have specified. You can of course also apply the threshold outlined above for reducing and thinning out when exporting slices. 138 Chapter 9: Exporting Data SCENE LT 5.5 User Manual Figure 9-2: Export of a single slice The orientation and position of the slice are defined by the reference plane. The default setting of the reference plane is the ground floor, so top and bottom limits refer to the z coordinate and are limits in height. If you want to create vertical slices, for example, you can select the corresponding predefined plane with the normal pointing along the x- or yaxis. The reference plane will be added to the workspace after the export. It will be called ExportRefPlane and will be available in the folder References. However, the export of slices is not limited to planes with normals pointing along the axes. With the Custom button you can use arbitrary planes as reference planes. Custom reference planes make it very easy to export scan points of objects that are located above a flat surface, like objects on the floor or on a table, by fitting a plane to the surface and using this plane as a reference. The Tomograph can be used with any reference plane and will be explained in chapter “Tomograph” on page 140. Several Slices If you want to export several slices at the same time, you can define the slices with a set of planes. Here, each plane directly defines the location of the slice. Instead of having a plane and a top and a bottom distance, each plane defines the center of the slice. All slices have the same thickness which you can input into the dialog. Only those points of a slice are exported which are located within a given radius around the center point of the slice. The center point of each slice is defined by the position of the corresponding plane (see chapter “Plane” on page 222). Figure 9-3: Export of several slices 139 Chapter 9: Exporting Data SCENE LT 5.5 User Manual You can create planes either by fitting (see chapter “Working with Objects” on page 96), or manually. Please observe that all planes of the workspace will be used as reference planes - even if they are defined in other scans or in completely different folders of the workspace. Tomograph The Tomograph brings out vertical surfaces and hides horizontal surfaces, thereby allowing walls and supports to stand out. Important parameters are the raster size, of course, and the threshold value from which the raster field should turn black. Set these parameters under Tools Options Tomograph: Figure 9-4: Settings for tomographs Raster Size – The raster size determines the resolution your result will have. Min. Hits – The minimum number of scan points for a raster field to turn black. Max. Hits – The maximum number of scan points for a raster field to turn black. If the number is exceeded, the raster field becomes white again. The specification of –1 means an infinite number. Export Height – Without this setting, the raster lies at height 0. With this setting, each raster field lies at the height which results from the mean of the scan points within the field. The overall size of the photo plate is critical for tomographs: the longer the edge of the photo plate and the finer the raster, the more main memory is required. 9.10 File Format Related Export Settings 9.10.1 DXF DXF is a data format developed by Autodesk for the exchange of CAD drawings. SCENE LT uses DXF version 12. 140 Chapter 9: Exporting Data SCENE LT 5.5 User Manual The scan points in DXF are always displayed as points. Since DXF has very few grey scales at its disposal, the visual appearance is not as good as in SCENE LT. 9.10.2 VRML Figure 9-5: Settings for VRML export Export points as is – Scan points are exported as points. Note: A lot of VRML viewer programs do not support points! Export points as sphere – Scan points are exported as small spheres. Export points as boxes – Scan points are exported as small boxes. VRML2 – Export in VRML2 format. Otherwise VRML1 is used. Coordinate System – Choose the target coordinate system. 9.10.3 IGES IGES is a multivendor-capable standard for the exchange of CAD drawings. SCENE LT uses IGES version 5.3. The scan points are exported as grey points or color points, if color information is available. When you import the IGES file into your CAD system, it decides how it will represent these points in its own grey or color space. 141 Chapter 9: Exporting Data SCENE LT 5.5 User Manual Figure 9-6: Settings for IGES export Part – naming the parts is a required component of an IGES file. Author – specifying the author is a required component of an IGES file. Organization – specifying the organization is a required component of an IGES file. Represent Scan Points as: Points – Scan points are displayed in the CAD system as points. Spheres – Scan points are displayed in the CAD system as small spheres. Set Color to – Settings for the colors to be used IGES default – The export file does not contain any color specifications so the CAD system will use the default color. Scan point color – Use the grey value or color value of the scan point. Scan specific – If the export consists of several scans, the scan points from the different scans will have different colors. Set Level to – Settings for the level to be used IGES default – The export file does not contain any level specifications so the CAD system will use the default level. Scan specific – If the export consists of several scans, the scan points from the different scans will have different levels. Objects Unbounded Planes – The idealized planes without border are also exported as idealized and without border. Otherwise a square is exported. Export Object Names – Object names are exported. 142 Chapter 9: Exporting Data SCENE LT 5.5 User Manual Level – Level allocation for object names. 9.10.4 XYZ text With XYZ text format, the export file contains one scan point per row. Each scan point is identified by its 3 Cartesian coordinates X, Y and Z and the reflection value. You can also specify the row and column number of the scan point. Both these numbers will then be next to the current scan point in the export file. Figure 9-7: Settings for XYZ text Include row/col – Export with row and column number. Export raw reflections – Export with raw reflections, which can be between 0 and 2047 for the FARO Laser Scanner. Otherwise, the monitor brightness will be exported (values between 0 and 255). When used without row and column number, this format can also be imported into MicroStation. However the reflection value will not be used by MicroStation, the scan points are uniformly created in the currently active color. To import into MicroStation, use the Import Coordinates button via Tools Annotation XYZ Text. 9.10.5 POD (Pointools) SCENE LT allows exporting of scan points for PointoolsTM. Pointools is a third-party application that provides an environment for viewing, analyzing, editing and producing visual content from a range of 3D data types. 143 Chapter 9: Exporting Data SCENE LT 5.5 User Manual Figure 9-8: Settings for Pointools export Compression Accuracy: POD files compress cloud data for efficient storage and faster retrieval from disk. You can set the level of accuracy you want to maintain. It is important to consider the accuracy of the instrument used to acquire the data and to not set the compression accuracy too high. Normal Generation: Normals are required for point lighting. This data is either imported from the source file or generated upon import. Quality of Normals: Indicates the size of the sample used in normal generation resulting in a quality ranging from Smooth to Sharp. Sharp (Sharpest, Sharper, Sharp) - degree of faceting on object’s surface Normal - no altering Smooth (Smoothest, Smoother, Smooth) - degree of curvature on object’s surface. Spatial Filter Strategy: For advanced users. Default setting is usually sufficient. Spatial Filter Accuracy: Much like the compression accuracy, setting this too high may result in errors. For details about the export settings, please refer to the PointoolsTM manual. 144 Chapter 9: Exporting Data SCENE LT 5.5 User Manual Chapter 10: Working with the Project Point Cloud Like the scan point clouds, the project point cloud is optimized for fast visualization of large amounts of scan points in the 3D View and is organized in a spatial data structure that facilitates fast visualization of the scan points. The project point cloud consists of the points of all the scans within you scan project and can thus be seen as a comprehensive point cloud of the complete scan project. For this reason, the amount of points in a project point cloud can be enormous. Unlike scan files, such large amounts of points cannot be loaded into physical memory at once. Therefore, the points of the project point cloud are automatically loaded and visualized on demand based on the camera position and point visibility. The automated point loading of the project point cloud is able to visualize hundreds of scans at once. This empowers you to actually see all scans of a scan project at once regardless of whether they fit into your computer’s physical memory or not. Manual scan file loading is not necessary. The project point cloud is the best way to visualize and manipulate enormous amounts of scan data interactively. It is accessible from all local workspaces of a scan project. There can only be one project point cloud for each scan project. For more information on scan projects and local workspaces please refer to chapter “Workspaces” on page 17. If your project has a project point cloud: 1. Open a 3D View with the Create 3D View button tool bar or from the standard use View 3D View from the context menu of the workspace. 2. Start exploring. As the point cloud visualization technique is constantly loading scan points from the hard disk drive based on point visibility, the overall performance strongly depends on the speed of your hard disk drive. While project point clouds outperform all other visualization methods (including scan point clouds) on regular hard disk drives, we recommend using a solid state drive for maximum performance. Using a solid state drive will also speed up the process of creating the project point cloud. The benefits of the project point cloud are: • No manual loading of scans required • Very fast visualization of large amounts of scans at once • One optimized single spatial data structure for all scan points in a project • Out-of-Core visualization • Can be accessed from all local workspaces associated with the project. . 145 Chapter 10: Working with the Project Point Cloud SCENE LT 5.5 User Manual 146 Chapter 10: Working with the Project Point Cloud SCENE LT 5.5 User Manual Chapter 11: FARO Focus3D Scanner Administration The built-in FARO Focus3D scanner administration functionality of SCENE LT allows you to manage your Focus3D SD cards, scanner snapshots and your scan projects. You can open the scanner administration of SCENE LT under View Administration View or in the projects selector by clicking on the Scanner Administration icon. For more information, see chapter “Working with the Project Selector” on page 7. Figure 11-1: Scanner administration Structure View Administration view 11.1 Items in the Structure View of the Scanner Administration 11.1.1 Scanner Snapshots Each time you start a scan on your FARO Focus3D scanner, it automatically saves its current settings to the currently inserted SD card. Thus, a Focus3D SD card not only contains the captured scans but also an automatic snapshot of all system settings, scanning parameters, scan profiles, scanner operators and scan projects that are currently available on your scanner. When you insert a Focus3D SD card into your computer, it will automatically be recognized by SCENE LT and you will be asked whether to start an automatic data transfer or not. Clicking yes will import new scans from the SD card and create a local copy of the automatic scanner snapshot. The local copy of this automatic scanner snapshot can 147 Chapter 11: FARO Focus3D Scanner Administration SCENE LT 5.5 User Manual be found under the folder Scanners in the Structure View of the scanner administration and bears the name of your scanner's serial number. With the scanner administration in SCENE LT you can also set up new scanner snapshots from scratch. These scanner snapshots can be configured according to the needs of your scan projects, which means that you can create several new snapshots with differing settings, profiles, operators and projects according to the needs of different scan projects and transfer their configurations to your FARO Focus3D scanner(s) whenever needed. You can find these new scanner snapshots in the Structure View under the folder Scanners. The Structure View shows the complete file structure of the snapshots. You can perform delete commands on the folders and files via their context menu. SD Cards The folder SD-Cards contains the FARO Focus3D SD cards that are currently inserted to your PC. Here, the complete content of the SD Card is shown. You can perform delete commands on the folders and files via their context menu. Projects The folder Projects contains all scan projects that are already known to SCENE LT. With the help of the scanner administration you can prepare or create new projects and transfer them to your FARO Focus3D (see chapter “Transferring Firmware Updates to your FARO Focus3D Scanner” on page 152). 11.2 Administration View With the administration view you can view and modify the scanner settings, scan profiles, scanning parameters, projects and scanner operators of all available scanner snapshots. If a SD card is inserted to your PC, the administration view of the automatically created scanner snapshot is initially shown. To open the administration view of another snapshot, double-click the respective item under the Scanner or the SDCards folder in the Structure View or select the administrate command in its context menu. Design and functionality of the administration view in SCENE LT is the same as of the user interface that runs on the touch screen of the FARO Focus3D scanner. Please refer to the FARO Laser Scanner Focus3D manual for details about how to change the scanner settings, create and edit scan profiles, scanner operators and projects. 11.3 Managing Snapshots 11.3.1 Editing the Automatic Scanner Snapshot on the Inserted SD Card When you open the scanner administration in SCENE LT, the administration view of the automatic scanner snapshot of the currently inserted SD card will initially be shown. You can also open the administration view of this automatic snapshot by selecting the Administrate command in the context menu of the SD card. Make your changes in the administration view. Please refer to the scanner manual for details about how to change the scanner settings and how to create new and edit existing scan profiles, scanner operators or projects. When finished, remove the SD card from your PC and insert it into your scanner. For more information, see chapter “Transferring a New, Modified or Restored Snapshot to Your Scanner” on page 151. 148 Chapter 11: FARO Focus3D Scanner Administration SCENE LT 5.5 User Manual 11.3.2 Creating a New Scanner Snapshot To create a new scanner snapshot, right click the Scanners folder in the Structure View and select New Scanner Snapshot in its context menu. SCENE LT will create a new scanner snapshot and open its administration view. Configure the scanner settings and create profiles, projects and scanner operators according to your needs. You can rename the snapshot by selecting the Rename command in its context menu. You can also create a new snapshot based on the content of an already existing snapshot. To do this, create a new scanner snapshot, then select the base snapshot and drag it onto your newly created snapshot. Now you have a duplicate copy of your original snapshot that can be modified according to your needs. To transfer a newly created snapshot to your scanner, select it in the Structure View and drag it to the SD card item under the folder SDCards. This will replace the data of your SD card snapshot with the data of the new snapshot. The scans on the SD card remain unaffected by this operation. When finished, remove the SD card from your PC and insert it into your scanner. For more information, see chapter “Transferring a New, Modified or Restored Snapshot to Your Scanner” on page 151. 11.3.3 Restoring and Editing Manually Created Scanner Backups The FARO Focus3D scanner allows you to manually create backups of your scanner data. You can modify these backups with SCENE LT and transfer the modified configuration data back to your scanner. If you have a scanner snapshot that contains manual backups, open the administration view of this snapshot in SCENE LT and go to Manage Service Restore. You will then get a list that contains all the manually created backups that are available in the currently administrated snapshot as well as its automatically created scanner snapshot. 149 Chapter 11: FARO Focus3D Scanner Administration SCENE LT 5.5 User Manual Figure 11-2: Restore manual backup Click on the backup that you want to restore (_AUTO_BACKUP is the automatically created scanner snapshot, _SCENE LT_BACKUP the snapshot that has been modified or created with SCENE LT) and a new screen will appear. Figure 11-3: Select restore data Select the configuration data that you want to restore from the selected backup and press the Restore button. The restored configuration data will override the configuration data of the administrated snapshot. For example, if you want to restore or import scan profiles, all the existing scan profiles of the administrated scanner snapshot will be overridden by the profiles of the backup. You can now modify the restored configuration data and transfer it back to your scanner. For more information, see “Transferring a New, Modified or Restored Snapshot to Your Scanner” on page 151. 11.3.4 Restoring the Local Copy of the Automatic Scanner Snapshot SCENE LT will create a local copy of the automatic scanner snapshot. This local copy bears the serial number of the scanner and can be found in the Structure View under Scanners. 1. Select local copy of your automatic scanner snapshot in the Structure View. 2. Drag it to the SD card item under the folder SD-Cards. 3. The configuration data on the SD card will be replaced by the configuration data of the snapshot, the scans on the SD card remain unaffected by this operation. 4. When finished, transfer it to your scanner. For more information, see chapter “Transferring a New, Modified or Restored Snapshot to Your Scanner” on page 151. 150 Chapter 11: FARO Focus3D Scanner Administration SCENE LT 5.5 User Manual 11.3.5 Transferring a New, Modified or Restored Snapshot to Your Scanner 1. Insert the SD card with a new, modified or restored snapshot into your scanner. You will be asked by the scanner‘s operating software whether to update the scanner with this snapshot or to keep the current scanner settings. 2. Click yes to transfer the settings from your SD card to the scanner. This will override all current scanner settings, scan profiles and scanner operators with the configuration data of the new scanner snapshot. You can also transfer your new, modified or restored scanner snapshot later using the restore functionality in the scanner's operating software. 3. Go to Manage Service Restore in the scanner's operating software. 4. Select the list item _SCENE LT_BACKUP. 5. Select the data that you want to restore and press the Restore button. For more information, see the scanner manual. If you own several scanners and if you want to make sure that they all have the same configuration, you can transfer one snapshot to several scanners which will then have duplicate configurations. Managing Scan Projects The scanner administration in SCENE LT provides a quick and convenient way to prepare your scan projects in advance. Projects prepared with SCENE LT usually represent the spatial distribution of your real scan projects and can be transferred to your scanner via the SD card. In the scanner‘s operating software, when carrying out the scan project, you can then assign scans to the created scan project or one of its subprojects. This information is very helpful for the later scans registration and will be used to automatically combine the scans to scan clusters. Create a new project 1. Right click the Projects folder in the Structure View of the scanner administration. 2. Select New Project. You will be asked to give the project a name and to specify its storage directory. To open an existing project, double click the project in the Structure View or select Load in its context menu. Add subprojects Add new scan folders or clusters to your main cluster 1. Select New Scan Folder in its context menu. 151 Chapter 11: FARO Focus3D Scanner Administration SCENE LT 5.5 User Manual Figure 11-4: Workspace with project structure 2. When finished, save the scan project and return to the scanner administration view. 3. Select your project in the Structure View and drag it onto a snapshot or a SD card. This will add the new project with all of its subprojects to the respective snapshot. Already existing projects will not be deleted. If the added project already exists on the snapshot, it will be updated with the changes you have made. 4. Transfer the snapshot with the added project to your scanner. For more information, see chapter “Transferring a New, Modified or Restored Snapshot to Your Scanner” on page 151. 11.4 Transferring Firmware Updates to your FARO Focus3D Scanner 1. Drag and drop the firmware update file from the windows explorer to the SD card item in the Structure View of the scanner administration. SCENE LT will then copy the file to your SD card into the folder Updates. If this folder does not exist, it will automatically be created. 2. Remove the SD card from your PC and insert it into your scanner. 3. To install the firmware update on your scanner, go to Manage Service Firmware in the operating software of the scanner. 4. Press the Update button. For more information please refer to the scanner manual. 11.5 Scanner Service Request In case of problems with your scanner, you can send a scanner snapshot with the current settings of the scanner to the FARO Customer Service that can then analyze the snapshot to find the cause of error. 1. Select Scanner Service Request in the context menu of the respective scanner snapshot. Your default email client should start automatically with an open email window that has the snapshot attached. 2. Send this E-Mail with a detailed description of your scanner failure to the FARO Customer Service. 152 Chapter 11: FARO Focus3D Scanner Administration SCENE LT 5.5 User Manual Chapter 12: Apps For developers, SCENE LT offers an application programming interface (API) which gives the opportunity to integrate own functionality into SCENE LT. This API allows anyone to create custom applications (Apps) which integrate seamlessly into the SCENE LT user interface in order to extend the functionality of SCENE LT. Developers are free to share their Apps with others (for free or for sale), so that everybody can benefit from them. Publicly available apps may be downloaded from the FARO 3D App Center: http://3d-app-center.faro.com/ You may install and manage apps with the app manager of SCENE LT. 12.1 App Manager The App Manager of SCENE LT is available under Tools Apps. It provides the following functionality: • It allows installing new apps. For more information, see chapter “Installing Apps” on page 153. • It gives an overview of the already installed apps with additional information, like the version number. • Already installed apps can be activated, deactivated or removed from the system. For more information, see chapters “Activating / Deactivating Apps” on page 154 or “Uninstalling Apps” on page 154. • Developers can create an app package file (app installation file) from their app files (with the Pack App… button that will be displayed when Developer Options is enabled). Figure 12-1: App Manager 12.2 Installing Apps To install a SCENE LT app do one of the following: 1. Click the button and select an App package file (with the extension .fpp) from your hard disk. In the drop down menu of the button you will find: 153 Chapter 12: Apps SCENE LT 5.5 User Manual o the possibility to install an app that is not packed to an app package but whose individual program files are available within a folder on the hard disk. o a link to the FARO 3D App Center to download new apps. 2. Drag & drop a downloaded app package file into SCENE LT. 3. Double-click an app package file in Windows Explorer. If the app is already installed you will get an error message and the installation will be cancelled. SCENE LT also checks whether the app is compatible to the current version of SCENE LT. If the app and SCENE LT are not compatible, the installation will be cancelled. Once the installation is complete, the app will be activated by default. 12.3 Updating Apps In case you would like to install a new version of an already installed app, please remove the former version of the app from your system first (see chapter “Uninstalling Apps” on page 154 for more details), and then install the new version as described above. 12.4 Activating / Deactivating Apps Use the Activate checkbox in the app manager to enable or disable certain apps at runtime. 12.5 Uninstalling Apps Use the button to uninstall an app from your system. 154 Chapter 12: Apps SCENE LT 5.5 User Manual Chapter 13: Advanced Functions 13.1 Coordinates The coordinates of a point describe its exact location in relation to an agreed reference point. This reference point is referred to as the origin of the coordinate system. With a scan, you receive points in the three dimensional space, therefore, for a precise description of a measured point, you need the definition of the origin and three other values which then indicate the relative location to this origin. Depending on the choice of origin, you can decide between local coordinates or global coordinates. The three other values can be set to different degrees, so that you obtain polar coordinates or Cartesian coordinates, for example. 13.2 Local Coordinates When scanning, the position of the scanner emerges as the natural origin of the coordinate system because when recording the scan, all position specifications of the points are initially recorded in relation to the scanner. This coordinate system is therefore described as the local coordinate system. Polar coordinate system Due to the rotation of the scanner, its natural coordinate system is the polar coordinate system, with which two angles and a distance value are used to determine the position. Figure 13-1: Polar coordinates For the single scan points created by the scanner, you can find the polar coordinates in the bottom status bar: Figure 13-2: Display the polar coordinates of a scan point Cartesian Coordinates In day to day use, you would generally use Cartesian coordinates, which have a direct reference to concepts such as length, width and height, rather than polar coordinates. 155 Chapter 13: Advanced Functions SCENE LT 5.5 User Manual Figure 13-3: Cartesian coordinates The conversion of polar coordinates into Cartesian coordinates occurs automatically in SCENE LT. It is completely independent from the location of the scanner or other influencing variables because it simply converts between two types of representation at the same level. The converted coordinates are displayed directly next to the polar coordinates in the bottom status bar: Figure 13-4: Display of the Cartesian coordinates of a scan point 13.2.1 Global Coordinates If a scan is viewed in its 3D position against another scan, local coordinates are no longer practical. If, for example, two scans were recorded at different positions, the points within each one can have the same local coordinates; they match reality but not one another. Therefore, you should relate the coordinates to one reference point which remains the same for all scans. This reference point is normally selected so that it is also possible to make a comparison using other systems, for example a CAD system. By doing so, you can view polar coordinates and Cartesian coordinates again. However, since the polar coordinates do not produce a clearer representation than the Cartesian coordinates, you will find no use for them in this environment and they are therefore not explained in any more detail here. Coordinate Transformation You can calculate the global coordinates using the local coordinates of a point if you know the relationship between the local and the global coordinate system. To do this, you transfer the local coordinates into global coordinates by tracing the movement which would make both coordinate systems match. You can differentiate between two types of movement: If the local origin does not match the global origin, all coordinate specifications must be moved by the difference between the local and global origin. This movement is also called Translation. 156 Chapter 13: Advanced Functions SCENE LT 5.5 User Manual Figure 13-5: Translation If the orientation of the coordinate axes is different, you have to make them match with a Rotation. Figure 13-6: Rotation The rotation is described by a rotation axis and the corresponding angle of rotation. Generally, any rotation can be described with a single rotation axis; this rotation axis, however, does not necessarily match one of the coordinate axes! It is then sometimes difficult to make this rotation graphically clear. However, you can also split the rotation up into three separate rotations around the coordinate axes. In this type of representation you can imagine the result of a rotation more easily. SCENE LT saves the rotation internally with a single rotation axis and a single angle of rotation; the user interface, however, displays the more comprehensible type of representation of the three rotations around the coordinate axes. When splitting the rotation into three separate rotations around the coordinate axes, it is important to have a defined sequence of the axes. If you first rotate around x, then around y, and finally around z with some specific angles of rotation, you get different results than you would get with the sequence x, z, y. 157 Chapter 13: Advanced Functions SCENE LT 5.5 User Manual Figure 13-7: Rotation of 90° around y and then 90° around z Figure 13-8: Rotation of 90° around z and then 90° around y In the user interface, SCENE LT uses the sequence x-y-z. If you want to fine-tune a rotation on a per-axis basis, this default sequence may lead to some unexpected behavior. For example if you want to place an object interactively and you are so far satisfied with the orientation around the x axis and the z axis. Now you want to adjust the orientation around the y axis – but when you change the corresponding rotation angle, the object seems to move around a totally different axis! This is simply caused by the fact that the rotation around the y axis is applied in the middle of the two other rotations. A more intuitive behavior is achieved when the rotation is last in the sequence. You can enforce this more appropriate sequence, when you checkmark Axis snap in the dialog. Local coordinates can always be transferred into global coordinates with a simple combination of these two basic movements: translation and rotation. This transfer is also called Transformation. The sequence in which the basic movements are executed is important because it makes a big difference whether you first move and then rotate or first rotate and then move. In SCENE LT the rotation takes place first and then the translation. Coordinate Transformation of a Scan In order to know the coordinate transformation of a scan, you have to know its position and orientation. You can see these values if you click on the scan with the right mouse button in the Structure View and select Properties in the context menu. On the Scan tab, the position and orientation are displayed in compact notation with a single angle of rotation. 158 Chapter 13: Advanced Functions SCENE LT 5.5 User Manual Figure 13-9: Orientation displayed compactly On the Transformation tab, you will see the same information displayed in a more intuitive way. 159 Chapter 13: Advanced Functions SCENE LT 5.5 User Manual Figure 13-10: Orientation displayed more intuitively Of course, coordinate transformations can not only be applied to local coordinates but can also be used to convert from one global coordinate system to another. For example, you could use a hall coordinate system as the first coordinate system, which has the origin in the corner of a hall and whose axes run along the walls of the hall. On a greater scale, you could define a plant coordinate system whose origin lies in the south-west corner of the plant premises and whose axes match the four points of a compass. Figure 13-11: Hierarchical transformations Then you only have to describe the transformation between the hall and the plant premises to automatically obtain all the coordinate specifications within the hall in plant coordinates. SCENE LT proceeds hierarchically from inside to outside: first, the local coordinates within the scan are transformed into hall coordinates and these are then converted into plant. 160 Chapter 13: Advanced Functions SCENE LT 5.5 User Manual The position of the scan is not only stored in the Workspace and its corresponding file .fws, but also in the scan file itself. When using hierarchical transformations, you should note that the scan file only stores the local transformation, not the global. In the example above, this means that the scan file only contains the relative position to the hall, not to the plant. Transformation and Registration Registration of scans is always performed in the global coordinate system. If you have added transformations in the scan folders, these transformations will of course also be used during the registration. The result might not be the one you expected: the scans will be positioned on the same global coordinates as they would have without the additional transformations! Only their local coordinates may differ. If you want to add a transformation because you don’t want to use the coordinate system of the surveyor, you should input it into the References folder. 13.3 Exemplary Driver Configuration for the Stereoscopic Mode This chapter describes how to enable OpenGL Stereo for an exemplary hardware and driver configuration. Enabling OpenGL Stereo on comparable configurations should be similar. The stereoscopic mode will most likely run with other driver versions, too. However, the menu structure may look different than described here. Exemplary hardware and driver configuration used for this description: • • Hardware o NVIDIA Quadro Graphic Card o NVIDIA 3D Vision (Shutter Glasses) o 120 Hz Monitor o Compatible cable (HDMI 1.4 or Dual Link DVI) Driver o NVIDIA Quadro/NVIDIA Tesla Driver (Release 295.73) Follow these steps to configure your system: • Enable OpenGL quad buffering: • Open the NVIDIA system control. For Windows 7: right click on the Desktop and choose NVIDIA system control in the context menu. • In the NVIDIA system control tool o select Manage 3D Settings in the structure tree on the left. o In the pane that is shown on the right set 3D OpenGL Stereo as global preset under global settings. 161 Chapter 13: Advanced Functions SCENE LT 5.5 User Manual Figure 13-12: Enabling OpenGL quad buffering 1. Set the 120 Hz Monitor as the primary output device (only when using multiple displays): o Select Set up multiple displays in the structure tree on the left. In the pane that is shown on the right, right click on the 3D monitor and select Make this the Windows main display. Figure 13-13: Select primary display 2. Ensure that the monitor refresh rate is set to 120 Hz. o Select Change resolution in the structure tree. 162 Chapter 13: Advanced Functions SCENE LT 5.5 User Manual o Select the 3D monitor and then choose 120 Hz in the refresh rate drop down box. The refresh rate of 120 Hz is not available for some resolutions. If the refresh rate is not available for any resolution, the display was not recognized as a 3D display. In this case refer to the manual of the display. Figure 13-14: Select primary display 3. Activate NVIDIA vision. o Switch on the shutter glasses by pressing the button on its left temple. Please see chapter “View (3D View and Quick View)” on page 49 on how to enable the stereoscopic mode in SCENE LT and view the point clouds in 3D. 13.4 3DConnexion 3D Mouse Support 3DConnexion1 is a manufacturer of 3D mice for navigating and manipulating 3D content. The 3DConnexion 3D mice are supported by SCENE LT. Compared to the use of traditional mice and keyboards, such a 3D mouse may make navigation in your 3D data much more intuitive and controllable. Gently push, pull, twist or tilt the Controller Cap of the 3D mouse to pan, zoom and rotate in your 3D data. Increase pressure to go faster or decrease pressure to make intricate adjustments. When operating the Controller Cap, the 3D mouse acknowledges the selected camera mode. In fly mode, for example, you can rotate the camera by twisting the cap. In camera pan mode, twisting it has no effect since only left-right and up-down movements of the cap are recognized. When a 3D View tool such as the measurement tool is selected, the 3D mouse operates in the examine mode. You can also use the 3D mouse to rotate and zoom in the Quick View and to pan and zoom in the Planar View. 1. www.3dconnexion.com 163 Chapter 13: Advanced Functions SCENE LT 5.5 User Manual When using a 3DConnexion Mouse, please make sure to always use the latest drivers. They can be downloaded from www.3dconnexion.com. Please refer to the 3DConnexion documentation for more information on installing and setting up the 3D mouse. 13.4.1 Predefined Commands If the 3DConnexion Add-in for SCENE LT has been installed with the driver of the 3D mouse, the following assignment of keys will be available (the number of available buttons varies with the available 3D mouse model): • Fit: Move the camera to show the whole SCENE LT in the 3D View; return to the initial zoom level in the Quick View and Planar View. • Menu: Open the settings menu of the 3D mouse. • T: Display the top view. • B: Display the bottom view. • L: Display the left view. • R: Display the right view. • F: Display the front view. • Bk: Display the back view. • Rot: Toggle rotation on/off. • Pan Zoom: Toggle pan and zoom on/off. Optionally, the following commands can be assigned to the function keys from 1 to 10 with the 3Dconnexion settings tool (this tool is accessible from the Windows start menu or the task bar. Please see the manual of the 3DConnexion mouse for more information). • Switch to fly mode. • Switch to examine mode. • Switch to walk mode. • Switch to camera pan mode. • Set the rotation point automatically during movement. • Set the rotation point automatically after movement. • Don’t set the rotation point automatically. • Show the rotation point always. • Show the rotation point during movement. • Hide the rotation point. 13.4.2 Adjusting the 3D Mouse Behavior To adjust the behavior of the 3D mouse and to access further functions, open the settings menu with the Menu button on the 3D mouse. 164 Chapter 13: Advanced Functions SCENE LT 5.5 User Manual Figure 13-15: 3DConnexion Mouse – Settings Rotate – Switch the rotation capability on or off. Pan and Zoom –Switch the pan and zoom capability on or off. Disable Rolling – Switch the roll axis on or off. Invert 3D Mouse in Examine Mode – Invert all axes in the examine mode. Invert 3D Mouse in Quick View – Invert all axes in the Quick View. Speed – Set the speed of movement. Fly Mode – Switch to fly mode. Examine Mode – Switch to the examine mode. Walk Mode – Switch to walk mode. Camera Pan Mode – Switch to camera pan mode. Rotation Point – Adjust the behavior of the rotation point. For more information, see chapter “Navigating in the 3D View” on page 43. 165 Chapter 13: Advanced Functions SCENE LT 5.5 User Manual 166 Chapter 13: Advanced Functions SCENE LT 5.5 User Manual Chapter 14: Hotkeys Key(s) Function Ctrl + O Open Workspace Ctrl + Shift + N Create new scan project Ctrl + F Find and locate objects in workspace 3D View (general) B Toggle between Walk- and Fly mode Space Toggle between Fly mode and Examine mode Ctrl-Key (hold down) Temporarily use Examine mode when another navigation mode is active Middle mouse button (hold Down) Temporarily use pan mode Shift + X Fly to point Q, E Roll camera left, right Page Up / R Page Down / F Move up Move down Shift + X Fly to point Q, E Roll camera left, right Page Up / R Page Down / F Move up Move down +/- Zoom in or out Shift + middle mouse button (click): Set the rotation point P Toggle between perspective camera and orthogonal camera V Remove camera rolling C Toggle Clear View T Align camera to surface normal X Move Camera to 3D point Alt + P Save screenshot of current 3D View Backspace Go back to previous camera position 1, 2, 3, 4 Point size 1, 2, 3, and adaptive point size (4) Ctrl + A Select all points (only the points of scan point clouds or the project point cloud) Ctrl + D Dismiss the current scan point selection (only for point selections of the scan point cloud or the project point cloud) Ctrl + F2 Create new viewpoint F2 Go to next viewpoint Shift + F2 Go to previous viewpoint 3D View (fly mode) Arrow Keys W, A, S, D 8, 4, 3, 6 (on numeric key pad) Move camera forward, left, backwards, right 167 Chapter 14: Hotkeys SCENE LT 5.5 User Manual I, J, K, L Rotate camera upwards, left, downwards, right 3D View (examine mode) Arrow Keys W, A, S, D 8, 4, 3, 6 (on numeric key pad) Move camera backwards (object away), right (objects left), forward (objects closer), left (objects right) I, J, K, L Rotate camera downwards (move towards top view of object), counter clockwise (object clockwise), upwards (move towards bottom view of object), clockwise (object counter clockwise) 168 Chapter 14: Hotkeys SCENE LT 5.5 User Manual Chapter 15: Reference Handbook 15.1 Meaning of the symbols in the Structure View Symbol Meaning Workspace (chapter “Workspaces” on page 17) Folder (chapter “Workspace Structure” on page 17) Folder for meshes and imported objects Cluster Scans Folder Scan Virtual scan Point (chapter “Geometric Object Types” on page 97) Sphere (chapter “Geometric Object Types” on page 97) Plane, Rectangle (chapter “Geometric Object Types” on page 97)) Slab (chapter “Geometric Object Types” on page 97) Pipe (chapter “Geometric Object Types” on page 97) Line (chapter“Geometric Object Types” on page 97) Mesh (chapter “Geometric Object Types” on page 97), Imported object (chapter “Importing Objects in VRML data format” on page 113) Documentation (chapter “Documentation Object” on page 110) Region (chapter “Regions” on page 112) Clipping box (chapter “Creating a Clipping Box” on page 84) View point (chapter “Managing Viewpoints” on page 47) Picture Overview map (chapter “Overview Map” on page 58) Fit Scans, Cluster Fully loaded (chapter “Loading Scans” on page 31) Loaded in reduced size (chapter “Loading Scans” on page 31) Scan with scan point cloud (chapter “Working with Scan Point Clouds” on page 33) Modified scan (chapter “Save Scan projects” on page 25) 169 Chapter 15: Reference Handbook SCENE LT 5.5 User Manual Reference scan or cluster Fixed scan or cluster Locked Scan Manager (chapter “Checking Results” on page 73) Global Origin Missing file Fitting Active fit (chapter “Working with Objects” on page 96) Outdated active fit (chapter “Working with Objects” on page 96) Good quality (chapter “Working with Objects” on page 96) Compromised quality (chapter “Working with Objects” on page 96) Seriously compromised quality (chapter “Working with Objects” on page 96) 15.2 Menu Bar Figure 15-1: Menu bar 15.2.1 File Figure 15-2: File Menu New - Create a new local workspace or a new scan project. If you open a new project you are asked to provide its storage location and its name. The new local workspace or the new scan project and its project workspace are initially empty and you have to fill them. For more information, see chapters “Workspace Structure” on page 17 and “Creating Scan Projects” on page 20. Open - Opens an existing project, workspace or scan. 170 Chapter 15: Reference Handbook SCENE LT 5.5 User Manual Close - Closes the loaded workspace. If the workspace has been changed, you will be asked to save the changes. After closing, a new empty workspace is automatically created. Save - Saves the workspace. If the workspace has not been saved yet, you will be asked to specify a location to save it to. When saving, the scan data is saved separate from the other workspace data. The scan data is saved in files with the extension .fls in a folder called Scans. The remaining data of the workspace is saved in a file with the extension .fws. Saving can fail if the files are write-protected by Windows. Also, changed scan data is not saved if Save modified scan points is not enabled under Tools Options Scan Data (see chapter “Tools” on page 174). Save As - Saves the opened local workspace under a different name and possibly in a different location. If the workspace does not belong to a scan project yet, you may add it to an existing project or to a new project. In this case, the following Save As dialog appears: Figure 15-3: Save As Project Location – Path to the project. Name – Name of the existing or new project. Use Existing – Click to select an existing project and add the workspace as a local workspace to this project. Create New – Click to create a new project and add the workspace as a local workspace to this project. Workspace Path and Filename – Select the path and filename for the local workspace. If the workspace is already a part of an existing project, the workspace will be saved as a local workspace under a different name and possibly in a different location but stays part of this project. You cannot add the workspace to another project. Import Adding additional data, and expanding the current workspace. 171 Chapter 15: Reference Handbook SCENE LT 5.5 User Manual The following data can be imported: o Scans – Scans can be imported in FARO Laser Scan format, SCENE LT can import scans in Leica’s PTZ, as well as in other formats: .e57, .ptx, .xyz. For more information on the supported file formats, please see chapter “External scan data of other producers” on page 60. o Image files – Image files like CAD layout plans or pictures can be imported in .bmp, .jpeg,.png and .tif format. o Survey data – The coordinates of the scan points that are extracted for registering the scan (file format see chapter “Survey data” on page 60). If a scan point with the same name already exists in the workspace, its values are overwritten. o CAD Models – Can be imported in the multivendor-capable format VRML. For this, see chapter “Importing Objects in VRML data format” on page 113. Workspaces – Expands the current workspace by all the elements from the imported workspace. If the imported workspace and the current workspace have an object with the same name, it is replaced by the object from the imported workspace. Scan Project Figure 15-4: File Scan Project menu The functions in the scan project menu are described in chapter “Project Toolbar” on page 194. Print SCENE LT can print the current Planar View, Quick View or 3D View. For the Planar View, three print pages are created: o A circumferential view in one piece. o A circumferential view divided into two sections. o The visible area in the Planar View. For the Quick or 3D View a single print page is created. Print Preview - Opens the print preview. Print Setup - Opens the dialog for the print setup. Recently loaded workspaces and scan projects - A list of the local workspaces and scan projects loaded recently, which can be loaded directly. Exit - Exits SCENE LT. 172 Chapter 15: Reference Handbook SCENE LT 5.5 User Manual 15.2.2 Edit Figure 15-5: Edit menu Clear Selection – Clears a scan point selection. Select All – Selects all scan points of the scan in the active planar or Quick View. Delete Object – Deletes the selected object. Delete Scan Points – Deletes the selected scan points of a scan. Properties – Opens the properties dialog of the selected object. 15.2.3 View Figure 15-6: View menu Contrast – Choose between low, medium or high contrast adjustments for the Planar View. Tabbed Documents – Multiple views are contained in a single window. Use the tabs to navigate between them. If you uncheck this option every view will be displayed in its own window. Presentation Mode – Displays SCENE LT in full screen mode. SCENE LT is minimizing all menus and toolbars to provide maximum space on the screen for scan data. Show Workspace – Hides or reveals the Structure View of the workspace. Show Statusbar – Status bar along the bottom edge of the screen which displays scan point data, command details or responses of the command last executed. Toolbars – Hides or reveals the different toolbars. View – Opens workspace in 3D. Opens the FARO Focus3D scanner administration. 173 Chapter 15: Reference Handbook SCENE LT 5.5 User Manual 15.2.4 Tools Figure 15-7: Tools menu Select – Selects scan points. Choose between the various available selection tools. Point Settings Figure 15-8: Tools Point Settings Change the scan point size in the 3D View, o Select between three preset sizes or o Use the Adaptive Point Size to use the setting you have made in the Visibility Settings dialog (see chapter “3D View ” on page 198). o Enable or disable Gap Filling. o Enable or disable Supersampling. For more information, see chapter “3D View ” on page 198. Measure Scan Points – Take measurements between scan points. For more information, see chapter “Measuring Distances” on page 117. Mark Objects – Use the currently selected object marker tool. For more information, see chapter “Working with Objects” on page 96. New Point – Creates a new point in the 3D View. Pipe Fit – Offers an alternative algorithm to fit a pipe. For more information see chapter “3D View ” on page 198. Find and Locate Object – Search for objects in the workspace. For more information see chapter “Workspaces” on page 17. Apps – Opens the App manager to install new apps or to manage the available apps. For more information see chapter “App Manager” on page 153. 174 Chapter 15: Reference Handbook SCENE LT 5.5 User Manual Options General Figure 15-9: Tools Options - General Use Project Selector – Use the Project Selector as the start screen of SCENE LT. For more information see chapter “Working with the Project Selector” on page 7. Automatically save model – Enable or disable the auto save option and set the auto save interval in minutes. For more information, see chapter “Save Scan projects” on page 25. Options Export Settings for the export of scan points. 175 Chapter 15: Reference Handbook SCENE LT 5.5 User Manual Figure 15-10: Tools Options Export Full Scan – Export the entire scan. Selection – Export the selected area of a scan. Min. Distance – The minimum distance the exported scan points can be from the scanner. Scan points situated closer are not exported. Max. Distance – The maximum distance the exported scan points can be from the scanner. Scan points situated further away are not exported. Subsample – To reduce the amount of exported data, you can impose a restriction on the export so that only every second, third, ... scan point is exported. Rows – Reduction by thinning out the rows. Columns – Reduction by thinning out the columns. Color and Grey –Exports the scan points with grey and color information if both are available and if this is supported by the selected export format. Grey and color information can be exported to these formats: E57, XYZASCII, PTS and PTX. Local Coordinates Use Local Coordinates - Enable to export the points in the local coordinate system of an available Clipping Box. Select the box from the drop down list. This setting only applies to points of scan point clouds or the project point cloud. For more information on exporting scan points, see chapter “Export Settings” on page 137. 176 Chapter 15: Reference Handbook SCENE LT 5.5 User Manual Options Units Figure 15-11: Tools Options - Units Display – Settings for the units in the display. Length – Display unit for lengths. Small Sizes – Display unit for small lengths, such as the quality criteria of the fit objects. Angle – Display unit for the angle. Import – Settings for the units when importing. Length – Import unit for lengths. Export – Settings for the units when exporting. Length – Export unit for lengths. You can select between these units of length: o Metric units of length: meter [m], centimeter [cm], millimeter [mm] o International yard [yd], foot [ft], inch [in] o U.S. Survey yard [yd US], foot [ft US], inch [in US] 177 Chapter 15: Reference Handbook SCENE LT 5.5 User Manual Options Tomograph Figure 15-12: Tools Options - Tomograph Raster Size – The length of the raster edge. Min. Hits – The minimum number of scan points with which a raster field turns black. Max. Hits – The maximum number of scan points with which a raster field still turns black. If the number is exceeded, the raster field is rated as blank. The specification of –1 means an infinite number. Export Height – Setting for whether the raster fields should lie at the height of 0 or on the mean value of the scan points that are in them. For more information, see chapter “Tomograph” on page 140. 178 Chapter 15: Reference Handbook SCENE LT 5.5 User Manual Options VRML Figure 15-13: Tools Options - VRML Scan points as is – Points are exported as points. Note: a lot of VRML viewer programs do not support points! Scan points as sphere – Scan points are exported as small spheres. Scan points as boxes – Points are exported as small boxes. VRML2 – Export in VRML2 format. Otherwise VRML1 is used. For more information, see chapter “VRML” on page 141. 179 Chapter 15: Reference Handbook SCENE LT 5.5 User Manual Options Import Figure 15-14: Tools Options - Import Import Length Unit – Import unit for lengths. XYZ-Import – Specifications for importing scans in XYZ text format. Explicit limits – Explicit specifications of the scan size. o Rows – Number of rows. o Columns – Number of columns. o Max. Reflection – Maximum reflection value. Deduce limits from import file – SCENE LT calculates the number of rows and columns from the apportionment of scan points in the import file. o Options Scan Data Increase size to compensate angular inhomogeneities – Large variations in angle values are balanced out by doubling the row and column number. Settings for loading and saving scans. 180 Chapter 15: Reference Handbook SCENE LT 5.5 User Manual Figure 15-15: Tools Options - Scan Data Scan maximal size Auto adjustment – A scan may only take up half of the main memory and is loaded with reduced resolution if necessary. Mio points – When loading, a scan is reduced to this maximum number of scan points (specified in millions, so 2 correspond to 2,000,000 scan points). unlimited – The number of scan points is unlimited. Scan color Use grey – If grey values of the scan points exist, load them and ignore any color values. Use color – If color values of the scan points exist, load them and ignore any grey values. Save modified scan points – Modified scan points of a scan are also saved again in its file. Scan points are changed by applying filters, for example. Colorize all scan points – The parallax between camera and scanner may lead to objects which are visible in the scan but not visible in the picture, because an object in front of them hides it from the camera, but not from the scanner. Normally these objects wouldn’t get colorized. When you set the checkmark here, these objects will get the same color as the object in front of them. 181 Chapter 15: Reference Handbook SCENE LT 5.5 User Manual Options Folder Figure 15-16: Tools Options - Folder SCENE LT WebShare Local Projects Folder – Path to a local folder that contains WebShare projects. When started, WebShare will search in this folder for projects. Existing projects will then be displayed in the projects list of SCENE LT WebShare. Specify the folder manually or check Deduce from last export to use the folder of the last WebShare export. Project Locations – Specify the paths to the folders that contain your scan projects. The projects in these folders will be listed in the project selector. Separate multiple folders by semicolon. Scanner Snapshots Locations – SCENE LT will transfer Focus3D scanner snapshots from SD cards to this folder. 182 Chapter 15: Reference Handbook SCENE LT 5.5 User Manual Options View Figure 15-17: Tools Options - View Mark Distance Range – Certain ranges of a scan can be emphasized in color in the Planar View. Activate at Startup Time – The emphasis is always automatically used when starting a Planar View of a scan. Invalid Points – If checked, invalid points are also displayed. Color Coded Distances – The emphasis should not be one color but should assume various colors depending on the distance. Close scan points are colored red and far away scan points are colored blue. Min. Distance – The minimum distance at which the emphasis should start. Max. Distance – The maximum distance at which the emphasis should end. Plane Distance Visualization Max. Dist. – Sets the boundaries within which you can color in the scan points around a plane. For this, see chapter . Advanced Textures / Offscreen Rendering - With some older graphic cards, the 3D View might not be displayed correctly. Switching off the advanced textures and/or offscreen rendering might solve this. When switching off offfscreen rendering, the stereoscopic view, the clear view, gap filling and supersampling will not be available anymore. 183 Chapter 15: Reference Handbook SCENE LT 5.5 User Manual Options Matching Figure 15-18: Tools Options – Matching Open Properties by Object Marker – select this checkbox if the properties dialog of an object shall be displayed after you marked this object. Expand Plane Settings Settings for the creation of limited planes. Figure 15-19: Tools Options – Matching Expand Plane Settings Max. Distance – The maximum distance of a scan point from the plane. Max. Normal Diff. – The maximum deviation of the normal in the area surrounding a scan point from the normal of the plane to be expanded. Max. Local Normal Diff. – The maximum standard deviation of the normal in the surrounding area of a scan point. Planar Test Size – The size of the analyzed surrounding area. Min. Border Split [m] – Smoothing parameter for the border line in the 3-dimensional space. Min Border Split [px] – Smoothing parameter for the border line in the Planar View. You can set the defaults using the Defaults button. For more information, see chapter “Working with Objects” on page 96. 184 Chapter 15: Reference Handbook SCENE LT 5.5 User Manual Match Sphere Settings Figure 15-20: Tools Options – Matching Match Sphere Settings In Match Sphere Settings, you can define the preferred radii of the used sphere reference object. You can preset more than one preferred sphere radius by entering the radii among one another into the text field. Scan Registration – Select this to see and edit the sphere radii used for the scan registration. Forensic Analysis – If you have the Forensic Analysis plugin installed, select this to see and edit the sphere radii used for the forensic analysis. You can set the defaults using the Defaults button. For more information, see chapter “Working with Objects” on page 96. 185 Chapter 15: Reference Handbook SCENE LT 5.5 User Manual Options Language Figure 15-21: Tools Options - Language Automatic language selection – SCENE LT determines the language according to the regional settings of Windows. Manual language selection – Select one of the available languages. You may have to install additional fonts. 186 Chapter 15: Reference Handbook SCENE LT 5.5 User Manual Options Default Filter Figure 15-22: Tools Options - Default Filter When loading a scan for the first time a set of default filters will be applied if Apply default filter on first load is enabled. It is recommended to leave this option enabled. With a filter, selected scan points are corrected or removed from the scans. This is determined by the selection criteria. The filters differ according to which method they identify an inaccurate scan point and which counter measure is then taken. A filter examines each scan point and establishes a quality value in accordance with its particular method. If this quality value is outside the threshold you have set, the scan point is either corrected or removed. In order to identify an inaccurate scan point, the filters running compare the scan point with the scan points in the surrounding area. The surrounding area is oriented towards the scanner's recording technique, in other words, it is oriented towards the rows and columns, as they can be seen in the Planar View. 187 Chapter 15: Reference Handbook SCENE LT 5.5 User Manual Figure 15-23: The area surrounding a scan point In Figure 15-23 this surrounding area oriented towards the recording technique is shown. The single scan point marked has the scan points within the surrounding square in its near vicinity. Using filters, you can set what should be regarded as the surrounding area. In this example, the value 5 was set, which means the edge length of the surrounding square is 5. The Grid Size is the size of the surrounding area used for comparison. For each scan point of the scan or selection, the filter takes the valid scan points of this surrounding area and counts how many of them are at a distance to the scanner which is approximately the same as the distance of the scan point currently being viewed. A scan point is counted if the difference in distance is smaller than the Distance Threshold. If at least the percentage of scan points indicated by the Allocation Threshold in the surrounding area is also within this distance threshold, the scan point remains in the scan. Otherwise it is removed. 188 Chapter 15: Reference Handbook SCENE LT 5.5 User Manual Options Navigation Figure 15-24: Tools Options - Navigation Adjust the speed of movement, the variability of rotation, the behavior of the mouse wheel and the setting of the rotation point. See chapter “3D View” on page 37 for a description of these settings. 15.2.5 Window Figure 15-25: Window Menu New Window – Open another view. Cascade – Arrange windows so they overlap. Tile Horizontally / Vertically – Arrange windows horizontally or vertically so that they do not overlap. Arrange Icons – The minimized views are lined up in the bottom edge of the view area. List of views – A list of all the existing views, including the visible and minimized views. 15.2.6 Help Contents - Opens the table of contents of the online documentation. 189 Chapter 15: Reference Handbook SCENE LT 5.5 User Manual About SCENE LT - Gives details of the version number and copyright. Licensing – Opens the License Manager. For more information, see chapter “Licensing the Software” on page 3 and “Network Licensing” on page 229. Online Tutorial – Opens FARO’s YouTube channel where you can find various SCENE LT training videos. Online Support – Opens the FARO online support sites. 15.3 Toolbars 15.3.1 Standard Toolbar Figure 15-26: Standard toolbar New – Creates new project or workspace (see chapter “File” on page 170). Open – Opens existing workspace (see chapter “File” on page 170). Save – Saves workspace (see chapter “File” on page 170). Print – Opens the dialog box to select printing options (see chapter “File” on page 170). Help – Opens the table of contents of the online documentation. Visibility Settings – Used to display the visibility settings of the currently active view (see chapter “Visibility Settings” on page 48). 3D View – Opens a 3D View of the entire workspace, i.e. all models and loaded scans, or the project point cloud if available (see chapter “3D View” on page 37). Project Selector - Opens the project selector (see chapter “Working with the Project Selector” on page 7). Overview Map Map” on page 58). - Opens the Overview Map (see chapter “Overview 15.3.2 Planar View Toolbar Figure 15-27: Planar View toolbar Mark Range on/off – Emphasize certain ranges of a scan in color. The settings applied for this are described in chapter “Coloring the Range” on page 130. Navigation mode Set scale 100% – Set navigation mode. – Set the scale to 100%. Select scale – Select the scale from a list of available scales or by directly entering any scale. Zoom out – Reduce the scale to see a larger area. 190 Chapter 15: Reference Handbook SCENE LT 5.5 User Manual Zoom in – Increase the scale to see more details. Add documentation object - Select to add a documentation object to the scan (see chapter “Documentation Object” on page 110). 15.3.3 Point Selection Toolbar Figure 15-28: Point Selection toolbar Rectangular selection – Select a rectangular area of scan points. Linear selection – Select an arbitrarily shaped line of scan points. The selection has a thickness of one point. Polygonal selection – Select an arbitrarily shaped area of scan points. The selection consists of the area that is enclosed by the border line. Circular selection – Select a circular area of scan points. Polygonal edge selection – Select an arbitrarily shaped area of scan points, with the polygon following the visible edge in the scan points. Elliptical selection New selection Add selection - Select an elliptical area of scan points. – The next selection replaces the existing selection. – The next selection is added to the existing selection. Subtract selection selection. – The next selection is removed from the existing Intersect selection – The new selection results from the intersection of the existing selection and the next selection. See chapter “Selecting Scan Points” on page 81 for more information on point selection. 15.3.4 Measurement Toolbar Figure 15-29: Measurement toolbar Measurement between objects objects. – Take measurements between Measurement between scan points scan points. – Take measurements between See chapter “Measuring Distances” on page 117 for more information on measurements. 191 Chapter 15: Reference Handbook SCENE LT 5.5 User Manual 15.3.5 Identify Objects Toolbar Figure 15-30: Identify Objects toolbar Circular Flat Target - Create a circular flat target. Checkerboard Target Sphere Plane Slab - Create a checkerboard target. - Create a sphere. - Create a plane. - Create a slab. Scan Point - Create a point. See chapter for more information on creating objects with the object marker tools. 15.3.6 3D View and Quick View Toolbar Figure 15-31: 3D View and Quick View toolbar Observer-based navigation (Fly mode) – When navigating, it seems as though you are moving. For example, turning to the right has the effect that you seem to turn to the right and objects from the right margin move into the center of the image. Observer-based navigation (Walk mode) - Similar to the fly mode but the z-value cannot be changed when walking forward. Object-based navigation (Examine) – When navigating, it seems as though the objects move while you stand still. For example, turning to the right has the effect that your entire surroundings seem to turn right and objects from the center of the image move to the right margin. Pan – There is no turning available in this navigation mode. Mouse movements are interpreted as observer movements (Not available in the Quick View). Standard viewing directions – Sets the viewing direction along one of the coordinate axes. When using the shift-key, the opposite direction is set. Standard viewpoints – Changes the position and viewing direction to view the complete SCENE LT from top, right, back, or 192 Chapter 15: Reference Handbook SCENE LT 5.5 User Manual in an isometric view. When using the shift-key, a bottom, left, or front view is achieved (Not available in the Quick View). View all – Changes the position of the observer in such a way, that a view on all the objects is achieved (Not available in the Quick View). Set rotation point – Select a scan point or object in the 3D View to set the center of rotation to this point or object. (Not available in the Quick View). Align Camera to surface Normal align: • - There are two possibilities to by picking one point, if the plane has an even surface. The center of rotation will be set to the picked point. by picking three points, if the plane is uneven, or if you need a high accuracy. Align Camera to surface Normal align: - There are two possibilities to • by picking one point, if the plane has an even surface. The center of rotation will be set to the picked point. • by picking three points, if the plane is uneven, or if you need a high accuracy. Move Camera to 3D Point – Pick one point in the view to move the camera position to that point. The center of rotation will be set to this point. Go back to last camera position camera position. Save 3D View Screenshot content. – Move camera to the previous - Save an image of the current 3D View Manage Viewpoints – Save the current camera position and line of sight as a viewpoint, so that you can return to it later. In the drop down menu you can activate the previous or next viewpoint. For more information see chapter “Managing Viewpoints” on page 47. Grid - Display or hide a grid to visualize distances and scales. In the drop down menu further functions are available. Here, you may change the properties of the grid. See chapter “Visualizing Scales and Distances” on page 125 for more information. Documentation Object - Create a documentation object (see chapter “Surface Analysis” on page 129). Polygonal selection – Select an arbitrarily shaped area of scan points. The selection consists of the area that is enclosed by the border line. The polygon selection only applies to scan points organized in a rowcolumn order. If the points of scans and scan point clouds or the project point clouds are visualized in the same 3D View (combined viewing of the point cloud and scan points of scans), it only applies on the scan points of the loaded scans. For more information, see chapter “Selecting Scan Points in 3D View” on page 82. 3D polygonal selection - The 3D polygon selection tool is similar to the polygon selection tool above, but only selects points that are organized 193 Chapter 15: Reference Handbook SCENE LT 5.5 User Manual in a spatial data structure (points from scan point clouds or the project point cloud) . For more information, see chapter “Selecting Scan Points in 3D View” on page 82. 3D brush selector - The 3D brush selection tool can be used similar to brush tools known from 2D image processing programs and works with scan- or project point clouds only. Traditional row-column based scan points cannot be selected with the 3D brush selector. The brush works in three dimensional spaces, meaning that you can use the mouse to literally paint points which are going to be selected. Drag the mouse while holding down the left mouse button in order to paint the points. The 3D brush has the shape of a sphere. A transparent red circle will highlight the area where the selection sphere is currently located. Moving the cursor around while having the brush selector tool activated will highlight the scan points that are currently within the selection sphere. Use the mouse wheel to modify the radius of the sphere. Hold the shift key to modify the sphere radius more quickly. For more information, see chapter “Selecting Scan Points in 3D View” on page 82. Change point size - Change the size of the points in the 3D View. Select between three preset sizes or click the Adaptive Point Size button to use the setting you have made in the Visibility Settings dialog (see chapter “Tools” on page 174). A custom point size may be set in the Visibility Settings of the 3D View (see chapter “3D View and Quick View Toolbar” on page 192). Toggle gap filler - Enable or disable the gap filler (see chapter “3D View and Quick View Toolbar” on page 192). Toggle supersampling – Enable or disable supersampling (see chapter “3D View and Quick View Toolbar” on page 192). Toggle Clear View - Enable or disable the Clear View (see chapter “Creating a Clipping Box” on page 84). Create new Clipping Box - Create a new Clipping Box in the 3D View (see chapter “Creating a Clipping Box” on page 84). Toggle application of Clipping Boxes - Enable or disable clipping of all available Clipping Boxes globally. When disabled, the points hidden by the Clipping Boxes will be displayed again (see chapter “Enabling / Disabling Clipping” on page 90). 15.3.7 Project Toolbar Figure 15-32: Project toolbar Open project – Available if you are working on a local workspace. Opens the associated scan project. Share changes – Available if you are working on a local workspace. Shares your changes made in the local workspace to the scan project. Create Local Workspace - Available if you are working on the scan project. Creates a local workspace from the project workspace. 194 Chapter 15: Reference Handbook SCENE LT 5.5 User Manual Project history – Shows the version history of the scan project and provides the possibility to revert to previous versions. Process • Replay – If scans did already pass some processing steps, Replay turns the scan process back to the beginning.Processing is now executed with higher precision than it was done during capturing. More scan points are created. • Extensive Marker Detection: provides a further possibility to detect the markers you have placed in the scene. While the marker detection in SCENE Capture checks if there are markers in the live scene, this marker detection now searches for marker images in your scans. This search is somewhat time consuming, but more precise. • Optimize Scans – Optimize Scans adjusts all frames of a scan to minimize the overall displacements errors. The function searches for loops in the scan and tries to close those loops. Loop closing is necessary because small errors from frame to frame may accumulate over time, resulting in gaps if you return to the same position again. • Color Smoothing – Averages the color of scan points in overlapping areas within the selected scan, and adjusts color effects caused by different lighting situations. • Stray Point Filtering – Removes stray points from the scan point cloud, creating a cleaner overall look. • Point Cloud Creation – Scan point clouds are optimized for fast visualization of large amounts of scan points. The scan point cloud has to be created for the single scans. The scan point cloud behaves very similar to scans. It can be transformed and moved around like the scans. 15.3.8 Correspondence Split View Figure 15-33: Correspondence split view toolbar Mark circular flat target - Mark corresponding circular flat targets. The circular flat target consists of a white circle on a dark background. The mean point of the circle is used for scan registration. Mark checkerboard target - Mark corresponding checkerboard targets. A checkerboard target fit determines the center point of the target’s four quadrants. This point is used for scan registration. Mark sphere - Mark corresponding spheres. Spheres should be fully visible in the scan. Make sure that they are not partly covered by other objects. Mark plane Mark slab - Mark corresponding planes. – Mark corresponding slabs. Mark scan point – Mark corresponding scan points. Since it is difficult to pick exactly the corresponding scan points, it is sufficient to pick them as precise as possible. 195 Chapter 15: Reference Handbook SCENE LT 5.5 User Manual Find correspondences between shown scans find correspondences between the found targets. - SCENE LT starts to Force current correspondences between shown scans - SCENE LT starts to force the correspondencing targets of the scans being displayed. Clear correspondences between shown scans - Deletes the correspondences and the correspondences folder. The targets are not deleted. Force Correspondence - Mark target objects. SCENE LT detects that the newly marked objects are correspondences, and forces them. Open Correspondence View – Opens the Correspondence View for a rough registration of the scans. See chapter “Manual Creation of Correspondences with the Correspondence Split view” on page 102. 15.4 Context Menus 15.4.1 Frequently Used Commands for Objects Visible – Make the selected object visible or invisible. Center – Display the selected object in the center and enlarged in the active view and use it as the center of rotation. Locate – Display the selected object in the center and enlarged in the active view. Set Rotation Point – In the 3D View, the selected object is used as the center of rotation. New Documentation – Attach a documentation object to the selected object. View 3D View – View the selected object in 3D View. Export… - Exports the selected object. Delete – Deletes the selected object. Rename – Renames the selected object. Properties – Opens the properties dialog. Material – Opens the dialog for the material setting. 196 Chapter 15: Reference Handbook SCENE LT 5.5 User Manual Figure 15-34: Material settings Create local material – If enabled, the object has its own material definition and changes made to it apply to this object only. Auto apply – If selected, new settings are applied and visible immediately; you do not need to click on the Apply button after changing the settings. Base Color – The base color of objects. Emissive Color – The color that the object radiates independently. This is only practical for objects that can radiate their own light. Specular Color – The color for the reflected highlights of the object. Shininess – A measure for the shininess of an object. The higher the value, the clearer and more differentiated the reflected highlights appear. Transparency – The transparency of an object. The higher the value, the better you can see through the object. Ambient Intensity – A measurement for how strongly the undirected ambient light is reflected. Using the Initial button you can go back to the initial values if you had changed the settings using Apply or Auto Apply. 15.4.2 Commands for Fit Objects Select – The selection that was used to create the fit object is reactivated. The selection combination mode determines how the new selection results from the existing selection and the reactivated selection. Delete – Deletes the fit object. Rename – Renames the fit object. Properties – Opens the properties dialog. 197 Chapter 15: Reference Handbook SCENE LT 5.5 User Manual 15.4.3 3D View Figure 15-35: Context menu: 3D View Current Selection – Delete the scan points of the current selection or clear the selection (only applicable for selected scan points of the scan point clouds or the project point cloud. For more information, see chapter “Selecting Scan Points in 3D View” on page 82). Add Scan Points – Add the scan points of the current selection. Export Scan points – Export the visible scan points that are organized in a rowcolumn order (the scan points of the loaded scans). 3D Selection – Export the selected scan points of scan point clouds or the project point cloud. For more information on exporting scan points, see chapter . Objects – Export objects within the selection. For more information, see chapter “Exporting Objects in DXF, IGES and VRML data formats” on page 112. Show All Objects – All objects, which have been set to invisible, are reset to visible. View All – Changes the observer position and viewing direction in a way that the view displays all objects and scan points. Create Objects - only works with point clouds. First, use the Point Cloud Polygon selector or the 3D Brush selector to mark scan points. Then, select if you want SCENE LT to create a Sphere, Sphere radius, Plane, Expanded plane, or Mean point in there. Camera Figure 15-36: Context menu: 3D View Camera Perspective – Normally, the 3D View displays the scan points and objects with the correct field of view, in other words, objects of the same size appear smaller with increasing distance. Orthographic – You can also change the view to orthographic representation. Then, objects of the same size always appear the same 198 Chapter 15: Reference Handbook SCENE LT 5.5 User Manual size, regardless of how far away they are. This type of representation is common in a lot of CAD systems. Properties… Figure 15-37: Camera properties Auto Apply – If selected, new settings are applied and visible immediately; you do not need to click on the Apply button after changing the settings. Global Coordinates – If checked, coordinates are displayed in the global coordinate system; else they are displayed in the coordinate system of the scanner (see chapter “Coordinates” on page 155). Position – The translation portion of the transformation. X – To key in a transformation in the x direction. Y – To key in a transformation in the y direction. Z – To key in a transformation in the z direction. Scroll bar – Set the transformation using the mouse. The direction of the transformation will be the x, y or z coordinate that is highlighted in yellow. Each tick increments by – Set the increment for the scroll bar. Rotation Angle – The angle of rotation if the rotation axis is split along the coordinate axes. X – The angle of rotation around the x axis. Y – The angle of rotation around the y axis. Z – The angle of rotation around the z axis. Scroll bar – Set a new angle of rotation. 199 Chapter 15: Reference Handbook SCENE LT 5.5 User Manual To change a value, you can either enter the required value directly into the appropriate field, or you first select the field and then use the corresponding slider to change the value step by step. You can set the increment using the drop-down box. If you hit the edge with the slider, simply reselect the field and the slider will return to the center without you losing your previous changes. Axis snap – If checked, you can change the rotation for the current axis independently from the others. This is achieved by changing the order in which the rotations are applied (see chapter “Coordinates” on page 155). Scale – Enter length, width and height, if you know the data. Scroll bar – Set the transformation using the mouse. The direction of the transformation will be the x, y or z coordinate that is highlighted in yellow. Each tick increments by – Set the increment for the scroll bar. Clear View Mode – Turns clear view mode on or off (see chapter “3D Clear View” on page 47). Rotation Point (examine navigation mode) Figure 15-38: Context menu: 3D View Rotation point Automatic – During Movement – Automatically sets the rotation point to the point or object that is currently nearest to the center of the current field of view. This will be done dynamically while navigating in the view. Automatic – After Movement – Automatically sets the rotation point to the point or object that is nearest to the center of the current field of view. This will be done after movement has stopped. Manual – The rotation point will not be set automatically. You may set it manually with the button from the 3D View toolbar. Use Selected Object – Uses the center of the currently selected object as the rotation point. In case the automatic setting of the rotation point and Use Selected Object are both enabled, Use Selected Object has the precedence. Show - Always– Always show the rotation point (the rotation point is visualized as a red dot in the view). Show – During Movement – Show the rotation point only when the point cloud is being moved. Hide – Never show the rotation point. 200 Chapter 15: Reference Handbook SCENE LT 5.5 User Manual Visibility Settings – Open and edit the visibility settings of this view. See chapter “Visibility Settings” on page 48 for more information. 15.4.4 3D View – Point Selection This context menu is available for point selections that were made on the points of scans, not scan point clouds or the project point cloud. Figure 15-39: Context menu: Selected area Delete Inside Selection – Delete all scan points inside the selected area. Delete Outside Selection – Delete all scan points outside the selected area. Remove Selection – Remove the selection. 15.4.5 Planar View and Quick View Figure 15-40: Context menu: Planar View and Quick View View – Open the scan in a new view; either as 3D View, Quick View (available in Planar View) or in Planar View (available in Quick View). Scan Points – create a new scan from the scan. Export – Direct Export – Exports the scan point with the settings of the last export. Scan points – Export the scan points of the scan. Scan Properties – Opens the properties dialog of the scan. Visibility Settings – Open and edit the visibility settings of this view. See chapter “Visibility Settings” on page 48 for more information. 15.4.6 Planar View or Quick View – Point Selection View – Opens a 3D View of the selected scan points. 201 Chapter 15: Reference Handbook SCENE LT 5.5 User Manual Scan Points Figure 15-41: Context menu: Point selection Scan Points Push/Pull Figure 15-42: Context menu: Point selection Scan Points Push Push – All scan points of a selection which are situated between Minimal Distance and Maximal Distance, are moved away from the scanner position (being the origin of the local coordinate system of the scan) by the value that is specified in Scan Properties Scanner Info Range. Pull – All scan points of a selection which are situated between Minimal Distance and Maximal Distance, are moved towards the scanner position (being the origin of the local coordinate system of the scan) by the value that is specified in Scan Properties Scanner Info Range. Create Scan – Create a new scan from the selected scan points. Figure 15-43: Context menu: Point selection Find Objects Create Objects – Manually fit object from the selected scan points. 202 Chapter 15: Reference Handbook SCENE LT 5.5 User Manual Figure 15-44: Context menu: Point selection Create Objects Sphere – Perform a sphere fit on the selected scan points. Sphere Radius – Perform a sphere fit with known radius on the selected scan points. Plane – Perform a plane fit on the selected scan points. Slab – Perform a slab fit on the selected scan points Expand Plane – Starting with the selected scan points, perform an automatic plane expansion. Mean Point – Determine the mean point of the selected scan points. Contrast Mean Point – Create a contrast mean point of the selected scan points. Usually used for circular flat targets. Line - Create Lines. Pipe – Create a pipe. Mesh – Create a mesh Region – Create a region. For more information on the creation of objects, please see chapter “Creating Geometric Objects” on page 107. Delete Objects – Delete all objects within the selection. Export – Export the scan points of the selection. For more information on exporting scan points, see chapter “Export Settings” on page 137. 15.4.7 Picture Figure 15-45: Context menu: Picture 203 Chapter 15: Reference Handbook SCENE LT 5.5 User Manual Loaded – Here a check mark shows whether the data of the picture is loaded. View – Opens a new Planar View of the picture. Import/Export Figure 15-46: Context menu: Picture Import / Export Export Objects – Exports all objects under the picture. Export Picture – Exports the picture in its original format or in JPEG format. Exchange Picture – Replaces the picture with an imported one. Undistort – Remove any so-called barrel or pin-cushion distortions from the picture. The distortion parameters have to reside inside the picture. 15.4.8 Plane Figure 15-47: Context menu: Plane New Figure 15-48: Context menu: Plane New Intersection Point – Creates an intersection point on the plane at the spot determined by the mouse pointer. Plane with Border - Creates a new limited plane with border lines from the point selection that was used to create the selected plane. Slab By Plane – Creates a slab from the plane (see chapter “Working with Objects” on page 96). Aligned Clipping Box – Creates a new Clipping Box aligned to the selected plane (see chapter “Creating a Clipping Box” on page 84). Documentation – Attach a documentation object to the selected object. 204 Chapter 15: Reference Handbook SCENE LT 5.5 User Manual View Scan Point Distance – Deviations from a level surface in relation to a plane are highlighted in color. See chapter “Surface Analysis” on page 129 Flip – turns the plane’s Normal for 180 degrees. Export… - Exports the selected object. Delete – Deletes the selected object. Properties – Opens the properties dialog. Limited Plane Figure 15-49: Context menu: Limited plane Set Border from Selection – The border line of the plane is replaced by the border line of the selection. View Scan Point Distance – Analyze the evenness of the surface. Deviations of the scan points from the plane will be highlighted in different colors. For more information, see chapter “Surface Analysis” on page 129. The remaining commands are described in chapter “Frequently Used Commands for Objects” on page 196 or “Plane Fit” on page 205. 15.4.9 Plane Fit See chapter “Commands for Fit Objects” on page 197. 15.4.10 Constraints Object See chapter “Frequently Used Commands for Objects” on page 196. 15.4.11 Constrained Plane Fit See chapter “Commands for Fit Objects” on page 197. 15.4.12 Slab All commands of the context menu of a slab can be found in the chapters “Frequently Used Commands for Objects” on page 196 or “Plane Fit” on page 205. 15.4.13 Slab Fit See chapter “Commands for Fit Objects” on page 197. 205 Chapter 15: Reference Handbook SCENE LT 5.5 User Manual 15.4.14 Sphere Figure 15-50: Context menu: Sphere New Figure 15-51: Context menu: Sphere New All commands of the context menu can be found in chapters “Frequently Used Commands for Objects” on page 196 or “Plane Fit” on page 205. 15.4.15 Sphere Fit See chapter “Commands for Fit Objects” on page 197. 15.4.16 Region Figure 15-52: Context menu: Region Select – The selection that was used to create the region is reactivated. The selection combination mode determines how the new selection results from the existing selection and the reactivated selection. Import/Export – Export the region as object. Delete – Delete the region object. The scan points are not deleted. All commands of the context menu can be found in chapters “Frequently Used Commands for Objects” on page 196 or “Plane Fit” on page 205. 206 Chapter 15: Reference Handbook SCENE LT 5.5 User Manual 15.4.17 Point Figure 15-53: Context menu: Point New Documentation – Attach a documentation object to the selected object. View – Opens a new 3D View of the point. Set Rotation Point – Sets the rotation point to the center of the scan point. Visible – Make the selected object visible or invisible. Export… - Exports the selected object. Delete – Deletes the selected object. Properties – Opens the properties dialog. 15.4.18 Point Fit See chapter “Commands for Fit Objects” on page 197. 15.4.19 Pipe All commands of the context menu can be found in chapters “Frequently Used Commands for Objects” on page 196 or “Plane Fit” on page 205. 15.4.20 Pipe Fit See chapter “Commands for Fit Objects” on page 197. 15.4.21 Line All commands of the context menu can be found in chapters “Frequently Used Commands for Objects” on page 196 or “Plane Fit” on page 205. 15.4.22 Line Fit See chapter “Commands for Fit Objects” on page 197. 15.4.23 Rectangle All commands of the context menu can be found in chapters “Frequently Used Commands for Objects” on page 196 or “Plane Fit” on page 205. 15.4.24 Rectangle Fit See chapter “Commands for Fit Objects” on page 197. 207 Chapter 15: Reference Handbook SCENE LT 5.5 User Manual 15.4.25 Scan Figure 15-54: Context menu: Scan Locate – Resumes the initial perspective of the view. In 3D View the rotation point will be set to the position of the scanner. Download – Only available with workspaces that were downloaded from a SCENE LT WebShare server. This command downloads the scan from the WebShare server to the project folder on your local hard disk. New – Create a specific object, folder or duplicate the scan (without objects). View – Open a new view of the scan. Loaded – Loads the scan points of the scan. Here a check mark shows whether the scan points of a scan are loaded. Operations – Apply several commands to the scan: Figure 15-55: Context menu: Scan Operations Registration Figure 15-56: Context menu: Scan Operations Registration Level – If no inclinometer data is available, you can level a scan manually. There are two possibilities to level: o by picking one point, if the plane has an even surface. o by picking three points, if the plane is uneven, or if you need a high accuracy. Color/Pictures Figure 15-57: Context menu: Scan Operations Color / Pictures 208 Chapter 15: Reference Handbook SCENE LT 5.5 User Manual Color Contrast Filter – Enhances the dynamic range of the color pictures. Restore Grey Image - Remove the color information and restore the original reflectance values.Import / Export Figure 15-58: Context menu: Scan Import / Export Export Objects – Export the objects of this scan. Export Scan Points – Export the scan points of the selected scan. This applies to the points of the scan only and does not export the scan points of any possible scan point cloud. Export Scan Point Cloud – Export the scan point cloud of the scan. Export Image – Obtains an overview image from the scan points and saves it in the file system in the same folder as the scans. Export Scan Parameters – Export the parameters of the scan. Save Objects in Scan – Save the objects of the scan in the scan file. Save Copy of Scan – Copy the scan to a target directory which is chosen by the user. For more information, see chapter “Save Scan projects” on page 25. Delete – Deletes the scan from the workspace. The associated file is not deleted. 15.4.26 Scan Fit Figure 15-59: Context menu: Scan Fit Delete – Deletes the fit object. Rename – Renames the fit object. Properties – Opens the properties dialog. 209 Chapter 15: Reference Handbook SCENE LT 5.5 User Manual 15.4.27 Scans Folder / Cluster Figure 15-60: Context menu: Scans folder or cluster Download – Only available with workspaces that were downloaded from a SCENE LT WebShare server. This command downloads the scans within the scan folder from the WebShare server to your local hard disk. New – Create a new Documentation Object, Cluster or a standard folder within the scan folder. View – Open the scans and objects of the scan folder, in the 3D View or in the Structure View. Load All Scans – Loads all scans, or more precisely, the scan points of the scans. Unload All Scans and Pictures – Unloads all scans and pictures. Scan points and pictures are removed from the memory. The scans are not deleted. Import/Export Figure 15-61: Context menu: Scan folder Import / Export Export Scan Points – Export the scan points of the scans in the scan folder or cluster. This applies to the points of the scans only and does not export the scan points of any possible scan point cloud. The scans will be loaded consecutively and unloaded again when the point export is complete. Import/Export 210 Chapter 15: Reference Handbook SCENE LT 5.5 User Manual Figure 15-62: Context menu: Scan folder Import / Export Export Scan Points – Export the scan points of the scans in the scan folder or cluster. This applies to the points of the scans only and does not export the scan points of any possible scan point cloud. The scans will be loaded consecutively and unloaded again when the point export is complete. Export Scan Point Clouds – Export the scan point cloud of the scans in the scan folder or cluster. Export as Project - Create a new SCENE LT project, or a new ReCap project. A dialog opens in which you can select the export format, a file name, and the location in which the new project shall be saved. Export Objects – Export objects. Scans need not to be loaded and are therefore not loaded automatically. Export Images – Obtains panorama images of the Planar View of each scan and saves these images in the file system in the same folder as the scans. Save Objects in Scans – Save the objects of the scans in the corresponding scan files. Delete Scans – Deletes the scan folder and all the scans in it from the workspace. The files belonging to the scans are not deleted. Export Objects – Export objects. Scans need not to be loaded and are therefore not loaded automatically. Export Images – Obtains panorama images of the Planar View of each scan and saves these images in the file system in the same folder as the scans. Save Objects in Scans – Save the objects of the scans in the corresponding scan files. Delete – Deletes the scan folder and all the scans in it from the workspace. The files belonging to the scans are not deleted. 15.4.28 Scan Manager Figure 15-63: Context menu: Scan Manager Delete – Deletes the Scan Manager. Rename – Renames the Scan Manager. Properties – Opens the Scan Manager. 211 Chapter 15: Reference Handbook SCENE LT 5.5 User Manual 15.4.29 Workspace Figure 15-64: Context menu: Workspace Download – Only available with workspaces that were downloaded from a SCENE LT WebShare server. This command downloads the complete content of the workspace from the WebShare server to your local hard disk. New – Create a new Point, Sphere, Checkerboard, Circular Flat Target, Corner Point, Plane, Slab, Documentation Object, Folder or Scan Folder in the Workspace. View – Open a 3D View, SCENE LT WebShare View or Structure View of the workspace. 3D View – Opens a 3D View with all the loaded scans and CAD models. Unloaded Scans are not loaded automatically. WebShare view – Opens WebShare. The workspace will only be displayed in WebShare if it already has been exported as a WebShare project. Structure View – opens a Structure View of the workspace. Import/Export Figure 15-65: Context menu: Workspace Import / Export Export Objects – Export objects. Note, scans need not to be loaded and are therefore not loaded automatically. Export Project - Exports the entire scan project. Select, if the new scan project will be used in SCENE or in ReCap. Then, select the target location and a project name. Export Project - Exports the entire scan project. Select, if the new scan project will be used in SCENE or in ReCap. Then, select the target location and a project name. Export Images – Obtains panorama images of the Planar View from all the scans in the workspace. The scans are loaded one after the other, the panorama image is created, then saved and then unloaded again. Export Positions – Saves the position specifications of all scans and reference objects. 212 Chapter 15: Reference Handbook SCENE LT 5.5 User Manual Visibility Figure 15-66: Context menu: Workspace Visibility 3D Visibility Settings – Opens the dialog with the default visibility settings for Quick Views and 3D Views. Planar View Visibility Settings – Opens the dialog with the default visibility settings for the Planar View. Layer Manager – Opens the dialog box of the layer manager. See chapter “Layer” on page 54 for more information. Create New Project – Creates a new scan project from the workspace. 15.4.30 Snapshot (Focus3D Scanner Administration) Figure 15-67: Context menu: Snapshot Administrate – Open the administration view of the snapshot. Scanner Service Request – Send the snapshot via email to the FARO Customer Service. Rename – Rename the snapshot Erase – Erase the content of the snapshot. All data of the snapshot will be deleted but the snapshot itself will be kept. Delete – Delete the complete snapshot. 15.4.31 Viewpoint Figure 15-68: Context menu: Viewpoint Activate – Go to the selected viewpoint in the current 3D View. For more information see chapter “Managing Viewpoints” on page 47. 213 Chapter 15: Reference Handbook SCENE LT 5.5 User Manual 15.5 Properties 15.5.1 Frequently Used Properties General Figure 15-69: Properties - General Name – The name of the object. The green traffic light right to the object name indicates that corresponding objects have been found in other scans. If corresponding references have not been found no traffic light will be displayed. Use for Place Scans, Correspondence Search and Automatic Name – The object will be used for the registration, correspondence relationships to this object are enabled and its name will automatically be changed if corresponding objects have been found or the name of a corresponding object has been changed. Local reference objects will have this option activated by default if their name has not been changed by the user manually. Use for Place Scans and Correspondence Search – The object will be used for registering scans, correspondence relationships to this object are enabled but its name will not be changed automatically. This means that the name of this object is fixed and corresponding reference objects in other scans will be named accordingly. Global reference objects and local references which have been (re-)named manually will have this option activated by default. Use for Place Scans – The object will only be used for registering scans but excluded from any correspondence search. Its name will not be changed automatically. Ignore for Place Scans – The object will not be used for registering scans and is excluded from any correspondence search. Its name will not be changed automatically. These options are relevant for the automatic correspondence search and for the registration of scans. Layer – The representation layer on which the object is situated. Transformation Select active layer – Enters the currently active representation layer. 214 Chapter 15: Reference Handbook SCENE LT 5.5 User Manual Figure 15-70: Properties – Transformation Position – The translation portion of the transformation X – To key in a transformation in the x direction. Y – To key in a transformation in the y direction. Z – To key in a transformation in the z direction. Scroll bar – Set the transformation using the mouse. The direction of the transformation will be the x, y or z coordinate that is highlighted in yellow. Each tick increments by – Set the increment for the scroll bar. Rotation Angle – The angle of rotation if the rotation axis is split along the coordinate axes. X – The angle of rotation around the x axis. Y – The angle of rotation around the y axis. Z – The angle of rotation around the z axis. Scroll bar – Set a new angle of rotation. To change a value, you can either enter the required value directly into the appropriate field, or you first select the field and then use the corresponding slider to change the value step by step. You can set the increment using the drop-down box. If you hit the edge with the slider, simply reselect the field and the slider will return to the center without you losing your previous changes. Axis snap – If checked, you can change the rotation for the current axis independently from the others. This is achieved by changing the order in which the rotations are applied (see chapter “Coordinates” on page 155). Global Coordinates – If checked, coordinates are displayed in the global coordinate system; else they are displayed in the coordinate system of the scanner (see chapter “Coordinates” on page 155). 215 Chapter 15: Reference Handbook SCENE LT 5.5 User Manual 15.5.2 3D Picture Fit Figure 15-71: 3D Picture fit properties Plane – Plane in a scan that is used as a reference to place the virtual scan and should be created from the surface where the picture has been taken. Properties – Opens the properties dialog of the plane. Scan – Scan that is used to select the matching points. Properties – Opens the properties dialog of the scan. Matching Points – Shows the matching points in the virtual scan (left matrix) and the corresponding scan (right matrix). View – Opens Planar Views of the scan and the virtual scan and arranges the windows if no Planar View has been open before. Scans that have not been loaded will be loaded automatically. Associate Points – Starts the tool to mark pairs of matching points in the Planar View of the virtual scan and in the Planar View of the scan Done – Ends the selection process of matching points. 2D projective deviation - The mean distance between the computed 2D projection of the marked 3D points and the corresponding points marked in the picture. The traffic light indicates the quality of this individual criterion. It is green at values <7.5px, red at values >15px and orange between them. 3D projective deviation – The mean distance between the computed 3D projection of the marked 2D points and the corresponding 3D points marked in the scan. The traffic light indicates the quality of this individual criterion. It is green at values <3mm, red at values >15mm and orange between them. 216 Chapter 15: Reference Handbook SCENE LT 5.5 User Manual 15.5.3 Constraints Object Figure 15-72: Constraints object properties Name – The name of the constraints object. Scanpoint Distance – A quality parameter of a plane. Max – The scan point distance of the plane with the highest distance. The traffic light indicates the quality of this individual criterion. It is green at values <4mm, red at values >20mm and orange between them. Mean – The mean value of all managed planes. The traffic light indicates the quality of this individual criterion. It is green at values <4mm, red at values >20mm and orange between them. Constraint Error – Constraints are implemented by functions that are zero if the .constraint is met. Deviations from zero are called Constraint Error. Max – Highest value of all constraint functions. The traffic light indicates the quality of this individual criterion. It is green at values <2.2e-013, red at values >1e-005 and orange between them. Mean – Mean value of all constraint functions. The traffic light indicates the quality of this individual criterion. It is green at values <2.2e-013, red at values >1e-005 and orange between them. Planes – Planes used to define constraints. Plane – Name and path of the plane. Fixed – Fixed planes are only used to define the constraint but will not be changed. 217 Chapter 15: Reference Handbook SCENE LT 5.5 User Manual Constraints – List of pairs of planes and the constraint chosen for this pair. Plane 1 – First plane. Plane 2 – Second plane. Description – The constraint chosen. 15.5.4 Constrained Plane Fit Figure 15-73: Constrained plane fit properties Global Coordinates – If checked, coordinates are displayed in the global coordinate system; else they are displayed in the coordinate system of the scanner (see chapter “Global Coordinates” on page 156). Plane Name – Name of the corresponding plane Name – Name of the fit (by default named according to the constraints object that manages this fit) Normal – The orientation determined by the fit. The orientation is given by the direction which stands perpendicular to the plane. Position – The position determined by the fit. Number of scan points – The number of scan points in the selection used for the fit. The traffic light indicates the quality of this individual criterion. It is green at values >80, red at values <20 and orange between them. Scan point distance – The standard deviation of the distance of the scan points from the calculated plane. The traffic light indicates the quality of this individual criterion. It is green at values <4mm, red at values >20mm and orange between them. Scan point drift – The average distance of the scan points from the calculated plane. With this, the scan points above the plane can be averaged out with the scan points below the plane. The traffic light indicates the quality of this individual criterion. It is green at values <1mm, red at values >5mm and orange between them. Last Constraint – The name and path of the last constraints object that has been used to manage this fit. 218 Chapter 15: Reference Handbook SCENE LT 5.5 User Manual 15.5.5 Measurement Figure 15-74: Measurement properties Overall Distance – Measured distance. When measuring between two points, the result will be the point-to-point distance. When using a plane or rectangle, the measurement is automatically taken perpendicular to this plane or rectangle. Note that negative distances will occur if the normal of the plane or rectangle points in opposite direction. Vertical Distance – Vertical part of the point-to-point distance. Horizontal Distance – Horizontal part of the point-to-point distance. Along X – The distance along the x axis of the point-to-point distance. Along Y – The distance along the y axis of the point-to-point distance. Show Distance – Select which values shall be shown in the views. Measure Objects –List of objects that were used for the measurement. List is empty for point-to-point measurements. 219 Chapter 15: Reference Handbook SCENE LT 5.5 User Manual 15.5.6 Picture Figure 15-75: Picture properties Spherical – A checkmark to indicate spherical pictures. 15.5.7 Pipe Figure 15-76: Pipe properties Global Coordinates – If checked, coordinates are displayed in the global coordinate system; else they are displayed in the coordinate system of the scanner (see chapter ). 220 Chapter 15: Reference Handbook SCENE LT 5.5 User Manual Pipe Name – The name of the pipe. Axis – The axis of the pipe. Position – The position of the pipe. Diameter – The diameter of the pipe. Length – The length of the pipe. 15.5.8 Pipe Fit Figure 15-77: Pipe fit properties Global Coordinates – If checked, coordinates are displayed in the global coordinate system; else they are displayed in the coordinate system of the scanner (see chapter “Global Coordinates” on page 156). Pipe Name – The name of the corresponding pipe. Name – The name of the fit object. Axis – The axis determined by the fit. Position – The position determined by the fit. Diameter – The diameter determined by the fit. Length – The length determined by the fit. Number of scan points – The number of scan points in the selection used for the fit. The traffic light indicates the quality of this individual criterion: green: >80 points orange: ≥ 20 and ≤ 80 points red: <20 points Scan point distance – The standard deviation of the distance of the scan points from the calculated pipe. The traffic light indicates the quality of this individual criterion: 221 Chapter 15: Reference Handbook SCENE LT 5.5 User Manual green: < 4mm orange: ≥ 4mm and ≤ 20mm red: >20 mm Scan point drift – The average distance of the scan points from the calculated pipe. With this, the scan points inside the pipe can be averaged out with the scan points outside the pipe. The traffic light indicates the quality of this individual criterion: green: < 1mm orange: ≥ 1mm and ≤ 5mm red: >5 mm 15.5.9 Plane Figure 15-78: Plane properties Global Coordinates – If checked, coordinates are displayed in the global coordinate system; else they are displayed in the coordinate system of the scanner (see chapter “Global Coordinates” on page 156). Normal – The orientation of the plane, given by the direction that stands perpendicular to the plane. Position – A point of the plane. 222 Chapter 15: Reference Handbook SCENE LT 5.5 User Manual 15.5.10 Plane Fit Figure 15-79: Plane fit properties Global Coordinates – If checked, coordinates are displayed in the global coordinate system; else they are displayed in the coordinate system of the scanner (see chapter “Global Coordinates” on page 156). Plane Name – The name of the corresponding plane. You can enter a name manually or choose one from the drop down menu. This menu contains the names of the last 10 fitted planes in other scans and helps choosing the right name for the registration and accelerates the manual naming process. Name – The name of the fit object. Normal – The orientation determined by the fit. The orientation is given by the direction which stands perpendicular to the plane. Position – The position determined by the fit. Number of scan points – The number of scan points in the selection used for the fit. The traffic light indicates the quality of this individual criterion: green: >80 points orange: ≥ 20 and ≤ 80 points red: <20 points Transversal normal deviation – The standard deviation of the normal, which is determined using the interim results of the fit. A high standard deviation indicates that the selected area is not as flat as it should be. There could be a ripple or there might be other objects in the plane. The standard deviation is broken down in a transversal and longitudinal deviation. The traffic light indicates the quality of this individual criterion: green: < 1° orange: ≥ 1° and ≤ 2.29° red: >2.29° 223 Chapter 15: Reference Handbook SCENE LT 5.5 User Manual Longitudinal normal deviation – The standard deviation of the normal in longitudinal direction. The traffic light indicates the quality of this individual criterion: green: < 1.15° orange: ≥ 1.15° and ≤ 2.29° red: >2.29° Scan point distance – The standard deviation of the distance of the scan points from the plane that has been determined. This is a good measurement for noise. The traffic light indicates the quality of this individual criterion: green: < 4mm orange: ≥ 4mm and ≤ 20mm red: >20 mm 15.5.11 Limited Plane Fit Figure 15-80: PlaneEx fit properties Global Coordinates – If checked, coordinates are displayed in the global coordinate system; else they are displayed in the coordinate system of the scanner (see chapter “Global Coordinates” on page 156). Border Points – A list of all the corner points of the plane. The remaining properties are consistent with the properties of the plane fit. For more information, please see chapter . 224 Chapter 15: Reference Handbook SCENE LT 5.5 User Manual 15.5.12 Slab Figure 15-81: Slab properties Global Coordinates – If checked, coordinates are displayed in the global coordinate system; else they are displayed in the coordinate system of the scanner (see chapter “Global Coordinates” on page 156). Face – The visible face of the slab object. Thickness – The thickness of the slab object. Normal – The orientation of the slab, given by the direction that stands perpendicular to the slab. Position – A point of the slab. 15.5.13 Slab Fit Figure 15-82: Slab fit properties 225 Chapter 15: Reference Handbook SCENE LT 5.5 User Manual Global Coordinates – If checked, coordinates are displayed in the global coordinate system; else they are displayed in the coordinate system of the scanner (see chapter “Global Coordinates” on page 156). Slab Name – The name of the corresponding slab. You can enter a name manually or choose one from the drop down menu. This menu contains the names of the last 10 fitted slabs in other scans and helps choosing the right name for the registration and accelerates the manual naming process. Face – The visible face of the slab object. Thickness – The thickness of the slab object. Name – The name of the fit object. Normal – The orientation determined by the fit. The orientation is given by the direction which stands perpendicular to the plane. Position – The position determined by the fit. Number of scan points – The number of scan points in the selection used for the fit. The traffic light indicates the quality of this individual criterion: green: >80 points orange: ≥ 20 and ≤ 80 points red: <20 points Transversal Normal deviation – The standard deviation of the Normal, which is determined using the interim results of the fit. A high standard deviation indicates that the selected area is not as flat as it should be. There could be a ripple or there might be other objects in the plane. The standard deviation is broken down in a transversal and longitudinal deviation. The traffic light indicates the quality of this individual criterion: green: < 1° orange: ≥ 1° and ≤ 2.29° red: >2.29° Longitudinal Normal deviation – The standard deviation of the Normal in longitudinal direction. The traffic light indicates the quality of this individual criterion: green: < 1.15° orange: ≥ 1.15° and ≤ 2.29° red: >2.29° Scan point distance – The standard deviation of the distance of the scan points from the plane that has been determined. This is a good measurement for noise. The traffic light indicates the quality of this individual criterion: green: < 4mm orange: ≥ 4mm and ≤ 20mm red: >20 mm 226 Chapter 15: Reference Handbook SCENE LT 5.5 User Manual 15.5.14 Point Figure 15-83: Point properties Global Coordinates – If checked, coordinates are displayed in the global coordinate system; else they are displayed in the coordinate system of the scanner (see chapter “Global Coordinates” on page 156). Position – The position of the point. Add GPS Position – Add GPS information to the point. See chapter “GPS Information” on page 67 for more information. 15.5.15 Point Fit 227 Chapter 15: Reference Handbook SCENE LT 5.5 User Manual Figure 15-84: Point fit properties Global Coordinates – If checked, coordinates are displayed in the global coordinate system; else they are displayed in the coordinate system of the scanner (see chapter “Global Coordinates” on page 156). Point Name – The name of the corresponding point. Name – The name of the fit object. Position – The position determined by the fit. Number of scan points – The number of scan points in the selection used for the fit. The traffic light indicates the quality of this individual criterion: For (contrast) mean points: green: >80 points orange: ≥ 20 and ≤ 80 points red: <20 points For checkerboard points: green: >400 points orange: ≥ 100 and ≤ 400 points red: <100 points GPS Position – Enable to add a GPS position to the object. Format – Select to enter the GPS position either as coordinates in decimal degree notation or in UTM format. Position – the GPS position in decimal degree notation or in UTM format. Altitude – The altitude above sea level of the position. Accuracy – The accuracy of the position. Only bright points – Is set for the contrast mean point of a selection. Objects – When creating an intersection point (see chapter “Geometric Object Types” on page 97), the fit is depending on the properties of the corresponding plane. This dependency is listed here. 15.5.16 Sphere Figure 15-85: Sphere properties 228 Chapter 15: Reference Handbook SCENE LT 5.5 User Manual Global Coordinates – If checked, coordinates are displayed in the global coordinate system; else they are displayed in the coordinate system of the scanner (see chapter “Global Coordinates” on page 156). Radius – The radius of the sphere. Position – The position of the sphere mean point. 15.5.17 Sphere Fit Figure 15-86: Sphere fit properties Global Coordinates – If checked, coordinates are displayed in the global coordinate system; else they are displayed in the coordinate system of the scanner (see chapter “Global Coordinates” on page 156). Sphere Name – The name of the corresponding sphere. Name – The name of the fit object. Radius – The sphere radius determined by the fit. Position – The position of the sphere mean point determined by the fit. Number of scan points – The number of scan points in the selection used for the fit. The traffic light indicates the quality of this individual criterion: green: >80 points orange: ≥ 20 and ≤ 80 points red: <20 points 229 Chapter 15: Reference Handbook SCENE LT 5.5 User Manual Radius deviation – The standard deviation of the radius, which is determined using the interim results of the fit. The traffic light indicates the quality of this individual criterion: green: < 1mm orange: ≥ 1mm and ≤ 4mm red: > 4mm Position deviation – The standard deviation of the position of the sphere mean point, which is determined using the interim results of the fit. The traffic light indicates the quality of this individual criterion: green: < 15mm orange: ≥ 15mm and ≤ 80mm red: > 80mm Scan point distance – The standard deviation of the distance of the scan points from the calculated sphere surface. The traffic light indicates the quality of this individual criterion: green: < 4mm orange: ≥ 4mm and ≤ 20mm red: > 20mm Scan point drift – The average distance of the scan points from the calculated sphere surface. Scan points outside the sphere can be averaged out with scan point within the sphere. The traffic light indicates the quality of this individual criterion: green: < 1mm orange: ≥ 1mm and ≤ 5mm red: > 5mm GPS Position – see fit of point object in chapter “Point Fit” on page 227. 230 Chapter 15: Reference Handbook SCENE LT 5.5 User Manual 15.5.18 Clipping Box Figure 15-87: Clipping box properties Clipping – Select between hiding the points outside the Clipping Box (hide exterior) or inside the Clipping Box (hide interior). Clipping Box enabled – Enable or disable clipping of the Clipping Box. When disabled, the points hidden by this box will be displayed again; the color of the Clipping Box boundaries and its icon in the Structure View change to grey. Clipping Box visible – toggle visibility of the Clipping Box. Disabling the visibility of a Clipping Box will only hide its boundaries; the Clipping Box is still active (if clipping is enabled) and it still has effect on the visibility of the points in the 3D View. For more information, see chapter “Tailor a Point Cloud View with the Clipping Box” on page 83. 231 Chapter 15: Reference Handbook SCENE LT 5.5 User Manual 15.5.19 Documentation Object Figure 15-88: Documentation object properties Global Coordinates – If checked, coordinates are displayed in the global coordinate system; else they are displayed in the coordinate system of the scanner (see chapter “Global Coordinates” on page 156). Position - determines the position of the documentation object in the workspace. Description – detailed information about the documentation object. Hyperlinks – hyperlinks to files or web sites. Add a new hyperlink by entering its address into the lower text field, then press Add. You can change the order of the hyperlinks with Up / Down, delete them with Remove or open them by double clicking on the list item or by selecting the Open button. 232 Chapter 15: Reference Handbook SCENE LT 5.5 User Manual 15.5.20 Scan Folder Figure 15-89: Scan folder properties – General Name – The name of the scan folder. Layer – The representation layer in which the scan folder is located. Select active layer – Enters the currently active representation layer. Assign layer to all contained objects – All the scans of the scan folder take on the representation layer of the scan folder. Figure 15-90: Scan folder properties – Folder Cluster – Determine the scan folder as a cluster. Reference Cluster – Determine the cluster as the reference cluster Fixed Cluster – Mark the cluster alignment as fixed and exclude it from further automatic registration attempts. 233 Chapter 15: Reference Handbook SCENE LT 5.5 User Manual 15.5.21 Scan Manager Figure 15-91: Scan Manager Name – The name of the Scan Manager. Managed by – Name of the super ordinate Scan Manager. Locked – as soon you finished your work with this cluster, you can lock its Scan Manager. Sub Manager – List of the subordinate Scan Managers. The Scan Manager also informs whether external references were used for the registration or not. The traffic lights next to the Scan Managers indicate whether they contain good or failed Scan Fits. If a traffic light next to a Scan Manager is red, this means that this Scan Manager contains bad Scan Fits. Green means that all the quality criteria are met. Amber shows that at least one quality criterion is somewhat compromised. If there is a symbol next to a Scan Manager or a Scan Fit, this means that registration could not be executed, maybe because of missing references. If you want to see the critical fits of a subordinate Scan Manager, double click onto this Scan Manager to open it. Switch to the tab Scan Results. Figure 15-92: Scan Manager –Scan Results The tab Scan Results gives you a list of all Scan Fits managed by the Scan Manager and shows the overall quality of each registration. This is symbolized by a traffic light too. Double-clicking on a fit object in the list opens its properties dialog. The average tension of each registration is calculated in the Mean Target Tension column of this table: the lower the value, the better the registration result. Here you can easily see which registrations failed or which registration results are bad (in this example the first two Scan Fits have an amber traffic light, so they seem not to be optimal). To identify the 234 Chapter 15: Reference Handbook SCENE LT 5.5 User Manual critical reference pairs which are responsible for the bad fit, you can switch to tab Ref. Tensions. Correspondence Split View – opens the Correspondence Split View. Tab Target Tensions shows all reference pairs used for registration, sorted by their tension. Tension – describes the discrepancy in the global coordinate system between the position and the orientation of the two corresponding reference objects in Scan 1 and Scan 2. With reference points the distance between the positions of the two reference points serves as input for the calculation of the tension. With planes, slabs or pipes the position and the direction of the objects serve as input for the calculation of this value. Values close to zero indicate a good registration result. Here, you can easily identify reference pairs which are causing problems in the registration. Clicking on the scan name selects the corresponding reference in this scan, double clicking opens the reference’s properties. Weighted Tensions – Global references and inclinometer data have higher weightings in the registration algorithm. When you activate this option, these different weightings will be considered in the calculation of the tensions. Full Hierarchy – When activated, the reference pairs of all Scan Managers will be displayed. Weighted Statistics Mean – Mean value over all tensions. Deviation – Deviation over all tensions. Min. – Minimum tension Max. – Maximum tension Figure 15-93: Scan Manager – Scan point Tensions Tab Scan Point Tensions shows all reference cluster pairs used for the scan registration. 235 Chapter 15: Reference Handbook SCENE LT 5.5 User Manual Mean – describes the discrepancy between the two corresponding referenced clusters. Full Hierarchy – When activated, the reference pairs of all Scan Managers will be displayed. Overall Statistics Mean – Mean value over all tensions. <4 mm – Deviation smaller than 4 mm, displayed in percent. This value gives a quick overview on the overall quality of the registration. 15.5.22 Scan Depending on the used scanner type, the scan properties dialog might have different tabs. On the following pages the scan properties dialog will be described for scans recorded with the FARO Laser Scanner. Scan Figure 15-94: Scan properties Size – The number of columns and rows. If a scan is loaded in reduced resolution, the reduced number of columns and rows is displayed and, in light grey underneath, the complete number of columns and rows. Data loaded – Indicates whether the scan is loaded. Reference Scan – Indicates whether the scan is used as a reference scan for registration. Scan Fixed – Mark the scan alignment as fixed and exclude it from further automatic registration attempts. 236 Chapter 15: Reference Handbook SCENE LT 5.5 User Manual Scanner Dist. Range – range of the scanner. Scanner Position – The position of the scanner with the mirror being the point of origin. Orientation Axis – Rotation axis of the scan. Orientation Angle – The scan’s angle of rotation. Recording Date – The time the scan was recorded. Scan Origin Info – Additional information on the origin of the scan, for example, where it was recorded and information about issues (scanner warnings or errors) that occurred during recording of the scan. Info – Further details that were provided when recording. General Figure 15-95: Scan properties – General Name – Name of the scan. Scans cannot be renamed. Layer – The representation layer in which the scan is located. Select active layer – Enters the currently active representation layer. Assign layer to all contained objects – All the objects of the scan take on the representation layer of the scan. Transformation See chapter “Frequently Used Properties” on page 214. 237 Chapter 15: Reference Handbook SCENE LT 5.5 User Manual Scan area Figure 15-96: Scan properties – Scan Area Selected Profile – The scan profile that was selected for the recording of the scan (only available for FARO Focus3D scanners). Angular Area – The recorded angular area. Vertical – The vertical angular area. Horizontal – The horizontal angular area. Resolution – The resolution of the scan, measured in fractions of the maximum resolution. Quality – The quality setting that was selected for the recording of the scan. This setting has influence on the quality respectively on the noise of the scan data. The corresponding measurement rate is displayed too (in 1000 points per second). Filters Clear Sky – Checked if the Clear Sky Filter was applied during the recording of the scan. Clear Contour – Checked if Clear Contour Filter was applied during the recording of the scan Scan Size – Number of rows and columns. Resolution – The resolution of the scan. You can select between: 238 Chapter 15: Reference Handbook SCENE LT 5.5 User Manual File Size – File size of the scan. Distance Range – is not available for scans taken with the FARO Focus3D X V6 scanner. Changing the Distance Range settings may help to reduce saturation. Distange Range slider set to low: Recommended for scanning high reflective objects up to 10 meters. Distange Range slider set to default: Recommended for most scanning situations. Distange Range slider set to high: Recommended for scanning objects up to 330 meters for the FARO® Laser Scanner Focus3D X 330 or 130 meters for the FARO® Laser Scanner Focus3D X 130, yet the accuracy of the data of nearby objects (up to 10 meters) may be affected. Operation This tab is only available for scans taken with the FARO Laser Scanner LS, the FARO Laser Scanner Photon or the FARO Laser Scanner Focus3D. Figure 15-97: Scan properties - Operation 239 Chapter 15: Reference Handbook SCENE LT 5.5 User Manual Name – The name of the project or the order. Company – The client’s company name. Division – The client’s or order’s division. Subdivision – The client’s or order’s sub-division. Area – The scanned area. Info – Additional information. Min. Reflection – The reflection value limit set when recording. Project This tab is only available for scans taken with the FARO Laser Scanner Focus3D X. Figure 15-98: Scan properties - Project This tab shows information about the scan project. This information was given before the scan was recorded. Project Name – The name of the project / or sub-project that was assigned to the scan. Customer – Information about the potential project customer. Additional Information – Additional information provided for the project. 240 Chapter 15: Reference Handbook SCENE LT 5.5 User Manual Operator Figure 15-99: Scan properties - Operator The FARO Laser Scanner Focus3D allows to create operator profiles with names, contact details and further information. While scanning, it also allows to specify the operator who is currently working with the scanner. This information will then be saved in the meta data of the recorded scans and is shown on this tab. It might be useful for the person who is post processing the scans; especially when there are several scanner operators working on the same scan project. You can still add or change this information when processing the scans in SCENE LT. 241 Chapter 15: Reference Handbook SCENE LT 5.5 User Manual Scanner Info Figure 15-100: Scan properties – Scanner Info Scanner – The name of the scanner. Revision – The revision number which is allocated during servicing. Scanner Type – The type of scanner. Serial Number – The serial number of the scanner. Range – The range of the scanner. Compensation – The name of the compensation file. 242 Chapter 15: Reference Handbook SCENE LT 5.5 User Manual Scanner Settings Figure 15-101: Scan properties – Scanner Settings This tab contains some compensation data of the scanner. 243 Chapter 15: Reference Handbook SCENE LT 5.5 User Manual Sensors Figure 15-102: Scan properties - Sensors Inclinometer Use – Enable or disable the use of the inclinometer data for registration. Inclinometer Axis – Shows the up direction of the inclinometer in the scan system. Inclinometer Angle – Shows the angle between the z-axis and the inclinometer axis in the scan system. Ignore Measurement – Overwrites the inclinometer axis and the angle with values that level the scan. Transformation mismatch – Shows the difference between the z-axis defined by the inclinometer and the z-axis defined by the scan’s transformation. Compass Use – Enable or disable the use of the compass data for the correspondence search. 244 Chapter 15: Reference Handbook SCENE LT 5.5 User Manual Compass Axis – Shows the orientation of the scan in the scan system. Compass mismatch – Shows the difference between the orientation defined by the compass and the orientation defined by the scan’s transformation. Altimeter Use – Enable or disable the use of the altimeter data for correspondence search. Measured Height – The height measured by the altimeter of the scanner based on a given reference height. Global Positioning System (GPS) – the values measured by the scanner’s GPS sensor. Position (lat./long.) –GPS position in longitude and latitude. Position (UTM) – GPS position in UTM coordinates. Measured Height – Height above sea level. Transformation mismatch - Shows the difference between the position defined by the GPS data and the position defined by the scan’s transformation. Advanced – Shows the raw data from the GPS sensor. Place using Sensors – Restores the initial placement of the scan according to the measurements of the various sensors. Camera This tab is only available for scans taken with the FARO Laser Scanner LS or the FARO Laser Scanner Photon. 245 Chapter 15: Reference Handbook SCENE LT 5.5 User Manual Figure 15-103: Scan properties - Camera Camera Mount – Type of the camera bracket that has been used for taking a colored scan. Non-winding is the old, fixed type for scans taken with FARO Photon and LS scanners and the type for all scans taken with FARO Focus3D scanners. No parallax is the new mount with the sliding mechanism. No parallax, with pins is the camera mount with the sliding mechanism and pins that fit into the bushes on the side of newer FARO Laser Scanners. Please that older models of the FARO Laser Scanner are not equipped with these bushes. Camera Orientation - Camera orientation Top – The camera was fixed in the top position of the mount bracket: Therefore the camera was pointing slightly upwards when taking pictures. Horizontal – The camera was fixed in the lower position of the mount bracket and therefore oriented horizontally. Exposure Manual - Exposure time, exposure index, and f-number is set directly at the camera. 246 Chapter 15: Reference Handbook SCENE LT 5.5 User Manual By Scanner - The scanner determined a balanced exposure setting. Correction - Correction factor for the exposure settings that have been determined by the scanner. Color This tab is only available for scans taken with the FARO Laser Scanner Focus3D. Figure 15-104: Scan properties – Color Scan with Color – Checked if the scan was recorded in color. Exposure Metering Mode – The exposure metering mode used to take the color pictures when colored scan recording was switched on: Even Weighted Metering - The light information coming from the entire SCENE LT without giving special weighting to a particular area was used to determine the exposure settings of the camera. Horizon Weighted Metering - The light information coming from the horizon was used to determine the exposure setting of the camera. Zenith Weighted Metering - The light information coming from above the scanner was used to determine the exposure setting of the camera. 247 Chapter 15: Reference Handbook SCENE LT 5.5 User Manual 15.5.23 Scan Fit Figure 15-105: Scan fit properties Scan Name – Name of the scan. Scans cannot be renamed. Name – The name of the fit object. Transformation Position – The calculated position of the scan. Orientation Axis – The calculated rotation axis of the scan. Angle – The calculated angle of rotation of the scan. Click the Used Settings button to check which registration method was performed. Global Coordinates – If checked, coordinates are displayed in the global coordinate system; else they are displayed in the coordinate system of the scanner (see chapter “Global Coordinates” on page 156). 248 Chapter 15: Reference Handbook SCENE LT 5.5 User Manual Figure 15-106: Target Tensions properties Normalized Tension - In most cases, this value is identical to the Point Distance (see below). It is only different if you have reference coordinates based on GPS measurements. For example if you use a GPS device to measure the position of a reference spheres, the position of the spheres is not very accurate. In consequence, the Scan Fit cannot be as good as it normally is, and would show very large deviations. In such cases the indicator of the Scan Fit quality should not base on this, therefore the Normalized Tension puts a lower weight on the GPS reference positions, leading to smaller numbers for the tension. Point distance – The standard deviation of the distance between the local reference points and their corresponding references. The traffic light indicates the quality of this individual criterion: green: < 10mm orange: ≥ 10mm and ≤ 20mm red: > 20mm Point drift – The mean value of the deviations between the local reference points and their corresponding references. In contrast to viewing purely the distance, the direction of the deviation is also taken into account here. Deviations can therefore cancel each other out. The traffic light indicates the quality of this individual criterion: green: < 1mm orange: ≥ 1mm and ≤ 5mm red: > 5mm Long. mismatch – The standard deviation of the longitudinal distance between the local reference points and their corresponding references. The longitudinal distance is the difference between the distance values to the scanner. The traffic light indicates the quality of this individual criterion: 249 Chapter 15: Reference Handbook SCENE LT 5.5 User Manual green: < 10mm orange: ≥ 10mm and ≤ 20mm red: > 20mm Angular mismatch – The standard deviation of the angular distance between the local reference points and the corresponding references. The angles are measured in the local coordinate system of the scanner. The traffic light indicates the quality of this individual criterion: green: < 0.08° orange: ≥ 0.08° and ≤ 0.17° red: > 0.17° Orthogonal mismatch – The standard deviation of the orthogonal distance between the local reference points and the corresponding references. This is a way to express the angular mismatch as distance mismatch. Inclinometer mismatch – Angular difference between the calculated orientation axis and the axis defined by the inclinometer. The traffic light indicates the quality of this individual criterion: green: < 1° orange: ≥ 1° and ≤ 5° red: > 5° List of targets used Object – The name of the reference object. If reference object is a specific real reference, the full path of the corresponding object will be displayed; if referenced object is a virtual mean reference (mean reference from several scans) only its name will be displayed. Distance – The distance between the local reference point and the corresponding global reference. Long. – The longitudinal distance between local reference point and the corresponding global reference. Angular – The angular distance between the local reference point and the corresponding global reference. Orth. – The orthogonal distance between the local reference point and the corresponding global reference. The traffic light here is green if a minimum of three references (including the inclinometer) are available; it’s red if there are less than three references. When you press the View button, a 3D View will open which gives you an overview of the placement of the scanner and the local and global references. 250 Chapter 15: Reference Handbook SCENE LT 5.5 User Manual Figure 15-107: Overview of references 15.5.24 Virtual Scan (3D Picture) Figure 15-108: Virtual scan properties For more information, see chapter “Scan” on page 236. 251 Chapter 15: Reference Handbook SCENE LT 5.5 User Manual 252 Chapter 15: Reference Handbook SCENE LT 5.5 User Manual Chapter 16: Error Messages The application must be started once by someone with sufficient privilege to register controls. Otherwise several modules won't work as expected. You should at least have "Power User" rights. – SCENE LT must be started at least once by a power user or administrator to ensure all functions can be executed smoothly. Version of model is not supported – The workspace was saved with a later version of SCENE LT and cannot be read by your version. Use a later version of SCENE LT. Version of scan is not supported – The scan was saved with a later version of SCENE LT and cannot be read by your version. Use a later version of SCENE LT. Failed to rename 'Scan’. Renaming scan files is not permitted! – You cannot rename scans. One or several objects failed to read in successfully. Please check properties of marked objects. – The workspace contains scans that do not exist as a file. Not all contents of 'Object' were copied successfully. One or several children are bound to their original location. – When copying objects that were created by a fit, it is not possible to also copy the fit object to the new location. The move request was rejected, because either ‘Object’ or one of its children is bound to its current location. – Some objects cannot be moved or copied to different locations, for example fit objects, or unloaded pictures. 253 Chapter 16: Error Messages SCENE LT 5.5 User Manual 254 Chapter 16: Error Messages SCENE LT 5.5 User Manual Chapter 17: Frequently Asked Questions Why can I not rename scans? Scans in the workspace must have the same name as the corresponding scan file on your data medium. You cannot rename the scan file at the same time as the scan in the workspace because scans can be used in several workspaces simultaneously. Why do I always get the message "Load data reduced size" when loading scans? Please check the settings under Tools Options Scan Data. The maximum scan size permitted is set there. You can lift the size restriction by setting the setting to unlimited. Why is the scan loaded even when starting a Quick View? The Quick View is normally saved in the scan. If this is not the case for a scan, SCENE LT has to first load the scan before it can display the Quick View. If the security settings permit it, SCENE LT then writes the Quick View in the scan, so that next time you open the Quick View, it is no longer necessary to load. When I call the context menu, why do I sometimes get the dialog to select the object? If several objects are lying next to one another or objects are lying within the selection, SCENE LT has to ask which object you mean. Why can I no longer load some scans? Some virus scanners have problems with the extensive scan files. Disable the virus scanner when working with SCENE LT. Why do I get a black window when opening the 3D View? SCENE LT requires a graphics card that supports OpenGL 2.0 or higher. If your graphics card supports older versions only, the 3D View might not work on it. Switching off the advanced textures and/or offscreen rendering under Tools Options View might solve this. When switching off advanced textures, the stereoscopic view is not available anymore. When switching off offfscreen rendering, the stereoscopic view, the clear view and gap filling are not available anymore. Why is the rendering performance in the 3D View slow or intermitted? On systems equipped with NVIDIA Quadro graphics processors, rendering performance in 3D View might be slow or intermitted. In order to improve rendering performance, start the NVIDIA Control Panel application (available in the Windows Control Panel) and select the global preset 3D App – Game Development from the Global Settings tab. Why don’t I get the most current position and orientation when I open an fls scan file in a 3rd party application? Point data and transformation information for scans may be stored in separate revisions. If you want to make sure that an fls scan file contains 255 Chapter 17: Frequently Asked Questions SCENE LT 5.5 User Manual the most current transformation, you need to use the command Export as project in the context menu of the scans or scan folders. Please also visit the FARO Customer Service area on the Web at www.faro.com to search our technical support database. 256 Chapter 17: Frequently Asked Questions SCENE LT 5.5 User Manual Chapter 18: Glossary Context menu – a menu with commands that can be applied to the object selected. It appears if you click on an object with the right mouse button. Fit object – an auxiliary object created by the object fit that stores the selection used for the fit and the quality values of the fit. Folder – an object type which stores any objects other than scans. It is similar to the Windows file system folder. The complement to this is the Scan Folder, in which scans are received. Layer – is used to draw a grouping of objects in order to be able to control the visibility of objects. Measurements – in the Structure View a visible object of the workspace. It contains the measurement logs. Menu bar – the top horizontal section in the SCENE LT screen. The menu bar contains all the menus with commands for the general operation. Further commands can be found in the toolbars and context menus. Models – in the Structure View a visible object of the workspace. It contains the CAD objects. Object – Objects are abstract shapes included in a scan, like spheres, planes, slabs, ... Object fit – ascertaining the best fitting object parameters possible from the scan points. Project Point Cloud - consists of the points of all the scans within a scan project and can be seen as a comprehensive point cloud of the complete scan project. It is typically created from all the single scans in the project after they have been preprocessed, colorized and registered. Registration – Registration means the process of determining the spatial relationship between scans. References – in the Structure View a visible object of the workspace. It contains the reference objects for positioning scans (for example, survey coordinates) and should not be renamed. Scan Folder – An object type that receives scans. It is similar to the Windows file system folder. The complement to this is the folder, in which all other objects are received. Scan – A scan is the scan file as it is recorded by the scanner with its millions of data records that include position, reflectance, and color for single scan points. A scan consists of scan points that were recorded from a single scanner location. Its points are organized in a row column order. Scan Point Cloud – A scan point cloud is an alternative representation of a scan. It has to be created from a single scan and is organized in a spatial data structure that facilitates fast visualization of scan points and automated point loading based on point visibility. Scan Project – In SCENE LT a scan project can be seen as a central storage which contains all the shared data of a project that all team i Chapter 18: Glossary SCENE LT 5.5 User Manual members can access. This includes the project workspace, scan project revisions, the project point cloud, WebShare data and much more. Scans – a visible object of the workspace in the Structure View. It is a kind of Scan Folder and contains Scans. Status bar – the bottom horizontal section on the SCENE LT screen. The status bar displays command details or responses to the last command executed as well as scan point data. Structure View – shows the structure of the workspace, including subfolders and objects. Target – Target means scan points or objects in a scan which can be used for registration. Toolbar – a toolbar has buttons with which you can easily start commands. SCENE LT has many toolbars, which you can hide or unhide where necessary. Toolbars are mostly situated in the upper area of the screen, below the menu bar. Workspace – the combination of all data required to process and analyze scans. This includes scans, CAD data, survey data, measurement results and much more. Project Workspace – is the workspace of the centrally provided scan project. It contains the shared data of the scan project. Local Workspace – contains private and non-shared data owned and is maintained by the individual user. It is typically saved to the local hard disk of the individual user and is linked to a centrally provided scan project. Changes done on the basis of a local workspace will not change the data of the scan project until it is explicitly shared with the scan project. Sharing the local changes with the scan project will update the project data and the project workspace accordingly. ii Chapter 18: Glossary SCENE LT 5.5 Manual Chapter 19: Technical Support FARO Technologies, Inc. is committed to providing the best technical support to our customers. Our Service Policy is detailed in “Industrial Service Policy” on page xxvii of this manual. If you have any problem using one of our products, please follow these steps before contacting our Technical Support Team: • Be sure to read the relevant sections of the documentation to find the help you need. • Visit the FARO Customer Care area on the Web at www.faro.com to search our technical support database. This is available 24 hours a day 7 days a week. • Document the problem you are experiencing. Be as specific as you can. The more information you have, the easier the issue will be to solve. • If you still cannot resolve your issue, have your device’s Serial Number available before calling. • E-Mails or Faxes sent outside regular working hours usually are answered before 12:00 p.m. the next working day. Should our staff be on other calls, please leave a voice mail message; calls are always returned within 24 hours. Please remember to leave a detailed description of your question and your device's Serial Number. Do not forget to include your name, fax number, telephone number and extension so we can reach you promptly. North America Support Hours (Monday through Friday) 8:00 a.m. to 7:00 p.m. Eastern Standard Time (EST) e-Mail: [email protected] Phone: +1 800 736 2771, +1 407 333 3182 (Worldwide) Mexico: 866-874-1154 Fax: +1 407-562-5294 Europe Support Hours (Monday through Friday) 8:00 a.m. to 5:00 p.m. Central European Standard Time (CET) e-Mail: [email protected] Phone: +800 3276 7378, +49 7150 9797-400 (Worldwide) Fax: +800 3276 1737, +49 7150 97979400 (Worldwide) Asia Support Hours (Monday through Friday) 8:30 a.m. to 5:30 p.m. Singapore Standard Time (SST) e-Mail: [email protected] Phone: +1 800 511 1360, +65 6511 1350 (Worldwide) Fax: +65 6543 0111 iii Chapter 19: Technical Support SCENE LT 5.5 Manual Japan Support Hours (Monday through Friday) 9:00 a.m. to 5:00 p.m. Japan Standard Time (JST) e-Mail: [email protected] Phone: +81 561 63 1411 (Worldwide) Fax: +81 561 63 1412 China Support Hours (Monday through Friday) 8:30 a.m. to 5:30 p.m. China Standard Time (CST) e-Mail: [email protected] Phone: +400.677.6826 Fax: +86 21 6494 8670 India Support Hours (Monday through Friday) 9:30 a.m. to 5:30 p.m. India Standard Time (IST) e-Mail: [email protected] Phone: 1800.1028456 Fax: +91 11.4646.5660 iv Chapter 19: Technical Support SCENE LT 5.5 Manual Appendix A: Software Licence Agreement This Software License Agreement is part of the Operating Manual for the product and software System which you have purchased from FARO TECHNOLOGIES, INC. (collectively, the “Licenser”) By your use of the software you are agreeing to the terms and conditions of this Software License Agreement. Throughout this Software License Agreement, the term “Licensee” means the owner of the System. I. The Licenser hereby grants the Licensee the non-exclusive right to use the computer software described in this Operating Manual (the “software”). The Licensee shall have no right to sell, assign, sub-license, rent or lease the software to any third party without the Licenser’s prior written consent. II. The Licenser further grants the Licensee the right to make a backup copy of the software media. The Licensee agrees that it will not decompile, disassemble, reverse engineer, copy, transfer, or otherwise use the software except as permitted by this section. The Licensee further agrees not to copy any written materials accompanying the software. III. The Licensee is licensed to use the Software only in the manner described in the Operating Manual. Use of the Software in a manner other than that described in the Operating Manual or use of the software in conjunction with any non-Licenser product which decompiles or recompiles the software or in any other way modifies the structure, sequence or function of the software code, is not an authorized use, and further, such use voids the Licenser’s set forth below. IV. The only warranty with respect to the software and the accompanying written materials is the warranty, if any, set forth in the Quotation/Purchase Order and Appendix B: Purchase Conditions pursuant to which the software was purchased from the Licenser. V. THIS WARRANTY IS IN LIEU OF OTHER WARRANTIES, EXPRESS OR IMPLIED, INCLUDING, BUT NOT LIMITED TO, THE IMPLIED WARRANTIES OF MERCHANTABILITY AND FITNESS FOR A PARTICULAR PURPOSE WITH RESPECT TO THE SOFTWARE AND WRITTEN MATERIALS. IN NO EVENT WILL THE LICENSER BE LIABLE FOR DAMAGES, INCLUDING ANY LOST PROFITS OR OTHER INCIDENTAL OR CONSEQUENTIAL DAMAGES ARISING OUT OF THE USE OR INABILITY TO USE THE SOFTWARE, NOTWITHSTANDING THAT THE LICENSER HAVE BEEN ADVISED OF THE POSSIBILITY OF SUCH DAMAGES, THE LICENSER WILL NOT BE LIABLE FOR ANY SUCH CLAIM BY ANY OTHER PARTY. VI. In the event of any breach by the Licensee of this Agreement, the license granted hereby shall immediately terminate and the Licensee shall return the software media and all written materials, together with any copy of such media or materials, and the Licensee shall keep no copies of such items. VII.The interpretation of this Agreement shall be governed by the following provisions: A. This Agreement shall be construed pursuant to and governed by the substantive laws of the State of Florida (and any provision of Florida law shall not apply if the law of a state or jurisdiction other than Florida would otherwise apply). B. If any provision of this Agreement is determined by a court of competent jurisdiction to be void and non-enforceable, such determination shall not affect any other provision of this Agreement, and the remaining provisions of this Agreement shall remain in full force and effect. If any provision or term of this Agreement is susceptible to two or more constructions or interpretations, one or more of which would render the provision or term void or non-enforceable, the parties agree that a construction or interpretation which renders the term of provision valid shall be favored. C. This Agreement constitutes the entire Agreement, and supersedes all prior agreements and understandings, oral and written, among the parties to this Agreement with respect to the subject matter hereof. VIII.If a party engages the services of an attorney or any other third party or in any way initiates legal action to enforce its rights under this Agreement, the prevailing party shall be entitled to recover all reasonable costs and expenses (including reasonable attorney’s fees before trial and in appellate proceedings). v 8/18/15 SCENE LT 5.5 Manual vi 8/18/15 SCENE LT 5.5 Manual Appendix B: Purchase Conditions All Purchase Orders (hereafter, the “Order”) for FARO-provided products and services (hereafter, the “Product”) are subject to the following terms and conditions, which are agreed to by the Purchaser. All capitalized terms are defined in Section 8.00 Definitions hereafter. 1.00Payment of Purchase Price 1.01Purchaser hereby promises to pay to the order of FARO all deferred portions of the Purchase Price, together with interest on late purchase price payments payable at 1.5% per month (18% per annum). 1.02The Purchaser grants to FARO a security interest in the products sold pursuant to the Order, which may be perfected by UCC-1 Financing Statements to be recorded in the applicable County of the Purchaser’s business location and filed with the Secretary of State’s Office, which security interest will remain in effect until payment in full of the purchase price together with interest on late purchase price payments payable thereon had been received by FARO. 1.03If the Purchaser fails to make full payment of the purchase price within the period set out in the Order, FARO shall at its option have the following remedies, which shall be cumulative and not alternative: a) the right to cancel the Order and enter the Purchaser’s premises to re-take possession of the Product, in which event the Purchaser agrees that any down-payment or deposit shall be forfeited to FARO, as liquidated damages and not as a penalty, and all costs incurred by FARO in connection with the removal and subsequent transportation of the Product shall be payable by the Purchaser upon written demand; b) the right to enter the Purchaser’s premises and remove any Software, components of the Product or other items necessary in order to render the Product inoperative; c) the right to withhold all services which would otherwise be required to be provided by FARO pursuant to the Warranties set out in Section 4.00 Warranties and Limitation of Liability hereof; d) terminate any existing software license agreement and e) pursue any other available remedy, including suing to collect any remaining balance of the purchase price (i.e., accelerate the payment of the purchase price causing the entire balance to immediately become due and payable in full). f) Customer will be charged a 20% restocking fee for refusal to accept equipment as delivered. Equipment must be returned unopened within 10 business days of receipt at customer facility. 1.04If Purchaser fails to make payment(s) in accordance with the terms of this Order, the Purchaser’s Products may be rendered inoperable until such payment terms are met. No waiver by FARO of its rights under these conditions shall be deemed to constitute a waiver of subsequent breaches or defaults by the Purchaser. In the event more than one Product is being purchased pursuant to the Order, unless otherwise set forth herein, each payment received by FARO from Purchaser shall be applied pro rata against the cost of each product rather than being applied to the purchase price of any product. 2.00Delivery and Transportation 2.01Delivery dates are estimates and not guarantees, and are based upon conditions at the time such estimate is given. 2.02FARO shall not be liable for any loss or damage, whether direct, indirect or consequential, resulting from late delivery of the Product. The Purchaser’s sole remedy, if the Product is not delivered within 90 days of the estimated delivery date, shall be to cancel the Order and to recover from FARO without interest or penalty, the amount of the down-payment or deposit and any other part of the purchase price which has been paid by the Purchaser. Notwithstanding the foregoing, such right of cancellation shall not extend to situations where late delivery is occasioned by causes beyond FARO’s control, including, without limitation, compliance with any rules, regulations, orders or vii 8/18/15 SCENE LT 5.5 Manual instructions of any federal, state, county, municipal or other government or any department or agency thereof, force majuere, acts or omissions of the Purchaser, acts of civil or military authorities, embargoes, war or insurrection, labor interruption through strike or walkout, transportation delays and other inability resulting from causes beyond FARO’s control to obtain necessary labor, manufacturing facilities or materials from its usual sources. Any delays resulting from such causes shall extend estimated delivery dates by the length of such delay. 2.03Responsibility for all costs and risks in any way connected with the storage, transportation and installation of the Product shall be borne entirely by the Purchaser. If any disagreement arises as to whether or not damage to the Product was in fact caused in storage, transit or on installation, the opinion of FARO’s technical advisors, acting reasonably, shall be conclusive. 3.00Installation and Operator Training 3.01The Purchaser shall be responsible for installation of the Product, including, without limitation, the preparation of its premises, the uncrating of the Product and setting up of the Product for operation. Purchaser may elect to order contract services from FARO to perform this service should they elect to do so. 4.00Warranties and Limitation of Liability 4.01FARO warrants that (subject to Section 4.06), the Product shall be free from defects in workmanship or material affecting the fitness of the Product for its usual purpose under normal conditions of use, service and maintenance. A complete statement of FARO’s maintenance/warranty service is set forth in Appendix B: Purchase Conditions. 4.02FARO warrants that the Software shall operate according to specifications and the System shall operate and perform in the manner contemplated in connection with the usual purpose for which it is designed. 4.03The maintenance/warranty set out in paragraphs 4.01 shall expire at the end of the twelve (12) month period commencing on the date of shipment from the FARO factory (the “Maintenance/Warranty Period”). 4.04Subject to the limitations contained in Section 4.06, the Warranties shall apply to any defects found by the Purchaser in the operation of the SCENE LT and reported to FARO within the Maintenance/Warranty Period. If the SCENE LT or the Software is found by FARO, acting reasonably, to be defective, and if the defect is acknowledged by FARO to be the result of FARO’s faulty material or workmanship, the SCENE LT will be repaired or adjusted to the extent found by FARO to be necessary or at the option of FARO, replaced with a new SCENE LT or parts thereof at no cost to the Purchaser. 4.05Claims under the Warranties shall be made by delivering written notice to FARO of the defect in the System, the SCENE LT. Within a reasonable time of receipt of such notice, FARO shall have the System and SCENE LT diagnosed by its service personnel, and maintenance/warranty service will be provided at no cost to the Purchaser if the System and SCENE LT is found by FARO to be defective within the meaning of this Section. (If, in the reasonable opinion of FARO after diagnosis of the system and the SCENE LT are not defective, the Purchaser shall pay the cost of service, which shall be the amount that FARO would otherwise charge for an evaluation under a non-warranty service evaluation. 4.06The Warranties do not apply to: a) Any defects in any component of a System where, if in the reasonable opinion of FARO, the SCENE LT, Software or System has been improperly stored, installed, operated, or maintained, or if Purchaser has permitted unauthorized modifications, additions, adjustments and/or repair to any hard drive structure or content, or any other part of the System, or which might affect the System, or defects caused or repairs required as a result of causes external to FARO workmanship or the materials used by FARO. As used herein, “unauthorized” means that which has not been approved and permitted by FARO. b) The Warranties shall not cover replacement of expendable items, including, but not limited to, fuses, diskettes, printer paper, printer ink, printing heads, disk cleaning materials, or similar items. viii 8/18/15 SCENE LT 5.5 Manual c) The Warranties shall not cover minor preventive and corrective maintenance, including, but not limited to, replacement of fuses, disk drive head cleaning, fan filter cleaning and system clock battery replacement. d) Any equipment or its components which was sold or transferred to any party other than the original Purchaser without the expressed written consent of FARO. 4.07Factory Repairs a) IF SYSTEM IS UNDER MAINTANENCE/WARRANTY: The Purchaser agrees to ship the Product to FARO in the original packing containers. FARO will return the repaired or replacement Product. FARO will incur the expense of the needed part and all return shipping charges to the Purchaser. FARO may authorize the manufacturer of a component of the Product to perform the service. b) IF SYSTEM IS UNDER PREMIUM SERVICE PLAN: When practical and subject to availability, FARO will make available to the Purchaser substitute component parts or SCENE LT’s (“Temporary Replacements”) while corresponding parts of the Purchaser’s system or SCENE LT are undergoing repair at FARO’s factory. Shipping charges for these “Temporary Replacement” parts or SCENE LT’s will be the responsibility of FARO. c) IF SYSTEM IS NOT UNDER MAINTANENCE/WARRANTY: The Purchaser is responsible for the cost of the replacement part or software, and all shipping charges. All charges shall be estimated and prepaid prior to commencement of repairs. 4.08Nothing herein contained shall be construed as obligating FARO to make service, parts, or repairs for any product available after the expiration of the Maintenance/ Warranty Period. 4.09Limitation of Liability FARO shall not be responsible under any circumstances for special, incidental or consequential damages, including, but not limited to, injury to or death of any operator or other person, damage or loss resulting from inability to use the System, increased operating costs, loss of production, loss of anticipated profits, damage to property, or other special, incidental or consequential damages of any nature arising from any cause whatsoever whether based in contract, tort (including negligence), or any other theory of law. FARO’s only liability hereunder, arising from any cause whatsoever, whether based in contract, tort (including negligence) or any other theory of law, consists of the obligation to repair or replace defective components in the System or SCENE LT subject to the limitations set out above in this section. This disclaimer of liability for consequential damage extends to any such special, incidental or consequential damages which may be suffered by third parties, either caused directly or indirectly resulting from test results or data produced by the system or any component thereof and the Purchaser agrees to indemnify and save FARO harmless from any such claims made by third parties. 4.10The foregoing shall be FARO’s sole and exclusive liability and the Purchaser’s sole and exclusive remedy with respect to the system. THE SOLE RESPONSIBILITY OF FARO UNDER THE WARRANTIES IS STATED HEREIN AND FARO SHALL NOT BE LIABLE FOR CONSEQUENTIAL, INDIRECT, OR INCIDENTAL DAMAGES, WHETHER THE CLAIM IS FOR BREACH OF WARRANTY, NEGLIGENCE, OR OTHERWISE. OTHER THAN THE EXPRESS WARRANTIES HEREIN STATED, FARO DISCLAIMS ALL WARRANTIES INCLUDING IMPLIED WARRANTIES OF MERCHANTABILITY AND FITNESS. 4.11FARO does not authorize any person (whether natural or corporate) to assume for FARO any liability in connection with or with respect to the Products. No agent or employee of FARO has any authority to make any representation or promise on behalf of FARO, except as expressly set forth herein, or to modify the terms or limitations of the Warranties. Verbal statements are not binding upon FARO. 4.12The Maintenance/Warranties extend only to the Purchaser and are transferable, only under the following conditions: • The SCENE LT is currently under maintenance/warranty. ix 8/18/15 SCENE LT 5.5 Manual • New owner is, or becomes, a certified user. • A FARO maintenance/warranty transfer form is completed, and submitted to Customer Service. All claims under the Warranties must originate with the Purchaser, or any subsequent owner, and the Purchaser will indemnify and save FARO harmless from any claims for breach of warranty asserted against FARO by any third party. 4.13Oral representations of FARO or its sales representatives, officers, employees or agents cannot be relied upon as correctly stating the representations of FARO in connection with the system. Refer to this purchase order, any exhibits hereto and any written materials supplied by FARO for correct representations. 4.14PURCHASER ACKNOWLEDGES THAT IT HAS PURCHASED THE SYSTEM BASED UPON ITS OWN KNOWLEDGE OF THE USES TO WHICH THE SYSTEM WILL BE PUT. FARO SPECIFICALLY DISCLAIMS ANY WARRANTY OR LIABILITY RELATED TO THE FITNESS OF THE SYSTEM FOR ANY PARTICULAR PURPOSE OR ARISING FROM THE INABILITY OF THE PURCHASER TO USE THE SYSTEM FOR ANY PARTICULAR PURPOSE. 5.00Design Changes 5.01The SCENE LT, the Software and the System are subject to changes in design, manufacture and programming between the date of order and the actual delivery date. FARO reserves the right to implement such changes without the Purchaser’s consent, however, nothing contained herein shall be construed as obligating FARO to include such changes in the SCENE LT, Software or System provided to the Purchaser. 6.00Non-Disclosure 6.01All Software including, without limitation, the Operating System Program and any FARO special user programs, provided to the Purchaser as part of the system, either at the time of or subsequent to the delivery of the SCENE LT, is the intellectual property of FARO. The Purchaser shall not reproduce or duplicate, disassemble, decompile, reverse engineer, sell, transfer or assign, in any manner the Software or permit access to or use thereof by any third party. The Purchaser shall forthwith execute any further assurances in the form of non-disclosure or licensing agreements which may reasonably be required by FARO in connection with the software. 7.00Entire Agreement / Governing Law / Miscellaneous / Guarantee 7.01These Purchase conditions constitute the entire agreement between FARO and the Purchaser in respect to the Product. There are no representations or warranties by FARO, express or implied, except for those herein contained and these conditions supersede and replace any prior agreements between FARO and the Purchaser. 7.02No representative of FARO has any authority to modify, alter, delete or add to any of the terms or conditions hereof. Any such modifications shall be absolutely void unless made by instrument in writing properly executed by an actual authorized employee or agent of FARO. 7.03The terms and conditions hereof shall be binding upon FARO and the Purchaser, and shall be construed in accordance with the laws of the State of Florida, United States of America. 7.04FARO shall be entitled to recover all of its reasonable fees and costs including, but not limited to, its reasonable attorney’s fees incurred by FARO in connection with any dispute or litigation arising thereunder or in connection herewith, including appeals and bankruptcy or creditor reorganization proceeds. 7.05These conditions shall not be construed more strictly against one party than another as a result of one party having drafted said instrument. 8.00Definitions 8.01“FARO” means FARO Technologies, Inc. 8.02“Purchaser” means the party buying the Product and who is legally obligated hereunder. x 8/18/15 SCENE LT 5.5 Manual 8.03“Software” means all computer programs, disk drive directory organization and content, including the computer media containing such computer programs and disk drive directory organization and content, sold pursuant to the Order. 8.04“Product” means the SCENE LT, the Software, operating manuals and any other product or merchandise sold pursuant to the Order. If the Purchaser is buying only a SCENE LT, or the Software, Product will mean the product being purchased by the Purchaser pursuant to the Order. 8.05“System” means a combination of the SCENE LT, the Software, the Computer, and optional parts and accessories associated with the SCENE LT. 8.06“Purchase Order” means the original document issued from the Purchaser to FARO, listing all parts and/or services to be purchased and the agreed purchase price. 8.07“Maintenance/Warranty Transfer Form” means a document to be completed for the transfer of the FARO Maintenance/Warranty. This document is available from FARO upon request. xi 8/18/15 SCENE LT 5.5 Manual xii 8/18/15 SCENE LT 5.5 Manual Appendix C: Implementation Notes paintlib SCENE contains paintlib code. paintlib is copyright (c) 1996-2000 Ulrich von Zadow. libtiff Copyright (c) 1988-1997 Sam Leffler Copyright (c) 1991-1997 Silicon Graphics, Inc. JPEG This software is based in part on the work of the Independent JPEG Group. KissFFT Copyright (c) 2003,4 Mark Borgerding All rights reserved. Redistribution and use in source and binary forms, with or without modification, are permitted provided that the following conditions are met: Redistributions of source code must retain the above copyright notice, this list of conditions and the following disclaimer. Redistributions in binary form must reproduce the above copyright notice, this list of conditions and the following disclaimer in the documentation and/or other materials provided with the distribution. Neither the author nor the names of any contributors may be used to endorse or promote products derived from this software without specific prior written permission. THIS SOFTWARE IS PROVIDED BY THE COPYRIGHT HOLDERS AND CONTRIBUTORS "AS IS" AND ANY EXPRESS OR IMPLIED WARRANTIES, INCLUDING, BUT NOT LIMITED TO, THE IMPLIED WARRANTIES OF MERCHANTABILITY AND FITNESS FOR A PARTICULAR PURPOSE ARE DISCLAIMED. IN NO EVENT SHALL THE COPYRIGHT OWNER OR CONTRIBUTORS BE LIABLE FOR ANY DIRECT, INDIRECT, INCIDENTAL, SPECIAL, EXEMPLARY, OR CONSEQUENTIAL DAMAGES (INCLUDING, BUT NOT LIMITED TO, PROCUREMENT OF SUBSTITUTE GOODS OR SERVICES; LOSS OF USE, DATA, OR PROFITS; OR BUSINESS INTERRUPTION) HOWEVER CAUSED AND ON ANY THEORY OF LIABILITY, WHETHER IN CONTRACT, STRICT LIABILITY, OR TORT (INCLUDING NEGLIGENCE OR OTHERWISE) ARISING IN ANY WAY OUT OF THE USE OF THIS SOFTWARE, EVEN IF ADVISED OF THE POSSIBILITY OF SUCH DAMAGE. Open Source Computer Vision Library Copyright (C) 2000, 2001, Intel Corporation, all rights reserved. Third party copyrights are property of their respective owners. Redistribution and use in source and binary forms, with or without modification, are permitted provided that the following conditions are met: Redistribution's of source code must retain the above copyright notice, this list of conditions and the following disclaimer. Redistribution's in binary form must reproduce the above copyright notice, this list of conditions and the following disclaimer in the documentation and/or other materials provided with the distribution. The name of Intel Corporation may not be used to endorse or promote products derived from this software without specific prior written permission. xiii 8/18/15 Appendix C: Implementation Notes SCENE LT 5.5 Manual This software is provided by the copyright holders and contributors "as is" and any express or implied warranties, including, but not limited to, the implied warranties of merchantability and fitness for a particular purpose are disclaimed. In no event shall the Intel Corporation or contributors be liable for any direct, indirect, incidental, special, exemplary, or consequential damages (including, but not limited to, procurement of substitute goods or services; loss of use, data, or profits; or business interruption) however caused and on any theory of liability, whether in contract, strict liability, or tort (including negligence or otherwise) arising in any way out of the use of this software, even if advised of the possibility of such damage. GPL GNU GENERAL PUBLIC LICENSE Version 3, 29 June 2007 Copyright (C) 2007 Free Software Foundation, Inc. <http://fsf.org/> Everyone is permitted to copy and distribute verbatim copies of this license document, but changing it is not allowed. Preamble The GNU General Public License is a free, copyleft license for software and other kinds of works. The licenses for most software and other practical works are designed to take away your freedom to share and change the works. By contrast, the GNU General Public License is intended to guarantee your freedom to share and change all versions of a program--to make sure it remains free software for all its users. We, the Free Software Foundation, use the GNU General Public License for most of our software; it applies also to any other work released this way by its authors. You can apply it to your programs, too. When we speak of free software, we are referring to freedom, not price. Our General Public Licenses are designed to make sure that you have the freedom to distribute copies of free software (and charge for them if you wish), that you receive source code or can get it if you want it, that you can change the software or use pieces of it in new free programs, and that you know you can do these things. To protect your rights, we need to prevent others from denying you these rights or asking you to surrender the rights. Therefore, you have certain responsibilities if you distribute copies of the software, or if you modify it: responsibilities to respect the freedom of others. For example, if you distribute copies of such a program, whether gratis or for a fee, you must pass on to the recipients the same freedoms that you received. You must make sure that they, too, receive or can get the source code. And you must show them these terms so they know their rights. Developers that use the GNU GPL protect your rights with two steps: (1) assert copyright on the software, and (2) offer you this License giving you legal permission to copy, distribute and/or modify it. For the developers' and authors' protection, the GPL clearly explains that there is no warranty for this free software. For both users' and authors' sake, the GPL requires that modified versions be marked as changed, so that their problems will not be attributed erroneously to authors of previous versions. Some devices are designed to deny users access to install or run modified versions of the software inside them, although the manufacturer can do so. This is fundamentally incompatible with the aim of protecting users' freedom to change the software. The systematic pattern of such abuse occurs in the area of products for individuals to use, which is precisely where it is most unacceptable. Therefore, we have designed this version of the GPL to prohibit the practice for those products. If such problems arise xiv Appendix C: Implementation Notes 8/18/15 SCENE LT 5.5 Manual substantially in other domains, we stand ready to extend this provision to those domains in future versions of the GPL, as needed to protect the freedom of users. Finally, every program is threatened constantly by software patents. States should not allow patents to restrict development and use of software on general-purpose computers, but in those that do, we wish to avoid the special danger that patents applied to a free program could make it effectively proprietary. To prevent this, the GPL assures that patents cannot be used to render the program non-free. The precise terms and conditions for copying, distribution and modification follow. TERMS AND CONDITIONS 0. Definitions. "This License" refers to version 3 of the GNU General Public License. "Copyright" also means copyright-like laws that apply to other kinds of works, such as semiconductor masks. "The Program" refers to any copyrightable work licensed under this License. Each licensee is addressed as "you". "Licensees" and "recipients" may be individuals or organizations. To "modify" a work means to copy from or adapt all or part of the work in a fashion requiring copyright permission, other than the making of an exact copy. The resulting work is called a "modified version" of the earlier work or a work "based on" the earlier work. A "covered work" means either the unmodified Program or a work based on the Program. To "propagate" a work means to do anything with it that, without permission, would make you directly or secondarily liable for infringement under applicable copyright law, except executing it on a computer or modifying a private copy. Propagation includes copying, distribution (with or without modification), making available to the public, and in some countries other activities as well. To "convey" a work means any kind of propagation that enables other parties to make or receive copies. Mere interaction with a user through a computer network, with no transfer of a copy, is not conveying. An interactive user interface displays "Appropriate Legal Notices" to the extent that it includes a convenient and prominently visible feature that (1) displays an appropriate copyright notice, and (2) tells the user that there is no warranty for the work (except to the extent that warranties are provided), that licensees may convey the work under this License, and how to view a copy of this License. If the interface presents a list of user commands or options, such as a menu, a prominent item in the list meets this criterion. 1. Source Code. The "source code" for a work means the preferred form of the work for making modifications to it. "Object code" means any non-source form of a work. A "Standard Interface" means an interface that either is an official standard defined by a recognized standards body, or, in the case of interfaces specified for a particular programming language, one that is widely used among developers working in that language. The "System Libraries" of an executable work include anything, other than the work as a whole, that (a) is included in the normal form of packaging a Major Component, but which is not part of that Major Component, and (b) serves only to enable use of the work with that Major Component, or to implement a Standard Interface for which an implementation is available to the public in source code form. A "Major Component", in this context, means a major essential component (kernel, window system, and so on) of the specific operating system (if any) on which the executable work runs, or a compiler used to produce the work, or an object code interpreter used to run it. xv 8/18/15 Appendix C: Implementation Notes SCENE LT 5.5 Manual The "Corresponding Source" for a work in object code form means all the source code needed to generate, install, and (for an executable work) run the object code and to modify the work, including scripts to control those activities. However, it does not include the work's System Libraries, or general-purpose tools or generally available free programs which are used unmodified in performing those activities but which are not part of the work. For example, Corresponding Source includes interface definition files associated with source files for the work, and the source code for shared libraries and dynamically linked subprograms that the work is specifically designed to require, such as by intimate data communication or control flow between those subprograms and other parts of the work. The Corresponding Source need not include anything that users can regenerate automatically from other parts of the Corresponding Source. The Corresponding Source for a work in source code form is that same work. 2. Basic Permissions. All rights granted under this License are granted for the term of copyright on the Program, and are irrevocable provided the stated conditions are met. This License explicitly affirms your unlimited permission to run the unmodified Program. The output from running a covered work is covered by this License only if the output, given its content, constitutes a covered work. This License acknowledges your rights of fair use or other equivalent, as provided by copyright law. You may make, run and propagate covered works that you do not convey, without conditions so long as your license otherwise remains in force. You may convey covered works to others for the sole purpose of having them make modifications exclusively for you, or provide you with facilities for running those works, provided that you comply with the terms of this License in conveying all material for which you do not control copyright. Those thus making or running the covered works for you must do so exclusively on your behalf, under your direction and control, on terms that prohibit them from making any copies of your copyrighted material outside their relationship with you. Conveying under any other circumstances is permitted solely under the conditions stated below. Sublicensing is not allowed; section 10 makes it unnecessary. 3. Protecting Users' Legal Rights From Anti-Circumvention Law. No covered work shall be deemed part of an effective technological measure under any applicable law fulfilling obligations under article 11 of the WIPO copyright treaty adopted on 20 December 1996, or similar laws prohibiting or restricting circumvention of such measures. When you convey a covered work, you waive any legal power to forbid circumvention of technological measures to the extent such circumvention is effected by exercising rights under this License with respect to the covered work, and you disclaim any intention to limit operation or modification of the work as a means of enforcing, against the work's users, your or third parties' legal rights to forbid circumvention of technological measures. 4. Conveying Verbatim Copies. You may convey verbatim copies of the Program's source code as you receive it, in any medium, provided that you conspicuously and appropriately publish on each copy an appropriate copyright notice; keep intact all notices stating that this License and any nonpermissive terms added in accord with section 7 apply to the code; keep intact all notices of the absence of any warranty; and give all recipients a copy of this License along with the Program. You may charge any price or no price for each copy that you convey, and you may offer support or warranty protection for a fee. xvi Appendix C: Implementation Notes 8/18/15 SCENE LT 5.5 Manual 5. Conveying Modified Source Versions. You may convey a work based on the Program, or the modifications to produce it from the Program, in the form of source code under the terms of section 4, provided that you also meet all of these conditions: a) The work must carry prominent notices stating that you modified it, and giving a relevant date. b) The work must carry prominent notices stating that it is released under this License and any conditions added under section 7. This requirement modifies the requirement in section 4 to "keep intact all notices". c) You must license the entire work, as a whole, under this License to anyone who comes into possession of a copy. This License will therefore apply, along with any applicable section 7 additional terms, to the whole of the work, and all its parts, regardless of how they are packaged. This License gives no permission to license the work in any other way, but it does not invalidate such permission if you have separately received it. d) If the work has interactive user interfaces, each must display Appropriate Legal Notices; however, if the Program has interactive interfaces that do not display Appropriate Legal Notices, your work need not make them do so. A compilation of a covered work with other separate and independent works, which are not by their nature extensions of the covered work, and which are not combined with it such as to form a larger program, in or on a volume of a storage or distribution medium, is called an "aggregate" if the compilation and its resulting copyright are not used to limit the access or legal rights of the compilation's users beyond what the individual works permit. Inclusion of a covered work in an aggregate does not cause this License to apply to the other parts of the aggregate. 6. Conveying Non-Source Forms. You may convey a covered work in object code form under the terms of sections 4 and 5, provided that you also convey the machine-readable Corresponding Source under the terms of this License, in one of these ways: a) Convey the object code in, or embodied in, a physical product (including a physical distribution medium), accompanied by the Corresponding Source fixed on a durable physical medium customarily used for software interchange. b) Convey the object code in, or embodied in, a physical product (including a physical distribution medium), accompanied by a written offer, valid for at least three years and valid for as long as you offer spare parts or customer support for that product model, to give anyone who possesses the object code either (1) a copy of the Corresponding Source for all the software in the product that is covered by this License, on a durable physical medium customarily used for software interchange, for a price no more than your reasonable cost of physically performing this conveying of source, or (2) access to copy the Corresponding Source from a network server at no charge. c) Convey individual copies of the object code with a copy of the written offer to provide the Corresponding Source. This alternative is allowed only occasionally and noncommercially, and only if you received the object code with such an offer, in accord with subsection 6b. d) Convey the object code by offering access from a designated place (gratis or for a charge), and offer equivalent access to the Corresponding Source in the same way through the same place at no further charge. You need not require recipients to copy the Corresponding Source along with the object code. If the place to copy the object code is a network server, the Corresponding Source may be on a different server (operated by you or a third party) that supports equivalent copying facilities, provided you maintain clear directions next to the object code saying where to find the Corresponding Source. Regardless of what server hosts the Corresponding Source, you remain obligated to ensure that it is available for as long as needed to satisfy these requirements. xvii 8/18/15 Appendix C: Implementation Notes SCENE LT 5.5 Manual e) Convey the object code using peer-to-peer transmission, provided you inform other peers where the object code and Corresponding Source of the work are being offered to the general public at no charge under subsection 6d. A separable portion of the object code, whose source code is excluded from the Corresponding Source as a System Library, need not be included in conveying the object code work. A "User Product" is either (1) a "consumer product", which means any tangible personal property which is normally used for personal, family, or household purposes, or (2) anything designed or sold for incorporation into a dwelling. In determining whether a product is a consumer product, doubtful cases shall be resolved in favor of coverage. For a particular product received by a particular user, "normally used" refers to a typical or common use of that class of product, regardless of the status of the particular user or of the way in which the particular user actually uses, or expects or is expected to use, the product. A product is a consumer product regardless of whether the product has substantial commercial, industrial or non-consumer uses, unless such uses represent the only significant mode of use of the product. "Installation Information" for a User Product means any methods, procedures, authorization keys, or other information required to install and execute modified versions of a covered work in that User Product from a modified version of its Corresponding Source. The information must suffice to ensure that the continued functioning of the modified object code is in no case prevented or interfered with solely because modification has been made. If you convey an object code work under this section in, or with, or specifically for use in, a User Product, and the conveying occurs as part of a transaction in which the right of possession and use of the User Product is transferred to the recipient in perpetuity or for a fixed term (regardless of how the transaction is characterized), the Corresponding Source conveyed under this section must be accompanied by the Installation Information. But this requirement does not apply if neither you nor any third party retains the ability to install modified object code on the User Product (for example, the work has been installed in ROM). The requirement to provide Installation Information does not include a requirement to continue to provide support service, warranty, or updates for a work that has been modified or installed by the recipient, or for the User Product in which it has been modified or installed. Access to a network may be denied when the modification itself materially and adversely affects the operation of the network or violates the rules and protocols for communication across the network. Corresponding Source conveyed, and Installation Information provided, in accord with this section must be in a format that is publicly documented (and with an implementation available to the public in source code form), and must require no special password or key for unpacking, reading or copying. 7. Additional Terms. "Additional permissions" are terms that supplement the terms of this License by making exceptions from one or more of its conditions. Additional permissions that are applicable to the entire Program shall be treated as though they were included in this License, to the extent that they are valid under applicable law. If additional permissions apply only to part of the Program, that part may be used separately under those permissions, but the entire Program remains governed by this License without regard to the additional permissions. When you convey a copy of a covered work, you may at your option remove any additional permissions from that copy, or from any part of it. (Additional permissions may be written to require their own removal in certain cases when you modify the work.) You may place additional permissions on material, added by you to a covered work, for which you have or can give appropriate copyright permission. xviii Appendix C: Implementation Notes 8/18/15 SCENE LT 5.5 Manual Notwithstanding any other provision of this License, for material you add to a covered work, you may (if authorized by the copyright holders of that material) supplement the terms of this License with terms: a) Disclaiming warranty or limiting liability differently from the terms of sections 15 and 16 of this License; or b) Requiring preservation of specified reasonable legal notices or author attributions in that material or in the Appropriate Legal Notices displayed by works containing it; or c) Prohibiting misrepresentation of the origin of that material, or requiring that modified versions of such material be marked in reasonable ways as different from the original version; or d) Limiting the use for publicity purposes of names of licensors or authors of the material; or e) Declining to grant rights under trademark law for use of some trade names, trademarks, or service marks; or f) Requiring indemnification of licensors and authors of that material by anyone who conveys the material (or modified versions of it) with contractual assumptions of liability to the recipient, for any liability that these contractual assumptions directly impose on those licensors and authors. All other non-permissive additional terms are considered "further restrictions" within the meaning of section 10. If the Program as you received it, or any part of it, contains a notice stating that it is governed by this License along with a term that is a further restriction, you may remove that term. If a license document contains a further restriction but permits relicensing or conveying under this License, you may add to a covered work material governed by the terms of that license document, provided that the further restriction does not survive such relicensing or conveying. If you add terms to a covered work in accord with this section, you must place, in the relevant source files, a statement of the additional terms that apply to those files, or a notice indicating where to find the applicable terms. Additional terms, permissive or non-permissive, may be stated in the form of a separately written license, or stated as exceptions; the above requirements apply either way. 8. Termination. You may not propagate or modify a covered work except as expressly provided under this License. Any attempt otherwise to propagate or modify it is void, and will automatically terminate your rights under this License (including any patent licenses granted under the third paragraph of section 11). However, if you cease all violation of this License, then your license from a particular copyright holder is reinstated (a) provisionally, unless and until the copyright holder explicitly and finally terminates your license, and (b) permanently, if the copyright holder fails to notify you of the violation by some reasonable means prior to 60 days after the cessation. Moreover, your license from a particular copyright holder is reinstated permanently if the copyright holder notifies you of the violation by some reasonable means, this is the first time you have received notice of violation of this License (for any work) from that copyright holder, and you cure the violation prior to 30 days after your receipt of the notice. Termination of your rights under this section does not terminate the licenses of parties who have received copies or rights from you under this License. If your rights have been terminated and not permanently reinstated, you do not qualify to receive new licenses for the same material under section 10. 9. Acceptance Not Required for Having Copies. xix 8/18/15 Appendix C: Implementation Notes SCENE LT 5.5 Manual You are not required to accept this License in order to receive or run a copy of the Program. Ancillary propagation of a covered work occurring solely as a consequence of using peer-to-peer transmission to receive a copy likewise does not require acceptance. However, nothing other than this License grants you permission to propagate or modify any covered work. These actions infringe copyright if you do not accept this License. Therefore, by modifying or propagating a covered work, you indicate your acceptance of this License to do so. 10. Automatic Licensing of Downstream Recipients. Each time you convey a covered work, the recipient automatically receives a license from the original licensors, to run, modify and propagate that work, subject to this License. You are not responsible for enforcing compliance by third parties with this License. An "entity transaction" is a transaction transferring control of an organization, or substantially all assets of one, or subdividing an organization, or merging organizations. If propagation of a covered work results from an entity transaction, each party to that transaction who receives a copy of the work also receives whatever licenses to the work the party's predecessor in interest had or could give under the previous paragraph, plus a right to possession of the Corresponding Source of the work from the predecessor in interest, if the predecessor has it or can get it with reasonable efforts. You may not impose any further restrictions on the exercise of the rights granted or affirmed under this License. For example, you may not impose a license fee, royalty, or other charge for exercise of rights granted under this License, and you may not initiate litigation (including a cross-claim or counterclaim in a lawsuit) alleging that any patent claim is infringed by making, using, selling, offering for sale, or importing the Program or any portion of it. 11. Patents. A "contributor" is a copyright holder who authorizes use under this License of the Program or a work on which the Program is based. The work thus licensed is called the contributor's "contributor version". A contributor's "essential patent claims" are all patent claims owned or controlled by the contributor, whether already acquired or hereafter acquired, that would be infringed by some manner, permitted by this License, of making, using, or selling its contributor version, but do not include claims that would be infringed only as a consequence of further modification of the contributor version. For purposes of this definition, "control" includes the right to grant patent sublicenses in a manner consistent with the requirements of this License. Each contributor grants you a non-exclusive, worldwide, royalty-free patent license under the contributor's essential patent claims, to make, use, sell, offer for sale, import and otherwise run, modify and propagate the contents of its contributor version. In the following three paragraphs, a "patent license" is any express agreement or commitment, however denominated, not to enforce a patent (such as an express permission to practice a patent or covenant not to sue for patent infringement). To "grant" such a patent license to a party means to make such an agreement or commitment not to enforce a patent against the party. If you convey a covered work, knowingly relying on a patent license, and the Corresponding Source of the work is not available for anyone to copy, free of charge and under the terms of this License, through a publicly available network server or other readily accessible means, then you must either (1) cause the Corresponding Source to be so available, or (2) arrange to deprive yourself of the benefit of the patent license for this particular work, or (3) arrange, in a manner consistent with the requirements of this License, to extend the patent license to downstream recipients. "Knowingly relying" means you have actual knowledge that, but for the patent license, your conveying the covered work in a country, or your recipient's use of the covered work in a country, would xx Appendix C: Implementation Notes 8/18/15 SCENE LT 5.5 Manual infringe one or more identifiable patents in that country that you have reason to believe are valid. If, pursuant to or in connection with a single transaction or arrangement, you convey, or propagate by procuring conveyance of, a covered work, and grant a patent license to some of the parties receiving the covered work authorizing them to use, propagate, modify or convey a specific copy of the covered work, then the patent license you grant is automatically extended to all recipients of the covered work and works based on it. A patent license is "discriminatory" if it does not include within the scope of its coverage, prohibits the exercise of, or is conditioned on the non-exercise of one or more of the rights that are specifically granted under this License. You may not convey a covered work if you are a party to an arrangement with a third party that is in the business of distributing software, under which you make payment to the third party based on the extent of your activity of conveying the work, and under which the third party grants, to any of the parties who would receive the covered work from you, a discriminatory patent license (a) in connection with copies of the covered work conveyed by you (or copies made from those copies), or (b) primarily for and in connection with specific products or compilations that contain the covered work, unless you entered into that arrangement, or that patent license was granted, prior to 28 March 2007. Nothing in this License shall be construed as excluding or limiting any implied license or other defenses to infringement that may otherwise be available to you under applicable patent law. 12. No Surrender of Others' Freedom. If conditions are imposed on you (whether by court order, agreement or otherwise) that contradict the conditions of this License, they do not excuse you from the conditions of this License. If you cannot convey a covered work so as to satisfy simultaneously your obligations under this License and any other pertinent obligations, then as a consequence you may not convey it at all. For example, if you agree to terms that obligate you to collect a royalty for further conveying from those to whom you convey the Program, the only way you could satisfy both those terms and this License would be to refrain entirely from conveying the Program. 13. Use with the GNU Affero General Public License. Notwithstanding any other provision of this License, you have permission to link or combine any covered work with a work licensed under version 3 of the GNU Affero General Public License into a single combined work, and to convey the resulting work. The terms of this License will continue to apply to the part which is the covered work, but the special requirements of the GNU Affero General Public License, section 13, concerning interaction through a network will apply to the combination as such. 14. Revised Versions of this License. The Free Software Foundation may publish revised and/or new versions of the GNU General Public License from time to time. Such new versions will be similar in spirit to the present version, but may differ in detail to address new problems or concerns. Each version is given a distinguishing version number. If the Program specifies that a certain numbered version of the GNU General Public License "or any later version" applies to it, you have the option of following the terms and conditions either of that numbered version or of any later version published by the Free Software Foundation. If the Program does not specify a version number of the GNU General Public License, you may choose any version ever published by the Free Software Foundation. If the Program specifies that a proxy can decide which future versions of the GNU General Public License can be used, that proxy's public statement of acceptance of a version permanently authorizes you to choose that version for the Program. xxi 8/18/15 Appendix C: Implementation Notes SCENE LT 5.5 Manual Later license versions may give you additional or different permissions. However, no additional obligations are imposed on any author or copyright holder as a result of your choosing to follow a later version. 15. Disclaimer of Warranty. THERE IS NO WARRANTY FOR THE PROGRAM, TO THE EXTENT PERMITTED BY APPLICABLE LAW. EXCEPT WHEN OTHERWISE STATED IN WRITING THE COPYRIGHT HOLDERS AND/OR OTHER PARTIES PROVIDE THE PROGRAM "AS IS" WITHOUT WARRANTY OF ANY KIND, EITHER EXPRESSED OR IMPLIED, INCLUDING, BUT NOT LIMITED TO, THE IMPLIED WARRANTIES OF MERCHANTABILITY AND FITNESS FOR A PARTICULAR PURPOSE. THE ENTIRE RISK AS TO THE QUALITY AND PERFORMANCE OF THE PROGRAM IS WITH YOU. SHOULD THE PROGRAM PROVE DEFECTIVE, YOU ASSUME THE COST OF ALL NECESSARY SERVICING, REPAIR OR CORRECTION. 16. Limitation of Liability. IN NO EVENT UNLESS REQUIRED BY APPLICABLE LAW OR AGREED TO IN WRITING WILL ANY COPYRIGHT HOLDER, OR ANY OTHER PARTY WHO MODIFIES AND/OR CONVEYS THE PROGRAM AS PERMITTED ABOVE, BE LIABLE TO YOU FOR DAMAGES, INCLUDING ANY GENERAL, SPECIAL, INCIDENTAL OR CONSEQUENTIAL DAMAGES ARISING OUT OF THE USE OR INABILITY TO USE THE PROGRAM (INCLUDING BUT NOT LIMITED TO LOSS OF DATA OR DATA BEING RENDERED INACCURATE OR LOSSES SUSTAINED BY YOU OR THIRD PARTIES OR A FAILURE OF THE PROGRAM TO OPERATE WITH ANY OTHER PROGRAMS), EVEN IF SUCH HOLDER OR OTHER PARTY HAS BEEN ADVISED OF THE POSSIBILITY OF SUCH DAMAGES. 17. Interpretation of Sections 15 and 16. If the disclaimer of warranty and limitation of liability provided above cannot be given local legal effect according to their terms, reviewing courts shall apply local law that most closely approximates an absolute waiver of all civil liability in connection with the Program, unless a warranty or assumption of liability accompanies a copy of the Program in return for a fee. END OF TERMS AND CONDITIONS Written Offer If you, the owner of the scanner, like to get a copy of the source code of GPL covered parts of the scanner's firmware, please contact our support team [email protected]. This offer is valid for three years and valid for as long as FARO offers spare parts or customer support for this product model. LGPL SCENE includes the following applications and libraries, which are covered by the LGPL: o libusb o Linux API o DirectFB o Eigen GNU LESSER GENERAL PUBLIC LICENSE Version 3, 29 June 2007 xxii Appendix C: Implementation Notes 8/18/15 SCENE LT 5.5 Manual Copyright (C) 2007 Free Software Foundation, Inc. <http://fsf.org/> Everyone is permitted to copy and distribute verbatim copies of this license document, but changing it is not allowed. This version of the GNU Lesser General Public License incorporates the terms and conditions of version 3 of the GNU General Public License, supplemented by the additional permissions listed below. 0. Additional Definitions. As used herein, "this License" refers to version 3 of the GNU Lesser General Public License, and the "GNU GPL" refers to version 3 of the GNU General Public License. "The Library" refers to a covered work governed by this License, other than an Application or a Combined Work as defined below. An "Application" is any work that makes use of an interface provided by the Library, but which is not otherwise based on the Library. Defining a subclass of a class defined by the Library is deemed a mode of using an interface provided by the Library. A "Combined Work" is a work produced by combining or linking an Application with the Library. The particular version of the Library with which the Combined Work was made is also called the "Linked Version". The "Minimal Corresponding Source" for a Combined Work means the Corresponding Source for the Combined Work, excluding any source code for portions of the Combined Work that, considered in isolation, are based on the Application, and not on the Linked Version. The "Corresponding Application Code" for a Combined Work means the object code and/ or source code for the Application, including any data and utility pro-grams needed for reproducing the Combined Work from the Application, but ex-cluding the System Libraries of the Combined Work. 1. Exception to Section 3 of the GNU GPL. You may convey a covered work under sections 3 and 4 of this License without being bound by section 3 of the GNU GPL. 2. Conveying Modified Versions. If you modify a copy of the Library, and, in your modifications, a facility refers to a function or data to be supplied by an Application that uses the facility (other than as an argument passed when the facility is invoked), then you may convey a copy of the modified version: a) under this License, provided that you make a good faith effort to ensure that, in the event an Application does not supply the function or data, the facility still operates, and performs whatever part of its purpose remains meaningful, or b) under the GNU GPL, with none of the additional permissions of this License applicable to that copy. 3. Object Code Incorporating Material from Library Header Files. The object code form of an Application may incorporate material from a header file that is part of the Library. You may convey such object code under terms of your choice, provided that, if the incorporated material is not limited to numerical parameters, data structure layouts and accessors, or small macros, inline functions and templates (ten or fewer lines in length), you do both of the following: a) Give prominent notice with each copy of the object code that the Library is used in it and that the Library and its use are covered by this License. xxiii 8/18/15 Appendix C: Implementation Notes SCENE LT 5.5 Manual b) Accompany the object code with a copy of the GNU GPL and this license document. 4. Combined Works. You may convey a Combined Work under terms of your choice that, taken together, effectively do not restrict modification of the portions of the Library contained in the Combined Work and reverse engineering for debugging such modifications, if you also do each of the following: a) Give prominent notice with each copy of the Combined Work that the Library is used in it and that the Library and its use are covered by this License. b) Accompany the Combined Work with a copy of the GNU GPL and this license document. c) For a Combined Work that displays copyright notices during execution, include the copyright notice for the Library among these notices, as well as a reference directing the user to the copies of the GNU GPL and this license document. d) Do one of the following: 0) Convey the Minimal Corresponding Source under the terms of this License, and the Corresponding Application Code in a form suitable for, and under terms that permit, the user to recombine or relink the Application with a modified version of the Linked Version to produce a modified Combined Work, in the manner specified by section 6 of the GNU GPL for conveying Corresponding Source. 1) Use a suitable shared library mechanism for linking with the Library. A suitable mechanism is one that (a) uses at run time a copy of the Library already present on the user's computer system, and (b) will operate properly with a modified version of the Library that is interface-compatible with the Linked Version. e) Provide Installation Information, but only if you would otherwise be required to provide such information under section 6 of the GNU GPL, and only to the extent that such information is necessary to install and execute a modified version of the Combined Work produced by recombining or relinking the Application with a modified version of the Linked Version. (If you use option 4d0, the Installation Information must accompany the Minimal Corresponding Source and Corresponding Application Code. If you use option 4d1, you must provide the Installation Information in the manner specified by section 6 of the GNU GPL for conveying Corresponding Source.) 5. Combined Libraries. You may place library facilities that are a work based on the Library side by side in a single library together with other library facilities that are not Applications and are not covered by this License, and convey such a combined library under terms of your choice, if you do both of the following: a) Accompany the combined library with a copy of the same work based on the Library, uncombined with any other library facilities, conveyed under the terms of this License. b) Give prominent notice with the combined library that part of it is a work based on the Library, and explaining where to find the accompanying uncombined form of the same work. 6. Revised Versions of the GNU Lesser General Public License. The Free Software Foundation may publish revised and/or new versions of the GNU Lesser General Public License from time to time. Such new versions will be similar in spirit to the present version, but may differ in detail to address new problems or concerns. Each version is given a distinguishing version number. If the Library as you received it specifies that a certain numbered version of the GNU Lesser General Public License "or any later version" applies to it, you have the option of following the terms and conditions either of that published version or of any later version published by the Free Software Foundation. If the Library as you received it does not specify a version number of the GNU xxiv Appendix C: Implementation Notes 8/18/15 SCENE LT 5.5 Manual Lesser General Public License, you may choose any version of the GNU Lesser General Public License ever published by the Free Software Foundation. If the Library as you received it specifies that a proxy can decide whether future versions of the GNU Lesser General Public License shall apply, that proxy's public statement of acceptance of any version is permanent authorization for you to choose that version for the Library. Written Offer If you, the owner of the scanner, like to get a copy of the source code of LGPL covered parts of the scanner's firmware, please contact our support team [email protected]. This offer is valid for three years and valid for as long as FARO offers spare parts or customer support for this product model. GEOTRANS The product was developed using GEOTRANS, a product of the National GeospatialIntelligence Agency (NGA) and U.S. Army Engineering Research and Development Center. Chromium Embedded Framework Copyright (c) 2008-2013 Marshall A. Greenblatt. Portions Copyright (c) 2006-2009 Google Inc. All rights reserved. Redistribution and use in source and binary forms, with or without modification, are permitted provided that the following conditions are met: "Redistributions of source code must retain the above copyright notice, this list of conditions and the following disclaimer. "Redistributions in binary form must reproduce the above copyright notice, this list of conditions and the following disclaimer in the documentation and/or other materials provided with the distribution. "Neither the name of Google Inc. nor the name Chromium Embedded Framework nor the names of its contributors may be used to endorse or promote products derived from this software without specific prior written permission. THIS SOFTWARE IS PROVIDED BY THE COPYRIGHT HOLDERS AND CONTRIBUTORS "AS IS" AND ANY EXPRESS OR IMPLIED WARRANTIES, INCLUDING, BUT NOT LIMITED TO, THE IMPLIED WARRANTIES OF MERCHANTABILITY AND FITNESS FOR A PARTICULAR PURPOSE ARE DISCLAIMED. IN NO EVENT SHALL THE COPYRIGHT OWNER OR CONTRIBUTORS BE LIABLE FOR ANY DIRECT, INDIRECT, INCIDENTAL, SPECIAL, EXEMPLARY, OR CONSEQUENTIAL DAMAGES (INCLUDING, BUT NOT LIMITED TO, PROCUREMENT OF SUBSTITUTE GOODS OR SERVICES; LOSS OF USE, DATA, OR PROFITS; OR BUSINESS INTERRUPTION) HOWEVER CAUSED AND ON ANY THEORY OF LIABILITY, WHETHER IN CONTRACT, STRICT LIABILITY, OR TORT (INCLUDING NEGLIGENCE OR OTHERWISE) ARISING IN ANY WAY OUT OF THE USE OF THIS SOFTWARE, EVEN IF ADVISED OF THE POSSIBILITY OF SUCH DAMAGE. SHA 1 SCENE contains sha1.h and sha1.cpp, which are covered by the following copyright: Copyright (c) 2011, Micael Hildenborg All rights reserved. Redistribution and use in source and binary forms, with or without modification, are permitted provided that the following conditions are met: Redistributions of source code must retain the above copyright notice, this list of conditions and the following disclaimer. xxv 8/18/15 Appendix C: Implementation Notes SCENE LT 5.5 Manual Redistributions in binary form must reproduce the above copyright notice, this list of conditions and the following disclaimer in the documentation and/or other materials provided with the distribution. Neither the name of Micael Hildenborg nor the names of its contributors may be used to endorse or promote products derived from this software without specific prior written permission. THIS SOFTWARE IS PROVIDED BY Micael Hildenborg ''AS IS'' AND ANY EXPRESS OR IMPLIED WARRANTIES, INCLUDING, BUT NOT LIMITED TO, THE IMPLIED WARRANTIES OF MERCHANTABILITY AND FITNESS FOR A PARTICULAR PURPOSE ARE DISCLAIMED. IN NO EVENT SHALL Micael Hildenborg BE LIABLE FOR ANY DIRECT, INDIRECT, INCIDENTAL, SPECIAL, EXEMPLARY, OR CONSEQUENTIAL DAMAGES (INCLUDING, BUT NOT LIMITED TO, PROCUREMENT OF SUBSTITUTE GOODS OR SERVICES; LOSS OF USE, DATA, OR PROFITS; OR BUSINESS INTERRUPTION) HOWEVER CAUSED AND ON ANY THEORY OF LIABILITY, WHETHER IN CONTRACT, STRICT LIABILITY, OR TORT (INCLUDING NEGLIGENCE OR OTHERWISE) ARISING IN ANY WAY OUT OF THE USE OF THIS SOFTWARE, EVEN IF ADVISED OF THE POSSIBILITY OF SUCH DAMAGE. xxvi Appendix C: Implementation Notes 8/18/15 SCENE 5.5 Manual Appendix D: Industrial Service Policy This Service Plan (hereafter, the “Plan”) is part of the Operating Manual for the FARO manufactured product purchased from FARO TECHNOLOGIES INC. (hereafter, “FARO”). The Plan and all of the optional additions, are subject to the conditions in Appendices A, B, & C, and are subject to change. This appendix refers to FARO’s service plans as written in the sales advertising literature, and is meant to provide additional details that the literature does not permit. 1.00 The purchase of the Plan shall occur with the purchase of the FARO products. 1.01 The plan shall apply to systems exclusively created or authored by FARO. 1.02 The plan shall include FARO product hardware only, and can not be extended or transferred through the sale of any part of the system to a third party unless the entire system has been sold or transferred. 1.03 The plan shall not cover Hardware or Software which has been subjected to misuse or intentional damage. FARO reserves the right to determine the condition of all returned Hardware and/or Software. 1.04 FARO shall determine the service method and contractor to service/repair all hardware which is not directly manufactured by FARO. All outside contractor terms and conditions are available from FARO and are incorporated herein by reference. 1.05 FARO shall not be responsible for any non-FARO authored software which inhibits the operation of the system. Furthermore the plan will not cover the re-installation of any software. 1.06 The Hardware and Software are subject to changes in design, manufacture, and programming. All updates are as follows: a) Hardware - The FARO Focus 3D and all of the associated optional parts, and the Computer are not subject to updates. b) Software - All computer programs, authored by FARO, which are used in conjunction with the FARO provided Hardware, will be updated (maintenance upgrades) for the life of the Purchaser’s current version. All enhancement and functionality upgrades must be purchased. c) 3rd Party Software - All computer programs not authored by FARO will not be updated under the Plan. The purchaser is responsible for the acquisition of all 3rd party software updates and warranty service or claims. 1.07 In the event that FARO replaces any product or replacement product, FARO retains all right, title, and interest in and to all products or portions of products that were replaced by FARO. 2.00 Definitions 2.01 “FARO” means FARO Technologies, Inc. 2.02 “Purchaser” means the party buying the Product and who is legally obligated hereunder. 2.03 “Software” means all computer programs, disk drive directory organization and content, including the diskettes containing such computer programs and disk drive directory organization and content, sold pursuant to the Order. 2.04 “Product” means the FARO Focus 3D, the Software, operating manuals and any other product or merchandise sold pursuant to the Order. If the Purchaser is buying only a FARO Focus 3D, or the Software, Product will mean the product being purchased by the Purchaser pursuant to the Order. 2.05 “System” means a combination of the Hardware, the Software, the Computer, and optional parts associated with the FARO Focus 3D. 2.06 “Hardware” means the scanner and all of the associated optional parts, and the Computer if provided by FARO. xxvii SCENE 5.5 Manual 2.07 “Software” means all computer programs, authored by FARO, which are used in conjunction with the FARO provided Hardware. The following is a layman’s definition of the coverage. Standard Service Plans All shipping times below are to destinations within the Continental United States. Outside the Continental U.S., FARO will ship equipment directly to the customs broker. • Standard Service Plans are contracted at time of purchase or at any time while a unit is covered by a FARO hardware service plan (as described in more detail later). • The Standard Service Plan covers the FARO Focus 3D and controller box. • Shipping costs, including insurance from the Purchaser to FARO are the responsibility of the Purchaser. FARO will be responsible for all return shipping costs including insurance. • All reasonable efforts will be made to keep the service repair time within 7 (FaroArm) or 14 (Laser Tracker and Laser Scanner) working days. The equipment will be returned via 2-Day air service, therefore, total service repair time will vary due to return shipping location. • Since the FARO Focus 3D is designed to be used with many other software packages not authored by FARO, this service plan can be purchased in its entirety to cover only FARO produced or authored products. For items not produced or authored by FARO, the customer is responsible for securing their own separate warranty or service plan coverage. Hardware Coverage FARO Scene Covered • All parts and labor for FARO Focus 3Ds failing under normal use as described in Appendix B. • Annual calibration and re-certification of the FARO Focus 3D. Not Covered • Misuse • Intentional damage • Wear and tear of probes, ball bars, auxiliary hardware products such as cables, wrenches, hex keys, screwdrivers, etc. Computer Covered • FARO contracts with 3rd party service providers for this service for up to 3 years. The terms and conditions of FARO’s contract with the provider apply herein and are incorporated herein by reference. • Typically, these services include repair of the computer, memory cards, and video monitors. Not Covered • All exclusions contained in the 3rd party service providers policy which is incorporated herein by reference. • Software operating system installation. • User intentional or unintentional removal of key software property or files. Software Coverage Covered • Periodically, FARO Technologies may release maintenance updates of its proprietary software. This will be supported through the life of the product version. All xxviii SCENE 5.5 Manual enhancement and functionality upgrades will be available in the next full version for a fee. Not Covered • End users are responsible for the procurement and installation of 3rd party authored or S/W updates as required to use with FARO authored software products, unless FARO Technologies resold these packages to the end user as an authorized reseller. Examples of 3rd party authored S/W are: DOS, Windows, AutoCAD, AutoSurf, SurfCAM and others. Premium Service Plans The Premium Service Plans additionally provide loaner FARO Focus 3Ds and Computers when service is required. All equipment shipping costs are paid for by FARO (both ways). FARO will make its best effort to ship all loaner FARO Focus 3Ds within 24 hours of the receipt of the purchasers request. Once the need for a service has been verified by FARO, FARO will make its best effort to ship all loaner computers within 72 hours of the receipt of the purchaser’s request. xxix SCENE 5.5 Manual Appendix E: Industrial Products Service Policy A one-year maintenance/warranty comes with the purchase of new FARO manufactured hardware products. The most regular of the FARO Standard Maintenance Terms and Conditions can be found in the FARO Knowledgebase. FARO Software All FARO Software users will receive maintenance releases until the end of life for the version at no charge electronically or at a minimal fee for the computer media package. All enhancement and functionality upgrades will be available for purchase upon release. Hardware & Software Training FARO’s training program is designed to instruct trainees in the operation of FARO’s hardware and software, which the customer has purchased. The training classes are set up for each trainee to obtain valuable hands on application exposure. This will help the trainees in their everyday use of the hardware and software. FARO also feels that once the trainee completes the training, finding solutions to problems or applying applications will be simpler. xxxi FARO Technologies, Inc. 250 Technology Park Lake Mary, FL 32746 800-736-2771 U.S. / +1 407-333-3182 Worldwide E-Mail: [email protected] FARO Europe GmbH & Co. KG Lingwiesenstrasse 11/2 D-70825 Korntal-Münchingen, Germany FREECALL +800 3276 73 78 / +49 7150/9797-400 FREEFAX +800 3276 1737 / +49 7150/9797-9400 E-Mail: [email protected] FARO Singapore Pte. Ltd. No. 03 Changi South Street 2 #01-01 Xilin Districentre Building B SINGAPORE 486548 TEL: +65 6511.1350 E-Mail: [email protected] FARO Japan, Inc. 716 Kumada, Nagakute-city, Aichi, 480-1144, Japan Tel: 0120-922-927, 0561-63-1411 FAX:0561-63-1412 E-Mail: [email protected] FARO (Shanghai) Co., Ltd. 1/F, Building No. 2, Juxin Information Technology Park 188 Pingfu Road, Xuhui District Shanghai 200231, China Tel.: 400.677.6826 Email: [email protected] FARO Business Technologies India Pvt. Ltd. E-12, B-1 Extension, Mohan Cooperative Industrial Estate, New Delhi-110044 India Tel.: 1800.1028456 Email: [email protected] FARO and FARO Laser Scanner Focus3D are registered trademarks and trademarks of FARO Technologies, Inc. FARO® Laser Scanner Focus3D X 330 Manual September 2015 2