1
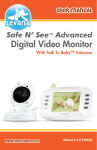
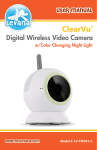
USeRS MANUAL
ClearVu®
Digital Video Monitor
w/Color Changing Night Light
www.myLevana.com
Model #: LV-TW301
PRODUCT WARRANTY
INFORMATION
Please visit our web site at www.myLEVANA.com
for information about your product’s warranty
We take quality very seriously. This is why all of our products come with a one year warranty from
the original purchase date against defects in workmanship and materials. If you have warranty or
support issues please contact us using any of the following methods:
Phone: 1.866.946.7828
Fax:
1.888.771.1701
Web: www.myLEVANA.com
LEVANA Canada
4080 Montrose Road
Niagara Falls, ON
Canada, L2H 1J9
LEVANA USA
60 Industrial Parkway #Z64
Cheektowaga NY 14227
USA 14305
Warranty Terms
1. LEVANA products are guaranteed for a period of one year from the date of purchase against
defects in workmanship and materials. This warranty is limited to the repair, replacement or
refund of the purchase price at LEVANA’s option.
2. This warranty becomes void if the product shows evidence of having been misused,
mishandled or tampered with contrary to the applicable instruction manual.
3. Routine cleaning, normal cosmetic and mechanical wear and tear are not covered under the
terms of this warranty.
4. The warranty expressly provided for herein is the sole warranty provided in connection with
the product itself and no other warranty, expressed or implied is provided. LEVANA assumes
no responsibilities for any other claims not specifically mentioned in this warranty.
5. This warranty does not cover the shipping cost, insurance or any other incidental charges.
6. You MUST call LEVANA before sending any product back for repair. You will be sent a Return
Authorization form with return instructions. When returning the product for warranty service,
please pack it carefully in the original box with all supplied accessories, and enclose your
original receipt or copy, and a brief explanation of the problem (include RA #).
7. This warranty is valid only in Canada and the continental U.S.
8. This warranty cannot be re-issued.
2
TABLE OF CONTENTS
PRODUCT WARRANTY INFORMATION......................................................... 2
INTRODUCTION....................................................................................... 4
WHAT’S INCLUDED................................................................................... 4
OPTIONAL ACCESSORIES........................................................................... 4
FEATURES............................................................................................... 5
BUTTONS AND CONNECTIONS - MONITOR ................................................... 6
BUTTONS AND CONNECTIONS - CAMERA..................................................... 8
INSTALLATION......................................................................................... 10
INSTALLING AC ADAPTER FOR THE CAMERA .......................................... 10
CHARGING THE MONITOR.................................................................... 10
CAMERA OPERATION................................................................................ 10
POWER ON/OFF................................................................................. 10
VOICE ACTIVATION . ........................................................................... 11
RAINBOW NIGHT LIGHT...................................................................... 11
AUTOMATIC NIGHT VISION . ................................................................ 11
MONITOR OPERATION............................................................................... 12
POWER SWITCH................................................................................. 12
CHANNEL SELECTION . ....................................................................... 12
VOLUME CONTROL............................................................................. 12
LCD BRIGHTNESS CONTROL................................................................. 12
RESET BUTTON.................................................................................. 12
PAIRING CAMERAS .................................................................................. 13
TROUBLESHOOTING................................................................................. 14
SPECIFICATIONS ...................................................................................... 14
FCC STATEMENT ...................................................................................... 15
SAFETY INSTRUCTIONS............................................................................. 16
3
INTRODUCTION
Thank-you for your purchase of the
Levana ClearVu® Digital Video Monitor.
Using advanced digital 2.4GHz ClearVu®
technology, it enables you to transmit
picture and sound signals wirelessly
up to 450 feet away! We know that you
will be pleased with the quality and
features of your new baby monitor.
WHAT’S INCLUDED
•
•
•
•
Baby Monitor
Camera
Camera Mount
Charging Base
• 2 x Power Adapters
• 1 x Lithium Ion Battery for Monitor
• User’s Manual
OPTIONAL ACCESSORIES
Extra Camera: LV-TW301-C
This system supports up
to 3 additional cameras!
4
FEATURES
Advanced ClearVu® Digital Technology
Feel free to take the monitor with you around the house and even outside! ClearVu
Technology ensures that you will always see and hear with perfect clarity and the signal
remains strong up to 450 feet away.
Rechargeable Monitor
When you’re not on the move simply put your monitor on its base to recharge – no
batteries required! Enjoy up to 4 hours of continuous audio and video monitoring with a
fully charged monitor.
Automatic Night Vision
The built-in night vision allows you to see your child, even in complete darkness. When the
lights go down the system automatically adjusts to the level of light. With 10 ft of night
vision range, the camera can be placed anywhere in your child’s room while displaying a
precise image on your monitor.
Color Changing Night Light
The color changing, built-in night light displays a calming light show, soothing your little
one to sleep. This beneficial feature turns on automatically when the room gets dark and
can be manually turned off once your child is asleep.
Advanced ClearVu® Wireless Monitor
The handheld video monitor is wireless, which means that it can travel with you. See and
hear your child while you pick-up your mail or while you clean the downstairs playroom.
With a signal that reaches up to 450 ft you have the freedom to multi-task with peace of
mind.
LCD on/off Switch
Conserve the life of your monitor and still hear everything your baby is doing by turning
off the LCD display and only using the audio function.
Expands to Suit Your Needs
If you have more than one child to monitor or your child is mobile, monitoring multiple
areas of your home is important. This system can support up to three additional cameras,
making it possible to watch your baby wherever he or she wanders.
24/7 Lifetime Live Customer Support
Our customer support team can be reached by phone 24/7 or by email and live web chat
services, so you always have access to an expert.
5
BUTTONS AND CONNECTIONS - MONITOR
Front
Back
Charging Base
6
BUTTONS AND CONNECTIONS - MONITOR
Baby Monitor - Front
1. Volume Adjustment Buttons
Increase or decrease the volume with these buttons
2. ON/LCD OFF/OFF Button
You can turn the monitor ON, turn ON only audio with the LCD screen OFF , or turn the
monitor completely off
3. 6V DC Input
Plug the AC adapter into the monitor here
4. LCD Display
Displays the video
5. Brightness Adjustment Buttons
Increase or decrease the video brightness with these buttons
6. Charging LED indicator
Glows red when the monitor is charging, and green when the monitor is fully charged
7. Speaker
Plays the sound from the camera
Baby Monitor - Back
8. Reset Button
Resets the monitor to original manufacturer settings
9. Channel Selection Button
Allows you to select which camera to view or automatically cycle through all
connected cameras
Baby Monitor - Charging Base
10. 6V DC Input
Plug the AC adapter in here
11. Power LED
Displays that the charging base has power attached
7
BUTTONS AND CONNECTIONS - CAMERA
Front
Side
Back
Bottom
8
BUTTONS AND CONNECTIONS - CAMERA
Camera - Front
1. Microphone
Captures every sound your baby makes
2. IR LED’s
Allows you to see in complete darkness
3. Power ON/OFF Indicator
Lets you know whether your camera is ON or OFF
4. Camera Lens
Camera - Side
5. Rainbow Night Light
Soothes your baby with a color changing night light
Camera - Back
6. Light Sensor for Automatic Night Vision
Detects the absence of light and turns on night vision
7. 6V DC Input
Plug the camera in here
Camera - Bottom
8. Night Light OFF/AUTO/ON Switch
Turn the night light ON, OFF, or set to Auto to turn on only when there is sound heard
in the baby’s room
9. Power ON/OFF Switch
Save electricity by turning the camera OFF when not in use
10. Pair Button
Use this button to add more cameras or re-pair any camera which is not connected
11. Camera/Voice Activation Switch
Set the camera to always transmit picture and sound, or set to AUTO and only
transmit when sound is heard
9
INSTALLATION
Installing AC Adapter for the Camera
1.
2.
3.
4.
Install the plug of the included AC adapter into the 6V DC input of the camera.
Plug the AC adapter into a standard AC power outlet.
Switch ON the camera with the ON/OFF switch on the bottom of the camera.
The power indicator on the front of the camera will be illuminated red.
Note: Use only the AC adapters and rechargeable batteries supplied with this
package. Using improper power sources may cause the unit to malfunction,
cause harm to yourself or others, or void the manufacturer warranty.
Installing the Rechargeable Battery and Charging the Monitor
1. To install the rechargeable battery, remove the battery compartment cover on the
back of the monitor, and place the battery in so the metal charging connectors are
touching.
2. Replace the battery compartment cover.
3. Install the plug of the included AC adapter into the 6V DC input of the charging base.
4. Plug the AC adapter into a standard AC power outlet.
5. Set the monitor down on the charging base so that the metal connections are
touching.
6. The charging indicator on the front of the monitor will be illuminated red.
7. Once the monitor is done charging, the charging indicator will be illuminated green.
CAMERA OPERATION
Power ON/OFF Switch
1. Use the power ON/OFF switch on the bottom of the camera to turn on the camera
and transmit video and sound.
10
CAMERA OPERATION
Voice Activated Camera (Camera/Auto Switch)
To Activate
1. Slide the CAMERA/AUTO switch on the bottom of the camera to the AUTO position.
2. When the sound level of the baby and surroundings are above the preset level, the
camera will transmit the image and sounds to the monitor.
3. When the sound level of the baby and surroundings are below the preset level,
transmission will be shut off and no picture or sound will be transmitted.
Note: This is a good option to choose to save battery power on your LCD monitor.
To Deactivate
1. Slide the CAMERA/AUTO switch on the bottom of the camera to the CAMERA position.
2. Choosing the CAMERA option will transmit the video and sound continuously until
you turn the camera or monitor OFF.
Color Changing Night Light
To Activate/Deactivate
1. Slide the OFF/AUTO/ON switch on the bottom of the camera
to the ON position, the camera will continuously illuminate
the night light, changing colors red, green and blue.
2. Slide the OFF/AUTO/ON switch to the OFF position to turn the
night light off completely.
To Turn on Voice Activated Night Light
1. Slide the OFF/AUTO/ON switch on the bottom of the camera to the AUTO position.
2. The night light will illuminate when the noise level is above the preset level, and
automatically shut off when the noise level is below the preset noise level.
Automatic Night Vision
•
•
The infrared night vision of the camera allows you to see up to ten feet in complete
darkness.
The night vision of the camera turns on automatically when the sensor on the back
of the camera senses that the light level in the room is too low to view. Avoid placing
blankets or objects that would cover the back of the camera to avoid the night vision
function turning on at incorrect times of the day
11
MONITOR OPERATION
Power ON/LCD OFF/OFF Switch
1. Slide the Power ON/LCD OFF/OFF switch to the ON position to turn the monitor ON,
view the video, and hear all sounds continuously.
2. Slide the Power ON/LCD OFF/OFF switch to the LCD OFF position to turn the LCD
screen OFF. In this setting you will still hear all sounds but the video will not transmit.
This is a good setting to save battery power for the monitor.
3. Slide the Power ON/LCD OFF/OFF switch to the OFF position to turn the monitor OFF,
you will not receive any video or sound.
Channel Selection
•
•
The included monitor and camera will automatically be paired to channel 1
This system allows for four cameras total to be connected to one monitor, you will
have to pair additional cameras to other channels. Please see the section on Pairing
Cameras on page 13
1. To change the camera channel being viewed, slide the channel selection switch on
the back of the monitor to the channel you wish to view: 1, 2, 3, or 4.
2. You can also choose AUTO with the channel selection switch, this function will cycle
through all of the channels you have connected to cameras.
Volume Control
1. Press the “+“ and “-“ buttons on the left side of the front panel to increase and
decrease the volume of the monitor.
LCD Brightness Control
1. Press the “+“ and “-“ buttons on the right side of the front panel to increase and
decrease the brightness of the video on the monitor.
Reset Button
1. Press the RESET button on the back of the monitor to return the system to its original
manufacturer settings.
12
PAIRING CAMERAS
•
This monitor has already been paired with the camera. You will
need a pin or small object to press the pair button to connect
additional cameras
To Pair Cameras
1. Turn the monitor OFF using the ON/LCD OFF/OFF switch.
2. Press and hold the “+” brightness button on the right side of the front panel, and
switch the ON/LCD OFF/OFF switch to the ON position.
3. The monitor will turn ON and the pairing screen will be shown.
Pair Button
4. Once you see the screen above, switch on the camera you would like to pair.
Using a pin or small object, press the pair button through the small opening on the
bottom of the camera.
5. The power LED on the camera will begin blinking when you have successfully pressed
the pair button.
6. The monitor and camera will now connect automatically, and the screen will show
“Cam1 OK!”
7. Once you pair Cam 1, the monitor will prompt you to pair Cam 2, Cam 3, and Cam 4.
8. Repeat steps 4 through 6 to connect up to three additional cameras.
9. Once you have connected the number of cameras you would like, turn the monitor
OFF and ON again to resume normal operation.
13
TROUBLESHOOTING
Problem
No reception on monitor unit •
(screen is blue)
•
•
•
•
Only black and white video is •
displayed
No transmission from camera unit •
•
•
•
Possible Cause
Unit has not been switched on
AC adapter has not been connected
Monitor is not charged
The camera is not transmitting (power is not
on, or in voice activation mode)
Wrong channel is chosen (manufacturer has
preset and paired the included camera to
channel 1)
Camera has switched to night vision mode,
move the camera closer to a light source to
return to color mode
Camera has not been switched on
AC adapter is not connected
Voice activation mode is on and there is not
enough noise to activate it
Camera is not paired with the monitor
SPECIFICATIONS
Camera Specs
Frequency
Maximum Range
IR LED’s
Night Vision Range
Power Input
2.4 GHz
450 Feet
10
10 Feet
6V ~ 800mA
Video Monitor Specs
Screen Size
2.4" LCD
Frequency
2.4 GHz
Power Input
6V ~ 800mA
Battery Power
3.7V ~1200mAh
14
FCC APPROVED
This equipment has been tested and found to comply with the limits for a Class B
digital device, pursuant to Part 15 of the FCC Rules. These limits are designed to provide
reasonable protection against harmful interference in a residential installation. This
equipment generates, uses and can radiate radio frequency energy and, if not installed
and used in accordance with the instructions, may cause harmful interference to radio
communications. However, there is no guarantee that interference will not occur in
a particular installation. If this equipment does cause harmful interference to radio or
television reception, which can be determined by turning the equipment off and on,
the user is encouraged to try to correct the interference by one or more of the following
measures:
• Reorient or relocate the receiving antenna
• Increase the separation between the equipment and receiver
• Connect the equipment into an outlet on a circuit different from that to which the
receiver is connected
• Consult the dealer or an experienced radio/TV technician for help
• FCC Label Compliance Statement
• This device complies with Part 15 of the FCC Rules. Operation is subject to the following
two conditions:
(1) This device may not cause harmful interference
(2) This device must accept any interference received, including interference
that may cause undesired operation
The manufacturer is not responsible for any radio or TV interference caused by
unauthorized modifications to this equipment. Such modifications could void the user's
authority to operate the equipment.
15
SAFETY INSTRUCTIONS
Read and Keep Instructions: All the safety and operating instructions should be read
before the video baby monitor is operated.
Water and Moisture: This product is designed for indoor use only. The unit should not be exposed to rain,
moisture, dripping or splashing. No objects filled with liquid should be place on top of, or beside the product,
such as a glass or vase. This item should not be used near water.
Ventilation: This baby monitor should not be used on a bed, sofa, rug or similar surface that may block
the ventilation openings, or be placed in an enclosed area, such as a bookcase or drawer that may impede
air flow.
Keep Away from Sources of Heat: This unit should not be exposed to direct heat sources such as a candle,
fireplace, radiator, heat register, stove or other appliance that emits heat. The unit should not be left in direct
sunlight.
Power Source: This unit should only be used with the AC power adapters included in this package (rated
6V 800mA)
Non-Use Periods: Always unplug the AC adapters from the wall outlets during long periods of non-use.
Damage Requiring Service: This unit should be serviced by qualified personnel only when:
a. Objects have fallen or liquid has been spilled into the product
b. The units have been exposed to rain
c. The units do not appear to operate normally or exhibits a distinct change in performance
d. The units have been dropped or the enclosure damaged
Caution: This product cannot replace responsible adult supervision of a child. You should personally check
your child’s activity at regular intervals.
STATEMENT ON REGULATION
These units are designed to provide reasonable protection against harmful interference in a residential
installation. This equipment generates, uses and can radiate radio frequency energy and if not installed
and used in accordance with the instructions, may cause harmful interference to radio communications.
However, there is no guarantee that interference will not occur in a particular installation. If this equipment
does cause harmful interference to radio or television reception, which can be determined by turning
the equipment off and on, the user is encouraged to try to correct the interference by one or more of the
following measures:
• Reorient or relocate the receiving antenna
• Increase the separation between the equipment and receiver
• Connect the equipment into an outlet on a circuit different from that to which the receiver is connected
• Consult the dealer or an experienced radio/TV technician for help
Operation with non-approved equipment or unshielded cables is likely to result in interference to radio or
TV reception. The user is cautioned that changes and modifications made to the equipment without the
approval of manufacturer could void the user’s authority to operate this equipment.
16
Please visit
.com for...
www.MYLevana
rmation
Warranty info
t
Product Suppor
ation
Contact inform
wnloads
User Manual Do
,.
.
.
. and much more!