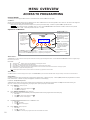
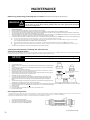
1
® Pool Pilot Salt Chlorine Generator Swimming Pool & Spa Purification System Model: DIG-220 Owner’s Manual Installation and Operation This manual covers the installation and operation of the DIG-220 Chlorine Generator with associated manifold assembly. IMPORTANT ! Read This Manual Before Installing or Operating INSTALLER: THIS DOCUMENT IS PURCHASER’S PROPERTY AND IS TO REMAIN WITH THE EQUIPMENT OWNER 1 PN: # 18500-DIG R12 4/23/09 b TABLE OF CONTENTS CONTACTING THE FACTORY ..................................................................................................... 4-5 SAFETY INFORMATION ............................................................................................................... 5-6 OWNER QUICK START & RUN ................................................................................................. 7-10 SPECIFICATIONS ............................................................................................................................ 11 Input Power ......................................................................................................................................... 11 Output Power ...................................................................................................................................... 11 Optional Internal Pump Relay Ratings ................................................................................................. 11 Chlorine Output ................................................................................................................................... 11 Manifold Flow Requirements................................................................................................................ 11 Agency Approvals ................................................................................................................................ 11 INSTALLATION ........................................................................................................................... 11-16 Before Installing: .................................................................................................................................. 11 What is included: ................................................................................................................................ 11 What is not included: .......................................................................................................................... 11 Required Components for a complete system:.................................................................................... 12 Installation Steps: ................................................................................................................................ 12 Plumbing the Manifold Assembly ............................................................................................ 12 Flow Rates Within Normal Range: ................................................................................... 13 Flow Rates Exceeding 100-gpm (379 L/m):...................................................................... 13 Mounting the Control Unit:.............................................................................................................. 13-14 Electrical Connections ................................................................................................................... 14-16 Grounding and Bonding .......................................................................................................... 14 Determine Incoming Voltage Requirements ............................................................................. 14 For incoming voltage of 230 Vac: ................................................................................ 14 For incoming voltage of 115 Vac: ................................................................................ 15 Connecting DIG-220 to External Equipment ............................................................................ 15 Connecting DIG-220 to External Time Clock: ................................................................... 15 Connecting DIG-220 to Control a One-Speed Pump .......................................................... 16 Connecting DIG-220 to Control aTwo-Speed Pump .......................................................... 16 Cell and Tri-Sensor Cord Connections.............................................................................. 16 PREPARING THE POOL WATER ................................................................................................... 17 Steps to Prepare Water: ...................................................................................................................... 17 Calculating Pool Volume: .................................................................................................................... 17 Adding Salt: ........................................................................................................................................ 17 Type of Salt to Add... .............................................................................................................. 17 Determine Amount of Salt Required (and salt level to maintain)... ........................................... 17 How to add the salt (or removeit if too much)... ...................................................................... 17 MENU OVERVIEW ........................................................................................................................... 18 ACCESS TO PROGRAMMING ................................................................................................. 18-23 Control Panel: ..................................................................................................................................... 18 Operation of Buttons: ..................................................................................................................... 18-19 Menu Button ........................................................................................................................... 18 Select Button ......................................................................................................................... 18 Pump Button ..................................................................................................................... 18-19 Basic Operational Programming: ......................................................................................................... 19 Adjusting the Purifier Output % ... .......................................................................................... 19 Boost or SuperBoost... ........................................................................................................... 19 Purifier Mode .......................................................................................................................... 19 Purifier % Adjustment Procedure: ..................................................................................... 19 2 TABLE OF CONTENTS Menus ............................................................................................................................................ 20-23 Test Pool Pilot ........................................................................................................................ 20 View Setup ............................................................................................................................. 20 Owner Options: ................................................................................................................. 20-21 Select Language: ............................................................................................................. 20 Select Units: .................................................................................................................... 21 Temperature Units ............................................................................................................ 21 12/24 Hour Clock: ............................................................................................................ 21 Set Time of Day: .............................................................................................................. 21 Maintenance Menu: ........................................................................................................... 21-22 Test Pool Pilot: ................................................................................................................ 21 Set Time of Day: .............................................................................................................. 21 Force Reverse .................................................................................................................. 21 Set Reverse Time: ............................................................................................................ 21 Replace Cell .................................................................................................................... 22 Calibrating Temperature: .................................................................................................. 22 Calibrating Salt: ............................................................................................................... 22 Installer Menu: ................................................................................................................... 22-23 Select Language: ............................................................................................................. 22 Select Units: .................................................................................................................... 22 Temperature Units ............................................................................................................ 22 12/24 Hour Clock: ............................................................................................................ 22 Pool Volume .................................................................................................................... 22 Cell Type .......................................................................................................................... 23 Cell Power ....................................................................................................................... 23 Pump Control ................................................................................................................... 23 Set Time of Day ............................................................................................................... 23 Select Remote: ................................................................................................................ 23 Select Minerals: ............................................................................................................... 23 Pump Program 1 and 2: ................................................................................................... 23 Enable Demo: .................................................................................................................. 23 REFERENCE SECTION ............................................................................................................ 24-26 Salt Addition Chart: ............................................................................................................................. 24 Basic Water Chemistry: ................................................................................................................. 24-25 Using the Saturation Index (SI):...................................................................................................... 25-26 Part Numbers: ..................................................................................................................................... 26 MAINTENANCE ......................................................................................................................... 27-30 Fuse Location and Ratings:................................................................................................................. 27 Removing \ Inspecting \ Cleaning the Tri-Sensor............................................................................. 27-28 Testing the Flow Switch, Cleaning the Filter Screen,Cleaning the Bypass Valve .................................. 28 Servicing the SuperCell .................................................................................................................. 28-29 Visual Inspection of the SuperCell.......................................................................................... 29 Manual Cleaning of the SuperCell... ........................................................................................ 29 Installing a SuperCell.............................................................................................................. 29 Winterizing .......................................................................................................................................... 30 Freeze protection program and its limits ................................................................................. 30 Spring Start-Up .................................................................................................................................... 30 TROUBLESHOOTING .............................................................................................................. 31-32 APPENDIX ........................................................................................................................................ 33 Delaration of Conformity ...................................................................................................................... 33 FCC Compliance ................................................................................................................................. 33 3 CONTACT INFORMATION Dear Owner: Congratulations on your wise decision to make anAquaCal AutoPilot chlorinator a part of your home. Just add salt, and let your DIG-220 produce the chlorine to sanitize your pool or spa. A wonderful thing happens to the salt after it is turned into chlorine and does the work of purifying the water—it turns back into salt and the process “You can rest assured knowing begins all over again. your new chlorinator is of the Plus, the salt, being at a much lower level than even contact lens solutions, highest quality and efficiency, and means no “salty” taste to the water for the average bather.And, no more is designed and built to provide odors from harsh chlorine products. years of trouble-free operation.” No longer experience the discomfort and inconvenience of harsh chemical reactions like red eyes, green hair, itchy skin, or faded swim wear. Our product makes it easy to retain a constant level of chlorine, purifying the water while making it soft and silky to the touch. What We Need to Know If You need To Contact Us... If you should need to callAquaCal AutoPilot for questions, service, or parts, please have the following information ready: 1 INSTALLER - Please record the following information prior to installation: Installer: Control Unit Model Type: Date of Installation: DIG-220 SuperCell Model Type: Control Unit Serial Number: SuperCell Serial Number: Pool Volume in Gallons: 2 CHEMISTRY: (from a current water sample) NOTE RECOMMENDED LEVELS ON PAGE-24 & 25. Approximate Water Temperature of pool: Total Chlorine (TC): Salt Level: Free Chlorine (FC): Stabilizer (CYA): Total Alkalinity: pH: Calcium Hardness: Combined Chlorine (CC): 3 “VIEW SETUP” and “TEST POOL PILOT” information Use the view set up menu, and test pool pilot menu and write down the results (see programming on page-20) 4 CONTACT INFORMATION (CONTINUED) To Contact the Factory... If you have questions, please refer to our web site atwww.autopilot.com for the latest manual revisions, additional information, and helpful service advice. You can also call us at: ( ) -. We are here to serve you from 8:00 a.m. to 5:00 p.m. Eastern time, Monday through Friday. If calling after hours, our voice mail system will handle your call. Please be sure to leave your name, a complete address, and your telephone number . Or, if you prefer, you may FAX us at: (727) 824-0847. Be certain to provide your full address and a daytime telephone number. SAFETY INFORMATION Used and maintained properly, your chlorine generator will provide year-upon-year of safe and economical service. However, as with any mechanical or electrical device, to get the most from your equipment— while insuring personal safety for you and others—certain operational and maintenance factors must be observed. Likewise, excepting a few minor owner-capable maintenance items (explained later in this manual), repair and service of your chlorinator must be performed only by experienced service personnel. Should you suspect your chlorine generator is not performing properly, refer to the section in this manual entitled: "T roubleshooting," to determine if a call for service is required. Your installer can be one source of service, orAquaCal AutoPilot Customer Support personnel stand ready to assist you at: (800) 786-7751. For questions concerning installation, operation, service and upkeep, please contact your installer or AquaCal AutoPilot Customer Support. Warranties may be voided if the chlorinator has been installed, operated, maintained, or repaired improperly. In addition to voiding the manufacturer’s warranty... unapproved installation methods, modifications, poor or incorrect maintenance, service by unqualified personnel, or improper use of the chlorinator may result in personal injury and/or property damage. For personal safety , and to avoid damage to equipment, follow all safety instructions displayed on the equipment and within this manual. Safety Signals Throughout this manual the following two safety signals are placed where particular attention is required. Please note "WARNING" relates to personal safety, while "NOTICE" signals promote avoiding damage to equipment. Failure to heed the following may result in permanent injury or death. WARNING A “Warning” signal appears in this manual where special attention is required for personal safety. (Specific instructions will appear in this box.) Failure to heed the following may result in equipment damage. NOTICE A “Notice” signal appears in this manual where special care is required to avoid equipment damage. (Specific instructions will appear in this box.) Follow all National Electric Codes (NEC) unless State or Local guidelines supersede. When installing and using your DIG-220, basic safety precautions must always be followed, including the following: 5 SAFETY INFORMATION (CONTINUED) IMPORTANT SAFETY INSTRUCTIONS READ AND FOLLOW ALL INSTRUCTIONS SAVE THESE INSTRUCTIONS All DIG-220 models: Risk of Electrical Shock. WARNING Ensure that the electrical panel or filter pump circuit is turned OFF prior to installation or servicing inside any Autopilot unit. Risk of Electrical Shock. WARNING Mount the Control Box to ensure the least amount of direct exposure to rain, garden sprinkler water, direct sunlight, or any corrosive environment. Risk of Electrical Shock. WARNING Install the Control Box at least 10’(3 m) for 115 Vac Units, from the inside wall of the pool or spa. Use 5’ (1.5 m) minimum dista nce for 230 Vac Units. Failure to heed the following may result in permanent injury or death. WARNING WARNING Do not permit children to use this product unless they are closely supervised at all times. Children should not use spas, hot tubs, or pools without permanent adult supervision. To avoid personal injury The proper residual chlorine level and water chemistry must be maintained. Installation of fixed wiring DIG-220 (115/230Vac, 50/60 Hz): WARNING To avoid personal injury All field-installed metal components such as rails, ladders, drains, or similar hardware within 10’ (3 m) of the spa or hot tub shall be bonded to the equipment grounding bus with copper conductors not smaller than No.8AWG (8.4 mm²). WARNING To avoid personal injury Use the bonding lug provided on the outside of your DIG-220, to connect a minimum No. 8 AWG (8.4 mm²) solid copper bonding conductor between the DIG220 and any metal equipment, metal enclosures of electrical equipment, metal water pipe or conduit within 5’ (1.5 m) of the DIG-220. WARNING To avoid personal injury A ground terminal is located on the inside of your DIG-220.To reduce the risk of electrical shock, this terminal must be connected to the grounding means provided in the electrical supply panel. A continuous copper wire is to be used equivalently sized to the circuit conductors supplying your DIG-220. WARNING To avoid personal injury A disconnect device such as a time clock relay or circuit breaker from the power source, with a contact separation of at least 0.12” (3mm) in all poles, must be incorporated in the fixed wiring for permanently wired units. To avoid personal injury WARNING WARNING 6 The input voltage to the DIG-220 must match the 1 5/230Vac jumper terminals on the Circuit board, marked “TRANSFORMER PRIMARY” (shown on Page-14 & 15). To avoid personal injury The Control Box is provided with (3) knock out holes for electrical conduit connections and has (1) 1/2” Liquidtite fitting already attached. 1/2” nonmetallic flex conduit is recommended. OWNER QUICK START & RUN The Pool Pilot DIG-220 is a salt chlorination system designed for pool or sp a water purification. Although the DIG-220 is easy to use, it is important to read through the entire manual before attempting to operate the system. How Your Chlorine Generator Works The system requires a low concentration of dissolved salt (sodium chloride) in the water . The salt concentration level is normally maintained below the taste threshold. The DIG-220 automatically converts the salt into chlorine, which your pool/spa requires to remain sanitized and algae free. The chlorine reverts back to salt after treating the water. Since the salt is constantly recycled, there is minimal loss during a swimming season. However, salt can be lost due to filter backwashing, rain water overflow , leaks, or bather splashing/carry out... but not through evaporation. The amount of chlorine required for proper sanitization will vary based on the pool size and various factors such as water temperature, bather load, exposure to direct sunlight, and special water features. The water circulation pump must be operating for your DIG-220 to produce chlorine, so run time is one of several key components to maintaining the proper sanitizer levels. Most installations require a minimum of eight (8) hours-per-day pump run time to properly filter and sanitize the water. Control Overview Following is a brief explanation of owner / operator control options. For full features of the Owner Options Menu, please see page-20 & 21. The MENU button is pressed to obtain access to the Owner Options Menu. Please Note: This quick start section assumes the installer has already programmed the system for specific site parameters, has established proper water balance, and has pretreated water to 1 - 3 ppm chlorine. Attention Owner: Should Celsius vs. Fahrenheit, choice of language, or other owner options require modification, please refer to Operation of Buttons located on page-18 and Owner Options on page-20 & 21. Up and Down Arrows: Use the UP and DOWN arrows to control thepurifier output level, then press the SELECT button to save the value chosen. With a properly prepared pool, the recommended starting output level is 50%. Upon initial start-up, check sanitizer level every few days and make small output level adjustments as necessary to maintain 1-3 ppm free chlorine levels. Your DIG-220 does not directly measure or regulate the sanitizer levels in your pool. Rather, the owner / operator will need to periodically test the water to determine the current chlorine level, and adjust the output setting as needed. Purifier 12:00 pm Boost Menu 100% 80F Select Check System Pump FIG-1 After the purifier output level is “tuned in,” the unit will automatically make fine output adjustments as the water temperature fluctuates. This patented temperature compensation feature will adjust output depending on water temperature. See page-10 & 30 for more information concerning the temperature compensation feature. Please Note: The optimum output setting will vary based upon pool size, location, exposure to sunlight, number of users, vegetation around the pool, water balance practices, and pump run time.Your installer should have already taken these factors into consideration when performing installation programming. Therefore, your adjustments, at this point, should be relatively minor. 7 OWNER QUICK START & RUN The Boost Button: The BOOST button increases output to 100%. Use this feature when a heavier then normal bather load is anticipated. Press BOOST once........................ = 24-Hour Boost Purifier 100% 12:00 pm 80F Check Press and hold BOOST for 8 seconds = 72-Hour Boost Press BOOST a second time............ = Deactivate Boost Boost Menu Select Pump FIG-2 Menu and Select Button: Allows access to the “Test,” “View Setup,” “Owner Options,” “Maintenance,” and “Installer” menus. The SELECT button allows the operator to choose program menu options. The owner / operator should not normally need to access these features on a regular basis. Consult “Programming” section or contact factory customer support for additional information. Purifier 12:00 pm Boost Menu 100% 80F Select Check Pump FIG-3 Check System Light: The CHECK SYSTEM light will flash to warn the DIG-220may need attention. A warning message will also be displayed. Unless deemed a normal condition, per below , see troubleshooting section beginning on page-31. Flashes if the water flow is insufficient under the following circumstances: - When DIG-220 is not set up to control the water pump (uses an External Timer or Remote Runs Pump), and DIG-220 is wired to the line side (hot all the time). - If the DIG-220 controls the pump (One-speed Pump), the light will not flash when the pump is off. Purifier 12:00 pm Boost Menu 100% 80F Select Check Pump FIG-4 Flashes when salt is low Flashes when water temperature exceeds 125° F, or drops below 10° F Flashes when “PUMP OFF FOR SERVICE” Normal Display: After 30-minutes of inactivity, the display will go to a “walking dot” screen saver mode. All functions such as chlorine generation, reverse, boost, etc., will continue in the background. Pressing any key will call up the normal informational display. Purifier Output level ................................................. : In 1% increments, from 0% to 100% Water Temperature .................................................. : In Fahrenheit or Celsius Cell Status ............................................................... : ON Check System Light ................................................ : OFF 8 OWNER QUICK START & RUN (CONTINUED) Water Balance & Chemistry Recommendations Proper water balance is critical to the operation of your DIG-220. Conditions such as high pH levels, low cyanuric acid (stabilizer ) levels, or other factors causing unbalanced water, will mask the sanitizer production of your DIG-220. Please note the following recommended water chemistry parameters: PH........................................: 7.2 – 7.8 Calcium Hardness....................: 200 – 400 ppm Total Alkalinity.........................: 80 – 100 ppm Salt.......................................: 2500 – 3500 ppm (ideal 3000 ppm) Cyanuric Acid (stabilizer )..........: 60 – 80 ppm Chlorine.................................: 1 – 3 ppm See “Basic Water Chemistry,” on page-24 & 25, and “Using the Saturation Index,” on p age-25 & 26 for further information concerning pool/spa water chemistry maintenance requirements. Should you have additional water balance or chemistry questions, please refer to the Troubleshooting section in the back of this manual. Important !!! Information Critical to the Survival of Your DIG220 Follows... Winterizing NOTICE Failure to heed the following may result in equipment damage. Special measures are required in the event of freezing conditions. Your DIG-220 may be damaged if measures are not taken in advance of freezing conditions. Equipment damage due to freezing conditions is NOT covered under the equipment warranty. Freeze Protection & Extended Shut Down: In areas where freezing conditions are a rare occurrence, allow the filtration system to run continuously throughout the freeze period. Typically, during light freeze conditions, circulating (moving) water will not freeze. In areas where freezing conditions are prevalent and sustained, the DIG-220MUST be winterized; please refer to winterizing instructions onpage-30. 9 OWNER QUICK START & RUN (CONTINUED) Important Features Patented temperature compensation for chlorine output control... Programmable microprocessor control... Multi-language digital display (English, Spanish, Italian, & French)... Digitally controlled power to the SuperCell... Tri-sensor circuitry to monitor water flow, water temperature, and salt level. Calculates and provides recommended salt addition amounts required to maintain the recommended 3000 ppm (3.0 g/l)) salt concentration level. Freeze Protection: allows the water pump, if wired and programmed for One-S peed pump, to override the program cycle and run continually (30-minute minimum) when the water temperature falls below 40° F (4.4° C). This helps to prevent damage to the plumbing during light freeze conditions. Optional Internal relay for controlling an external single-speed or two-speed water pump. On-board diagnostic and test programs. Lithium battery back up for saving program settings. ORP dry contact interface for connection to an external ORPcontroller. Opitional Electronic controller interface for Jandy® (Versions I,K, and newer), Polaris® EOS, or Pentair IntelliTouch ® controllers. Patented Temperature Compensation The Tri-Sensor temperature sensor works in conjunction with the purifier % feature to automatically adjust chlorine output based upon changes in water temperature. The automatic compensation feature operates between 55°F and 95°F (13°C - 35°C). As water temperature falls below 65°F (18°C), the controller will activate a high purifier percent lockout, and may not allow purifier adjustments up to 100%. This feature prevents the controller from overworking the cell under colder temperatures, thus preventing premature cell wear . At 55°F (13°C) or colder water temperatures, the controller will adjust to a fixed 1% output (and will not allow the percentage to be raised manually), thus preventing over-chlorination and premature cell failure. As the water temperature rises above set point, the controller will increase output up to 100%, thus preventing under-chlorination during warmer water temperatures. Water Manifold Assembly The DIG-220 may be operated with the Patented (Automatic-Flow Bypass) Manifold using the following Super Cells: SC-36, SC-48, SC-60, or CC-15. Please see Installer section: “Basic System Overview,” for details and diagrams. Get the Most from Your Purchase! To become fully-familiar with all the features, the safe operation, and the care of your new chlorinator, please read through the entire remainder of this manual. 10 SPECIFICATIONS This device complies with part 15 of the FCC Rules. Operation is subject to the following two conditions: (1) This device may otncause harmful interference, and (2) this device must accept any interference received, including interference that may cause undesired operation. Output Power: Input Power: 230 Vac (1.5 AC amps) 50/60 Hz (default from factory) Cell Power 1 (5* DC amps) 115 Vac (3 AC amps) (easily converted in the field, refer topage-14 & 15 for instructions on conversion) Cell Power 2 (6.5* DC amps) Cell Power 3 (8* DC amps) * Indicates nominal amperage output. The dual axis controller will slightly vary the amps to optimize the power to the cell. Optional Internal Pump Relay Ratings: Chlorine Output: Voltage Input ................... Amps / HP max @ Cell Power 3 (8 amps DC)(set at 100% - 24 hour operation) 115 Vac ............................ 30 amps / 1 HP CC-15 2.50 lbs/day (1.13 kg/day) 230 Vac ............................ 30 amps / 2.5 HP SC-60 1.92 lbs/day (0.88 kg/day) SC-48 1.56 lbs/day (0.71 kg/day) SC-36 1.28 lbs/day (0.58 kg/day) Manifold Flow Requirements: Agency Approvals: Maximum Operating Pressure: 50 psi ETL tested to confirm to UL1081 specification. Standard for Safety for Swimming Pool Pumps, Filters and Chlorinators. Maximum Flow Rate: 100 gpm NSF/ANSI 50 ............................. Circulation System components and related materials for swimming pools, spas/hot tubs. Minimum Flow Rate: 20 gpm CAN/CSA-E335-1 ...................... General Requirements For Safety of Household and Similar Electrical Appliances. See appendix on page-33 for CE Declaration of Conformity A Note Concerning Terminology: Throughout this manual, the portion of the system which mounts to the wall (and powers the cell) may be referred to as the: DIG-220 or unit. In addition, when “pool” is referred to in the absence of the word “spa,” it should be assumed “spa” is inferred (should a spa be present in the installation). Installer... Please record the following information on page-4 of this manual: Date of Installation SuperCell Serial Number SuperCell Type Control Unit Serial Number Control Unit Model For questions concerning installation or operation of this equipment: Visit www.autopilot.com for latest manual revisions and helpful troubleshooting tips. You can also contact AquaCal AutoPilot customer support as specified onpage-5 of this manual. Before Installing: Determine everything needed for installation is on hand. Determine where the Manifold Assembly will be plumbed. Identify a suitable mounting location for the DIG-220 within proper cord length to the manifold. If possible, avoid locations with direct sunlight, sprinklers, etc. Plan runs for SuperCell and Tri-Sensor Cables. (Cables are 12’ or 3.65M) Plan wire runs and wiring connections for source power. Determine origination point for control center power feed: Directly from a circuit breaker... Circuit breaker is used to power the DIG-220 and circulation pump. From an external timer, or DIG-220 is to be wired to the same location as the circulation pump; the unit is activated only when the From an electronic controller circulation pump is energized. Determine whether the input voltage for the DIG-220 will be 15-Vac 1 or 230-Vac Determine whether the DIG-220 will be used to control a single speed or a two speed pump. (Optional pump relay mst be installed ) Determine whether the DIG-220 will be controlled by an ORP controller. Determine whether the DIG-220 will be controlled by an Electronic Controller System. What is included: Although the manifold assembly may be sold separately, both a manifold and a Digital Control Center are required for a completeinstallation. The standard cell & manifold assembly is available with the following cells: SC-36, SC-48, SC-60, and CC-15. Before attempting the installation, verify the following items have been included with the Control Center: Quantity Item Description 1 DIG-220 Control Center / Power Supply Screws and Anchors CHECK SYSTEM 4 Screws and Screw Anchors 1 Drilling Template 1 Manual 6 amp fuse, and wire jumper kit 1 1 Super Cell Cable 2* 68mm x 2” metric adaptors (#19059) * European systems only BOOST MENU SELECT PUMP Super Cell Cable Power Supply FIG-5 What is not included: Power service electrical wire. ½" liquid tight (nonmetallic flex) conduit. 11 INSTALLATION Required Components for a complete system: Automatic-Flow Bypass Manifold Assembly: The manifold is connected into the plumbing after all other equipment. Water from the pool/spa is moved though the manifold the by circulation pump. The manifold's four key components are the: Strainer Screen, Tri-Sensor, SuperCell, and Bypass Flow Valve (See FIG-7). FIG-7 The Strainer Screen prevents debris in the water from entering the Tri-Sensor or SuperCell, and requires periodic inspection and cleaning. The SuperCell receives power from the DIG-220 and converts the salt contained in the water to chlorine. The Bypass Valve allows the water flow rate to be slowed and optimized through the SuperCell, while permitting the pump to continue to circulate water to-and from the pool/spa at full flow rates. The slowed water flow through the SuperCell results in a more efficient "Super-Chlorination” effect, resulting in improved overall sanitization. The Tri-Sensor provides data (from electronic sensors) to the DIG-220 for monitoring water flow, water temperature, and salt concentration level. The DIG-220 uses this data to determine if conditions are safe for the SuperCell to operate; the signal read from the temperature sensor allows the automatic temperature compensation feature to function (See FIG-8). Tri-Sensor SuperCell Strainer Screen (INSIDE) Bypass Flow Valve When the water flow reaches a minimum flow rate of 20-gpm (76 L/m), the flow paddle magnet closes a microswitch monitored by the Control Unit. The Control Unit uses the Tri-Sensor dedicated salt sensor blades to measure the level of salt in the water. The Control Unit uses the Tri-Sensor temperature sensor to determine water temperature. This measurement is required for the PatentedAutomatic Temperature Compensation feature to automatically adjust chlorine output as water temperature varies. Less chlorine is needed in cold water, so chlorine output is automatically reduced as water temperature drops (avoiding excess chlorine production). Conversely, more chlorine is needed in warmer water, and production is automatically adjusted higher as water temperatures increase. Tri-Sensor Assembly SALT SENSOR FLOW PADDLE Note: The use of high strength magnet devices in the close proximity of the Tri-Sensor can cause the flow switch to function incorrectly. TEMPERATURE TRI-SENSOR O - DIRECTION OF FIG-8 Installation Steps: Details on each step of the installation process are presented on the following pages: 1. Plumbing the Manifold Assembly (page-12 & 13) 2. Mounting the Control Unit (page-13 & 14) 3. Electrical Connections a. Grounding and Bonding (page-14) b. Determine Incoming Voltage Requirements (page-14 & 15) c. Connecting DIG-220 to External Equipment (page-15 & 16) d. ORP Connection (page-16) e. SuperCell cable (page-16) f. Tri-sensor cable (page-16) 4. Preparing the Water (page-17) 5. Programming and Setup for Site Parameters. (page-18, 22, & 23 ) Plumbing the Manifold Assembly: The Manifold Assembly is 2" Schedule 40 PVC, and is typically plumbed into the pool return line; and, if applicable, after the heater and spa return diverter valve. Installing the manifold in the spa return line, will cause an excessive amount of chlorine to be introduced into the spa, while the spa is in use andust m be avoided. STEP-1: Select the location for installing the manifold: must be installed close enough to the Manifold It is recommended the manifold be installed prior to the installation of the Control Unit. The Control Unit Assembly to allow the Tri-Sensor and SuperCell cables sufficient slack to enable component service and maintenance. The cables are 12’ long. 12 The assembly must be installed in a vertical orientation as illustrated in the diagram on page-13 (fig 9). This orientation prevents hazardo us gas buildup in the system, should the flow switch fail to detect insufficient flow. WARNING! Place manifold in vertical position ONLY. The direction of the water flow through the manifoldmust be as indicated for the system to operate properly . For a Pool/Spa combination, the manifoldmust be located as the last component in the POOL RETURN LINE (to avoid over-sanitization of the spa). Continued Next Page... INSTALLATION (CONTINUED) Plumbing the Manifold Assembly Continued: Flow Rates Within Normal Range: The manifold can be directly plumbed into the system as shown. If the flow rate for the system is less than 20-gpm (76 L/m), a larger pump must be installed (or steps taken to improve flow rate). FIG-9 Note: Insure “proper” flow rates. some two-speed pumps may provide insufficient flow on low speed. *One set of 68 mm x 2” metric adapters (#19059) are included with European Systems. For other plumbing configurations, please contact the factory for assistance. To Pool Return Pump Filter Manifold Assembly Plumbing the Manifold Assembly: FIG-10 Flow Rates Exceeding 100-gpm (379 L/m): NOTE: 5-lb spring bypass check valve must be plumbed in parallel with the manifold. WARNING! MANIFOLD VERTICAL TO F ROM P U M P STEP-2: Install the cell into the manifold with the cell cable terminals at the bottom of the manifold as illustrated in picture (fig0).1 Failure to heed the following may result in equipment damage. NOTICE If the cell is improperly installed upside down, water from rain or other sources may enter the cable contacts and result in failure of the Supercell. This would void the warrantly. STEP-3: Tighten the unions by hand for a watertight seal. The manifold will accept an SC-36, SC-48, SC-60 or CC-15 cell; use of any other cell may damage the power supply and the equipment warranty will be voided. STEP-4: Follow the procedures outlined in the maintenance section onpage-28to verify proper operation of the Tri-Sensor Flow Switch protection. Failure to heed the following may result in equipment damage. NOTICE NOTICE It is extremely important to verify the safe and proper operation of the Tri-sensor’s Flow Switch protection device before operating equipment. Failure to heed the following may result in equipment damage. To avoid over-saturation conditions of your spa, it is suggested to locate the cell downstream of all other equipment and on the pool return line only . For applications other than as recommended, conta ct the factory. Mounting the Control Unit: Your DIG-220 is suitable for indoor or outd oor mounting. If it is connected to 230 V ac, it must be installed at least 5’ (1.5m) horizontal distance from the pool or spa wall (or more if local codes require). It it is connected to 1 5 Vac, it must be insta lled at last 10’ (3m) horizontal distance from the pool or spa. The DIG0-220 is designed to mount vertically on a flat surface with the wiring inputs facing downward. The enclosure is designe d to allow heat to dissipate from inside the box. It is important not to block the top or bottom of the box. Do NOT mount the unit inside a panel or a tightly enclosed area with out proper ventilation. The cover of the DIG-220 is removed from the sides by four thumbscrews so it is advisable to leave adequate space on the sides for hand access to the thumbscrews. When selecting a location for installing the DIG-220, please note that the Tri-Sensor and SuperCell cables are 12’ (3.6m) long. Failure to heed the following may result in equipment damage. NOTICE Verify that the selected DIG-220 location is close enough to the ManifoldAssembly so that the Tri-Sensor and Supercell cables will have enough slack for service or maintenance procedures. Continued Next Page... 13 INSTALLATION (CONTINUED) Mounting the Control Unit Continued: Read the following section complety before proceeding (damage to wires and connectors may occur): 1. Level and tape the mounting template to the selected mounting location. Mark the wall for the four (4) mounting holes. 2. DRILL ¼” (6mm) DRILL ¼” (6mm) TOP TEMPLATE FOR DRILLING POOL PILOT SOFT TOUCH & POOL PILOT DIGITAL MOUNTING HOLES. Plastic anchors and screws have been provided for concrete or stucco walls. Drill and install anchors and screws. Leave a 1/4” gap from the wall when tightening the screws. DRILL 4 ¼” (6mm) HOLES FOR WALL ANCHORS WHERE SHOWN. BOTTOM DRILL ¼” (6mm) P/N 18550 DRILL ¼” (6mm) FIG-11A 3. Loosen, but do not remove the four (4) thumbscrews on the sides of the unit cover. Carefully slide off the outer housing cover. Disconnnect the 3 plugs that connect to the display (mounted inside the cover). The display circuit board does not need to be removed from the cover. FIG-11B 4. Safely set the cover aside. FIG-11D FIG-11C 5. Hang the DIG-220 on the four mounting screws. Using a long shaft slotted screwdriver, tighten the screws through the black plastic access holes. 6. For access to the electrical terminal strip, remove the four screws and lift off the inner metal protective cover. 7. Inside Metal Cover Safely set the metal protective cover aside. FIG-11E 8. See Electrical Connections on page-14, 15, & 16 for terminal connections. 9. After terminal connections have been made, reverse steps 3-8 to re-install the metal and external covers. F3 F2 F1 Make sure to route and connect the 3 cables through the side slot in the protective cover properly , then replace the outer housing cover after first connecting the 3 plugs (that were disconnected in step 3). FIG-11F Electrical Connections The DIG-220 uses both high and low voltage connections. High voltage connections will be made for providing the direct input wer. po Additional high volgate connections may be made to the filter pump from the DIG-220. Low voltage connections will be made to the Tri-Sensor and Supercell. Additional low voltage connections are provided for optional equipment such as a pH/ORP or electronic controller. Failure to heed the following may result in permanent injury or death. WARNING Insure the electrical panel or filter pump circuit breaker is turned OFF before wiring the DIG-220. Follow all state, local, NE C, CEC codes as applicable. AquaCal Autopilot recommends a licensed electrician or certified electrical contractor perform the electrical connections. Grounding and Bonding Connect a ground wire from the primary electrical input to the grounding lug located inside the box. Also ground any piece of igh h voltage equipment that is connected to the DIG220 relay. The DIG-220 must also be connected to the pool bonding system with an AWG 8 (6 AWG for Canada) wire. A lug is provided on the bottom exterior of the unit. Determine Incoming Voltage Requirements AC LINE IN The DIG-220 is pre-wired from the factory for 230 V a c using a 3-ampere fuse on theAC input. Short test leads are atta ched to the AC terminal strip and must be removed prior to installation. if 115 Vac input power is required please follow steps in section entitled ”For incoming volta ge of 115 Vac” on pages-15. For incoming voltage of 230 Vac: For incoming voltage of 230 Vac, confirm the “TRANSFORMER PRIMARY” is wired as indicated in FIG-11G. TRANSINNER 230VAC Terminal Strip 14 TAB 9 TAB 10 TAB 7 TAB 8 TAB 5 TAB 6 TAB 3 TAB 4 230 Vac FACTORY FIG-11G INSTALLATION (CONTINUED) For incoming voltage of 115 Vac: For incoming voltage of 115 Vac, re-wire the existing jumper then add the jumper wire provided in the inst allation kit, as shown on the circuit board marked “Transformer Primary”. (see fig 12) Step 1: Remove the cover to access the inner control panel (see page-14 for more information). Rewire jumper as shown on this page on the circuit board marked “TRANSFORMER PRIMARY” (using included jumpers). Step 2: Replace the 3 ampere fuse at the lower left corner of the inner control panel with a 6 ampere fuse from the installation kit. eeSfuse location in the reference section on page-27. FACTORY SETTING INNER CONTROL PANEL Converted Setting 115 Vac 230 Vac 230VAC TAB 9 TAB 10 TAB 7 TAB 8 TAB 5 TAB 6 TAB 3 TAB 4 TAB 9 115VAC 115VAC TRANSFORMER PRIMARY Terminal Strip TAB 10 TAB 7 TAB 8 TAB 5 TAB 6 TAB 3 TAB 4 TRANSFORMER PRIMARY FIG-12 Connecting DIG-220 to External Equipment: You must provide the appropriate gauge wire for complete inst allations to External Time Clock, One-Speed Pump, or Two-Speed Pump connections. Select the diagram that matches your application . (Wiring diagram also located on inside of cover): INNER CONTROL PANEL Wire the terminal strip as follows for appropriate equipment #1 #2 #3 #4 #5 #6 FIG-13 Terminal Strip Connecting DIG-220 to External Time Clock: LINE-IN: 1. Remove and discard factory “test “ wires from terminals 1, 2, and ground. 2. Connect AC wires from Terminals #1, #2, and ground lug of the DIG-220 to the LOAD SIDE of the time clock, or the same location as the circulation pump wires (pump connected to circuit breaker, time clock or electronic controller). FIG-14 Terminal Strip Time Clock, Electronic Controller Relay or Circuit Breaker #1 #2 #3 #4 #5 #6 (LINE IN) from Circuit Breaker (LOAD OUT) to pump Continued Next Page... 15 INSTALLATION (CONTINUED) Connecting DIG-220 to Control a One-Speed Pump (with optional pump relay installed) LINE-IN: 1. 2. 3. Remove and discard factory “test “ wires from terminals 1, 2, and ground. Cut Factory AC wires to 5”, strip and expose ½” of wire and connect from Terminal #1 to #3, and terminal #2 to #4. Supply new AC LINE-IN wires from circuit breaker toTerminals #3 and #4. Ensure proper gauge wire is used to power the pump. LINE-OUT: Pump is connected to Terminals #5, #6 and Ground lug. (LOAD OUT) to pump #1 #2 #3 #4 #5 #6 (LINE IN) from GRND GRND L1/L L2/N L1/L L2/N FIG-15 Connecting DIG-220 to Control a Two-Speed Pump (with optional pump relay installed) LINE-IN: Follow the LINE-IN instructions for the above One-Speedinstructions for Two-Speed Pump configuration. Note: The pump is always powered and will run continuously on low speed when internal time clock program does not have the pump operating on high speed. A safety shut off (wall switch) between the circuit breaker and control bo x is recommended when the circuit breaker cannot be a c cessed easily. LINE-OUT: Low Speed Wire 1. 2. Common Wire Remove Factory #6from the Terminal Strip. Disconnect the other end of the wire from the relay bottom row and reconnect to the relay top row right terminal. Connect the exposed end to the low speed input of the pump. 1. 2. Remove the factory #4 wire from the relay. Cut the end off and expose 1/2” of wire. Insert this bare end into the #6 terminal which will create a jumper from #4 to #6. #1 #2 #3 #4 #5 #6 (LINE IN) from Circuit Breaker Ground L2/N GRND L1/L - High speed L1/L L2/N L1/L Low Speed FIG-16 Cell and Tri-Sensor Cord Connections Cell Cord Connection: (2) banana connectors plug into the (2) banana jacks on the bottom of the Power Supply. Bonding Lug Conduit AC Line Red plug provided with SC-36 and SC48 cells to cap off one hole. Either right or left side hole can be plugged. Plu Plu Pump conduit plugs ORP Connection: When an ORP controller is used, the purifier output will be automatically controlled. Adjust the output level to 0% and connect the ORP controller “dry contact” to the 2-pin connector on the Control Box Base Plate. Although the output will displaying 0% output, the DIG-220 will generate purifier as determined by the ORP controller. Tri-Sensor Cord Connection: 12’ (3.4 m) cord connects to the Power Supply with a 6 pin connector. FIG-17 NOTICE 16 Failure to heed the following may result in equipment damage. Do not energize the orp inputs! The orp connections are dry contact inputs. PREPARING THE POOL WATER Installer Please Note: When properly sized to the site, the DIG-220 will meet the sanitizer “maintenance” requirements of the pool/spa. The DIG-220 not is designed to chlorine shock treat, or build up a chlorine residual, when starting with a zero or very low chlorine level. Before starting the DIG-220, the water must be properly balanced, and the chlorine level must be adjusted to between 1-to-3 ppm free chlorine. More on adjusting water balance, and start-up chlorine levels, follows below. Steps to Prepare Water: 1. 2. 3. 4. 5. Calculate Pool Volume: See next section, below. Adjust Water Chemistry: (Via saturation index... consider pH, total alkalinity, hardness, and water temperature; also adjust stabilizer level). See Reference section, page-25 & 26. Add Initial Chlorine Dosage: Use liquid chlorine (sodium hypochlorite), or available types of ablet t or granular chlorine as obtained from pool supply, to achieve 1-3 ppm free chlorine. Add salt to water (test the water for salt level, first). Adjust to 3000 ppm. See salt chart on page-24. Enter pool volume Information into DIG-220: See “Pool Volume” programming on page-22. Calculating Pool Volume: depth of deep end + depth of shallow end Average Depth = Gallons (pool size measured in feet) Rectangular Round Oval 2 = Length x Width x Average Depth x 7.5 = Diameter x Diameter x Average Depth x 5.9 = Length x Width x Average Depth x 5.9 Liters (pool size measured in meters) Round Rectangular = Length x Width x Average Depth x 1000 = Diameter x Diameter x Average Depth x 785 Oval = Length x Width x Average Depth x 785 Calculated pool volume is: Enter Pool Volume figure in the information section, page-4. FIG-18 Adding Salt: Type of Salt to Add... • • • It is important to use Sodium Chloride (NaCl) salt that is greater than 99% pure. Acceptable types of salt include granular food grade, water softener pellets, or solar salt flakes; these are usually available in 25-lb (13 kg) to 80-lb (36 kg) bags at local pool or building supply outlets. Water softener and solar salt will have a slower dissolve rate than food grade salt. Rock salt and Granular Salt with IodineRust or Preventatives should not be used, as these mixtures contain high levels of impurities and will cause staining. Note: While not recommended, granular salt containing anti-caking additives such asYPS (Yellow Prussiate of Soda) or Sodium Ferrocyanidecan be used. However, these mixtures— if not mixed and dissolved immediately— may cause a localized tint to the water or yellow staining of the pool/spa finish. Determine Amount of Salt Required (and salt level to maintain)... FIRST... Test the water for current salt content !!! • • • • The ideal salt range is 3000 - 3500 PPM (2500 minimum) (2.5 - 3.5 g/l). However, if so desired, the DIG-220 can operate with salt levels in excess of 35,000 PPM (35.0 g/l). Salt levels above 6000 PPM are not normally recommended, as corrosion issues may result. Salt levels below 2400 ppm will redu ce the efficiency of the DIG-220 and will result in low chlorine production. Extremely low salt levels (below 1900 ppm) will activate the low salt safety cut off, and will halt chlorine production until salt is replenished to proper levels. Once the DIG-220 is programmed to the pool water volume, the controller will automatically indicate how much salt is required to attain ideal salt levels. Additionally, please see the reference table, on page-24 for information on amount of salt to be added relative to the gallons of water to be treated vs existing salt level. NOTICE Failure to heed the following may result in equipment damage. Do not use a pool cleaner or vacuum head with wheels, as wheels can leave track marks on newly-plastered pools. Do not allow Granular salt to pile up in one location, without brushing, as sta ining may occur. Add Salt to Pool Water... How to add the salt (or remove it if too much)... • The object is to have the saltfully dissolve into the water. • Add salt directly to pool (or spa, if a spa-only installation), and over the main drain (If main drain is present). If there is no main drain, a vacuum head may be used to encourage salt circulation. Start the water circulation pump and set to run continuously for 24 hours to properly dissolve salt. • Distributing the salt through brushing is also helpful; brush the salt toward the main drain (if one is present). Set pump oper ation to normal run time after salt has fully dissolved into water. • If the salt level becomes undesirably high, the only way to remove excess salt is to partially drain the pool/spa and refillthwifresh water. 17 MENU OVERVIEW ACCESS TO PROGRAMMING Control Panel: The following instructions apply to soft ware versions 4.40 and above. Earlier versions of software will vary slightly. The DISPLAY – After 30 minutes of inactivity, the display will go to a walking dot screen saver mode.All functions such as chlorine generation, reverse, boost, etc., will continue in the background. Pressing any key will call up the normal informational display . The First line of the display shows the Purifier Output Level in percent (set to 50% at install), or whether the system is in oost B or Super-Boost mode. The Second line of the display shows the currentTIME in either 12 or 24-hr mode, theTEMPERATURE in either Fahrenheit or Celsius, whether the cell is powered or not shown as “ON” or “OFF”, and Polarity Direction shown as a “.” or blank. Operation of Buttons: Press the UP or DOWN arrow to: Set Chlorine Level %* Scroll through Menus and sub-Menus Increase or Decrease programming values for menus. *Make Initial Setting at install 50%. CHECK SYSTEM – Red LED flashes when the circulation pump is off or to warn attention is required. A warning message will also be displayed.See troubleshooting on page-31 & 32. TM Pool Pilot Digital Purifier 12:00 pm Boost Menu 80F 50% ON Select Check Pump Press MENU to leave normal Press BOOST to start 24-hour boost mode, or operation to access the menus for press and hold BOOST for 8-seconds to start 72- programming and diagnostics. hour boost mode. Press BOOST again to cancel boost. PUMP – over ride the water pump timer, temporarily turning the pump on or off (if wired & programmed to control the circulation pump). Press the SELECT button to choose the item currently displayed. FIG-19 Menu Button... The MENU button is used to leave the normal operation mode and enter the program and diagnostic modes. Use the UP/DOWN arrows and SELECT buttons to navigate through the menus and sub-menus. MAIN MENU: (R) Test Pool Pilot - displays various operating parameters and diagnostic results View Setup - displays the programmed setup parameters Owner Options - programs the primary operating parameters an owner would need to change Maintenance Menu - tests and programs the primary features a service technician would need to access when servicing the system Installer Menu - program the initial system setup Note: to permit quick access to features, some functions are accessed or programmed in several menus. Select Button... The SELECT button chooses the displayed menu option. For theInstaller Menu, press and hold the SELECT button for approximately 13-seconds to access this feature. Pump Button... (This button is not active if the Pump Configuration is programmed for “External Timer” or “Remote runs pump”. If the Pump but ton is pressed when programmed for one of these modes, ”External Time” or ”Remote runs pump” will display, then revert back to the normal display.) Pump Button - One-Speed Pump Control The DIG-220 must be wired to control the main circulation pump and programmed for a One-Speed pump for this feature to be activ e (for more information on wiring, see page-15 & 16, and for pump control programming, see page-23). Note - optional pump relay must be installed. To turn “PUMP OFF” , when pump is on: 1. 2. 3. Press Pump. Press - Stop Pump will be displayed. Press “Pump off” will be displayed. To turn “PUMP OFF FOR SERVICE”, when pump is off : (This mode disables pump operation indefinitely, until manually enabled. Boost and Pump program modes will not enable pump.) 1. Press Pump. 2. Press - Stop Pump will be displayed. Press 3. “Pump off for service” will be displayed. 18 To terminate maintenance mode and return to “PUMP OFF” mode: 1. Press Pump. 2. Press - End Maint. 3. “Pump off” will be in the displayed. To turn “PUMP ON”, when pump is off: 1. Press Pump. 2. Press - to start pump. 3. The pump will run until the pump program reaches the next scheduled turn off time. PROGRAMMING (CONTINUED) Pump Button Cotinued... Pump Button - Two-Speed Pump Control The DIG-220 must be wired to control the two-speed main circulation pump and programmed for a Two-Speed pump for this feature o be t active (for more information on wiring, see page-15 & 16, and for pump control programming, see page-23). The DIG-220 cannot turn off the pump, and can only change pump speeds, between high and low (see “Pump Program 1 and 2” on page-23 for additional information) Note - optional pump relay must be installed. To switch to “LOW SPEED” when pump is on high speed: 1. Press Pump. 2. Press Low Speed. 3. Pump will switch to low speed. To switch to “HIGH SPEED” when pump is on low speed: 1. 2. 3. Press Pump. Press High Speed. Pump will switch to high speed. Basic Operational Programming: Adjusting the Purifier Output % ... Press the UP/DOWN arrow buttons to enter the Purifier Adjustment mode. Adjust the purifier output percentage to the desired out put: from 0% (off) to 100 % (maximum output); then, press SELECT to default back to the normal display. At start up of a new system, the standard output setting starting point is 50%. Typically, once the initial setting is esta blished, very little adjustment is needed.The purifier % setting refers to the amount of time the cell is energized within a 15-minute cycle. The system cycles on-and-off, as indicated on the display's lower right display.... “ON,” when generating chlorine. Higher settings will generate more chlorine. Follow the instructions “Purifier % Adjustment Procedure” in the chart on page-19 to determine and correct purifier % settings . Example: 50% setting = 50% of 15-minutes or 7.5-minutes ON and 7.5-minutes OFF . 25% setting = 3.75-min ON, 11.25-min OFF Once the percentage is set, the DIG-220 will implement the patented temperature compensation algorithm based on current water emperature. t Boost or SuperBoost... The Boost feature is used to increase the purifier % from its normal setting to 100% for a cumulative 24-hour or 72-hour period . When the Boost period expires, or is manually terminated, the Purifier % returns to its previous setting and normal operation. Boost Purifier Output to 100% for 24-Hours... From the normal operation mode, press and release the BOOST button. The display will flash: "Boost 24-hour," then “Boost hh” (with the “hh” actually being the displayed hours remaining in the boost period). Boost Purifier Output to 100% for 72-Hours... From normal operation mode, press and hold the BOOST button until:“Boost 72 hour ON” is displayed; then release the BOOST button. Display will then show B “ oost hh” with the “hh” actually being the displayed hours remaining in boost period. When Boost is activated, and DIG-220 powered through an external time clock or programmer, the time remaining for the boost cyc le is held in memory; Boost will continue when the pump restarts until the 24 or 72-hr boost period has expired. If the DIG-220 is controlling the pool pump, the Boost will override the pump program and will run continuously at 100% for her eit 24 or 72 hours. To exit Boost or SuperBoost mode and revert to normal operation: Allow the Boost cycle to expire. OR press BOOST at anytime to manually deactivate Boost. Purifier Mode The DIG-220 will automatically display informative messages about the condition of the chlorinator (Purifier Output %, water mperature, te warning messages, etc.), and responds to manual adjustment of purifier % setting (as described below).After 30 minutes of inactivity, the display will go to a walking dot screen saver mode.All functions such as chlorine generation, reverse, boost, etc., will continue in the background. Pressing any key will call up the normal informational displ ay. Purifier % Adjustment Procedure: 1 Balance water chemistry according to necessary water chemistry parameters. (See page-24 & 25.) For new start ups, if free chl orine level as tested is not at least 1 ppm, add liquid chlorine to insure a 1 -3 ppm free chlorine reading. 2 Add the proper amount of salt as indicated by the DIG-220 (or as described on page-24), and run the circulation pump continuou sly for 24-hours allowing the salt to be fully mixed and dissolved into the pool.If the salt level is too low, the DIG-220 will provide a warning, and will not generate chlorine until the minimum salt level has been reached. 3 Use the UP and DOWN arrow buttons to set the purifier % to 50%, and then allow the pool to operate normally . For the first two weeks, test the water chemistry parameters every 3-4 days. Adjust chemicals as needed to maintain correct ter wa balance. For the Free Chlorine adjustment, use the following table for fine-tuning the controller output percentage (%): If Free Chlorine is lower than ideal range... Purifier % Currently set to: The purifier % output needs to be increased. Use the up arrow button to increase the purifier output %. 0% - 25% 25% - 100% - The purifier % output needs to be increased. If not done already, set purifier % to higher value. If at 100%, power level may be too low and need to be raised and/ or cell size increased. - Check sizing. If Free Chlorine is higher than ideal range... - The purifier % output needs to be reduced. If not done already, set purifier % to lower value. Power level may be too high and may need to be adjusted down. The purifier % output needs to be reduced. Use the down arrow button to decrease the purifier output %. FIG-21 After the optimal output percentage (%) has been determined, this setting will not normally require further adjustment. Rather, to compensate for increased bather usage or heavy rainfalls (which can both quickly consume chlorine), select a Boost Cycle. 19 PROGRAMMING (CONTINUED) Menus: Test Pool Pilot (pg 20) Salt Salt Needed Temperature Cell V/A Amp Hrs * Main Menu Test Pool Pilot View Setup Owner Options Maintenance Menu Installer Menu Exit Menu Mode View Setup (pg 20) Software Version Cell Type Power Level Pump Configuration Pool Size Reverse Time Temp Adjust Salt Adjust Pump Prog 1 (if active) Pump Prog 2 (if active) Freeze Protect Maintenance Menu (pg 21) Test Pool Pilot Set time of day Pump Prog 1 (if active) Pump Prog 2 (if active) Force Reverse Set Reverse Time Replace Cell Calibrate Temperature Calibrate Salt Exit Menu Mode Owner Options (pg 20) Select Language Select Units Temperature Unit 12/24 Hour Clock Set time of day Pump Prog 1 (if active) Pump Prog 2 (if active) Exit Menu Mode * Only available when “Test Pool Pilot” is selected under “Maintenance” menu. Installer Menu (pg 22) Select Language Select Units Temperature Unit 12/24 Hour Clock Set Pool Volume Set cell type Set cell power Set pump control Set time of day Select remote Select minerals Pump Program 1 (if One or Two Speed Pump) Pump Program 2 (if One or Two Speed Pump) Enable Demo Exit Menu Mode Test Pool Pilot (Diagnostic Menu): 1 Press MENU. 2 “Test Pool Pilot” is automatically displayed; then press SELECT. 3 The display will automatically toggle through the following displays ( or allows manual control forward and back. While in this feature, pressing MENU will override the remaining displays and exit back to normal operation): “Salt =XXXX ppm (X.x g/l)” (The optimum salt level is 3000 ppm (3.0 g/l)) 4. “Add Salt xx Lbs (xx Kg)” (The amount of salt needed to maintain 3000 ppm (3.0 g/l)) “Temperature XX° F (XX° C)” (The temperature of the water flowing through the Tri-Sensor) “Cell = XX V XX.x A” (The measured voltage and current sent to the SuperCell) “Amp-Hrs = xxxxxx” (The amount of amps received by the SuperCell per hour) . This is only viewable if "Test Pool Pilot was selected under the "Maintenance Menu." The controller will automatically leave the menu and revert to normal operation. View Setup (Program and parameter menu to view the current programmed settings): or until “View Setup” is displayed, then press SELECT. 1. Press MENU, press 2. allows manual control forward and back. While in this feature, pressing MENU The display will automatically toggle through the following displays (or pressing or will override the remaining displays and exit back to normal operation): “Software V X.Xx” (The version number of Digital #DIG-200 software) “Cell = XX-XX” (cell type: SC-36, SC-48, SC-60, CC-15) “Power Level” (1-lowest, 2, and 3-highest; factory setting is 2) Pump Configuration (External Timer, one-speed pump, two-speed pump, or remote runs pump. Factory setting is External Timer.) “XX,XXX gallons( liters)” (The pool volume programmed in Installation Menu; 15,000 is the factory setting; page-22) “Reverse = X hrs” (The reverse rate programmed in Installation Menu: 4-hrs is factory setting) “Temp. adjust = X” (The temperature adjustment variation of actual tri-sensor reading; page-22) “Salt adjust + X %” (The salt calibration adjustment variation of actual tri-sensor reading; page-22) “Pump program 1” (Only appears if pump control has been set to one-speed or two-speed) “Pump program 2” (Only appears if pump control has been set to two-speed or two-speed) 3. Freeze protect (can only be enabled when the pump control is set to one-speed pump mode) The DIG-220 will automatically leave the menu and revert to normal operation. Owner Options: 1. Press MENU, press 2. Press 3. Once all modifications are complete, press Select or or until “Owner Options” is displayed; then press SELECT. for desired selections, followed by SELECT or until “Exit Menu Mode” is displayed; then press SELECT. The menu will also time out after 20 seconds of no key activity. Language: (Allows for personal preference language display) 20 1. Press or until “Select Language” is displayed; then press SELECT (English is the factory setting). 2. Press or until desired language “English,” “Espanol,” “Italiano”, or “Francais,” is displayed; then press SELECT. Continued Next Page... PROGRAMMING (CONTINUED) Owner Options Continued: Select Units: (Used to program the operator’s personal preferences for the liquid and weights measurement the DIG-220 will display.) 1. Press or until “Select Units” is displayed; then press SELECT (“ English Units” is the factory setting). 2. Press or until desired measurement “English Units” (gallons and pounds), or “Metric Units” (liters and kilograms), is displayed; then press SELECT . Temperature Units: (Used to set the personal preference (C or F) for temperature display .) 1. Press or until “Temperature Unit” is displayed; then press SELECT(“Fahrenheit” is the factory setting). 2. Press or until desired measurement unit “Fahrenheit” or “Celsius” is displayed; then press SELECT. 12/24 Hour Clock: (Allows for personal preference time clock display) 1. Press or until “12/24 hour clock” is displayed; then press SELECT (12 hour clock is the factory setting). 2. Press or until the desired clock format (12-hour or 24-hour clock) is displayed, then press SELECT . Set Time of Day: (Allows for changes to the time of day displays for time zones or day-light savings.) 1. Press or 2. Press or until desired hours are displayed; then press SELECT. until the desired minutes are displayed; then press SELECT . Exit Menu Mode: Press SELECT to exit menu entry. Maintenance Menu: or until “Maintenance Menu” is displayed; then press SELECT. Press MENU, press Press Once all modifications are complete, press or for desired selections, followed by SELECT or until “Exit Menu Mode” is displayed; then press SELECT. The menu will also time out after 20 seconds of no key activity. Test Pool Pilot: (Diagnostic Menu) The display will automatically toggle through the following displays ( the remaining displays and exit back to normal operation): or allows manual control forward and back. While in this feature, pressing MENU will override “Salt =XXXX ppm (X.x g/l)” (The optimum salt level is 3000 ppm (3.0 g/l)) “Add Salt xx Lbs (xx Kg)” (The amount of salt needed to maintain 3000 ppm (3.0 g/l)) “Temperature XX° F (XX° C)” (The temperature of the water flowing through the Tri-Sensor) “Cell = XX V XX.x A” (The measured voltage and current sent to the SuperCell) “Amp-Hrs = xxxxxx” (The amount of current times hours of operation received by the SuperCell) This . is only viewable if "Test Pool Pilot was selected under the "Maintenance Menu." Set Time of Day: (Allows for changes to the time of day displays for time zones or day-light savings.) 1. Press or 2. Press or until desired hours are displayed; then press SELECT. until the desired minutes are displayed; then press SELECT . Force Reverse: Note: this is a diagnostic tool, only, and should not be used unless a problem is suspected. (This function activates a reverse cycle, which can be used to verify that the self-cleaning feature is working). After selecti ng "Force Reverse, " there will be a 40 second delay before proceeding. During the delay "Cell reversing *" will display . 1. 3. Press or until “Force Reverse” is displayed; then press SELECT. “Cell reversing” will display temporarily for 40-seconds. The “.”(period) on the end of 2nd line of the display will either appear, or disappear—based on its previous state—to indicate cell power polarity has reversed. Set Reverse Time: (Used to program the SuperCell’s self-cleaning cycle.) Failure to heed the following may result in equipment damage. NOTICE Reduced polarity reversing cycle times will reduce SuperCell life, and should only be used due to uncontrollable scale formation on the Cell. ALWAYS test and adjust water balance,before attempting scale control via shortening reverse period. 1. Press or until “Set Reverse Time” is displayed; then press SELECT (4-hours is the factory setting). 2. Press or until the desired cycle time (2, 4, 8, or 16 hours) is displayed; then press SELECT . Continued Next Page... 21 PROGRAMMING (CONTINUED) Replace Cell: (Used to reset the ampere-hour counter after a cell is replaced) Press and hold for aproximately 13 seconds until display briefly shows “Amp-Hrs = 0”. Calibrating Temperature: (Used only when it is desired to match the display of the Digital to another on-site thermometer.) Note: Temperature can only be calibrated 2-minutes after start-up. 1. Press 2. or to adjust temperature up or down to the desired temperature; then press SELECT . The maximum adjustment is ± 6o F (± 3 o C). (To maximize protection, only Press negative adjustments will be used to calculate freeze protection temperature.) Calibrating or until “Calibrate Temp.” is displayed; then press SELECT. Salt: Note: This step is used to match the Digital to the installed Tri-Sensor. In the event the salt display does not match on-site test results, follow these steps (it is necessary to wait 2-minutes after start-up before calibrating salt): 1. Press or until “Calibrate Salt” is displayed; then press SELECT. 2. Press or until the number on the display matches the accurately measured pool sample; then press SELECT . The maximum adjustment is ± 1000 ppm (1.0 g/l). Exit Menu Mode: Press SELECT to exit menu entry. Programming at Installation NOTE: Once determined to be appropriately programmed for the installation site, the following menu items should not require reg ular access; rather, need to access should be infrequent or not at all. See “Basic Operational Programming,” for setting initial Purifier Level and routine control instruct ions (page-19). The DIG-220 requires the pool volume be entered into the microprocessor for control center to automatically indicate how manyounds p (kgs) of salt to add should salt levels fall. For instructions in calculating volume, see Calculating Pool Volume on page-17. The salt chart on page-24 can also be used to calculate how much salt, in pounds (kgs), should be added to reach the recommende d level of 3000 ppm (3.0 g/l) salinity. Adjust Purifier Output to 50%... see page-19 for instructions. Installer Menu: Press MENU, press or until “Installer Menu” is displayed Press and hold the SELECT button for approximately 13-seconds. Press or for desired selections, followed by SELECT Once all modifications are complete, press or until “Exit Menu Mode” is displayed; then press SELECT. Please note - the menu will time out after 20 seconds of no key activity and any changes may be lost. To enter the Installer Menu, press and hold SELECT button for approximately 13-seconds. Select Language: (Allows for personal preference language display) 1. Press or until “Select Language” is displayed; then press SELECT (English is the factory setting). 2. Press or until desired language “English,” “Espanol,” “Italiano”, or “Francais,” is displayed; then press SELECT. Select Units: (Used to program the operator’s personal preferences for the liquidand weights measurement the DIG-220 will display.) 1. Press or until “Select Units” is displayed; then press SELECT (“ English Units” is the factory setting). 2. Press or until desired measurement “English Units” (gallons and pounds), or “Metric Units” (liters and kilograms), is displayed; then press SELECT . Temperature Units: (Used to set the personal preference (C or F) for temperature display .) 1. Press or until “Temperature Unit” is displayed; then press SELECT(“Fahrenheit” is the factory setting). 2. Press or until desired measurement unit “Fahrenheit” or “Celsius” is displayed; then press SELECT. 12/24 Hour Clock: 1. Press or until “12/24 hour clock” is displayed; then press SELECT (12 hour clock is the factory setting). 2. Press or until the desired clock format (12-hour or 24-hour clock) is displayed, then press SELECT . Pool Volume: (Must be programmed for the “salt amount needed” display to be accurate.) 1. 3. 22 Press or until “Set Pool Volume” is displayed; then press SELECT. (Factory setting is 15,000 gallons). (The range is 500 to 127,500 gallons (1,000 to 226,000 liters) Press or until correct pool size is displayed; then press SELECT . Continued Next Page... PROGRAMMING (CONTINUED) Cell Type: (Must match the installed cell) 1. Press or until “Set Cell Type” is displayed; then press SELECT(SC-48 is the factory setting). 2. Press or until the desired cell type (SC-36, SC-48, SC-60, or CC-15) is displayed, then press SELECT . Cell Power: (See recommendations on pg 31 for when to change cell power. Factory setting is cell power 2) 1. Press or 2. Press or until “Set cell power” is displayed; then press SELECT (Power level 1 is the factory setting). until the desired power level (1,2, or 3) is displayed; the press SELECT . Pump Control: (Program DIG-220 to accept a one-speed pump, two-speed pump, remote, or external timer) Note - optional pump relay must be inst alled. 1. Press or until “Set Pump Control” is displayed; then press SELECT (external timer is the factory setting). 2. Press or until the desired pump configuration (One-speed pump, two-speed pump, remote runs pump or external timer) is displayed; then ess pr SELECT. Set Time of Day: (Allows for changes to the time of day displays for time zones or day-light savings.) 1. Press or until desired hours are displayed; then press SELECT. 2. Press or until the desired minutes are displayed; then press SELECT . Select Remote: (Selects type of external controller. Need Pump control programmed for “remote runs pump” inorder to use this option.) 1. Press or until “Select remote” is displayed, then press SELECT (Remote 1). 2. Press or until the desired remote (1 or 2) is displayed, then press SELECT . Select Minerals: (This is a special display mode, which does not impact salt readings or other functionality) 1. Press or until “Select minerals” is displayed, then press SELECT (Salt). 2. Press or until the desired display mode (Salt or Minerals) is displayed; then press SELECT . Pump Program 1 and 2: Note: The pump programs are only accessible if a one or two speed pump is selected in the pump configuration) There are two grams pro available for high speed operation. Low speed operation is not programmable and pump will run continuously on low speed unless pump program is calling for high spe ed. A separate switch is recommended to turn off low speed pump operation when servicing system) 1. Press 2. Press - If or until “Pump program X” is displayed; then press SELECT. to program the pump, press D to Delete the program or SELECT to exit with no change. is selected, use or to select hours, then SELECT. Repeat for minutes. Enable Demo: (This is a special display mode, which does not impact salt readings or temperature readings. Note that chlorine will not be nerated ge even though valid readings for volts and mps will show on the “Test Pool Pilot” menu.) 1. Press MENU; press 2. To disable demo mode, press or until “Installer Menu” is displayed; then press SELECT. 3. To enable demo mode, press or until “Enable demo” is displayed, then press SELECT. *** DEMO *** will flash, then DIG-220 will reset into demo mode. or until “Disable demo” is displayed, then press SELECT . Unit will reset and operate in normal mode. Exit Menu Mode Press SELECT to exit menu entry. END OF PROGRAMMING SECTION 23 REFERENCE SECTION Salt Addition Chart: The following salt chart is included for reference only; once programmed to the correct water volume, the controller will autom atically indicate how much salt is required to achieve optimum water salinity. Pounds (kilograms) of Salt needed to attain 3000 ppm (3.0 g/l) To use this chart: 1. Find current salt level (ppm or g/l) in the left column. (This can be obtained from DIG-220 display or by testing water.) 2. Find pool/spa volume in the second row (Gallons or Liters). 3. Find the amount of salt needed to bring pool to the ideal level by finding the intersection of the row and column. Current salt level ppm (0.0g/l) Pool/Spa Volume in Gallons or Liters 1,000 2,000 5,000 10,000 15,000 20,000 25,000 30,000 35,000 40,000 (4,000) (8,000) (18,000) (38,000) (56,000) (76,000) (94,000) (114,000) (132,000) (152,000) 0 For volumes other than what is shown, use combinations of various columns. 25 50 125 250 376 501 626 751 876 1,002 (11) (23) (57) (114) (170) (227) (284) (341) (398) (454) 250 (0.25) 23 46 115 230 344 459 574 689 803 918 (10) (21) (52) (104) (156) (208) (260) (312) (364) (416) 500 (0.50) 21 42 104 209 313 417 522 626 730 835 (9) (19) (47) (95) (142) (189) (237) (284) (331) (379) 750 (0.75) 19 38 94 188 282 376 470 563 657 751 (9) (17) (43) (85) (128) (170) (213) (256) (298) (341) 1,000 (1.0) 17 33 83 167 250 334 417 501 584 668 (8) (15) (38) (76) (114) (151) (189) (227) (265) (303) 1,250 (1.25) 15 29 73 146 219 292 365 438 511 584 (7) (13) (33) (66) (99) (133) (166) (199) (232) (265) 1,500 (1.5) 13 25 63 125 188 250 313 376 438 501 (6) (11) (28) (57) (85) (114) (142) (170) (199) (227) 1,750 (1.75) 10 21 52 104 157 209 261 313 365 417 (5) (9) (24) (47) (71) (95) (118) (142) (166) (189) 2,000 (2.0) 8 17 42 83 125 167 209 250 292 334 (4) (8) (19) (38) (57) (76) (95) (114) (133) (151) 2,250 (2.25) 6 13 31 63 94 125 157 188 219 250 (3) (6) (14) (28) (43) (57) (71) (85) (99) (114) 2,500 (2.5) 4 8 21 42 63 83 104 125 146 167 (2) (4) (9) (19) (28) (38) (47) (57) (66) (76) Ideal 3,000 OK for DIG-220 Operation - (This is typically the maximum salt level desired by most pool owners/operators since most people can taste salt levels above 3,500 OK for DIG-220 Operation but greater than 6000 ppm can cause corrosion to metallic objects Greater (If lower salt level is desired, partially drain and refill with fresh water.) than 3,500 Basic Water Chemistry: The DIG-220 is designed to produce chlorine on a daily basis.To monitor the system’s efficiency, the water chemistry ranges, and schedule of periodic checks—per below—should be followed. Failure to heed the following may result in equipment damage. NOTICE Excessively high chlorine levels can cause premature cell failure and corrosion damage to pool fixtures and equipment. Failure to heed the following may result in equipment damage. NOTICE Always follow the instructions on the manufacturer's label whenever handling or using chemicals. Failure to heed the following may result in equipment damage. NOTICE 24 Do not use a hydrogen peroxide based chlorine neutralizer or permanent damage to the cell will occur. REFERENCE SECTION Basic Water Chemistry Continued: CHEMICAL IDEAL RANGE IDEAL TEST SCHEDULE Free Chlorine 1 to 3 ppm Weekly EFFECT OF LOW/HIGH LEVELS CORRECTIVE ACTIONS Low free chlorine: Not enough residual chlorine to safely sanitize pool water. High free chlorine: Corrosive to metallic fixtures in pool water. Can bleach swimwear and hair. Ph Total Alkalinity 7.2 to 7.8 ppm Weekly 80 to 100 ppm Monthly Low pH: (acidic) Equipment corrosion, eye/skin irritation, plaster etching, rapid chlorine consumption. High pH: (basic) Scale formation, cloudy water, eye/skin irritation, poor chlorine effectiveness Low free chlorine: Check for combined chlorine level and shock as necessary. Increase purifier output to maintain a 1-3 ppm residual reading. High free chlorine: Decrease purifier output. Let chlorine dissipate normally until 1-3 ppm is achieved. In extreme cases, pool water can be diluted with fresh water or a chlorine neutralizer added. (Diluting will reduce salt and CYA. Check and adjust as needed.) Low pH: Add sodium carbonate or soda ash High pH: Add muriatic acid or sodium bisulfate. Low TA: Eye irritation, pH "bounce", stained/etched plaster and metal corrosion. Low TA: Add sodium bicarbonate. High TA: Constant acid demand, difficulty in maintaining pH, and contributes to scale formation or cloudy water conditions. High TA: Add muriatic acid often, a little at a time (may take a week or more to lower the TA). Salt 3000 to 3500 ppm Monthly Low Salt: Below 2,500 ppm causes premature cell failure and reduces chlorine production High Salt: Above 6,000 ppm can cause corrosion of metallic fixtures and will taste salty. Note: DIG-220 can safely operate with salt levels up to 35,000. Low Salt: Add salt according to digital display on Pool Pilot unit or salt chart. High Salt: If undesirably high, partially drain and refill the pool with fresh water. (Diluting will reduce CYA. Check and adjust as needed.) Calcium Hardness 200 to 400 ppm Monthly Low CH: Etching of plaster, equipment corrosion High CH: Scale formation, cloudy water. Rapid buildup of scale may exceed the system's self-cleaning capability and require manual cleaning of the SuperCell. Monthly Low CYA: destruction of chlorine by the UV rays from the sun. High CYA: Requires more chlorine to maintain proper sanitizer levels. Note: CYA not needed for indoor or bromine pool. CYA can be reduced to 30 - 50 ppm for DIG-220 in colder climate regions. Low CH: Add calcium chloride flakes. High CH: Partially drain and refill pool with fresh water to dilute. (Diluting will reduce salt and CYA. Check and adjust as needed.) Please note – in some areas there may be higher than recommended calcium levels in the tap water. If this level is seen, call the factory for advice on this condition. Low CYA: Add cyanuric acid(1 lb/5000 gallons increases CYA 25 ppm) High CYA: Partially drain and refill pool with fresh water to dilute. (Diluting will reduce salt. Check and adjust as needed.) Cyanuric 60 to 80 ppm Acid (CYA) - Stabilizer 30 to 50 ppm Using the Saturation Index (SI): The Saturation Index is a formula used to predict the calcium carbonate saturation of water, that is, whether your water willrecipitate, p dissolve, or be in equilibrium with calcium carbonate. Water is properly balanced if the SI is 0 ± 0.3. If SI is greater than 0.3, scaling and staining will occur. If SI is less than -0.3, then the water is corrosive to metallic fixtures and aggressive to plaster surfaces and vinyl liners. A high or low SI can cause premature damage to the cell, equipment or pool finish. As a general rule, higher concentrations calcium, of total dissolved solids, pH, and alkalinity all promote a greater tendency for scale. Scaling potential also increases with increasing temperature. Use the chart below to determine your overall water balance.Test water for pH, water temperature, Calcium Hardness,Total Alkalinity, Salt Level, and use the equivalent Factors (TF, CF, AF, Constant) from the chart below to determine your Saturation Index.Adjust chemicals to maintain balanced water. pH + TF + CF + AF - SC = SI 60 F 15.6C 0.4 Calcium Hardness 150 ppm 1.8 Total Alkalinity 75 ppm 1.9 0 - 1000 ppm 12.1 66 F 18.9C 0.5 200 ppm 1.9 100 ppm 2.0 1001 - 2000 ppm 12.2 76 F 24.4C 0.6 250 ppm 2.0 125 ppm 2.1 2001 - 3000 ppm 12.3 84 F 28.9C 0.7 300 ppm 2.1 150 ppm 2.2 3001 - 4000 ppm 12.4 94 F 34.4C 0.8 400 ppm 2.2 200 ppm 2.3 4001 - 5000 ppm 12.5 103 F 39.4C 0.9 600 ppm 2.4 250 ppm 2.4 5001 - 6000 ppm 12.6 Temperature Corrosive to metals, etches plaster finishes, and irritates skin -.3 TF -.2 -.1 CF 0 .1 AF Salt Level .2 .3 SC Scaling, staining, and cloudy water conditions OK 25 REFERENCE SECTION Using the Saturation Index (SI) Continued: Examples: Water Test Results #1 pH = 7.4 ..................................................................................... : pH = 7.4 Water Temperature = 84 F ....................................................... : TF = 0.7 Calcium Hardness = 400 ppm ................................................. : CF = 2.2 Total Alkalinity = 125 ppm......................................................... : AF = 2.1 Salt Level = 3200 ppm ............................................................... : SC = 12.4 7.4 + 0.7 + 2.2 + 2.1 – 12.4 = 0 (Water is perfectly balanced) Water Test Results #2 pH = 7.8 ..................................................................................... : pH = 7.8 Water Temperature = 84 F ....................................................... : TF = 0.7 Calcium Hardness = 600 ppm ................................................. : CF = 2.4 Total Alkalinity = 200 ppm......................................................... : AF = 2.3 Salt Level = 3200 ppm ............................................................... : SC = 12.4 7.8 + 0.7 + 2.4 + 2.3 - 12.4 = 0.8 (Water is scale forming) (FIG-24) Part Numbers: MANIFOLD UNION w/Strainer (#19065) (#APA0003) Union Nut Tri-Sensor with integrated cord Union O-Ring (#19062) Strainer (#19064) 12’ (3.6 m) Cell Cord (# 952-ST/DIG) FIG-26 Red Cap Plug for SC-36 and SC-48 cell cord (#19050) FIG-27 FIG-29 Electrolytic Cell: (Cell Unions and Cord ordered separately) UNION COMPLETE (#19070) Cell (#’s SC-36, SC-48, SC-60, & CC-15 MANIFOLD ASSEMBLY (STK0035): (Tri-Sensor and Cell sold seperately) Union O-Ring (#19070-0) Nut only for 2” Slip Union (#312-A) (51 mm) 2” Slip Union (#312-B) (51 mm) FIG-28 FIG-25 26 MAINTENANCE Fuse Location and Ratings: Failure to heed the following may result in permanent injury or death. WARNING ELECTRICAL SHOCK HAZARD... Turn off the electrical power to DIG-220 before servicing. To inspect or service fuse, disconnect power and remove power center cover (see below for location of fuse). As required, see pages-14 & 15 of this manual for information on converting the DIG-220 from a 230-Vac to 115-Vac input power supply. Incoming Voltage Location 230V F1 230V F2 230V F3 115V F1 115V F2 115V F3 Fuse 3 Amps 250 Vac 3 Amps 250 Vac 20 Amps 250 Vac 6 Amps 250 Vac 3 Amps 250 Vac 20 Amps 250 Vac Description Main AC Power Fuse Control Panel Cell Fuse Main AC Power Fuse Control Panel Cell Fuse (FIG-31) There are very few serviceable parts on the DIG-220 except the fuses. For any other problems with the Control Box, please cont act the Factory or Authorized Dealer/Service Center. To remove the Control Box Cover and access the fuses, follow these step s. DANGER: TURN OFF THE POWER FROM THE CIRCUIT BREAKER BEFORE SERVICING THIS UNIT. 1 2 POOL PILOT™ Digital 3 4 Control Circuit Board F3 Top Cover Front of Unit F2 Wire Harness Connection Inside Top Cover Loosen (4) knobs (you do not need to remove these) Lift off cover and disconnect wire harnesses (Control Circuit board removes with cover) Inside Metal Cover Remove (4) screws and lift off metal cover. (FIG-32) F1 Access is gained to electrical connections, fuses, and pump/aux relay. Verify power is off with a volt meter. Removing\Inspecting\Cleaning the Tri-Sensor (Pump must be off): Note: the Tri-Sensor does not normally require maintenance or cleaning. Unnecessary cleaning will decrease the life of the cell . Failure to heed the following may result in permanent injury or death. WARNING NOTICE Turn off the pump power at the circuit breaker before servicing this unit. Personal injury or equipment damage could occur if the pump activates. Failure to heed the following may result in equipment damage. If the manifold is located below the water level, be sure to block the flow from both the pool input and outputbefore removing the manifold, tri-sensor, or electrolytic cell. Failure to heed the following may result in equipment damage. NOTICE The Tri-Sensor should not be pulled out at an angle, or the flow paddle or flow post may be damaged. Continued Next Page... 27 MAINTENANCE Removing\Inspecting\Cleaning the Tri-Sensor Continued (Pump must be off): Failure to heed the following may result in permanent injury or death. WARNING 1. 2. 3. 4. 5. 6. CHEMICAL HAZARD... To avoid damaging splashes, always add acid to water , never water to acid. Wear safety glasses and use other appropriate personal protection equipment. Disconnect the Tri-Sensor cable from the power center. (Place the end of the cable out of the way , where it will stay dry when the Tri-Sensor is removed.) Please note all cautions and warnings! Remove the two (2) screws retaining the Tri-Sensor in the Tee joint of the Manifold. Note the orientation of the Directional of FlowTab. The Tri-Sensor must be installed in the same orientation when it is reinstalled or replaced. The Tri-Sensor can now be pulled out of theTee. Firmly grip the Tri-Sensor assembly (this is typically done with a large p air of channel lock pliers).Twist the Tri-Sensor backand-forth while simultaneously pulling theTri-Sensor straight out of the Tee joint. Inspect the following on the flow switch: Verify the thin metallic paddle is straight and free from erosion; verify the long plastic post is straight and free of cracks. Do not twist or bend the paddle or the plastic post. (see fig 30 on page-26 for illustration of Tri-Sensor flow paddle.) Inspect the two salt sensor blades. The blades should not have any mineral deposits (scale) or other debris on them. If the lades b need to be cleaned, use the following method: Do not use any metallic objects to scrape the blade surfaces or you will remove or damage the blade sensor coating. art Muriatic Acid into four (4) parts water. Mix the solution in a small container tall enough to cover the sensor To remove a calcium scale buildup, mix one (1) p blades. Always add acid to water, never water to acid, see warnings above. Immerse the salt sensor blades in the solution for up to 15-minutes. An effervescing action indicates the calcium is being solved dis from the blades. Rinse with fresh water and reinspect. Repeat the acid treatment as necessary until all scale has been eliminated. Use care not to allow the pin connection to get wet. Check the tri-sensor assembly for any damage to the plastic housing and replace if needed. 7. Testing the Flow Switch, Cleaning the Filter Screen, Cleaning the Bypass Valve The flow switch is a critical equipment protection device. When water flow has stopped, to prevent damage to the cell or system , it is important power to the SuperCell be automatically turned OFF. It is important to verify the proper operation of theTri-Sensor’s water Flow Switch protection device. NOTICE Failure to heed the following may result in equipment damage. DO NOT operate system with a faulty flow switch. The following procedure can be used to verify the proper operation of the flow switch, or to flush debris from the Byp ass Valve. 1. 2. 3. 4. 5. 6. 7. 8. 9. 10. 11. 12. 13. 14. Turn off circulator pump. Slightly loosen the union nut just below the cell on the side of the manifold that does not contain the filter screen. Completely loosen the manifold union nut that contains the filter screen and pivot the manifold to gain access to the filter screen. Remove the screen. Clean the screen if dirty. If the screen was dirty, then the system may need to be purged to remove excess debris. Leave the manifold off and run the pump for a few seconds until clear. Wrap the strainer screen securely with a small piece of plastic wrap (saran wrap, food wrap or zip lock bag) as indicated in the diagram, place it back in the union. Hand tighten the two unions that were loosened. Turn on the pump and the DIG-220. The plastic will stop water flow to the flow switch, which is part of the Tri-Sensor that is located in the upper portion of the manifold. All water will be forced through the Bypass Valve. This action will normally flush out any small bits of debris trapped in the Bypass Valve.) The DIG-220 should detect a low water flow at the Tri-Sensor, and activate the red Check System LED. The DIG-220 will also display the message “Purifier Off! Check Flow.” STRAINERSCREEN SHOWN TEMPORALLY W RAPPED IN P LASTIC FIG-33 If the DIG-220 did not display this warning, then check the Tri-Sensor cable connections and inspect the Tri-Sensor as outl ined in the previous section. If the warning message still does not appear, then turn the DIG-220off and contact the factory or your local dealer for assistance. Turn the pump off. Loosen the unions. Remove the plastic wrap and replace the strainer screen. Hand tighten unions. Resume normal operation. Servicing the SuperCell The SuperCell may require removal for periodic visual inspections, or for servicing when debris or calcium mineral deposits dev elop. The need to inspect and service the cell is indicated by the following display messages: “Check System” light, and the message, “Check/Clean Cell”, or ”Purifier Off - Che ck Flow”. The SuperCell is installed with Unions on each end to allow quick and easy installation and removal. 1. 2. 3. 4. Turn off pump and shut off all power. Detach the SuperCell cable from the SuperCell. Unscrew the unions at both ends of the SuperCell. Slide the SuperCell out of the ManifoldAssembly. SU P E R CE L L AND U N I O N S – (SIDE VIEW) FIG-34 28 Continued Next Page... MAINTENANCE Servicing the SuperCell (Continued) Visual Inspection of the SuperCell... E ND VIEW OF THE S UPER CELL LOOKING AT THE BLADES Remove the SuperCell from the ManifoldAssembly, following the directions in the previous section.The SuperCell titanium blades, seen inside the cell body, should be straight and clear of any debris on the ends or between the blades. A white flaky or crusty calcium build up on the edge or between the blades will shorten the life of the cell. Clean the cell immediately, and determine the cause of scaling. See “Basic W ater Chemistry,” and “Using the Saturation Index” ... on page-24, 25, & 26. Also see “Manual Cleaning of the SuperCell” ... starting on this page. Your DIG-220 is designed to automatically self-clean calcium scale build up that may form on the blades during normal operation. However, unbalanced water chemistry can cause a heavy scale build up exceeding self-cleaning capabilities... thus; periodic manual cleaning may be necessary. The simplest way to avoid this extra work is to maintain the water chemistry at the levels recommended. FIG-35 Failure to heed the following may result in equipment damage. NOTICE For maximum cell life, maintain water in a balanced condition. Water maintained in a scaling condition will shorten cell life and may render the chlorinator inoperative. Damage and/or service calls, caused by improper water balance, will NOT be covered under the equipment warranty. Manual Cleaning of the SuperCell... NOTICE Failure to heed the following may result in equipment damage. Scraping or scratching the titanium blade’s edge or surfacewill damage the blade catalyst coating and cause premature failure of the cell... warranty will be voided. Never use any sharp or metallic objects to remove scale. Failure to heed the following may result in permanent injury or death. WARNING CHEMICAL HAZARD... To avoid damaging splashes, always add acid to water , never water to acid. Wear safety glasses and use other appropriate personal protection equipment. The SuperCell should only be cleaned when excessive calcium buildup is present. Unnecessary cleaning will reduce the life ofethcell. 4. 5. Fill the rest of the cell with Muriatic Acid. This allows for an approximate 1-to-4 solution. Always add the acid to the water. If you do it the other way around, it can cause the solution to spray back at you causing serious injury. Allow the solution to sit in the cell for up to 20-minutes. Safely dispose of the solution; pouring it into the pool is recommended. UNION 6. 7. Turn off circulator pump. Loosen the unions as indicated on the cell manifold. Remove the cell and place a cap or plug on the end of the cell as shown. Plugs are available at any pool supply warehouse or home improvement store. Ask for a 1.5" MPT clean out plug. Fill the capped cell with water 2-inches from the top of the cell blades. UNION 1. 2. 3. 1 . 5 ” Installing a SuperCell... 1. 2. 3. 4. 5. 6. 7. FIG-36 FIG-37 Clean and dry the electrical terminals on the SuperCell. The contacts must be completely dry to avoid corrosion and failuref the o SuperCell or cable. Insure the union o-rings are firmly in place; then place the SuperCell into the manifold with the cell oriented as illustrated in the diagram on page-12. Tighten the unions by hand for a watertight seal. The SC-36 and SC-48 SuperCell will have two (2) electrical terminals. The SC-60 and CC-15 will have three terminals Connect the SuperCell plug cord so two (2) open holes align with any two mating terminals and push gently , but firmly, to connect. if using a SC-36 or SC-48 Cell, use the red weather plug to seal the unused contact in the cable. Turn on the system. Check for leaks and proper operation of the chlorinator. 29 MAINTENANCE Important Information Critical to the Survival of Your Chlorinator Winterizing In areas that experience severe cold weather, or extended periods of freezing temperatures, the DIG-220 should be winterized by draining all water from the Manifold Assembly (SuperCell and Tri-Sensor), pump, filter, supply and return lines prior to freezing weather, the Digital Manifold (including ethSuperCell and Tri-Sensor) will be damaged by freezing water. The DIG-220 power supply is not affected by the cold and does not need to be removed. NOTICE Failure to heed the following may result in equipment damage. Special measures are required in the event of freezing conditions. Your DIG-220 may be damaged if measures are not aken t in advance of freezing conditions. Equipment damage due to freezing conditions is NOT covered under the equipment warranty. Freeze protection program and its limits When configured to control the circulation pump, the DIG-220 can reduce the possibility of freeze damage to the filter and pipe s in milder climates where freezing weather is not normally expected. Winterizing procedures should be done prior to periods of freezing temperatures. The DIG-220 will turn on the pump and circulate pool water while the water temperature is below 40°F (4.4°C). Circulating the pool water will reduce the possibility of damage to the filter and pipes due to freezing. The DIG-220 freeze protect feature will NOT work properly unless all of the following conditions are met: The DIG-220 must be powered continuously. An external switch or timer should not be used to turn of f the DIG-220 power during the freezing weather. The DIG-220 must control the power to the circulation pump. The DIG-220 “Pump Control” must be programmed for One-speed pump (see pg. 34). When the Tri-Sensor indicates that water tempe rature is below 38°F (4.4°C), the Control Unit will override the normal timed program cycle and run the pump 30 minutes minimum or continuously while the water temperatu re is below 38°F (4.4°C). The DIG-220 uses a temperature sensor located in the Tri-Sensor to determine water temperature. If the Tri-Sensor is located o that s it cannot accurately detect the cold water, then the freeze protection becomes ineffective. (For example, if the Tri-Sensor is located inside a protected or warm location and the other pool components are located in an unprotected area, the other pool components could freeze before the Tri-Sensor detects the cold water.) Spring Start-Up It is recommended the water be manually chlorine-shocked when first starting up the pool in the springtime. Test water, and add the appropriate chemicals to balance the pool water per the levels recommended on page-24 & 25. Be sure to check salt and cyanuric acid (stabilizer), bringing those readings up to the recommended levels. It is also a good dea i to inspect the cell, manifold screen, and test the Tri-Sensor flow switch; clean and/or replace those items as necessary . 30 TROUBLESHOOTING Issue / Message Displayed 1) 2) 3) 4) Insufficient Purifier Production. Scale Buildup within the Cell. DC Plug and Cell Terminals Burned. Premature Cell Failure (Requires Replacement Cell). Problem Typical Solution The test kit reagents or test strips are old or expired. Retest with new Reagents or Strips. The DIG-220 is set too low in relation to purifier demand. Increase the Purifier % output. The circulation run time is insufficient. Increase your pump run time. The bather load has increased. Increase the Purifier % output or add a Non-Chlorine Shock containing PotassiumMonopersulfate tosupplement. The body of water being purified leaks. Repair the leak and rebalance as needed. Low Salt. Check the residual salt level and adjust as needed. “Cell Type” selection not matched to the cell installed. Follow the INSTALLER SETUP instructions, see page 23. Purifier loss due to intense sunlight. Check your stabilizer level and adjust if needed. If the output is 100% then “Cell Power” may be inadequate. Follow programming directions on page 23 to increase the power level. The water being purified contains high pH, total alkalinity and calcium hardness levels. (Cell scales within 2 – 3 weeks) Calculate Saturation Index to assure balanced water. Adjust chemicals and clean the cell. See page-24 & 25 and page-28 & 29. Power Supply not reversing polarity. (Cell constantly scales within 3 – 5 days) Contact the factory for Warranty Status/Procedures. The Cell terminals are wet due to an incorrectly oriented (upside down) cell, failure to dry terminals, or leaking cell body . Make sure cell is installed correctly. See page- 29. Contact the factory for Warranty Status/Procedures. The Cell plug is not securely pushed onto the cell terminals,causing electrical arcing in the cell cord terminals. Ensure the Cell cord plug is pressed completely onto the Cell terminal. Check the terminals and clean with a dry cloth to remove all dirt and corrosion. If the cell cord is corroded or burned then it must be replaced to prevent damage to the cell. Abnormally high Cell usage due to an insufficient Stabilizer (Cyanuric acid) level. Check the stabilizer level and adjust to recommended levels. Excessive Scale/Debris in the Cell. See Section 2 above. “Cell Type” selection not matched to the Cell installed. Follow the INSTALLER SETUP instructions, see page-29. 5) White Flakes in the Water. This occurs when excessive calcium hardness is present. Usually due to waterchemistry imbalance Adjust your water chemistry, visually inspect Cell for scale buildup and if necessary clean the cell as describedon page-29. 6) No Power to the Control Box. Circuit Breaker tripped. Check the power going to the Control Box. Reset the Circuit Breaker. Internal Power Fuse blown. Check and replace fuse. See page-27. Insufficient Flow (Min 15 gpm) (3.4 m³/hr) Ensure your Filter and Cell are clean of debris. Check all valves that might divert flow away from the cell. 7) 8) CHECK SYSTEM Light Flashing. Message Displayed “PURIFIER OFF - CHECK FLOW” (No purifier generation during this display) CHECK SYSTEM Light Flashing. Tri-Sensor Defective. Contact the factory for Warranty Status/Procedures. Tri-Sensor Cord Defective. Contact the factory for Warranty Status/Procedures. Extremely Low Cell Amperage. Select “Test Pool Pilot” menu and note cell volts and amps. Same as LOW SALT message below. Low Cell Amperage. Cell heavily scaled. If cell is already clean, replace cell. Pool has low salt and the unit needs salt calibration. Add salt to pool, recalibrate salt sensor. The Cell Cord is Loose. Ensure that the cord is firmly pressed into the cell and the wires properly connected into the banana plugs. Power Supply has failed. Contact the factory for Warranty Status/Procedures. Message Displayed “CHECK/CLEAN CELL” (Purifier still producing) 9) CHECK SYSTEM Light Flashing. Message Displayed “LOW AMPS – CELL” (Purifier still producing) Continued Next Page... 31 TROUBLESHOOTING Issue / Message Displayed Problem Typical Solution 10) CHECK SYSTEM Light Flashing. Message Displayed “PURIFIER OFF - Add Salt xxx lbs (No purifier generation during this display) Salt level extremely low (below 1900 ppm (2.0 g/l) Same as LOW SALT message below. 11) CHECK SYSTEM Light Flashing. Salt level Low (below 2500 ppm (2,5 g/l)). Add the amount of salt shown on the display . Test the salt level with a reliable salt test kit and compare to the DIG-220 display. Calibrate if needed, see page-22. Pump runs when no program is on. Freeze protect function is active. See page-30 for description. Chlorine is not generated. Disable demo mode, see page-23. Display is inactive, but all functions such as purifier are still operational. Pressing a key will activate the display. Message Displayed “Warning! Add Salt XXX lbs (kg)” 12) CHECK SYSTEM Light Flashing. Message Displayed “Freeze Protect” 13) CHECK SYSTEM Light Flashing. Message Displayed “DEMO” instead of “On” or “Off” 32 14) A small dot “walks” across the display. 15) CHECK SYSTEM Light Flashing. Message Displayed “Pwr Ctrl Error” Contact the factory for Warranty Status Procedures. 16) CHECK SYSTEM Light Flashing. Message Displayed “Control Error” (No purifier generation during this display) Contact the factory for Warranty Status/Procedures. APPENDIX Declaration of Conformity (according to ISO/IEC Guide 22 and EN 45014) Manufacturer’s Name: Autopilot Systems, Inc. Manufacturer’s Address: 2737 24th Street North, St. Petersburg, Florida USA 33713. declares that the product: Product Name: Pool Pilot Digital Model Number(s): DIG-220 + SC-36, SC-48, SC-60, CC-15 to which this declaration relates, meets the essential health and safety requirements and is in conformity with the relevant EU directives listed below: EU EMC Directive 89/392/EEC EU Low Voltage Directive 73/23/EEC using the relevant sections of the following EU standards and other normative documents: EMC: EN55014-1:1993 + A1:1997 EN55014-2:1995 Safety: EN 60335-1:94 + A11:95 + A1:96 + A12:96 Fort Lauderdale, Florida USA March 7 2002 (Place and date of issue) Peter Maitland, BSc(Eng), CEng. FCC Compliance: NOTE: This equipment has been tested and found to comply with the limits for a Class B digital device, pursuant to part 15 of the FCC Rules. These limits are designed to provide reasonable protection against harmful interference in a residential installation. This equipment generates, uses and can radiate radio frequency energy and, if not installed and used in accordance with the instructions, may cause harmful interference to radio communications. However , there is no guarantee that interference will not occur in a particular installation. If this equipment does cause harmful interference to radio or television reception, which can be determined by turning the equipment off and on, the user is encouraged to try to correct the interference by one or more of the following measures: -Reorient or relocate the receiving antenna. -Increase the separation between the equipment and receiver. -Connect the equipment into an outlet on a circuit different from that to which the receiver is connected. -Consult the dealer or an experienced radio/ TV technician for help. 33 2737 24th St. North St. Petersburg, FL 33713 727-823-5642 34