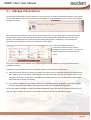
1
Sedao Ltd
SWEP Client
Administrators guide covering SWEP Client functions in version 2.1.7
SWEP Client User Manual
Contents
What is SWEP? ......................................................................................................................................... 4
How does SWEP fit in to my digital Signage installation? ........................................................................ 4
Understanding the different SWEP Users ................................................................................................ 6
1 - Installing SWEP Client Software .......................................................................................................... 8
1.2 - Launching and configuring the software ......................................................................................................................... 9
1.3 - Status Monitor ...............................................................................................................................................................10
1.4 - Logging into SWEP. ........................................................................................................................................................11
1.5 - The SWEP main menu screen ........................................................................................................................................11
1.6 - Common buttons found within SWEP ...........................................................................................................................12
2.1 - Manage Presentations ...................................................................................................................................................14
2.1.1 - Updating a local RSS feed .......................................................................................................................................15
2.1.2 - Modifying ‘Online’ RSS Feeds .................................................................................................................................16
2.1.3 - Updating Image Folders ..........................................................................................................................................16
2.1.4 - Updating Movie Folders ..........................................................................................................................................18
2.1.5 - Modifying HTML Browsers ......................................................................................................................................19
2.1.6 - Updating RollerWriter Elements .............................................................................................................................20
2.1.7 - Uploading a ‘.sif’ File ...............................................................................................................................................22
2.1.8 - To change the source of live video .........................................................................................................................23
2.1.9 - To change a Shockwave element ............................................................................................................................23
2.1.10 - Changing a PowerPoint file ...................................................................................................................................24
2.2 - Manage Presentations – Network import. ....................................................................................................................25
2.3 - Manage Presentations – Upload Presentations from archives .....................................................................................25
2.4 - Manage Presentations - Rescan Presentations. ............................................................................................................26
3.1 - Configure This Server. ....................................................................................................................................................28
3.1.1 - Setting the site root ................................................................................................................................................28
3.1.2 - See what’s onscreen now .......................................................................................................................................29
3.1.3 - Reload ImageFlyer Schedule ...................................................................................................................................29
3.1.4 - Editing the Imageflyer Schedule .............................................................................................................................29
3.1.5 - ImageFlyer Schedule - Presentation Groups...........................................................................................................32
V2.1
Page 1
SWEP Client User Manual
3.1.6 - Configuring the schedule file used by SWEP. .........................................................................................................34
3.1.7 - Setting the SWEP administrator password. ............................................................................................................34
3.1.8 - Changing the SWEP Serial Number. ........................................................................................................................35
3.1.9 - Configuring Network Drives ....................................................................................................................................35
3.1.10 - Backing up the SWEP database.............................................................................................................................35
3.1.11 - Restoring the SWEP database ...............................................................................................................................36
3.1.12 - Initialising the SWEP database ..............................................................................................................................36
3.2 - Creating New Users........................................................................................................................................................37
3.2.1 - To Create a New User: ............................................................................................................................................37
3.2.2 - Editing an existing user: .........................................................................................................................................37
3.2.3 - To delete an existing user .......................................................................................................................................38
3.2.4 - To configure the permissions assigned to each user .............................................................................................. 38
3.3 - View ImageFlyer Status ..................................................................................................................................................39
3.3.1 - Viewing the screen Live! .........................................................................................................................................39
3.4 - Using Hot Call Buttons ...................................................................................................................................................40
3.4.1 - Adding a new Hot Call button. ................................................................................................................................41
3.4.2 - Editing a hot call button ..........................................................................................................................................41
3.4.3 - Deleting a hot call button .......................................................................................................................................41
3.4.4 - Enable Hot Call Buttons checkbox ..........................................................................................................................41
3.4.5 - Enable Event Sharing checkbox ..............................................................................................................................42
3.5 - Setting up System Commands .......................................................................................................................................42
3.5.1 - Creating a new command using a Sedao command as a template. .......................................................................43
3.5.2 - Creating a new system command ...........................................................................................................................43
3.5.3 - To edit an existing user command ..........................................................................................................................43
3.5.4 - To delete a user command .....................................................................................................................................43
3.5.5 - Upload new command set ......................................................................................................................................44
3.5.6 - Upload new command schedule.............................................................................................................................44
3.6 - Schedule System Commands .........................................................................................................................................44
3.6.1 - Adding a command to the schedule .......................................................................................................................44
3.6.2 - Editing a command that is in the schedule .............................................................................................................44
3.6.3 - Removing a command that is in the schedule ........................................................................................................45
A.1 - Introduction ...................................................................................................................................................................47
A.1.1 - What is a mapped drive? ........................................................................................................................................47
A.2 - Configuring a user account to be used by SWEP ...........................................................................................................48
V2.1
Page 2
SWEP Client User Manual
A.3 - Starting SWEP Network import .....................................................................................................................................48
A.3.1 - Configuring your mapped drives ............................................................................................................................48
A.3.2 - Creating your presentations ...................................................................................................................................49
A.3.3 - Using the SWEP network import ............................................................................................................................49
A.3.4 - Using SWEP to import a network folder .................................................................................................................50
A.4 - Troubleshooting.............................................................................................................................................................50
B.1 – Introduction ..................................................................................................................................................................52
B.2.1 – Checking your current SWEP version .....................................................................................................................52
B.2.2 – Upgrading from SWEP versions 2.x.x (earlier than 2.1.7) ......................................................................................52
B.2.3 – Upgrading from SWEP versions 1.x.x (equal to or later than 1.5.4) ......................................................................52
B.2.4 – Unsupported upgrade paths. .................................................................................................................................52
B 2.5 – Removing SWEP from your system ........................................................................................................................53
V2.1
Page 3
SWEP Client User Manual
What is SWEP?
SWEP is an abbreviation for Sedao Web Enabled Player. SWEP is the software that comes pre-installed on Sedao
Hardware players such as the ‘SWEP HD’. The SWEP software gives you several powerful functions, such as:
a. The ability to edit components of an
ImageFlyer presentation from any
computer attached to the same network
as the player. You can add or replace
picture or movie media within zones,
change local RSS text and replace website
links, amongst other functions.
b. The ability for a SWEP ‘administrator’ to
give permissions to SWEP ‘users’ to be
able to edit specific content within a
presentation layout.
c. The ability to update the presentation
playback schedule.
d. A method of viewing a thumbnail of the presentation that is currently being displayed.
SWEP does not allow you to move or resize the content of a presentation and it does not allow you to add or
remove elements in a presentation.
SWEP is a web based application which needs to be used in conjunction with Sedao Digital Signage software. A
description of how SWEP fits into your signage network follows below.
How does SWEP fit in to my digital Signage installation?
Your digital signage installation is made up of several different software applications. The key applications that
will be referred to in this user manual are listed below.
ImageFlyer - for presentation layout
design and playback.
Use ImageFlyer to create screen presentation layouts
by layering multiple different media types and
manipulating their size and position. ImageFlyer uses
existing media elements such as photos and movies.
ImageFlyer is described in more detail in its own user
manual.
V2.1
Page 4
SWEP Client User Manual
RollerWriter – for creation of animated scrolling web pages.
RollerWriter is a useful tool for creating animated scrolling text. With a
number of options, including support of full rich-text editing and the ability to
pause animation at specific points – RollerWriter can create text based
elements that really do grab attention. For further information on the
functions of RollerWriter, please refer to the RollerWriter user guide.
RSSWriter – for creation of locally based RSS news
feeds
RSS Writer is another useful tool that allows anyone to create
locally saved RSS feeds in a matter of minutes. With absolutely no
need to learn any code or worry about any syntax – RSS Writer
creates XML files which you can use to display multiple ‘ticker’
stories which help to ensure your audience keep watching your
presentation. RSS Writer has its own separate user manual.
SedaoLive – for globally
accessible RSS feeds.
If you require the ability to edit your RSS
feeds from any internet connected device,
anywhere in the world, then you need to use
SedaoLive. For further information on
SedaoLive please refer to its own user
manual.
V2.1
Page 5
SWEP Client User Manual
QuickChange PROject - for static
element design.
QuickChange PROject helps you to create fully rendered
still images using a number of pre-defined templates.
These images form important screen components such as
banners and backgrounds, and sit alongside other media
types such as RSS Feeds and Movies in an ImageFlyer
presentation layout. You can integrate existing media such
as Logos and Photos. QuickChange PROject also has many
advanced features, which are explained in detail in a
separate user manual.
Understanding the different SWEP Users
SWEP is set up and initially configured by the SWEP administrator. The administrator then gives permissions to
SWEP Users to enable them to make changes to the desired content.
SWEP Administrator
The SWEP administrator will usually be the person within your organisation who has technical abilities and
experience with your network infrastructure. The main duties of an administrator are to establish and maintain
the intended goals of the Digital Signage installation and to delegate user rights within the organisation.
Artistic or creative skills are not usually required although they are often useful in this role. The Administrator
usually has very little involvement in the day-to-day management of the Digital Signage installation.
SWEP User(s)
SWEP user(s) require little technical or artistic skill as they rely on SWEP Software to update existing screen
designs on a regular basis. SWEP users rarely use ImageFlyer directly, but may wish to use other related
applications to create media that can be integrated into the design using SWEP. SWEP user(s) have their relevant
permissions defined and controlled by the SWEP Administrator.
V2.1
Page 6
SWEP Client User Manual
Section One
SWEP installation and initial configuration.
V2.1
Page 7
SWEP Client User Manual
1 - Installing SWEP Client Software
If you have purchased your SWEP hardware direct from Sedao or from a Sedao reseller, then it is likely that the
SWEP software is installed already. To check this, double click the “Internet Explorer” icon on the desktop. Then
navigate to the page ‘localhost’. If the SWEP login page is displayed, then the SWEP software is installed and you
can skip to the section “Logging into SWEP” below.
1.1.1 - Configuring your playback device prior to SWEP Installation.
First: check for any conflicting products.
The simplest way to do this is to open Internet Explorer and in the address bar type ‘localhost’. If you receive a
‘page cannot be displayed’ or the results from your default search engine, then no conflicting product is running
and you can continue with the install.
If you receive the login page from another application, then either you have an application ‘listening’ on port 80,
or your proxy server requires login before it will serve web pages. The resolution of these issues is beyond the
scope of this manual. You should refer to your own IT department to change the configuration of the service
using port 80 - or contact Sedao technical support for advice.
Second: check that your configuration is optimal.
The playback device needs to be assigned an easy to use ‘computer name’. This is usually configured in the
Network Setup Wizard if using the computer in a workgroup, or by a domain administrator if connecting to a
domain. The computer name is used to access SWEP from other PC’s on the network, so it makes sense to assign
the PC a name that is easily remembered and relevant to the players position or function. For example, a
reception screen might be named ‘RECEPTION’.
If you use a proxy server, please ensure your browser is set to “Bypass proxy server for local addresses”.
SWEP runs best in Internet Explorer 7 or 8. Other browsers should also be able to provide SWEP functions.
1.1.2 - Installation of SWEP Software
If you are upgrading from a previous SWEP version,
please refer to appendix B – upgrading SWEP.
Insert the SWEP CD into the CD-ROM drive of the Player
PC. Select ‘INSTALL SWEP CLIENT SOFTWARE’ from the
menu.
On the ‘Welcome...’ window that appears, click ‘NEXT’ to
prepare for the installation process.
On the ‘Ready to install’ window click ‘INSTALL’ to start
the installation process. The process usually takes a
couple of minutes.
When the installation has been completed, click ‘Finish’.
V2.1
Page 8
SWEP Client User Manual
SWEP Software is now installed. Please follow the steps on the following pages to configure your new software.
1.1.3 - Configuring your firewall for SWEP.
The SWEP installation installs Apache Web Server and MySQL Database Engine. It also installs a number of tools
for un-archiving presentations and performing network functions. If you need further information on what is
included, please contact Sedao Technical Support.
To ensure the SWEP features are able to operate properly, please ensure the following rules are enabled in the
local firewall installed on the player. NOTE: This will have been completed for you if you purchased a Sedao
hardware player.
Port / Executable name
Application Name
Scope
Port 3306
Port 80
Application / WinVNC.EXE
MySQL
Apache2
Launch TightVNC Server
open for local subnet
open for local subnet
Allowed for local subnet
1.2 - Launching and configuring the software
SWEP is web based software. As we do not know the name of your computer, we cannot provide shortcuts in the
start menu or on the desktop that would reliably launch the software.
The quickest and easiest way to start the program is:
a.) If you are using SWEP directly on the player, simply open Internet Explorer and enter the address ‘LocalHost’.
b.) If you are accessing SWEP across the network, open Internet Explorer and type the address of the computer
that SWEP is installed on. Depending on your network configuration, you may need to type a name, or the IP
address. Examples would be ‘http://reception’ or ‘http://192.168.1.101’
1.2.1 - First time use: Entering an authorisation code.
If you have just installed SWEP for the first time – you
will be prompted to enter your authorisation code.
This will have been provided with your installation
CDROM or will be attached to the hardware you
purchased. Type your code exactly as it appears.
Then click ‘Authorise’.
1.2.2 - First time use: Setup page
The ‘Default Site Root’ needs to be configured to show the
folder where ImageFlyer SIF files have been saved. SWEP will
look for presentation files in this folder and any subfolders. The
default site root is ‘C:\ImageFlyer’. Administrator details are
also requested. Please enter a username and password
according to your own preferences. Then click ‘SUBMIT’ to save
the details.
V2.1
Page 9
SWEP Client User Manual
Please keep the details used for the administrator username and password in a safe place. If these details
are lost, the only option is to delete the SWEP configuration and start from a clean installation.
SWEP has been set to read the ImageFlyer schedule data from C:\ImageFlyer\Imageflyer.sch. If you have
customised ImageFlyer so that it stores schedule data in another location, you will also need to update the
schedule configuration in SWEP. This is explained later in this manual in the section “Configure this server”.
1.3 - Status Monitor
The Status Monitor will need to be configured in ImageFlyer on the SWEP computer.
The Status Monitor allows both users and administrators to view a thumbnail image of the screen layout currently
being displayed by the player computer. This is not a live broadcast, but a still image representation of the current
or most recent screen layout. The Status Monitor updates automatically every minute while ImageFlyer is
running. When ImageFlyer is closed, it will display the last layout ImageFlyer played.
1.3.1 - Configuring the Status Screen in ImageFlyer
The Status Monitor relies upon a number of settings being configured within ImageFlyer.
Launch ImageFlyer directly on the player PC and bring up the Control Panel using ‘Page Up’
Click on the ‘CONTROLS’ menu and select ‘STATUS…’
Complete the details as shown, ensuring ‘XML’ is selected
as the format. The template path is:
c:\program files\Sedao Ltd\ImageFlyer\Templates\xml.ift
The Save As... path should be:
c:\www\swepnet\website\sedao_core\backups\status.xml
Click on ‘CONTROLS’ once more and select ‘GRAB SCREEN’
Open a screen layout, then click on the ‘CONTROLS’ menu
and select ‘GRAB SCREEN…’
Tick the ‘GRAB EVERY MINUTE’ checkbox.
Now return to the SWEP interface and click the ‘VIEW IMAGEFLYER STATUS’ link.
The thumbnail should change approximately every minute.
When you have completed configuring SWEP you should logout from the interface.
Your SWEP computer is now configured and ready to be used for updating your screens as described in the
following pages.
V2.1
Page 10
SWEP Client User Manual
1.4 - Logging into SWEP.
Before logging into SWEP, please make sure you have copied any presentations you have designed, along with
their supported media files, to the C:\ImageFlyer directory. If you have specified a different site root, copy your
files to that folder instead. If you have not created any presentations, SWEP will display the sample presentations
supplied with the player or installation package (if any).
To login to SWEP you need to:
1. Open your internet browser such as ‘Internet Explorer’. You can do this directly on the SWEP computer or on
another computer connected to the same network
2. Type in the address bar, the SWEP computer name or IP address, such as ‘http://RECEPTION’ or
‘http://192.168.1.101’.
The SWEP Login screen will then be displayed.
If your SWEP hardware was supplied by Sedao, the
default username and password will both be ‘admin’. If
you installed the SWEP software yourself, the username
and password were preset by the person who ran SWEP
for the first time.
If the administrator username and password are lost,
the only option is to delete the SWEP configuration and start from a clean installation.
On the login screen, the only active language is English. Please contact Sedao Technical Support if you wish to
develop an additional language.
The option ‘Check for new presentations after login’ is normally checked. This ensures that the ImageFlyer
presentation files are scanned and updated within the SWEP software such that the most up to date information
is presented for editing.
1.5 - The SWEP main menu
screen
Once you have logged into SWEP as an
administrator, you will be presented with the SWEP
main menu which contains links to every facility
provided by the SWEP software.
Manage Presentations – use this link to see a list of
the presentation files stored on your PC. You can
also use this link to re-scan the presentations and
import a presentation from a network share.
V2.1
Page 11
SWEP Client User Manual
Configure this server – use this link to make basic SWEP settings and to configure the schedule on the playback
PC.
Configure Users – use this link to add additional user accounts to SWEP. The user accounts you have added can
be assigned permissions to only edit specific content within specific presentation layouts.
View ImageFlyer Status – this link allows you to view a thumbnail of the screen layout being displayed. This
option depends on settings being correct in the ImageFlyer software. You can also take control of the screen if
your network allows VNC connections.
Configure HotCall buttons – allows you to define presentations that can be called on screen temporarily with a
single click of a ‘hot call’ button
Configure System Commands – allows you to create command lines that will be executed on the playback
computer according to the system commands schedule.
Schedule System Commands – allows you to schedule the date(s) and time(s) at which your system commands
will be executed.
Please refer to the contents page of this guide for assistance in locating further information on the above options.
1.6 - Common buttons found within SWEP
Most pages within SWEP contain one or more of the following buttons. Wherever you see these buttons, they
perform the following functions:
Back to Admin
Back to Projects
Logout
Back
Save Changes
Cancel
Returns to the SWEP main menu
Returns to the ‘Manage Presentations’ list
Logs you out of the SWEP software and returns to the login screen
Discards any unsaved changes and returns you to the prior screen.
Saves the changes you have made and returns to the prior screen.
Stops the editing task that is in progress and returns to the prior screen.
SWEP is a web based application. You should use the buttons within SWEP to navigate through the software
and avoid using the back, forward and refresh buttons provided in your browser. If you have made changes
please ensure you save them before changing the page – otherwise the changes will be lost.
V2.1
Page 12
SWEP Client User Manual
Section Two
Administrators guide to end-user functions.
V2.1
Page 13
SWEP Client User Manual
2.1 - Manage Presentations
The ‘Manage Presentations’ screen is where you can review a list of all the presentations installed on your player.
You can then edit elements of the presentations using SWEP. If the presentation is live on screen, most changes
will appear instantly.
The presentation list shows the name of the presentation SIF file in red, the folder path in which the SIF file is
stored in black. There is also a thumbnail that shows what the presentation looked like the last time it was
opened. The thumbnail function relies on specific settings being made in ImageFlyer. These settings are
described in the ImageFlyer manual and in Appendix A of this guide.
To see what editable elements a
presentation contains, simply click the
thumbnail of the presentation. You will then
be presented with the ‘Project contents’
screen.
The project contents screen contains icons representing each of the elements in your presentation that are
available for editing.
If elements of your presentation have not appeared, please check the below requirements
a) Does the element reference a file that is stored at the same level or in subfolders below the presentation SIF
file? SWEP can only read and/or modify files that are within the folder structure that the SIF resides in. For
example, if an element is shared on a network drive or being read from your ‘My Documents’ folder, SWEP
will not be able to display it for editing.
b) Is the element capable of being edited? Audio files, Colour Backgrounds, ImageFlyer Control Files, Volume
Controls, WAV audio and SedaoLive RSS and Picture feeds cannot be edited through SWEP.
To view the options available for editing presentation elements, simply click the icon representing the item you
wish to change. Further information on the options available is included on the following pages.
V2.1
Page 14
SWEP Client User Manual
2.1.1 - Updating a local RSS feed
RSS Feeds are best described as a list of stories that are displayed one after the other within a defined zone on
the screen. Local RSS feeds are usually created using Sedao RSS Writer and saved as an XML file within your
presentation folder structure. This type of RSS feed can have many of its properties changed using the SWEP
interface.
To edit a local RSS file
Log into the SWEP software and click the ‘Manage
Presentations’ link. Select the presentation that
contains the RSS feed, then click on the icon that
represents the RSS feed you wish to edit.
Editing existing articles
To edit any of the existing articles, simply make your
changes directly into the ‘Title’ and ‘Description’
boxes that contain existing data
Deleting existing articles
Simply click ‘DELETE THIS SECTION’ to the right of the
article you wish to remove. NOTE: The title and
description text immediately to the left of the button are removed immediately without confirmation.
Add a new article
Click ‘ADD NEW SECTION’ at the bottom of the RSS feed. Empty boxes will be added to the end of the RSS feed
into which an additional ‘Title’ and ‘Description’ can be entered.
After editing, adding or deleting RSS text – remember to click the ‘Save changes’ button. If you edit any
colours, changes to the RSS text will be lost if they have not yet been saved.
To Change the Colour of RSS titles,
items or backgrounds.
NOTE: Please ensure you save any changes to your RSS text as
changes will be lost if you edit the colours.
Click the ‘EDIT’ button to the right of the RSS colour you wish
to change. The following dialog appears. Use the three slider
bars to adjust the level of Red, Green and Blue that comprise
the colour you wish to use. Alternately, you can enter RGB
values into the corresponding fields. Click ‘SAVE COLOUR’ to
save the changes. The colour will change on screen when you
subsequently save the RSS feed.
To Change the Font of the RSS text
Use the ‘CURRENT FONT’ drop down list to select the required font. The font will be changed on screen when you
click the ‘SAVE CHANGES’ button.
V2.1
Page 15
SWEP Client User Manual
2.1.2 - Modifying ‘Online’ RSS Feeds
In addition to local RSS feeds, you can also make changes to the properties of Online RSS feeds. Online RSS feeds
are usually hosted on internet sites or intranets.
To Start Editing an Online RSS Feed
Log into the SWEP software and click the ‘Manage
Presentations’ link. Select the presentation that contains
the RSS feed, then click on the icon that represents the
online RSS feed you wish to edit.
To change the source of an online RSS Feed
Simply replace the address in the ‘CURRENT URL’ field. It
is much easier to copy and paste the URL information
from your web browser. Click the ‘SAVE CHANGES’
button.
After editing the ‘Current URL’ – remember to click the ‘Save changes’ button. If you edit any colours,
changes to the URL will be lost if they have not yet been saved.
To Change the Colour of online RSS titles, items or background.
NOTE: Please ensure you save any changes to your RSS URL as changes
will be lost if you edit the colours.
Click the ‘EDIT’ button to the right of the RSS colour you wish to change.
The following dialog appears. Use the three slider bars to adjust the
level of Red, Green and Blue that comprise the colour you wish to use.
Alternately, you can enter RGB values into the corresponding fields.
Click ‘SAVE COLOUR’ to save the changes. The colour will change on
screen when you subsequently save the RSS feed.
To Change the online RSS Font
Use the ‘CURRENT FONT’ drop down list to select the required font. The font will be changed on screen when you
click the ‘SAVE CHANGES’ button.
2.1.3 - Updating Image Folders
Image folders represent a folder of still image files such
as JPG, BMP or GIF files that are displayed in sequence
on an ImageFlyer layout. You can change the content of
the folder, but transitions and timings can only be
changed from within ImageFlyer.
To change the content of Image Folders.
Log into the SWEP software and click the ‘Manage
Presentations’ link. Select the presentation that contains
the image folder, then click on the icon that represents the image folder you wish to edit.
V2.1
Page 16
SWEP Client User Manual
To View an Image
Click the ‘VIEW’ link next to the desired image. When you have finished viewing the image use the ‘back’ button
to return to the images list.
To Change an image
Click the ‘Change’ link to the right of the image file you wish to
replace. Click the ‘Browse’ button on the ‘Upload Image screen.
Navigate to the file you wish to use and then click ‘Send File’.
You can send a file from any location that you can browse to,
such as USB drives, network drives, or your ‘my pictures’ folder.
NOTE: When you ‘change’ a file, the original file is immediately
deleted and cannot be recovered.
To Rename an Image
Click the ‘RENAME’ link to the right of the image you wish to rename.
Type the new name in the ‘NEW NAME’ field and then click the
‘RENAME’ button.
To Delete an Image
Click the ‘DELETE’ link to the right of the image you wish to delete.
Click ‘OK’ to confirm you wish to delete the image. You will then return
to the images list. NOTE: This not only removes the image from the
display, it also DELETES the file from the folder. You cannot restore an
image that has been deleted.
To Add an Image
Click the ‘ADD’ button at the bottom of the image list. Then click the
‘BROWSE’ button. Navigate to the location of the image – you can
browse to any accessible folder on your PC, network or external drives.
Click ‘SEND FILE’. Please be patient as a copy of the selected image is
sent to the image folder. When this is completed, you will return to the
image list. NOTE: If the ImageFlyer presentation links to a single image, such as a background design, the ‘ADD’
button is not shown. SWEP cannot convert a single image zone to an image folder zone.
V2.1
Page 17
SWEP Client User Manual
2.1.4 - Updating Movie Folders
Movie folders are folders containing video files such as AVI, MPG or WMV files that are displayed in sequence on
an ImageFlyer layout. You can change the content of the folder, but not the timings as these may only be
changed from within ImageFlyer.
To change the content of Movie Folders.
Log into the SWEP software and click the ‘Manage
Presentations’ link. Select the presentation that
contains the movie folder, then click on the icon that
represents the movie folder you wish to edit.
To Change a movie.
Click the ‘Change’ link to the right of the movie file you wish to replace.
Click the ‘Browse’ button on the ‘Upload movie’ screen. Navigate to the
file you wish to use and then click ‘Send File’. You can send a file from any
location that you can browse to, such as USB drives, network drives, or
your ‘my videos’ folder. NOTE: When you ‘change’ a file, the original file is
immediately deleted and cannot be recovered. Depending on your network conditions, it may take several
minutes to upload the movie to the player.
If you change a movie file and it is not part of a movie folder – SWEP will interrupt presentation playback for
the duration of the upload. The presentation that is scheduled to playback at the current date and time will
be loaded once the movie upload is completed. Please check the
ImageFlyer Schedule to ensure there is a default presentation –
otherwise ImageFlyer will not be able to restart a presentation.
Scheduling is described in more detail later in this guide.
To Rename a Movie
Click the ‘RENAME’ link to the right of the movie you wish to rename.
Type the new name in the ‘NEW NAME’ field and then click the ‘RENAME’ button.
To Delete a Movie
Click the ‘DELETE’ link to the right of the movie you wish to delete.
Click ‘OK’ to confirm you wish to delete the movie. You will then
return to the movies list. NOTE: This not only removes the movie
from the display, it also DELETES the movie file from the folder. You
cannot restore a movie that has been deleted.
V2.1
Page 18
SWEP Client User Manual
To Add a Movie
Click the ‘ADD’ button at the bottom of the movie list. Then click the ‘BROWSE’ button. Navigate to the location
of the movie file – you can browse to any accessible folder on your PC, network or external drives. Click ‘SEND
FILE’. Please be patient as a copy of the selected movie is sent to the movie folder. When this is completed, you
will return to the movie list. NOTE: If the ImageFlyer presentation links to a single movie, the ‘ADD’ button is not
shown. SWEP cannot convert a single movie zone to a movie folder zone.
1.
Depending on the size of the movie and the network speed, adding or changing a movie may take a
while to complete.
2. At the moment, SWEP can only support folders of the same movie type. For example, AVI folders or
MPG folders. If you wish to mix movie types in one folder, you will have to use Windows File Sharing
instead of SWEP.
3. Please be aware that movies are provided in dozens of formats even though the file extension may be
the same. It may be necessary to install codecs on the playback computer if movies do not play back as
expected.
2.1.5 - Modifying HTML Browsers
HTML browsers provide a cropped window onto a website. As an example, they can display the weather element
on the BBC homepage. HTML Browsers are added and manipulated in ImageFlyer. You can use SWEP to change
the URL of the page being displayed.
To edit the HTML Browser
Log into the SWEP software and click the ‘Manage Presentations’ link. Select the presentation that contains the
HTML browser, then click on the icon that represents the HTML browser you wish to edit.
To Change the Browser address
Replace the text in the ‘NEW URL’ window with the URL for the
required website. Click the ‘CHANGE’ button.
When using cropped HTML browser windows within
ImageFlyer, it is important to remember that the crop
settings may not be suitable for the new page displayed
within the Browser window. Please see example below.
The first image is a weather forecast that makes up a portion of the BBC homepage. When the page URL is
changed through SWEP, the crop settings remain the same. This makes the replacement image seem incorrect.
Please ensure you select a compatible URL when making the change.
V2.1
Page 19
SWEP Client User Manual
2.1.6 - Updating RollerWriter Elements
RollerWriter is an application that allows you to rapidly create vertically or horizontally scrolling text. SWEP
allows you to modify the text and many of the settings that define the appearance of RollerWriter files.
RollerWriter files are HTML files stored within your presentation folder structure.
To begin editing a RollerWriter element
Log into the SWEP software and click the ‘Manage
Presentations’ link. Select the presentation that
contains the HTML browser, then click on the icon that
represents the HTML browser you wish to edit.
To change the RollerWriter scrolling type
Click the ‘SCROLL TYPE’ dropdown list. Select ‘SCROLL’
for vertical movement or ‘CRAWL’ for horizontal
movement. Then click the ‘SAVE’ button.
We do not recommend that you set a RollerWriter
scroll type to ‘None’, so we have not included it on
the list. If you wish to set the scroll type to ‘None’
and have static text, please contact Sedao
Technical Support for a patch file that enables this
function.
To change the movement direction
Click the ‘SCROLL TYPE’ dropdown list and select from the available options. For vertical scrolling the options are
‘Top to bottom’ and ‘Bottom to top’. For horizontal scrolling the options are ‘Left to right’ and ‘Right to left’.
To change the animation speed
Click the ‘SCROLL SPEED’ dropdown list and select a speed from the options available.
To change text alignment
Click the ‘TEXT ALIGNMENT’ dropdown list then select from the ‘Left’, ‘Right’ or ‘Centre’ as the alignment type.
To edit the scrolling text
Simply edit the text directly on the page. You can paste in any Rich Text format documentation from a word
processing program. Colours, fonts and sizes will all be honoured.
You can change properties of the text you have highlighted. Simply use
the ‘Font’ and ‘Font Size’ drop down boxes; Bold, Italic and underline
toggle buttons; and colour dropdown list.
In the colour dropdown list, clicking ‘More Colours’ shows the ‘Select a
colour’ dialog. From here you can use the ‘Picker’ tab to directly select
a colour from those available. The ‘Palette’ tab allows you to select a
colour from several pre-defined options. The ‘Named’ tab allows a
selection from a group of pre-defined colours that have descriptive names. Click ‘Apply’ when you have located
the colour you wish to use.
V2.1
Page 20
SWEP Client User Manual
To undo the most recent change, click the ‘Undo’ icon, or press <Ctrl> and <Z>. To redo the most recent change
that has been undone, click the’Redo’ icon or press <Ctrl> and <Y>.
Remember to click ‘Save’ after making your changes.
To change the background colour
The background colour appears behind the text that you enter onto
your scroller. Before changing the background colour, ensure you have
saved any text changes by clicking on ‘Save’ at the bottom of the page.
To change the background colour, click the ‘EDIT’ button to the right of
the ’Background Colour’ option. Click OK to proceed to the colour
choices. Use the three slider bars to adjust the level of Red, Green and
Blue that comprise the colour you wish to use. Alternately, you can enter RGB values into the corresponding
fields. Click ‘SAVE COLOUR’ to save the changes.
Background Image
The background image appears behind the text that you enter onto
your scroller. Before changing the background image, ensure you
have saved any text changes by clicking on ‘Save’ at the bottom of the
page. Click the Upload button beside the ‘Background Image’ item.
Click OK to proceed to the Upload screen. Click the browse button.
Navigate to the file you wish to use and then click ‘Send File’. You can send a file from any location that you can
browse to, such as USB drives, network drives, or your ‘my pictures’ folder. NOTE: When you ‘send’ a file, the
original file is left on the hard disk. To change back you must upload the file again. Depending on your network
conditions, it may take a few moments to upload your picture to the player.
Background Position
If you have uploaded a background picture to the player, you may find that the picture is not the same size as the
scrolling text you wish it to appear behind. The picture will be scaled to fit the available space. The aspect ratio
will be maintained which means there may be some unused space. This option allows you to choose the position
of the picture and hence where the unused background space will appear. You can select from these options:
‘Top Left’, ‘Top Centre’, ‘Top Right’, ‘Middle Left’, ‘Middle Centre’, ‘Middle Right’, ‘Bottom Left’, ‘Bottom Centre’,
‘Bottom Right’.
Background Repeat
If you have uploaded a background picture to the player, you may find that the picture is not the same size as the
scrolling text you wish it to appear behind. The picture will be scaled to fit the available space. The aspect ratio
will be maintained which means there may be some unused space. This option allows you to choose whether the
picture is repeated to fill the available space. You can choose from these options:
None: The background picture will appear once
X-Axis: The background picture will appear as a single row
Y-Axis: The background picture will appear in a single column
Both: The background picture will be tiled horizontally and vertically to fill all available space.
V2.1
Page 21
SWEP Client User Manual
2.1.7 - Uploading a ‘.sif’ File
ImageFlyer stores the information that defines a screen layout in ‘.sif’ files. The files contain information that
describes where to locate media and how to display it on screen. ‘Sif’ files are very compact as they do not
contain any of the media files being used.
ImageFlyer licenses are purchased based on the number of displays that are actively showing presentations. You
are also allowed to install ImageFlyer on a design PC in order to make adjustments to the layout without the need
to interrupt the presentation on display.
If you have added or changed media on your design PC, you need to make the same changes, using the same
folder structure on the playback PC. You need to do this before uploading the new SIF. Please refer to the
ImageFlyer and/or Content Manager user guides for more information.
Once you have made the adjustments – such as repositioning elements on screen - you need to transfer the new
SIF file to the player, which you can do using SWEP.
To upload a new ‘.sif’ file
Log into the SWEP software and click the ‘Manage Presentations’
link. Select the presentation you wish to update, then click the
icon that represents the SIF file.
Click the ‘BROWSE’ button and navigate to the location of the new
‘.sif’ file. Click ‘SEND FILE’.
1. When you send a SIF file, it must have the same name as the file you wish to replace.
2. After uploading the SIF file, the data in SWEP will no longer be current. Either log out and then log back
in, or manually refresh the presentation data. See ‘Manage Presentations - Rescan Presentations’ later
in this guide.
V2.1
Page 22
SWEP Client User Manual
2.1.8 - To change the source of live video
Some playback hardware comes fitted with video input cards. This allows you to show live video, such as
television, CCTV or DVD in your presentation. Some video input cards have multiple inputs that you can choose
between to enable you to display different live video content. SWEP is able to allow you to choose the source.
To edit the live video element
Log into the SWEP software and click the ‘Manage Presentations’ link. Select the presentation that contains the
Live Video zone, then click on the icon that represents the Live Video.
Select the name of the source you
wish to display from the ‘Select video
type’ drop down list.
The names of the video source will
vary depending on how the manufacturer of the hardware being used has decided to name the various inputs
available.
Click Save to change the video source being displayed.
2.1.9 - To change a Shockwave element
ImageFlyer is able to display Shockwave content such as FLV and SWF files. These may be used to show video or
short animations. The most common use is for clocks. SWEP can allow you to change the file being displayed.
To change the shockwave element
Log into the SWEP software and click the ‘Manage Presentations’ link. Select the presentation that contains the
shockwave file, then click on the icon that
represents the shockwave SWF file.
To preview the element being used
Simply click the ‘View’ link to the right of the
icon representing the shockwave file. The core
of the shockwave file will be shown. Files
referenced by the shockwave element – such
as background images – will not be previewed.
Click ‘Back’ to return to the Shockave editing page.
V2.1
Page 23
SWEP Client User Manual
To change the shockwave file being used
Click the ‘Change’ link to the right of the icon representing the Shockwave
file. Click the browse button. Navigate to the file you wish to use and then
click ‘Send File’. You can send a file from any location that you can browse
to, such as USB drives, network drives, or your ‘my documents’ folder.
NOTE: When you ‘send’ a file, the original file is deleted. To change back
you must send the original file again. Please make sure you have a copy of
the original file before you replace it. Depending on your network conditions, it may take a few moments to
upload your shockwave file to the player.
2.1.10 - Changing a PowerPoint file
ImageFlyer is able to display PowerPoint slideshows that have been created using certain guidelines. These are
explained in more detail in the ImageFlyer user guide. SWEP can allow you to change the PowerPoint file being
displayed.
To change the PowerPoint File.
Log into the SWEP software and click the ‘Manage Presentations’ link. Select the presentation that contains the
PowerPoint file, then click on the icon that represents the PowerPoint file.
To preview the PowerPoint file
currently being used
Simply click the ‘View’ link to the right of the
icon representing the PowerPoint file. The
PowerPoint file will be downloaded to your
computer temporarily which may cause a
security dialog to be displayed. Depending
on the format of the file – PPT or PPS – and on the software installed on the computer, the PowerPoint file will
open in whichever application is configured to play that type of file – such as PowerPoint or PowerPoint Viewer.
Close the application to return to the PowerPoint editing page.
To change the PowerPoint file being used
Click the ‘Change’ link to the right of the icon representing
the PowerPoint file. Click the browse button. Navigate to
the PowerPoint file you wish to use and then click ‘Send File’.
You can send a file from any location that you can browse to,
such as USB drives, network drives, or your ‘my documents’
folder. NOTE: When you ‘send’ a file, the original file is deleted. To change back you must send the original file
again. Please make sure you have a copy of the original file before you replace it. Depending on your network
conditions, it may take a few moments to upload your shockwave file to the player.
SWEP will interrupt presentation playback for the duration of the upload. The presentation that is scheduled
to playback at the current date and time will be loaded once the PowerPoint upload is completed. Please
check the ImageFlyer Schedule to ensure there is a default presentation – otherwise ImageFlyer will not be
able to restart a presentation. Scheduling is described in more detail later in this guide.
V2.1
Page 24
SWEP Client User Manual
2.2 - Manage Presentations – Network import.
SWEP is able to import presentations that are stored on a shared drive. The shared drive might be on another PC
on your network, or in a file share protected by a domain controller. This function is useful for those users who
have no access to their local hard disks. It allows them to design a presentation and then transfer the
presentation to the player where it will run locally.
This feature is for advanced users and requires several configuration steps. These are covered in more detail in
Appendix A - ‘SWEP Client Network Import’.
2.3 - Manage Presentations – Upload Presentations from
archives
ImageFlyer Archiver is a utility that allows for the easy distribution of presentations, complete with all their
media. ImageFlyer Archiver creates IFZ files that contain the presentation SIF as well as all the media that the SIF
depends upon. SWEP has a feature that allows you to import an IFZ file into the player via SWEP. In doing so, the
presentation and all its content will be unpacked into a suitable folder.
2.3.1 - To upload an IFZ file
Log into the SWEP software and click the ‘Manage
Presentations’ link. Click the upload button above the
presentation list, to the right of the ‘Upload presentations from
archives’ text.
Click the browse button. Navigate to the IFZ archive file you
wish to upload and then click ‘Send File’. You can send an
archive file stored in any location that you can browse to, such as USB drives, network drives, or your ‘my
documents’ folder. NOTE: The IFZ file is not sent to the player – only the content of the file is extracted. Please
keep the original IFZ in case you wish to use it with additional players. Depending on your network conditions and
overall size of the IFZ file - it may take several minutes to upload your archive file to the player.
The presentation will be unpacked to a subfolder of your site root. If your site root is the default of C:\ImageFlyer
and the presentation is named Sample.SIF, then the presentation will be unpacked to
C:\ImageFlyer\Sample\Sample.SIF. All the presentation elements will be unpacked to subfolders at the same
level as the SIF file. If there are elements in the original SIF which were not stored in subfolders at the same level
as the SIF, these will be stored in an ‘External’ subfolder. Please see below table for clarification.
Original SIF
New Location
C:\imageflyer\MyCompany\MyLayout.SIF
C:\imageflyer\MyCompany\MyRSS\RSS.XML
\\MyServer\Media\Events\Jun10\movie.avi
C:\imageflyer\MyLayout\MyLayout.SIF
C:\imageflyer\MyLayout\MyRSS\RSS.XML
C:\imageflyer\MyLayout\External\movie.avi
V2.1
Page 25
SWEP Client User Manual
For further information on ImageFlyer Archiver, please refer to its separate user manual.
2.4 - Manage Presentations - Rescan Presentations.
SWEP automatically reads the presentations stored in your site root, whenever you log in to the software. This
assumes the checkbox “Check for new presentations after login” remains ticked.
If you are aware that a presentation has changed since you last logged into the system – for example – if you used
ImageFlyer to directly add an additional Picture Folder – then you need to manually re-scan the presentations in
order to be able to work with the changes that have been made.
You also need to rescan presentations if:
1. You add a new SIF or delete a SIF using Windows File Sharing
2. You upload a replacement .SIF using SWEP
3. You adjust a SIF file using another computer either directly in ImageFlyer or in SWEP
You do not need to rescan presentations if only media has changed, as SWEP checks presentation media each
time the media type is edited.
To rescan the presentations, click the ‘Rescan Presentations’ button at the bottom of the presentation list.
V2.1
Page 26
SWEP Client User Manual
Section Three
Administrative guide to SWEP advanced features.
V2.1
Page 27
SWEP Client User Manual
3.1 - Configure This Server.
The ‘Configure this server’ page allows you to choose where presentations are found; adjust the ImageFlyer
schedule; reset the administrator password and perform other administrative functions. ‘Configure this server’ is
reached from the main menu, after logging into the SWEP software.
3.1.1 - Setting the site root
The site root is the folder on the player which is used to store presentation SIF files. The folder is entered as if it is
being viewed from the player and must begin with ‘C:\’. For clarification, C:\ represents the hard disk on the
player PC.
To change the site root, you need
to type the new path to the
presentation folder, then click
‘Change’
Every site root that has been successfully used is stored in the ‘Select Site Root’ drop down list. You can also
select a recently used site root from this list, to begin working on presentations stored in a different location.
NOTE: At the current time, you cannot remove an unused entry from the ‘Select Site Root’ drop down list.
V2.1
Page 28
SWEP Client User Manual
If the site root has not previously been used – the schedule display will disappear and a prompt to ‘click here to
populate the database’ will be shown. This means that at the current time, SWEP has not scanned the
presentations in the site root and is unaware of the folder content.
Click the link to be taken to the ‘Manage Presentations’ page. On this page, in place of the presentation list, there
will be a button named ‘Get Installed Presentations’. Click this button to scan the presentations and build the
presentation list. You can then return to the ‘Configure this Server’ page using the ‘Back to Admin’ button.
3.1.2 - See what’s onscreen now
The button ‘See What’s Onscreen Now’ is a
shortcut to the ‘View ImageFlyer Status’
page. Please refer to ‘View ImageFlyer
Status’ later in this guide.
3.1.3 - Reload ImageFlyer Schedule
The ‘Reload ImageFlyer Schedule’ button re-reads the contents of the ImageFlyer schedule file and displays it in
SWEP. This is very useful if you think the schedule may have been changed since you logged into SWEP or if the
schedule you can see contains presentations that relate to a short-term event such as a Hot-Call button press or a
PowerPoint file changeover. It also reveals the results of any Presentation Groups you have added. More
information on Presentation Groups is included later in this guide.
3.1.4 - Editing the ImageFlyer Schedule
V2.1
Page 29
SWEP Client User Manual
SWEP provides powerful schedule editing tools so that you can maintain playback of relevant information at all
times. It is no longer necessary to interrupt playback to make changes to the schedule file
Before making changes to the schedule, please ensure the default schedule in SWEP is also the default
schedule in ImageFlyer. See the section below ‘Change Schedule Location’.
3.1.4.1 - To edit the schedule
Log into the SWEP software and click the ‘Configure this server’ link. If necessary, click the ‘Reload ImageFlyer
Schedule’ button so that the correct schedule information is displayed.
The schedule is displayed in a table. ‘From’ is the start time for the presentation and ‘To’ is the end time of the
presentation. The end time is only effective if there is a default presentation –or- a presentation defined that
starts on or after the end time on the relevant date. The date defines the day or days on which the ‘From’ and
‘To’ times are effective. The name is the presentation filename. For clarification please refer to the table below.
From Time
To Time
Current time
Is there a default
Result
presentation?
09:00
10:00
09:15
Yes
Scheduled presentation
09:00
10:00
10:15
Yes
Default presentation
09:00
10:00
10:15
No
Previously scheduled
presentation
3.1.4.2 - To add presentations into the schedule
1.
Click on the ‘Presentation’ drop down list and choose the presentation file you would like to schedule. You
can only schedule presentation files that are stored within the SWEP site root.
2. Type in the start time and end time (if applicable) into the ‘From’ and ‘To’ fields.
3. Select how you would like the schedule to be applied using the options below:
• ‘ONLY THIS DATE’
This option is used for showing a presentation on one date only and can be combined with times of day. Enter
the date in dd/mm/yy format in the field on the right. This could be used to schedule any future date and is most
likely used to show presentation data that has been designed for a specific event such as Parents evening at a
school or Product launch at an office.
From Date/Time
To Date/Time
Current date/time
Is there a default
Result
presentation?
V2.1
Every day 09:00
Every day 17:00
09:15
Yes
Daily presentation
21/05 09:00
21/05 10:00
21/05 09:15
Yes
Special presentation
Every day 09:00
Every day 17:00
17:30
Yes
Default presentation
Every day 09:00
Every day 17:00
17:30
No
Daily presentation
Page 30
SWEP Client User Manual
• ‘OR EVERY’
This option allows you to display a different presentation on a weekly basis and can be combined with times of
day. There are two ways to configure this – either select to display a different presentation on a specific
weekday, -or- select to display a presentation on every day except a specific weekday. This option can be used to
configure complex schedules rapidly. You might want to set up a schedule that displays a standard presentation
on 6 days and a special presentation on a Tuesday. To do so requires 2 steps, not 7. Simply select the daily
presentation and choose “Day” from the “or every” field. The select the Tuesday presentation and select
“Tuesday” from the “except” field.
From Date/Time
To Date/Time
Current date/time
Is there a default
Result
presentation?
Every day except
17:00
Monday 09:30
Yes
Daily presentation
Saturday 09:00
17:00
Saturday 09:30
Yes
Saturday presentation
Every day except
17:00
Monday 17:30
Yes
Default presentation
17:00
Monday 17:30
No
Daily presentation
17:00
Saturday 17:30
No
Saturday presentation
Saturday 09:00
Saturday 09:00
Every day except
Saturday 09:00
Saturday 09:00
• ‘IF IDLE FOR’
If your screen layout is interactive – i.e. it contains ImageFlyer Control Files – then you can use ‘If Idle For’ to
return to a default presentation if there is no user activity. For example – if you had a suite of presentations with
information for visitors, a visitor may navigate to information that is specific to their interest which may not
attract the next person passing by. This feature allows the ‘front screen’ presentation to be re-displayed after the
number of seconds you define. Simply enter the number of seconds into the ‘seconds’ field on the right. NOTE:
If this schedule entry is present, it will be applied at all times.
• ‘IS THE DEFAULT’
This option defines the presentation that will be displayed when there is no other presentation scheduled for
display. If this is the only entry in the schedule, then ImageFlyer will always open the defined presentation. If this
rule is present, it will be applied at all times.
Having selected and customised one of the options above, click ‘ADD’. The schedule is then updated with your
changes but will not be saved until you click the ‘Save Changes’ button.
When you save a schedule, the presentation on screen will change depending on what the schedule defines
should be being shown.
V2.1
Page 31
SWEP Client User Manual
3.1.4.3 - Editing and/or replacing an entry in the schedule list
When you click on an entry in the schedule list, the settings are restored to the various fields on the page. You
can make adjustments and then click the ‘REPLACE’ button.
3.1.4.4 - Remove an entry from the schedule list
If you would like to remove an entry from the schedule list – simply click the entry and then click the ‘REMOVE’
button.
When you have finished making adjustments to the schedule, please remember to click the ‘Save Changes’
button.
3.1.5 - ImageFlyer Schedule - Presentation Groups
A new feature in this version of SWEP is the ability to create complex schedules with ease, through the use of
Presentation Groups. With a Presentation Group you can create a sequence of presentations and have the
sequence repeat continuously.
3.1.5.1 - To create a presentation group
1. Click “Configure Groups”
The ‘Configure presentation groups’ page is displayed. A list of all existing presentation groups is shown on
this page.
2. Click “Create New”.
3. Give your presentation group a
memorable name by typing into the
‘Name’ field.
4. Select a presentation that you would
like to use, from the ‘Presentation’
drop down list.
V2.1
Page 32
SWEP Client User Manual
5. Choose a duration for the display of this presentation by typing number in the ‘Minutes’ and ‘Seconds’ fields.
6. Click ‘Add’ to add the presentation to the group list. The name and duration of each presentation is displayed
in the table.
7. Repeat steps 4, 5 and 6 until you have all the presentations you wish to use, added to the group.
8. Click ‘Save Changes’, then click ‘Back’ to return to the ‘Configure Presentation Groups’ list.
3.1.5.2 - To Edit a Presentation Group
1. From the ‘Configure this server’ page, select ‘Configure Groups’
2. Click the name of the group you would like to make changes to.
3. You can add additional presentations to the group using the instructions in the previous section.
4. To REPLACE a presentation in the group list, click the presentation so that it is highlighted. Choose a new
presentation from the ‘Presentation’ drop down list. Then click the ‘Replace’ button
5. To REMOVE a presentation from the list, click the presentation so that it is highlighted, then click the
‘Remove’ button
6. When you are satisfied with the list, click the ‘Save Changes’ button, then click ‘Back’ to return to the
‘Configure Presentation Groups’ list.
3.1.5.3 - To Delete a Presentation Group
1. From the ‘Configure this server’ page, select ‘Configure Groups’
2. Click the ‘Delete’ button to the right of the group you wish to delete. Then click OK.
3.1.5.4 - Scheduling a Presentation Group
In order for SWEP to generate a schedule file that acknowledges the intentions of your presentation group, it is
necessary to add the Presentation Group to the playback schedule.
You can add the Presentation Group to the schedule using any of the scheduling options with the exception of ‘Is
the default’. Presentation Groups cannot be set as a default presentation.
1. From the ‘Configure this server’ page – select the presentation group you would like to schedule using the
‘Presentation Group’ drop down list.
2. Select the scheduling options in the same way as you would when scheduling an individual presentation.
3. Click the ‘Add’ button to the right of the Presentation Group drop down list.
The Presentation Group is added to the schedule.
You can also remove and replace a presentation group in exactly the same way that you would with a stand
alone presentation.
When you have finished making adjustments to the schedule, please remember to click the ‘Save Changes’
button.
V2.1
Page 33
SWEP Client User Manual
When a schedule containing a presentation group is saved, SWEP generates a schedule file that contains all the
required schedule changes. Depending on the options you have chosen, there may be a large quantity of items
listed in the schedule. You will not see the newly adjusted schedule until you click the ‘Reload ImageFlyer
Schedule’ button.
NOTE: Generating the schedule requires that Sedao Port Control is running on the playback PC. This
application is installed automatically by SWEP and runs as a Windows taskbar item.
3.1.6 - Configuring the schedule file used by SWEP.
SWEP uses the ImageFlyer schedule file to direct ImageFlyer to play presentations based on the scheduling
options you have chosen. In order for this to function, the default schedule file set in ImageFlyer must be the
same as the one set in SWEP.
To check the default ImageFlyer schedule location, open the ImageFlyer control panel and choose Controls > Time
Setting > Configure. The schedule filename is shown in the title bar of the Window. For further information on
ImageFlyer, please refer to the separate ImageFlyer manual.
To change the schedule file in use, please type the new schedule file path into the ‘Change Schedule location
field. Then click the ‘Change’ button. The schedule file is referenced as though you are using the player PC – so
be aware that the C:\ is the player and not the PC you are using SWEP from.
3.1.7 - Setting the SWEP administrator password.
In SWEP, there is a single administrator account
that gives access to all the SWEP functions. The
default password for the account is ‘admin’. We
recommend that you change this password to
secure your SWEP environment. When
changing the password, be sure to keep the details in a safe place. If the password is lost, you will need to
remove SWEP and reinstall a new copy. This will cause the loss of all the information and configuration settings
stored in the SWEP database.
To change the password, simply enter your chosen password into the ‘new password’ and ‘repeat password’
fields. Then click ‘Change’.
V2.1
Page 34
SWEP Client User Manual
3.1.8 - Changing the SWEP Serial Number.
The SWEP serial number is entered for you at the factory if you have purchased Sedao hardware. If you have
purchased SWEP separately, the serial number must be entered before you can use SWEP for the first time. Every
SWEP on your network must have a different serial number to function properly. In the event that you need to
change a SWEP serial number, you can do so using the ‘Change Serial number’ button located on the ‘configure
this server’ page.
Enter your
replacement serial
number into the
relevant boxes
then click the ‘Authorise’ button.
3.1.9 - Configuring Network Drives
SWEP can be configured to import presentations from a network drive. This may be a drive mapped to a
workgroup file share or a domain based file share. One of the steps in the process is to confirm to SWEP which
drive letters are mapped to network shares.
This feature is for advanced users and is one of several configuration steps that are required. The complete
process is covered in detail in the supplement ‘SWEP Client Network Import’.
3.1.10 - Backing up the SWEP database
The SWEP database contains all your
SWEP configuration settings and
includes data that may take time to
replicate such as user accounts and
permissions. From time-to-time it is
sensible for you to backup the database
such that it will be easier to recover it in
the event of issues with your playback device.
In the ‘Configure this server’ page, click the ‘Backup’ button.
Existing backups are listed for convenience. Please type a new filename in the format filename.SQL. NOTE: You
can only enter a filename – not a drive or folder. The filename must also end “.SQL”. Click the ‘Backup’ button
when you have named the file. The backup will be completed and you will return to the ‘Configure this server’
screen.
The backup file is located in the folder: C:\www\swepnet\website\sedao_core\backups. You should make sure
there is a procedure in place to backup the file to a secure location.
V2.1
Page 35
SWEP Client User Manual
3.1.11 - Restoring the SWEP database
If your SWEP hardware has been replaced, you may wish to restore a backup you have made of your SWEP
configuration. The configuration information includes user accounts and their assigned permissions.
To restore a backup, first restore the folder C:\www\swepnet\website\sedao_core\backups from the location
you have previously backed it
up.
From the ‘Configure this
server’ page click the ‘Restore’
button. Click on the SQL file
that represents the SWEP data
that you wish to restore. You
can only choose SQL files that are on this list – please do not type into the filename field.
Click the ‘Restore’ button to start the restore process. You will be returned to the ‘Configure this server’ page
once the restore is complete.
3.1.12 - Initialising the SWEP database
WARNING: This is a destructive process and you should ensure you have a backup of any SWEP data you
need to restore before proceeding.
If your SWEP is not acting in the expected way, it is possible that the database it uses has become corrupted. You
can use the ‘Initialise Database’ function to clear the database and start SWEP as if it has just been installed.
Although you may not need it – please ensure you have Your SWEP Serial number to hand.
To initialise the database, click the ‘Initialise’ button on the ‘configure this server’ page. You will proceed to the
SWEP Setup Screen.
The ‘Default Site Root’ needs to be adjusted to show the folder where ImageFlyer SIF files have been saved.
SWEP will look for presentation files in this folder and any subfolders. The default site root is ‘C:\ImageFlyer’.
Please enter a username and password according to your preferences. Then click ‘SUBMIT’ to save the details.
Please keep the details used for the administrator username and password in a safe place. If these details
are lost, the only option is to delete the SWEP configuration and start from a clean installation.
V2.1
Page 36
SWEP Client User Manual
3.2 - Creating New Users
One of the most powerful features of SWEP is it’s ability to allow administrators to create ‘users’ that can be
assigned permissions to only perform specific functions with specific presentations.
A SWEP administrator always has full control over the player. A SWEP User has no permissions until the SWEP
administrator assigns some. The permissions can be quite flexible. As an example, you may want to create a user
whose only ability will be to change the RSS on a single presentation.
Log into SWEP as an administrator and select ’Configure Users’ from the main menu.
3.2.1 - To Create a New User:
Click the ‘CREATE NEW USER’
button. Complete the following
fields:
‘USERNAME’
The username will be used
each time your user wishes
to login to SWEP.
‘NAME’
For your reference, this
should be the full name of
the user.
‘EMAIL’
‘PASSWORD’
‘REPEAT PASSWORD’
For your reference– this should be an email address where you can reach the user.
This is the password your user needs to use to log into SWEP
To ensure you typed the password correctly, please type it a second time.
The ‘Allow this user to edit the schedule’ checkbox defines whether your user is able to enter the schedule page
in SWEP and potentially change the playback schedule and the currently playing presentation.
The ‘Allow this user to change colour projects’ checkbox defines whether your user is able to change the colour of
elements, where such options are
presented. For example, will they be able
to change the colour of RSS text.
3.2.2 - Editing an existing user:
To edit the details previously entered for a
SWEP user, simply click the users name in the ‘Configure Users’ page. A screen resembling the ‘Create a new
user’ screen will appear, pre-filled with the users existing details. If you do not enter the users password on this
screen, the existing password will be retained. Any of the details can be updated individually, except the
password which must be entered in both the ‘password’ and ‘repeat password’ fields.
V2.1
Page 37
SWEP Client User Manual
3.2.3 - To delete an existing user
On the ‘Configure Users’ page, click the ‘DELETE USER’ link to the right of the user to be deleted.
NOTE: The user is instantly deleted, along with all the permissions that they used to have.
3.2.4 - To configure the permissions assigned to each user
Once you have created your user accounts to assign to your different members of staff – you need to assign
permissions for editing presentation elements to the appropriate members of staff. New user accounts have no
permissions by default and will only be shown the ‘logout’ button if they try to login.
From the ‘Configure Users’ page click the ‘edit user permissions’ link, next to the user you wish to assign
permissions to.
A list of presentations available on the PC
is displayed.
NOTE: In the presentations list, the tick
boxes indicate whether permissions have
been assigned in the related presentation.
If they have been assigned, the checkmark will be present. Ticking or un-ticking the checkboxes on this page has
no effect and any changes to these checkboxes will not be saved.
Click the name of the presentation that you wish this user to be able to make changes to. You will then be shown
a list of the presentation elements for which permissions can be assigned.
NOTE: You can assign permissions for WAV Audio and for Audio files, but at the current time, SWEP does not
support user editing of these elements.
Similarly, the ‘Colour’ element is reserved
for future use.
Click the checkbox beside the element you
would like your user to be able to edit.
They can be assigned permission to edit
any element that SWEP offers editing
facilities for.
When you have assigned permission for the required elements, click the ‘UPDATE PERMISSIONS’ button. Then
click ‘Back’ to return to the presentations list.
You can continue to assign permissions in other presentations if required. When you have assigned permissions
in all the presentations you wish the user to have access to – simply click ‘BACK’ to return to the User List.
From the user list, you can continue creating and editing users, or click ‘BACK’ to return to the main menu
V2.1
Page 38
SWEP Client User Manual
3.3 - View ImageFlyer Status
The ‘view ImageFlyer status’ page in SWEP allows you to view thumbnails of the presentation currently being
displayed. It also has an option that allows you to take control of the playback device.
When you click ‘View ImageFlyer Status’, the
following screen is shown:
The current presentation name and presentation
file path are confirmed at the top of the page.
The presentation thumbnail is also shown.
The presentation thumbnail is updated by
ImageFlyer every 60 seconds and is updated only
is certain ImageFlyer settings have been correctly made. A summary of the required settings is included in
Appendix A. The ImageFlyer manual contains further information.
This page automatically updates every 5 seconds. Depending on your web browser security settings, you may be
prompted that data is being sent upon each refresh. This is normal and not a cause for concern.
3.3.1 - Viewing the screen Live!
Sedao hardware players come with a VNC server application pre-installed. This allows you to view the player
screen in ‘almost’ real-time and also allows you to directly control the player as if you have plugged a keyboard
and mouse into the player hardware.
Pre-Requisites:
1. If you have not purchased Sedao hardware, you can download a VNC server from http://TightVNC.com. This
needs to be installed as a service on your player hardware. To do so, you will need to connect your own
keyboard and mouse directly to the player.
NOTE: You do not need to add VNC software to the computer you are using to view the player.
2. Your firewall needs to allow traffic on ports 5800 and 5900
3. The computer being used to view the player must have the Java Runtime installed. You can obtain this from
http://www.java.com
V2.1
Page 39
SWEP Client User Manual
To view the player from your management PC
Log into SWEP and navigate to the ‘View
ImageFlyer Status’ screen.
Click the ‘Click here to view your screen
live!’ link.
In the VNC authentication field, type your
VNC password and then click OK. The VNC
password was set by you when you installed the VNC server on the player. If you are using Sedao hardware, the
VNC default password is ‘admin’. The VNC password can be reset in the VNC server options.
For information on the VNC server options and the VNC Java Viewer options, please refer to the VNC website for
the relevant VNC documentation.
When you are finished with the connection to the player, please click the ‘Disconnect’ button at the top of the
screen. Then close the VNC viewer window to return to SWEP.
3.4 - Using Hot Call Buttons
One of the newest features in SWEP is the Hot Call buttons. This allows you to create floating buttons within the
SWEP website that allow you to make a complete and immediate change of layout for a pre-set amount of time –
after which, the original schedule is restored. This can be useful in many ways. For example, in a retail
environment, it can be used to ‘Call’ the next customer waiting in a queue – or in an education environment it
might be used to bring up important notices such as ‘Quiet Please – examination in progress’.
Only an administrator can set up Hot Call buttons. An administrator can use any hot call button. Users can only
use hot call buttons assigned to them.
Before you set up a hot call button, you need to perform the following tasks
1.
Configure the presentation that will be temporarily displayed. This can contain any ImageFlyer presentation
content. If the presentation will be displayed for less than 30 seconds, it makes sense to keep the
presentation simple to reduce loading time. The presentations must be saved within the SWEP site root.
2. Configure user accounts for the person(s) who will be able to activate the hot call buttons.
V2.1
Page 40
SWEP Client User Manual
3.4.1 - Adding a new Hot Call
button.
From the SWEP main menu, click the
‘Configure Hot Call buttons’ link.
Click the ‘CREATE NEW’ button.
The HotCall button editing screen will be
displayed.
In the name box, type a descriptive name for the
button to help administrators recall the buttons
function. This name becomes the link used to edit
the button.
For the button text – type a short description of the
buttons function for end users. This appears on the
actual button that is created.
For event type – choose between ‘Presentation’ –
where a press of a hot call button is used to
activate a presentation. Or select ‘System Command’ to have the button activate a system command. Further
information on how to configure system commands is included later in this guide.
If you chose ‘Presentation’ – select the presentation to be displayed, from the ‘Presentation’ drop down list. If
you selected ‘System Command’, select the command to be activated from the ‘command’ drop down list. Only
the appropriate list will be displayed.
Use the ‘Time On Screen’ drop down lists to select the date, hours, minutes and seconds that the presentation
will be displayed for once the hot call button has been clicked. NOTE: This has no effect over a system command.
Finally, select the users that can activate the hot call button by ticking their names in the ‘Users for...’ list. If no
users are selected, the button will only appear for the administrator.
Click ‘Save’ to create the button, then ‘Back’ to return to the hot call button list.
3.4.2 - Editing a hot call button
To edit a hot call button, simply log into SWEP – click the ‘Configure Hot Call buttons’ link. Then click the link
representing the button you wish to make changes to. Remember to click ‘Save’ after making the changes. The
changes that can be made are the same as described in the ‘Adding a new hot call button’ section above.
3.4.3 - Deleting a hot call button
To delete a ‘hot call’ button, simply click the ‘delete’ button next to the name of the button you need to be
removed. Click OK to confirm that the button should be deleted.
3.4.4 - Enable Hot Call Buttons checkbox
This checkbox on the ‘Hot Call buttons’ list screen enables or disables the ‘Hot call buttons’ functions globally. If
the checkbox is ticked, then ‘Hot call buttons’ act as described above. If this checkbox is unchecked, the ‘Hot call
buttons’ will not appear for any users.
V2.1
Page 41
SWEP Client User Manual
3.4.5 - Enable Event Sharing checkbox
This checkbox on the ‘Hot Call buttons’ list screen enables or disables the Hot Call Buttons event sharing. If this
button is checked, the hot call events will be copied as files to the ‘C:\ImageFlyer\Schedule-Sync’ folder. If this
button is not checked, then the events will take place only on the local machine.
To share events with other machines, you will require a copy of Sedao Content Manager (available separately).
Set a Content Manager task on the player PC as follows:
Source:
C:\ImageFlyer\Schedule-Sync
Type:
Backup Changed Files
Destination(s) \\PlayerName\ImageFlyer\Schedule_Sync
PlayerName can be the DNS name or IP address of the player.
Pre-Requisites for sharing events:
1. Port Control must be running on the source and every destination PC. Port Control is installed by SWEP and
starts automatically with Windows.
2. The “C:\ImageFlyer\Schedule_Sync “ folder on each target PC will need to be visible across the network to the
source player PC. This is pre-configured for you on Sedao hardware players.
3. Content Manager must be installed, licensed and running on the source player PC with the task properly
configured as above.
4. Each destination PC must have a local copy of the ‘Hot Call’ presentation in the same folder structure as the
source PC.
5. Each PC must have a default presentation in the schedule. Otherwise the hot call presentation will continue
to run indefinitely once it has been triggered.
Assuming all the above details have been configured, pressing a hot call button configured on the source PC – will
cause the event to be triggered on the source and all destination PC’s simultaneously.
3.5 - Setting up System Commands
SWEP can be configured to launch any system command according to a schedule. A system command can be any
command that can be issued at the command line. The scope of commands available depends on your operating
system and applications you have installed. Before system commands can be scheduled, they must be defined in
the ‘Configure System Commands’ page of
SWEP.
SEDAO COMMANDS:
Sedao commands are pre-configured in
SWEP and cannot be removed or modified
USER COMMANDS:
These are commands that the SWEP
administrator has added to the system.
V2.1
Page 42
SWEP Client User Manual
3.5.1 - Creating a new command using a Sedao command as a template.
Sedao have pre-configured a number of commands. ShutDown contains the syntax used to shut down the local
PC. ImageFlyer contains the syntax used to launch the ImageFlyer software.
To create a command based on one of the above, click the relevant command in the ‘Sedao Commands’ list. Click
OK on the prompt that you will be creating a new command. You will be shown the ‘Edit command’ page. Please
see ‘creating a new system command’ below for further details.
3.5.2 - Creating a new system command
Click the ‘Create new’
button under the ‘User
Commands’ list.
Name: This field is the
friendly name for the
command which is used
to identify the commands
purpose in the commands
list.
Program: This is the full path to the executable name that the system command will launch. An example is
shown in the above illustration. If the path contains spaces, please enclose the entire command in speech marks.
Note: This must be the full path to the EXE. SWEP is unable to search for programs even if they can be run as
executables off the command line. For example:
This will work:
C:\Windows\System32\Calc.exe
This will work:
“C:\Program Files\Windows NT\Accessories\wordpad.exe”
This will NOT work: C:\Windows\System32\Calc
This will NOT work: calc.exe
This will NOT work: C:\Program Files\Windows NT\Accessories\wordpad.exe
Parameters: These are parameters that you wish to pass to the command. These may be option switches or the
path to a file. If your command was for WordPad, you could pass it the name of a document to open.
When you have finished editing your command, click the ‘SAVE’ button – then click the ‘Back’ button to return to
the commands list page.
3.5.3 - To edit an existing user command
If you wish to edit an existing user command, simply log into SWEP – click the ‘Configure system commands’ link,
then click the name of the user command you wish to edit.
You may only edit user commands. You cannot change Sedao Commands.
3.5.4 - To delete a user command
To delete a user command, simply click the delete button to the right of the command link. Click OK to confirm
the command should be deleted. NOTE: Deleted commands can never be recovered.
You can only delete user commands. You cannot delete Sedao commands.
V2.1
Page 43
SWEP Client User Manual
3.5.5 - Upload new command set
This button is reserved for future features and currently has no use for administrators.
3.5.6 - Upload new command schedule
This button is reserved for future features and currently has no use for administrators.
3.6 - Schedule System Commands
Once you have configured your system
commands you can add them to the
schedule so that they will be executed at
the required time(s).
The schedule list shows the times, dates
and command names that are scheduled.
3.6.1 - Adding a command to the
schedule
On the command schedule page, click the
‘Command’ drop down list and select the
command you would like to schedule.
Type the time you would like to schedule the command into the ‘At’ box.
To schedule the command on a specific date, click the ‘Only This Date’ option and then enter the required date
into the field on the right.
To schedule the command to occur regularly, click the ‘Or every’ option, then either
a) If the command is executed once a week, select the day of the week you would like the command executed on
b) If the command is executed every day, select ‘Day’ from the dropdown list. You may also optionally select one
day each week that the command will NOT be executed.
The ‘Or Every’ option can be very flexible as you can set up different commands or different times for each day of
the week. For example, you could have the player shut down at 5pm every day except Sunday, when a separate
command tells it to shut down at 3pm.
When you have configured each command, click ‘Add’ to add the command to the schedule. Then click ‘Save
Changes’ to save the schedule.
3.6.2 - Editing a command that is in the schedule
If you wish to make changes to a command in the schedule – simply click on the command in the schedule list.
The time and dates will change to reflect the current settings in the command. Make your changes to the time,
date or days – then click the ‘REPLACE’ button. The command in the schedule will be updated. REMEMBER: You
must save the schedule using the ‘SAVE CHANGES’ button for the changes to be effective.
V2.1
Page 44
SWEP Client User Manual
3.6.3 - Removing a command that is in the schedule
To remove a command that is schedule, simply highlight the command in the schedule list, then click the
‘REMOVE’ button. The command is removed instantly. The only way to reverse this action is to not save the
changes to the schedule. REMEMBER: You must save the schedule using the ‘SAVE CHANGES’ button for the
changes to be effective.
The System Commands schedule relies upon the Sedao Port Control application – which must be running on
the playback PC. This application is installed automatically by SWEP and runs as a Windows taskbar item.
V2.1
Page 45
SWEP Client User Manual
Appendix A
Administrators Guide to Network Import Function
V2.1
Page 46
SWEP Client User Manual
A.1 - Introduction
The SWEP network import functions have been added to the SWEP software to enable users that have restrictions
on saving items to their local disks, to be able to import presentations from a network share. In this way, if a
person cannot create a presentation on their own PC using the C: drive, they can instead create a presentation
using a ‘mapped drive’ and then import the presentation to the Digital Signage player such that ImageFlyer is able
to play back the presentation.
A.1.1 - What is a mapped drive?
A mapped drive is a drive letter that represents a shared UNC path on another PC. For example, you may have a
central PC named \\companystorage. That PC may have a shared folder called ‘Presentations’. The UNC path you
would use would be \\companystorage\presentations. A mapped drive can substitute the entire UNC path for a
single easy-to-use drive letter. For example P:\
To create mapped drive, open ‘My Computer’. Click the Tools menu, then select “Map Network Drive”.
Select a drive letter, type your UNC path into the ‘Folder’ field, then click ‘Finish’. If you need to enter credentials
for the connection click on “connect using a different user name” and then enter the required details.
V2.1
Page 47
SWEP Client User Manual
A.2 - Configuring a user account to be used by SWEP
On the PC that is running the new SWEP client, you must have a user account that has access to the shared folder
storing the presentations. This can be the current user account or may be any other user account. The account
you select:
a.) must have a password set
b.) must have access to the shared network folder
To add user accounts, please consult Windows help, or ask your IT Support desk.
A.3 - Starting SWEP Network import
The SWEP network import features are fully integrated into the SWEP user interface. For additional information
on running SWEP, please see the main section of the “SWEP Client User Guide”.
A.3.1 - Configuring your mapped drives
In addition to configuring mapped drives in the “My Computer” window (See “What is a mapped drive?” above) –
you also need to create the same mapped drive configuration in SWEP.
Log into SWEP and click on “Configure this server”. Then click the ‘Configure’ button next to ‘Configure Network
Drives’.
1. Click ‘Create New’
2. Enter the required drive letter into the ‘Drive Letter’ field. Example: “S:”
3. Enter the required UNC path into the ‘UNC path’ field. The UNC path is in the format
\\computername\sharename - as per example illustrated.
4. Click ‘Update’
5. Repeat steps 1 to 4 for any additional drive mappings required.
6. Click ‘Back’ to return to the main menu.
You may also delete a drive mapping using the ‘delete’ button on this page.
V2.1
Page 48
SWEP Client User Manual
A.3.2 - Creating your presentations
On the PC that you use to create and edit presentations, you should also be using the same drive mappings.
Create the presentation using the mapped drive to store the presentation elements. An example folder structure
might be
S:\MyPresentation\MyPres.SIF
S:\MyPresentation\MyPics\
S:\MyPresentation\MyRSS\
S:\MyPresentation\MyScroller\
A.3.3 - Using the SWEP network import
To import a presentation from your network share, to the SWEP database for playback with ImageFlyer:
Log into SWEP and go to the ‘Manage Presentations’ screen.
In the ‘Username for user account with network access’ field, type the username of the account on the local PC
which has access to the network share. If the account is administered on a domain, the username should be in
the format “domain\username”.
In the ‘Password for user account with network access’ field, type the password for the account used in step 2.
In the ‘Full path to presentation or folder’, type the full path to the presentation – for example
‘S:\MyPresentation\MyPres.SIF’.
Click ‘Import’. Depending on the size of the media in the presentation, the import may take several minutes to
complete. The screen will refresh and the message ‘Import successful’ will be displayed.
V2.1
Page 49
SWEP Client User Manual
A.3.4 - Using SWEP to import a network folder
The network import can also parse all the SIF files in a specific network folder. In step 4 above, simply enter the
path to the folder containing SIF files. For example ‘S:\MyPresentation\Summer_Screens’.
A.4 - Troubleshooting
The following messages may be displayed at the end of the import process. Please take the appropriate action to
resolve the issue.
Authentication Failed
Please check the username and password for the local user account which has access to the network share.
If the problem persists and you are using a domain account, please contact Sedao technical support and ask
for an update to SWEP 2.1.7.
Could not start the task
An essential system component is missing. Please contact Sedao Support for advice.
Compression failure
An essential system component is not working as expected. Please contact Sedao Support for advice.
Presentation not found
Please check that the path you supplied for the presentation is valid.
Summary
Using the above information, you should now be able to import presentations into SWEP, for display using
ImageFlyer, from a shared folder on your network.
V2.1
Page 50
SWEP Client User Manual
Appendix B
Guide to Upgrading from previous SWEP versions
V2.1
Page 51
SWEP Client User Manual
B.1 – Introduction
If you have a previous SWEP version installed on your system – it may be possible for you to obtain an upgrade to
the latest release. Please check the current policies and pricing with your Sedao representative.
If a current version of SWEP is installed, the use of the full SWEP installer can result in loss of SWEP
configuration information and is NOT a supported upgrade path.
If you have run the incorrect installer, we may not be able to offer you support until you have completely
removed and then installed a new version of SWEP.
Before starting a SWEP upgrade please take a backup of your SWEP database. If possible you should have a
written record of your user accounts and user permissions – as well as a written record of any other SWEP
configuration settings. These will be valuable in the unlikely event of issues being encountered during the
upgrade.
SWEP installation requires that you are logged in with an account that has local administrator privileges.
B.2.1 – Checking your current SWEP version
The current version of SWEP installed on your PC is indicated on the SWEP login screen.
B.2.2 – Upgrading from SWEP versions 2.x.x (earlier than 2.1.7)
If your current version of SWEP is a version 2.x.x and is earlier than 2.1.7 – then you should use the upgrade
version of the installer. Instead of using the CD autorun menu, please run the executable: “setup-v2clientupdate-2.1.7.exe”. Please follow the simple on screen instructions to update SWEP to the new version.
If you have run the incorrect installer, we may not be able to offer you support until you have completely
removed and then installed a new version of SWEP.
B.2.3 – Upgrading from SWEP versions 1.x.x (equal to or later than 1.5.4)
If your current version of SWEP is a version 1.x.x and equal to or later than 1.5.4 – then you should use an
upgrade version of the installer. Instead of using the CD autorun menu, please run the executable: “setup-clientupdate-2.1.7.exe”. Please follow the simple on screen instructions to update SWEP to the new version.
If you have run the incorrect installer, we may not be able to offer you support until you have completely
removed and then installed a new version of SWEP.
B.2.4 – Unsupported upgrade paths.
We do not support upgrades from versions of SWEP earlier than 1.5.4. To upgrade from an earlier version, please
follow the un-installation instructions in B.2.5 and then treat the installation as a new install.
V2.1
Page 52
SWEP Client User Manual
B 2.5 – Removing SWEP from your system
You may need to remove SWEP from your system if any of the following events occur:
1. You wish to upgrade from a version earlier than 1.5.4
2. You have run an incorrect installer while trying to perform an upgrade
3. You have been directed to do so by Sedao.
To remove older SWEP versions, please follow this procedure:
In this procedure, whenever your PC prompts you to restart, you should do so immediately. Please do not
delay or ‘queue’ any requested restarts.
Not all features have been implemented in all SWEP versions, so some instructions may not apply in all cases.
1. Note down the configuration of items in SWEP that you may wish to recreate. The below is a guideline
that may not be exhaustive:
*Server settings
*User Accounts and User Permissions
*Hot Call buttons settings
*System commands and schedules.
2. Make sure you have written down your SWEP product key in case you need it. This is usually affixed to
the bottom of Sedao Hardware or on the paperwork generated when you placed your order.
3. Backup any presentation data on the player as a precaution.
4. Using the add/remove programs function in Control Panel
a) Remove Sedao Networked WebControl . There may be multiple entries if you have upgraded SWEP
in the past.
b) Remove Apache HTTP Server
c) Remove MySQL
d) Remove PortControlApplication
e) Delete the following folders on the PC
i) C:\PHP or C:\PHP-5
ii) C:\Program Files\Apache Group
iii) C:\Program Files\MySQL
iv) C:\sweptemp (if it exists)
v) C:\WWW
5. Restart the PC to ensure all relevant services have stopped and been removed.
Summary
Using the above information, you should now be able to upgrade your SWEP installation from any prior version.
V2.1
Page 53
SWEP Client User Manual
Further Information
Sources for Further Information
Your Sedao Representative
Your Sedao representative will be able to assist you with any problems or queries you may have, or put you in
direct contact with a technical specialist. Depending on your region, it may be possible to book on-site, off-site or
remote log-in training with Sedao through your representative. There is also a range of artwork, template and
screen creation services available on request. Software updates may also be available.
The Sedao Website
Create an account on the Sedao website to gain access to the latest software and further information and
assistance:
www.sedao.co.uk
V2.1
Page 54