1
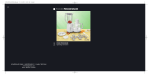
1
Trident 2.0 Help Documentation
And
User Manual
1704 Kennedy Pointe Suite 1100
Oviedo, FL 32765
Telephone: (321) 765-4947
E-Mail: [email protected]
www.scormsoft.com
2
Trident IDE - Introduction ............................................................................................................................................ 4
What's new in Trident 2.0? ...................................................................................................................................... 4
Requirements................................................................................................................................................................. 4
Updates ............................................................................................................................................................................ 4
What's new in Trident 2.0? .......................................................................................................................................... 4
SCORM 2004 3rd Edition........................................................................................................................................... 5
Run-Time Environment .............................................................................................................................................. 5
Run-Time API............................................................................................................................................................. 5
Run-Time Data .......................................................................................................................................................... 6
Conformance Requirement Validation ................................................................................................................. 6
SCORM Help Documentation ................................................................................................................................... 7
File Finder View............................................................................................................................................................. 8
Getting Started ................................................................................................................................................................. 9
Create new Content Package ...................................................................................................................................... 9
New Content Package Project Wizard .................................................................................................................. 9
Your Content Package Project............................................................................................................................... 11
Open existing Content Package................................................................................................................................ 13
New Content Package Project Wizard ................................................................................................................ 14
Your Content Package Project............................................................................................................................... 15
IDE Concepts ................................................................................................................................................................... 17
Workbench ........................................................................................................................................................................ 17
Workspace......................................................................................................................................................................... 18
Resources.......................................................................................................................................................................... 19
Refreshing and Filtering....................................................................................................................................... 19
Views and Perspectives................................................................................................................................................ 20
Editors................................................................................................................................................................................. 21
Multi-Page Editors ...................................................................................................................................................... 22
Default Editors............................................................................................................................................................. 22
Editor/File Associations............................................................................................................................................ 23
Cheat Sheets.................................................................................................................................................................... 24
Launching a Cheat Sheet ........................................................................................................................................ 25
Progressing through a Cheat Sheet.................................................................................................................... 26
Cheat Sheet Icons.................................................................................................................................................. 26
Cheat Sheet Toolbar ............................................................................................................................................. 27
Editors................................................................................................................................................................................. 27
Manifest Editor ................................................................................................................................................................ 27
Forms Page ................................................................................................................................................................... 28
Source Page ................................................................................................................................................................. 29
Editor Actions............................................................................................................................................................... 30
SCO HTML Editor ............................................................................................................................................................ 31
RTE JavaScript Editor ................................................................................................................................................... 34
LOM Metadata Editor .................................................................................................................................................... 36
Tasks ................................................................................................................................................................................... 37
3
Content Packages................................................................................................................................................... 37
Manifest Files ........................................................................................................................................................... 38
Create new Content Package .................................................................................................................................... 38
New Content Package Project Wizard ................................................................................................................ 38
Your Content Package Project............................................................................................................................... 40
Open existing Content Package................................................................................................................................ 42
New Content Package Project Wizard ................................................................................................................ 43
Your Content Package Project............................................................................................................................... 44
Add Resources................................................................................................................................................................. 46
File Finder.................................................................................................................................................................. 46
Copy-n-Paste ........................................................................................................................................................... 47
Drag-n-Drop............................................................................................................................................................. 47
Import Resources........................................................................................................................................................... 47
Import Wizard ......................................................................................................................................................... 47
Copy-n-Paste ........................................................................................................................................................... 49
Drag-n-Drop............................................................................................................................................................. 49
Validate a Content Package ....................................................................................................................................... 49
Launch a Content Package ......................................................................................................................................... 52
Save a Content Package.............................................................................................................................................. 53
Set Content Package as Template........................................................................................................................... 54
Creating a SCO File ....................................................................................................................................................... 56
Add Resources to Manifest ......................................................................................................................................... 58
Drag-n-Drop............................................................................................................................................................. 58
Resources Menu...................................................................................................................................................... 59
Add Activities to Manifest............................................................................................................................................ 59
Acitivity Tree ............................................................................................................................................................ 60
Add Activity .............................................................................................................................................................. 60
Set Resource ............................................................................................................................................................ 61
Define Metadata in the Manifest .............................................................................................................................. 63
Add Metadata........................................................................................................................................................... 63
Metadata Form ........................................................................................................................................................ 64
Define Sequencing in the Manifest.......................................................................................................................... 65
Add Sequencing ...................................................................................................................................................... 65
Sequencing Form ................................................................................................................................................... 66
Run-Time Environment (RTE) ................................................................................................................................... 66
Run-Time API........................................................................................................................................................... 67
Run-Time Data ........................................................................................................................................................ 67
RTE Navigation Controls.............................................................................................................................................. 68
Support and Feedback ................................................................................................................................................. 69
4
Trident IDE - Introduction
Welcome to the help documentation for Trident IDE.
Trident is an integrated developement environment (IDE) for SCORM. What does that mean? It means Trident is a
platform for tools that make developing SCORM content and working with other SCORM tools easier.
Trident is developed by JCA Solutions (www.scormsoft.com). JCA Solutions is dedicated to creating and supporting
SCORM Development Tools.
What's new in Trident 2.0?
Click here to see what's new in Trident 2.0.
Requirements
Trident requires a Java Runtime Environment (JRE), version 5.0+, available for free from www.java.com.
Trident is built on top of the Eclipse platform. Eclipse is an open-source platform for developer tools.
Updates
Getting updates for Trident software is easy thanks to its built-in update manager. Select Help » Update Trident
from the main menu to contact Trident's software update servers and automatically download newer versions of
Trident components.
What's new in Trident 2.0?
Below are a few of the new features in Trident 2.0.
5
SCORM 2004 3rd Edition
Trident now supports SCORM 2004 3rd Edition, the latest version of the standard.
Run-Time Environment
Trident now includes a full-featured Run-Time Environment (RTE) for experiencing and testing Content Packages,
without having to leave the IDE.
Run-Time API
See the Run-Time API calls in real-time as you experience your content packages.
6
Run-Time Data
See the Run-Time Data model in real-time as you experience your content packages.
Conformance Requirement Validation
Trident now validates your content packages against the standard's conformance requirements.
7
Detailed error messages point to the source of the conformance requirement violation.
SCORM Help Documentation
Trident now includes in depth SCORM help documentation.
8
File Finder View
The new File Finder view makes finding files on your computer and adding them to your content packages easy,
without leaving the IDE.
9
Getting Started
Trident makes it easy to build and manipulate SCORM content packages.
To work with a content package you must create project for it. A project is just a working container for for all the
resources related to a content package. Each project contains .project file that stores information about your
project for Trident. The .project file will not be included with your completed (zipped) content packages.
You can begin working with Trident by creating a new content package or opening an existing content package.
Create new Content Package
Open existing Content Package
Create new Content Package
Create a new Content Package by pressing Ctrl + N or selecting File > New Content Package Project... from
the main menu.
This will launch the New Content Package Project Wizard.
New Content Package Project Wizard
To create a project for a new Content Package, simply specify the project name, location, and select its initial
contents.
10
The Location section specifies where your content package will be created and stored. The Default location will
store it in the local workspace.
The Contents section specifies what files you're content package will begin with. The default Template option will
automatically create a SCORM version 1.3 manifest file and needed supporting files (DTD and XSD) in your new
package.
Click Next to select the content package template to use.
11
Click Finish to create your new content package project and see the results.
Your Content Package Project
After you have successfully created your new content package project, you will see its contents in the workbench
Navigator window.
12
Also, your content package's manifest file (imsmanifest.xml) will be automatically opened in the Manifest Editor.
13
Congratulations, you are ready to build and deploy SCORM content packages.
Open existing Content Package
Open an existing Content Package by pressing Ctrl + O or selecting File > Open Content Package Project...
from the main menu.
This will show a dialog to select the Content Package ZIP file to open.
14
After you select a file the New Content Package Project Wizard will launch.
New Content Package Project Wizard
To create a project for the existing Content Package, simply specify the project name, and the project location.
15
The Location section's specifies your project's location, and where the contents of the zipped package will be
extracted. Use the default location or choose a directory.
The Contents section's ZIP File option specifies the path to the ZIP file to import contents from.
Click Finish to create your new content package project and see the results.
Your Content Package Project
After you have successfully created your new content package project, you will see its contents in the workbench
Navigator window.
16
Also, your content package's manifest file (imsmanifest.xml) will be automatically opened in the Manifest Editor.
17
Congratulations, you are ready to build and deploy SCORM content packages.
IDE Concepts
This help topic explains underlying concepts of Trident's integrated development environment (IDE).
Workbench
Workspace
Resources
Views and Perspectives
Editors
Cheat Sheets
Workbench
18
The term Workbench refers to the desktop development environment. The Workbench aims to achieve seamless
tool integration and controlled openness by providing a common paradigm for the creation, management, and
navigation of workspace resources.
Upon startup, Trident's workbench looks something like this:
In Trident the workbench is your main application window and provides all the tools you need to build, test, a
deploy SCORM content packages.
Workspace
The Workspace is the central hub for your projects' resources. A workspace's resources are organized into a tree
structure, with projects at the top, and folders and files underneath. A special resource, the workspace root
resource, serves as the root of the resource tree.
Trident's workspace will be home to all of your projects and content packages. By default, Trident's workspace is
physically located in the "workspace" directory of Trident's install directory (typically C:\Program Files\JCA
Solutions\Trident2\workspace").
19
The workspace contains a collection of resources: projects, folders, and files. A project is a collection of any number
of files and folders. A workspace can have any number of projects, each of which can be stored in a different
location on disk.
Resources
Resources is a collective term for the projects, folders, and files that exist in the Workbench. The Navigator view
provide a hierarchical view of resources and allows you to open them for editing. Other tools may display and
handle these resources differently.
There are three basic types of resources that exist in the Workbench: Files, Folders, and Projects.
Projects contain files and folders, but not other projects. Projects and folders are like directories in a file system.
When you delete a project, you will be asked whether you want to delete all of the files and folders that it contains.
Deleting a folder from a project will delete the folder and all of its children. Deleting a file is analogous to deleting a
file in the file system.
In Trident all of your content packages (and their files) are resources.
Refreshing and Filtering
Note that if you move and/or copy files to and/or from your project's file system folder (outside of Trident) while
Trident is open you may need to refresh the navigation view.
20
You can also filter the resources shown in the navigation view to hide certain files.
Views and Perspectives
Views provide information and ways to navigate that information in your Workbench. For example, to display
projects and other resources that you are working with.
21
While each view can give different information about your projects, in Trident the views work together to give you a
wholostic view of what you're working on.
To show or reopen a View that has been closed, you can use the Window » Show View menu.
Some of the views avialble in Trident include:
•
Content Packages - provides a heirarchical view of Content Package projects
•
File Finder - browsable local file-system to copy files to a project
•
Editors - provides editing cabilities for individual resources
•
Outline - an outline view of what's currently being edited
•
Tasks - a list of manually created tasks (a todo list)
•
Problems - a list of generated problems with your projects
•
Properties - a list of properties/values associated with what you've clicked on
•
Cheat Sheets - provides assistance for performing specific tasks
•
Navigator - provides a hierarchical view of projects and resources
The views that are visible and the layout of those views are a product of the current Perspective. You can change
the layout of a perspective by opening and closing views and by docking them in different positions.
Views and Perspectives provide information about your projects and resources. A view might appear by itself, or
stacked with other views in a shared site.
In Trident the views work together to give you a complete, wholistic view of your project.
Editors
Editors are a special type of view for editing resources.
Different types of files are associated with different types of editors. When you open a file for editing by doubleclicking it in one of the navigation views, the associated editor opens in the Workbench editor area.
Any number of editors can be open at once, but only one can be active at a time. The main menu bar and toolbar
for the Workbench window contain operations that are applicable to the active editor.
22
Tabs in the editor area indicate the names of resources that are currently open for editing. An asterisk (*) indicates
that an editor has unsaved changes.
Multi-Page Editors
Editors can be multi-page, meaning they have more than one way of editing the file. Multi-page editors have
multiple tabs (one for each page) that you can switch between. Trident's Manifest Editor is an example of a multipage editor. In multi-page editors, changes in each page are automatically kept synchronized.
Also note that editors aren't always text/code based. For instance, the (multi-page) Manifest Editor has a tree and
form based page (shown above).
Default Editors
Each file has a default editor that will be used to open it. The original default editor for a file is determined by its file
type/extension.
You can choose which editor you want to open a file with by right-clicking on a file in the resource navigator and
selecting the "Open With" menu option. Selecting another editor from the "Open With" editors will set the file's new
default editor. Next time you open that file it will automatically use the editor you selected.
23
Editor/File Associations
You can also define file associations with external editors.
1.
Select Window > Preferences from the main menu to launch the Preferences dialog.
2.
Select General > Editors > File Associations from the preference tree on the left.
3.
Select the file-type you want to associate with an external editor (e.g. *.js) under the "File types" section.
4.
Click the "Add..." button under the "Associated editors" section.
5.
In the Editor Selection dialog select the "External Editors" radio button.
6.
Select the Program that you want to use to edit the file type.
7.
Click the OK button in the Editor Selection dialog.
8.
You now have a new external editor to open the file type with.
9.
Click the OK button in the Preferences dialog.
24
Cheat Sheets
A Cheat Sheet helps guide you through a particular development process. Each cheat sheet is designed to help you
complete some task, and it lists the sequencing of steps required to help you achieve the goal.
As you progress from one step to the next, the cheat sheet will automatically launch the required tools for you. If
there is a manual step in the process, the step will tell you to perform the task and click a button in the cheat sheet
to move on to the next step.
25
Also, relevant help information to guide you through a task is retrieved in a single click so that lengthy
documentation searches will no longer be required.
Launching a Cheat Sheet
To launch a Cheat Sheet, select Help > Cheat Sheets... from the menu bar.
26
The cheat sheet opens as a view. At any time, only one cheat sheet is open and active. When you launch a cheat
sheet, any opened cheat sheet is closed before the new one is opened. The completion status of a closed cheat
sheet is saved.
Progressing through a Cheat Sheet
Cheat Sheets are sequential. You'll follow them one step at a time starting with the Introduction step. The
Introduction step is automatically expanded when you open a cheat sheet. Click the "Click to Begin" icon to
progress to the first step.
At any time, the highlighted step is the current step. You can get help for any step by clicking its "Related Help"
icon.
Some steps will contain a "Click to Perform" icon. Clicking this will automatically perform the step for you or launch
a tool (such as a wizard) to help you complete the step.
You may manually mark a step as completed by clicking the "Click to Complete" icon, if it contains one. Completed
steps will be marked with a check icon.
You may choose to skip a step by clicking the "Click to Skip" icon, if it contains one. Skipped steps will be marked
with a skipped icon.
You can redo a step that you have completed or skipped by expanding the step and clicking its "Click to Redo" icon.
After redoing a step, the cheat sheet will continue from the redo step.
When you finish the last step of a cheat sheet, it automatically restarts at the beginning. You may manually restart
a cheat sheet at any time by clicking the "Click to Restart" icon in the Introduction step.
Closing a cheat sheet will save it's progress at the current step so you can resume it next time it is opened.
Opening another cheat sheet will automatically close the currently open one.
Cheat Sheet Icons
Click to Begin - begin the first step
Click to Perform - let the cheat sheet help you perform the task
Click to Complete - mark the step as complete
Click to Skip - mark the step as complete
Click to Redo - redo a completed or skipped step
Related Help - view help documentation for a step
27
Cheat Sheet Toolbar
Collapses all the expanded steps except the current step or expands steps to the last expanded state.
Click to toggle between these two states.
Allows you to select and open another cheat sheet. The completion status of the active cheat sheet is
saved. Then, the active cheat sheet is closed and the selected cheat sheet is opened.
Hides the cheat sheet.
Saves the completion status of the active cheat sheet and closes it.
Trident makes creating SCORM conformant content packages so easy that it my feel like cheating.
Editors
SCORM development typically requires understanding of several technologies, including XML, HTML, and JavaScript.
Trident has integrated tools and editors to support each of these. Additionally, Trident supports and understands
the specific vocabularies, application programming interfaces, and data models standardized by SCORM.
Manifest Editor
SCO HTML Editor
RTE JavaScript Editor
LOM Metadata Editor
Manifest Editor
A Manifest file (imsmanifest.xml) defines the structured inventory of a Content Package. Trident's Manifest Editor
is a multi-page editor that makes defining all aspects of a manifest accurate and easy.
Components of the Manifest Editor:
Forms Page - contains a structured tree of manifest elements that you may click on to edit in easy to use
forms
Source Page - contains the actual XML source of a manifest in a full-featured, color-coded editor
28
Actions - clickable actions for performing manifest related tasks
Forms Page
The forms page of the Manifest Editor shows the structure and elements of a manifest in a clickable, drag-ndroppable tree. Clicking on an element shows a form editor for it. Right-clicking on an element shows a menu for
adding child elements.
29
The tree also supports drag-n-drop for reordering, organizing, and associating elements. Some of the available
drag-n-drop operations:
Drag Resource to Activity - set the activity's resource reference id (identifierref) to that of the resource
Drag Activity to Activity - set the order of activities or make one activity the child of another
Drag File to Resource - set the file as one of the resource's file
Drag Resource to Resource - set one resource as a dependency of another
Of course any changes made in on the forms page are immediately synchronized with and viewable in the source
page.
Source Page
30
The source page of the Manifest Editor is a full-featured XML editor with color-coding, content-assist, customizable
formatting, and real-time validation. Clicking on an element will automatically select the corresponding element in
the forms page.
Of course any changes made in on the source page are immediately synchronized with and viewable in the forms
page.
Editor Actions
When a Manifest Editor window is active you'll see extra action icons added to the toolbar and menus.
31
Validate Content Package will run XML validation against the Manifest using all the ADL/IMS schemas.
Launch Content Package will launch the content package in the Run-Time Environment (RTE).
Save Content Package will launch a wizard/dialog to save the entire content package to a ZIP file.
Congratulations, you've found the easiest, most powerful way to edit manifest files.
SCO HTML Editor
The SCO HTML Editor is used for editing HTML files, especially those that serve as Shareable Content Objects
(SCOs).
The source page of the SCO HTML Editor is a full-featured HTML editor with color-coding, content-assist,
customizable formatting, and real-time validation. Within <script> tags you can access the SCORM Run-Time API
and Data Model.
Tool-tips provide information about RTE API and data model elements.
32
Content-assist helps you find the RTE API method or data model element you are looking for.
33
Clicking on a RTE API method or data model element automatically updates the context sensitive help.
34
The SCO HTML editor is the default editor for *.htm, *.html, *.xhtml, and *.wml files in Trident. You can also
change the editor/file associations.
Congratulations, you've found the easiest, most powerful way to edit Shareable Content Objects.
RTE JavaScript Editor
The RTE JavaScript Editor is used for editing JavaScript files that interact with SCORM's Run-Time Environment
(RTE).
The source page of the RTE JavaScript Editor is a full-featured JavaScript editor with color-coding, content-assist,
customizable formatting, and real-time validation. The editor has knowledge of the SCORM Run-Time Environment
API Methods and Data Model.
Tool-tips provide information about RTE API and data model elements.
Content-assist helps you find the RTE API method or data model element you are looking for.
35
Clicking on a RTE API method or data model element automatically updates the context sensitive help.
36
The RTE JavaScript editor is the default editor for *.js files in Trident. You can also change the editor/file
associations.
Congratulations, you've found the easiest, most powerful way to edit JavaScript files for the SCORM Run-Time
Environment.
LOM Metadata Editor
The LOM Metadata Editor is used for editing Learning Object Metadata (LOM) XML files.
The source page of the LOM Metadata Editor is a full-featured XML editor with color-coding, content-assist,
customizable formatting, and real-time validation.
37
Tasks
Please select a task below to view instructions how to perform it.
Content Packages
Create new Content Package
Open existing Content Package
Add Resources to a Content Package
Import Resources to a Content Package
Validate a Content Package
Launch a Content Package
Save a Content Package
Set Content Package as Template
38
Create a Shareable Content Object (SCO)
Manifest Files
Define Resources in the Manifest
Define Activities in the Manifest
Define Metadata in the Manifest
Define Sequencing in the Manifest
Create new Content Package
Create a new Content Package by pressing Ctrl + N or selecting File > New Content Package Project... from
the main menu.
This will launch the New Content Package Project Wizard.
New Content Package Project Wizard
To create a project for a new Content Package, simply specify the project name, location, and select its initial
contents.
39
The Location section specifies where your content package will be created and stored. The Default location will
store it in the local workspace.
The Contents section specifies what files you're content package will begin with. The default Template option will
automatically create a SCORM version 1.3 manifest file and needed supporting files (DTD and XSD) in your new
package.
Click Next to select the content package template to use.
40
Click Finish to create your new content package project and see the results.
Your Content Package Project
After you have successfully created your new content package project, you will see its contents in the workbench
Navigator window.
41
Also, your content package's manifest file (imsmanifest.xml) will be automatically opened in the Manifest Editor.
42
Congratulations, you are ready to build and deploy SCORM content packages.
Open existing Content Package
Open an existing Content Package by pressing Ctrl + O or selecting File > Open Content Package Project...
from the main menu.
This will show a dialog to select the Content Package ZIP file to open.
43
After you select a file the New Content Package Project Wizard will launch.
New Content Package Project Wizard
To create a project for the existing Content Package, simply specify the project name, and the project location.
44
The Location section's specifies your project's location, and where the contents of the zipped package will be
extracted. Use the default location or choose a directory.
The Contents section's ZIP File option specifies the path to the ZIP file to import contents from.
Click Finish to create your new content package project and see the results.
Your Content Package Project
After you have successfully created your new content package project, you will see its contents in the workbench
Navigator window.
45
Also, your content package's manifest file (imsmanifest.xml) will be automatically opened in the Manifest Editor.
46
Congratulations, you are ready to build and deploy SCORM content packages.
Add Resources
File Finder
The File Finder view can be used to copy files and folders into your content package projects. To view the File
Finder, simply click on its tab (located next to the Content Packages view tab) or select Window » Show View »
File Finder from the main menu.
The import wizard allows you to import several types of resources from different sources.
47
You can also use copy-n-paste and drag-n-drop to add files from your computer to a project.
Copy-n-Paste
You can copy files from the file system (e.g. Windows explorer) and paste them directly into your project (via the
Content Packages view).
Drag-n-Drop
You can drag files from the file system (e.g. Windows explorer) and drop them directly into your project (via the
Content Packages view).
Import Resources
Import Wizard
The Import Wizard can be used to import files and folders into your content package projects. To open the import
wizard, from the main menu bar select File > Import.
The import wizard allows you to import several types of resources from different sources.
48
Select File System to import files from your computer.
49
You can also use copy-n-paste and drag-n-drop to add files from your computer to a project.
Copy-n-Paste
You can copy files from the file system (e.g. Windows explorer) and paste them directly into your project (via the
Content Packages view).
Drag-n-Drop
You can drag files from the file system (e.g. Windows explorer) and drop them directly into your project (via the
Content Packages view).
Validate a Content Package
50
Trident validates your content packages against the SCORM standard Conformance Requirements.
Simply right-click on a Content Package project and select Validate Content Package to validate it.
With one click Trident launches a wizard to validate your content package against the latest SCORM conformance
requirements. You'll know if your content package has any conformance problems before deployment.
Detailed error messages explaining conformance requirement violations point to the source of the problem directly
in your manifest file.
51
Simply double-click a conformance violation to take you to the source of the problem.
You can also validate a Content Package by using the Edit menu or the tool bar to package to a zip file. Note that
these menu/toolbar items only appear when a Manifest file is open in an editor.
52
Launch a Content Package
Simply right-click on a Content Package project and select Launch Content Package to launch in Trident's RunTime Environment (RTE).
Trident's Run-Time Environment (RTE) allows you to experience your content packages as a learner would in a
learning management system (LMS), without leaving the IDE.
You can also launch a Content Package in Trident's Run-Time Environment (RTE) by using the Edit menu or the tool
bar to launch the preview browser. Note that these menu/toolbar items only appear when a Manifest file is open in
an editor.
53
Save a Content Package
Simply right-click on a Content Package project and select Save Content Package to save it to a ZIP file.
Simply specify the file name for the Content Package and click save. The result is a SCORM compliant ZIP file (also
known as a PIF - Package Interchange File).
54
You can also save a Content Package by using the Edit menu or the tool bar to package to a zip file. Note that these
menu/toolbar items only appear when a Manifest file is open in an editor.
Set Content Package as Template
55
You can designate a Content Package Project as a Template by right-clicking the project and selecting the "Content
Package Template" option.
Content Package Projects designated as templates can be selected from the Templates page of the New Content
Package Project Wizard.
56
Creating a SCO File
Trident makes it easy to build and edit Shareable Content Object (SCO) files.
Create a new SCO HTML file by selecting File > New > SCO HTML File from the main menu.
57
This will open the New SCO HTML File Wizard.
After creating a SCO file, Trident will automatically open the new file in the SCO HTML Editor.
Congratulations, you've found the easiest way to create Shareable Content Objects (SCOs).
58
Add Resources to Manifest
You can add Resources to the Manifest in a couple of ways:
Drag-n-Drop from the Navigator View to the Manifest Tree
Right-click on the Resources node in the Manifest Tree and select 'Add Resource' from the menu
Drag-n-Drop
Drag-n-Drop is the preferred way of adding a Resource to the Manifest. To do this simply select a file resource in
the Navigator View (on the left) and drag to the Manifest Tree (on the right) and drop the file on the Resource
node.
When you add the resource with drag-n-drop a couple of things automatically happen:
A resource identifier is automatically generated
File dependencies of the resources are automatically discovered
59
Resources Menu
You can also add a Resource to the Manifest by right clicking on the Resources node in the Manifest Tree and
selecting 'Add Resource' in the menu. Be sure to fill in the required information (such as HREF and File
dependencies) in the new Resource.
Add Activities to Manifest
Before you can create Activities in your manifest you must first create an Activity Tree (or Organization) root.
60
Acitivity Tree
You can add an Activity Tree root to the Manifest by right clicking on the Activity Trees node in the Manifest Tree
and selecting 'Add Root Activity' in the menu.
Be sure to specify required information (such as Title) in the new Activity Tree.
Add Activity
You can add an Activity to the Manifest by right clicking on an Activity in the Manifest Tree and selecting 'Add
Activity' in the menu.
Be sure to specify required information (such as Title and Resource) in the new Activity.
61
Set Resource
You can specify an Activity's Resource in a couple of ways:
Drag-n-Drop a Resource to an Activity in the Manifest Tree
Select the Resource via a Dialog from the Activity Form
62
63
Define Metadata in the Manifest
Metadata can be defined for the following Manifest elements:
The Manifest itself
Activities and Activity Trees
Resources (Assets and SCOs)
Add Metadata
You can add Metadata to an element by right-clicking on its node in the Manifest Tree and selecting 'Add Metadata'
in the menu. The new Metadata element will appear in the tree (selected).
64
Metadata Form
The Metadata Form has several sections that can be expanded and collapsed by clicking on the section title. Below
the General section is expanded.
65
Define Sequencing in the Manifest
Sequencing can be defined for Activities and Activity Trees.
Add Sequencing
You can add Sequencing to an Activity by right-clicking on its node in the Manifest Tree and selecting 'Add
Sequencing' in the menu. The new Sequencing element will appear in the tree (selected).
66
Sequencing Form
The Sequencing Form has several sections that can be expanded and collapsed by clicking on the section title.
Below the Sequencing Rules section is expanded.
Run-Time Environment (RTE)
Trident allows you to test your content packages in a true SCORM Run-Time Environment (RTE), without leaving
the IDE.
With one click Trident launches your content package in a true SCORM run-time environment allowing you to
experience it as a learner would in a learning management system (LMS).
67
Run-Time API
See the Run-Time API calls in real-time as you experience your content packages.
Run-Time Data
See the Run-Time Data model in real-time as you experience your content packages.
68
RTE Navigation Controls
The navigation controls appear in the upper-right corner of this browser window.
Start - request to identify the first or "starting" activity of a tree, typically generated automatically by the LMS
when the learning begins a new attempt
Resume All - request to resume a previously suspended attempt on an activity tree
Continue - request to identify the "next" logical learning activity (in relation to the current activity) available in
the tree
Previous - request to identify the "previous" logical learning activity (in relation to the current activity) in the
tree
Suspend All - request to "pause" the current attempt on the root activity of the tree
Abandon - request to prematurely or abnormally terminate the current attempt on the current activity
Abandon All - request to prematurely or abnormally terminate the current attempt on the root activity of the
tree
69
Exit - indicates the attempt on the current activity has finished normally and not as the result of another
navigation event
Exit All - indicates the current attempt on the root activity of the tree has finished normally; resets the run-time
progress data
To issue a Choice navigation request: double-click on an activity in the Activity Tree window.
Support and Feedback
For support issues and feedback, you can visit www.scormsoft.com/support.
You can email support and feedback using the following email addresses:
[email protected]
[email protected]
You can also request support (and provide feedback) directly within Trident using the Help menu.
If you have found a possible bug in Trident, please email [email protected]. Please be sure to include a detailed
description of how the problem was discovered, how to reproduce the problem, and any appropriate screenshots.