1
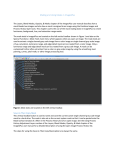
Introduction
Our web sites play an important part in the Kverneland Group marketing mix. Our
ambition is to present ourselves as a dynamic and innovative company on the web with
an attractive product offering. We want the web sites to be sales and campaign driven,
with strong focus on news, activities and competent product information.
Future success of our web sites is very dependent on content management, and that we
manage to keep our web sites alive and up-to-date. To ensure this we must all actively
contribute with content, activities and stories, in order to ensure a strong and attractive
presence on the web.
We want an open approach, high involvement and input from all entities involved in our
web sites. Therefore, if you have open issues or questions, please contact Group
Marketing for support.
This User Manual serves as a practical tool in supporting you as a local publisher, in your
daily work on the web sites. It should be regarded as a working document, and if you
have comments, suggestions for improvements or miss elements please do not hesitate to
report this back to us. In this way we ensure that the User Manual is always up-to-date.
Main Contact Persons, Kverneland Group Web Sites
Michael Jørgensen, Group Web Master
[email protected]
Phone: +45 27 61 67 81
Liv Bjelland, Central Web Publisher
[email protected]
Phone: +47 90 10 21 21
Per Sørensen, Manager, Branding and Web Sites
[email protected]
Phone: +45 60 29 37 90
Editor, User Manual: Liv Bjelland
Page 2 of 71
WEB ADDRESSES FOR KVERNELAND GROUP ................................................................................ 5 EXIT AN ITEM (ARTICLE, FOLDER ETC) ........................................................................................................ 5 IMAGE SIZES .............................................................................................................................................. 6 TRANSLATIONS FORM. .......................................................................................................................... 7 HOW TO CHANGE FIXED WORDS ON THE SITE.............................................................................................. 7 ARTICLES.................................................................................................................................................... 8 MAKE AN ARTICLE OR CHANGE THE TEXT FOR AN ARTICLE....................................................................... 8 TO MAKE A NEW ARTICLE .......................................................................................................................... 8 CHANGING TEXT IN AN ARTICLE ................................................................................................................ 9 UPLOAD IMAGES IN A NEW ARTICLE ......................................................................................................... 10 MAKING TABLES ...................................................................................................................................... 11 TABLES FOR THE RIGHT HAND COLUMN................................................................................................... 12 VIDEO FROM YOUTUBE INTO ARTICLES ................................................................................................... 15 CORPORATEFRONTPAGE.................................................................................................................... 17 BROWSING TO ARTICLES........................................................................................................................... 19 EVENTS ...................................................................................................................................................... 22 HOW TO MAKE EVENTS ............................................................................................................................. 22 URL TO THE EVENT: ................................................................................................................................. 23 PR: UPLOAD PRESS RELEASES (FILE) ............................................................................................. 24 ARTICLELIST ........................................................................................................................................... 26 HOW TO MAKE AN ARTICLELIST .............................................................................................................. 26 IF THE ARTICLELIST DO NOT SHOW .......................................................................................................... 30 ARTICLELIST LINKED TO ANOTHER ARTICLELIST .................................................................................... 31 EXTERNAL WEB ADDRESSES IN ARTICLELIST ........................................................................................... 34 SENDING ITEMS FOR TRANSLATION TO OTHER SITES ............................................................ 35 A tool for BA Marketing Managers..................................................................................................... 35 ITEMS FOR TRANSLATION.................................................................................................................. 37 Url Replacement ................................................................................................................................. 39 MOVE THE ITEM TO THE FOLDER .............................................................................................................. 40 PRODUCT: CHANGE THE TEXT FOR A PRODUCT ON BRAND SITES ..................................... 43 FOR EDITING A PRODUCT .......................................................................................................................... 44 TO CHANGE THE MAIN PICTURE ................................................................................................................ 45 MAKING TABLES ...................................................................................................................................... 47 FEATURES AND HIGHLIGHTS FOR PRODUCTS ON BRAND SITE ............................................ 51 FEATURES................................................................................................................................................. 51 HIGHLIGHTS ............................................................................................................................................. 54 HOW TO MAKE NEW FEATURES ....................................................................................................... 56 NEW FEATURES ........................................................................................................................................ 56 ADD FEATURE TO A PRODUCT .................................................................................................................. 64 COPY FEATURES TO OTHER PRODUCTS..................................................................................................... 67 HOW TO MAKE HIGHLIGHTS TO A PRODUCT ............................................................................. 69 Page 3 of 71
DOWNLOAD CENTRE ............................................................................................................................ 72 THESE TAGS ARE THE CHOICES YOU HAVE IN THE DOWNLOAD CENTRE ................................................... 72 Page 4 of 71
Web addresses for Kverneland Group
National site:
xy.kvernelandgroup.com
Brand sites:
xy.kverneland.com
xy.vicon.eu
Working from the admin area:
http://admin.kvernelandgroup.com/
- Click on this icon
in the bottom of the page to log into the system.
This toolbar shows when you are logged in:
Exit an item (article, folder etc)
When an item of any kind are edited; to exit, please press either the button “Send for
publishing” if the changes should be saved, or press the button “Discard Draft” if you do
not want to save your changes.
Page 5 of 71
Image sizes
Pixel sizes for the images that need adjustment on our web
sites
Always use 72 dpi. For mac-versions save images as RGB, or the images will get
strange colors.
National and Brand site
Pixel size for
images
Comment
Banner Pictures
Images showing in the
ArticleList/CorporateFrontpage
1140 x 415 px
210 x 120 px
Upload in each article under
"Image".
Main article Welcome side, Map
230 x 245 px
Only for the map image.
Brand site Special sizes
Highlight images
Image carousel for Product and
Feature
1000 x 500 px
500 x 340 px
Page 6 of 71
Translations form.
How to change fixed words on the site
Folders and documents are translated by simply changing their name. Some of the words
on the web site like “View all” and “Home” can only be translated in the form called
“Translations xy…”. You will find it in the admin area (admin.kvernelandgroup.com)
when you click on your site, like you see below. Each site has one; you don’t have to
create it.
In this form you find all the words that can be translated into you your language. Type the
words in the text area and click on “Send for publishing”.
Page 7 of 71
Articles
Make an Article or change the text for an Article
Please log into the web site you are going to make changes to
xy.kvernelandgroup.com
This toolbar shows when you are logged in:
To make a new Article, choose the correct Folder for the Article. Normally
“Article” shows in the dropdown list, click on this icon
(Create here) and fill in the
form. Same procedure as for “Changing text in an Article” described below in the
following pages.
Page 8 of 71
Changing text in an Article
- Choose your article.
- For editing the article, please click on the pencil icon on the toolbar.
Body text is the main text.
- For easier to see what is pasted into this area, click on the icon
and you will
get this area in full screen mode. To get back to the other view, click the icon once
more.
Page 9 of 71
Upload images in a new article.
The new Article must always be published before uploading an image. The image has to
be uploaded in that article, and for this you have to choose (in Location) the new article
name and not Automatic. Here is how it looks when the article is published; you will see
the article name with the word “(this)” behind:
(Please look at “Uploading Images” for detailed description for uploading images)
Page 10 of 71
Making tables
- Click on this icon
on the toolbar…
…and you will get a new window
In text fields for the Technical Specifications, tables can now have a pre-defined look.
Follow the description here:
Make your choice for:
- how many columns and rows you are going to have
- in the box “Class”, choose one of the tables (IMPORTANT!)
- always write a letter or a number in the box “Summary” (anything)
Click OK.
- Write the text in the table:
- Here is how a table with the choice of “green-edge” table looks on the web page:
Page 11 of 71
Tables for the Right hand Column
- The procedure is the same as written above, but in the box for “Class”, you have to
choose one of the 4 choices at the bottom of the list depending on which site you are
on. The safest is to use the “gray-edge”.
- Choose only 1 for Columns and Rows.
Page 12 of 71
Uploading Images
- For uploading images into the article, choose this icon
from the toolbar.
- In the new window that shows, you can add images from the Download Center by
choosing tags or you can upload from your computer.
- If you upload images from your computer it is Very important that you, in the area
“Location”, choose the article you are working in. The example here is from and
Article called Kverneland, and to choose this article, “Kverneland (this)” was
selected. Click on “Upload local file”.
Page 13 of 71
- In the next window you have to choose the size for the image, on which side and if it
should be with the text below or in the text. Click ok.
- Click on “Send for publishing”.
If you do not want to save your changes, please click on “Discard Draft”.
Page 14 of 71
Video from YouTube into articles
- On http://www.youtube.com/kvernelandgrp Clikk on Share, so Embed
- Here is the link you have to copy.
Page 15 of 71
- In the article you have to click on this icon
Choose youtube and click OK
- This blue area will show. Remove the words “youtube” and add the link you copied
from YouTube into here.
- When inserting the link into the article, remember to break the link to youtube if it is
active (unlink in our article)
Page 16 of 71
CorporateFrontpage
On the national site there is an item called CorporateFrontpage. This is used to control the
banner and add article links to the first page on the National site (xy.kvernelandgroup.com)
(NB! This is NOT for the brand sites!)
Work from the admin area http://admin.kvernelandgroup.com/
CorporateFrontpage is already made for all the national sites. In CorporateFrontpage you
can fill in pictures, banners, text on the banner (green label), logos, url for the logo and
article list to show articles in the small boxes.
The banner pictures have to be 990x360 pixels.
Explanation step by step:
Page 17 of 71
Articlelist are the items you want to show on the Home page in the 4 boxes. Choose the
articles you want to show by clicking on Add objects and browse to the article (shown in
the screen dumps in the next page). The order is set by choosing numbers under “Order”.
- Delay is how often the banner pictures are going to change (in second).
- Banner1 image. The size of this has to be 990x360 pixels. Browse and find your
picture.
- Banner1 greentext. This is the text for the green label on the banner. For this page we
STRONGLY suggest to use “The future of Farming”
Page 18 of 71
Browsing to articles
How to browse to the article you want to show on the Home page.
- Mark the article and click on Select.
Page 19 of 71
- The buttons for choosing Kverneland and Vicon have to be added here. These logos
are special made. Ask web master or central web publisher to send them to you. Add
the logo on both “Banner1 brand image normal” and “Banner1 brand image faded”.
- Add the url to the actual site for this button. You need the whole url to your brand
site.
- Do the same for the Vicon logo and url:
Page 20 of 71
- Add the other banner images and “Banner greentext”.
- Send for publishing.
The “Banner3 and 4 brand image normal” and “Banner3 and 4 brand image faded” we
are not going to use unless you have more than 2 brands in your market.
Page 21 of 71
Events
How to make events
All Evenst made on the national sites will automatically show on the
ien Corporate site. Here you can see what shows on our Corporate site for
the time being: http://ien.kvernelandgroup.com/News-and-Media/Events-for-All-Countries
- Log into your national site, and go to: News and Media/Events folder
- Here you choose to create an Event.
- Fill in the form. In the screen dump on the next page are examples for how to fill in
the form. Areas filled out with information in the example are “required”.
- In the bottom of the form you have to choose date for “Show from this date” (use
today’s date) and “Show until this date” (after this date the event will not show on our
site, so use the day after the event is over). Dates are choose by clicking on the
calendar.
- Click on “Send for publishing”.
Page 22 of 71
How
to fill in the form for Event
(If you want to change something to an already made Event, this has to be done from the
admin area.)
Url to the Event:
If you do not have an extern url to add, you need to add the url to the Event on your
national site. Save the event, get the url from your national site and add this into the
Event.
Page 23 of 71
PR: Upload Press Releases (File)
- Navigate to the folder for Press Releases.
- In the toolbar, Choose File and click on the + (Create here)
- Browse to the file on your computer for uploading.
Page 24 of 71
- Write the name for the file and add a description (this is the subtext).
- Send for publishing.
Page 25 of 71
ArticleList
How to make an ArticleList
Here are some examples for how the ArticleList will show on the web site:
- Work from the admin area.
- The pictures shown in the small boxes are added into the article you want to show.
The size of these pictures are 300x143 pixels and has to be uploaded in the article,
(here you see the article about Technical Service in the folder Service and Parts):
Page 26 of 71
- Go into the Folder where the ArticleList are going to be added on your site.
- Choose ArticleList from the menu and click on click “Here”.
Page 27 of 71
- Fill in Title. This will be the text on the banner.
- Her you choose which template you want to use.
- Upload the banner image (NB! Size National site 990x360 pixel, brand site 999x360)
- Add the URL for the Folder on your site where this list is. You have also to write
something in the Text area underneath the url.
Page 28 of 71
- Link to mainarticle and Articles by navigating to the article. Click on Add objects.
- If you have chosen the template for News in the News folder, you can change the
number of how many articles and Press Releases you want to show. Normally it is 4
news and 5 PR.
Page 29 of 71
If the ArticleList do not show
when you click on the folder on the web site the reason can bee that there
is added a “Node Link” to the Folder. In the previous version, we had to
add this Node Link, otherwise the articles would not show properly. Here is
a picture for where you can delete this Node Link: Click on “Remove
object” and send for publishing.
Page 30 of 71
ArticleList linked to another ArticleList
How to make an ArticleList linked to another ArticleList
(If you want to have an ArticleList further down in a Folder, here is the way of doing it.)
NB! ArticleList must ALWAYS be made in the admin area.
- Create a Folder where you create ArticleList, Folders and Article (it is not necessary
to make folders if you only are going to make a few Articles). See the description in
the file “How to make ArticleList”.
- In the ArticleList, you have to make the links to the Articles.
- And so to THE IMPORTANT THING FOR MAKEING THIS WORK! Edit the
Folder you are working with. Scroll down until you find the area for “Node Link”.
Here you have to click on “Add object” and find the ArticleList you have made.
- In this Folder you also have to add a “Main image” (this is the clickable image in the
first ArticleList) and a “Banner image”.
Page 31 of 71
Here are screen dumps taken from an already made case. You will find it by clicking on
this link:
http://ien.kvernelandgroup.com/Brands-and-Products
Here is how it looks like when finished: Click on the image or text for iM FARMING:
- The new window will show you the second ArticleList, and it looks like this:
Page 32 of 71
-From the Admin area it looks like this:
Here you can see the Folders and ArticleList. All the links to the ArticleList called iM
FARMING is made in the normal way (see the description in the file How to make
ArticleList).
- To link this ArticleList “iM FARMING” to the ArticleList “Brands and Products”
(the first ArticleList in the folder) you have to do this:
- Edit the Folder you are working with (in this case called “iM FARMING”). Scroll
down until you find the area for “Node Link”. Here you have to click on “Add
object” and find the ArticleList you have made (in this case it is iM FARMING).
THIS IS THE IMPORTANT THING FOR MAKEING THIS WORK!
- In this Folder you also have to add a “Main image” (this is the clickable image in the
first ArticleList) and a “Banner image”.
Page 33 of 71
External web addresses in ArticleList
How to add external web addresses to the image boxes for the ArticleList
-
Make an Article. In this you need the image that is going to show on the ArticleList
and add the external url. In this example there is just used an already made Article.
Add an image in the area “Image”. This will show in the ArticleList.
-
The external url is typed in the box fro “Url Replacement”.
External url should always be opened in a new window. Make a mark in the small
window for “Url Replacement in new window”.
-
Work from the admin area for making an ArticleList (or edit an already made one). In
the ArticleList, add the articles into “Articles (required)” by click on “Add objects”
and navigate to the articles (click “Select” to go back to this window).
-
The link is now added to the image that will show on the web site.
You can have 3 og 6 boxes with images in the ArticleList. See the explanation for this
in the chapter “How to make an ArticleList”.
Page 34 of 71
Sending items for translation to other sites
A tool for BA Marketing Managers
This is a tool for BA Marketing Managers to inform local web publishers about updates
they have made onto the International English “master versions”.
-
Find your current article/product and click on it.
-
This window will now show. Click on the button “Send to translation”.
Page 35 of 71
-
The window beneath here will show. Please set a mark in the small box in front of the
site where the article/product should be copied to. Click on “Send to selected”.
The item has now been copied to a folder on all the sites marked in this window.
For the local publisher it is visible on their Dashboard. If you want to check the
copying, you can go into http://admin.kvernelandgroup.com . Go to one of the sites
and check in the folder “Translation inbox”.
Page 36 of 71
Items for translation
On your web site, you have on the toolbar, a choice to enter to your Dashboard. This is
the same as when you go into the admin area. Some of the things you can see on the
dashboard are “My drafts” and “Translation inbox”. When new articles/product
information, or changes to current documents, has been made on the international page
(Corporate or Brand) you can find the article in the Translation inbox. It will be added to
your box by a PM or our Central Publisher.
You must decide if the article should be translated and used or just deleted.
If you are going to use it, here is the procedure:
- Click on “Dashboard” on the toolbar that you get when you edit your local site. (You
may also go to http://admin.kvernelandgroup.com, but that is not described in this
document.) Here is how window looks like when pressed on “Dashboard”.
Page 37 of 71
- Click on “Go to Translation inbox”
- Choose your file and the pencil for editing the article.
Page 38 of 71
Url Replacement
- If there is a url pasted into the area here “Url Replacement”, you have to change it.
This url is used to show the news on your national first page. When the article is
stored the correct place on your site, you can add the new url.
- Make your changes.
- If this is a product, you have check if the tag is correct. It shall only have the product
tag.
Page 39 of 71
-
Send for publishing.
Move the item to the folder
- The document is now ready to be moved out of your “Translation inbox” and to
where you want it on your site.
- To move the article to the correct folder on your site, click on the name of the article
in the Translation inbox.
- In the new window, click on the “Move” icon
Page 40 of 71
- Navigate to your site and correct folder in the new window. (Use the arrow, and click
on the folder names till you are in the correct place)
Page 41 of 71
- Click on the circle to the left of the folder name to select it, and then click on the
“Select” button.
- The article/Product is now stored in the correct folder and visible on your website.
- If it is a News and you want to show it on the national first page you have to add the
url for this article (and a picture, special size).
Page 42 of 71
Product: Change the text for a Product on brand sites
Please log into the web site you are going to make changes to
xy.kverneland.com
xy.vicon.eu
- To choose your product, please navigate by using the dropdown menu. These screen
dumps are taken from the Products/Forage Equipment/Bale Equipment:
Page 43 of 71
- Click on the product you are going to make changes to.
For editing a product, please click on the pencil icon.
Page 44 of 71
To change the main picture on the right hand side, you have to remove the
image that is already here:
- Click on “Select new image”,
Page 45 of 71
- and a dialog box will show:
- Write the name of the machine here and the pictures matching your typing will show.
By holding the mouse button over “Preview”, a small picture will show. Find your
picture and click in the circle. The picture is now added to the product information.
- Make sure you choose a picture that suits into the frame. The system will
automatically crop the picture, so portrait version pictures will most likely not be a
good choice.
Page 46 of 71
Body text is the main text.
- For easier to see what is pasted into this area, click on the icon
and you will
get this area in full screen mode. To get back to the other view, click the icon once
more.
Making tables
- Click on this icon
and you will get this window.
Page 47 of 71
In text fields for the Technical Specifications, tables can now have a pre-defined look.
Follow the description here:
Make your choice for:
- how many columns and rows you are going to have
- in the box “Class”, choose “Comparison Table” (IMPORTANT!)
- always write a letter or a number in the box “Summary” (anything)
Click OK.
- Write the text in the table:
- Here is how the table looks on the web site:
- The formatting is the same for all tables. You can not change alignment or colors
without changing all “comparison table’s”…
Page 48 of 71
- Under image 1-4 you must add the 4 pictures for the image carousel. Format of the
image must be 500x340 pixel (make sure you save the image in a web format). It is
also possible to add an alternative image text. It is recommended to keep these very
short, max two lines.
- The published result.
Page 49 of 71
- Before you click on “Send for publishing” please add the correct tag for the
product. If you can not find the name for it, please send an e-mail to Leif or Liv with
suggestion for the missing tag.
- If you do not want to save your changes, please click on “Discard Draft”.
Page 50 of 71
Features and Highlights for products on brand site
Work with this from the admin area: http://admin.kvernelandgroup.com
Features
All the Features are stored in a folder connected to the machines. In the Features Folder
for the Round Balers, there are 9 Features.
-
Click on the Feature you are going to translate and click on Edit. Same procedure for
translation as for other “articles”.
Here are the 9 Feature in the Features (Folder):
Page 51 of 71
-
Next step is to go to the Product. Click on the product so you can see the items
connected to that product.
-
Here you can see that Kverneland 6225 has one Feature folder and one Highlights.
Page 52 of 71
-
Click on Features and Edit this. These object are linked to the Features on your site
-
Normally the objects added in this form are linked to your site, but sometimes (if the
text do not show properly), you need to remove some of the objects and “Add
existing objects”. Browse to your site and select the correct Feature.
Page 53 of 71
Highlights
- When the Features are translated, you will see that in the Highligts most often still
have the English Feature connected. Change the link in the Highlight (for the
Product) to the Feature on your site.
- In this Highlight, the link to the Feature connected must be changed (Highlight 1
feature/article). Remove the Feature and click on “Add object”. Browse to your site
and the Feature for the product. Choose the Feature and click on “Select”. Do the
same in the boxes for the other “Highlight X feature/article”.
Page 54 of 71
Page 55 of 71
How to make new Features
The Features have to be made in a special way. You have to work from the admin area
for making those folders and Features. http://admin.kvernelandgroup.com/
New Features
For each category of products, you make one normal Folder and fill it with all Features
for products in this category. Then you make a Feature Folder under each Product and
connect only to the Features for that product. Detailed description follows:
- In the product folder for the products you have to make an ordinary Folder and call it
Features. This folder will not show on the web site, therefore you have to work in
admin
Page 56 of 71
- In this folder you have to make a “Feature”.
Page 57 of 71
- Fill in the “title” and text in the “Body text”. To add a picture you have to click on
“Add object” in the box “Media database image”. When you click on that button, you
have to navigate to the correct folder. Beneath here there are several screen dumps
showing how:
- When you click on “Add object”, this window will show. Now you have to navigate
by clicking in different places. First of all, click on this small arrow
Page 58 of 71
- New window, click on the word “Media”
- Next window, click on “Images”
Page 59 of 71
-
Here is the window where you choose the picture. If you know some of the name of
the picture (you can find the picture you want in Download Centre, copy the file
name and paste it into the search box) you can write the name in the search box.
Write the name and press Enter.
Page 60 of 71
- Here is the result for my search. Click in the circle in front of the picture and click
“Select”.
Page 61 of 71
- Now you are back to the Feature and the picture is added.
- Add the highlight text. This will be shown when the feature box opens under
highlights (see illustration below).
- It is recommend to make the highlight text no longer than 100 signs (including space)
Page 62 of 71
- Add the text you want to show in the box for this Feature on the Highlights picture.
- Add images and text in the boxes “image 1, 2…”. These pictures have the size of
500x340 pixels.
- You can add 4 pictures like this, and they will show here.
- When adding the alternative image text is recommend keeping this at 50 signs and
maxing 75 signs (including space).
Click “Send for publishing”.
Page 63 of 71
Next step is how to:
Add Feature to a product
- Find the product (I selected the product Exacta CL). Choose to make a “Feature
folder”.
- New window: Put a name in “Title” area and click on “Add objects”
Page 64 of 71
- Navigate to the correct Features by clicking on the text until you find the correct
place
- For this case it is navigated to Kverneland spreaders and Features. Choose the
Features for the product by marking the check box and click “Select”
Page 65 of 71
- Now you can see the links to Features for this product. Do you want to add other
Features to this product just edit the “Feature folder” and click on “Add objects”. You
can also choose the Order of the Features here.
- For a final check, go to the web site and find you product and click on “Features”.
Page 66 of 71
Copy Features to other Products
- If these Features are going to be for other products as well, you can copy the “Feature
folder” to the other products. Here is how you do that: Mark the square in front of the
“Feature folder”. Click in the square in front of the name with your left mouse button
and click on “Copy Subtree”
Page 67 of 71
- Navigate to the product where you want this folder and click on “Select” and “OK”.
Page 68 of 71
How to make Highlights to a product
Work from the admin area: http://admin.kvernelandgroup.com/
- Choose your product. Create Highlights and click “Here”.
Page 69 of 71
- Add a picture as the main picture. The correct size for the picture is 1000x500 pixels.
Make sure you save the image in a web format
- Fill inn the Buttontext. Max 25 signs including space.
- Click on “Add object” and browse to the correct Feature article and click “Select”
Page 70 of 71
- Fill in the coordinates (where you want the button on the picture).
- Do the same for the other buttons. You can have totally 8 buttons on the image.
- Here is how this Highlights just made looks:
Page 71 of 71
Download Centre
These tags are the choices you have in the Download Centre
Each image needs at least one of each tag for showing in Download Centre (minimum 6
tags).
Page 72 of 71