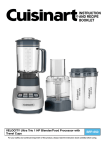
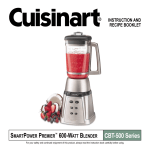
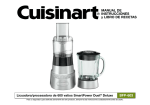
1
INSTRUCTION
AND RECIPE
BOOKLET
VELOCITY Ultra Trio 1 HP Blender/Food Processor with
Travel Cups
BFP-650
For your safety and continued enjoyment of this product, always read the instruction book carefully before using.
IMPORTANT SAFEGUARDS
over the counter or tabletop, where it can be
pulled on by children or tripped over. Excess cord
should be stored in the cord storage area at the
back of the blender base to avoid injury caused
by the longer cord.
18. Wash the blender jar, blade assembly, cover,
work bowl, chopping/mixing blade, reversible
slicing/shredding disc, feed tube, travel cups and
travel lids before first use.
When using an electrical appliance, basic safety
precautions should always be followed, including the
following:
1. READ ALL INSTRUCTIONS BEFORE USING.
2. To protect against the risk of electrical shock, do
not put motor base of blender in water or other
liquids.
19. WARNING: TO REDUCE THE RISK OF
ELECTRICAL SHOCK OR FIRE, DO NOT
REMOVE THE BASE PANEL. NO USERSERVICEABLE PARTS ARE INSIDE. REPAIR
SHOULD BE DONE ONLY BY AUTHORIZED
PERSONNEL.
3. Close supervision is necessary when any
appliance is used by or near children.
4. Unplug from outlet when not in use, before
putting on or taking off parts and before cleaning or removing contents from blender jar. Never
put hands into the blender jar or handle the
blades with the appliance plugged in.
20. WARNING: FLASHING LIGHT INDICATES
READY TO OPERATE. DO NOT TOUCH BLADES.
5. Avoid contact with moving parts.
21. When blending hot liquids in blender jar, remove measured pour lid to allow steam to escape.
6. Do not operate any appliance with a damaged
cord or plug or after the appliance malfunctions
or is dropped or damaged in any manner. Return
appliance to nearest Cuisinart service facility for
examination, repair and/or mechanical or electrical adjustment.
22.Never feed food into processor by hand. Always
use the food pusher.
23.Make sure the blade or disc has come to a full
stop before removing cover.
7. The use of attachments including canning or
ordinary jars, not recommended or sold by
Cuisinart may cause fire, electrical shock or risk
of injury to persons.
24.This food processor attachment is to be used only
with the Cuisinart® BFP-650 blender. Do not use with
any other manufacturer’s blender base. This appliance
is intended for household use only.
8. Do not use outdoors.
25.Do not blend hot liquids in travel cup!
9. Do not let cord hang over edge of counter or
table or touch hot surfaces.
26.To reduce the risk of injury, never place cutting blade or discs on base without first putting bowl properly in place. Be certain cover is securely locked in place before operating appliance. Never feed food by hand. Always use food pusher. Do not attempt to defeat the cover interlock mechanism.
10.Keep hands and utensils out of jar while
blending to reduce the risk of severe injury to
persons or damage to blender itself. A rubber
or plastic spatula may be used, but must be used
only when the blender is turned off.
27. Do not operate your appliance in an appliance garage or under a wall cabinet. When storing in an appliance garage always unplug the unit from the electrical outlet. Not doing so could create a risk of fire, especially if the appliance touches the walls of the garage or the door touches the unit as it closes.
11.When blender is on, and LED lights are illuminated or flashing, do not touch cutting assembly,
interfere with blade movement or remove blender
jar cover. Accidentally touching a speed button
may activate the blender.
12. BLADES ARE SHARP. HANDLE CAREFULLY.
13. To reduce the risk of injury, never place cutting
assembly on base unless the blender jar is
properly attached.
28.DO NOT blend carbonate beverages in the blender jar, travel cups
14. Always operate blender with the cover in place.
15. Never leave your blender unattended while it is
running.
16. Twist removable blade assembly firmly to blender
jar. Injury can result if moving blades accidentally
become exposed.
17.Regarding your cord set: A longer cord has
been provided so that you will have flexibility in
positioning your Cuisinart® VELOCITY Ultra Trio
1 HP Blender/Food Processor with Travel Cups.
Exercise care when using the longer cord to avoid
entangling or tripping over the cord. The longer
cord should be arranged so that it will not drape
2
SAVE THESE INSTRUCTIONS TABLE OF CONTENTS
FOR HOUSEHOLD USE ONLY Important Safeguards . . . . . . . . . . . . . . . . . . . . . . . 2
Unpacking Instructions . . . . . . . . . . . . . . . . . . . . . . 3
NOTICE:
Features and Benefits . . . . . . . . . . . . . . . . . . . . . . . 4
This appliance has a polarized plug (one prong is wider
than the other). To reduce the risk of electric shock,
this plug will fit into a polarized outlet only one way.
If the plug does not fit fully into the outlet, reverse
the plug. If it still does not fit, contact a qualified
electrician. Do not modify the plug in any way.
Blender Jar Assembly . . . . . . . . . . . . . . . . . . . . . . . 5
Helpful Reminders . . . . . . . . . . . . . . . . . . . . . . . . . . 5
Operation . . . . . . . . . . . . . . . . . . . . . . . . . . . . . . . . . 5
This appliance comes with a resettable thermal
device to prevent damage to the motor in the case of
extreme overload. Should the unit shut off unexpectedly, unplug it and let it cool for at least 15 minutes
before continuing (see “To reset the unit,” on page 6).
Cleaning and Maintenance . . . . . . . . . . . . . . . . . . . 6
Maximum of 750 watts rated power is based on jar
attachment. Other attachments may draw significantly less power.
Food Processor Features . . . . . . . . . . . . . . . . . . . . 8
Dos and Don’ts . . . . . . . . . . . . . . . . . . . . . . . . . . . . 7
Food Processor
Food Processor Assembly, Use and Care . . . . . . . 8
Food Processor Operation . . . . . . . . . . . . . . . . . . . . 9
Travel Cup Operation . . . . . . . . . . . . . . . . . . . . . . . 10
UNPACKING INSTRUCTIONS
Recipe Tips . . . . . . . . . . . . . . . . . . . . . . . . . . . . . . . 10
1. Place the gift box containing your Cuisinart®
VELOCITY Ultra Trio 1 HP Blender/Food Processor
with Travel Cups on a large, sturdy, flat surface
before unpacking.
Quick Reference Guides . . . . . . . . . . . . . . . . . 11–13
Warranty . . . . . . . . . . . . . . . . . . . . . . . . . . . . . . . . . 14
Recipes . . . . . . . . . . . . . . . . . . . . . . . . . . . . . . . . . . 15
2. Open top flaps and remove instruction booklet and
other printed materials from top of pulp tray.
3. Set the large panel of the gift box face down and
gently slide the pulp tray containing the reversible
slicing/shredding disc and food processor accessory out of the gift box.
4. Carefully remove the disc from the pulp tray and
set aside, as it is VERY SHARP, then remove the
adapter stem and 2 travel cup covers from pulp
tray’s 2 sides, then lift the food processor accessory and travel cup.
5. Slide another pulp tray containing the blender jar
assembly out of the gift box.
6. Remove the jar cover and measuring cup, then
carefully lift blender base and set aside.
7. Remove blender jar gently by grasp the jar handle,
then lift travel cup from inside the blender jar.
To assemble the blender, follow Blender Jar
Assembly instructions on page 5 of this instruction
booklet. Replace all packing material in the box and
save the box for repackaging. See the Features and
Benefits section on page 4 of this booklet for a listing
of all parts.
Before using for the first time: Wash all parts according to the Cleaning and Maintenance section on page
6 of this booklet to remove any dust.
3
FEATURES AND BENEFITS
1.Cover
Just press down into place. Tight-fitting seal
prevents leakage.
2.
1.
2.Measured Pour Lid
Allows you to measure and add ingredients
without removing the cover.
3. 56-oz. BPA-Free Tritan® Co-Polyester
Blender Jar
Has a unique, sturdy, wide-mouth design.
3.
4.High-Quality Blade Assembly with Patented
Stainless Steel Blades
Strong enough for all blending tasks, including tough
jobs like crushing ice and blending smoothies.
4.
5.Electronic Touchpad Controls
a.On/Off Button
Turns blender on or off.
b.Low Button
Choose Low speed to blend ingredients to
desired consistency. Blue LED lights indicate
which speed you are using.
6.
c.High Button
Choose High speed to blend ingredients to
desired consistency. Blue LED lights indicate
which speed you are using.
d.
5.
Pre-Programmed Ice Crush Button
Press Ice Crush to begin crushing. The blender will cycle through a pre-programmed function and stop when finished.
7.
e.Pre-Programmed Smoothie Function
Program is specifically designed to blend a
variety of ingredients into a perfect smoothie.
The blender will cycle through a pre-programmed
function and stop when finished.
Note: Blades are sharp.
Handle carefully.
f.Pulse Button
Allows you to pulse ingredients on High or Low.
11.
6. Powerful Motor Base
Plenty of power to handle a wide variety of blend-
ing and food prep tasks.
7.Slip-Proof Feet
Prevent movement during use and prevent
damaging marks on countertops or tables.
9.
8. Cord Storage (not shown)
Keeps countertop safe and neat by conveniently storing excess cord.
10.
9. Work Bowl
Durable 3-cup clear plastic work bowl is ideal for many everyday food prep tasks.
12.
10. Chopping/Mixing Blade
Made of ultra-sharp stainless steel.
11. Reversible Slicing/Shredding Disc
Adapter stem attaches disc to work bowl.
12. Two 16-ounce Travel Cups with Lids
Attach to blade assembly to mix directly in cup.
* Tritan is a registered trademark of Eastman Chemical Company.
4
OPERATION
BLENDER JAR ASSEMBLY
1.Place the motor base of your Cuisinart® VELOCITY
Ultra Trio 1 HP Blender on a flat, sturdy surface.
It is important that the surface be clean and
dry. Assemble the blender jar by following the
Assembly instructions. Once the jar is assembled
and is in position on the motor base, plug the unit
into an electrical outlet.
To use your Cuisinart® VELOCITY Ultra Trio 1 HP
Blender, begin by assembling the blender jar.
1. Turn the blender jar (a) upside down and place it
flat on a sturdy surface.
Note: You may need to position the rubber gasket
(b) into the groove of the blade assembly if not
tightly in place
ut all necessary ingredients into the blender jar
2. P
and replace the cover. You may add more ingredients by lifting the measured pour lid and dropping
ingredients through the fill area. Replace the measured pour lid after adding ingredients. Do not put
hands into blender jar with blender plugged in.
2. T
urn the blade assembly (c) upside down and
place the blade end in the blender jar opening.
3. Twist blade assembly (c) clockwise until secure.
Note: Blades are sharp. Handle carefully.
c.
Note: Add liquid ingredients first, then follow with
solid ingredients. This will provide more consistent
blending and prevent unnecessary stress on the
motor.
Note: To remove blender jar cover, lift edge of
cover upward. Lifting measured pour lid will not
remove cover.
3.
Start blending:
b.
Press the On/Off button. The red LED indicator light will illuminate and flash, indicating that the blender is turned on, but no speed has been selected.
a.
HELPFUL REMINDERS
4.
Choose blending action:
•Once the cover is in position, additional
ingredients can be added during blending by
simply lifting the measured pour lid, adding
ingredients and replacing the measured pour lid.
a. If selecting a blending speed, press Low or
High button to determine the speed at which
you would like to blend the ingredients. Both
the On indicator light and the activated speed
indicator light will glow. The blender will now be
functioning at the desired speed.
•
Cover should always be in place while the unit is
on.
b. If selecting a pre-programmed function,
press the Ice Crush or Smoothie button to
determine the function you would like to blend
the ingredients. Both the On indicator light and
the activated pre-programmed indicator light
will glow. The blender will now be functioning
at the desired pre-programmed function. The
blender will stop running once the
pre-programmed function times out and
completes the blending cycle.
•
Warning: Do not place blender jar on base while
motor is running.
•Do not remove blade assembly from blender jar
when removing blender jar from base. Simply lift
blender jar from motor base.
•Never put boiling liquids or solid frozen foods (with
the exception of ice cubes or ½-inch [1.3cm] pieces
of frozen fruit) in the blender jar.
•Do not put ice, frozen foods or very cold liquids
into a blender jar that has come directly out of
a hot dishwasher.
c.If selecting Pulse mode, you can create a
burst of power for quick, efficient blending.
To use the Pulse mode, push the Pulse button and the blue Pulse LED indicator light will
blink. Press and release either the Low or High
button. Repeat as desired. You determine the
duration of each pulse. While pulsing, the blue
LED indicator light will glow. The Pulse mode
can be used to break apart larger pieces of
food or to control the texture of food when
•Do not put very hot liquids or foods into a
blender jar that has come directly out of the
freezer. Cool boiling liquids for 5 minutes before
pouring into blender jar.
•Follow Cleaning and Maintenance instructions on
page 6 prior to your first use.
5
CLEANING AND MAINTENANCE
OF CUISINART® VELOCITY Ultra
Trio 1 HP BLENDER
chopping. The Pulse mode is also effective in
starting the blending process when you do not
want continuous power or when processing
items that do not require an extended amount
of blending.
WARNING: FLASHING RED LIGHT INDICATES
READY TO OPERATE. DO NOT TOUCH BLADES.
Always unplug your Cuisinart® VELOCITY Ultra Trio 1
HP Blender from the electrical outlet before cleaning.
The blender is made of corrosion-resistant parts that
are easy to clean. Before first use and after every
use, clean each part thoroughly. Periodically check
all parts before reassembly. If any part is damaged
or blender jar is chipped or cracked, DO NOT USE
BLENDER.
5. To pause or stop blending process:
a.To pause blending process:
Push the button corresponding to the speed at
which you are currently blending. For example:
If you are blending on High speed, push the
High speed button and the blender will stop
blending, but the unit will remain on.
Remove the blender jar from the motor base by lifting
straight up and away. Remove blade assembly by
turning counterclockwise.
b.To stop blending process:
Push the On/Off button when you are finished
with your recipe and would like to turn the
blender off.
Wash in warm, soapy water, rinse and dry thoroughly.
CAUTION: Handle the blade assembly carefully. It
is SHARP and may cause injury. Do not attempt to
remove blades from assembly.
c.To prevent excessive stress to the motor:
Your blender incorporates an auto-stop
feature. After running continuously for two
minutes, the blender will automatically revert to
Standby mode. To continue blending, press the
desired function.
Remove the blender jar cover and the measured
pour lid. Wash in warm, soapy water; rinse and dry
thoroughly or place in upper rack of dishwasher. The
blender jar must be washed in warm, soapy water
and rinsed and dried thoroughly. The blender jar can
also be placed upside down in dishwasher.
To dislodge food: First, be sure blender is turned
off. Use a rubber or plastic spatula to help remove
food lodged around the removable blade assembly. Replace the cover and measured pour lid and
continue blending, if necessary. Make sure spatula
is not inside the blender jar before blending.
Finally, wipe the motor base clean with a damp cloth
to remove any residue and dry thoroughly. Never
submerge the motor base in water or other liquids,
or place in a dishwasher.
Tip: You may wish to clean your blender blade
assembly as follows: Squirt a small amount of
dishwashing liquid into assembled blender jar and
fill halfway with warm water. Run on Low for 15
seconds. Repeat, using clean tap water. Rinse and
dry all parts thoroughly.
To reset the unit: This appliance features an
advanced, resettable thermal device. In the event
of an overload condition, the unit will shut down
to protect the motor from overheating. To reset
the appliance when this happens, unplug the unit
and let it cool for a minimum of 15 minutes. Then,
reduce the contents of the blender jar and/or clear
any jams. Restart the unit as noted in the operating directions.
Any other servicing should be performed by an
authorized service representative.
CLEANING AND STORING YOUR
CUISINART® VELOCITY Ultra Trio
1 HP BLENDER/FOOD
PROCESSOR WITH TRAVEL CUPS
hen finished blending: Press the On/Off butW
ton and unplug the blender from the electrical
outlet. Never remove the blender jar from the
motor base until the blender is off. Do not remove
blade assembly from blender jar when removing
jar from motor base. Simply lift blender jar from
motor base. Do not put hands into blender jar with
blender plugged in.
Store the chopping blade and slicing/shredding disc as
you would sharp knives – out of the reach of children.
The work bowl, cover, pusher, chopping blade and slicing/
shredding disc are top-shelf dishwasher safe. When
placing parts in your dishwasher, insert the work bowl
upside down. Remember where you place the sharp blade
and disc, and be certain to unload the dishwasher
carefully.
The gearbox collar is not immersible. To clean, just wipe
with a damp cloth. If you wash the blades and discs by
hand, do it carefully. Avoid leaving them in soapy water
where they may disappear from sight. To clean the metal
blade, fill the work bowl with soapy water, hold the blade
6
Don’t:
by its plastic center and move rapidly up and down on the
center shaft of the bowl. Use of a spray hose is also
effective. If necessary, use a brush.
• Don’t store food or liquids in the blender jar.
•Don’t place blade assembly on motor base
without the blender jar attached.
The work bowl should not be placed in a microwave oven.
•Don’t attempt to mash potatoes, knead heavy
dough or beat egg whites.
DOs and DON’Ts
WHEN USING YOUR BLENDER
•Don’t remove blender jar while unit is on. Keep
the blender jar cover on the blender jar while
blending.
•Don’t twist removable blade assembly from
blender jar when removing blender jar from motor
base. Simply lift blender jar from motor base.
Do:
•Make sure the electrical outlet is rated at the
same voltage as that stated on the bottom of the
blender motor base.
•Don’t overload blender. If the motor stalls, turn
the blender off immediately, unplug the unit and
remove a portion of the food, then continue.
•Always use the blender on a clean, sturdy and
dry surface.
•Don’t use any utensil inside the blender jar while
the motor is on.
•
A lways add liquid ingredients to the blender
jar first, then add remaining ingredients. This
will ensure that ingredients are uniformly
mixed.
•Don’t use any containers or accessories not
recommended by Cuisinart. Doing so may result
in injury.
•Don’t put hands inside the blender jar when
blender is plugged in.
•Cut most foods into cubes approximately 1 inch
(2.5cm) to achieve a more uniform result. Cut
all cheeses into pieces no larger than ½ inch
(1.3cm).
•Don’t add boiling liquids or frozen foods (except
ice cubes or ½-inch pieces of frozen fruit) to
blender jar. Boiling liquids should cool for
5 minutes before being poured into blender jar.
•Use the measured pour lid to measure liquid
ingredients such as alcohol. Replace measured
pour lid after ingredients have been added.
•Don’t run blender when jar is empty.
•Use a rubber or plastic spatula as needed, only
when the blender is turned off. Never use
metal utensils, as damage may occur to the
blender jar or blade assembly.
•Place cover on firmly. Always operate the blender
with the cover on.
•Make sure removable blade assembly is tightly
attached to blender jar.
•Always remove blade assembly before cleaning.
•When chopping fresh herbs, garlic, onion, zest,
breadcrumbs, nuts, etc., make sure the blender
jar and blade assembly are completely dry.
•If food tends to stick to the sides of the blender
jar when blending, pulse in short bursts.
•Pulses should be short bursts. Space the pulses
so the blades stop rotating between pulses,
about 1–2 seconds.
7
FOOD PROCESSOR FEATURES
3.Place chopping/mixing blade over shaft in work bowl.
Chopping blade should slide easily to the bottom of
the bowl. Lower blade will almost touch bottom of
bowl.
1. Food pusher with drizzle hole
2. Work bowl cover with feed tube
BE SURE TO HANDLE THE METAL BLADE WITH
CARE AS IT IS RAZOR SHARP!
3. Stainless steel chopping/mixing blade
1.
4.Place food to be processed in work bowl. Put cover
on work bowl and turn the cover clockwise until it fits
into position. Cover lock must click into locked
position prior to use. If you have trouble fitting the
cover on the work bowl, turn chopping blade hub
slightly and replace cover.
2.
5.The food pusher fits in feed tube with the more
rounded side toward the outside of the bowl.
ALWAYS USE PUSHER TO GUIDE FOOD
THROUGH FEED TUBE. NEVER USE YOUR
FINGERS OR SPATULA.
4. Stainless steel reversible slicing/shredding disc
5. Adapter stem
6. Clear work bowl
7. Gearbox collar
8.Motor base
(not shown)
Used for both the
blender jar and the food
processor bowl
6.Plug your Cuisinart® VELOCITY Ultra Trio 1 HP
Blender/Food Processor with work bowl into a wall
outlet. Push the On/Off button and then the High
button to start chopping or puréeing. It is
recommended that one hand be placed on the food
processor lid while in use, to provide unit stability. If
the machine doesn’t start, make sure it is plugged in
and the work bowl and cover are locked into place.
The food processor will not start until the collar, work
bowl and work bowl lid are locked into place.
Nevertheless, always unplug the unit before placing
hands into the food processor bowl. NOTE: The
motor base will start, but the food processor blade
will not turn until assembled properly.
3.
4.
5.
6.
FOOD PROCESSOR ASSEMBLY FOR SLICING
AND SHREDDING
1. Unplug unit. Place gearbox collar onto motor base. 7.
2. Place workbowl onto the collar with handle facing front. Twist clockwise to lock onto collar.
3. Place adapter stem onto the center shaft. To slice:
Attach disc to stem with the raised edge of slicer on
top. To shred: Attach disc to stem with the raised
shredding slots on top. Be sure to handle the metal
blade with care, as it is razor sharp.
FOOD PROCESSOR ASSEMBLY,
USE AND CARE
4. Place cover on work bowl and turn cover clockwise
until it fits into position and locks. Insert food into
feed tube.
Please note that the bowl with collar will fit on the base in
four different positions. The handle can be in front or on
either side, and the feed tube in front, back or on either
side. Directions for use reference a certain position for
instructional purposes only.
5. Hold pusher with the more rounded side toward the
outside of the bowl and insert it in feed tube over
food. Always use pusher to guide food through feed
tube. Never use your fingers or spatula.
FOOD PROCESSOR ASSEMBLY FOR CHOPPING,
PURÉEING AND MIXING
6. Plug your Cuisinart® VELOCITY Ultra Trio 1 HP
Blender/Food Processor with work bowl into a
household electrical outlet.
1.Place collar onto motor base.
2.Place work bowl onto the collar with handle facing
front. Twist clockwise to lock onto collar.
7. To remove cover, unlock it by turning it
counterclockwise, then lift it straight up.
8
FOOD PROCESSOR OPERATION
5. To purée, follow same procedure for chopping, but let machine run until food is a smooth purée.
High speed will work best for most items when slicing or
shredding. The High speed is perfect for most of your
food processing tasks. You may also use the Pulse button
with this function for pulse-chopping.
6. New users are often surprised at how fast the processor works. You will quickly get used to its great speed.
To use your food processor, make sure that the bowl is
assembled properly and the blade and cover are locked
into place.
• Size of pieces you put in bowl – all should be about the same size.
7. These are some conditions that affect your results:
When you use the control panel, the LED will illuminate
each button you press.
• Amount of food you process – don’t add too much.
• Type of processing you choose – continuous or pulse-chopping.
Press the On/Off button. For continuous operation, press
the Low or High button. Motor will start if you have
followed assembly instructions.
ADDING FOOD WHILE PROCESSING
To turn motor off, press the speed function again or the
On/Off button.
1. To add liquid while the machine is running, pour it through open feed tube. This is especially useful when making mayonnaise or dressings.
For On/Off operation, called pulse-chopping or pulsing,
press the On/Off button, press the Pulse button and then
press and release the Low or High button the desired
number of times. Motor runs as long as you hold the Low
or High button down. The motor stops when you release
control switch. Try it a few times.
2. A small hole in the pusher allows you to add liquids in a very slow, steady stream – useful when making sauces or dressings.
3. When you want to add small pieces of food like cheese, meat or garlic cloves while machine is running, drop them through open feed tube.
You control the duration and frequency of pulses by the
length of time you hold the Low or High button down and
the rate at which you press it. Allow enough time between
pulses to let food in work bowl fall to bottom.
4. To prevent spills when adding sugar and other dry ingredients, use a funnel.
Never turn cover back and forth to start and stop
processor.
REMOVING PROCESSED FOOD
TIPS WHEN USING THE FOOD PROCESSOR TO
CHOP, PURÉE, AND MIX
Before removing processed food, press On/Off button and
wait for blade to stop spinning. Then remove cover by
turning it counterclockwise. Never try to remove cover and
work bowl together; this can damage work bowl.
Refer to Food Processor Assembly instructions on
previous page.
It is important not to let metal blade fall out of work bowl
as you empty it.
1. Cut food into 1/2 to 1-inch pieces. You will get a more
even chop if you start with pieces that are all the
same size.
Here are two ways to prevent the blade from falling
out:
You can put in up to 1 cup of food at a time. If you
want to process more, do it in batches.
1. Before tilting bowl, use spatula to remove food from
around blade. Carefully remove blade by the plastic
hub.
2. It is recommended to use the Pulse function to chop food. With pulse-chopping technique, you can get an even chop without danger of overprocessing. Check texture by looking through work bowl. Be careful not to overprocess. For a coarse chop, pulse only a few times.
2.
old top of blade in place with finger or spatula while
H
pouring out processed food.
At this point, you may either lift the work bowl off motor
base or hold the collar at the base and turn the handle of
the bowl counterclockwise and lift blade straight up.
3. If you want a finer chop or purée, press the On/Off
button and then the High button and let machine run
continuously until the food is chopped as fine as you
want it. Check frequently through clear cover or bowl
to avoid chopping too fine. Use a plastic spatula to
scrape down any pieces that stick to inside of bowl.
NOTE: Occasionally, a piece of food may become
wedged between the blade and the work bowl. If this
happens, turn to remove the cover, lift the blade out
carefully and remove the wedged piece. Empty the bowl,
reinsert the blade and lock the cover into place. Process
smaller amounts of the food at one time.
4. Onions and other food with a high water content turn into a smooth purée very quickly. Do not over-chop – look at food frequently through work bowl.
9
TIPS WHEN USING THE FOOD PROCESSOR TO
SLICE AND SHRED
1. Assemble clear work bowl on collar and base in the
usual way. (See page 8.)
2. Use moderate pressure to push down on food with pusher button, with one hand, while using your other hand to push the Low or High button. Slicing and shredding only take a few seconds.
3.Wait until disc stops spinning before removing cover.
When it stops, remove cover before removing work
bowl. Never try to remove cover and work bowl
together; this could damage work bowl.
4. Remove slicing/shredding disc before removing work
bowl. To remove it, grasp flat top section of adapter
stem and lift it straight up. Holding work bowl collar,
turn work bowl counterclockwise and lift it straight
up to remove it from base.
TRAVEL CUP OPERATION
1.The travel cups use the same blade assembly as the
blender jar. Put food ingredients into the travel cup,
and then attach blade assembly.
2.Place the blender base on the tabletop and plug in
the power cord. Turn the filled travel cup upside
down and place it on the base, aligning the 4 tabs on
the travel cup rim with the 4 openings on the blender
base. Using both hands, firmly push down on the
cup, and turn it clockwise to lock into place. NOTE:
To ensure cup is properly installed, check to see that
the small black button in the back-left tab opening is
fully visible.
6.Turn cup right side up, turn blade assembly
counterclockwise to remove. Attach travel cup lid by
twisting clockwise.
RECIPE TIPS
You’ll find many easy ways to prepare savory, healthful
meals with your Cuisinart® VELOCITY Ultra Trio 1 HP
Blender/Food Processor with Travel Cups. The simple
recipes that follow include some old Cuisinart favorites as
well as some creative combinations that are sure to
please your friends and family. Thanks to the superior
ice-crushing power of the Cuisinart® VELOCITY Ultra Trio
1 HP Blender/Food Processor with Travel Cups, you’ll
also be able to make delicious frozen drinks.
• When using the blender to purée hot mixtures such as
creamed soups and baby foods, strain the solids from
the liquid, reserving the cooking liquid. Then put a
portion of the reserved cooking liquid into the blender
jar along with the cooked solids. Blend on Low until
desired consistency/purée is reached.
• Allow hot foods to cool slightly before blending to
prevent steam buildup, which may cause the lid to lift
up from the blender jar. When blending hot foods,
remove the measured pour lid and hold lid down with
a dishtowel in hand to hold in place.
• Keep ice cubes made of juices, yogurt, milk or fruit
purées on hand to substitute for plain ice when
making smoothies and frosty beverages to prevent
diluting the drink.
• Keep your blender out on the counter within easy
reach, and you will be surprised how often you will
use it.
• For quick cleaning, add 1 cup of warm water and a
drop of liquid dish soap to the blender jar. Cover and
run on Low or High for 15 to 30 seconds, or more as
needed. Discard the soapy water and rinse blender
thoroughly before the next use.
3.Press the ON/OFF button and then the desired
speed or function. The blue LED light will illuminate,
indicating that the blender is on and running. It is
possible to switch between speeds by simply
pushing the desired speed button.
• When using the travel cups, ingredients should be
added in the reverse order of a regular blender jar —
solids first, then liquids.
4.To pause the blending process, press the activated
speed or pre-programmed button. The blending
process will stop. The red Standby indicator light will
continue to flash to let you know that the blender is
still activated. To re-engage the unit, choose the
desired speed.
5.When you have finished blending, press the ON/OFF
button. Remove the travel cup from the base by
pressing down firmly, and turning counterclockwise.
Unplug the unit.
10
QUICK REFERENCE GUIDE
To activate
Press On/Off – It is in Standby mode.
To begin blending/processing
Press desired speed or pre-programmed button.
To change speeds
Press desired speed button.
To pulse
Press On/Off, then Pulse, then press and release desired speed
button as needed.
To crush ice
Press On/Off, then press Ice Crush button and program will begin.
Ice Crush program runs for 1 cycle.
To stop blending/processing
(and deactivate unit)
Press On/Off button.
To stop blending/processing
(during a designated function and
pause timer)
Press same function key under operation again.
To stop blending/processing in Pulse
Release speed button.
USING YOUR BLENDER JAR AND TRAVEL CUPS
Ingredient/Recipe
Speed
Result
Reconstituting frozen juice concentrate
(Blender or Travel cup)
Low
Smooth and full-bodied
Mayonnaise
(Blender only)
Low
Thick and creamy
Salad dressings
(Blender only)
Low
Completely blended and emulsified
Heavy or whipping cream
(Blender or Travel cup)
Pulse on Low
Thick, creamy topping
Smoothies, shakes, health drinks
(Blender or Travel cup)
Smoothie
Smooth, creamy and thick
Baby food/fruit and vegetable purée
(Blender or Travel cup)
Low
Smooth and creamy
Frozen cocktails
(Blender only)
Ice Crush
Thick and slushy
Ice (approx. 12 cubes per cycle for Blender
Jar, 6 cubes for Travel Cups)
Ice Crush
Coarse crush to snowy
11
PROCESSING WITH THE FOOD PROCESSOR)
CHOPPING BLADE
The Food
How to Prepare
Fruit and vegetables
eel and core if necessary. Remove large, hard pits and seeds. Cut into ¾-inch pieces
P
and process up to 1 cup at a time.
Meat, poultry and fish
hese should be very cold, but not frozen. First, cut into ¾-inch pieces. Put up to ½
T
pound in work bowl. Pulse until desired consistency is reached. Check texture every 2
or 3 seconds to avoid overprocessing.
Bread, crackers or
cookies
reak into 1-inch pieces and process continuously until texture for crumbs is fine.
B
For seasoned crumbs, chop with herbs. For buttered crumbs, dribble melted butter
through feed tube while processing. Process no more than 1 cup at a time.
Crumb crusts
hop crackers or cookies as described in preceding paragraph. Add other ingredients
C
as specified by recipe. Pulse until combined. Process no more than 1 cup at a time.
Hard cheese – grated
If it is too hard to cut with a knife, don’t try to chop it – it may damage blade. First cut
into ½-inch pieces. Pulse until pea-sized, then process continuously. You can chop it
as coarse or as fine as you want. Simply run machine longer for finer chop. Process no
more than 3 ounces at one time.
Whipping cream
Process refrigerated cream 1 cup at a time. It is excellent as a topping for desserts or
hot drinks.
Fresh herbs
ork bowl and metal blade must be clean and dry. Remove stems; use leaves only.
W
Dry herbs completely. The more herbs you chop at once, the finer chop you can get.
Chopped herbs keep for several days in the refrigerator in airtight bags, or can be frozen for months. Chop up to ½ cup at one time.
Grating Citrus Zest
For best results, work bowl and blade must be clean and dry. Remove zest from fruit
in strips (using vegetable peeler). Use no more than 8 strips at a time (zest of one
medium lemon). Cut strips in half. Add strips and 1 teaspoon sugar (from recipe) to the
work bowl. Process for 15 to 20 seconds.
12
PROCESSING WITH THE SLICING/SHREDDING DISC
Food
To Prepare for Slicing
To Prepare for Shredding
Long narrow foods like carrots, celery, cucumbers, and
zucchini
Cut into even lengths about 1 inch shorter
than height of feed tube. Stand pieces
upright in feed tube, flat side down, adding
enough pieces so they cannot tilt.
For long shreds, cut into largest
size that will fit sideways in feed
tube. Stack in feed tube to about
1 inch from top. For shorter
shreds, stand pieces upright
in feed tube, flat side down (as
described in slicing column). Cut
into even lengths, about 1 inch
shorter than height of tube.
Apples, onions, potatoes, peppers, tomatoes and other large
round fruits and vegetables
Cut, coring and seeding if necessary, into
even pieces to fit into the feed tube. Pack
solidly to prevent tilting. Fill feed tube to
about 1 inch from top. Use light to moderate pressure.
Prepare same as for slicing.
Place in feed tube sideways for
longer shreds, or upright for
shorter shreds.
Strawberries, mushrooms,
radishes and other small, round
fruits and vegetables
Prepare foods as required. Place in feed
tube. Use light to moderate pressure.
Radishes shred well. Prepare
same as for slicing.
Cabbage, iceberg lettuce
Cut off top and bottom, leaving center
section. Cut into wedges to fit feed tube
upright. Remove core. Cut top and bottom
pieces in similar wedges.
Prepare same as for slicing.
Soft cheeses like mozzarella
Do not slice.
Cut into pieces to fit feed tube.
Chill in freezer for 5 minutes
before processing. Stand pieces
in feed tube and use light pressure on pusher.
Medium-hard cheeses like
Cheddar and Swiss
Cut into pieces to fit feed tube. Stand
pieces in feed tube and use light pressure
on pusher.
Prepare same as for slicing.
Hard cheeses like Parmesan
Do not slice.
Do not shred.
13
LIMITED THREE-YEAR
WARRANTY
result in the appropriate relief to the consumer, the
consumer may then take the product to an independent
repair facility if service or repair can be economically
accomplished.
This warranty is available to U.S. consumers only. This
warranty supersedes all previous warranties on the
Cuisinart® VELOCITY Ultra Trio 1 HP Blender/Food
Processor with Travel Cups. You are a consumer if you
own a Cuisinart® VELOCITY Ultra Trio 1 HP Blender/Food
Processor with Travel Cups that was purchased at retail
for personal, family or household use. Except as otherwise
required under applicable state law, this warranty is not
available to retailers or other commercial purchasers or
owners. We warrant that your Cuisinart® VELOCITY Ultra
Trio 1 HP Blender/Food Processor with Travel Cups will be
free of defects in material or workmanship under normal
home use for three years from the date of original
purchase. We recommend that you visit our website,
www.cuisinart.com for the fastest, most efficient way to
complete your product registration. However, product
registration online does not eliminate the need for the
consumer to maintain the original proof of purchase in
order to obtain the warranty benefits. In the event that you
do not have proof of purchase date, the purchase date for
purposes of this warranty will be the date of manufacture.
Cuisinart and not the consumer will be responsible for the
reasonable cost of such service, repair, replacement or
refund for nonconforming products under warranty.
California residents may also, at their preference, return
nonconforming products directly to Cuisinart for repair or,
if necessary, replacement by calling our Consumer Service
Center toll-free at 1-800-726-0190. Cuisinart will be
responsible for the cost of the repair, replacement and
shipping and handling for such nonconforming products
under warranty.
BEFORE RETURNING YOUR CUISINART
PRODUCT
If you are experiencing problems with your Cuisinart
product, we suggest that you call our Consumer Service
Center at 1-800-726-0190 before returning the product for
servicing. Often, our Consumer Service Representatives
can help solve the problem without having the product
serviced. If servicing is needed, a representative can
confirm whether the product is under warranty and direct
you to the nearest service location.
If your blender should prove to be defective within the
warranty period, we will repair it or, if we think necessary,
replace it. To obtain warranty service, please call our
Consumer Service Center toll-free at 1-800-726-0190 or
write to: Cuisinart, 7475 North Glen Harbor Blvd.,
Glendale, AZ 85307.
Your Cuisinart® VELOCITY Ultra Trio 1 HP Blender/Food
Processor with Travel Cups has been manufactured to the
strictest specifications and has been designed for use
only in 120 volt outlets and only with authorized
accessories and replacement parts. This warranty
expressly excludes any defects or damages caused by
attempted use of this unit with a converter, as well as use
with accessories, replacement parts or repair service other
than those authorized by Cuisinart. This warranty does not
cover any damage caused by accident, misuse, shipment
or other than ordinary household use. This warranty
excludes all incidental or consequential damages. Some
states do not allow the exclusion or limitation of these
damages, so these exclusions may not apply to you. You
may also have other rights, which vary from state to state.
To facilitate the speed and accuracy of your return, please
enclose $10.00 for shipping and handling of the product.
Be sure to include a return address, daytime phone
number, description of the product defect, product serial
number (stamped on bottom of product base), and any
other information pertinent to the product’s return. Please
pay by check or money order. (California residents need
only supply proof of purchase and should call 1-800-7260190 for shipping instructions.)
NOTE: For added protection and secure handling of any
Cuisinart product that is being returned, we recommend
you use a traceable, insured delivery service. Cuisinart
cannot be held responsible for in-transit damage or for
packages that are not delivered to us. Lost and/or
damaged products are not covered under warranty.
Important: If the nonconforming product is to be serviced
by someone other than Cuisinart’s Authorized Service
Center, please remind the servicer to call our Consumer
Service Center at 1-800-726-0190 to ensure that the
problem is properly diagnosed, the product is serviced
with the correct parts and to ensure that the product is
still under warranty.
CALIFORNIA RESIDENTS ONLY
California law provides that for In-Warranty Service,
California residents have the option of returning a
nonconforming product (A) to the store where it was
purchased or (B) to another retail store that sells Cuisinart
products of the same type. The retail store shall then,
according to its preferences, either repair the product,
refer the consumer to an independent repair facility,
replace the product or refund the purchase price less the
amount directly attributable to the consumer’s prior usage
of the product. If either of the above two options does not
©2014 Cuisinart
150 Milford Road
East Windsor, NJ 08520
Printed in China
14CE002001
IB-12674-ESP
14
RECIPES
Power Protein Smoothie
This on-the-go drink, packed with energy-dense ingredients,
will keep you full, longer.
Smoothies to Go
Power Protein Smoothie................................................... 15
Makes about 2 cups*
Very Berry Smoothie......................................................... 15
¾
1
1
¼
¾
1
Smoothies for a Crowd
Sweet Green Smoothie..................................................... 16
Super Antioxidant Smoothie............................................. 16
Vitamin C Smoothie.......................................................... 16
Frozen Drinks (with/without spirits)
cup mixed frozen berries
banana, quartered
tablespoon protein powder
cup plain or vanilla yogurt
cup unsweetened soy, almond or hemp milk (cow’s milk may also be used)
tablespoon honey (optional)
Frozen Rum Punch............................................................ 16
1. Put ingredients into the travel cup, in order listed. Screw the blending blade attachment very well. Place into base, press and turn to lock.
Mocha Shake.................................................................... 17
2. Blend on the Smoothie function.
Brunch
3. Turn cup over, remove the blending blade assembly, screw the lid on and GO!
Apple-Walnut Waffles........................................................ 17
Crêpe Batter...................................................................... 17
*To make this in the blender jar, double the recipe and put ingredients into jar in the reverse order.
Nutritional information per serving (2 cups):
Calories 303 (9% from fat) • carb. 49g • pro. 21g • fat 3g
• sat. fat 1g • chol. 1mg • sod. 199mg • calc. 153mg
• fiber 6g
Soups
Carrot-Ginger Soup........................................................... 18
Creamy Greens Soup........................................................ 18
Gazpacho.......................................................................... 19
Very Berry Smoothie
Sauces, Dips and Dressings
Blend up this combination of fresh and frozen fruit for a
refreshing morning or afternoon treat.
Champagne Vinaigrette..................................................... 19
Green Goddess Dressing.................................................. 19
Makes about 2 cups*
Hollandaise........................................................................ 20
½ cup frozen strawberries
¼ cup frozen mixed berries
½ cup fresh strawberries, hulled
½ medium to large peeled ripe banana, cut into 2-inch pieces
¾ cup orange juice
Hummus............................................................................ 20
Peach Salsa...................................................................... 21
Pesto................................................................................. 21
Starters and Sweets
Crab Cakes....................................................................... 22
1. Put all the ingredients into the travel cup, in the order listed. Screw the blending blade attachment very well. Place into base, press and turn to lock.
Raspberry Sauce............................................................... 22
2. Blend on the Smoothie function.
3. Turn cup over, remove blending blade assembly, screw the lid on and GO!
*To make this in the blender jar, double the recipe and put ingredients into jar in the reverse order.
Nutritional information per serving (2 cups):
Calories 198 (4% from fat) • carb. 49g • pro. 3g • fat 1g
• sat. fat 0g • chol. 0mg • sod. 3mg • calc. 51mg • fiber 6g
15
Sweet Green Smoothie
Vitamin C Smoothie
This sweet—yes, sweet!—green drink will give
you the extra energy boost you need early in the
morning or late in the afternoon.
Enjoy this smoothie when you need the ultimate
cold-fighting punch. Plus, the tropical flavors will
instantly whisk you away to warmer climates.
Makes 3½ cups
Makes about 5 cups
1½
1
¾
¾
6
1
2
1
1
1
2
cups almond milk
medium-large apple, cored and cut into 1-inch pieces
cup frozen mango chunks
cup frozen strawberries
stems lacinato kale, trimmed and chopped into 1-inch pieces
1. Put all ingredients into blender jar, in the order listed.
cup orange juice
cups fresh strawberries, hulled
small to medium orange, cut into
segments (about ¾ cup)
cup cut papaya (about ¼ large papaya, cut into 1-inch pieces)
cup cut mango (about 1 small mango, cut into 1-inch pieces)
cups frozen strawberries
2. Cover and blend on the Smoothie function. For 1. Put ingredients into the blender jar in order a smoother consistency, run on Smoothie listed.
function again, or run on High until desired 2. Cover and blend on the Smoothie function.
result.
3. Serve immediately.
3. Serve immediately.
Nutritional information per serving (8 ounces):
Calories 106 (3% from fat) • carb. 26g • pro. 1g • fat 0g
• sat. fat 0g • chol. 0mg • sod. 5mg • calc. 42mg • fiber 4g
Nutritional information per serving (7 ounces):
Calories 82 (15% from fat) • carb. 18g • pro. 1g • fat 1g
• sat. fat 0g • chol. 0mg • sod. 128mg • calc. 102mg
• fiber 3g
Frozen Rum Punch
Your friends may never leave if you prepare this for
them at your next get-together.
Super Antioxidant Smoothie
Berries are the ultimate antioxidant ingredient. Sip
on this mix for breakfast, especially after a day of
indulgent eating, to kick-start your healthy-eating
routine.
Makes about 6 cups
½
cup orange juice
3
tablespoons fresh lime juice (the juice of approximately 2 limes)
¾
cup rum (light or dark)
1
tablespoon grenadine
3
cups fresh pineapple, cut into 2-inch
pieces
1
pint mango sorbet
6
ice cubes
Makes about 6 cups
2
1
4
2
cups pomegranate juice
banana, cut into 1-inch pieces
cups mixed frozen berries
tablespoons ground flaxseed
1. Put ingredients into the blender jar in the order listed.
2. Cover and blend on the Smoothie function.
1. Put ingredients into the blender jar in order listed.
3. Serve immediately.
2. Cover and blend on the Smoothie function.
3. Serve immediately.
Nutritional information per serving (8 ounces):
Calories 118 (11% from fat) • carb. 28g • pro. 1g • fat 2g
• sat. fat 0g • chol. 0mg • sod. 5mg • calc. 14mg • fiber 4g
Nutritional information per serving (4 ounces):
Calories 111 (0% from fat) • carb. 22g • pro. 0g • fat 0g
• sat. fat 0g • chol. 0mg • sod. 107mg • calc. 1mg
• fiber 1g
16
Mocha Shake
Remove the Food Processor Attachment and
reserve.
This chocolatey coffee treat will quickly satisfy your
sweet tooth.
3.Put the flour, wheat germ, sugar, baking powder,
salt and cinnamon into a large mixing bowl,
whisk to combine. Put the milk, egg, egg white,
oil and vanilla to the blender jar. Cover and run
on Low for 20 seconds to fully combine. Add
half of the dry ingredients. Pulse on Low to
combine; turn blender off, scrape down sides of
the jar. Add the remaining dry ingredients and
pulse on Low to just combine (it is OK if there
are still dry patches in the batter).
Makes about 4½ cups
3
2¼ ¼
cups coffee ice cream
cups reduced-fat milk
cup chocolate syrup
1. Put all of the ingredients into the blender jar, in the order listed.
4.Transfer the batter to the large mixing bowl that
was previously holding the dry ingredients. Add
the reserved apple and walnuts; fold to just
combine.
2. Cover and blend on Low for 30 to 40 seconds, or until smooth.
3. Serve immediately.
5.Preheat a Cuisinart® Belgian Waffle Maker to
desired setting. Pour the suggested amount of
batter (refer to waffle maker instructions) onto
the prepared, preheated waffle maker. Quickly
and carefully spread the batter evenly with a
heatproof spatula. Close the cover and cook
until tone sounds. Serve immediately.
Nutritional information per serving (4 ounces):
Calories 203 (58% from fat) • carb. 17g • pro. 5g • fat 13g
• sat. fat 8g • chol. 83mg • sod. 65mg • calc. 145mg
• fiber 0g
Apple-Walnut Waffles
Nutritional information per waffle:
Calories 220 (45% from fat) • carb. 24g • pro. 6g • fat 11g
• sat. fat 1g • chol. 25mg • sod. 352mg • calc. 230mg
• fiber 1g
Served with warm maple syrup, these waffles are a
comforting fall treat.
Makes 10 Belgian-style waffles (6 cups of batter)
Crêpe Batter
½
cup toasted walnuts
½
large apple, cored
1½
cups unbleached, all-purpose flour
¼
cup wheat germ
3
tablespoons light brown sugar
1
tablespoon, plus 1 teaspoon baking
powder
½
teaspoon kosher salt
¼
teaspoon ground cinnamon
1¾
cups reduced-fat milk
1
large egg
1
large egg white
¼
cup vegetable oil
¾
teaspoon pure vanilla extract
Extremely versatile, this recipe should be added
to everyone’s collection. Crêpes can be filled with
sweet items (cinnamon-sugar and fruit; whipped
cream and chocolate) or savory (eggs and ham;
vegetables and hollandaise.)
Makes about 12, eight-inch crêpes
3
large eggs, room temperature
¼
cup unsalted butter (½ stick), melted and cooled to room temperature
¾
cup unbleached, all-purpose flour
½
teaspoon kosher salt
1
tablespoon granulated sugar
1
cup reduced-fat milk, room temperature
1
teaspoon pure vanilla extract
1
teaspoon unsalted butter, room
temperature
1.Insert the chopping blade into the Food
Processor Attachment of the Cuisinart® Blender.
Fit onto the blender base.
2.Put the walnuts in the work bowl of the food
processor. Pulse 2 to 3 times on High to chop.
Remove the chopping blade and replace with
the reversible shredding/slicing disc, with the
shredding side facing up. Shred the apple
directly into the work bowl with the nuts.
1. Put the eggs, melted butter, flour, salt and
sugar into the blender jar. With the unit running
on Low, carefully remove the measured pour lid
from the cover of the blender. Add the milk and
vanilla through the opening and blend for
17
3. Continue cooking and replace the chopping
blade with the slicing disc. Slice the carrots and
then stir directly into the saucepan, adding the
salt, cinnamon, allspice, nutmeg and thyme.
Stir ingredients together well and then add the
chicken broth. Increase heat and bring to a boil.
Once soup comes to a boil, reduce the heat so
that it is barely simmering. Cover and simmer
until the carrots become tender, about 50 to 60
minutes.
about 15 to 20 seconds, or until smooth. If time
allows, let the batter rest in the refrigerator for
at least 30 minutes. Before using batter, whisk
to re-blend, straining if necessary to remove
any lumps.
2. Melt the teaspoon of butter in an 8-inch,
nonstick skillet set over medium heat. Once
pan is hot, add a scant ¼ cup of batter to the
pan, moving the batter around quickly to make
a thin coating on the pan. Cook the crêpe for 2
to 3 minutes, until the edges just start to brown,
and then carefully flip and finish cooking on the
other side for an additional minute. Continue
cooking crêpes until there is no more batter.
4. Once tender, separate the solids from liquid.
Put about half of the broth and half of the solids
into the blender jar. Blend on Low for about
10 seconds and then switch to High to blend
thoroughly. Pour soup into a clean pot. Repeat
with remaining ingredients. Taste and adjust
seasoning as desired.
3. Serve with your favorite sweet or savory fillings.
Nutritional information per crêpe:
Calories 92 (52% from fat) • carb. 8g • pro. 3g • fat 5g
• sat. fat 3g • chol. 59g • sod. 129mg • calc. 36mg
• fiber 0g
Nutritional information per serving (1 cup):
Calories 95 (44% from fat) • carb. 12g • pro. 2g • fat 5g
• sat. fat 3g • chol. 12mg • sod. 733mg • calc. 69mg
• fiber 3g
Carrot-Ginger Soup
Creamy Greens Soup
A small amount of fresh ginger goes a long way.
You’ll love how it brightens up the warm flavors in
this silky-smooth soup.
Don’t let the color fool you—this earthy, nourishing
soup is delicious! Garnish with a dollop of crème
fraîche and a sprig of parsley for a special,
restaurant-like touch.
Makes about 5 cups
1
2
½
1
1
½
¼
1
⁄8
1
4
Makes about 5 cups
small onion, cut into 1-inch pieces
tablespoons unsalted butter or olive oil
ounce fresh ginger, peeled and cut into ½-inch pieces
garlic clove
pound carrots, peeled and cut to fit
feed tube
teaspoon kosher salt
teaspoon ground cinnamon
teaspoon ground allspice
Pinch freshly ground nutmeg
thyme sprig
cups chicken broth, low sodium
2
3
1
1
2
1
1
½
¼
4
½
small shallots (about 3 ounces)
garlic cloves
small leek (about 2 ounces), white part only
tablespoon olive oil
tablespoons unsalted butter
bunch kale, hard stems discarded and roughly chopped
bunch Italian parsley, leaves only
teaspoon kosher salt
teaspoon freshly ground black pepper
cups vegetable broth low sodium
cup heavy cream
1. Insert the metal chopping blade into the Food
Processor Attachment and place on the blender
base. Add the onion and pulse on High to
roughly chop, about 8 to 10 pulses.
1. Insert the metal chopping blade into the
Food Processor Attachment and place on the
blender base. Add the shallot, garlic and leek
and process on High until finely chopped.
2. Put the butter or oil into a 6-quart saucepan
set over medium heat. Add onion. While onion
is cooking, chop ginger and garlic together
by running on High. Add ingredients to the
saucepan.
2. Put the oil and butter into a 6-quart saucepan
set over medium heat. Once butter is melted,
add the chopped shallot-garlic-leek mixture.
Sweat ingredients together so that they gently
sauté, but do not pick up any color.
18
3. Chill well before serving.
3. Add the kale, parsley, salt and pepper and stir
to coat. Add the vegetable broth and bring to a
boil. Cover and reduce heat so that the soup is
just simmering. Simmer for about 30 minutes.
Add the cream and continue simmering,
uncovered, for an additional 20 to 30 minutes.
Nutritional information per serving (1 cup):
Calories 47 (6% from fat) • carb. 9g • pro. 2g • fat 0g • sat.
fat 0g • chol. 0mg • sod. 399mg • calc. 23mg • fiber 2g
4. Put ingredients into the blender jar. Blend on
Low for about 10 seconds and then switch to
High to thoroughly blend, about 45 seconds.
Taste and adjust seasoning as desired.
Champagne Vinaigrette
This all-purpose dressing can be used as a salad
topper, marinade or finishing drizzle for roasted
vegetables.
Nutritional information per serving (1 cup):
Calories 216 (67% from fat) • carb. 14g • pro. 5g • fat 17g •
sat. fat 9g • chol. 45mg • sod. 694mg • calc. 129mg
• fiber 2g
Makes about 1 scant cup
2½
1
¼
¼
1
¾
Gazpacho
Serve this simple, no-cook soup at your next
barbecue. It is great for a hot summer day.
Makes about 7 cups
3
cups tomato or vegetable juice cocktail, divided
1 to 2 garlic cloves
1
large celery stalk, peeled and cut into 1-inch pieces
1
medium to large cucumber, peeled, halved lengthwise, seeded and cut into 1-inch pieces
1
red or yellow bell pepper, cored, seeded and cut into 1-inch pieces
1
jalapeño, seeded and cut into ½-inch
pieces
6
scallions, trimmed and cut into ½-inch pieces
4
medium tomatoes, cored, seeded and cut into 1-inch pieces
3
tablespoons sherry vinegar
½
teaspoon kosher salt
¼
teaspoon freshly ground black pepper
1. Put 1 cup of the juice, the garlic, celery,
cucumber, pepper, jalapeño and scallions to
the blender jar. Blend on Low until vegetables
are medium-finely chopped, about 15 to 20
seconds. Transfer to a large serving bowl.
1. Put all ingredients into the blender jar, in the
order listed.
2. Blend on Low until processed, about 20
seconds.
3. Taste and adjust seasoning as desired.
Nutritional information per serving (1 tablespoon):
Calories 91 (99% from fat) • carb. 0g • pro. 0g • fat 11g
• sat. fat 2g • chol. 0mg • sod. 45mg • calc. 0mg • fiber 0g
Green Goddess Dressing
Packed with fresh herbs, this classic dressing has
a refreshing tang. It’s perfect over grilled chicken,
vegetables or salad.
Makes about 1¼ cups
1
2
1
⁄3
2
2
1
¼
½
¼
1
2. Add the remaining juice with the tomatoes
to the blender jar. Pulse the blender on High,
about 4 to 5 times to chop (or you may blend
it if a smoother gazpacho is preferred). Add
to the bowl of vegetables/juice. Season with
the sherry vinegar, salt and pepper, adjusting
amounts to taste.
19
tablespoons Champagne vinegar
teaspoon Dijon mustard
teaspoon kosher salt
teaspoon freshly ground black pepper
small shallot, halved
cup extra virgin olive oil
anchovy fillet
teaspoons white wine vinegar
cup packed Italian parsley
tablespoons fresh tarragon
tablespoons chopped chives
cup nonfat Greek yogurt
cup mayonnaise
teaspoon kosher salt
teaspoon freshly ground black pepper
small garlic clove
Hummus
1. Put all ingredients in blender jar, in the order
listed above.
2. Blend on Low until smooth, about 1½ minutes.
Serve this brightly flavored dip with warm pita for a
satisfying snack.
Nutritional information per serving (2 tablespoons):
Calories 110 (73% from fat) • carb. 3g • pro. 3g• fat 9g sat.
fat 3g • chol. 9mg • sod. 325mg • calc. 72mg • fiber. 0g
Makes about 1½ cups
1
1
3
2
2
1
½
¼ 1
⁄8
Hollandaise
Fair warning: It is almost too easy to make this
creamy and decadent sauce in the
Cuisinart® Blender.
Makes ¾ cup
½
4
1½
¼
cup (1 stick) unsalted butter
large egg yolks
tablespoons fresh lemon juice
teaspoon kosher salt
Pinch ground mustard
Pinch freshly ground black pepper
1. Insert the chopping blade into the work bowl
of the Food Processor Attachment. Fit onto the
blender base. Put all the ingredients into the
work bowl and process on Low until smooth,
about 3 minutes, stopping to scrape down the
sides of the bowl as needed.
1. Put the butter into a saucepan set over low
heat until butter is melted and reaches a slight
simmer.
2. For serving, transfer hummus to a shallow
bowl. Make a slight indentation in the center of
the dip and fill with the remaining tablespoon
of oil. Sprinkle the paprika and za’atar, if using,
over the oil.
2. While the butter is melting, put the remaining
ingredients into the blender jar. About a minute
before adding the butter, blend on Low for
about 30 seconds to combine.
3. With the blender still running on Low, carefully
remove the measured pour lid from the
cover. Very slowly add the hot butter through
the opening (holding the pour lid or even a
dishtowel in place to prevent any splattering).
When adding the butter, be careful not to add
the white milk solids that will be left on the
bottom of the pan. Once all butter has been
added, check hollandaise for consistency. With
the blender turned off, use a long, slim spatula
to scrape down the sides, as some yolk may
have accumulated in the well by the blade. If
overall consistency is too thick, add some hot
water, 1 tablespoon at a time, and blend until
desired consistency is achieved.
Nutritional information per serving (2 tablespoons):
Calories 79 (44% from fat) • carb. 2g • pro. 2g • fat 4g
• sat. fat 1g • chol. 0mg • sod. 207mg • calc. 23mg
• fiber 2g
4. Taste and adjust seasoning as desired.
5. Serve immediately or transfer hollandaise to a
double boiler to keep warm for serving.
can (15.5 ounce) chickpeas, drained
and rinsed
garlic clove
tablespoons water
tablespoons tahini
tablespoons extra virgin olive oil, plus 1 tablespoon for serving
tablespoon fresh lemon juice
teaspoon kosher salt
teaspoon ground cumin
teaspoon paprika (optional)
Pinch za’atar (optional)
Nutritional information per serving (1 tablespoon):
Calories 85 (94% from fat) • carb. 0g • pro. 1g • fat 9g
• sat. fat 5g • chol. 81mg • sod. 47mg • calc. 8mg.
• fiber 0g
20
Peach Salsa
Pesto
Peach salsa is excellent served over grilled fish,
chicken or even pork tenderloin. It can also be
served like traditional tomato salsa with tortilla chips.
We love it paired with our Crab Cakes on page 22.
If you have other herbs or nuts, use them in place
of the basil and pine nuts.
Makes ½ cup
1
¼
¼
large red bell pepper, cored, seeded and
2
cut into ½-inch pieces
½
1
small garlic clove
1
small jalapeño, halved and seeded, cut into 1
½-inch pieces
1
⁄3
½
small red onion, cut into ½-inch pieces
2
peaches, peeled and pitted, cut into 1.
½-inch pieces
1½
tablespoons fresh cilantro or parsley
2
teaspoons fresh lime juice
1½
teaspoons rice vinegar (may use raspberry or white balsamic vinegar in place of the rice)
½
teaspoon honey
2.
Pinch kosher salt
Makes about 1½ cups
1. Insert the chopping blade into the work bowl
of the Food Processor Attachment. Fit onto
blender base.
2. Put the red pepper into the work bowl and
pulse on High to roughly chop, about 2 pulses.
Reserve in a separate mixing bowl.
ounce Parmesan, cut into ½-inch pieces
cup pine nuts, lightly toasted
garlic cloves
teaspoon kosher salt
Pinch freshly ground black pepper
cup tightly packed fresh basil leaves
cup extra virgin olive oil, divided
Insert the chopping blade into the work bowl
of the Food Processor Attachment. Fit onto
blender base. Put the cheese into the work
bowl. Pulse to break up, about 5 times on
High, and then process continuously for about
20 seconds, or until ground (it does not have to
be extra fine because it will be blended more
with the rest of the ingredients).
Add the nuts, garlic, salt and pepper to the
work bowl with the cheese. Pulse on High
about 5 times and then process on High for
about 5 seconds. Scrape down the sides of
the bowl. Add the basil and half of the olive oil.
Pulse a few times, and then run continuously
on Low while adding the remaining olive oil
through the drizzle hole in the food pusher, until
desired consistency is achieved.
3. To store the pesto, transfer to a glass jar or
bowl, tap to remove all air bubbles, even out
the surface. Float a layer of olive oil on top;
cover with plastic wrap and refrigerate. The
pesto will keep for 5 days in the refrigerator, or
it may be frozen.
3. Put the garlic, jalapeño and onion in the work
bowl. Pulse on High, 2 to 3 times, to chop.
Remove and reserve in the same bowl as the
red pepper.
4. Add the peaches and cilantro or parsley to the
work bowl and pulse on High, 2 to 3 times,
until peaches are roughly chopped. Transfer
peaches and cilantro or parsley to the bowl
with the other chopped vegetables. Stir in
the lime juice, vinegar, honey and salt. Cover
and let salsa rest to allow flavors to develop
(a minimum of 30 minutes). Taste and adjust
seasoning as desired.
Nutritional information per serving (1 tablespoon):
Calories 125 (90% from fat) • carb. 1g • pro. 2g • fat 13g
• sat. fat 2g • chol. 2mg • sod. 190mg • calc. 52mg.
• fiber 0g
Nutritional information per serving (2 tablespoons):
Calories 10 (5% from fat) • carb. 2g • pro. 0g • fat 0g
• sat. fat 0g • chol. 0mg • sod. 6mg • calc. 2mg • fiber 0g
21
Crab Cakes
important to mix carefully to keep the crabmeat
intact.
A gentle mixing hand is key to these delicate and
delicious crab cakes. Pair with our Peach Salsa
found on page 21.
7. From the mixture, form ¼-cup oval cakes with
your hands and place them on a clean plate,
separating the layers of patties with wax paper.
Cover with plastic wrap and refrigerate for 1
hour before sautéing.
Makes about 20 crab cakes
16
ounces lump crabmeat
1
medium red bell pepper, cored, seeded and cut into ½-inch pieces
1
jalapeño, halved, seeded and cut into ½-inch pieces
3
scallions, trimmed and cut into ½-inch pieces
1
garlic clove
1
teaspoon olive oil
¼
teaspoon kosher salt
1
egg, lightly beaten
1½
cups panko (Japanese) breadcrumbs, plus extra for dredging
½
cup mayonnaise
1
teaspoon Worcestershire sauce
1
teaspoon Dijon mustard
1½
teaspoons crab/seafood seasoning Hot sauce (optional)
1
tablespoon vegetable oil
1. Look through crabmeat to make sure there are
no shells or cartilage. Reserve in refrigerator.
8. Place a Cuisinart® nonstick skillet over
medium heat and add the vegetable oil. Lightly
dredge the crab cakes in panko crumbs.
When oil is hot, sauté crab cakes in batches,
approximately 3 to 5 minutes per side. Crab
cakes should be a deep golden brown on each
side.
9. Serve immediately with our Peach Salsa.
Lemon wedges make a nice accompaniment
as well.
Nutritional information per crab cake:
Calories 52 (29% from fat) • carb. 5g • pro. 4g • fat 2g
• sat. fat 0g • chol. 29mg • sod. 211mg • calc. 12mg
• fiber 0g
Raspberry Sauce
Use this sweet sauce to complement different
desserts, from ice cream to cheesecake to
chocolate cake.
Makes about 1¼ cups
2. Insert the chopping blade into the work bowl
of the Food Processor Attachment. Fit onto the
blender base.
1
bag (12 ounces) frozen raspberries, thawed
¼
cup granulated sugar
Pinch kosher salt
Pinch grated orange zest
3. Add the red pepper to the bowl. Pulse on High
3 times to finely chop. Reserve in a separate
mixing bowl.
4. Add the jalapeño, scallions and garlic. Pulse on
High 3 times to finely chop. Add to the same
bowl with the red pepper.
1. Put all ingredients into the blender jar, in the
order listed.
2. Blend on High for 15 seconds, or until smooth.
5. Put the olive oil in a large skillet and place over
medium heat. Add the peppers, scallions and
garlic to the pan. Sauté until softened, about 6
to 8 minutes. Remove from heat and allow to
cool for a few minutes.
3. Pass through a fine mesh strainer to remove all
of the raspberry seeds.
4. Raspberry sauce will keep refrigerated for about 1 week to 10 days.
6. Once the vegetables are cool to the touch,
add them to the reserved crabmeat. To the
mixture, add the egg, panko, mayonnaise,
Worcestershire, mustard and seasoning, along
with a dash or two of the hot sauce, if desired.
Very gently mix all the ingredients together. The
best way to mix the crab mixture is with clean
hands, however, you can mix with a spoon. It is
Nutritional information per serving (2 tablespoons)
Calories 109 (1% from fat) • carb. 28g • pro. 0g • fat 0g
• sat. fat 0g· chol. 0mg • sod. 58mg • calc. 10mg • fiber 3g
22
NOTES:
23
NOTES:
24