1
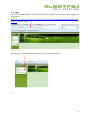
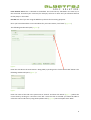
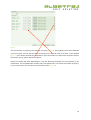
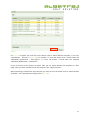
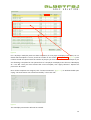
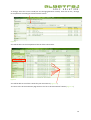
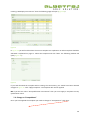
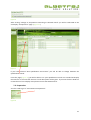
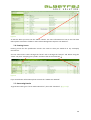
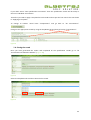
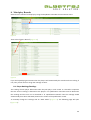
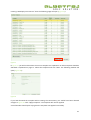
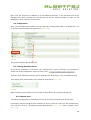
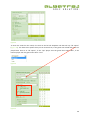
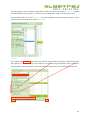
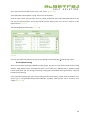
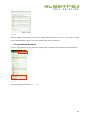
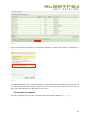
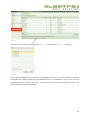
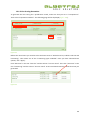
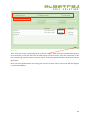
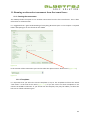
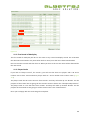
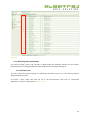
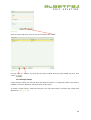
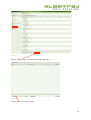
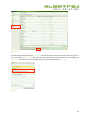
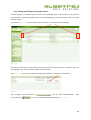
Instruction Manual Albatros Tournament Management System: Matchplay Version 9 1 Table of Contents Introduction ........................................................................................................................................... 5 1. Login ............................................................................................................................................... 6 2. Creating a Matchplay Tournament ................................................................................................ 7 3. Accessing your Tournament ......................................................................................................... 13 3.1. Changing between rounds ........................................................................................................ 13 3.2. Changing to “Competitions” ..................................................................................................... 13 4. Preparation ................................................................................................................................... 15 4.1. Common ................................................................................................................................... 15 4.2. Additional ................................................................................................................................. 15 4.3. Publish ...................................................................................................................................... 16 4.4. Report Headings ....................................................................................................................... 16 4.5. Report Images ........................................................................................................................... 17 5. Editing Round Settings ................................................................................................................. 19 6. Adding Players .............................................................................................................................. 21 7. Qualification Rounds .................................................................................................................... 23 7.1. Applying a Template ................................................................................................................. 23 7.2. Change to “Competitions” ........................................................................................................ 26 7.3. Preparation ............................................................................................................................... 27 7.4. Other Setup Options ................................................................................................................. 29 7.5. Setting up the Draw .................................................................................................................. 29 7.6. Entering Scores ......................................................................................................................... 30 7.7. Generating Results .................................................................................................................... 30 7.8. Changing between rounds ........................................................................................................ 31 7.9. Closing the round ...................................................................................................................... 32 8. Matchplay Rounds ........................................................................................................................ 34 8.1. Player Rankings/Seedings ......................................................................................................... 34 8.2. Applying the template .............................................................................................................. 35 8.3. SP Opponents ........................................................................................................................... 38 8.4. Entering Matchplay Scores ....................................................................................................... 38 8.4.1 Manual Score ...................................................................................................................... 38 8.4.2 Default Scoring .................................................................................................................... 42 8.4.3 Hole by hole scoring using gross scores .............................................................................. 45 2 8.4.4 Entering Scores in “SP Tournaments” side (New Development) ........................................ 46 Default Scoring ............................................................................................................................ 47 Manual Scoring ............................................................................................................................ 47 Hole by Hole Scoring Using Gross Scores ..................................................................................... 48 8.5. Generating and Calculating Results .......................................................................................... 49 8.6. Closing the round and setting ranks ......................................................................................... 50 9. Reports ......................................................................................................................................... 53 9.1. Qualification Round Reports ..................................................................................................... 53 9.2. Participant’s List Reports .......................................................................................................... 53 9.3. Matchplay Result Reports ......................................................................................................... 54 9.4. Matchplay Tree Reports ........................................................................................................... 55 9.5. Press Report .............................................................................................................................. 57 10. Setting up Live Scoring ............................................................................................................... 59 10.1. Live Scoring for the Qualification Round/s ............................................................................. 59 10.1.1 Golf Club TV Setup ............................................................................................................ 59 10.1.2 Live Scoring Generation .................................................................................................... 60 10.2. Live Scoring for the Matchplay Rounds .................................................................................. 61 10.2.1 Golf Club TV Setup ............................................................................................................ 61 10.2.2 Live Scoring Generation .................................................................................................... 63 11. Running an alternative tournament from first round losers ...................................................... 65 11.1. Creating the tournament ........................................................................................................ 65 11.1.1 Templates ......................................................................................................................... 65 11.2. First Round of Matchplay ........................................................................................................ 66 11.3. Players Ranks .......................................................................................................................... 66 11.4. Allocating Parts and Groups ................................................................................................... 67 11.4.1 Player Parts ....................................................................................................................... 67 11.4.2 Player Groups ................................................................................................................... 69 11.4.3 Assigning a Group ............................................................................................................. 71 11.4.4 How to know which match to assign a group to ............................................................... 73 11.5. Other ....................................................................................................................................... 73 11.6. With Losers Reports ................................................................................................................ 73 12. Double Round Final and Semi-‐Final ............................................................................................ 76 12.1. Entering Scores ....................................................................................................................... 77 13. Other Issues ................................................................................................................................ 79 3 13.1. Qualification Draw changes after Template has been applied ............................................... 79 13.2. Setting ranks without closing the round ................................................................................. 84 14. Frequently Asked Questions ...................................................................................................... 87 4 Introduction The purpose of this manual is to educate and inform the user, of the capabilities, of the ATMS so as to be able to setup and run a successful Matchplay Tournament. 5 1. Login Login in to the ATMS (Albatros Tournament Management System) by entering the following URL into your browser https://tournament.handicaps.co.za/albport/index.jsp?sid=AAF595C377ABDEC28277176B&languag e=en_ZA and then search. Figure 1 Enter the login and password details, given to you, in the space provided. Figure 2 6 2. Creating a Matchplay Tournament To create a matchplay tournament, click on “SP Tournaments” and then “New Tournament”. Figure 3 The following window will open (Figure 4): Figure 4 Enter the name of the tournament, in the box next to “Name”, and then click “Next”. This name will appear in your tournament list in SP Tournaments – See Figure 3 above. It will also appear as the first line of your heading in the reports that you generate. 7 In Figure 5, click on “Matchplay SP”. Figure 5 There are a number of different settings you can choose from: Start date: This is the day the tournament starts. You will be able to edit the date and time of each round further on in the preparation process. Use qualification: If you have a qualification tournament to determine the matchplay field, click the box. Number of qualification rounds: This is the number of rounds in the qualification tournament. One qualification tournament: If you want each round in the qualification tournament to be an individual tournament then deselect this. Number of matchplay steps: This is the number of players and rounds you have in the matchplay component of your tournament. With losers: Select “With losers” when you want the losers in a round to play in the next round. I.e. If you have a “with losers” division eg. A Plate event being played with all first round losers. Double round final: Select this if you want a 36 hole final. Double round semi-‐final: Select this if you want a 36 hole semi-‐final. Manual score: This is if you wish to enter scores at the end of the round. Both players score: If you select “Both players score” then you will be able to fill in the gross score on each hole, the ATMS will then automatically work out the winner of each hole. If it is deselected then you will only be able to use the “+”, “-‐” and “H” functions to format the score. NB: You must select one of either “Both players score” or “Manual score”, not both. If you are undecided on the format, then do not select either as this can be done later for each round. 8 From starttee score: This is selected as the default. This links the tee, allocated in the start list, to the scorecard. Therefore your scorecard, for example, will start on Hole 10 if you allocated hole 10 to that player in the editor. Use BB: Click this if you are using the Blackberry devices for livescoring purposes. Once you have selected the correct attributes for your tournament, click “Next” (Figure 5). The following window will open (Figure 6): Figure 6 Enter the club where the tournament is being held, by clicking on the “select home club” button. The following window will open (Figure 7). Figure 7 Enter the name of the club in the space next to “Search” and then click Search (Figure 7). Select the correct club by clicking on it and then click “Ok”. Once the Club is selected you should be able to select the course and tees by using the dropdown tabs (Figure 6). Once complete click “Next”. 9 Figure 8 The final window, of creating a tournament, will open (Figure 8). This window has the time and dates of all the rounds. You can edit the dates by clicking on the calendar next to the date. In this window (Figure 8) you need to allocate the templates for your tournament. To allocate the templates click on the button next to “Select Startlist Template”. Different windows will open depending on if you are allocating templates for the matchplay or the qualification. For the qualification rounds, select a template that is more than the number of players, in your tournament, but still closest to that amount. (See Figure 9) 10 Figure 9 For Figure 9 to appear you must click on the button next to “Select Startlist Template”, in the row, “Qualification – Round 1” (Figure 8). For example: If I have 84 players then I would select the “Matchplay Qualification – 100 Players”. If I have 118 players I would select the template “Matchplay Qualification – 120 Players”. If you are unsure of the number of players then you can always allocate the template at a later stage. Once you have selected the correct template, click “Apply selection”. When allocating a template for the matchplay you must click on the button next to “Select Startlist Template”, in the appropriate matchplay row (Figure 8). 11 Figure 10 For a 32 player matchplay event use these templates, for a 16 player matchplay event these, etc. To decide which template is correct, check the number in the column “Groups count” (Figure 10). This number should correspond with the number of players you have for the round. For example if you are allocating a template for the quarterfinals of a 32 player matchplay event then use “Matchplay 32 – Last 08”. Once you have selected the correct template, click “Apply selection”. Repeat this process for all rounds Once all the templates are assigned, click “Create Tournament” (Figure 11). A window should open saying “The tournament was created successfully”. Then click “Ok”. Figure 11 The matchplay tournament will now be created. 12 3. Accessing your Tournament To access your tournament, click on the tab “SP Tournaments” and then “Tournament List”. Then select the correct dates and click on the correct tournament. (Figure 12) Figure 12 3.1. Changing between rounds To change between rounds you must select the dropdown tab under the tournament title. Figure 13 Then select the round. This allows you to change between the Strokeplay Qualifiers and the Matchplay. 3.2. Changing to “Competitions” You will need to change between “SP Tournaments” and “Competitions” during the tournament. The reason for this is explained further on in the manual. 13 To change, select the correct round (see 3.1 Changing between rounds). Then click on the, “Change to competitions according to selected round” button. Figure 14 You will be taken to the competitions format of the tournament. Figure 15 You will be able to see all the rounds for your tournament (Figure 15). To return to the SP Tournaments page click on the “Go to SP Tournament” button (Figure 15). 14 4. Preparation Once you have created the tournament click on “Tournaments<Preparation”. Figure 16 There are a number of tabs at the top of this page “Common, Additional, Publish, Report Headings, Report Images” (Figure 16). 4.1. Common In the common page you can change the name of the tournament (this is the name that will appear on all your report headings) and add a comment. Once complete click “Save”. If you make a mistake, click “Cancel”. Figure 17 4.2. Additional The only option that can be changed under additional is the “Tie gross” and “Tie net”. The default setting is ‘Manual Tieing’ as tieing is not relevant to matchplay except in the case of a qualifictaion round. If the seedings of your matchplay field are to be determined by the order in which your qualification round finishes, the correct tieing option needs to be selected. Your qualification tournament countout procedure for the running of the qualification tournament can be selected in 15 competitions as you wish, without the tieing procedure in SP being affected. (See the ATMS Manual for a more in depth explanation of tieing options). Select you option here before calculating. Figure 18 If you make any changes, click “Save”. 4.3. Publish Publish is where you setup the livescoring for each round. (Figure 19) Figure 19 The setting up of livescoring is discussed in “10. Setting up Live Scoring”. 4.4. Report Headings “Report Headings” is where you enter the headings that will appear on the reports that you generate. 16 Figure 20 “Venue and Date Report Header” is essentially heading 2. “Format” is essentially heading 3. You can put anything you want in these headings; it doesn’t have to be what the title suggests. Figure 21 shows an example of a report with the headings inserted. The title heading is the name of the tournament. Heading 2 appears below it and heading 3 below that. Figure 21 “Semi-‐Finals – 9 November 2013” is a default heading that is taken from the selected round. Once you have completed the details, click “Save”. (Figure 20) 4.5. Report Images The “Report Images” tab is where you can add images to appear in your report. 17 Figure 22 Image 1 will appear in the top left of the report, Image 2 will appear in the top right and Image 3 will appear in the bottom centre of the report. (See Figure 23) To add an image, click on the edit button, next to the image number. To delete an image, click on the delete button. If you require any further information on this please consult the ATMS User Manual. Figure 23 18 5. Editing Round Settings You are able to change some of the tournament parameters after creating the tournament. Dates, times and intervals between groups can be changed. The tee is allocated in each template but can be changed in the draw editor in Competitions. Templates can be re-‐selected but need to correspond to the correct format of the matchplay competition – see step 4 of setting up a Matchplay tournament. The method of scoring can be changed – manual scoring, blackberries or both players scores. However, parameter’s which are integral to the format of the matchplay event cannot be changed after the setup. These include the use of qualification rounds, double round finals or semi-‐finals, with losers (ie a plate event) and number of Matchplay steps. Please refer to Section 2 of this manual for the selection of Matchplay setup parameters. Figure 24 To edit settings, click on “SP Tournaments<Tournaments<Rounds”. To edit one of the rounds, click on the edit button in the relevant row. You will now be taken to the relevant round (Figure 25): 19 Figure 25 Here you can edit certain settings. The setting that will most likely be changed is the Start List Template. You can edit it by clicking on the templates button. You can also adjust the template parameters by clicking on the box next to “Adapt template parameters”. If you make any changes, click “Save”. 20 6. Adding Players To add players to your matchplay tournament, click on “Players<Players” (Figure 26). Figure 26 Then click on “Edit”. The following window will open (Figure 27) Figure 27 To add a player, insert their name into the block next to “Customer filter”. Then click, “Search”. 21 Figure 28 All the possible names will appear. Click the side arrow remove a player, click the delete button to add a player into the competition. To . (Figure 28) If the player does not appear, it is possible that he is not on the ATMS. In this scenario you need to add the player from the handicap server. You can do this by clicking the “Add Player” button (Figure 28). Please consult the ATMS manual for a more detailed description of how to add the player. Once you have added all the players, click “Save”. You will now be able to view all the players that are in the tournament (Figure 29): Figure 29 22 7. Qualification Rounds The qualification rounds for your tournament are run differently from the matchplay rounds. When running the qualification rounds you are essentially running a standard strokeplay tournament in the Competition side of the ATMS. A good working knowledge of running strokeplay events in the ATMS is required. Please refer to the ATMS User Manual for more information on this. You need to have chosen the amount and type of qualification rounds in the preparation. Figure 30 It is best to select the box next to “One qualification tournament”, as this will place all qualification rounds as a single tournament in “Competitions”. 7.1. Applying a Template Once you have entered all the players (6 Adding Players) into the event you need to apply the template. This transfers the players to “Competitions”. To apply the template go to “Players<Players-‐Round” (Figure 31). Figure 31 You may have assigned a template when you created a tournament (0. 23 Creating a Matchplay Tournament). This will now help you to skip a step. Figure 32 Once here you will see that each player has been given a rank. You can adjust these ranks if you wish. It is suggested that you only sort the ranks if you have a unique template created for your tournament and that this has been co-‐ordinated with the ATMS co-‐ordinator. To adjust the ranks, click on “Rank Editor” (Figure 32). The following window will open: (Figure 33) 24 Figure 33 To adjust the ranks, use the up and down arrows . Click “Save & leave”. To apply the template, click on “Start Templates” (Figure 32). If you did not allocate the template in “0. 25 Creating a Matchplay Tournament” then the following page will open (Figure 34): Figure 34 In Figure 34 you will be able select the correct template. An explanation on what template should be allocated is explained on page 11. Select the template and click “Next. The following window will open (Figure 35): Figure 35 If you had allocated the template while creating the tournament, you would have been directed straight to Figure 35. Click “Apply template”. The template will now be applied. NB: If you did not select “One qualification tournament” then you must apply a template to every qualification round. 7.2. Change to “Competitions” Once you have applied the template you need to change to “Competitions”. Click here. 26 Figure 36 After clicking “Change to competitions according to selected round” you will be redirected to the strokeplay “Competitions” page. (Figure 37) Figure 37 If you have selected “One qualification tournament” you will be able to change between the qualification rounds. From this page (Figure 37) you will be able to run your qualification rounds as a standard strokeplay tournament. In the next few sections a brief description will be given. If you want further details on certain facets of a strokeplay event please consult the ATMS manual. 7.3. Preparation You first need to go to “Tournaments<Preparation”. Figure 38 27 Figure 39 Under “Common” you can change the name of the qualification event. This is useful when the qualification event is in fact a separate tournament. Under “Rounds” you can adapt the parameters for each round. Under “Additional” you may need to increase the maximum number of participants, if you didn’t do this when creating the tournament. Under publish you need to setup the livescoring as you would for a Strokeplay. Figure 40 Make sure that you select all the parameters at the top as well as one of the “LiveScoring Types”. Once you have done this, click “Apply”. Even though you have selected the “Report Headings” and the “Report Logo’s” in “SP Tournaments” you have to do this again in “Competitions”. The reason for this is that you may wish to have a different heading for your qualification event, so it doesn’t carry over. The “Report Headings” and “Report Logo’s” in “Competitions” works the same as “SP Tournaments”. Therefore please consult “Report Headings” and “Report Images” if you have any problems. 28 7.4. Other Setup Options The “Course data” as well as “Course allocation” will already have been loaded for all the rounds, from the setup in “SP Tournaments”. A standard gross prize would have been allocated under “Prizes”. If you have any specific groupings you will have to assign them manually. If you have any other prizes you will have to add them manually. All the players would have been allocated in “SP Tournaments”. If you have any questions surrounding these setup options please consult the ATMS manual. 7.5. Setting up the Draw If you have a specific template for your strokeplay event then this needed to be allocated when creating your tournament. This template will set the draw up automatically. Figure 41 If you used one of the standard templates, then you will have to make some alterations to suit your tournament. Figure 42 To edit the draw go to “Players<Draw”. The following screenshot will appear (Figure 43): 29 Figure 43 To edit the draw you must use the “Editor” button. For more information on how to use the draw editor please consult the “Albatros Tournament Management System: User Manual”. 7.6. Entering Scores Entering scores for the qualification round is the same as what you would do in any strokeplay tournament. You can either enter scores through the “Draw” tab or through the “Players” tab. When using the “Draw” tab, click “Grouping entry mode” and then click on the white ball . Figure 44 If you need further information please consult the “ATMS: User Manual”. 7.7. Generating Results To generate results go to “Final results<Result list”, then click “Generate”. (Figure 45) 30 Figure 45 The results for the round should be displayed. For further details on how to generate results, print reports etc. please consult the “ATMS: User Manual” 7.8. Changing between rounds If you ticked “One qualification tournament”, when creating the tournament, then it is very easy to change between the different rounds in your qualification tournament. Figure 46 All the rounds are grouped as one tournament; therefore you would just change between them like you would in any normal stroke play event. Make sure that you are in “Competitions” and then select the dropdown tab next to round to change between rounds (Figure 47). Figure 47 31 If you didn’t select “One qualification tournament” then the qualification rounds will be setup as their own individual tournaments. Therefore you need to apply a template for both rounds and not just the first round. This was shown in “Applying a Template”. To change to another round leave “Competitions” and go back to “SP Tournaments”. Change to the appropriate round by using the dropdown tab and then go back to “Competitions”. Figure 48 7.9. Closing the round Once you have generated the results and completed all the qualification rounds go to “SP Tournaments<Final Results<Statistic” (Figure 49). Figure 49 Select the dropdown tab and then select the last round. Figure 50 32 Once you have selected the last round, click “Calculate”. (Figure 50) Figure 51 The results for the qualification rounds will now show in SP Tournaments. Once you have completed this step, click “Close and set ranks” (Figure 50). Once you have closed the round you will see that it will say closed next to the round name. Figure 52 By closing the round and setting the ranks you have successfully sorted all their players into the rank for the first round of matchplay. 33 8. Matchplay Rounds Select the first round of matchplay by using the dropdown tab under the tournament name. Figure 53 Then select “Players-‐Round” (Figure 54) Figure 54 If you had a qualifying tournament then the players will automatically be sorted into there ranking. If not, then you will have to assign the rankings to them. 8.1. Player Rankings/Seedings The ranking of each player determines who they will play in each round. It is therefore important that the correct ranking is allocated to the players. If a qualification round was used to determine the rankings and this was run as described in “6. Qualification Rounds” then the rankings would automatically have been allocated, based on the results of the qualification round. To manually change the rankings click on “Rank editor” (Figure 54). The following page will open (Figure 55): 34 Figure 55 You can adjust the ranking of each player by selecting a player from the list and then using the up and down arrows, next to the list. Once you are happy with the ranking order, click “Save & leave”. 8.2. Applying the template You will need to apply the template for each matchplay round. The template takes all the players and their rankings and places them in the correct position to play each other. To apply the template go to “Players<Players-‐Round” (Figure 56). Figure 56 You may have assigned a template when you created a tournament ( 35 Creating a Matchplay Tournament). This will now help you to skip a step. To apply the template, click on “Start Templates” (Figure 54). If you did not allocate the template in “ 36 Creating a Matchplay Tournament” then the following page will open (Figure 57): Figure 57 In Figure 57 you will be able select the correct template. An explanation on what template should be allocated is explained on page 11. Select the template and click “Next. The following window will open (Figure 58): Figure 58 If you had allocated the template while creating the tournament, you would have been directed straight to Figure 58. Click “Apply template”. The template will now be applied. A small window should open saying that the template was applied successfully. 37 NB. If your tee off times are different to to the default parameters in the template (even if you changed these when creating your tournament) tick the box ‘Adapt Template’ In order for the Matchplay Tree to reflect the correct times. 8.3. SP Opponents After you have applied the template, you can view who is playing each other in “SP Opponents”. Go to “SP Tournaments<Players<SP Opponents”. (Figure 59) Figure 59 The groups of players will be displayed. 8.4. Entering Matchplay Scores All scores for matchplay are entered in the “Competitions” section. Therefore it is necessary to switch over to the competitions section to enter scores. There are three methods of entering scores: Manual score, Both Players score and Default scoring. These option were selected when you created the tournament (Figure 60) Figure 60 When selecting, choose either one or the other or leave blank, do not select both options. 8.4.1 Manual Score The manual scoring option is used when you wish to record only the final result of the match. First check if manual scoring has been selected. To do this, make sure you are in the “Competitions” side and then click on “Competition<Preparation<Rounds” (Figure 61). Select “Manual score”. (Figure 61) 38 Figure 61 To use the manual scoring, make sure that you are in “Competitions”, click on “Players<Draw” (Figure 62). Figure 62 Make sure that the “Groupings entry mode” is deselected. Then click on the white ball the match. The following page should open (Figure 63): next to 39 Figure 63 To enter the result for the match, first click on the far left dropdown tab that will say “All square” (Figure 65). You have three options that you can choose from, if the game was halved and went to a playoff then leave it as “All square”, if the “top” player won the game then select “Win”, if the bottom player won the game then select “Loss” Figure 64 Figure 65 40 The “Top” player is the first player mentioned. Therefore the result you select, in Figure 64, is based on what happened to this player. i.e. Collins won the match select “Win”, if he lost select “Loss”. If you selected “Win” or “Loss” in Figure 64 then the dropdown tab to the right of it gives you the option to select the result of the match (Figure 66). Figure 66 If the match ends all square, then select the amount of holes that were played, select which player won (“Player 1” is the “top” player and “Player 2” the “bottom” player) and then enter a comment. The comment is what will appear in the result column on the report, so it is best to enter the hole. Figure 67 41 Once you have entered the correct result, click “Save”. (Figure 67) A small window should appear saying “Score save successfully”. To fill in more results, you can either click on, “Draw” and follow the process described above or you can use the search function. To use the search function either press F3 or click on “Search” in the bottom left of Figure 67. The following window will open (Figure 68): Figure 68 You can now select the player from this list by clicking on the white ball next to their name. 8.4.2 Default Scoring There are two ways of using the default scoring system. The first is to not select either of the scoring options, “Both players score” and “Manual Score”, or to select only “Manual Score”. Default scoring is best used when you are running livescoring using ipads. The Default Scoring method is a hole by hole format of scoring. If you selected “both players score” when setting up the tournament, you will have to deselect it. To do this go to “Competitions<Preparation<Rounds”, deselect “Both players score” and then click “Apply” (Figure 69). 42 Figure 69 To enter scores, click on “Start list” and then select “Flight entry mode” Figure 70 Then click on the white ball next to the player’s name. If the ball is green then that means the round is complete if it is yellow then it mean some scores have been entered. After click on the white ball the following page will open (Figure 71): 43 Figure 71 Scores are entered, for each hole, using a “+” for a win, a “-‐” for a loss and an “H” for a half. Each result relates to the first/top player on the list. For example if “Bottriell” (Figure 71) won hole 1, “Filippi” won hole 2 and they halved hole 3 then the scorecard would look like Figure 72. Figure 72 To enter the scores use a +, -‐ or h on your keyboard. The ipads will have their own keypad that you can use to enter the result. When you have entered all the results you will be asked if you would like to save the score, click “ok”. As with manual scoring the result refers to the “top” player. Therefore in Figure 73 “Bottriell” lost one down. Figure 73 Once you are happy with the score, click “Save and Exit”. You will back taken back to the start list where you can carry on filling in more scores. 44 8.4.3 Hole by hole scoring using gross scores To be able to use the “Both players score” option, you need to have selected it in the setup or you need to have gone to “Competitions<Preparation<Rounds”, deselected “Manual score” and selected “both players score”. Figure 74 Figure 74 To enter scores, click on “Start list” and then select “Flight entry mode” Figure 75 Then click on the white ball next to the player’s name. If the ball is green then that means the round is complete if it is yellow then it mean some scores have been entered. After click on the white ball the following page will open Figure 76: Figure 76 45 With the “Both players score” format you will enter the gross scores that each player received on the hole. If the player concedes the hole, then enter “C”. The first row refers to the “top” players score and displays the match result. Figure 77 Once you have entered all the scores for the round you will be asked if you wish to save the scores, click “OK”. Once you are happy with the score, click “Save and Exit”. You will back taken back to the start list where you can carry on filling in more scores. 8.4.4 Entering Scores in “SP Tournaments” side (New Development) A new feature has been added to the ATMS Matchplay that allows for scores to be entered on the SP Tournaments side. After applying the template, click on the button “Enter Scores”. Figure 78 The following window will open Figure 79: 46 Figure 79 The match will show on the left and the scoring on the right. The scoring that appears as the default will depend on what scoring type you selected when creating the tournament, shown in Figure 5. If you selected nothing then the default will show, as displayed in Figure 79. Default Scoring If you choose the default scoring system then you must enter “+” for a win, “-‐” for a loss and “H” for a half. All these results are for the first player from left to right. For example if Bill beats Alex on hole 1, halves on hole 2 and loses on hole 3 his scores will look like Figure 80. The overall result of the match is displayed under the names of the players. Figure 80 Manual Scoring To change to manual scoring, you need to select the dropdown tab above the scorecard and select “Manual end results” 47 Figure 81 Select the winner and then select the match score. Figure 82 If the match goes to extra holes, scroll down on the score entry dropdown tab and select “By extra holes”. Hole by Hole Scoring Using Gross Scores If you did not select “Both Players Score when creating your tournament (Figure 5), you will have to select it in competitions. Follow the process shown in “8.4.3 Hole by hole scoring using gross scores”, on how to change to the “Both Players Score” function. Once you have selected this option return to SP Tournaments and click the “Enter Scores” button. The following page will open Figure 83: 48 Figure 83 You can now enter the player’s gross scores in the scorecard. The system will automatically calculate the winner. Once you have completed any of the formats remember to click “Save and leave”. 8.5. Generating and Calculating Results Once you have filled in and saved the scores you need to generate and calculate the results. While in “Competitions”, click on “Preparation<Publish”. The following window will open Figure 84: Figure 84 You need to select all three of the publish options and one of the “Livescoring types”, and then click “Apply”. Once you have applied these parameters, click “Generate” in the “Start list”, “Livescoring” 49 and “Result list” rows and the “Current round” column. A time and date should appear under the “Last time” column; this indicates that the generation was a success. If you ran the tournament using the live scoring then you would already have done some of the steps. Once you have generated everything, return to “SP Tournaments”. Once in “SP Tournaments”, click “Final results<Statistic”. The following page will open (Figure 85): Figure 85 Then click “Calculate”. Figure 86 The results for the round will now be calculated and displayed (Figure 86). 8.6. Closing the round and setting ranks To close the round, make sure that you are in “SP Tournaments”. Then click “Final results<Statistic”. 50 Figure 87 Figure 88 To close the round click “Close and set ranks”. The “Set ranks without close” is discussed later in the manual. Figure 89 If the round closed successfully then you will see “Closed” next to the name of the round (Figure 89). You can check if the rankings have been set correctly by changing over to the next round and then clicking on “Players-‐Round”. The ranks will be displayed for round 2 (Figure 90). 51 Figure 90 Once you are here you can start the process again at 7.1 Player Rankings/Seedings, for round two. 52 9. Reports 9.1. Qualification Round Reports All reports used in the qualification round are the same as if you were running a strokeplay tournament. Please consult the “ATMS: User Manual” if you have any queries on this. 9.2. Participant’s List Reports To access the participants list report’s, click “SP Tournaments<Players<Players”. Then click “Print”, in the bottom right. Figure 91 The following window will open (Figure 92): 53 Figure 92 Select a report from the list that suits your requirements and the click “Print”. Then click on “Click here to download the report”, the report should then start to download. 9.3. Matchplay Result Reports To print result reports, for the matchplay rounds, click on “SP Tournaments<Final results<Statistic”. Figure 93 The following page will open (Figure 94): 54 Figure 94 There are two types of matchplay result reports available. To access these, click on “Matchplay” in Figure 94. Figure 95 “ZA_SAGA_MP Results” gives you all matchplay round results up to and including the round you are on. “ZA_SAGA_MP Results_All_Days” gives you all the results no matter what round you are on. Once you have selected one of the options, click “Print”. 9.4. Matchplay Tree Reports To print a matchplay tree, click on “SP Tournaments<Final results< Statistic” (Figure 96). 55 Figure 96 Then click on the button “Matchplay Tree” (Figure 96).The window in Figure 97 will open. Figure 97 Each report is designed for the size of your matchplay event. E.g. If you started with a 64 player matchplay event with 6 rounds, then you would select the “64_MatchPlay” report. Once you have selected the correct report, click “Print”. Then click on “Click here to download the report”, the report should then start to download. 56 9.5. Press Report To obtain a press report, click on “SP Tournaments<Final results<Statistic”. Figure 98 Then click the button “Press report” (Figure 98). A window will open (Figure 99) asking if you wish to generate results. If you have already generated results in “Competitions” (as shown in 8.5 Generating and Calculating Results) then you will see the results behind the window (Figure 99). If this is the case then you don’t need to regenerate the results, so click “No”. Figure 99 After clicking no you will be able to fully view the window. (Figure 100) 57 Figure 100 If you wish to edit the press report, then click the “edit” (Figure 101): button. The following window will open Figure 101 Make any changes that you wish, then “OK”. If you wish to save the changes, give the press report a name in the block next to “Description” (Figure 100). Then once you have given it a name, click the “Save” button (Figure 100). You can download the report to either a word document, by using the “rtf” PDF, by using the “pdf” button (Figure 100). button, or a The press report will begin to download. 58 10. Setting up Live Scoring A few pointers, on setting up live scoring, are described below. This is not a full explanation on live scoring setup, a full explanation can be found in the “ATMS: User Manual”. 10.1. Live Scoring for the Qualification Round/s Live Scoring for the qualification round/s is run in the same way as a standard stroke play event. All live scoring is done in the “Competitions” side. You do not need to do anything in “SP Tournaments”, for the qualification rounds. 10.1.1 Golf Club TV Setup When setting up the “Golf Club TV”, for the qualification rounds, you can select the “Type” that you usually would use for a stroke play event (LiveScoring and Final Results). Figure 102 Make sure that the correct tournament is selected next to “Tournament”. If the qualification rounds are separate tournaments then you will have to change this parameter for each qualification round. All other parameters will work the same as for a stroke play event. 59 10.1.2 Live Scoring Generation To generate the live scoring for a qualification round, make sure that you are in “Competitions”. Then select “Preparation<Publish”. The following page will be displayed (Figure 103): Figure 103 Before the round starts you need to select the boxes next to “Publish start list, Publish result list and LiveScoring”. Then select one of the “LiveScoring types available”. Once you have selected these options, click “Apply”. Click “Generate” in the row “Start list” and the column “Current round”. Then click “Generate” in the row “LiveScoring” and the column “Current round”. A time and date should then show when last you generated. Figure 104 60 10.2. Live Scoring for the Matchplay Rounds Live scoring for the matchplay rounds will need to be generated for each round. 10.2.1 Golf Club TV Setup To setup the Live Scoring, click on “GolfClub TV” (Figure 105). You can use the “Playlist” that you used for the qualification rounds or you can create a new one. If you don’t know how to do this please consult the “ATMS: User Manual”. Figure 105 You can either create a new page and delete the old one or edit the existing page. Once you have chosen one of these options you will be able to adapt the different parameters. Below refers to Figure 106: Name: Enter the name that you want to be displayed on the Playlist. Make sure that it is unambiguous so it is easy to find. Type: You need to select “SP Matchplay” as the type. Duration, Show, Language: Same as stroke play. Template: There is no specific template for matchplay, use the template that was given to you by the ATMS co-‐ordinator. Option: Use the option given to you by the ATMS co-‐ordinator. 61 Figure 106 Tournament: Select your tournament. Only SP Tournaments will be displayed. Round: You have the option to select a single round or a combination of rounds. Figure 107 The combination of rounds is best used as you start completing more and more rounds. (Figure 107) Result: Select “LiveScoring” during the rounds and select “Final Results” at the end of the round. View: “View” gives you a variety of different options on how you want the template to be displayed. These different options are only available if have select one round under “Round”. “All” will show only the current result of all matches, in a list. “Holes All” will show all the matches hole-‐by-‐hole scores. “Holes All (Separate)” will show all the match’s hole-‐by-‐hole scores but separate each match with a heading of the player’s names. “Holes Pair” will show the hole-‐by-‐hole scores for the specific match chosen. 62 Show mode, Scrolling, Repeat count: Same as stroke play. Once you are happy with the parameters, click “Save” in the top left. The Golf Club TV will now be setup. You can generate the URL for the page by clicking on the URL button. 10.2.2 Live Scoring Generation Once you have setup the “GolfClub TV” you need to generate the live scoring for the round. Make sure that you are in “SP Tournaments” and then click on “Preparation<Publish”, the following page will be displayed Figure 108: Figure 108 Select either “Tee/Time (Ascending)” or “Tee/Time (Descending)” then click “Save” bottom of the page. at the Then change over to competitions and click on “Preparation<Publish”. Select the boxes next to “Publish start list, Publish result list and LiveScoring”. (Figure 109) 63 Figure 109 Then select one of the “LiveScoring types” and click “Apply”. Once you have selected these options click “Generate” in the row “Start list” and the column “Current round”. Then click “Generate” in the row “LiveScoring” and the column “Current round”. A time and date should then show when last you generated. Once you have generated the live scoring you can start to enter scores. The scores will then appear on your URL template. 64 11. Running an alternative tournament from first round losers 11.1. Creating the tournament The ATMS provides the option to run another tournament from the first round losers. This is often referred to as a Plate Division. It is suggested that a good understanding of everything discussed prior to this chapter is required before attempting to run this format on the ATMS. Figure 110 In the creation of the tournament you need to select the option next to “With losers” (Figure 111) Figure 111 11.1.1 Templates It is important that you select the correct templates in step 4. The templates will have the words “with losers” at the end of the name (Figure 112). If you are unsure on which templates to use contact the ATMS Co-‐ordinator. If you cannot see the template, they may be hidden, so select the box next to “Show unknown types”. 65 Figure 112 11.2. First Round of Matchplay The first round of matchplay will be run the same as any normal matchplay round. This is because the alternative tournament only starts after the first round, once the losers have been decided. Run this round as normal and then close it. When you close it the correct ranks will be allocated for the next round. 11.3. Players Ranks If you look at “Players-‐round”, for round 2, you will see that there are players with a W and a number next to their name and other players with an L and a number next to their name. (Figure 113) The players with the W are the winners from round 1 and they will make up one division. For the purpose of the manual we are going call the round 1 winners division the “Championship Division”. The players with an L are the losers from round 1 and they will make up another division. For the purpose of the manual we are going to call the round 1 loser’s the “Plate Division”. Once you are happy with the ranks assign the template. 66 Figure 113 11.4. Allocating Parts and Groups You need to assign “Parts” and “Groups” to differentiate the different divisions on the reports. Otherwise there is nothing that differentiates which division the player belongs to. 11.4.1 Player Parts The “Part” which the player belongs to is effectively the division they are in. You will only need to assign two different parts. To create a “Part”, make sure that you are in “SP Tournaments”, then click on “Players<SP Opponents”. Click on “Players parts”. (Figure 114) 67 Figure 114 The following window will open (Figure 115): Figure 115 Click on insert to create a “Part”. 68 Figure 116 Enter the name and short name for the part and then click “Insert”. Figure 117 You can “Edit” or “Delete” any parts that you have created. Once you have added you parts, click “Close” . 11.4.2 Player Groups “Player Groups” allow you to break down the divisions further. It is especially useful if you wish to indicate a 3rd and 4th playoff or add more detail to the report. To create a “Player Group”, make sure that you are in “SP Tournaments” and then, click “Players<SP Opponents”. (Figure 118) 69 Figure 118 Click on “Players group”, the following window will open Figure 119 Figure 119 Click on “Insert” to create a group. 70 Figure 120 Enter the “Name” of the group and the “Short Name”. Click the dropdown tab underneath “Part” and select which “Part” the group should be allocated to. You obviously need to have already created a “Part” before creating a “Group”. 11.4.3 Assigning a Group Once you have created a “Group” you need to assign it to the matches. To assign a group to a match, make sure that you are in “SP Tournaments”, and then click “Players<SP Opponents”. Then click on “Opponents editor” . The following window will open (Figure 121): 71 Figure 121 Select the match by placing a tick in the box next to the relevant group (Figure 122) Figure 122 Then click on the dropdown tab next to “Set Group” (Figure 123). Select the group. Figure 123 Once the group is displayed, then click “Set Group”. 72 Figure 124 The “Part” and the “Group” will now be shown next to the match. Figure 125 Once you have assigned all the groups, click “Save & leave” (Figure 121). 11.4.4 How to know which match to assign a group to To make sure that you are assigning the correct group to the correct match, you need to check the rankings. Click on “Players<Players-‐Round”. You will see the different rankings, make sure that all players with a “W” are allocated to one of the divisions and players with an “L” are allocated to another. 11.5. Other Run the “With losers” event as you would any other event. The most important thing is to make sure that you allocate the correct templates and extract the correct reports. See 11.6 With Losers Reports to know which reports to use. 11.6. With Losers Reports There are two reports available, one report that differentiates by “Part” and one that differentiates by “Group”. Make sure you are in “SP Tournaments” then click “Final results<Statistic”. Click on the “Matchplay” button. 73 Figure 126 The following window will open (Figure 127). Select the reports that end with “by name of group” or “by name of part” (Figure 127). “By name of group” will display the group name in the heading, see Figure 128. “By name of part” will display the part name in the heading Figure 129. Figure 127 74 Figure 128 Figure 129 75 12. Double Round Final and Semi-Final The ATMS Matchplay gives you the option to run a double round semi-‐final and/or a double round final. Double round meaning 36 holes. The “double round” needs to be selected in the setup and cannot be changed once selected. Therefore you must make sure that your tournament does in fact have a “double round final/ semi-‐ final” when creating the tournament. Select the appropriate box next to the “double round” options, in the second step of creating your tournament. Figure 130 When applying the templates in step 4, you can apply the same “Final template” for both rounds and then adjust the time for the second round to make it later in the day (Figure 131). 76 Figure 131 Once you have made these setups, run your tournament as you would any normal matchplay. 12.1. Entering Scores You need to enter hole by hole scores for a double round final or semi-‐final. To enter scores do as you would for a normal round. Make sure you are in “Competitions” and then click on “Players<Start list”. Click on the white ball next to the players names and then enter the hole by hole scores using either method described in 8.4 Entering Matchplay Scores. Once you have completed entering the scores for the first round you need to “Close” the round. Once the round is closed you need to change over to round 2. If you close the round and the lock doesn’t turn red (Figure 132) then refresh , the lock should now appear red (Figure 133). Figure 132 77 Figure 133 Once you have changed to round two, click on the white ball next to the players score. The following page will open (Figure 134). You will be able to view the score from the first round. If this score is not visible then you most likely have not closed the first round. Figure 134 Fill in the scores for round 2 and then complete all the processes you would for a normal round of matchplay. 78 13. Other Issues 13.1. Qualification Draw changes after Template has been applied This scenario could occur if a player does not arrive for his/her tee off time and is replaced with another player. You have already set up a custom draw in the competitions side of the tournament, after having applied the template. If you were to add the player in “SP Tournaments” and then reapply the template your custom draw would be changed. This would cause serious issues if the round has already started. Follow the steps below if this occurs: In Figure 135 a custom draw has been set up, using the draw editor in “Competitions”, after applying the template. If the template was to be reapplied the custom draw would be ruined, see Figure 136. Figure 135 Figure 136 To make sure you retain the draw that you created in the draw editor, you need to first remove the player from the “Competitions” side. Therefore open up the draw editor (Figure 137) and remove the player from the draw (Figure 138). 79 Figure 137 Figure 138 Once you have edited the draw click “Save & leave”. Then click on “Players<Players”. The following window will open (Figure 139): 80 Figure 139 If you sort by tee time, then the player you removed will be at the bottom of the list. To delete the player, click on the delete button next to their name. You will be asked if you wish to delete the player, click “Ok”. You then need to add the new player. Once the new player is added then he will appear at the bottom of the list. You then need to add the player to the draw, click on “Players<Start list”. Click on the draw editor and then insert the player into the open spot. You can now start filling scores in for the player (Figure 140). Figure 140 Once you have inserted the player into the draw on the competitions side, you need to change back to “SP Tournaments”. You will see that the player you removed in the “Competitions” side is still in the “SP Tournaments” list (Figure 141). 81 Figure 141 You need to remove this player from the “SP Tournaments” side and then add the new player. To do this, click on the “Edit” button . The following window will open Figure 142: 82 Figure 142 Remove the player by clicking the delete button and then search for the new player and add him. Once you have done this click “Save”. The new player will now have been added successfully and you can carry on with the matchplay event. 83 13.2. Setting ranks without closing the round It often happens in matchplay that the next round will begin while a few matches of the previous round are still on going. The ATMS caters for this by allowing you to set the ranks for the next round without closing. If you look at Figure 143 then you will see that matches 1 and 2 have been completed. Figure 143 The winners of matches 1 and 2 will now start their semi-‐final match. However, matches 3 and 4 are still ongoing. If this scenario occurs, follow the steps below. From Figure 143, Click on “Competition<Preparation<Publish”. “Generate” the result list. Figure 144 Then change to “SP Tournaments” click “Calculate” . Click on “Final results<Statistic”. Then . The current results will then be displayed (Figure 145). 84 Figure 145 As can be seen in Figure 145 the bottom two matches are still ongoing. Once calculated, click “Set ranks without close”. Then change to the next round and change to “Competitions”. Click on “Players<Draw”. Figure 146 Now you will be able to fill in scores for the match that is taking place in the next round, while still being able to fill in scores for the current round. Once the current round is complete, make sure you are in “Competitions” and then click “Competition<Preparation<Publish”. “Generate” the result list for the round, as shown in Figure 144. Then change over to “SP Tournaments” and click on “Final Results<Statistic”. 85 Figure 147 Then click on “Calculate”. Once calculated click “Close and set ranks”. If you change to the next round, switch to competitions and then click “Players<Draw”, you will see that both matches are now displayed. You will now be able to fill in scores for match 2. Figure 148 86 14. Frequently Asked Questions Questions Answers Q1. Do I have to set my competition up as one A1. No. You may set the qualification and tournament if I have qualification rounds? Matchplay up separately. This parameter is set when the Matchplay is created. If the Matchplay is created as a separate tournament the players will have to be put in manually. Q2. What do I do if some of the matches for the first round are complete and want to tee off for the second round while there are still matches in progress from the first round? A2. You can set ranks without closing the round thus allowing the next round to start before the first round is finished. Refer to Step 13.2 of the manual on how to do this. Q3. Can I change the start times, tees & A3. Yes. The template has default parameters but intervals of Matchplay rounds? you can edit these in competitions under the draw once the template has been applied. Q4. How do I get livescoring going for A4. Startlist & Livescoring need to be generated in Matchplay? competitions under ‘Preparation<Publish’ just as it is done for a stroke play tournament. 87 Q5. How do I get my draw to show up for a A5. You need to apply a template. Matchplay round? Q6. What do I do if the template I am looking A6. Click on the box ‘Show unknown types’. If the for is not there? template is still not there contact the system administrator. Q7. How does the system know which player to A7. The templates that are set up are in accordance put against which? with the rules of golf for Matchplay. Q8. Why is my Matchplay Tree showing up the A8. When applying the template you need to tick incorrect times? the box ‘Adapt Template’. You can go and reapply the template and do this. Please note if you change the Tee’s in the draw editor these will not reflect on the Matchplay Tree. 88