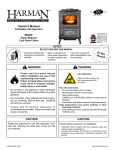
1
JP003P.qxd
4/21/04
11:30 AM
Page 101
N CONC
CA
RI
M
EN
AT
I
E
PAV
ON
TE
RE
AM
E
Concrete
Crack
and
Partial-Depth
Spall
Repair
Manual
T ASSOC
I
American Concrete
Pavement Association
JP003P.qxd
4/21/04
11:30 AM
Page i
Reprint from
UNIFIED FACILITIES CRITERIA (UFC)
Operation & Maintenance:
CONCRETE CRACK AND
PARTIAL-DEPTH SPALL REPAIR
Edited and Annotated by the
American Concrete Pavement Association
U.S. ARMY CORPS OF ENGINEERS
NAVAL FACILITIES ENGINEERING COMMAND
AIR FORCE CIVIL ENGINEER SUPPORT AGENCY
APPROVED FOR PUBLIC RELEASE:
DISTRIBUTION UNLIMITED
UFC 3-270-03
May 2004
Any copyrighted material included in this UFC is identified at its point of use. Use
of the copyrighted material apart from this UFC must have the permission of the
copyright holder. The format of this document does not conform to UFC 1-300-1.
i
JP003P.qxd
4/21/04
11:30 AM
Page ii
FOREWORD
The Unified Facilities Criteria (UFC) system is prescribed by MILSTD 3007 and provides planning, design, construction, operations
and maintenance criteria, and applies to all service commands
having military construction responsibilities. UFC will be used for all
service projects and work for other customers where appropriate.
UFC are living documents and will be periodically reviewed,
updated, and made available to users as part of the Services’
responsibility for providing technical criteria for military construction.
Headquarters, United States Army Corps of Engineers (HQUSACE),
Naval Facilities Engineering Command (NAVFAC), and Air Force
Civil Engineer Support Agency (AFCESA) are responsible for
administration of the UFC system.Technical content of UFC is the
responsibility of the preparing tri-service committee. Recommended
changes with supporting rationale should be sent to the respective
service proponent office, as follows:
• HQUSACE, ATTN: CECW-E, 441 G Street, NW, Washington,
DC 20314-1000, or the Recommended Changes to
Engineering Documents page on the TECHINFO site listed
below.
• HQUSACE, ATTN: CECW-E, 441 G Street, NW, Washington,
DC 20314-1000, or the Recommended Changes to Engineering Documents page on the TECHINFO site listed below.
• Commander, Atlantic Division, Naval Facilities Engineering
Command, 1510 Gilbert Street (ATTN: NAVFAC Criteria Office),
Norfolk, VA 23511-2699, or [email protected].
navy.mil, by commercial telephone (757) 322-4200, or DSN
262-4200, or by facsimile machine to (757) 322-4416.
• Air Force Civil Engineer Support Agency, 139 Barnes Drive,
Tyndall Air Force Base, FL 32403-5319, or larry.spangler@
tyndall.af.mil.
UFC are effective upon issuance. UFC are distributed only in
electronic media from the following sources:
• USACE TECHINFO Internet site http://www.hnd.usace.army.
mil/techinfo/index.htm.
• NAVFAC Criteria Office Internet site http://criteria.navfac.
navy.mil/criteria.
• Construction Criteria Base (CCB) system maintained by the
National Institute of Building Sciences on CD-ROM and at
Internet site http://www.ccb.org/.
Hard copies of UFC printed from electronic media should be
checked against the current electronic version prior to use to ensure
that they are current.
FOREWORD BY ACPA
This publication is annotated by the American Concrete Pavement
Association. It is a reprint of a United Facilities Criteria document,
UFC 3-270-04, and is an ACPA publication, JP002P. The ACPA
wishes to thank the Tri-Services of the Department of Defense for
allowing ACPA to annotate and reprint this document.
ii
JP003P.qxd
4/21/04
11:30 AM
Page iii
CONTENTS
Chapter 1 – Introduction . . . . . . . . . . . . . . . . . . . . . . . . . . . . . . . . . 1
1.1. Preface . . . . . . . . . . . . . . . . . . . . . . . . . . . . . . . . . . . . . . . . 1
1.2. Safety Considerations . . . . . . . . . . . . . . . . . . . . . . . . . . . . . 1
1.3. References . . . . . . . . . . . . . . . . . . . . . . . . . . . . . . . . . . . . . 1
Table 1.1. American Society for Testing and
Materials (ASTM). . . . . . . . . . . . . . . . . . . . . . . . . . . . 3
Table 1.2. American Concrete Institute (ACI). . . . . . . . . . . . . . . 5
Table 1.3. American Concrete Pavement
Association (ACPA) . . . . . . . . . . . . . . . . . . . . . . . . . . 5
Chapter 2 – Purpose of Crack and Partial-Depth Spall Repair . . . 7
2.1. Description . . . . . . . . . . . . . . . . . . . . . . . . . . . . . . . . . . . . . 7
2.2. Objective . . . . . . . . . . . . . . . . . . . . . . . . . . . . . . . . . . . . . . . 7
2.3. Airfield Inspections . . . . . . . . . . . . . . . . . . . . . . . . . . . . . . . 7
2.4. Cracks . . . . . . . . . . . . . . . . . . . . . . . . . . . . . . . . . . . . . . . . . 8
2.5. Spalls . . . . . . . . . . . . . . . . . . . . . . . . . . . . . . . . . . . . . . . . . 8
2.6. Moderate-Severity Spalling . . . . . . . . . . . . . . . . . . . . . . . . . 9
Chapter 3 – Crack Sealing and Repair . . . . . . . . . . . . . . . . . . . . . 11
3.1. Description. . . . . . . . . . . . . . . . . . . . . . . . . . . . . . . . . . . . . 11
3.2. Test Section . . . . . . . . . . . . . . . . . . . . . . . . . . . . . . . . . . . . 11
3.3. Sealant Selection . . . . . . . . . . . . . . . . . . . . . . . . . . . . . . . 11
3.4. Shape Factor and Recess . . . . . . . . . . . . . . . . . . . . . . . . 12
3.5. Sandblasting . . . . . . . . . . . . . . . . . . . . . . . . . . . . . . . . . . . 12
3.6. Removing Loose Material . . . . . . . . . . . . . . . . . . . . . . . . . 12
3.7. Vacuuming. . . . . . . . . . . . . . . . . . . . . . . . . . . . . . . . . . . . . 12
3.8. Cleanliness . . . . . . . . . . . . . . . . . . . . . . . . . . . . . . . . . . . . 12
3.9. Backer Rod . . . . . . . . . . . . . . . . . . . . . . . . . . . . . . . . . . . . 13
3.10. Foreign Object Damage . . . . . . . . . . . . . . . . . . . . . . . . . 13
Chapter 4 – Backer and Sealant Materials. . . . . . . . . . . . . . . . . . 15
4.1. Description . . . . . . . . . . . . . . . . . . . . . . . . . . . . . . . . . . . . 15
4.2. Separating Materials . . . . . . . . . . . . . . . . . . . . . . . . . . . . . 16
4.3. Fuel and Blast Resistance . . . . . . . . . . . . . . . . . . . . . . . . 16
4.4. Navy Regulations . . . . . . . . . . . . . . . . . . . . . . . . . . . . . . . 16
4.5. U.S. Army and Air Force Regulations . . . . . . . . . . . . . . . . 16
Chapter 5 – Shape Factors. . . . . . . . . . . . . . . . . . . . . . . . . . . . . . 17
5.1. Description . . . . . . . . . . . . . . . . . . . . . . . . . . . . . . . . . . . . 17
5.2. Silicone Sealants. . . . . . . . . . . . . . . . . . . . . . . . . . . . . . . . 17
Chapter 6 – Crack Repair Equipment. . . . . . . . . . . . . . . . . . . . . . 21
6.1. Description . . . . . . . . . . . . . . . . . . . . . . . . . . . . . . . . . . . . 21
6.2. Random Crack Saw . . . . . . . . . . . . . . . . . . . . . . . . . . . . . 21
6.3. Vertical Spindle Router . . . . . . . . . . . . . . . . . . . . . . . . . . . 22
iii
JP003P.qxd
4/21/04
11:30 AM
Page iv
6.4. Sandblasting Equipment . . . . . . . . . . . . . . . . . . . . . . . . . . 22
6.5. Waterblasting Equipment . . . . . . . . . . . . . . . . . . . . . . . . . 23
6.6. Hot-Air Lance . . . . . . . . . . . . . . . . . . . . . . . . . . . . . . . . . . 24
6.7. Power Broom . . . . . . . . . . . . . . . . . . . . . . . . . . . . . . . . . . 24
6.8. Compressed Air Equipment . . . . . . . . . . . . . . . . . . . . . . . 24
6.9. Backer Rod Installation Equipment. . . . . . . . . . . . . . . . . . 24
6.10. Hot-Applied Sealant Equipment . . . . . . . . . . . . . . . . . . . 25
6.11. Cold-Applied Sealant Equipment . . . . . . . . . . . . . . . . . . 25
Chapter 7 – Crack Preparation . . . . . . . . . . . . . . . . . . . . . . . . . . . 27
7.1. Description . . . . . . . . . . . . . . . . . . . . . . . . . . . . . . . . . . . . 27
7.2. Cleaning . . . . . . . . . . . . . . . . . . . . . . . . . . . . . . . . . . . . . . 28
Chapter 8 – Crack Sealing Procedures . . . . . . . . . . . . . . . . . . . . 29
8.1. Description . . . . . . . . . . . . . . . . . . . . . . . . . . . . . . . . . . . . 29
8.2. Preparation . . . . . . . . . . . . . . . . . . . . . . . . . . . . . . . . . . . . 29
Chapter 9 – Partial-Depth Spall Repair . . . . . . . . . . . . . . . . . . . . 31
9.1. Description . . . . . . . . . . . . . . . . . . . . . . . . . . . . . . . . . . . . 31
9.2. Test Area . . . . . . . . . . . . . . . . . . . . . . . . . . . . . . . . . . . . . . 34
9.3. Selecting Repair Materials and Procedure . . . . . . . . . . . . 34
9.4. Removing Old Sealant . . . . . . . . . . . . . . . . . . . . . . . . . . . 34
9.5. Boundaries . . . . . . . . . . . . . . . . . . . . . . . . . . . . . . . . . . . . 35
9.6. Concrete Removal . . . . . . . . . . . . . . . . . . . . . . . . . . . . . . 35
9.7. Concrete Soundness. . . . . . . . . . . . . . . . . . . . . . . . . . . . . 35
9.8. Cleaning . . . . . . . . . . . . . . . . . . . . . . . . . . . . . . . . . . . . . . 35
9.9. Sweeping . . . . . . . . . . . . . . . . . . . . . . . . . . . . . . . . . . . . . 35
9.10. Joint Re-former . . . . . . . . . . . . . . . . . . . . . . . . . . . . . . . . 36
9.11. Bonding Agent . . . . . . . . . . . . . . . . . . . . . . . . . . . . . . . . . 36
9.12. Sawing . . . . . . . . . . . . . . . . . . . . . . . . . . . . . . . . . . . . . . 36
9.13. Cleanup . . . . . . . . . . . . . . . . . . . . . . . . . . . . . . . . . . . . . . 36
Chapter 10 – Spall Repair Materials. . . . . . . . . . . . . . . . . . . . . . . 37
10.1. Specifications . . . . . . . . . . . . . . . . . . . . . . . . . . . . . . . . . 37
10.2. Alternative Repair Materials . . . . . . . . . . . . . . . . . . . . . . 37
Chapter 11 – Spall Repair Equipment . . . . . . . . . . . . . . . . . . . . . 39
11.1. Description. . . . . . . . . . . . . . . . . . . . . . . . . . . . . . . . . . . . 39
11.2. Concrete Saw . . . . . . . . . . . . . . . . . . . . . . . . . . . . . . . . . 39
11.3. Jackhammers . . . . . . . . . . . . . . . . . . . . . . . . . . . . . . . . . 39
11.4. Mixers . . . . . . . . . . . . . . . . . . . . . . . . . . . . . . . . . . . . . . . 39
11.5. Hand Tools. . . . . . . . . . . . . . . . . . . . . . . . . . . . . . . . . . . . 39
Chapter 12 – Spall Repair Preparation. . . . . . . . . . . . . . . . . . . . . 41
12.1. Description . . . . . . . . . . . . . . . . . . . . . . . . . . . . . . . . . . . 41
12.2. Boundaries . . . . . . . . . . . . . . . . . . . . . . . . . . . . . . . . . . . 41
12.3. Soundness . . . . . . . . . . . . . . . . . . . . . . . . . . . . . . . . . . . 42
iv
JP003P.qxd
4/21/04
11:30 AM
Page v
Chapter 13 – Spall Repair Procedures. . . . . . . . . . . . . . . . . . . . . 43
13.1. Description . . . . . . . . . . . . . . . . . . . . . . . . . . . . . . . . . . . 43
13.2. Joint Re-former . . . . . . . . . . . . . . . . . . . . . . . . . . . . . . . . 43
13.3. Bonding Agents . . . . . . . . . . . . . . . . . . . . . . . . . . . . . . . . 44
13.4. Mixing and Placing . . . . . . . . . . . . . . . . . . . . . . . . . . . . . 44
13.5. Consolidation . . . . . . . . . . . . . . . . . . . . . . . . . . . . . . . . . 44
13.6. Curing . . . . . . . . . . . . . . . . . . . . . . . . . . . . . . . . . . . . . . . 46
13.7. Resealing . . . . . . . . . . . . . . . . . . . . . . . . . . . . . . . . . . . . 46
13.8. Placing Sealant . . . . . . . . . . . . . . . . . . . . . . . . . . . . . . . . 47
13.9. Cleanup . . . . . . . . . . . . . . . . . . . . . . . . . . . . . . . . . . . . . . 47
Chapter 14 – Common Problems & Solutions . . . . . . . . . . . . . . . 49
14.1. Joint/Crack Sealing & Resealing. . . . . . . . . . . . . . . . . . . 49
14.2. Partial-Depth Spall Repair. . . . . . . . . . . . . . . . . . . . . . . . 51
v
JP003P.qxd
vi
4/21/04
11:30 AM
Page vi
JP003P.qxd
4/21/04
11:30 AM
Page 1
Chapter 1 – Introduction
CHAPTER 1
INTRODUCTION
1.1. Preface – This handbook describes methods and
procedures for the repair of cracks and spalls in concrete
pavements as well as the selection of materials and
equipment. This handbook is intended for use as a field
handbook for airfield concrete pavement repair for all U.S.
Navy, Army, and Air Force facilities; however, the techniques for repair can be used for other concrete pavements as well. References are provided for additional
information on pavement repair practices not addressed
in this manual. Tables 1.1, 1.2, and 1.3 list applicable
American Society of Testing and Materials (ASTM) specifications, American Concrete Institute (ACI) publications,
and American Concrete Pavement Association (ACPA)
publications.
1.2. Safety Considerations – It is the responsibility of
supervisory personnel to ensure worker safety by
informing the workers of any potential hazardous practices. Follow the applicable Occupational Safety and
Health Administration (OSHA) guidelines at all times for
hazardous practices such as sandblasting joints and
cracks, airblasting for cleaning cracks, and working with
chemicals. Workers are required to be informed of all
hazardous materials and practices that may involve
exposure to toxic materials in the workplace. Material
Safety Data Sheets must be available to all workers at the
work site.
1.3. References
1.3.1. Department of the Navy, Naval Facilities Engineering Command. (1994). “Concrete Pavement Repair
Manual,” MIL-HDBK-1102/7.2, Norfolk, Virginia.
1.3.2. Headquarters, Departments of the Army and Air
Force. (1989). “Procedures for U.S. Army and U.S. Air
Force Airfield Pavement Condition Surveys,” TM 5-8266/AFM 93-5, Washington, DC.
1.3.3. Unified Facilities Guide Specification. (Sept.
1999). “Resealing of Joints in Rigid Pavement,” UFGS02982N.
1.3.4. Air Force Civil Engineer Support Agency. (1996).
“Silicone Joint Sealants for Pavements,” Engineering
Technical Letter ETL 96-4, Tyndall Air Force Base, Florida.
1
JP003P.qxd
4/21/04
11:30 AM
Page 2
1.3.5. Unified Facilities Guide Specification. (1997).
“Field Molded Sealants for Sealing Joints in Rigid Pavements,” UFGS-02760A.
1.3.6. Headquarters, Departments of the Army and Air
Force. (1989). “Repair of Rigid Pavements Using EpoxyResin Grouts, Mortars, and Concrete,” TM 5-822-9/AFM
88-6, Chapter 10, Washington, DC.
1.3.7. Evans, L. D., and Romine, A. R. (1993). “Materials and Procedures for the Rapid Repair of Joint Seals in
Concrete Pavements,” SHRP-H-349, Strategic Highway
Research Program, Transportation Research Board,
Washington, DC.
1.3.8. Unified Facilities Criteria. (2003). “O&M: Concrete Repair,” UFC 3-270-04, ACPA JP002P.
1.3.9. Unified Facilities Guide Specification. (Sept.
1999). “Patching of Rigid Pavement Partial Depth,”
UFGS-02983N.
1.3.10. Unified Facilities Guide Specification. (Aug.
1997). “Patching of Rigid Pavements,” UFGS-02980A.
1.3.11. Evans, L. D. et al. (1993). “Materials and
Procedures for Rapid Repair of Partial-Depth Spalls in
Concrete Pavements,” SHRP-H-349, Strategic Highway
Research Program, Transportation Research Board,
Washington, DC.
1.3.12. American Association of State Highway and
Transportation Officials (AASHTO). (1991). “Burlap Cloth
Made From Jute or Kenaf,” AASHTO M 182, Washington,
DC.
1.3.13. U.S. Army Corps of Engineers Waterways
Experiment Station. (1990). “Specification for MembraneForming Compounds for Curing Concrete,” CRD-C 30090, Handbook for Concrete and Cement, Vicksburg, MS.
2
JP003P.qxd
4/21/04
11:30 AM
Page 3
Chapter 1 – Introduction
Table 1.1. American Society for Testing and Materials
(ASTM) Specifications for Sealants, Joint Fillers, Patching
Materials, etc.
Joint and Crack Repair
ASTM C 603
(1997)
ASTM C 639
(2001)
ASTM C 661
(1998)
ASTM C 679
(1997)
ASTM C 719
(1998)
ASTM C 792
(1998)
ASTM C 793
(2002)
ASTM D 412
(1998)
ASTM D 1751
(1999)
ASTM D 1752
(1996)
ASTM D 2628
(1998)
ASTM D 2835
(1998)
ASTM D 3406
(2000)
ASTM D 3569
(2000)
ASTM D 5893
(1996)
ASTM D 6690
(2001)
Extrusion Rate and Application Life of
Elastomeric Sealants
Rheological (Flow) Properties of
Elastomeric Sealants
Indentation Hardness of ElastomericType Sealants by Means of a Durometer
Tack-Free Time of Elastomeric Sealants
Adhesion and Cohesion of Elastomeric
Joint Sealants under Cyclic Movement
Effects of Heat Aging on Weight Loss,
Cracking, and Chalking of Elastomeric
Joint Sealants
Effects of Accelerated Weathering on
Elastomeric Joint Sealants
Vulcanized Rubber and Thermoplastic
Rubbers and Thermoplastic Elastomers –
Tension
Preformed Expansion Joint Filler for
Concrete Paving and Structural
Construction (Nonextruding and Resilient
Bituminous Types)
Preformed Sponge Rubber and Cork
Expansion Joint Fillers for Concrete
Paving and Structural Construction
Preformed Polychloroprene Elastomeric
Joint Seals for Concrete Pavements
Lubricant for Installation of Preformed
Compression Seals on Concrete
Pavements
Joint Sealant, Hot-Applied, ElastomericType, for Portland Cement Concrete
Pavements
Joint Sealant, Hot-Applied, Elastomeric,
Jet-Fuel-Resistant-Type for Portland
Cement Concrete Pavements
Cold-Applied, Single Component
Chemically Curing Silicone Joint Sealant
for Portland Cement Concrete Pavements
Joint and Crack Sealants, Hot-Applied,
for Concrete and Asphalt Pavements
3
JP003P.qxd
4/21/04
11:30 AM
Page 4
Table 1.1. American Society for Testing and Materials
(ASTM) Specifications for Sealants, Joint Fillers, Patching
Materials, etc., Continued
Spall Repair
ASTM C 31
(2000)
ASTM C 33
(2002)
ASTM C 39
(2001)
ASTM C 94
(2000)
ASTM C 131
(2001)
ASTM C 136
(2001)
ASTM C 143
(2000)
ASTM C 150
(2002)
ASTM C 171
(1997)
ASTM C 173
(2001)
ASTM C 231
(1997)
ASTM C 260
(2001)
ASTM C 309
(1998)
ASTM C 494
(1999)
ASTM C 881
(2002)
4
Making and Curing Concrete Test
Specimens in the Field
Concrete Aggregates
Compressive Strength of Cylindrical
Concrete Specimens
Ready-Mixed Concrete
Resistance to Degradation of Small-Size
Coarse Aggregate by Abrasion and
Impact in the Los Angeles Machine
Sieve Analysis of Fine and Coarse
Aggregates
Slump of Hydraulic Cement Concrete
Portland Cement
Sheet Materials for Curing Concrete
Air Content of Freshly Mixed Concrete
by the Volumetric Method
Air Content of Freshly Mixed Concrete
by the Pressure Method
Air-Entraining Admixtures for Concrete
Liquid Membrane-Forming Compounds
for Curing Concrete
Chemical Admixtures for Concrete
Epoxy-Resin-Base Bonding Systems for
Concrete
JP003P.qxd
4/21/04
11:30 AM
Page 5
Chapter 1 – Introduction
Table 1.2. American Concrete Institute (ACI) Publications
That Detail Good Practices for Concrete Repair Work
ACI 305R-99
ACI 306R-88
ACI 308-01
ACI 548.1R-97
Hot-Weather Concreting
Cold-Weather Concreting
Guide to Curing Concrete
Guide for the Use of Polymers in Concrete
Table 1.3. American Concrete Pavement Association (ACPA)
Publications Pertaining to Joint, Crack, and Spall Repair
That Detail Good Practices for Concrete Repair Work
ACPA TB012P
ACPA SR903P
ACPA TB003P
ACPA TB020P
ACPA TB002P
Joint and Crack Sealing and Repair for
Concrete Pavements
Stitching Concrete Pavement Cracks and
Joints
Guidelines for Partial-Depth Spall Repair
Concrete Pavement Restoration Guide:
Procedures for Preserving Concrete
Pavements
Guidelines for Full-Depth Repair
Table 1.4. Federal Specifications for Sealants
SS-S-200E
SS-S-1614A
Sealants, Joint, Two-Component, Jet-BlastResistant, Cold-Applied, for Portland
Cement Concrete Pavement
Sealants, Joint, Jet-Fuel Resistant, HotApplied, for Portland Cement Concrete
Pavements
5
JP003P.qxd
6
4/21/04
11:30 AM
Page 6
JP003P.qxd
4/21/04
11:30 AM
Page 7
Chapter 2 – Purpose of Crack and Partial-Depth Spall Repair
CHAPTER 2
PURPOSE OF CRACK SEALING AND
PARTIAL-DEPTH SPALL REPAIR
2.1. Description – The primary purpose of sealing joints
and cracks, and repairing spalls in portland cement
concrete pavements on airfields is to reduce the costs
associated with foreign object damage (FOD) and to prolong the service life of the pavement, reducing the lifecycle costs for the pavement structure. A considerable
investment has been made in the construction of a concrete surface and the vehicles that use these surfaces;
therefore, costs decrease dramatically for every additional
year of pavement use that does not cause vehicle damage
or require repeated patching or full slab replacement.
Routine periodic inspections and rapid repair of pavement
problems are essential for reducing life-cycle costs
(References 1.3.1 and 1.3.2). A properly constructed and
maintained concrete pavement can last for many years.
2.2. Objective – The objective of joint/crack sealing and
spall repair is to reduce FOD and to minimize moisture or
incompressible material (rocks, sand, other pieces of
concrete, etc.) entering into the crack or joint. Unsealed
joints and cracks will allow moisture to penetrate under
the slab causing an increase in the moisture content in the
base and/or subbase. As thermal cycling occurs and the
joint or crack expands and contracts, incompressible
material such as rocks, chunks of concrete, sand, or ice in
the crack may cause stress to build in the slab. Such
stress can result in more spalling or cracking and further
damage to the slab, thereby increasing the potential
for FOD.
2.3. Airfield Inspections – For airfields, conduct inspections of the pavement surfaces receiving traffic at least
monthly to locate spalls or cracks that may cause FOD.
Otherwise, conduct routine field evaluations at least biannually, once during the summer and once during the
winter. Seasonal checks allow for evaluation of the
material during the two extremes of ambient conditions.
Locate and inspect all cracks and spalls. If concrete has
begun to break away from the crack or spalled area, repair
the damaged area.
7
JP003P.qxd
4/21/04
11:30 AM
Page 8
2.4. Cracks – Cracks less than 3/16 in. (5 mm) wide and
without any surface spalling do not require repair or
sealing. Seal all cracks between 3/16 in. (5 mm) and 2 in.
(50 mm) wide. Cracks larger than 2 in. (50 mm) require
full-depth patching. Use of a backer rod is recommended
for all crack sealing, unless irregular crack dimensions
preclude its use. If spalling is present adjacent to a crack
(of any width), repair the damaged area by treating the
crack the same as a joint. The sealed crack protects the
repaired area from damage that might result from
movement of the slab along the crack faces.
2.5. Spalls – Spalling is generally caused by incompressible materials in the joints and cracks that prevent
the necessary movement of the slab due to thermal fluctuations, thereby causing breaks in the concrete adjacent
to the joint or crack (Figure 2.1). Minor spalls may also be
caused by snowplows, overworking of the plastic concrete, or popouts. To repair a spalled area, remove incompressible materials from the joint or crack, patch the
spalled area, and replace the sealant. Additional repairs of
previous spall repairs due to failure of the material or poor
repair practices are also common. If the spall depth is
greater than 1/3 the slab depth, full-depth patching is
needed. Full-depth patching will not be covered in this
manual but is addressed in Reference 1.3.8 or ACPA
TB002P. Cracking of slabs can be due to load-related
failure or environmental stress on the slab.
Figure 2.1. Incompressibles causing spalling in joint or
crack.
8
JP003P.qxd
4/21/04
11:30 AM
Page 9
Chapter 2 – Purpose of Crack and Partial-Depth Spall Repair
2.6. Moderate to Severe Spalling – An example of
moderate to severe spalling is shown in Figure 2.2. Spalls
are present along the face of the joint. Missing chunks of
concrete are visible with the potential for more pieces to
become dislodged and cause FOD. Repair all spalled areas
that have loose concrete to reduce FOD potential.
Figure 2.2. Moderate to severe spalling along a joint.
9
JP003P.qxd
10
4/21/04
11:30 AM
Page 10
JP003P.qxd
4/21/04
11:30 AM
Page 11
Chapter 3 – Crack Sealing and Repair
CHAPTER 3
CRACK SEALING & REPAIR
ACPA NOTE: ACPA does not recommend the use of crack
routers due to the chipping and micro-cracking damage
this equipment causes to the concrete. ACPA recommends small diameter crack-tracing saw blades to
prepare a sealant reservoir.
ACPA recommends that water be used only to flush the
joint of sawing slurry. Waterblasting is not recommended
after the joints are sandblasted.
ACPA cautions personnel on use of hot-air lances to dry
seal reservoirs. Over-heating can damage the concrete.
3.1. Description – The recommended method for
preparing cracks with no raveling along the edges is to
saw the crack with a small-diameter blade or rout it to the
proper depth and width for the particular sealant and
backer rod. Sandblast each face of the sawcut or routed
crack. The crack faces are then cleaned with highpressure water and/or air and the area swept with a
vacuum-broom to prevent the material from re-entering
the sawed crack. Waterblasting is typically only needed
immediately after using a wet saw, whereas sandblasting
is used after a dry saw.
Small sections of repair are made at a time to prevent
the sawed crack faces from being exposed to the
elements for more than 24 hours. If the cracks are wet,
they may be dried with a hot-air lance or high-pressure air
compressor equipped with an operating water and oil
separator before placing the sealant and backer rod.
Use a sealant conforming to the applicable ASTM specifications and approved for use at a particular facility by
the engineer. The sealant is placed in the crack from the
bottom up and in one smooth run from the beginning to
the end of the crack. Fill the crack to a depth of 1/8 to 1/4
in. (3 to 6 mm) below the surface of the pavement for
conventional sealant (Reference 1.3.3) and 1/4 to 3/8 in.
(6 to 9 mm) for silicone sealant (Reference 1.3.4).
3.2. Test Section – Construct a test section of approximately 200 linear feet (61 m) of sealed cracks to be
approved by the contracting officer before beginning the
full crack sealing project. Use the same procedures and
materials in the test section that will be used in the full
11
JP003P.qxd
4/21/04
11:30 AM
Page 12
project. Ensure that crack sawing or routing does not
cause spalling.
Clean the crack faces before placement of any sealant.
For two-component sealants, verify the correct mixing
ratio to within a specified tolerance according to the
manufacturer’s specifications for that particular sealant. If
using hot-applied sealants, use calibrated thermometers
to verify correct application temperatures. Ensure that all
equipment is in good working condition and operating
properly. Additional details on joint and crack repair are
given in References 1.3.5 through 1.3.8 and in Table 1.3.
3.3. Sealant Selection – Select the proper sealant
material for the area being repaired (Chapter 4, “Backer
and Sealant Materials”); however, ensure that the selected
sealant conforms to appropriate specifications and is
authorized by the engineer before use. Normally, it should
match adjacent sealants. However, do not use neoprene
compression seals for cracks.
Time the repair such that prepared cracks are not
exposed for more than 24 hours before sealing. If the
cracks get wet or are cleaned with high-pressure
waterblasting, continue the sealing operation only when
the cracks are completely dry. The cracks may be dried
with a heat lance, as long as proper precautions are
followed to prevent heat damage to the concrete.
3.4. Shape Factor and Recess – Saw or rout (Figures 6.1
and 6.2) the crack to the proper width and depth to reach
the desired shape factor and recess (Chapter 5, “Shape
Factors”) recommended by the manufacturer of the
sealant to be used. For silicone sealants, use of a backer
rod in lieu of separating tape is recommended (Chapter 4,
“Backer and Sealant Materials”). Small cracks may be
sawed by hand.
3.5. Sandblasting – Clean the crack faces by light sandblasting using the multiple pass technique (Figures 6.3
and 7.3). While standing to one side of the crack, pass the
wand along the crack face at an angle to allow a strong
blast on one crack face; then step to the other side of the
crack and reverse direction. Direct the nozzle to the
location where the sealant will bond to the concrete, and
not above or below this region.
3.6. Removing Loose Material – Blow debris out of the
crack using compressed air; then clean the crack with
high-pressure water (not recommended by ACPA) (Figure
12
JP003P.qxd
4/21/04
11:30 AM
Page 13
Chapter 3 – Crack Sealing and Repair
6.4). Ensure that there is no loose material in the bottom
of the crack.
3.7. Vacuuming – Clean the area around the crack with a
vacuum sweeper to prevent debris from re-entering the
crack before sealing (Figure 6.5). Compressed air may be
required to re-clean crack if a power broom is used.
3.8. Cleanliness – Remember that the cleanliness of both
crack faces is extremely important! Dirty crack faces are a
major cause of loss of adhesion of the sealant and subsequent failure of the crack repair. Place the sealant within 24
hours after cleaning. If sealant is not placed within 24
hours, clean the crack again before sealing. If a finger
wiped along the crack face picks up dirt or dust, the crack
face is dirty and must be cleaned (Figure 7.3). Wait until
the pavement is completely dry before sealing.
3.9. Backer Rod – Place the backer rod immediately prior
to sealing the crack (Figure 6.6). Ensure that the backer
rod is at least 25 percent larger in diameter than the width
of the crack and is placed at the proper depth for the
shape factor of the sealant being used (Figure 5.1). Seal
the crack from the bottom up and from beginning to end
in one stroke without interruption, when practical (Figures
8.1 and 13.5).
3.10. Foreign Object Damage – After the crack repair
operation is complete, clean the surrounding pavement
and sweep away all potential materials that may cause
foreign object damage (FOD). Clean, lubricate, and properly store all equipment until the next repair operation.
13
JP003P.qxd
14
4/21/04
11:30 AM
Page 14
JP003P.qxd
4/21/04
11:30 AM
Page 15
Chapter 4 – Backer and Sealant Materials
CHAPTER 4
BACKER AND SEALANT MATERIALS
4.1. Description – Concrete crack repair sealants are
essentially the same as joint sealants and are designed to
mitigate two problem areas, moisture intrusion into the
pavement base and debris retention in the crack opening.
The influx of moisture through a crack into the pavement
base layer can seriously reduce the strength of the base
and the ability to sustain a load. It can also erode underlying material and cause pumping. Debris retention is a
particular problem due to thermal movement of the slab
at the crack. If incompressible material is present in the
crack and the slab expands due to thermal changes,
spalling may result due to the inability of the stress to be
relieved through movement of the slab at the crack.
Backer material is placed in the sawed crack to
minimize excess stress on the sealant material from
improper shape factors and to prevent three-sided
adhesion which inhibits the ability of the sealant to expand
and compress under thermal stress. Typically, backer
materials are rope-shaped and are often referred to as
“backer rod” (Figure 4.1). Ensure that the backer material
is compatible with the sealant, flexible to conform to the
shape of the crack path, non-absorptive to prevent water
retention, non-shrinkable, and compressible to allow for
easy installation. Follow the sealant manufacturer’s
recommendations on the type of backer rod needed for a
particular sealant.
Figure 4.1. Installation of backer rod into joint.
15
JP003P.qxd
4/21/04
11:30 AM
Page 16
Typical backer materials are polychloroprene, polystyrene, polyurethane, and polyethylene closed-cell foams.
Do not use paper, rope, or cord. Ensure that the melting
temperature of the backer material is at least 25°F (14°C)
higher than the sealant application temperature to prevent
damage during sealant placement. Ensure that the
uncompressed backer rod has a diameter at least 25%
larger than the sealant reservoir so that it remains in
position during the sealing operation. The use of backer
rod is recommended prior to sealant placement in
repairing cracks.
4.2. Separating Materials – Separating tape may be
employed when the sealant reservoir dimensions correspond to the proper shape factor and the use of backer
material would lead to an incorrect shape factor for that
sealant material. Separating materials are usually a thin
adhesive tape or a flexible plastic strip employed to prevent three-sided adhesion of the sealant. These materials
must be flexible enough to deform with the sealant as the
concrete expands and contracts. However, only use separating materials when the crack has been sawed to
provide a reservoir of the proper depth.
4.3. Fuel and Blast Resistance – Additional considerations for the crack repair material are jet fuel and jet blast
resistance. The crack to be repaired may be located in an
area in which fuel or lubricating or hydraulic fluid spillage
may occur or in an area subjected to high temperature
from jet blast or exhaust from auxiliary power units. Use
a repair material that conforms to ASTM and/or federal
specifications designated for joint and crack sealants for
use in these areas, as listed in Table 1.1 under “Joint and
Crack Repair” and Table 1.4.
4.4. Navy Regulations – Naval regulations require that all
materials used on U.S. Navy facilities conform to UFGS02982N (Reference 1.3.3). The Navy recommends use of
silicone sealants on all Naval facilities and as an alternative to materials meeting ASTM D 5893, if approved by
the engineer. Silicone sealants may be used in place of
preformed neoprene sealants for new joints if cost is a
major factor (References 1.3.3 and 1.3.4).
4.5. U.S. Army and Air Force Regulations – Sealants
used on U.S. Army and Air Force pavements must conform to the ASTM specifications listed in Table 1.1 under
“Joint and Crack Repair.” Preformed neoprene compression seals are common on Air Force pavements.
16
JP003P.qxd
4/21/04
11:30 AM
Page 17
Chapter 5 – Shape Factors
CHAPTER 5
SHAPE FACTORS
ACPA NOTE: ACPA does not recommend the use of crack
routers due to the chipping and micro-cracking damage
this equipment causes to the concrete. ACPA recommends small diameter crack-tracing saw blades to
prepare a sealant reservoir.
5.1. Description – For proper crack sealing, route or saw
the crack to a designated width and depth for the
particular type of sealant employed in the crack repair. The
dimensions of a typical crack reservoir (Figure 5.1) are
defined by a shape factor (S = D/W) that is the ratio of the
depth of the sealant (D) to its width (W). Shape factors
generally range from 0.5 to 2.0; however, these dimensions may be particular for the type of sealant employed
in the repair operation and a recommended value will be
supplied by the sealant manufacturer.
5.2. Silicone Sealants – Silicone sealants require a shape
of approximately 0.5 (Reference 1.3.3). For example, if
the width (W) of the sawed crack is 1/2 in. (13 mm), the
depth of the sawed crack (T) must be 1.25 in. (30 mm) to
accommodate a backer rod of 5/8 in. (16 mm). The top of
the backer rod will be 1/2 in. (13 mm) below the pavement surface. This allows for a depth (D) of 1/4 to 3/8 in.
(6 to 9 mm) of silicone sealant on top of the crown of the
backer rod to keep the sealant at 1/8 to 1/4 in. (3 to 6 mm)
below the pavement surface.
17
JP003P.qxd
4/21/04
Sealant
Material
11:30 AM
Page 18
1/4" (6 mm)
recess typ.
W
1" (32 mm)
minimum
Backer Rod
Joint or Crack
Field Poured Sealant
Hot-Poured Sealant – D/W = 1 (typical)
Silicone Sealant – D/W = 0.5 (typical)
Two-Component Material Cold Poured – D/W = 0.5 (typical)
1/4" (6 mm)
Chamfer or Radius*
1/4" (6 mm)
Recess Typ.
Sealant
Material
1" (25 mm) max.
Bond Breaker
Non-Extruding
Pre-Molded
Compressible
Material
1" (25 mm) max.
Isolation Joint
*Chamfer for airfield pavement subjected
to heavy-load aircraft
18
JP003P.qxd
4/21/04
11:30 AM
Page 19
Chapter 4 – Backer and Sealant Materials
W
Preformed
Neoprene
Compression
Seal
1/4" (6 mm)
Recess Typ.
D
As Required by
Manufacturer
Joint
Preformed Seal
Preformed Compression Seal – W Sized for Slab and Climate
Only for New Pavement Joints
Figure 5.1. (3) Typical sealant reservoir details and shape
factors for joints or cracks.
19
JP003P.qxd
20
4/21/04
11:30 AM
Page 20
JP003P.qxd
4/21/04
11:30 AM
Page 21
Chapter 6 – Crack Repair Equipment
CHAPTER 6
CRACK REPAIR EQUIPMENT
6.1. Description – Inspect all equipment employed in the
crack repair operation before, during, and after the repair
project to ensure proper operation of the equipment,
safety of the personnel involved in the project, and potential damage to the pavement due to equipment problems.
Follow proper safety procedures in accordance with OSHA
guidelines and common sense practices for the protection
of all project personnel. Use hand tools for working in
areas where machinery is not practical or allowed.
All sealant equipment must be equipped with nozzles
designed to fill the cracks from the bottom up. Inspect the
equipment daily, prior to application of the sealant, and
during the operation to ensure safe operation and that the
sealant is being applied properly. If a two-component
sealant is used, the metering ratio must be checked daily.
Refer to sealant manufacturer’s recommendations for
proper equipment to be used.
6.2. Random Crack Saw – Sawing is the preferred
method for preparing cracks for sealing. This device is
essentially a concrete saw but has a smaller rear-mounted
blade approximately 7 in. (175 mm) in diameter (Figure
6.1). These saws are generally self-propelled machines
with caster wheels that allow more freedom of movement
than an ordinary concrete saw for following the path of
cracks. Use diamond blades manufactured for tracing
cracks, which are wide enough to cut each edge of the
crack and will not warp during operation.
Figure 6.1. Random crack saw.
21
JP003P.qxd
4/21/04
11:30 AM
Page 22
6.3. Vertical Spindle Router – Cracks may be routed out
if a saw is not available. The vertical spindle router has a
vertically mounted router bit and is constructed such that
the device can caster and easily follow the contours of a
crack (Figure 6.2). The bit must be the proper size for the
sealant reservoir and be belt-driven for safety considerations arising from jamming of the bit if the router is forced
along the crack. Use proper size bits that yield the proper
shape for the sealant reservoir and do not cause spalling
or raveling along the crack path. (This type of equipment
is not recommended by ACPA.)
Figure 6.2. Router used to shape sealant reservoir for
cracks.
6.4. Sandblasting Equipment – Light sandblasting is
used to clean joint or crack faces prior to sealing (Figure
6.3). The necessary sandblasting equipment includes an
air compressor, air hose, and a 1/4-in. (6-mm) diameter
venturi-type nozzle. The compressor must be capable of
delivering 150 ft3/minute (4.25 m3/minute) at 90 psi (620
kPa) and be equipped with operating in-line traps to keep
the air hoses and the sandblasted surface free of oil and
water. This device must be capable of removing all sawed
slurry, dirt, and old sealant that may be present in cracks
that are being resealed.
Ceramic and tungsten carbide nozzles are available for
sandblasting, but the tungsten nozzles last longer. A guide
that keeps the nozzle consistently close to the pavement
surface and at an effective angle to the crack face, promotes consistency to the sandblasting technique and
22
JP003P.qxd
4/21/04
11:30 AM
Page 23
Chapter 6 – Crack Repair Equipment
Figure 6.3. Sand blasting.
reduces operator fatigue. Ensure that the nozzle has an
adjustable guide that will hold the nozzle aligned with the
crack approximately 1 in. (25 mm) above the pavement
surface.
Make safety a primary concern. Sandblasting operators
are required to follow OSHA guidelines. A helmet with a
separate air source and air purification equipment reduces
the possibility of inhalation of silica dust. Protective
clothing may also be required.
6.5. Waterblasting Equipment – Waterblasting is another
technique for cleaning crack faces. It is sometimes employed as an alternative to sandblasting due to local air regulations, or where the sand and debris might create
additional problems. Waterblasting equipment consists of a
trailer-mounted water tank, pumps, high-pressure hoses,
an auxiliary water supply, a wand with a safety cutoff if the
operator should lose control, and a proper size nozzle for
the crack width (Figure 6.4). After waterblasting is completed, dry the entire crack prior to sealant installation.
Figure 6.4. High-pressure water cleaning.
23
JP003P.qxd
4/21/04
11:30 AM
Page 24
ACPA NOTE: Waterblasting is not necessary when sandblasting is employed.
6.6. Hot-Air Lance – If waterblasting is used to clean
crack faces, a hot-air lance is sometimes employed to dry
the crack or joint immediately prior to sealing. The
operator must take special precaution not to overheat the
pavement, which may cause cracks and chalking of the
concrete surface. Do not use direct flame devices. Use
strict safety precautions to reduce operator hazard such
as protective clothing as well as eye and ear protection.
ACPA NOTE: Hot air lances are not recommended by
ACPA.
6.7. Power Broom – Ensure that a vacuum-type power
broom is present to remove debris from the pavement
surface and reduce the potential for FOD (Figure 6.5).
Figure 6.5. Power broom.
6.8. Compressed Air Equipment – Compressed air is employed for the final cleaning phase of the project. The air
source must produce sufficient pressure (90 psi [0.63
MPa] min.) and contain no oil that may foul the surface
prior to sealing. Some compressors have in-line sources
for the constant lubrication of air tools. Remove these
devices along with the oil-coated pressure hoses, and
install in-line oil and water traps to provide a clean air
source for the airblasting operation.
6.9. Backer Rod Installation Equipment – There are
different types of equipment available for installing backer
rod, either custom-made by contractors or produced by
24
JP003P.qxd
4/21/04
11:30 AM
Page 25
Chapter 6 – Crack Repair Equipment
Figure 6.6. Installation of backer rod.
manufacturers. These devices place the rod at a consistent depth without undue stretching or tearing of the
backer materials (Figure 6.6).
6.10. Hot-Applied Sealant Equipment – Hot-applied
sealant equipment must be capable of holding a sufficient
amount of sealant and be able to heat the material to the
proper controlled application temperature (usually between 325°F [163°C] and 410°F [210°C]) without overheating. Installation hoses should be insulated to maintain
the proper temperature as the sealant enters the reservoir.
The equipment necessary for application of roomtemperature solid sealants consist of a double-wall-type
kettle that is heated by a fluid between the walls of the
chamber and a mechanical agitator to prevent localized
overheating at the walls. Calibrated thermometers must
be easily visible to allow constant monitoring of the
sealant temperature to prevent the possibility of overheating. The sealant must be circulated through the
delivery hose and back to the heating chamber when not
being applied.
6.11. Cold-Applied Sealant Equipment – The necessary
equipment for application of cold-applied sealants
depends on whether the sealant is a single-component or
a two-component mix and whether the material is handmixed or machine-mixed. Two-component machine
mixers consist of an extrusion pump, air compressor, and
the associated hoses to dispense the components
through separate nozzles and mixed in a 50:50 ratio with
25
JP003P.qxd
4/21/04
11:30 AM
Page 26
less than 5% error just prior to discharge from the nozzle.
Hand-mixing equipment for two-component sealants is
generally a slow-speed electric drill with a paddle mixer or
an air-powered mixer. Mix single component sealants to
overcome any segregation before they are applied to the
pavement. Small hand-held caulking guns can also be
employed for small jobs. Contact the sealant manufacturer for recommendations on equipment.
ACPA NOTE: Hand-mixing of two-component sealants is
not recommended due to the potential for inconsistency
and resulting variable performance of the sealant material.
26
JP003P.qxd
4/21/04
11:30 AM
Page 27
Chapter 7 – Crack Preparation
CHAPTER 7
CRACK PREPARATION
7.1. Description – One essential element of the crack
sealing operation is proper preparation of the crack and
the crack face. If the prepared cracks are dirty or contain
excess moisture, the sealant will not adhere to the surface
and eventually will separate from the crack wall. Schedule
the crack sealing operation such that the prepared cracks
are sealed as soon as possible to prevent contamination
before sealant application. If vegetation is growing in the
cracks, remove it and use a water-based herbicide to kill
the weeds. Oil-based herbicides can leave a residue that
may prevent adhesion of the sealant to the crack face.
Route or saw the cracks to the proper depth and width
according to the shape factor, or as designated by the
manufacturer’s recommendations for the particular
sealant being employed (Figure 7.1). After completion of
the sawing operation, sandblast the crack face to remove
laitance, sawing debris, and other foreign material.
Conduct the sandblasting operation with a multiple-pass
technique in which one side of the sawed crack face is
abraded, followed by the other face (Figure 7.2). The
pavement surface directly adjacent to the sawed crack
may also be blasted to remove any debris or material that
may cause problems during crack sealing.
Figure 7.1. A freshly sawed crack.
27
JP003P.qxd
4/21/04
11:30 AM
Page 28
Figure 7.2. Sandblasting a joint face.
7.2. Cleaning – The importance of proper cleaning of the
crack faces cannot be overemphasized. Surface dust,
debris, and laitance remaining in the sawed crack can
prevent adhesion of the crack sealant to the prepared face
(Figure 7.3). If using a wet saw, perform waterblasting
immediately after sawing. If using a dry saw, sandblast
the crack. Then clean the crack with high-pressure air,
followed by sealing operations. Repeat the airblast immediately prior to placing the sealant in the sawed reservoir
if the sealant is not placed within a few hours of the
cleaning. Use a power broom or hand broom to remove
sand and dust and prevent it from re-entering the crack
(References 1.3.7 and 1.3.8).
ACPA NOTE: ACPA does not recommend high-pressure
waterblasting after sandblasting.
Figure 7.3. Dust and debris in a joint (or crack) will
prevent proper adhesion.
28
JP003P.qxd
4/21/04
11:30 AM
Page 29
Chapter 8 – Crack Sealing Procedures
CHAPTER 8
CRACK SEALING PROCEDURES
8.1. Description – Conduct the crack sealing operation
only when pavement temperatures are above 40°F (4°C)
and rising. Monitor application temperatures for hotapplied crack sealants constantly to ensure that they are
in the correct range.
8.2. Preparation – Ensure that crack faces are clean and
free of moisture. If moisture is present, a hot-air lance or
compressed air can be used to dry the crack face before
sealing. Insert the backer rod into the crack immediately
prior to sealing.
Fill the crack from the bottom up to prevent air from
becoming trapped under the sealant and cause bubbling.
Fill the crack from beginning to end in one smooth operation whenever practical (Figure 8.1). For jet-fuel resistant
hot-applied sealants, at the end of a day’s work, remove
and discard the sealant remaining in the pot. Do not
reheat and re-use.
Figure 8.1. Sealing a crack.
29
JP003P.qxd
30
4/21/04
11:30 AM
Page 30
JP003P.qxd
4/21/04
11:30 AM
Page 31
Chapter 9 – Partial-Depth Spall Repair
CHAPTER 9
PARTIAL-DEPTH SPALL REPAIR
ACPA NOTE: The American Concrete Pavement Association recommends the use of rectangular-shaped repairs
on all partial-depth spalls in concrete pavements,
regardless of the spall location. ACPA also endorses the
option of carbide milling to remove spalled areas and
create a roughened surface at the patch location as a
substitute for removal by chipping.
9.1. Description – The recommended method for partial
depth spall repair is the saw and patch method. First, the
joint or crack sealant adjacent to the spall area must be
removed. A boundary surrounding the spalled area
(Figure 9.1) is typically sawed using a concrete saw.
W
W
L
3 in. min.
(75 mm)
L
Compressible Insert
Notes:
1. For Army & Air Force pavements, W & L ≥ 6 in. (150 mm);
for Navy pavements, W & L ≥ 12 in. (300 mm).
2. For Navy pavements, if spall cavity width is less than 2 in.
(50 mm), fill with joint sealant material.
Figure 9.1. Typical spall repair layout.
For Army and Air Force pavements, the minimum
length and width of the rectangular sawcut boundary
around a joint spall is 6 in. (150 mm), and for corner
spalls, the rectangular sawcut boundaries are a minimum
of 6 in. (150 mm) from the joint corner. The minimum
depth of the sawcut boundaries is 2 in. (50 mm).
31
JP003P.qxd
4/21/04
11:30 AM
Page 32
W
L
4"
(100 mm)
min.
4"
(100 mm)
min.
Notes:
1. For Navy pavements, if spall cavity width is less than 2 in. (50 mm),
fill with joint sealant material.
2. For corner spalls in Navy pavements, sawcuts must be ≥ 4 in.
(100 mm) in length and ≥ 12 in. from the joint; for rectangular
spalls, W & L ≥ 12 in. (300 mm).
Figure 9.2. Corner spall repair for Navy pavements.
For Navy pavements, the minimum length and width of
the rectangular sawcut boundary around a joint spall is
12 in. (300 mm). For corner spalls, the sawcuts are a minimum of 12 in. (300 mm) from the joint corner and extend
a minimum of 4 in. (100 mm) perpendicular to the joint.
A third cut is then made between the two 4-in. (100-mm)
cuts to form a pentagon with the joint corners and sawcuts comprising the five sides (Figure 9.2). The minimum
depth of the sawcut boundaries is 2 in. (50 mm).
A light jackhammer (less than 30 lb [14 kg]) equipped
with a chipping hammer, scarifier, or high-pressure water
blaster is then used to remove the concrete within the
boundary to a depth of at least 2 in. (50 mm), or to 1/2 in.
(13 mm) below the surface of visually sound concrete,
whichever is deeper. If a dowel is exposed during the
concrete removal, it must be removed if within the upper
one-third of the slab. Procedures for dowel replacement
will not be covered here but may be found in References
1.3.1, 1.3.6, and 1.3.8. If more than 90 degrees of the
perimeter of reinforcement is exposed, a space must be
exposed completely around the bar or wire and at least
1/2 in. (13 mm) below it, to allow for complete consolidation of patch material around the reinforcing steel.
32
JP003P.qxd
4/21/04
11:30 AM
Page 33
Chapter 9 – Partial-Depth Spall Repair
A joint re-forming medium (compressible insert) is
used to re-form the existing joint or crack. Ensure that all
spall repairs do not bridge a joint or crack without a
compressible insert in place (Figure 9.3). If required and
used correctly, bonding agents can help ensure a good
bond between the old concrete and the patching material.
Strictly follow curing procedures for portland cement
concrete (PCC) to prevent shrinkage cracking. The ideal
curing procedure utilizes moist curing for at least 7 days
followed by application of white-pigmented membraneforming curing compound, or other engineer-approved
method. Applying curing compound immediately after
finishing the patch has been shown to work well.
ACPA NOTE: ACPA does not recommend 7-days moist
curing unless in a non-traffic or low-traffic location. In
traffic areas, propose an alternative method meeting the
material and traffic requirements.
9.1.1. Commence curing immediately after finishing is
complete for each repair (patch).
9.1.2. Apply two layers of completely pre-saturated
clean burlap conforming to AASHTO M 182 (Reference
1.3.12).
9.1.3. Re-saturate (over-saturate) the burlap after
placing and immediately cover with clear or white polyethylene sheeting at least 100 mm (4 mils) in thickness.
9.1.4. Cover with plywood at least 1/2 in. (13 mm) thick
or wood form material and weigh down sufficiently to
prevent displacement by wind.
Need for Compressible Insert
Point
Bearing
Popout and
Breakage
Joint
Closure
Expansion
Debonding
Expansion
Figure 9.3. Point bearing occurs when partial-depth patch
bridges joint or crack without compressible insert.
33
JP003P.qxd
4/21/04
11:30 AM
Page 34
9.1.5. Extend all covering materials, burlap, plastic, and
wood at least 6 in. (150 mm) beyond every edge of the
patch.
9.1.6. At least once every 24 hours, remove the
plywood and plastic, re-saturate the burlap, and immediately replace the plastic and plywood.
9.1.7. When moist curing operations are complete,
remove the plastic sheet and the plywood. Between 3 and
7 hours later, remove the burlap and immediately apply a
uniform coat of white-pigmented curing compound to the
repair area. Use curing compound conforming to CRDC300 (Reference 1.3.13), and apply at a coverage rate of
200 ft2/gal (4.9 m2/L).
9.1.8. Protect the patches from traffic for the following
7 days, or until they have developed sufficient strength. If
proprietary concrete patching materials are to be used in
the repair, be sure to follow the manufacturer’s recommendations for bonding agents, mixing, placement, and
curing. After the spall area has been filled and the material
cured, seal the joint or crack.
9.2. Test Area – Before beginning a full-scale patching
operation, conduct a test area of spall repair. This ensures
familiarity with equipment and materials and any potential
problems with techniques, etc., before beginning the fullscale repair operation. Additional information on spall
repair is available in References 1.3.9 through 1.3.11. All
applicable ASTM test methods are listed in Table 1.1 and
information on joint, crack, and spall repair from the American Concrete Pavement Association is listed in Table 1.3.
9.3. Selecting Repair Materials and Procedure – Select
the spall repair materials and the spall repair procedure
(saw and patch is recommended; however, carbide
milling has worked for highway projects in Minnesota and
Wisconsin). The recommended patch materials are
discussed in Chapter 10; however, use of these materials
(concrete, joint sealer, joint filler, etc.) must meet specifications and/or be authorized by the engineer.
As with any repair operation, the cleanliness of the area
to be patched is one of the most important factors in a
long-lasting patch. Take extra care to ensure the repair
area is clean before repair. Schedule the repair procedures
such that the prepared spall recess is not exposed to the
elements for more than 24 hours without additional
cleaning.
34
JP003P.qxd
4/21/04
11:30 AM
Page 35
Chapter 9 – Partial-Depth Spall Repair
9.4. Removing Old Sealant – Remove any sealant
present in the joint or crack adjacent to the spall as
discussed in Chapters 3 and 6.
9.5. Boundaries – Cut along the marked boundary
around the area to a depth of at least 2 in. (50 mm) using
a concrete or a hand saw (Figure 11.1). Size the spall
repair area as described in Chapter 12.
9.6. Concrete Removal – Remove the concrete inside the
boundary to a depth of at least 2 in. (50 mm), or 1/2 in.
(13 mm) into visually sound concrete, whichever is
deeper. Use a light jackhammer (less than 30 lb [14 kg])
equipped with a chipping hammer (Figure 11.2), scarifier,
modified carbide milling machine, or high-pressure water
blaster (Figure 6.4). If a dowel is exposed during the
concrete removal, replace it (References 1.3.1, 1.3.6, or
1.3.9 for details on dowel replacement). If more than 90
degrees of the perimeter of reinforcement is exposed, expose a space at least 1/2 in. (13 mm) completely around
the bar or wire.
9.7. Concrete Soundness – Check the underlying concrete for soundness and remove any concrete found to be
unsound by tapping with a hammer or other metallic
object.
9.8. Cleaning – Clean out the spall recess using sandblasting and compressed air (Figure 9.4). Ensure that
there is no dust or debris within the spall repair area
(Figure 9.5).
Figure 9.4. Air-blasting to remove dust and debris.
35
JP003P.qxd
4/21/04
11:30 AM
Page 36
Figure 9.5. Checking for dust & debris
within spall repair area.
9.9. Sweeping – Sweep the area to prevent debris from
re-entering the spall repair area.
9.10. Joint Re-former – Install joint re-forming medium
(also called joint filler or compressible insert) to provide a
rigid boundary along the joint or crack and to retain the
shape of the joint. This filler must extend the full length of
the joint or crack, for the full depth of the spall repair area
and extend below the bottom of the patch to prevent
patching material from flowing into the joint/crack space.
9.11. Bonding Agent – If required, apply bonding agent to
the spall repair surface (Figure 13.1). Always ensure that
the spall repair is clean before adding bonding agent or
repair material. If the spall repair area is large and the
repair material is cementitious (cement-based), be sure to
place the bonding grout rapidly so that areas do not begin
to dry prior to filling the area with repair material. Place
the spall repair material (Figure 13.2), finish the surface
(Figure 13.3), and follow the curing procedure recommended by the manufacturer of the repair material or refer
to the guidelines outlined in Chapter 13, “Spall Repair
Procedures.”
9.12. Sawing – Where the spalled area abuts a joint, use
a compressible insert or other joint re-forming medium to
prevent bond at the joint face. After the curing is complete, saw a reservoir for the joint sealant with a smalldiameter saw blade to the dimensions required for other
joints, or as required to be routed for cracks. Sandblast
each face of the fresh sawcut, wash with high-pressure
water, airblast, and sweep the area. Place the proper width
backer rod at the required depth for the sealant. Place the
36
JP003P.qxd
4/21/04
11:30 AM
Page 37
Chapter 9 – Partial-Depth Spall Repair
sealant from the bottom up and in one smooth operation
from the beginning to the end of the joint or crack.
9.13. Cleanup – After the spall operation is complete,
clean and sweep the surrounding pavement of all potential
materials that may cause FOD. In addition, clean, lubricate, and properly store all equipment until needed.
37
JP003P.qxd
38
4/21/04
11:30 AM
Page 38
JP003P.qxd
4/21/04
11:30 AM
Page 39
Chapter 10 – Spall Repair Materials
CHAPTER 10
SPALL REPAIR MATERIALS
10.1. Specifications – The particular repair materials
chosen for the repair operation must conform to the
appropriate specifications as discussed below. For Navy
pavements, use of asphalt patching materials for
temporary spall repair is allowed. The Army and Air Force
do not allow the use of asphalt patching materials for spall
repair.
The concrete, curing compound, sealant (see the
section “Crack Sealants”), backer rod (see the section
“Backer Materials”), and joint filler must meet ASTM
specifications. For U.S. Army Corps of Engineers
construction, the curing compound must conform to
CRD-C300 (Reference 1.3.13). Joint re-forming fillers
(compressible inserts) can be asphalt-impregnated fiberboard, styrofoam sheeting, sponge rubber, or cork, but
must conform to ASTM D 1751 or D 1752 and be
compressible without excessive change in shape.
Recommended maximum aggregate size is 3/8 in. (10
mm). Use Type I concrete for the patching material unless
other materials are approved by the engineer. Use
portland cement that conforms to ASTM C 150, Type I,
unless other materials are approved by the engineer. Type
II cements are generally not necessary for repair projects.
Type III cements can be employed when the repaired area
has be opened to traffic within 1 to 3 days after placement
of the PCC. Typical concrete mixtures for partial-depth
spall repairs have a range of 0 to 1/2 in. (0 to 13 mm) of
slump, and a thoroughly tamped or consolidated in-place
specimen should meet a minimum compressive strength
of 5,000 psi (35 MPa) at 28 days of age.
On U.S. Navy facilities, the materials chosen must meet
all of the specifications outlined in UFGS-02983N
(Reference 1.3.9), and UFGS-02982N (Reference 1.3.3).
For U.S. Army and Air Force facilities, refer to UFGS02980A (Reference 1.3.10) and UFGS-02760A (Reference
1.3.5). For U.S. Air Force pavement repair, also see
Reference 1.3.6. For filling popouts, use a sand-cement
mortar of one part cement to two parts sand. Ensure that
the water-to-cement ratio does not exceed 0.40 by weight.
10.2. Alternative Repair Materials – Spall repair materials can be classified into three broad categories: cemen39
JP003P.qxd
4/21/04
11:30 AM
Page 40
titious, polymeric, and bituminous. Only the cementitious
or polymeric materials are approved for use on airfields.
Do not use bituminous materials for spall repair material
on Army and Air Force airfields due to the potential for
FOD.
Typical concerns for selection of a spall repair material
are cost, physical properties, curing time (how soon can
the section be opened to traffic), material availability,
familiarity with the product, etc. There are numerous
products for concrete repair that address various aspects
of the repair project such as high early-strengths, rapid
set times, ease of workability, low shrinkage, and low
permeability. However, since use of rapid-setting
concretes and polymer concretes may require very
different placement and curing procedures, be aware of
what is required for the repair material before making a
decision.
Use of admixtures in portland cement-based, rapidsetting, and polymer concretes must meet appropriate
specifications ASTM C 260 and C 494 (Table 1.1). If using
fast-setting polymer concretes or admixtures, follow the
manufacturer’s recommendations on the use and cleanup
of these materials to avoid problems. Mixing procedures
for the polymer concretes vary depending on the material.
Concrete mixes may harden much faster when temperatures are above 90°F (32°C).
Retarding compounds can be added to the mixtures to
slow the curing process at pavement temperatures above
90°F (32°C), or special mixtures premixed with retarders
that extend the setup time are also available. Due to the
high heat released upon curing of many of the polymer
materials, only 2-in. (50-mm) or smaller lifts are
suggested. Begin cleanup of rapid-setting materials soon
after placement to prevent these materials from ruining
equipment. Guidelines for use in placement of polymer
concretes are provided in ACI 548.1R (Table 1.2).
40
JP003P.qxd
4/21/04
11:30 AM
Page 41
Chapter 11 – Spall Repair Equipment
CHAPTER 11
SPALL REPAIR EQUIPMENT
11.1. Description – Much of the equipment necessary for
spall repair has been previously described under “Crack
Preparation.” However, additional equipment such as
concrete saws, jackhammers, mixers, small spud
vibrators, tampers, and hand tools may also be necessary.
11.2. Concrete Saws – A conventional concrete saw is
similar to a random crack saw but generally is less
maneuverable and has a larger blade (Figure 11.1).
Concrete saws are employed extensively for re-facing
joints for joint sealing projects but are often used for large
patching operations or full-depth repair. Use small
diameter blades of 6 to 10 in. (170 to 250 mm) to
minimize the size of the runout kerfs when sawing out the
spalled area. Larger blades may be necessary for refacing joints or cracks. Small patches can be sawed with
a random crack or a hand-held saw.
11.3. Jackhammers – The jackhammer needed for large
patching operations may be a 30-lb (13.6-kg) model
(Figure 11.2); for smaller jobs, a 10- to 15-lb (4.6- to 6.8kg) model is sufficient. Use a chipping hammer at an
angle of between 45 and 90 degrees relative to the
pavement surface. Take special care to not damage the
layer of concrete under the spall repair area or cause
microcracking around the crack.
11.4. Mixers – Drum or mortar mixers are usually
employed for most patching operations. Buckets may be
used with a hand-held, electric drill-powered (or pneumatic), paddle-wheel mixer for smaller operations.
11.5. Hand Tools – Hand tools such as shovels, trowels,
tampers, and screeds must be available.
41
JP003P.qxd
4/21/04
11:30 AM
Page 42
Figure 11.1. Sawing out the edges of a spalled area.
Figure 11.2. Using a jackhammer to remove damaged
concrete.
42
JP003P.qxd
4/21/04
11:30 AM
Page 43
Chapter 12 – Spall Repair Preparation
CHAPTER 12
SPALL REPAIR PREPARATION
12.1. Description – As with most concrete repairs, an
essential element of the spall repair operation is the
proper preparation of the spalled area. If the prepared
spalls are dirty or contain excess moisture, the repair
material will not completely adhere to the surface.
Schedule the spall repair operation such that the prepared
areas are filled as soon as possible to prevent contamination of the surface.
The importance of proper cleaning of the repair area
cannot be overemphasized. After completion of the
sawing and removal of the concrete, clean the recess by
sandblasting, airblasting, and/or waterblasting to remove
concrete chips, laitance, sawing debris, and other foreign
material from the recess. The area must then be thoroughly swept, using a vacuum broom if available, to
prevent debris from re-entering the spall repair area.
12.2. Boundaries – To begin the saw and patch procedures, mark the boundaries of the area to make the
sawcuts easier and decide which repair material(s) are to
be employed in the patching effort. Remove the joint or
crack sealant a few inches on either side of the spall. Make
the sawcuts at least 2 in. (50 mm) deep and 2 to 3 in. (50
to 80 mm) outside the boundary of the spall (Figure 11.1).
For joint and crack spalls in Army, Air Force, and Navy
pavements and corner spalls in Army and Air Force pavements, make sawcuts straight and at right angles to each
other with the cuts forming a rectangle with the joint or
crack as one side. For corner spalls in Navy pavements,
make the initial cuts at least 4 in. (100 mm) long and perpendicular to the joint with the final cut joining the initial
cuts to form a pentagon at the slab corner (Figure 9.2).
A small jackhammer may then be used to remove the
concrete to a depth of at least 2 in. (50 mm) from the surface or 1/2 in. (13 mm) into visually sound concrete, whichever is deeper, within the cut area by starting in the center
of the spall and working toward the cuts (Figure 11.2).
If both sides of the joint or crack are spalled, repair the
spall on each side while maintaining the joint or crack. An
example is shown in Figure 12.1. The joint re-forming
filler is placed in the joint or crack, and the spalls on each
side are repaired independently. See References 1.3.7
43
JP003P.qxd
4/21/04
11:30 AM
Page 44
Figure 12.1. A partial-depth repair spanning both sides of
the joint.
through 1.3.9 and 1.3.12 for additional details on joint
sealant removal and repair.
12.3. Soundness – After the concrete in the area has been
removed, test the repair area for soundness to ensure that
there are no cracks in the underlying concrete or loose
material present. This can be easily accomplished with a
steel rod, a short length of chain, or a ball peen hammer.
A hollow or dull thud indicates a crack or loose material
beneath the sounding device. If unsound concrete is
located, remove it to a depth of at least 1/2 in. (13 mm)
into sound concrete.
Conduct a thorough cleaning of the repair area to
remove debris by compressed air and high-pressure
water. Use a power broom, vacuum sweeper, or at least a
thorough hand broom sweeping of the area to prevent
debris from re-entering the repair zone.
44
JP003P.qxd
4/21/04
11:30 AM
Page 45
Chapter 13 – Spall Repair Procedures
CHAPTER 13
SPALL REPAIR PROCEDURES
13.1. Description – The repair process begins after the
final cleaning of the area. The area must be dry and free
of dust, oil, dirt, etc. A good repair begins with a clean
surface. Since the volume of most spall repairs is usually
small, use a small drum or mortar mixer for mixing the
repair material. Some repair materials come premixed and
others allow the mix to be extended by adding aggregate
(maximum recommended size is 3/8 in. or 10 mm).
Consolidate the material through tamping, supplemented,
when possible, by vibration, and work the surface to
match the surrounding finish as closely as possible.
13.2. Joint Re-former – If the spalled area is adjacent to
a joint or a crack, use a joint re-forming medium
(compressible insert) to prevent the repair material from
fouling the joint (Figure 13.1) and to retain the joint shape.
If the spall is next to a crack, treat the crack as a joint. Do
not allow spall repairs to bridge cracks or joints. The crack
must be formed up just as a joint. Use a joint re-forming
medium the same width as the existing joint or crack,
long enough to cover the spall area, and deep enough to
extend below the full depth of the spall repair area.
Figure 13.1. Application of bonding agent to
the concrete surface – note the joint reforming
medium.
45
JP003P.qxd
4/21/04
11:30 AM
Page 46
13.3. Bonding Agents – Bonding agents can be utilized to
improve the bond between the patch and the patch repair
materials. If required, use a light coating of bonding agent
when using PCC as the repair material. If using a rapidsetting or polymer concrete, consult the manufacturer’s
recommendations on the use of bonding agents. For PCC
repairs, the bonding grout used is a mixture of one part
portland cement to one part sand with a water-to-cement
ratio less than 0.45. Brush the bonding agent into cracks
and crevices to ensure good contact with the repair
surface (Figure 13.1).
Many repair materials are proprietary and may require
a proprietary bonding agent. When employing these types
of material in the repair, follow the manufacturer’s recommendations closely. Coat or spray the entire surface of the
repair area with the bonding agent, and place the repair
material when the bonding agent has reached a tacky
consistency, but before it has fully dried. To prevent the
bonding agent from entering any small openings where
the joint re-forming medium meets the bottom of the spall
recess, a small bead of caulk may be placed against the
interface.
13.4. Mixing and Placing – The mixing and placing of
spall repair materials often varies considerably due to the
widely different materials that can be used. It is good
practice to place the repair material at pavement temperatures above 55°F (13°C) and below 90°F (32°C). If water
is required, add the correct amount of clean, fresh water
and thoroughly mix. Hand mixing almost always requires
more time than drum or mortar mixers. When hand
mixing, there is also a tendency to add more water than
required to ease the mixing effort.
Strictly follow the manufacturer’s recommendations for
mixing and curing of materials to ensure a quality
patching job. For more details on placing concrete in hot
and cold weather, refer to ACI 305R and ACI 306R (Table
1.2). Do not place repair materials at temperatures less
than 40°F (4°C), and for temperatures less than 55°F
(13°C), only with special insulation and longer cure times.
In summer, it is best to place repair materials in the
morning when pavement temperatures are lower. In
winter, afternoons are best.
13.5. Consolidation – After placement, thoroughly
consolidate the repair material to remove entrapped air.
Cementitious and polymer concrete materials require
46
JP003P.qxd
4/21/04
11:30 AM
Page 47
Chapter 13 – Spall Repair Procedures
some type of consolidation, by tamping or, if possible,
supplemented by vibration (Figure 13.2). Vibrators with a
small (less than 1 in. [25 mm]) head or vibratory screeds
are recommended for small repairs. Do not use grate
tampers.
After consolidation, finish the repair material to match
that of the surrounding pavement (Figure 13.3). A completed patch is shown in Figure 13.4 where the spall repair
was conducted on both sides of the expansion joint. Note
the joint re-forming filler separating the spall repair.
Figure 13.2. Consolidation of the
repair material by vibration.
Figure 13.3. Finishing the patch surface.
47
JP003P.qxd
4/21/04
11:30 AM
Page 48
Figure 13.4. Completed partial-depth repairs – note joint
re-former as well as heavy coat of curing compound.
13.6. Curing – Curing of the patching material is very
important, due to the large surface-area-to-volume ratio
of the repair area, and because bond strength develops
much slower than compressive strength. Rapid water loss
from the surface due to high temperature, low humidity,
and/or windy conditions can result in severe shrinkage
cracking on the surface.
Follow special curing procedures for rapid-setting
concretes to prevent excessive shrinkage cracking. These
materials harden rapidly and severe plastic shrinkage
cracking may develop on the surface if the materials dry
too fast. Follow manufacturer’s recommendations for
curing of proprietary concretes.
For curing standard concrete materials, cover the
patched area with two layers of presaturated burlap,
which is then covered with clean polyethylene sheeting.
The burlap and sheeting is then covered with weighted
plywood or form board. Extend all cover layers at least 6
in. (150 mm) beyond the outline of the patch. Cover the
fresh patching material as soon as possible after finishing
the surface.
13.7. Resealing – After the patch has cured, the final
repair step is to replace the sealant to maintain the
existing joint or crack. Do not begin joint or crack
resealing preparation and installation until the concrete
curing is complete. The joint sealing operation is analogous to crack sealing. The joint or crack adjacent to the
spall is sawed out to the same width as the existing joint
or crack using a concrete saw, router, or hand saw.
48
JP003P.qxd
4/21/04
11:30 AM
Page 49
Chapter 13 – Spall Repair Procedures
Remove the joint filler (compressible insert) by hand or by
sawing.
Ensure that joint preparation conforms to the specifications outlined in Chapter 7. The sides of the sawcuts are
then sandblasted and airblasted with compressed air to
prepare a good surface for sealant adhesion. Sweep the
area surrounding the repair with a vacuum broom to
remove debris, etc. After cleaning the area, install backer
rod in the joint or crack recess.
For U.S. Army and Air Force facilities, the sealant
employed must conform to the ASTM specifications for
the particular location in which the sealant is being
replaced. For pavements on Naval facilities, the sealant
must conform to UFGS-02982N (Reference 1.3.3);
however, silicone sealants may be used in lieu of materials
called for in ETL 94-9 (Reference 1.3.4).
13.8. Placing Sealant – Placement of the sealant is
similar to that of crack sealants in that the sealant is being
placed from the bottom up and in a smooth stroke from
the beginning to the end of the joint or crack, if practical
(Figure 13.5). For details on sealing of joints, refer to the
section on crack sealing, as this is analogous to sealing
joints. In addition, procedures for sealing joints are given
in References 1.3.4 through 1.3.7 and in Table 1.3.
13.9. Cleanup – After the repair is complete, clean all
equipment, lubricate if necessary, and properly store until
needed for the next repair operation.
Figure 13.5. Resealing joints after partial-depth repairs
complete.
49
JP003P.qxd
50
4/21/04
11:30 AM
Page 50
JP003P.qxd
4/21/04
11:30 AM
Page 51
Chapter 14 – Common Problems and Solutions
CHAPTER 14
COMMON PROBLEMS &
SOLUTIONS
14.1. Joint/Crack Sealing & Resealing
Sealant not adhering to joint/crack
• Joint not clean enough – re-clean
• Wet joint surfaces – allow to dry
• Low sealant application temperature (hot applied
sealants) – heat to correct temperature, or verify
temperature gauges
• Cold ambient temperature – allow temperature to rise
• Insufficient recess for cold applied sealants; traffic
pulling sealant out – use correct recess for joint width
• Concrete not cured sufficiently; too much moisture in
concrete – allow concrete to further cure and dry out
before sealing
Sealant picks up or pulls out when opened to traffic
• Opened to traffic too soon after application – delay
opening
• High ambient temperature – seal in cooler temperatures
• Excessive sealant application – apply flush with
surface or with specified recess
• Sealant too soft for climate – use stiffer sealant
• Use a detackifier or blotter to reduce initial tack
• Overheated or underheated sealant – install at correct
temperature, verify temperature gauges on melter
• Sealant contaminated with solvent or heat transfer oil
from tank leak
• Joint faces contaminated with old, incompatible sealant, may also cause bleeding – re-clean joint to remove old sealant
• Preformed sealant installed too high in joint – use
required recess
• Preformed sealant was stretched during installation
51
JP003P.qxd
4/21/04
11:30 AM
Page 52
Sealant Gelling in Melter
• Overheated sealant – check melter temperature
gauges
• Sealant reheated too many times – use fresh sealant
• Using sealant with short pot life – use sealant with
longer pot life
Sealant Cracking or Debonding in Winter
• Sealant too stiff – use softer grade
• Poor cleaning during installation – improve cleaning
• Sealing during extreme hot summer temperatures
when joints at their narrowest – avoid sealing during
extremely hot temperatures
• Joint too narrow for the movement experienced – use
wider joints
• Joint spacing too long – use closer joint spacing
• Incorrect joint configuration, sealant installed too
thick or too thin – use correct depth to width ratio
Voids or Bubbles in Cured Sealant
• High pavement temperature and moisture content
when sealed – seal during cooler periods and allow
concrete to further dry or cure, or use non-sag type
sealant to resist void formation
• Outgassing of backer material – backer may be
melting with hot applied sealants, use heat-resistant
backer material, and check for proper sealant
temperature
• Backer may be punctured during installation – install
backer without damaging
• Top down sealing which can trap air – apply sealant
from bottom up
• Air entering the sealant pumping lines – tighten all
connections, or bleed off entrapped air
• Moisture buildup on backer material due to being
installed night before – replace backer material
• Primer not properly cured prior to sealant application
52
JP003P.qxd
4/21/04
11:30 AM
Page 53
Chapter 14 – Common Problems and Solutions
Sink holes in Sealant
• Sealant flowing past gaps in backer material – use
larger backer material, reapply (top off) sealant to
correct level, or use non-sag sealant
• Backer melting when using hot applied sealants – use
heat resistant backer
Cold applied sealants not setting up
• Sealant has exceeded its shelf life – use fresh sealant
• Incorrect proportioning or mixing of two-component
sealant – use correct mix ratios and mixing systems
14.2. Partial-Depth Spall Repair
More deterioration below pavement surface than evident above
• Extend limits of repair area into sound concrete
• If deterioration extends below one-third of the
pavement thickness, do a full-depth repair
Dowel bar or reinforcing steel is exposed during concrete removal
• If steel including dowel bars is in the upper third of
slab, remove the steel to the edges of the patch and
continue
• If unsound concrete extends to mid-depth of the slab,
do a full-depth repair
Patch material flows into joint or crack
• Place a bead of caulk along bottom of joint or crack
before placing joint insert
• Ensure joint insert extends far enough into the
adjacent joint/crack and below the patch
• Ensure insert is correctly sized for joint/crack width
Patch cracking or debonding
• Check that joint insert is being used properly
• Ensure that the insert is correctly sized for the
joint/crack width and that it has been inserted
correctly
• Check that patch area was cleaned immediately prior
to grouting/concrete placement
53
JP003P.qxd
4/21/04
11:30 AM
Page 54
• Check that air blowing equipment is not releasing oil
in the compressed air
• Check that grout material has not dried out before
concrete placement
• Check that patch material is not susceptible to
shrinkage
• Ensure that curing compound has been applied
adequately
54
JP003P.qxd
4/21/04
11:30 AM
Page 56
© 2004
American Concrete Pavement Association
5420 Old Orchard Road
Suite A100
Skokie, Illinois 60077
847.966.2272 (Phone)
847.966.9970 (Fax)
www.pavement.com
JP003P