Download User Manual For Enterprise Attendance Software
Transcript
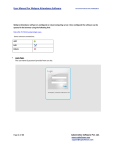
User Manual For Enterprise Attendance Software Document Release Date: 24/07/2012 Enterprise Attendance software is configured on IIS server. Once configured the software can be opened in the browser using the following link: http://localhost/time/login.aspx .Here you can use Computer name /IP address in place of localhost. Some common conventions: Add Edit Delete Login Page: The default username & password for the software is admin. Page 1 of 47 Cybernetics Software Pvt. Ltd. www.csplsoftware.com [email protected] User Manual For Enterprise Attendance Software Document Release Date: 24/07/2012 HOME PAGE: On the Home page you will find summary information for: 1) Today’s Attendance 2) Pending Requests 3) Location-wise Employees 4) Birthdays Page 2 of 47 Cybernetics Software Pvt. Ltd. www.csplsoftware.com [email protected] User Manual For Enterprise Attendance Software Document Release Date: 24/07/2012 Master Data: Master data entry acts as the major input for any system. Following are the masters available in the system: Page 3 of 47 Cybernetics Software Pvt. Ltd. www.csplsoftware.com [email protected] User Manual For Enterprise Attendance Software Document Release Date: 24/07/2012 COMPANY MASTER: The system allows the user to add and maintain multiple companies. LOCATION MASTER: You can also maintain multiple locations which further helps in grouping or classifying the employees. Page 4 of 47 Cybernetics Software Pvt. Ltd. www.csplsoftware.com [email protected] User Manual For Enterprise Attendance Software Document Release Date: 24/07/2012 DEPARTMENT MASTER : Multiple departments can be maintained in the system against a company-location. SUB-DEPARTMENT MASTER: Multiple sub-departments can be maintained against a department. Page 5 of 47 Cybernetics Software Pvt. Ltd. www.csplsoftware.com [email protected] User Manual For Enterprise Attendance Software Document Release Date: 24/07/2012 DESIGNATION MASTER: Multiple designations can be added & maintained against a location. Page 6 of 47 Cybernetics Software Pvt. Ltd. www.csplsoftware.com [email protected] User Manual For Enterprise Attendance Software Document Release Date: 24/07/2012 SECTION MASTER : Multiple sections can be added in the software. The concept of section has been included because it is sometimes difficult to define user hierarchy on the basis of department or sub-department level as there may be multiple reporting heads within a sub-department or employees of different departments or subdepartments may be reporting to a head. In that case a section can be defined & employees (of different sub/departments) can be included in a single section & a section-head can be defined for it. Page 7 of 47 Cybernetics Software Pvt. Ltd. www.csplsoftware.com [email protected] User Manual For Enterprise Attendance Software Document Release Date: 24/07/2012 EMPLOYEE DATA : The employee data has 2 sections i.e. Employee classification & Employee Details. 1) EMPLOYEE CLASSIFICATION: In Employee Classification we can assign company, location, department, sub-department & section can be assigned to all/selected employees. Also employee status (Active/De-active) can be modified here. STEPS FOR ASSIGNMENT: 1) Select the data to assign company/location/department etc. whichever applicable. Also select the checkbox besides that option. 2) Select the employees in the table below. You can use the various search options available at the top to filter the employees you want. To search the records select the filter options & click on “Refresh”. 3) Click on “ASSIGN” button to assign. You will get a message “Assigned successfully”. Page 8 of 47 Cybernetics Software Pvt. Ltd. www.csplsoftware.com [email protected] User Manual For Enterprise Attendance Software Document Release Date: 24/07/2012 Employee Details : Here you can view/update detailed information for a particular employee e.g. address, birth date, join date, photo etc. Steps to edit the employee details: 1) At the top, select company/location/department/sub-department to filter employees & click on “Refresh”. 2) The employees will be listed as per the search criteria in the table below. Select the employee for which you want to edit the details by clicking on the “Select” option corresponding to that employee record in the table. 3) The details will be displayed in the right panel. You can edit the details & then click on “Save” button to modify that record. Page 9 of 47 Cybernetics Software Pvt. Ltd. www.csplsoftware.com [email protected] User Manual For Enterprise Attendance Software Document Release Date: 24/07/2012 USER MANAGEMENT : There are 4 different user profiles in the Enterprise Attendance software. They are as follows: 1) Super-Admin 2) Section Admin 3) Hierarchy Admin 4) Employee 1) Super-Admin : The super-admin user has full access to the software. Multiple super-admin users can be added by specifying the username & password. Page 10 of 47 Cybernetics Software Pvt. Ltd. www.csplsoftware.com [email protected] User Manual For Enterprise Attendance Software Document Release Date: 24/07/2012 2) Section Admin : A section head can be assigned to each section defined in the software. A section head can manage all the employees under his section. STEPS TO CREATE SECTION ADMIN: 1) Select the section for which you want to create the section head. 2) Select the employee i.e. the section head. You can also specify the email-id for the section head here. 3) The access given to the section head can be restricted by selecting the forms to which access needs to be granted in the form rights list. 4) Click on “Save” to add the section head. The section head details can also be modified later. Page 11 of 47 Cybernetics Software Pvt. Ltd. www.csplsoftware.com [email protected] User Manual For Enterprise Attendance Software Document Release Date: 24/07/2012 3) Hierarchy Admin : A hierarchy admin can be a company/location/department/sub-department level admin. Also multiple companies/locations etc. can be assigned to a single hierarchy admin. He can manage all the employees in his company/location/department/sub-department. STEPS TO ADD HIERARCHY ADMIN : 1) Select the user level i.e. Company/Location/Department/Sub-Department. 2) Select the corresponding companies/locations etc. form the list below. 3) Select the employee who will be the admin & specify e-mail id. 4) Select the forms for granting access & click on “Save”. Page 12 of 47 Cybernetics Software Pvt. Ltd. www.csplsoftware.com [email protected] User Manual For Enterprise Attendance Software Document Release Date: 24/07/2012 4) Employee : The employees can also login to the software. They can view their corresponding data & attendance. They can also make requests for manual punches, tour, outdoor or leaves & track their status. STEPS TO CREATE THE EMPLOYEE USER : 1) Select the employees from the list of employees displayed. You can also filter the employees. 2) Enter the username/password for the employee against the corresponding employee & click on “Save” to create the employee user. Page 13 of 47 Cybernetics Software Pvt. Ltd. www.csplsoftware.com [email protected] User Manual For Enterprise Attendance Software Document Release Date: 24/07/2012 HOLIDAY MASTER : Holidays can be maintained against a company-location. Steps to add Holiday: 1) Select Company or location under which you want to add Holiday. 2) Enter the holiday name. 3) Select date or date range as per the holiday dates. 4) Click on “SAVE ’to save the holiday details. You can also edit or delete the holiday. Page 14 of 47 Cybernetics Software Pvt. Ltd. www.csplsoftware.com [email protected] User Manual For Enterprise Attendance Software Document Release Date: 24/07/2012 SHIFT MASTER : Shifts can be applied to a particular employee under a particular Company and Location. Shifts are of 2 types : 1)Regular Shift & 2)Flexi-Shift 1) Regular Shift Steps to add Shifts: 1) You need to select the Company and Location to which the Shift is applicable. 2) Enter the Shift name and Shift Code which is mandatory. 3) You also need to enter the shift start/end time and Break Start/End time. Shift work Hours are generated automatically. 4) You need to specify work Hour duration for Half Days. 5) Day Start Time & Day End Time: These fields are auto generated. Generally applicable work duration for any employee is considered to be 24 hours. Day start/Day end times are used to facilitate this duration. Day Start Time: It starts 1 hour before the Shift Start time. Day End Time: It indicates the day end-time. By default it is 24 hours from the day start time. 6) Night Shift: You can also set a particular shift as night shift by checking the checkbox provided 7) Default Shift: You can also set a particular shift as default. A default shift is applicable in case no shift is assigned to the employee. Page 15 of 47 Cybernetics Software Pvt. Ltd. www.csplsoftware.com [email protected] User Manual For Enterprise Attendance Software Document Release Date: 24/07/2012 2) Flexi-Shift : In a flexible shift only the day start, day end & work hours are defined. The employee can come at any-time within the day start & day end & his day status is marked on the basis of his work hours. There is no late/early marking. Page 16 of 47 Cybernetics Software Pvt. Ltd. www.csplsoftware.com [email protected] User Manual For Enterprise Attendance Software Document Release Date: 24/07/2012 SHIFT ROSTER : Shift Roster can be prepared under a particular Company and Location. Shift Roster is a rotational shift pattern. Steps to add Shift Roster: 1) 2) 3) 4) 5) You need to select the Company and Location to which the Shift Roster is applicable. Enter the Roster name which is mandatory. Enter no. of days and click on “Refresh”. Select appropriate shift or weekly off for each day. Click "Save" to save the Shift Roster details to the database. Page 17 of 47 Cybernetics Software Pvt. Ltd. www.csplsoftware.com [email protected] User Manual For Enterprise Attendance Software Document Release Date: 24/07/2012 SHIFT GROUP: Multiple shifts can be grouped together to form a shift group. A shift group is used for assigning autoshifts. When auto-shift is assigned you need to select the shift group. Only shifts from assigned shift group are applicable for auto-shifts. This is useful if there are multiple shifts starting in close proximity to reduce the chances of wrong shift assignment as shifts which are not applicable for the employee can be excluded from the shift group. STEPS TO ADD SHIFT GROUP : 1) Select Particular Company and Location to which you want to add shift group. 2) Enter Shift group name. 3) Select shifts which you want to add in the group, and click on “SAVE” to add shift group. Page 18 of 47 Cybernetics Software Pvt. Ltd. www.csplsoftware.com [email protected] User Manual For Enterprise Attendance Software Document Release Date: 24/07/2012 ASSIGN SHIFTS : Steps to assign shift : 1) Select from date and to date to assign shift (If you want to continue the shift for employee then select the check box for continue shift and specify the date from which to assign shift.) 2) Select shift, Shift roaster or shift group as applicable for employee. 3) Select check box for weekly off to assign and select day of weekly off. 4) Select employees to assign shift. 5) Click on “Assign” to assign the shift. 6) If you want to view the records for assigned shifts then click on “View” or ”View details” Page 19 of 47 Cybernetics Software Pvt. Ltd. www.csplsoftware.com [email protected] User Manual For Enterprise Attendance Software Document Release Date: 24/07/2012 CATEGORY MASTER : A category is a set of rules defined which consist of settings for full day hrs, half day hrs, punch, compensation off, overtime, late/early etc which can be applied to the employees. It consists of 3 sections: By default one default category for all employees is added in the system. a) Punch Settings: This section contains settings for Check In, Check Out, Break time consideration in case of single or multiple punches. b) General Settings: 1) Specify whether to consider Punch timing for Check In time consideration or to overwrite shift In time as Check In time. 2) Specify time Interval within which punches would be ignored.ie. If specified 10 minutes then punches within 10 mins. range would be ignored. 3) You can also provide time round up facility. Select criteria before or after. Specify the time. Accordingly the punch times would be rounded up. Page 20 of 47 Cybernetics Software Pvt. Ltd. www.csplsoftware.com [email protected] User Manual For Enterprise Attendance Software Document Release Date: 24/07/2012 c) Overtime & Late/Early Settings: 1) Overtime Settings: 1. Select option in order to Apply or Ignore Overtime Settings. 2. Set time interval after .before the shift work hours to start overtime. Select "+" to indicate time after Shift Work Hours. Select "-" to indicate time before Shift Work Hours. 3. Select Grace Overtime Hours: This indicates the grace time for overtime consideration. 4. You can also provide settings for compulsory overtime before or after shift. Minimum OT hours Before Shift: If you check this checkbox and specify certain time interval, overtime will be calculated only if the employee works for that time before shift. Minimum OT hours After Shift: If you check this checkbox and specify certain time interval, overtime will be calculated only if the employee works for that time after shift. 2) Late/Early Settings: 1. Check the Checkbox at the top to Apply Early/Late Settings. 2. Set Late/Early Count as interval. If After every interval checkbox is checked, then the following conditions are applied only after those many late counts. 3. You can either deduct leave or attendance days for late counts. If Deduct from Leave is true, then specified no. of leaves would be deducted from specified leave type. ASSIGN CATEGORY : Page 21 of 47 Cybernetics Software Pvt. Ltd. www.csplsoftware.com [email protected] User Manual For Enterprise Attendance Software Document Release Date: 24/07/2012 Steps to assign Category: 1) To assign category select the company name and location 2) Select appropriate category. 3) Select from date to continue category. 4) Select employees from the list for which you want to assign the category and click on assign button to assign the category. 5) To view the details of employee category details click on ”View” button. Page 22 of 47 Cybernetics Software Pvt. Ltd. www.csplsoftware.com [email protected] User Manual For Enterprise Attendance Software Document Release Date: 24/07/2012 Import Data from Excel Sheet : The following 3 options have been provided to bulk import data from Excel Sheets. 1) Import Masters 2) Import/Export Employees (the existing employee list can also be exported from the software in csv format. 3) Import Shift Roster. A link has been provided to the left-side(Download format) to download the respective formats. Data can then be filled in the Excel sheet according to the format. There is an option to browse the data file. Once “Load” button is clicked all the data from Excel sheet is loaded onto the page. It can then be saved by clicking on the “Save” button. The data gets saved in the system. Page 23 of 47 Cybernetics Software Pvt. Ltd. www.csplsoftware.com [email protected] User Manual For Enterprise Attendance Software Document Release Date: 24/07/2012 Email Settings : Email settings need to be done if online request management has to be enabled. Description of the fields : 1) Port No. : - you need to set some port for SMTP settings. Like ( 25, 587 or 465) 2) SMTP Server name: like mail.google.com or your SMTP server name 3) Username: Valid email id from which all mail communication will happen from the software. 4) Password: Password for the email-id. 5) Once the settings are saved you can also check the e-mail configuration by entering an e-mail id in “Send Test Mail” section & sending a test mail on it. Page 24 of 47 Cybernetics Software Pvt. Ltd. www.csplsoftware.com [email protected] User Manual For Enterprise Attendance Software Document Release Date: 24/07/2012 SOFTWARE SETTINGS : This has 2 sections: 1) Logo Settings : Here you can configure the organization logo. 2) Authentication Setting : Here software authentication setting can be done i.e. whether active directory authentication option should be provided or not. If it is selected then the user can also login to the system directly through his active directory credentials. Page 25 of 47 Cybernetics Software Pvt. Ltd. www.csplsoftware.com [email protected] User Manual For Enterprise Attendance Software Document Release Date: 24/07/2012 Database Settings : Here you can configure your database. Help->Version Details : Here you can view your version details. The software version can also be upgraded from here by specifying the new registration code. Page 26 of 47 Cybernetics Software Pvt. Ltd. www.csplsoftware.com [email protected] User Manual For Enterprise Attendance Software Document Release Date: 24/07/2012 ATTENDANCE DATA : In this section you can see the attendance details (i.e. day status, shift, check-in, check-out, work hours, overtime hours, late time, early time etc.) of employees for the current month. The left pane contains a treeview list of all the employees according to their company, location. You can select a particular employee or a location to view the attendance of current month. Page 27 of 47 Cybernetics Software Pvt. Ltd. www.csplsoftware.com [email protected] User Manual For Enterprise Attendance Software Document Release Date: 24/07/2012 UPDATIONS : This section contains options for attendance data updations. Manual Punches : Facility to add manual punches has been provided for attendance adjustment. Manual Punches can be assigned to one or more employees. Steps : 1) Click on the add sign (+) to add manual punches. A popup will be displayed for adding manual punches. 2) Select the company & location. 3) Select the employees from the list displayed in the bottom section. 4) Select the date & enter the punch timings. 5) Click on Assign to assign manual punches. 6) Assigned manual punches can be selected to delete by clicking on the delete sign (X) on the main page. 7) Also deleted punches can be viewed & restored by selecting “Deleted” option for the punch type in the search section & then selecting the deleted punch & clicking on “Restore”. Page 28 of 47 Cybernetics Software Pvt. Ltd. www.csplsoftware.com [email protected] User Manual For Enterprise Attendance Software Document Release Date: 24/07/2012 Compensation-Off : Comp-off can be assigned to the employee in 2 cases: if he has worked on holiday/weekly-off or on the basis of his extra hours. STEPS TO ASSIGN COMP-OFF : 1) Select the employee for whom comp-off is to be assigned. You can also filter the employees by company, location, department, sub-department or by name or emp-code. 2) Select the month/year & click on “Refresh”. 3) If comp-off is to be assigned on the basis of weekly-of/holiday, the days for which the employee has worked on weekly-off/holiday are listed below in the left pane. Select the day. Select the comp-off date & click on “Save”. 4) If comp-off is to be assigned on the basis of his extra hours, the total extra hours & available extra hours are displayed in the right pane. If extra hours are available you can select the comp-off date & click on “Save” to assign comp-off. 5) Also, existing comp-off can be deleted by clicking on the “X” sign corresponding to the comp-off date in the list. Page 29 of 47 Cybernetics Software Pvt. Ltd. www.csplsoftware.com [email protected] User Manual For Enterprise Attendance Software Document Release Date: 24/07/2012 SPECIAL ENTRY : This is a special feature provided where the admin can over-write the day status of an employee as present, not late, not early. Work hrs can also be specified in case of “Present”. Steps to add special entry: 1) Click on add sign (+) to add a special entry. 2) Select the company & location. 3) Select the employees to assign special entry to. 4) Enter the special entry mode-present, not late, not early and enter work hours. 5) Click on “Add Entry” to add the special entry. 6) Existing entries can be selected to delete by clicking on the delete sign(X). Page 30 of 47 Cybernetics Software Pvt. Ltd. www.csplsoftware.com [email protected] User Manual For Enterprise Attendance Software Document Release Date: 24/07/2012 TOUR ENTRY : Tour entry can be added if the employee is outside for single/multiple days for official work. Steps to add tour entry: 1) Click on add sign (+) to add a tour entry. 2) Select the company & location. 3) Select the employee & date for which to make tour entry. 4) Select the mode i.e. present or half-day & click on Add Entry to make the tour entry. 5) Select an existing tour entry to delete and click on delete sign(X) to delete it. Page 31 of 47 Cybernetics Software Pvt. Ltd. www.csplsoftware.com [email protected] User Manual For Enterprise Attendance Software Document Release Date: 24/07/2012 OUTDOOR ENTRY : Outdoor entry can be assigned to employees which means time utilized for official work outside office which gets added into the work hours. Steps to add outdoor entry: 1) Select the company & location. 2) Select the employee & date for which to make outdoor entry. 3) Enter the work hours on outdoor duty & click on “Add” to make outdoor entry. 4) Existing Outdoor entry can also be modified or deleted by selecting the record. Page 32 of 47 Cybernetics Software Pvt. Ltd. www.csplsoftware.com [email protected] User Manual For Enterprise Attendance Software Document Release Date: 24/07/2012 OVERTIME REQUEST : The section head or hierarchy admin can request overtime approval for all employees under him to an authorized approver. On approval the overtime gets reflected in the individual records. STEPS FOR OVERTIME REQUEST : 1) The section head or admin can view the list of all employees under him. He can select the employees for whom overtime request needs to be made. 2) He can select the date range for which overtime is to be approved 3) On clicking on “View” button he gets the list of overtime records of the selected employees in a popup window. 4) He can modify the overtime hours if required & select the authorized approver from the “Send To” drop-down & click on “Request” button. 5) He can also view the status of the requests made by selecting “Requested” option in the drop-down list options & clicking on “Refresh”. Page 33 of 47 Cybernetics Software Pvt. Ltd. www.csplsoftware.com [email protected] User Manual For Enterprise Attendance Software Document Release Date: 24/07/2012 OVERTIME APPROVAL : The authorized approver can view the list of overtime requests sent to him. Once he approves the request the overtime gets added to the individual records. STEPS FOR OVERTIME APPROVAL: 1) The authorized person can select the overtime record from the list of requests. 2) He can modify the overtime hours if required & click on “Approve” to approve the overtime request. 3) HE can also delete an approved request by selecting “Approved” option in the list of options & clicking on “Delete: button. Page 34 of 47 Cybernetics Software Pvt. Ltd. www.csplsoftware.com [email protected] User Manual For Enterprise Attendance Software Document Release Date: 24/07/2012 Employee Requests : The employee can add requests for manual punches, tour, od, leave etc. The section head or admin can manage the requests of the employees under him. If email-setting is configured a mail is also sent to the section head or admin to approve /reject or forward the requests & a return mail is sent to the employee for status notification of the request. PENDING REQUESTS: In the Pending request section the head can view the list of requests pending for approval. STEPS : 1) The type of request can be selected from the drop-down list i.e. (Manual Punches, Tour, Outdoor). 2) The pending requests of the selected type are displayed in the table below. The admin can select the request to be approved by clicking on “Select” of the corresponding record. 3) The admin can then approve/reject the request by clicking on the respective options. Page 35 of 47 Cybernetics Software Pvt. Ltd. www.csplsoftware.com [email protected] User Manual For Enterprise Attendance Software Document Release Date: 24/07/2012 ALL REQUESTS : Here all the requests can be viewed & their status can be tracked. The type of request can be selected & the requests can be filtered on the basis of various criteria like company, location, date range, status of request, type etc. Page 36 of 47 Cybernetics Software Pvt. Ltd. www.csplsoftware.com [email protected] User Manual For Enterprise Attendance Software Document Release Date: 24/07/2012 LEAVE REQUESTS : In this section all the pending leave requests can be viewed & managed. The admin can see the details of the pending leave requests for the leave accounting year in a tree structure format. He can approve/reject the request partially/fully. He can either select the whole request or some dates from the details & click on “Approve” or “Reject”. Page 37 of 47 Cybernetics Software Pvt. Ltd. www.csplsoftware.com [email protected] User Manual For Enterprise Attendance Software Document Release Date: 24/07/2012 LEAVES : Leave Management plays a very important role in Attendance generation. Leave Management in Time Attendance allows the user to define their own leave codes and set rules for individual leave codes as explained below. Leave Year Settings : Here you can define the leave accounting year whether it is from Jan-Dec or April-March. Leave Codes : User can define the leave codes according to company norms. Steps to define leave codes 1) Select the company & location. 2) Enter the leave code & description. 3) Click on Save to add the leave code. 4) Added leave codes are seen in the grid as shown below. You can edit/delete the existing leave codes. Page 38 of 47 Cybernetics Software Pvt. Ltd. www.csplsoftware.com [email protected] User Manual For Enterprise Attendance Software Document Release Date: 24/07/2012 Leave Rules : User can define the leave rules for individual leave codes category-wise. i.e. e.g. Leave Rules for CL can be different for two different attendance categories. Steps to define Leave Rules : 1) Select the company, location & category. 2) Select the leave code. 3) Set appropriate values for all the rules displayed on the form i.e. Max./Min. Leaves allowed, Half days allowed, Accumulation, Max. Accumulation days etc. 4) Click on Save to add the leave rues. 5) Added leave rules are seen in the grid as shown below. You can edit/delete the existing leave rules. Page 39 of 47 Cybernetics Software Pvt. Ltd. www.csplsoftware.com [email protected] User Manual For Enterprise Attendance Software Document Release Date: 24/07/2012 LEAVE OPENING BALANCE : Leave account of an employee starts when an opening balance is set for that employee against the required leave codes. Through this form the admin or section head can set the opening balance for the employees for individual leave codes as explained below. Steps to set the Leave opening balance: 1) Select the company & location and click on refresh to load the employees in the grid 2) Leave opening balance can be set category-wise. Select the category. The employees belonging to this category are displayed in the grid. The leave codes for which leave rules are assigned are loaded in the drop-down. 3) Select the required leave code; enter the leave balance count which you need to set as balance. 4) Select the employees for whom you want to assign the balance and then click on “Set”. Clicking on set will delete all the existing leave entries of the selected employees for the current leave year. Page 40 of 47 Cybernetics Software Pvt. Ltd. www.csplsoftware.com [email protected] User Manual For Enterprise Attendance Software Document Release Date: 24/07/2012 LEAVE SANCTION : Leave account of each employee is maintained separately in the software. Leave Sanctioning can be carried out in the following ways: 1) Admin /Section Head can directly sanction the leaves against employee. 2) Employee can request for a leave which will then be approved or rejected by admin/section head. Steps to sanction Leave: 1) Select the company & location and click on refresh to load the employees in the grid 2) Select the employee from the Drop down. The employee category is displayed on the side, 3) Select the required leave code, the date range for leave. Select half day option if half day leave is to be assigned. Click on Sanction. 4) The Leave balance for all codes till date and the sanctioned leaves are displayed in two separate grids below. The sanctioned leaves can also be deleted if not used yet. Reflections in the leave balance are seen immediately. Page 41 of 47 Cybernetics Software Pvt. Ltd. www.csplsoftware.com [email protected] User Manual For Enterprise Attendance Software Document Release Date: 24/07/2012 LEAVE CARRY FORWARD : This means that the unused leaves of previous Leave year can be transferred to the next year. To allow this, the appropriate settings must be done in leave rules. Steps to Carry Forward Leaves: 1) Select the company & location and click on refresh to load the employees in the grid. The employees who have any previous balance are shown in the grid 2) Select the category and leave code for which to carry forward leaves. Page 42 of 47 Cybernetics Software Pvt. Ltd. www.csplsoftware.com [email protected] User Manual For Enterprise Attendance Software Document Release Date: 24/07/2012 REPORTS : A wide range of reports can be generated & exported from the system in various formats. Page 43 of 47 Cybernetics Software Pvt. Ltd. www.csplsoftware.com [email protected] User Manual For Enterprise Attendance Software Document Release Date: 24/07/2012 Steps to generate Report: 1) You need to select the Company and Location for whose employees to generate report. 2) You can filter the required employees department, sub-department, name or employee code-wise. 3) Select all the required employees. You can directly select all employees with "Check All" checkbox provided below every list. 4) Click on "View" to generate the report. 5) You can also export the reports by selecting the export format (PDF or Excel) & clicking on "Export". Page 44 of 47 Cybernetics Software Pvt. Ltd. www.csplsoftware.com [email protected] User Manual For Enterprise Attendance Software Document Release Date: 24/07/2012 EMPLOYEE LOGIN : Employee can login to the system & make requests for manual punches, tour, outdoor entry & leaves. The employee can also be a section head or hierarchy admin. In that case a profile selection window is shown after login. The user can select the desired profile and click on “Login”. Page 45 of 47 Cybernetics Software Pvt. Ltd. www.csplsoftware.com [email protected] User Manual For Enterprise Attendance Software Document Release Date: 24/07/2012 REQUISITION : Steps to add requests: 1) Select the type of request to add i.e. whether it is manual punch, tour, outdoor entry etc. 2) Enter the corresponding details of the request i.e. punch timings etc. 3) Click on Add to make the request. REQUISITION STATUS : The employee can also track the status of his requests. Page 46 of 47 Cybernetics Software Pvt. Ltd. www.csplsoftware.com [email protected] User Manual For Enterprise Attendance Software Document Release Date: 24/07/2012 LEAVE REQUEST : Employees can make leave request by selecting the leave type & entering leave details. They can also view their used leaves & leave balance. The employee can also select a pending leave request & cancel it by clicking on “Cancel”. REPORTS : The employee can also view his own attendance reports & shift reports. Page 47 of 47 Cybernetics Software Pvt. Ltd. www.csplsoftware.com [email protected]


