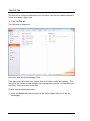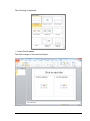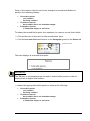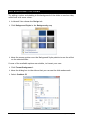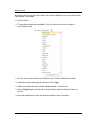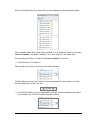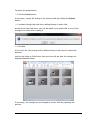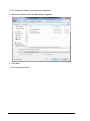
1
Table of Contents Introduction ........................................................................... 1 Getting started ........................................................................ 3 The file tab ......................................................................... 3 The ribbon .......................................................................... 5 Help ..................................................................................... 6 Creating a new presentation ........................................................ 8 Slide Layouts........................................................................ 8 Adding a new slide ............................................................... 11 Changing the style of the bullet ............................................ 16 Views ................................................................................. 26 Slide Sorter view ................................................................. 26 Notes page view .................................................................. 27 Reading view ..................................................................... 29 Normal View ...................................................................... 29 Outline View ................................................................... 30 Quick access views buttons ..................................................... 32 Slide show ......................................................................... 32 Zoom tool ......................................................................... 33 Background colours ................................................................. 34 Slide designs ......................................................................... 36 Colour schemes ................................................................... 36 Animations ........................................................................... 37 Slide transitions .................................................................. 37 Transition Duration ........................................................... 38 Advancing the slide automatically .......................................... 38 Using Sound .................................................................... 39 Animating slide content ......................................................... 40 Animating images ............................................................. 42 Animating a bulleted list ..................................................... 42 Fine tuning animations ....................................................... 44 The advanced animation group ................................................ 48 Copying animation effects ................................................... 48 Adding multiple animations to an item .................................... 48 Presenting the slide show ......................................................... 54 Adding timings to slides ......................................................... 54 Hiding slides ...................................................................... 56 Slide show options ............................................................... 58 Action buttons .................................................................... 59 Hyperlinks ......................................................................... 62 Adding a movie to a slide .......................................................... 63 SmartArt ............................................................................. 67 Converting existing text to SmartArt ......................................... 67 Adding Animation to SmartArt ................................................. 72 Inserting SmartArt into a new slide ........................................... 73 Tables ................................................................................ 75 Charts ................................................................................ 79 Adding animation to a chart .................................................... 82 PowerPoint 2010 (051012) i ©De Montfort University, IT Training 2012 Headers and footers ................................................................ 84 Headers and footers on notes and handouts ................................. 84 Footers on Slides ................................................................. 87 Spelling Checker .................................................................... 88 Printing ............................................................................... 89 Page setup ........................................................................ 89 Printing notes pages ............................................................. 90 Printing handouts ................................................................ 92 The slide Master..................................................................... 94 Using two themes in a presentation ........................................... 96 Creating a custom layout ....................................................... 98 Templates ........................................................................... 101 Saving a presentation as a template ......................................... 101 Using your saved template ..................................................... 103 Using other available templates .............................................. 104 Exercise ............................................................................. 106 Appendix ............................................................................ 109 PowerPoint 2010 (051012) ii ©De Montfort University, IT Training 2012 INTRODUCTION This is an introductory course aimed at those with no experience of using PowerPoint. After the course you will be able to create an animated presentation including images and charts. Knowledge assumed experience of using a computer, for example the keyboard and mouse experience of using Windows; icons, loading software and click boxes Areas covered creating a presentation creating a screen show using transitions and animations applying designs master slides slide layouts PowerPoint 2010 (051012) 1 ©De Montfort University, IT Training 2012 Document signposts Instructions for you to type Bold text Shortcuts Reminders Notes Exercises PowerPoint 2010 (051012) 2 ©De Montfort University, IT Training 2012 GETTING STARTED The aim of this document is to guide you through creating and modifying a screen show using PowerPoint 2010. Double click the PowerPoint 2010 shortcut icon on the desktop Or Click the Start button All Programs Microsoft Office Microsoft PowerPoint 2010 The PowerPoint opening screen is displayed. Tabs Title slide Ribbon View buttons PowerPoint 2010 (051012) 3 ©De Montfort University, IT Training 2012 THE FILE TAB The File tab is coloured differently from the other tabs on the ribbon because it is not an ordinary ribbon tab. Click the File tab The following is displayed. Microsoft calls this the Backstage View. From here you can access your recent files and folders easily and quickly. This also gives you access to the standard file management options, so from here you can open, save, print and close files. To exit from the backstage view: Click the Home tab (selecting any of the other ribbon tabs will close the backstage) PowerPoint 2010 (051012) 4 ©De Montfort University, IT Training 2012 THE RIBBON The Ribbon is designed to help you quickly find the command you need to complete a task. The commands are organised in logical groups which are collected together under tabs. For example, when you first open PowerPoint the Home tab is the one that is selected. This contains the most commonly used commands. The commands on the ribbon are placed in groups so that those used for a similar purpose are together. For example the Slides group includes New Slide, Layout, Reset and Section. When you select a different tab the ribbon shows you different groups of commands. Click the Insert tab Now you see commands relating to objects that can be inserted into a presentation: Tables, Images, Illustrations, etc. There are also tabs that display only when they are needed, for example if you select a picture or Word Art in your presentation. These are called contextual tabs. We will see some of these later in the training course. PowerPoint 2010 (051012) 5 ©De Montfort University, IT Training 2012 HELP The built-in help system in PowerPoint is the first place to look if you are unsure of a process or procedure. If you have an internet connection, PowerPoint help will automatically connect to the Internet and this provides you with access to even more articles and tutorials. Click the PowerPoint Help button above and to the right of the ribbon The following window is displayed. The help window displays a series of links to allow you to browse through different topics. Or you can type a keyword or phrase in the Search window to pinpoint information that may be useful to you. Type adding a slide into the Search window Click Search PowerPoint 2010 (051012) 6 ©De Montfort University, IT Training 2012 A list of subjects related to your search is displayed. Each subject title in the list is a hyperlink to a help article, a demonstration video, or a tutorial. Close Help PowerPoint 2010 (051012) 7 ©De Montfort University, IT Training 2012 CREATING A NEW PRESENTATION In this training course you will create a presentation about endangered species of animals. It will be only a short presentation but you will include images, a chart and various effects. When you start PowerPoint a new presentation is started automatically and contains one blank slide. By default, the first slide is a Title Slide and contains two placeholders: one for the title of the presentation, and one for a subtitle. Placeholders This is usually ideal for the first slide and is used to introduce yourself and the subject you will be talking about. However, you can choose to change the layout of this and any other slide that you add to the presentation. SLIDE LAYOUTS To display the available slide layouts: Click Layout from the Slides group of commands on the Home tab PowerPoint 2010 (051012) 8 ©De Montfort University, IT Training 2012 The following is displayed. Select Two Content The slide changes to the selected layout. PowerPoint 2010 (051012) 9 ©De Montfort University, IT Training 2012 A slide layout can consist of several elements including a title placeholder, subtitle placeholder, and other placeholders for objects such as images, charts and media clips. The layout you choose will depend on what content you intend to put on the slide and where you want it to be positioned. For this presentation, a presentation title and your name are the only things that you will put on the first slide. Change the layout back to Title Slide Position the insertion point in the title placeholder Type Endangered Species Position the insertion point in the subtitle placeholder Type your name PowerPoint 2010 (051012) 10 ©De Montfort University, IT Training 2012 ADDING A NEW SLIDE Ensure the Home tab is selected Click the bottom of the New Slide button to see the list of layouts Click Select Title and Content A second slide is added to the presentation with the selected layout. PowerPoint 2010 (051012) 11 ©De Montfort University, IT Training 2012 Notice that, as you add slides to the presentation, thumb nail images are also shown in the Slides tab to the left of the screen (in Normal view). Position the insertion point in the title placeholder Type the slide title: Terms Position the insertion point in the main placeholder Text typed in this placeholder will be bulleted automatically. Type the following list: Vulnerable species Low numbers Declining numbers Threatened species Has problems but in no immediate danger Endangered species In immediate danger of extinction PowerPoint 2010 (051012) 12 ©De Montfort University, IT Training 2012 Some of the items in the list need to be changed to second level bullets to produce the following display: Vulnerable species Low numbers Declining numbers Threatened species Has problems but in no immediate danger Endangered species In immediate danger of extinction To indent the second bullet point (Low numbers) to create a second level bullet: Click at the start of the text for the second bullet point Click the Increase List Level button in the Paragraph group on the Home tab Increase List Level The item displays as a second level point. Alternatively The Tab key on the keyboard can be used to indent bullet points in order to display them as higher level bullets. Indent the appropriate bullet points to achieve the following: Vulnerable species Low numbers Declining numbers Threatened species Has problems but in no immediate danger Endangered species In immediate danger of extinction PowerPoint 2010 (051012) 13 ©De Montfort University, IT Training 2012 Add the following to the bottom of the list: Extinct species No longer living To change a second level bullet point into a first level point: Either ● Use the Decrease List Level button in the Paragraph group on the Home tab Decrease List Level Or ● Hold down the Shift key while pressing the Tab key Notice that the lines of text have been automatically adjusted to make room for the new lines. As you start to type the last line, an AutoFit Options button is displayed next to the placeholder. Click the drop arrow to display the options The Autofit Text to Placeholder option is selected by default. Click away from the list to hide the options PowerPoint 2010 (051012) 14 ©De Montfort University, IT Training 2012 You can control the fit of the text in the placeholder yourself by changing the line spacing between lines of text in the list. The line spacing button is in the Paragraph group of the Home tab. Click the Line Spacing button Fine tune the spacing by selecting Line Spacing Options... Adjust the spacing Before or After a paragraph (text with a paragraph mark at the end – where you have pressed the Enter key) to get the desired gap between the points. To the inexperienced, when you adjust the point size between the lines of text it is difficult to judge the space that will be added. You might have to find the right amount by trial and error. This particular slide does not need to be altered. Click Cancel PowerPoint 2010 (051012) 15 ©De Montfort University, IT Training 2012 Changing the style of the bullet To emphasise the first level of bullet point you will change the style of the bullet and embolden the text. Select the first line of text – Vulnerable species On the Home tab click the drop arrow to the right of the Bullets button Move the mouse pointer over the different styles of bullets to see the change on the slide Choose a different style of bullet, for example the hollow square bullets While the first line is still selected, embolden the text by clicking the Bold button in the Font group on the Home tab Select each main bullet and change the style to match the first one Change the style of bullet for the second level headings to the hollow round bullet Format the text as italic PowerPoint 2010 (051012) 16 ©De Montfort University, IT Training 2012 Your slide should look similar to this: Save the presentation with the name EndangeredSpecies in the PowerPoint 2010 folder on drive C: Add a new slide as slide 3 - choose the Title and Content layout In the title placeholder type the heading – Vulnerable Species To insert a picture on this slide: In the main placeholder click the Insert Picture from File icon Locate the PowerPoint2010 folder on drive C PowerPoint 2010 (051012) 17 ©De Montfort University, IT Training 2012 Select the image of the Spotted Bat Click Insert The bat image is added to the slide. To include the name of the species of bat you will add a text box to the slide. Select the Insert tab Click the Text Box button in the Text group Draw a text box in the centre of the slide above the picture Type Spotted Bat Centre the text within the text box by clicking the Centre button in the Paragraph group of the Home tab PowerPoint 2010 (051012) 18 ©De Montfort University, IT Training 2012 Your slide should look something like this: Add a new slide to the presentation – choose the Content with Caption layout In the title placeholder (top left box) enter the text Threatened Species The text needs to match the heading on the previous slide so format it as 44pt, not bold Now that you have changed the size of the text the placeholder is not deep enough to hold both lines, so it overflows the top of the placeholder. You can either resize the placeholder manually to hold the text or use the Autofit Options to allow PowerPoint to resize the text to fit the placeholder. Use the Autofit Options and choose Autofit Text to Placeholder PowerPoint 2010 (051012) 19 ©De Montfort University, IT Training 2012 To fit larger text in the placeholder, you need to adjust the size of the title placeholder and the placeholder below it to make room for the larger text. Click in the Caption placeholder (the lower placeholder) to select it The squares at the centre of each edge of the placeholder are resizing handles. Drag the resizing handle on the top edge of the placeholder down to make more space above it Drag this to resize the placeholder Drag the lower edge of the title placeholder down to make it deeper If the title placeholder is enlarged sufficiently, the Autofit Text to Placeholder option causes the heading text to change to the larger size (44 pt) that was specified earlier. In the lower placeholder add the text Red Kangaroo Format this as 18pt Use the Align Text button in the Paragraph group on the Home tab to align the text to the bottom of the placeholder Align Text PowerPoint 2010 (051012) 20 ©De Montfort University, IT Training 2012 Your slide should look something like this: In the Content placeholder: Insert the picture of the Red Kangaroo from the PowerPoint2010 folder on drive C While the picture is selected, the Picture Tools Format tab is displayed. This is a contextual tab which is only shown when a picture is selected. This tab gives you access to formatting options that you can use on your picture. Click away from the picture and the Picture Tools Format tab disappears Click on to the picture again Now that the picture of the kangaroo has been inserted into the slide you can see that it is quite small. It would look better if the picture was a similar size to the picture of the bat on the previous slide. PowerPoint 2010 (051012) 21 ©De Montfort University, IT Training 2012 Using the Shape Height option in the Size group on the Format tab, change the height of the picture to 8 cm. The width of the picture will change automatically to ensure the picture remains in proportion. The Picture Styles group on the ribbon shows different effects that you can apply to the picture. With the image selected, move the mouse pointer over the different picture styles to view the effect on the kangaroo picture Scroll arrows Reflected Rounded Rectangle Use the scroll arrows to see more options Choose the Reflected Rounded Rectangle as the picture style for the picture of the kangaroo Note that there are also Picture Border, Picture Effects, and Picture Layout options available. If necessary, drag the image to a more central position on the slide PowerPoint 2010 (051012) 22 ©De Montfort University, IT Training 2012 Your slide should look something like this: Select slide 3 and change the height of the image to 8 cm Apply the Beveled Oval, Black picture style Add a new slide to the end of the presentation with the Title Only layout When you click the new slide button, a new slide is inserted immediately after the slide that is currently selected. So to insert a new slide after slide 4 you must first ensure that slide 4 is selected. In the title placeholder type the heading Endangered Species Although you did not choose a slide layout that includes the option to insert a picture, you can still add one to the slide. On the Insert tab, click the Picture button in the Images group PowerPoint 2010 (051012) 23 ©De Montfort University, IT Training 2012 Choose the picture of the Siberian Tiger from the PowerPoint2010 folder on drive C Click Insert This picture is much too big for the slide. Change the height of the picture to 8 cm Drag the picture to the middle of the slide Apply the Rotated, White picture style to the image Insert a text box between the title and the picture to include the sub heading Siberian Tiger Your slide should look something like this: PowerPoint 2010 (051012) 24 ©De Montfort University, IT Training 2012 Add a new slide to the presentation Choose your own layout and use the following information: Title: Sub heading: Picture: Extinct Species Dodo Dodo from PowerPoint2010 folder Resize and reposition the picture similar to the other slides Add another slide to the end of the presentation with the Title and Content layout The slide title is Causes of Endangerment The bullet text is: Habitat destruction Over exploitation Introduction of exotic species Disease Pollution Change the style of the bullets Centre the bullet text vertically in the placeholder Add a final slide to the presentation with the Title and Content layout The slide title is What can we do The bullet text is: Conserve habitat Make space for wildlife Recycle, reduce and reuse Plant native plants Join an organisation Make your voice heard Change the style of the bullets Change the line spacing of the bullet points to 1.5 Save the presentation PowerPoint 2010 (051012) 25 ©De Montfort University, IT Training 2012 VIEWS The PowerPoint display that you have been using so far is called Normal view. When working on a presentation you have a choice of which view to use. However, what you are doing with the slides dictates the view you use. For example, by default the presentation is displayed in Normal view which is used to create and edit slides. Select the View tab The views available are displayed in the Presentation Views group. SLIDE SORTER VIEW Click the Slide Sorter button You see the slides in the presentation as thumbnail images. The slide with the orange outline is the one that is currently selected. PowerPoint 2010 (051012) 26 ©De Montfort University, IT Training 2012 Slide Sorter view enables you to see a larger number of slides on the screen at the same time. This view is therefore useful when copying or reordering slides within the presentation. To move the Vulnerable Species slide (current slide 3) so that it becomes slide 2: Select slide 3 and drag it over to the left As you move the mouse pointer a line is displayed between the slides to show where the slide would move to if you released the mouse button. Move the slide so that it becomes slide 2 Use the Undo button to move the slide back to its original position NOTES PAGE VIEW If you need to write notes and prompts to remind you of important points that you need to mention when delivering the presentation, these can be saved within PowerPoint. Every slide has a notes page on which you can type your notes and then print the notes pages to use as prompts when presenting the presentation. Click the Notes Page button in the Presentation Views group The Notes page is displayed for the selected slide. The page has two sections: the top section shows the slide as it would be seen by your audience, and the bottom section is used to add and display your notes and prompts. PowerPoint 2010 (051012) 27 ©De Montfort University, IT Training 2012 When in this view, you can use the arrow keys on the keyboard to display the notes page of another slide in the presentation. Click the left arrow repeatedly until the notes page for slide 1 (the title slide) is displayed Click in the notes section (identified by the ‘Click to add text’ prompt) Type the following note: Welcome to my presentation on the important subject of ‘Endangered Species’. I hope that you will be able to support the cause. Change the font to Trebuchet MS 12pt PowerPoint 2010 (051012) 28 ©De Montfort University, IT Training 2012 READING VIEW Reading view fills the screen with the current slide, thus providing a quick way to preview what the slides would look like during the presentation. Click Reading View in the Presentation Views group on the View tab The screen fills with the first slide of the presentation. Press the Right arrow key (or Down arrow key) to display the next slide Press the Left arrow key (or Up arrow key) to display the previous slide To exit from Reading View and return to the previous view: Press the Esc key NORMAL VIEW As mentioned earlier, this is the default view and is the main working window in PowerPoint. This is the view used to edit the contents on the slides. Click Normal View in the Presentation Views group The slide currently selected is displayed in Normal view. Slide selected for editing Slide thumbnails Notes pane PowerPoint 2010 (051012) 29 ©De Montfort University, IT Training 2012 Observe that Normal view consists of three distinct sections: the Slides/Outline pane on the left which by default displays thumbnails of the slides, a large view of the selected slide in the main pane, and a notes pane at the bottom. In the notes pane of the title slide you can see the note that you typed earlier. Because the pane is small you will need to use the scrolling arrows on the side in order to view the rest of the note. It is also possible to make the notes pane section larger by dragging the top border of the notes pane upward. It is often more convenient to type your notes directly into the notes pane in Normal view instead of switching to the Notes page view. It may sometimes be useful to hide the thumbnails and notes pane sections in order to allow more space to display the slide that is being edited. To close the thumbnails section and notes pane: Click the cross at the top right of the Slides/Outline pane Click here to close the thumbnails The selected slide enlarges to fill the window. To display all three sections: Click Normal View in the Presentations Views group on the View tab Outline View Outline View is achieved by selecting the Outline tab in the Slides/Outline pane. Click the Outline tab Instead of the slide thumbnails, the Slides/Outline pane now displays all the text on all the slides in a list. This view is particularly useful for reordering bullet points. PowerPoint 2010 (051012) 30 ©De Montfort University, IT Training 2012 For example, in slide 2, if you wish to change the order of the two sub-points under Vulnerable species: Move the mouse pointer over the bullet point for the text Low numbers The mouse pointer changes to cross arrows indicating that it can be dragged. Drag the Low numbers bullet point downward As you drag the bullet point, a blue horizontal line will appear in the pane. Release the mouse button when the blue line is below the Declining numbers bullet point To close Outline view, Click the Slides tab PowerPoint 2010 (051012) 31 ©De Montfort University, IT Training 2012 QUICK ACCESS VIEWS BUTTONS Some of the views described above can also be accessed using the buttons on the right side of the status bar, at the bottom of the window. Normal view Reading view Slide Sorter view Fit slide to current window Slide Show This bar also has a shortcut to the zoom tool: Zoom SLIDE SHOW The Slide Show button is used to start the presentation and fill the screen initially with the currently selected slide. You are then able to move through the presentation slides one at a time. Select slide 1 Click the Slide Show button This starts the slide show from slide 1. To advance through the presentation: Press the space bar or Press the Enter key or Click the left mouse button or Press the right arrow key To go back a slide: Press the left arrow key To stop the presentation: Press the Esc key PowerPoint 2010 (051012) 32 ©De Montfort University, IT Training 2012 The Slide Show can also be started from the commands on the ribbon. Select the Slide Show tab The commands for starting the presentation are in the Start Slide Show group. Starts the slide show from the first slide regardless of which slide is currently selected Starts the slide show from the currently selected slide Click the From Beginning command The slide show starts by presenting slide 1. Move to the next slide Stop the presentation ZOOM TOOL The Zoom tool next to the Quick Access Views buttons enables you to change the magnification of the slides by either using the slider or displaying the Zoom dialog box. To change the magnification to 40% using the slider: Drag the slider until the figure 40% is displayed on the bar To change the magnification to 66% using the Zoom dialog box: Click on the zoom value (40%) next to the zoom slider The Zoom dialog box is displayed: Select 66% Click OK The Zoom dialog box can also be displayed by selecting the Zoom command on the View tab. PowerPoint 2010 (051012) 33 ©De Montfort University, IT Training 2012 BACKGROUND COLOURS Try adding a colour and shading to the background of the slides to see how they would look with more colour. In Normal View choose the Design tab Click Background Styles in the Background group Move the mouse pointer over the Background Styles palette to see the effect on the selected slide If none of the available options are suitable, to format your own: Click Format Background… Move the dialog box to the side so that you can see the slide underneath Select Gradient fill PowerPoint 2010 (051012) 34 ©De Montfort University, IT Training 2012 The dialog box expands to give more options. Click the arrow next to the Type box and select Radial to see the effect Try some of the other options to see the effects in the preview To undo all of the background changes that you experimented with: Before closing this dialog box click Reset Background Click Close PowerPoint 2010 (051012) 35 ©De Montfort University, IT Training 2012 SLIDE DESIGNS In the centre of the Design tab is the Themes group. These are ‘built-in’ designs that enable you to format all of the slides in your presentation instantly. Click here to see more themes Move the mouse pointer over the themes to see an example on the selected slide Select one of the themes to apply to your presentation Be aware that some of the themes will resize the pictures and text on your slides. Check headings to ensure they have not been split over two lines. COLOUR SCHEMES A colour scheme is a set of eight co-ordinated colours that are used in the design of the slide. Click the Colors button in the Themes group to see a selection of colour palettes that you could choose to apply to your chosen theme Move the mouse pointer over the palettes to see a preview of the colour change Click on the selected slide (away from the Built-In colour list) to hide the list of options Select the first slide in the presentation Using the Slide Show button at the bottom of the screen, view the presentation PowerPoint 2010 (051012) 36 ©De Montfort University, IT Training 2012 ANIMATIONS SLIDE TRANSITIONS A slide transition is a special effect used to introduce a slide during a slide show. For example, a slide can fade on to the screen, can appear from a corner or you can choose to have the slides appear with a random effect. You can select the transitions you want from a comprehensive list, and vary the speed of each. Use the PowerPoint Help search box to find links to articles and tutorials on slide transitions From the search results list, select the link Add transitions to a PowerPoint Presentation and view the short video Select Slide 2 Select the Transitions tab In the Transition to This Slide group, click on one of the options in the gallery to see the effect on the slide Click the More button to display the full transitions gallery Click here to display the full transitions gallery The following options are displayed. Select the Dissolve transition PowerPoint 2010 (051012) 37 ©De Montfort University, IT Training 2012 Transition Duration You can specify the length of time in seconds that the transition will take as the slide appears on the screen. To change the transition duration: Click into the duration value and type a new value, or use the arrows next to the value Advancing the slide automatically Earlier in the exercise you ran the presentation and advanced the slides by either clicking the mouse, pressing Enter or using the arrow keys. In the Advance Slide section of the Timing group you can set the slide to advance automatically after a set time. This option is useful if the presentation has been created to run on its own, for example at an open day or exhibition. Use it carefully if you are presenting the information as, if you are interrupted, the presentation may continue before you are ready. This sets the time to wait before the slide is automatically advanced Set the slide to advance automatically after 10 seconds (00:10.00) You can use different transitions for each slide but to keep the presentation in a uniform style: Click Apply to All Run the presentation to test the timing To ensure that the automatic timing is not used: Ensure that only the On Mouse Click check box is selected in the Advance Slide section Click Apply to All PowerPoint 2010 (051012) 38 ©De Montfort University, IT Training 2012 Using Sound As well as using a special effect when the slide is displayed you can add a sound. The default is no sound. Select slide 2 To see what sounds are available, click the down arrow to the right of Sound [No Sound] Choose one of the sounds from the list and it will be added to the slide Select the slide containing the picture of the tiger Add a sound but this time choose Other Sound… from the list Select TigerGrowl from the list of sound files in the PowerPoint folder on drive C Run the presentation from the previous slide to hear the effect PowerPoint 2010 (051012) 39 ©De Montfort University, IT Training 2012 ANIMATING SLIDE CONTENT In addition to using a transition when the slide is displayed you can animate text, graphics and other objects on your slides so you can focus on important points, control the flow of information, and add interest to your presentation. You can have each main bullet point appear progressively one after the other, or they can all appear at the same time. Select slide 1 Position the insertion point in the slide title – Endangered Species Select the Animations tab in the Animation group, hover the mouse pointer over some of the animations in the gallery to see the effect on the title text Click the More button to display a larger list of animations in the gallery Click here to display more animations in the gallery The following set of animations is displayed: PowerPoint 2010 (051012) 40 ©De Montfort University, IT Training 2012 The animations in the gallery are grouped under the categories: Entrance, Emphasis, Exit, and Motion Paths. Entrance animations are suitable for animating the way that content is introduced on to the slide. From the Entrance category, select Zoom The gallery does not display all of the available animations. If you do not see the animation that you are looking for, or if you want to see all the available animations in a particular category, click on one of the More Effects options at the bottom of the gallery. The effect is previewed and the slide title is numbered 1 – the first animation on the slide. Add the Float In Entrance effect to your name Select slide 2 and add an Entrance effect to the slide title Run the slide show starting with slide 1 You will need to click the mouse button or press the right arrow key to action each animation. Notice on slide 2 that because the main text on the slide are not animated, they appear on the screen before the title of the slide. Continue the slide show to the third slide and press Esc to stop the show PowerPoint 2010 (051012) 41 ©De Montfort University, IT Training 2012 Animating images Animation effects can be set on any type of slide content. You will use slide 3 to add an effect to an image. Select the image of the bat on slide 3 Select an Entrance effect from the Animation gallery A preview of the effect is shown on the slide Animating a bulleted list You can add an effect to a bulleted list as a group or as individual bullet points. How the list is animated depends on what selection is made before the animation effect is added. Select slide 2 To apply an effect to all the bulleted text as one group: Select all the bulleted text on the slide Select an Entrance effect from the Animation gallery Each bullet point is numbered 2 – indicating that this is the second effect on the slide, and that all the bullet points will be animated together, after the title. PowerPoint 2010 (051012) 42 ©De Montfort University, IT Training 2012 Run the slide show starting at slide 2 to verify that all bullet points are introduced on to the screen at the same time Continue the slide show to see the image animated on the next slide then press Esc to stop the show Click the Undo button on the Quick Access Toolbar to remove the animation effect on the bullet points The default behaviour in PowerPoint is to animate main bullet points individually. If a main point has sub-points then these sub-points will be animated with the main point as one group. To achieve this effect you do not select any of the bulleted text but simply select the placeholder. Ensure that slide 2 is selected To add the main bullet points individually: Click into the bulleted list to select the placeholder Select an Entrance effect from the Animation gallery Each of the main bullet points is given a different number from 2 to 5, indicating that there are 5 different animation effects on the slide and showing the order in which they will be executed. PowerPoint 2010 (051012) 43 ©De Montfort University, IT Training 2012 Run the slide show starting at slide 2 to see how the bullet points are introduced on to the slide Continue the slide show to the next slide then stop the show Select Slide 7 Add the Float In Entrance effect to the bulleted text so that each bullet point will be animated separately The bullet points should now be numbered 1 to 5. Fine tuning animations When animation effects are added to content on a slide, it is possible to edit and fine tune the animations in a variety of different ways. Effect Options Some animation effects have options associated with them that can be accessed using the Effect Options button in the Animation group of commands. PowerPoint 2010 (051012) 44 ©De Montfort University, IT Training 2012 Ensure that the cursor is within the bulleted list on slide 7 and that no text is selected Click the Effect Options button The following is displayed: You can therefore use these options to change the direction in which the text will move as it floats on to the page, and also change whether the bullet points are animated all at once or one at a time. Select different options to see how it affects the text With the text placeholder on slide 7 still selected, Select the Fly In animation Use the Effect Options button to change the direction of the animation and ensure that By Paragraph is selected as the Sequence Finally, add the Split animation effect to the title of slide 7 and select the Vertical Out direction from the Effect Options list PowerPoint 2010 (051012) 45 ©De Montfort University, IT Training 2012 Timing By default, when animation effects are added to a slide, the animations will be performed in the order in which they were added to the slide. Also the slide show pauses at each animation for you to manually indicate when the next effect should be shown on the screen. Both of these can be altered using the commands in the Timing group on the Animations tab. The last animation effect that you added to slide 7 was added to the title and therefore this is numbered 6 and will be the last thing to appear on the slide when the show is presented. This needs to be changed so that the title will appear on the slide before the bulleted text. To set the effect on the title to be the first animation on the slide: Click into the title placeholder to select it In the Reorder Animation section of the Timing group, click the Move Earlier command The title placeholder is now numbered 1, indicating that it will be the first effect to be added to the slide when the show is presented. PowerPoint 2010 (051012) 46 ©De Montfort University, IT Training 2012 If you run slide 7 as a slide show you would observe that initially the slide is blank and you need to click the mouse button for the title to be displayed. This is controlled by the Start setting in the Timing group. The default value is On Click. To set the animated title to appear automatically on the screen as soon as the slide is shown: Ensure that the title placeholder is still selected Click the down arrow in the Start setting Select With Previous The title placeholder is now numbered 0, indicating that this animation will be performed as soon as the slide is displayed. It is also possible to set an animation to be performed automatically after a specific period of time. To set each bullet point to be displayed automatically, 2 seconds after the previous animation: Click in the bulleted list to select the placeholder In the Timing group on the Animations tab: Change the Start setting to After Previous Change the Delay value to 02.00 Run slide 7 as a slide show to check that all the animations on the slide are displayed automatically PowerPoint 2010 (051012) 47 ©De Montfort University, IT Training 2012 THE ADVANCED ANIMATION GROUP The Advanced Animation group of commands enables you to copy animations from one slide to another and add multiple effects to an object on a slide. Copying animation effects Once you have set an animation effect to some content on a slide, you can copy the effect to other content in your presentation using the Animation Painter. To copy the effect set on the title on slide 7 to the title on slide 8: On slide 7, click on the title to select the placeholder Click Animation Painter in the Advanced Animation group on the Animations tab Select slide 8 and click on the title The animation effect, including options and timings are copied across to the slide 8 title. Adding multiple animations to an item You will add two different animation effects to the bulleted list on slide 8. Using the methods described earlier, set the first animation effect as follows: Set the Fly In Entrance effect to the bulleted list so that the bullets will be displayed on the slide one at a time Set the effect to fly in From Left Change the Duration setting to 01.00 seconds You will now add a second effect to the bulleted list to move them off the slide one at a time. Click into the bulleted list to select the placeholder Click Add Animation from the Advanced Animation group PowerPoint 2010 (051012) 48 ©De Montfort University, IT Training 2012 The following is displayed: Select Fly Out from the Exit category of effects Use the Effect Options to set the effect to fly out To Right Each of the bullet points now has two animation effects associated with it. The numbering of the effects indicates that the list will be displayed one line at a time and then removed from the slide one line at a time. Run slide 8 as a slide show to verify the order of the effects PowerPoint 2010 (051012) 49 ©De Montfort University, IT Training 2012 We wish to change the order of the effects, so that the first line of text moves off the slide while the second line is moving on to the slide, and the second line moves off while the third line comes on, etc. The two animation effects on the first bullet point are numbered 1 and 7. We therefore need effect number 7 to move up the order and become effect number 2. The Animation Pane enables you to accomplish this task. Click Animation Pane from the Advanced Animation group of commands The Animation Pane is displayed on the right of the window. Click the down chevron to expand the group and display all effects If any down chevrons are present, click them to display all the individual animation effects PowerPoint 2010 (051012) 50 ©De Montfort University, IT Training 2012 All the animation effects on the slide are now displayed in the animation pane. The animation pane shows that effect number 1 is an entrance effect on the text Conserve habitat, and effect number 7 is an exit effect on the same text. To move the exit effect on the text Conserve habitat up the list: Click on effect 7 to select it This should now be the only effect with a blue border. The Re-Order arrows at the bottom of the Animation Pane are used to re-order the selected effect within the list. Click the Re-Order up arrow repeatedly until the Conserve habitat exit effect is just below the Conserve habitat entrance effect PowerPoint 2010 (051012) 51 ©De Montfort University, IT Training 2012 Move the other exit effects to achieve the following order: We want the second bullet point to come on as the first bullet point moves off. In other words, we want effect 2 and effect 3 to occur together. Select effect 3 Change the Start value in the Timing group to With Previous Repeat the process for the other bullet points so that each one moves on to the slide as the previous one moves off The animation pane now displays the following: Run slide 8 as a slide show to see the effect PowerPoint 2010 (051012) 52 ©De Montfort University, IT Training 2012 Instead of moving each line of text off the slide with an exit effect, you can use an emphasis effect to change the look of the preceding text as the next point comes on to the slide, thus keeping the text on the screen but causing the current point to stand out in some way. Select effect 2 in the Animation Pane This was set as the Fly Out effect, so Fly Out is highlighted in the Animation group. Click the More button to display more effects (see page 40) Select Transparency from the Emphasis category This makes the text semi-transparent so the effect causes it to fade slightly. Change the other 5 exit effects to Transparency Multiple animations can be selected in the Animations Pane by using the Ctrl key when making the second and subsequent selections. You can then change the effect on the selected animations all at once. Run slide 8 as a slide show to see the effect Close the Animation Pane Save the presentation PowerPoint 2010 (051012) 53 ©De Montfort University, IT Training 2012 PRESENTING THE SLIDE SHOW You have already seen how to use the Slide Show command to start a slide show and then use the mouse or keyboard to advance through the slides and any animations in an ordered sequence. In this section you will learn how to setup a slide show to run automatically, look at ways in which you can control the order of the presentation in a flexible manner, and also take a look at some of the slide show options that can be configured. ADDING TIMINGS TO SLIDES If you intend to present the slide show yourself, you are likely to need to explain and discuss topics as they arise. In this case it is best to advance the slides manually. You can set the slide show to run automatically by either using the timing option to include a time on the slide transitions (see page 38) or you can use the rehearsal feature to record the timings. Choose the Slide Show tab Click the Rehearse Timings button The first slide of the show is displayed, together with a Recording timer. The window at the centre of the Recording timer shows the length of time the current slide has been displayed. Length of time current slide has been displayed Length of time the slide show has been running Advance to next slide or bullet Pause Start timing on current slide again When you feel that it is time to proceed to the next bullet point or slide, either: Click the left mouse button to advance (or use the keys mentioned earlier) or Use the Advance arrow on the Recording timer The time to the right of the timer shows the total time the slide show has been running. PowerPoint 2010 (051012) 54 ©De Montfort University, IT Training 2012 To pause the presentation: Click the Pause button If necessary, repeat the timing of the current slide by clicking the Repeat button. Continue through the slide show adding timings to each slide At the end of the slide show, you will be asked if you would like to record the timings to be used when viewing it. Click Yes (If you click No, the timings will be deleted and you will need to repeat the process.) Look at the slides in Slide Sorter View and you will see that the timings are displayed beneath them. If necessary, the timings can be changed at a later date by repeating the process. PowerPoint 2010 (051012) 55 ©De Montfort University, IT Training 2012 HIDING SLIDES When a slide is hidden it remains available, but will not ordinarily be displayed in the presentation. So for example, if your presentation is required to last for a specified length of time, you can hide a slide which, if time allows, you can use to expand a point, or if time is short, you can ignore it. To hide slide 2: Select slide 2 Ensure that the Slide Show tab is selected Click the Hide Slide button in the Set Up group The slide number is displayed crossed through. Run the slide show from the beginning to see the effect You are now going to run the slide show again, but this time you will display the hidden slide. This will be easier if you set the slide show to advance manually rather than automatically. Remove the check mark from the Use Timings option in the Set Up group Start the slide show again from slide 1 Display the presentation title and your name Move the mouse pointer over the lower left corner of the slide and four buttons are displayed (faintly) Move the mouse pointer over each button in turn to highlight it and see it more clearly PowerPoint 2010 (051012) 56 ©De Montfort University, IT Training 2012 When displayed clearly the buttons look like this: Forward Back Pen Navigation Click the Navigation button Choose Go to Slide In the list of slides, the slide number will be shown in brackets for any hidden slide. Select (2) Terms The second slide is displayed. Press Esc to stop the presentation To unhide slide 2: Select slide 2 Click Hide Slide on the Slide Show tab Alternatively ● Right click on the slide 2 thumbnail ● Choose Hide Slide PowerPoint 2010 (051012) 57 ©De Montfort University, IT Training 2012 SLIDE SHOW OPTIONS You saw in the previous section that you can disable the timings set without deleting them, giving you the option to quickly and easily enable them again at a later time. You will now look at some other options that will enable you to further configure how your presentation behaves when you run the slide show. Ensure the Slide Show tab is selected Click the Set Up Slide Show button The Set Up Show dialog box is displayed. The Show type options are: o Presented by a speaker – a traditional full screen slide show. You can advance the slides manually, or set automatic timings. o Browsed by an individual – runs the slide show in a standard window with custom menus and commands enabling an individual to browse your presentation. o Browsed at a kiosk – runs the slide show full screen as a self-running show that restarts after 5 minutes of inactivity. The audience can advance the slides but cannot modify the presentation. PowerPoint 2010 (051012) 58 ©De Montfort University, IT Training 2012 Ensure that Presented by a speaker is selected You use the Show slides section to specify which slides you want to include. Ensure that All is selected In the Advance slides section you can choose to run the slide show using the timings you have set up, or manually. If you choose the latter, you advance them by clicking the mouse. Select Using timings, if present The Show options are: o Loop continuously until ‘Esc’ – the slide show plays continuously in a loop until the Esc (Escape) button on the keyboard is pressed to end the show. o Show without narration – runs the show without the recorded narration being played back. (Check the on-line help for more information on adding narration to your presentation.) o Show without animation – plays the slide show without any of the animations and slide transitions that were added. Ensure that Loop continuously until ‘Esc’ is selected Click OK Select slide 1 Click the Slide Show button The presentation is displayed, starting from the selected slide, using the timings that you recorded. When you have viewed the presentation and are satisfied that it is running correctly in a continuous loop, press Esc to exit the show ACTION BUTTONS An action button is a ready-made button that you can insert into your presentation and assign an action to. For example, you could use it to jump to another slide, to a URL, a Word document, or another presentation. The button can have two actions associated with it, one started by the mouse moving over the button (mouse over), and the other when the mouse button is clicked (mouse click). PowerPoint 2010 (051012) 59 ©De Montfort University, IT Training 2012 If you are using the button as a link to something else, we suggest that you use Mouse Click rather than Mouse Over. Ensure you are in Normal view Select slide 2 Select the placeholder holding the bullet points Choose the Insert tab Click the Shapes button in the Illustrations group Scroll to the bottom of the list to see the Action Buttons Choose the Action Button: Forward or Next Forward or Next Move the mouse pointer (now shaped like a +) on to the slide Click the mouse on a blank area on the slide to produce a button The Action Settings dialog box is displayed, giving you the opportunity to specify what the button is to be linked to. Notice that you need to choose the relevant tab depending on whether you want to use Mouse Click or Mouse Over to initiate the hyperlink. Ensure that the Mouse Click tab is on top Click the ‘Hyperlink to:’ radio button Click on the down arrow at the side of the box PowerPoint 2010 (051012) 60 ©De Montfort University, IT Training 2012 Choose Last Slide Click OK When the button is selected, resize handles are shown on each edge and corner. Resize handles Drag one of the corner resize handles to make the button smaller Drag the button to the bottom right corner of the slide Use the Slide Show tab to run the slide show from the beginning When Slide 2 is displayed, click the action button to check that it works Stop the presentation PowerPoint 2010 (051012) 61 ©De Montfort University, IT Training 2012 HYPERLINKS As an alternative to Action Buttons you can include hyperlinks to move quickly to other slides, the Internet, or to a document stored on your computer. You are going to create a hyperlink to the Internet from Slide 7. In Normal view select slide 7 At the bottom of the bulleted list type the text Link to Earth Trust to use as a prompt for a hyperlink Select the text that you have just typed (Link to Earth Trust) Click the Hyperlink button in the Links group on the Insert tab The Insert Hyperlink dialog box is displayed. In the Address window type http://earthtrust.org The Insert Hyperlink dialog box also enables you to create a screen tip to act as a prompt if you so wish. Click OK Run the slide show starting at slide 7 and test the hyperlink Close Internet Explorer Stop the slide show PowerPoint 2010 (051012) 62 ©De Montfort University, IT Training 2012 ADDING A MOVIE TO A SLIDE Depending on the subject matter of your presentation, adding a short video clip could enhance its impact. Ensure that you are in Normal view Choose slide 4 Select the Insert tab Click the down arrow on the Video command in the Media group Select Video from File Choose RedKangaroo from the PowerPoint2010 folder on drive C Click Insert The following is inserted on the slide. Rearrange the picture and the movie on the slide so that they are side by side Observe that two Video Tools tabs are displayed on the ribbon. Tools on these tabs enable you to configure how the video is displayed on the screen and whether or not it starts automatically. Click Video Shape from the Video Styles group of commands on the Format Video Tools tab PowerPoint 2010 (051012) 63 ©De Montfort University, IT Training 2012 Select the Rounded Rectangle shape Rounded Rectangle Select the Playback tab By default the video is configured to start when it is clicked with the mouse. To start the video automatically: Click the Start down arrow in the Video Options group and select Automatically Also in the Video Options group, click the Hide While Not Playing check box Save the presentation View the slide using the Slide Show button Press Esc to stop the show Insert the video named siberiantigers into slide 5 Start the video Automatically as the slide appears on the screen Rearrange the video and the image so that they fit on to the slide Configure the video to Play Full Screen Run the presentation to check that the video works The video is longer than we want it to be so you will use the video editing feature in PowerPoint to trim it down. Ensure that the video on slide 5 is selected Select Video Trim from the Editing group on the Playback tab The Trim Video window is displayed. PowerPoint 2010 (051012) 64 ©De Montfort University, IT Training 2012 The top right corner of the window shows the current duration to be 53.640 seconds. You will reduce the length of the video to less than 15 seconds. Click the Play button to start the video Play As the video plays, a bar moves across the timeline showing how far into the video you are currently. This enables you to note the time where you want the video to start playing and where you want it to end. The Pause button enables you to stop the video at any time. PowerPoint 2010 (051012) 65 ©De Montfort University, IT Training 2012 I have chosen to start the video at 00:06.785 and end at 00:17.026 Click into the Start Time value and change it to 00:06.785 Click into the End Time value and change it to 00:17.026 Click the Play button This previews the section of the video that you have chosen to play and the duration is now shown as just over 10 seconds. Click OK to accept the edit and close the Trim Video window This process does not delete any part of the file. It just enables you to choose to play only a portion of the video. Save the presentation Run the presentation to check that the video plays as you intended Stop the presentation at the end of the video PowerPoint 2010 (051012) 66 ©De Montfort University, IT Training 2012 SMARTART SmartArt enables you to display your text in a graphical and more interesting manner. CONVERTING EXISTING TEXT TO SMARTART Select slide 2 Delete the Action Button With the insertion point in the bulleted list: Click the right mouse button From the shortcut menu choose Convert to SmartArt A list of options is displayed. Click More SmartArt Graphics at the bottom of the window PowerPoint 2010 (051012) 67 ©De Montfort University, IT Training 2012 Scroll down to see all the available options Select List from the categories on the left Scroll down and choose the Vertical Block List in the second column Click OK The bulleted list is converted to the chosen smart art. A text pane is also displayed, providing a convenient method for editing the text on the smart art graphic. PowerPoint 2010 (051012) 68 ©De Montfort University, IT Training 2012 text pane Text can be entered or edited using the text pane or directly in the graphic. Close the text pane by clicking the cross at the top right The text pane can be opened by clicking the control at the centre of the left border. Alternatively, click the Text Pane button on the ribbon. Once the text pane is open, click away from the bulleted list and it is hidden Click on the list and the text pane is displayed again When you select the SmartArt graphic, two SmartArt Tools contextual tabs are displayed. To add another bullet point to one of the main points: Click in the text pane at the end of ‘In immediate danger of extinction’ PowerPoint 2010 (051012) 69 ©De Montfort University, IT Training 2012 Press Enter to create a new bullet point at the same level Type Exceptionally low numbers The new bullet point is added to the SmartArt graphic but may need to be formatted to match the formatting on the other points. You may however want this new point to be displayed as a new main point. Ensure that the bullet point you just typed is still selected in the text pane Select the Design SmartArt Tools tab Click the Promote button in the Create Graphic group The text is now displayed as a new main point. PowerPoint 2010 (051012) 70 ©De Montfort University, IT Training 2012 To remove the new point that you added: In the Text Pane, select the text Exceptionally low numbers Press the Delete key Choosing a different style for your SmartArt: Ensure the Design tab is still selected More Click the More button in the SmartArt Styles group A gallery of alternative styles is displayed. Hover the mouse pointer over the different styles to preview the effects Select one of the alternative styles Click the Change Colors button in the SmartArt Styles group Hover the mouse pointer over some of the options to preview the effect Select one of the options Save the presentation PowerPoint 2010 (051012) 71 ©De Montfort University, IT Training 2012 ADDING ANIMATION TO SMARTART You can add a little extra interest to the SmartArt by including an animation that will ‘build’ the chart on the slide. Click anywhere on the SmartArt graphic or its Text Pane Select the Animations tab Select Fade from the list of Entrance effects By default this animates the whole graphic as one object but this can be changed using the Effect Options. Click the Effect Options button in the Animation group Hover the mouse pointer over each option in the Sequence list to preview the effect Select Level One by One Use the Slide Show button to preview the slide, clicking the left mouse button to advance the points PowerPoint 2010 (051012) 72 ©De Montfort University, IT Training 2012 INSERTING SMARTART INTO A NEW SLIDE Add a new slide, with the Title and Content layout, to the end of the presentation Click SmartArt in the Illustrations group on the Insert tab Alternatively: ● Click the Insert SmartArt Graphic button on the slide Insert SmartArt Graphic Select the Process category Scroll down the list and choose Funnel Click OK PowerPoint 2010 (051012) 73 ©De Montfort University, IT Training 2012 Enter the following list of points in the Text Pane (use the down arrow to go to the next bullet): o Habitat destruction o Over exploitation o Pollution o Extinction Try one or two of the other SmartArt Styles to see the effect on the graphic Use the Change Colors button to change the colour scheme of the graphic Save the presentation PowerPoint 2010 (051012) 74 ©De Montfort University, IT Training 2012 TABLES A table is a useful tool that can be used for presenting information in either a grid format or, if the lines are hidden, as a place-holder for text and pictures to achieve a more complex layout on the slide. Add a new slide at the end of the presentation Add the heading The size of big cats Select the Insert tab Click Table Selecting a square on the grid will insert the corresponding table on to the slide. However, many prefer to use the Insert Table dialog box. Select Insert Table The Insert Table dialog box is displayed. PowerPoint 2010 (051012) 75 ©De Montfort University, IT Training 2012 Alternatively: ● Click the Insert Table button on the slide Insert Table Select 3 columns and 7 rows Click OK A table is displayed on the slide. The table has been formatted to match the other slides. PowerPoint 2010 (051012) 76 ©De Montfort University, IT Training 2012 Type the following into the table: Type of cat Weight (lbs) Approximate length (feet) Siberian Tiger Up to 700 10+ Indonesian or Bali Tiger Up to 200 Up to 7 Cougar 75-250 5-9 Leopard 250-400 Up to 7 Ocelot 17-24 4 - 5.5 Lion Up to 550 Up to 8 (Taken from: http://www.bigcatrescue.org/catfacts/catfacts.htm) Centre the column headings Ensure that all the text is displayed on a single line in each cell by changing the column widths if necessary Save the presentation PowerPoint 2010 (051012) 77 ©De Montfort University, IT Training 2012 When the table is selected two Table Tools contextual tabs are displayed. Click the Design Table Tools tab Move the mouse pointer over the Table Styles to see a preview on the slide as the format of your table automatically changes Use the More button to the right of the Table Styles group to display the full gallery of styles Select a different style Try using the tick boxes in the Table Style Options group to see the difference they make to the design Click the Layout Table Tools tab to see further tools and options that you could use to format the table PowerPoint 2010 (051012) 78 ©De Montfort University, IT Training 2012 CHARTS Insert a new slide at the end of the presentation Click Chart in the Illustrations group on the Insert tab The Insert Chart dialog box is displayed. Alternatively: ● Click the Insert Chart option in the centre of the slide Insert Chart The types of chart are listed in the left hand column. Select Bar Click OK to select the default Bar Chart offered PowerPoint 2010 (051012) 79 ©De Montfort University, IT Training 2012 You can see that the screen has split into two panes showing a default chart on the left and related data in an Excel worksheet on the right. Enter the following data into cells A1:B7 Lion Ocelot Leopard Cougar Indonesian tiger Siberian tiger Weight (lbs) 550 24 400 250 200 700 To specify that only the first two columns are to be used for the chart: Drag the bottom right corner of the blue box so that only A1:B7 is enclosed PowerPoint 2010 (051012) 80 ©De Montfort University, IT Training 2012 Notice that the chart in the left window has changed to match the data Close the Excel window Add the slide title Maximum weight of some cats Legend The Legend is not needed on this chart: Select the Legend and press Delete The Legend is deleted and the chart expands to fill the space. The three Chart Tools tabs contain commands and tools to help you to edit, configure and format the chart. For example, to edit the chart data: Select the Design Chart Tools tab (this will only be displayed when the chart is selected) Select Edit Data in the Data group The screen splits as before and displays the Excel table used to create the chart. This enables you to make any necessary changes. Close the Excel window PowerPoint 2010 (051012) 81 ©De Montfort University, IT Training 2012 ADDING ANIMATION TO A CHART Like other types of content, charts can also be animated. Adding animation to the chart gives you time to speak about each part before displaying the next. Select the chart Select the Animations tab Click Fade in the Animations gallery to set that effect on the chart By default, the whole chart will be animated as one object. Click the Effect Options button in the Animation group Choose By Category from the Sequence options Click the Slide Show button to see the effect Click the left mouse button to display each bar on the chart This effect is particularly good if you have a chart that displays a comparison between several items. Add a new slide at the end of the presentation Create a Clustered Cylinder column chart (accept the default example data) PowerPoint 2010 (051012) 82 ©De Montfort University, IT Training 2012 Add an animation to the chart Use the Effect Options button to set the effect to animate By Series Click the Slide Show button Press the left mouse button to display each series in turn Delete the last slide Save the presentation PowerPoint 2010 (051012) 83 ©De Montfort University, IT Training 2012 HEADERS AND FOOTERS Footers can be included on slides, and both Headers and footers can be included on notes pages and handouts. HEADERS AND FOOTERS ON NOTES AND HANDOUTS Select the Insert tab Click the Header & Footer option in the Text group The Header and Footer dialog box is displayed. There are two tabs in the dialog box, one for Slides and one for Notes and Handouts. Ensure that the Notes and Handouts tab is selected Using this dialog box you can enter text to be displayed in the header and/or footer, and choose whether or not to insert a date and page number. Date and Time: A fixed date can be inserted in the header, or the date can be automatically updated to always display the current date when the page is displayed. Update the date automatically When you use this option, the date is updated each time you load the file on your computer. Therefore if handouts are not printed on the day of the presentation they will display a different date. PowerPoint 2010 (051012) 84 ©De Montfort University, IT Training 2012 Fixed date If you want the date on the notes pages and handouts to represent a specific day, use this option. Page numbers: If you want a page number on your handouts or speaker’s notes (sometimes handy for you or the audience to be able to follow/organise), ensure that the Page number check box is ticked. Header and Footer text: To insert your own text in either the header or footer, select the appropriate check box and enter the text in the corresponding text box. Click Header and enter your name Click Footer and type Endangered Species Click Date and Time and select Update automatically Ensure that the date is in the correct format by choosing English (U.K.) as the language Click Apply to All PowerPoint 2010 (051012) 85 ©De Montfort University, IT Training 2012 To see the header and footer: Select slide 1 Select the View tab Click Notes Page Return to the editing screen by clicking the Normal button Save the presentation PowerPoint 2010 (051012) 86 ©De Montfort University, IT Training 2012 FOOTERS ON SLIDES Choose the Insert tab Click the Header & Footer option in the Text group Ensure the Slide tab is selected in the dialog box Select Slide number Select Footer (add the text Endangered Species) Choose the option Don’t show on title slide Click Apply to All Run the slideshow to check that the information has been added to the slides PowerPoint 2010 (051012) 87 ©De Montfort University, IT Training 2012 SPELLING CHECKER When you create a presentation it is wise to check the spelling before showing it. Although the spelling checker provided with PowerPoint is a useful tool, remember that it is not foolproof. Occasionally it will pick up words that are not necessarily misspelled, and it will not flag up words which may have been mistyped, for example “contact” instead of “contract”. Click the Review tab Click Spelling in the Proofing group PowerPoint 2010 (051012) 88 ©De Montfort University, IT Training 2012 PRINTING You can print your presentation in several formats. In this section you will look at printing handouts and notes pages. PAGE SETUP Select the Design tab Choose Page Setup in the Page Setup group The Page Setup dialog box is displayed. As you are going to print handouts or notes pages, use the down arrow on the Slides sized for window and choose A4 paper Remember to change this back to On-screen Show (4:3) before running your presentation; otherwise you are likely to have a black bar at the top and bottom of the screen. If you are creating transparencies for an overhead projector choose Overhead from the drop list. Remember to load transparencies into the printer. Ensure that you use transparencies recommended for use in laser printers. Check the user’s manual for your printer to make certain that you are using suitable media. Click OK PowerPoint 2010 (051012) 89 ©De Montfort University, IT Training 2012 PRINTING NOTES PAGES Select the File tab Click Print Click on Full Page Slides in the Settings section The following options are displayed. PowerPoint 2010 (051012) 90 ©De Montfort University, IT Training 2012 In the Print Layout section, select Notes Pages A preview of the notes page for the selected slide is displayed on the right. To print the notes page for the current slide only: Select Print All Slides in the Settings section Choose Print Current Slide Click Print The notes page is printed. PowerPoint 2010 (051012) 91 ©De Montfort University, IT Training 2012 PRINTING HANDOUTS Select the File tab Click Print Click Full Page Slides in the Settings section There are a number of options in the Handouts section. The 3 Slides option is the only option that provides a lined notes area on the right of the page for your audience to make their own notes. Choose 6 Slides Horizontal A preview of one of the pages is displayed on the right of the screen. PowerPoint 2010 (051012) 92 ©De Montfort University, IT Training 2012 Click Print Save the presentation To close the presentation: Select the File tab Click Close PowerPoint 2010 (051012) 93 ©De Montfort University, IT Training 2012 THE SLIDE MASTER It is important that your presentation makes a good impression. Ideally you should follow one theme or style throughout the presentation. PowerPoint offers you various ways to control the appearance of your slides: templates, themes and masters. There are three types of master – Slide Master, Handout Master, and Notes Master, but we will investigate only the Slide Master. To create a new presentation: Select the File tab Select New Ensure that Blank Presentation is selected Click Create To view the Slide Master: Select the View tab Click the Slide Master option in the Master Views group The Slide Master view is displayed. Slide Master Subordinate layout masters PowerPoint 2010 (051012) Placeholders 94 ©De Montfort University, IT Training 2012 The slide at the top of the list is the Slide Master (numbered 1). The slides listed below it are subordinate masters, one for each style of layout. The Slide Master includes five preset placeholders: Title, Text, Date, Footer, and Slide Number. Title Text Date Footer Slide Number When you open a new presentation, you see the title and text placeholders immediately, but the date, footer and slide numbers are seen only when you choose to add text to them using the Header and Footer option. Any change you make to the Master Slide will be reflected on all the slides in the presentation. You can change the appearance of the Master Slide by formatting or moving a placeholder, even removing it altogether if you like. You can also add images, for example a logo, to the Master Slide in order for it to appear on all slides. When you apply a theme to your presentation, the Master Slide is automatically updated to include it and this is cascaded down to the other slide layouts. You can make changes to the theme in the Slide Master and again the other slide layouts will be updated. Click the Close Master View button to the right of the ribbon Select the Design tab Apply a Theme to the presentation PowerPoint 2010 (051012) 95 ©De Montfort University, IT Training 2012 View the Slide Master again to see that all of the slide layouts have updated to show the theme With the Slide Master selected: Click Themes in the Edit Theme group Choose a different theme The Slide Master and all the subordinate layout masters change to reflect the new theme. USING TWO THEMES IN A PRESENTATION Depending on your presentation, you may want to use more than one theme for the slides. Up to now each time you have made a change to the theme all of the slides have changed. If you want to use a second theme for your slides, you need to preserve the current Slide Master, so that PowerPoint will create a second one. With the Slide Master selected: Click Preserve in the Edit Master group on the Slide Master tab A drawing pin is inserted below the Slide Master number indicating that it is preserved. Preserved pin Now with the Slide Master selected: Click Themes in the Edit Themes group Choose a different theme This time a second Slide Master is created with its various sub-masters and the new theme is applied to these. You now have two different themes to choose from for each of the slides in your presentation. PowerPoint 2010 (051012) 96 ©De Montfort University, IT Training 2012 Close the Master View Select the Home tab Insert a new slide To select the other theme to apply to the slide: Choose Layout in the Slides group The slide layouts for each of the themes that you have chosen are displayed. Click the theme and slide layout that you want to use for the selected slide PowerPoint 2010 (051012) 97 ©De Montfort University, IT Training 2012 CREATING A CUSTOM LAYOUT You can edit existing slide layouts or create a new layout of your own design so that it is available each time you create a presentation. Display the Slide Master You are going to add your layout at the end of those displayed so select the last slide in the list Click the Insert Layout option in the Edit Master group A new slide is added to the list ready for you to select the components that you want to include in the new layout Click the bottom half of the Insert Placeholder button in the Master Layout group PowerPoint 2010 (051012) 98 ©De Montfort University, IT Training 2012 Select the SmartArt placeholder and place it on the bottom right of the slide by using a dragging method to draw a box in that position Add a Picture placeholder above the SmartArt placeholder and below the Title placeholder on the right Add a Text placeholder below the Title placeholder on the left Your new layout master should look similar to the one below. Click the Rename option in the Edit Master group PowerPoint 2010 (051012) 99 ©De Montfort University, IT Training 2012 By default the new layout will be called Custom Layout so you need to change the name to something more meaningful. Insert a suitable name for the new layout Click Rename to accept the name and close the dialog box Close the Master View Check that the layout is ready for use: Click the Layout option in the Slides group Scroll down if necessary to see your slide layout Select the Picture, SmartArt, and Text layout The redesigned and new Slide Masters and Layout masters will only be available in the current presentation. If you would like to use them in future presentations, you need to save them as part of a template. PowerPoint 2010 (051012) 100 ©De Montfort University, IT Training 2012 TEMPLATES SAVING A PRESENTATION AS A TEMPLATE A template may contain basic slides to start your new presentation, custom layouts, colour schemes or simply an empty presentation with customised Slide Masters. If you would like to preserve the new designs you can save the current presentation as a template. Select the File tab Choose Save As The Save As dialog box is displayed. In the Save as type: window choose PowerPoint Template PowerPoint 2010 (051012) 101 ©De Montfort University, IT Training 2012 The Templates folder is automatically displayed Name the template My Two Slide Master Template Click Save Close the presentation PowerPoint 2010 (051012) 102 ©De Montfort University, IT Training 2012 USING YOUR SAVED TEMPLATE To use the template that you have just saved: Select the File tab Choose New Select My templates The following window opens showing the template(s) that you saved. Select the name of the template that you want to use Click OK Check the list of Layouts to see that the new one you created is available Close the presentation without saving PowerPoint 2010 (051012) 103 ©De Montfort University, IT Training 2012 USING OTHER AVAILABLE TEMPLATES PowerPoint comes with a few built-in templates and many others are available through the Internet. For example, if you want to create a presentation to support a training session you may be able to find a suitable template that you can use. Select the File tab Choose New Type training in the Search box and press Enter Available templates that relate to your search keyword are displayed. Any of these can be downloaded and adapted to your needs. PowerPoint 2010 (051012) 104 ©De Montfort University, IT Training 2012 Select the Training presentation: General template Click Download The template is downloaded and opened as a new presentation. This template contains fourteen slides. On each slide you will find suggestions of what can usefully be included on it. If you find a template that you like, this can prove to be a quick way of creating your presentation. Close the presentation without saving PowerPoint 2010 (051012) 105 ©De Montfort University, IT Training 2012 EXERCISE You are representing the Management Committee of the 2012 Olympics in London. You have information on: the technology that will be used during the Olympics the Olympic Park transport There are pictures available in the PowerPoint 2007 folder for each of the subjects. You have to prepare a short presentation to ‘sell’ the project to a group of journalists who will be reporting on the progress of the venture. The presentation should contain a minimum of five slides and should be fairly dynamic. Choose the information you would like to use from the items below. Olympics 2012 – London Technology Technology will play an important role in both the build up to 2012 and the Games themselves. We will be working closely with our partners to ensure we use existing and emerging technologies in innovative and powerful ways. Operational technology When it comes to staging the Games, technology will play a bigger part than ever before. It will be central to the ways we capture scores, timings and performance in the sports competitions. Inside the venues, technology will feed back information to officials, spectators, venue staff and volunteers. And it will help with all levels of decision making during the Games, from separating a photo finish to managing the flow of people to and from the Park. Business technology Technology is not just relevant to the delivery of the Games. PowerPoint 2010 (051012) 106 ©De Montfort University, IT Training 2012 It will be instrumental in our planning, procurement and other business activities in the run up to 2012. From the way we share information with multiple stakeholders to modelling data such as pedestrian flows in the Olympic Park, technology will help us run a world-class programme. Communications technology Technology will transform the way people engage with the Games. It is not just about receiving information – it will also be about reacting to it. Digital channels such as the web and mobile phones will be the number one way for everyone to access, share and participate in the 2012 Games. In the run-up to the Games, we will be offering people ways to get closer to the action, interacting with our data and sharing their own. Come 2012, there will be new ways to interact with events, whether it is through spectator services in the Olympic Park or interactive technologies in UK towns and cities. Our plans We will be using mature and advanced technologies in the Games. We are looking at existing, proven systems already in use. But this is also an opportunity to push boundaries, and work with leading suppliers and developers to create new applications. We will be ensuring our technological solutions are reliable – able to perform on the day, in all kinds of places and under extreme conditions. And we will be re-deploying some of the technology solutions used during the Games to the lasting benefit of local communities after 2012. Of course, technology is not an end in itself. Our focus is the Games and the people who will take part, as spectators, volunteers or competitors. But using it imaginatively will help to create a Games excitingly relevant for a 21st-century audience – a ‘Games for a connected world'. Olympic Park The focus of the London 2012 Games will be the Olympic Park in east London, which will house the new sport venues. The Park is located in the Lower Lea Valley - an area of great untapped potential. PowerPoint 2010 (051012) 107 ©De Montfort University, IT Training 2012 After the Games the area will be transformed into the largest urban park created in Europe for more than 150 years. There will be a huge amount of activity up until the Beijing Games in August 2008, to get the site ready for the construction work that will start in earnest in the summer of 2008. Construction hotline You can call the Olympic Delivery Authority's Community Relations team about any questions or concerns you have about construction works in general on 08000 722 110, 24 hours a day, seven days a week. Transport We’re aiming for 100 per cent of spectators to get to the Games by public transport, cycling or on foot. Approximately seven million tickets are available for sale for the London 2012 Olympic Games. Eleven days of competition during the Paralympic Games will bring 1.5 million spectators. Our transport plans for the Games will help transform the Lower Lea Valley into one of the best connected areas in the capital, bringing economic and social benefits that go far beyond 2012, and far beyond sport. (Taken from the www.london2012.com) You may also wish to include the Legacy of hosting the games. PowerPoint 2010 (051012) 108 ©De Montfort University, IT Training 2012 APPENDIX Design considerations for dyslexia and visual impairment 1. Use Arial, Verdana or Comic Sans fonts 2. Use Size 36 font or larger where possible, no smaller than Size 24 3. Don’t type text IN ALL CAPITAL LETTERS AS ITS HARD TO READ 4. Avoid italic and underline, use bold for emphasis 5. Use short bullet points rather than long blocks of text 6. Left align text – don’t justify 7. Use generous line spacing and space between paragraphs 8. Use diagrams, images and pictures rather than words where possible 9. Use pale blue, pale yellow, cream or white backgrounds and dark text 10. Avoid red and green 11. Avoid ‘busy’ backgrounds and don’t use pictures as backgrounds either PowerPoint 2010 (051012) 109 ©De Montfort University, IT Training 2012