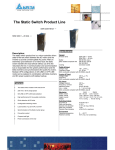
Download User Manual - Topelcom.gr
Transcript
E1 SERIES USER MANUAL Table of Contents 1 Overview ............................................................................................................... 4 2 Safety .................................................................................................................... 5 2.1 Warnings (Please Read!) ................................................................................... 5 2.2 Explanation of Symbols ..................................................................................... 7 3 Installation ............................................................................................................ 8 3.1 Transportation ................................................................................................... 8 3.2 Unpacking......................................................................................................... 8 3.3 Choosing the right location ................................................................................ 9 3.4 Electrical Connections ..................................................................................... 10 3.4.1 Input Feedback Protection ....................................................................... 10 3.4.2 Requirement Cross-Sections of Cable...................................................... 10 3.4.3 Cable Connections .................................................................................. 11 3.4.4 Cable Connections of External Battery Cabinet ........................................ 12 4 Operation Modes ................................................................................................ 14 4.1 Online Operation Modes .................................................................................. 14 4.1.1 Normal Mode .......................................................................................... 14 4.1.2 Battery Mode .......................................................................................... 14 4.1.3 Bypass Mode .......................................................................................... 15 4.2 Economic Operation Mode (ECO-MOD) ........................................................... 15 4.3 System Off Mode ............................................................................................ 15 4.4 Manual Bypass Mode ...................................................................................... 16 5 User Control and Communication Interfaces ..................................................... 17 5.1 Rear Panel ...................................................................................................... 17 6 Front Panel and Menu Structure ........................................................................ 18 6.1 Front Panel ..................................................................................................... 18 6.1.1 Data Monitoring Window.......................................................................... 20 6.2 Menu Structure................................................................................................ 21 6.2.1 Main Menus ............................................................................................ 22 7 Operating Procedures ........................................................................................ 31 7.1 Switching the UPS on ...................................................................................... 31 7.2 Starting the UPS ............................................................................................. 31 7.2.1 Starting the UPS from Mains.................................................................... 31 7.2.2 Starting the UPS from Battery(Optional) ................................................... 32 7.3 Stopping the UPS............................................................................................ 33 7.4 Switching the UPS off ...................................................................................... 33 7.5 Manual Bypass Operation................................................................................ 33 7.5.1 Switching the UPS Manual Bypass .......................................................... 34 7.5.2 Switching the UPS Back from Manual Bypass Mode ................................ 34 7.6 Economic Operation Mode (ECO-MOD) ........................................................... 35 7.6.1 Activating Economic Operation Mode....................................................... 35 7.6.2 Deactivating Economic Operation Mode................................................... 36 7.7 Emergency Stop Procedure ............................................................................. 36 E1 Series 10-20kVA Rev 1.0.1 Page| 1 E1 SERIES USER MANUAL 7.8 Operation During Mains Fail ............................................................................ 37 7.9 Remote start and stop of the UPS.................................................................... 38 7.10 Testing Batteries ....................................................................................... 39 7.10.1 Manual Test ............................................................................................ 39 7.10.2 Periodical Test ........................................................................................ 40 7.11 Operation on Generator............................................................................. 40 7.12 Operation During an Overload ................................................................... 41 8 Parallel Operation............................................................................................... 43 8.1 Installation ...................................................................................................... 43 8.2 Settings .......................................................................................................... 46 8.3 Starting parallel system ................................................................................... 48 8.4 Stopping parallel system ................................................................................. 49 8.4.1 Stopping any UPS in the system.............................................................. 49 8.4.2 Stopping all the UPSs in the system ........................................................ 50 9 Communication .................................................................................................. 51 9.1 RS–232 and RS–485 communication .............................................................. 51 9.2 Mod-bus communication option ....................................................................... 52 9.3 SNMP communication (Optionel) ..................................................................... 52 9.4 Remote monitoring panel (Optionel)................................................................. 53 9.5 Programmable relay unit ................................................................................. 54 9.6 Custom contacts ............................................................................................. 55 10 Battery Placement and Connection ................................................................... 57 10.1 UPS Cabinet ............................................................................................. 57 10.2 External Battery Cabinet ............................................................................ 58 11 Troubleshooting ................................................................................................. 60 12 Maintenance ....................................................................................................... 61 13 Technical Specification ...................................................................................... 62 E1 Series 10-20kVA Rev 1.0.1 Page| 2 E1 SERIES USER MANUAL Introduction Thank you for choosing our high technology E1 series uninterruptible power supply. Product you purchased was manufactured as per ISO9001 quality assurance system using most advanced technology. In order to get highest efficiency from your product and to ensure a safe use, we recommend that you strictly read and retain this user’s manual for later reference. In addition, do not hesitate to contact your nearest authorized vendor or technical support center for more detailed information and/or assistance. E1 Series 10-20kVA Rev 1.0.1 Page| 3 E1 SERIES USER MANUAL 1 Overview E1 Series Uninterruptible Power Supply (UPS) is a high technology product that was manufactured to provide uninterruptible energy to fields including but not limited to industrial facilities, hospital, schools, banks, business centers, and computer and communication systems. You can use your device, which is equipped with static bypass system, all necessary protection systems and an online structure with all loads safely. Because this device was designed double conversion online system basis, it supplies all connected loads with continuous voltage with stable frequency and stable amplitude. Therefore, no transition period is necessary when electric power is interrupted or recovered. With deployment of a DSP (Digital Signal Processor) based microprocessor in its design, UPS output voltage is accurately controlled, thereby ensuring stable operation of devices that are sensitive to voltage fluctuations. Static bypass unit of the system ensures that the mains voltage is constantly kept at backup. In case of an overload, this system takes over the load uninterruptedly. Once overload is recovered, load is transferred back to inverter. In addition, static bypass unit acts in similar way in cases of UPS failure and prevents power shortage at the system. UPS will supply loads from the battery in cases of mains voltage outage. Loads are supplied from the battery for a backup time that varies depending on the capacity of batteries used. If mains voltage is recovered during the backup time, UPS will return to online mode automatically and continue supplying power to loads. Meanwhile, batteries are charged as well. When UPS is connected to a computer system using any of a several communication options, all functions of the device can be monitored by means of designated software. Connecting to a remote device via modern is possible to transfer information on device related functions and problems. System used in E1 series uninterruptible power supply is shown in the following simple block diagram. Figure–1 UPS block structure E1 Series 10-20kVA Rev 1.0.1 Page| 4 E1 SERIES USER MANUAL 2 Safety This user manual contains all information pertaining to transportation, installation and operation of E1 Series uninterruptible power supplies of 10-20 KVA power range. Be sure to read this user manual thoroughly before operating you UPS system. Heed all warnings given in this user manual. Please apply all instructions in respective order. Please keep user manual thinking that you need it in future. 2.1 Warnings (Please Read!) Life Safety Use the UPS in room with restricted Access. (TS EN 62040-1-2). The UPS has its own energy source. So, even all the switches are thrown off, there will be energy at the output. There is high voltage inside of the UPS. So, the UPS must be open only by qualified service personnel. The UPS must be grounded accordance with the rules. Explosion Hazard: Do not litter batteries in fire. Do not open the plastic cover of the batteries. Electrolyte liquid inside batteries is highly hazardous to skin and eyes. Comply with all applicable regulations for disposal of waste batteries. Safe Transport Be careful when moving the load. Do not carry heavy loads without assistance. Wheeled UPS must be move unhindered and smooth surfaces. Do not use a ramp inclined more than 10° angle. Follow the following recommendations for load weights. An adult human can carry loads up to 18 kg. Two adult human can carry loads up to 32 kg. Three adult human can carry loads up to 55 kg. Use pallet truck and forklift to move loads are heavy than 55 kg. E1 Series 10-20kVA Rev 1.0.1 Page| 5 E1 SERIES USER MANUAL UPS Safety Strictly, do not carry the UPS in horizontal position. UPS must be carried in upright (vertical) position only. The UPS must be protected by a circuit breaker easily accessible in short circuit and overload case. If the environment temperature and relative humidity are out of value specified in the manual, do not operate the UPS. Do not operate the UPS with liquids or excessive moisture environment. Do not allow a liquid or a foreign object to enter into the UPS. Do not block the ventilation grids located on the UPS. Do not leave the UPS exposed to direct sunlight or heat source. If connections of external batteries necessary, make sure only the batteries that are compatible with device are connected and that connection is made by authorized personnel only. Lifetime of the UPS is 10 years. Private Safety Information Electrical connection of the UPS must be made as stated in manual. Check the conformity of the total load and mains with the UPS. The UPS must be stored in place is terms of moisture dry conditions between -10°C and 45°C before installation. The UPS must be operated at least once a month to charge batteries during 24 hours. Storage time is limited due to battery life starts in production date. The UPS is design to run in altitude, operation environment temperature, relative humidity ratio, transport and storage conditions are stated in manual. Special design and protection measures are necessary for abnormal operating conditions. These conditions: - Harmful fumes, abrasive dust - Humidity, vapor, bad air, raw, - Explosive dust and gas mixture, - Over temperature variation, - Bad ventilation, - Be exposure to heat in direct or with radiation from other sources, E1 Series 10-20kVA Rev 1.0.1 Intense electromagnetic field, Harmful level of radioactive, Insect, rabble, fungus, etc. Page| 6 E1 SERIES USER MANUAL Replacing the Batteries and Recycling Replacing the batteries must be done by authorized service staff. Metal accessory as watch, ring are must be taken to prevent personal accidents. Gumshoe and glove must be used. Tools with dielectric handle must be used. Be sure that battery connections did not grounded by mistake. Do not put tool or metal accessory to above batteries. Battery has an electric shock and short circuit shock. Batteries must be replaced with batteries are same capacity and same type, same quantity and same sizes. Do not throw batteries in a fire, there is risk of explosion. Recycle of batteries must be provided. Deliver batteries to any recycling plant with packaging material of batteries. If you face a problem when you perform directions in the manual, contact with call center by using phone number and e-mail address on the rear cover of the manual. 2.2 Explanation of Symbols DANGER! HIGH VOLTAGE CAUTION HEAVY GOODS SAFETY RECYCLING EARTH E1 Series 10-20kVA Rev 1.0.1 Page| 7 E1 SERIES USER MANUAL 3 Installation 3.1 Transportation Protection is provided against problems that can be compared when transport and transfer period. So, the UPS must be carried by packed until the place which it will be installed. Make sure that the UPS is upright position when all transport and transfer period. The UPS must be carried by at least two people. The UPS has wheels that are useable for short distance transport. 3.2 Unpacking If UPS shall be kept at the depot for a prolonged period, do not remove packaging until the installation. Cut the black protection band shown in figure and remove the nylon protective material inside the card box. Remove nylon protective material. Lift the carton upwards to remove. Remove Styrofoam protective materials fit on upper corners of the UPS. Place the UPS on the pallet carefully. Figure–2 Unpacking Once unpacked, examine the UPS carefully. UPS may have been damaged during the transportation. Check to ensure that all standard (user manual, communication cable, parallel cable and warranty certificate) and optional products ordered were shipped with the device without omissions. Do not forget to throw packing material to the recycle bin. E1 Series 10-20kVA Rev 1.0.1 Page| 8 E1 SERIES USER MANUAL 3.3 Choosing the right location The UPS must be installed in restricted Access location. (Only authorized personal). Uninterruptible power supplies are devices that consist of highly delicate circuits. Therefore, the environment to install and run UPS must be carefully analyzed and chosen. Platform that the UPS is placed must carry the entire weight of the UPS, it must be straight and if it is possible, platform must be covered with plastic. Proposed temperature, humidity and altitude for the UPS are indicated in technical specification (see chapter-14) chapter. The cooling devices provide adequate ventilation must be located to keep installation environment within values indicated. Do not install the UPS on uneven ground or open area. Be sure that ventilation hole on the side covers is not off. Do not install the UPS in the places has a liquid system and fire risk. Do not install the UPS in places that is exposed to sunlight or be affected from heat sources. Keep distances which are required between the UPS and wall and between units (see Figure-3). Do not install the UPS in places that the UPS is exposed to vibration and impacts. Do not install the UPS in the too high humidity places or too low humidity places. Do not run the UPS in dusty and dirty environments. There must not be burning gas as hydrogen, sulphur, sulphuric acid, chloride, ammonium, nitric acid, ozone, hydrochloric acid in operating environment. Figure–3 UPS placement E1 Series 10-20kVA Rev 1.0.1 Page| 9 E1 SERIES USER MANUAL The UPS must be installed according to standards below: TS HD 384.4.42 S1: Electric Wiring in Buildings chapter 4: Protection for S group 42: Protection against Thermal Effect. TS HD 384.4.482.S1: Electric Wiring in Buildings chapter 4: Safety ProtectionGroup 48: Choosing of Protective Measures Which is Depend on External Effects-Section 482: Protection against Fire at the Places Where There Are Special Risk or Danger. 3.4 Electrical Connections Three phases and neutral (3P+N) must be connected to input of the UPS to run the UPS. 3.4.1 Input Feedback Protection This UPS includes no internal circuit for protection against feedback currents. Therefore, it is essential that users or those who installed the UPS put warning labels on all circuit interrupt switches deployed on the line where uninterruptible power supply is used. Warning labels should remind that a UPS device is operating on this line to technical personnel to service these circuits. Warning labels should be as follows. BE SURE TO ISOLATE THE UPS PRIOR TO SERVICING THIS CIRCUIT 3.4.2 Requirement Cross-Sections of Cable Requirement cross-sections of cables to be used are given in the following table. Be sure to adhere to following cable cross-section specifications for a safe operation. Cable Cross-Section (mm²) Input Output Internal Battery External Battery Manual Bypass Earth 10KVA 4x4 4x4 3x6 3x6 4x4 1x4 15KVA 4x4 4x4 3x6 3x6 4x4 1x4 20KVA 4x6 4x6 3x6 3x6 4x6 1x6 Circuit Breaker (A) 10KVA C 3x25 C 3x25 C 3x32 C 3x32 C 4x25 15KVA C 3x40 C 3x40 C 3x50 C 3x50 C 4x32 20KVA C 3x50 C 3x50 C 3x63 C 3x63 C 4x50 Figure–1 Cable cross-section E1 Series 10-20kVA Rev 1.0.1 Page| 10 E1 SERIES USER MANUAL 3.4.3 Cable Connections Rear view and connection terminals are shown in figure below. Explanation of connection terminals are given in table-2. Figure–4 Rear view and connection terminals of the UPS Be sure that all circuit breakers at the power circuit breaker unit are off. No. 1 2 3 Connection Terminals Battery (External Battery Cabinet) + N - (+) pole Midpoint (-) pole R S T N1 E1 R phase S phase T phase Neutral Earth U V W N2 E2 U phase V phase W phase Neutral Earth INPUT OUTPUT Figure-2 Connection terminals of the UPS Firstly, EARTH (E1 and E2) must be connected to connection terminal of the UPS. E1 Series 10-20kVA Rev 1.0.1 Page| 11 E1 SERIES USER MANUAL Connect earth cable to terminal is named ‘EARTH’ (E1 and E2). Make sure that phase sequence when connect input cables. If phase sequence is failure, the UPS will not run. Connect input cables to input terminals (R), (S), (T). Connect output cables to output terminals (U), (V), (W) and (N2) in sequence. If external battery cabinet is not used, do not make any connection to battery terminals. 3.4.4 Cable Connections of External Battery Cabinet When a backup time that is longer than backup time normally provided by the internal battery group is necessary, batteries designated by the manufacturer may be connected externally. In that case, follow the steps below to connect batteries located inside external tray(s) to device. The information is given about external battery cabinets of 7Ah, 9Ah, 12Ah batteries in this chapter. Please, contact with producing company to use high capacity battery. Capacity of external batteries must be same with capacity of internal batteries. Be sure that power circuit breaker of the external battery cabinet is off and there is not energy at the connection terminals. Be sure that power circuit breaker of the UPS is off and there is not energy at the connection terminals. Connect earth cable before all connections. E1 Series 10-20kVA Rev 1.0.1 Page| 12 E1 SERIES USER MANUAL Figure-5 External battery cabinet and the UPS connections. Make a connection from ‘+’ terminal of external battery cabinet to ‘+’ terminal of the UPS and from ‘N’ terminal of external battery cabinet to ‘N’ terminal of the UPS and from ‘-’ terminal of external battery cabinet to ‘-’ terminal of the UPS (see figure-5). Be sure that polarity of battery cables when connect battery cables. If there is polarity failure, the UPS will be damaged. 1. If a distance between the UPS and external battery cabinet is over one meter, span battery cables in wrapped around each other. 2. A distance between the UPS and external battery cabinet must not be more than 3 meter. Contact with producing company for long distance. 3. Placement and connections for external and internal batteries is given in chapter-11. Please read related chapter before place batteries. E1 Series 10-20kVA Rev 1.0.1 Page| 13 E1 SERIES USER MANUAL 4 Operation Modes 4.1 Online Operation Modes 4.1.1 Normal Mode E1 Series UPS devices supply all connected loads with continuous voltage with stable frequency and stable amplitude during online operation. Rectifier and inverter units run continuously. Load is supplied with a stable sinusoidal voltage generated by the inverter. Inverter and bypass voltages are synchronized. So, uninterruptable load transfer can be done in the UPS. Batteries are constantly kept at a buffer charge voltage. Mimic diagram displayed on the LCD screen is as shown in figure-6 below. During this operation mode, LED bar is constantly lit in green. Figure–6 Normal mode UPS will switch back from this operation mode when any of the following occurs: Mains voltage or mains frequency is out of limits Overheat or overload Battery test procedure A failure 4.1.2 Battery Mode Rectifier unit does not run, inverter unit runs. Inverter unit is supplied from the battery. Load is supplied a stable sinusoidal voltage generated by the inverter. Batteries are in discharge position. Mimic diagram is as shown in the figure7. In this operation mode, LED bar flashes green. Figure–7 Battery Mode When any of the following occurs, UPS will switch to this operation mode. Mains voltage or mains frequency is out of limits Mains phase sequence fault Battery test procedure E1 Series 10-20kVA Rev 1.0.1 Page| 14 E1 SERIES USER MANUAL 4.1.3 Bypass Mode Inverter and rectifier units do not run. Load is supplied by bypass source over static bypass unit. Mimic diagram is as shown in the figure-8. In this operation mode, LED bar is constantly lit in red. Figure–8 Bypass mode When any of the following occurs, UPS will switch to this operation mode. As soon as UPS is turned on Cases of overheat shutdown, overload shutdown or over current inverter Stopping the UPS by remote bypass switch Any failures in rectifier or inverter stages 4.2 Economic Operation Mode (ECO-MOD) Load is fed from bypass source instead of energy is produced by the UPS in this mode. Rectifier and inverter units run in this mode. The Voltage, frequency and waveform of bypass source are continuously monitored. Inverter voltage is kept ready as synchronous with bypass source. Mimic diagram is as shown in the figure-9. In this operation mode, LED bar is constantly lit in red. Load is transferred to the inverter unit automatically when voltage or frequency of bypass source is out of limit. Load is transferred to the bypass automatically when voltage or frequency of bypass source returns to normal limits. Figure- 9 Economic operation mode Batteries are kept in charge in this mode. Rectifier unit is stopped, inverter unit start to feed from batteries and batteries start to discharge when mains voltage is out of limit. If mains voltages return to normal limits, rectifier will step in and batteries start to charge. 4.3 System Off Mode Rectifier, inverter and static bypass units do not run. In this operation mode, LED bar will be fully off. Mimic diagram is as shown in the figure-10. E1 Series 10-20kVA Rev 1.0.1 Page| 15 E1 SERIES USER MANUAL Figure- 10 System off mode UPS will switch to this operation mode if any of the following occurs. Stopping the UPS by ‘EPO’ switch Stopping the UPS through a computer (shutdown). Bypass voltage and frequency is out of limits during bypass operation mode Static bypass switch (SCR) malfunction during bypass operation mode Shutdown due to overheat or overload during stop mode 4.4 Manual Bypass Mode Load is fed from mains in this mode. Load will be transferred to mains without any problem when steps in operating procedure are carried out. The UPS can be turned off due to load feed from mains. This operation mode is used for maintenance. Maintenance and repair of the UPS can be done by authorized personnel without cut the power. E1 Series 10-20kVA Rev 1.0.1 Page| 16 E1 SERIES USER MANUAL 5 User Control and Communication Interfaces 5.1 Rear Panel Placement of control and communication interfaces at the rear panel is explained in this chapter (see Figure-11 and Table-3). No. Part 1 Dry Contacts Socket (see Chapter-10 Communication) 2 SNMP (see Chapter-10 Communication) 3 4 Figure-11 Rear panel view E1 Series 10-20kVA Rev 1.0.1 RS232 Socket (see chapter-10 Communication) RS485 Socket (see Chapter-10 Communication) 5 Remote Monitoring Panel Socket (see Chapter-10 Communication) 6 Custom Contacts Socket (see Chapter10 Communication) 7 External Heat Sensor Input 8 Parallel Operation Card Sockets (Optional) 9 Fans 10 Manual Bypass Fuse Cover 11 Manual Bypass Fuse 12 Internal Battery Fuse 13 Input Fuse 14 Output Fuse 15 Connection Cover Table-3 Rear panel Page| 17 E1 SERIES USER MANUAL 6 Front Panel and Menu Structure 6.1 Front Panel Figure-12 Front panel Keypad Keypad is used to switch on or off the UPS, to browse through menu options, to monitor UPS data and to change as necessary (see Figure-12 and Table4). No. BUTTON >3 sec. (Press longer than 3 second) Turn on Turn off 1 ON/OFF 2 ESC - 3 ENTER - 4 UP ARROW - 5 DOWN ARROW - <3 sec. (Press less than 3 second) In normal mode: cancel execution/task In bypass mode: confirm execution/task Turning on/off warning sound Turning back mimic diagram Exit from selected parameter Exit from sub-menu Entry to main menu from intermediate menu Entry to intermediate menu from main menu Entry to sub-menu from intermediate menu Item selection Value saving Increase value Move UP in sub menu Move UP in intermediate menu Move UP in main menu Decrease value Move DOWN in sub menu Move DOWN in intermediate menu Move DOWN in main menu Table-4 Front Panel Keypad E1 Series 10-20kVA Rev 1.0.1 Page| 18 E1 SERIES USER MANUAL 6. LED Bar LED Bar indicates the current operation mode of the UPS in different colors (see Table-5) Green Red Constantly Lit Flashing Constantly Lit Flashing Off Normal operation mode Battery operation mode Bypass operation mode Economic operation mode (Eco-mod) System off Table-5 LED bar situations 7. LCD Screen This screen is used for monitoring purposes (see Figure-13). LCD screen displays input, output and battery data, UPS’s current operation mode, warning and failure information, system date and time, and UPS’s internal temperature. There are two windows in LCD screen. First window include mimic diagram and alarm information section. Data and status information about the UPS is monitored and make changes to parameters and settings in the second window. Figure–13 Mimic diagram window Mimic diagram This is a graphical diagram. Diagram features symbols denoting input, output, battery, rectifier and inverter units and paths that indicate the current operating mode of the UPS. Moreover, there is a bar that indicates battery charge level in battery indicator and another bar that indicates load percentage. This bar graph is filled or emptied depending on battery and load percentages. This way, user will be able to tell the current condition of the UPS at a glance. Alarm information section This is the lower portion of mimic diagram window and consists of two lines. This section shows active alarm and failure information of the UPS. Alarm information is E1 Series 10-20kVA Rev 1.0.1 Page| 19 E1 SERIES USER MANUAL displayed in this section for as long as alarm condition continues. If there are multiple alarms, these are displayed in this section alternately (see Figure-14). Figure–14 Alarm information window (alarm status) Whenever there is no alarm or failure, certain important information such as system date and time, device internal temperature etc. is displayed in this section (see Figure-15). Figure–15 Alarm information window (without any alarm condition) 6.1.1 Data Monitoring Window You can monitor data and status information about the UPS and make changes to parameters and settings using this menu structure. Figure–16 Data monitoring window E1 Series 10-20kVA Rev 1.0.1 Page| 20 E1 SERIES USER MANUAL 6.2 Menu Structure There is a menu structure in data monitoring window to ensure easy access to UPS data and make changes to settings as necessary (see Figure-17). Menu structure consists of three levels, namely: Main Menu, Intermediate Menu, and Sub Menu. You can browse through menu options and make changes using the keypad (see Table-6). Users are allowed to use displays, UPS status, warnings and custom settings main menus only. Calibration, set values and test settings main menus are for use by theorized technical service personnel only. Şekil–17 Menu structure Follow the steps explained in the table below to browse through different menus. Browsing through main menus E1 Series 10-20kVA Rev 1.0.1 To select main menus, press “ENTER” key while mimic diagram is displayed on LCD screen. Use “Up” or “Down” arrows to select desired main menu. Press “ENTER” key again to enter in to main menu you have chosen. Page| 21 E1 SERIES USER MANUAL Browsing through intermediate menus Once entered in a main menu, use “Up” or “Down” arrows to select desired intermediate menu. Press “ENTER” key to enter in to intermediate menu you have chosen. While in sub menu level, you can use “Up” or “Down” arrows to access different sub menus. Browsing through sub menus Note: You cannot change sub menus by pressing “Up” or “Down” arrows in parameter changing mode. In parameter changing mode these arrows will respectively increase or decrease the parameter value. Table–6 Browsing through menus 6.2.1 Main Menus 6.2.1.1 Displays This is the menu where information pertaining to mains (input), output, battery, bypass, inverter and UPS can be monitored. Use selection keys to browse through menu options. Following information can be monitored using sub menus. Figure–18 Displays main menu Input Mains supply voltages (phase-neutral), mains currents, mains apparent and active powers, power factor, crest factor of load currents and mains frequency information can be monitored. INPUT Voltage --- V --- V Current --- A --- A Apparent Power --- kVA --- kVA Active Power --- kW --- kW Power Factor ----Crest Factor ----Frequency --- Hz Table-7 Input sub menu E1 Series 10-20kVA Rev 1.0.1 --- V --- A --- kVA --- kW ----- Page| 22 E1 SERIES Output USER MANUAL UPS output voltages (phase-neutral), load currents, model, load apparent and active powers, output power factor, crest factor of load currents and output frequency information can be monitored. OUTPUT Voltage --- V --- V Current --- A --- A Percentage --- % --- % Apparent Power --- kVA --- kVA Active Power --- kW --- kW Power Factor ----Crest Factor ----Frequency --- Hz Overload Counter --Table-8 Output sub menu Battery --- V --- A --- % --- kVA --- kW ----- Battery voltage, battery current, remaining battery capacity (percentage), elapsed time (resets at every battery operation), remain battery life can be monitored during discharge. At the same time, manual battery test procedures are also initiated from this menu (See: Testing Batteries). BATTERY Voltage --- V --- V Capacity --- % Test Time xxx Test Result xxx Test Monitoring xxx Table-9 Battery sub menu Rectifier Rectifier DC bus information can be monitored. Rectifier Voltage --- V --- V Table-10 Rectifier sub menu Bypass Bypass voltages (phase-neutral) and frequencies can be monitored. Voltage Frequency Inverter Bypass --- V --- V --- Hz Table-11 Bypass sub menu --- V Voltages generated by UPS inverter unit (phase-neutral) can be monitored. Voltage E1 Series 10-20kVA Rev 1.0.1 Inverter --- V --- V Table-12 Inverter sub menu --- V Page| 23 E1 SERIES Device USER MANUAL Information on device model, serial number, power, program name, program date, total uptime (in days, hours, minutes and seconds respectively) and warranty status of the device can be monitored using this menu. One of the following three is displayed in ‘Warranty Status’ line: “not entered” if device warranty term was not set; or warranty expiry date if warranty term was set; or “warranty expired” if warranty term is expired. Device Model B Series Power --- kVA Serial Number -- / ----Software-1 ---_-----.--.---Software-2 ---_-----.--.---Software-3 ---_-----.--.---Operating Time - --:--:-Table-13 Device sub menu 6.2.1.2 UPS status This is used to acquire information about important components of the UPS. There are intermediate menus under this main menu. Figure–19 UPS status main menu UPS STATUS Input --Bypass --Output --Fan --Heatsink --SCR --IGBT --Table-14 UPS status main menu Input This shows mains status. This will display “normal” if mains voltage is within the designated limits; or “low” if mains voltage is under the designated limit; or “high” if mains voltage is over the designated limit. If mains frequency is out of designated frequency range, “Frequency Out of Limits” warning will be E1 Series 10-20kVA Rev 1.0.1 Page| 24 E1 SERIES USER MANUAL displayed while mains phase sequence faults will be shown as “Phase Sequence Fault” warning. Bypass This indicates bypass status. This will display “normal” if bypass voltage is within the designated limits; or “low” if bypass voltage is under the designated limit; or “high” if bypass voltage is over the designated limit. If bypass frequency is out of designated frequency range, “Frequency Out of Limits” warning will be displayed while mains phase sequence faults will be shown as “Phase Sequence Fault” warning. Static bypass switch unit will not activate if bypass phase sequence fault occurred. Output This indicated the source used to supply the load. This will display “service” is manual bypass is active, or “bypass” if static bypass unit is active, or “normal” if UPS is operating in online mode, or “battery” if the UPS is running on battery mode. If there is no power at the output, “low” warning will be displayed here. Fan This shows the failures of fans connected to cooling units and rotation rpm of cooling fans. Rotation speed of fans connected to cooling unit will be dynamically adjusted by the microprocessor depending on the output load and temperature of cooling unit. This indicates the temperature of cooling block where power semiconductors are mounted for cooling purposes. If the temperature of cooling block exceeds preliminary alarm level of 60 °C an ‘overheat’ warning will be displayed here. In this case, UPS will continue to operate in online mode. If the temperature exceeds auto shutdown level of 80°C, ‘overheat shutdown’ warning will be displayed. In this case, UPS will no longer operate in online mode, and transfer the load to static bypass unit. This indicates the status of thyristors placed on power stage to function as static switch (SCR). This will display “inverter SCR” if any of the inverter thyristors is malfunctioned, it will display “bypass SCR” if any of the bypass thyristors is malfunctioned or “normal” if all thyristors are intact. Heatsink SCR IGBT This indicates the status of IGBTs placed on power stage for switching purposes. This will display the location of the malfunctioned IGBT (rectifier or inverter) if any of IGBTs malfunction. If all IGBTs are intact, “normal” will be displayed here. 6.2.1.3 Warnings Previous warning, failure and information messages are monitored in this menu. 512 different warnings may be displayed along with date and time when warning condition occurred. You can browse through warning messages using selection keys and obtain information about past failures of the UPS. Warnings are displayed in a page structure (see Figure-20). Most recent warning is displayed in number 1. Warning date section consists of day and month. “Down” arrow will take to you next page while “Up” arrow will take you to previous page. E1 Series 10-20kVA Rev 1.0.1 Page| 25 E1 SERIES USER MANUAL Figure–20 Warnings menu List of possible warnings and failures that may be displayed in warnings menu is given in the table-15 below. Warnings Description Power on This indicates that UPS is switched on by turning on the input circuit breaker. Stop Mode This indicates that UPS stopped/is stopped. Rectifier Start This indicates that rectifier unit started. Inverter Start This indicates that inverter unit started. Normal Mode This indicates that UPS is running in online mode. Battery On This indicates that UPS is running on battery power. Battery Low While in battery mode, this indicates that batteries are about to run out. Battery Depleted This indicates that battery voltage has depleted. Battery Test The manual or periodical battery test mode of the UPS. Synchron Control This indicates an ongoing synchronization procedure between inverter and bypass voltages. Eco Mode This indicates that UPS is in economic operation mode. Awaiting Shutdown This indicates that UPS is being shut down via a control program running on computer. Awaiting Restore This indicates that UPS is being restarted via a control program running on computer. Mains Low This indicates that mains voltage is below the designated limit and that UPS has begun operating on battery power. Mains High This indicates that mains voltage is above the designated limit and that UPS has begun operating on battery power. Bypass Low This indicates that bypass voltage is below the designated limit. Static bypass unit will not supply bypass voltage to output. E1 Series 10-20kVA Rev 1.0.1 Page| 26 E1 SERIES USER MANUAL Bypass High This indicates that bypass voltage is above the designated limit. Static bypass unit will not supply bypass voltage to output. DC Low This indicates that busbar voltage at the output of rectifier unit is below the designated limit. DC High This indicates that busbar voltage at the output of rectifier unit is above the designated limit. Battery High This indicates that the voltage at battery group contacts is above the designated limit. Battery Fault Battery faulty detected during a periodic or manual battery testing procedure. Rectifier Fault During the operation of rectifier unit, this indicates that the designated voltage cannot be ensured at the output of this unit and that rectifier unit may be a problem in rectifier. Inverter Fault This indicates that the voltage at the output of inverter unit is out of designated limits. Load is transferred to static bypass unit. Output Fault This indicates that UPS output voltage is out of designated limits. Load is transferred to static bypass unit. Synchron Fault This indicates that synchronization between inverter and bypass voltages has failed. There is a synchronization problem. Emergency Stop This indicates that UPS is being switched off via emergency stop switch (EPO). Generator Active In generator applications, this indicates that generator is online and the generator supplies that UPS. Overheat Shutdown This indicates that cooler temperature has exceeded auto shutdown level (80°C). Load is transferred to static bypass unit. Overload Load supplied by UPS has exceeded designated limits. UPS will continue operating in online operation mode. We recommend that load is reduced to prevent device from overheat. Overload Shutdown Limit time for operation under overload has exceeded. Load is transferred to static bypass unit. We recommend that load is reduced. Overcurrent Rectifier There is a problem at rectifier unit. UPS will switch to battery operation mode. In this case, UPS will attempt to start rectifier unit a few times. Overcurrent Inverter There is a malfunction at inverter unit. Load is transferred to static bypass unit temporarily. In this case, device will attempt to start inverter unit a few times. Overcurrent Fault UPS is switched to failure mode due to repetitive overcurrent problems that occurred at rectifier or inverter units. Load is transferred to static bypass unit permanently. Bypass SCR Fault Bypass thyristors are malfunctioned. Inverter IGBT Fault IGBT at inverter unit is malfunctioned. Inverter CPU Fault There is a problem between inverter CPU and panel CPU. E1 Series 10-20kVA Rev 1.0.1 Page| 27 E1 SERIES USER MANUAL Rectifier CPU Fault There is a problem between rectifier CPU and panel CPU. Short circuit shutdown There is a short circuit on any of output loads. Table–15 Warning table 6.2.1.4 Custom Settings This is a menu where users can make parameter changes as per their desire and purpose. You can make changes using selection keys. Follow these steps to make changes. In this menu, there is a horizontal graphical bar that covers the first two lines. This bar will assist you in selecting the parameter that you are willing to change. Using “Up” or “Down” arrow keys, bring the graphical bar over the parameter that you’re willing to change. Figure-21 Custom Settings main menu Figure–22 Selecting the parameter to change 1. In this menu, a horizontal graphical bar covers the first two lines. This bar will assist you in selecting the parameter that you are willing to change. Using “Up” or “Down” arrow keys, bring the graphical bar over the parameter that you’re willing to change and press ‘ENTER’. 2. Once “ENTER” key is pressed, two-line graphical bar will change to a single line and select the value of the parameter that you are willing to change. E1 Series 10-20kVA Rev 1.0.1 Page| 28 E1 SERIES USER MANUAL 3. You change the parameter value to your desire using “Up” and “Down selection keys. 4. When you press “ENTER” key again, new value is set and graphical bar shifts to next parameter. Parameters included in Custom Settings main menu and their respective functions are given in the following table-16. Main Menu Sub Menu Password–1 Passwords Password–2 Password–3 Test Time Test Period Function These are the passwords required to access “CALIBRATION”, “SET VALUES” and “TEST SETTINGS” main menus. Entering all three passwords correctly is necessary to enter these menus. Otherwise, these menus will not be visible. Passwords are changed on weekly basis. Process can be done by authorized service personnel entering these menus. These are the parameters used for test procedure (See: Testing Batteries) On: Following full depletion of batteries, UPS restarted when mains voltage is recovered. Battery Automatic Start Off: Following full depletion of batteries, UPS is not restarted when mains voltage is recovered. UPS waits for a manual start up. Language This determines the language used on LCD screen. There are nine languages, namely Turkish, English, French, German, Polish, Hungarian, Italian, Spanish, and Russian. Start-up Picture ‘xxx’: Company logo is displayed while UPS starts up. Off: No logo is displayed Display Illumination If front panel is not used for a prolonged period of time, LCD screen is dimmed to save energy and to prolong the life of LCD screen. Off: Screen will not switch to standby mode and will stay bright all the time. ‘1–30 min’: LCD screen will be dimmed if keypad is not used for a period determined here. LCD screen will be automatically lit as soon as keypad is used again. RL1 Relays RL2 There are three user relays (See: Programmable Relay Unit). RL3 Settings Hour E1 Series 10-20kVA Rev 1.0.1 System time can be changed here. This features hour and minute in respective order (this is activated once password is entered in correctly). Page| 29 E1 SERIES USER MANUAL Date System date can be changed here. This features day, month, year, and day of the week in respective order (this is activated once password is entered in correctly). Alarm This is used to set the alarm. This features day, hour, and minute information in respective order. This will be activated only while the status information is On (this is activated once password is entered in correctly). Guarantee UPS’ warranty term is entered, changed or cancelled here (this can be changed by authorized personnel only). Serial Number UPS’ serial number is entered here. This can be entered by authorized personnel only and only during the testing stage (this is activated once password is entered in correctly). Table–16 Custom settings menu E1 Series 10-20kVA Rev 1.0.1 Page| 30 E1 SERIES USER MANUAL 7 Operating Procedures 7.1 Switching the UPS on All switches must be in OFF position before switching UPS on. Check to make sure that all electrical connections are correct. Perform following steps in given order to switch on the UPS. 1. Bring INPUT and BATTERY circuit breaker to (on) position (Figure-23) 2. Check LCD display whether it run when you hear short warning beep. 3. If the mains voltage is within the designated limits the UPS will switch to bypass mode and LED bar lights in red color, otherwise UPS will switch to system off mode and LED bar will not light. Check. Figure-23 7.2 Starting the UPS 7.2.1 Starting the UPS from Mains 1. Briefly press “ON/OFF” key located on front panel. Mimic diagram window will be displayed on LCD screen. 2. Press “ON/OFF” for short time (>3 second) at the front panel. 3. Rectifier unit will begin running. Mimic diagram will be seem as Figure-24. E1 Series 10-20kVA Rev 1.0.1 Page| 31 E1 SERIES USER MANUAL Figure-24 Rectifier start 4. Once rectifier unit has begun running, inverter unit will begin to run automatically. Mimic diagram will be seem as Figure-25. Figure-25 Inverter start 5. Once inverter unit is ready, the UPS will switch to online mode and LED bar light in green. Mimic diagram will be seem as Figure-26. Figure-26 Normal Mode 6. Throw the output circuit breaker switch to (on) position. 7. Now you can turn on the loads connected to the UPS. If you encounter anything unexpected during the startup, please contact authorized technical service. 7.2.2 Starting the UPS from Battery (Optional) E1 series UPS has a feature that the UPS can be switched on battery without mains connection. This feature is named as (Cold start). Be sure that battery circuit breaker is (on). 1. Press “ON/OFF” on the front panel. Mimic diagram will be seem on the display. 2. Press ‘ON/OFF’ on the front panel for a brief period (>3 second). 3. The inverter unit will begin to run by feeding from batteries. Mimic diagram will be seem as Figure-27. Figure-27 Battery operation mode inverter start E1 Series 10-20kVA Rev 1.0.1 Page| 32 E1 SERIES USER MANUAL 4. After inverter unit is ready, the UPS will switch to battery mode and LED bar will start to flash in green. Mimic diagram will be seem as Figure-28. Figure-28 Battery operation mode 5. Throw the OUTPUT circuit breaker switch to (on) position. 6. Now you can turn on the loads connected to the UPS. 7.3 Stopping the UPS Press and briefly hold (>3 second) “ON/OFF” key located in front panel. If mains voltage is within the designated limits, UPS will switch to bypass mode, otherwise the UPS will switch to system off mode. Mimic diagram window will show the information of this mode The UPS will feed the loads which are connected to output of the UPS from mains. Energy of the loads will be cut when power blackout. The UPS will not give energy to output when The UPS switch to system off mode. Stop the UPS after check critical loads. 7.4 Switching the UPS off Stop the UPS as explained in “Stopping the UPS” section. Turn off all loads connected to the UPS. Throw output circuit breaker switch to (off) position. Throw battery circuit breaker switch to (off) position. Throw input circuit breaker switch to (off) position. There is dangerous voltage in UPS even after the UPS is switched off. Never service or intervene inner parts of the UPS. 7.5 Manual Bypass Operation This operation must be only done by authorized personal. E1 Series 10-20kVA Rev 1.0.1 Page| 33 E1 SERIES USER MANUAL 7.5.1 Switching the UPS Manual Bypass Do not switch the UPS to this mode from battery operation mode. There will not be energy at the output of the UPS when switched. Follow the steps below for a safe manual bypass procedure that will not cause any energy interruption at the UPS output. 1. Press and briefly hold (>3 second) “ON/OFF” button on the front panel. Load is transferred to static bypass unit uninterruptedly and device switches to bypass operation mode. 2. Check the UPS whether it switch to bypass mode with mimic diagram and LED bar (red). If the UPS did not switch to bypass mode, repeat the first step. 3. Remove cover of manual bypass fuse by using screwdriver. 4. Throw the Manual BYPASS fuse switch to (on) position. 5. Throw BATTERY, INPUT and OUTPUT fuses switch to (off) position. Sometime later, the UPS will be switched off. 6. Reassemble cover of manual bypass fuse by using screwdriver. Loads are connected to the UPS have an energy during MANUAL BYPASS circuit breaker is on and there is mains voltage. Interruptions will be transferred to the loads. There are dangerous voltages on input, battery and output contacts while the UPS is in manual bypass mode. Do not remove terminal protective cover. 7.5.2 Switching the UPS Back from Manual Bypass Mode While UPS is in manual bypass mode and switched off, do not bring manual bypass switch to “OFF” position. Follow the steps below in order for a safe manual bypass procedure that will not cause energy interruption at UPS output. 1. Bring INPUT and BATTERY switch to ON position. 2. UPS will switch to static bypass mode. 3. Check the UPS whether it is on the bypass mode from mimic diagram and LED bar (red). If the UPS is not transferred to bypass mode, contact with authorized technical personal. 4. Bring OUTPUT switch to ON position. 5. Bring MANUAL BYPASS switch to OFF position. 6. Start the UPS by pressing and briefly holding (>3 sec) “ON/OFF” button located on the front panel of the device. E1 Series 10-20kVA Rev 1.0.1 Page| 34 E1 SERIES USER MANUAL 7. The UPS will switch to online mode. 8. Check the UPS whether it is on the normal mode from mimic diagram and LED bar (green). If the UPS is not transferred to normal mode, contact with authorized technical personal. 9. Reassemble cover of manual bypass fuse by using screwdriver. 7.6 Economic Operation Mode (ECO-MOD) This processing must be done by authorized personal. Accessing of main menus requires password. 7.6.1 Activating Economic Operation Mode 1. Switch the UPS to the bypass mode by pressing and briefly holding (>3 sec) “ON/OFF” button located on the front panel of the device. 2. Check the UPS whether it is on the bypass mode from mimic diagram and LED bar (red). If the UPS does not transfer to bypass mode, repeat step 1. 3. Open the locked menus by entering passwords under the ‘CUSTOM SETTINGS/ Passwords’. 4. Check the menus whether they are opened. 5. Select the “Eco Mod” under “TEST SETTINGS\General\Operating Mode” menu. 6. Switch on the UPS by pressing and briefly (>3 sec) holding “ON/OFF” button on front panel. 7. Wait until rectifier and inverter units begin running. 8. Once “Eco Mod” warning is visible in “WARNINGS” menu, displayed mimic diagram will be as figure-29. Figure- 29 Economic operation mode If the UPS is stopped during Eco-Mode, Eco-Mode will be temporarily deactivated. If bypass voltage is interrupted in this state, your loads will not be supplied power. Perform steps given above to reactivate EcoMode feature. E1 Series 10-20kVA Rev 1.0.1 Page| 35 E1 SERIES USER MANUAL 7.6.2 Deactivating Economic Operation Mode 1. Press and briefly (>3 sec) hold “ON/OFF” button on front panel to switch the UPS to bypass operation mode. 2. Check the UPS whether it is on the bypass mode from mimic diagram and LED bar (red). If the UPS does not transfer to bypass mode, repeat step 1. 3. Open the locked menus by entering passwords under the ‘CUSTOM SETTINGS/ Passwords’. 4. Check the menus whether they are opened. 5. Select “Normal” option under “TEST SETTINGS\General\Operating Mode” menu. 6. Switch on the UPS by pressing and briefly (>3 sec) hold “ON/OFF” button on front panel. 7. Wait until rectifier and inverter units begin running. 8. Check the UPS whether it is on the normal mode from mimic diagram and LED bar (green). If the UPS is not transferred to normal mode, contact with authorized technical personal. 7.7 Emergency Stop Procedure The UPS may be halted using emergency stop switch in extraordinary cases including but not limited to fire, earthquake, flood or alike. When emergency stop switch is used, rectifier and inverter units switch off, static bypass unit will not activate, and the UPS will switch to system off mode. When emergency stop switch is used “Emergency off” will be visible in “WARNINGS” main menu. There are dangerous voltages on input and battery terminals even after emergency stop procedure is completed. Do not remove protective covers of switch and terminal sections. Emergency stop is performed by means of an external switch. Contacts of external emergency stop switch are taken from “CUSTOM CONTACTS” socket located on the UPS communication unit (see: chapter 10 Custom contacts). If external emergency stop switch is brought to ON position while the UPS is running, emergency stop procedure will be initiated. To activate emergency stop feature follow steps below: 1. Press and briefly (>3 sec) hold “ON/OFF” button on front panel to switch the UPS to bypass operation mode. 2. Check the UPS whether it is on the bypass mode from mimic diagram and LED bar (red). If the UPS does not transfer to bypass mode, repeat step 1. E1 Series 10-20kVA Rev 1.0.1 Page| 36 E1 SERIES USER MANUAL 3. Connect emergency stop switch to the Custom Contacts socket (see: chapter-10 Custom Contacts). 4. Open the locked menus by entering passwords under the ‘CUSTOM SETTINGS/ Passwords’. 5. Check the menus whether they are opened. 6. Bring the ‘TEST SETTINGS\ Hardware info\ Emergency off’ menu to ‘on’ position. 7. Switch on the UPS by pressing and briefly (>3 sec) hold “ON/OFF” button on front panel. 8. Wait until rectifier and inverter units begin running. 9. Check the UPS whether it is on the normal mode from mimic diagram and LED bar (green). If the UPS is not transferred to normal mode, contact with authorized technical personal. You will have to turn off the UPS and turn back on again if you want to start the UPS after an emergency stop. 7.8 Operation During Mains Fail In case of a power outage, load is uninterruptedly supplied battery power and UPS goes under the following changes. 1. UPS will switch to battery operation mode and mimic diagram will indicate battery operation mode accordingly. 2. Alarm information window will display “Mains Out of Limit” and WARNINGS menu will display “Mains Fault” warnings. 3. Data monitoring window will display “DISPLAYS\Battery” menu. 4. Periodical siren will activate. 5. LED bar will flash in green. Flashing interval of LED bar will shorten as battery level diminishes. Battery capacity, and accordingly battery voltage, diminishes throughout the mains voltage outage. Capacity increase rate is dependent on battery voltage and amount of load connected to output. Periodical siren will emit more frequently depending on the result of this comparison. If mains voltage is recovered before batteries are fully depleted, UPS will switch to online (normal) operation mode uninterruptedly. The UPS will give “Batteries Depleted” warning once batteries are fully depleted and will switch off inverter units. In this case, load will no longer be supplied with power. E1 Series 10-20kVA Rev 1.0.1 Page| 37 E1 SERIES USER MANUAL Once batteries were fully depleted, the UPS continues to observe mains voltage for approximately 4 minutes. If mains voltage is recovered during this period, UPS will start up automatically and switch to online (normal) operation mode. If mains voltage is not recovered during this period, UPS will be switched off completely to prevent damage to batteries. Once UPS is fully switched off, do not bring the switch to OFF position to ensure that device can automatically startup as soon as mains voltage becomes available again. Otherwise, you will have to startup the device manually. Once UPS is fully switched off, do not bring the switch to OFF position to ensure that device can automatically startup as soon as mains voltage becomes available again. Otherwise, you will have to startup the device manually. 7.9 Remote start and stop of the UPS Starting and stopping Uninterruptible Power Supply, remotely using an external switch is possible. Contacts of external switch will be taken from the “CUSTOM CONTACTS” socket located on the communication unit of the UPS (See: Custom Contacts Socket). If this switch is brought to OFF position while the device is running, device will switch to bypass operation mode. Rectifier and inverter units will be switched off and load will be supplied via static bypass. Once the switch is brought back to ON position, the UPS will switch to online mode again. To enable remote start/stop feature follow steps below: 1. Press and briefly (>3 sec) hold “ON/OFF” button on front panel to switch the UPS to bypass operation mode. 2. Check the UPS whether it is on the bypass mode from mimic diagram and LED bar (red). If the UPS does not transfer to bypass mode, repeat step 1. 3. Connect emergency stop switch to the Custom Contacts socket (see: chapter-10 Custom Contacts). 4. Open the locked menus by entering passwords under the ‘CUSTOM SETTINGS/ Passwords’. 5. Check the menus whether they are opened. 6. Bring the ‘TEST SETTINGS\ Hardware info\ UPS Shutdown’ menu to ‘on’ position. 7. Switch on the UPS by pressing and briefly (>3 sec) hold “ON/OFF” button on front panel. 8. Wait until rectifier and inverter units begin running. 9. Check the UPS whether it is on the normal mode from mimic diagram and LED bar (green). E1 Series 10-20kVA Rev 1.0.1 Page| 38 E1 SERIES USER MANUAL If the UPS is not transferred to normal mode, contact with authorized technical personal. 7.10 Testing Batteries Batteries are tested in two different ways, namely manual and periodical battery testing. Battery testing can only be performed while the UPS is in online operation mode. 7.10.1 Manual Test To initiate manual battery testing, follow the steps below. 1. Go to “CUSTOM SETTINGS\Battery\Test Time” menu path and set battery test time in minutes. Battery test time is 1 minute by factory default ‘. 2. Go to “DISPLAYS\Battery” menu path and then using “Down” arrow, to test monitoring page (see: Figure-30). Figure–30 Battery test monitoring page (no ongoing test procedure) 3. When “ENTER” key is pressed, UPS switches to battery operation mode and begins testing the batteries for a designated period of time. 4. When ‘ON/OFF’ key is pressed, mimic diagram will indicate battery testing procedure as shown on the figure-31. Figure–31 Battery test operation page (during an ongoing test procedure) 5. Press ‘ENTER’ key to go back to battery monitoring page. This page features information on previous tests while there isn’t any ongoing battery test. E1 Series 10-20kVA Rev 1.0.1 Page| 39 E1 SERIES USER MANUAL Test Time: This displays the date and time of previous battery test. If there has not been any previous testing, this will not be shown. Test Result: This displays the result of previous battery test. If there hasn’t been any previous testing, “no tests” will be displayed here. If there has been a test where any problem was detected with the batteries, you will see “fault”; if no problems were detected in previous test you will see “OK” here. If previous test was cancelled, you will see “Cancel”, during test ‘xxx’ is displayed. Test Monitoring: Reference battery voltage and remaining test time will be displayed (see: Figure-32). If battery voltage drops below the reference voltage during testing, this will be interpreted as battery failure. Battery test will be completed once test time elapsed and UPS will switch back to online mode Figure–32 Battery test monitoring page (during an ongoing test procedure) If you press “ENTER” key during an ongoing test, battery test procedure will be terminated and UPS will switch back to online (normal) operation mode. UPS will also terminate test procedure and switch back to online (normal) operation mode if any battery failure is detected. A periodical siren notifies Battery failure. “Test Result” field of battery test monitoring page will show “fault”. 7.10.2 Periodical Test Batteries can be tested automatically at intervals defined using “CUSTOM SETTINGS\Battery\Test Period” menu option. Factory default setting for this menu option is 7 days. If you see “CUSTOM SETTINGS\Battery\Test Period” menu option to OFF, periodical battery test procedure will not run. 7.11 Operation on Generator Battery charge feature of the UPS may be disabled to ensure more efficient and problem-free operation of the generator at times when uninterruptible power supply is supplied by the generator instead of the mains voltage. For this purpose, contact information must be supplied from the generator to UPS. These contact ends must be connected to the contacts of “CUSTOM CONTACTS” socket (See: Custom contacts). When generator is activated while the UPS is in battery operation mode, UPS will switch E1 Series 10-20kVA Rev 1.0.1 Page| 40 E1 SERIES USER MANUAL to online (normal) operation mode but batteries will not be charged. Moreover, UPS will transfer the load to generator gradually while device switches from the battery to generator thereby preventing unbalanced loading on generator. When mains voltage is recovered and generator is deactivated, batteries will begin charging again. Follow steps below for activating this feature. 1. Press and briefly (>3 sec) hold “ON/OFF” button on front panel to switch the UPS to bypass operation mode. 2. Check the UPS whether it is on the bypass mode from mimic diagram and LED bar (red). If the UPS does not transfer to bypass mode, repeat step 1. 3. Connect contact tip which come from generator to the Custom Contacts socket (see: chapter-10 Custom Contacts). 4. Open the locked menus by entering passwords under the ‘CUSTOM SETTINGS/ Passwords’. 5. Check the menus whether they are opened. 6. Bring the ‘TEST SETTINGS\ Hardware info\ Generator Activates’ menu to ‘on’ position. 7. Switch on the UPS by pressing and briefly (>3 sec) hold “ON/OFF” button on front panel. 8. Wait until rectifier and inverter units begin running. 9. Check the UPS whether it is on the normal mode from mimic diagram and LED bar (green). 7.12 If the UPS is not transferred to normal mode, contact with authorized technical personal. Operation During an Overload Overload situation occurs when current is drawn more than nominal value from output of the UPS. When an overload occurs, UPS will go under the following changes; Overload” warning will be displayed in alarm information window and warnings main menu. Periodical siren system will be activated. Siren will go off once three times in every 5 seconds. Overload counter starts. This counter is located on the third page of “DISPLAYS\Output” menu. Counters speed increases depending on the load amount. Period of time UPS operates under overload changes depending on the load amount. Factory default settings are given in the Table-17. These parameters are given for nominal operation mode. E1 Series 10-20kVA Rev 1.0.1 Page| 41 E1 SERIES USER MANUAL Load Amount (Percentage) %100 Overload Time Constant %101-110 1 hour %111-130 10 minutes %131-150 1 minute Table–17 Overload withstand periods Once overload withstand period elapsed, UPS will transfer the load to static bypass unit automatically. Rectifier and inverter units will be switched off. “Overload Shutdown” will be shown in Warnings main menu. UPS will wait 4 minutes for cooling block to cool down. If load is reduced by the end of this waiting period, UPS will start up again and switch to online mode. If overload is continued after the end of waiting period, UPS will not start up. If overload is recovered before overload withstands period elapses, periodical siren system will silence. Overload counter begins to decrease. “Overload” warning at alarm information window will be removed. We do not recommend you to run UPS on overload to prolong the life of the UPS. In case of an overload, loads must be reduced. E1 Series 10-20kVA Rev 1.0.1 Page| 42 E1 SERIES USER MANUAL 8 Parallel Operation A parallel system may be designed by connecting outputs of multiple uninterruptible power supplies to a common load switch. A parallel system will safely supply loads that are overly sensitive against electric power outages. In a parallel system, when any of UPSs malfunction and become offline, other UPSs continue to supply the load, thereby preventing any interruption with supply to load. In case where all UPSs in a parallel system malfunction, UPSs will transfer the load automatically to static bypass lines and UPSs will activate again as soon as recovered from malfunction. 8.1 Installation All electrical connections of all UPSs constituting parallel system must be provided as explained in “Installation” section of this user manual. Note following warnings while installing a parallel system. Installing and commissioning a parallel system should be carried out by authorized technical service personnel only. Parallel cables should be maximum 20 meters in length. Nevertheless, shorter cables ensure safer operation. Use a separate designated grounding cable for each UPS in parallel system. Use a separate designated battery group for each UPS. All UPSs in parallel system must be of same model and power capacity. Air conditioning for the room where UPSs will be located must be installed as appropriate for total power of the parallel system. Provide separate input and output cables and mains and load panel connections for UPSs and build a common output busbar here. We also recommend you to place a load interrupt switch between common output busbar located on load distribution panel and load system. Recommended electrical connections are shown in the Figure-33 for parallel UPS system. Signal cables must be used to ensure data transmission between the UPSs that constitute a parallel system. These signal cables are connected to sockets of parallel cards located on devices’ communication units (see: Figure-34 DB1 and DB2). E1 Series 10-20kVA Rev 1.0.1 Page| 43 E1 SERIES USER MANUAL Figure–33 Electrical parallel connection diagram E1 Series 10-20kVA Rev 1.0.1 Page| 44 E1 SERIES USER MANUAL Figure–34 Parallel connection sockets Safety of data communication is increased by means of ring connection method used in E1 Series UPS. Connect parallel signal cables to parallel port located on communication port as shown in the Figure-35. Figure–35 Connecting signal cable Due to this connection manner of signal cables, layout of UPSs constituting the parallel system is highly important. Therefore, we recommend you to place the UPSs as shown in the Figure-36. E1 Series 10-20kVA Rev 1.0.1 Page| 45 E1 SERIES USER MANUAL Figure–36 Recommended UPS layout for a parallel system Make sure that phase sequence is correct when connecting output cables of UPSs to common busbar. 8.2 Settings Once electrical connections of all UPSs in the parallel system were provided, make the following adjustments for each UPS constituting the parallel system. 1. Switch on all the UPSs in the parallel system. Mimic diagram will display bypass operation mode image. Following settings are made while UPSs are in bypass operation mode. 2. Open the locked menus by entering passwords under the ‘CUSTOM SETTINGS/ Passwords’. 3. Check the menus whether they are opened. 4. Set “Test Settings\Parallel\Parallel Option” menu option to ON (see: Figure-41). 5. Enter quantity of devices in the parallel system to “Test Settings\Parallel\Number of Devices” menu option (see: Figure-37). 6. Enter an order number for each UPS in “Test Settings\Parallel\Device ID” menu option. Order numbers assigned to UPSs must be unique and consecutive. E1 Series 10-20kVA Rev 1.0.1 Page| 46 E1 SERIES USER MANUAL 7. Set “Test Settings\Parallel\Detect Cable Fault” menu option to ON. Figure–37 Adjusting parallel settings using test settings menu Once parallel system settings were completed, boxes that denote each UPS are displayed in mimic diagram window alarm information section. These boxes provide information regarding data transmission between the UPSs. If a box is filled, that means UPS corresponding to that box is on and communicating with the system. If a box is empty, that means the UPS corresponding to that box is off or is not communicating with the system. For instance, in mimic diagram shown in Figure-38, the UPS number 2 is off or is not communicating with the system. The UPSs 1, 3 and 4 are on and communicating with the system Figure–38 Mimic diagram in parallel operation Operating statuses of UPSs constituting parallel system may be monitored from any UPS. Therefore, operation modes (online operation mode, bypass operation mode, battery operation mode, or system off mode) and load percentages can be seen using “Displays/Parallel” menu option. Arrow sign shown on the left side of the menu indicates the UPS itself. For instance, Figure-39 below shows that all UPSs are in bypass operation mode and are not yet loaded from the UPS 1 screen E1 Series 10-20kVA Rev 1.0.1 Page| 47 E1 SERIES USER MANUAL Figure–39 Parallel menu 8.3 Starting parallel system Before running parallel system, check and make sure that load interrupt switch on distribution panel is in OFF position. The UPSs in parallel system can be run individually using their screens. Alternatively, all system can be run together using LCD screen of any UPS in the system. Nevertheless, we recommend you to run each UPS individually when commissioning the system for the first time. 1. Starting from any UPS, press and briefly (>3 sec.) hold “ON/OFF” button on the front panel. Following selection menu will be displayed (see: Figure-40). Select “Unit” option using arrow keys and press “ENTER” key. In this case only that UPS will start up. Figure–40 Starting up a UPS parallel system 2. Soon later, the UPS will switch to online operation mode and LED bar will be lit in green. Right at that moment, all other UPSs will switch to system off mode. 3. Startup all the UPSs by repeating this step for all other UPS in the parallel system. 4. Throw output switches of the UPSs in parallel system to “ON” position one by one. E1 Series 10-20kVA Rev 1.0.1 Page| 48 E1 SERIES USER MANUAL 5. Throw main interrupt switch on load panel to ON position. Once all the UPSs in parallel system were started, you can monitor operating statuses and load sharing of all the UPSs in LCD screen of any UPS in “Displays/Parallel” menu (see: Figure-41) Load sharing among the UPSs must be equal to the extent possible. In case of a significant unbalance between individual loads taken by the UPSs, contact authorized technical service. Figure–41 Parallel menu 8.4 Stopping parallel system 8.4.1 Stopping any UPS in the system When you wish to deactivate any UPS in parallel system manually or otherwise following a malfunction, follow these steps to prevent any interruption with power supplied to load. 1. Press and hold (>3 sec.) briefly “ON/OFF” button on front panel. Mimic diagram will display the Figure-42. Select “Unit” option using arrow keys and press “ENTER” key. Figure–42 Stopping a UPS in parallel system 2. At this moment, UPS will switch to system off mode. 3. Throw output switch to OFF position. 4. Throw battery switch to OFF position. E1 Series 10-20kVA Rev 1.0.1 Page| 49 E1 SERIES USER MANUAL 5. Throw input switch to OFF position. 6. Once the UPS is deactivated, check to make sure that remaining UPSs share the load equally, using “Displays/Parallel” menu option. 8.4.2 Stopping all the UPSs in the system All UPSs in parallel system can be stopped using any UPS. Follow these steps to ensure that system can be stopped safely. 1. Press and briefly (>3sec.) hold “ON/OFF” button on front panel. Mimic diagram will display the following. Using arrow keys, select “System” option and press “ENTER” key (see: Figure-43). All devices in the system will switch to bypass operation mode at the same time. Figure–43 Stopping parallel system 2. 3. 4. 5. Turn off loads connected to system. Throw output switch to OFF position. Throw battery switch to OFF position. Throw input and static bypass switch to OFF position. E1 Series 10-20kVA Rev 1.0.1 Page| 50 E1 SERIES USER MANUAL 9 Communication 9.1 RS–232 and RS–485 communication E1 Series UPS supports RS232 and RS485 communication protocols. Placements of RS232 and RS485 are showed in the figure-44. Figure–44 RS–232 and RS–485 ports on communication board RS232 This is used to enable uninterruptible power supply communicate with a nearby computer (within 20 meters range maximum) over RS–232 protocol. To enable this feature, go to “TEST SETTINGS\Communication\Hardware Protocol” menu and select “rs232” option. Communication speed can be changed using “TEST SETTINGS\Communication\Baud rate” menu option. By use of assisting software, RS–232 protocol provides the following features. 1. Compatible with Windows, UNIX, Macintosh operating systems. 2. Status changes that occur on UPS can be monitored. 3. UPS status can be sent to desired addresses via e-mail. 4. It saves data that is measured by the UPS in determinated periods. 5. It can be used to turn off the computer and running programs as desired by using suitable software. Pin Signal Signal Description 2 TXD 3 RXD Signals sent and received 5 GND Ground Figure-45 RS232 Socket structure RS485 RS-485 option is used to make use of advantages of RS–232 in longer ranges. Because RS–485 communication is kind of a signal transformation, an adaptor (RS-485 adaptor) is necessary for connection to computer end. Connection points of RS485 are showed in figure-46. To enable RS–485 option, set “TEST E1 Series 10-20kVA Rev 1.0.1 Page| 51 E1 SERIES USER MANUAL SETTINGS\Communication\Hardware Protocol” menu option to “rs485”. Communication speed can be changed using “TEST SETTINGS\Communication\Baud rate” menu option Pin Signal Signal Description 1 B 2 A Signals sent and received 5 GND Ground Figure-46 RS485 connection points 9.2 Mod-bus communication option This is a standard communication protocol that enables data transmission between uninterruptible power supply and PLC or other industrial systems. To enable mod-bus feature, set “TEST SETTINGS\Communication\Hardware Protocol” menu option to “rs485” and “TEST SETTINGS\Communication\Software Protocol” to “modbus (rtu)”. Communication speed can be changed using “TEST SETTINGS\Communication\Baud rate” menu option. Please consult your mod-bus manual for greater detail. 9.3 SNMP communication (Optional) This is a communication protocol that was designed and developed to enable monitoring and controlling of multiple UPSs from a single center simultaneously. Each UPS that will be used in network environment is connected to network over an SNMP adaptor (see: Figure-47). Figure–47 Connecting UPS to network over an SNMP adaptor E1 Series 10-20kVA Rev 1.0.1 Page| 52 E1 SERIES USER MANUAL You can connect to UPSs and check all information regarding their latest status by assigning them individual IP addresses over SNMP. You can monitor operating status of the UPS on a computer screen. Input, output and battery information of the UPS can be monitored on computer screen. Latest condition of the battery can be monitored while the UPS is operating in battery mode. You can see failure statuses of the UPS and ensure timely intervention by the technical unit. More than one UPS connected in a network environment can be monitored just from one computer of the network. For details, please consult you SNMP manual. 9.4 Remote monitoring panel (Optional) This is a panel designed to enable remote monitoring of the uninterruptible power supply (see: Figure-48). Typically, this shows UPS’s operation mode, voltage, current, load and frequency information. This works over RS–485 communication protocol. Multiple panels can be connected in parallel (maximum 32 panels). Panel can be moved up to 100 meters away from the UPS. This only for monitoring purpose and does not provide controlling capability. To enable use of remote monitoring panel, please select the choice ‘on’ in the “TEST SETTINGS\Communication\Remote Monitoring” menu. Figure–48 Remote monitoring panel view “REMOTE MONITORING” socket located on communication board is as Figure-49. E1 Series 10-20kVA Rev 1.0.1 Page| 53 E1 SERIES USER MANUAL Figure–49 Remote monitoring socket located on communication board Communication signal layout in the port is as figure-50. Pin Signal 3 B 4 A 5 GND Signal Description Signals sent and received Ground Figure-50 Remote monitoring socket structure 9.5 Programmable relay unit This unit consists of three relays that transmit the status signals of the uninterruptible power supply to user. The user can individually program each relay. A status that will activate the relay can be designated from the front panel for each relay. When designated condition occurs, relay will be activated and contact position will change. Maximum 24V/3A DC voltage can be applied to relay contacts. Relay contacts can be accessed via “RELAY OUTPUTS” (DB-9) female socket located on the communication unit (see: Figure-51). Relay contact layout in relay port is given in the table-18. Figure–51 Relay port located on communication board Contact \ Relay RL1 RL2 RL3 NO (normally on) 1 7 4 NC (normally close) 6 3 9 COM (common) 2 8 5 Table-18 Relay contacts layout in relay unit Programming relay unit Go to “CUSTOM SETTINGS\Relays” menu ‘. There are three sub menus for three relays in this menu, respectively RL1, RL2, and RL3. Using selection arrows, select the relay that you wish to program in accordance with the status information given in the Table-19. Save by pressing “ENTER” key. E1 Series 10-20kVA Rev 1.0.1 Page| 54 E1 SERIES USER MANUAL Status Default Relay normal operation Explanation RL1 UPS is in online operation mode. bypass operation - UPS is in bypass operation mode. battery operation RL2 UPS is in battery operation mode. standby mode - Currently not in active use. mains out of limit - Mains voltage is out of limits. bypass out of limit - Bypass voltage is out of limits. output out of limit - Output voltage is out of limits. battery low RL3 Batteries are about to deplete. battery fault - Battery fault detected. overload - There is an overload case. overheat - There is an overheat case. fuse failure - One of fast fuses blown. general failure - There is a general failure in the system. generator active - Generator is running. battery breaker off - Battery switch is off. service breaker on - Manual bypass switch is on. emergency stop - Ongoing emergency stop. remote shutdown - UPS was shutdown via remote access. rectifier fault - Rectifier unit malfunctioned. general alarm - There is a general alarm with the UPS. Table-19 Status list 9.6 Custom contacts Status information can be received from the pins located on custom contacts of the uninterruptible power supply to control the UPS. Placement of ‘CUSTOM CONTACTS’ socket is showed in the Figure-52. Signal points are showed in the Figure-53. Figure–52 Custom contacts located on communication board Status Information Pin Remote startup/shutdown 1–2 Operation on generator 3–4 Emergency stop 8–9 Figure–53 Status information of socket output pins E1 Series 10-20kVA Rev 1.0.1 Page| 55 E1 SERIES USER MANUAL Activating of custom contacts must be done by authorized personal. Please contact with technical service. To activate Custom Contacts please follow the below instructions. 1. Press and briefly (>3 sec) hold “ON/OFF” button on front panel to switch the UPS to bypass operation mode. 2. Check the UPS whether it is on the bypass mode from mimic diagram and LED bar (red). If the UPS does not transfer to bypass mode, repeat step 1. 3. Open the locked menus by entering passwords under the ‘CUSTOM SETTINGS/ Passwords’. 4. Check the menus whether they are opened. 5. Bring the custom contact that you want to activate to “on” under TEST SETTINGS\ Hardware info menu. 6. Switch on the UPS by pressing and briefly (>3 sec) hold “ON/OFF” button on front panel. 7. Wait until rectifier and inverter units begin running. 8. Check the UPS whether it is on the normal mode from mimic diagram and LED bar (green). If the UPS is not transferred to normal mode, contact with authorized technical personal. E1 Series 10-20kVA Rev 1.0.1 Page| 56 E1 SERIES USER MANUAL 10 Battery Placement and Connection 20/30 pieces 7Ah or 9Ah batteries can be put inside E1 Series UPSs cabinets according to desired power and backup time. For longer backup time external battery, cabinets can be used. 7Ah, 9Ah and 12Ah internal and external battery placement and connection is shown in this topic. To increase battery capacity, please contact with authorized technical personal. Replacing the Batteries and Recycling Replacing the batteries must be done by authorized service staff. Metal accessory as watch, ring are must be taken to prevent personal accidents. Gumshoe and glove must be used. Tools with dielectric handle must be used. Be sure that battery connections did not grounded by mistake. Do not put tool or metal accessory to above batteries. Battery has an electric shock and short circuit shock. Batteries must be replaced with batteries are same capacity and same type, same quantity and same sizes. Do not throw batteries in a fire, there is risk of explosion. Recycle of batteries must be provided. Deliver batteries to any recycling plant with packaging material of batteries. 10.1 UPS Cabinet Internal and external battery placement and connection is shown in this topic. Only authorized service staff can interfere internal batteries. There is dangerous voltage inside UPS. 30 pieces 7-9Ah E1 Series 10-20kVA Rev 1.0.1 Page| 57 E1 SERIES USER MANUAL (View from left side) (View from right side) Figure-54 30 pieces of 7-9Ah Battery Placement and Connections 10.2 External Battery Cabinet Internal and external batteries must be at same capacity. If bigger batteries more than 12Ah will be used as external batteries, internal batteries must be disconnected. 30 pieces 7-9Ah (View from left side) (View from right side) Figure-55 30 pieces of 7-9Ah Battery Placement and Connections E1 Series 10-20kVA Rev 1.0.1 Page| 58 E1 SERIES USER MANUAL 2x30 pieces 7-9Ah (View from left side) (View from right side) Figure-56 2x30 30 pieces of 7-9Ah Battery Placement and Connections 30 pieces 12Ah (View from left side) (View from right side) Figure-60 30 pieces of 12Ah Battery Placement and Connections E1 Series 10-20kVA Rev 1.0.1 Page| 59 E1 SERIES USER MANUAL 11 Troubleshooting If any problem is encountered with operation of uninterruptible power supply, please perform following checks before contacting authorized technical service. Necessary checks on UPS must be performed by authorized technical service personnel only. Check to make sure that input, output, and battery connections of the UPS were provided correctly. Check to make sure that interrupt switches connected to input and output of UPS are appropriate. Check to make sure that protection grounding of the UPS was provided as appropriate. Electrical and installation infrastructure is of utmost importance for efficient UPS system operation. Basic issues associated with UPS devices that you may encounter with and things you must do in those cases are given in the following. Overload The power required by the loads is higher than the power available. Check that the load is well balanced on three phases by checking the measurements on the display. Mains out of limit Check to make sure that mains voltage and frequency are in line with the limits set forth in technical specifications section of this user manual. Overheat Check to make sure that UPS’ operation environment temperature is within the recommended temperature limits. Check air conditioning system in the environment where UPS is located. Failure to run with a generator Check and make sure that the generator used with uninterruptible power supply is of adequate power. Battery operation time too short o Charge batteries for at least 10 hours and try again. o Review recommended environment specifications for batteries. Operating environment temperature is one of the factors that affect battery life. o In systems that are subject to frequent power outages where batteries activated and deactivated very frequently, battery life will be shorter inevitably. Do not service inside the UPS in cases of malfunction. E1 Series 10-20kVA Rev 1.0.1 Page| 60 E1 SERIES USER MANUAL 12 Maintenance Customer must pay utmost attention during commissioning, use and maintenance of UPS devices. Modern UPS devices consist of delicate electronic circuits and are very sensitive to temperature and sanitary conditions. UPS devices and battery banks must be operated in a cool place (air conditioning room) in clean environment that does not have humidity, and their maintenance must be performed at regular intervals. Otherwise UPS’ useful life will shorten and failures and malfunctions will occur more frequently We recommend you to have periodical maintenance (twice a year) performed to ensure maximum efficiency from E1 Series UPS. All maintenance on the UPS must be performed by authorized technical service personnel only. Fans in uninterruptible power supply must be checked and cleaned once in every three (3) months. Air inlets and outlets must be checked and cleaned. Front panel must be cleaned periodically (once in every three months). We recommend you to change condensers in rectifier and inverter sections once in every five (5) years. Batteries used in the system must be checked periodically. Environment where batteries are used must be clean and at appropriate temperature. E1 Series 10-20kVA Rev 1.0.1 Page| 61 E1 SERIES USER MANUAL 13 Technical Specification TECHNICAL SPECIFICATIONS E1 SERIES Power (KVA) INPUT Voltage Voltage tolerances Frequency Frequency tolerances Power factor THDi OUTPUT Voltage Voltage tolerances Frequency Frequency tolerances Power factor THDv Crest factor OVERLOAD CAPACITY %110 %125 %150 %160 EFFICIENCY Online Eco-mod GENERAL Technology Control Communication Remote monitoring Dry contacts Custom inputs Cold start Maintenance bypass 10 15 380 / 400 / 415 Vac 3faz + N ± %25 (without downgrading) 50 / 60 Hz ± %10 ≥ 0,99 < %5 380 / 400 / 415 Vac 3faz + N ± %1 (static load), dynamic load in accordance with VFI-SS-11 50 / 60 Hz ± %0,1 (self-synchronize), ± %1 (mains-synchronize) 0,8 ≤ %2 (linear load), ≤ %5 (non-linear load) 3:1 60 min. 10 min. 1 min. 10 sec. up to %94 up to %98 True online-double conversion, Three level inverter, Digital PFC Dual-DSP, SPWM SNMP, RS232, RS485, MODEM, MODBUS SNMPView, Remote monitoring panel 3 (Three) pieces Programmable relay Generator, Remote EPO , UPS start-stop Standard Standard Parallel Connection Feature Standard (cabled, up to 6) ENVIRONMENT Operating temperature Relative humidity Maximum altitude Noise level UPS CABINET 0-40 °C (from 20 °C to 25 °C for maximum battery life) % 0-85 (without condensation) ≤ 2000 m < 55 dB (A) 255 x 730 x 870 Dimensions (W x D x H) (mm) Weight (kg) Degree of protection Color Internal battery quantity Internal battery capacity (Ah) BATTERY CABINET Battery quantity Battery capacity (Ah) STANDARDS Certificates UPS LIFETIME E1 Series 10-20kVA Rev 1.0.1 20 48 50 IP20 RAL7012 30 7-9 30 7-9-12 60 7-9 60 12 EN 62040-1 (Safety), EN 62040-2 (EMC) 10 years Page| 62 E1 SERIES USER MANUAL AUTHORIZED TECHNICAL SERVICE E1 Series 10-20kVA Rev 1.0.1 Page| 63


