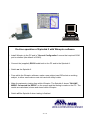
1
Spirolab
Spirolab II
User’s Manual
User’s Manual Rev. 2
Prepared by Massimiliano Perillo
Date 09 / 07 / 2001
Approved by Paolo Sacco Boschetti
Date 09 / 07 / 2001
1 / 46
Thank you for choosing a product from
MIR Medical International Research
The original packaging contains one of the following spirometers with its respective accessories:
Article
code
910560
910561
910550
910551
672685
910320
910350
910300
671492
910110
980060
270464
270468
Description
Spirolab with Black/White LCD display + 220V power supply
Spirolab with Black/White LCD display + 110V power supply
Spirolab II with colour LCD display + 220V power supply
Spirolab II with colour LCD display + 110V power supply
Nylon carrying- case
Nose clip
Roll of thermal paper
Sample of disposable paper mouthpiece
Connection cable RS 232, 9 pin for PC
Serial/parallel printer converter (optional)
User’s manual in English
Spare fuse (internal) 2A
Spare fuse (internal) 4A
Before using your spirometer …
•
Please read this manual carefully, plus the labels and all of the information supplied together with the
product
•
Set up the device (date, time, language, predicted values, etc.) to your requirements as described
under Configuration Menu in this Manual
Keep the original packaging!
•
In the event that your spirometer has a problem then you must use the original packaging to return the
machine to your local distributor or to the manufacturer
Due to ongoing product development and product improvements the manufacturer reserves the right to modify the
information contained within this manual.
Note that due to printing limitations the screenshots shown in this manual may differ from the display of the machine
and/or from the keyboard graphics.
Copying of this manual in whole or in part is strictly forbidden.
The manufacturer accepts no responsibility for loss or damage due to the use of this manual and/or due to an incorrect
use of the product.
2 / 46
IMPORTANT NOTE
If the device needs to be returned for repair the following steps must be followed:
• before sending the unit, written permission for return must be obtained from the manufacturer, with a Return
Authorization Number (RAN);
• the unit must be returned in its original packaging;
• the delivery must be prepaid by the sender.
Manufacturer’s address :
MIR srl
Via Del Maggiolino, 125
00155 Rome, Italy
Tel: ++ 39 0622754777
Fax: ++ 39 0622754785
e-mail: [email protected]
3 / 46
INDEX
INTRODUCTION
Pg. 6
INTENDED USE
User category
Qualification and experience required
Operating environment
Who must/can make the installation
Pg. 6
Pg. 6
Pg. 6
Pg. 6
Pg.
6
Subject effect on the use of the device
Limitations of use - Contraindications
Pg. 6
Pg. 6
IMPORTANT SAFETY WARNINGS
Pg. 7
DANGER OF CROSS – CONTAMINATION
The turbine
The mouthpiece
Pg. 10
Pg. 10
Pg. 10
PROBLEMS AND UNFORESEEN ERRORS
Pg. 11
LABELS AND SYMBOLS
Other symbols on the device
Pg. 12
Pg. 12
TECHNICAL FEATURES OF THE DEVICE
Parameters measured
Technical specifications
Pg. 13
Pg. 13
Pg. 14
DESCRIPTION OF THE DEVICE
Pg. 16
ILLUSTRATION OF Spirolab
Pg. 17
ILLUSTRATION OF Spirolab II
Pg. 18
KEYBOARD ILLUSTRATION
Pg. 19
OPERATING THE SPIROMETER
Charging the battery
Switching on the spirometer
Backlight settings
Contrast settings
Loading the thermal paper
Connecting the flow sensor
Switching off the spirometer
Pg. 21
Pg. 21
Pg. 21
Pg. 21
Pg. 21
Pg. 21
Pg. 22
Pg. 23
SPIROMETRY FUNCTIONS
Pg. 24
INSERT/MODIFY NEW SUBJECT DATA
Modify subject data
Automatic insertion of a subject FILE
Pg. 26
Pg. 27
Pg. 27
4 / 46
SPIROMETRY: FVC, VC/IVC, MVV
How to make spirometry testing
FVC
VC / IVC and breathing pattern
MVV
Pg. 28
Pg. 28
Pg. 28
Pg. 28
Pg. 29
SPIROMETRY POST DRUG TESTING
1st case: current subject
2nd case: subject from FILE
Physiological test (placebo)
Pg. 30
Pg. 30
Pg. 30
Pg. 30
VIEWING AND PRINTING THE RESULTS
Pg. 31
TEST QUALITY CONTROL OF THE SPIROMETRY
Pg. 32
REPRODUCIBILITY OF THE FVC TEST
Pg. 33
METHOD OF MEASUREMENT AND INTERPRETATION
Pg. 34
CONFIGURATION MENU
Delete data in memory
Print last calibration
Turbine calibration
Printout header text
DATE format: dd/mm/yy
UNITS format: cm, Kg
Change DATE/TIME
Choose operating language
Setup parameters
Setup printout
Pg. 35
Pg. 35
Pg. 36
Pg. 36
Pg. 37
Pg. 37
Pg. 37
Pg. 37
Pg. 37
Pg. 37
Pg. 37
FIND AND READ TESTS IN MEMORY
Subject List
Memory List
Pg. 38
Pg. 38
Pg. 38
FILE ORGANIZATION
Pg. 39
MAINTENANCE CLEANING AND STERILIZATION
Cleaning the device
Cleaning and sterilizing the turbine
and mouthpiece holder
Verify the free movement of the turbine
Pg. 40
Pg. 40
ON-LINE OF SPIROLAB II WITH WINSPIRO SOFTWARE
Pg. 44
PROBLEMS / CAUSES AND SOLUTIONS
Pg. 45
LIMITED WARRANTY CONDITIONS
Pg. 46
5 / 46
Pg. 40
Pg. 41
INTRODUCTION
The spirometers series MIR 010 are sold with the Spirolab and Spirolab II names.
The difference between the two models Spirolab and Spirolab II is that the Spirolab II model includes
an LCD colour display and a full International Alphabet Keyboard with 29 characters.
In the Spirolab model the display is in Black/White and the keyboard does not include the 29
International Alphabet characters.
If not otherwise specified, from this point onwards, for reasons of brevity “Spirolab” is used in reference to both models.
INTENDED USE
User Category
The spirometer calculates a series of parameters relating to human respiratory function. The product is therefore intended for use by a
doctor or by a paramedic under the supervision of a doctor.
Qualification and experience required
The correct use of the device, the interpretation of the test results plus the maintenance of the device, in particolar the sterilization (to
avoid the risk of cross-infection) all require qualified personnel.
Operating environment
It is foreseen that the normal operation of the device will be within a doctor’s office or within a hospital ward.
The device is not intended for use in an operating room or in the presence of inflammable liquids or detergents, nor in the presence of
inflammable anaesthetic gases, oxygen or nitrogen.
The device is not designed to be used in direct air currents (eg. wind), sources of heat or cold, direct sun rays or other sources or
light or energy, dust, sand or any other chemical substances.
The user is responsible to ensure the suitability of the ambiental conditions both for the storage and for the operation of the device.
Who must/can make the installation
The device requires installation by qualified personnel. It is the responsibility of the user of the device to ensure that the required
operations are made.
Subject effect on the use of the device
A spirometry test should only be carried out when the subject is at rest and in good health, and thus in a suitable condition for the
test. A spirometry test requires the collaboration of the subject since the subject must make a complete forced expiration, in order to
have a meaningful test result.
Limitations of use- Contraindications
An analysis of the results of a spirometry test is not by itself sufficient to make a correct diagnosis of the subject’s clinical
condition. A detailed clinical history of the subject is also required together with the results of any other test(s) suggested by a
doctor. Test comments, a test interpretation and suggested courses of treatment must be given by a doctor.
Any symptoms that the subject has at the time of the test must be carefully considered before a spirometry test is made. The user is
responsible to assess both the mental and the physical capacity of the subject to make a correct test and the user must also assess the
degree of collaboration for each test carried out.
The acceptability of a test is the responsibility of the user. Special attention should be given to testing elderly subjects, children and
handicapped people.
The device should never be used when it is possible or probable that the vadility of the results may be compromised due to any such
external factors.
6 / 46
IMPORTANT SAFETY WARNINGS
Spirolab has been examined by an independent laboratory which has certified the conformity of
device to the European Safety Standards EN 60601-1 and guarantees the EMC Requirements within
limits laid down in the European Standard EN 60601-1-2
The Spirolab is continually controlled during its production and therefore the product confirms to
established security levels and quality standards laid down by the Council Directive 93/42/CEE
MEDICAL DEVICES
the
the
the
for
After removing the device from its package, control that there is no visibile damage present, pay particular attention to any flaws or
cracks in the plastic casing that may lead to exposure of electrical components.
Note that this symbol means:
read the instructions carefully before use
The safety and the correct performance of the unit can only be assured if the user of the device respects all of the current safety rules
and regulations.
Conserve the instructions for use together with the warranty conditions for any future reference or in case the device presents technical
problems.
The device must be used only and exclusively as a spirometer following the indications given by the manufacturer with particular
attention to the paragraph on INTENDED USE utilizing only original spare parts and accessories.
Any use of the device which differs from the original is to be considered improper and therefore dangerous.
The manufacturer cannot be held responsible for damage caused by the failure of the user to follow these instructions correctly, misuse
of the device whether that misuse is improper, incorrect and/or unreasonable, or when the device is connected to an electrical outlet
which does not conform to the safety regulations in force.
The device and its accessories must be controlled before each and every use, so that any malfunction and/or damage caused during
transport and/or storage may be detected.
Do not use the device in the presence of inflammable anaesthetic gases, oxygen or nitrogen.
Keep the device away from hot and/or cold sources.
The thermal paper used for printing is highly inflammable. Keep away from open flames.
High-frequency emissions that are outside the limits expressed by the EN60601-1-2 may interfere with the correct functioning of the
device. High frequency emissions coming from other electrical or electronic devices can in fact interfere with the functioning of the
device. For this reason certain minimum clearances (a few meters), should be observed when high-frequancy appliances such as TV,
radio, cellular phones, etc and other electronic units are operated in the same room.
When connecting the Spirolab to any other devices (PC, printer, modem etc.), the user must guarantee that the required security
level for subjects and/or users in the same room are not in any way endangered by the connection.
In order to maintain the essential safety characteristics laid down by EN 60601-1-1, only equipment which complies with the current
safety regulations must be used.
In case the device is not functioning properly, switch it off and consult the instruction manual.
After correctly following all the instructions, if the device does not function correctly, call the manufacturer or an authorized service
centre for assistance.
For any repairs call only certified service centres that are authorized by the manufacturer.
Do not open or tamper with the device.
7 / 46
Always use and demand only original spare parts.
Use of non original parts such as the turbine flow sensor and other accessories may cause errors in measurement and/or
compromise the correct functioning of the device and is therefore not permitted.
The installation must be carried out according to the manufacturer’s instructions. An incorrect installation may cause damage to
people, animals or things, in which the manufacturer is not to be considered liable.
Any modifications, adjustments, repairs or reconfiguration must be made by the manufacturer or by personnel authorized by the
manufacturer.
In case of problems, never attempt to make repairs by oneself.
The set-up of the configurable parameters should only be made by qualified personnel. However, an incorrect set-up of the
parameters does not put the subject at risk.
Inadequate respect to any of the above-mentioned points may compromise the safety of the device.
Always respect the safety norms indicated for electrical devices, in particular:
•
•
•
•
•
•
•
•
use only original accessories and spare parts
do not immerse the device in any type of liquid
do not touch the device with wet or damp hands
do not leave the device exposed to atmospheric conditions
during any maintenance operations keep the device
use of the device always requires full mental ability
when unplugging the device, never pull the cable of the power supply or of the device.
always place Spirolab on a suitable rigid horizontal on a stable surface with at least 30 cm of space all around the device. The
ventilation slots must be free from any cover or obstruction of any kind. The ventilation slots are located both behind and
underneath the plastic outer casing of the device.
Before plugging in the charging unit, make sure that the electrical information on the label of the charging unit corresponds to those of
the electrical wiring of the mains supply.
In case the plug of the charging unit supplied with the device is not compatible with the electric socket of the mains supply, call
qualified personnel for the substitution of the plug with a suitable one. Generally, it is not advisable to use adapters and/or extension
cables. If it is essential to use them, it is necessary to utilize only types that conform to the safety norms, paying attention that they
tolerate the maximum limits which are indicated on adapters and extension cables.
Unplug the power supply cable when battery charging is not required.
In case of breakdown or damage of the charging unit, replace it only with the manufacturer’s original spare parts.
Use of an unsuitable power supply may change the performance of the device and no longer guarantee the safety conditions.
In order to avoid dangerous overheating we recommend to totally unwind the power supply cable of the charging unit.
The maintenance operations detailed in this manual must be carried out precisely. If these instructions are not followed this can
cause measurement errors and/or incorrect test interpretation.
Before doing any cleaning and/or maintenance operations, always switch off the device and unplug the power supply.
Keep the device out of reach of children and of any person with mental handicap.
When deciding to no longer use the device, it is recommended to dispose of it according to the local regulations.
8 / 46
In order to avoid contamination of the environment provoked by disposing of the spirometer, of its accessories, of plastic consumable
materials or parts, follow all local regulations.
Do not use the product for longer than the declared life expectancy.
If the LED of the lithium back-up battery flashes, (the lithium battery is used for the back up of the test data and spirometry
parameters in the memory, plus the device configuration) which indicates that the battery is low, then all information stored may be
cancelled automatically.
The batteries used for power supply and for data storage are both inside the device. It is not permitted to open the device in order to
replace them. This procedure must be carried out only in an authorised service centre, authorized by the manufacturer.
9 / 46
DANGER OF CROSS- CONTAMINATION
The device uses a turbine sensor and in order to connect a subject to the spirometer a mouthpiece is required. Always use a new
disposable mouthpiece for each subject.
In order to avoid exposing the subject to the critical danger of cross-contamination certain components of the flow sensor must
always be sterilized before each spirometry test.
The turbine
An incorrect or insufficient sterilization and cleaning of the turbine (which is made up of the turbine plus the mouthpiece holder)
could be a cause of infection for the subject.
For details of the correct sterilizing operation see the relevant paragraph in MAINTENANCE CLEANING AND
STERILIZATION as described in this manual.
Do not expose the turbine sensor to a direct jet of water or air, nor allow it to come into contact with liquid at high temperature.
Do not allow dust or foreign bodies to enter the turbine sensor, in order to avoid incorrect functioning and possible damage.
The presence of any impurities such as hair, sputum, threads etc within the body of the turbine sensor may seriously compromise the
accuracy of the measurements.
In order to avoid ambiental contamination caused by the disposal of cleaning and sterilizing substances the user must follow all
relevant local regulations.
The mouthpiece
Any disposable mouthpieces included with the device are supplied only as a guide to the correct type and dimensions of the
mouthpiece required for this device, they are clean but not sterile.
To purchase appropiate mouthpieces, generally either paper or plastic but in any case mono-use/disposable, we suggest that you contact
your local distributor who supplied the spirometer.
The use of a mouthpiece made from an inappropriate material could modify the bio-compatibility and could be the cause of an
incorrect functioning of the device and thus of incorrect test results, and create inconvenience to the subject.
The user is responsible to obtain the correct type of mouthpieces for the device. Those required are a standard type with an outside
diameter of 30mm, they are commonly used and in general easily procured.
In order to avoid ambiental contamination caused by the disposal of the used mouthpieces, the user must follow all relevant local
regulations.
10 / 46
PROBLEMS AND UNFORESEEN ERRORS
In case of any problems, one of a series of messages to indicate the nature of the problem will appear on the LCD display
accompanied by an acoustic signal.
If appropriate and timely action is not taken in the event of such messages appearing during the life of the device, then it is
possible that the device will lose its working memory (SRAM).
Errors in measurement or in test interpretation can also be caused by :
•
•
•
•
•
•
•
lack of adequate care of the device,
operation by non-qualified or non-trained personnel, lacking the required ability and/or experience
user error
use of the device outside the guidelines described in this User’s Manual
use of the device even when some operational anomalies is encountered
non-authorized servicing of the device
improper, incorrect and/or unreasonable use of the product
Following the European Directive:
93/42/CEE for MEDICAL DEVICES
In the event of any accident caused by the device, the user must inform the manufacturer as quickly as possible.
11 / 46
LABELS AND SYMBOLS
Identification label of the spirometer model Spirolab
REF:Spirolab
S/N: A23-051xxx
Via del Maggiolino, 125 - 00155 Roma Italy
[email protected]
0476
Identification label of the spirometer model Spirolab II
REF:Spirolab II
S/N: A23-050xxx
Via del Maggiolino, 125 - 00155 Roma Italy
[email protected]
0476
The identification label on the underside of the housing shows the product name, plus the following:
• Manufacturer’s name and address
• Product conformity marking, in line with the CE 93/42 guidelines
• Serial number of the device
0476 EC mark for medical devices.
The product is certified to conform to the requirements of the 93/42/CEE medical devices directive.
Electrical safety symbol. In accordance with the EN 60601-1 the product and
its component parts are of type BF and therefore protected against the
dangers of direct and indirect contact with electricity.
Other symbols on the device
Warning symbol for the connection of the power
supply.
To charge the internal battery use only and exclusively
the original power supply
( 12 V - 1A DC) guaranteed and certified to the EN 60601-1 Safety Standard
Warning symbol for the turbine connector.
Use only and exclusively the original turbine flow sensor
Warning symbol for the RS232 serial port. For connection to other
devices such as PC or printer.
RS 232 port use only the serial cable supplied by the manufacturer and observe the safety regulations of EN
60601-1-1
12 / 46
TECHNICAL FEATURES OF THE DEVICE
Parameters measured
ERV
FEF25
FEF50
FEF75
FEF25/75
FET
FEV1
*FEV1
FEV6
FEV1%
FEV6%
FEV1%VC
FEV1/FEV6%
FIVC
FIV1%
RR
FVC
*FVC
IC
IVC
MVV
PEF
*PEF
PIF
Te
Ti
ti/te
TV
TV/ti
VE
Vext
VC
Expiratory reserve volume
Maximum flow at 25% of FVC
Maximum flow at 50% of FVC
Maximum flow at 75% of FVC
Average flow from 25% to 75% of FVC
Forced expiratory time
Volume expired in the first second of test
Best FEV1
Volume expired in the first 6 seconds of test
FEV1/FVCx100
FEV6/FVCx100
FEV1/VCx100
FEV1/FEV6x100
Inspiratory forced vital capacity
FIV1/FIVCx100
Respiratory frequency at rest
Forced Vital Capacity
Best FVC
Inspiratory Capacity
Inspiratory slow vital capacity
Maximum Voluntary Ventilation
Expiratory peak flow
Best PEF
Inspiratory peak flow
Average time of expiration at rest
Average time of inspiration at rest
Ratio ti/te
Tidal volume
Average inspiratory flow at rest
Ventilation at rest
Extrapolated volume
Expiratory slow vital capacity
13 / 46
L
L/s
L/s
L/s
L/s
s
L
L
L
%
%
%
%
L
%
Atti/m
L
L
L
L
L/min
L/s
L/s
L/s
s
s
1
L
L/s
L/min
mL
L
Technical Specifications
Temperature sensor:
Semiconductor (0-45°C)
Memory capacity:
Mod. Spirolab: around 400 tests
Mod. Spirolab II: around 1500 tests
A complete test is comprised of the parameters, the Flow/Volume and Volume/time curves. The number
of tests is approximate as it depends upon the configuration of the device and the type of tests made.
Display:
Mod. Spirolab:Graphic B/W passive type FSTN LCD 320x240 pixel
Mod. Spirolab II:Graphic 16 colour passive type FSTN LCD 320x240 pixel
Keyboard:
Silicon rubber keyboard
07 Hardware function keys, with symbols
15 Software function keys, with symbols
05 Easy search keys with symbols (right,left,up,down,enter)
02 Gender identification with appropiate symbols
10 Number keys
29 International alphabet keys
Communication port/interface:
RS232, bidirectional and optoisolated to 4KV
Power supply:
Rechargeable battery, Ni-MH, 6 elements 1.2V each, 4000 mAh
Dimensions:
310x200x65mm
Weight:
1.9 kg
Flow/volume measurement system:
Bidirectional digital turbine
Measurement principle:
Infrared interruption
Volume range:
10 L, BTPS
Flow range:
±16 L/s, BTPS
Volume accuracy:
± 3% or 50 mL
Flow accuracy:
± 5% or 200 mL/s
Dynamic resistance at 12 L/s:
< 0,5 cmH2O/L/s
Type of electrical protection:
Class II device
Safety level for shock hazard:
Apparatus type BF
Protection against water penetration :
Standard device
Safety levels during use in presence of inflammable anaesthetic gases or oxygen or nitrogen:
Apparatus not suitable
Conditions of use:
Apparatus for continuous use
Conditions of storage :
Temperature: MIN 0 °C, MAX + 40 °C
Humidity :MIN 10% RH; MAX 95%RH
14 / 46
Operating Conditions :
Temperature: MIN + 10 °C, MAX + 40 °C;
Humidity:MIN 10% RH; MAX 95%RH
Applied norms:
Electrical Safety Standard EN 60601-1
Electro Magnetic Compability EN 60601-1-2
Expected working life:
A life expectancy of 10 years is declared
This device is a Class IIa medical device according to the European Directive 93/42/CEE.
15 / 46
DESCRIPTION OF THE DEVICE
Spirolab is a new generation spirometer, it facilitates the total valuation of lung function. The product is
designed for use by specialists who require a simple, compact device but one at the same time capable of
calculating more than 30 spirometric parameters .
Spirolab makes FVC, VC, IVC, MVV and breathing pattern tests and calculates an index of test
acceptability (test quality control) and a measure of reproducibility; and also gives functional
interpretation with 11 possibile levels following the latest ATS (American Thoracic Society) classification.
The main spirometric parameters are measured and displayed and all data with Flow/Volume and
Volume/time curves can be printed out in seconds by the built-in thermal printer.
The Flow/Volume curve is shown in real time.
Each test can be repeated several times. The best parameters are always available for rapid reference or
printing. Several sets of predicted (or reference) values can be selected from five different authors. For
example, in general within the European Union the values recommended by the ERS (European
Respiratory Society) are used.
The device also calculates the response to drug administration, that is the percentage change between
spirometry results obtained after the subject takes a drug and those prior to the drug (PRE/POST) plus
the results of a bronchial challenge test or a bronchodilation test. A comparison of data is made between
POST (after-drug) and PRE (before drug administration).
The keyboard is organized to be quick and user friendly, thanks to the 15 programmed keys.
The internal memory can contain more than 1000 spirometry tests complete with Flow/Volume and
Volume/time curves.
Spirolab is supplied with an RS-232 optoisolated serial communication port, which guarantees excellent
electrical protection (> 4 KV) both for the doctor and for the subject, and respects the most severe
European safety requirements (EN 60601-1).
The machine can be connected directly to the serial port of a printer using the standard RS 232
communication port. To connect to the parallel port an optional serial to parallel converter is required.
The internal software (or firmware) inside the device can be upgraded quickly and simply from a PC.
To make this upgrade consult the manufacturer or an authorized representative.
16 / 46
ILLUSTRATION of Spirolab
1
2
3
1. Flow sensor
2. Thermal paper container lid
3. Flow sensor compartment
4. Black and White Display
5. Keyboard
17 / 46
4
5
ILLUSTRATION of Spirolab II
1
2
3
1. Flow sensor
2. Thermal paper container lid
3. Flow sensor compartment
4. Colour display
5. Keyboard
18 / 46
4
5
KEYBOARD ILLUSTRATION
Mod. Spirolab / Spirolab II
Green LED
Device on
Orange LED
Battery charging
Green LED
Battery charged
Switch On / Switch Off
...
Number keys
Correction key, to cancel the number inserted; press twice to return to the number inserted
previously, when used for viewing pages shows the previous page
ENTER key and scroll forward key (when viewing pages).
Adjust contrast. Press several times as required
Adjust brightness. Press several times as required
Advance the printer paper
Self-check key (will be activated in a future release of the internal software)
Specifies female sex
Specifies male sex
Insert or modify subject data
Configuration menu
View best test result
View last test result
19 / 46
View bronchodilation test
Print
Cancels the current operation
Make FVC test
Make VC test
Make MVV test
Make POST test
Memory management of spirometry data
Help key (will be activated in a future release of the internal software)
Move cursor and/or move within a page
20 / 46
OPERATING THE SPIROMETER
First check that all accessory items are in good condition.
Before using the device, proceed with the cleaning and sterilizing operations, as described in the
MAINTENANCE CLEANING AND STERILIZING section.
Charging the battery
Make sure that the electrical information found on the label of the charging unit corresponds to that of the
mains power.
Plug the power supply into an electrical outlet.
Plug the power supply jack into the socket on the back of the device
Do not use the power supply if it is wet or damp.
The charging process has several phrases which are signalled by two LEDs, one green and one orange.
•
•
•
•
•
Immediately after connecting the power supply, the orange LED (on the right hand corner near the
battery symbol) starts to flash.
After a few seconds the orange LED stops flashing and remains lit.
For about 10 minutes the charging is only partial and the device automatically checks the condition of
the battery.
After 10 minutes the charging starts and proceeds to full charge.
When charging is completed the orange LED turns off and the green LED lights up.
It is possibile that during battery charging there may be a slight increase of a few degrees in the temperature of the power supply.
During charging place Spirolab on a suitable hard surface with at least 30 cm of space all around the device.
Switching on the spirometer
Lift the LCD display, release the catch.
on/off key on the upper left corner of the keyboard. When the device is on, the green led
Press the red
on the right hand side of the on/off key should light up.
Backlight settings
To adjust the backlighting of the display use the double key
left to diminish the brightness or on the right to increase it.
. Press several times as required, on the
Contrast settings
To adjust the contrast of the display, according to the angle of vision and the surrounding light, use the
. Press several times as required, on the left to diminish the contrast or on the right to
double key
increase it.
Loading the thermal paper
Open the lid of the thermal paper compartment and remove the paper roll holder.
Insert the new roll of paper onto the paper roll holder.
Push the paper into the slot located under the traction reel (black rubber reel).
A sensor detects the paper and automatically advances it. The paper will advance to the “tearing” line.
Insert the paper roll holder into the appropiate slots.
Close the lid of the compartment.
The paper must advance through the slot in the compartment when it is closed.
If necessary make the paper advance forward by pressing the key
To avoid dammage to the printer and/or defects in printing, it is recommended to always use thermal paper with 112 mm width
size.
21 / 46
The sensibility of the thermal paper must be suitable for printers with a printing speed of 50 mm/s. This type of paper is easy to find
at most medical device dealers.
Connecting the flow sensor
The flow sensor is made up of the elements shown in the following illustration
optoelectronic
sensor
turbine
mouthpiece
holder
mouthpiece
Before doing any spirometry testing be sure that there are no foreign bodies present inside the flow sensor.
Attach the connector of the flow sensor on the left hand side of the Spirolab.
Make sure that a new diposable mouthpiece has been correctly inserted into the mouthpiece holder, as
shown.
22 / 46
Detail of the flow sensor
compartment
Carefully follow all the instructions given in the various paragraphs of this manual, to ensure that
all of the functions operate correctly.
Remove the used mouthpiece and dispose of it after finishing the spirometry testing.
When the flow sensor head is not in use, we recommend that it is kept in its compartment.
Press lightly on the connector to detach the flow sensor turbine from the socket on the left hand side of the
device and proceed with the cleaning operations as outlined in the MAINTENANCE CLEANING AND
STERILIZING section of the manual.
Switching off the spirometer
After a few minutes (generally about 5 min) that the device is not used then the device automatically turns
itself off in order to reduce battery consumption. In any case, if the device remains switched on when all
on/off key. When the device is switched off,
operations are completed, switch it off by pressing the red
the green (LED) indicator on the right hand side of the on/off key should also turn off.
When there is no need to charge the battery, detach the power supply from the power supply socket on the
back of the device and remove it from the mains socket.
23 / 46
SPIROMETER FUNCTIONS
Spirolab makes the following spirometry tests:
Forced Vital Capacity test
Slow Vital Capacity test
Maximum Voluntary Ventilation test
The valuation and interpretation of test results are given by comparing the measured parameters with
specific ‘normal’ spirometry values (known as predicted values) which are calculated from subject data:
age, height, weight, sex and ethnic group.
For the calculation of the ‘normal’ spirometry values, there are five different sets available, both for adults
and for children.
• for adults
•
“
•
“
•
“
• for children
• for children
ERS (European Respiratory Society)
Knudson
Morris/Bass
Multicentrico Barcellona
Knudson
Zapletal
After each test session the results are compared to the relevant predicted values and the percentage ratio
between measured and predicted is shown for each parameter.
% Predicted = Measured/Predicted x 100
The test can be repeated more than once and the best result is memorized in order to recall it from the
Spirolab’s memory .
The best test result is determined following the ATS (American Thoracic Society), and ERS (European
Respiratory Society) standards as described in APPENDIX B.
All tests are analyzed by applying six quality criteria (quality control), following the latest ATS
recommendations. In addition the reproducibility of the FEV1, FVC and PEF parameters are also
calculated
It is possible to make POST drug testing, in this case the test results are compared to a test made prior to
the administration of drugs (PRE-Test) from memory.
Spirolab visualizes and prints the two Flow/Volume and Volume/time curves superimposed, with PRE and
POST parameter comparison and percentage of change.
% PRE =Value POST/Value PRE –100%
The sections of the manual written with the character type SPIROMETER represent the display of the
device.
24 / 46
Spirolab
v. x.y
-------------------------------------------DATE 29/03/01
TIME 12:44:00
PRE FILE
N°1
-------------------------------------------#ID
LAST NAME
FIRST NAME
-------------------------------------------BIRTH DATE
HEIGHT
cm
AGE
WEIGHT
Kg
SEX
-------------------------------------------ETHNIC G.
-------------------------------------------SPIROMETRY INTERPRETATION
-------------------------------------------CHOOSE ANY FUNCTION
After switching on, the current date and time is shown, the time of the last calibration control is printed and
the opening screen appears.
Some values shown are as follows:
v. x.y
Indicates the version of the software (firmware) inside the spirometer. In case of technical problems always
note the version number.
DATE and TIME
The present date and time, which can be modified from the configuration menu.
PRE drug
The first test for each new subject is a PRE type, ie without the administration of drugs. For the POST test
ie after the administration of drugs, see the relevant paragraph in the POST test chapter of this manual.
FILE
Spirolab assigns a progressive number to each new test PRE, and to each POST test that is made (on the
same person) when the dose of the drug is changed.
#ID
Indicates the subject number or identification code which is inserted by the user.
If an existing ID code is inserted, the device will warn the user with the message:
WARNING! THIS #ID IS ALREADY
ASSIGNED TO A SUBJECT. CONFIRM
THIS EXISTING SUBJECT OR MODIFY
SPIROMETRY INTERPRETATION
Indicates the test interpretation made
Automatic Interpretation.
The functional diagnosis or more correctly the test interpretation carried out by the Spirolab follows
the most recent ATS recommendations with 5 levels of obstruction and of restriction plus a normal
spirometry diagnosis.
For obstruction (ie reduced flows):
Very Severe Obstruction
Severe Obstruction
25 / 46
Mod. Severe Obstruction
Moderate Obstruction
Mild Obstruction
For restriction (ie reduced volume)
Very Severe Restriction
Severe Restriction
Mod. Severe Restrict.
Moderate Restriction
Mild Restriction
If instead the results show that the lung function of the subject is normal then the following message is
shown:
Normal Spirometry
If there is insufficient data for the interpretation to be calculated then the following message is shown:
Not Valid
ATTENTION
THE INTERPRETATION MADE WITHIN A TEST SESSION FOR ANY SUBJECT IS ALWAYS
BASED UPON THE BEST TEST MADE IN THAT SESSION BY THAT SUBJECT.
26 / 46
INSERT/MODIFY NEW SUBJECT DATA
Press
key
CHANGE NEW Modify the details of the current subject or enter the anthropometric details of the new subject.
Spirolab
v. x.y
------------------------------------------#ID
LAST NAME
FIRST NAME
------------------------------------------BIRTH DATE 04/05/71
H EIGHT
cm
0
AGE 0
WEIGHT
Kg
0
SEX
------------------------------------------ETHNIC G.
------------------------------------------SPIROMETRY INTERPRETATION
CHOOSE ANY FUNCTION
The cursor blinks on the ID code. Enter code via the keyboard
or cancelled with
ID code must be confirmed with
entered use
. To change a number after it has been
key to return the cursor to the area required.
Enter the subject ID code: this can be a combination of 10 characters with which it is possible, afterwards,
to recall the subject test details.
AGE
Enter the subject’s age in years (1-99) with keys
SEX
Select gender using the keyboard,
for male and
...
for female.
HEIGHT
Enter the subject’s height (in cm or in inches, according to the current configuration).
WEIGHT
Enter the subject’s weight (in Kg or in pounds, according to the current configuration).
ETHNIC GROUP.
A list of possible ethnic groups appear.
By relating a subject to an ethnic group, the predicted values for that subject are then modified by a
percentage which is according to ERS and published in THE EUROPEAN RESPIRATORY JOURNAL
Volume 6 Supplement 16 March 1993 “Standardized Lung Function Testing” paragraph 5.3.
By entering the number 0 (zero), no ethnic correction will be made to the calculation of the predicted values. It is possible to enter
ethnic group n° 10 to define a “custom” correction percentage of predicted values, that goes from 50% to 200% of the predicted value
in use.
Modify subject data
To modify subject data press the
key and repeat the data entry procedure.
AIl data not to be modified must be confirmed by pressing
Automatic insertion of a subject FILE
27 / 46
.
Press the key
Enter the existing subject ID code, and press
In case the ID code of a subject’s FILE cannot be remembered then it is possibile to find it by using
function.
28 / 46
SPIROMETRY: FVC, VC/IVC, MVV
All the subject’s data must be inserted before making a spirometry test.
The test can be made from the main display or from any display that show a previous test result (last test,
best test or test in memory).
Selection of the spirometry test:
To make the FVC test
To make the VC/IVC test and breathing pattern tests (if required)
To make the MVV test
As the test is carrying out the Flow/Volume curve or the Volume/time curve are shown on the display, in
real time.
The test must begin within 30 seconds after pressing the start key, otherwise the test is interrupted and the
device returns to the main screen.
The key
or the lack of a volume variation for more than 3 sec. will terminate the test.
How to make spirometry testing
Insert the new mouthpiece into the mouthpiece holder.
Fit the noseclip tightly onto the nose of the subject to ensure that air cannot escape through the nostrils.
The mouthpiece must be inserted well into the mouth (beyond the teeth) and the mouth must be closed
around the mouthpiece to ensure that air cannot escape from the sides of the mouth.
Breath as directed according to the test required, details as follows.
Make the test in a standing or a sitting position. During total expiration (slowly or forced) it is suggested to
bend forward at the waist as this movement helps to force air out of the lungs.
FVC
If required (this is optional) before the test make several breaths at rest. When ready inspire slowly as
much air as possible (opening the arms helps) and then expire all of the air as fast as possible. Then,
without removing the mouthpiece from the mouth, finish the test by inspiring again as fast as possible. This
final inspiration is not necessary if the inspiratory parameters (FIVC, FIV1, FIV1%, PIF) are not required.
It is possible to repeat the cycle several times, (without removing the mouthpiece) and in this case
Spirolab will automatically select the best test and will show the results.
To end the test press
or wait 3 sec. after the last volume cycle.
In the case of an FVC test, after making at least two valid tests, the reproducibility of the parameters FVC, FEV1, and PEF is
shown.
VC / IVC and breathing pattern
It is possible (optional) to begin the test by making several breaths at rest. After three or four similar
breaths a message (VC/IVC) will indicate that the breathing pattern has been measured and that you can
go ahead and make the VC or IVC test.
How to make a VC test:
When the message VC/IVC appears inspire slowly as much air as possible into the lungs and then expire
slowly as much air as possible.
How to make an IVC test:
When the message VC/IVC appears expire slowly as much air as possibile and then inspire slowly as
much air as possible.
or wait for 3 sec after last volume variation.
To end the test press
If you make the test without the breathing pattern (respiratory function at rest) then the measured
parameters will be only VC or IVC.
MVV
29 / 46
Start the test making a series of forced inspirations and expirations, breathing as deeply as possible. The
ideal frequency to instruct the subject is 30 breaths/minute. The test stops automatically after 12 seconds.
To finish press
or wait 3 sec after the last volume variation.
At the end of the test the display shows shows the curves made and on the right of the display the
measured parameter.
After viewing the curves, press the
key to view the related parameters, the predicted values and the
percentage ratio between the measured value and the predicted value.
30 / 46
SPIROMETRY POST - DRUG TESTING
1st case: current subject
After one or more PRE tests, to make a POST test on the current subject proceed as follows.
Press
key to activate the POST phase.
A POST test can be made immediately.
2nd case: subject from FILE
To recall a subject from memory in order to make a POST test, you must first ‘recall from memory’ the
corresponding PRE test of that subject. Proceed as follows:
Press
Select either Subject List or Memory List to list the relevant PRE test and then select the FILE number of
the PRE test to use for the POST test.
Then press
to activate the POST phase.
Note that when the POST phase is active, the data of the existing subject test are shown on the display.
On the upper left appears the POST file number.
During the POST phase it is possibile to make FVC, VC and MVV tests.
Before making any of the POST tests
the device requests the input of the drug dose.Insert the dose with the numerical keys and confirm with
.
Whenever the test is repeated using the same dose, the best test related to the dose used is memorized.
When the dose is changed then a new record is made with a progressive FILE number. For example, if
three different doses are used for the same subject, then three different records ( POST tests) are made for
that subject.
Afterwards it is possible to view the separate best POST tests.
The subject code in the POST test is the same as for the related PRE test.
In the POST phase, the measured result is compared to the values of the relevant PRE test made before
the drug administration.
The Flow/Volume curves of the PRE test and related POST test are shown on the same graph.
key, to proceed to the viewing of the measured
When the two curves are shown, press the
parameters (POST), of the related PRE values and the percentage variations between POST and PRE.
In the POST phase no test interpretation is given, the test quality control messages are shown.
Physiological Test (placebo)
It is common practise prior to a POST test to make a test using physiological solution in place of a drug, to
examine the subject’s response to such a stimulus.
If the subject is healthy the reaction to a placebo is almost zero but in the case of hypersensitivity even this
stimulus can cause some reaction.
In the physiological test the amount of the dose to enter is zero and it is still possible to compare the
POST results with those of the PRE test.
31 / 46
VIEWING AND PRINTING THE RESULTS
From the main screen it is possible to view and print the following:
Press
key for results plus Flow/Volume curves relating to the best test.
Press
key for results plus Flow/Volume curves relating to the last test.
All tests in memory can be recalled, viewed and printed.
The test results in the memory are the best test results.
The current test result can be printed by pressing
viewing best/last test.
from the main screen, at the end of a test and when
To print a test result in memory after recalling it, press the
To interrupt printing press
key
.
The printout consists of a heading with date, time and the BTPS factor at the moment of the test, subject
data, the FILE number, the ethnic correction percentage chosen (if any) and the author of the predicted
values. Then follow the Flow/Volume and Volume/time curves which can be from the last test or the best
test.
By pressing
from the main screen the best test will be printed.
To print instead the last test press
when viewing the data related to the last test.
A list of the measured parameters plus the test interpretation then follow.
In case of a PRE test the following values are shown:
Pred.
predicted values
PRE
values measured before the administration of drugs
%Pred. percentage values compared to predicted values
In case of a POST test, the two curves will be superimposed and in addition to the parameters previously
described, the following are shown:
POST measured value after the administration of drugs
%CHG represents percentage variation (+/-) between POST and PRE.
32 / 46
TEST QUALITY CONTROL
By applying a series of mathematical calculations (quality control) to certain key parameters, Spirolab
produces a series of test comments which are useful to understand how well the test was performed.
Vext and PEFT ERROR
If the extrapolated volume Vext is greater than 250 mL or more than 5% of FVC, or when the PEFT (time to
peak flow) is greater than 200 ms, this message is shown:
repeat the test and blow faster
DROP IN FLOW >50%
If there is a drop in flow (>50%) and the flow then rises again all within the 1st second of the expiration,
this message is shown:
repeat and avoid coughing
FET ERROR
If the FET is less than the minimum, this message is shown:
expiry time insufficient
FLOW ERROR
If the last point of the F/V curve is greater than 200 mL/s this means that the expiration was not finished
and therefore this message is shown:
blow out all air in the lungs
33 / 46
REPRODUCIBILITY OF THE FVC TEST
Following the international ATS and ERS standards, it is recommended to repeat at least 3 times every
FVC test to ensure the reliability of the spirometry test results. The device helps the user through the
reproducibility control check.
Between one test and another, the reproducibility of the following parameters is calculated:
FVC
⇒
reproducible if ΔFVC < 5 % or < 200 mL
FEV1
⇒
reproducible if ΔFEV1 < 5 % or < 100 mL
PEF
⇒
reproducible if ΔPEF < 10 %
Δ (delta) indicates the difference between two measured values.
At the end of an FVC test the reproducibility of a single parameter is indicated alongside the numerical
value by a + sign (reproducible) or a - sign (not reproducible).
An FVC test is defined as reproducible when you have the reproducibility (+) for at least the FVC and FEV1
parameters.
34 / 46
METHOD OF MEASUREMENT AND INTERPRETATION
The device uses the infrared interruption measurement principle, with two sets of optoelectronic
transmitters and receivers.
A pair of deflectors positioned at the entry and at the exit of the turbine tube generates a vortex around the
axis of the sensor in the passing air.
A rotor with a speed of rotation directly proportional to the air flow then interrupts the the infrared beams
and generates a signal. The measurement of the air volume that passes through the tube is proportional to
the interruption of the infrared rays.
This measurement principle guarantees stability, reproducibility and reliability over a long period of time.
The measurement is not effected by gas density, humidity or pressure.
The cleaning of the turbine flow sensor is very simple and essential for the protection of the subject from
possible infections. For cleaning and sterilizing operations see the relative paragraph of this manual.
No calibration of the turbine is required but it is good practice to make a calibration check, see the simple
instructions found in the relevant paragraph in the maintenance section of this manual.
Method of test interpretation
Following every FVC test, the device makes a quality control check to verifiy the validity of the test made
and also (if possible) a test interpretation by comparing the main measured parameters FEV1, FEV1%
and FVC with the respective normal (predicted) values. It also calculates a series of indices as follows:
index % = measured values / normal value x 100
The interpretation of these indices % following the ATS standards then generates a series of messages
corresponding to possibile levels of obstruction or restriction and one level of normal spirometry, as
shown in the following table :
•
•
•
•
•
•
normal spirometry
very mild restriction or obstruction
mild restriction or obstruction
moderate restriction or obstruction
severe restriction or obstruction
very severe restriction or obstruction
If it is not possibile to make the calculations for lack of data the interpretation is not valid and this message
appears:
•
Not Valid
Attention – The interpretation during a test session for each subject refers always to the best test result.
35 / 46
CONFIGURATION MENU
CONFIGURATION MENU
------------------------------------------Delete data in memory
Print last calibration
Turbine calibration
Printout header text
Change DATE/TIME
Choose operating language
Choose predicted values
Setup parameters
Setup printout
• DATE format: dd/mm/yy
• UNITS format: cm, Kg
• Auto power-off: 60 min
------------------------------------------TO CHANGE DATE AND UNITS
FORMAT SELECT AND PRESS ENTER
-------------------------------------------CHOOSE ANY FUNCTION
The various items within the configuration menu can be selected by pressing the corresponding number on
the keyboard.
Delete data in memory
WARNING! ALL SPIROMETRY TESTS
IN MEMORY WILL BE DELETED.
TO PROCEED INSERT PASSWORD
(
)
ESC to Quit
This option is used to delete all the test data in memory.
to quit without deleting the test data.
The password is: 122333
The display then shows:
Test data have been DELETED!
Now available Memory is: 100%
-------------------------------------------HIT ANY KEY
If the password is entered incorrectly, the display shows:
36 / 46
PASSWORD INCORRECT
ENTER to Retry
-------------------------------------------ESC to Quit
to repeat the procedure
Print last calibration
To print the turbine calibration coefficient currently in use plus the date of the last calibration made
Turbine calibration
To modify the calibration of the turbine based on the FVC values (for the expiratory phase) and FIVC (for
the inspiratory phase), measured during a test made with a calibration syringe.
SYRINGE VOLUME cL:300
------------------------------------------Old
BTPS
%ERR
FVC
0
.00
FIVC
0
.00
New ATP
FVC
FIVC
------------------------------------------If FVC and FIVC = 0 then use factory
calibration
%ERR = TOTAL ERROR
BTPS = Measure condition
ATP = Conversion from BTPS
------------------------------------------HIT ANY KEY
ATP stands for Ambient Temperature and Pressure which indicates that the measurement conditions are ambient
temperature and pressure.
BTPS stands for Body Temperature and Pressure Saturated which represents a world standard reference
condition for the measurement of spirometric parameters. All spirometric parameters are calculated at body temperature (37 °C)
and pressure saturated
In line with the publication STANDARDIZED LUNG FUNCTION TESTING of the' European Respiratory Society (Vol 6, Supplement 16,
March 1993), the air expired from the mouth is at a temperature of approximately 33/34 °C.
The expired flow and volume, to be converted to BTPS conditions (37 °C) must be increased by 2.6% This is derived from the BTPS
factor of 1.026 at a temperature of 33°C. In practice the BTPS factor for the expired flow and volumes is therefore fixed and equal to
1.026.
For the inspired volumes and flows, the BTPS factor depends upon the temperature of the ambient air inspired.
For example, at an ambient temperature of 20 °C the BTPS factor is 1.102 ie a correction of +10.2%.
The conversion of the inspired volumes and flows is made automatically as the machine has an internal temperature sensor, and the
BTPS values are thus calculated.
It is possibile to insert the volume in cL of the calibration syringe used (for a 3 litre syringe enter 300 cL).
37 / 46
Insert both the FVC and FIVC values measured in a test with a calibration syringe. The coefficient
correction factors now are calculated and shown.
If they are < 20 % the new correction % are shown.
If the percentage is greater than 20% the display shows:
%Error out of range
To indicate that the system is not able to correct such a large calibration error.
When a new calibration is made, then the new correction factor will be added to the existing factor (if any).
The display shows the previous calibration (Previous) with the FVC and FIVC values and the percentage
differences (diff %).
If no calibration has ever been made then FVC and FIVC are equal to the nominal value of the syringe and
the percentage differences are null.
To cancel the current calibration factor and thus reset the calibration factor to the original value set by the
manufacturer enter 0 (zero) in the space reserved for the FVC and FIVC values.
The flow sensor does not require calibration but only periodic cleaning of the turbine. In any case, if a calibration must be made,
consider the following information:
1) If a 3 L syringe is used to make the calibration and if the machine is correctly calibrated then the FVC (syringe) value will be:
3.00 (FVC) x 1.026 (BTPS) = 3.08 L (BTPS) (for more information on BTPS see the relevant note).
2) If the ambient temperature is 20 °C, the value of the FIVC (syringe) value will be:
3.00 (FIVC) x 1.102 (BTPS) = 3.30 L (BTPS).
The user should be aware that the volume of the syringe measured by the machine is converted automatically to BTPS conditions and
therefore the results compared to the expected values does not constitute an error.
For instance if the calibration is carried out with a 3L syringe and the measured data is FVC = 3.08 and FIVC = 3.30 at an
ambient temperature of 20 °C , the spirometer is perfectly calibrated and the relative correction factors are null. (No calibration is
required!).
This does not constitue an error but it is a logical consequence of what has been explained above.
Printout header text
To insert a line that will be printed at the beginning of each spirometry report.
Change DATE/TIME
To change the date and time.The time is shown in the 24 hour format.
Choose operating language
To modify the language of the device.
Choose predicted values
To select one of the predicted value sets available for the calculation of normal values.
Setup parameters
To enable or disable the printout of spirometry parameters
Setup printout
To enable or disable the printout of the F/V and V/t curves plus test interpretation
DATE format: dd/mm/yy
To change the date format from dd/mm/yy to mm/dd/yy. Press enter
to invert the selection.
UNITS format: cm,kg
To change the units format from cm, kg to in, lb. Press enter
to invert the selection.
Auto power-off: 6 min
To change the wait-time for auto power off, either 6 or 60 minutes. Press enter
38 / 46
to invert the selection.
39 / 46
FIND AND READ TESTS IN MEMORY
Press this key to see the menu to view and to print all test data stored in the memory of the device.
FIND AND READ TESTS IN MEMORY
------------------------------------------Subject List
Memory List
------------------------------------------CHOOSE ANY FUNCTION
Subject List
SUBJECT LIST
------------------------------------------INSERT LAST NAME OR THE FIRST
LETTERS(S) OF LAST NAME TO FIND
ALL MATCHINGS FILES IN MEMORY
------------------------------------------LAST NAME:
Insert the last name of the subject, or just the first letter or letters of the last name.
All corresponding surnames found in memory will then be listed, together with the FILE number.
Insert the relevant FILE number to view and/or to print the corresponding spirometry report.
Press
to print out the corresponding test(s).
Memory list
A list is shown of all the subjects/tests held in memory of the device.
Insert the relevant FILE number to view and/or to print the corresponding spirometry report.
LAST NAME
FILE PHASE
------------------------------------------Rossi
1
PRE
------------------------------------------∧ ∨ Pag,
Read FILE N. 1
Press
to print out the corresponding test(s).
40 / 46
FILE ORGANIZATION
The memory of the spirometer is a ‘string’ of memory areas called records, each of which contain
information regarding a single test session.
In detail, each record is made up as follows:
•
•
•
•
•
•
•
Anthropometric details of the subject
Date, time and ambient temperature at the time of the FVC test
Reproducibility and quality control information
Parameters stored with the FVC test:
FVC, FEV1, PEF, FEF75, FEF2575, FET, *PEF, *FVC, *FEV1, FEV1%, FEV6, FEV6%,
FEV1/FEV6%, FEF25, FEF50, Vext, FIVC, FIV1, FIV1%, PIF, FEV1%/VC%
Parameters stored with the VC test:
VC, IVC, *(VC or IVC), ERV, IC, TV, VE, fr, ti, te, TV/ti, te/tt
Parameters stored with the MVV test:
MVV
Points of the expiratory part and (if made) the inspiratory part of the Flow/Volume curves then the
points of the Volume/time curve.
All of the parameters are always stored even if not all of the tests were made ( in this case the results of those parameters are stored
as zero). The symbol * indicates the best result of that subject.
Spirometry results can be recalled from the memory.
To go into the database, press the
on the subject ID code.
key and select the required record based on the FILE number or
The results of the selected test can be printed by pressing the
41 / 46
key while viewing them.
MAINTENANCE CLEANING AND STERILIZATION
Cleaning the device
The cleaning of the device must be made with a damp cloth. Make sure to dry it afterwards.
Do not wet or immerse the device and power supply in any liquids.
Do not use any abrasive materials to clean the device.
Cleaning and sterilizing the turbine and the mouthpiece holder
The maintenance operations to perform are the periodic cleaning and controlling of the turbine flow sensor
.
The turbine guarantees the precision of the spirometry measurements and has the great advantage of
requiring no periodic calibration. In order to maintain this precision a simple periodic cleaning is required.
This operation also guarantees hygiene and thus safety for the subject.
It is a good practise to control visually and to ensure that there are no foreign bodies, hairs or similar
objects deposited within the body of the turbine. If this does happen then this can slow or even stop the
free rotation of the turbine blade and thus compromise the accuracy of the measurements.
optoelectronic
sensor
turbine
mouthpiece
holder
mouthpiece
Extract the mouthpiece and throw it away.
Extract the mouthpiece holder from the body of the optoelectronic sensor simply by pulling it from the
mouthpiece holder. If required it can also be pushed from behind.
Separate the turbine from the mouthpiece holder and immerge both in a cold sterilizing solution.
Do not sterilize in an autoclave. This operation would cause irreparabile damage to the turbine.
Move them briskly inside the solution in order to remove any impurities contained both inside and outside
of the pieces. Leave them immersed for the time specified in the instructions of the solution.
Rinse well in clean water and do not expose the turbine to a direct jet of water.
42 / 46
Let the water drip off of the turbine and the mouthpiece holder by shaking them and then put them to dry on
a clean surface in an upright position.
When the two elements are dry insert the turbine into the mouthpiece holder and then insert them into
the optoelectronic sensor.
To avoid ambiental contamination caused by the disposal of the cleaning and sterilizing solutions, the user must follow all local
regulations.
Verify the free movement of the turbine.
Switch on Spirolab as if to make a spirometry test (for example FVC)
Hold the optoelectronic sensor in one hand and move it gently from side to side so that air passes
through the turbine
• If the rotor within the turbine is turning correctly then you will hear a beep that indicates that the turbine
is moving within the specific low flow range indicated by the beeping
•
If moving the turbine from side to side at a constant velocity, the regular beeps or no beeps at all are
heard, then proceed with the cleaning of the turbine.
•
•
43 / 46
On-Line operation of Spirolab II with Winspiro software.
•
Install Winspiro to the PC and in "General Configuration" ensure that required COM
port is selected (the default is COM1).
•
Connect the (supplied) RS232 cable both to the PC and to the Spirolab II.
•
Switch on the Spirolab II.
•
From within the Winspiro software, make a new subject card OR select an existing
subject, in either case make a new visit card with today's date.
•
Make the spirometry testing from within Winspiro. The Spirolab II shows "ON-LINE
MODE: Connected via RS232" on the screen and the testing is made on the PC. The
results are calculated, shown and stored within Winspiro.
•
Switch off the Spirolab II when testing is finished.
44 / 46
PROBLEMS / CAUSES AND SOLUTIONS
The device does not switch on
Press firmly on the on key.
The internal battery may be discharged. Make sure that the power supply cable of the charging unit is
connected to the spirometer and that the plug is inserted correctly into the mains outlet, then proceed with
charging.
The LCD does not display
Using the two appropiate keys regulate the brightness and the contrast of the display.
The battery charging is not working correctly
The device is protected thermically. In case the power supply of the battery reaches high temperatures then
a thermal protection intervenes and prevents the charging.
This thermo protector can intervene if:
• the device has operated over the functioning limits indicated in this manual.
• the device is operated near a heat sources, or in ambients with a temperature either too high or too low.
Disconnect the power supply and let it cool down before continuing with charging.
The lithium battery for the data memory indicates discharged
If the internal lithium battery is discharged, the spirometry parameters in the memory and other configuration
data may be cancelled automatically.
Call an authorized service centre to replace it.
The printer does not print
The thermal paper may have run out.
Insert a new roll of thermal paper.
The printer is in thermal protection
The printer is also protected thermically. In case the printer reaches elevated temperatures then a thermal
protection device intervenes and blocks the functioning of the printer.
A message on the display appears to signal the protection.
Let the printer cool down before turning on the device again.
The printer makes noises
Make sure there is a sufficient quantity of thermal paper.
Make sure that the thermal paper and the thermal paper holder are positioned correctly.
Make sure that the thermal paper container lid is in the correct position.
The device does not measure
Make sure that the turbine’s cable is connected to the spirometer and that the plug is inserted properly in the
appropiate connector.
Make sure that the turbine is inserted correctly into the optoelectronic holder.
The device does not measure correctly
Make sure the turbine is inserted correctly in the optoelectronic holder. Carry out the Control of the turbine
free movement illustrated in the relevant paragraph in the maintenance chapter.
In case the device does not resume correct functioning in spite of the controls made, call the manufacturer or an authorized service
centre.
45 / 46
LIMITED WARRANTY CONDITIONS
This MIR product together with its standard accessories is guaranteed for a period of ONE YEAR from the date of purchase.
In the case of any warranty claims the relevant sales invoice (or another proof of purchase document) must be submitted to
MIR.
The instrument must be checked at the time of purchase and any claims must be made immediately in writing to MIR.
This warranty covers the repair or the replacement (at the discretion of the manufacturer) of the product or of the defective
parts without charge for the parts or for the labour
All batteries and other consumable parts are specifically excluded from the terms of this guarantee.
The warranty is not valid, and the judgement of the MIR technicians is final, in the following cases:
•
•
•
•
•
•
•
If the fault is due to an improper installation or operation of the machine, or if the installation does not conform to
the current safety norms in the country of installation.
If the product is use in a different way from that described in the User’s Manual (improper, incorrect and/or
unreasonable use)
If any alteration, adjustment, modification or repair has been carried out by personnel not authorised by MIR.
If the fault is caused by lack of or incorrect routine maintenance of the machine.
If the machine has been dropped, damaged or subjected to physical or electrical stress.
If the fault is caused by the mains or by another product to which the instrument has been connected.
If the serial number of the instrument is missing, tampered with and/or not clearly legible.
The repair or replacement described in this warranty is supplied for goods returned at the customers expense to our certified
service centre. For details of these centres please contact your supplier of the spirometer or contact the manufacturer
directly.
The customer is responsible for the transportation and for all transport and customs charges for the delivery of the goods
both to and from the service centre.
Any instrument or accessory returned must be accompanied by a clear and detailed explanation of the defect or problem
found. If units are to be returned to the manufacturer then written or verbal permission must be received before any
instruments are returned to MIR.
MIR reserves the right to modify the instrument if required, and a description of any modification made will be sent along
with the returned goods.
46 / 46