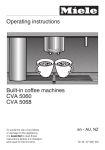
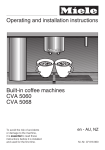
1
Operating and Installation
Instructions
Coffee System
CVA 4062
CVA 4068
To prevent accidents
and appliance damage
read these instructions
before
installation or use.
en - US, CA
M.-Nr. 07 816 880
Contents
IMPORTANT SAFETY INSTRUCTIONS. . . . . . . . . . . . . . . . . . . . . . . . . . . . . . . . . 4
Guide to the coffee system . . . . . . . . . . . . . . . . . . . . . . . . . . . . . . . . . . . . . . . . . . 8
Included accessories . . . . . . . . . . . . . . . . . . . . . . . . . . . . . . . . . . . . . . . . . . . . . . 10
First steps to use . . . . . . . . . . . . . . . . . . . . . . . . . . . . . . . . . . . . . . . . . . . . . . . . . 11
Touch controls . . . . . . . . . . . . . . . . . . . . . . . . . . . . . . . . . . . . . . . . . . . . . . . . . . . . 11
Display . . . . . . . . . . . . . . . . . . . . . . . . . . . . . . . . . . . . . . . . . . . . . . . . . . . . . . . . . . 11
Before the first use . . . . . . . . . . . . . . . . . . . . . . . . . . . . . . . . . . . . . . . . . . . . . . . . . 11
Filling water, beans or ground coffee . . . . . . . . . . . . . . . . . . . . . . . . . . . . . . . . 13
Filling the water tank . . . . . . . . . . . . . . . . . . . . . . . . . . . . . . . . . . . . . . . . . . . . . . . 13
Filling the bean container . . . . . . . . . . . . . . . . . . . . . . . . . . . . . . . . . . . . . . . . . . . 14
Filling ground coffee . . . . . . . . . . . . . . . . . . . . . . . . . . . . . . . . . . . . . . . . . . . . . . . 14
Preparing drinks . . . . . . . . . . . . . . . . . . . . . . . . . . . . . . . . . . . . . . . . . . . . . . . . . 15
Turning on . . . . . . . . . . . . . . . . . . . . . . . . . . . . . . . . . . . . . . . . . . . . . . . . . . . . . . . 15
Pre-warming cups . . . . . . . . . . . . . . . . . . . . . . . . . . . . . . . . . . . . . . . . . . . . . . . . . 15
Adjusting main dispenser height . . . . . . . . . . . . . . . . . . . . . . . . . . . . . . . . . . . . . . 16
Coffee and espresso prepared from coffee beans . . . . . . . . . . . . . . . . . . . . . . . . 16
Coffee and espresso prepared from ground coffee . . . . . . . . . . . . . . . . . . . . . . . 17
Beverages with milk . . . . . . . . . . . . . . . . . . . . . . . . . . . . . . . . . . . . . . . . . . . . . . . . 18
User profile beverages . . . . . . . . . . . . . . . . . . . . . . . . . . . . . . . . . . . . . . . . . . . . . 20
Adjusting the coffee grinder . . . . . . . . . . . . . . . . . . . . . . . . . . . . . . . . . . . . . . . . 21
Settings . . . . . . . . . . . . . . . . . . . . . . . . . . . . . . . . . . . . . . . . . . . . . . . . . . . . . . . . . 22
Language. . . . . . . . . . . . . . . . . . . . . . . . . . . . . . . . . . . . . . . . . . . . . . . . . . . . . . . . 22
Time of day . . . . . . . . . . . . . . . . . . . . . . . . . . . . . . . . . . . . . . . . . . . . . . . . . . . . . . 23
Timer . . . . . . . . . . . . . . . . . . . . . . . . . . . . . . . . . . . . . . . . . . . . . . . . . . . . . . . . . . . 24
Coffee jug (dispensing several servings, one directly after another) . . . . . . . . . . 25
Amount of coffee . . . . . . . . . . . . . . . . . . . . . . . . . . . . . . . . . . . . . . . . . . . . . . . . . . 26
Pre-brewing . . . . . . . . . . . . . . . . . . . . . . . . . . . . . . . . . . . . . . . . . . . . . . . . . . . . . . 26
Temperature . . . . . . . . . . . . . . . . . . . . . . . . . . . . . . . . . . . . . . . . . . . . . . . . . . . . . 27
Automatic rinsing . . . . . . . . . . . . . . . . . . . . . . . . . . . . . . . . . . . . . . . . . . . . . . . . . . 27
Steam system . . . . . . . . . . . . . . . . . . . . . . . . . . . . . . . . . . . . . . . . . . . . . . . . . . . . 28
Lighting: Adjusting the brightness . . . . . . . . . . . . . . . . . . . . . . . . . . . . . . . . . . . . . 28
Lighting: Setting the switch-off time. . . . . . . . . . . . . . . . . . . . . . . . . . . . . . . . . . . . 29
Info (displaying No. of drinks) . . . . . . . . . . . . . . . . . . . . . . . . . . . . . . . . . . . . . . . . 29
System lock . . . . . . . . . . . . . . . . . . . . . . . . . . . . . . . . . . . . . . . . . . . . . . . . . . . . . . 30
Water hardness . . . . . . . . . . . . . . . . . . . . . . . . . . . . . . . . . . . . . . . . . . . . . . . . . . . 30
2
Contents
Display . . . . . . . . . . . . . . . . . . . . . . . . . . . . . . . . . . . . . . . . . . . . . . . . . . . . . . . . . . 31
Tone options . . . . . . . . . . . . . . . . . . . . . . . . . . . . . . . . . . . . . . . . . . . . . . . . . . . . . 32
Showroom program . . . . . . . . . . . . . . . . . . . . . . . . . . . . . . . . . . . . . . . . . . . . . . . . 32
Restoring factory default settings . . . . . . . . . . . . . . . . . . . . . . . . . . . . . . . . . . . . . 33
Setting the serving sizes . . . . . . . . . . . . . . . . . . . . . . . . . . . . . . . . . . . . . . . . . . . 34
User profiles . . . . . . . . . . . . . . . . . . . . . . . . . . . . . . . . . . . . . . . . . . . . . . . . . . . . . 37
Selecting a user profile . . . . . . . . . . . . . . . . . . . . . . . . . . . . . . . . . . . . . . . . . . . . . 37
Cleaning and care . . . . . . . . . . . . . . . . . . . . . . . . . . . . . . . . . . . . . . . . . . . . . . . . 40
Overview . . . . . . . . . . . . . . . . . . . . . . . . . . . . . . . . . . . . . . . . . . . . . . . . . . . . . . . . 40
Descaling the appliance . . . . . . . . . . . . . . . . . . . . . . . . . . . . . . . . . . . . . . . . . . . 53
Frequently asked questions . . . . . . . . . . . . . . . . . . . . . . . . . . . . . . . . . . . . . . . . 55
After sales service . . . . . . . . . . . . . . . . . . . . . . . . . . . . . . . . . . . . . . . . . . . . . . . . 63
Installation instructions . . . . . . . . . . . . . . . . . . . . . . . . . . . . . . . . . . . . . . . . . . . 65
Caring for the environment . . . . . . . . . . . . . . . . . . . . . . . . . . . . . . . . . . . . . . . . . 66
Electrical connection . . . . . . . . . . . . . . . . . . . . . . . . . . . . . . . . . . . . . . . . . . . . . . 67
Installation . . . . . . . . . . . . . . . . . . . . . . . . . . . . . . . . . . . . . . . . . . . . . . . . . . . . . . 68
Adjusting the door hinges . . . . . . . . . . . . . . . . . . . . . . . . . . . . . . . . . . . . . . . . . . . 70
3
IMPORTANT SAFETY INSTRUCTIONS
When using electrical appliances basic safety precautions should always be
followed, including the following:
Read all instructions before installation or use of the coffee system.
Proper use
Please read these instructions
carefully to prevent accidents and
machine damage.
This appliance complies with current
safety requirements. Improper use
of the appliance can cause personal
injury and material damage.
Read this safety information carefully
before operating the appliance.
They contain important information
on the safe installation, operation,
and care of your coffee system. To
avoid the risk of personal injury or
damage to the coffee system, it is
important that you carefully read the
instructions.
Keep them in a safe place and pass
them on to any future user.
~ This coffee system is for household
use only, for the preparation of coffee
beverages (espresso, cappuccino, latte
macchiato, etc.).
Do not use this machine other than for
its intended use. Any other use could
be hazardous.
~ Persons which lack physical,
sensory or mental abilities or
experience with the machine should not
use it without supervision or instruction
by a responsible person.
Children
~ Close supervision is necessary
when any appliance is used by or near
children. They could easily be scalded
or burned.
~ Never let children play with the
coffee system.
4
IMPORTANT SAFETY INSTRUCTIONS
Technical safety
~ If the appliance is installed behind a
~ Before installing the appliance,
door front, use the appliance only when
the door front is open. Do not close the
door front when the appliance is in
operation.
check for externally visible damage.
Do not operate a damaged appliance.
~ Before connecting the appliance to
the electrical supply make sure that the
voltage and frequency listed on the
data plate correspond with the
household electrical supply. If in doubt,
consult a qualified technician.
~ Be certain your appliance is
properly installed and grounded by a
qualified technician. To guarantee the
electrical safety of this appliance,
continuity must exist between the
appliance and an effective grounding
system. It is imperative that this basic
safety requirement be met. If there is
any doubt, have the electrical system of
the house checked by a qualified
electrician.
~ The appliance must be properly
installed before operation to ensure that
no electrical components are
accessible. Ensure that power is not
supplied to the appliance while
installation work, repairs or
maintenance is performed.
~ Do not use an extension cord to
connect the appliance to electricity.
Extension cords do not guarantee the
required safety of the appliance
(danger of overheating and open
ground circuit).
~ Do not install or use outdoors even if
installed in the display cabinet.
~ Before service or maintenance
disconnect the power supply by either
removing the fuse, "tripping" the circuit
breaker or unplugging the unit.
~ This appliance is not designed for
maritime use or for use in mobile
installations such as recreational
vehicles or aircraft. However, under
certain conditions it may be possible for
installation in these applications. Please
contact the Miele Technical Service
Department with specific requirements.
~ Installation work and repairs must
only be performed by a trained
technician in accordance with national
and local safety regulations. Repairs
and other work by unauthorized
persons could be dangerous and may
void the warranty.
~ While the appliance is under
warranty repairs should only be
performed by an authorized service
technician. Otherwise the warranty is
void.
~ Defective components should be
replaced by Miele original spare parts
only. Only with these parts can the
manufacturer guarantee the safety of
the appliance.
~ To protect against fire, electric
shock and injury to persons do not
submerge the cord or plugs in water or
other liquids.
5
IMPORTANT SAFETY INSTRUCTIONS
~ Do not let the cord hang over the
edge of a table or counter, or touch hot
surfaces.
~ Do not operate any appliance with a
damaged cord or plug, or after the
appliance malfunctions or has been
damaged in any manner. Contact
Miele.
~ Always attach the cord to the
appliance first, then plug it into the wall
outlet. To disconnect, turn the machine
off, then remove the plug from the wall
outlet.
~ Never open the outer casing of the
appliance. Tampering with electrical
connections or components and
mechanical parts is dangerous and
may cause machine damage.
~ If installed in combination with
another appliance, a protective base
must be installed between the coffee
system and the appliance.
~ Install or locate this appliance only
in accordance with the provided
installation instructions.
Use
Caution! Do not look directly or with
an optical instrument into the
lighting - laser radiation.
Caution! Risk of burns when
dispensing hot beverages, they are
extremely hot.
~ Before the first use, flush the supply
lines for water and milk and thoroughly
clean the coffee system and
stainless-steel milk container.
~ Only fill the water tank with cold,
fresh tap water. Warm or hot water, or
any other liquids may damage the
machine. The water should be changed
daily to prevent bacteria or mold
growth.
~ Do not use deionized or mineral
water. They may lead to heavy calcium
built-up in the machine that can
damage the unit.
~ Do not put anything but coffee
beans into the beans container. Do not
put ground coffee in the beans
container, it will damage the grinding
unit.
~ Do not fill anything but ground
coffee or a cleaning tablet (for the brew
unit) in the funnel for ground coffee,
otherwise it will get damaged.
~ Only use plain milk. Flavored milk
products contain substances that can
clog the coffee system.
6
IMPORTANT SAFETY INSTRUCTIONS
~ Sugar can damage the appliance!
Caramelized or otherwise pre-treated
coffee beans or other sugar containing
beverages must not be put in the
machine.
~ The appliance must be descaled
~ Never place a cup with an
alcohol-coffee mixture underneath the
main dispenser. Plastic parts of the unit
could catch fire!
~ Only use the descaling tablets
~ The hot water and steam dispensed
could cause scalding. These functions
must be used carefully. Never hold any
parts of the body under the steam
nozzle or the hot water dispenser. The
machine must never be used to clean
objects.
~ Depending on the oil content of the
~ Never use a steam cleaner to clean
the appliance. Pressurized steam could
damage electrical components and
cause a short circuit.
~ Clean the coffee system daily to
prevent bacterial growth. All parts of
the coffee system are dishwasher-safe
except for the brew unit, bean
container, stainless-steel milk container
and lid, and main dispenser cover.
Failure to properly maintain machine
may cause health issues.
~ Be aware of how long milk in stored
in the milk container. If milk is not
continually cooled it can readily spoil
causing illness. Be sure the milk
container and pipework are properly
cleaned and maintained. See "Cleaning
and Care" for more information.
regularly with the supplied descaling
tablets. In areas with very hard water
the machine may need to be descaled
more often.
provided by Miele. Take care to use the
correct mixture of water and descaler,
otherwise it may cause damage.
coffee, the brew unit may clog. Clean
the brew unit every 200 cups with a
cleaning tablet. The display shows a
reminder message.
~ Dispose of the coffee waste in a
trash can, not in the sink. The sink
could get clogged.
~ Do not hang, lean, sit or place heavy
items on the door. The machine could
be damaged.
~ The use of accessory attachments
not recommended by the appliance
manufacturer may result in fire, electric
shock or injury to persons.
~ The appliance is designed for use
in room temperatures between 59°F
and 140°F (15°C and 60°C). Do not use
the appliance outside of this range of
temperatures.
SAVE THESE INSTRUCTIONS
AND REVIEW THEM
PERIODICALLY
~ To avoid injuries allow the coffee
system to cool before cleaning or
putting on and taking off parts. Turn the
machine off at the main switch when
not in use and before cleaning.
7
Guide to the coffee system
Front view
a On/Off s touch control
b Display
c Left arrow <, to scroll through program options
d OK touch control, to confirm selected program options and save settings
e Right arrow >, to scroll through program options
f Hot water - touch control
g Door grip
h Hot water dispenser
i Lighting
j Drip tray
k Main dispenser, height-adjustable
l Stainless-steel milk container
8
Guide to the coffee system
Interior view
a Main switch
b Storage drawer
c Funnel for ground coffee
d Grind control slide
e Coffee bean container
f Drip tray with no-spill grid for transport
g Water tank
h Brew unit
i Waste unit
j Main dispenser connector (connects the brew unit to the main dispenser)
k Stainless-steel milk container
9
Guide to the coffee system
Included accessories
Cleaning agent
Stainless steel milk container
For daily cleaning of the milk pipework
Cleaning tablets
To hold and insulate milk, with
lid/handle and additional cover for
storing milk in the refrigerator (not
dishwasher-safe)
Cleaning containers
To clean the brew unit
Descaling tablets
To descale the coffee system
Large and small, for rinsing and
cleaning the milk pipework
Coffee spoon
To measure ground coffee
10
Additional accessories are available.
Contact Miele or visit the Miele
website for more information
First steps to use
Touch controls
Before the first use
Select a touch control with your
fingertip to use the machine.
The appliance must be correctly
installed and connected before the
first use. See the "Installation
Instructions" section of this manual.
Display
Espresso
q
r
H
I
J
L
n
m
C
The following symbols appear in the
main menu display:
q
Espresso
r
Coffee
H
Cappuccino
I
Latte macchiato
J
Hot milk
L
Milk froth
n
User profile for up to nine
different users
Clean the appliance and remove
any protective film before the first
use. See "Cleaning and Care".
Turning on
^ Select On/Off s to turn the machine
on.
The first few times the machine is
turned on with the main switch, a
welcome screen will appear briefly on
the display, followed by additional
messages. The welcome screen is
displayed each time the machine is
turned on until 5 drinks have been
prepared:
G Maintenance programs
C Settings: to customize
your coffee system
^ Use the arrow buttons to select a
program item from the display. Once
highlighted, confirm with OK.
Míele
Welcome
During the very first use, you will be
prompted to select a language.
^ Tap < or > until the desired language
appears in the display.
^ Confirm with OK.
The language is now set.
11
First steps to use
You will then be prompted to set the
Time format.
^ Tap < or > until the time format you
wish to select (12-hour or 24-hour) is
highlighted, confirm with OK.
^ Enter the Time of day: First set the
hours using < or >, confirm with OK.
Repeat to set the minutes.
^ Now specify when the time of day
should be displayed:
– On: The time will be displayed even
when the machine is turned off.
– On for 60 seconds: The time will be
displayed for 60 seconds after
the machine has been turned off.
– Do not display: The display will go
dark as soon as the machine is
turned off.
^ Confirm with OK.
^ Select OK to confirm the message
indicating that your coffee system is
communication enabled.
12
If everything has been entered
correctly, Set up successful will
appear in the display.
^ Confirm the message with OK.
Turning off
^ Tap the On/Off button s to turn the
machine off.
If the automatic rinse feature is
enabled, the machine will start the
rinse cycle as soon as a coffee or
milk-based drink has been
dispensed. It will not shut off until
after the rinse cycle is complete.
Filling water, beans or ground coffee
Before using the coffee system for
the first time, clean the appliance.
See "Cleaning and Care".
Be sure to program the water
hardness (see "Settings - Water
hardness").
Filling the water tank
^ Pull the water tank out.
The beans and the water quality is
important for a good espresso or
coffee. The water tank must be washed
and filled with fresh cold drinking water
before each day of use. The unit
displays a reminder when turned on.
^ Fill the container with fresh, cold tap
water to the "Max." mark.
Never add hot water or any other
liquids except cold water to the
water tank.
Do not use mineral water. Mineral
water leads to heavy calcium
built-up in the machine that can
damage the unit.
The valve on the water tank ensures
that water cannot leak out.
^ Close the lid and push the water tank
into the unit until it clicks into place.
The water tank must be positioned
correctly or the valve will leak. If the
water tank has not clicked into
place, pull the tank out, check and
clean the niche.
^ Open the appliance door.
13
Filling water, beans or ground coffee
Filling the bean container
Only fill espresso or coffee beans in
the beans container. Anything else including ground coffee - will
damage the grinding unit.
Caramelized or otherwise
pre-treated beans or sugar
containing beverages must not be
filled into the appliance. It will
damage the coffee system.
Filling ground coffee
A funnel for ground coffee is provided
in case you would like to prepare a
different coffee type, e.g. decaffeinated
coffee.
^ Pull the bean container out.
^ Pull the storage drawer out of the
appliance and lift the funnel lid, a.
^ Place one spoonful of ground coffee
into the funnel, b, (using the
supplied spoon) and close the lid.
^ Push the cover into the appliance
and close the door.
^ Push the lid back and fill the
container with roasted coffee beans.
^ Push the lid back into place and put
the beans container back into the
appliance.
^ Close the door.
14
See "Preparing drinks - Espresso and
coffee made from ground coffee".
Preparing drinks
Clean the coffee system daily to
prevent bacterial growth. All parts of
the coffee system are
dishwasher-safe except for the brew
unit, bean container, stainless-steel
milk container and lid, and main
dispenser cover. Failure to properly
maintain machine may cause health
issues. See "Cleaning and Care".
Water will now flow from the main
dispenser and into the drip tray.
The machine will notify you when the
drip tray is full, but the tray should be
emptied daily.
The main menu then appears in the
display:
Espresso
q
The lines should be rinsed daily
before the first use. This will happen
automatically if the rinsing feature is
set to "On" (see "Settings - Rinse
Automatic") and the machine is cold.
After heating, hot water runs out of
the two spouts into the drip tray. If
the rinse feature was set to "Off",
select "Rinsing" to rinse the lines.
See "Cleaning and Care - Rinsing
the system".
r
H
I
J
L
n
m
C
Pre-warming cups
All beverages should be made in a
warm cup, to develop the aroma. The
smaller the amount of coffee or
espresso and the thicker the cups, the
more important it is to pre-warm the
cups.
^ Place an empty cup under the hot
water spout.
Turning on
^ Select hot water -.
^ Select On/Off s.
^ Hot water is dispensed. Select OK to
stop the flow.
The following message appears in the
display:
Heating phase
^ Let the hot water sit for a moment to
pre-warm the cup, then empty the
cup and prepare the beverage.
If the automatic rinse feature is set to
"on" (factory default), the following
message is displayed after the heating
phase:
Rinsing
15
Preparing drinks
Adjusting main dispenser
height
The height of the main dispenser can
be adjusted, to keep the shortest
distance to the cup and retain heat,
and maintain a better crema and froth.
Espresso
q
r
H
I
J
L
n
m
C
^ Use the arrow buttons to select the
desired beverage, confirm by
tapping OK once.
The machine grinds the beans and
pre-brews the coffee (if "On" is selected
under "Pre-brewing"). The selected
beverage is dispensed.
^ Slowly pull the main dispenser up or
down as desired.
Coffee and espresso prepared
from coffee beans
Espresso, coffee, double espresso, and
double coffee are all prepared in the
same way:
^ Place a cup under the main
dispenser.
The beverage is dispensed through
both dispensers at the same time.
16
Do not open the appliance door
during the brewing process. The
appliance will be damaged.
Discard the very first two coffees
dispensed once you have started to
using the appliance, this will ensure
that any coffee residue from factory
testing is eliminated from the brew
unit.
Preparing drinks
Double portion
If you would like a double portion of
coffee or espresso, or to prepare two
portions at the same time,
^ tap the OK button a second time,
while the display reads "2 portions?".
The two portions are always prepared
one after the other.
Coffee and espresso prepared
from ground coffee
After filling the funnel with ground
coffee (see "Filling water, beans or
ground coffee - Filling ground coffee"),
the display shows:
Make the coffee?
Yes
No
^ Tap < or > until "Yes" is highlighted.
Select "No" if no ground coffee is filled
in the funnel. Otherwise the coffee
system assumes that ground coffee is
in the machine and dispenses only
water the next time coffee is made.
^ To fill two cups at the same time,
place one cup under each spout.
The display reverts to the main menu,
and you can select the desired
beverage type.
Be sure to wait for 2 dispensing
cycles to be completed before
removing the cups.
Interrupting preparation
^ Tap OK when you see "Stop" in the
display.
Preparation will immediately stop.
17
Preparing drinks
Prepare beverages
^ Place a cup under the main spout.
^ Tap the OK button.
The appliance brews the espresso or
coffee, and the selected beverage is
dispensed from the main spout.
Do not open the appliance door
during the brewing process. The
appliance will be damaged.
After dispensing, the appliance
automatically reverts to bean
operation.
Beverages with milk
Stainless steel milk container
The stainless steel milk container is
vacuum insulated, to keep milk cold for
a period of time. With an ambient
temperature of about 68°F (20°C), milk
at 43°F (6°C) can be stored for 11-12
hours and remain under 55°F (13°C).
(Milk that is warmer than 55°F (13°C)
should not be used because it will not
make good milk froth.)
Milk cannot be stored as long if there is
a warming drawer underneath the
coffee machine.
Interrupt preparation
^ During preparation, tap the OK
button when "Stop" appears in the
display.
Do not fill the container to the rim,
leave a gap of approx. 1" - 1 ½"
(2 - 3 cm) from the top.
Preparation will immediately stop.
If you use ground coffee, only one
serving is prepared at a time. The
appliance always uses the entire
portion of ground coffee loaded into
the funnel, for one beverage.
Make sure to keep the top and seals
of the container clean. Soiling can
cause affect the functioning of the
milk container.
Cold milk is best for creating froth.
Always pre-warm the cup with hot
water, before you prepare a beverage.
18
Preparing drinks
To prepare beverages with milk,
Cappuccino, latte macchiato, hot
milk, froth
^ Place a suitable cup or glass under
both dispensers.
^ place the lid on the stainless steel
milk container and turn the lid to the
left, so that it clicks into place.
For best results when preparing a
latte macchiato, place the glass
under the spout in such a way that
the espresso flows into the middle of
the froth.
Cappuccino
q
r
H
I
J
L
n
m
C
^ Tap the right arrow button until the
beverage symbol is highlighted, tap
OK once.
^ To interrupt preparation, tap OK
again.
^ Open the appliance door and hang
the milk container in the appliance
(as shown).
^ Close the appliance door.
To set the proportions for beverages
(coffee, espresso, froth, hot milk),
see "Setting serving sizes").
After preparing the first drink with
milk the reminder "Clean the milk
pipework" will appear in the display.
^ Tap OK to return to the main menu.
This reminder will not appear after each
additional drink.
19
Preparing drinks
User profile beverages
After use
The user profile function is used to
prepare beverages to suit your taste,
by adjusting the amounts of water, milk,
and ground coffee, as well as
temperature and pre-brewing (see
"Creating a user profile").
If you have already created a user
profile, first select it then prepare the
beverage.
User profile
q
r
H
I
J
L
n
m
C
^ Tap < or > until "User profile" is
highlighted, confirm with OK.
^ Tap < or > to select "Select", confirm
with OK.
^ Use < or > to select the desired user
profile, confirm with OK.
A large user profile n symbol will
appear in the display to show that a
profile has been selected.
You can now operate the appliance
as you would for a "standard" profile.
20
Before turning the machine off, or at
the end of the day, flush the water
lines, the brew unit, the spouts and
the milk pipework in order to prevent
the machine from clogging (see
"Cleaning and care").
Adjusting the coffee grinder
The finer the coffee beans are ground
determines the strength of the coffee
and the quality of the crema.
To prevent machine damage adjust
the coffee grinder one level at a
time and let the beans grind before
adjusting another notch. Otherwise
the machine will be damaged.
The grinder should be adjusted:
– If the espresso flows too quickly into
the cup, the pressure cannot be built
up because the beans have been
ground too coarsely. The grinder
should be adjusted to a finer setting.
– If the espresso only trickles into the
cup, the beans have been ground
too fine and the coffee will be bitter.
The grinder should be adjusted to a
coarser setting.
To adjust the grinder setting
^ Push the slide control to the left for a
finer grind or to the right for a coarser
grind.
You should be able to feel the notches
when moving the slide control.
If the slide control will not move:
^ Close the machine and dispense a
cup of coffee.
Then try to move the slide control
again.
– If the crema is evenly colored but
pale, the ground coffee is too
coarse.
– If the crema is very dark brown on
one side, graduating almost to white
on the other, the ground coffee is too
fine.
21
Settings
The coffee system can be customized
to suit individual preferences.
Settings menu
r
H
I
J
L
You can select the language for all text
and messages displayed on your
machine.
^ Select "Settings F" and confirm with
OK.
Settings F
q
Language
n
m
C
^ Tap < or > until Settings C is
highlighted. Confirm with OK.
^ Tap < or > until the desired option is
highlighted and confirm with OK.
The current setting(s) will be marked
with a check.
To return to the previous options in the
manu, select "Back A".
The possible setting options are
described in detail on the following
pages.
Settings
Language F
Time of day
^ Tap OK.
^ Tap < or > until the language you
wish to select is highlighted.
^ Confirm with OK.
This setting is automatically saved, and
the display returns to the previous
screen.
All display text will now appear in the
language selected.
If you select the wrong language
accidently, follow the flag icon F to
find the "Language" option.
22
Settings
Time of day
Clock format
^ Select "Settings F", confirm with OK.
^ Use < or > to select "Clock format".
Settings
Time of day
Timer
^ Tap < or > until "Time of day" is
highlighted, confirm with OK.
^ Tap < or > to select a 24-hour or
12-hour display.
^ While the desired option is
highlighted, confirm with OK.
The clock format is now saved.
Three options are now available:
Setting the time of day
Display
^ Use < or > to select "Set".
The time display can be turned on or
off.
^ Tap < or > to set the hours. Confirm
with OK. Repeat to set the minutes.
^ Use < or > to select "Display".
The time of day is now saved.
You can now choose from among three
settings:
– "On": The time will be displayed
even when the machine is turned off.
– "On for 60 seconds": The time will
be displayed for 60 seconds after
the machine has been turned off.
– "Do not display": The display will go
dark as soon as the machine is
turned off.
^ Once a display format has been
selected, confirm the setting with OK.
23
Settings
Timer
Switch off after
^ Select "Settings F", confirm with OK
^ Select < or > until "Timer" is
highlighted, confirm with OK.
The machine will turn off automatically
to save energy after a programmed
period of time (ranging from 15 minutes
to 9 hours after the last use). When the
"Switch off after" option is set, the
machine will turn off automatically after
the programmed amount of time.
^ Use < or > to select "Set", confirm
with OK.
^ Use < or > to select "Switch off after",
confirm with OK.
Three options are now available:
A display of 1:00, for example,
indicates that the machine will turn off
after one hour.
Settings
Timer
Coffee jug
Switch on at
You can program your machine to turn
on automatically at a certain time, for
example, at breakfast time.
^ Tap < or > to select "Switch on at",
confirm with OK.
^ Tap < or > to set the hours. Confirm
with OK. Repeat to set the minutes.
The machine will turn on each day at
the specified time once you have
activated the timer (see "Activate").
If the machine is turned on
automatically three times and no
beverages were dispensed, the
machine will no longer turn on
automatically. The programmed
times stay saved and will be
activated again when the machine is
manually turned on the next time.
This safety measure is designed so
that the machine does not turn on
every day if the setting was not
canceled before a longer time of
absence, e.g. vacationing.
24
^ Tap < or > to set the hours. Confirm
with OK. Repeat to set the minutes.
The machine will now turn off after the
programmed amount of time.
If the automatic rinse feature is
turned on, and the machine has
been used to prepare a beverage, it
will always run a brief rinse cycle
before turning off.
Settings
Switch off at
A specific time of day can be set to turn
the coffee system off.
^ Use < or > to select "Switch off at",
confirm with OK.
^ Tap < or > to set the hours. Confirm
with OK. Repeat to set the minutes.
The machine will turn on each day at
the specified time when you have
activated the timer (see "Activate").
Coffee jug (dispensing several
servings, one directly after
another)
With this function, you can dispense up
to eight servings of coffee, one immediately after another (max. 1 qt / 1 l). The
brewing process will run automatically
for all servings.
^ In the main menu, select item
"Settings F", then tap ok.
Settings
If the automatic rinse feature is
turned on, and the machine has
been used to prepare a beverage, it
will always run a brief rinse cycle
before turning off.
Activate
^ Use < or > to select "Activate",
confirm with OK.
The program items "Switch on at" and
"Switch off at" are displayed.
Activate
8 Switch on at
8 Switch off at
^ Use < or > to select the program
item(s) you wish to activate.
Tap OK to activate (select the check
box) or deactivate (clear the check
box) the desired option.
Coffee jug
Prog. the amount
^ Tap the right arrow until "Coffee jug"
is highlighted, then tap OK.
^ Using the arrows to select the
number of servings you wish to be
dispensed (3 to 8) and confirm with
OK.
^ Place the desired container under the
main dispenser and follow the
instructions on the display.
Each cup of coffee will be individually
ground, brewed, and dispensed. The
display will report the progress made.
You can interrupt the process at any
time by tapping the OK key (Stop).
^ When the display reads process
completed confirm with OK.
^ Use < or > to select "Accept", confirm
with OK.
^ Use < or > to select "Back A",
confirm with OK.
25
Settings
Amount of coffee
Pre-brewing
The amount of coffee will determine
both the strength and the crema of your
brewed coffee.
During the pre-brew step, the freshly
ground coffee is first moistened with hot
water. After a short steeping period, the
remaining water is then forced through
the moistened coffee at high pressure.
This process produces a much more
intense coffee aroma.
Depending on the type of coffee, the
ideal amount ranges from
approximately 0.2 ounces and 0.5
ounces (6 g to 14 g) per cup. The
higher the value, the stronger the
prepared espresso, coffee, latte
macchiato, or cappuccino will be.
The crema is also influenced by the
amount of coffee.
– If the crema has an even but
white/yellow coloring, the ground
amount might be too little.
– If the crema is dark brown to black in
color on the one side and almost
white on the other side, the amount
of coffee might be too much.
^ Using < or > select " Settings F", and
confirm with OK.
Settings
Amount of coffee
Pre-brewing
^ Tap < or > until "Amount of coffee" is
highlighted, confirm with OK.
^ Use < or > to select a beverage,
confirm with OK.
^ Using < or > adjust the amount of
coffee to "more" or "less".
^ To save the setting, tap OK.
26
If the function is turned off, the hot
water will be immediately pushed at a
high pressure through the ground
coffee.
You can program normal or long
pre-brew or turn the pre-brew function
off. The default factory setting for the
pre-brew function of your machine is
Off (= without).
^ Select "Settings F", and confirm with
OK.
Settings
Pre-brewing
Temperature
^ Tap < or > until "Pre-brewing" is
highlighted, confirm with OK.
^ Tap < or > until the desired pre-brew
setting is highlighted.
^ Tap OK to save the setting.
Settings
Temperature
Automatic rinsing
Three temperature settings are
available for each coffee beverage and
two settings for hot water.
It is important to flush out any residual
coffee from the lines when starting to
use the machine for the day. If the automatic rinse function is activated and the
machine is cold, the rinse cycle will
begin automatically as soon as the
machine is turned on. This will also
pre-heat the lines with the hot water
used during the rinse cycle. This is
indicated by a message in the display.
If a beverage has already been made,
the machine will also automatically run
a rinse cycle just before turning off.
Not every coffee type allows high
temperatures. Some types react so
sensitively that the crema cannot be
properly built.
^ Select "Settings F", and confirm with
OK.
Settings
Temperature
Automatic rinsing
^ Tap < or > until "Temperature" is
highlighted, confirm with OK.
^ Tap < or > until the beverage is
highlighted in which you wish to set
the temperature for. Confirm with OK.
^ Tap < or > until the desired
temperature is highlighted.
^ Tap OK to save the setting.
The factory default setting for the
automatic rinse function is On.
If you do not want the rinse water to
collect in the drip tray, always place an
empty cup or the small cleaning
container underneath the main
dispenser.
^ Select "Settings F", confirm with OK.
Settings
Automatic rinsing
Steam system
^ Tap < or > until "Automatic rinsing" is
highlighted, confirm with OK.
^ Tap < or > to select "On" or "Off",
confirm with OK.
It is recommended that you set this
program option to "On" to ensure
that the rinse cycle will not be
forgotten.
27
Settings
Steam system
This appliance has two heating
systems, making it possible for you to
prepare milk froth/hot milk and
coffee/espresso, one right after the
other. If you seldom need milk froth or
hot milk, you can turn the steam heating
system off to save energy.
If you select milk froth or hot milk
with the steam heating system
turned off, the machine must first
heat up.
The steam heating system will
remain On until the machine has
been turned off completely.
^ Select "Settings F", confirm with OK.
Settings
Steam system
Lighting
^ Tap < or > until "Steam system" is
highlighted, confirm with OK.
^ Tap < or > to select "On" or "Off".
^ Tap OK to save the setting.
28
Lighting: Adjusting the
brightness
The brightness of the machine lighting
can be adjusted.
^ Select "Settings F", confirm with OK.
Settings
Lighting
Info
^ Tap < or > until "Lighting" is
highlighted, confirm with OK.
^ Select "Brightness", confirm with OK.
^ Tap < or > to select a lighter or
darker setting.
^ Tap OK to save the setting.
If you continue to tap < all the way to
the left until you can no longer see the
small white bars, the lighting will turn
off.
Settings
Lighting: Setting the switch-off
time
Whenever the machine is On, the
machine lighting is also On. The
lighting turns off automatically when the
machine has been idle for 15 minutes.
When the machine is turned off, you
can program the lighting to remain On
and to shut off automatically after a
certain amount of time if the machine is
not used
You can choose a duration from 15
minutes to 6 hours.
^ Turn the machine off.
^ With the machine turned off, tap OK.
^ Select "Lighting", confirm with OK.
Info (displaying No. of drinks)
The "Info" option allows you to display
the number of beverages that have
been dispensed from the machine and
the number of beverages the machine
can still make before it requires
descaling.
^ Select "Settings F", confirm with OK.
Settings
Info
Safety
^ Tap < or > until "Info" is highlighted,
confirm with OK.
^ Use < or > to select "No. of drinks" or
"Portions until descaling", confirm
with OK.
^ Use < or > to select an switch-off
time, confirm with OK.
Under "No. of drinks", you can display
"Total number of coffees" or a
breakdown according to each
individual coffee beverage, milk froth,
milk, and hot water.
^ Select "Brightness" and tap OK
^ Tap OK to go back to previous menu.
^ Select "Switch off after", confirm with
OK.
^ Tap the arrow button to increase or
decrease the brightness, then tap OK
to save the setting (Factory Default:
Off).
^ Select "Back" symbol twice to exit the
menu.
When the machine requires
descaling, you will be notified
automatically. It is not necessary to
check these messages regularly.
The machine will now automatically turn
the lighting off after the programmed
amount of time.
29
Settings
System lock
Water hardness
The coffee system can be locked so
that it cannot be used by children or
those not familiar with the operating
instructions.
The hardness of the water used in the
coffee system must be determined and
programmed into the appliance. The
water hardness will determine how
frequently the unit must be descaled to
maintain the coffee system properly.
The machine monitors the volume of
water used (including the amount
required for producing steam), and will
then let you know when a descaling
cycle is necessary.
To measure the hardness of your water,
use the test strip that is included in your
installation kit.
When the machine is locked, the timer
setting "Switch on at" will not work.
Activating/Deactivating the System
lock
^ Select "Settings F", confirm with OK.
Settings
Safety
Water hardness
^ Use < or > to select "Safety", confirm
with OK.
^ Tap < or > until "System lock" is
highlighted, confirm with OK.
^ Use < or > to select "On", confirm
with OK.
As soon as the machine is turned off, it
will lock and cannot be turned back on.
A closed padlock X and a message
will appear in the display, whenever a
button is touched.
To deactivate the system lock, follow
the same procedure as above, but
select "Off".
Overriding the system lock
^ Press and hold OK for approx.
3 seconds.
The machine is now temporarily
unlocked and can be used to prepare
beverages. It will lock again as soon
as it is turned off.
30
^ Place the test strip under your
kitchen tap for a second and shake
off any remaining water. The result is
visible in about 1 minute.
If the water hardness is greater than
40 gr/gal (40°D), the water must be
descaled more often than displayed.
Calcium will build up faster than at a
lower water hardness and may
damage the machine.
Settings
You can program four hardness levels
on the machine:
– Level 1 (soft):
0 - 3 gr/gal (0 - 3 °d)
– Level 2 (moderately hard):
4 - 7 gr/gal (4 - 7 °d)
– Level 3 (hard):
7 - 15 gr/gal (7 - 14 °d)
– Level 4 (very hard):
15 - 22 gr/gal (14 - 21 °d)
^ Select "Settings F", confirm with OK.
Settings
Water hardness
Display
^ Tap < or > until "Water hardness" is
highlighted, confirm with OK.
Display
The display contrast and brightness
can be adjusted.
^ Select "Settings F" , confirm with OK.
Settings
Display
Volume
^ Tap < or > until "Display" is
highlighted, confirm with OK.
^ Tap < or > to select "Contrast" or
"Brightness", confirm with OK.
^ Tap < or > to adjust the contrast
lower or higher or make the display
brighter or darker.
^ Tap OK to save the setting.
^ Tap < or > to program the water
hardness level, confirm with OK.
The selected water hardness level is
now saved.
31
Settings
Tone options
Showroom program
A tone can be selected to confirm the
selection of a touch control. The volume
of the tone can also be adjusted.
The showroom program is used to
demonstrate the machine at exhibits. In
this demo mode, the machine lighting is
On, but the machine does not heat up.
^ Select "Settings F", confirm with OK.
Settings
Volume
Showroom prog.
^ Tap < or > until "Volume" is
highlighted, confirm with OK.
^ Tap < or > to select "Buzzer tones" or
"Keypad tone", confirm with OK.
^ Tap < or > to increase or decrease
the volume.
If you continue to tap < all the way to
the left until you can no longer see the
small white bars, the sound will turn
off.
^ Tap OK to save the setting.
32
Settings
Restoring factory default
settings
Factory default settings
The "Factory default" setting can be
used to reset different settings back to
their original default status.
– Temperatures for coffee beverages
and hot water (medium for both)
You can select whether to reset all
settings to the factory default or delete
any user profiles.
^ Select "Settings F", confirm with OK.
Settings
Factory default
Back #
^ Tap < or > until "Factory default" is
highlighted, confirm with OK.
Two options are now available:
User profiles
Selecting "User profiles" deletes all user
profiles that you have entered, leaving
only the default (standard) profile.
– Amount of coffee (medium)
– Pre-brewing (without)
– Automatic rinse and steam system
(both On)
– Showroom program (Off)
– Time display (On for 60 seconds),
Time format (24 h),
Timer - Switch on at (12:00),
Timer - Switch off after (1:00),
Timer - Switch off at (12:00),
("Switch on at" and "Switch off at"
both deactivated)
– Coffee jug (3 cups)
– Lighting: Brightness (medium)
– Safety: System lock (Off)
– Water hardness (very hard 4)
^ Under "User profiles", select "Reset",
confirm with OK.
– Display: Contrast (medium),
Brightness (maximum)
The user profiles are deleted.
– Volume: Buzzer tones and keypad
tone (both at maximum setting)
All settings
Selecting "All settings" restores all
settings back to the factory default.
^ Under "All settings", select "Reset",
confirm with OK.
All settings are now reset to the default.
– User profile: Revert (when machine is
turned on)
If "Reset" is selected by accident,
turn the machine off, the settings will
not be reset.
33
Setting the serving sizes
The flavor of a coffee beverage
depends not only on the type of coffee,
but also on the quantity of water used.
Not every espresso or cappuccino cup
is the same size. Use this feature to set
the volume of water to suit your taste
and cup sizes.
Setting serving sizes of
espresso, coffee, hot milk and
milk froth using OK
^ Place the desired cup under the main
dispensers.
^ Select the beverage type.
For beverages with milk the
proportions of espresso, milk, and froth
have an important impact on flavor. You
can set the appliance to suit your
preferences for cappuccino and latte
macchiato.
^ Press and hold OK until the display
reads "Prog. the amount".
To program serving sizes, you can
either press and hold the OK button, or
via the "Settings" option.
The programmed volume of water or
milk will now be dispensed each time
that particular drink is selected.
When a user profile is activated, the
serving size is set for that particular
profile only.
If you want to set the serving size for
all profiles, select the "Standard"
user profile.
34
^ Tap OK again once the cup is filled
to your desire. "Save" appears in the
display.
Once the maximum water or milk
volume is reached, the appliance
automatically stops the water
supply. The maximum fill amount for
each beverage is then stored.
If the water tank or milk container
becomes empty during portion
programming, the process is
canceled and the size is not stored.
Setting the serving sizes
Setting serving sizes for
cappuccino and latte
macchiato using OK
^ Place the cappuccino cup or latte
macchiato glass you will be using to
set the portion size under the main
dispensers.
^ Select cappuccino or latte
macchiato.
^ Press and hold OK until the display
shows the options for Cappuccino
(Milk froth, Espresso) or Latte
Macchiato (Hot milk, Milk froth,
Espresso).
Latte Macchiato
The appliance now begins preparing a
cappuccino or latte macchiato.
As soon as the component (which you
have checked) is being dispensed, the
display will read "Program the amount".
^ Once the cup is full to your liking with
that component and "Save" appears
in the display, tap OK to save the
amount.
^ Repeat this process for the other
components you have chosen for this
type of coffee.
Each time the drink is prepared it will
contain the programmed amount of
coffee, milk, etc.
8 Hot milk
8 Milk froth
^ Use < or > to reach the option you
wish to program to a certain serving
size.
^ Tap OK to place a check mark next
to the desired component to show
that you would like to program this
component.
^ Repeat this process until all
components you wish to program the
serving size for are marked with a
check.
^ Use < or > to select "Start", confirm
with OK.
35
Setting the serving sizes
Setting the serving size for hot
water
Setting serving sizes via
"Settings"
^ Place the desired cup under the hot
water dispenser.
^ Select "Settings F", confirm with OK.
^ Tap - until the display reads "Prog.
the amount".
^ Tap - again once the cup is filled as
desired and "Save" appears in the
display.
Each time the hot water is prepared the
programmed amount will be dispensed.
Settings
Prog. the amount
Amount of coffee
^ Tap < or > until "Prog. the amount" is
highlighted, confirm with OK.
^ Use < or > to select the beverage
you wish to set a serving size for.
^ Select "Start", confirm with OK.
Proceed as you would for programming
using OK or - .
36
User profiles
If the appliance is used by several
people with different preferences, you
can save up to 9 individual user
profiles.
The following settings can be
programmed for each user profile:
– Serving size for coffee beverages
and hot water
– Serving size of milk for beverages
with milk
– Amount of coffee
– Water temperature
User profile
H
I
J
– Delete user profile to delete a user
profile.
– Revert: The appliance can be set so
that it automatically reverts to the
Standard user profile or continues to
use the most recently selected user
profile set.
^ Use < or > to select the user profile
you wish to use, confirm with OK.
See "Setting the serving sizes" and
"Settings".
r
– Change user profile to change a
user profile.
Selecting a user profile
– Pre-brew
q
The following options appear only if you
have already created a user profile:
L
n
m
C
^ Tap < or > until "User profile" is
highlighted, confirm with OK.
+
Espresso
John
q
r
H
I
J
L
n
m
C
To show that a user has been selected,
the upper display line shows a large
user n symbol.
You can now either:
– Select user profile from the profiles
already set.
– Create user profile to enter a new
user profile.
37
User profiles
Creating a user profile
Saving an entry
^ Tap < or > until "Create" is
highlighted, confirm with OK.
^ Once you have completed an entry,
use < or > to select "OK", confirm
with OK.
Up to 9 user profiles can be created.
If you try to create more than 9 user
profiles, the message "Memory full"
will appear, you will need to delete a
profile to create space.
The display will briefly show the User
profile welcome screen, followed by the
main menu.
Canceling an entry
Letters and numbers will now appear in
the display. Use < or > to select the
desired letters or numbers.
^ If you do not wish to save an entry
you have made, use < or > to select
"back A", confirm with OK.
A new word will always be capitalized,
the appliance will then switch to
lower-case letters.
Changing a user profile
^ Use < or > to select the desired
characters.
^ Select "Change user profile", confirm
with OK.
^ Tap OK to confirm a character.
^ Select the user profile you wish to
change, confirm with OK.
You will see the selected characters in
the top line of the display.
Continue as you would for "Creating a
user profile".
If you misspelled a word, use the
arrow buttons to select the trash can
symbol, confirm with OK. The last
character entered will be deleted.
38
User profiles
Deleting a user profile
Revert
^ Select "Delete user profile", confirm
with OK.
The appliance can be set so that it
automatically reverts to the standard
user profile or continues to use the
most recently selected user profile set.
^ Use < or > to select the user profile
you wish to delete, confirm with OK.
A check mark appears after the user
profile, and it will be erased shortly.
^ Use < or > to select "Revert".
You can now choose between:
Manually
The appliance retains the selected user
profile until another profile is selected.
^ Use < or > to select "Manually",
confirm with OK.
After dispensing
After each drink prepared, the
appliance automatically reverts back to
the standard user profile.
^ Use < or > to select "After each use",
confirm with OK.
When switched on
Each time the appliance is turned on,
the standard user profile will
automatically be selected, no matter
which user profile was set before it was
last turned off.
^ Use < or > to select "When switched
on", confirm with OK.
39
Cleaning and care
Overview
Frequency
What needs to be done?
Every time mile is prepared, if there Rinse the milk pipework
is more than one hour between
uses
Rinse the system (intake lines)
Clean the milk pipework (with cleaning powder)
Everyday
(at least at the end of the day,
before you switch off the
appliance)
Clean the stainless steel milk container and lid
Clean the main spout
Clean the water tank
Clean the waste unit
Clean the drip tray and no spill grid
Clean the bean container
Clean the main spout connections
Once a week
(more often if there is a heavy
soiling)
Clean the interior
Clean the inside door tray
Clean the brew unit
Clean the front of the appliance (especially right after
descaling)
Once a month
Lubricate the cap on the main spout connection
Approx. every 200 portions
De-grease the brew unit (use the cleaning tablets)
Depending on the water hardness
Descale the appliance
When necessary
Clean clogged milk pipework
40
Cleaning and care
Rinsing the system
Allow the coffee system to cool
before cleaning. Danger of burns!
Do not clean the unit with a steam
cleaner.
Never use cleaners containing
chlorides, sand, soda or scouring
agents. These will damage the
surface.
To avoid mold, growth and odors it is
important to clean the machine
regularly.
All removable parts are
dishwasher-safe, except the following:
– Brew unit
– Bean container
– Stainless-steel milk container and lid
– Main dispenser cover
When these parts are cleaned in the
dishwasher they may become
discolored by food residues such as
tomatoes or their surface coating may
become damaged.
Before switching your machine off for
an extended period of time, you should
clean the supply lines, the brew unit,
and the main dispenser.
If you have turned off the automatic
rinse feature (see "Settings - Automatic
rinsing"), the lines will need to be rinsed
manually. When performing a manual
rinse cycle, it is recommended that you
place the small cleaning container
under the main dispenser.
Maintenance
q
r
H
I
J
L
n
m
C
^ Tap < or > until "Maintenance m" is
highlighted, confirm with OK.
^ Select "Rinse the system", confirm
with OK.
^ Select "Start", confirm with OK.
When the main menu reappears in the
display, the lines have been rinsed. The
appliance can now be turned off.
41
Cleaning and care
Milk pipework
Cleaning the milk pipework
Rinsing the milk pipework
To prevent the milk residue from
spoiling or drying in the machine and
pipework, you should rinse these lines
after use. In addition to rinsing after
use, the lines need to be cleaned at
the end of the day.
Maintenance
q
r
H
I
J
L
n
m
To prevent milk residue from spoiling or
drying in the machine and pipework, it
should be cleaned at the end of each
day milk was used to make a
beverage.
^ If the milk pipework in the lid is
clogged, clean under running water
using the cleaning brush.
Insert the cleaning brush into the
pipework, and push it in and out.
C
^ Tap < or > until "Maintenance m" is
highlighted, confirm with OK.
Maintenance
q
r
H
I
J
L
n
m
C
^ Select "Rinse milk pipework", confirm
with OK.
^ Tap < or > until "Maintenance m" is
highlighted, confirm with OK.
^ Select "Start", confirm with OK.
^ Select "Clean milk pipework", confirm
with OK.
^ Select "Start", confirm with OK.
Follow the instructions in the display.
^ Follow the instructions in the display.
To rinse the pipework in the lid of the
stainless-steel milk container, fill the
large cleaning container to the
"max." mark with cold water.
Fit the lid of the stainless-steel milk
container into place on the large
cleaning container. Hang the
cleaning container in the appliance
where the milk container would
normally sit.
42
Cleaning and care
Cleaning clogged milk pipework
If no milk, just steam, comes out of the
main dispenser, the milk pipework in
the appliance door may be clogged.
^ Take the lid off the main dispenser.
Pull out the nozzles of the main
dispenser (see "Main dispenser").
To rinse the pipework in the lid of the
stainless-steel milk container, fill the
large cleaning container to the
"max." mark with lukewarm water to
dissolve the cleaning agent.
Fit the lid of the stainless-steel milk
container into place on the large
cleaning container.
Hang the cleaning container in the
appliance where the milk container
would normally sit.
Use only Miele cleaning agent,
which was developed especially for
this coffee system. You can obtain
this cleaning agent from Miele.
The cleaning process has now begun.
When Prog. finished appears on the
display, the lines are clean, and you
can turn the machine off.
^ Open the appliance door.
^ Remove the stainless steel milk
container and clean it, particularly the
lid (see "Stainless steel milk
container").
Unlock the cover for the milk pipework
by pressing in the two brackets on the
left and right.
43
Cleaning and care
^ Remove the cover with the milk
pipework. Clean the whole part in the
dishwasher without taking it apart.
If there are milk residues in the milk
pipework you can clean them with the
cleaning brush provided. To do this,
take the cover and the milk pipework
apart as follows:
Do not pull the milk hoses off the
retainers. This may cause the milk
pipework to leak.
^ Press the small recess on the
dispenser retainer a and pull the
retainer out towards the front b. Take
the milk hoses off the guide rail.
^ Grasp the second retainer by the
stud c and pull it up and off.
Now you can clean the hoses with the
brush under running water.
44
^ Insert the brush into the milk hoses
one after the other from below. Push
the brush back and forth to the end
until there is no more no milk residue
in the hoses.
Reassemble the milk pipework as
follows:
^ Push the retainer with the plug onto
the cover as shown. Make sure that
the retainer is sitting properly on the
cover.
Cleaning and care
Stainless-steel milk container
The stainless-steel milk container
and lid must be cleaned by hand
with hot water.
Make sure to keep the top and seals of
the container clean. Soiling can affect
the functioning of the milk container.
^ Then press the milk hoses into the
guide rail a and push the dispenser
retainer b on until it clicks into place.
^ Put the cover with the milk pipework
back into the rear of the appliance
door.
^ Reattach the main dispenser (see
"Main dispenser").
^ Clean the stainless-steel container
with hot water.
^ Rinse the handle under running water
and then clean it thoroughly with a
damp cloth to remove all milk
residue.
^ If the milk pipework in the lid is
clogged, clean under running water
using the cleaning brush.
Insert the cleaning brush into the line,
and push it in and out.
45
Cleaning and care
Main dispenser
^ Pull the main dispenser all the way
down a and pull the cover forward to
remove b.
^ Turn the cover around, slide the
insert upward and out, and clean
both parts thoroughly.
^ Slide the insert back into the cover
until it clicks into place.
^ Pull the nozzles of the main
dispenser out.
46
^ Pull both rubber stoppers out and
clean the stoppers and nozzles
thoroughly.
^ Put the rubber stoppers back into
place.
^ After cleaning the nozzles of the main
dispenser, slide them back into the
machine firmly upward to ensure they
are securely in place.
^ Replace the cover and slide the main
dispenser up.
Cleaning and care
Water tank
Waste unit
Empty the water tank daily and refill
before preparing the first drink with
fresh, cold tap water.
The display shows a message to empty
the waste unit. Clean the waste unit
daily. Coffee waste can mold if there is
water in the waste unit from the rinse
process.
There may be water in the waste
container from the rinsing process. This
is normal.
Check if the valve is clean. If the
valve has residues on it, the water
tank will not connect properly and
might leak.
Line the waste unit with a paper towel
to make for easier cleaning.
^ Pull the waste unit out.
^ Wash the waste container in the
dishwasher or by hand with hot water
and liquid dish soap.
Dry with a soft cloth.
^ Clean the niche of the waste unit in
the machine.
^ Wash the water tank in the
dishwasher or by hand with hot water
and liquid dish soap.
Dry with a soft cloth.
^ Push the waste unit completely into
the machine.
^ Clean the niche of the water tank.
47
Cleaning and care
Drip tray
The trip tray contains a sensor which
causes the display to show when the
tray is full and needs to be emptied.
Clean the drip tray daily.
Remove the drip tray after the final
rinse when no more water runs from
the lines.
Carefully remove the drip tray from
the machine; the water may be very
hot and could cause scalding.
^ Wash the drip tray and grid in the
dishwasher or by hand with hot water
and liquid dish soap, then dry with a
soft cloth.
Take care that the metal contacts at
the back of the drip tray are clean
and dry. If the contacts are soiled or
wet the unit cannot detect when the
drip tray is full and needs to be
emptied.
^ Open the door and pull the drip tray
out.
The drip tray contains a grid to avoid
spilling during transport.
^ Push the drip tray with grid along the
right edge all way in the machine.
^ Close the door.
Drip tray cover
^ Remove the drip tray cover and wash
it.
48
Cleaning and care
Bean container
The bean container must be cleaned
by hand with hot water and liquid
dish soap. Do not use a
dishwasher.
Interior and door
^ Once all movable parts are removed
clean the interior with a solution of hot
water and liquid dish soap.
Dry ground coffee can be vacuumed.
^ Pull the bean container out and push
the lid back.
^ Wash the bean container by hand
with hot water and liquid dish soap,
then dry with a soft cloth.
^ Push the lid back and reinsert the
bean container into the machine.
Main dispenser connector
^ The lower part of the inner door has a
drip tray. Clean the drip tray.
A connecting piece between the brew
unit and the main dispenser is located
on the inside of the door.
^ Clean this connector regularly with a
damp cloth without removing the
lubricant for the cap.
^ Lubricate the cap once a month with
the supplied silicone grease.
49
Cleaning and care
Brew unit
Manually clean the brew unit weekly.
The movable parts are lubricated
and the cap will get damaged in the
dishwasher. Do not use a
dishwasher this will cause damage.
^ Take out the water tank, waste unit
and the storage drawer.
^ Rub off any coffee residue from the
filters with a sponge. One filter is in
the funnel, a, the second is to the
left of the funnel, b.
^ Dry the funnel, a, to prevent ground
coffee from sticking.
^ Clean the interior and remove coffee
residues.
Dry coffee grounds can be vacuumed.
^ Press the light colored button on the
brew unit handle, a, and turn the
handle to the left, b.
^ Push the brew unit in the track
straight into the appliance.
^ Press the brew unit catch, c,
downwards and pull the brew unit
out.
The brew unit is not in the correct
position if it is hard to pull out. See
"Frequently asked questions".
^ Clean the brew unit under running
warm water. Do not use soap.
Leave the handle in position or the
brew unit cannot be inserted
properly.
50
^ Press the light colored button on the
brew unit handle, a, and turn the
handle to the right, b, to lock it into
place.
Cleaning and care
Cleaning/Degreasing the brew unit
Depending on the oil content of the
coffee, the brew unit can clog. Clean
the brew unit approx. every 200 cups
with the enclosed detergent tablets.
They are specially developed for the
coffee maker to optimize the
degreasing. The cleaning tablets can
be purchased from Miele.
As a reminder the display shows
"Please run cleaning program" after
200 cups and then until the machine
is cleaned.
The cleaning process takes about 6
minutes.
Maintenance
q
r
H
I
J
L
n
m
C
^ Tap < or > until "Maintenance m" is
highlighted, confirm with OK.
^ Select "Clean brew unit", confirm with
OK.
^ Select "Start", confirm with OK.
^ Follow the instructions in the display.
To avoid having to empty the drip
tray too frequently, place the small
cleaning container beneath the main
dispenser.
The inside of the machine is also
rinsed, therefore you will still have to
empty the drip tray during the
cleaning process.
51
Cleaning and care
When the display prompts you to
Please drop the cleaning tablet in the
ground coffee funnel.
Only use a slightly damp sponge
when cleaning the controls. Water
could penetrate into the electronics
and cause damage.
The external surfaces of the coffee
machine are susceptible to scratching.
Scratches on the glass surface could
also weaken the glass making it more
susceptible to breakages.
^ Remove the storage drawer and
open the funnel lid.
^ Drop a cleaning tablet into the funnel.
^ Close the lid, replace the cover, and
close the machine door.
Glass cleaners may be used to
clean the exterior. However do not
allow them to sit or "puddle", this can
cause damage to the surface.
Remove the cleaner promptly.
^ Follow the instructions in the display.
To better maintain your appliance
avoid the following:
^ When the display shows Process
finished, tap OK.
– cleaners containing soda, ammonia,
thinners, or chlorides
The brew unit is now degreased, and
the machine is ready for use.
– cleaners containing descaling
agents or lime removers,
Exterior
– abrasive cleaners,
– stainless steel cleaners,
If soiling is not removed promptly it
could cause the surface of the
machine to alter or discolor. Be sure
to remove soiling immediately.
^ Turn off the machine using the On/Off
button.
^ The front of the appliance can be
cleaned with a sponge and a solution
of warm water and non abrasive
liquid dish soap. Dry with a soft cloth.
52
– caustic (oven) cleaners,
– scouring pads, steel wool, hard
brushes,
– eraser sponges,
– metal scrapers.
Wipe any spills from descaling immediately!
Descaling the appliance
The coffee system must be descaled
regularly. The appliance will display a
reminder message to descale and will
eventually lock if not descaled.
The display will show "Please descale
the coffee system. Remaining number
of servings: 50". This message will now
appear after each preparation.
^ Tap OK to acknowledge this
message.
If the counter has elapsed to 0, the
appliance will be locked, and the
display reads: Descaling program
must be carried out.
^ Tap OK to start the descaling cycle
immediately.
Descaling takes about 20 minutes. If
you want to continue at a later point in
time, turn the unit off. The appliance
can only be used again once descaling
is performed.
Only use the enclosed descaling
tablets for descaling. They are
specially developed for the coffee
system to optimize the descaling.
The descaling tablets can be
purchased from Miele.
Other agents may damage the
machine and affect the taste of
coffee and hot water.
The machine could also be
damaged.
Use the correct proportion of
descaling agent in solution to
prevent damage to the machine.
Use the supplied cleaning
containers to protect the appliance
front from the descaling agent.
Clean up any descaling spills immediately to avoid damage to the
appliance front.
Thoroughly clean the water tank and
the drip tray of descaling residues.
53
Descaling the appliance
Descaling
To dissolve the descaling tablets:
Maintenance
q
r
H
I
J
L
n
m
C
^ Tap < or > until "Maintenance m" is
highlighted, confirm with OK.
^ Select "Descale" confirm with OK or,
if the appliance is switched off: tap
OK while switched off.
^ Select "Start", tap OK to begin the
descaling process.
The display prompts the user through
the single steps of the descaling
process. Follow the prompts.
If the descaling is started while the
machine is still hot, the appliance
will cool down for 10 minutes before
the descaling begins.
The descaling process cannot be
canceled once "OK" is selected. The
process now needs to be
completed. This is a safety feature to
ensure the process will be
completed. It is important for best
results and the longevity of the
machine.
^ Remove the water tank and fill it up to
the k mark with lukewarm water.
(Do not under-fill the water tank,
because this will cause the descaling
cycle to end prematurely, before
completion.)
^ Add 2 descaling tablets to the water
and allow them to dissolve
completely before closing the water
tank and placing it back into the
machine.
During the descaling cycle, the
descaling agent-water solution will run
out of the hot water spout and the main
dispenser. This will be followed by a
pause to allow the solution to dissolve
the internal mineral buildup, after which
more descaling solution with be
released from the spouts. This process
will repeat itself until the cycle is
finished.
^ When the display prompts you to
Add fresh water to tank, rinse the
tank thoroughly with clear water (all
traces of descaling residue must be
removed) and fill it with clean
drinking water up to the k mark.
During rinsing, water will run out of the
dispensing spouts. Because the inside
of the machine is also rinsed out, you
must empty the drip tray in the final
step.
^ When the display shows Prog.
finished, tap OK.
The appliance is now fully descaled
and ready for use.
54
Frequently asked questions
,Repairs to electrical appliances should only be carried out by a suitably
qualified person in accordance with local and national safety regulations.
Repairs and other work by unqualified persons could be dangerous.
The light does not illuminate when the appliance is turned on.
Possible fault
Solution
Is the lighting turned off?
– See "Settings - Lighting".
If not, the lighting is defective.
Contact Miele.
The display remains dark.
Possible fault
Solution
The unit has no power.
– The main switch is turned off.
– The machine is not plugged in.
– Check that the fuse had not blown or
is defective. If the fuse has blown
contact Miele's Technical Service
Department.
The unit suddenly turns off.
Possible fault
Solution
– The machine goes into standby
mode when not used for a
programmed time. See "Settings Timer - Switching off after".
– There could be pebbles within the
– Call Miele's Technical Service
coffee beans. The unit shuts off after
Department.
20 secs. to avoid damage.
– Is the machine plugged in?
– Plug in the machine.
– Is the machine programmed to
switch off after a programmed time?
The light turns off suddenly.
The light turns off automatically when the machine has not been used for
15 minutes. See "Settings - Lighting".
55
Frequently asked questions
What if the machine does not switch on, even though the "Switch on at"
timer setting is activated?
Possible fault
Solution
The System Lock is activated.
See "Settings - System Lock".
The display messages are difficult to read.
Possible fault
Solution
The contrast or brightness of the Adjust the display contrast / brightness.
displays are too low / high.
See "Settings - Display".
No milk or milk froth comes out of the main dispenser.
Possible fault
Solution
The dispenser is clogged.
See "Cleaning and Care".
The display prompts me to fill or insert the stainless steel milk container
even though the container has already been filled and inserted
Possible fault
Solution
The container needs to be
cleaned.
See "Cleaning and Care".
The grinding sounds louder than usual.
Possible fault
Solution
There could be pebbles within
the coffee beans.
– Turn off the unit immediately.
– Contact the Miele's Tech. Service if the
bean container is not empty. Otherwise fill
the container with fresh beans.
The coffee/espresso flows too fast into the cup.
Possible fault
Solution
The grind control is set too
coarse.
Set the grind control slide to a finer grind.
The coffee/espresso flows too slow into the cup.
Possible fault
Solution
The grind control is set too fine.
Set the grind control slide to a coarser grind.
56
Frequently asked questions
The coffee/espresso is not hot enough.
Possible fault
Solution
– Were the supply lines and cup
pre-heated?
– The temperature is set too low.
– The smaller the cup, the more important
it is to pre-heat.
– Check on what temperature range the
coffee type is set.
– Check if the brew unit is clogged. – Clean the brew unit.
No drink is prepared although the beans were grinded and enough water is
in the container.
Possible fault
Solution
– Adjust the grind control slide to a
– The grind control is set to the
different position, or the amount of
finest or the amount of coffee is
coffee more or less.
set to the maximum.
– The process is timed, the process
might need so long, there is no
time for brewing any more.
The door cannot be closed.
Possible fault
– Check if all containers are
properly inserted.
– The door hinges need to be
adjusted.
Solution
See "Installation Instructions".
The steam heating system is turned off but steam can still dispensed.
Steam can be dispensed as long as the steam heating system is heated. Once it
has cooled, steam can only be dispensed once the steam system has heated.
The coffee dispensing is interrupted.
Possible fault
Solution
The water tank is empty.
Refill the water tank with fresh cold tap
water.
You will be asked whether you would like
the coffee dispensing to continue after the
water tank has been filled. If you do not
confirm with "OK" within 5 minutes the
coffee preparation will be canceled.
57
Frequently asked questions
Instead of coffee only water is dispensed.
Possible fault
Solution
– The beans may have gotten stuck.
– Pull the bean container out and push
it back in.
– The ground coffee funnel cover was
opened and closed and a
preparation with ground coffee was
selected but no ground coffee was
inserted.
The coffee system switches
automatically back to bean use after
preparation.
The drip tray is empty but a message to empty it is displayed.
Possible fault
Solution
– The metal contacts are soiled or wet. – Clean and dry the contacts.
– Check if the drip tray is inserted
– Insert the drip tray as described in
correctly.
"Cleaning and Care - Drip tray".
– Turn the machine off and on again
with the main switch.
– If the message still appears contact
Technical Service.
The machine does not rinse when turned on although the automatic rinse
feature is set to "On".
When the machine is still at a temperature of about 140°F (60°C). The machine
will not rinse when it is too hot.
The water (or milk) dispensing stops when programming the serving size.
Possible fault
Solution
– Fill the water tank or milk container
– There was not enough water in the
tank or milk in the milk container. The
before programming the serving
dispensed amount will not be saved.
size.
– If the maximum amount is
dispensed, the flow stops
automatically. The maximum amount
is saved.
58
Frequently asked questions
Water is in the waste unit.
Possible fault
Solution
This is not a fault.
This is residual water from the cleaning
process.
"Coffee water" is in the waste unit.
Possible fault
Solution
If the grind setting is too coarse, this
can result in too much coffee water in
the waste unit.
Adjust the grind setting and/or amount
of coffee.
The descaling process was started accidently.
The descaling process cannot be canceled once it is started. The process
needs now to be completed. This is a safety feature to ensure the process will be
completed. It is important for best results and the longevity of the machine.
See "Descaling".
The machine makes loud noises during descaling
During a descaling cycle, the machine is relatively loud because water is being
forced through the lines at high pressure. This is not a fault.
The preheating time is increased, the water flow amount is not correct and
the unit performs less?
Possible fault
Solution
The machine needs to be descaled.
See "Descaling the appliance".
No water flows from the main dispenser.
Possible fault
Solution
The filters in the brew unit are clogged. Rub any residue off the filters with a
sponge. See "Cleaning and Care".
The brew unit or waste unit could not be pulled from the machine.
Possible fault
Solution
– The brew unit is not in the correct
position.
– The door was opened during
grinding or brewing.
– Close the door. The brew unit
automatically gets into the correct
position.
59
Frequently asked questions
No crema has formed or it is "different".
Possible fault
Solution
– Check if the grind setting is too
coarse or too fine.
– Check what temperature range the
coffee type is set. If the temperature
is too high, there are black areas in
the crema.
– Some coffee types produce too
much crema when the coffee /
espresso temperature is set to the
maximum and the amount of ground
coffee is too much.
– Adjust the grind setting.
– Lower the temperature and amount
of ground coffee. See "Settings".
– The coffee is not fresh enough.
– The coffee is unsuitable for use in
this machine.
– The coffee dispensers are set too
high.
The message "Push water container in as far as it will go" appears
Possible fault
Solution
No water is dispensed.
– The water tank is not inserted
properly. Take it out and reinsert
correctly.
– The water tank was not filled
correctly during the descaling
process. Fill the water tank up to the
correct mark.
– If the message still appears contact
Technical Service.
Too much crema has formed and is above the coffee dispensers.
Possible fault
Solution
Some coffee types produce too much
Lower the temperature and amount of
crema when the coffee / espresso
coffee.
temperature is set to the maximum and
the amount of ground coffee is too
much.
The grind control slide will not move.
Close the unit and prepare a coffee/espresso. The grind grade can now be
reset.
60
Frequently asked questions
The storage drawer cannot be pushed in properly.
Close the lid of the ground coffee funnel.
The door is hard to open and close.
– Adjust the door with the door hinges. See "Installation - Adjusting the door
hinges".
– Lubricate the cap of the connecting piece with the supplied silicone grease.
The message "Check brew unit" appears on the display?
Possible fault
Solution
The brew unit is clogged.
– Follow the display prompts.
– Clean the brew unit (see "Cleaning
and care" - "Brew unit").
– Set the amount of ground coffee and
the grinder setting to the medium
settings, also adjust these settings in
the user profiles. See the respective
chapters in this manual.
The message "Fault - 28" appears on the display?
Possible fault
Solution
If too much ground coffee passes
– Tap the button next to OK.
through the coffee chute the machine is The machine is again ready for use.
unable to process it so it can be emptied
into the waste container.
One of the messages "Fault - 1" to "Fault - 4" or "Fault - 80" to "Fault - 83"
appears in the display.
Possible fault
Solution
Use the On/Off button to switch off the
appliance and wait approx. 1 hour
before you switch it back on.
If the message still appears, contact
Technical Service.
One of the messages "Fault - 74" or "Fault 77" appears in the display.
Possible fault
Solution
Switch off the appliance, wait a short
while, then switch it back on.
If the message still appears, contact
Customer Service.
61
Frequently asked questions
The message "Fault - 73" appears in
the display.
The brew unit cannot reset to the
correct position.
^ Take out and clean the brew unit.
See "Cleaning and Care - Brew unit".
^ Push the coffee ejector of the brew
unit into the correct position.
^ Set the brew unit aside and insert the
waste unit and the water tank.
^ Close the door.
The brew unit motor will automatically
move to the correct position.
^ When the message "Fit the brew unit"
appears, open the door and insert all
parts into the machine.
^ Close the door.
If the message still shows contact Miele
Technical Service.
62
After sales service
In the event of a fault which you cannot
easily fix yourself, please contact the
Miele Technical Service Department at
the contact information on the back of
this booklet.
When contacting the Technical Service
Department, please quote the model
and serial number of your appliance
given on the data plate inside the
appliance.
MieleCare
(USA only)
MieleCare, our Extended Service
Contract program, gives you the
assurance of knowing that your
appliance investment is covered by
5 years of worry free ownership.
MieleCare is the only Extended Service
Contract in the industry that guarantees
repairs by a Miele Authorized Service
Provider using genuine Miele parts.
Only genuine Miele parts installed by
factory trained professionals can
guarantee the safety, reliability, and
longevity of your Miele appliance.
Please note that unless expressly
approved in writing by Miele’s Service
department, Extended Service
Contracts offered by other providers for
Miele products will not be recognized
by Miele. Our goal is to prevent
unauthorized (and untrained) service
personnel from working on your Miele
products, possibly doing further
damage to them, you and/or your
home.
To learn more about MieleCare
Extended Service Contracts, please
contact your appliance dealer or visit
us online at:
http://miele.com/mielecare
63
64
Installation instructions
Information is subject to change. Please refer to our website to obtain the most
current product specification, technical & warranty information.
Caring for the environment
Disposal of packing material
Disposal of an old appliance
The cardboard box and packing
materials protect the appliance during
shipping. They have been designed to
be biodegradable and recyclable.
Please recycle.
Old appliances may contain materials
that can be recycled. Please contact
your local recycling authority about the
possibility of recycling these materials.
Ensure that any plastic wrappings,
bags, etc. are disposed of safely and
kept out of the reach of children.
Danger of suffocation!
66
Ensure that the appliance presents no
danger to children while being stored
for disposal. Before discarding an old
appliance, unplug it from the outlet, cut
off its power cord and remove any
doors to prevent hazards.
Electrical connection
Make sure that the power to the
machine is OFF before installing or
performing maintenance or repairs.
WARNING:
THIS APPLIANCE MUST BE
GROUNDED
Important
All electrical work should be
performed by a qualified electrician
in strict accordance with national
and local safety regulations.
Installation, repairs and other work
by unqualified persons could be
dangerous.
The coffee system comes equipped
with a 6 ft (1.8 m) power cord with a
NEMA 5-15P molded plug for
connection to a 120 V, 15 A, 60 Hz
power supply.
Verify that the voltage, load and circuit
rating information found on the data
plate match the household electrical
supply before installing the coffee
system.
Do not connect the appliance to a
power inverter or directly to power
produced outside of the normal
electrical grid (i.e. direct solar or wind
power source).
Direct connection to such power
sources can cause power surges and
tripped breakers when the appliance is
turned on, and could damage the
appliance.
Do not connect the appliance to energy
saving plugs or outlets. The reduction
of power to the appliance caused by
these devices will cause the appliance
to run hot and may damage it and/or
shorten its usable life.
If there is any question concerning the
electrical connection of this appliance
to your power supply, please consult a
licensed electrician or contact Miele’s
Technical Service Department. See
back page for contact information.
67
Installation
Installation options
The coffee system is designed to be built into cabinetry.
Miele appliances can be installed flush or proud. Discuss your installation
requirements with your architect, designer and installer.
A combination with other Miele built in appliances is possible. If the machine is
installed in combination with other appliances, it should be installed with a
protective base between the appliance and the unit (exception: installation with a
built-in plate warmer).
A special display cabinet is also available from your dealer or Miele, as an
installation option.
68
Installation
Installation
Make sure power is not supplied to
the appliance while installation or
maintenance work is performed.
Disconnect the power supply to the
work area by unplugging the unit,
tripping the circuit breaker or
removing the fuse. The coffee
system must be installed into
cabinetry before being used.
This unit should only be used in
room temperatures ranging between
59 °F and 140 °F.
To align the appliance door flush with
the kitchen cabinetry, there must be a
sealing strip around the installation
recess; otherwise, a sealing strip must
be put in place around the appliance.
^ Unscrew the height adjustable feet
on the underside of the machine
about 1/16" (2 mm).
^ Push the appliance all the way back
into the cabinet and center it. If
necessary level the unit with the four
height adjustable feet.
The feet can be turned out up to 3/8"
(10 mm).
^ Plug the appliance into the electrical
outlet.
^ If there is no sealing strip around the
installation recess, stick the Miele
sealing strip onto the appliance from
the back before putting it into the
recess. Sealing strips are available
from Miele.
69
Installation
Adjusting the door hinges
The door hinges can be adjusted if the
door cannot be opened easily.
^ Push the appliance into the niche.
^ Open the door and partially tighten
the screws.
^ Carefully turn the lower screws, a, to
center the machine.
^ To secure the appliance in the
cabinet, tighten the upper screws, b,
by hand. Do not use an electric
screwdriver.
70
^ To adjust the door sideways, a, turn
screw a.
^ To adjust the door to the front or
back, b, turn screw b.
71
Alteration rights reserved / 0710
CVA 4062, CVA 4068
M.-Nr. 07 816 880 / 00
INFORMATION IS SUBJECT TO CHANGE. PLEASE REFER TO OUR WEBSITE TO OBTAIN THE MOST
CURRENT PRODUCT SPECIFICATIONS, TECHNICAL & WARRANTY INFORMATION.