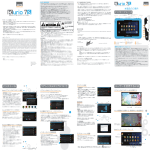
Download the Little Reader User Manual
Transcript
Little Reader User Manual Learn how to maximize you and your baby’s Little Reader experience Get to know more about important program features and screens. Find step-by-step guides on everything from installation to playing lessons, customizing playback, creating your own lessons, printing flash cards and getting technical support! Introduction Thank you for purchasing the Little Reader Learning System! The decision you have taken to invest in your child's learning is about to change you and your child's lives for the better. We really believe that with Little Reader, we have taken all of the difficulty and inconvenience out of teaching for you. There are just a few things we would urge you to read, before you begin using your Little Reader Learning System… Understand the curriculum! Why are your Little Reader lessons designed the way they are? How many times should each lesson be played? Find out the answer to these and many more related questions in Understanding the Little Reader Curriculum. Personalize! One of the keys to effective teaching is to customize your lessons, as that is a surefire way to make them as engaging as possible for your child. For ideas on getting started, check out our Little Reader Tips. Got a question? Go to the comprehensive Little Reader HelpDesk section. Last but certainly not least… The number one rule of teaching is to have fun doing it! Results should never be the focus of lessons. Instead, treat lessons primarily as a time for bonding, and enjoy the learning experience with your child. 2|Little Reader User Manual Do remember to share your teaching experiences with us at the BrillKids Forum – we'd love to hear from you! What Makes this System Effective? The key to why our system works – YOU The Little Reader Learning System is designed with PARENTAL INTERACTION in mind, making it more powerful and effective compared to other preschool programs. This system requires you to be your child's first – and best – teacher. You are encouraged to sing and act out songs, perform the actions represented by the words, and pronounce the word with your child – all of which helps to facilitate effective learning. We make learning ENGAGING FOR YOUR BABY Learning to read is easier when your child can get a multisensory experience by associating words with pronunciation, pictures, videos, and sound effects. You control what your baby hear and sees, making lessons meaningful, exciting, and fun – each and every time! MEANINGFUL - Customized lessons teach your baby words using your very own pictures, videos and recorded pronunciations! EXCITING - There's always something new to learn: thousands of lessons on various topics in more than a dozen languages are just a download away! 3|Little Reader User Manual FUN - Your baby will have so much fun learning about words through pictures, videos, pronunciations and sound effects! We make teaching EASY FOR YOU Each Little Reader lesson only lasts for around five minutes – and with parental interaction, each session doubles as a bonding time with your baby. If you're new to teaching, you need not worry – Little Reader comes with an early reading curriculum which will guide you in teaching your baby gradually from single words all the way to full stories! EFFORTLESS - We've created a curriculum for you to follow, so you won't have to start from scratch! CONVENIENT - No more countless hours spent on making your own teaching materials and flash cards – creating new lessons is a breeze! EASY - Just show your baby the lessons that we've already created for you – all you need is five minutes once or twice a day, five days a week. 4|Little Reader User Manual Installing Little Reader To download and install Little Reader, first make sure that your computer has a working Internet connection and that you have an active BrillKids subscription. To sign up for an account, go to the BrillKids website. Downloading Little Reader from Your BrillKids Account Open your browser and log in to your BrillKids Account with your email and password. Go to your Account Management Page and click on the Purchases Tab. In the Little Reader Tab, go to Software Download and click on the download button (shown below) to get the software installer for the latest version of Little Reader. Once you’re done downloading, open the file using an extracting program and double-click on the “Little_Reader_install.exe” file. Follow the prompts during installation, and after completing the setup process, your Little Reader will open. 5|Little Reader User Manual Installing Little Reader from your Installer CD Insert your BrillKids Little Reader Software Installation Disc in your computer's CD drive. Close your CD drive. The installation wizard will begin to guide you through the whole process of installing Little Reader on your computer. Follow the prompts during installation, and after completing the setup process, your Little Reader will open. The InstallShield Wizard will guide you through the entire process of installing Little Reader on your computer. Click Next to start the installation process. In the License Agreement Screen, please read the terms carefully. If you accept the terms, choose the option “I accept the terms in the license agreement” and click Next. 6|Little Reader User Manual Select your installation preferences in the next few screens and click Install to begin installing Little Reader. Once the wizard has finished installing, choose to “Launch BrillKids Little Reader” and click Finish. Other Components Installed with Little Reader Depending on your computer, the InstallShield Wizard may prompt you to install additional components. Choose to Install these additional components. Follow the prompts to finish installing each component. Once you’ve finished installing these required components you can continue installing Little Reader. Microsoft .NET Framework - The BrillKids Learning Systems requires an installation of Microsoft .NET Framework 2.0 or higher in order to work properly. If your computer is currently running on Windows Vista or Windows 7, you do not need to do this step because this is already installed by default. Otherwise if you are using Windows XP or an earlier operating system, you must install this before you can continue installing Little Reader. For more information on the .NET Framework, go to this page. 7|Little Reader User Manual NOTE: The .NET 2.0 Framework is a ONE-TIME installation requirement for all BrillKids Learning Systems – once you have it installed, you won't need to install it again. FFDShow Codec Pack - Installing the FFDSHOW Codec Pack, a widely known and commonly used audio and video codec pack, will ensure that your computer efficiently processes the media files included in your Little Reader lessons. This way you can be sure that the pronunciation audio and videos will always play smoothly whenever you play back lessons for your baby! Importing Course Content After installing your Little Reader, the next thing you need to do is to import your course content. Currently, you will notice that you only have a few lessons in your Little Reader – by importing your content files completely, you will be able to get all of your lessons ready for playback! Importing Course Content from your BrillKids Account Open your browser and log in to your BrillKids Account with your email and password. Go to your Account Management Page and click on the Purchases Tab. In the Little Reader Tab, go to Content + License Keys and download your content files. 8|Little Reader User Manual NOTE: Downloading large content files may take a while because of the amount of media files attached to the lessons. Once you’re done downloading, double-click on the content files one by one. If not already opened, Little Reader will open automatically. A pop-up dialogue will appear, asking if you want to import your Semester 1 lesson content. Select Yes. Importing Course Content from Your Content CDs Insert your Littler Reader Semester 1 content Disc. Close your CD drive. A pop-up dialogue will appear, asking if you want to import your Semester 1 lesson content. Select Yes. After importing the Semester 1 content, take out your Semester 1 Content Disc and replace it with your Semester 2 Content Disc to import your Semester 2 lesson content (if your purchase includes Semester 2). Activating Course Content To unlock your Little Reader courses, you must have a purchased content license key in your BrillKids Account, which you will use to activate your courses. Note that you must be connected to the Internet to compete this step. You may install and activate your BrillKids software on UP TO 2 computers. If you wish to free up one of your activation slots later on, simply click on the Delete button beside the 9|Little Reader User Manual Activation Record you want to erase (this can be found in your Account Management Page). To activate your course content: Open your browser and log in to your BrillKids Account with your email and password. Go to your Account Management Page and click on the Purchases Tab. In the Little Reader Tab, go to Content + License Keys and download your purchased content license key. Once you have finished downloading, double-click on the littlereader-license-.lrd-lic file and if not already opened, Little Reader will open automatically. An "Activate your Little Reader" window will appear – click on Activate. Once Little Reader finishes communicating with our server, a small window will appear telling you that you have successfully activated your BrillKids program. NOTE: You can also type in your content license key shown in your Account Management Page, your purchase receipt, or the license key card inside your Little Reader CD box. How to Start Little Reader To open your program, click on the Little Reader Icon located on your Desktop, Quick Launch, or Start Menu. 10 | L i t t l e R e a d e r U s e r M a n u a l To help you get started with Little Reader, the Start Guide window will pop up the first time you run Little Reader. The Start Guide The Little Reader Start Guide introduces you to Little Reader. The Start Guide’s homepage will show you the latest news, announcements and updates from BrillKids. The Start Guide also includes a Beginner’s Tutorial on how to use the program’s features, FAQs and Tips, and a Tutorial Videos section where you can watch tutorial videos about how to use your Little Reader. Beginner’s Tutorial You may want to spend a few minutes to go through the Beginner’s Tutorial so that you have an idea about how Little Reader works and familiarize yourself with its features. FAQs and Tips The FAQs and Tips section provides answers to frequently asked questions about Little Reader. It also provides useful information on how to maximize you and your baby’s Little Reader experience. 11 | L i t t l e R e a d e r U s e r M a n u a l Tutorial Videos To begin viewing a video tutorial, simply click on the video you want to play and your selection will be shown. Be sure to turn on your speakers so you won’t miss the tutorial‘s narrations! NOTE: You may choose not to show the Start Guide whenever you open Little Reader by unchecking the box at the bottom of the Start Guide window. To go back to the Start Guide later on, click on the Start Guide button at the top right part of the Little Reader window. The Play Courses Screen The Play Courses Screen is simple to use – from here you can play course lessons for your baby at a click of a button. Available Courses You can begin playing lessons on your Little Reader as soon as you’ve installed and started it up! Your Available Courses panel will be pre-populated with the course lessons you have imported. 12 | L i t t l e R e a d e r U s e r M a n u a l Day Navigation Bar The Day Navigation Bar in the Play Courses Screen makes it easy for you to navigate between days and lessons in your selected curriculum. Just click the Back button on the left of the bar to go back one day, or click Next to go forward one day. Depending on the day you have selected, the corresponding lessons will be displayed in the panel below the Day Navigation Bar. NOTE: To quickly jump to a specific day, simply click on the middle part of the Day Navigation Bar and a dropdown list of days will appear. Select a day from the list to view the lessons for that specific day. Play Panel The long Play Panel along the bottom of the Little Reader window provides additional options for you to customize how presentations play back for your child. In case you’d like to make more changes in a lesson’s playback settings, just click on the Customize Your Lessons button and you’ll be taken to the Advanced Play/Edit Screen! FAQ: About the Different Lesson Types Courses, Playlists and Categories are the three lesson types you will use to teach your child, but what's the difference between them? 13 | L i t t l e R e a d e r U s e r M a n u a l Courses Your purchase of Little Reader comes with a pre-made early reading curriculum. The Little Reader Curriculum is divided into Semester Courses, depending on whether you chose a Semester 1 (6-month) or a Semester 1+2 (12-month) curriculums. These lessons are designed to be played back at least twice per day (i.e., Session 1 and 2), five days a week, but you may always play lessons at your (or your baby’s) convenience! Each Course lesson is designed to teach your baby in a progressive manner, from reading single words to couplets, phrases, simple sentences, and later on, short stories. If you are at a loss on what to teach your baby while she is at her current reading level, or if you don’t have the time to set up your own lesson plan, you can simply follow the curriculum! Playlists Playlists are selections of custom-ordered Categories and words. Playlists may be created from Categories or individual words, and you may freely set each to play back in a certain way. Categories Each lesson from the pre-made Little Reader curriculum contains words, phrases or sentences that are grouped into Categories, each with a common theme or topic. You may opt to play Categories from past Course lessons as a way of reviewing your baby on the words she has previously learned. You may also create your own Categories on special topics or other lessons you would like to teach your baby, or if you’re too busy you can simply download Categories from the BrillKids Forum Library! 14 | L i t t l e R e a d e r U s e r M a n u a l How to Play Lessons You can begin playing the three types of lessons on your Little Reader as soon as you install and start it up! You can play Courses right from the Play Courses Screen, or you can go to the Advanced Play/Edit Screen to play Courses, Playlists, or Categories. How to Play Courses Go to the Play Courses Screen. The Available Courses tab displays the courses that came with your Little Reader. Choose the lesson day you want to play, starting with Day 1. Simply pressing the Play button will play the session(s) for that day, going through each part of the session. To stop the presentation at any time, simply press the Esc key on your keyboard, and later on you just need to click on the Next Lesson button (beside the Play button) and Little Reader will play the lesson from where you stopped. 15 | L i t t l e R e a d e r U s e r M a n u a l How to Play a Playlist Go to the Advanced Play/Edit Screen and display Playlists. Select the Playlist you want to play. Click on the Play button. How to Play a Category Go to the Advanced Play/Edit Screen and display Categories. Select the Category you want to play. Click on the Play button. 16 | L i t t l e R e a d e r U s e r M a n u a l Keys to Use During Playback During playback (your Little Reader lessons), you will need to know what keys and mouse clicks to use to navigate your way through a lesson. To advance to the next slide, use the Left-Click on your mouse, or press the Right Arrow, Spacebar or Enter on your keyboard. To repeat the slide, click on your Mouse-Wheel or press the Down Arrow on your keyboard. To go back, use the Right-Click on your mouse or press the Left Arrow on your keyboard. To exit playback, press the Esc key on your keyboard to return to your Little Reader. 17 | L i t t l e R e a d e r U s e r M a n u a l The Advanced Play/Edit Screen The Little Reader Learning System is fully customizable – you can edit and create lessons to fit your baby’s needs via the Advanced Play/Edit Screen. You can essentially create hundreds of personalized lessons! The Advanced Play/Edit Screen consists of three major areas: the Lesson Panel, the Word and Playback Settings Panel, and the Play Panel. Lesson Panel Located at the left side of the Advanced Play/Edit Screen, the Lesson Panel lets you select the Course, Playlist or Category to play back, edit or customize. Simply click on the corresponding button at the top part of your Lesson Panel to make your selection. 18 | L i t t l e R e a d e r U s e r M a n u a l Organize Lessons into Folders Create folders to better organize your lessons, in the same way as you would organize your files in your computer’s My Documents folder! Simply click on the New Folder button and type in your new folder’s name. You may even add folder/s within a folder as needed! To place lessons in your new folder, select a lesson then drag-and-drop it into your folder – you can also transfer many lessons at a time by holding your Shift or Ctrl key while selecting lessons. Other Options for Organizing Lessons If you’d like to delete a lesson, just select the item you want to delete and click on the Delete button. If you want to move a lesson (or lessons) up or down the list, just select the lesson/s you want to move and click on the Up or Down Arrow buttons. The Word Settings Panel The Word Settings Panel lets you preview the words or Categories in a Playlist, or the word list of a Category, including all the media files associated with each word. Here you will also find several functions to edit and customize each word in your selected Category. 19 | L i t t l e R e a d e r U s e r M a n u a l The Word List shows you what words will be shown during playback in the default order (i.e., as originally listed in the Category) in your Playlists, Categories, or selected Course lesson. You can use the buttons below the word list to change how the words are listed as well as edit, delete and add new words to your Categories. New Word - Create a new word for the Category you’ve selected by opening the New Word Window. Edit Word - Select the word you want to edit and click on the Edit button to customize the media files currently attached to that word. Remove Word - Select the word you want to delete and click on the Delete button. This will delete the word from your Word Library. If you just want to remove the word from your Category, use the Edit Category function. Trash Deleted items can be found in the Trash bin located at the bottom of your Playlists or Categories in the Lesson Panel. These ‘deleted’ items can be restored back into Little Reader or you can choose to permanently delete them. 20 | L i t t l e R e a d e r U s e r M a n u a l The Playback Settings Panel The Playback Settings panel lets you customize how the words and media files in each Course and Category lesson are shown during playback. The Preview Panel Beside the word list is a Preview Panel that gives you a quick preview of what will be displayed during playback. The Preview Panel lets you preview the images, videos, sound effects and pronunciation recordings for each word in your library. Word Display - This displays the word that will be flashed on the screen during playback. Pronunciation - This lets you listen to each pronunciation that will be heard during playback. Picture - This lets you view the images that will be flashed on the screen during playback. Video - This lets you watch the videos that will be shown during playback. Picture Audio - This lets you listen to each picture audio and sound effect that will be heard during playback. NOTE: To toggle the next or previous media file that you would like to preview, simply click on the Left or Right Arrow buttons located at the bottom of the Preview Panel. 21 | L i t t l e R e a d e r U s e r M a n u a l Playback Settings Little Reader allows you to fully customize how your lessons are played back. Settings are built-in to let you show your child Word Flash, Picture Flash and Multisensory presentations the way you want them to be played. All you have to do is adjust the settings according to how you want your playback to be. Here are the different settings of the Playback Settings Panel: Playback Mode The Playback Mode allows you to change how you want to show the lesson content to your child. To change your Playback Mode, simply toggle the Playback Mode selection at the top of the Playback Settings Panel, as shown below: Little Reader enables you to configure your Playback Mode in five different ways: Word, Media This displays the word first, then the media files (image, video, and picture audio). 22 | L i t t l e R e a d e r U s e r M a n u a l Word, Media, Word This displays the word first, followed by the media files (image, video, and picture audio), and then the word again. Media, Word This shows the media files before the word is displayed. Word Only (Word Flash Mode) This flashes the words one after another. Picture Only (Picture Flash Mode) This flashes a picture for each word one after another. 23 | L i t t l e R e a d e r U s e r M a n u a l Picture Flash Mode Settings – When Picture Flash Mode is selected, you can choose to make Little Reader change all sound effects and picture audio that usually play with the images to pronunciations during playback. Order This dictates the order in which the words in your Course, Playlist or Category will be shown to your child. You may choose from two options: According to List Words will be shown according to how the words are arranged in your Word List. You may adjust and change the order of the words in the Word List by using the up and down buttons in the Word Settings Panel. Random Words will be shown in no particular order, regardless of how the words are arranged in your Word List. You may use this option to easily change your child’s lessons and keep the content new and exciting. 24 | L i t t l e R e a d e r U s e r M a n u a l Words This group of settings lets you configure how the words are displayed during playback. Letter Case Choose how you want the words to be displayed – the original case in which the words are written (for example, allowing you to show “Sam” instead of “sam”) or toggle between lowercase, uppercase, or capitalize only the first letter of the word. Font Type Choose from 4 different fonts in which to display the word during playback: Arial, Times New Roman, Comic Sans MS, or Tahoma. You may also choose to have font type change randomly during the lesson, or use a custom font (i.e., any font that is currently installed in your computer). Custom fonts may be useful for displaying non-English lessons as sometimes a certain Font type displays non English characters in a wrong way (e.g., a Chinese character may have a stroke missing). Font Size Choose the font size with which to display the words during playback. You may also choose to let Little Reader automatically adjust the font size to a size optimized for the word length with your PC screen and resolution in mind. 25 | L i t t l e R e a d e r U s e r M a n u a l Double Space Turning this option on will display two or more words spaced more far apart than how they would normally be, to help your baby focus on each word displayed. Display Mode Select how words are displayed during playback – you may choose to show each word in one font color or in split mode, where two font colors are used to emphasize each syllable or part of a word. Font Color Choose what font color the words are displayed in during playback. You may also choose to have the font color change randomly for each slide shown or for each playback. When Split Mode is turned on, you may choose two font colors. Background Select a background color to stimulate your child’s brain during playback. You may specify a color or choose to have the background color change randomly for word slides or picture and video slides. 26 | L i t t l e R e a d e r U s e r M a n u a l Subtitles Choose to turn subtitles on or off to place small subtitles during playback for the Current Slide, and/or a preview of the next Slide that will play. You may also specify the text size of the subtitles during playback. Current Slide Subtitle This displays a small box with the word corresponding to the flashed picture in the bottom center of the screen. This way you’ll know what word to read aloud to your child. Next Page Preview This displays a small box with a preview of the next word at the lower right corner of the screen during your playback. This allows you to know what is coming up ahead of your child (especially useful if you have selected a random order playback), so you can say the word out loud as the next slide flashes. 27 | L i t t l e R e a d e r U s e r M a n u a l Other Playback Settings Number of Pics/Vids Shown Choose how many images or videos will be shown for each word during playback. Selecting “All” will play back all the pictures or videos that are attached to that word. This option is particularly useful if you want to emphasize the meaning of the word by showing different images of the same thing. NOTE: If a particular word does not have that number of images or videos attached to it, the same image(s) or video(s) will be shown repeatedly until it matches the number that you have selected in your playback setting. Rotate Media Selecting this option will show the media your child has not seen as often as the others during playback. Each time you play the word back Little Reader will play the next image attached to the word. This can help your baby understand a word better by associating a word with more than one picture. Pronunciation On Selecting this option will play the pronunciation file when a word is flashed during playback. Turn this option off if you prefer to personalize the lesson and pronounce the word yourself, instead of playing the default recording. Pic. Audio On Selecting this option enables the recorded sound effect, song or vocal audio to be played when an image is flashed during playback. 28 | L i t t l e R e a d e r U s e r M a n u a l NOTE: If the word does not have picture audio, turning this function on will enable the pronunciation to be played along with the word AND the image. Video On Selecting this option will play any videos attached to the word during playback. Display words with pictures/videos. Selecting this option will display the word on the word slide AND on the picture and video slides. This will reinforce the meaning of the word as your baby will always see the picture or video with the corresponding word. Allow Override Selecting this option will allow Little Reader to override the settings in the Playback Settings Panel. If the Override button in the Play Panel is turned on (green light), all the playback settings configured in the Override Settings window will be applied during playback (i.e., the individual playback settings set for each Category will not take effect). The Play Panel Aside from the Playback Settings Panel, the Play Panel along the bottom of the Advanced Play/Edit Screen provides additional options for you to further customize how presentations play back for your child. 29 | L i t t l e R e a d e r U s e r M a n u a l Lock When the Lock buttons for the Mouse and Keyboard are turned on (green light), all power will be removed from your keyboard and mouse during playback (except the Esc key to exit the presentation). This is useful if your baby often likes to play with the keyboard keys or the mouse buttons. Override When the Override button is turned on (green light), all playback settings set in the Override Settings window will take effect during playback, disregarding any playback settings previously set in the Playback Settings Panel of each Category. Click on the Cog button next to the Override button to configure and save universal playback settings in the Override Settings window, as shown below: You may also choose to turn on only specific settings so that only those settings will override all of the Categories’ playback settings and leave the rest of the playback settings as previously configured for each Category. For example, if the Split Word Display Mode override setting is turned on, all the words played back will be flashed in split colors, even for Categories originally in Normal Word Display Mode. 30 | L i t t l e R e a d e r U s e r M a n u a l Auto Forward Enabling the Auto Forward setting (green light) allows you to playback presentations continuously, without needing to click a mouse button or press the spacebar to proceed to the next slide. To adjust the Auto Forward settings, click on the Cog button next to the Auto Forward button. This will pop up a small window where you can set the speed of continuous playback and minimum slide duration by adjusting the Auto Forward Delay bar. Volume This lets you control the volume of all audio files during playback. NOTE: You can further increase or decrease volume through your computer and speaker volume control. Pointer Turn on this setting (green light) so that your mouse pointer is shown during playback. You can use your pointer to direct your child’s attention throughout the lesson. You may choose how your pointer looks like and other pointer settings that will take effect during playback by clicking on the Cog button beside the Pointer button: 31 | L i t t l e R e a d e r U s e r M a n u a l Pointer size There are 5 sizes available for pointers (five being the largest). Pointer Color Click on the button to pick a pointer color (the default pointer color is black). TIP: The bigger the contrast between the pointer and the background color, the more effective it will be in drawing your child’s attention. Auto-Pointer delay Enabling the Auto-Pointer delay will make the pointer wait a certain amount of time before it starts moving below the word. You can specify the time the pointer will be delayed by moving the slider to the left or right side of the delay bar. Show pointer for pictures When you enable this option, your pointer will remain on the screen even when a picture is flashed during playback. This is useful when you want to draw your child’s attention to the main object in the image (e.g., cat). TIP: For pictures in Categories like Colors or Shapes, you may want to disable this function so that your pointer will disappear when the picture slide is displayed, but will reappear when the word slide comes up. 32 | L i t t l e R e a d e r U s e r M a n u a l Split Mode: The Pattern Phonics System With Little Reader, your baby will not only learn to sight-read, but will also be guided to decode the written language in an intuitive manner using the Pattern Phonics™ system. This system enables you to split words into syllables or "parts" – creating a visually comprehensible way of showing pronunciation stress and highlight certain consonants, vowels and letter combinations! How to Create Pattern Phonics You can create your own Phonics Categories and Playlists in the same way your own word Categories and Playlists were made: Go to the Advanced Play/Edit Screen and choose to view Categories. Click on the New button at the bottom of the Lesson Panel to create a new Category for your new Phonics set. Click on the New button at the bottom of the Word List in the Word Settings Panel to add a word to your new Phonics Category. This will open an “Add Word” window. In the Word(s) area, type in your new phonics word – you can divide the word into syllables or letters by simply adding a “/” between the parts. Example: Brill/Kids, dad/dy, but/ter/fly 33 | L i t t l e R e a d e r U s e r M a n u a l After adding your new phonics words, toggle the Playback Settings panel of your Category and turn on the split display mode (bottom part of the Words settings box) This will make each part of your presentation appear in different colors, highlighting each part of the word! 34 | L i t t l e R e a d e r U s e r M a n u a l Double Space Mode The Double Space Mode lets you space your words much more far apart than how it regularly appears. This helps emphasize individual words, giving you an extra space between each word, as shown below: How to Activate the Double Space Mode Go to the Advanced Play/Edit Screen. Select the Playlist or Category you want to be displayed in Double Space Mode Go to the Playback Settings panel. Tick the Use Double Space check box (located just below the Font Size selection). Edit Multiple Items With the Edit Multiple Items function you can adjust playback settings for multiple Courses, Playlists, or Categories all at once, rather than changing settings for each lesson one at a time. 35 | L i t t l e R e a d e r U s e r M a n u a l How to Edit Mutliple Items Go to the Advanced Play/Edit Screen. Depending on which items you want to edit, click on Courses, Playlists or Categories in the Lesson Panel on the left side of the screen. Edit multiple items by first selecting the items you want to edit: Select multiple items by clicking on items while holding down the Ctrl key, OR select one item then hold the Shift key and click on a second item.. Select the folder or multiple folders containing the items you want to edit. Once you have made your selections, an Edit button will appear in the Multiple Selection Preview on the right-hand panel. Click the Edit button and configure your settings. Click on the Apply button to finalize your settings. 36 | L i t t l e R e a d e r U s e r M a n u a l Editing Categories This section will provide instructions on how to go about managing your Little Reader Categories. How to Create a Category Go to the Advanced Play/Edit Screen and choose to display Categories. Click on New at the bottom of the Lesson Panel. Type the name of your new Category. Press Enter on your keyboard. How to Delete a Category Go to the Advanced Play/Edit Screen and choose to display Categories. Select the Category you want to delete, and click on the Delete button at the bottom of the Lesson Panel. A confirmation box will then pop up asking you to confirm your action. Click on Yes. 37 | L i t t l e R e a d e r U s e r M a n u a l How to Edit a Category Go to the Advanced Play/Edit Screen and choose to display Categories. Select the Category you want to edit, and click on the Edit button at the bottom of the Lesson Panel. The Edit Category Window will then be displayed as shown below: How to Change a Category Name In the Category Name section (upper right part), type in the new Category name. Once you have finished, click on Save. How to Add and Remove a Word from a Category From the Word Library on the left, click on the Right Arrow button or double-click on the word you want to add to your Category. From the Category Word List on the right, click on the Left Arrow button or double-click on the word you want to remove from your Category. Once you have finished, click on Save. 38 | L i t t l e R e a d e r U s e r M a n u a l How to Change the Default Word Playback Order Select the word(s) you want to move. Click on the Top, Up, Down, or Bottom buttons to rearrange the word(s) included in your Word List. Once you have finished, click on Save. Editing Playlists This section will provide instructions on how to go about managing your Little Reader Playlists. How to Create a Playlist Go to the Advanced Play/Edit Screen and choose to display Playlists. Click on New at the bottom of the Lesson Panel and type the name of your new Playlist. Press Enter on your keyboard. How to Delete a Playlist Go to the Advanced Play/Edit Screen and choose to display Playlists. 39 | L i t t l e R e a d e r U s e r M a n u a l Select the Playlist you want to delete, and click on the Delete button at the bottom of the Lesson Panel. A confirmation box will then pop up asking you to confirm your action. Click on Yes. How to Edit a Playlist Go to the Advanced Play/Edit Screen and choose to display Playlists. Select the Playlist you want to edit, and click on the Edit button at the bottom of the Lesson Panel. The Edit Playlist Window will then be displayed as shown below: How to Change a Playlist Name In the Playlist Name section (upper right part), type in the new Playlist name. Click on Save. How to Add and Remove a Word from a Playlist Click on a Category on the left side and the words for that Category will be shown under the ADD TO FINAL ITEM box. 40 | L i t t l e R e a d e r U s e r M a n u a l You can then add a word to your Playlist by selecting the word and then clicking on the Right Arrow button or double-clicking on the word. Add all words from the Category by clicking on the Right Arrow “All” button. Remove a word from your Playlist by selecting the word and clicking on the Left Arrow button or double-click on the word. Remove all words from the Playlist by clicking on the Left Arrow “All” button. Once you have finished, click on Save. How to Change the Default Word Playback Order Select the word(s) you want to move. Click on the Top, Up, Down, or Bottom buttons to rearrange the word(s) included in your Word List. Once you have finished, click on Save. Creating and Editing Words Create new words to expand your child’s vocabulary, and customize your lessons further by editing words – add family photos or videos and record your own pronunciations to make learning fun and exciting for your child. The best part is that you no longer have to purchase additional software to expand your child’s learning vocabulary! How to Create a Word Go to the Advanced Play/Edit Screen and choose to display Categories. Select the Category you want to add a new word to. In the Word Settings Tab, click on the New button at the bottom of the Word Settings Panel. 41 | L i t t l e R e a d e r U s e r M a n u a l This will pop up the New Word Window. The New Word Window has four tabs that provide you with the functionality to add in the details of your new word. In the Word Slide Tab, you can enter your word in the Word(s) text box by typing in the word the way you want it to appear during playback. You may also insert “/” marks to divide your new word into syllables or parts (Example: “mom/my,” “bot/tle,” “note/book”). Once done, you will see your word in the Preview Word(s) box. After you have finished adding media to the word file, click on the Save button. If you have not done so already, you will prompted to enter a filename to save your new word. NOTE: Filenames must begin with a letter and may contain numbers (e.g., “nature_flower" or “nature-flower-2”). 42 | L i t t l e R e a d e r U s e r M a n u a l How to Edit a Word Go to the Advanced Play/Edit Screen and choose to display Categories. Select the word you want to edit from the different Category word lists. Click on the Edit button below the Word List. The Edit Word Window will pop up as shown below: Once you’re done adding your media files, click on the Save button. Managing Media Files How to Add a Pronunciation Recording In the Pronunciation Audio File(s) box of the Word Slide Tab, click on the Add button and locate the audio file in your computer. 43 | L i t t l e R e a d e r U s e r M a n u a l Click on the Open button to add your audio file, OR simply drag-and-drop your audio file into the Pronunciation Audio File(s) box (you must have your folder containing your file opened already). Click on the green Play button beside the audio name to preview your new pronunciation audio. NOTE: Little Reader supports .mp3, .wav, and .wma audio file types. How to Add a Picture In the Picture Slide Tab, click on the Add button under the Picture(s) box and locate the photo or image file in your computer. Click on the Open button to add your image file, OR simply drag-and-drop your image file into the Picture(s) box (you must have your folder containing your file opened already). NOTE: Little Reader supports .jpg, .bmp, .gif, and .png image file types. How to Add a Video In the Video Slide Tab, click on the Add button under the Video box and locate the video file in your computer. Click on the Open button to add your video file, OR simply drag-and-drop your video file into the Picture(s) box (you must have your folder containing your file opened already). You can preview your video in the Video Preview box by clicking on the Play button below the Preview box. 44 | L i t t l e R e a d e r U s e r M a n u a l In the Audio section, you can choose what type of audio file to play along with your video(s) during playback. NOTE: Little Reader supports .avi, .mpg, .mpeg, .mp4 and .wmv video file types. How to Add Picture Audio In the Picture Audio File(s) box, click on the Add button and locate the audio file in your computer. Click on the Open button, OR simply drag-and-drop your audio file into the Picture Audio File(s) box (you must have your folder containing your file opened already). If you want the pronunciation to play instead of the picture audio when a picture is flashed during playback, enable the Play Pronunciation Instead option. NOTE: Little Reader supports .mp3, .wav, and .wma audio file types. 45 | L i t t l e R e a d e r U s e r M a n u a l How to Delete an Existing Media File To delete any media file attached to a word, go to the Edit Word Window of the word you want to edit. Toggle the Edit Word Window tab for the type of media file you want to delete. Select the file you want to delete from the list of media files currently attached to the word, then click on the Delete button. NOTE: Deleting files this way will not remove the files from your computer permanently. Record your own Pronunciation Before you start: Make sure you have a working microphone plugged in to your computer! Go to the Edit Word Window of the word you want to record your own pronunciation for. Click the Rec New button found in the Word Slide Tab or Picture Slide Tab (if you want to record your own picture audio or sound effects). This will open the BrillKids Easy Voice Recorder. How to use the BrillKids Easy Voice Recorder When you are ready, click the Rec button and speak into your microphone. You will notice that the Rec button has now changed to a Stop button – click it to stop recording. You can now use the Skip to Start button (next to the Rec button) to rewind, and then click Play to playback what you’ve just recorded. You may use the various tools in the BrillKids Easy Voice Recorder to edit your recording. If you are happy with the results, click the Save to Little Reader button (or go to the File menu and select Save to Little Reader) to save your recording. Close the Easy Voice Recorder window and return to Little Reader’s Edit Word window. 46 | L i t t l e R e a d e r U s e r M a n u a l Software Information The Software Information section of the Tools Screen makes it easy for you to manage and access your Little Reader software, content, and license key downloads directly from your BrillKids Account. Note that you need to be signed in to your Account first to be able to access your downloads directly from your Little Reader. Check which version of Little Reader you are currently using by referring to the version number written at the top part of the Software Information section. You will also see a list of Little Reader curricula you have imported and whether these have been activated or not. If a curriculum has not been activated yet, click on Enter License Key and enter your content 47 | L i t t l e R e a d e r U s e r M a n u a l license key. Click on Check Course Update button to see if any of your courses need to be updated. BrillKids Account Sign in to your BrillKids Account to access the Little Reader Software section of your Account Management page directly from your Little Reader. Software Download Download the latest version of Little Reader. Important information regarding use and instructions to download can be found here. Content + License Keys See what curriculum are available for download and directly download the content files you need right away. Note that you will need the corresponding content license keys to activate the full functionality of the curriculum you are about to download. You can also delete an Activation Record for your content license keys to free up a slot for activating your Little Reader curriculum on another computer. The Playback Statistics Screen Little Reader also provides a way for you to monitor your baby’s learning progress through the Statistics Screen. Simply go to the Tools Screen and select Statistics. 48 | L i t t l e R e a d e r U s e r M a n u a l Here you will find statistics on how many times your child has viewed a certain Course lesson, Category and individual words. This will help you adjust your playback settings and frequency to balance your baby’s learning process. You may choose to view playback stats for Words (this will show stats for all the words currently in your Word Library), Courses, Playlists, or Categories. Filter the playback statistics you want to see for Words, Courses, Playlists, or Categories further by selecting your filter options from Show words from and Display. The Playback Stats show: What the Playback Stats Show Name - This is the name of the particular item in which the statistics are associated with. The name of the item will correspond to a particular Word, Course, Playlist, or Category. Count Played - This number indicates how many times a particular Word, Course, Playlist, or Category has been played. 49 | L i t t l e R e a d e r U s e r M a n u a l Last Played - This shows the last time a particular Word, Course, Playlist, or Category was played. Items in this column may be displayed in two ways, which you can specify via the Show selection right above the stat list: Days Ago – Display the Last Played stats as “2 Day(s) ago,” “10 Day(s) ago,” etc. Date – Display the Last Played stats as the exact date and time (e.g., “1 Dec 2010 10:30”). How to Use the Import/Export Screen Little Reader allows you to share your learning library with other parents and children with an easy-to-use Import and Export function! Click on the Tools Screen button and then click on the Import/Export Content button as seen in the screen below. 50 | L i t t l e R e a d e r U s e r M a n u a l How to Import Little Reader Files Importing files mean that you have already downloaded Courses, Playlists, or Categories, and these are saved in your computer’s hard drive. The next thing you need to do is import these files into your Little Reader, so they can be ready for use! Go to the Import/Export Screen. In the Import panel (top part of the Import/Export Screen) Click on the Import Content button and locate the file on your computer. Click on the Open button. A confirmation will appear once the file has finished importing. How to Export Little Reader Files Exporting files mean that you would like to save a copy of your library so you can share it with other people, or to save it as a backup for future use. This doesn’t mean that you are deleting the lists from your Little Reader program entirely; rather you are just making a copy of your lists, to be saved in your computer. Go to the Import/Export Screen. In the Export panel, select Categories or Playlists. Select the Category or Playlist you want to export, or select multiple items by holding down your Shift or Ctrl key. Select whether to export all the media files attached or only certain media files by checking or un-checking the corresponding boxes in the Content box on the left. Click on the Export Content button, and you will be shown a list of the items you have selected. Click Yes to proceed or click No if you want to make changes. Type in a filename and choose where to save the file, then click on Save. 51 | L i t t l e R e a d e r U s e r M a n u a l Once you have exported some of your Categories or Playlists, you may begin sharing these with other Little Reader users by emailing them, uploading them to the BrillKids Forum, or burning them to data CDs! About the Screen Name Feature Type in your BrillKids Forum Username in the Screen Name box (located at the bottom of the Import/Export Screen) – this will tag your Categories with your Forum user name so that when you export files to share with others, people will know you created those files. How to Upload Files to the BrillKids Forums It’s always fun to share what you’ve created, and you can do exactly that by uploading your Little Reader Categories or Playlists to the BrillKids Forum Lesson Library! To upload your Little Reader files: Go to the BrillKids Forum and sign in to your BrillKids Account. In your My Profile box, click on the Add a Download link. In the File Type selection, select Little Reader Library File. In the Language selection, select English Language if you want to upload a file containing English content, or Foreign Language if you want to upload a file containing foreign language content. Select the appropriate option/s to categorize your file, then fill in a short description of your file. 52 | L i t t l e R e a d e r U s e r M a n u a l In the Upload File section, click on the Browse button and locate the file on your computer. Select the file you want and click on the Open button. When you’re done, click on the Add Download button. How to Backup/Restore Data Use the Backup/Restore Data function in the Tools Screen to create a backup of all your Little Reader Data, such as your database, media library and any additional fonts, so that you can restore Little Reader to a “fixed” state should you run into any major problems later on. The Backup function will backup data regarding all Words, Courses, Playlists, and Categories currently imported in your Little Reader – if you want to backup other lessons that you haven’t imported yet, make sure you import these first before proceeding with creating a backup file. Once you have a backup file, you can then easily restore your Little Reader data whenever you need to revert to your original data. 53 | L i t t l e R e a d e r U s e r M a n u a l How to Backup Data Select what you want to backup: Select Only Database to backup your word files only (i.e., no media will be attached). Select Database + Media Library to backup your word files and all the media files attached to it. Select With Fonts if you want to backup your fonts, especially if you used Custom Fonts in any of your lessons. Click on Create Backup. Type in a filename for your backup file and choose where you want to save it on your computer, then click on Save. NOTE: This process may take a while depending on how much information needs to be backed up. How to Restore Data Select what you want to restore: Restore Only Database if you only want to restore your word files only (i.e., no media will be attached). Restore Database + Media Library if you want to restore your word files and all the media files attached to it;. Click on Restore Data and locate your Backup file, and click on Open to start restoring your backed-up data. A message will appear warning that restoring will replace the existing database and/or media library and fonts in your Little Reader, select Yes to proceed. Restoring may take a while depending on the file size. NOTE: The Backup file will overwrite ALL existing data in your Little Reader, replacing your database and your media library (only if your backup file includes your media library data). 54 | L i t t l e R e a d e r U s e r M a n u a l Copy to Media Library When you create your own lessons and add your own media files, sometimes your media files may not get saved into your Little Reader Media Library. The Copy to Media Library function will copy any missing media file that you’ve previously attached to your lessons into your Media Library, thus ensuring that when you back up your media library all your files would be included. To copy media files required by Little Reader into your Little Reader Media Library: Once you go to the Backup/Restore Data section, Little Reader will automatically scan for any stray media files that need to be copied to your Media Library. You can always perform another scan by clicking on the Scan Again button. Select the media files you wish to copy to your Little Reader Media Library and click on the Copy button. Speed Optimizations You can optimize Little Reader to work according to how fast or slow your computer’s processing power, and you can also choose to clean up your Little Reader Media Library and free up space in your computer. To do this, simply go to Tools Screen and select Speed Optimizations. 55 | L i t t l e R e a d e r U s e r M a n u a l Speed Optimization You can adjust the performance of Little Reader for Slow computers by choosing to disable the visual aspects of Little Reader; in turn this will make Little Reader run significantly faster and more smoothly. Otherwise, you may choose to optimize Little Reader for Average or Fast computers. Purge Unused Media As you continue to use Little Reader’s features, importing and removing Playlists or Categories and creating your own lessons, it will not be unusual for left-over files to remain, cluttering up your Media Library folder. The Purge Unused Media function removes any media files found in your Media Library that are no longer in use by Little Reader, freeing up space in your computer. Once you go to the Speed Optimizations section of the Tools Screen, Little Reader will automatically begin to scan and list down any unused media files in your Media Library. You may repeat the scan by clicking on the Scan Again button, or proceed to deleting your unused media files by clicking on the Delete button. Additional Settings Want to change the interface language of Little Reader? Maybe you want to see the “Never show again” messages you once chose not to see again. Or you may prefer to see your words in Little Reader along with the corresponding word filename. 56 | L i t t l e R e a d e r U s e r M a n u a l In the Additional Settings section of the Tools Screen you can change the interface language of Little Reader, choose to reset all “Never show again” options and “choose to show word file names in words lists”. NOTE: When changing the interface language, you will need to restart Little Reader in order for the language change to take effect. The Picture Editor Do you want to draw an arrow or encircle an object in a picture you are using? How about use your own photos and zoom in or out to highlight an object, or perhaps adjust the brightness or crop away unwanted parts of your photo? You don’t need to buy any additional software to do that – your Little Reader comes with a Picture Editor that lets you do exactly what you want! With the Picture Editor you can easily customize the pictures your baby sees in every Little Reader lesson. 57 | L i t t l e R e a d e r U s e r M a n u a l Launch the Picture Editor by going to your Little Reader’s Tools Screen, or via the shortcut in your Little Reader Start menu folder. How to Open an Existing Picture for Editing To open an existing picture that you want to edit, click on the Open button (or go to the File menu and select Open) and locate the file in your computer. You will then see an Auto-Clone Confirmation dialogue box as shown below: Select Yes if you want to make another copy of the picture (i.e., this will preserve the original image). Select No if you think that it’s okay to edit the picture itself. Your image will then be shown to you, ready for any editing that you may wish to perform. About Cloning a Picture Cloning a picture means copying your actual picture and making an identical copy of it. To clone an image, simply click on the Clone button, or select Yes in the Auto-Clone Confirmation dialogue box. This will create a new tab for your cloned image. 58 | L i t t l e R e a d e r U s e r M a n u a l How to Change Views While Editing To aid your editing, Picture Editor offers four views to choose from: Zoom In – Use this button to magnify your image. This is particularly useful for viewing the finer details in images that you may want to edit. Zoom Out – Use this button to make your image view smaller. Actual Size – Use this button to revert the image to its actual size. Auto-Fit – If you have a big image (for example, a photo taken with a very high resolution camera setting), using Auto-Fit will automatically resize your image to the size which will best fit your screen. How to Crop Your Image Cropping means removing any excess area of an image that you do not want to display or have no interest in retaining. Picture Editor deletes all objects outside of the selected area or currently selected objects when cropping. 59 | L i t t l e R e a d e r U s e r M a n u a l Click on the Crop button. Select the area of the base image that you want to keep by adjusting the borders of your cropping tool. Double click inside the image to finalize the crop. How to Resize your Image This is particularly useful if you have an image that is too large or too small to use with Little Reader. Resizing your images will make sure that you optimize the file size of your image as well as the clarity of the picture on the screen. Click on the Resize button. Adjust the size of the image in terms of percentage or pixels. Make sure that you keep the aspect ratio so as not to distort the image proportions. When you are done, click on OK. 60 | L i t t l e R e a d e r U s e r M a n u a l NOTE: The default size of 1000x750 pixels is used in most of the images in the Little Reader curriculum. This allows for a reasonable sharpness of the image while maintaining a minimum file size. How to Rotate your Image Select the object you wish to flip or rotate and select Rotate. A submenu will appear on the right side of the screen with the following options: No Rotation – Selecting this function will not rotate your image in any way. 180 – Rotate your image 180 degrees, flipping your image upside-down. Left 90 – Rotate your image 90 degrees to the left. Right 90 – Rotate your images 90 degrees to the right. Custom Angle – If you want to rotate your image to a certain degree other than the available options, you may choose to specify a rotation degree that you want to use. To implement your rotation setting, click on Apply. When you’re all done, confirm your actions by clicking on Done. Other Major Editing Options The Picture Editor also has other editing options that allow you to change your images: 61 | L i t t l e R e a d e r U s e r M a n u a l Brightness Make an image lighter or darker by adjusting the brightness, contrast and gamma of your image. This function allows you to make parts of it stand out or blend in more. Color Adjust specific colors or adjust the saturation of your image. Auto This will automatically adjust your image’s color and brightness to achieve the best contrast between the image and the background. Sharpen Using this function makes edges stand out more distinctly in an image. Drawing Options The Picture Editor has many easy-to-use drawing options that create lively and vibrant strokes on your photo. 62 | L i t t l e R e a d e r U s e r M a n u a l How to use the Pencil Tool Manually draw freeform shapes using the mouse as your pencil and the document as your paper, which is especially useful when creating irregularly-shaped objects. Click on the Pencil button. Choose the pencil thickness and color in the side panel. (You cannot change this after you have drawn something on your picture). Draw on the image. When you have finished drawing, click Done. TIP: If you made a mistake, click the Undo button. How to use the Line Tool Draw lines of different colors, length and thickness by using this tool. Click on the Line button. Choose the line thickness and color in the side panel. Click on an area in your picture where you would like the line to start, and then drag this to another area to change the length and the direction of the line. When you have finished drawing, click Done. 63 | L i t t l e R e a d e r U s e r M a n u a l How to use the Arrow Tool Draw arrows in varying colors, lengths and thickness with this tool. This is particularly useful to draw your child’s attention, especially in a busy image. Click on the Arrow button. Choose the arrow thickness and color in the side panel. Click on an area in your picture where you would like the arrow to start (i.e., the end without the pointer), and then drag this to where you want your arrow to point. When you have finished drawing, click Done. How to use the Ellipse Tool Draw an oval or oblong over the image to highlight a specific area of the picture. You may also choose to fill the shape with a color, creating a full colored ellipse on your image. Click on the Ellipse button. Choose the pen thickness and color in the side panel. Choose whether or not to fill the ellipse with color by checking the box beside Fill Color. Click on an area in your picture where you want to position the circle or ellipse (i.e., where the top left part will be), and then drag this to adjust the size and shape of the ellipse. When you have finished drawing, click Done. How to use the Rectangle Tool Draw a rectangle over the image to highlight a specific area of the picture. You may also choose to fill the shape with color, creating a full colored rectangle on your image. Click on the Rectangle button. Choose the pen thickness and color in the side panel. 64 | L i t t l e R e a d e r U s e r M a n u a l Choose whether or not to fill the rectangle with color or not by checking the box beside Fill Color. Click on an area in your picture where you want to position the rectangle (i.e., where the top left part will be), and then drag this to adjust the size and shape of the rectangle. When you have finished drawing, click Done. How to use the Text Tool Click on the Text button to add text to an image. Type the text that you want to insert into the white box in the side panel. Choose the font type, style, size, and color of your text. Click on an area in your picture where you want the text to appear. You may insert the same text again by clicking on another area, or insert a different text by changing the text you typed in the Text tool panel earlier. When you’re happy with the changes, Done. The Draw Tool Layer A draw tool layer (.DTL) is a separate file that is laid over your original picture, very much like a transparent piece of paper over your photo. This layer is where you draw on all of your additional graphics in the Picture Editor, and you can always choose to take away everything you’ve drawn onto your original picture by clicking on the Remove Draw Layer button. The Easy Voice Recorder The Easy Voice Recorder is a recording tool that replaces the standard Windows Sound Recorder when creating sound files for Little Reader. Simple, intuitive, and completely 65 | L i t t l e R e a d e r U s e r M a n u a l integrated with Little Reader, this program handles all of your recording needs and comes with lots of powerful tools to edit your recordings. Launch the Easy Voice Recorder by going to your Little Reader’s Tools Screen, or via the shortcut in your Little Reader Start menu folder. With Easy Voice Recorder you can record your own Pronunciations and Picture Audio for Little Reader with ease and efficiency. How Does Easy Voice Recorder Work? Easy Voice Recorder works just like a tape recorder: click on the Rec button then speak into your microphone, and click on it again to stop recording! From there, you can edit your recording with a range of useful tools, save your recording as an MP3 file and apply it to your Little Reader lessons – it’s as simple as that. How to Create a New Recording To create a new recording, first make sure that your microphone is connected to your computer and is functioning properly. When you are ready, click the Rec button and speak into your microphone. You will notice that the Rec button has now changed to a Stop button – click on it again to stop recording. 66 | L i t t l e R e a d e r U s e r M a n u a l You can now use the Skip to Start button next to the Rec button to rewind, and then click Play to playback what you’ve just recorded. If you are happy with the results, click the Save button to save your recording. How to Download Additional Lessons Little Reader comes with dozens of built-in Categories for you and your child, but you can also create your own Categories or download Categories made by other parents who use Little Reader! 67 | L i t t l e R e a d e r U s e r M a n u a l How to Download Files Go to the Download Screen (make sure you have already signed in to your BrillKids Account). Browse between the three Library tabs to view the available Little Reader files in the BrillKids Forum Downloads Library. Click on a file you would like to download to view the file’s download page, where you will find information and a preview of the media files attached to the file. Click on the Download button to start downloading this file. Once finished downloading, double-click on the file to import it to your Little Reader. There are two main types of downloads available for your Little Reader: English and Foreign Downloads English Downloads are Categories in English that come complete with pictures, pronunciations and sound effects, classified into various topics for you to choose from. We also have Foreign downloads, these are Categories in various languages that come complete with pictures, pronunciations and sound effects, sorted by language. About the Forum Screen Find out what BrillKids has in store for you and your child! With an Internet connection, you can easily access the BrillKids Forums, giving you news on the latest updates, software and early learning developments right from your Little Reader program! 68 | L i t t l e R e a d e r U s e r M a n u a l Learn more about new BrillKids programs focusing on different learning areas – music, math, and much more! Subscribe to newsletters with relevant breakthroughs concerning research and studies on early learning! Join beta testing for new and upcoming programs! Meet and greet fellow parents around the world and share word lists, swap teaching techniques, and ask for teaching or even parenting tips! Browse and download free content! Upload your own Little Reader files to the Forum Library! The Progress Diary Little Reader is a journey of fun and knowledge. With the Progress Diary Screen you can record what your baby has been learning and document every step of her journey. Note that you need to sign in to your BrillKids Account first to be able to access your Progress Diary. 69 | L i t t l e R e a d e r U s e r M a n u a l How to Use your Progress Diary From the Courses menu on the left you can choose which Course you want to view. Select a day from that course by clicking the Next or Back button on the Day Navigation bar, you can also quickly jump to a specific day by clicking on the middle part of the Day Navigation Bar and a selecting a day. The words presented in the lessons for that day will be shown in the middle of screen. Write down how your baby has been progressing or some notes on the day’s lessons by clicking on the Write button. You may then type in your notes and finalize your entry by clicking on the Save button. 70 | L i t t l e R e a d e r U s e r M a n u a l How to Use the Print Function To add to the flexibility of the Little Reader program, we have added the Print function, which allows you to print your own flashcards so you can have hardcopies to use anywhere and everywhere! With the Print Function, you can choose the pictures, fonts and colors that will be printed on your flash cards. For best results, use a color printer and A4-sized paper for your print outs. Print Options Print Layout There are three print layouts to choose from: Full Sheet Prints – This layout will print one word or picture on one sheet (no folding or cutting required). Use this if you want the words and pictures to be as large as possible. Half Sheet Prints (Word & Picture separate) – This layout will print two words (or two pictures), from the same word file, on one sheet. Use this if you want to print more words (in different font styles) or pictures in one sheet. 71 | L i t t l e R e a d e r U s e r M a n u a l Half Sheet Prints (Word & Picture together) – This layout will print one word and one picture from the same word file on one sheet. Use this if you want to print the word and its corresponding picture on one sheet. You can use this for the following purposes: Word-only flash lessons Picture-only flash lessons Multisensory lessons without BrillKids Flap and Flash Cards Print Content You can also choose what to print for your flash cards: Word only, Picture only, or Word and Picture. To do this, simply choose your preferred content in the Content selection option (located below the Print Layout option). NOTE: If you choose the Half Sheet Prints (Word & Picture together) layout with “Word only” or “Picture only” content, the word or picture will be printed on one half of the sheet while the other half will be left blank. Word Print Options You can choose how many times a word flash card is printed out (maximum number is 4), each with a different font type and color that you’ve specified. You can also use the Randomize button to automatically assign font types and colors to your word prints, as well as turn the Split Mode on or off. 72 | L i t t l e R e a d e r U s e r M a n u a l Picture Print Options As with word prints, you can also choose how many picture flash cards are printed out (maximum number is 4). For each picture print, you can select which of the image files currently attached to a word will be printed on your flash cards, or you can use the Randomize button to automatically pick the image files for you. NOTE: If a word doesn’t have as many image files attached to it as you’ve specified in the Number of Picture Prints option, some of the image files attached to that word will be printed repeatedly until your chosen number of prints is met. Print a Cover Tick this option to print out a cover sleeve for each Category of flash cards. You may customize the cover by typing in the title name you want, in the font type and color you’ve selected. You can then store your flash cards in an organized manner when they are not in use. 73 | L i t t l e R e a d e r U s e r M a n u a l Print Preview To preview how your flash cards would look like with your print settings applied, click on the Preview button at the bottom of the Print Screen. Printer Settings To set your printing preferences, click on the Settings button (located beside the Preview button). How to Print Flash Cards Depending on your flash card teaching style, you can choose from four types of flash cards to print out for your Little Reader lessons. You can also print out your own words and pictures that you can use with your BrillKids flap and flash cards. Full Sheet Flash Cards Choose the words you want to print from the leftmost panel in the Print Screen. Use the Full Sheet Prints layout with Word and Picture content. Choose your Word Prints and Picture Prints options. Click the Print button to start printing. Sort your printouts so that each word is paired with the corresponding picture. Glue the word prints to the picture prints so that each word is on one side of the flash card and the picture is on the other side. 74 | L i t t l e R e a d e r U s e r M a n u a l Half Sheet Word-Only Flash Cards Choose the words you want to print from the leftmost panel in the Print Screen. Use the Half-Sheet Prints (Word & Picture separate) layout with Word Only content. Choose your Word Prints options. Click the Print button to start printing. Cut your printouts in half and sort them so that two versions of the same word are paired together. Glue the two halves together so that both sides of the flash card show one of the printed words. You may also choose to print a cover sleeve, to store the flash cards when not in use. 75 | L i t t l e R e a d e r U s e r M a n u a l Half Sheet Picture-Only Flash Cards Choose the words you want to print from the leftmost panel in the Print Screen. Use the Half-Sheet Prints (Word & Picture separate) layout with Picture Only content. Choose your Picture Prints options. Click the Print button to start printing. Cut your printouts in half and sort them so that two different pictures of the same word are paired together. Glue the two halves together so that both sides of the flash card show one of the printed pictures. You may also choose to print a cover sleeve, to store the flash cards when not in use. Half Sheet Word and Picture Flash Cards Choose the words you want to print from the leftmost panel in the Print Screen. Use the Half-Sheet Prints (Word & Picture together) layout with Word and Picture content. Choose your Word Prints and Picture Prints options. Click the Print button to start printing. Cut your printouts in half and sort them so that each word is paired with the corresponding picture. 76 | L i t t l e R e a d e r U s e r M a n u a l Glue the word prints to the picture prints so that each word is on one side of the flash card and the picture is on the other side. You may also choose to print a cover sleeve, to store the flash cards when not in use. TIP: Dry glue is recommended for sealing flash cards. How to Use BrillKids Flap and Flash Cards Use BrillKids Flap and Flash cards as an alternative way to teach your child to read! Be sure to read up on how to get the most out of using BrillKids Flap and Flash Cards by following our guides below. How to Use BrillKids Flap Cards Our unique flap cards are a great way to teach your child to read using the multisensory method! Your child will enjoy learning about each word by opening flaps and seeing the pictures. Each flap card is made of durable child-safe plastic, so you can get more use out of each card. Just insert the pictures and corresponding words into the plastic flaps, and attach them to the BrillKids Presentation Binder! 77 | L i t t l e R e a d e r U s e r M a n u a l Use the pre-printed word and picture sheets, and insert them into the flap cards. You may choose to put the word in the outer flap (B), and place the image in the inner Insert area (C) and vice-versa. Attach the prepared flap cards onto the BrillKids Presentation Binder, or use them separately as hand-held flap cards. For multisensory lessons, show your child the word/image on the outer flap first, and then open the flap to display the image/word, or encourage your child to open the flap herself. When presenting a word card, run your index finger along the bottom of the word while pronouncing the word(s) clearly. This will help emphasize the direction of reading – from the 78 | L i t t l e R e a d e r U s e r M a n u a l leftmost letter moving towards the right. During these lessons, interact with your child as much as possible and engage as many of her senses as you can. For flash lessons, flip through the cards in the binder as swiftly as possible using the presentation binder, or (if not using the binder) flip through the stack of cards with your hands by putting the card at the back of the stack and placing it at the front. Play games with your child with the flap cards by placing two or more cards in front of her and asking her to choose the correct one. Whether or not she gets it right, applaud her for her effort! NOTE: At the back of each card is a note area (D) – in case you want to use the flash method to teach your child, you can use a pencil to write down the word each card contains, so you know what word is in the card you are holding. Erase with an eraser as necessary. 79 | L i t t l e R e a d e r U s e r M a n u a l How to Use BrillKids Flash Cards Customize your flash lessons by changing the font and colors of the words! Simply change the printouts, insert them into the plastic flash cards and present them to your child! Use the pre-printed word or picture sheets, and insert them into the insert area (B) of the flash cards. You have the option of using only pictures (for a picture flash lesson) or only words (for a word flash lesson). TIP: These cards are ideal for use with the BrillKids Pattern Phonics™ word Categories. Attach the prepared flash cards onto the BrillKids Presentation Binder, or use them separately. If using the multisensory method, run your index finger along the bottom of the word. This will help emphasize the direction of reading – from the leftmost letter moving towards the right. During these lessons, interact with your child as much as possible and engage as many of her senses as you can. 80 | L i t t l e R e a d e r U s e r M a n u a l For flash lessons, flip through the cards in the binder as swiftly as possible using the presentation binder, or (if not using the binder) flip through the stack of cards with your hands by putting the card at the back of the stack and placing it at the front. Play games with your child with the flash cards by placing two or more cards in front of her and asking her to choose the correct one. Whether or not she gets it right, applaud her for her effort! Don’t forget to pronounce the word(s) clearly during the lessons! NOTE: At the back of each card is a note area (C) – in case you want to use the flash method to teach your child, you can use a pencil to write down the word each card contains, so you know what word is in the card you are holding. Erase with an eraser as necessary. 81 | L i t t l e R e a d e r U s e r M a n u a l How to Use Little Reader with Different Languages Teaching your child a foreign language is easy! Little Reader supports foreign languages that use the standard Roman alphabet and other characters (provided you have installed the additional language packs in your computer), so you can create and edit words and use other languages to teach your baby. If you have not installed the additional language packs yet, follow the directions below to unlock full language support for your Little Reader. In your computer, click on Start and open the Control Panel. Note that some menu items that will be mentioned in the next steps may not have the same name, depending on your computer’s operating system: Instructions for Windows XP In your Control Panel (Category View), click on Date, Time, Language, and Regional Options and then click on Regional and Language Options. This will open a pop-up window as shown below. Go to the Languages tab. 82 | L i t t l e R e a d e r U s e r M a n u a l In the Supplemental Language Support area, tick on the boxes to install additional languages of your choice. Click OK, and follow the prompts. You may be prompted to restart your computer for the changes to take effect. Instructions for Windows Vista and Windows 7 In your Control Panel (View by Category), click on Clock, Language, and Region and then click on Regional and Language Options. 83 | L i t t l e R e a d e r U s e r M a n u a l This will open a pop-up window as shown below. Go to the Keyboards and Languages and click on Change Keyboards. Click on Add in the Text Services and Input Languages pop-up window to install additional languages of your choice. You may be prompted to restart your computer for the changes to take effect. 84 | L i t t l e R e a d e r U s e r M a n u a l Getting More Help with Little Reader The Little Reader Learning System comes with a built-in support section so help is always at hand – just click on the Support button on top of Little Reader. Common Tech Problem - This section includes solutions to common technical problems encountered when using Little Reader – simply click on a question to find the corresponding solution. General Questions - This section shows the Little Reader discussion boards in the BrillKids Forum. In the HOW TOs and FAQs board, you can find tips to help you make the most out of your Little Reader. In the Tech Support board, you can get live support from the BrillKids Team.\ Contact BrillKids Support - If you have any problems or questions, go to the Contact BrillKids Support section and fill in the form to send a message to the BrillKids Team. Feedback - For comments and suggestions on how we can improve Little Reader, please use the feedback form. 85 | L i t t l e R e a d e r U s e r M a n u a l Manual - If you want to explore all the features in Little Reader, Manual is the best place to visit. It provides rich content and detailed information on everything your Little Reader is capable of doing. Support Tools Use the Support Tools to generate a complete diagnostic report that you can send to the BrillKids Team so they can help you troubleshoot and fix any playback problems. Create Diagnostic Report - Click on Create a Diagnostic Report to create a zip file containing information about your Little Reader. This file will help us analyze and resolve your problem. Sound Problems - If you have a sound problem with Little Reader, click on Start Wizard to run the Audio Diagnostic Wizard which will help you fix any sound problems you are experiencing. Install Adobe Flash - To play flash animations you must have Adobe Flash installed. If you have problems with your animations click on Install Adobe Flash Plugin to install Adobe Flash. Repair .Net Framework - Sometimes, the reason why your Little Reader is not working properly is because of a problem in the Microsoft .NET Framework installed in your computer. Simply click use the Repair.NET Framework function to resolve any issues in your .NET Framework. 86 | L i t t l e R e a d e r U s e r M a n u a l Report a Problem - Report a problem to BrillKids Support by filling out a short form with your details along with a Diagnostic Report so that we can help you resolve your problem. Application Crash - If Little Reader has encountered an unrecoverable crash, an error message will pop up as shown below: We encourage you to send us the Error Report to help us know more about your problem. To report the problem, simply click on the Send Error Report button. This will open another dialogue box which will ask you for more details: After adding your additional information about the error, remember to type in your email address or your forum username so that a customer representative of the BrillKids Team can get back to you as soon as possible. 87 | L i t t l e R e a d e r U s e r M a n u a l


