1
www.razorworks.com Strategy Guide by Richard "Flexman" Hawley Contents Chapter 1 Getting Started Joysticks and game principles Chapter 2 Acquisition Systems / Advanced Gunnery Application of Radar and Electro Optical sensors. Advanced missile employment techniques. Chapter 3 Countermeasures / Evasion Surviving and countering a variety of threats. SAMs and aircraft, masking and hiding. Chapter 4 Campaigns Tips for better and more successful campaign play. Campaign intelligence and breakdown of mission types. Chapter 5 Missions Individual Missions Chapter 6 Tables and Metrics Career Charts, Vehicle Tables, Weapon Data Chapter 7 Simulation Mechanics / Updates Command Line parameters, editing/creating your own custom campaign files and links to Patches. CHAPTER 1 getting started 1.1 Introduction Apache Havoc, a complex, subtle, often obscure simulation boasting an unforgiving "free form" style of gameplay. It takes some getting used but it is ultimately rewarding. Helicopter enthusiasts and true commercial helicopter pilots have enjoyed what currently represents the best single rotor flight model on a desktop PC. This strategy guide assumes some knowledge of the basics of helicopter flight on the part of the reader. If more basic help is required then the Apache Havoc manual has a good description. To get the best flying experience you are going to need three things: A lot of practice. A joystick, throttle and a set of rudder pedals. This guide (a little conceited perhaps) This guide aims to provide insights into how the campaign operates, game mechanics, tactics, cheats and some information of how you can customise the simulation. 1.2 Gameplay Basics - Why Am I Here? First a quick word about the world of Apache Havoc and the entities that inhabit it. The mission and campaign system of Apache Havoc is "re-active" - meaning that an action by one entity will often result in a re-action by another entity. Consequent actions by entities may in turn produce yet more actions. For example, if an attack helicopter attacks a group of tanks, those tanks will radio for assistance. A nearby base will generate a retaliation mission for any available aircraft at that base. Depending on what resources are available, the mission may be assigned to attack helicopters or fighters. And so on and so forth... This is a broad overview of how the dynamic campaign engine operates. There are many subtleties and mission types, most of which is covered in this strategy guide. You, the pilot! You play the role of the pilot in both the Apache and Havoc. The front seat CP/G (co-pilot and gunner) is there to take some of the workload away from you. His role is to identify targets and operate the countermeasures. However you can perform these actions yourself. 1.3 Goldern Rules For Helicopter Combat Survival Basic rules for survival in helicopter combat: NEVER, EVER forget your stand-off capability. Never overfly dead targets. The one you missed will get you. Keep low and slow when expecting enemy contact. Leave the engagement area as soon as possible. Dead helicopters shouldn't have unused countermeasures or wing mounted ordenance. Use 'em or loose 'em. Chaff bundles are no good to you once you have been shot down. Once you initiate an attack at close range, carry it though and prosicute the enemy as *fast* as possible. Seconds really do count. 1.4 Joystick Control Configurations The Apache Havoc CD has a number of configurations for various kinds of joysticks and controllers. These are not installed to your hard disk and remain in the "JOYSTICK" folder on the CD. Also included on the CD is a copy of Bob Church's freeware "CTFJ" joystick centering program (version 1.2) should your cyclic prove a little twitchy. Links to joystick template updates and new joystick configurations are given below. Grey Edit Cluster Keys Apache Havoc's' sensor mode keys use the six gray edit cluster keys (Insert, Home, Page Up etc.), some programmable joysticks have difficulty handling these. Thrustmaster joysticks can use press and release RAW codes to handle these. Sticky Keys / Loss of Key Response If you seem to experience a loss of key control when using programmable joysticks - try increasing the rate at which the joystick sends it's key commands using it's software where applicable. Thrustmaster programs can specify this using the RATE command in the program file. The loss of keyboard response is due to the joystick button RELEASE code being quickly overwritten by a new key PRESS code. So the keyboard can think that a modifier key such as SHIFT or CTRL or ALT is still being held down. Pressing and releasing these keys on the keyboard will restore normal keyboard operation. For Thrustermaster joysticks, setting the RATE to 20 (20 microseconds) generates characters very quickly. The lower the number, the faster the setting. "I Prefer My Own Configuration - What Commands Should I Program?" Very much a matter of personal preference, given that most joysticks have some kind of HAT for view panning (as of version 1.1e the panning no longer snaps back to a target making it easier to use). Here are my list of favorites (in order of preference): Weapon Cycle Air and Ground Radar Modes / IHADSS mode Flares (and or chaff) Cyclic Trim and Clear Trim CTRL and arrow key cockpit view stepping Well there are more but the above represents the basic flight and survival commands you will need. If you can program a key series on one button then a single button that releases both a FLARE and CHAFF bundle will help you survive a lot longer. Cyclic Trim is something that probably isn't seen as important - but it does have it's uses, it makes steady flying much easier. Trimming the input several times to adjust for wind or roll - or even just maintaining a hover really helps lighten the stick workload. That is what it is there for - real pilots use it, you can too. 1.31 Joystick Configurations These are user constructed or updated joystick files... CH Products CH FighterStick with Pro Throttle by Christian Giroux (294k) Microsoft ... Quickshot MasterPilot with Artwork by Richard Hawley (154k) Saitek ... Thrustmaster F-16 FLCS + TQS by Richard Hawley (3k) If you have a configuration that is not listed here then please forward them to: Richard "Flexman" Hawley at [email protected] CHAPTER 2 acquisition systems / advanced gunnery This section contains several nuggets if information about the radar/optical systems and using them in conjunction with various forms of attack. Some of this information you may - or may not - have determined for yourself already. It should be noted that line-of-sight and environmental conditions can subtly effect how all acquisition modes operate. While I can not cover all possibilities, such effects mostly degrade expected operation resulting in differing behavior from that described in below examples. 2.1 Radar / FCR Operation The radar systems modeled for both the Apache and Havoc are near identical. The only difference being the maximum detection range. However there are subtle methods of operation with the radar which enable special forms of missile attack and increase the crews awareness and survivability. Some simplification of the extensive radar systems had to be made for Apache Havoc for reasons of accessibility and balancing the gameplay between the two helicopters. The Havoc does not have the luxury of shared electronic battlefield information displays such as the Tactical Situation Display modes of the Apache. So this kind of capability has been incorporated into radar return display. In multiplay, it is possible to share radar target information, but not with the AI computer controlled entities. 2.11 Radar Information Filters Part I - Threat Priority Use them! The radar system such as that used in the Apache Longbow FCR has the ability to reduce "operator overload" - the display can filter out certain object types. In real life operation, a reflected radar signal is digitally processed by a black box, due to the wavelength of the radar it can be processed in such a way as to derive basic structure information from the reflected energy. This feature is modeled to a small degree in Apache Havoc. The radar can determine if the object is a wheeled or tracked vehicle. Also it can detect a "turret" structure such as those commonly found on tanks. Using this information, the radar display electronics automatically classify detected objects and assign them a potential "threat priority" value. The radar symbol used in Apache Havoc is the result of this information. Each detected object is assigned a LOW, MEDIUM or HIGH threat priority. The highest threat priority is given to anti-aircraft vehicles such as mobile SAM launchers which are of immediate concern to the helicopter crew. Medium is reserved for armoured vehicles such as tanks and personnel carriers. Low is assigned to everything else, basic trucks, cars, well defined structures. Apache Havoc permits the radar operator to set the threat priority level, to only display those targets that fall within the selected classification. figure 2-1: The target filter set to display only MEDIUM category - armoured vehicles. This feature is extremely invaluable when engaging armoured columns. When the targets are so closely grouped together presenting many targets in such a small area - it is desirable to eliminate the surface to air defense capability of the column before they can return fire. By setting the threat filter to HIGH, only those SAMs in the armoured column will be displayed and targeted by the radar. Also, by targeting only medium threat objects, you can ensure you do not waste valuable missiles on non-priority targets. The priority filter reduces the time spent identifying and cycling through objects and can be used in conjunction with a high re-sweep rate to rapidly degrade enemy response at the beginning of an engagement. Radar priority settings have no effect on optical modes. 2.12 Radar Information Filters Part II - Air Radar ENEMY / IFF Filter This filter (only activated while the air radar is active) only displays enemy air contacts on the display. You could consider this as contacts which did not return an automatic response to a coded IFF (Identify Friend or Foe) interrogation signal. figure 2-2: The "Enemy" contact filter of the air radar. Radar Line Of Sight The LOS indicator in the "high action display" or HUD is very important when using the radar pre or post missile attack. When a missile hits and destroys a target, the radar will continue to display that target until it has been reswept by the radar. And even then, there needs to be radar line of sight to the destroyed target before the system can remove it (this is assumed to be interaction between the radar system and co-pilot confirming destruction). Unlike many other simulations, dead targets are not magically removed. The operator must keep this in mind, otherwise serious "overkill" may result (Overkill: meaning target is attacked with more munitions than that required to destroy it). Apache LOAL Attack Consideration This makes LOAL missile attacks in the Longbow more difficult as it requires re-establishing visual contact of the engaged targets before destroyed targets can be "confirmed" killed and removed. This enforces a limited method of BDA (battle damage assessment). Sweep Periods The sweep period is another important operator consideration. There is the a reason why there is a sweep angle indicator in the HUD, it's not just eye candy, it provides a visual reference useful during rapid fire missile attacks. For example, spacing between laser or command guided missiles using the radar as the targeting systems needs to be longer than the sweep period. A destroyed target will remain targeted until it is reswept by the radar. If the HUD displays the radar sweep indicator, this can be used as a "metronome" for missile release. Firing a missile each time it hits the left (or right) side will ensure that the target area is re-swept between missiles. Narrow the sweep for faster updates. figure 2-3: Narrow radar sweep for rapid targeting updates during an attack. When attacking a road convoy, radar line of sight is another reason to narrow the sweep angle. Vehicles can HIDE other vehicles. A vehicle hit by a missile can be thrown several meters thus revealing another vehicle behind it. A narrow and hence rapid radar sweep will detect such new threats much faster. Remember, some ground vehicles have heavy caliber machine guns and can assault you as far out as 3 km. It's not the detected threats that will kill you, it's the undetected ones. In urban or built up areas in which there can be plenty of unwanted bridge or supply factory structures in the target list, use the radar range setting in conjunction with the sweep angle to "confine" your desired target area. The figure below shows the ground radar being used such that the bridge structures on the right are not targeted by the scan volume. figure 2-4: Using the scan to prevent auto-targeting of the bridge structures (to the right) during an attack. The need to use the sweep angle will vary from situation to situation. Many times it may not be required at all. But the capabilities should be kept in mind, especially with regard to the air radar and the long sweep period required for a 360 degree scan. When retreating from an area in which an enemy air response may arrive, it may be wise to set the air radar to sweep that rear quadrant. In the time it takes the air radar to sweep 360 degrees, a fighter can fly within weapons range, lock on and fire. Early detection will increase your reaction time and hence your survival. Also, it is possible to use a rapid fire laser or radio command guided missile attack against multiple air targets *only* in conjunction with a narrow scan volume. Only a 45 degree sweep angle will be fast enough to remove downed air targets after multiple missile release. More details on rapid fire missile attacks are covered later in this chapter. Reality Check The Longbow's radar can only detect moving objects at it's maximum performance range of 8km. Static (non-moving) objects can only be reliably detected at ranges of 6km and less. Little is known about the MIL Havoc radar systems other than they can operate at centimetric and milimetric wavelengths - potentially giving them the same kind of capabilities as it's western rival. For sake of gameplay and accessibility, the operation of the Havoc radar is similar to the Apache. 2.2 Optical Systems Lets take a look at the EO (electro optical) modes and their uses and differences. 2.21 Advantages Over Radar Acquisition There are occasions where the ground radar does not have engough resolution or the correct angleing onthe objects to pick them up. In "noisy" places such as among wrecked vehicles or close to tree canopys, the radar will fail to pick up a potential threat. Optical sensors should be used to double check, by plac helicopter into a hover and manually sweeping the EO sensor crosshairs around, any live objects can be picked up. Once an object has been swept, it is entered into the target list and can by cycled thought or locked up like any radar acquired target. At ranges of less than 5km, enough object detail is percieveable to enable manual target indentification without having to wait for the CP/G to identify them. figure 2-5: In poor weather, the targetted tank has just used smoke grenades to hide itself. Too late, the lofted missile is already on it's way. If your high action display indicates no LOS for a target in poor lighting conditions then smoke may be the culprit. figure 2-6: The tank is hidded by the wreckage and the smoke. Had this target not been detected before the smoke it may have remained hidden and dangerous. Black smoke from burning wreckage and purple smoke grenades will hide objects from your EO sensors if it's thick enough. 2.21 Helmet Mounted Sight / IHADSS This targetting mode is very much tied to your internal cockpit view position, it targets the closest object to the centre of your view automatically. Generally it's good for really dumb close range target strafing and picking off the small vehicles at enemy FARPS and airbases. Also, once a target is killed it is removed from the target list immediatley. Should you have an awkward radar target that it says has no LOS, switching to the helmet mode and looking at it should clear it. All optical systems are effected by lighting and weather conditions. At dawn or dusk, using the HMS/IHADSS will be ineffective unless the night vision mode is activated. 2.22 FLIR, DTV, DVO, LLLTV Most of these systems are near identical. Differences being the default magnification and ability to handle poor weather conditions. But they do offer an MFD view of whatever you are targetting, even when using the radar you can cycle through the MFD pages and bring up the EO display. figure 2-7: Heads down MFD view clearly shows your missiles as fast moving points. Very dramatic. figure 2-8: During attacks on airfields, use the FLIR views to locate the important structures. WARNING Laser devices are potentially dangerous. Their rays can and will burn someone's eyes if they look directly at them. Users should not direct the beams at friendly positions or where they could reflect off shiny surfaces into friendly positions. Other soldiers must know where lasers are being used and take care not to look directly at the laser beam. 2.3 Advanced Gunnery Now we will use some of the techniques about radar line of sight and sweep rates and cover their use in various kinds of missile attack. 2.31 Apache Specific Launch Modes First it is important to cover some differences in Hellfire missile launch modes. The Havoc does not have this capability so the following notes about LOAL/LOBL launch modes do not apply. LOBL (pronounced: lo-ball) Lock On Before Launch. The default launch mode and should be the preferred launch mode. The Hellfire follows a direct trajectory and requires the target be in range, in the seekers field of view and be in line of sight. This is indicated by "VALID LOCK" in the head up display. The missiles maximum effective range is 8km. LOAL (pronounced: lo-al) Lock On After Launch. The missile does not require line-of-sight for release. This mode is used to fire a missile from a concealed position without exposing yourself to the target. The firing helicopter can remain hidden throughout the entire duration of the missiles flight. After launch, the missile performs a zoom-climb. This is to clear any obstacles such as hills or buildings in front of you. figure 2-8: Using LOAL to kill targets hidden behind a bend in the road However, the climb during the missiles motor burn period reduces the energy to missile and reduces it's maximum effective range to around 5km. It gets worse. If the target is closer than 2.5 km, when the missile reaches the top of it's climb and noses down to hunt for it's target, the missile overshoot since it has too much forward velocity and too much altitude. The relative height difference between the helicopter and the target will alter the Hellfire's effective maximum AND minimum range. Because of this, LOAL launch mode should be reserved for situations where it is tactically prudent. While radar Hellfires are fire and forget, in Apache Havoc it is possible to switch targets while the missile is still in the zoom climb phase. Once the missile noses over to begin its dive, you can no longer change its target. This is something you should watch out for. 2.32 Rapid Fire Missile Attack Mode (Hellfire and Attacka) Rapid fire missile attack mode refers to a method of simultaneously guiding several missiles in flight. Each missile in-flight will track the same target. However as each target is hit, a new target is designated and all remaining missiles currently in-flight will change course towards it. It does require that there is enough spacing between missiles so they can steer towards their new targets. Designation of targets can be done manually, however it takes longer to steer and requires full concentration which can be difficult in a hover. Narrowing the radar scan volume and using the priority filtering will automate the process assuming there is line-of-sight throughout the engagement. Should line-of-sight be lost then manual targeting will be required. Why should you want to perform such an attack? Several reasons: Eliminates the time of flight for each missile Greatly reduces enemy reaction time and response capability Allows for earlier egress from your engagement position Clustered vehicles are easy prey fig 2-9: Animation showing a Rapid Fire missile attack Both the Apache and Havoc air to ground missile systems are capable of performing this type of attack profile. However this attack can not be performed using the Apache's LOAL mode when there is no lineof-sight. Radar guided Hellfire's can not be redesignated mid-flight in the LOAL mode but they can using the LOBL launch mode. Once a radar Hellfire has been fired, it can not be re-directed to new targets unless fired in LOBL mode. The campaign AI in Apache Havoc is reactive, so once you begin an attack, a retaliatory strike will be assigned to available enemy resources. So there may not be time to wait 11 seconds or so between each missile. Each situation is different, it is up to you the pilot in command to determine the best and safest strategy. Destroyed Targets can still appear on Radar Unlike other simulations, when a target is destroyed in Apache Havoc, that target can still remain on the radar. In this situation, a radar guided Hellfire can be fired at a target that is unknowingly dead already. Result: waste of a good (and expensive) missile that could have been used against a more deserving target. While the radar guided missile Hellfire is the only choice against targets without direct line of sight to you, the laser Hellfire and the Havoc's Attacka are best used in rapid attacks on large target clusters. Method 1. 2. 3. 4. 5. 6. 7. 8. Set target priority filter accordingly Adjust radar ground radar to rapidly sweep targeted vehicle group Launch missile Wait a few seconds or wait for the radar's return sweep Repeat from step 3 as required for the number of targets As each missile hits, the radar should re-sweep the destroyed target and remove it. (The missiles "Time Of Flight" indicator in the head up display will show the time until the next missile impact.) The next target should automatically be designated, (if not and "NO LOS" is displayed then select the next target manually). Wait until all missiles have impacted It becomes quite easy with practice. Best targets for this attack mode are: Road Convoys Parked vehicles at road junctions 2.33 Ballistic Weapon Attack Modes There are three main attack methods in helicopter gunnery... Hover Fire Running Fire Diving Fire These methods describe the motion of the helicopter during the attack. We will take a look at each one in turn. 2.34 Hover Fire The technical definition of Hover fire is any engagement made below Transitional Lift (TL) speeds. Any attack made from a hovering position is considered as Hover Fire. In a hover, the aircraft is less stable and subject to effects which degrade hit probabilities, such as wind, and fired weapons causing aircraft movement. In Apache Havoc, rockets and cannon shells in flight are not effected by wind or gravity effects. Here are some general pointers for Hover Fire. Use hover hold or cyclic trim to maintain attitude or position. If the threat and terrain conditions allow, drift with the wind, don't make things harder by fighting to maintain a position if you don't have to. Adding collective will cause the aircraft to briefly yaw to the right, reducing it will cause the aircraft to turn left. This is something you can exploit for fine tuning your aim if rudder controls are too sensitive. Hover Fire Rocket attacks in the Havoc is much more difficult since the Havoc's rocket pods are not elevated. Running or Diving Fire attacks are the norm. Reality Check Most fully loaded attack helicopters in a hover are operating near maximum torque limits. Without transitional lift, the pilots work is much harder requiring slow deliberate flying inputs. Also rockets tend to be effected by the lateral and horizontal force effects of wind (including rotor downwash) and gravity. 2.35 Running Fire with Rockets (or cannon) Forward airspeed adds stability to the helicopter thus making rocket attacks more accurate. Also, the forward velocity of the aircraft is added to the rockets forward velocity, thus extending its range. [side on image of helicopter degree nose down. Arrow indicating forward helo motion. On right, a tank. At bottom, two arrows, one indicating the 5 to 3km distance, the second indicate 3km to target. Just illustrating the key points below.] The procedure for a Running Fire attack is as follows: Select an initial point (IP) about 8 to 10 kilometres from the target. The IP should be an identifiable terrain feature or waypoint added on the in-flight map. The IP is selected primarily as a function of the desired route to the target. The helicopter departs the IP toward the target flying contour, using terrain to mask the approach. Approximately 6 km from the target, the pilot starts a climb to achieve LOS with the target. Once the crew acquires the target, the pilot levels the aircraft. At 5 km (Hydra rockets) or 1300 m (cannon) from the target, the pilot starts a shallow 3-to 5degree dive angle and the crew begins engaging the target. (Havoc crews can engage from 6 km if armed with S-13 rocket pods. S-8 rockets only have a range of 4 km. The Gsh 23mm cannon has a range of 2 km.) At 3 km (rockets) or 1 km (cannon) from the target, the pilot begins his break and uses terrain to cover his departure from the target area. The crew returns for an immediate reattack on the target or returns to the IP and holds. The aircraft should NEVER overfly the target even if it appears all targets have been destroyed. At ranges of less than 3km the aircraft becomes vulnerable to return cannon fire. [include graphic] If playing with a wingman, you might consider multiple attacks by co-ordinating staggered running fire attacks with rockets. For maximum effect, crews should commence their running fire attacks from different locations and directions. This will confuse the enemy and reduce the chance of possibly hidden targets remaining undetected. All ships can continue to circle back to their IPs making repeat runs at the target until the engagement is broken off. Care should be taken to ensure that there is enough lateral spacing between ships down the axis of the attack to reduce possibility of friendly fire incidents. 2.36 Diving Fire with Rockets Again, as with Running fire, the airspeed of the aircraft improves accuracy of a rocket attack. Also you get a better visual and scan coverage of the targets, the high angle will reveal contacts that otherwise would remain partially masked. The disadvantage of such an attack is the high airspeed - less time to line up the attack and retreating blade stall effects interfering with flight controls. Use a careful cross-check because target fixation may cause the pilot to fly the aircraft into the ground. The pilot should complete the recovery from the dive no lower than 500 feet AGL. The pilot must plan the dive recovery in time to avoid abrupt recovery manoeuvres. If an abrupt recovery is attempted at high airspeed, "mushing" may occur. When the pilot tries to recover from a dive, the high rate of descent and high power setting cause the controls of the helicopter to become less responsive. Mushing may prevent the pilot from recovering from the dive. The procedure for a Diving Fire attack is as follows: Establish entry altitude 1,500 feet AGL (above ground level) minimum, ±100 feet. Establish entry airspeed 100 KIAS (normal) or 50 KIAS (steep), ±10 KIAS. (KIAS = knots, indicated air speed) Establish a 12- to 15-degree dive angle (normal) or a 30-degree dive angle (steep), +0 to -5 degrees. Maintain the aircraft in trim. The crew begins engaging the target. Recover to level flight before reaching computed Vne (velocity never exceed) or 500 feet AGL. Correctly perform crew co-ordination actions. If there is some difficulty in recovering then kick hard right pedal (left pedal in the Havoc) and reduce collective to 30%. This should reduce power to the rotors, increase drag and increase the amount of cyclic authority. An unorthodox procedure true but it seems to work. Try to avoid rolling out until the nose is level. Reality Check Diving Fire attacks runs increase munitions accuracy by reducing the rotor downwash effect on the ordinance, rotor downwash in a dive is substantially reduced due to the angle and airflow. Also this profile reduces the risk of being hit by small arms fire. CHAPTER 3 countermeasures / evasion "I saw the launch high above my head though the canopy – the captain saw it too, ‘FLARE FLARE’ he yelled. My thumb repeatedly pushed the countermeasure control release, stick over - I banked hard right and dived at the ground – too fast. The [beep beep] of the ground proximity made my heart stop. Cursing myself for not looking where I was going, I pulled the stick back hard, all the way to the stop. BOOM! Something exploded behind – but not us thankfully – the missile had...well missed. I don’t remember thinking about the near miss at the time, all I felt was relief at seeing the horizon and the instruments reading 20 AGL and 120 knots - bloody dangerous. ‘ Where is he? You see him?’ ‘Got him, 1 o-clock high.’ The enemy fighter had passed right over us in its head-on missile attack, in my dive and roll over I’d done a 180 and was now pulling the nose up hard...and looking right up at the fighters receding tail pipe. ‘SHOOT!’ Two stingers left our wing tips, one went wide, the other connected. We watched the fighters’ engine spew fire and dive into the ground some miles away – no pilot ejection. Chalk up another kill for the Ghostriders." – Captain Flexman Hawley, Ghostrider flight, US Army, somewhere in South East Asia, March 1999 3.1 Spoofing IR and Radar Guided Missiles In an area where enemy contact is expected keep one eye on my ASE as advanced warning. Any with a connecting line means they've locked on to you and will most probably engage. When you get a launch warning the ASE or the Havoc’s TWD will indicate the type of inbound missile and the number of seconds before impact. While Apache Havoc has an option for automatic countermeasure launching, do not rely on this to save your hide. By all means leave auto countermeasures turned on, as this takes away the task of manually turning on the jammers. But you should get into the habit of dumping CM stores by hand. Your survival rate will greatly increase. Manual Countermeasure Launching Both flares and chaff have an effective duration of three seconds from launch. This means that a flare launched to spoof a missile that’s eight seconds away will burn out when the missile is five seconds away. You should also be aware that a spoofed missile can re-acquire you if the countermeasure it is chasing expires. With this in mind, take a look at figure 3-1 below. This is the ASE page from the Apache. The "countdown" shows the missile is 3.9 seconds from impact. This is the earliest time it is wise to begin manual countermeasure dumping. If a chaff bundle is launched now and the missile is spoofed, the chaff bundle will dissipate 0.9 seconds from impact, but as the missile would be directed AWAY from the helicopter by the trajectory of the countermeasure there is no way the missile can re-acquire you. However, in practice you may need to repeatedly dump chaff or flares in this 4 second window. figure 3-1: Time for a decoy I recommend the following: Dump a flare or chaff bundle every two to three seconds. When a missile is less than three seconds away and still inbound, launch doubles. If the missile is one second away, keep hitting the dump key. Do NOT feel you have to conserve chaff or flares, you can't use them once you're dead. It really is a matter of use them or loose them. You will know when the missile has been spoofed as the "countdown" will vanish. In the Havoc the "countdown" is the light sequence as pictured in the manual. Get familiar with the symbology if you are not already. Accuracy Travelling perpendicular to a tracking gun or missile will increase the angle of error. This means a greater chance of it missing you since it requires more lead ahead on the part of the tracking gun or missile seeker. All missiles in Apache Havoc compute Intercept Trajectories, the further away from the computed intercept point you are with each fraction of a second - the safer you are. Ground clutter Another trick you can use is hiding yourself in the ground clutter. At altitudes of less than 40 feet AGL, radars (such as mobile SAMs) have difficulty tracking you. This is the biggest weakness of remote SAM emplacements, if you are low enough you can approach until they are within cannon range. Exploit Lead Pursuit All guided missiles in Apache Havoc follow a "lead pursuit" trajectory. A dangerous low-level tactic can be employed to exploit this. At low level, a rapid loss of altitude will make the missile nose into the ground as it plots an intercept point that is "below ground". This requires good timing and consideration for the "powered descent" effect. Reality Check Stingers are traditionally lag pursuit missiles, however the Stinger missile upgrade program is producing a next generation lead pursuit version. 3.2 Dealing with the Air Threat The enemy air threat is without doubt the biggest, most dangerous threat you will face on the battlefield. Attack helicopters don’t have the speed to run away from a fight. Once the fight has begun, someone is going to die. When to fight and when not to fight? Remember the Borg from Star Trek? Sometimes it was possible to walk past them unmolested because they didn’t consider the others a threat. And other times they attacked everything that moved. Apache Havoc is a little like this, at the core of the decision making is something called "the retaliation engine". Most of the time aircraft are flying about on specific tasks/missions, if you happen to be flying past then it’s not in their interest to attack you (unless they have been told to attack you or they are on combat air patrol). So you should be able to safely pass enemy air threats because you are not considered a threat, however once you open fire they will quickly re-evaluate your presence and danger factor and prosecute an attack, even vectoring in additional flights from nearby bases if needed. So, the player can (mostly) choose when to fight and when not to fight. Of course if you choose not to fight then those enemy helicopters or fighters will engage your forces at some later time. It is a strategy decision you will have to make. However, enemy air patrols may make the decision for you. Detection Detection is becoming aware of a potential threat. When using the Air radar sweep mode hit the [ENEMY] filter key. This will only display those air contacts that are recognized as…oddly enough…enemy aircraft. Also learn to recognize the symbols which reveal what kind of contact it is, diamond for a fighter, two triangles pointing at each other for helicopters. As soon as you have ANY symbols on this display you’ll have to quickly decide your next course of action. If you are retreating back into "friendly" territory you would be wise to maintain a rapid rearward scan for early detection of inbound fighters possibly scrambled to intercept you. Use the scan control keys to set the radar wedge to the rear 180’ or which ever direction you expect enemy response. If they are out looking for your ship then keeping stealthy won’t help you very much. There are two clear categories of air threats, each present a different challenge. Fighters Combat Helicopters By far the most dangerous of air threats is the enemy fighter. Their high speed allows them to approach, engage and extend out of range of your air to air missile systems. Your helicopters air search radar can take several seconds to conduct a full 360-degree sweep. In that time, the enemy aircraft can cover a maximum of 2km before you even know it’s there. The best way to stay alive is simply avoid direct confrontation with enemy fighters, particularly air superiority fighters. A single attack helicopter against a single fighter is a winnable situation, engaging two fighters is pushing the odds, however ground attack fighters are much more vulnerable than air superiority or multi-role fighter aircraft. An engagement against more than two fighters without support from friendly units and you are seriously outgunned. Face facts - there are situations that should be avoided, getting into a furball against six Mig-29s and Su-33s is one of them. Avoid "Kill" or "Danger Zones" The most dangerous areas are near enemy airbases or "hot" areas of enemy activity. Examining trends can identify "Hot" areas, how often fighters are observed patrolling those areas. Killing zones around enemy airbases are particularly dangerous. figure 3-2: Danger zone around a Cuban airbase. When an engagement in this danger area has begun, it’s quite probable that additional air support is being readied at the nearby airbase. Given your proximity to the base you will have little time to "get out of Dodge" before reinforcements arrive, this is what makes the area so dangerous. In fact this zone can extend up to 32km from an enemy airbase (effective radio range). The area north of Guantanamo bay in Cuba pictured above is a good example of deadly ground. Defensive Positioning and Air Combat Maneuvering While fighters are formidable opponents the well-flown attack helicopter is not defenseless. The helicopter has a major turning advantage. If the terrain allows the pilot should elect to deploy to cover, hiding in a terrain feature that masks the helicopter. From such a position it may be possible to call for help and slip away at NOE altitude. However when terrain does not provide enough cover you may have to resort to more aggressive Maneuvering. A fighter requires that it position you on its nose for a missile or gunshot. The most dangerous place to be is within the 120 degree "funnel" extending out from the fighters’ nose. As the fighter approaches and closes to engage, the helicopter can turn into the fighter and dive, this closes the distance and maneuvers you out of the "funnel". By turning into the fighter and diving you force the fighter to increase its dive angle, the fighter pilot will have to break off earlier to escape from the maneuver. figure 3-3: a fighters weapon lock area Once the fighter has passed by it will attempt to extend and turn for a second pass leaving the fighter vulnerable for a few seconds. The danger here is that the attack helicopter bleeds too much speed while turning to track the passing fighter. If this happens the helicopter becomes and easy target and sits in the air. The general rules are: Turn into the fighter and dive. Maintain high forward air speed. Enemy Attack Helicopters Cannon - The most effective weapon against enemy aircraft is the 30-mm cannon, but this only has a range of 1.2km. And then you have to be at or near the same flight level as the target, preferably at its front or rear quarter. A side tracking shot will probably miss. Heat Seeking Missiles - Lightweight heat seeking missiles would almost always be used against air threats. Apaches don’t normally carry flare dispensers, hot magnesium sets tress and shrubbery on fire. However the Apache’s tail boom dispenser is modular and can be fitted with flare cartridges if required. Soviet helicopters are often seen fitted with large flare racks, a result of hard lessons learned from years of conflict in Afghanistan where the shoulder launched heat-seeking missile was extensively used. Laser / Radar Guided Missiles - The second best weapon against fast movers and helicopters are Laser guided Hellfires / Igla missiles. While it may seem odd that the Apache’s Stingers are less effective Air to Air weapons, Laser Hellfires can’t be spoofed (distracted) as they follow the target being tracked by the player (using a laser designator). Stingers and Igla’s for that matter are IR guided weapons and can be spoofed by flares. Igla’s tend to be mounted in racks of 8, double that of the Apache’s A2A missile system, and as such can be launched in "double whammys" increasing their effectiveness. One thing Laser Hellfires can’t do and that’s maneuver very quickly, so unless you have a nose or tail shot at a fast moving target then chances are it will miss. Laser Hellfires are VERY effective against helicopters. A helicopters slow speed combined with the inability to spoof them by normal means that a Laser Hellfire has a very high chance of hitting its target. Also the extended range of the Hellfire enables you to engage air targets from as far away as 7km. However this is only effective if the target is heading right for you - if it's heading away, the motor of the slow moving missile will burn out long before it gets within range. Defense - The best defence against a laser guided Hellfire or Attacka is removing the line of sight element. Without LOS the missile will go wild after a few seconds. If this is not an option then "beaming" the missile (putting it onto your 9 or 3 o’clock position) and diving for speed while dumping chaff is all you have left. Reality Check Of course Hellfires, laser guided or otherwise has never to my knowledge been employed against airborne threats. The TADS laser designator would find it difficult to track all but the slowest moving targets even under manual control. IR fluctuations of a moving background image would make it very difficult for a guidance system to automatically isolate and track the aircraft without a human operator manually tracking and lasing the target. 3.3 Dealing with the SAM Threat Know your Enemy. The threat from surface to air missiles (SAMs) in an ever present danger behind the front line. SAM vehicles are generally passive, they will "listen" for enemy search radar or laser emissions. Once they are alerted to the presence of possible enemy activity they will use their search and track radar systems. A stealthy approach (sensors set to inactive) will enable you to go undetected unless you are within visual range. If you are within the visual detection (recon) range of a ground vehicle (as specified in the simulations object database), detection by enemy units can be based on line of sight (LOS). In which case, SA-19s will begin to track you. Stay Tuned - ASE for Early Warning Your Apache's ASE is tuned to listen for SAM search radar, upon detection, a threat circle will be displayed on your Tactical Situation Display (TSD). figure 3-4: SAM Threat Circles This threat circle indicates the effective killing range of the detected SAM threat. If you have LOS to the SAM then there is a high probability you will be fired upon (reaction time is based upon the difficulty setting). Double Threat Circles - Many bases and cities will have some semi-fixed SAM protection in the form of two SAM vehicles. The SA-19 Grison and SA-13 Gopher are typically paired. They are generally parked in close proximity to each other and since they have different max ranges, a "double threat circle" is displayed in the ASE and TSD display. figure 3-5: Apache ASE/TSD - Double SAM Threat Circles Many airbases can have 5 or 6 if these SAM vehicle pairs around the perimeter. This arrangement does have one Achilles heel. The SA-19 fires much more powerful and explosive warheads, as such, when it is destroyed, the secondary explosion from the SA-19 will also destroy the SA-13. The SA-13 is a smaller vehicle and will only damage the SA-19 when attacked. To rapidly and efficiently remove SAM protection from an airbase, target ONLY the SA-19s at each location. 3.4 CP/G Speech Feedback Your CP/G is ever vigilant, regardless of your current flight mode he will offer assistance whenever appropriate. If you are being tracked by enemy SAMs, your CP/G say: "We are being tracked by radar". If he tells you to: "Keep low and out of sight" "Use the cover" "Keep low and out of sight." "Use the terrain." "We're sitting ducks up here!" You have been *seen* and targeted by an enemy object. Also if your CP/G spots enemy aircraft he will announce: "Fast movers comming in hot and heavy" CHAPTER 4 campaigns / missions 4.1 Objectives - The Goal Simply put - to successfully win a campaign, your side is required to capture the specified number of Objective Se (ObSecs). This number will vary from theater to theater, but there are always more objective sectors available on the map, th you are required to capture. Each sector is a 4km x 4km area and control deemed strategically vital for victory. How Objective Sectors Are Captured To capture a sector, it must be unoccupied - all opposing forces must be eliminated from it. Any air or ground unit entering an unoccupied objective sector will capture it. Once your forces enter and capture the last required ObSe campaign victory screen will be displayed. A sector can be re-captured by the enemy if it is left unoccupied. Basic Overall Strategy To win a campaign you should be flexible. Destroy enemy air capability as early as possible, then move in on mobile ground forces concentrating on those occupying Objective Sectors. To do this you will really need to be flexible and not always follow the generated mis routes. You should create your own scout missions to locate and destroy enemy bases. Choose a campaign in accordance with your ability. New players should choose to fly the quieter more sedate Go Triangle campaign. Campaign Difficulty Table hardest medium easiest BLUE FORCE Cuban Crisis Caspian Sea Golden Triangle RED FORCE Golden Triangle Caspian Sea Cuban Crisis 4.2 The Campaign Intelligence Map It's a mistake to think the in-flight campaign map displays current unit positions. In fact it only displays last known unit positions. The campaign map is a vital component of the campaign. The war is a highly fluid situation where an armored column can be torn to shreds by enemy attack helicopters in a matter of minutes. You should refer to it often, use it to avoid areas with high levels of fighter activity. Perishable Intelligence - Enemy units (including human players) are only shown on the map if you have up to date information on that sector. Each sector (4km sq.) has a timer specifying when either sides information is no longer current (hiding icons). To reset this timer an allied vehicle/aircraft must pass through the sector. At the start of a campaign, some timers for random sectors are set so you can see some of the enemy forces. Allied helicopters are always visible but only updated once every 20sec with one exception, wingmen are constantly updated. Also visible are the waypoint routes of other allied human players missions (in gray on the map screen). Forcing a map update - You can force a quick map update by single step zooming in and out. 4.3 Destroying Enemy Bases Destroying enemy air bases is vital for a successful campaign. Taking out the enemies airbases reduces their capability to replace aircraft. Taking out 70% of the objects at a base (or FARP) will effectively shut it down but not necessarily kill it. You can tell when you have done enough damage by referring to the campaign map - the base symbol turns gray when seriously damaged. However there are subtle differences between the different kinds of bases. Airbases The larger Airfields are much more difficult, once the perimeter air defence vehicles are destroyed there are multiple airfield buildings and hangers that need to be damaged. For such airfield busting missions I recommend the pilot arm their helicopter with as many rocket pods as they can fit. Rockets instead of missiles will do much more damage to and airfield. The smaller buildings can be damaged with just two rockets. Airbases have two special buildings called "maintenance sheds" or "generators". These special hangers serve to re-supply the campaigns operational pool of aircraft when they get shot down. The campaigns resource pool is a finite number of specific aircraft types for that theatre. The maintenance sheds serve as the "portal" between the aircraft pool and the 3D world. Occasionally you may notice helicopters or fighters emerging from the doors of these hangers. figure 4-1: An airbase helicopter building "giving birth" Destroying these generator buildings should stem the flow of aircraft. A base that has been "closed down" (reduce to below 30%) will still generate aircraft unless the generator buildings are completely destroyed . Typically these fighter/helicopter generators are located on or near their respective aprons. figure 4-2: AE Hongson Airfield (Burma) Even if you destroy ALL buildings and aircraft at an airbase, that base may request "Transfer" flights from other nearby operational bases. Should no aircraft land for any length of time the base will begin to deconstruct and become unused. When this happens, the destroyed building shells will disappear. FARPS FARPS are easy pickings, mostly consisting of soft vehicles, mules and external power units that can be destroyed with the cannon. Even better if you can catch them with aircraft on the ground. Shutting down a FARP won’t remove it. A repair mission will be generated at a nearby base, with perhaps an additional series of rescue helicopter flights to ferry off wounded and stranded aircrew. In addition, transfer flights to replace lost helicopters may be generated (dependant on a nearby base having the resources to send them). If the FARP is not repaired after a period of time, it will dismantle itself but leave behind a residue of its presence, tents, landing mats etc. The campaign map icon will eventually be removed once it has finally closed. This may take some time. 4.4 The Ground Advance If the FARP is not repaired after a period of time, it will dismantle itself but leave behind a residue of its presence, tents, landing mats etc. The campaign map icon will eventually be removed once it has finally closed. This may take some time. Ground Advance Stalls Examine the map for areas where the ground advance has "stalled". Look for friendly ground units on the same road as an enemy ground unit. When an advancing unit comes into range of an enemy ground force, it will stop and begin to attack with it's available weapons - usually the main battle tanks will proceed to lob shells over several kilometers at the blocking force. The unit will also send a radio message - see below. The blocked ground unit can not advance until the blocking force has been eliminated. figure 4-3: Ground advance stall Be aware, should the blocking enemy be hit by a shell, it will radio for immediate air support. A retaliatory attack by enemy helicopters can take anything from a few minutes to half an hour depending on the proximity of available forces. Also, enemy tanks will return fire - again lobbing shells over several kilometers. Note: due to terrain considerations, it may not be posssible for the engaged ground forces to hit each other. As there is no "curve of sight" routine in the simulation, tanks could be firing shells into a forest canopy that just happens to be in the way. If this situation occurs, tanks will needlessly use up their ammunition - stop to reload - then continue blindly wasting ammunition. The only way out of this cycle is if the blocker or blocking unit is eliminated by air forces. So always keep a look out for ground advance stalls. You can fly into the area and clean out the enemy, thus allowing your ground forces to continue. (Remember, what ever applies to your forces, also applies to the enemy forces) Ground Unit Radio Messages If you are within radio range of a ground unit (max range is 32km), the ground controller will radio various signals under certain conditions. If a ground units advance is blocked they will radio: "This is ground control, requesting support" "This is ground control, we need air support" If a ground unit comes under attack by enemy forces they will radio: "We are pinned down by enemy fire" "We are taking heavy fire, requesting aerial assisstance" When your ground forces advance forwards or retreats, they radio: "This is ground control, we are advancing" "This is ground control, we are retreating" Who said that? - Although it is hard to determine who sent the transmission, there are some clues. The sound volume of the radio message is determined by the distance from transmission source. The fainter the message, the further away. Look at the campaign map and examine the roads and distances. The presence of enemy units near your ground forces give a clue as to who radioed for assisstance. Ground Force Movement AI How does the AI decide to move ground forces? The advance and direction of ground units is determined by pre-designed "warmth" map. Each ground unit heads towards a road junction (or junction "node" to give it a techie name) that has the hottest value on the hidden warmth map. Assuming you could overlay the network of roads over the warmth map and sample the values that lay under each road junction. The junction with the highest value is the direction the ground unit will head towards. Cuban Theater Warmth Maps Blue Force Red Force figure 4-4: ground forces attracted to lighter areas. Every time a unit reaches a road junction, it stops and waits a pre-determined time before checking the "map" again and deciding which way to turn. Most campaign objective sectors are hand placed so ground forces following the "map" should eventually pass through them. However some units will get stuck at dead ends. Or bypass some sectors. The warmth maps and objective sectors are editable with Adobe PhotoShop. Details on this can be found in a later chapter. 4.5 Urban Objective Sectors - Infantry Units Capturing most objective sectors is usually straightforward. However those sectors which are controlled by infantry present something of a minor problem. Infantry units guarding city areas carry shoulder launched SAMs, these are - on the whole - not much of a threat. The units don't move around so unless you inadvertently park in front of them you are unlikely to be in danger from them. The problem is finding the little buggers. They don't have the decency to show up on millimetric wavelength radars or be tracked by 1st generation FLIRs. The eliminate infantry and capture city sectors you need the greatest sensor system ever devised for pilots, the Mk.1 eyeball. This is real search and destroy, territory. If you must, plan a search pattern and fly it. Using Night Vision can help, infantry tend to show up as two small points. Going through the city, block by block may get a bit tedious so there are some pointers pictured below. Where Are They? Infantry units can be found around the same structures, but these structures differ according to the campaign. In Thailand (Golden Triangle campaign), SAM infantry can be found in pairs by a particular kind of hut. Other examples are pictured below. figure 4-5: examples of urban infantry "hang-outs" Once all infantry units have been eliminated, it is necessary to exit and re-enter the sector to confirm it's capture on the campaign map. 4.6 Supply Lines Reinforcements All forces in the campaign begin with a finite number of units. Some of them are already active when the game begins. The rest are "reserves" and remain in a hidden pool. When a unit is destroyed a replacement from the reserve pool will appear. In the case of aircraft it will emerge from an airbase generator hanger (see section 4.3) and taxi to park on the apron until that aircraft is assigned to a mission. Smaller bases such as FARPs and aircraft carriers require replacement aircraft to be flown from adjacent bases. When a base is low on helicopters it will radio a request for helicopter re-supply, this will generate a "Transfer" mission at the recieving airbase. You can actually fly some of these transfer missions during the campaign, it's just a taxi job, but it also serves as a way of transferring you to another base. Fuel and Stores Each individual vehicle keeps track of it's stores. When a unit has expended it's stores it will remain in this unarmed state until re-supplied. Armoured columns usually carry their supplies with them in trucks. It takes exactly 10 minutes of simulator time to reload, re-arm and refuel a vehicle. When an SA-13 vehicle has fired it's full complement of surface to air missiles it will be rendered harmless until it reloads. There is an infinite reserve pool of ammunition and fuel. However airbases and FARPS do run out and require resupply from nearby "supply" installations. These supply installations are identified on the campaign map as factory symbols. 4.7 Getting Transferred to the FARP of Your Choice If you wish to transfer to a front line FARP early on in a campaign and no TRANSFER missions are available, you can force a transfer. On the mission selection screen, create a SCOUT mission, then move the last waypoints near to the FARP you wish to visit. Fly to the last waypoint, your return route will direct you to the nearest FARP or BASE with free capacity which should be the one you wanted. Most often you will find that when you hit the last waypoint at the end of a mission you will be directed to land at the nearest FARP or base which is low on aircraft. 4.8 Pilot Ranks And Promotion Promotion is based soley on points. The rank pyramid is as follows: LIEUTENANT CAPTAIN MAJOR LT COLONEL COLONEL 0 5,000 50,000 200,000 1000,000 Your rank determines the availability of more difficult missions (see section 5.1 ). CHAPTER 5 missions / objectives 5.1 Mission Availability Difficulty The variety and availability of missions is dictated by the estimated difficulty rating of that mission and your current pilot ranking. The theory being that rookie pilots are not assigned excessively dangerous missions. The mission difficulty tree looks something like this: Rank Min Difficulty Lieutenant Captain Major Lt Colonel Colonel 6 7 8 9 10 Therefore any mission with a difficulty over 7 is unavailable to Lieutenants and Captains. The difficulty rating is rated by type, length of exposure behind enemy lines and number of estimated enemy contacts. 5.2 Mission Types It is not immediately obvious how you successfully complete some mission types. Upon completion of a mission you are vectored back to a base with an accompanying radio message. Some missions require you to hit your final waypoint position, others require you to order a return to base via the communications menu. Then only exception to this is the "INTERCEPT" mission which ends when the target entities have been destroyed. Here is a list of player flown mission types with notes. SCOUT Requirements: Hit the final waypoint co-ordinate. Objective: Search and Destroy any enemy targets of opportunity en-route to final waypoint sector. This can be classified as a "movement to contact" mission. This is the standard and most common sortie. SEAD Requirements: Hit the final waypoint co-ordinate. Objective: Search and destroy any enemy air defence assets. These missions are usually generated as a result of friendly aircraft coming under attack. The point of attack being in close vicinity of the final waypoint. DEEP STRIKE Requirements: Hit the final waypoint co-ordinate Objective: A long range strike against targets deep behind enemy lines. The trick is to remain hidden until the engagement area (the final waypoint). Engaging any enemy units before reaching the objective may result in retaliatory attacks which may endanger your mission. RECON Requirements: Hit the final waypoint co-ordinate and/or transmit recon data in the comms menu. Objective: Reach the recon co-ordinates and return to base. You are free to engage units as you wish. Also you can transmit recon information via the comms menu prior to hitting the final waypoint. The effect is just the same as hitting the last waypoint. TANK BUSTING Requirements: Player or lead aircraft transmits RTB order via comms menu. Objective: Search and Destroy any enemy armored units in the area around the last waypoint on your route. Mission is not over until the lead helicopter (or player) sends the return to base signal. A return route will be plotted for you. INTERCEPT Requirements: The target unit is destroyed. Objective: As a matter of urgency, intercept missions need to be carried out as soon as possible. The intentions of an enemy unit has been determined and deemed important enough to intercept (destroy) before it reaches it's destination. BATTLEFIELD AIR INTERDICTION Requirements: Hit the final waypoint co-ordinate. Objective: Search and Destroy any enemy targets of opportunity en-route to final waypoint sector. This can be classified as a "movement to contact" mission. This is the standard and most common sortie. CLOSE AIR SUPPORT Requirements: Patrol your route until you hit the final waypoint co-ordinate. Objective: Defend the air space above friendly units in your mission area. These missions can be generated by advancing ground units. COMBAT AIR PATROL Requirements: Hit the final waypoint co-ordinate. Objective: These mission routes often take you repeatedly across your patrol zone in a zig-zag fashion, usually around your current base. This is mostly busy work, the AI flights on these missions should attempt to defend the base from air attackers. ESCORT Requirements: The escorted aircraft completes its mission. Objective: Supply, troop-insertion and transfer flights may request an escort flight. Players with a suitably high enough career rank will only be able to take on these missions. TRANSFER Requirements: Fly to the final waypoint and await landing instructions. Objective: Transfer missions are requested by bases low on aircraft. Any nearby returning aircraft will be vectored to the base. It is possible to transfer to the base of your choice by simply creating a scout mission which ends near the base of your choice. Chances are that base will not have a full complement of aircraft and you will be diverted to it upon finishing your scout patrol route. CHAPTER 6 tables and vehicle metrics 6.1 Vehicle And Weapon Tables It is not necessary to understand or digest the tables in this chapter, they are provided for the curious and can help explain certain perceived behavior of entities within the campaign. Knowing that Black Hawk helicopters cruise at 85 knots may aid you when escorting them, or that the air radar detection range of the SA-19 is 8km and can't detect objects below 10m (approx. 40ft). A study of the data can reveal weaknesses which you can exploit during combat. Vehicles / Entities Cruise Speed/Altitude Speed is in knots, altitude in meters for normal cruising flight. Structure Points The amount of damage an object can take before it is destroyed. Scan Interval Time in seconds between all sensor sweeps. Air/Ground Threat The higher the value, the greater the perceived threat. Entities will engage their greatest perceived threat when attacked. Thus a helicopter engaged by a Black Hawk (Air Threat value of 0.8) will continue to retaliate against it until it is attacked by an ever greater threat such as an RAH-66 Comanche (Air Threat value of 1.0). Note: All ranges in Meters unless specified. Table 1 - Helicopters and Fighter Aircraft Cruise Speed Name Cruise Alt Structure Points Recon Range Ground Scan Range Air Scan Range Scan Interval Air Threat Ground Threat AH-64D Longbow 110 40 600 5,000 5,000 5,000 10 1 1 Mi-28 Havoc 110 40 600 5,000 5,000 5,000 10 1 1 RAH-66 Comanche 100 40 500 5,000 5,000 5,000 10 1 1 Ka-52 Hokum 90 40 650 5,000 5,000 5,000 10 1 1 UH-60 Black Hawk 85 40 650 5,000 5,000 5,000 10 0.8 1 Mi-24D Hind 80 40 650 5,000 5,000 5,000 10 0.8 1 CH-46E Sea Knight 70 40 750 3,000 0 0 10 0 0 Ka-29 Helix B 75 40 750 5,000 5,000 0 10 0 1 CH-3 Jolly Green Giant 70 40 800 3,000 0 0 10 0 0 Mi-17 Hip 75 40 800 5,000 5,000 0 10 0 1 CH-47D Chinook 70 100 800 3,000 0 0 10 0 0 Mi-6 Hook 70 100 1,000 3,000 0 0 10 0 0 A-10A Thunderbolt 300 700 850 6,000 5,000 5,000 10 0.8 1 Su-25 Frogfoot 300 700 850 6,000 5,000 5,000 10 0.8 1 F-16 Fighting Falcon 450 900 700 10,000 10,000 10,000 10 1 1 MiG-29 Fulcrum 450 900 700 10,000 10,000 10,000 10 1 1 AV-8B Harrier 350 800 700 6,000 5,000 5,000 10 0.8 1 Yak-41 Freestyle 350 800 700 6,000 5,000 5,000 10 0.8 1 F/A-18 Hornet 450 1,000 700 10,000 10,000 10,000 10 1 1 Su-33 Flanker 450 1,000 700 10,000 10,000 10,000 10 1 1 Table 2- Ground Vehicles Name Speed Structure Points Type Recon Range Ground Scan Range Air Scan Range Scan Interval Air Search Air Search Min Max Air Threat Ground Threat M1A2 Abrams 20 Tracked 1,500 2,000 4000 2,000 15 10 1,000 0.333 1 T-80U 20 Tracked 1,350 2,000 4000 2,000 15 10 1,000 0.333 1 M2A2 Bradley 20 Tracked 1,000 3,000 4000 4,000 15 10 2,000 0.666 1 BMP-2 20 Tracked 1,000 3,000 4000 4,000 15 10 2,000 0.666 1 BMP-3 20 Tracked 1,000 2,000 5000 2,000 15 10 2,000 0.666 1 M113A2 20 Tracked 800 2,000 0 2,000 15 10 1,000 0.333 0 BTR-80 20 Wheeled 800 2,000 0 2,000 15 10 1,000 0.333 0 M1025 HumVee 20 Wheeled 650 1,000 0 0 0 0 0 0 0 BRDM-2 20 Wheeled 650 1,000 0 2,000 15 10 2,000 0.333 0 M109A2 20 Tracked 600 2,000 0 2,000 15 10 1,000 0.333 0 2S19 20 Tracked 600 1,000 0 2,000 15 10 1,000 0.333 0 M270 MLRS 20 Tracked 700 2,000 0 0 0 0 0 0 0 BM-21 Grad 20 Wheeled 700 2,000 0 0 0 0 0 0 0 M163 Vulcan 20 Wheeled 600 2,000 0 2,000 15 10 1,000 0.666 0 SA-19 Grison 20 Tracked 600 6,000 0 8,000 15 10 4,000 1 0 M1037 Avenger 20 Wheeled 600 4,000 0 5,000 15 10 3,000 1 0 M48A1 Chaparral 20 Wheeled 600 4,000 0 5,000 15 10 3,000 1 0 SA-13 Gopher 20 Wheeled 600 3,000 0 5,000 15 10 3,000 1 0 M998 HumVee 20 Wheeled 350 1,000 0 0 0 0 0 0 0 UAZ-469B 20 Wheeled 350 1,000 0 0 0 0 0 0 0 M923A1 Big Foot 20 Wheeled 350 1,000 0 0 0 0 0 0 0 Ural-4320 20 Wheeled 300 1,000 0 0 0 0 0 0 0 M978 HEMTT 20 Wheeled 300 1,000 0 0 0 0 0 0 0 Ural Fuel Tanker 20 Wheeled 300 1,000 0 0 0 0 0 0 0 20 1,000 0 5,000 15 5 3,000 1 0 Infantry 0 Foot Note: Tanks and other armoured vehicles have between 6 to 8 smoke grenades. Table 3 - Ships Name Speed (knots) Structure Points Recon Range Air Scan Range Scan Interval Air Search Min Air Search Max Air Threat Ground Threat Tarawa Class 24 12,000 8,000 10,000 15 10 5,000 1 0 Kiev Class 32 15,000 8,000 10,000 15 10 5,000 1 0 Oliver Hazard Perry Class 29 8,000 6,000 10,000 15 10 5,000 1 0 Krivak II Class 32 8,000 6,000 10,000 15 10 5,000 1 0 Landing Craft Utility 8 1,000 1,000 0 0 0 0 0 0 LCAC (air cushion) 8 1,000 1,000 0 0 0 0 0 0 Aist Class 8 1,000 1,000 2,000 15 10 1,000 0.66 0 Ammunition and Explosives Damage Soft/Hard Objects are categorized as either soft or hard targets. These values indicate the amount of damage they transfer to either soft or hard objects. For example, a Stinger will do 300 points of damage to a soft target such as a helicopter, but no damage to a hard target such as a city block. Guidance IR Passive Infra-red Lsr Active Laser R(s) Radar (semi-active) RC Radio Command Name Table 4 - Surface To Air Missiles (SAMs) Damage Soft Damage Hard Guidance Seeker FOV Weight Min Range Max Range Velocity G Max Burn Time Cruise Time Chaparral 300 0 IR 120 0 500 5,000 850 15 5.437 FIM-92A Stinger 300 0 IR 80 0 500 5,000 680 15 4.281 3.004 5.055 SM-1MR Standard 300 0 R (s) 120 0 500 30,000 850 10 8.155 30.977 Sea Sparrow 300 0 R (s) 120 0 500 55,000 850 10 8.155 60.389 SA-7 Grail 300 0 IR 60 0 500 3,200 510 15 3.126 4.558 SA-13 Gopher 400 0 IR 50 0 500 5,000 510 10 4.689 7.230 SA-19 Grison SAM 450 0 RC 60 0 500 8,000 890 15 5.708 5.974 SA-N-3 Goblet 350 0 RC 90 0 500 24,000 952 10 9.195 20.371 SA-N-4 Gecko 400 0 RC 90 0 500 12,000 850 10 8.155 9.800 Table 5 - Air To Air Missiles (AIMs) Name AIM-92 Stinger Damage Soft Damage Hard Guidance Seeker FOV Weight Min Range Max Range Velocity G Max Burn Time Cruise Time 550 0 IR 80 13.6 500 5,000 680 15 4.281 5.055 AIM-9M Sidewinder 1000 0 IR 80 0 500 18,000 850 15 5.437 18.298 AIM-120 AMRAAM 1400 50 R (a) 90 0 500 65,000 1300 15 8.495 45.589 550 0 IR 60 18.2 500 5,200 850 15 5.437 3.239 AA-8A Aphid 1132 40 IR 60 0 500 10,000 1000 15 6.456 6.611 AA-8B Aphid 0 0 R (s) 60 0 500 15,000 1000 15 6.456 11.611 AA-10A Alamo 1220 40 R (s) 60 0 500 40,000 1500 15 9.854 21.575 AA-10B Alamo 1250 40 IR 60 0 500 20,000 1500 15 9.854 8.242 AA-11 Archer 1300 40 IR 60 0 500 30,000 850 15 5.437 32.416 Igla-V Table 6 - Air To Ground Missiles Name Damage Soft Damage Hard Guidance Seeker FOV Weight Min Range Max Range Velocity G Max Burn Time Cruise Time AGM-114L Hellfire 2,000 2,000 R (a) 60 45 500 8,000 442 10 3.996 15.876 AGM-114K Hellfire II 2,000 2,000 Lsr 60 45 500 8,000 442 10 3.996 15.876 AGM-65D Maverick 3,000 3,000 IR 20 0 500 24,000 340 5 5.912 67.197 AGM-65F Maverick 3,000 3,000 IR 20 0 50 24,000 340 5 5.912 67.197 Ataka 2,000 2,000 RC 50 42.5 500 6,000 400 10 3.568 12.993 Vikhr 2,500 2,500 Lsr 50 0 500 8,000 400 10 3.568 17.993 744 744 RC 40 0 500 7,000 340 10 2.956 18.893 AS-10 Karen 1,000 1,000 IR 20 0 500 10,000 340 5 5.912 26.021 AS-14 Kedge 6,354 6,354 Lsr 20 0 500 40,000 340 5 5.912 114.256 AT-6 Spiral Table 7 - Unguided Rockets Name Damage Soft Damage Hard Weight Min Range Max Range Velocity G Max Burn Time Cruise Time Hydra 70 M255 500 120 6 100 5,000 850 30 2.718 4.443 Hydra 70 M261 600 400 6 100 5,000 850 30 2.718 4.443 LAU-69/A 450 50 0 100 5,000 850 30 2.718 4.443 S-5 200 30 0 100 3,000 700 30 2.209 3.103 S-8 400 200 11.3 100 4,000 750 30 2.379 4.065 S-13 600 400 68 100 6,000 800 30 2.548 6.146 Table 8 - Ballistic Weapon Data Name 12.7mm Round Damage Soft Damage Hard Weight Min Range Max Range Muzzle Velocity Rate Of Fire Burst Duration 4 0 0 0 1,800 600 1,000 3 M61A1 20mm Round 12 0 0 0 1,600 884 1,000 3 M197 20mm Round 12 0 0 0 1,600 884 1,500 3 GAU-12/U 25mm Round 15 3 0 0 1,600 1,051 1,650 3 M242 25mm Round 16 6 0 0 3,500 1,000 1,000 3 100 100 0 0 1,200 1,030 2,100 3 M230 30mm Round 30 15 495 0 1,200 792 625 3 M75 76mm Round* 450 450 0 2,571 4,000 198 1 0 M256 120mm Round 634 634 0 0 4,000 247 1 0 M284 155mm Round 1,610 1,610 0 0 30,000 542 1 0 M270 227mm Rocket 8,000 8,000 0 15,801 31,600 556 1 0 12.7mm Round 4 0 0 0 1,800 600 1,000 3 9-A-624 12.7mm Round 5 0 0 0 1,500 600 4,000 3 14.5mm Round 6 0 0 0 1,600 600 1,000 3 GSh-23L 23mm Round 25 8 200 0 2,000 930 1,000 3 GSh-301 30mm Round 40 25 0 0 1,600 800 1,000 3 2A38M 30mm Round 25 10 0 0 2,500 1,200 1,000 3 2A42 30mm Round 30 15 0 0 4,000 1,000 300 3 2A42 30mm HE Round 30 15 1,000 0 2,000 1,000 300 3 2A42 30mm AP Round 25 25 1,000 0 2,000 1,000 300 3 2A72 30mm Round 30 15 0 0 2,000 800 1,000 3 AO-17A 30mm Round 30 15 0 0 1,500 1,000 100 3 ADMG-630 30mm Round 30 15 0 0 1,500 800 1,000 3 76mm Round 450 450 0 0 4,000 198 1 0 100mm Round 650 650 0 0 4,000 198 1 0 2K23 100mm Round 650 650 0 0 4,000 198 1 0 1,400 1,400 0 5,209 30,000 542 1 0 688 688 0 0 4,000 289 1 0 1,548 1,548 0 0 24,000 485 1 0 Chaff 0 0 0 0 0 25 1 3 Flare 0 0 0 0 0 25 1 3 Smoke Granade 0 0 0 0 0 6 1 45 GAU-8/A 30mm Round BM-21 122mm Rocket 2A46M1 125mm Round 2A65 152mm Round Rate Of Fire/Burst Duration The rate of fire is the number of rounds capable of being fired per minute. The "Burst Duration" is th ammunition will be fired, typically 3 seconds. Therefore a weapon capable of 1,000 rounds per minute fired in a three second burst, will fire 50 rounds of ammunition. Each impacting round will deliver the appropriate amount of hard or soft damage. e length of time this Muzzle Velocity In meters per second. CHAPTER 7 simulation mechanics 7.1 Command Line Parameters Shortcuts Apache Havoc is customizable to some degree by the user. Some flight model, visual and most communication elements can be altered by passing command line parameters when launching the game. This section includes a full list of some documented and undocumented ones (which can now be considered documented). Command Line parameters can be entered into a DOS box or program shortcut. Several Windows shortcuts to Apache Havoc with different options included in the Target field (see figure 8-1 below) can be made and re-named to switch between different options. figure 8.1: Shortcut Properties - command line switches in Target box Environment Variable As an alternative to using command line or shortcuts options, you can specify the commands you want with the APACHE_HAVOC environment variable and SET command. For example: SET APACHE_HAVOC=/cgs:1 /cig:1 /cbar:1000 For more information on using command lines and environment variables, please refer to your computers disk operating system manual or Windows95 user manual. Apache Havoc version 1.1e Parameters Category – Communications Switch Meaning Description /ccrs:n comms_connection_receive_size n = Initial guess of campaign data size. If campaign data is larger then this can slow things down (default = 200k) /cdrs:n comms_data_record_size similar to above… /cpbs:n comms_pack_buffer_size similar to above… /cgs:1 comms_guaranteed_send Force the comms to use DirectPlay guaranteed send instead of its own. n = 1 (turn on) n = 0 (turn off - default) /crls:n comms_resend_list_size n = Packet history list size, increase if client keeps getting kicked out by server (default = 1000) /crl:n comms_rerequest_limit n = number of times a client can re-request the same packet. Increase this for poor connections (default = 10) /cpt:n comms_packet_timer n = time delay in seconds the comms will wait for a packet before re-requesting it. (default = 5s) /crt:n comms_resend_timeout n = time comms will wait before assuming re-requested packets was lost (default = 2s) /mur:n max_update_rate n = network frame rate for a server, n/a for a client (default = 5fps for TCP/IP, 15fps for IPX) /cig:1 comms_interpolate_gunships program will interpolate a players helicopter position for smoother visuals n = 0 (off / default) n = 1 (on) /cvc:1 comms_validate_connection removes dead player husks when client crashes n = 0 (off / default) n = 1 (on) /cto:n comms_time_out the amount of time to wait before removing dead player husks n = 0 (off / default) n = 1 (on) Category – Visual Switch Meaning Description /cbar:n city_block_approximation_range n = distance in meters that city blocks resolve from their simple form to complex form (default = 500 meters) /mfr:n max_frame_rate n = Max visual frame rate, (defaults = 30) Category – Flight Dynamics Switch Meaning Description /drbs:n dynamics_retreating_blade_stall n = floating point scaling factor for RBS effect (default = 1.0) /drv:n dynamics_rudder_value n = scaling factor for drag on tail rotation (default = 1.0) /dra:n dynamics_rudder_acceleration n = scaling factor for tail rotation acceleration (default = 0.8) /drd:n dynamics_main_rotor_drag n = scaling factor for drag caused by main rotor (default = 1.0) /dtrd:n dynamics_tail_rotor_drag n = scaling factor for drag caused by tail in forward flight (default = 1.0) /dzd:n dynamics_cyclic_dead_zone n = percentage deadzone for the cyclic (default = 0.0) Category - Miscellaneous Switch Meaning Description /goto:1 planner_goto_button Activates "GOTO" teleport button on the campaign map. /vfm:1 vector_flight_model Activates viewer or "UFO" flight mode. /psr:n player_start_rank n = Start rank for new pilots /ns no_sound Bypass soundcard, useful for tracking hardware conflicts /pitod:n player_initial_tour_of_duty Tour Of Duty start timer value /3dreset 3d_reset Reset screen resolution to 640x480 /dxtm directx_texture_management Should fix "unable to allocate hardware slot" error Dedicated Server Options - Version 1.1d and later Category – Dedicated Server Mode Switch Meaning Description /dedicated:n dedicated_server n = Switch to activates dedicated server mode 0 = On 1 = Off /game_type:n initialisation_phase_game_type n = The type of game to host 1 = Free Flight 2 = Dynamic Missions 3 = Campaign 4 = Special 5 = Demo /gunship_type initialisation_phase_gunship_type Dummy value that’s not important but required. 0 = Apache 1 = Havoc /path:<path> campaign_path Path from .EXE of the theater map folder eg ..\common\maps\map2 /filename:<file> campaign_filename The campaign (.CMP) file to use relative from the .EXE eg campaign\cuba.cmp 7.2 Command Line Examples Activate the Teleport feature aphavoc.exe /goto:1 This enables a "GOTO" button on the campaign map. It could be considered a poor mans "skip" feature if the flying experience passes you by and you want to get to the action soonest. Enabling DirectPlay Guaranteed Packet Delivery aphavoc.exe /cgs:1 This activates the guaranteed packet delivery of DirectX, while this may introduce a little extra latency at one layer, it may reduce packet re-transmissions at a higher layer and improve performance (in theory). Your mileage may vary. Dedicated Server Example aphavoc.exe /dedicated:1 game_type:3 gunship_type:0 path:..\common\maps\map2 filename:campaign\cuba.cmp This will start the server running the Cuban campaign. Rather than use the command line directly you could create a .BAT file or shortcut with the parameters you want. 7.3 Editing Campaign Files This section describes how to modify the campaigns in Apache Havoc. It should not be taken as a complete guide or manual but it should go some way to assist the keen hacker. This information is courtesy of Todd Gibbs at Razorworks. Note: If altering any files causes problems with the game, either restore from backups or the original files located on the CD. Directory Structure Each campaign uses similar files but stored in their own sub-directory. Map Numbers and their Location MAP1 is Thailand MAP2 is Cuba MAP3 is Georgia figure 7-1: Campaign Directories CUBA (Map #2) as an Example There are several files in each MAP# directory, their file extensions denote their usage: CMP (campaign) DEM (demo) FRE (free flight) SGL and SPC (single and special games). The CMP files are the most use for quickly changing the balance of power although some others can influence it. CUBA.CMP The CMP files are mostly self-explanatory but here is a quick run down the contents: The attitude is not used at the moment but will be in Comanche Hokum. Its will influence the sides retaliation characteristics. The task_generation stuff defines the type of tasks a side can create, the values after it aren't used. They use to deal with frequency, urgency and duration but never made it in. Hardware reserves I think you can guess. During the campaign these are spawned in base "Generator Hangers". Out of these you will see helicopters and jets taxiing to the landing pads. The frequency of replacements from the reserves is defined by REGEN_FREQUENCY, its value is defined as: time to regen = 10 minutes / REGEN_FREQUENCY With 1 giving a new aircraft every 10 minutes and 10 giving one every minute. You'll notice that the BLUE FORCE regen frequency is a lot lower to try and address the balance. The actual size of the groups of tanks is defined by how big the area is that they are being placed into (clear area around the road node), but the maximum they will ever get is defined by FRONTLINE_FORCES. The default is 10 and the max is 16. You could try giving the US 12 and the CIS 6 and see what happens.... If you try 16/16 you'll probably see a large frame-rate drop, especially on Thailand (by default there is 1000 tanks already!) From there on its all about bases (keysites) and the initial forces at them. You've pretty much worked out how the groups are built and what goes into them (from formcomp.dat and forms.dat). This will influence the war quite a bit. At the moment no ground forces are placed this way, they are either done automatically by the Frontline code or SAM/AAA placement code. I'll have a look next week and see if I can provide some help in tweaking these. You could try placing some tanks at a base and see what happens, although the only task they would be able to pickup is 'Supply'... I probably need to explain how the task engine works as well... everything in the world is capable of doing a task (mission). Obviously some things are more suitable for certain tasks than others. When a task is created (by either the Highlevel AI or the Retaliation engine - another subject ;) ) it goes onto an "unassigned_mission" list. This list is periodically assessed by idle groups in the world to see if there is anything for them to do. When assessing they take into account their 'suitability' values and, hopefully, a suitable match is made. The Highlevel AI deals with planned attacks or missions, like Deep strike (not all of them) or CAP. The Retaliation engine probably creates most of the mission in the game. Each side has a Retaliation engine that is informed if anything happens, like a tank targeting a helicopter. The Retaliation engine decides if the tank should attack, hide or if it should send in some forces to help (or whatever...) and on the other side if the helicopter should attack back, run away or if it should send assistance. CUBA.SID There is also a file called CUBA.SID This is a multi-layered PSD (Adobe PhotoShop file) that has simply been renamed. If you rename it back to CUBA.PSD and load it up you'll see that the file has a number of layers. The layers are: .PSD Layer Name Description BACKGROUND Defines the red/blue initial land held BLUE_HOT_SPOTS defines the objective sectors (the ones you need to capture to win) RED_HOT_SPOTS defines the objective sectors (the ones you need to capture to win) BLUE_GROUND_WARMTH Greyscale, used by the ground forces to know which way to move, RED_GROUND_WARMTH (Cold to warmer, White being the warmest) BLUE_SEA_WARMTH Not Used RED_SEA_WARMTH Not Used You should be able to draw on this, rename it back to CUBA.SID and see the changes... it would help a lot if you just gave the BLUE_FORCE side more land! FORMS.DAT FORMS.DAT contains all the campaign formations, unfortunately you can't add new formations, only alter the existing ones. I guess the easiest way to work out new formation positions is on graph paper, (that's how it was done). I don't think the Kiev and Tarawa ones are used any more so you could totally alter those (change name etc). Here’s the complete list of available formations in case any are missing from the file: NONE, 1, 2_ROW_LEFT, 2_ROW_RIGHT, 2_COLUMN, 2_VERTICAL, 3_ROW_LEFT, 3_ROW_RIGHT, 3_COLUMN, 3_VERTICAL, 3_VEE, 4_ROW_LEFT, 4_ROW_RIGHT, 4_COLUMN, 4_VERTICAL, 5_ROW_LEFT, 5_ROW_LEFT_LOOSE, 5_ROW_RIGHT, 5_ROW_RIGHT_LOOSE, 5_COLUMN, 5_VERTICAL, 5_VEE, 7_VEE, 9_VEE, 16_ROW_LEFT, 16_ROW_RIGHT, 16_COLUMN_LOOSE, 16_COLUMN_TIGHT, 80M_ROAD_NODE_16_TANKS, TARAWA_HELICOPTER_LANDING_SITES, KIEV_HELICOPTER_LANDING_SITES, Here is the complete list of valid components: HELICOPTER_SCOUT_GROUP, HELICOPTER_STRIKE_GROUP, HELICOPTER_ESCORT_GROUP, HELICOPTER_RECON_GROUP, HELICOPTER_MARINE_ASSAULT_GROUP, HELICOPTER_MEDIUM_LIFT_GROUP, HELICOPTER_HEAVY_LIFT_GROUP, FIXED_WING_CLOSE_AIR_SUPPORT_GROUP, FIXED_WING_MULTI_ROLE_GROUP, FIXED_WING_CARRIER_BORNE_STRIKE_GROUP, FIXED_WING_CARRIER_BORNE_INTERCEPTOR_GROUP, PRIMARY_FRONTLINE_GROUP, SECONDARY_FRONTLINE_GROUP, HEAVY_SAM_AAA_GROUP, LIGHT_SAM_AAA_GROUP, INFANTRY_SAM_GROUP, ARTILLERY_GROUP, MLRS_GROUP, INFANTRY_GROUP1, INFANTRY_GROUP2, AIRCRAFT_CARRIER_GROUP, FRIGATE_GROUP, LANDING_GROUP, Placing vehicles at bases won't have the desired effect... 'landed' vehicles cannot attack until they 'takeoff'.. that applies to anything, aircraft, vehicles, ships. Around each base is a number of defined routes, one for landing, one for taking off, etc... before anything can start engaging, it must fly/drive the takeoff route. CUBA.BIN There use to be a PSD layer (like the .SID file) for the SAM/AAA placement but it was combined into the CUBA.BIN file. The composition of the bin file is binary, but it is possible to play around with it. The bin file is split into sections. Each section will have a size and a data part. Looking through it would be too difficult to tweak values but luckily the very last section is to do with SAM/AAA placement. The section is stored as: [number_of_sam/aaa] [x_position] [z_position] [x_position] [z_position] ... ... So if you wrote a program that worked backwards from the end of the file, reading in 4_BYTE float values until you get to a value that looks like the 'number_of_sam/aaa' (you could calculate what the value should be). By default, the value for Cuba is 110 and Georgia is 93, that should help you locate it. Then all you need to do is alter the count and write out the new positions... the side of the SAM/AAA is determined by the sector side. The easiest way to increase the number of SAM/AAA units is to change the formation data. The group type is: ENTITY_SUB_TYPE_GROUP_ANTI_AIRCRAFT And the formation is: FORMATION_COMPONENT_LIGHT_SAM_AAA_GROUP. Ground forces also get their side from the sector side info... same for the FARPs. The map is actually covered with possible FARP positions. FARPs can only exist along the frontline and as the game progresses the frontline moves, enabling new FARPs and disabling old ones. When a sector with a FARP in is captured the FARP starts to shutdown. This allows the enemy to possibly capture it and use it for itself - you'll sometimes see helicopters on FARP_RECON missions... this mission is used to enable a new FARP site. The hotspot layers are to do with the sector_objective... there are two layers because it is possible to have different objectives for each side. You should find that if you alter the blue hotspot layer and run the game, blue force objective sectors will change... although not the count on the status screen (that's done in the script file so if you change one, don't forget to change the other). CAMPAIGN.POP The .POP files are used to create keysites without the .BIN file. The main campaigns (cuba.cmp etc) don't use them anymore but special games do (mult3.spc). All it does is create a keysite, create the landing routes for various types (helicopter, fixed_wing, ship or routed_vehicles) and place buildings. You could build a new base using the pop file and tell the campaign file to load it... have a look at mult3.spc where it specifies the filename mult3.pop. Completion criteria for the campaigns (or any game) can be any of the following... you can see from the .CMP file how they are used. The game checks every couple of seconds to see if all the criteria has been fulfilled, if they have the game ends with the specified 'result'. For each, here are the parameters that must be supplied: CAMPAIGN_CRITERIA_BALANCE_OF_POWER: GOAL RESULT CAMPAIGN_CRITERIA_COMPLETED_TASKS: CAMPAIGN_CRITERIA_FAILED_TASKS: GOAL TYPE RESULT CAMPAIGN_CRITERIA_DESTROYED_ALLIED_OBJECTS: CAMPAIGN_CRITERIA_DESTROYED_ENEMY_OBJECTS: GOAL TYPE RESULT CAMPAIGN_CRITERIA_INEFFICIENT_ALLIED_KEYSITES: CAMPAIGN_CRITERIA_INEFFICIENT_ENEMY_KEYSITES: GOAL TYPE RESULT CAMPAIGN_CRITERIA_SURRENDERED_SIDES: GOAL RESULT CAMPAIGN_CRITERIA_SECTOR_REACHED: GOAL X_SECTOR Z_SECTOR RESULT CAMPAIGN_CRITERIA_REACHED_WAYPOINTS: GOAL TYPE RESULT CAMPAIGN_CRITERIA_TIME_DURATION: DAYS HOURS MINUTES SECONDS RESULT CAMPAIGN_CRITERIA_CAPTURED_SECTORS: CAMPAIGN_CRITERIA_LOST_SECTORS: GOAL RESULT CAMPAIGN_CRITERIA_ENEMY_FIRED: GOAL RESULT So, for example if you wanted to make a special game in which you had to avoid being detected by the enemy but destroy their base you could use: For blue only (no need for red criteria in this case!) :CAMPAIGN_CRITERIA :CRITERIA_DESTROYED_ENEMY_OBJECTS :GOAL 1 :TYPE OBJECT_3D_LAST :RESULT SUCCESS :CAMPAIGN_CRITERIA :CRITERIA_ENEMY_FIRED :GOAL 1 :RESULT FAILURE You could add a timer (5 minutes) with ... :CAMPAIGN_CRITERIA :CRITERIA_TIME_DURATION :DAYS 0 :HOURS 0 :MINUTES 5 :SECONDS 0 :RESULT FAILURE There are a lot of things you can do with this. There used to be a special game in which you had to hover within a big transparent sphere for a 10 seconds within a time limit... it was really quite hard. Special games are probably the best way to practice and I think will allow the most scope. Map positions are calculated from the bottom left of the map. You can calculate the size of the map from the data in the .CMP file. The hotspot layers are the same at the moment because both sides objective sectors are the same.... they don't have to be though... try changing blues to cover the entire map except a little bit in the middle and you'll see what I mean (hopefully!) The warmth layers are purely used by the ground forces for when they are deciding which direction to travel. Imagine a group of tanks at a road junction with 2 directions of possible travel; the warmth map just helps the decision. The background layer is only used to define the side of the sectors. Although other things use the sector sides to define their side. The hotspot layers are the only ones used to set the objective sectors. So, in the blue_hotspot layer colour the whole thing in blue and see what happens in the game... you should see that the whole map is covered by objective sectors. By intelligently altering the hotspot layers you can change how difficult it is to complete a campaign (although you could just reduce the number of required objective_sectors in the cmp file !) The only reason the red and blue layers are the same is to make the two sides appear to battle for sectors... if they were different blue would go off in one direction to capture its sectors while red would concentrate on getting its. Having then on top of one another makes each side try and capture the same sector. If that makes sense !? The easiest way to add campaigns is to copy the cmp file, changing the titles to New Cuban Crisis (or whatever). Then the game will pick them up as different campaigns. In the FORMCOMP.DAT file (and all script files) the double slash // designates a comment line. Looking through the .DAT file it is pretty straightforward. The first "type" is the name of the formation_components. The second "type" is the name of the formation (from forms.dat). The "count" is the number of aircraft (or whatever) in the formation. Then comes the group type (from the valid ones listed at the start of the section). Finally the actual aircraft types, listed Blue, Red, Blue, Red etc... The only thing to be careful of is to make sure that the "count" (x2 for Blue/Red) is the same as the number of aircraft listed. 7.4 Patches / Updates All international patches and updates for Apache Havoc can be downloaded from the Razorworks site at the following URL: http://www.razorworks.com/pages/patches_txt.htm Latest version is 1.1e which is available for all language version from the site above. Although the patch installer says it is version 1.1d, it is in fact the correct 1.1e version. The European patch is 4.5mb in size, all over versions are 1.5mb. This is due to the extra artwork and sound not included in the European version which was included in the original U.S release. 7.5 Hall Of Shame And finally, a chance to giggle at their get-up. The cast and crew of Razorworks - the Oxford based software team responsible for Apache Havoc. In order of tubbiness - left to right: Matt Smith, Dave Proctor, James Morris, Todd Gibbs, Dave Lomas, Kevin Bezant, Neil Roberts Inset: James Hobson
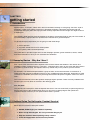
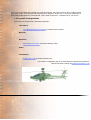
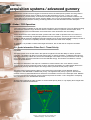
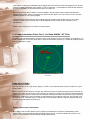
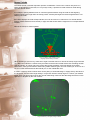
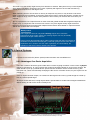

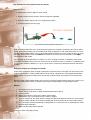
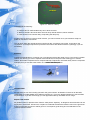
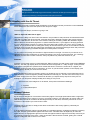
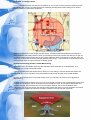
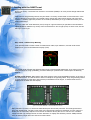
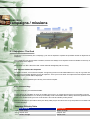

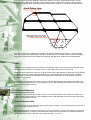
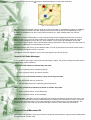
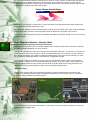

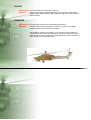

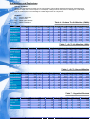
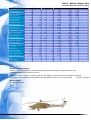
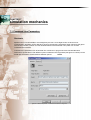
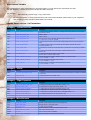
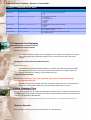
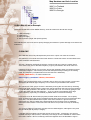
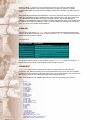
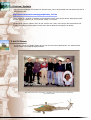

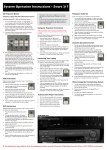


![ManualCover-3Panel10_03 [Converted]](http://vs1.manualzilla.com/store/data/005972160_1-0dfed70a109ebed97541db23da1c3e7d-150x150.png)