1
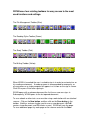
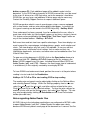
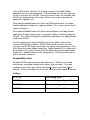
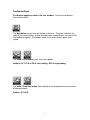
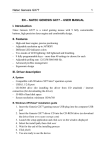
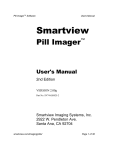
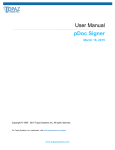
Grand Valley State University
Disability Support Services
Guide to Assistive Technology
GVSU WYNN 5.1 Quick Reference Guide
Prepared by Jeff Sykes, Assistive Technology Coordinator, Disability Support Services
WYNN Wizard 5.1 by Freedom Scientific (What You Need Now) is a
scan-and-read system that allows access to printed material by individuals with
vision impairments and reading disabilities. WYNN allows printed material to be
scanned and converted to electronic text, and read aloud by a computer.
Documents can be viewed in either an exact image view or a text-only view.
Existing electronic documents, including Microsoft Word, ASCII text, and Adobe
Reader documents, can be opened in WYNN and read aloud. WYNN provides
visual enhancements, study tools and a word processor with word echo and word
prediction. WYNN also contains a speech-enabled web browser.
In this quick reference guide to WYNN 5.1, both mouse and keyboard (HotKey)
commands are listed for navigating through various functions and settings.
WYNN menu item ALT-key shortcuts are underlined when referenced. A listing
of WYNN HotKey commands equivalencies can be found with the toolbar button
descriptions.
This is a quick reference guide to WYNN 5.1, and is not intended as a
comprehensive user’s manual.
To start WYNN Wizard on a home computer, double-click on the WYNN icon, or
press the Windows key, navigate to the WYNN 5.1 desktop icon, and press the
Enter key.
To start WYNN in the GVSU lab environment using a mouse, double-click on the
Assistive Technology folder on the desktop, and then double-click on the WYNN
Wizard 5.1 icon.
To start WYNN in the GVSU lab environment using the keyboard press the
Windows key + TAB, then press Enter to access the Start button, followed by
the R key to access the Run dialog box. Run WYNN from its installed location by
typing C:\WYNN5\wynn
To exit WYNN click the Close Application button, or Click on the File menu, and
then click Exit. HotKey – Alt+F+X
2
WYNN uses four rotating toolbars for easy access to the most
used functions and settings.
The File Management Toolbar (Blue)
The Reading Styles Toolbar (Green)
The Study Toolbar (Pink)
The Writing Toolbar (Yellow)
When WYNN is launched the user is asked to sign-in in order to customize her or
his reading environment. A made-up name is recommended for anonymity, as
all usernames on a single computer will appear in a list box on the sign-in screen.
Click OK or press Enter after signing in.
WYNN opens with a welcome document the first time a new user signs in.
Subsequently, WYNN opens to the last opened document.
To scan a book or other text a user must be using a workstation with an attached
scanner. Click on the New button and then click on the Scan button in the
toolbar. (HotKeys and can also be used to scan a new document. ALT+N
creates a new document, and F3 initiates a scan.) WYNN will scan the page.
To scan additional pages lay each page on the scanner and click the Scan
3
button, or press F3. Each additional page will be added in order into the
document. In the GVSU lab environment all WYNN scanned files must be saved
to the users N: drive or to a USB flash drive, not to the computer’s hard drive.
WYNN files are very large, and additional N: drive space may be necessary.
Contact the Disability Support Services to request additional space.
WYNN can perform a batch scan of several pages using a scanner equipped
with a sheet feeder, and can auto-collate double-sided pages. Instructions for
this type of scanning can be found in the WYNN Help utility. HotKey: Alt+H
Once a document has been scanned, it can be read back to the user, either in
exact view, which looks just like the book's pages, or text view, a text-only format.
This choice can be controlled by the Exact View / Text View "toggle" button on
any of the standard toolbars. HotKey – ALT+V+H
Both exact view and text view have specific advantages. Exact view displays an
exact image of the scanned page, including pictures, graphs, math notation and
charts. Text view displays only text, and is fully editable. A user can edit text
recognition errors, and control visual settings such as color and font size.
Highlighting, bookmarks, text notes, and voice notes can be added to either Text
View or Exact View.
To open an existing document in WYNN, click on the Open button, browse to
the file, and click OK. (HotKey: ALT+F+O, browse to the file, and press the
Enter.) WYNN supports many file types, including Microsoft Word, ASCII text,
Adobe Reader (.pdf), and HTML. However, the exact image view of a document
is available only in files originally created by scanning by WYNN.
To have WYNN read a document aloud, position the cursor in at the point where
reading is to start and click the Read button.
HotKeys: ALT+T+R or F2 to start reading, ESC to stop reading
The reading rate and speech can be adjusted by clicking on the Settings Menu,
and selecting Speech Settings. Within the Settings property sheet a user can
select the voice used, the rate, pitch, and other settings related to the voice.
Click Apply and OK to use the selected settings. To save the voice settings for
another session click on the Settings menu, and select Save Settings. The rate
may also be adjusted by clicking the Rate button on the Visual Presentation
toolbar (describe later).
Notes regarding Adobe Reader files
All GVSU lab assistive technology workstations are configured so WYNN is able
to open Adobe Reader (.pdf) files. Adobe Reader files open more slowly
because WYNN must process each page of the document as it converts the files
4
to the WYNN format. While the file is being converted, the Adobe Reader
application will run in the background. Once converted, the user may work with
the file as any other file in WYNN. Both exact and text views are available, and
WYNN can read aloud from either view. Either view may be marked up with
bookmarks, highlights, etc.
When opening Adobe Reader files within the WYNN web browser, the Adobe
Reader application will open in a separate window. This is necessary for the file
conversion process.
When opening Adobe Reader files within Internet Explorer, the Adobe Reader
application will open the document in a separate window, not within the browser
window. This is due to the specific configuration requirements for Adobe Reader
to work with WYNN.
For users purchasing a copy of WYNN for home use, please note that two
versions of WYNN are available – WYNN Wizard, which contains scanning
functions, and WYNN Reader, which does not contain scanning functions. Only
Wynn Wizard can open Adobe Reader files. Adobe Reader 6.0.1 or higher must
be installed on the system in order for WYNN Wizard to be able to open Adobe
Reader files. Adobe Reader must be configured on its Preference menu not to
open a file within a browser.
Accessibility notes
By default WYNN reads aloud text within documents. WYNN can also read
aloud menus and dialogs, toolbar button names, and messages. To enable
reading of any of these items click on the Settings menu, and select Speech
Settings. Click the checkbox next to the item name to enable reading of the item.
HotKeys:
ALT+T+X
Text reading on/off
ALT+T+M
Menu and dialog reading on/off
ALT+T+T
Toolbar reading on/off
ALT+T+G
Message reading on/off
5
Toolbar buttons
Five buttons appear on each of the four toolbars. Three of these buttons
have dual functions.
The Next button moves from one toolbar to the next. The arrow indicates the
color of the current toolbar, and the line above the arrow indicates the color of the
next toolbar to appear. The toolbars rotate in the order of blue, green, pink,
yellow
.
The Read / Pause button starts and stops speech.
HotKeys: ALT+T+R or F2 to start reading, ESC to stop reading
The Write / Read Only button allows editing of existing documents and creation
of new documents.
HotKey: ALT+E+E
6
The Exact View / Text View button switches display between an exact image
view of a scanned document and a text-only view of a document.
HotKey: ALT+V+H
The Other Docs button allows switching between other open WYNN
documents.
HotKey: ALT+W+Number_Of_Document_In_List
7
The File Management Toolbar allows users to easily manage
documents and use the internet.
The Scan button scans a document into a new or existing file.
HotKeys: ALT+S+S, or F3
The New button creates a new WYNN document.
HotKey: ALT+F+N
The Open button opens an existing document.
HotKey: ALT+F+O
8
The Close button closes a document.
HotKey: ALT+F+C
The Save button saves a copy of a document with the existing filename.
HotKey: ALT+F+S
The Save As button saves a copy of a document with a new name, and allows
the user to specify a file format, such as ASCII text, MS Word or HTML.
HotKey: ALT+F+A
9
The Print button prints a document exactly as it appears on the screen,
including highlights, bookmarks, and text notes at the end of the document.
Markups do not print from Exact View.
HotKey: ALT+F+P
The Go To Web button opens WYNN’s web browser, allowing users to access
the World Wide Web using speech within WYNN, and WYNN’s specialized web
environment.
HotKey: ALT+B+O
10
The Reading Styles Toolbar allows users to create a customized
reading environment.
The Size button selects from several preset font sizes.
HotKey: ALT+S+V+T
The Line Space button selects line space settings.
HotKey: ALT+G+V+I
The Word Space button selects word space settings.
HotKey: ALT+G+V+W
11
The Margins button selects margin settings.
HotKey: ALT+G+V+L (adjust left margin) , ALT+G+V+R (adjust right margin)
The Color button selects from present color schemes adjusting text,
background, spotlight and spotlight background colors.
Color Button HotKeys:
ALT+G+V+ALT+E
Set text color
ALT+G+V+ALT+K
Set background color
ALT+G+V+ALT+P
Set spotlight color
ALT+G+V+ALT+G
Set spotlight background color
Visual settings, such as exact text size, side margins, word spacing and color
can also be adjusted from the Visual Settings properties sheet in the Settings
menu.
To adjust the visual settings
In the Settings menu, choose Visual Settings.
Adjust the settings as desired.
Click Apply and then OK, or press Enter.
12
The Study Tools Toolbar provides tools to enhance reading and
learning.
The Dictionary and Thesaurus button provides easy access to a recursive
dictionary and thesaurus. Definitions and synonym lists can be read aloud.
Dictionary and Thesaurus HotKeys:
ALT+T+B
Basic dictionary (limited definitions)
ALT+T+D
Standard dictionary
ALT+T+T or F4
Thesaurus
The Spell button instructs WYNN to spell a word aloud by letter.
HotKey: ALT+T+W or F6
The Syllables button instructs WYNN to read a word aloud by syllables.
HotKey: ALT+T+Y
13
The Highlight button allows a user to highlight text in up to three different
colors, and provides access to a highlight eraser tool.
HotKeys: ALT+T+G up/down arrow – choose highlighter pen or eraser,
ATL+T+H or F8 – Start highlight or eraser
The Lists button allows a user to extract highlighted or bookmarked text from a
document into a new document.
HotKey: ALT+T+L up/down arrow to select highlight or bookmark
The Bookmark button allows a user to insert bookmark symbols into a
document, and provides access to a bookmark eraser tool
HotKeys: ALT+T+B up/down arrow to choose bookmark type, or eraser
ALT+T+I or F9 to insert or erase bookmark
14
The Note button allows a user to insert typed text notes into a document. Each
text note is represented by a special icon, and can be viewed and read aloud by
double-clicking on this icon. Notes will be printed at the end of a printed WYNN
document in the order they are created.
HotKey ALT+T+N or F10
The Voice Note button allows a user to insert spoken notes into a document. A
microphone is required to use voice notes. Each note is represented by an icon,
and can be played back by double-clicking on this icon.
Voice Note HotKeys:
ALT+T+V or F11
Open voice note dialog
ALT+R
Record voice note
ALT+P
Play voice note
ALT+S
Stop recording or playing voice note
ALT+C
Close voice note dialog
15
The Writing Tools Toolbar provides advanced writing and
editing tools.
The Cut and Paste button Allows a user to cut, copy and paste selected text
from one location to another by selecting the action fro a list.
HotKeys:
CTRL+X
Cut
CTRL+C
Copy
CTRL+P
Paste
The Style button is used to format text to bold, italic or underline.
HotKeys: CTRL+I – Italics, CTRL+B – Bold, CTRL+U – Underline
The Find button is used to find and/or replace a word or phrase.
HotKeys: CTRL+F – Find, CTRL+H – Find and Replace
16
The Go To button is used to navigate to a particular page within the document.
HotKey: CTRL+G
The Outlines button opens the Outline Wizard, designed to assist a user in
creating outlines.
HotKey: ALT+E+O
The Adjust button allows adjustment of outline levels.
HotKey: ALT+E+J and up/down arrows to select option for a list
17
The Predict button turns Word Prediction on and off.
HotKey: ATL+T+O
The Spell Check button starts the spell check function. The user has options to
ignore, replace and add to dictionary. WYNN can spell the word choices and the
misspelled word aloud.
Spell check HotKeys:
ALT+T+P or F7
Start spell check
ALT+C
Close spell check
ALT+I
Ignore misspelled word
ALT+A
Ignore all occurrences of misspelled word
ALT+R
Replace misspelled word
ALT+A
Replace all occurrences of misspelled word
ALT+D
Add to dictionary
ALT+M
Spell misspelled word aloud
ALT+S
Spell replacement word
Up/down arrows
Scroll suggested words
18
19