Download User Manual KI6103 - Kingfisher International
Transcript
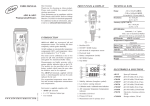
www.kingfisherfiber.com User Manual KI 6103 Optical PON Power Meter Warranty: Information in this manual is given in good faith for the benefit of the user. It cannot be used as the basis for claims against Kingfisher International or its representatives, if accidental damage or inconvenience results from use or attempted repair of the equipment. This Kingfisher International product is guaranteed against defective components and workmanship for a period of 1 year from the date of delivery, unless specifically stated in the original purchase contract or agreement. This warranty excludes optical connectors or incorrect use. The warranty will be voided if the following instance happens:1) Opening the instrument. 2) The instrument has been immersed in water or subjected to extreme environmental conditions. Liability is limited solely to repair of the equipment. User Manual: KI 6103 Optical PON Power Meter Issue 2 1 of 17 www.kingfisherfiber.com Safety: Take appropriate eye-safe precautions when handling live fibre. Operation Battery The instrument uses AA type alkaline batteries or NiMh rechargeable batteries. Avoid using mixed battery types. Do not use lithium batteries or other batteries with a nominal voltage greater than 1.8 V. The instrument will be damaged. Only charge NiMh rechargeable batteries. Do not charge Alkaline batteries. Avoid condensation The instrument is resistant to normal dust and moisture, however it is not waterproof. If moisture gets into the instrument, remove the batteries and dry it out carefully for at least one hour before using it again. Storage During prolonged storage, remove batteries to eliminate the possibility of acid leakage. Use only high quality batteries. User Manual: KI 6103 Optical PON Power Meter Issue 2 2 of 17 www.kingfisherfiber.com Check the instrument and part list (Please contact us if you find anything missing after you open the case) Standard accessories Instrument AC Adapter/Charger User manual 1 Carry case with strap 1 User Manual: KI 6103 Optical PON Power Meter Issue 2 3 of 17 www.kingfisherfiber.com Instrument Description 1 2 3 ONT upstream signal test port (1310 nm) SC OLT/Video downstream signal test port (1490/1550 nm) SC LCD display 4 5 6 7 8 9 ONT upstream Pass/Fail LED indicator (1310 nm) OLT downstream Pass/Fail LED indicator (1490 nm) OLT downstream Pass/Fail LED indicator (1550 nm) On/Off key Measurement unit dBm/dB key Backlight key 10 11 12 13 14 15 Absolute/Relative key Up key Threshold menu select key Test data storage key Down key Reference set key 16 17 18 USB port DC power supply socket Charging indicator User Manual: KI 6103 Optical PON Power Meter Issue 2 4 of 17 www.kingfisherfiber.com Install Batteries Warning: To avoid damage to the instrument, do not mix different types of batteries. 1. Press in the direction of the arrow. 3. Place batteries correctly. User Manual: KI 6103 Optical PON Power Meter 2. Open the battery compartment cover. 4. Press down until the cover clicks into place. Issue 2 5 of 17 www.kingfisherfiber.com In-Line Test Setup OLT PON-C type average power test diagram User Manual: KI 6103 Optical PON Power Meter Issue 2 6 of 17 www.kingfisherfiber.com OLT Optical power sensitivity test diagram User Manual: KI 6103 Optical PON Power Meter Issue 2 7 of 17 www.kingfisherfiber.com Power Auto off, battery saving function To Turn On; Press the [ON/OFF] key. The instrument will turn on and automatically zero and self-calibrate. For power saving, the instrument automatically turns Off 10 minutes after the last key press. To defeat the Auto Off feature: Press the [ON/OFF] key for >2 seconds until “PERM” is displayed on the LCD. To turn Off: Press the [ON/OFF] key. User Manual: KI 6103 Optical PON Power Meter Issue 2 8 of 17 www.kingfisherfiber.com Optical Power Measurement The instrument can measure upstream 1310 nm and downstream 1490, 1550 nm PON power levels. When connected to a live PON network, the instrument displays the 3 channel power level. If the power level is too high, it displays “HI”. If the power level is close to but higher than the LO level, WRNG is displayed to warn the user. If the signal is too low, it displays ‘LO”, User Manual: KI 6103 Optical PON Power Meter Issue 2 9 of 17 www.kingfisherfiber.com Using LED indicators for fast Pass/Fail assessment The instrument uses LED indicators for fast Pass/Fail assessment according to the threshold settings, which can be pre-set per wavelength. Press [F/P mode], the instrument displays the following according to the threshold setting: 1) “PASS” if the power level meets the specification. 2) “WRNG”, to give warning if the signal level is close to the fail specification. 3) “FAIL”, if the signal level fails the specification. For the LED indicators: 1) Green means “PASS”. 2) Orange means “WRNG”, warning. 3) Red means “FAIL”. User Manual: KI 6103 Optical PON Power Meter Issue 2 10 of 17 www.kingfisherfiber.com Optical Power Reference Setting The instrument can be operated in Absolute (dBm) and Reference (dB) mode. To set the Reference at all wavelengths: Press [REF/Enter] for > 2 seconds, the instrument will beep indicating that the reference is set and display the relative values in dB. To toggle between dB and dBm, short press the [dB/dBm] key. User Manual: KI 6103 Optical PON Power Meter Issue 2 11 of 17 www.kingfisherfiber.com Threshold setting The threshold settings permit fast assessment of a links Pass/Fail status. There are 10 threshold Pass/Fail data memory locations, numbered 1~10. To enter the threshold setting area, press [Threshold]. To toggle between the threshold memory locations press [Up] or [Down] To select a threshold memory location press [REF/Enter]. To exit the threshold setting area, press [Threshold]. When entered, the threshold area displays the threshold number 1~10. You can use the [UP] and [DOWN] keys to select threshold number. Press [REF/Enter] to confirm. For each wavelength, there are 3 parameters: 1) Up limit (communication will fail if the power level is above this value) 2) Down limit warning (communication is close to fail) 3) Down limit (communication will fail if the power level lower than this value) 4) Use the [UP] and [DOWN] keys to alter the value, followed by [REF/Enter] to confirm. By pressing [Threshold] again, the instrument reverts back to measurement mode. User Manual: KI 6103 Optical PON Power Meter Issue 2 12 of 17 www.kingfisherfiber.com Store the test data A total of 100 test measurement data sets can be stored in the instrument. After the internal memory is full, the instrument will circulate to overwrite the first memory location. To save measurement data: press the [Save/ReCall] key, To review the stored data, hold the [Save/ReCall] for > 2 seconds. Then use the [UP] and [DOWN] keys to scroll through the stored data area. To exit the memory press [Save/ReCall] again. User Manual: KI 6103 Optical PON Power Meter Issue 2 13 of 17 www.kingfisherfiber.com Backlight When working in a low light environment, you can press the [ to help view the screen. Pressing the [ ] key to turn the backlight on ] key again turns the backlight off. User Manual: KI 6103 Optical PON Power Meter Issue 2 14 of 17 www.kingfisherfiber.com Battery level and external power monitor The battery symbol has 4 levels. 80 – 100% battery power remains 40 – 80% battery power remains 20 – 40% battery power remains Less than 20% battery power remains The LCD symbol shows external power is connected and battery charging initiated. Please remove any alkaline batteries when connected to external power. While charging, the battery symbol will flash until the batteries are fully charged, after which it will enter trickle/slow charging mode. Avoid leaving the instrument on charge for longer than 24 hours. The instrument can be used whilst charging/external power is connected. For rechargeable batteries, if less than 20% power remains, to avoid reducing the rechargeable batteries lifetime, the instrument should be turned off and the batteries charged. User Manual: KI 6103 Optical PON Power Meter Issue 2 15 of 17 www.kingfisherfiber.com Instrument maintenance and calibration General maintenance Avoid hard material making contact with the optical adaptors. Keep adaptors clean at all times. Keep the instrument in a dry place, avoid moisture. Remove the batteries when storing the instrument for long time. Calibration period Recommended once a year calibration if the instrument is used in the field. Recommended once every two years calibration if the instrument is used in the laboratory. User trouble shooting Problem Reason Fails to turn On Battery Immediately turns itself Off after turn On Fails to charge the batteries Error display Display is OK, but fails to operate Battery Method Check if the batteries are properly installed Check the battery charge level Reset Check if the batteries are rechargeable batteries Turn Off and then turn On Firmware Turn Off and then turn On Battery User Manual: KI 6103 Optical PON Power Meter Issue 2 16 of 17 www.kingfisherfiber.com Specifications 1310nm upstream measurement Pass zone Measurement range Max power input Isolation (@1490/1550nm) 1490nm downstream measurement Pass zone Measurement range Max power input Isolation (@1310nm) Isolation (@1550nm) 1550nm downstream measurement Pass zone Measurement range Max power input Isolation (@1310nm) Isolation (@1490nm) Connector interface Fiber type Connector interface Measurement accuracy Uncertainty Polarization Return Loss Linearity Insertion Loss General Display Show Results Display Accuracy Backlight function Battery Type, Battery Life Auto off function External power supply 1260 nm ~ 1360 nm +10 dBm ~ -35 dBm +15 dBm > 30 dB 1480 nm ~ 1500 nm +10 dBm ~ -50 dBm +15 dBm > 30 dB > 30 dB 1530 nm ~ 1570 nm +25 dBm ~ -45 dBm +25 dBm > 30 dB > 30 dB SM 9/125 µm Fixed, select from LC, SC, FC, PC or APC 0.5 dB <0.25 dB 0.1 dB < 1.5 dB LCD dBm, dB, Pass/Fail 0.01 dB YES 3 AA batteries, > 20 hours 10 minutes after last key pressed 9V, 1A DC input with LED charging indicator Temperature Storage temperature Relative humidity -0 ~ +50 Cº -40 ~ +70 Cº < 95% non-condensing Size Weight 190 x 95 x 45 mm 0.54Kg Test condition: 23 ± 3 ºC, 40 – 60% relative humidity, SC/PC connector. User Manual: KI 6103 Optical PON Power Meter Issue 2 17 of 17


