1
-
Océ
Posterizer™
Enterprise
Fast, flexible and in
control
o
User manual
Administration
settings and tasks
Copyright
© 2010 Océ
All rights reserved. No part of this work may be reproduced, copied, adapted, or transmitted
in any form or by any means without written permission from Océ.
Océ makes no representation or warranties with respect to the contents hereof and specifically disclaims any implied warranties of merchantability or fitness for any particular purpose.
Further, Océ reserves the right to revise this publication and to make changes from time
to time in the content hereof without obligation to notify any person of such revision or
changes.
Edition: 2010-09
Contents
Contents
Chapter 1
Preface.................................................................................................................5
Trademarks.................................................................................................6
Notes for the reader...................................................................................7
Chapter 2
Océ Posterizer - Presentation ...........................................................................9
Océ Posterizer Enterprise........................................................................10
Chapter 3
Set the environment.........................................................................................13
Compatibility and requirements.............................................................14
Hardware and software requirements..............................................14
Request the license files..........................................................................16
Get information to request the Océ Posterizer™ Enterprise package
license file ..........................................................................................16
Chapter 4
Install the Océ Posterizer Enterprise package...............................................19
Install and configure the Océ Posterizer™ Enterprise software...........20
Install the Océ Posterizer™ Enterprise package..............................20
Activate Océ Posterizer™ Enterprise in the Data Entry module ....22
Configure the first printer in the Print Manager..............................24
Send and print a test poster..............................................................26
Create and manage departments and users....................................28
Manage the users.........................................................................28
Share 'Common templates', 'Department templates' and catalogs................................................................................................31
Advanced access and options.................................................................33
Set the 'Company ID' and the 'Store information...'.......................33
Import the 'Company ID'..............................................................33
Set the 'Store information...'.......................................................35
Remote access to the modules.........................................................36
Open a module from a workstation............................................36
Install the options afterwards............................................................37
Request and install the Automation option ...............................37
Request and install the Multi Printers license ...........................38
Request and install the Flyer-to-Poster option (Catalog Management) .............................................................................................39
Configure the Chart update by FTP........................................................40
Set and configure the FTP server (Headquarters)...........................40
3
Contents
Publish a chart or a chart selection...................................................42
Configure the Chart Updater at the store location..........................45
Chapter 5
Advanced administration settings in the Océ Posterizer™ Enterprise modules.....................................................................................................................49
Update/Uninstall the software................................................................50
Update the modules...........................................................................50
Un-install the Océ Posterizer™ Enterprise ......................................51
Configure the log file and reporting activity..........................................52
View, print or archive the 'Log file'...................................................52
Configure the Print Manager module.....................................................53
Check the application folders ...........................................................53
Add and configure printers................................................................54
Add a printer.................................................................................54
Configure the printer....................................................................56
Configure the 'Job dispatcher' and the optimization......................59
Configure the 'Job dispatcher'....................................................59
'Activate' / 'Suspend' the 'Job dispatcher'.................................63
Store and Restore the 'Job dispatcher' settings........................64
Set the 'Optimization'...................................................................65
Store the configuration......................................................................67
Store and restore the settings configuration file.......................67
Appendix A
Appendix............................................................................................................69
File formats: Standard or Custom...........................................................70
The supported file formats......................................................................71
4
Chapter 1
Preface
Trademarks
Trademarks
Océ, Océ Posterizer™ Enterprise are registered trademarks of Océ.
Microsoft®, Windows®, Access ®, ActiveX ® Data Object, ODBC ™, Windows XP®,
Windows Server 2003®, Windows Vista® , Windows Server 2008® and Windows 7® are
either registered trademarks or trademarks of Microsoft® Corporation in the United States
and/or other countries.
Oracle ® and Oracle database are registered trademarks of Oracle and/or its affiliates.
BDE is a trademark or registered trademarks of Borland Software Corporation in the
United States and other countries.
DB2® is a trademark or registered trademark of IBM Corporation in the United States,
other countries, or both.
Products in this publication are referred to by their general trade names. In most, if not
all cases, these designations are claimed as trademarks or registered trademarks of their
respective companies.
6
Chapter 1 - Preface
Notes for the reader
Notes for the reader
Introduction
This manual helps you to use the Océ Posterizer™ Enterprise . The manual contains a
description of the product and guidelines to use and operate the Océ Posterizer™ Enterprise .
Definition
Attention-Getters
Parts of this user manual require your special attention. These parts can provide the following:
■ Additional general information, for example information that is useful when you
perform a task
■ Information to prevent property damage.
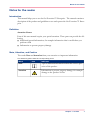
Note, Attention, and Caution
The words Note and Attention draw your attention to important information.
The attention-getters with the corresponding icons#
Word
Icon
Indicates
Note
Tips or additional information about the correct operation of the product.
Attention
Information to prevent property damage, for example
damage to the product or files.
Chapter 1 - Preface
7
Notes for the reader
8
Chapter 1 - Preface
Chapter 2
Océ Posterizer - Presentation
Océ Posterizer Enterprise
Océ Posterizer Enterprise
Introduction
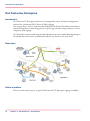
Océ Posterizer™ Enterprise software is an integrated content and print management
solution for on-demand POS (Point of Sales) signage.
You can produce a variety of professional-looking POP (Point of Purchase) materials ondemand: from short-term pricing posters to price tags, window clings, banners or other
temporary POS signage.
Océ Posterizer ensures brand integrity and information accuracy while allowing the input
of variable data and creative customization all the way down to the store level.
Illustration
Global workflow
There are three main steps in a typical Océ Posterizer™ Enterprise signage workflow:
10
Chapter 2 - Océ Posterizer - Presentation
Océ Posterizer Enterprise
#
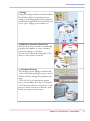
1. Design
Using the Designer module, the Retail Chain
Head Office defines a customized poster
template, including graphical chart elements
and default settings for all necessary fields such
as text, price, images, price formula, etc.
2. Manual or Automated Data Entry
With the Data Entry module, automatically
populate the template to create a batch of
posters by linking to a database.
You can enter information manually, if desired, to create posters on the fly.
3. Automated Printing
The intelligent Print Manager module will:
- Screen the jobs depending on pre-set criteria
- Define the best nesting for optimal media
usage
- Send the job to the appropriate printer
Once your workflow is set up, Océ Posterizer™ Enterprise software can generate a complete new batch of posters in minutes, with
hardly any operator intervention.
Chapter 2 - Océ Posterizer - Presentation
11
Océ Posterizer Enterprise
The Océ Posterizer Automation option
The Automation option is an option of Océ Posterizer™ Enterprise .
It can help you dramatically improve your productivity by automating some routine tasks
and linking the system to complex databases for automated data entry and for batch
printing.
The Automation option activates the following functionalities:
■
■
■
■
Chart Updater: you can automate the export of the templates to your stores
Template connection to products databases: you can generate posters from the
records of a database (such as Access, SQL, Oracle...)
Batch Creator: you can fully automatically generate a batch of posters by simply
dropping a CSV command file into a hot folder (no user intervention)
Database requests: you can generate a batch of posters from a command file
The Océ Posterizer Multi Printers option
The Multi Printers option is an option of Océ Posterizer™ Enterprise .
Océ Posterizer can be connected by default to any small format printer (with output
maximum of 12x18") and to certain large format printers (see your local sales representative
for more details).
The Multi Printers option allows you to connect Océ Posterizer to ANY large format
printer, driven with a Windows driver, on the market.
The Flyer-to-Poster (Catalog management) option
This option makes it very easy and error-free for a store to print posters that exactly
match promotions printed in the retail chain flyer.
With the Flyer-to-Poster option, the store can visualize a soft copy of the current flyers,
newspaper inserts or store catalogs.
The operator simply clicks on a product thumbnail of this digitized flyer, to print a promotional poster of the selected product in the desired template format, with all product
and pricing details automatically populated.
This option requires that the flyer be digitized and indexed beforehand, and that a database
be created containing the promotional data. These professional services are offered by
Océ.
12
Chapter 2 - Océ Posterizer - Presentation
Chapter 3
Set the environment
Hardware and software requirements
Compatibility and requirements
Hardware and software requirements
System and network
The Océ Posterizer modules will be installed on a shared network drive accessible (with
Read/Write access) by workstations located on the same LAN or VLAN.
You can install and run all modules on a single computer.
Hardware requirements
#
Processor
1.6 GHz or more
Memory
2 GBytes or more
Disk space
200 MB for software installation
20 GB free space recommended for the shared network
drive, to run the application
Note:
The actual amount of disk space needed to run
the application depends on the volume and
type of data processed
Display
1024x768 or higher
Network
Broadband (2 Mbit/s or more) connection to the Internet
FTP traffic allowed
10 Mbits/s or faster LAN between the computers running the applications
FTP server (for the Chart
Updater)
FTP server application with FTP server IP address
(Host)
Note:
Make sure that the FTP server Host Name is
fully qualified so that it can be resolved on
both the Headquarters and retailer shop sites
sites.
14
Chapter 3 - Set the environment
Hardware and software requirements
Operating System
For the server (with a shared network drive)
■ Windows Server 2003 R2, 32 bits
■ Windows Server 2008, 32 bits
For the workstations
■ Windows XP (SP2 or higher) Professional
■ Windows Vista (Business or Ultimate), 32 bits
■ Windows 7 (Professional, Enterprise or Ultimate), 32 bits
■ Windows 7 (Professional, Enterprise or Ultimate), 64 bits (the software will run in
32 bits compatibility mode)
Language of the operating system: English, French, German, Dutch or Spanish
Chapter 3 - Set the environment
15
Get information to request the Océ Posterizer™ Enterprise package license file
Request the license files
Get information to request the Océ Posterizer™ Enterprise
package license file
Introduction
To get the Océ Posterizer™ Enterprise license file, communicate the computer Host
Name and HostID (which is the Physical Address of the network adapter that connects
it to the network).
This computer will be the Océ Posterizer 'server'. It will be:
- The license server for the Océ Posterizer applications
- The computer on which the Océ Posterizer package will be installed
When to do
Get the computers information before the installation of the Océ Posterizer™ Enterprise
package and send them to your Océ representative.
Request the Automation, Multi Printers and Flyer-to-Poster options when needed.
Then Océ can generate and provide the license files for the installation.
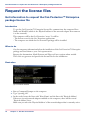
Illustration
[7] Command window
1. Run a Command Prompt on the computer
2. Type' ipconfig /all '
3. In the result, locate the lines with 'Host Name' and the line with 'Physical Address'
If there are several network adapters enabled on the computer, there will be several
'Physical Address' lines.
Make sure you select the 'Physical Address' of the network adapter that is currenlty active.
16
Chapter 3 - Set the environment
Get information to request the Océ Posterizer™ Enterprise package license file
4. Send the 'Host Name' and 'Physical Address'('HostID') information to your Oce representative.
Note:
On demand, your Océ representative can provide a utility tool to display the Host Name
and HostID.
Result
This information will be used to generate a license file that you will need to activate the
software features you ordered.
Chapter 3 - Set the environment
17
Get information to request the Océ Posterizer™ Enterprise package license file
18
Chapter 3 - Set the environment
Chapter 4
Install the Océ Posterizer
Enterprise package
Install the Océ Posterizer™ Enterprise package
Install and configure the Océ Posterizer™
Enterprise software
Install the Océ Posterizer™ Enterprise package
Introduction
The Océ Posterizer™ Enterprise package must be installed on a shared drive of a computer in order to be used simultaneously by several users (on several distant workstations).
Note:
Make sure you ordered the relevant license to use several instances of the modules at the
same time.
Before you begin
Log on the computer with the Windows Administrator profile
When you install from the zip file, unzip the installation files to a temporary folder.
Required tool
■
■
The .ZIP file that contains the installation files or the installation CD.
The license file for the Océ Posterizer package
Install the software
1. Run the setup.exe file (from the temporary folder or from the CD)
A wizard opens.
2. Select your language
3. Accept the license agreement
Follow the instructions of the wizard.
4. Install the application:
- only for the current profile (Administrator only)
- for all the users on this computer (recommended)
5. Select a destination drive/folder on which any distant users of the application will have
the read/write rights
6. Select the program folder
7. Decide whether shortcuts are installed on the desktop
8. Click Finish and read the Readme file
20
Chapter 4 - Install the Océ Posterizer Enterprise package
Install the Océ Posterizer™ Enterprise package
Result
A shortcut for each Océ Posterizer™ Enterprise module is displayed on the list of programs
and appears on the desktop of the computer.
Open the installation folder (Posterizer\Exe) to create shortcuts for the Chart Updater
and Batch Creator components.
Chapter 4 - Install the Océ Posterizer Enterprise package
21
Activate Océ Posterizer™ Enterprise in the Data Entry module
Activate Océ Posterizer™ Enterprise in the Data Entry module
Before you begin
■
■
■
Log on the computer with the Administrator profile
Make sure that during the activation, the computer is connected to the network, using
the same adapter whose Physical Address was communicated in the license file request
Make sure you received the license file from your Océ operating company.
Activate the software
1.
2.
3.
4.
5.
Double-click the Data Entry shortcut icon to run it
An license window opens
Browse to to the license file and select it
Validate
Log in as the Administrator
Note:
The default login is 'Admin'. The password is 'pwd4Admin'.
6.
7.
8.
9.
Enter the 'Store code'
In the top menu select 'Help'
Select 'About...'
In the 'About' tab, open 'Licenses' to check that the Océ Posterizer license is activated
Import the chart
1. In the 'Tools' menu, select 'Chart tools'
2. Open 'Import chart from zip file...'
3. Import the default chart (named 'DemoChartxxx.zip') from the temporary installation
folder or CD
4. Leave the password field empty
The chart is unzipped and installed on the computer (in a Posterizer folder, in the user
profile)
5. When the chart is successfully installed, a window pops up. Click 'OK'
Open a poster template from the chart
1. Click 'New...' to create a new poster
2. The list of default templates opens. Select one template to create a poster
22
Chapter 4 - Install the Océ Posterizer Enterprise package
Activate Océ Posterizer™ Enterprise in the Data Entry module
Result
The Océ Posterizer™ Enterprise software is activated.
The Data Entry module is ready to create the posters.
Chapter 4 - Install the Océ Posterizer Enterprise package
23
Configure the first printer in the Print Manager
Configure the first printer in the Print Manager
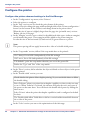
Introduction
When you open Print Manager for the first time, no printer is configured. You are
prompted to log as the Administrator to install the first printer.
Before you begin
Make sure the printer to add is already installed on your Windows operating system.
Open the 'Printers and faxes' window in your Windows operating system and check the
availability of the printer.
Note:
To add non-Océ wide format printers, you need the Multi Printers option license installed. See ‘Request and install the Multi Printers license ’ on page 38 to get the detailed
workflow and procedure.
Illustration
Configure the first printer
1. Open the Print Manager module
2. Log in as the Administrator
24
Chapter 4 - Install the Océ Posterizer Enterprise package
Configure the first printer in the Print Manager
Note:
The default login is 'Admin'. The password is ''pwd4Admin''.
3. Select a printer in the list of available Windows printers and click 'Next'
4. Configure the printer
- Set the printer type and paper
- Set the page size
- Set the automatic behavior (recommendation: activate the 'Reduce job size to fit page'
option)
5. Configure the advanced settings when needed
6. Configure the printer driver ('Printer configuration...') when needed
7. Finish to close the wizard
Result
You installed the first printer in Print Manager.
The application automatically creates and activate the first queue (Queue1) and links it
to the printer. Print Manager is ready to print the first job.
Chapter 4 - Install the Océ Posterizer Enterprise package
25
Send and print a test poster
Send and print a test poster
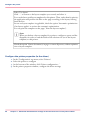
Introduction
Send a poster from the Data Entry module and print it using Print Manager.
Illustration
1. In Data Entry adjust the poster
2. Click 'Send to Print Manager'
3. In Print Manager, the job arrives in the Queue15 and then moves to the Queue1.
Check the content of the Queue15 and of the Queue1
4. When the job is in Queue1, it appears in the jobs zone, 'Active Jobs'.
Open the 'Job preview' tab to check the poster
5. Start the printing (click 'Auto')
Result
The job moves to the 'Optimization Pending Job' tab.
When it is printed, it moves to the 'Inactive Jobs' tab.
26
Chapter 4 - Install the Océ Posterizer Enterprise package
Send and print a test poster
The workflow between the modules of Océ Posterizer™ Enterprise is validated.
Chapter 4 - Install the Océ Posterizer Enterprise package
27
Manage the users
Create and manage departments and users
Manage the users
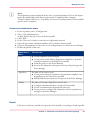
Introduction
You need to login as a declared user to open and use any Océ Posterizer™ Enterprise
application.
As an Administrator, you create all the users of the Designer, Data Entry and Print
Manager modules.
Create a user, define one or several departments the user belongs to and select the profile.
When needed, update a user's profile.
Before you begin
Open the Designer, or Data Entry, or Print Manager module and log in as the Administrator.
Illustration
Create the departments
1.
2.
3.
4.
5.
28
In the top menu, select 'Configuration'
Select 'Edit department list'
Click 'Add'
Enter a new department name
Click 'OK'
The new department is added to the 'Department list'.
Chapter 4 - Install the Océ Posterizer Enterprise package
Manage the users
Note:
The department names displayed in the 'Auto created departments' list are the departments for which folders have been created in the Templates folder (example:
'Chart\Templates\$Grocery'). Very likely, the 'Auto created departments' have available
specific poster templates.
Create and administrate users
1. In the top menu, select 'Configuration'
2. Select 'User administration...'
A table displays the list of users with their profile
3. Click 'New...'
4. In the 'New user' window, create the user login and password
5. Enter the user name, telephone number and a comment when needed
6. Click on 'Department' to select one or several departments to which the user belongs
7. Define the profile of the user:
#
When the profile is:
The user can:
User
■
■
■
■
Create templates in the Designer
Create posters from his/her department templates or from the
common templates in the Data Entry module
Send the posters to the Print Manager
Activate the dispatcher and queues, and start the printing in the
Print manager
SuperUser
Do what a User can do, and:
■ Create posters from all common or departments templates (any
department) in the Data Entry module
■ Modify links between printers and queues in the Print Manager
Admin
Do what a User and a SuperUser can do, and:
■ Configure the administration settings of each module
■ Create and administrate departments and users
■ Create printers, configure the dispatcher and the optimization
settings in the Print Manager
Result
Each user created in a module can open the other modules, according to his/her profile.
Chapter 4 - Install the Océ Posterizer Enterprise package
29
Manage the users
A user with the Admin profile can update and modify the users' configuration.
30
Chapter 4 - Install the Océ Posterizer Enterprise package
Share 'Common templates', 'Department templates' and catalogs
Share 'Common templates', 'Department templates' and
catalogs
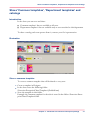
Introduction
In the chart you can store and share:
■
■
'Common templates' that are available to all users
'Department templates' that are available only to users attached to this department
To share a catalog and create posters from it, contact your Océ representative.
Illustration
Store a common template
To create a common template that will be shared to every user:
1. Create a template in Designer.
2. In the chart create the following folder:
\Posterizer Enterprise\Chart\Templates\[FolderName]
3. Store the template in this folder.
Example: the common template for the sales is stored in the folder: \Posterizer Enterprise\Chart\Templates\Sales
Chapter 4 - Install the Océ Posterizer Enterprise package
31
Share 'Common templates', 'Department templates' and catalogs
Result
The chart can be shared and exported to the retailers' stores.
All users will see the template in the list of 'Common templates' (when opening the Data
Entry module). They will be able to create posters from this template.
The user can then select for which department he/she uses the template.
Store a department template
To create a department template that will be displayed only to users related to the department or to the SuperUsers:
1. Create a template in Designer.
2. In the chart create the following folder:
\Posterizer Enterprise\Chart\Templates\[$FolderName]
3. Store the template in this folder.
Example: a department template for the grocery department is stored in the folder:
\Posterizer Enterprise\Chart\Templates\$Grocery
Result
The chart can be shared and exported to the retailers' stores.
When a user from this department will log in, he/she will see the template in the list of
'Department templates'.
The user will be able to create a poster from this template. The department will be one
reference of this poster.
Share a flyer or a catalog
1. Contact your Océ representative to digitize the catalog or flyer and create the associated
templates
2. Store the catalog material provided by Océ in a specific folder, in the chart:
\Posterizer Enterprise\Chart\Templates\[zzCatalogFolderName]
Result
The chart can be shared and exported to the retailers' stores.
All users will see the catalog in the list of 'Catalogs' (when opening the Data Entry module). They will be able to create posters from this catalog.
32
Chapter 4 - Install the Océ Posterizer Enterprise package
Import the 'Company ID'
Advanced access and options
Set the 'Company ID' and the 'Store information...'
Import the 'Company ID'
Introduction
The 'Company ID' allows you to open, use and print the templates generated exclusively
for your company.
You need the same 'Company ID' as the one saved in the template to be able to use it.
The 'Company ID' can be:
- Automatically installed during the installation of the software
- Imported afterwards
Note:
When the Company ID is not imported (default 0 one), you can only open and use the
'Demo Chart' templates.
Purpose
Check if the 'Company ID' is installed.
Import it when needed.
When to do
After the installation of the software, before you open a company template.
Required tool
■
The Company ID .ini file (encrypted file named 'PosterizerEnterpriseSettings.ini' by
default)
Chapter 4 - Install the Océ Posterizer Enterprise package
33
Import the 'Company ID'
Illustration
Check whether the 'Company ID' is installed
1.
2.
3.
4.
Open one Océ Posterizer Enterprise module (Designer, Data Entry or Print Manager)
In the top menu select 'Help'
Select 'About...'
In the 'About' tab, check the value of the 'Company ID':
-' 0' is the default value. You need to import your 'Company ID'
- Another value (>255) means that your 'Company ID' has been installed
Import your company ID
1.
2.
3.
4.
5.
Open one Océ Posterizer Enterprise module (Designer, Data Entry or Print Manager)
In the top menu select 'Configuration'
Select 'Import company ID'
Browse to the location of the 'PosterizerEnterpriseSettings.ini' file (default name)
Open the .ini file
Result
The 'Company ID' stored in the .ini file is imported.
Check the ID in the 'About...' window.
You can open and use the templates generated for this 'Company ID'.
34
Chapter 4 - Install the Océ Posterizer Enterprise package
Set the 'Store information...'
Set the 'Store information...'
Introduction
After the installation of the Data Entry module in a store, the administrator fills in the
'Store information...' to provide:
■
■
■
■
The 'Store code' was filled in during the installation of the Data Entry module
The 'Store code' is the store reference that will be displayed in the Print Manager
The location of the store
The contact name and means to contact him/her
Any additional information
Before you begin
Log in as the Administrator
Set the store information
1. In the top menu select 'Configuration'
2. Select 'Store information...'
3. Enter all information related to the store: 'Address', 'Contact' name and 'Other information'...
4. Click 'OK' to save the 'Store information'
Chapter 4 - Install the Océ Posterizer Enterprise package
35
Open a module from a workstation
Remote access to the modules
Open a module from a workstation
Introduction
The Océ Posterizer package is installed on a shared drive of the Océ Posterizer 'server'.
You can open each module from distant workstations.
Before you begin
■
■
Make sure the workstations are connected to the network
Make sure the users on the workstations have the read/write rights on the shared
folder
On the workstation, browse the network to the shared drive of Océ Posterizer 'server'
Map this network drive to create the connection
Browse to the Posterizer\Exe folder
Create a shortcut for each module:
- Designer.exe
- DataEntry.exe
- PrintManager.exe
5. Copy or cut the shortcuts
6. Paste the shortcuts on the workstation desktop or start menu
1.
2.
3.
4.
Result
Click the shortcuts to start the modules (Designer, Data Entry or Print Manager) on the
workstation.
36
Chapter 4 - Install the Océ Posterizer Enterprise package
Request and install the Automation option
Install the options afterwards
Request and install the Automation option
Introduction
You can order this option when you order Océ Posterizer™ Enterprise or you can request
and install it afterwards.
Purpose
You need the Automation option to:
■
■
■
■
Connect to a database
Automatically share the templates through the Océ Posterizer™ Enterprise Chart
Updater
Automatically process batch prints with the Océ Posterizer™ Enterprise Batch Creator
Create 'Request database' files
Illustration
Request and install the Automation option
Open a module (Data Entry for example)
In the top menu select 'Help'
Select 'About...'
In the 'About' tab, record the 'Serial number'
Send this 'Serial number' to your Océ representative and order the Automation option
When your Océ representative sends the license file, store it
In the module, open the 'About' page from the 'Help' menu
In the 'Licenses' tab, click 'Activate...'
In the 'Import License File' window, browse to the location fo the license
Select the license file and open it
The Automation option is installed.
11. In the 'Licenses' tab, check the license 'Posterizer Automation' is selected
1.
2.
3.
4.
5.
6.
7.
8.
9.
10.
Chapter 4 - Install the Océ Posterizer Enterprise package
37
Request and install the Multi Printers license
Request and install the Multi Printers license
Introduction
You can order this option when you order Océ Posterizer™ Enterprise or you can request
and install it afterwards.
Purpose
You need the Multi Printers license to add non-Océ wide format printers.
Request and install the Multi Printers option license
Open a module (Print Manager for example)
In the top menu select 'Help'
Select 'About...'
In the 'About' tab, record the 'Serial number'
Send this 'Serial number' to your Océ representative and order the Multi Printers
When your Océ representative sends the license file, store it
In the module, open the 'About' page from the 'Help' menu
In the 'Licenses' tab, click 'Activate...'
In the 'Import License File' window, browse to the location of the license
Select the license file and open it
The Multi Printers option is installed
11. In the 'Licenses' tab, check the license 'Posterizer Multi Printers' is selected
1.
2.
3.
4.
5.
6.
7.
8.
9.
10.
38
Chapter 4 - Install the Océ Posterizer Enterprise package
Request and install the Flyer-to-Poster option (Catalog Management)
Request and install the Flyer-to-Poster option (Catalog Management)
Introduction
You can order this option when you order Océ Posterizer™ Enterprise or you can request
and install it afterwards.
Purpose
You need the Flyer-to-Poster option to:
■
■
Create posters from a catalog or a flyer
Send these posters to the Print Manager
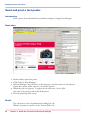
Illustration
[14] Posterizer options
Request and install the Flyer-to-Poster option
Open a module (Data Entry for example)
In the top menu select 'Help'
Select 'About...'
In the 'About' tab, record the 'Serial number'
Send this 'Serial number' to your Océ representative and order the Flyer-to-Poster option
When your Océ representative sends the license file, store it
In the module, open the 'About' page from the 'Help' menu
In the 'Licenses' tab, click 'Activate...'
In the 'Import License File' window, browse to the location fo the license
Select the license file and open it
The Flyer-to-Poster option is installed.
11. In the 'Licenses' tab, check the license 'Posterizer Enterprise Flyer-to-Poster' is selected
1.
2.
3.
4.
5.
6.
7.
8.
9.
10.
Chapter 4 - Install the Océ Posterizer Enterprise package
39
Set and configure the FTP server (Headquarters)
Configure the Chart update by FTP
Set and configure the FTP server (Headquarters)
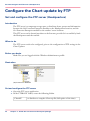
Introduction
The FTP server is a temporary storage space to distribute charts, posters and information
between the Océ Posterizer Enterprise modules at the Headquarters location, and the
Océ Posterizer Enterprise modules at the retailers' stores locations.
This FTP server can be located anywhere on the Internet, provided it is accessible by both
the Headquarters and the retailers.
When to do
The FTP server needs to be configured, prior to the configuration of FTP settings in the
Chart Updater.
Before you begin
Make sure you are logged with the Windows Administrator profile.
Illustration
[15] Folders in FTPROOT
Set and configure the FTP server
1. Open the FTP server application
2. In the FTPROOT folder, create the following folders
#
'ChartAll'
40
to distribute a complete Chart.zip file (full update of the chart)
Chapter 4 - Install the Océ Posterizer Enterprise package
Set and configure the FTP server (Headquarters)
'Chart'
to distribute the ChartSelection.zip files, in order to update only
specific elements of the Chart
'Catalogs'
to distribute the Catalog.zip files delivered by the Océ Professional
Services
'Documents'
to distribute ZIP files of print ready document or other documents
to share with the stores
'Messages'
to communicate text files with a .mess extension. These messages
will be displayed in Data Entry.
'Output'
to store the log files, in order to monitor which stores have downloaded the updates
3. Create 2 FTP users and name them, for example:
- HQ (for Headquarters)
- Store
4. For the HQ user, set:
- a password
- the Read/Write/Delete rights on the folders in FTPROOT
5. For the Store user, set
- a password
- the Read/Execute & read right on the folders in FTPROOT
Result
The FTP server is configured.
You can open a Command window and test it.
Chapter 4 - Install the Océ Posterizer Enterprise package
41
Publish a chart or a chart selection
Publish a chart or a chart selection
Purpose
Once you created a chart or a selection of a chart, you must make it available to the users
of the data entry module in the retailer stores. To do so, you publish the chart and some
possible additional information. All those updated items are stored into .ZIP files.
To publish a chart, you can:
■
■
send the .ZIP files by e-mail to the users of the data entry modules.
save the .ZIP files on the FTP server for retrieval by Chart Updater (Automation option
is a prerequisite).
Check the name of the ZIP files to publish
For compatibility reasons with Chart Updater, the .ZIP files you save on the FTP server
have a specific syntax.
This syntax is composed of 2 parts, as follows:
freetext_yyyymmdd.zip
Where:
■
■
■
the free text part cannot contain special characters or white spaces
the free text part and date information must be separated with the underscore character:
_
the date information is composed as follows: y stands for 'year', m for 'month' and d
for 'day'
Save the chart on the FTP server
1. Browse to the location where you stored the .ZIP file of the chart.
2. Save the .ZIP file in the '\FTPROOT\ChartAll' folder of the FTP server.
Save the chart selection on the FTP server
1. Browse to the location where you stored the .ZIP file of the chart selection.
2. Save the .ZIP file in the '\FTPROOT\Chart' folder of the FTP server.
Publish additional information on the FTP server
1. Chart Updater can retrieve additional information from the FTP server.
42
Chapter 4 - Install the Océ Posterizer Enterprise package
Publish a chart or a chart selection
Browse to the FTPROOT folder of the FTP server.
2. You can add:
#
Information to
add
Description
documents
■
■
■
catalogs
■
■
Gather your documents into a .ZIP file.
Name the ZIP file according to this syntax:
freetext_yyyymmdd.zip
Save the .ZIP file in the '\FTPROOT\Documents' folder.
If Océ services do not have access to the FTP server, they
provide you with catalogs gathered into .ZIP files.
Save the .ZIP files with the catalogs in the '\FTPROOT\Catalogs' folder.
Specificities of the Catalogs folder:
■ The .ZIP file uploaded on the FTP server must have the
following syntax:
catalogsinfo_yyyymmdd.zip
■ The 'catalogsinfo_yyyymmdd.zip' file must have the same
structure as a chart.
The .ZIP file must include the following subfolders (even if
some of them are empty): 'ExtraDb', 'Fonts', 'Formula',
'Images', 'Messages', 'Posters' and 'Templates'.
messages
■
■
■
In the '\FTPROOT\Messages' folder, create a text file (.TXT
or .DOC, for instance).
Type in a general message for the retailer stores.
Save the file:
- with the following syntax: freetext_yyymmdd.mess
- with the .MESS extension.
Create .ZIP files for a single retailer store
1. You can create .ZIP files that can only be retrieved by one single retailer store.
To do so, retrieve the store code of the retailer store.
2. Browse to the location where you stored the .ZIP file.
3. Rename it with the following syntax:
freetext_yyymmdd[StoreCode].zip
4. Save the file in the dedicated folder of the FTP server.
Chapter 4 - Install the Océ Posterizer Enterprise package
43
Publish a chart or a chart selection
Result
The Chart Updater component installed in all the retailer stores will retrieve those information. The local data entry modules and the charts of the retailer stores will be updated
accordingly.
44
Chapter 4 - Install the Océ Posterizer Enterprise package
Configure the Chart Updater at the store location
Configure the Chart Updater at the store location
Introduction
The Headquarters upload the new templates and new information (messages, images,
catalogs...) onto the FTP folders.
Configure the Chart Updater in each store, in order to automatically check and install
locally these new elements.
Before you begin
Make sure you activate the Automation option (see ‘Request and install the Automation
option ’ on page 37)
Find the ChartUpdater.exe shortcut in the 'Start - All programs - Océ - Posterizer Enterprise' menu or open the file from the \Oce\Posterizer Enterprise\Exe folder .
You can duplicate or create shortcuts and put them on the desktop.
Note:
When the application is minimized, the icon is displayed in the taskbar. Double click
on the icon to open the application.
Illustration
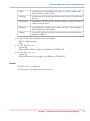
Configure the Chart Updater
1.
2.
3.
4.
5.
Open the Chart Updater
Log in with the Admin profile
In the 'Information' window, select 'Manual mode'
In the left menu, select 'Configuration' and FTP 'Configuration'
Click 'Configure…'
Chapter 4 - Install the Océ Posterizer Enterprise package
45
Configure the Chart Updater at the store location
6. Fill in the information to connect the 'Store' user to the folders on the FTP server
#
'Host'
IP address or hostname of the FTP server
Note:
Make sure that the FTP server 'hostname' is fully
qualified so that it can be resolved on both the Headquarters and the stores sites.
'Port'
By default, the FTP port is the port 21
'User'
Name of the user who reads on the FTP server.
In our example: Store
'Password'
The user password you set in the FTP server application
'Folder'
The folder where the Posterizer FTP folders are stored
The folder is '/' when the path is already declared in the Store
user's FTP settings.
In our example, the folder is '/' because the 4 Posterizer folders
on the FTP are directly stored in the FTPROOT folder
'Output folder'
The place where the log files will be stored.
In our example: '/Output'
7. Click 'Test connection' to check the communication with the FTP folder
8. Select 'Timeslots' to set the days and timeslots when the Chart Updater will check the
new elements and download them from the FTP server
9. Click 'Configure…'
10. Set the 'Time range settings'
11. Click 'OK'
Result
The Chart Updater is configured to perform the scheduled checks and downloads.
Following the timeslot, the Chart Updater checks the content of the FTP folders,
downloads it and install it locally.
When a new zip file is retrieved in the ChartAll FTP folder, the Chart Updater:
■
■
■
46
Makes a backup of the current chart
Replaces the current chart with the content of the zip file downloaded from the
ChartAll folder
Downloads (from the Chart folder) and installs the chart updates that have a date tag
more recent than the date of the new zip file
Chapter 4 - Install the Océ Posterizer Enterprise package
Configure the Chart Updater at the store location
Manually check the updates
You can also launch the process manually:
1. Select 'Updates' in the left menu
2. In the 'Check now' table, you can check and download the updates folder by folder
(Chart, Catalogs, Documents, Messages...) or download all the updates.
You can also decide to download the whole chart ('Graphical chart (whole) and following
updates')
3. In the 'Manual mode' tab, you can check the content of the Catalogs and Chart FTP
folders. Then you can decide to download elements from these folders
4. The 'Log file' tab displays the logs of the Chart Updater actions stored in the \Oce\Posterizer Enterprise\DbFolder\Log folder.
Chapter 4 - Install the Océ Posterizer Enterprise package
47
Configure the Chart Updater at the store location
48
Chapter 4 - Install the Océ Posterizer Enterprise package
Chapter 5
Advanced administration
settings in the Océ Posterizer™ Enterprise modules
Update the modules
Update/Uninstall the software
Update the modules
Introduction
You can easily update a version of the Océ Posterizer™ Enterprise to a more recent one.
Before you begin
Log in as the Windows Administrator.
Required tool
■
A CD-Rom or a zip file containing the updated installation package.
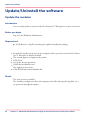
1. Launch the installer (setup.exe) on the computer where a previous version of Océ Posterizer™ Enterprise is already installed
2. The wizard appears and propose the update
3. Click 'Next'
4. Accept the license agreement
5. Check the installation notes
The update process starts.
6. Click Finish and read the Readme file
Result
The new version is installed.
The modules configuration data and temporary data (like jobs spooled, log files, etc..)
are preserved through the update.
50
Chapter 5 - Advanced administration settings in the Océ Posterizer™ Enterprise modules
Un-install the Océ Posterizer™ Enterprise
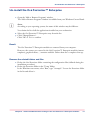
Un-install the Océ Posterizer™ Enterprise
1. Open the 'Add or Remove Programs' window.
The 'Add or Remove Programs' window is available from your Windows Control Panel.
Note:
According to your operating system, the name of this window may be different.
You obtain the list of all the applications installed on your workstation.
2. Select the Océ Posterizer™ Enterprise entry from the list.
3. Click 'Change/Remove'.
Click 'OK' or 'Yes' to confirm.
Result
The Océ Posterizer™ Enterprise modules are removed from your computer.
However, the content you created in the Océ Posterizer™ Enterprise modules (master
templates, graphical charts,...) remains available. Delete them for a complete clean up:
Remove the related folders and files
1. Delete the Oce\Posterizer folder containing the configuration files (defined during the
installation procedure)
2. Delete the Posterizer folder in the 'Temp' folder:
In the Windows start menu, select 'Run', type "%temp%". Locate the Posterizer folder
in the list and delete it.
Chapter 5 - Advanced administration settings in the Océ Posterizer™ Enterprise modules
51
View, print or archive the 'Log file'
Configure the log file and reporting activity
View, print or archive the 'Log file'
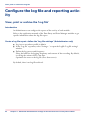
Introduction
An Administrator can configure the reports of the activity of each module.
Refer to the application manuals of the Data Entry and Print Manager modules to get
specific information about the log file report.
Create a log file report: define the 'Log file settings' (Administrator only)
■
■
■
Log in as a user whose profile is Admin
In the 'Log file' top menu, select 'Settings...' to open the Logfile 'Log file settings'
window.
Define the log process and frequency:
Select the behavior for logging: frequency and content of the recording. By default,
it will log the actions of the 7 last days.
Optimize the access to the log file (for a faster access)
By default, there is no log file archived.
52
Chapter 5 - Advanced administration settings in the Océ Posterizer™ Enterprise modules
Check the application folders
Configure the Print Manager module
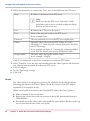
Check the application folders
Illustration
[17] Example of the structure of the application folders
Check the application folders
1. In the 'Configuration' menu, select 'Application folders'
2. In the 'Application folders' window you can check all the paths to the folders used by the
application
Chapter 5 - Advanced administration settings in the Océ Posterizer™ Enterprise modules
53
Add a printer
Add and configure printers
Add a printer
Introduction
This is the first step to configure the print workflow in the Print Manager.
Purpose
Add all the printers to be connected to print queues.
They can be local printers or network printers.
Before you begin
Log in as a user whose profile is Admin.
Make sure the printers to add are already installed on your Windows operating system.
Open the 'Printers and faxes' window in your Windows operating system and check the
availability of the printers.
To add non-Océ wide format printers, you need the Multi Printers license installed. See
‘Request and install the Multi Printers license ’ on page 38 to get the detailed workflow
and procedure.
Add a printer
1. In the 'Configuration' top menu, select 'Printers'
2. Select 'Add a printer...'
3. In the 'Add a printer' window, select one of the printers available on your system
Click the icon at the bottom of the window to display the list of paper formats available
on the selected printer
4. Click 'Next'
5. Set the 'Printer type' (small format sheet printer, wide format printer or 'RIP')
6. Select the default 'Paper color' in the printer
7. Click 'Next'
8. Check the page size.
Click the 'Printer configuration...' button to change it when needed
9. Check the default 'Page size'
When the size of posters is slightly larger than the page size (printable area), activate
'Reduce job size to fit page'
Click on the button to change the default page size when needed.
54
Chapter 5 - Advanced administration settings in the Océ Posterizer™ Enterprise modules
Add a printer
10. Click 'Advanced...' to open the advanced configuration settings (see ‘Configure the printer
properties (in the driver)’ on page 58)
11. Click Finish
Note:
To use the same printer with different configurations, add a Windows printer several
times into the Print Manager.
In the Print Manager, configure each printer for each needed configuration (example:
printer A with A3 page configuration, printer B with A4 page configuration, printer C
with yellow paper ...)
These printers are different in Print Manager but point to the same physical printer.
Result
The printer is added to the list in the Print Manager.
This printer is independent from the printer in the Windows system. The printer configuration you define in the Print Manager (see ‘Configure the printer advanced settings in
the Print Manager’ on page 56) will not influence the configuration of the printer in your
system.
Delete a printer
1.
2.
3.
4.
In the 'Configuration' top menu, select 'Printers'
Select 'Remove printer...'
Select the printer to remove
Click 'OK' and confirm
Note:
You must keep at least one printer in the list.
Chapter 5 - Advanced administration settings in the Océ Posterizer™ Enterprise modules
55
Configure the printer
Configure the printer
Configure the printer advanced settings in the Print Manager
1. In the 'Configuration' top menu, select 'Printers'
2. Select the printer to configure
3. In the 'Page' section you can check the print format of the printer.
When you need to change the page width and height click on the 'Printer configuration...'
button (at the bottom of the window) and change them in the printer driver
When the size of posters is slightly larger than the page size (printable area), activate
'Reduce job size to fit page'.
4. In the 'Margins' section, enter a value for the additional white space (software margins)
to add around the poster. These margins will be added to the printer margins.
Set also the size of the horizontal (X) and vertical (Y) gutter between 2 posters.
Note:
This poster spacing will not apply between the 2 sides of a double sided poster.
5. In the 'Crop marks' section, define if the crop marks have to be printed:
#
'On': always, for each file (independently of the file settings)
'Off': never, for no file (independently of the file settings)
'File defaults': print the crop marks when they are set on the poster file
Define the 'Type' and 'Size' of the crop marks.
6. In the 'Sleeve' section, define whether the objects defined as sleeve objects in the poster
will be printed
7. In the 'Double sided' section, you can:
#
Check whether the printer allows duplex printing. So you can decide where to define
the double siding.
Select 'Software' when your printer has no duplex capability or when you do not want
to use it. When 'Software' is selected, the software will print the recto and verso of
the poster on the same sheet. You will obtain the double sided poster by folding the
sheet in two.
Select 'Printer' when the printer has duplex capabilities (and is configured as default
for that).
The 'Double sided offsets' fields allow to define a vertical and horizontal shift between
the 2 sides of the poster.
8. In the 'Color' section you can set the optimization of the ink usage:
56
Chapter 5 - Advanced administration settings in the Océ Posterizer™ Enterprise modules
Configure the printer
#
According to the color of the paper, define the level of ink reduction for colored inks
(the higher level of reduction, the clearer they will be) and for black ink (it will make
gray)
The adjustment of this feature allows you savings on ink costs and avoid the paper
deformation due to an excess of ink in dense areas.
Select the default color of paper on this printer.
When several colors are available on a printer, you can create different instances of
the printer to use one instance per color.
When you activate 'Print posters on white background' the background of the poster
file is not printed and remains white.
9. In 'Special' define the size of the printout:
#
Keep 'Printer page size' when:
- you print to a wide format printer on which the paper saving option is activated
(recommended)
- you print to a sheet fed printer (mainly a small format printer)
Select 'Inked area - paper economy' to print only the inked part to wide format
printer without Paper saving option
Select 'Document size' when you print using a RIP
Select 'Print only one row' when you print several posters on a same roll via the
'Optimization' feature (wide format printer)
The software will send each row of posters separately to the printer.
10. In 'Layout' define the position of the posters or labels on the page:
Note:
You can use a 'Layout template' in order to print a sheet containing multiple product
labels displaying the product price and barcode.
Create this 'Layout template' (.plf file) in the Designer module.
Chapter 5 - Advanced administration settings in the Océ Posterizer™ Enterprise modules
57
Configure the printer
#
Select 'Use layout'
Click '...' to browse to the layout template you created, and select it.
You can declare several layout templates for this printer. Then, order them by priority:
the application will position the files on the page according to the layout, starting
from the first.
In case no layout template is applicable, check the option 'Automatic optimization
if no layout applies' to activate the automatic optimization.
You can print the template on the page ('Print the layout template').
Note:
When you declare a layout template for a printer, configure a queue and the
dispatcher in order to send the labels of the relevant size (set in the layout
template) to this printer.
Check the option 'Center document(s) in page' to center all posters, without optimization or layout template.
Configure the printer properties (in the driver)
1.
2.
3.
4.
58
In the 'Configuration' top menu, select 'Printers'
Select the printer to configure
At the bottom of the window, click 'Printer configuration...'
In the printer properties window, configure the driver settings
Chapter 5 - Advanced administration settings in the Océ Posterizer™ Enterprise modules
Configure the 'Job dispatcher'
Configure the 'Job dispatcher' and the optimization
Configure the 'Job dispatcher'
Introduction
The 'Job dispatcher' routes the incoming jobs to queues according to some criteria of the
job.
It directs some jobs to some printers (through a queue) and can also group jobs of the
same type together.
Purpose
The role of the dispatcher is to collect all the jobs sent to the Print Manager into Queue15
and to allocate each job to the optimal queue (and printer) according to:
■
■
■
■
■
The size of the poster (small format or wide format)
The color of the paper
The keywords in the posters
The tags (the database field defined in the Designer module)
The store code
Before you begin
Log in as a user whose profile is Admin.
Chapter 5 - Advanced administration settings in the Océ Posterizer™ Enterprise modules
59
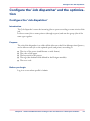
Configure the 'Job dispatcher'
Illustration
Configure the job dispatcher
1. In the 'Configuration' top menu select 'Job dispatcher'
2. Select 'Configuration' to open the 'Job dispatcher' window
3. Select the first top line to initialize and configure it, using the contextual menu (right
click on the line) or the top menu icons:
#
'Paper color': select the color paper criteria in order to send:
- all posters using colored paper to a queue related to a printer using colored paper,
select 'Colored paper'
- all posters to be printed on white paper to a queue related to a printer using white
paper only, select 'White paper'
To make no difference on the paper color, select 'All paper colors'
'Paper size': select the paper size criteria:
- to send all posters of a specific standard or custom size to a queue related to a
printer configured for the corresponding paper size, select 'Select paper size' and define
the paper size.
- to make no difference on the paper size, select 'All paper sizes'
'Keywords': to dispatch the posters according to template keywords (defined in the
Designer), select 'Keywords' and type the keywords in the field
60
Chapter 5 - Advanced administration settings in the Océ Posterizer™ Enterprise modules
Configure the 'Job dispatcher'
'Tag': when the content of posters is related to a database, you can set the dispatch
on the value of a field in the database. Then type the value of the database field in
the tag field.
Note:
In Designer, in the 'Database''Advanced''Template properties', the database
field must be selected in the Tag field.
'Store code': to dispatch the jobs to queues according to the origin of the jobs (the
store that sent the jobs)
'Queue': associate the queue to which the poster must be sent when the combination
of criteria is fulfilled
When you define the queue, the combination is initialized in the dispatcher
4. When all the combinations of criteria are defined you must sort them by priority:
#
Principle of the hierarchy in the 'Job dispatcher':
During the processing, the dispatcher will read the combinations from the first to the
last.
It will first take into account the color of the paper, then the size and the keywords
to find the most appropriate queue for the job.
Example:
When the first combination fulfills all the poster requirements, the dispatcher sends
the poster to the related queue
When the paper color matches, but the size does not match, the dispatcher goes to
the following lines to look for the relevant combination
When no combination perfectly matches, it will select the combination of the color
with a wider size of paper.
Hierarchy of the combinations
It is recommended to arrange the combinations from the smaller paper size to the
wider one, with white paper color put on top of colored paper.
To move the combinations in the list, use the arrows.
Note:
The queue number does not influence the sequence of the combinations.
5. Enable the 'Job dispatcher' to activate it
Chapter 5 - Advanced administration settings in the Océ Posterizer™ Enterprise modules
61
Configure the 'Job dispatcher'
Delete a combination
1. In the 'Job dispatcher' window, select a combination
2. Right click on it and select 'Delete' in the contextual menu
62
Chapter 5 - Advanced administration settings in the Océ Posterizer™ Enterprise modules
'Activate' / 'Suspend' the 'Job dispatcher'
'Activate' / 'Suspend' the 'Job dispatcher'
Purpose
After you configured the combinations in the 'Job dispatcher', enable or activate it.
To hold all the incoming jobs in Queue15 and stop the dispatch, 'Suspend' the 'Job dispatcher'
Before you begin
Log in as the Administrator.
Enable the 'Job dispatcher' from the 'Job dispatcher' window
1. At the end of the configuration of the 'Job dispatcher' keep the window opened
2. Check the 'Enable the job dispatcher' setting
The 'Job dispatcher' is then activated
Activate the 'Job dispatcher' from the menu
1. In the 'Configuration' top menu, select 'Job dispatcher'
2. Click 'Activate'
Suspend the 'Job dispatcher'
1. In the 'Configuration' top menu, select 'Job dispatcher'
2. Click 'Suspend'
Chapter 5 - Advanced administration settings in the Océ Posterizer™ Enterprise modules
63
Store and Restore the 'Job dispatcher' settings
Store and Restore the 'Job dispatcher' settings
Purpose
Save the 'Job dispatcher' combinations for later reuse or duplication:
■
■
■
The size of the poster (small format or wide format)
The color of the paper
Keywords in the posters
Before you begin
Log in as the Administrator.
Store the 'Job dispatcher' settings
1. In the 'Job dispatcher' window, click 'Store...'
2. Type a name for the file
3. Click 'Save'
A .jod file is saved in the 'DbFolder/Bak' folder.
Restore the 'Job dispatcher' settings
1.
2.
3.
4.
64
Click on the 'Restore...' button
Browse to the .jod file
Click 'Open' to restore the combination
'Activate'/ 'Enable the job dispatcher' if needed
Chapter 5 - Advanced administration settings in the Océ Posterizer™ Enterprise modules
Set the 'Optimization'
Set the 'Optimization'
Introduction
The administrator configures the optimization settings to get the best position of the jobs
on the page, according to the needs.
You can configure the optimization:
■
■
From the 'Optimization' menu, to set the behavior of the application
At queue level, to set the optimization behavior for jobs in the queue
Purpose
Set the optimization settings to:
■
■
Group jobs and print each group separately, to print grouped jobs of a same origin
(user, department) for example
Set the behavior of the optimization
Before you begin
Log in as a user whose profile is Admin.
Create a group of jobs
1. In the 'Optimization' top menu select 'Group jobs by'
2. Select the criteria for grouping:
■ The origin of the jobs: 'User' and/or 'Department' and/or 'Store code'
All the selected active jobs from the same user or department will be grouped and
positioned on the same page, or on successive pages.
■ The size of the jobs: 'Size'
All jobs of the same size will be grouped to optimize the position on paper
3. Select the sequence of the printing of these groups:
■ Print them by 'Order': the application prints the jobs of a group in chronological order:
first arrived, first printed
■ Print them by 'Printed surface': the application prints first the smaller and then the
wider jobs of a group
Chapter 5 - Advanced administration settings in the Océ Posterizer™ Enterprise modules
65
Set the 'Optimization'
Position settings
1. in the 'Optimization' top menu select 'No poster rotation' when you want to prevent the
rotation of the poster on the paper. The rotation phase is skipped during the optimization
and the application will keep the image orientation.
2. Define if the application must avoid or prefer vertical double sided, when vertical double
sided is possible.
Note:
You can also set these settings using the icons in the 'Optimization' toolbar: activate it
in 'View' - 'Toolbars'.
Set the 'Optimization preview settings'
1. In the 'Optimization' menu select 'Optimization panel settings...'
2. Define whether:
- the user must confirm the optimization before the job is printed (using the buttons
'OK', 'No' or 'Stop' in the 'Optimization preview')
- the printing is automatically launched after a timeout
- the job is never printed after the optimization
Result
In the 'Optimization' menu select 'Information...' to get a summary of the optimization
settings you activated.
In combination with the optimization set at queue level and with the settings set on the
printer, the optimization can save paper and time by defining the best combination of
page size and jobs groups and orientation.
When needed, you can deactivate the optimization for a queue in the queue settings.
66
Chapter 5 - Advanced administration settings in the Océ Posterizer™ Enterprise modules
Store and restore the settings configuration file
Store the configuration
Store and restore the settings configuration file
Purpose
Save the 'Settings' files to store:
■
■
■
■
■
The links to printers
The job dispatcher configuration
The queues settings
The printers settings
The custom paper sizes
When to do
Save the 'Settings' after the configuration of the application advanced settings.
Before you begin
Log in as a user whose profile is Admin.
Save the configuration 'Settings' files
In the top menu select 'Configuration'
Select 'Settings'
Click 'Store settings...'
Enter the name of a new folder to create
In the confirmation window, the path to the folder that will contain the settings files is
displayed (in 'Posterizer\DbFolder\bak')
6. Click 'Yes' to create the folder and the files
7. Confirm
1.
2.
3.
4.
5.
Restore the configuration 'Settings' files
1.
2.
3.
4.
5.
In the top menu select 'Configuration'
Select 'Settings'
Click 'Restore settings...'
Open the Posterizer\DbFolder\bak\[folder name] folder
Confirm the restoration
Chapter 5 - Advanced administration settings in the Océ Posterizer™ Enterprise modules
67
Store and restore the settings configuration file
The configuration settings are restored in the application.
6. Click 'OK'
68
Chapter 5 - Advanced administration settings in the Océ Posterizer™ Enterprise modules
Appendix A
Appendix
File formats: Standard or Custom
File formats: Standard or Custom
Introduction
In the Print Manager, several functions require the definition of the page size:
■
■
■
The resize of a job in the jobs zone
The creation of links between queues and printers
The configuration of the job dispatcher
Use the standard sizes
To resize one or several posters, select it (them) in the job list and select 'Resize selected
posters...' in the contextual menu.
In the 'Select size' window, select a standard size in the 'Page size' tab.
When needed, you can adjust the width and the height. To keep the same size proportions
when you change the width or the height, check the 'Keep aspect' option.
To maintain the proportions of the objects in the poster, check the 'Resize objects' option.
Create and use custom sizes
You can create and store custom sizes to reuse them.
In the 'Select size' window, open the 'Custom size' tab.
Type a name for the size, the width and the height and click the arrow to store the new
format.
To maintain the proportions of the objects in the poster, check the 'Resize objects' option.
To change the size of the custom format, modify the width and height values and click
'Modify'.
Select the custom size and click 'Delete' to remove it from the list.
70
Appendix A - Appendix
The supported file formats
The supported file formats
Supported file formats
#
The database file formats
.db, .mdb, .csv, .xls
The image file formats
.bmp, .pct, .ras, .eps, .pcx, .tga, .jpeg, .pic,
.tif, .jpg, .png, .pcd, .psd
.emf, .cmp, .eps, .wmf
Note:
When the application does not recognize a file format, it displays a big 'X' instead of
the image.
The Posterizer custom formats
#
File format for
Extension
Designer
Module
Formula
.for
Message file
.mess
x
Objects Layout file
.olf
x
Saved poster
.ppf
Poster sent to spooler
.psf
Template
.ptf
x
Layout template
.plf
x
Saved queue settings
.qni
LogFile print report
.qrp
Formula
Editor
Data Entry Module
Print
Manager
Module
x
x
x
x
x
x
Appendix A - Appendix
71
Index
Index
I
Activation
Data Entry ......................................................22
Administrator
Password .........................................................24
Application folders
Application folders ..........................................53
Automation option
Automation option .........................................12
Install .............................................................37
Request ...........................................................37
C
Chart
Publish ...........................................................42
Chart selection
Publish ...........................................................42
Chart Updater
Configuration .................................................45
Manual updates ..............................................47
Check Company ID
Check Company ID .......................................34
Company ID
Import ............................................................34
Crop marks
Crop marks .....................................................56
D
Department
Create .............................................................28
F
Flyer-to-Poster option
Install .............................................................39
Request ...........................................................39
Flyer-to-poster option
Flyer-to-poster option .....................................12
FTP
Chart ..............................................................42
Documents .....................................................42
Messages .........................................................42
FTP server
Configuration .................................................40
72
Import Company ID
Import Company ID ......................................34
Install package
Install package ................................................20
J
Job dispatcher
Activate ..........................................................63
Configuration .................................................60
Suspend ..........................................................63
Job dispatcher settings
Restore ...........................................................64
Store ...............................................................64
L
Layout template
Layout template ..............................................56
License
Request ...........................................................16
License file
License file ......................................................22
Log file
Log file ...........................................................52
M
Multi Printers option
Install .............................................................38
Request ...........................................................38
Multi-Printers option
Multi-Printers option .....................................12
O
Océ Posterizer Enterprise
Océ Posterizer Enterprise ................................10
Open modules
Open modules ................................................36
Optimization
Configuration .................................................65
Group .............................................................65
Option
Multi Printers .................................................38
Options
Index
Automation ....................................................37
Catalog ...........................................................39
Flyer-to-Poster ................................................39
P
Poster
Print ...............................................................26
Send ...............................................................26
Printer
Add a printer ..................................................54
Configuration .................................................56
Remove a printer ............................................55
Printout size
Printout size ...................................................56
R
Requirements
Requirements .................................................14
S
Settings
Restore configuration settings .........................67
Store configuration settings ............................67
Sleeve
Sleeve .............................................................56
Store information
Store information ...........................................35
T
Templates
Catalogs ..........................................................32
Common templates ........................................31
Department templates ....................................31
U
Un-installation
Un-installation ...............................................51
Update
Update ...........................................................50
User
Administration ...............................................29
Profile .............................................................29
73
+2
+2
-
Beyond the Ordinary
o
Printing for
Professionals
Professionals everywhere look to Océ for digital printing
and document management. In the office, Océ systems
keep the information of business and government
flowing. In manufacturing, architecture, engineering,
and construction, Océ wide-format printers set the
standard, while our display graphics systems help people
produce banners, billboards, and other large, colorful
applications. In corporate print facilities, marketing
service bureaus, and the graphic arts industry, Océ
systems print transaction documents, mailings,
newspapers, manuals, and books - on demand and at the
highest speeds. And Océ Business Services manages the
complete document workflows of customers around the
world. It all helps you go “Beyond the Ordinary” in
printing and document management.
Océ. Illustrations and specifications do not necessarily apply to products
and services offered in each local market. Technical specifications are
subject to change without prior notice. All other trademarks are the
property of their respective owners.
For more information visit us at:
2010-09
www.oce.com
US