1
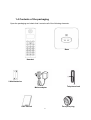
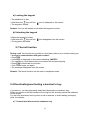
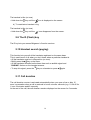
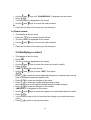
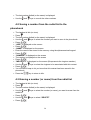
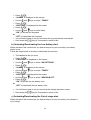
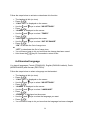
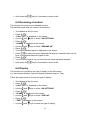
1 - PRESENTATION OF THE APPLIANCE ................................................................................. 3
1-1 General characteristics ........................................................................................................... 3
1-2 Precautions for use ................................................................................................................. 4
1.3 Usage conditions .................................................................................................................... 5
1.4 Contents of the packaging ...................................................................................................... 6
1.5 Installing the telephone .......................................................................................................... 7
1.6 Installing the rechargeable batteries ....................................................................................... 7
1.7 Battery charge: ....................................................................................................................... 7
1.8 Diagrams and functions .......................................................................................................... 8
1.9 Screen icons .......................................................................................................................... 10
1.10 Configuring your Twist 129 telephone .............................................................................. 11
2 – TELEPHONE FUNCTIONS ................................................................................................... 12
2.1 Using the alphanumerical keypad ........................................................................................ 12
2-2 Dialling a number ................................................................................................................ 12
a) Dialling a number ........................................................................................................... 12
b) Pre-dialling a number ..................................................................................................... 12
2-3 Receiving a call .................................................................................................................... 13
2-4 Amplified listening .............................................................................................................. 13
a) To call: ........................................................................................................................... 13
b) To receive: ..................................................................................................................... 13
c) Switching from amplified listening mode to handset mode........................................... 14
d) Switching from handset mode to amplified listening mode .......................................... 14
2-5 Setting the regular and amplified listening volume ............................................................. 14
2-6 Locking and unlocking the keypad ...................................................................................... 14
2-7 Secret function ..................................................................................................................... 15
2-8 Deactivating/reactivating a handset’s ring: .......................................................................... 15
a) To deactivate (disconnect) a handset’s ring ................................................................... 15
b) To reactivate a handset’s ring ........................................................................................ 16
2-9 The R (Flash) key................................................................................................................. 16
2-10 Handset search (paging) ..................................................................................................... 16
2-11 Call duration....................................................................................................................... 16
3 – ALPHANUMERICAL PHONEBOOK ................................................................................... 17
3-1 Saving a contact (name and number) in the phonebook .................................................. 17
3-2 Consulting the phonebook ................................................................................................... 17
a) Using the menu .................................................................................................................. 17
b) Direct access ...................................................................................................................... 18
3-3 Modifying a contact ............................................................................................................. 18
3-4 Erasing a contact .................................................................................................................. 19
3-5 Erasing the phonebook completely ...................................................................................... 19
4 – REDIAL LIST .......................................................................................................................... 19
4-1 Consulting the redial list ...................................................................................................... 19
4-2 Saving a number from the redial list to the phonebook ....................................................... 20
4-3 Erasing a number (or name) from the redial list .................................................................. 20
4-4 Erasing the full redial list ..................................................................................................... 21
5 – BASE SETTINGS .................................................................................................................... 22
5-1 De-registering a handset ...................................................................................................... 22
5-2 Dialling selection ................................................................................................................. 22
1
5-3 Modifying the R (flash) key time......................................................................................... 23
5-4 Changing the PIN code (confidential personal code) .......................................................... 24
6- HANDSET SETTINGS ............................................................................................................. 25
6-1 Setting the alarm .................................................................................................................. 25
6-2 Choosing a ring on the handset ............................................................................................ 25
a) Choosing a ringtone for an internal call ............................................................................. 26
a) Choosing a ringtone for an external call ............................................................................ 26
c) Ring volume on a handset .................................................................................................. 27
1) Using the menu .............................................................................................................. 27
2) During call reception ...................................................................................................... 27
6-3 Tones .................................................................................................................................... 27
a) Activating/Deactivating the key beeps ............................................................................... 27
b) Activating/Deactivating the Low battery alert ................................................................... 28
c) Activating/Deactivating the Out of range alert .................................................................. 28
6-4 Handset language ................................................................................................................. 29
6-5 Renaming a handset ............................................................................................................. 30
6-6 Display ................................................................................................................................. 30
6-7 Automatic answer ................................................................................................................ 31
6-8 Setting the time .................................................................................................................... 31
a) Date format ......................................................................................................................... 31
b) Time format ....................................................................................................................... 32
c) Setting the time .................................................................................................................. 32
d) Setting the date ................................................................................................................... 33
7 REGISTERING A HANDSET ON A BASE ............................................................................. 33
8- REINITIALISING THE DEFAULT SETTINGS ..................................................................... 34
9- INTERPHONE .......................................................................................................................... 35
9-1 Internal call .......................................................................................................................... 35
a) To another handset ............................................................................................................. 35
b) To all the other handsets .................................................................................................... 36
9-2 Receiving an internal call..................................................................................................... 36
9-3 Receiving an external call during an internal call ................................................................ 36
9-4 Transferring an external call to another handset .................................................................. 37
9-5 Three-way conference call (two internal handsets + one external correspondent) .......... 37
10- VOICE MAIL (PHONEMAIL) .............................................................................................. 37
11- CALL LOG .............................................................................................................................. 38
11-1 Name and number presentation ......................................................................................... 38
11-2 Consulting the call log ....................................................................................................... 39
11-3 Dialling a number from the log .......................................................................................... 39
11-4 Saving the number in the log in the phonebook ................................................................ 40
11-5 Erasing selected calls ......................................................................................................... 40
11-6 Erasing all calls .................................................................................................................. 41
12- IF A PROBLEM OCCURS ..................................................................................................... 41
13-CERTIFICATE OF CONFORMITY ....................................................................................... 43
14- GUARANTEE TERMS ........................................................................................................... 44
2
1 - PRESENTATION OF THE APPLIANCE
1-1 General characteristics
The appliance’s main technical characteristics are:
Telephone
• 3-row LCD screen (1 alphanumerical row + 2 rows of icons)
• GAP compatible.
• Up to 5 handsets may be associated with the same base.
• Range: 50 metres indoors and 300 metres in clear space.
• Autonomy: 100 hours on standby.
10 hours in communication.
• Amplified listening
• 20 contact alphanumerical phonebook (names and numbers)
• Date and time setting.
• Interphone call between 2 handsets.
• 3-way conference call (2 internal + 1 external).
• Call transfer to another handset.
• Redialling of one of the last 5 numbers dialled.
• Choice of 10 ringtones on the handset (5 classic and 5 polyphonic).
• Ringing volume can be adjusted on the handset (5 levels).
• Listening volume can be adjusted on the handset (5 levels).
• Audible alerts (key beeps, low batteries, out of range)
• Keypad locking.
• Call duration display.
• Handset call.
• Secret function.
• Clock or handset name display function on idle.
• Alarm function.
• Voice frequency (default) or decimal dialling.
• Handset name customisation
• 4-digit PIN code customisation to protect access to certain functions
3
1-2 Precautions for use
•Read the instructions in this manual carefully.
•Only use the mains adaptor provided.
•Do not install the appliance in a place that is sensitive to dust or likely to be disrupted
by vibration or impact.
•Do not place your appliance next to a magnetic source (television, speakers, etc.) as
this may cause interference.
•Never pour any liquids onto the appliance; this may cause a short circuit.
•Do not place the base near any damp locations.
•Never dismantle the appliance.
•Unplug the telephone connection before you disconnect the electric plug.
•Disconnect any damaged appliances immediately and have them repaired at an
approved after-sales service.
•After you move the appliance begin by reconnecting the electric plug.
•Do not put anything on the electric cable and make sure no-one can walk on it.
•Avoid connecting too many appliances to the same current source.
•Never install the appliance during a storm.
•Never touch bare telephone wires unless they are disconnected.
•Disconnect the appliance before you clean it. Do not use cleaners or aerosols and use
a slightly damp cloth.5
•Do not place the appliance on an unstable elements. The appliance must not be
allowed to fall as this could cause serious damage.
•The appliance will not work if there is no mains power supply or if the mains is
disconnected. You will not be able to make or receive any emergency calls.
This is why we recommend that you also use a standard telephone set.
•Keep this user manual carefully for any future reference.
IMPORTANT :
1) Only use the type of battery provided.
4
2) Do not throw the batteries onto a fire or into a bin.
3) Do not open the batteries. The electrolyte they contain is corrosive and may cause
burns to hands, skin and eyes and is toxic if swallowed.
Your product has been designed and manufactured with superior quality
materials and components that can be recycled and re-used.
This symbol means that electric and electronic equipment at the end of their
life-cycle must be disposed of separately from household waste.
Consequently, please send this equipment to your local collection/recycling
centre.
The European Union has selective systems for used electric and electronic
products.
6
1.3 Usage conditions
• The appliance cannot be connected to an IT power supply scheme.
• The appliance is powered by an AC/DC mains adaptor, in compliance with standard
EN 60950, connected to a 230 V AC 50 Hz socket.
• As the adaptor acts as a circuit breaker, the power base must be installed near the
appliance and must be easily accessible.
• The connection to the telephone line meets safety level TRT-3.
• The power supply input meets safety level TBTS.
• The electrical safety corresponds to verifications EN 60950.
• The maximum usage temperature is 35° C.
• This appliance uses radio frequency bands for which use is standardised throughout
the whole European Community.
• The conformity marking for the terminal equipment is located under the base.
111117
5
1.4 Contents of the packaging
Open the packaging and check that it contains all of the following elements:
Base
Handset
2 AAA batteries
Mains adaptor
User manual
Telephone lead
Four-pole plug
6
1.5 Installing the telephone
1 – Select an appropriate location for the base. Make sure that it is not near another
telephone or electrical appliance (computer, television, etc.) to avoid interference.
2 – Connect the mains adaptor plug to the modular socket located behind the base.
3- Connect the mains adaptor to the 230 V AC ,50 Hz socket.
4 – Connect the telephone lead to the modular socket located behind the base and the
other end to your telephone socket in the wall.
1.6 Installing the rechargeable batteries
1 – Open the battery compartment.
2- Insert the 2 rechargeable batteries (AAA NiMH/500
mA type) in the compartment, respecting the polarities.
3 – Close the battery compartment.
1.7 Battery charge:
Before you use the telephone you must charge the batteries for at least 24 hours (the
first time).
- Place the handset on the charge support. You will hear a confirmation signal.
- Leave the batteries to charge without interruption for at least 24 hours.
Remark: When the handset is charging, the
icon will be permanently lit. There will
be nothing to indicate that the battery is fully charged in this position.
7
Caution: Your handset will not operate at its full capacity if you do not leave it to charge
for 24 hours the first time.
The warranty will not be valid for operating problems caused by an incomplete charge
during the first use.
1.8 Diagrams and functions
Telephone:
key
key
Used to access the menu
Used to confirm a function
During a call, used to access the
log, the redial list and the
phonebook.
Used to return to the previous menu (short
press) or return to idel (press and hold).
Used to erase a digit or character (short press)
or delete all of them (press and hold).
Used to make an interphone call.
During a call, used to activate (disconnect the
microphone) or deactivate the secret function.
Used to adjust the ringing volume when a call si
received.
key
Used to access the list of calls
received.
Used to increase the volume
during a call.
Used to browse the menu.
key
Used to access the redial list.
Used to reduce the volume during a call.
Used to browse the.
key
Used to open the line or answer a
call.
key
Used to hang up
Used to switch the
handset on or off
key
Used to lock/unlock the keypad.
key
Used to activate or
deactivate the ringing
key
Used to activate amplified
listening.
R (Flash) key
Used to access operator
services *
key
Used to access the
phonebook
* Depending on subscription to Belgacom’s Comfort services.
8
Base:
key
Used to look for handsets
(paging)
Used to register a handset
on the base.
9
1.9 Screen icons
The handset screen lets you see the telephone’s functions
Indicates that a function can be accessed using the navigation keys.
Flashes when the handset is out of range or not associated with the base.
Flashes when an incoming internal call is received and remains lit during the call.
Indicates that a call is in progress.
Indicates that amplified listening is active.
Indicates that the ringing has been disconnected.
Is displayed when the alarm is active.
Indicates that the keypad is locked.
Indicates that a new message has been received on Belgacom’s voicemail
(PhoneMail – number 1230).
Indicates that the batteries are charged.
Indicates that the batteries are flat and you must recharge them.
Indicates that there are functions that can be accessed through the menu
Confirms the selected function
Indicates a missed (unanswered) call that has not been read.
Used to make an internal call by pressing the corresponding key
Used to return to the previous menu (short press) or idle (press and hold)
Used to delete a character or stop the alarm or disconnect the ringing during a
call or return to the previous menu.
10
1.10 Configuring your Twist 129 telephone
We suggest you change your telephone’s language (English by default) to enable you to
use it more easily.
•
•
The handset is idle (no tone)
Press the
key, “CALL LIST” is displayed on the screen
•
•
Use the and
Press the
keys to select “HS SETTING”
key, “ALARM” is displayed on the screen
•
•
Use the
Press
keys to select “LANGUAGE”
•
•
•
Use the and keys to select the language you want
to confirm.
Press
You will hear a beep to let you know that the language has been changed.
•
Hold down the
and
key for 2 seconds to return to idle.
11
2 – TELEPHONE FUNCTIONS
2.1 Using the alphanumerical keypad
Some functions such as the phonebook require the alphanumerical keypad. The keypad
automatically switches to alphanumerical mode when you enter one of these functions.
To enter a letter, press the corresponding key on the keypad as many times as necessary.
Examples:
- To enter an “A”, press 2 once
- To enter a “B”, press 2 twice
- To enter an “A” followed by a “B” enter “A” then wait for the cursor to move to the next
character then enter a “B”.
- To enter a space press 1 once.
The main characters available are listed in this table:
Keys
1
2
3
4
5
6
7
8
9
0
1st Press
SPACE
A
D
G
J
M
P
T
W
0
2nd Press
B
E
H
K
N
Q
U
X
3rd Press
1
C
F
I
L
O
R
V
Y
Remark: Special characters are available with the * and # keys.
2-2 Dialling a number
a) Dialling a number
• Press
.
• Dial your contact’s number.
• At the end of the call, press
.
b) Pre-dialling a number
12
4th Press
2
3
4
5
6
S
8
Z
5th Press
7
9
• Dial your contact’s number.
• Press
.
• Once you have finished the call, press
.
2-3 Receiving a call
a) Receiving an external call
• The handset rings (depending on the setting)
if the handset is not placed on the base (If the handset is on the base, see
• Press
function 6-7 Automatic answer)
• Once you have finished the call, press
.
b) Receiving an internal call
• The handset rings.
• The handset where the call comes from (“CALL FROM 2” for example), and the
icon flash on the screen
• Press
.
• Once you have finished the call, press
.
2-4 Amplified listening
This function lets you:
• Obtain the tone.
• Dial your contact’s number.
• Listen to and talk to your contact without needing to hold the handset in your hand.
a) To call:
• Press .
• The
icon is displayed on the handset screen.
• Dial your contact’s number.
• Speak when your contact picks up the phone.
b) To receive:
13
• When the handset rings, press
• The
icon is displayed on your telephone’s LCD screen.
• You can talk with your contact.
c) Switching from amplified listening mode to handset mode
• During an amplified listening call, press
• Pick up the handset to keep talking.
to disconnect amplified listening mode.
d) Switching from handset mode to amplified listening mode
• During a conversation in handset mode, press
switch to amplified listening mode.
to disconnect handset mode and
CAUTION: Prolonged use of amplified listening mode during a conversation causes a
serious drain in the batteries and considerably reduces the appliance's autonomy.
2-5 Setting the regular and amplified listening volume
The volume can be set to 5 different levels (from 1 to 5).
Level 5: the loudest level
Level 1: the lowest level
You must be in conversation to set the regular or amplified listening volume:
•Once you are in conversation , to set the volume level use the
(increase) keys.
(reduce) and
Remark: The volume level is maintained between each call. The regular listening
volume stored in the handset is not the same as the amplified listening volume.
Each volume level setting is stored independently.
For example, you can keep level 2 permanently for regular listening and level 5 for
amplified listening.
2-6 Locking and unlocking the keypad
Locking the keypad prevents you from dialling a number by mistake. When the keypad is
locked the
Icon is displayed in the top of the screen.
14
a) Locking the keypad
• The handset is on idle.
• Hold down the
key until the
• The keypad is locked.
icon is displayed on the screen.
Remark: You can still answer a call when the keypad is locked.
b) Unlocking the keypad
• When the keypad is locked.
• Hold down the
key until the
• The keypad is unlocked.
icon disappears from the screen.
2-7 Secret function
During a call, this function lets you talk to a third party without your contact hearing you.
• You are in communication with your contact:
.
• Press
• A message is displayed on the screen indicating “MUTED”.
• You can talk to a third person and your contact will not hear anything.
• Press
to deactivate this function.
• Your contact hears you again.
• The message disappears from the screen.
Remark: The Secret function can be used in interphone mode.
2-8 Deactivating/reactivating a handset’s ring:
If you want to, you can temporarily deactivate (disconnect) a handset’s ring.
When you receive a call the handset will not ring but the incoming call will be indicated
on the screen.
You can also disconnect the ring when a call is received, to avoid waking a sleeping
child, for example.
a) To deactivate (disconnect) a handset’s ring
15
The handset is idle (no tone)
• Hold down the
key until the
icon is displayed on the screen.
b) To reactivate a handset’s ring
The handset is idle (no tone)
• Hold down the
key until the
icon disappears from the screen.
2-9 The R (Flash) key
The R key lets you access Belgacom’s Comfort services.
2-10 Handset search (paging)
This function lets you call all the handsets registered on the same base.
This is useful most of all when you don’t know where a particular handset is.
• All the handsets must be in idle position (no tone).
• Briefly press the
key on the base.
• All the handsets recorded on the base then emit an audible signal and
“PAGING” flashes on the handset screens.
• To stop this signal, press the
key on a handset or press
again.
2-11 Call duration
The call duration counter is activated automatically when you open a line or after 15
secs’ conversation when a call is received in hours: minutes: seconds (e.g.: 01:34:45 for
1 hour 34 minutes and 45 seconds)
At the end of the call, the call duration remains displayed on the screen for 5 seconds.
16
3 – ALPHANUMERICAL PHONEBOOK
3-1 Saving a contact (name and number) in the
phonebook
You can save up to 20 contacts in the alphanumerical phonebook.
Each contact may contain a 12-character name and a 20-digit number.
Remarks: - A name must be entered.
- If you try to save a contact with a name that already exists, “DOUBLE
ENTRY” will be displayed to tell you to change name.
Follow the instruction below to save a new contact (number and name):
•
•
•
The handset is idle (no tone).
Press
“CALL LIST” is displayed on the screen
•
•
•
•
•
•
•
•
•
•
•
•
•
Use the
and
navigation keys to select “PHONEBOOK”
Press
“EMPTY” is displayed on the screen
Press
“ADD” is displayed on the screen
Press
“NAME” is displayed on the screen
Enter the name to be stored in the memory using the alphanumerical keypad
Press
“NUMBER” is displayed on the screen
Enter the number to be stored in the memory
Press
“MELODY X” is displayed on the screen (X represents the ringtone number)
•
•
•
Use the and keys to select the ringtone to be associated with this contact
Press
You will hear a beep to let you know that your contact has been saved.
3-2 Consulting the phonebook
a) Using the menu
•
•
•
The handset is idle (no tone)
Press
“CALL LIST” is displayed on the screen
17
•
•
•
Use the and keys until “PHONEBOOK” is displayed on the screen
Press
The first contact is displayed on the screen
• Use the and keys to consult the other contacts
Or
• Press the first letter of the name you are looking for
b) Direct access
•
The handset is idle (no tone)
•
•
Press the
key to access the phonebook
The first contact is displayed on the screen
• Use the and keys to consult the other contacts
or
• Press the first letter of the name you are looking for
3-3 Modifying a contact
•
The handset is idle (no tone)
•
•
Press
The first contact is displayed on the screen
•
•
•
Use the and keys to select the contact you want to modify
Press
“ADD” is displayed on the screen
•
Use the
•
to erase the name displayed character by character then use the
Press
keys on the alphanumerical keypad to edit.
Press
to save the changes to the name
•
and
keys to select “EDIT” then press
•
Press
to erase the number displayed digit by digit
then use the keys on the alphanumerical keypad to make changes.
• Press
to save the changes to the number.
• “MELODY X” is displayed on the screen
•
•
•
Use the and keys to select the ringtone to be associated with the contact
Press
You will hear a beep to let you know that the changes you made have been
saved.
•
Press
to return to the previous menu.
19
18
3-4 Erasing a contact
•
The handset is idle (no tone)
•
•
Press
The first contact is displayed on the screen
•
•
•
Use the and keys to select the contact you want to erase
Press
“ADD” is displayed on the screen
•
•
•
Use the and keys to select “DELETE”
Press
You will hear a beep to let you know that your contact has been erased.
•
Press
to return to the previous menu.
3-5 Erasing the phonebook completely
•
The handset is idle (no tone)
•
•
•
•
Press
The first contact is displayed on the screen
Press
“ADD” is displayed on the screen
•
•
•
•
•
Use the and keys to select “DELETE ALL”
Press
“CONFIRM?” is displayed on the screen
Press
You will hear a beep to let you know that all the contacts in the phonebook have
been erased
•
Press the
key to return to idle.
4 – REDIAL LIST
The redial list stores the last 5 numbers dialled.
If the number was already stored in the phonebook, the name associated with it is
displayed.
4-1 Consulting the redial list
•
The handset is idle (no tone)
•
Press
19
•
The last number dialled (or the name) is displayed
•
Use the
and
keys to consult the other numbers
4-2 Saving a number from the redial list to the
phonebook
•
The handset is idle (no tone)
•
•
Press
The last number dialled (or the name) is displayed
•
•
•
•
•
•
•
•
•
•
•
Use the and keys to select the number you want to save in the phonebook
Press
“ADD” is displayed on the screen
Press
“NAME” is displayed on the screen
Enter the name to be stored in the memory using the alphanumerical keypad
Press
“NUMBER” is displayed on the screen
The number is displayed on the screen
Press
“MELODY X” is displayed on the screen (X represents the ringtone number)
•
•
•
Use the and keys to select the ringtone to be associated with this contact
Press
You will hear a beep to let you know that this contact has been saved in the
phonebook
•
Press the
key to return to idle.
4-3 Erasing a number (or name) from the redial list
•
The handset is idle (no tone)
•
•
Press
The last number dialled (or the name) is displayed
•
keys to select the number (or name) you want to erase from the
•
Use the and
redial list
Press
•
•
Use the
Press
keys to select “DELETE”
and
20
•
You will hear a beep to let you know that the selected number (or name) has
been erased from the redial list
•
Press the
key to return to idle.
4-4 Erasing the full redial list
•
•
•
Press
The last number dialled (or the name) is displayed
Press
•
•
•
•
•
•
Use the and keys to select “DELETE ALL”
Press
“CONFIRM?” is displayed on the screen
Press
You will hear a beep to let you know that all the numbers (or names) in the redial
list have been erased
“EMPTY” is displayed on the screen
•
Press the
key to return to idle.
21
5 – BASE SETTINGS
Remark: When you access a base setting, the appliance will always ask you for the
base’s PIN code (“PIN?” is displayed on the screen).
The default PIN code is 0000
5-1 De-registering a handset
This function lets you de-register a handset registered on your base.
You cannot d—register a handset if it is the only one registered on your base.
A handset can only be de-registered from another handset registered on the same base.
Follow the steps below to de-register a handset:
•
•
•
The handset is idle (no tone)
Press
“CALL LIST” is displayed on the screen
•
•
•
•
•
•
•
•
Use the and keys to select “BS SETTINGS”
Press
“DELETE HS” is displayed on the screen.
Press
“PIN? ---- » is displayed on the screen
Use the alphanumerical keypad to enter your PIN code.
Press
“HANDSET 1” is displayed on the screen
•
•
Use the
Press
•
Hold down the
and
keys to select the handset to be de-registered.
key for 2 seconds to return to idle.
Remark: When you de-register a handset it will be de-registered from all the bases with
which it has been associated. “ASSOCIATED” or “DELETED” will be displayed on the
idle screen permanently to indicate that this handset has been de-registered. You will
have to associate it with the base again (see chapter 7).
5-2 Dialling selection
You can select the type of dialling to be used on your phone when you make a call.
We strongly recommend that you use voice frequency dialling, which is quicker and
more practical (in fact, decimal dialling does not let you consult a remote answering
machine or use voice or banking servers).
22
Follow the steps below to select the type of numbering:
•
•
•
The handset is idle (no tone)
Press
“CALL LIST” is displayed on the screen
•
•
•
Use the and keys to select “BS SETTINGS”
Press
“DELETE HS” is displayed on the screen.
•
•
•
Use the and keys to select “DIAL MODE”
Press
“VOICE FREQ” is displayed on the screen
•
•
•
Use the and keys to select the type of dialling you want.
Press
You will hear a beep to let you know your choice has been confirmed.
•
Hold down the
key for 2 seconds to return to idle.
5-3 Modifying the R (flash) key time
The R key lets you access Belgacom’s Comfort services.
Contact Belgacom for all information.
CAUTION: We strongly recommend that you leave this setting at SHORT (set at 100ms
by default).
However, for sets installed behind certain private exchanges (PABX), another setting
may be vital.
•
•
•
LONG (600ms)
MEDIUM (270ms)
SHORT (100ms)
Follow the steps below to modify the time for the R key:
•
•
•
The handset is idle (no tone)
Press
“CALL LIST” is displayed on the screen
•
•
•
Use the and keys to select “BS SETTINGS”
Press
“DELETE HS” is displayed on the screen.
•
•
•
Use the and keys to select “FLASH TIME”
Press
“SHORT *” is displayed on the screen
23
(The asterisk * indicates the time that is currently used).
•
•
•
Use the and keys to select the time you want to use
Press
You will hear a beep to let you know your choice has been confirmed.
•
Hold down the
key for 2 seconds to return to idle.
REMARK: After the default settings are reinitialised, the R key time automatically
returns to SHORT (100ms).
5-4 Changing the PIN code (confidential personal code)
Some functions can only be accessed by users who know the PIN code.
The default basic PIN code is 0000
CAUTION: If you want to change the default PIN code you must write your new
PIN code down. You will not be covered by the warranty if you forget your new
PIN code.
Follow the steps below to change your PIN code:
•
•
•
The handset is idle (no tone)
Press
“CALL LIST” is displayed on the screen
•
•
•
Use the and keys to select “BS SETTINGS”
Press
“DELETE HS” is displayed on the screen.
•
•
•
•
•
•
•
•
•
•
•
Use the and keys to select “CHANGE PIN”
Press
“PIN? ---- » is displayed on the screen
Use the alphanumerical keypad to enter your current PIN code.
Press
“NEW PIN? ---- » is displayed on the screen
Enter the new PIN code.
Press
“CONFIRM?---” is displayed on the screen
Press
You will hear a beep to let you know that your PIN code has been changed.
•
Hold down the
key for 2 seconds to return to idle.
REMARK: After the default settings are reinitalised, the PIN code always returns to the
default PIN code (0000).
24
6- HANDSET SETTINGS
6-1 Setting the alarm
If the alarm is activated, it will ring automatically at the time set for it.
If the SNOOZE function is activated, when the alarm rings, even if you switch it off
temporarily, it will ring every 5 minutes.
•
•
•
The handset is idle (no tone)
Press
“CALL LIST” is displayed on the screen
•
•
•
•
Use the and keys to select “HS SETTINGS”
Press
“ALARM” is displayed on the screen
Press
•
Use the and keys to select either:
“ON” to activate the alarm
or
“OFF” to deactivate the alarm
•
•
•
•
Press
Set the alarm time (enter the hours then the minutes)
Press
“SNOOZE” is displayed on the screen
“ON” to activate the alarm
or
“OFF” to deactivate the alarm
• Press
• You will hear a beep to let you know that the alarm time has been saved.
•
Hold down the
key for 2 seconds to return to idle.
• The
icon is displayed on the idle screen indicating that the alarm is active
Remark: - Press the
key to stop the alarm when it
sounds.
- If you activated the SNOOZE function, the alarm will ring every 5
minutes. Deactivate the alarm to stop the handset ringing every 5 minutes.
6-2 Choosing a ring on the handset
You have a choice of 10 ringtones (1 to 10) for an external call and for an internal call.
You can choose between 5 standard ringtones and 5 polyphonic ringtones.
An internal call comes from another handset registered on the same base.
25
You can use the same ringtone for an external call or an internal call but we suggest you
use a different tone to tell where the call comes from.
a) Choosing a ringtone for an internal call
•
•
Press
“CALL LIST” is displayed on the screen
•
•
•
Use the and keys to select “HS SETTINGS”
Press
“ALARM” is displayed on the screen
•
•
•
•
•
Use the and keys to select “RINGS”
Press
“INT. RING” is displayed on the screen
Press
The ringtone used is played and “MELODY X” is displayed
•
•
•
Use the and keys to select an internal ringtone.
Press
You will hear a beep to let you know that the ringtone you selected has been
confirmed.
a) Choosing a ringtone for an external call
•
•
Press
“CALL LIST” is displayed on the screen
•
•
•
Use the and keys to select “HS SETTINGS”
Press
“ALARM” is displayed on the screen
•
•
•
•
•
Use the and keys to select “RINGS”
Press
“EXT. RING” is displayed on the screen
Press
The ringtone used is played and “MELODY X” is displayed
•
•
•
Use the and keys to select an external ringtone.
Press
You will hear a beep to let you know that the ringtone you selected has been
confirmed.
•
Hold down the
key for 2 seconds to return to idle.
26
c) Ring volume on a handset
You can adjust the ring volume for an external call or an internal call to 5 levels (1 to 5)
or to OFF.
The same volume is set for both the internal and external ring.
1) Using the menu
•
•
Press
“CALL LIST” is displayed on the screen
•
•
•
Use the and keys to select “HS SETTINGS”
Press
“ALARM” is displayed on the screen
•
•
•
Use the and keys to select “RINGS”
Press
“EXT. RING” is displayed on the screen
•
•
•
Use the and keys to select “RING VOL”
Press
The ring volume used is played and “VOLUME X” is displayed.
•
•
•
Use the and keys to select the ring volume.
Press
You will hear a beep to let you know that the ring volume has been saved.
•
Hold down the
key for 2 seconds to return to idle.
2) During call reception
•
The handset rings.
•
•
Press
or use the and keys to select the ring volume
The last setting selected is stored.
6-3 Tones
a) Activating/Deactivating the key beeps
When activated, this function lets you hear a beep each time you press a key.
Follow the steps below to activate or deactivate the key beeps:
•
•
•
The handset is idle (no tone)
Press
“CALL LIST” is displayed on the screen
•
Use the
and
keys to select “HS SETTINGS”
27
•
•
Press
“ALARM” is displayed on the screen
•
•
•
•
Use the and keys to select “TONES”
Press
“KEYTONE” is displayed on the screen
Press
•
Use the and keys to select either:
“ON” to activate the keytones
or
•
“OFF” to deactivate the keytones
You will hear a beep to let you know that the ring volume has been saved.
•
Hold down the
key for 2 seconds to return to idle.
b) Activating/Deactivating the Low battery alert
When activated, this function lets you hear a beep to let you know that your battery
power is low.
Follow the steps below to activate or deactivate this function:
•
•
•
The handset is idle (no tone)
Press
“CALL LIST” is displayed on the screen
•
•
•
Use the and keys to select “HS SETTINGS”
Press
“ALARM” is displayed on the screen
•
•
•
Use the and keys to select “TONES”
Press
“KEYTONE” is displayed on the screen
•
•
Use the and keys to select “WRONG BATT”
Press
“ON” to activate the low battery tone
or
“OFF” to deactivate the low battery tone
•
You will hear a beep to let you know that the change has been saved.
•
Hold down the
key for 2 seconds to return to idle.
c) Activating/Deactivating the Out of range alert
When activated, this function lets you hear a beep to let you know that your handset is
out of range.
28
Follow the steps below to activate or deactivate this function:
•
•
•
The handset is idle (no tone)
Press
“CALL LIST” is displayed on the screen
•
•
•
Use the and keys to select “HS SETTINGS”
Press
“ALARM” is displayed on the screen
•
•
•
Use the and keys to select “TONES”
Press
“KEYTONE” is displayed on the screen
•
•
Use the and keys to select “OUT OF RANGE”
Press
“ON” to activate the Out of range tone
or
•
“OFF” to deactivate the Out of range tone
You will hear a beep to let you know that the change has been saved.
•
Hold down the
key for 2 seconds to return to idle.
6-4 Handset language
You have 4 languages: French (FRANCAIS), English (ENGLISH-default), Dutch
(NEDERLANDS) and German (DEUTSCH).
Follow the steps below to select a language on the handset:
•
•
•
The handset is idle (no tone)
Press
“CALL LIST” is displayed on the screen
•
•
•
Use the and keys to select “HS SETTINGS”
Press
“ALARM” is displayed on the screen
•
•
•
Use the and keys to select “LANGUAGE”
Press
“FRENCH” is displayed on the screen
•
•
•
Use the and keys to select the language you want
Press
You will hear a beep to let you know that the language has been changed.
29
•
Hold down the
key for 2 seconds to return to idle.
6-5 Renaming a handset
This function lets you give your handset a name.
The handset name must not exceed 10 characters.
•
•
•
The handset is idle (no tone)
Press
“CALL LIST” is displayed on the screen
•
•
•
Use the and keys to select “HS SETTINGS”
Press
“ALARM” is displayed on the screen
•
•
•
Use the and keys to select “RENAME HS”
Press
The current handset name is displayed on the screen
•
•
•
Press
to erase the name displayed character by character then use the
keys on the alphanumerical keypad to edit.
Press
You will hear a beep to let you know that the name has been changed.
•
Hold down the
key for 2 seconds to return to idle.
6-6 Display
This function lets you define the type of display for the idle screen.
You can choose between 2 types of display (Handset name or Time).
Follow the steps below to choose the type of display:
•
•
•
The handset is idle (no tone)
Press
“CALL LIST” is displayed on the screen
•
•
•
Use the and keys to select “HS SETTINGS”
Press
“ALARM” is displayed on the screen
•
•
•
Use the and keys to select “DISPLAY”
Press
“TIME” is displayed on the screen
•
Use the
and
keys to select the type of display
30
•
•
Press
You will hear a beep to let you know that the display has been changed.
•
Hold down the
key for 2 seconds to return to idle.
6-7 Automatic answer
When this function is active, the line is automatically opened when you lift the handset
from the base (without pressing
) to answer a call.
When this function is deactivated, when you lift the handset from the base you must
press
to answer a call.
Follow the steps below to activate or deactivate this function:
•
•
•
The handset is idle (no tone)
Press
“CALL LIST” is displayed on the screen
•
•
•
Use the and keys to select “HS SETTINGS”
Press
“ALARM” is displayed on the screen
•
•
Use the and keys to select “AUTO ANSWER”
Press
“ON” to activate this function
or
“OFF” to deactivate this function
• Press
• You will hear a beep to let you know that the setting has been changed.
•
Hold down the
key for 2 seconds to return to idle.
6-8 Setting the time
a) Date format
You can choose to display the date in month/day/year format (MM--DD--YY) or in
day/month/year format (DD--MM--YY).
•
•
•
The handset is idle (no tone)
Press
“CALL LIST” is displayed on the screen
•
Use the
and
keys to select “HS SETTINGS”
31
•
•
Press
“ALARM” is displayed on the screen
•
•
•
•
Use the and keys to select “DATE & TIME”
Press
“DATE FORMAT” is displayed on the screen
Press
•
•
•
Use the and keys to select a format.
Press
You will hear a beep to let you know that the format has been confirmed.
•
Press
to return to the previous menu.
b) Time format
You can choose to display the time in 24-hour format (e.g.: 23.14) or in 12-hour format
(E.g.: 11.14 P for 23.14 or 11.14 M for 11.14).
•
•
•
The handset is idle (no tone)
Press
“CALL LIST” is displayed on the screen
•
•
•
Use the and keys to select “HS SETTINGS”
Press
“ALARM” is displayed on the screen
•
•
•
Use the and keys to select “DATE & TIME”
Press
“DATE FORMAT” is displayed on the screen
•
•
Use the
Press
•
•
•
Use the and keys to select a format.
Press
You will hear a beep to let you know that the setting has been changed.
•
Hold down the
and
keys to select “TIME FORMAT”
key for 2 seconds to return to idle.
c) Setting the time
•
•
•
The handset is idle (no tone)
Press
“CALL LIST” is displayed on the screen
•
•
•
Use the and keys to select “HS SETTINGS”
Press
“ALARM” is displayed on the screen
32
•
•
•
Use the and keys to select “DATE & TIME”
Press
“DATE FORMAT” is displayed on the screen
•
•
•
•
•
•
Use the and keys to select “SET TIME”
Press
The current time is displayed on the screen
Use the alphanumerical keypad to enter the hours then the minutes
Press
You will hear a beep to let you know that the time has been confirmed.
•
Press
to return to the previous menu.
d) Setting the date
•
•
•
The handset is idle (no tone)
Press
“CALL LIST” is displayed on the screen
•
•
•
Use the and keys to select “HS SETTINGS”
Press
“ALARM” is displayed on the screen
•
•
•
Use the and keys to select “DATE & TIME”
Press
“DATE FORMAT” is displayed on the screen
•
•
•
•
•
Use the and keys to select “SET DATE”
The date is displayed on the screen
Use the alphanumerical keyboard to set the date.
Press
You will hear a beep to let you know that the setting has been changed.
•
Hold down the
key for 2 seconds to return to idle.
7 REGISTERING A HANDSET ON A BASE
You must know the base’s PIN code (0000 by default) to access this function.
A base may register up to 5 handsets.
Follow the steps below to register a handset on a base:
On the base:
33
•
•
Hold down the
key for 10 seconds
The base is in association mode for 3 minutes; now follow the steps below on the
handset.
On the handset to be registered:
• Press
• “CALL LIST” is displayed on the screen
•
•
Use the
Press
•
•
•
•
Use the and keys to select the base where the handset is to be registered.
Press
“PIN? ---- » is displayed on the screen
Use the alphanumerical keypad to enter the base's PIN code (0000 by defautlt)
where you will register this handset
Press
“SEARCHING” is displayed on the screen
You will hear a beep to let you know that the handset has been registered on the
base.
•
•
•
and
keys to select “REGISTRATION”
8- REINITIALISING THE DEFAULT SETTINGS
This function lets you restore all the default settings on the base and the handset.
CAUTION: If you reinitialise the parameters you will completely erase the call log (list of
calls received) and the redial list (list of the last numbers dialled) but you will keep the
full contents of the phonebook.
The base’s PIN code will be reset at 0000.
The default settings are:
On the base:
• PIN code: 0000
• Dialling: VF (voice frequency)
• R key: SHORT (100ms)
On the handset:
• Language: ENGLISH
• External ringing: 1
• Internal ringing: 2
• Ringing volume: 3
• Keytones: Activated (ON)
34
•
•
•
•
•
•
•
Low battery tone alert: Activated (ON)
Out of range tone alert: Deactivated (OFF)
Alarm deactivated (OFF)
Time: 00 :00
Time format: 24-hour
Handset name: BELGACOM
Automatic answer Activated (ON)
Follow the steps below to reset the base settings:
•
•
Press
“CALL LIST” is displayed on the screen
•
•
•
•
•
•
•
•
Use the and keys to select “DEFAULT”
Press
“PIN? ---- » is displayed on the screen
Enter your base’s PIN code (0000 by default)
Press
“CONFIRM?” is displayed on the screen
Press
You will hear a beep to let you know that the settings have been reset.
•
Hold down the
key for 2 seconds to return to idle.
9- INTERPHONE
The following functions are only accessible if you have at least 2 handsets registered on
your base.
Remark: If you only have 2 handsets registered with the base you do not need to select
a handset – simply pressing
handset.
automatically makes an internal call to the other
9-1 Internal call
a) To another handset
•
The handset is idle (no tone)
•
•
•
•
Press
“COM XX
9” is displayed on the screen. (Example: “COM 1 3
9”)
Enter the number of the handset you want to call
“CALLING HS X” is displayed on the handset’s screen (X represents the number
of the handset called: (Example: “CALLING HS 3”)
35
•
“CALL FROM X” is displayed on the screen of the handset called
(X corresponds to the number of the handset from where the call is made;
example: “CALL FROM 2”).
•
Press
•
At the end of the call, press
or hang the telephone up on its base.
b) To all the other handsets
•
The handset is idle (no tone)
•
•
•
•
•
Press
“COM XX
9” is displayed on the screen. (Example: “COM 1 3
9”)
Press 9 on the alphanumerical keypad
“CALLING ALL HS” is displayed on the screen
“CALL FROM X” is displayed on all the screens of the other handsets called.
(X corresponds to the number of the handset from where the call is made;
example: “CALL FROM 2”).
•
Press
•
At the end of the call, press
to answer on one of the handsets
or hang the telephone up on its base.
9-2 Receiving an internal call
•
•
The called handset rings.
“CALL FROM X” is displayed on the screen
•
•
Press
Talk to your internal correspondent.
•
At the end of the call, press
.
9-3 Receiving an external call during an internal call
When you receive an external call during an internal call, tones will be heard inside
the earpieces of the handsets involved in the call. You must finish the internal call to
be able to take the external call.
•
You are in an internal call.
•
Press
to end the internal call.
•
Press
to take the external call.
•
At the end of the call, press
.
36
9-4 Transferring an external call to another handset
•
•
•
•
•
•
•
•
•
•
You are talking to an external correspondent.
Press
“INTERCOM” is displayed on the screen
Press
“COM XX
9” is displayed on the screen. (Example: “COM 1 3
9”)
Enter the number of the handset where you want the call to be transferred to.
“CALLING HS X” is displayed on the handset’s screen (X represents the number
of the handset called: (Example: “CALLING HS 3”)
“CALL FROM X” is displayed on the screen of the handset called
(X corresponds to the number of the handset from where the call is made;
example: “CALL FROM 2”).
Press
Your external correspondent is now in a call with your internal correspondent.
9-5 Three-way conference call (two internal handsets +
one external correspondent)
You can talk to an internal correspondent and an external correspondent at the same
time.
•
•
•
•
•
•
•
•
•
•
•
You are on line with an external correspondent.
Press
“INTERCOM” is displayed on the screen
Press
“COM XX
9” is displayed on the screen. (Example: “COM 1 3
9”)
Enter the number of the handset you want to call
“CALLING HS X” is displayed on the handset’s screen (X represents the number
of the handset called: (Example: “CALLING HS 3”)
“CALL FROM X” is displayed on the screen of the handset called
(X corresponds to the number of the handset from where the call is made;
example: “CALL FROM 2”).
As soon as your internal correspondent picks up, hold down the
seconds.
“CONFERENCE” is displayed on the screen
You are now in a three-way conference call.
10- VOICE MAIL (PHONEMAIL)
37
key for 3
Belgacom offers you a voice mail service (voice mailbox) on the network. You can
transfer your calls to a voice mailbox if you are not home or are already involved in call.
Contact Belgacom for more information.
The presence of one or more messages is indicated on the screen with the
icon
Dial 1230 to listen to your voice messages.
The icon disappears from the screen when you have played all the messages.
11- CALL LOG
The call log lets you store the last 10 calls received.
CAUTION: To take advantage of all of the following functions, you must subscribe
to Belgacom’s Number and name display service. This service is dependent on
availability.
11-1 Name and number presentation
•
•
•
•
•
•
•
•
When a call is received, the calling line number is compared with the telephone
numbers stored in the phonebook. If the phonebook contains the number, the
phone replaces it with the corresponding name stored in the phonebook.
The phone lets you identify the name and number of your correspondents and the
date and time of their calls.
When “X NEW CALLS” is displayed on idle, this means that you have received X
new missed calls (unanswered) in the log; these calls can be recognised by the
icon when consulted.
Calls where the caller does not want to reveal their number are not saved in the
call log. “SECRET” is displayed on the screen when the caller does not want to
reveal their number.
When a call is received with the name, the handset displays the caller’s name
and number alternately.
Answered calls are saved in the log but are considered as read.
When you answer a call, the number or name is replaced with the conversation
time after 40 seconds’ conversation.
The name and number are only displayed when you are on line if you have
subscribed to the number and name display service.
38
11-2 Consulting the call log
Your call log can contain the last 10 calls received.
Beyond this, the most recent call replaces the oldest one.
IMPORTANT: As soon as you consult the log, a missed (unanswered) call which is not
read is indicated by the icon displayed on the screen. This icon will disappear when
and keys.
you consult it with the
.
• The handset is idle (no tone)
•
•
Press to enter consultation mode.
The most recent number (or name) saved in the log is displayed on the screen.
•
•
Use the
Press
and
•
•
Use the
Press
and keys to select “DETAILS”
to view the date and time the call arrived.
•
•
Press
Press
•
Press the
keys to consult the other numbers in the log.
to view the number if the name is displayed
to exit the “DETAILS” option
key to return to idle.
You can also access the call log via the menu:
•
•
•
•
Press
.
“CALL LIST” is displayed on the screen.
Press
.
The most recent number (or name) saved in the log is displayed on the screen.
•
•
Use the
Press
and
.
•
•
Use the
Press
and keys to select “DETAILS”
to view the date and time the call arrived.
•
•
Press
Press
•
Press the
keys to consult the numbers in the log.
to view the number if the name is displayed
to exit the “DETAILS” option
key to return to idle.
11-3 Dialling a number from the log
39
•
The handset is idle (no tone)
•
•
Press to enter consultation mode.
The most recent number (or name) saved in the log is displayed on the screen.
•
Use the
•
•
Press
The number (or name) displayed is dialled automatically.
and
keys to consult the other numbers in the log.
11-4 Saving the number in the log in the phonebook
•
The handset is idle (no tone)
•
•
Press to enter consultation mode.
The most recent number saved in the log is displayed on the screen.
•
•
•
•
•
•
•
•
•
•
Use the and keys to consult the other numbers in the log.
Press
“ADD” is displayed on the screen
Press
“NAME” is displayed on the screen
Use the alphanumerical keypad to enter the contact’s name
Press
The contact’s number is displayed on the screen
Press
“MELODY 1” is displayed on the screen
•
•
•
Use the and keys to select the ringtone to be associated with the contact
Press
You will hear a beep to let you know that the contact’s name and number have
been saved.
•
Press the
key to return to idle.
11-5 Erasing selected calls
This function lets you erase a call from the log.
•
The handset is idle (no tone)
•
•
Press to enter consultation mode.
The most recent number (or name) saved in the log is displayed on the screen.
•
Use the and keys to select the name or number (name in the phonebook)
you want to erase.
40
•
•
Press
“ADD” is displayed on the screen
•
•
•
Use the and keys to select “DELETE”
Press
You will hear a beep to let you know that the contact’s name and number have
been erased.
•
Press the
key to return to idle.
11-6 Erasing all calls
This function lets you erase all the calls saved (read and unread) in the call log.
•
The handset is idle (no tone)
•
•
•
•
Press to enter consultation mode.
The most recent number (or name) saved in the log is displayed on the screen.
Press
“ADD” is displayed on the screen
•
•
•
•
•
•
Use the and keys to select “DELETE ALL”
Press
“CONFIRM?” is displayed on the screen
Press
You will hear a beep to let you know that all the calls in the log have been erased.
“EMPTY” is displayed on the screen
•
Press the
key to return to idle.
12- IF A PROBLEM OCCURS
Check the points below before contacting Belgacom’s Customer Service
department.
TELEPHONE FUNCTION
No display:
•
•
•
Check that the handset batteries have been correctly inserted (polarities).
Place the handset on the base to charge the batteries.
Remove the handset batteries and put them back in.
The batteries are not charged:
41
•
•
•
Check the battery polarities.
Clean the handset and base charge contacts.
Recharge the batteries again.
A beep is heard both when you are making a call or when the set is idle:
•
•
Recharge the handset batteries.
Move closer to the base.
The handset cannot find the base:
•
•
•
•
You are out of range and must move closer to the base.
Connect the base power supply correctly.
Remove the handset batteries and put them back in.
Disconnect the mains adaptor from the base and reconnect it to the base.
The dialling tone cannot be heard:
•
Check that the telephone line is correctly connected to the base.
NUMBER AND NAME DISPLAY FUNCTON
•
•
Access to the Number and name display service is subject to subscription to
the Belgacom service (and depends on the technical availability of the service).
If you have subscribed to this service, the date (day/month) and time are updated
by the network each time a call is received.
42
13-CERTIFICATE OF CONFORMITY
We,
Logicom
74, rue de la Belle Etoile
Z.I. Paris Nord II
B.P. 58338
95941 ROISSY CDG
France
Declare that the Twist 129 (Riva 250) product conforms to the essential, applicable
requirements, especially the following in directive 1999/5/CE:
Article 3.1a - (user health and safety protection):
- EN60950-1 (2006)
Article 3.1b - (protection requirements in relation to electromagnetic compatibility):
- EN301489-6 V1.2.1 (08/2002)
- EN301489-1 V1.6.1 (2005)
Article 3.2 – (correct use of the radio-electric spectrum avoiding harmful interference):
- EN301406V 1.5.1 (2003)
We declare that the Twist 129 (Riva 250) product conforms to the requirements related
to European line interface standards.
This device is designed for connection to Belgacom's Public Switched Analog
Telephone Network.
This conformity covers the product for which it is provided, as long as it is installed and
used according to the instructions provided in the user manual.
Any unauthorised modification to the product cancels this declaration of conformity.
Roissy, 22nd December 2008
Bernard BESSIS
Chairman and Chief Executive
43
14- GUARANTEE TERMS
The Equipment you have bought has been carefully selected by Belgacom and
is covered by a two-year warranty on spare parts and labor in the event of any
material or manufacturing defect, unless otherwise specified. The warranty shall
be valid from the date on which the equipment is collected or delivered.
If you have any problems with the equipment, you should take it to a
Teleboutique or to one of our authorized agents, in its entirety and in its original
packaging, or in packaging providing the same degree of protection, together
with the original receipt. The addresses for our Teleboutiques and authorized
agents are given in the Information Section of the White Pages.
Your equipment will be repaired or replaced free of charge, on presentation of the
receipt, in the event of any material or manufacturing defect.
Belgacom alone shall determine what repairs and/or replacements are necessary.
The warranty on the repaired or replaced equipment shall end on the date on
which the original warranty on the purchased equipment expires, but shall not
be less than 3 months.
The warranty shall not cover:
- damage of any kind that does not predate the sale;
- any damage, faults or defects attributable to the Customer or to causes unrelated
to the Equipment: lightning, power surges, humidity, accidental damage,
improper use or poor maintenance, failure to comply with the instructions in
the user manual, and force majeure;
- the repair or replacement of movable parts (cords, wires, plugs, aerials, etc.),
consumables (cells, batteries, paper, ink, etc.) needing regular replacement and
the supply of cleaning products.
The warranty shall not apply:
- to any changes or repairs to the terminal Equipment undertaken by the
Customer himself/herself or through the services of persons not designated
by Belgacom;
- if the Customer removes or tampers with the manufacturer’s serial numbers
and/or brand names on the terminal Equipment.
Belgacom shall not be liable for any indirect or immaterial loss sustained by the
Customer as a result of the malfunctioning of the terminal Equipment, such as
any loss of production, revenue or contracts.
The General Terms and Conditions for the Sale of Terminal Equipment can
be obtained on request from any Belgacom service available to the public
or at www.belgacom.be
44