1
ZETTLER Medicall 800 ZETTLER, Medicall 800, User Manual, 950.8000E User Manual 950.8000E Doc. version 3.5 7. October 2015 © Tyco Fire & Security GmbH, Victor von Bruns-Strasse 21, 8212 Neuhausen am Rheinfall, Switzerland, 1996, 2000, 2001, 2002, 2005, 2009, 2011, 2012, 2014, 2015 Contents subject to change without notice. All rights to this documentation, including the contents of the online help, are reserved, in particular but not limited to the rights of copying, distribution and translation. No portion of this documentation, including the online help, may be reproduced, edited, copied or distributed in any form without prior written authorization from Tyco Fire & Security GmbH. ZETTLER Medicall 800 Contents Contents 1 Guide to this manual .........................................................................................5 1.1 1.2 Signal words and symbols ............................................................................................. 5 About this document ..................................................................................................... 5 2 Safety information ............................................................................................6 3 General information ..........................................................................................7 4 Presence ............................................................................................................8 5 Making and processing calls .............................................................................9 5.1 5.1.1 5.1.2 5.1.3 5.2 5.3 5.3.1 5.3.2 Making calls (systems with and without speech) .......................................................... 9 Patient makes a call ...................................................................................................................................9 Calls triggered automatically ......................................................................................................................9 Nursing staff make a call ...........................................................................................................................9 Signalling calls ............................................................................................................. 10 Processing a call at the call line .................................................................................. 18 Cancel call................................................................................................................................................18 Stored calls ..............................................................................................................................................18 6 Answer stations ..............................................................................................19 6.1 6.1.1 6.1.2 6.1.3 6.1.4 6.1.5 6.1.6 6.1.7 6.1.8 6.1.9 6.1.10 6.1.11 6.1.12 6.1.13 6.1.14 6.1.15 6.1.16 6.1.17 6.1.18 6.1.19 6.2 6.2.1 6.2.2 6.2.3 6.2.4 6.2.5 6.2.6 6.2.7 6.2.8 6.2.9 6.2.10 6.2.11 NCS Touch ................................................................................................................... 19 Handset ...................................................................................................................................................19 Buttons ....................................................................................................................................................19 Display .....................................................................................................................................................21 Menu .......................................................................................................................................................21 Use, general information .........................................................................................................................23 Switching the NCS Touch on...................................................................................................................23 Answering a call with speech facility .......................................................................................................23 Processing a call without speech (e.g. WC call) ......................................................................................24 Voice contact ...........................................................................................................................................24 Announcement ........................................................................................................................................25 Initiating a call ..........................................................................................................................................25 Monitor room...........................................................................................................................................25 Acknowledging faults and messages ......................................................................................................26 Telephone ................................................................................................................................................26 Signal emergency mode ..........................................................................................................................26 Additional functions .................................................................................................................................26 Settings for Medicall 800.........................................................................................................................27 Settings for the NCS Touch .....................................................................................................................28 Service .....................................................................................................................................................28 Communication terminal Touch (CT Touch) ................................................................ 29 Overview .................................................................................................................................................29 Use, general information .........................................................................................................................32 Switching on the CT Touch......................................................................................................................33 Answering a call with speech facility .......................................................................................................33 Processing a call without speech (e.g. WC call) ......................................................................................33 Voice contact ...........................................................................................................................................34 Announcement ........................................................................................................................................34 Initiating a call ..........................................................................................................................................35 Monitor room...........................................................................................................................................35 Acknowledging faults and messages ......................................................................................................35 Telephoning .............................................................................................................................................35 User Manual Doc. version 3.5 3 Contents ZETTLER Medicall 800 6.2.12 6.2.13 6.2.14 6.2.15 6.2.16 6.2.17 6.2.18 6.3 6.4 6.4.1 6.4.2 6.4.3 6.4.4 6.4.5 6.4.6 6.5 6.5.1 6.5.2 6.5.3 6.5.4 6.5.5 6.5.6 6.5.7 6.5.8 Timer........................................................................................................................................................36 Signal emergency mode ..........................................................................................................................36 Additional display buttons........................................................................................................................36 Additional functions .................................................................................................................................36 Settings for Medicall 800.........................................................................................................................37 Settings for the CT Touch........................................................................................................................38 Service .....................................................................................................................................................38 PCAIM audio interface module .................................................................................... 39 Other answer stations in systems with speech ........................................................... 41 Button functions ......................................................................................................................................41 Display indication .....................................................................................................................................42 Processing calls .......................................................................................................................................42 Processing faults and messages .............................................................................................................42 Signal emergency mode ..........................................................................................................................43 Additional functions .................................................................................................................................43 Displays in systems without speech ............................................................................ 45 Button functions ......................................................................................................................................45 Display indication .....................................................................................................................................45 Processing calls .......................................................................................................................................46 Processing faults and messages .............................................................................................................46 Signal emergency mode ..........................................................................................................................46 Additional functions .................................................................................................................................46 Display S2, universal display ....................................................................................................................46 Display S1 ................................................................................................................................................47 7 Other components...........................................................................................49 7.1 7.2 7.3 7.3.1 7.4 7.4.1 7.4.2 7.4.3 Room electronics with RFID......................................................................................... 49 Patient's handsets........................................................................................................ 50 Call indication on the corridor display......................................................................... 52 Signal emergency mode ..........................................................................................................................52 Adapter for medical device .......................................................................................... 53 Description...............................................................................................................................................53 Installation and connection ......................................................................................................................54 Symbols on the adapter...........................................................................................................................55 8 Pager system and DECT ..................................................................................56 8.1 8.2 8.2.1 Systems with pagers) ................................................................................................... 56 Systems with cordless telephones (DECT) ................................................................... 56 Operation .................................................................................................................................................56 9 Examples of use ..............................................................................................57 9.1 9.2 9.3 Notes to the examples ................................................................................................. 57 Examples of systems without speech .......................................................................... 58 Examples of systems with speech ............................................................................... 61 10 Maintenance and servicing .............................................................................64 10.1 10.2 10.3 10.4 10.5 10.5.1 10.5.2 Operation and repairs................................................................................................... 64 Servicing ...................................................................................................................... 64 Inspections ................................................................................................................... 65 Disposal........................................................................................................................ 65 Protection range, cleaning and disinfection ................................................................ 65 Protection range ......................................................................................................................................65 Cleaning and disinfection.........................................................................................................................65 11 Glossary ..........................................................................................................66 Index.............................................................................................................................69 4 User Manual Doc. version 3.5 ZETTLER Medicall 800 1 Guide to this manual 1 Guide to this manual 1.1 Signal words and symbols Signal words and symbols are used in this manual to alert you to warnings, information and instructions (see table 1). Key word Symbol Explanation DANGER Warning. Imminent danger. Death or serious injury if ignored. WARNING Warning. Potentially dangerous situation. Possible death or serious injury if ignored. CAUTION Warning. Potentially dangerous situation. Possible light or minor injuries if ignored. NOTICE Note. Potentially dangerous situation. Possible material damage if ignored. 1.2 About this document WARNING If you do not follow the information in this document, you could make mistakes when using Medicall 800. This could mean that calls from patients remain unanswered and patients could be put at risk. Operation of the call system may be disrupted. Pay attention to the information in this document. Keep the document in a safe place. Pass it on to other users if necessary. This user guide describes how to operate the components of a Medicall 800 system. The settings on your system may differ from the settings described here. This user guide is intended for the following groups: nursing staff in hospitals, spa and rehabilitation clinics, retirement and nursing homes service personnel Helpful information. Table 1: Signal words and symbols in this manual User Manual Doc. version 3.5 5 2 Safety information 2 Safety information Keep a safe distance Be sure to keep CB radios, PMR radios and mobile phones a safe distance away from components of Medicall 800 at various frequencies: 150 kHz to 80 MHz (CB radio) 0.01 W 0.12 m, 0.1 W 0.37 m, 1 W 1.17 m, 10 W 3.69 m, 100 W 11.67 m 80 to 800 MHz (PMR radio) 0.01 W 0.04 m, 0.1 W 0.11 m, 1 W 0.35 m, 10 W 1.11 m, 100 W 3.50 m 800 MHz to 2.5 GHz (mobile phones) 0.01 W 0.07 m, 0.1 W 0.22 m, 1 W 0.70 m, 10 W 2.21 m, 100 W 7.00 m If you do not keep a safe distance, this may interfere with the components of Medicall 800 and cause them not to work properly. Volume of acoustic call forwarding One of the ways that calls are signalled is by acoustic call forwarding in rooms with a set presence. The acoustic pressure at a distance of 2 m is between 45 and 65 dBA. 6 ZETTLER Medicall 800 Systems with uninterruptible power supply Systems compliant with DIN VDE 0834 need a power source for safety purposes. If the normal power supply fails, this power source takes over the supply and keeps the system going for at least an hour. This means that calls can continue to be made and processed. Articles treated with biocidal products Some plastic parts that are used are classed as articles treated with biocidal products as defined in the EU Biocides Regulation 528/2012. A biocidal product is added to them during manufacture in order to restrict the proliferation of bacteria on the surface. This does not entail any particular precautionary measures or instructions for use for these components. The following are used as a biocidal product: Silver ions – Communication terminal Touch – Room electronics with RFID (housing), traffic white, 130.1305 – Patient's handsets, traffic white, 127.xxxx – Call panel, presence panel, sockets (VL Flat), traffic white, 127.xxxx Zinc pyrithione – Communication terminal Touch (keypad) – Room electronics with RFID (keypad), traffic white, 130.1305 User Manual Doc. version 3.5 ZETTLER Medicall 800 3 3 General information General information Medicall 800 Medicall 800 is a fully electronic care and communications system that conforms to the very latest standards and requirements (DIN VDE 0834) and offers a high level of safety. The monitoring functions integrated into the system ensure that any faults that occur are signalled immediately and can be quickly rectified. They also ensure that the other parts of the system are not affected by this fault and can continue to work reliably. Calls are signalled in a variety of ways: On overdoor lights and station lights. By acoustic call forwarding. In clear text on various display devices (“displays”) in rooms and corridors. This allows the patient calling to be quickly located. If necessary, a station can be divided into care groups or interconnected with other stations. You can easily change the interconnections at the answer stations. This means that the system can be adapted to the requirements prevailing at any particular time. User Manual Doc. version 3.5 Components with and without speech In Medicall 800 there are components with and without speech. In components without speech you can store calls from the displays before locating the patient. The stored room is then specially identified by means of the room signal light. In components with speech, you can speak to the patient and ask what he needs before going to find him. This saves many unnecessary journeys. Here too, you can identify the particular room by “storing” it. Components with speech also have the following functions: Announcement to all or to particular rooms Speak to nursing staff (“speak to presence”) Speak to rooms or beds without presence 7 4 Presence 4 ZETTLER Medicall 800 Presence WARNING Set the presence conscientiously so that the call system can function properly. Patients could otherwise be put at risk. You can set your presence in a number of ways (see figures 1, 2, 3). How to set the presence with an IR transmitter 1 Fasten the IR transmitter as high as possible, e.g. on the collar or a breast pocket of your clothing. Make sure that the IR transmitter is not hidden. 2 Enter a room with an IR sensor. Medicall 800 sets your presence 1 or 2 automatically depending on your IR transmitter. You do not need to press any button. 3 Leave the room again. Medicall 800 cancels the presence automatically if no other presence is registered in the room. Fig. 1: Presence button Fig. 2: RFID tags (for room components with RFID) Window for infrared signals Trigger emergency call Battery display flashes when the battery is low Fig. 3: IR transmitter (for use with IR sensors) How to set the presence with the presence button 1 Press the presence button when entering a room: – Presence 1, green: 1 – Presence 2, yellow: 2 If you do not know which presence category applies to you, find this out. Many systems only have presence 1. 2 Press your presence button again when leaving the room in order to cancel presence again. 8 How to set the presence with an RFID tag 1 Hold the RFID tag a few centimetres away from the room component with RFID. Medicall 800 sets your presence 1 or 2 depending on your RFID tag. An acoustic signal indicates with 1 tone that the presence has been set. 2 When leaving the room, hold your RFID tag in front of the room component with RFID again in order to cancel the presence. An acoustic signal indicates with 2 tones that the presence has been cancelled. Switching the presence on has the following effects: You can process calls at an answer station. The green (presence 1) or yellow (presence 2) presence lamp in the room signal light illuminates. If there is no cancel panel and only one call is made in the room, an existing call is cancelled. You are informed of further calls for your presence category by means of an audible signal (acoustic call forwarding); for signals see section 5.2 “Signalling calls” on page 10. You can disconnect a patient’s handset or the like without triggering a plug removed call (see section “Plug removed call” on page 9). You can make emergency calls. You receive the calls that are intended for your presence category. RFID tags and IR sensors can be assigned to individual people. Additional functions include: Medicall 800 stores the time at which your presence was registered and cancelled in mediLog. If you leave the room or cancel your presence with the RFID tag and no other presence is registered in the room, Medicall 800 cancels the presence. User Manual Doc. version 3.5 ZETTLER Medicall 800 5 Making and processing calls 5 Making and processing calls 5.1 Making calls (systems with and without speech) 5.1.1 Patient makes a call S 2 1 Figures 4 and 5 show devices at which the patient can make a call. Buttons: Press the call button to make a call. A locating light illuminates weakly next to the call button so that you can find the call button even in the dark. Pneumatic ball (in case of pneumatic call panel): Press the ball. Pull cord (in case of pull switch): Pull the pull cord. There is a reassurance light in all call devices. It illuminates to indicate to the patient that his call has been accepted by the system. Table 2 shows the buttons for making calls. Button In the bathroom or WC 3 Fig. 5: Devices used by patients to make a call in the WC 1 – Call panel 2 – Pneumatic call panel 3 – Pull cord panel The patient makes a WC call in the bathroom or WC. Call 5.1.2 Used by the patient to call the nursing staff. Infusion call and diagnostic call These calls are triggered automatically by the connected monitoring devices. To cancel these calls, set your presence and cancel the alarm at the monitoring device. If the alarm is not cancelled at the monitoring device, the diagnostic call is triggered again within 2 seconds. Used to call the service personnel. Table 2: Buttons used by patients to make a call Calls triggered automatically By the bed 1 2 S ZETTLE R ® Fig. 4: Bedside devices used by patients to make a call 1 – Call panel (device shown here with patient call, service call, socket) 2 – Patient’s handset Plug removed call This call is triggered automatically if the plug of a mobile call device (pendant push button, patient’s handset or adapter for medical device) is inadvertently pulled out of the socket. If you have set your presence properly, you can disconnect or replace a mobile call device at any time without the automatic plug removed call being triggered. 5.1.3 Nursing staff make a call In the room or by the bed If you have set the presence, you can make the calls from table 3 using the call buttons. Button Call Used to call a nurse in an emergency. Used to call a doctor in an emergency. Used by staff to call other nursing staff. REA Used to call the resuscitation team in the event of a cardiac call. Table 3: Buttons used by nursing staff to make a call User Manual Doc. version 3.5 9 5.2 Signalling calls In the bathroom or WC If you have set your presence and then press any call device in the bathroom or WC, this triggers a WC emergency call. 5.2 ZETTLER Medicall 800 Tables 4 on page 11, 5 on page 12 and 6 on page 13 show how calls in the system are signalled in compliance with DIN VDE 0834. Tables 8 on page 15, 7 on page 14, 9 on page 16 and 10 on page 17 show how calls in the system are signalled in compliance with HTM 08-03. Signalling calls DANGER The LEDs of the LED lights are very bright. If you look directly into the LEDs without a diffuser, you could injure your eyes. Fit the diffuser before looking into the LEDs. WARNING Danger that the call of a second call device in the same room will not be noticed. If the acoustic signal indicating that a second call has been forwarded to the same room is heard, find out who made the second call. If necessary, see to other patients first. WARNING If Medicall 800 changes to emergency mode, it continues to distribute calls to all nodes of the station. In all components with a display Medicall 800 shows this emergency mode with “Emergency mode” (depending on your configuration). Calls continue to be indicated on the overdoor lights. During emergency mode, check the overdoor lights to find out where a call was made from. 10 User Manual Doc. version 3.5 User Manual Doc. version 3.5 Constant light Constant light Constant light WC call Normal call, e.g. staff call Emergency call, e.g. diagnostic call 0 1 1 1 2 Flashing red light 3 4 s Constant red and green light Constant red and white light Constant red light Constant light in the telephone call lamp Overdoor light Flashing white light Constant white light Constant white light Constant white light Constant white light Other signal lights a a– b– c– d– 13.67 0.17 14 14 14 0 2 3 4 s Call category and call line shown on displaydb Call category and call line shown on displayb Call category and call line shown on displayb Call category and call line shown on displayb Call category and call line shown on display b Devices with display Station, group, direction signal light. See sections 6.4.2 “Display indication” on page 42 and 6.5.2 “Display indication” on page 45. See section 7.3 “Call indication on the corridor display” on page 52. See section 8.1 “Systems with pagers)” on page 56 and 8.2 “Systems with cordless telephones (DECT)” on page 56. 1 1 1 0 1 2 4 6 8 10 12 14 16 s 1 0 1 2 4 6 8 10 12 14 16 s 1 0 1 2 4 6 8 10 12 14 16 s 1 0 1 2 3 4 5 6 7 8 910 12 14 s 1 Acoustic call forwarding Table 4: Signalling pursuant to DIN VDE 0834 If the call location is a WC, the white WC lamp in the overdoor light also illuminates. Constant light Constant light Telephone call Normal call, e.g. patient call, service call, plug removed call, infusion call Reassurance light Call category Call and call line shown on displaydc Call and call line shown on displayc Call and call line shown on displayc Depends on type of systemd Depends on type of systemd Depends on type of systemd Depends on type of systemd Depends on type of system d Call and call line shown on display c Call and call line shown on displayc Pager system, DECT Corridor display ZETTLER Medicall 800 5.2 Signalling calls 11 12 Constant light Constant light Cardiac call Presence 1 2 3 4 s 1 1 2 3 4 s 1 2 3 4 s 0.33 0.67 1 1.33 s Constant yellow light Constant green light Constant green light 0 0.33 0.33 Rapid flashing red light 0 1 1 Flashing red light Constant white and green light 0 1 Flashing red light - - Rapid flashing white light Flashing white light Flashing white light Flashing white light Other signal lights a User Manual a– b– c– d– 0.33 0.33 1 1 1 1 1 2 2 2 0.33 0.67 1 1 1 1 3 3 3 1.33 s 4 s 4 s 4 s No call forwarding No call forwarding 0 0 0 0 1 Acoustic call forwarding Indication in lists Indication in lists Call category and call line shown on displayb Call category and call line shown on displayb Call category and call line shown on displayb Call category and call line shown on display b Devices with display Station, group, direction signal light. See sections 6.4.2 “Display indication” on page 42 and 6.5.2 “Display indication” on page 45. See section 7.3 “Call indication on the corridor display” on page 52. See section 8.1 “Systems with pagers)” on page 56 and 8.2 “Systems with cordless telephones (DECT)” on page 56. Table 5: Signalling pursuant to DIN VDE 0834 If the call location is a WC, the white WC lamp in the overdoor light also illuminates. Constant light Constant light Alarm, e.g. fire alarm, special emergency call Presence 2 Constant light WC emergency call 1 1 Constant green or yellow light 0 Flashing red light Emergency Constant light call, e..g nurse emergency call, doctor emergency call 1 Overdoor light Call category Reassurance light Pager system, DECT Indication possible Indication possible No signalling No signalling Call and call line Depends on type c shown on display of systemd Call and call line Depends on type shown on displayc of systemd Call and call line Depends on type shown on displayc of systemd Call and call line Depends on type shown on display c of system d Corridor display 5.2 Signalling calls ZETTLER Medicall 800 Doc. version 3.5 User Manual Doc. version 3.5 5 s 2 3 4 s 0 1 2 3 1 2 3 4 5 No optical signal No optical signal - - - Flashing red light, if No optical sigWC is location also nal constant white light Constant red light, if WC is location also constant white light 0 3.17 0.17 s 4 s Call line WC white: Constant white light 1 1 Flashing green or yellow light 1 - Other signal lights a a– b– c– d– 1 1 0 0 1 1 2 2 3 0.17 3.17 1 1 4 3 5 s 4 s 0 1 2 4 6 8 10 12 14 16 s 14 0 1 2 4 6 8 10 12 14 16 s 14 No call forwarding No call forwarding - Call category and call line shown on displayb Call category and call line shown on displayb Call category and call line shown on display b Indication in lists Indication in lists Acoustic call for- Devices with warding display Station, group, direction signal light. See sections 6.4.2 “Display indication” on page 42 and 6.5.2 “Display indication” on page 45. See section 7.3 “Call indication on the corridor display” on page 52. See section 8.1 “Systems with pagers)” on page 56 and 8.2 “Systems with cordless telephones (DECT)” on page 56. Table 6: Signalling pursuant to DIN VDE 0834 If the call location is a WC, the white WC lamp in the overdoor light also illuminates. - Call forwarding to the actual room 4 Constant light 3 Emergency call message 2 Constant light 1 Message 0 0.17 Fault, light call fault, emergency call fault 3.17 Flashing light Stored WC call and WC emergency call 0 1 1 Flashing green light Stored calls Flashing light Overdoor light Call category Reassurance light No signalling No signalling Pager system, DECT - - Call and call line Depends on type shown on displayc of systemd Call and call line Depends on type shown on displayc of systemd Call and call line Depends on type shown on display c of system d No signalling No signalling Corridor display ZETTLER Medicall 800 5.2 Signalling calls 13 14 Constant light Constant light Constant light Normal call without call forwarding (HTM 08-03: controlled drugs cupboard) WC call Normal call, e.g. staff call 14 18 22s Constant white light Constant white light Constant white light Constant white light Constant white light Other signal lights a a– b– c– d– 1 13.67 0.17 9 1 20 3 1 4 6 8 10 14 18 1 22 s 01 Hz 20 4 6 8 10 14 18 1 22 s 0 1 2 3 4 5 6 7 8 910 12 14 16 s Hz 01 Hz 0 1 2 4 6 8 10 12 14 16 s Hz 0 1 2 3 4 5 6 7 8 910 12 14 s Hz Call category and call line shown on displayb Call category and call line shown on displayb Call category and call line shown on displayb Call category and call line shown on displayb Call category and call line shown on display b Acoustic call for- Devices with warding display Station, group, direction signal light. See sections 6.4.2 “Display indication” on page 42 and 6.5.2 “Display indication” on page 45. See section 7.3 “Call indication on the corridor display” on page 52. See section 8.1 “Systems with pagers)” on page 56 and 8.2 “Systems with cordless telephones (DECT)” on page 56. Table 7: Signalling pursuant to HTM 08-03 If the call location is a WC, the white WC lamp in the overdoor light also illuminates. In acoustic call forwarding the pitch is indicated in Hz. Constant red and green light Constant red and white light 12 4 6 8 10 20 1 Slow flashing red light Constant red light Constant light Normal call, e.g. patient call, service call, plug removed call, infusion call Overdoor light Constant light in the telephone call lamp Reassurance light Telephone call Constant light Call category Call and call line shown on displayc Call and call line shown on displayc Call and call line shown on displayc Depends on type of systemd Depends on type of systemd Depends on type of systemd Depends on type of systemd Depends on type of system d Call and call line shown on display c Call and call line shown on displayc Pager system, DECT Corridor display 5.2 Signalling calls ZETTLER Medicall 800 User Manual Doc. version 3.5 User Manual Doc. version 3.5 Constant light Constant light Constant light Emergency call, e.g. doctor emergency call WC emergency call Alarm, e.g. fire alarm, special emergency call 1 1.5 2 s 0.5 1 1.5 2 s 0 0.33 0.67 0.33 0.33 Flashing red light 1 1.33 s Flashing red light, constant white and green light Constant green or yellow light 0 0.5 0.5 Flashing red light Flashing red light, constant green or yellow light 0.5 Flashing white light Flashing white light Flashing white light Flashing white light Flashing white light Other signal lights a a– b– c– d– 0.5 0.5 0.5 0.5 0.5 0.5 1 1 1.5 1.5 3 1 0.5 0.5 1 0.5 1.5 2 s 2 s 2 s 0 Hz 1 1 1 2 3 4 s 0 1 2 3 4 5 6 7 8 910 12 14 16 s Hz 0 Hz Two-tone signal 0 Hz 0 Hz Acoustic call forwarding Call category and call line shown on displayb Call category and call line shown on displayb Call category and call line shown on displayb Call category and call line shown on display b Call category and call line shown on displaydb Devices with display Station, group, direction signal light. See sections 6.4.2 “Display indication” on page 42 and 6.5.2 “Display indication” on page 45. See section 7.3 “Call indication on the corridor display” on page 52. See section 8.1 “Systems with pagers)” on page 56 and 8.2 “Systems with cordless telephones (DECT)” on page 56. Table 8: Signalling pursuant to HTM 08-03 If the call location is a WC, the white WC lamp in the overdoor light also illuminates. In acoustic call forwarding the pitch is indicated in Hz. Constant light Emergency call, e.g. nurse call 0 0.5 0.5 Flashing red light Emergency call, e.g. diagnostic assistance call Constant light Overdoor light Call category Reassurance light Depends on type of systemd Call and call line shown on displaydc Call and call line Depends on type shown on displayc of systemd Call and call line Depends on type shown on displayc of systemd Call and call line Depends on type shown on displayc of systemd Call and call line Depends on type shown on display c of system d Pager system, DECT Corridor display ZETTLER Medicall 800 5.2 Signalling calls 15 16 0 1 2 3 3 0.17 3.17 2 3.17 4 4 5 s 5 s 0.75 - - Constant red light, if WC is location white instead - Flashing green or yellow light, constant white light - - - Flashing green light - Constant yellow light Constant green light 1 s Rapid flashing white light Other signal lights a a– b– c– d– 0.25 0.25 0.5 0.75 0.25 14 1 1 s 14 1 0 1 2 4 6 8 10 12 14 16 s Hz 0 1 2 4 6 8 10 12 14 16 s Hz No call forwarding No call forwarding No call forwarding No call forwarding 0 Hz Two-tone signal Call category and call line shown on displayb Call category and call line shown on display b Indication in lists Indication in lists Indication in lists Indication in lists Call category and call line shown on displayb Acoustic call for- Devices with warding display Station, group, direction signal light. See sections 6.4.2 “Display indication” on page 42 and 6.5.2 “Display indication” on page 45. See section 7.3 “Call indication on the corridor display” on page 52. See section 8.1 “Systems with pagers)” on page 56 and 8.2 “Systems with cordless telephones (DECT)” on page 56. Table 9: Signalling pursuant to HTM 08-03 If the call location is a WC, the white WC lamp in the overdoor light also illuminates. In acoustic call forwarding the pitch is indicated in Hz. Light call fault 1 Flashing light Stored WC call and WC emergency call 0 Flashing light Stored calls 0.17 Constant light Presence 2 Fault Constant light Presence 1 0.5 0.25 0.25 Constant green light 0 Rapid flashing red light Constant light Cardiac call 0.25 Overdoor light Call category Reassurance light Pager system, DECT No signalling No signalling No signalling No signalling Call and call line Depends on type c shown on display of systemd Call and call line Depends on type shown on display c of system d No signalling No signalling Indication possible Indication possible Call and call line Depends on type shown on displayc of systemd Corridor display 5.2 Signalling calls ZETTLER Medicall 800 User Manual Doc. version 3.5 User Manual Doc. version 3.5 5 s 1 2 3 4 s - 0 1 1 1 2 Flashing red light 3 4 s Constant red light 0 1 1 - - - - Other signal lights a a– b– c– d– 14 1 14 1 0 Hz 0 Hz 1 1 2 2 3 0.17 3.17 1 1 4 3 5 s 4 s 0 1 2 4 6 8 10 12 14 16 s Hz 0 1 2 4 6 8 10 12 14 16 s Hz - Call category and call line shown on displayb Call category and call line shown on displayb Call category and call line shown on display b Acoustic call for- Devices with warding display Station, group, direction signal light. See sections 6.4.2 “Display indication” on page 42 and 6.5.2 “Display indication” on page 45. See section 7.3 “Call indication on the corridor display” on page 52. See section 8.1 “Systems with pagers)” on page 56 and 8.2 “Systems with cordless telephones (DECT)” on page 56. Table 10: Signalling pursuant to HTM 08-03 If the call location is a WC, the white WC lamp in the overdoor light also illuminates. In acoustic call forwarding the pitch is indicated in Hz. - Call forwarding to the actual room 4 Constant light 3 Emergency call message 2 Constant light 1 3.17 Message 0 Flashing red light, if WC is location white instead: Emergency call fault 0.17 Overdoor light Call category Reassurance light Pager system, DECT - - Call and call line Depends on type c shown on display of systemd Call and call line Depends on type shown on displayc of systemd Call and call line Depends on type shown on display c of system d Corridor display ZETTLER Medicall 800 5.2 Signalling calls 17 5.3 Processing a call at the call line 5.3 Processing a call at the call line 5.3.1 Cancel call ZETTLER Medicall 800 Cancelling a call with speech facility at the answer station You can answer calls with a speech facility. When you end the voice contact, the call is cancelled automatically. After the voice contact has ended emergency calls are stored automatically and can only be cancelled from there. You can answer alarms. However, they remain active after voice contact has ended and must be cancelled from there. How to cancel a call with the presence button 1 Set your presence 1 or 2 when entering a room. The acoustic signalling and the signalling on signal lights and other displays is cancelled. You can tell from the bright reassurance lamp which bed the call was made from. 2 Cancel your presence when leaving the room. The call is cancelled. 5.3.2 How to cancel a call with the cancel panel, e.g. in the bathroom or WC 1 Set your presence 1 or 2. The call is signalled optically and acoustically until it is cancelled. You can tell from the bright reassurance lamp where the call was made from. 2 Press the cancel panel. The call is cancelled. 3 Cancel your presence when leaving the room. How to cancel several calls in the room 1 Set your presence 1 or 2. If several calls have been made in the room, this is signalled by call forwarding into the room (3 consecutive short tones, pause). You can tell from the bright reassurance light where the call was made from. If there is a display in the room, the call lines will be displayed there. 2 Press your presence button again. The acoustic signalling and the signalling on signal lights and other displays is cancelled. 3 Cancel your presence when leaving the room. The reassurance lights and the calls are cancelled. 18 Stored calls A stored call is signalled again after the storage time Every stored call is signalled again after the storage time. The storage time is set individually for each system. What you can store a call with You can store calls with these components: At answer stations and communication terminals with speech (see section 6.4.3 “Processing calls” on page 42) At station and group displays without speech (see section 6.5.3 “Processing calls” on page 46) How you detect a stored call How to detect a stored call: The green lamp in the overdoor light flashes. The reassurance light of the call panel flashes. Rooms with several beds: Before cancelling the stored call, you can see which bed the call had been made from by the brightly flashing reassurance light. What happens with stored calls Storing changes the signalling: At the call line the call is signalled as a stored call (see section 5.2 “Signalling calls” on page 10). The call is no longer signalled at the answer stations, communication terminal and displays and is moved to the list of stored calls. User Manual Doc. version 3.5 ZETTLER Medicall 800 6 Answer stations 6 Answer stations 6.1 NCS Touch 6.1.1 Use The NCS Touch is the answer station for the nursing staff. The NCS Touch displays all events in a station and allows you to process all events. In addition, the nursing staff can use the NCS Touch to make voice contact with various areas of the Medicall 800 system or with rooms. Components The components of the NCS Touch are described in figure 6. NCS Touch with desktop kit Handset When a call with speech is indicated: Lift the handset to answer the call. When a call without speech is indicated: No function. While answering: Replace the handset to end voice contact. This cancels calls. Emergency calls are stored. When you have answered a call using the answer button and are already speaking in hands-free mode: Lift the handset to speak using the handset. Handsfree mode is ended. 6.1.2 Buttons Setting presence Only if you set your presence can you use the NCS Touch and process calls. However, you can also make a call with the call button without setting your presence. 1 2 3 Membrane buttons Button 5 4 Fig. 6: NCS Touch with desktop kit 1 – Handset 2 – Display (touchscreen) 3 – Membrane keyboard 4 – Service pin, service and data LEDs 5 – USB 2.0 mini-B socket for USB stick for software update Use USB adapter OTG for connecting USB sticks. Explanation Call button Make a patient call. Reassurance light on: Call has been initiated. Presence button Set or cancel presence 1. Switch NCS Touch on and off with the presence as well. Cancel calls that were made on this Ports on the underside of the NCS Touch with desktop kit NCS Touch with the presence. LED on: Presence has been set. Table 11: Membrane buttons and what they mean 1 2 3 4 Fig. 7: Rear of the NCS Touch with desktop kit 1 – Port for LAN (with metal frame), not used 2 – Connection for outputs, RJ12, 6 pins 3 – Port for LON 4 – Port for handset cable, RJ-10, 4 pins User Manual Doc. version 3.5 19 6.1 NCS Touch Button Menu ZETTLER Medicall 800 Explanation Answer or open the menu When a call with speech is indicated: Answer the call in hands-free mode. To end the current voice contact, press the button again. Emergency calls are stored automatically. When you have answered a call using the answer button and are already speaking in hands-free mode: Lift the handset and speak. If there is no call with speech: – Open the menu. – Or return to the next higher level in the menu. LED on: – Call with speech present. – Or menu can be opened. Call LED The LED indicates new calls, faults and messages. Scroll button Move the marking in lists. LED on: Marking in a list can be moved. ENTER or store call Calls with/without speech: Store the current call. During answering: Store the current call. Fault/message: Acknowledge the current fault/message. If there is a new call during voice contact: Store the first call. In the function menu: Confirm selection. Table 11: Membrane buttons and what they mean (cont.) Buttons on the display Button Explanation Answer When a call with speech is indicated: Answer the call in hands-free mode. To end the current voice contact, press the button again. Emergency calls are stored automatically. When you have answered a call using the answer button and are already speaking in hands-free mode: Lift the handset and speak. Store call STORE Please note: STORE is a list of stored calls Mute the microphone of the NCS Touch and switch it on again PTT PTT PTT PTT (Push to talk) When you answer a call or make voice contact with a room, the NCS Touch automatically switches the direction of speech between the people talking. If loud noises or conversations disturb voice contact at your end or at the other end of the line, press the PTT button and hold it down. PTT The NCS Touch changes to PTT mode. To speak, press the PTT button PTT and hold it down. When you release the PTT button again, the direction of speech changes. You can now hear the person at the other end of the line. The PTT buttons PTT indiPTT cates that you are in PTT mode. The symbol on the button indicates the direction of speech when you press the button. Once the voice contact has been ended, the NCS Touch reverts to automatic mode again. Voice contact Voice contact in hands-free mode. Announcement Voice contact in hands-free mode. Table 12: Buttons on the display and what they mean 20 User Manual Doc. version 3.5 ZETTLER Medicall 800 Button Explanation Change volume During the voice contact you can adjust the volume for hands-free speech or speaking with the handset. 6.1 NCS Touch 6.1.3 All events (calls, messages, faults, presences) are indicated on the display (see figure 8). 1 Open menu MENU Confirm change ENTER ESC Return to the next higher level in the menu Open list of presences PRES Open list of stored calls STORE DOOR Open door The display button DOOR appears during voice contact with the door. If you then tap on this button, you can open the door. Table 12: Buttons on the display and what they mean (cont.) 2 No Call 10:54 3S1-Int1 Postpone call If a new call is signalled during voice contact, you can suppress signalling on the NCS Touch using this button. This allows you to continue talking undisturbed. The call is not stored or cancelled. It is only not signalled on this NCS Touch. The call will be displayed again as soon as you have finished your voice contact. Telephone The NCS Touch opens a field for entering the telephone number. Display ZETTLER 4 F PRES 5 STORE M MENU Fig. 8: Display of the NCS Touch 1 – Current calls 2 – Time 3 – Activated interconnections Tap on the interconnections to open the list of interconnections. 4 – F – Faults M – Messages Tap on the symbol to open the list. 5 – Frequently used lists and functions A new call is displayed in this format: SSSSSSSS #CCCCCC RRRRRR LLLLLLLL If there are calls in the call list, the station/group is not displayed: The format is explained in table 13. Symbols Explanation SSSSSSSS Station/group CCCCCC Call text RRRRRR Room LLLLLLLL Call line (e.g. bed) # A # character before the call designation indicates that this call has already been stored and is now being signalled again. Table 13: Display format and explanation The presentation in the fields depends on the settings of the call system. 6.1.4 Menu Menu items hidden The engineer can hide or display menu items. This may mean that some menu items are hidden on your NCS Touch. User Manual Doc. version 3.5 21 6.1 NCS Touch ZETTLER Medicall 800 Menu (function) Submenu Announcement Station Tap on Announcement to make an announcement to all terminals in the station. General Tap on All stations to make an announcement to all terminals of all stations. Presence 1/2 Tap on Presence 1 or 2 to make an announcement to all terminals in the station in which the nursing staff have set a presence. Care groups Tap on Care groups to make an announcement to all terminals of a care group. Combined Op. Interconnection The NCS Touch indicates all interconnections of your station with other stations. Select the interconnections with the groups or stations that the NCS Touch is to monitor. Lists Presences The NCS Touch indicates all presences of your station. You can select and make voice contact with presences with a speech facility. Messages The NCS Touch indicates all messages of your station. Stored calls The NCS Touch indicates all stored calls of your station. You can select and make voice contact with stored calls with a speech facility. Faults The NCS Touch indicates all faults of your station. Call forwarding Volume Tap on Volume to change the volume for forwarded calls. Voice contact Rooms and call terminals Select a room with speech with which you want to make voice contact. Sounder Sounder Switch the call tone signal of the NCS Touch on or off. Monitor room Start monitoring Monitor sequentially all rooms of the room list without being heard in the room. Change room list Add rooms that you want to monitor, or delete them from the list. Monitor pres. Determine whether rooms with a set presence are to be able to be monitored. Care groups Change the assignment of a room to a care group. Management Voice contact Element Explanation Dial in privacy Change the dial in privacy setting for making voice contact with individual rooms. Gong volume Change the volume of the gong when making voice contact with individual rooms. Change password Change the password used to save individual menu items. Time and date Change the time and date. Contrast Change the display contrast. Store call Store the calls of a component from which a call was made but that then developed a fault. Cancel call Delete the calls of a component from which a call was made but that then developed a fault. Table 14: Menu structure 22 User Manual Doc. version 3.5 ZETTLER Medicall 800 6.1 NCS Touch Menu (function) Submenu Element Explanation Service Node monitoring Here the service engineer can switch node monitoring for individual nodes on and off. Initialise password Here the service engineer can cancel the customer password. Version Here the service engineer can view technical data about the NCS Touch. Software update Here the service engineer can update the software of the NCS Touch. Table 14: Menu structure (cont.) 6.1.5 Use, general information Touchscreen (touch-sensitive screen) You can run all functions of the NCS Touch using the touchscreen. Please note: Do not use sharp objects to tap on commands on the touchscreen. Just tap gently on the commands on the touchscreen. Functions without a password can also be executed using the membrane keyboard. Information on cleaning and disinfection can be found in section 10.5.2 “Cleaning and disinfection” on page 65. If you want to enter figures, tap on 1..9. Tap on A..Z to enter letters again. 6.1.6 6.1.7 Navigation in the menu Tap on the individual menu items to open or select a menu. To return to the next higher level in the menu, tap on ESC (menu on the membrane keyboard). To scroll in a menu, tap on the arrow keys on the right-hand side. If you want to change a value, tap on it to select it and then change it. Then tap on ENTER to confirm the change. On the membrane keyboard, tap on ENTER to change a value and simultaneously confirm it. The NCS Touch returns to the start window if you do not tap on the touchscreen for 20 seconds. Password-protected menus Some menus may be protected with a password. If a password is allocated for a menu, enter the password and then tap on ENTER. If you want to delete a character, tap on the arrow key on the right in the display. User Manual Doc. version 3.5 Switching the NCS Touch on How to switch the NCS Touch on 1 Press the presence button to set your presence and switch the NCS Touch on. Only when you have set your presence can you operate the NCS Touch. An LED beside the presence button indicates the set presence. Answering a call with speech facility Extend talk time If you speak for so long that the maximum talk time is nearly exhausted, the NCS Touch alerts you to this with a gong. To continue talking, tap on YES in response to the question. New call while you are answering a call The NCS Touch indicates new calls in the display while you are in the process of answering a call. You have the following options: Put the new call on hold. To do so, tap on . The NCS Touch then signals the new call as soon as you have ended the current call. End the current call and change to the new call. To do so, press the answer button . The NCS Touch stores the old call. 23 6.1 NCS Touch ZETTLER Medicall 800 Marker Identification of a call with speech facility Explanation Audio signal Indication of the call in the display Call LED Call with speech, also answer button in the display. Table 15: Identification of a call with speech facility How to answer a call with speech 1 Pick up the handset . Or tap on the answer button to speak in hands-free mode. The voice contact is established automatically. 2 To store the call, tap on STORE. If your Medicall 800 system supports the Store with presence function, the NCS Touch displays a list of presences. Then tap on your presence. The call is stored. Emergency calls are stored automatically after voice contact is ended. 3 End the call. Replace the handset . Or tap on the answer button to end the voice contact. 6.1.8 Processing a call without speech (e.g. WC call) Marker Identification of a call without speech facility Explanation Audio signal Indication of the call in the display Call LED Table 16: Identification of a call without speech facility 24 How to process a call without speech 1 To store the call, tap on STORE. For faults and messages, tap on QUIT. If your Medicall 800 system supports the Store with presence function, the NCS Touch displays a list of presences. Then tap on your presence. The call is stored. Faults and messages are acknowledged. 6.1.9 Voice contact The NCS Touch allows you not only to answer calls that are indicated on the display but also make voice contact with rooms or beds. You can make voice contact with: Rooms with and without presence Rooms with stored calls Individual beds You can also make announcements to your whole Medicall 800 system, the station or individual care groups (see section 6.2.7 “Announcement” on page 34). Extend talk time If you talk so long that the maximum talk time is nearly reached, the NCS Touch indicates this. Then tap on YES to continue talking. New call while you are speaking The NCS Touch indicates new calls in the display while you are in the process of speaking. You have the following options: Put the new call on hold. To do so, tap on . The NCS Touch then signals the new call as soon as you have ended the voice contact. End the voice contact and change to the new call. To do so, tap on the answer button. How to make voice contact with a room with presence 1 Tap on PRES to open the list of presences. Or tap on MENU to open the menu. Tap on the arrow keys until Lists appears and then tap on it. Tap on Presences. 2 Tap on the desired presence if it is not already marked. 3 Pick up the handset . Or tap on to speak in hands-free mode. 4 Now speak to the room with the selected presence. The person in the room you are speaking to can talk to you immediately. 5 End the voice contact. Replace the handset . Or tap on . User Manual Doc. version 3.5 ZETTLER Medicall 800 How to make voice contact with a room with a stored call 1 Tap on STORE to open the list of stored calls. 2 Tap on the desired stored call if it is not already marked. 3 Pick up the handset . Or tap on to speak in hands-free mode. 4 Now you can speak to the room with the selected call immediately. 5 End the voice contact. Replace the handset . Or tap on . Making voice contact with a room by dialling in privacy You can only make voice contact with a room without a call or presence by dialling in privacy. You can speak, but you cannot hear anything in the room as long as the patient does not answer the call using the call button. The NCS Touch indicates dial in privacy on the display: Please talk [dial in privacy]. Ask someone in the room to press the call button. You can then make voice contact with the room. How to make voice contact with a room of the station or interconnection 1 Tap on MENU to open the menu. 2 Tap on the arrow keys until Voice contact appears and then tap on it. 3 Tap on the desired room if it is not already marked. If you want to make voice contact with a room in another station, tap on ALL to display the rooms of all stations. 4 If there are several beds in the room with which voice contact may be established, the NCS Touch displays a list of the beds. Tap on the bed number or the room number. 5 Pick up the handset . Or tap on to speak in hands-free mode. You can now speak to the room with which voice contact has been established. If someone in the room presses the call button, he or she can answer your call. 6 End the voice contact. Replace the handset . Or tap on . 6.1.10 Announcement How to make an announcement 1 Tap on MENU to open the menu. 2 Tap on Announcements. 3 Tap on the arrow keys until your desired announcement destination appears, and tap on it. User Manual Doc. version 3.5 6.1 NCS Touch 4 Pick up the handset and make your announcement. Or tap on to speak in hands-free mode. 5 End the announcement. Replace the handset . Or tap on . 6.1.11 Initiating a call Press the call button to make a call. The NCS Touch indicates that a call has been made by a reassurance light next to the button. 6.1.12 Monitor room The NCS Touch allows you to monitor sequentially all rooms of the room list without being heard in the room. You can set whether rooms with presence are to be missed. How to prepare for listening 1 Tap on MENU to open the menu. 2 Tap on the arrow keys until Monitor room appears and tap on it. 3 To change the room list, tap on Change room list. Tap on the arrow keys until the desired room appears. Tap on the station or a room to set it to ON (monitor) or OFF (not monitor). Then tap on ENTER to confirm the change. Next, tap on ESC to return to the next higher level. 4 If you also want to monitor rooms which have set presences, tap on Monitor presence. Then tap on the presence to set it to ON (monitor) or OFF (not monitor). Then tap on ENTER to confirm the change. Next, tap on ESC to return to the next higher level. 5 Tap on ESC to return to the next higher level. How to monitor sequentially all rooms of the room list 1 Tap on MENU to open the menu. 2 Tap on the arrow keys until Monitor room appears and tap on it. 3 Tap on Start monitoring to monitor the rooms of the room list. If you want to hear with the handset rather than the speaker, pick up the handset . 4 Tap on STOP to stop at a room and not move on to the next room. 5 Tap on to speak to the room. You can only speak while you are tapping on the button. 6 Tap on CONT. to move between the rooms automatically again. 7 Finish monitoring. Replace the handset . Or tap on . 25 6.1 NCS Touch 6.1.13 Acknowledging faults and messages Fault messages must always be observed! In the event of a fault, notify your head office or service department in accordance with your duty instructions. Not only calls but also faults and messages can be indicated on the NCS Touch. The following faults are indicated: General node fault NodeFT Line fault in the room: CallFt Additional faults or messages may appear on the display, depending on the settings of the call system. How to acknowledge a fault or message 1 Tap on QUIT to acknowledge a fault or message. It will be stored in the list of faults and messages. An “F” appears on the right in the start screen to indicate a fault. An “M” appears on the right in the start screen to indicate a message. 6.1.14 Telephone If your NCS Touch and call system are suitably configured, you can receive calls or call someone using the NCS Touch just as you could with an ordinary telephone. New call while you are telephoning The NCS Touch indicates new calls in the display while you are in the process of telephoning. You have the following options: Put the new call on hold. To do so, tap on ENTER. The NCS Touch then signals the new call as soon as you have ended the call. End the call and change to the new call. To do so, tap on the answer button . How to telephone with the NCS Touch 1 Pick up the handset . If you do not pick up the handset, you automatically speak in hands-free mode. 2 Tap on the telephone symbol to select the telephone function. 26 ZETTLER Medicall 800 3 Enter the telephone number. If you want to delete a character, tap on the arrow key on the bottom right in the display. To obtain a dial tone for an outside line, dial the same number as you would from other telephones in your telephone system. If you have entered the wrong telephone number, tap on the answer button and start again. 4 When the called person answers, speak to him/her. 5 If a call is made during the call, this is indicated in the display. Tap on ENTER to put the call on hold. Or end your call and receive the other call. If you put the call on hold, the NCS Touch signals the new call as soon as you have ended your call. 6 End your call. Replace the handset . Alternatively, tap on the answer button . 6.1.15 Signal emergency mode Emergency mode must always be heeded! If the NCS Touch indicates emergency mode, inform your head office or service department in accordance with your duty instructions. 6.1.16 Additional functions How to open a door with the NCS Touch 1 If the door bell rings, the NCS Touch indicates a door call. 2 Pick up the handset . Or tap on the answer button to speak in hands-free mode. The button DOOR appears in the display. 3 Now activate the door opener. Tap on DOOR to open the door. The door opener is activated for 2 seconds. 4 End your call. Replace the handset . Alternatively, tap on the answer button . How to change an interconnection 1 Tap on MENU to open the menu. 2 Tap on Interconnection. 3 Tap on the arrow keys until the desired interconnection appears. Tap on the interconnection to set it to ON or OFF. Then tap on ENTER to confirm the change. 4 Next, tap on ESC to return to the next higher level. How to check a list 1 Tap on MENU to open the menu. 2 Tap on the arrow keys until Lists appears and then tap on it. User Manual Doc. version 3.5 ZETTLER Medicall 800 3 Tap on the list that you want to check. – Presences – Messages – Stored calls (depending on the configuration of the NCS Touch, you can store stored calls again or you can delete them) – Faults 4 Tap on the arrow keys to display all elements of the list. You can answer or make voice contact with presences and stored calls with speech. Tap on the desired presence or the stored call. 5 Pick up the handset . Or tap on to speak in hands-free mode. Now speak to the selected room. The nursing staff or the patient in the selected room can talk to you immediately. 6 End the voice contact. Replace the handset . Alternatively, tap on the answer button . 7 Next, tap on ESC to return to the next higher level. 6.1.17 Settings for Medicall 800 Assigning a room to a care group You can assign a room to a care group. How to assign a room to a care group 1 Tap on MENU to open the menu. 2 Tap on the arrow keys until Management appears and then tap on it. 3 Tap on Care groups. 4 Tap on the arrow keys until the room that you want to assign to another care group is displayed. Keep tapping on the room until the NCS Touch indicates the desired care group. Then tap on ENTER to confirm the change. WARNING: When you assign a room to another care group, it takes approx. 15 seconds for the room to apply the change. No calls can be made in this room during this time. Patients could be put at risk. 5 Then tap on ESC to return to the next higher level. Deactivating dialling in privacy for individual rooms You can activate or deactivate dialling in privacy for individual rooms. Without dialling in privacy you can monitor a room without anyone in the room pressing the call button. User Manual Doc. version 3.5 6.1 NCS Touch How to deactivate dialling in privacy for individual rooms 1 Tap on MENU to open the menu. 2 Tap on the arrow keys until Management appears and then tap on it. 3 Tap on Voice contact and then Dial in privacy. 4 Tap on the arrow keys until the room whose dial in privacy setting you want to change appears. Tap on the room to set the dial in privacy setting to ON or OFF. Then tap on ENTER to confirm the change. 5 Then tap on ESC to return to the next higher level. Changing the call forwarding volume in the station or care group You can change the volume of the call tone for call forwarding in the station or care group of the NCS Touch. How to change the call forwarding volume 1 Tap on MENU to open the menu. 2 Tap on Call forwarding. Tap on the volume until the NCS Touch indicates the desired volume. Then tap on ENTER to confirm the change. 3 Next, tap on ESC to return to the next higher level. Changing the volume of the gong in the station or care group You can change the gong volume for making voice contact with individual rooms in the station or care group of the NCS Touch. How to change the gong volume for making voice contact with individual rooms 1 Tap on MENU to open the menu. 2 Tap on the arrow keys until Management appears and then tap on it. 3 Tap on Voice contact and then Gong volume. 4 Tap on the arrow keys until the room whose gong volume you want to change is displayed. Keep tapping on the room until the NCS Touch indicates the desired gong volume. Then tap on ENTER to confirm the change. 5 Then tap on ESC to return to the next higher level. How to store a call of a component from which a call was made but that then developed a fault. 1 If a call was made by a component but this component then developed a fault, the call can no longer be stored or cancelled in the normal way. This call continues to be signalled in the station by call forwarding. However, you can still store or cancel the call in the Management menu. 27 6.1 NCS Touch 2 Tap on MENU to open the menu. 3 Tap on the arrow keys until Management appears and then tap on it. 4 Tap on Management and then Cancel call or Store call. 5 Tap on the arrow keys until the call that you want to store or cancel appears. Then tap on ENTER to confirm the change. The call is now cancelled in the station. When the fault is rectified, however, the component makes the call again. You can now store or cancel the call in the normal way. 6 Then tap on ESC to return to the next higher level. 6.1.18 Settings for the NCS Touch How to change the volume of the NCS Touch 1 Tap on while in voice contact. Then tap on the arrow keys to change the volume of the speaker. The NCS Touch remembers the volume, even when it is switched off. Switching the call tone (sounder) on and off The NCS Touch gives a call tone when it indicates a new call or the NCS Touch is addressed. When you cancel the presence, the call tone will be switched on again. How to switch the call tone (sounder) on or off 1 Tap on MENU to open the menu. 2 Tap on the arrow keys until Sounder appears and then tap on it. 3 Tap on Sounder to set the tone signal to ON or OFF. Then tap on ENTER to confirm the change. When you cancel the presence, the call tone will be switched on again. 4 Next, tap on ESC to return to the next higher level. How to change the time and date on the NCS Touch 1 Tap on MENU to open the menu. 2 Tap on the arrow keys until Management appears and then tap on it. 3 Tap on the arrow keys until Time and date appears and tap on it. 4 Enter the time, and underneath it the date. 5 You can move from one position to the next using the arrow keys. 6 Then tap on ENTER to confirm the change. 7 Next, tap on ESC to return to the next higher level. 28 ZETTLER Medicall 800 How to change the display contrast 1 Tap on MENU to open the menu. 2 Tap on the arrow keys until Management appears and then tap on it. 3 Tap on the arrow keys until Contrast appears and then tap on it. 4 Tap on the arrow keys until the display is using the desired contrast. Or tap on the bar to increase or reduce the contrast. 5 Then tap on ENTER to confirm the change. 6 Next, tap on ESC to return to the next higher level. Changing passwords for menu items When configuring the NCS Touch with the ZETLON configuration software, you can determine whether a password is required for individual menus. In this case the user can open the menu only when he enters the password or the service password. You can change the password in the NCS Touch. Preset customer password The preset customer password is empty. How to change the customer password 1 Tap on MENU to open the menu. 2 Tap on the arrow keys until Management appears and then tap on it. 3 Tap on the arrow keys until Change password appears and then tap on it. 4 Enter the old password and tap on ENTER to confirm it. 5 Then enter the new password and tap on ENTER to confirm it. The password can consist of 2 to 8 characters. 6 Then enter the new password again and tap on ENTER to confirm it. The NCS Touch has now accepted the new password. 7 Next, tap on ESC to return to the next higher level. 6.1.19 Service CAUTION This information is for service personnel only. If you use these functions without authorisation, you could deactivate the automatic monitoring of devices of the Medicall 800 system and put patients at risk. User Manual Doc. version 3.5 ZETTLER Medicall 800 Settings of the NCS Touch may be overwritten in the event of a software update. You can use the NCS Touch to change settings that affect other nodes, such as changing assigned care groups. These changes may be overwritten when you update the NCS Touch software. They will be lost. All service functions are protected by the service password All service functions are protected by the service password. This service password is known only to service technicians. How to start up the NCS Touch 1 Press the presence button to switch the NCS Touch on. 2 Tap on MENU to open the menu. 3 Tap on the arrow keys until Service appears and then tap on it. 4 Enter the password for the NCS Touch and tap on ENTER. If you want to delete a character, tap on the arrow key on the bottom right in the display. 5 Tap on the various menu items to set or check them: – Node monitoring: Tap on the individual nodes to activate or deactivate monitoring. Then tap on ENTER to confirm the change. – Initialise password: Tap on ENTER to reset the password for the Management menu. No password is set when delivered. – Version: In this window you can display the hardware and software versions. – Software update: Tap on this if you want to update the software of the NCS Touch. The NCS Touch then looks for the software on a connected USB stick and uses it to update the software of the NCS Touch. 6 Next, tap on ESC to return to the next higher level. Technical data Power supply via system bus: Uin = 20 - 28 V (no additional power supply required) Power consumption: approx. 200 mA LCD display (touchscreen): 320 x 240 pixels Dimensions with handset (WxHxD): 171 x 63 x 200 mm Weight: 620 g Colour: traffic white (RAL 9016) User Manual Doc. version 3.5 6.2 Communication terminal Touch (CT Touch) 6.2 Communication terminal Touch (CT Touch) 6.2.1 Overview Use The CT Touch is the communication terminal for use in patient's rooms and in ancillary rooms with roomwise or bedwise speed. The CT Touch allows you to set your presence with an RFID tag as well. Components The components of the CT Touch are described in figure 9. CT Touch 1 2 S1 G1 1105 NurseE / Bed 2 T STORE 3 4 F MENU S 5 Fig. 9: CT Touch 1 – Loudspeaker 2 – Display (touchscreen) 3 – Membrane keyboard 4 – Service pin for CT Touch LON (press presence 1 and in the middle of the buttons at the same time), service LED Service pin for CT Touch LAN, see section 6.2.18 “Service” on page 38. 5 – USB 2.0 mini-B socket for USB stick for software update Use USB adapter OTG for connecting USB sticks. Buttons Setting presence Only if you set your presence can you use the CT Touch and process calls. However, you can also make a call with the call button without setting your presence. 29 6.2 Communication terminal Touch (CT Touch) Membrane buttons Button ZETTLER Medicall 800 Button Explanation Mute the microphone of the CT Touch and switch it on again Call button Make a patient call. Reassurance light on: Call has been initiated. S Call button S Make a configured call. Reassurance light on: Call has been initiated. Presence button 1/2 PTT PTT PTT Set or cancel presence. Switch CT Touch on or off with the presence. Cancel calls that were made on this CT Touch with the presence. LED on: Presence has been set. Call LED The LED indicates new calls, faults and messages. Answer or store call Calls with speech facility: Answer the current call. Calls without speech facility: Store the current call. During answering: Store the current call. Fault/message: Acknowledge the current fault/message. If there is a new call during voice contact: Store the first call. LED on: Call present. Announcement Change volume You can change the volume during voice contact. Buttons on the display Postpone call If a new call is signalled during voice contact, you can suppress signalling on the CT Touch using this button. This allows you to continue talking undisturbed. The call is not stored or cancelled. It is only signalled on this CT Touch. The call will be displayed again as soon as you have finished your voice contact. Explanation Answer When a call with speech is indicated: Answer a call. To end the current voice contact, press the button again. Emergency calls are stored automatically. STORE PTT (Push to talk) When you answer a call or make voice contact with a room, the NCS Touch automatically switches the direction of speech between the people talking. If loud noises or conversations disturb voice contact at your end or at the other end of the line, tap on the PTT button and hold it down. PTT The CT Touch changes to PTT mode. To speak, press the PTT button PTT and hold it down. When you release the PTT button again, the direction of speech changes. You can now hear the person at the other end of the line. PTT The PTT buttons PTT indicates that you are in PTT mode. The symbol on the button indicates the direction of speech when you press the button. Once the voice contact has been ended, the CT Touch reverts to automatic mode again. Voice contact Table 17: Membrane buttons and what they mean Button Explanation Store call Please note: STORE is a list of stored calls Telephone The CT Touch opens a field for entering the telephone number. Table 18: Buttons on the display and what they mean MENU Open menu Table 18: Buttons on the display and what they mean (cont.) 30 User Manual Doc. version 3.5 ZETTLER Medicall 800 Button ENTER ESC PRES STORE RESET DOOR CLEAR 6.2 Communication terminal Touch (CT Touch) A call is displayed in the call list in the following format: SSSSSSSS #CCCCCC RRRRRR LLLLLLLL The format is explained in table 19. Explanation Confirm change Symbols Explanation Return to the next higher level in the menu SSSSSSSS Station/group (only if a call is stored) Open list of presences CCCCCC Call text RRRRRR Room LLLLLLLL Call line (e.g. bed) # A # sign before the call designation indicates that this call is a stored call that will be signalled again. Open list of stored calls Resetting the list of rooms (depending on your system) See here: 6.2.9 “Monitor room” on page 35 “Deactivating dialling in privacy for individual rooms” on page 37 “Changing the volume of the gong in the station or care group” on page 37 Open door The display button DOOR appears during voice contact with the door. If you then tap on this button, you can open the door. Table 19: Display format and explanation The presentation in the fields depends on the settings of the call system. Menu Menu items hidden The engineer can hide or display menu items. This means that some menu items may not be shown on your CT Touch. Cancel timer for call line Table 18: Buttons on the display and what they mean (cont.) Display All events (calls, messages, faults, presences) are indicated on the display (see figure 10). 2 SSSSSSSS Menu (function) Submenu Explanation Announcement Station Tap on Announcement to make an announcement to all terminals in the station. General Tap on All stations to make an announcement to all terminals of all stations. Presence 1/2 Tap on Presence 1 or 2 to make an announcement to all terminals in the station in which the nursing staff have set a presence. Care groups Tap on Care groups to make an announcement to all terminals of a care group. Interconnection The CT Touch indicates all interconnections of your station with other stations. Select the interconnections with the groups or stations that the CT Touch is to monitor. E 1 RRRRRR CCCCCC / LLLLLLLL T STORE 3 F 4 Fig. 10: Display of the CT Touch 1 – Current calls 2 – E – Emergency mode (flashing) 3 – T – Timer F – Faults M – Messages Tap on the symbol to open the list. 4 – Frequently used lists and functions MENU Combined Op. Table 20: Menu structure User Manual Doc. version 3.5 31 6.2 Communication terminal Touch (CT Touch) Menu (function) Submenu Explanation Timer Select timer Select a timer for the various call lines in the room. Set the time after which the timer is to trigger a call. Lists Presences The CT Touch indicates all presences of your station. You can select and make voice contact with presences with a speech facility. Messages Stored calls Menu (function) The CT Touch indicates all messages of your station. The CT Touch indicates all stored calls of your station. You can select and make voice contact with stored calls with a speech facility. Faults The CT Touch indicates all faults of your station. Call forwarding Volume Tap on Volume to change the volume for forwarded calls. Voice contact Rooms and Select a room with call termi- speech with which you nals want to make voice contact. Sounder Sounder Switch the call tone signal of the CT Touch on or off. Monitor room Start monitoring Monitor sequentially all rooms of the room list without being heard in the room. Change room list Add rooms that you want to monitor, or delete them from the list. Monitor presence Determine whether rooms with a set presence are to be able to be monitored. Care groups Change the assignment of a room to a care group. Management ZETTLER Medicall 800 Service Submenu Explanation Voice contact, dial in privacy Change the dial in privacy setting for making voice contact with individual rooms. Voice contact, Gong volume Change the volume of the gong when making voice contact with individual rooms. Change password Change the password for single menu items. Time and date Change the time and date. Contrast Change the display contrast. Node mon- Here the service engiitoring neer can switch node monitoring for individual nodes on and off. Initialise password Here the service engineer can cancel the customer password. Version Here the service engineer can view technical data about the NCS Touch. LAN only: Press the service pin. Software update Restart and update software. IP address (LAN only) Check and change the IP address of the CT Touch LAN, the gateway, the subnet mask and the IP address of the TCP/IP gateway. Table 20: Menu structure (cont.) 6.2.2 Use, general information Touchscreen (touch-sensitive screen) You can execute all functions of the CT Touch using the touchscreen. Please note: Do not use sharp objects to tap on commands on the touchscreen. Just tap gently on the commands on the touchscreen. Information on cleaning and disinfection can be found in section 10.5.2 “Cleaning and disinfection” on page 65. Table 20: Menu structure (cont.) 32 User Manual Doc. version 3.5 ZETTLER Medicall 800 6.2 Communication terminal Touch (CT Touch) Navigation in the menu Tap on the individual menu items to open or select a menu. To return to the next higher level in the menu, tap on ESC. To scroll in a menu, tap on the arrow keys on the right-hand side. If you want to change a value, tap on it to select it and then change it. Then tap on ENTER to confirm the change. If no button is pressed for a short while when navigating in the menu and changing values, the CT Touch changes back to the start window. The NCS Touch returns to the start window if you do not tap on the touchscreen for 20 seconds. Marker Password-protected menus Some menus may be protected with a password. If a password is allocated for a menu, enter the password and then tap on ENTER. If you want to delete a character, tap on the arrow key on the right in the display. If you want to enter figures, tap on 1..9. Tap on A..Z to enter letters again. How to answer a call with speech 1 Tap on the answer button to speak in handsfree mode. 2 To store the call, tap on STORE. If your Medicall 800 system supports the store with presence function, the CT Touch shows a list of presences. Then tap on your presence. The call is stored. Emergency calls are stored automatically after voice contact is ended. 3 Tap on the answer button to end the voice contact. 6.2.3 Switching on the CT Touch How to switch the CT Touch on 1 Press the presence button to set your presence and switch the CT Touch on. Only if you have set your presence can you use the CT Touch. An LED beside the presence button indicates the set presence. 6.2.4 Answering a call with speech facility Extend talk time If you talk so long that the maximum talk time is nearly reached, the CT Touch indicates this with a gong sound. To continue talking, tap on YES in response to the question. New call while you are answering a call The CT Touch indicates new calls in the display while you are in the process of answering a call. You have the following options: Put the new call on hold. To do so, tap on . The CT Touch then signals the new call as soon as you have finished the current call. End the current call and change to the new call. To do so, tap on the answer button. The CT Touch stores the old call. User Manual Doc. version 3.5 Identification of a call with speech facility Explanation Audio signal Indication of the call in the display Call LED Call with speech, also answer button in the display. Table 21: Identification of a call with speech facility 6.2.5 Processing a call without speech (e.g. WC call) Marker Identification of a call without speech facility Explanation Audio signal Indication of the call in the display Call LED Table 22: Identification of a call without speech facility How to process a call without speech 1 To store the call, tap on STORE. For faults and messages, tap on QUIT. If your Medicall 800 system supports the store with presence function, the CT Touch shows a list of presences. Then tap on your presence. The call is stored. Faults and messages are acknowledged. 33 6.2 Communication terminal Touch (CT Touch) 6.2.6 ZETTLER Medicall 800 Making voice contact with a room by dialling in privacy You can only make voice contact with a room without a call or presence by dialling in privacy. You can speak, but you cannot hear anything in the room as long as the patient does not answer the call using the call button. The CT Touch indicates dial in privacy on the display: Please talk [dial in privacy]. Ask someone in the room to press the call button. You can then speak to the room. Voice contact The CT Touch allows you not only to answer calls that are indicated on the display but also make voice contact with rooms or beds. You can make voice contact with: Rooms with and without presence Rooms with stored calls Individual beds You can also make announcements to your whole Medicall 800 system, the station or individual care groups (see section 6.2.7 “Announcement” on page 34). Extend talk time If you talk so long that the maximum talk time is nearly reached, the CT Touch indicates this. Then tap on YES to continue talking. New call while you are in voice contact The CT Touch indicates new calls in the display while you are in the process of speaking. You have the following options: Put the new call on hold. To do so, tap on . The CT Touch then signals the new call as soon as you have ended the voice contact. End the voice contact and change to the new call. To do so, tap on the answer button. How to make voice contact with a room with presence 1 Tap on PRES to select the list of presences. Or tap on MENU to open the menu. Tap on the arrow keys until Lists appears and then tap on it. Tap on Presences. 2 Tap on the desired presence if it is not already marked. 3 Tap on to speak in hands-free mode. 4 Now speak to the room with the selected presence. The person in the room you are speaking to can talk to you immediately. 5 End the voice contact. Tap on . How to make voice contact with a room with a stored call 1 Tap on STORE to open the menu. 2 Tap on the desired stored call if it is not already marked. 3 Tap on to speak in hands-free mode. 4 Now you can speak to the room with the selected call immediately. 5 End the voice contact. Tap on . 34 How to make voice contact with a room of the station or interconnection 1 Tap on MENU to open the menu. 2 Tap on the arrow keys until Voice contact appears and then tap on it. 3 Tap on the desired room if it is not already marked. The list shows all rooms that were assigned in the configuration. If you want to search for a room or make voice contact with a room in another station, tap on Search. Then tap on the first characters of the room name and tap on ENTER. The CT Touch shows all rooms beginning with those letters. The list shows all rooms that were assigned in the configuration. If you want to delete a character, tap on the arrow key on the bottom right in the display. If you want to enter figures, tap on 1..9. Tap on A..Z to enter letters again. 4 If there are several beds in the room that can be spoken to, the CT Touch shows a list of the beds. Tap on the bed number or the room number. 5 Tap on to speak in hands-free mode. You can now speak to the desired room. If someone in the room presses the call button, he or she can answer your call. 6 End the voice contact. Tap on . 6.2.7 Announcement How to make an announcement 1 Tap on MENU to open the menu. 2 Tap on Announcements. 3 Tap on the arrow keys until your desired announcement destination appears, and tap on it. 4 Tap on to speak in hands-free mode. Make your announcement. 5 End the announcement. Tap on . User Manual Doc. version 3.5 ZETTLER Medicall 800 6.2.8 Initiating a call Press the call button or S to make a call. The CT Touch shows that a call has been made by the reassurance light next to the button. 6.2.9 Monitor room The CT Touch enables you to monitor all rooms in the room list successively without you yourself being heard in the room. You can set whether rooms with presence are to be missed. How to prepare for listening 1 Tap on MENU to open the menu. 2 Tap on the arrow keys until Monitor room appears and tap on it. 3 To change the room list, tap on Change room list. Tap on the arrow keys until the desired room appears. Tap on the station or a room to set it to ON (monitor) or OFF (not monitor). Then tap on ENTER to confirm the change. Next, tap on ESC to return to the next higher level. If you want to reset the room list to the original value, tap on RESET (depending on your system). 4 If you also want to monitor rooms which have set presences, tap on Monitor presence. Then tap on the presence to set it to ON (monitor) or OFF (not monitor). Then tap on ENTER to confirm the change. Next, tap on ESC to return to the next higher level. 5 Tap on ESC to return to the next higher level. How to monitor sequentially all rooms of the room list 1 Tap on MENU to open the menu. 2 Tap on the arrow keys until Monitor room appears and tap on it. 3 Tap on Start monitoring to monitor the rooms of the room list. 4 Tap on STOP to stop at a room and not move on to the next room. 5 Tap on to make voice contact with the room. You can only speak while you are tapping on the button. 6 Tap on CONT. to move between the rooms automatically again. 7 Finish monitoring. Tap on . User Manual Doc. version 3.5 6.2 Communication terminal Touch (CT Touch) 6.2.10 Acknowledging faults and messages Fault messages must always be observed! In the event of a fault, notify your head office or service department in accordance with your duty instructions. The CT Touch can indicate not just calls, but faults and messages as well. The following faults are indicated: General node fault NodeFT Line fault in the room: CallFt Additional faults or messages may appear on the display, depending on the settings of the call system. How to acknowledge a fault or message 1 Tap on QUIT to acknowledge a fault or message. It will be stored in the list of faults and messages. An “F” appears on the right in the start screen to indicate a fault. An “M” appears on the right in the start screen to indicate a message. 6.2.11 Telephoning If your CT Touch and call system are suitably configured, you can receive calls or call someone using the CT Touch just as you could with an ordinary telephone. New call while you are telephoning The CT Touch indicates new calls in the display while you are in the process of telephoning. You have the following options: Put the new call on hold. To do so, tap on ENTER. The CT Touch then signals the new call as soon as you have ended the call. End the call and change to the new call. To do so, tap on the answer button . How to telephone with the CT Touch 1 Tap on the telephone symbol to select the telephone function. 2 Enter the telephone number. If you want to delete a character, tap on the arrow key on the right in the display. To obtain a dial tone for an outside line, dial the same number as you would from other telephones in your telephone system. If you have entered the wrong telephone number, tap on the answer button and start again. 3 When the called person answers, speak to him/her. 35 6.2 Communication terminal Touch (CT Touch) 4 If a call is made during the call, this is indicated in the display. Tap on ENTER to put the call on hold. Or end your call and receive the other call. If you put the call on hold, the CT Touch signals the new call as soon as you have ended your call. 5 End your call. Tap on the answer button . 6.2.12 Timer ZETTLER Medicall 800 Announcem pres 2 Listen into room Call gate Timer Day/ night Speak to R 101 Select a timer for the various call lines in the room. Set the time after which the timer is to trigger a call. How to set the timer 1 Tap on MENU to open the menu. 2 Tap on Timer. 3 Tap on the call line for which you want to set a timer. 4 Tap on + or – to set the hours and minutes for the timer. Then tap on ENTER to confirm the change. Next, tap on ESC to return to the next higher level. 5 If you want to cancel a timer, tap on T in the start window in order to display the activated timer. Tap on the timer and then tap on CANCEL to cancel the timer. 6 Tap on ESC to return to the next higher level. MENU Fig. 11: Display of the CT Touch with display buttons (example) Function of the display button Explanation Announcement Click on the display button to make an immediate announcement to the set destination. Speak to Click on the display button to speak to the set room or bed immediately. Telephone Click on the display button to call the set telephone number. Menu Click on the display button to open the set submenu. You may need to enter your password to do so. 6.2.13 Signal emergency mode Emergency mode must always be heeded! If the CT Touch indicates emergency mode, inform your head office or service department in accordance with your duty instructions. Table 23: Possible functions of the display buttons 6.2.14 Additional display buttons 6.2.15 Additional functions Additional display buttons can be configured in the CT Touch (see figure 11, example). The possible functions are shown in table 23. The texts and colours of the display buttons can be adapted to individual requirements. The display buttons on your CT Touch will therefore look different. Figure 11 shows an example of the configuration of the display buttons. The CT Touch only shows the display buttons if no call is queued and no menu is open. How to open a door with the CT Touch 1 When the doorbell rings, the CT Touch indicates a door call. 2 Tap on the answer button to speak in handsfree mode. The button DOOR appears in the display. 3 Now activate the door opener. Tap on DOOR to open the door. The door opener is activated for 2 seconds. 4 End your call. Tap on the answer button . How to change an interconnection 1 Tap on MENU to open the menu. 2 Tap on Interconnection. 3 Tap on the arrow keys until the desired interconnection appears. 36 User Manual Doc. version 3.5 ZETTLER Medicall 800 4 Tap on the interconnection to set it to ON or OFF. Then tap on ENTER to confirm the change. Your configuration may not allow you to change the interconnection, just view the current setting. 5 Next, tap on ESC to return to the next higher level. How to check a list 1 Tap on MENU to open the menu. 2 Tap on the arrow keys until Lists appears and then tap on it. 3 Tap on the list that you want to check. – Presences – Messages – Stored calls (depending on how the CT Touch is configured, you can store or cancel calls again) – Faults 4 Tap on the arrow keys to display all elements of the list. You can answer or make voice contact with presences and stored calls with speech. Tap on the desired presence or the stored call. Tap on to speak in hands-free mode. Now speak to the selected room. The nursing staff or the patient in the called room can talk to you immediately. End the voice contact. Tap on the answer button . 5 Next, tap on ESC to return to the next higher level. 6.2.16 Settings for Medicall 800 How to assign a room to a care group 1 Tap on MENU to open the menu. 2 Tap on the arrow keys until Management appears and then tap on it. 3 Tap on Care groups. 4 Tap on the arrow keys until the room that you want to assign to another care group is displayed. 5 Keep tapping on the room until the CT Touch indicates the desired care group. Then tap on ENTER to confirm the change. WARNING: When you assign a room to another care group, it takes approx. 15 seconds for the room to apply the change. No calls can be made in this room during this time. Patients could be put at risk. 6 Next, tap on ESC to return to the next higher level. Deactivating dialling in privacy for individual rooms You can activate or deactivate dialling in privacy for individual rooms. Without dialling in privacy you can monitor a room without anyone in the room pressing the call button. User Manual Doc. version 3.5 6.2 Communication terminal Touch (CT Touch) How to deactivate dialling in privacy for individual rooms 1 Tap on MENU to open the menu. 2 Tap on the arrow keys until Management appears and then tap on it. 3 Tap on Voice contact and then Dial in privacy. 4 Tap on the arrow keys until the room whose dial in privacy setting you want to change appears. 5 Tap on the room to set the dial in privacy setting to ON or OFF. Then tap on ENTER to confirm the change. Medicall 800 marks the room with an asterisk (depending on your system). 6 If you want to reset the room list to the original value, tap on RESET (depending on your system). 7 Next, tap on ESC to return to the next higher level. Changing the call forwarding volume in the station or care group You can change the volume of the call tone for call forwarding in the station or care group of the CT Touch. How to change the call forwarding volume 1 Tap on MENU to open the menu. 2 Tap on Call forwarding. 3 Tap on the volume until the CT Touch indicates the desired volume. Then tap on ENTER to confirm the change. 4 Next, tap on ESC to return to the next higher level. Changing the volume of the gong in the station or care group You can change the gong volume when making voice contact with individual rooms of the station or care group of the CT Touch. How to change the gong volume when making voice contact with individual rooms 1 Tap on MENU to open the menu. 2 Tap on the arrow keys until Management appears and then tap on it. 3 Tap on Voice contact and then Gong volume. 4 Tap on the arrow keys until the room whose gong volume you want to change is displayed. 5 Keep tapping on the room until the CT Touch indicates the desired gong volume. Then tap on ENTER to confirm the change. 6 If you want to reset the volumes in the rooms to the original value, tap on RESET (depending on your system). 7 Next, tap on ESC to return to the next higher level. 37 6.2 Communication terminal Touch (CT Touch) 6.2.17 Settings for the CT Touch How to change the volume of the CT Touch 1 Tap on while in voice contact. Then tap on the arrow keys to change the volume of the speaker. 2 Tap on again to store the changed volume. The CT Touch stores the volume even when it is switched off. Switching the call tone (sounder) on and off The CT Touch gives a tone signal when it indicates a new call or the CT Touch is spoken to. When you cancel the presence, the call tone will be switched on again. How to switch the call tone (sounder) on or off 1 Tap on MENU to open the menu. 2 Tap on the arrow keys until Sounder appears and then tap on it. 3 Tap on Sounder to set the tone signal to ON or OFF. Then tap on ENTER to confirm the change. When you cancel the presence, the call tone will be switched on again. 4 Next, tap on ESC to return to the next higher level. How to change the time and date on the CT Touch 1 Tap on MENU to open the menu. 2 Tap on the arrow keys until Management appears and then tap on it. 3 Tap on the arrow keys until Time and date appears and tap on it. 4 Enter the time, and underneath it the date. 5 You can move from one position to the next using the arrow keys. 6 Tap on ENTER to confirm the change. 7 Next, tap on ESC to return to the next higher level. How to change the display contrast 1 Tap on MENU to open the menu. 2 Tap on the arrow keys until Management appears and then tap on it. 3 Tap on the arrow keys until Contrast appears and then tap on it. 4 Tap on the arrow keys until the display is using the desired contrast. Or tap on the bar to increase or reduce the contrast. 5 Tap on ENTER to confirm the change. 6 Next, tap on ESC to return to the next higher level. 38 ZETTLER Medicall 800 Changing passwords for menu items When configuring the CT Touch using the ZETLON configuration software, you can specify whether a password is required for individual menus. In this case the user can open the menu only when he enters the password or the service password. You can change the password in the CT Touch. Preset customer password The preset customer password is empty. How to change the customer password 1 Tap on MENU to open the menu. 2 Tap on the arrow keys until Management appears and then tap on it. 3 Tap on the arrow keys until Change password appears and then tap on it. 4 Enter the old password and tap on ENTER to confirm it. If you want to delete a character, tap on the arrow key on the bottom right in the display. If you want to enter figures, tap on 1..9. Tap on A..Z to enter letters again. 5 Then enter the new password and tap on ENTER to confirm it. The password can consist of 2 to 8 characters. 6 Then enter the new password again and tap on ENTER to confirm it. The CT Touch has now accepted the new password. 7 Next, tap on ESC to return to the next higher level. 6.2.18 Service CAUTION This information is for service personnel only. If you use these functions without authorisation, you could deactivate the automatic monitoring of devices of the Medicall 800 system and put patients at risk. Settings of the CT Touch may be overwritten in the event of a software update. You can use the CT Touch to change settings that affect other nodes, such as changing assigned care groups. These changes may be overwritten when you update the CT Touch software. They will be lost. User Manual Doc. version 3.5 ZETTLER Medicall 800 All service functions are protected by the service password All service functions are protected by the service password. This service password is known only to service technicians. How to start up the CT Touch 1 Press the presence button to switch the CT Touch on. 2 Tap on MENU to open the menu. 3 Tap on the arrow keys until Service appears and then tap on it. 4 Enter the password for the CT Touch and tap on ENTER. If you want to delete a character, tap on the arrow key on the bottom right in the display. If you want to enter figures, tap on 1..9. Tap on A..Z to enter letters again. 5 Tap on the various menu items to set or check them: – Node monitoring: Tap on the individual nodes to activate or deactivate monitoring. Then tap on ENTER to confirm the change. – Initialise password: Tap on ENTER to reset the password for the Management menu. No password is set when delivered. – Version: In this window you can display the hardware and software versions. Srv.Pin (CT Touch LAN only): Tap on Srv.Pin if you want to initiate the service pin. – Software update: If you want to update the software of the CT Touch, tap on Software update and then press both presence buttons immediately. Do not release the two presence buttons until the CT Touch restarts. The CT Touch then looks for the software on a connected USB stick and uses it to update the software of the CT Touch. If you press the presence buttons too late or not for long enough, the CT Touch will restart. – IP address (CT Touch LAN only): Change the IP address if there are special requirements or if you want to preconfigure a CT Touch LAN before later replacing it. You can change these IP addresses: IP address of the CT Touch LAN IP address of the gateway (router) Subnet mask of the CT Touch LAN IP address of the TCP/IP gateway 6 Next, press ESC to return to the next higher level. 6.3 PCAIM audio interface module Technical data Power consumption: 260 mA when idle, max. 460 mA (with 4 sockets, 4 patient’s handsets with speech, 4 radio adapters, call and reset panel, pull cord panel) Environmental conditions and EMC compliant with DIN VDE 0834, part 2, environmental class 1 – Ambient temperature: 0 to 40 °C – Relative humidity: max. 85 %, non-precipitating IP code: IP 40 Colour: traffic white (RAL 9016) Material (housing and membrane keypad): ABS plastic, antimicrobial Weight: 257 g Dimensions (WxHxD) 95 x 218 x 21 mm 6.3 PCAIM audio interface module 1 2 2 Fig. 12: PCAIM audio interface module 1 – Buttons 2 – Service pin, service and data LEDs LEDs, sounders LED Explanation Sounder Call LED The LED flashes and the sounder sounds at the rhythm of the call with the highest call category (call, emergency call, alarm). Audio LED On: Audio link for listening and speaking. Off: No audio link. Flashing: Speaking or listening only in one direction, e.g. for announcements, with the microphone switched off or in “Push To Talk” (PTT) mode. Table 24: Meaning of the LEDs of the PCAIM audio interface module User Manual Doc. version 3.5 39 6.3 PCAIM audio interface module LED Sounder Explanation Power-on LED LED on: PCAIM audio interface module is switched on, connection to mediGraph. LED off: PCAIM audio interface module without current. LED flashing and sounder buzzing: emergency mode. No connection to mediGraph or mediGraph is switched off. To switch the sounder off, lift the handset briefly and then replace it. Call with speech facility On: Call with speech facility. You can answer the call. Off: No call with speech facility pres- ent. -service- (on the side of the PCAIM audio interface module) data- (on the side of the PCAIM audio interface module) Service LED Flashing or always on: PCAIM audio interface module fault. Please contact your technical support. Note: The service LED flashes briefly when the PCAIM audio interface module is first connected. This is normal. Off: Normal mode. Data LED Flashing: Data being transmitted. This is normal. Table 24: Meaning of the LEDs of the PCAIM audio interface module (cont.) ZETTLER Medicall 800 Buttons Button Explanation VOLUME buttons You can adjust the volume during an audio link in hands-free mode or using the handset. MUTE button Press the MUTE button briefly to switch the microphone off. Press the MUTE button again to switch the microphone back on. PTT (Push To Talk) button When you answer a call, the PCAIM audio interface module switches automatically between the people who are speaking. If noise or conversations disturb voice contact at your end or at the other end of the line, press and hold down this button. The PCAIM audio interface module switches to PTT mode, so that you can speak only when you press this button. Release the button again to listen to the person at the other end of the line. The Audio LED indicates whether you are in this mode. The PCAIM audio interface module returns to automatic mode after the voice communication. You can use this button in hands-free mode and with the handset. ANSWER button If the LED indicates a call with speech facility: Press the ANSWER button to speak in hands-free mode. To end the current call, press the button again. Emergency calls are stored automatically. Pick the handset up to speak using the handset. When you replace the handset, the current answer is terminated. The ANSWER button has no function if the call does not have speech facility. Table 25: Meaning of the buttons of the PCAIM audio interface module 40 User Manual Doc. version 3.5 ZETTLER Medicall 800 6.4 6.4 Other answer stations in systems with speech Other answer stations in systems with speech This section explains how to use these answer stations (see figure 13): Communication terminal with display (CT) for roomwise speech Communication terminal with display (CT) for bedwise speech Lamps indicate that the button can be pressed Universal terminal with display and handset, often configured as a main or group answer station (ANS) Section 6.4.2 “Display indication” on page 42 explains how to answer and cancel or store calls. Other possible functions are described in section 6.4.6 “Additional functions” on page 43. Reassurance lights Lamps indicate that the button can be pressed 1 1 2 2 Lamps indicate that presence is set Universal terminal with display and handset Communication terminal with display for roomwise speech Communication terminal with display for bedwise speech Fig. 13: Answer stations in systems with speech 6.4.1 Button functions Button The function of the buttons and the associated indication lamps is described in Table 26. Button 1 2 Explanation Lamp function Presence buttons: Presence switched on Set and cancel pres- ence Switch display on and off Cancel call in the room Call button Call made Staff call button Staff call made Doctor emergency call button Doctor emergency call made Table 26: Meaning of the buttons and lamps Explanation Lamp function Answer button on CT: If there is a call: Answer While answering: Cancel Only in CT for roomwise speech: No call: Jump to the function menu In the function menu: 1 level back Call can be answered or cancelled Function button (on the answer station) Jump to the function menu In the function menu: 1 level back Operation possible Scroll button For the function menu and lists Scrolling possible Table 26: Meaning of the buttons and lamps (cont.) User Manual Doc. version 3.5 41 6.4 Other answer stations in systems with speech Button Explanation Handset on the answer station Lamp function Store button Calls without speech facility: Store During answering: Store In the function menu: Confirm selection Store or confirmation possible If there is a call: Answering possible Pick up = answer While answering: Hang up = cancel ZETTLER Medicall 800 6.4.3 Processing calls Processing a call with speech facility Step Procedure Marker ANS: Lamp in speech device lit. CT: Lamps in answer button and store button Answer a call SSSSSSSS CCCCCC* RRRRRR LLLLLLLL¯ Table 27: Display indication celled. Or: Press store button CCCCCC Designation of the call (call text) RRRRRR Designation of the room (room number) LLLLLLLL Designation of the call line (e.g. bed) * Identification for further calls ↓ You can use the scroll button to scroll on to the next page. When idle, if there is no call, fault or message in the system (station), a square flashes and the message “No call” appears. Table 29: Meaning of the characters in the display The representation in the character fields depends on the system settings. 42 , call is Processing a call without speech facility (WC call) Procedure Marker Only the lamp of the store button is lit. Process call Designation of the station , call is Table 30: Processing a call with speech facility The characters are explained in Table 29. SSSSSSSS and hang up, call is stored. CT: Press answer button cancelled. Or: Press store button stored. Table 28: Display indication Character Explanation . ANS: Replace handset, call is can- Exit Step CCCCCCCCCC * SSSSS RRRRRR LL¯ CT: Press answer button speak. Display indication All calls, messages and faults are indicated in 4 character fields on the two-line display as shown in Table 27 on page 42 or 28 on page 42. ANS: Pick up handset. Indication <SPE> <STO>: You can Table 26: Meaning of the buttons and lamps (cont.) 6.4.2 lit. Press store button , call is stored. Table 31: Processing a call without speech facility Several calls at the same time Identification: * at the end of the 1st display line, the lamp of the scroll button is lit. The most important call at the time is displayed and can be answered or stored. You can also use the scroll button to scroll through the list of calls and process the call that is displayed at the time (see sections “Processing a call with speech facility” on page 42 or “Processing a call without speech facility (WC call)” on page 42). 6.4.4 Processing faults and messages Take note of faults Take note of any faults that are displayed! Inform your head office or service department in accordance with your duty instructions. User Manual Doc. version 3.5 ZETTLER Medicall 800 6.4 Other answer stations in systems with speech In addition to calls, Medicall 800 also presents faults and messages on the displays. Table 32 shows a list of the faults that are presented on the displays. Additional faults or messages may appear on the LCD display depending on the system settings. The room number is displayed as well as the fault. Fault Presentation on the display General node fault NodeFT or NF or Flt Line fault in room CallFt or cF or Flt Pager system fault PagrFt or PF or Flt Patient's handset fault PH Ft or PH or Flt Check that the patient's handset has been properly connected. Then check whether a call can be made. If a call cannot be made, exchange the patient's handset Table 32: Faults that are shown on the displays How to process a fault or message 1 With presence set, press the store button or QUIT. This acknowledges the fault or message: – An F appears on the right in the top line if there is a fault. – An M appears on the right in the top line if there is a message. – The fault or message is moved to the list of faults or messages and is no longer signalled. – If the cause of the fault or message has been rectified, the fault or message is cleared from the list. 6.4.5 Signal emergency mode Emergency mode must always be heeded! If the answer station indicates emergency mode, inform your head office or service department in accordance with your duty instructions. 6.4.6 Additional functions Functions only available in CTs with roomwise or bedwise speech if there is no call In contrast to the universal terminal, you can only use these functions at the communication terminal with roomwise or bedwise speech if there is no call. These buttons have a different meaning in the event of a call. User Manual Doc. version 3.5 The communication terminals and answer stations do not support all functions. See also Table 33. Function Universal terminal CT for roomwise speech CT for bedwise speech CT Touch Intercon- x nection x x Announc x ement x x Call forwarding x x Lists x x Voice contact with presence x x Display contrast x x x x x x Table 33: Functions of the universal terminal and the communication terminals Depending on the answer station, “function button” means the following: In a communication terminal with display, answer button In a universal terminal function button How to change an interconnection 1 With presence set, press the function button / . The menu list appears. 2 If necessary, keep pressing the scroll button until Interconnection appears. Press the store button to confirm the selection. 3 Keep pressing the scroll button until the desired interconnection appears. Press the store button to confirm the selection. 4 Press the function button / twice to close the menu and return the answer station to idle. How to make an announcement 1 With presence set, press the function button / . The menu list appears. 2 Keep pressing the scroll button until Announcement appears. Press the store button to confirm the selection. 3 Keep pressing the scroll button until the desired announcement target appears. 43 6.4 Other answer stations in systems with speech 4 To make the announcement: – ANS: Pick up the handset and speak. – CT: Press the function button and speak. 5 To end the announcement: – ANS: Replace the handset . – CT: Press the function button . How to set the volume of call forwarding for the station 1 With presence set, press the function button / . The menu list appears. 2 Keep pressing the scroll button until Call forwarding appears. Press the store button to confirm the selection. 3 Keep pressing the scroll button until the desired volume appears. 4 Press the function button / twice to close the menu and return the answer station to idle. How to check one of the lists 1 With presence set, press the function button / . The menu list appears. 2 Keep pressing the scroll button until Lists appears. Press the store button to confirm the selection. 3 Keep pressing the scroll button until the desired list appears. The lists are as follows: – Presences – Messages – Acknowledgements (stored calls) – Faults Press the store button to confirm the selection. 44 ZETTLER Medicall 800 4 Press the scroll button to scroll through the list. 5 Press the function button / three times to close the menu and return the answer station to idle. How to make voice contact with a presence 1 With presence set, press the scroll button so that the presence list appears. 2 Keep pressing the scroll button until the desired presence appears. 3 To make voice contact with the presence: – ANS: Pick up the handset and speak. – CT: Press the function button and speak. 4 To end the conversation: Replace the handset or press the function button / , or press the presence button. How to change the display contrast 1 With presence set, press the function button / . The menu list appears. 2 Keep pressing the scroll button until Display Contrast appears. Press the store button to confirm the selection. 3 Keep pressing the scroll button until the desired contrast appears. 4 Press the function button / twice to close the menu and return the answer station to idle. User Manual Doc. version 3.5 ZETTLER Medicall 800 6.5 6.5 Displays in systems without speech Displays in systems without speech Universal display, often configured as a station or group display Section 6.5.3 “Processing calls” on page 46 explains how to cancel and store calls on the display. Other possible functions are described in section 6.5.6 “Additional functions” on page 46. This section explains how to use the displays (see figure 14): Display S1 Display S2 Reassurance light Lamps indicate that the button can be pressed 1 1 1 Lamps indicate that presence is set Display S1 Reassurance light 2 Lamps indicate that presence is set Display S2 Universal display Fig. 14: Displays in systems without speech 6.5.1 Button functions 6.5.2 The function of the buttons of the displays and the associated indication lamps is described in Table 34. Button Explanation Presence buttons: 1 Set and cancel pres- Lamp function Presence switched on ence Switch display on and off Cancel call in the room 2 or Table 35: Display indication Table 36: Display indication Call made Function button: Jump to the function menu In the function menu: One level back Operation possible Scroll button for function menu and lists Scrolling possible Store button Store or confirmation possible In the function menu: SSSSSSSS CCCCCC* RRRRRR LLLLLLLL¯ CCCCCCCCCC * SSSSS RRRRRR LL¯ Call button If there is a call: Store Display indication All calls, messages and faults are indicated in 4 character fields on the two-line display as shown in Table 35 or 36. Confirm selection Table 34: Buttons of the displays User Manual Doc. version 3.5 45 6.5 Displays in systems without speech The characters are explained in Table 37. Character Explanation ZETTLER Medicall 800 In addition to calls, Medicall 800 also presents faults and messages on the displays. Table 38 shows a list of the faults that are presented on the displays. Additional faults or messages may appear on the LCD display depending on the system settings. The room number is displayed as well as the fault. SSSSSSSS Designation of the station CCCCCC Designation of the call (call text) RRRRRR Designation of the room (room number) LLLLLLLL Designation of the call line (e.g. bed) Fault * Identification for further calls General node fault NodeFT or NF or Flt ↓ You can use the scroll button to scroll on to the next page. Line fault in room When idle, if there is no call, fault or message in the system (station), a square flashes and the message “No call” appears. Patient's handset fault 6.5.3 Processing calls Universal display and display S2 On the universal display and display S2 you can store calls as follows. To do so press the store button . The call is stored. If there are several calls (identification: the lamp of the scroll button is lit) you can use the scroll button to scroll through the list of current calls and store the call being shown at the time with the store button . Display S1 On the display S1 you can store calls as follows: Press the scroll button and hold it down. Then press the presence button: The call is stored. If there are several calls (identification: the lamp of the scroll button is lit), you can scroll through the list of current calls with the scroll button . When the call that you want to store is displayed, press the scroll button and hold it down. Then press the presence button: The call is stored. Processing faults and messages Take note of faults Take note of any faults that are displayed! Inform your head office or service department in accordance with your duty instructions. 46 PH Ft or PH or Flt Check that the patient's handset has been properly connected. Then check whether a call can be made. If a call cannot be made, exchange the patient's handset Table 38: Faults that are shown on the displays How to process a fault or message 1 With presence set, press the store button . This acknowledges the fault or message: – An F appears on the right in the top line if there is a fault. – An M appears on the right in the top line if there is a message. – The fault or message is moved to the list of faults or messages and is no longer signalled. – If the cause of the fault or message has been rectified, the fault or message is cleared from the list. 6.5.5 Signal emergency mode Emergency mode must always be heeded! If the answer station indicates emergency mode, inform your head office or service department in accordance with your duty instructions. 6.5.6 6.5.4 CallFt or cF or Flt Pager system fault PagrFt or PF or Flt Table 37: Meaning of the characters in the display The representation in the character fields depends on the system settings. Presentation on the display Additional functions The display S1 is used in a different way to the display S2 and the universal display. 6.5.7 Display S2, universal display Depending on the display, “function button” means the following: In the display S2, function button In the universal display, function button User Manual Doc. version 3.5 ZETTLER Medicall 800 How to change an interconnection 1 With presence set, press the function button / . The menu list appears. 2 If necessary, keep pressing the scroll button until Interconnection appears. Press the store button to confirm the selection. 3 Keep pressing the scroll button until the desired interconnection appears. Press the store button to confirm the selection. 4 Press the function button / twice to close the menu and return the display to idle. 6.5 Displays in systems without speech How to change the display contrast 1 With presence set, press the function button / . The menu list appears. 2 Keep pressing the scroll button until Display Contrast appears. Press the store button to confirm the selection. 3 Keep pressing the scroll button until the desired contrast (1 to 16) appears. 4 Press the function button / twice to close the menu and return the display to idle. 6.5.8 How to set the volume of call forwarding for the station 1 With presence set, press the function button / . The menu list appears. 2 Keep pressing the scroll button until Call forwarding appears. Press the store button to confirm the selection. 3 Keep pressing the scroll button until the desired volume appears. Press the store button to confirm the selection. 4 Press the function button / twice to close the menu and return the display to idle. How to check one of the lists 1 With presence set, press the function button / . The menu list appears. 2 Keep pressing the scroll button until Lists appears. Press the store button to confirm the selection. 3 Keep pressing the scroll button until the desired list appears. The lists are as follows: – Presences – Messages – Stored calls – Faults Press the store button to confirm the selection. 4 Press the scroll button to scroll through the list. 5 Press the function button / three times to close the menu and return the display to idle. User Manual Doc. version 3.5 Display S1 How to change an interconnection 1 With presence set, press the scroll button and hold it down. Then press the call button . The menu list appears. 2 If necessary, keep pressing the scroll button until Interconnection appears. Press the scroll button , hold it down and press the presence button 1 to confirm the selection. 3 Keep pressing the scroll button until the desired interconnection appears. Press the scroll button , hold it down and press the presence button 1 to confirm the selection. 4 To close the menu and return the display to idle: Press the scroll button , hold it down and press the call button . Release the buttons and press the scroll button again, hold it down and press the call button . How to check one of the lists 1 With presence set, press the scroll button and hold it down. Then press the call button . The menu list appears. 2 Keep pressing the scroll button until Lists appears. Press the scroll button , hold it down and press the presence button 1 to confirm the selection. 3 Keep pressing the scroll button until the desired list appears. The lists are as follows: – Presences – Messages – Stored calls – Faults Press the scroll button , hold it down and press the presence button 1 to confirm the selection. 4 Press the scroll button to scroll through the list. 5 To close the menu and return the display to idle: Press the scroll button , hold it down and press the call button . Release the buttons and press the scroll button again, hold it down and press the call button . 47 6.5 Displays in systems without speech ZETTLER Medicall 800 How to change the display contrast 1 With presence set, press the scroll button and hold it down. Then press the call button . The menu list appears. 2 Keep pressing the scroll button until Display Contrast appears. Press the scroll button , hold it down and press the presence button 1 to confirm the selection. 3 To increase the contrast by 1, press the scroll button , hold it down and press the presence button 1 . Then release the buttons. Repeat this until the desired contrast (1 to 16) appears. 4 To close the menu and return the display to idle: Press the scroll button , hold it down and press the call button . Release the buttons and press the scroll button again, hold it down and press the call button . 48 User Manual Doc. version 3.5 ZETTLER Medicall 800 7 Other components 7.1 Room electronics with RFID Fig. 15: Room electronics with RFID The room electronics with RFID has 1 call button, 1 presence button and an RFID antenna. Call button User Manual Doc. version 3.5 7 Other components – Call with and without presence Presence button The presence button can be programmed. You have the following options: – Standard (presence on/off) – Only switch presence off – Button has no function RFID antenna With the RFID antenna you can set presence 1 or 2 or register a person (doctor, service) so that the person is logged with mediLog. Hold the RFID tag 2 to 4 cm from the room electronics unit to register the tag. If you then register yourself on another room electronics unit in another room, you will be automatically deregistered in the first room. On registration you receive these signals: – 1 peep: tag is registered. – 2 peeps: tag is deregistered. – In the presence category, the reassurance light of the presence button is activated/deactivated. 49 7.2 Patient's handsets 7.2 ZETTLER Medicall 800 Patient's handsets Operation of the patient's handsets is identical with and without speech. Patient's handsets with speech offer additional functions for speaking with nursing staff and for controlling televisions and radios (see figures 16 and 17). 3 5 3 Z E T T L E R ® 2 1 125.5701, 127.5700 3 5 5 Z E T T L E R 3 Z E T T L E R ® Z E T T L E R ® 2 1 125.5711, 127.5710, 127.5750 2 125.5721, 125.5721XL, 127.5720, 127.5760 Z E T T L E R ® ® 2 1 125.5731, 127.5730, 127.5770 125.5741, 127.5740, 127.5780 Fig. 16: Patient’s handsets with speech (125.5701, 127.5700 only listening with headphones) 1 – Headphone socket 2 – Microphone 3 – Speaker on rear 5 5 Z E T T L E R ® Z E T T L E R ® 125.5601, 125.5601XL, 125.5611, 127.5600, 127.5600IP, 127.5610 127.5600XL, 127.6120IP Z E T T L E R ® 125.5621, 125.5621XL, 127.5620, 127.5620IP, 127.5620XL Z E T T L E R 127.5630 ® Z E T T L E R ® 125.5641, 127.5640 Fig. 17: Patient's handsets without speech 50 User Manual Doc. version 3.5 ZETTLER Medicall 800 Call Button Television/radio/function Explanation Call nursing staff LED lights up red – reassurance light if you have made a call. LED flashes – nursing staff have noted your call. LED lights up faintly – locating light. S Service call Example for service, baby, etc. Depends on the configuration of the Medicall 800 system. Table 39: Meaning of the call buttons of the patient's handsets Light Button 7.2 Patient's handsets Explanation Light Reading light LED lights up faintly – locating light. Table 40: Meaning of the light buttons of the patient's handsets Button Explanation Change functions Use this button to change between the individual functions: Radio: Numbers 1 to 5 Television: Minus – Function: F Only television with multifunction control, additional device required: Switch off television: Hold function button down for more than two seconds. Off: Full stop . Up/down keys In radio mode (1 to 5): Change programme. In TV mode (minus “–”, only television with multifunction control): Switch on: Press briefly on the Up or the Down button. Change programme Press Up/Down buttons to change between the programmes. In function mode (F): Control additional functions, e.g. roller shutters or head section of the bed up/down. Volume Speak/listen If your device supports voice contact, the nursing staff can call you back when you make a call and you can answer. Only patient's handsets with the stock code numbers 125.57xx and 127.57xx. Function Explanation Speak Speak after being called by the nursing staff. Handsfree: patient's handset in the retaining bracket. With patient's handsets with orientation dependent speech, even when it is hanging down vertically. As with telephone handset: pick up the patient's handset. Listen (also TV/radio) Headphones connected: Head- phones on, speaker off Headphones disconnected: Speaker on. patient's handset in the retaining bracket: speaker loud. Patient's handset in the hand as with telephone handset: speaker quiet. Table 41: Speaking and listening using patient's handsets with speech User Manual Doc. version 3.5 Table 42: Meaning of the buttons of the patient's handsets for television, radio and other functions Safety information WARNING Trip hazard. Someone could trip over cables lying loose on the floor and injure themselves. Lay the connecting cable for the patient's handset so that no one can step on it or trip over it. Make sure that nothing is placed on top of the cable. WARNING Danger that the patient will strangle himself with the connecting cable and choke. If the patient is asleep or unconscious, insert the patient's handset into the retaining bracket or secure it with the blanket clip. 51 7.3 Call indication on the corridor display WARNING Danger that a wireless device or mobile will interfere with the patient's handset so that it does not work. If you are carrying a wireless device or mobile phone, keep the safe distance from the patient's handset. How to install the patient's handset 1 Check whether the patient’s handset is damaged. Only put it into operation if you do not see any damage. If the patient's handset is damaged, do not plug it into the socket. Inform the responsible engineer. 2 Hang the patient’s handset in the VL Retaining bracket, stock code number 125.5802. Alternatively, secure it with the VL Blanket clip, stock code number 125.5830. 3 Insert the connecting cable of the patient’s handset into the jack of the socket. 4 Check that the patient's handset is working properly: Make a call using the patient's handset. The call must be signalled at the reassurance light of the patient's handset and at the overdoor light to which the socket is connected. If the call or alarm is not signalled, check that the sockets are located correctly and try again. If the fault persists, do not put the patient's handset into service. Remove the patient's handset from the socket. Inform the responsible engineer. 52 ZETTLER Medicall 800 How to trigger a call 1 To make a call, press the red button on the patient’s handset. Protection range Patient's handsets marked !A! on the rear may only be used in protection range A. All other patient's handsets of Medicall 800 may be used in protection ranges A and B. 7.3 Call indication on the corridor display The information in this section applies for systems with and without speech. If there are corridor displays, all calls, faults and messages are indicated on them. They contain information about the call text and call line. If there are several calls at the same time, they are displayed one after the other (the list of calls is scrolled through automatically). Emergency calls are presented flashing. If the system is configured with a wireless clock or is connected to a PC with the mediLog software, the corridor display can show the date, the time and the text “no call”. 7.3.1 Signal emergency mode Emergency mode must always be heeded! If the corridor display indicates emergency mode, inform your head office or service department in accordance with your duty instructions. User Manual Doc. version 3.5 ZETTLER Medicall 800 7.4 Adapter for medical device 7.4 Adapter for medical device 7.4.1 Description Adapter for electrical isolation of the patient's environment (medical electrical device or patient’s handset) from Medicall 800. The adapter prevents dangerous voltages from being discharged through the patient, putting him at risk. The following call components can be connected to the adapter: Alarm output of a medical electrical device VL Patient's handset, 1 call button, only for adapter for medical device, electrically isolated 125.6120IP/ 127.6120IP Only connect the adapter to sockets of a Medicall 800 system. The adapter is used in hospitals, spa and rehabilitation clinics and in retirement and nursing homes and similar institutions. The adapter must be prepared by a call systems specialist (technician trained as an electronic engineer or similar and with training in Medicall 800). After training, the adapter, medical electrical device and the patient's handset can be connected to the socket by: Nursing staff (qualified nurses, care assistants, etc.) Doctors (who have completed their training) Mini-DIN plug for connection to socket Eyelet for hanging the adapter outside the patient's environment Adapter for medical device Reassurance light, red RJ10 socket for connecting a patient's handset or the alarm output of a medical electrical device Fig. 18: Adapter for medical device, with mini-DIN plug, electrically isolated User Manual Doc. version 3.5 Sub-D plug for connection to socket Eyelet for hanging the adapter outside the patient's environment Adapter for medical device Reassurance light, red RJ10 socket for connecting a patient's handset or the alarm output of a medical electrical device Fig. 19: Adapter for medical device, with Sub-D plug, electrically isolated Safety information WARNING Danger that the alarm will not be noticed. Use of the adapter does not replace the regulations for staff and the duty of supervision when operating medical electrical devices. The adapter in conjunction with the call system only serves the additional purpose of accelerating call or alarm tracking. Please also note the information for the medical electrical device. WARNING Danger that the alarm of a second adapter in the same room will not be noticed. If the acoustic signal of call forwarding indicates a second alarm in the same room, check the cause. If necessary, see to other patients first. 53 7.4 Adapter for medical device ZETTLER Medicall 800 WARNING Danger that the adapter will not function after repair. Calls or alarms from patients may not be forwarded. Patients could be put at risk. Do not attempt to repair the adapter yourself. Do not put the adapter into operation. Instead, inform the responsible engineer. You can only make and exchange the cable connecting the medical electrical device to the adapter. WARNING Trip hazard. Someone could trip over cables lying loose on the floor and injure themselves. Lay the connecting cable to the medical electrical device or patient's handset so that no one can step on it or trip over it. Make sure that nothing is placed on top of the cable. WARNING Danger that a wireless device or mobile will interfere with the adapter so that it does not work. If you are carrying a wireless device or mobile phone, keep the safe distance from the adapter. 7.4.2 Socket Hook Patient’s handset in the patient's environment ZETTLE ® Adapter outside the patient's environment Fig. 21: Block diagram for connection of the patient’s handset to the adapter Sub-D Socket Hook Alarm output Medical electrical device in the patient's environment Adapter outside the patient's environment Fig. 22: Block diagram for connecting a medical electrical device Socket Hook Patient’s handset in the patient's environment Installation and connection Mini-DIN R ZETTLE R ® Adapter outside the patient's environment Socket Hook Alarm output Fig. 23: Block diagram for connection of the patient’s handset to the adapter Adapter outside the patient's environment Medical electrical device in the patient's environment Fig. 20: Block diagram for connecting a medical electrical device 54 User Manual Doc. version 3.5 ZETTLER Medicall 800 How to connect the adapter 1 Before connecting, check the cable of the adapter and all components for damage. If a cable is damaged, do not attach the cable. Inform the responsible engineer. 2 To ensure that the room electronics does not trigger any fault, first connect the medical electrical device or the patient's handset to the RJ10 socket of the adapter. 3 Only then do you connect the mini-DIN or Sub-D plug of the adapter to the socket. 4 Always check that the adapter is working properly when you connect the adapter to a socket: – Make a call using the patient's handset. The call must be signalled at the reassurance light of the patient’s handset and of the adapter and at the overdoor light to which the socket is connected. – Trigger a test alarm on the medical electrical device. The alarm must be signalled at the reassurance light of the adapter and at the overdoor light to which the socket is connected. In the event of a plug removed call, check that the sockets are located properly and then try again. If the fault persists, do not put the adapter into service. Remove the adapter from the socket. Inform the responsible engineer. User Manual Doc. version 3.5 7.4 Adapter for medical device How to remove the adapter 1 Set the presence so that a plug removed call is not made on removal. 2 First disconnect the adapter for medical device. 3 Then disconnect all components and devices from the adapter. 7.4.3 Symbol Symbols on the adapter Explanation Warning. Follow documentation. Do not dispose of the adapter in household waste. Take the adapter for proper disposal. Table 43: Explanation of the symbols on the adapter 55 8 Pager system and DECT ZETTLER Medicall 800 8 Pager system and DECT 8.1 Systems with pagers) In systems with pagers (“wireless pager system”) additional information about the calls is provided through the “pagers” of the pager system. How this information is signalled on the pagers depends on the make of the pager system and on your specific settings. You must therefore read the corresponding user guide! Switch presence on/off on the pager system also Even if a pager system is connected to your system, you still need to make sure you switch the presence on and off! See section 4 “Presence” on page 8. 8.2 Systems with cordless telephones (DECT) The information in this section applies only for systems with speech. In systems to which a DECT PABX system is connected, additional information about the calls is also provided through the cordless telephones of the PABX system. You can also use it to speak with the calling patient and cancel and store calls. Operation depends on the PABX system used. This means that only general user information can be given. The following information applies for all DECT PABX systems. However, the operation of specific systems may be very simplified. You must therefore read the corresponding user guide! Switch presence on/off on the DECT also Even if a DECT PABX system is connected to your system, you still need to make sure you switch the presence on and off! See section 4 “Presence” on page 8. 8.2.1 Operation TI-NUM TI-NUM is the call number of the telephone interface. The connection between the Medicall 800 system and the PABX system is by means of the telephone interface, which has its own call number. 56 How to retrieve the most important call in the station 1 Dial the TI-NUM and wait for the tone. 2 Press 0#. The connection is established. You can speak. 3 To exit, press # before hanging up. The connection is ended and the call is cancelled. If you want to store the call, press 1# before hanging up. How to retrieve the most important call in a group 1 Dial the TI-NUM and wait for the tone. 2 Enter the number of the group (1 to 5). 3 Press #. The connection is established, you can speak. 4 To exit, press # before hanging up. The connection is ended and the call is cancelled. If you want to store the call, press 1# before hanging up. How to speak to a room 1 Dial the TI-NUM and wait for the tone. 2 Enter the number of the desired room. 3 Press #. The connection is established. You can speak. 4 To exit, press # before hanging up. The connection is ended. How to make an announcement to a station 1 Dial the TI-NUM and wait for the tone. 2 Press *#. The connection is established. You can speak. 3 To exit, press # before hanging up. The connection is ended. How to make an announcement to a group 1 Dial the TI-NUM and wait for the tone. 2 Enter the number of the group (1 to 5). 3 Press *#. The connection is established. You can speak. 4 To exit, press # before hanging up. The connection is ended. User Manual Doc. version 3.5 ZETTLER Medicall 800 9 Examples of use 9.2 “Examples of systems without speech” on page 58 and 9.3 “Examples of systems with speech” on page 61 give examples of usage that occurs frequently in practice. 9.1 9 Examples of use Notes to the examples Display texts Because of the many different ways of presentation offered by Medicall 800, various texts are just represented as symbols. The characters are explained in Table 44. Character Explanation SSSSSSSS Station or care group (up to 8 characters). Example: Surg 1 CCCCCC Call (call text). RRRRRR Room or room number (up to 6 characters). Example: Rm 318 LLLLLLLL Call line (up to 8 characters). Example: Bed 1 Symbols In the examples symbols are used for the optical and acoustic signalling. An explanation is given in Table 45. Symbol Explanation Symbol for acoustic call forwarding (sounder), see Table 4 on page 11 Symbol for constant light Symbol for flashing light, see Table 4 on page 11 Table 45: Meaning of the symbols in the examples GGGGGGGGG Indication of interconnection with other groups or stations (up to 9 characters). Example: G1+G2 * Identification for further calls ¯ You can use the scroll button to scroll on to the next page. n In idle mode a flashing square appears if there is no fault or message in the Medicall 800 system. Table 44: Meaning of the characters in the display User Manual Doc. version 3.5 57 58 SSSSSSSS Pat RRRRRR LLLLLLLL Patient call P1 No call 13:00 GGGGGGGG Cancel presence Table 46: System without speech, patient call Patient makes patient call Nursing staff store call on the display Nursing staff go to the call line and switch presence on Nursing staff switch presence off and leave room, stored call is deleted SSSSSSSS pres. 1 RRRRRR LLLLLLLL Set presence No call 13:00 GGGGGGGG Display Action room Overdoor light 1 2 Station/group signal light 9.2 Store call (opt.) Action display 9.2 Examples of systems without speech ZETTLER Medicall 800 Examples of systems without speech Presence panel WC call button reassurance light Bed call button reassurance light yellow green red white User Manual Doc. version 3.5 User Manual Doc. version 3.5 SSSSSSSS pres. 1 RRRRRR LLLLLLLL SSSSSSSS nurse RRRRRR LLLLLLLL SSSSSSSS pres. 1 RRRRRR LLLLLLLL No call 13:00 GGGGGGGG Nurse emergency call Confirm presence Cancel presence No call 13:00 GGGGGGGG SSSSSSSS Pat RRRRRR LLLLLLLL Display Set presence Patient call P1 Action room Table 47: System without speech, patient call with subsequent nurse call Patient makes patient call Nursing staff store call on the display Nursing staff go to the call line and switch presence on Nursing staff need assistance and make a nurse emergency call while with the patient 2nd nurse immediately goes to call line and confirms presence Both nurses switch presence off and leave the room Store call (opt.) Action display Overdoor light 1 2 Station/group signal light ZETTLER Medicall 800 9.2 Examples of systems without speech Presence panel WC call button reassurance light Bed call button reassurance light yellow green red white 59 60 SSSSSSSS WC call RRRRRR LLLLLLLL WC call SSSSSSSS pres. 1 RRRRRR LLLLLLLL SSSSSSSS pres. 1 RRRRRR LLLLLLLL No call 13:00 GGGGGGGG Set presence Press WC cancel button Cancel presence No call 13:00 GGGGGGGG Display Action room Table 48: System without speech, WC call Patient makes WC call Nursing staff store call on the display Nursing staff go to the call line and switch presence on Nursing staff press cancel button in WC Nursing staff switch presence off and leave room, stored call is deleted Store call (opt.) Action display Overdoor light 1 2 Station/group signal light 9.2 Examples of systems without speech ZETTLER Medicall 800 Presence panel WC call button reassurance light Bed call button reassurance light yellow green red white User Manual Doc. version 3.5 User Manual Doc. version 3.5 No call 13:00 GGGGGGGG Cancel presence Table 49: System with speech, patient call Patient makes patient call Nursing staff answer call Nursing staff store call on answer station Nursing staff go to the call line and switch presence on Nursing staff switch presence off and leave room, stored call is deleted SSSSSSSS pres. 1 RRRRRR LLLLLLLL Set presence No call 13:00 GGGGGGGG Store call (opt.) SSSSSSSS Pat RRRRRR LLLLLLLL Answer station, communication terminal RRRRRR LLLLLLLL < SPK > < STR? > Patient call P1 Action room Overdoor light 1 2 Station/group signal light 9.3 Answer a call Action answer station ZETTLER Medicall 800 9.3 Examples of systems with speech Examples of systems with speech Presence panel WC call button reassurance light Bed call button reassurance light yellow green red white 61 62 No call 13:00 GGGGGGGG Overdoor light yellow green red white 1 2 Station/group signal light Table 50: System with speech, patient call with subsequent nurse emergency call Patient makes patient call. Nursing staff answer call. Nursing staff store call on answer station. Nursing staff go to the call line and switch presence on. Nursing staff need assistance and make a nurse emergency call while with the patient. 2nd nurse answers the call. 2nd nurse stores the nurse emergency call. 2nd nurse goes to the call line and confirms presence. Both nurses switch presence off and leave the room. Cancel presence SSSSSSSS Pres.1 RRRRRR LLLLLLLL No call 13:02 GGGGGGGG Store nurse emergency call Confirm presence RRRRRR LLLLLLLL < SPK > < STR ?> SSSSSSSS Nurse RRRRRR LLLLLLLL Nurse emergency call Answer nurse emergency call SSSSSSSS Pres.1 RRRRRR LLLLLLLL No call 13:00 GGGGGGGG Store call (opt.) Set presence RRRRRR LLLLLLLL < SPK > < STR ?> SSSSSSSS Pat RRRRRR LLLLLLLL Answer station, communication terminal Answer a call Patient call P1 Action answer sta- Action room tion 9.3 Examples of systems with speech ZETTLER Medicall 800 Presence panel WC call button reassurance light Bed call button reassurance light User Manual Doc. version 3.5 User Manual Doc. version 3.5 SSSSSSSS pres. 1 RRRRRR LLLLLLLL SSSSSSSS pres. 1 RRRRRR LLLLLLLL No call 13:00 GGGGGGGG Set presence Press WC cancel button Cancel presence No call 13:00 GGGGGGGG SSSSSSSS WC call RRRRRR LLLLLLLL Answer station, communi- Overdoor light cation terminal yellow green red white 1 2 Station/group signal light Table 51: System with speech, WC call (as there is no speech facility in the WC, this example corresponds to Table 48 on page 60) Patient makes WC call Nursing staff store call on the display Nursing staff go to the call line and switch presence on Nursing staff press cancel button in WC Nursing staff switch presence off and leave room, stored call is deleted Store call (opt.) WC call Action answer sta- Action room tion ZETTLER Medicall 800 9.3 Examples of systems with speech Presence panel WC call button reassurance light Bed call button reassurance light 63 10 Maintenance and servicing ZETTLER Medicall 800 10 Maintenance and servicing Some points need to be observed in the installation, operation and servicing of a call system. Additional information can be found in the DIN VDE 0834 standard for call systems in hospitals, nursing homes and similar institutions. National legislation must be observed in countries in which this standard is not applicable. 10.1 Operation and repairs The owner of a call system in hospitals, nursing homes, nursing stations and similar institutions or penal institutions must himself be an “instructed person” within the meaning of DIN VDE 0834 or commission an instructed person. He must ensure the following: Personnel must be made familiar with the operation and use of the call system through training or the like. Suitable training must be provided and repeated at regular intervals. Personnel must report any indications of impairment in the permanent readiness or irregularities in the functions and inspections must be carried out. Non-system devices and equipment (e.g. medical electrical devices) may only be connected by personnel who have been given special training in this procedure. Plug-in devices for making calls, e.g. patient's handsets, must be checked after every insertion to ensure that their call-making functionality is still perfect. Personnel must report any irregularities in functions, all failures and all faults. Any maintenance or modification that is required on the call system must be instigated immediately by the operator or by a person commissioned and instructed by him. Call systems must be maintained by specialists in call systems. In the event of faults, call systems must be inspected immediately and repaired by specialists in call systems. The timely and proper performance of this work must be arranged between the operator and the maintenance firm, for instance in the form of a maintenance contract. The maintenance firm must commence rectification of the faults no later than 24 hours after notification. 64 In all cases in which part or all of the call system is switched off, the operator must provide some other means of monitoring the rooms affected until such time as the call system is switched on again. Modifications to the call system may only be carried out by specialists in call systems. The desired condition of the call system must be restored immediately after every modification and a modification check must be carried out (see section “Check after modification” on page 65). All fault incidents in the call system must be recorded in an operating log. 10.2 Servicing Responsibility for maintenance rests with the owner of a call system. He must ensure that the call system is duly and properly maintained at the right time. He can transfer this responsibility to a specialist firm. The necessary spare parts logistics and availability should be ensured. Necessary inspections: Inspections must be carried out 4 times a year at roughly the same intervals of time. The following must be checked for proper functioning: – Call buttons and movable components for making calls that are intended for use by patients – Lights and acoustic signal transmitters – Energy supply A more comprehensive inspection must be carried out once a year. The following must be checked for proper functioning: – All other components for making calls, cancelling calls and signalling presence – All other display devices – All equipment for answering calls Maintenance work must be carried out to the manufacturer's instructions, but at least once a year. It also includes: – Upkeep of system parts – Replacement of elements with a limited life (e.g. batteries) – Adjustment – Resetting and calibration of elements and components – Check of the UPS User Manual Doc. version 3.5 ZETTLER Medicall 800 10.3 Inspections Acceptance inspection An acceptance inspection must be carried out by an expert in call systems before the call system is commissioned. It comprises: A visual and functional check of the call system and the components A check of the completeness of the documents required for operation of the call system An acceptance report signed by the person responsible for the acceptance inspection. Acceptance inspections of partial sections of the call system may be carried out as building progresses. If you are using a structured network with LAN cabling, this must satisfy the requirements of Link Class D (transmission class) under DIN EN 50173/ISO/IEC 11801 and be certified. Visual check The visual check covers the expert installation and mounting of the components, their proper condition and a comparison with technical literature. The area of use and protection area must be taken into account (see section 11 “Glossary” on page 66). Functional check The functional check covers the proper interaction between the system parts. Check after modification In the event of modifications to the call system or its scope, an acceptance inspection must be carried out as a modification check (see section “Acceptance inspection”). It may be limited to the parts affected by the modification if it can be safely assumed that the modifications have no effect on the rest of the call system. 10.4 Disposal Do not throw the components and used batteries in the household waste. Take the components and batteries for proper disposal. 10.5 Protection range, cleaning and disinfection 10.5.1 Protection range Patient's handsets marked !A! on the rear may only be used in protection range A. User Manual Doc. version 3.5 10.3 Inspections All other devices of Medicall 800 may be used in protection ranges A and B. For information on the protection range, see section “Protection range (pursuant to DIN VDE 0834)” on page 67. 10.5.2 Cleaning and disinfection NCS Touch and communication terminal Touch Cleaning When cleaning displays, use only agents that contain alcohol (methanol, ethanol, propanol) as an active ingredient. Dilute as specified by the manufacturer. Do not use any other cleaning agents to clean the displays, e.g. containing acids, lyes, peroxide compounds, quaternary ammonium compounds, aldehydes, organic solvents or abrasive mechanical cleaning agents. Liquids must not be allowed to penetrate the display. You must therefore use only slightly moist wipes. Disinfection Disinfect the Communication Terminal Touch with wipe disinfection. Use only agents that contain alcohol (methanol, ethanol, propanol). Use the concentrations specified by the manufacturer. Do not use any other disinfectants, e.g. containing acids, lyes, peroxide compounds, quaternary ammonium compounds, aldehydes or organic solvents. Liquids must not be allowed to penetrate the display. You must therefore use only slightly moist wipes. Other components Cleaning Use commercial household cleaners when cleaning components of Medicall 800. Dilute as specified by the manufacturer. Do not use any abrasive mechanical cleaning agents. Liquids must not be allowed to penetrate the display. You must therefore use only slightly moist wipes. Disinfection All components of Medicall 800 and VarioLine can be disinfected by wipe disinfection. Use the concentrations specified by the manufacturer. Do not use any disinfectants that contain active chlorine. Liquids must not be allowed to penetrate the display. You must therefore use only slightly moist wipes. 65 11 Glossary ZETTLER Medicall 800 11 Glossary Answer terminal or answer station Component for answering and processing calls. Display: Answer station without speech. Area Unit in a call system. Area of use (pursuant to DIN VDE 0834) An area of use is the area for which a call system is used as intended. The key factor here is the response of the call system in the event of a malfunction. Area of use A: In this area of use the caller or other people may be put in danger if a call is not signalled because of a fault or faults are not identified in time. This is the case if help is supposed to be obtained through the call system. Area of use B: In this area of use the caller or other people may be put in particular danger if a call is not signalled because of a fault or faults are not identified in time. This applies to the following applications, among others: Intensive care stations Alerting a resuscitation team Connection of electric medical equipment Call systems in prisons and similar institutions if the supervisory personnel are to be able to trigger emergency calls. Applications in which a fault in transmission of the call presents a comparable hazard for the caller or other people. Call forwarding Medicall 800 forwards calls to all rooms in the station which have a set presence. At answer stations with speech the nursing staff can answer the call. In answer stations without speech an audio signal draws attention to the call; you can store this call. This way the nursing staff get the call even if they are not in the care support point. Call system System by which people can be called or sought or by which information can be communicated. Care group A care group consists of several rooms within a station that are monitored jointly from one answer station. Up to 5 care groups can be created for each station. 66 Discretion With all answer stations the nursing staff can speak to a room without a call or a presence only with discretion. They can speak, but they cannot hear anything in the room as long as the patient does not answer the call using the call button. Display Answer station without speech. Dormophon See section “Noise monitoring”. Gong Attention signal of the loudspeaker: Before an announcement When the nursing staff answer a call or speak to a room. This means that the person being spoken to knows that someone wants to speak to him. He cannot be monitored without noticing. Group answer station Parallel answer station at which the nursing staff can process and answer all calls of a care group. Interconnection You can interconnect several stations or care groups to form a larger entity. This enables the nursing staff at a main answer station to process all calls of the individual stations or care groups. LON bus System bus for Medicall 800. Main answer station Also station display (without speech). Component in the station room for answering and processing calls of a station. It could be one of a number of different components, e.g. NCS Touch, GNCS, universal display. Noise monitoring Noise monitoring allows a call to be triggered in the event of a noise. If presence is set an emergency call is triggered. The sensitivity of noise monitoring can be adjusted. The following device has this function: VL Sound monitor, stock code number 125.5550 User Manual Doc. version 3.5 ZETTLER Medicall 800 Pager system See section “Pager system” on page 67 Pager system Pager system System by which short text messages can be transmitted wirelessly to people equipped with a pager. Protection range (pursuant to DIN VDE 0834) A protection range is the area in which certain measures protecting against hazardous shock currents must be taken where equipment is used as intended. Of key importance here is the electrically conductive connection of people with earth potential or other plant and machinery. Protection range A: In this area there is no electrically conductive connection of people with earth potential or other plant and machinery. This means that no special protective measures are required. Protection range B: In this area persons may be at increased risk if they have an electrically conductive connection with earth potential or electrical equipment. Additional protective measures are required in this area. Call panels in bathrooms, for instance, belong to protection class B. REBS Abbreviation for Room electronic bedwise speech. Room electronics (communication terminal) for bedwise speech. User Manual Doc. version 3.5 11 Glossary Station call forwarding Medicall 800 forwards a call which the nursing staff were unable to process within a defined period of time to any nodes, other stations or care groups. Station display See section “Main answer station”. Station A station is a unit within a Medicall 800 network. Data are first distributed to all nodes within a station. Depending on the setting, data are also transmitted to other stations if station call forwarding or interconnection is set. A station always contains a main answer station for answering and processing calls. UPS Uninterruptible power supply for emergency power. A battery takes over the power supply for a limited period of time. Vital call In the vital call function in mediGraph the patient must make a call within a certain period of time. mediGraph marks the room until he makes a call. At the end of this time, mediGraph makes a call. 67 11 Glossary 68 ZETTLER Medicall 800 User Manual Doc. version 3.5 ZETTLER Medicall 800 Index Index Symbols !A! 52, 65 A A! 52, 65 Acceptance inspection 65 Acoustic call forwarding 11, 12, 13, 14, 15, 16, 17 Alarm 12 Announcement 43 ANS 41 Answer button on CT 41 Answer station 66 Answer stations in systems with speech 41 Answer terminal 66 Area 66 Area of use 66 Articles treated with biocidal products 6 B Bathroom 9, 10 Bedwise speech 41 Buttons in displays with speech 41 Buttons in displays without speech 45 Buttons of the PCAIM audio interface module 40 C Call Cancel 18 Make 9 Processing in displays with speech 42 Processing in displays without speech 46 Store 18 Call button in displays with speech 41 Call button in displays without speech 45 Call category 11, 12, 13, 14, 15, 16, 17 Call forwarding 11, 12, 13, 14, 15, 16, 17, 66 Call forwarding in displays with speech 43 Call forwarding to the actual room 13, 17, 18 Call forwarding, changing the volume in displays with speech 44 Call panel 9 Call signalling 10 Call system 66 CallFt, line fault in displays with speech 43 CallFt, line fault in displays without speech 46 Cardiac call 9, 12, 16 Care group 66 CAUTION 5 CB radio, safe distance 6 User Manual Doc. version 3.5 Cell phone, safe distance 6 cF, line fault in displays with speech 43 cF, line fault in displays without speech 46 Changing interconnection in displays with speech 43 Changing the display contrast in displays with speech 44 Changing the display contrast in the display S1 48 Changing the display contrast in the display S2 and universal display 47 Changing the interconnection in the display S1 47 Changing the interconnection in the display S2 and universal display 47 Changing the volume of call forwarding in displays with speech 44 Changing the volume of call forwarding in the display S2 and universal display 47 Checking lists in displays with speech 44 Checking lists in the display S1 47 Checking lists in the display S2 and universal display 47 Chlorine 65 Cleaning 65 Communication terminal Touch 29 Communication terminal with display (CT) for bedwise speech 41 Communication terminal with display (CT) for roomwise speech 41 Cordless telephone 56 Corridor display 11, 12, 13, 14, 15, 16, 17, 52 Corridor display, emergency mode 52 CT for bedwise speech 41 CT for roomwise speech 41 CT Touch 29 Acknowledging 35 Activating 33 Activating or deactivating node monitoring 39 Announcement 34 Announcement, display button 30 Answer 33 Answer, calls with speech 33 Answer, display button 30 Buttons 29 Buttons on the display 30 Call button 30 Call button S 30 Call format 31 Call forwarding, changing the volume 37 Call LED 30 Call tone on/off 38 Care group, assigning a room 37 Change volume, display button 30 Changing interconnection 36 Changing passwords for menu items 38 Checking lists 37 Confirm change, display button 31 69 Index Customer password 38 Date, set 38 Dial in privacy, deactivating for individual rooms 37 Dialling in privacy in the room activated 34 Display 31 Display buttons 30, 36 Display contrast, set 38 DOOR, display button 31 Door, open 36 Emergency mode 36 ENTER, display button 31 ENTER, membrane button 30 ESC, display button 31 Extend talk time 33, 34 Faults, acknowledging 35 Gong, changing volume 37 Initialise password 39 Initiating a call 35 Intercept 35 IP address 39 LED, call 30 Listen 35 Listen in 35 Membrane buttons 30 Menu 31 Menu up, display button 31 Messages, acknowledging 35 Microphone, display button 30 Monitor room 35 Navigation 33 Open door 36 Open door, display button 31 Open menu, display button 30 Open presence list, display button 31 Password 33 Password, service 39 Passwords, change for menu items 38 Postpone call, display button 30 PRES, display button 31 Presence button 30 Presence button, switching on 33 Presence, voice contact 34 Processing a call without speech (e.g. WC call) 33 Program version 39 PTT, display button 30 Push to talk, display button 30 Room, assigning to a care group 37 Room, voice contact 34 S, call button 30 Screen with touch inputs 32 Sensor screen 32 Service 38 Service password 39 Setting presence 29 Software update 38, 39 Sounder on/off 38 Store call, display button 30 Store call, membrane button 30 Store, call, membrane button 30 70 ZETTLER Medicall 800 STORE, list of stored calls, display button 31 STORE, store call 33 STORE, store call, display button 30 Stored call, voice contact 34 Stored calls, open list, display button 31 Submenu 31 Switching on 33 Telephone, display button 30 Telephoning 35 Time, set 38 Timer 36 Touchscreen 31, 32 Touch-sensitive screen 32 Update 38 Version 39 Voice contact 34 Voice contact with a presence 34 Voice contact with a room 34 Voice contact with a stored call 34 Voice contact, display button 30 Volume of call forwarding, changing 37 Volume, adjust 38 Volume, of the gong, changing 37 WC call 33 CT Touch display 31 D DANGER 5 Data LED of the PCAIM audio interface module 40 DECT system 56 Diagnostic call 9, 11, 15 DIN VDE 0834 66, 67 Discretion 66 Disinfection 65 Display 66 Display contrast in displays with speech 43 Display indication in displays with speech 42 Display indication in displays without speech 45 Display S1 45, 47 Display S2 45, 46 Displays in systems without speech 45 Doctor emergency call 9, 12, 15 Doctor emergency call button in displays with speech 41 Documentation 5 Dormophon 66 E Emergency call 11, 12, 15 Emergency call fault 13, 16, 17 Emergency call message 13, 17 Emergency mode 43, 46 Examples 57 Examples of use 57 User Manual Doc. version 3.5 ZETTLER Medicall 800 Index F M F, fault in displays with speech 43 F, fault in displays without speech 46 Fault 13, 16, 17 Fault in pager system in displays with speech 43 Fault in pager system in displays without speech 46 Fault in patient's handset in displays with speech 43 Fault in patient's handset in displays without speech 46 Faults in displays with speech 42 Faults in displays without speech 46 Fire alarm 12 Flt, fault in pager system in displays with speech 43 Flt, fault in pager system in displays without speech 46 Flt, fault in patient's handset in displays with speech 43 Flt, fault in patient's handset in displays without speech 46 Flt, line fault in displays with speech 43 Flt, line fault in displays without speech 46 Flt, node fault in displays with speech 43 Flt, node fault in displays without speech 46 Function button in displays with speech 41 Function button in displays without speech 45 Functional check 65 M, message in displays with speech 43 M, message in displays without speech 46 Main answer station 41, 66 Maintenance 64 Making an announcement 43 Message 13, 17 Messages in displays with speech 42 Messages in displays without speech 46 Mobile phone, safe distance 6 Modification check 65 G General information 6, 7 Glossary 66 Gong 66 Group answer station 41, 66 Group display 45 Guide 5 I Information 5 Infusion call 9, 11, 14 Inspections 64, 65 Interconnection 66 Interconnection in displays with speech IR sensors 8 IR transmitter 8 43 L Lamps in displays with speech 41 Lamps in displays without speech 45 LEDs of the PCAIM audio interface module 39 Light call fault 13, 16, 17 Light call system 66 Line fault in room in displays with speech 43 Line fault in room in displays without speech 46 Lists in displays with speech 43 LON bus 66 User Manual Doc. version 3.5 N NCS Touch Acknowledging 26 Activating 23 Activating or deactivating node monitoring 29 Announcement 25 Announcement, display button 20 Answer 24 Answer, calls with speech 23 Answer, display button 20 Answer, membrane button 20 Buttons 19 Buttons on the display 20 Call button 19 Call format 21 Call forwarding, changing the volume 27 Call LED 20 Call tone on/off 28 Care group, assigning a room 27 Change volume, display button 21 Changing interconnection 26 Changing passwords for menu items 28 Checking lists 26 Components 19 Confirm change, display button 21 Customer password 28 Date, set 28 Desktop kit 19 Dial in privacy, deactivating for individual rooms Dialling in privacy in the room activated 25 Display 21 Display buttons 20 Display contrast, set 28 DOOR, display button 21 Door, open 26 Emergency mode 26 ENTER, display button 21 ENTER, membrane button 20 ESC, display button 21 Extend talk time 23, 24 Faults, acknowledging 26 Gong, changing volume 27 Handset 19 Initialise password 29 Initiating a call 25 27 71 Index Intercept 25 LED, call 20 Listen 25 Listen in 25 Membrane buttons 19 Menu 21 Menu up, display button 21 Messages, acknowledging 26 Microphone, display button 20 Monitor room 25 Navigation 23 Open door 26 Open door, display button 21 Open menu, display button 21 Open menu, membrane button 20 Open presence list, display button 21 Password 23 Password, service 29 Passwords, change for menu items 28 Ports on the desktop kit 19 Postpone call, display button 21 PRES, display button 21 Presence button 19 Presence button, switching on 23 Presence, voice contact 24 Processing a call without speech (e.g. WC call) Program version 29 PTT, display button 20 Push to talk, display button 20 Room, assigning to a care group 27 Room, voice contact 25 Screen with touch inputs 23 Scroll button 20 Sensor screen 23 Service 28 Service password 29 Setting presence 19 Software update 29 Software updates 19 Sounder on/off 28 Store call, display button 20 Store call, membrane button 20 Store, call, membrane button 20 STORE, list of stored calls, display button 21 STORE, store call 24 STORE, store call, display button 20 Stored call, voice contact 25 Stored calls, open list, display button 21 Submenu 21 Switching on 23 Technical data 29 Telephone 26 Telephone, display button 21 Time, set 28 Touchscreen 21, 23 Touch-sensitive screen 23 Update 29 Update software 29 USB 2.0 mini-B socket 19 72 ZETTLER Medicall 800 USB 2.0 mini-B socket for USB stick for software update 19 Use 19 Version 29 Voice contact 24 Voice contact with a presence 24 Voice contact with a room 25 Voice contact with a stored call 25 Voice contact, display button 20 Volume of call forwarding, changing 27 Volume, adjust 28 Volume, of the gong, changing 27 WC call 24 NF, node fault in displays with speech 43 NF, node fault in displays without speech 46 Node fault in displays with speech 43 Node fault in displays without speech 46 NodeFT, node fault in displays with speech 43 NodeFT, node fault in displays without speech 46 Noise monitoring 66 Normal call 11, 14 NOTICE 5 Nurse emergency call 9, 12, 15 24 O Operation 64 Overdoor light 11, 12, 13, 14, 15, 16, 17 P Pager 56 Pager system 56, 67 PagrFt, fault in pager system in displays with speech 43 PagrFt, fault in pager system in displays without speech 46 Parallel answer station 66 Patient call 9, 11, 14 Patient's handsets 50 Patient’s handset 9 PCAIM audio interface module 39 Buttons 40 LEDs 39 Sounder 39 PF, fault in pager system in displays with speech 43 PF, fault in pager system in displays without speech 46 PH Ft, fault in patient's handset in displays with speech 43 PH Ft, fault in patient's handset in displays without speech 46 PH, fault in patient's handset in displays with speech 43 PH, fault in patient's handset in displays without speech 46 Plug 9 Plug removed call 9, 11, 14 User Manual Doc. version 3.5 ZETTLER Medicall 800 PMR radio, safe distance 6 Pneumatic call panel 9 Presence 1 12 Presence 1, green 8 Presence 2 12 Presence 2, yellow 8 Presence button 8 Presence buttons in displays with speech 41 Presence buttons in displays without speech 45 Presence, voice contact 43, 44 Protection range 52, 65, 67 Pull cord panel 9 Index Store button in displays with speech 42 Store button in displays without speech 45 Store, calls 18 Stored call, signalling 13, 16 Stored calls 18 Stored delay 18 Stored WC call and WC emergency call 13, 16 Symbols 5 System bus 66 T Telephone 56 Telephone call 11, 14 R Reassurance light 11, 12, 13, 14, 15, 16, 17 REBS 67 Repairs 64 RFID tags 8 Room electronics with RFID 49 U Uninterruptible power supply 6 Universal display 45, 46 Universal terminal with display and handset UPS 6, 67 41 S Scroll button in displays with speech 41 Scroll button in displays without speech 45 Service call 9, 11, 14 Service LED of the PCAIM audio interface module 40 Servicing 64 Setting presence 8 Signal words 5 Signalling calls 10 Sounder of the PCAIM audio interface module 39 Special emergency call 12 Staff call 9, 11, 14 Staff call button in displays with speech 41 Station 67 Station call forwarding 67 Station display 45, 67 User Manual Doc. version 3.5 V VDE 0834 66, 67 Visual check 65 Vital call 67 W WARNING 5 Warning messages 5 WC 9, 10 WC call 11, 14 WC emergency call 12, 15 Wipe disinfection 65 73 950.8000E, doc. version 3.5, 7. October 2015. Subject to change without notice. Further information about ZETTLER can be found on the Internet at www.tycoemea.com Company stamp


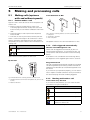


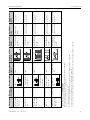
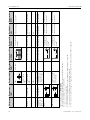


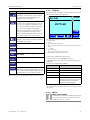


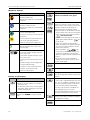
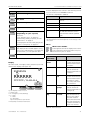
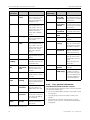

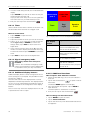


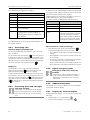

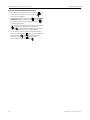


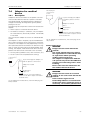
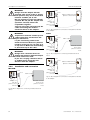


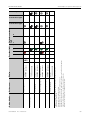
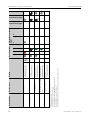
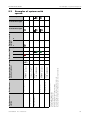
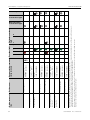
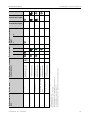
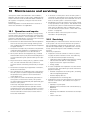


![Capitolato e disciplinare prog. preliminare [file]](http://vs1.manualzilla.com/store/data/006109286_1-555899dc20fd93aaac53ada57fd7457b-150x150.png)