Download PowerPrep™ HP Plasmid Purification Systems
Transcript
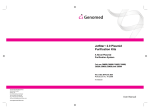
PowerPrep™ HP Plasmid Purification Systems For the isolation of HIGH PURITY plasmid, cosmid, and BAC DNA suitable for all molecular and cellular biology applications. ___________________________________________________________ 9620 Medical Center Drive Suite 200 Rockville, MD 20850 888-267-4436 (phone) 301-340-9254 (fax) 10010 Rev5 POWERPREP™ HP PLASMID P U R I F I C AT I O N K I T S PowerPrep™ HP Plasmid Miniprep Kits Catalog No. NP100004 Catalog No. NP100005 25 Reactions 100 Reactions PowerPrep™ HP Plasmid Midiprep Kits Catalog No. NP100006 Catalog No. NP100007 25 Reactions 50 reactions PowerPrep™ HP Plasmid Maxiprep Kits Catalog No. NP100008 Catalog No. NP100009 10 Reactions 25 Reactions PowerPrep™ HP Plasmid Megaprep Kits Catalog No. NP100020 4 Reactions PowerPrep™ HP Plasmid Gigaprep Kits Catalog N o. NP100021 2 Reactions PowerPrep™ HP Plasmid Midiprep Kits with Prefilters Catalog No. NP100022 Catalog No. NP100023 25 Reactions 50 Reactions PowerPrep™ HP Plasmid Maxiprep Kits with Prefilters Catalog No. NP100024 Catalog No. NP100025 10 Reactions 25 Reactions PowerPrep™ HP Plasmid Midiprep Columns with Prefilters Catalog No. NP100045 25 Reactions PowerPrep™ HP Plasmid Maxiprep Columns Catalog No. NP100046 25 Reactions 2 TABLE OF CONTENTS NOTICE TO CUSTOMERS .................................................................................. 4 OVERVIEW .......................................................................................................... 4 COMPONENTS .................................................................................................... 5 ADDITIONAL MATERIALS and PREPARATIONS ............................................... 6 CRITICAL PARAMETERS AND PROTOCOL NOTES ........................................ 6 MINIPREP PROTOCOL ......................................................................... 8 MIDIPREP PROTOCOL ......................................................................... 9 MAXIPREP PROTOCOL ..................................................................... 10 MIDIPREP PROTOCOL with Integrated Prefilters ............................... 11 MAXIPREP PROTOCOL with Integrated Prefilters .............................. 12 Quick Reference Protocol (Volumes Per Reaction) ............................. 13 MEGA and GIGAPREP OVERVIEW and PROTOCOL NOTES......................... 14 MEGAPREP PROTOCOL .................................................................... 15 GIGAPREP PROTOCOL ..................................................................... 16 TROUBLESHOOTING GUIDE ........................................................................... 17 ACCESSORIES ................................................................................................. 18 RELATED PRODUCTS ...................................................................................... 18 3 NOTICE TO CUSTOMERS S TO CUSTOMERS Important Information The product you have received is authorized for laboratory research use only. The product has not been qualified or found safe and effective for any human or animal diagnostic or therapeutic application. Uses other than the labeled intended use may be a violation of applicable law. Precautions Warning: This product contains hazardous reagents. It is the end user’s responsibility to consult the applicable MSDS(s) before using this product. Disposal of waste organics, acids, bases, and radioactive materials must comply with all appropriate federal, state, and local regulations. If you have any questions concerning the hazards associated with this product, please call OriGene at (888)-267-4436. OVERVIEW The PowerPrep™ HP Plasmid Purification Kits* use a unique anion exchange resin to purify plasmid DNA to a level equivalent to two passes through CsCl gradients. The kits with prefilters add the convenience of an integrated filter unit that allows simultaneous, one-step lysate clarification and column loading. After a modified alkaline/SDS procedure to lyse the cells and precipitate the genomic DNA, the cleared lysate is passed over a pre-packed ion-exchange column (1). The negatively charged phosphates on the backbone of the DNA interact with the positive charges on the surface of the resin. The temperature, salt concentration and pH of the solutions influence binding. Under moderate salt conditions, plasmid DNA remains bound to the resin while RNA, proteins, carbohydrates and other impurities are washed off. The plasmid DNA is eluted under high salt conditions. It is then desalted and concentrated by alcohol precipitation. The protocol can be completed in 1.5 to 2 hours. These products eliminate the use of hazardous chemicals such as phenol, chloroform, and ethidium bromide. All types and sizes of plasmid DNA can be purified with the PowerPrep™ HP Plasmid Purification Kits. Please contact Customer Service at [email protected] or at (888)-267-4436 for modified protocols for BAC, bacmid and ssM13 DNAs or visit our web site at www.origene.com. Yields of up to 30 µg (miniprep), 150 µg (midiprep), 750 µg (maxiprep), 2.5 mg (megaprep) and 10 mg (gigaprep) can be obtained with these systems. Results are dependent on plasmid copy number, plasmid type, bacterial strain, and growth conditions (e.g., medium, antibiotics, temperature, and aeration). Plasmid DNA purified using the PowerPrep™ HP Plasmid Purification Kits is of very high quality and is suitable for all molecular and cell biology applications, including transfection, automated fluorescent DNA sequencing, manual DNA sequencing, amplification reactions, in vitro transcription, cloning, and labeling. Reference 1. Birnboim, H. and Doly, J. (1979) Nucleic Acids Res. 7, 1513. *This product is the subject of U.S. Patent No. 5,843,312 and foreign equivalents. 4 COMPONENTS Store all components at room temperature. After the addition of RNase A to the Cell Suspension Buffer, store at 4°C. NOTE: The Megaprep kit is contained in two separate boxes (a cartridge box and a solutions box). VOLUMES OF COMPONENTS MINIPREP KITS MIDIPREP KITS MAXIPREP KITS 25 RXN 100 RXN 25 RXN 50 RXN Cell Suspension Buffer 15 mL 65 mL 100 mL 250 mL 100 mL RNase A 100 µL 650 µL 650 µL 1.5 mL COMPONENT NAME Cell Lysis Solution 15 mL 65 mL 100 mL Neutralization Buffer 10 mL 40 mL Equilibration Buffer 50 mL Wash Buffer 10 RXN 650 µL MIDIPREP KIT WITH PREFILTERS MAXIPREP KITS WITH PREFILTERS MEGA GIGA 25 RXN 4 RXN 2 RXN 250 mL 250 mL 250 mL 250 mL 500 mL 100 mL 250 mL 1.5 mL 1.5 mL 1.5 mL 1.5 mL 2.8 mL 650 µL 1.5 mL 500 mL 100 mL 250 mL 25 RXN 50 RXN 10 RXN 25 RXN 250 mL 100 mL 250 mL 250 mL 250 mL 250 mL 100 mL 200 mL 100 mL 250 mL 200 mL 250 mL 250 mL 500 mL 100 mL 250 mL 250 mL 250 mL 2 x 250 mL 300 mL 2x 400 mL 400 mL 400 mL 400 mL 2x 400 mL 300 mL 2x 400 mL 125 mL 500 mL 500 mL 2 x 500 mL 2 x 300 mL 3x 500 mL 4 x 400 mL 3 x 400 mL 2x 400 mL 3x 500 mL 2x 300 mL 3x 500 mL Elution Buffer 25 mL 125 mL 125 mL 250 mL 250 mL 400 mL 400 mL 400 mL 130 mL 250 mL 250 mL 400 mL TE Buffer 15 mL 15 mL 15 mL 30 mL 30 mL 30 mL 30 mL 30 mL 15 mL 15 mL 15 mL 30 mL Columns/ Cartridges 25 100 25 50 10 25 4 each 2 each 25 50 10 25 4 each 2 each Lysate Filtration Cartridges 5 ADDITIONAL MATERIALS and PREPARATIONS Additional Materials Required Advance Preparations Isopropanol 70% ethanol Nucleic Acid Purification Rack Tube, appropriate for pelleting and lysing cells Tube, appropriate in size for collecting and precipitating plasmid DNA eluted from column For minipreps: microcentrifuge capable of reaching ~12,000 x g at room temperature and 4°C Add RNase A to Cell Suspension Buffer according to the instructions on the label of the bottle. Mix well. Place a mark on the label to indicate that RNase A has been added, then store Cell Suspension Buffer at 4°C. Check Cell Lysis Solution for precipitate. If necessary, warm the solution briefly at 37°C to dissolve the precipitate. Store all components at room temperature. For midipreps and maxipreps: centrifuge and rotor capable of reaching ~15,000 x g at room temperature and 4°C For mega and gigapreps: vacuum controller, 1000 mL receiver flask, 150 mL receiver flask. See page14 for details. CRITICAL PARAMETERS AND PROTOCOL NOTES RITICAL PARAMETERS AND PROTOCOL NOTES General For optimal performance use volumes, temperatures, incubation times, and centrifugations precisely as indicated in the protocol. Store columns and solutions at recommended temperatures. Cultures may be grown in LB medium or rich media including Superbroth, Terrific Broth, 2XYT, or other proprietary media. Cell density should be 1 - 4 A 600 units/mL. Do not overload the columns. Use the recommended culture volumes as indicated in the protocol to obtain optimal yield and purity. Modified protocols for purifying DNA from BACs, Bacmids, Cosmids, and M13 can be found on our website at www.OriGene.com or may be requested by calling customer service at (888)-267-4436. Additional volumes of some buffers are required to purify DNA from BACs. These buffers can be purchased separately as the PowerPrep™ HP BAC Buffer Kit (Cat. No. NP100003). If you are processing more than 50 ml of culture for Midiprep columns or more than 200 ml for Maxiprep columns to purify low copy plasmids, we strongly recommend that you double the standard volumes of Cell Suspension Buffer (with double the RNase concentration), Lysis Buffer, and Neutralization Buffer used for preparation of the cell lysate. The buffer volumes included in the kit, however, are only sufficient for the designed number of standard preps. Therefore, additional buffer is required in order to utilize all of the columns in the kit for processing large culture volumes. These buffers can be purchased separately as the PowerPrep™ HP BAC Buffer Kit (Cat. No. NP100003). 6 Important Considerations for Alkaline Lysis and Neutralization Steps Suspension For efficient lysis it is important to use a vessel that is large enough to allow complete mixing of the lysis buffers. Ensure that RNase A has been added to Cell Suspension Buffer. The bacteria should be resuspended completely by vortexing or pipetting up and down until no cell clumps remain. Lysis Mix gently but thoroughly. Do not vortex, as this may result in shearing of genomic DNA and contamination of the plasmid DNA. The lysate should appear viscous. Do not allow the lysis reaction to proceed for more than 5 min. Neutralization After addition of Neutralization Buffer, a fluffy white material should form and the lysate should become less viscous. The precipitated material contains genomic DNA, proteins, cell debris, and SDS. The lysate should be mixed thoroughly to ensure even precipitation. If the mixture still appears to contain a gelatinous and slightly brownish material, more mixing is required to completely neutralize the solution. This is more likely to happen when large cell pellets have been processed. Protocol for Clearing Lysates by Filtration for Midi and Maxipreps (not necessary if using kits with prefilters, cat. nos. NP100022, NP100023, NP100024, NP100025) This protocol modification provides a fast and inexpensive method for clarification of cell lysates for the Midi and Maxi size preps. The Mega and Gigapreps use a vacuum-assisted filter cartridge to clarify cell lysates. Plasmid DNA prepared with this method is generally of higher purity than plasmid DNA obtained from lysates cleared by centrifugation because the precipitate is completely removed and does not enter the column. Recommended Materials Funnel Filter Paper Midiprep Tyco Healthcare 65 mm Polystyrene Funnel (8889216100) Whatman 2V fluted filter paper, 125 mm (1202-125) Maxiprep Nalgene 80 mm Polypropylene Powder Funnel (4252-0080) Whatman 2V fluted filter paper, 150 mm 150) 1. Before beginning, place the funnel in the top of the column and insert the fluted Whatman 2V filter paper into the funnel. Apply the entire required amount of Equilibration Buffer to the filter and allow the solution to drain by gravity through the filter and column. During equilibration, proceed with the lysis and neutralization steps. 2. After equilibration and neutralization, pour the lysate into the filter. The cleared lysate will flow through the filter and into the column. The last 1-2 mL of cleared lysate can be recovered by gathering the top of the filter with gloved fingers and twisting gently. When the lysate has finished flowing through the column, remove the funnel containing the filter paper and discard the filter paper. The funnel may be reused if desired. Continue with the Column Wash (step 7). 7 MINIPREP PROTOCOL 2 mL Equilibration Buffer BEFORE BEGINNING: Verify that RNase A has been added to Cell Suspension Buffer and that no precipitate has formed in Cell Lysis Solution (See Advance Preparations). 1. Column Equilibration: Apply 2 mL of Equilibration Buffer to the column. Allow the solution in the column to drain by gravity flow. Harvest Cells 2. Cell Harvesting: For high copy-number plasmids (>2 µg DNA/mL culture), pellet 1 to 3 mL of an overnight culture. For low copy-number plasmids (~2 µg DNA/mL culture), pellet 10 to 15 mL of an overnight culture. Thoroughly remove all medium. 0.4 mL Cell Suspension Buffer 3. Cell Suspension: Add 0.4 mL of Cell Suspension Buffer (containing RNase A) to the pellet and suspend the cells until homogeneous. 4. Cell Lysis: Add 0.4 mL of Cell Lysis Solution. Mix gently by inverting the capped tube five times. Do not vortex. Incubate at room temperature for exactly 5 min. 5. Neutralization: Add 0.4 mL of Neutralization Buffer and mix immediately by inverting the tube until the solution is homogeneous. When large cell pellets have been processed, more vigorous shaking may be required. However, DO NOT VORTEX! Centrifuge the mixture at ~12,000 x g at room temperature for 10 min. If centrifugation is done at 4°C, supernatant must be warmed to room temperature before loading on column. 6. Column Loading: Pipet the supernatant from step 5 onto the equilibrated column. Allow the solution in the column to drain by gravity flow. Discard flow-through. 7. Column Wash: Wash the column two times with 2.5 mL of Wash Buffer. Allow the solution in the column to drain by gravity flow after each wash. Discard flowthrough. 8. Plasmid DNA Elution: Elute the DNA by adding 0.9 mL of Elution Buffer. Allow the solution in the column to drain by gravity flow. Do not force out remaining solution. 9. Plasmid DNA Precipitation: Add 0.63 mL of isopropanol to the eluate. Mix, and centrifuge the mixture at ~12,000 x g at 4°C for 30 min. Carefully discard supernatant. Wash the plasmid DNA pellet with 1 mL of 70% ethanol and centrifuge at ~12,000 x g at 4°C for 5 min. Carefully and fully pipet off the ethanol wash. Air dry the pellet for 10 min. 0.4 mL Cell Lysis Solution 0.4 mL Neutralization Buffer Load Column 2 x 2.5 mL Wash Buffer 0.9 mL Elution Buffer 0.63 mL isopropanol 1 mL 70% ethanol NOTE: The DNA pellet is easily dislodged when washing with 70% ethanol. It is best to pipet off the isopropanol supernatant and ethanol wash to remove these liquids from the pellet. This is a particular problem for minipreps or when the DNA pellet is very small. 10. 50 µL TE Buffer 8 Purified DNA: Dissolve the pelleted DNA in 50 µL of TE Buffer. Occasionally, insoluble particles are present. These particles do not influence the quality of DNA and can easily be removed by centrifugation at ~12,000 x g at room temperature for 1 min. Transfer the sample to a fresh tube. MIDIPREP PROTOCOL 10 mL Equilibration Buffer Harvest Cells BEFORE BEGINNING: Verify that RNase A has been added to Cell Suspension Buffer and that no precipitate has formed in Cell Lysis Solution (See Advance Preparations). 1. NOTE: If using the filtration method for lysate clarification, pour the Equilibration Buffer through the filter paper in the funnel that was placed in the column. 2. Cell Harvesting: For high copy-number plasmids µg DNA/mL culture), pellet 15 to 25 mL of overnight culture. For low copy-number plasmids µg DNA/mL culture), pellet 25 to 100 mL of overnight culture. Thoroughly remove all medium. 3. Cell Suspension: Add 4 mL of Cell Suspension Buffer (containing RNase A) to the pellet and suspend the cells until homogeneous. 4. Cell Lysis: Add 4 mL of Cell Lysis Solution. Mix gently by inverting the capped tube five times. Do not vortex. Incubate at room temperature for exactly 5 min. 5. Neutralization: Add 4 mL of Neutralization Buffer and mix immediately by inverting the tube until the mixture is homogeneous. When large cell pellets have been processed, more vigorous shaking may be required. However, DO NOT VORTEX! Centrifuge the mixture at ~15,000 x g at room temperature for 10 min. If centrifugation is done at 4°C, supernatant must be warmed to room temperature before loading on column. 6. Column Loading: Pipet the supernatant from step 5 onto the equilibrated column. Allow the solution in the column to drain by gravity flow. Discard flow-through. 7. Column Wash: Wash the column two times with 10 mL of Wash Buffer. Allow the solution in the column to drain by gravity flow after each wash. Discard flowthrough. 8. Plasmid DNA Elution: Elute the DNA by adding 5 mL of Elution Buffer. Allow the solution in the column to drain by gravity flow. Do not force out remaining solution. 9. Plasmid DNA Precipitation: Add 3.5 mL of isopropanol to the eluate. Mix, and centrifuge the mixture at ~15,000 x g at 4°C for 30 minutes. Carefully discard supernatant. Wash the plasmid DNA pellet with 3 mL of 70% ethanol and centrifuge at ~15,000 x g at 4°C for 5 min. Carefully and fully pipet off the ethanol wash. Air dry the pellet for 10 min. 4 mL Cell Suspension Buffer 4 mL Cell Lysis Solution 4 mL Neutralization Buffer Load Column 2 x 10 mL Wash Buffer 5 mL Elution Buffer 3.5 mL isopropanol 3 mL 70% ethanol Column Equilibration: Apply 10 mL of Equilibration Buffer to the column. Allow the solution in the column to drain by gravity flow. (>2 an (~2 an NOTE: The DNA pellet is easily dislodged when washing with 70% ethanol. It is best to pipet off the isopropanol supernatant and ethanol wash to remove these liquids from the pellet. This is a particular problem for minipreps or when the DNA pellet is very small. 10. 200µL TE Buffer 9 Purified DNA: Dissolve the pelleted DNA in 200 µL of TE Buffer. Occasionally, insoluble particles are present. These particles do not influence the quality of DNA and can easily be removed by centrifugation in a microcentrifuge at ~12,000 x g at room temperature for 1 min. Transfer the sample to a fresh tube. MAXIPREP PROTOCOL 30 mL Equilibration Buffer BEFORE BEGINNING: Verify that RNase A has been added to Cell Suspension Buffer and that no precipitate has formed in Cell Lysis Solution (See Advance Preparations). 1. Harvest Cells 10 mL Cell Suspension Buffer NOTE: If using the filtration method for lysate clarification, pour the Equilibration Buffer through the filter paper in the funnel that was placed in the column. 2. Cell Harvesting: For high copy-number plasmids (>2 µg DNA/mL culture), pellet 100 mL of an overnight culture. For low copy-number plasmids (~2 µg DNA/mL culture), pellet 250 to 500 mL of an overnight culture. Thoroughly remove all medium. 3. Cell Suspension: Add 10 mL of Cell Suspension Buffer (containing RNase A) to the pellet and suspend the cells until homogeneous. 4. Cell Lysis: Add 10 mL of Cell Lysis Solution. Mix gently by inverting the capped tube five times. Do not vortex. Incubate at room temperature for exactly 5 min. 5. Neutralization: Add 10 mL of Neutralization Buffer and mix immediately by inverting the tube until the solution is homogeneous. When large cell pellets have been processed, more vigorous shaking may be required. However, DO NOT VORTEX! Centrifuge the mixture at ~15,000 x g at room temperature for 10 min. If centrifugation is done at 4°C, supernatant must be warmed to room temperature before loading on column. 6. Column Loading: Pipet the supernatant from step 5 onto the equilibrated column. Allow the solution in the column to drain by gravity flow. Discard flow-through. 7. Column Wash: Wash the column with 60 mL of Wash Buffer. Allow the solution in the column to drain by gravity flow. Discard flow-through. 8. Plasmid DNA Elution: Elute the DNA by adding 15 mL of Elution Buffer. Allow the solution in the column to drain by gravity flow. Do not force out remaining solution. 9. Plasmid DNA Precipitation: Add 10.5 mL of isopropanol to the eluate. Mix, and centrifuge the mixture at ~15,000 x g at 4°C for 30 min. Carefully discard supernatant. Wash the plasmid DNA pellet with 5 mL of 70% ethanol and centrifuge at ~15,000 x g at 4°C for 5 min. Carefully and fully pipet off the ethanol wash. Air dry the pellet for 10 min. 10 mL Cell Lysis Solution 10 mL Neutralization Buffer Load Column 60 mL Wash Buffer 15 mL Elution Buffer 10.5 mL isopropanol 5 mL 70% ethanol 500 µL TE Buffer Column Equilibration: Apply 30 mL of Equilibration Buffer to the column. Allow the solution in the column to drain by gravity flow. NOTE: The DNA pellet is easily dislodged when washing with 70% ethanol. It is best to pipet off the isopropanol supernatant and ethanol wash to remove these liquids from the pellet. This is a particular problem for minipreps or when the DNA pellet is very small. 10. 10 Purified DNA: Dissolve the pelleted DNA in 500 µL of TE Buffer. Occasionally, insoluble particles are present. These particles do not influence the quality of DNA and can easily be removed by centrifugation in a microcentrifuge at ~12,000 x g at room temperature for 1 min. Transfer the sample to a fresh tube. MIDIPREP PROTOCOL with Integrated Prefilters BEFORE BEGINNING: Verify that RNase A has been added to Cell Suspension Buffer and that no precipitate has formed in Cell Lysis Solution (See Advance Preparations). 1. Column Equilibration: Apply 15 mL of Equilibration Buffer directly into the prefilter that is inserted in the column. Allow the solution in the column to drain by gravity flow. Prepare cell lysate while the column and prefilter unit are equilibrating. Note: Shortly after the column has begun dripping, some drops at the outlet may appear turbid. This is normal and due to the interaction of the equilibration buffer with the resin. The turbid drops will not affect the preparation in any way. 2. Cell Harvesting: For high copy-number plasmids (>2 µg DNA/mL culture), pellet up to 50 mL of an overnight culture. For low copy-number plasmids (~2 µg DNA/mL culture), pellet 50 to 100 mL of an overnight culture. Thoroughly remove all medium. 3. Cell Suspension: Add 10 mL of Cell Suspension Buffer (containing RNase A) to the pellet and suspend the cells until the mixture is homogeneous. 4. Cell Lysis: Add 10 mL of Cell Lysis Solution and mix gently by inverting the capped tube five times. Do not vortex. Incubate at room temperature for exactly 5 min. 5. Neutralization: Add 10 mL of Neutralization Buffer and mix immediately by inverting the tube until the solution is homogeneous. When large cell pellets have been processed, more vigorous shaking may be required. However, DO NOT VORTEX! 6. Column Loading: Pour the neutralized cell lysate including all of the precipitated material into the previously equilibrated prefilter/column combination. Let the lysate run through by gravity flow until the flow stops or becomes very slow (< 1 drop per 10 seconds). Discard flow-through. 7. Lysate Wash: Add 10 mL of Wash Buffer to the prefilter and let drain by gravity until the flow stops or becomes very slow. 8. Prefilter Removal : As soon as the column has stopped dripping, remove the prefilter from the column and discard it. 9. Column Wash: Wash the column with 20 mL of Wash Buffer. Allow the solution in the column to drain by gravity flow. Discard flow-through. 10. Plasmid DNA Elution: Elute the DNA by adding 5 mL of Elution Buffer. Allow the solution in the column to drain by gravity flow. Do not force out remaining solution. 11. Plasmid DNA Precipitation: Add 3.5 mL of isopropanol to the eluate. Mix, and centrifuge the mixture at ~15,000 x g at 4°C for 30 min. Carefully discard supernatant. Wash the plasmid DNA pellet with 3 mL of 70% ethanol and centrifuge at ~15,000 x g at 4°C for 5 min. Carefully and fully pipet off the ethanol wash. Air dry the pellet for 10 min. Do not force any remaining liquid out of the Prefilter! NOTE: The DNA pellet is easily dislodged when washing with 70% ethanol. It is best to pipet off the ethanol wash to remove it from the pellet. This is a particular problem when the DNA pellet is very small. 12. Purified DNA: Dissolve the pelleted DNA in 200 µL of TE Buffer. Occasionally, insoluble particles are present. These particles do not influence the quality of DNA and can easily be removed by centrifugation in a microcentrifuge at ~12,000 x g at room temperature for 1 min. Transfer the sample to a fresh tube. 11 MAXIPREP PROTOCOL with Integrated Prefilters BEFORE BEGINNING: Verify that RNase A has been added to Cell Suspension Buffer and that no precipitate has formed in Cell Lysis Solution (See Advance Preparations). 1. Column Equilibration: Apply 30 mL of Equilibration Buffer directly into the prefilter that is inserted in the column. Allow the solution in the column to drain by gravity flow. 2. Cell Harvesting: For high copy-number plasmids (>2 µg DNA/mL culture), pellet up to 100 mL of an overnight culture. For low copy-number plasmids (~2 µg DNA/mL culture), pellet 200 to 500 mL of an overnight culture. Thoroughly remove all medium. 3. Cell Suspension: Add 10 mL of Cell Suspension Buffer (containing RNase A) to the pellet and suspend the cells until homogeneous. For culture volumes greater than 200 mL, add 20 mL of Cell Suspension buffer. 4. Cell Lysis: Add 10 mL of Cell Lysis Solution. For culture volumes greater than 200 mL, add 20 mL of Cell Lysis Solution. Mix gently by inverting the capped tube five times. Do not vortex. Incubate at room temperature for exactly 5 min. 5. Neutralization: Add 10 mL of Neutralization Buffer and mix immediately by inverting the tube until the solution is homogeneous. For culture volumes greater than 200 mL, add 20 mL of Neutralization Buffer and mix immediately by inverting the tube until the solution is homogeneous. When large cell pellets have been processed, more vigorous shaking may be required. However, DO NOT VORTEX! 6. Column Loading: Pour the neutralized cell lysate including all of the precipitated material into the previously equilibrated prefilter/column combination. Let the lysate run through by gravity flow until the flow stops or becomes very slow (< 1 drop per 10 seconds). Discard flow-through. 7. Lysate Wash: Add 10 mL of Wash Buffer to the prefilter and let drain by gravity until the flow stops or becomes very slow. 8. Prefilter Removal: As soon has the column as stopped dripping, remove the prefilter from the column and discard it. 9. Column Wash: Wash the column with 50 mL of Wash Buffer. Allow the solution in the column to drain by gravity flow. Discard flow-through. 10. Plasmid DNA Elution: Elute the DNA by adding 15 mL of Elution Buffer. Allow the solution in the column to drain by gravity flow. Do not force out remaining solution. 11. Plasmid DNA Precipitation: Add 10.5 mL of isopropanol to the eluate. Mix, and centrifuge the mixture at ~15,000 x g at 4°C for 30 min. Carefully discard supernatant. Wash the plasmid DNA pellet with 5 mL of 70% ethanol and centrifuge at ~15,000 x g at 4°C for 5 min. Carefully and fully pipet off the ethanol wash. Air dry the pellet for 10 min. Do not force any remaining liquid out of the Prefilter! NOTE: The DNA pellet is easily dislodged when washing with 70% ethanol. It is best to pipet off the ethanol wash to remove it from the pellet. This is a particular problem when the DNA pellet is very small. 12. Purified DNA: Dissolve the pelleted DNA in 500 µL of TE Buffer. Occasionally, insoluble particles are present. These particles do not influence the quality of DNA and can easily be removed by centrifugation in a microcentrifuge at ~12,000 x g at room temperature for 1 min. Transfer the sample to a fresh tube. 12 Quick Reference Protocol (Volumes per Reaction) Miniprep Midiprep Midiprep Prefilter Maxiprep Maxiprep Prefilter 30 mL 30 mL Column Equilibration Equilibration Buffer 2 mL 10 mL 15 mL Cell Harvesting and Alkaline Lysis Cell Suspension Buffer* 0.4 mL 4 mL 10 mL 10 mL 10 mL Cell Lysis Buffer* 0.4 mL 4 mL 10 mL 10 mL 10 mL Neutralization Buffer* 0.4 mL 4 mL 10 mL 10 mL 10 mL Column Loading and Elution Wash Buffer** 10 mL 10 mL Discard Prefilter Discard Prefilter Wash Buffer 2 x 2.5 mL 2 x 10 mL 20 mL 60 mL 50 mL Elution Buffer 0.9 mL 5 mL 5 mL 15 mL 15 mL Isopropanol 0.63 mL 3.5 mL 3.5 mL 10.5 mL 10.5 mL 70% Ethanol 1 mL 3 mL 5 mL 5 mL 5 mL TE Buffer 50 μL 200 μL 200 µl 500 μL 500 µL * Additional volumes may be required for Low Copy Number plasmids (Cat. No. NP100003) ** Lysate Wash for kits with prefilters 13 MEGA and GIGAPREP OVERVIEW and PROTOCOL NOTES Additional Materials Required for Mega and Gigapreps A vacuum source capable of generating a negative pressure of –20 inches Hg (–600 to –800 mbar). It is essential that a vacuum control device be placed just next to the filter bottle, so that the vacuum pressure can be adjusted down to –5 to –8 in Hg during the procedure. A 1000 mL Stericup Receiver flask with 45 mm thread, Millipore Cat. SC00 B10 RE (also available from Fisher Scientific). A 150 mL Stericup Receiver flask with 45 mm thread, Millipore Cat. No. SC00 B01 RE (also available from Fisher Scientific) See: http://www.millipore.com/catalogue.nsf/docs/C3239. NOTE: The 1000 mL and 150 mL receiver flasks are reusable if washed thoroughly and show no signs of wear or cracking. In order to avoid cross-contamination, it is highly recommended that the receiver flasks only be reused for identical plasmid preps. To avoid the possibility of implosion, do not use any vessels that are not designed for use with vacuum. Do not use bottles, flasks or any other vessels that are cracked or scratched. Always wear safety glasses when working near a bottle or flask under vacuum. Purification of high purity, endotoxin-free DNA with the novel OriGene Mega and Giga Plasmid Kits is quite different than purification of DNA with the Mini/Midi/Maxi kits that are based on gravity-flow columns. New users are strongly advised to read the entire protocol very carefully before starting the procedure! Although still based on a patented anionexchange chromatography, the OriGene Megaprep and Gigaprep Kits are not based on gravity flow-columns, but consist of the high purity anion-exchange resin packed in a vacuum-driven filter cartridge. Vacuum is applied to the cartridge by a conventional water jet filter pump or a vacuum pump. The PowerPrep™ HP Megaprep Kit is appropriate for culture volumes of 500 mL to 2.5 liters. The nominal capacity of the Megaprep DNA binding cartridges is 2.5 mg of DNA. For high-copy plasmids (pTZ, pBluescript, pUC and other plasmids that are present in E. coli cultures at concentrations of 4-5 µg/mL) we recommend the use of not more than 500 mL of culture. The maximum volume of 2.5 liters should only be used with low copy-number plasmids, cosmids, or BACs. The PowerPrep™ HP Gigaprep Kit is appropriate for culture volumes of 2.5 to 5 liters. The nominal capacity of the Gigaprep DNA binding cartridges is 10 mg of DNA. For high-copy plasmids (e.g., pTZ, pBluescript, pUC), we recommend the use of not more than 2.5 liters of culture. The maximum volume of 5 liters should only be used with low copy-number plasmids or cosmids. Critical Parameters Review all of the critical parameters on page 6, especially the notes regarding alkaline lysis and neutralization. 14 MEGAPREP PROTOCOL BEFORE BEGINNING: Verify that RNase A has been added to Cell Suspension Buffer and that no precipitate has formed in Cell Lysis Solution (See Advance Preparations). 1. Setup: Screw the Megaprep Lysate Filtration Cartridge onto a clean 1000 mL Stericup Receiver flask. NOTE: Do not overtighten the filtration cartridge on the bottle neck, since the filtration cartridge plastic may crack. 2. Cell Harvesting: For high copy-number plasmids (>2 µg DNA/mL culture), pellet 500 mL of an overnight culture. For low copy-number plasmids (~2 µg DNA/mL culture), pellet 500 mL to 2.5 L of an overnight culture. Thoroughly remove all medium. 3. Cell Suspension: Add 50 mL of Cell Suspension Buffer (containing RNase A) to the pellet and suspend the cells until homogeneous. Be sure that no cell clumps are visible. 4. Cell Lysis: Add 50 mL of Cell Lysis Solution. Mix gently but thoroughly by inverting at least five times until a homogeneous solution is obtained. The mixture is very viscous at this stage due to the release of genomic DNA. DO NOT VORTEX! Incubate at room temperature for exactly 5 min. 5. Neutralization: Add 50 mL of Neutralization Buffer and mix immediately by inverting the tube until the solution is homogeneous. A white flocculent precipitate made of proteins, cellular debris, genomic DNA and detergent will form. When large cell pellets have been processed, more vigorous shaking may be required. However, DO NOT VORTEX! 6. Lysate Filtration: Pour the bacterial lysate from Step 5 directly into the prepared Megaprep Lysate Filtration Cartridge from Step 1. Let stand at room temperature for at least 2 minutes without agitation. Then attach a vacuum source to the tubing connector and apply vacuum. Collect the clear flow-through into the bottle. Keep the vacuum on until all liquid has drained from the unit. Then switch off the vacuum source. IMPORTANT NOTE: It is very important to let the lysate stand for at least 5 minutes after the transfer into the cartridge. This allows the precipitate to float and form a layer on top of the lysate and ensures convenient filtration without clogging. As a rule of thumb, one can expect to recover up to 125 mL of filtrate. 7. Cleared Lysate Collection: Add 50 mL of Wash Buffer to the Megaprep Lysate Filtration Cartridge and gently stir the precipitate with a sterile spatula. Connect the vacuum source again and apply vacuum until all liquid has been pulled through completely. Gentle agitation of the precipitate improves the flow of liquid through the filter unit. The bottle now contains the filtered lysate containing the plasmid DNA. Remove the Megaprep Lysate Filtration Cartridge from the 1000 mL Stericup Receiver flask and decant the cleared lysate into a new sterile container. 8. DNA Binding: Screw the Megaprep DNA Binding Cartridge containing the ion exchange resin onto the 1000 mL Stericup Receiver flask and add 100 mL of Equilibration Buffer. Apply vacuum to the cartridge through the sidearm with the tubing connector and keep the vacuum on until all liquid has drained from the resin. Discard the flowthrough. Add the filtered cleared lysate from Step 7 into the Megaprep DNA Binding Cartridge with the equilibrated resin and apply vacuum to the cartridge through the side-arm with the tubing connector. Keep the vacuum on until all of the lysate has passed through the resin. 9. Column Wash: Add 175 mL of Wash Buffer into the cartridge and apply vacuum to the cartridge through the sidearm with the tubing connector. Repeat the wash with an additional 175 mL of Wash Buffer. Keep the vacuum on until all liquid has drained from the resin. 10. DNA Elution: Remove the Megaprep DNA Binding Cartridge from the 1000 mL receiver flask and screw it onto a clean, sterile 150 mL Stericup Receiver flask. Add 50 mL of Elution Buffer into the Megaprep DNA Binding Cartridge. Apply a soft vacuum (–5 to –8 in Hg) to the cartridge through the side-arm with the tubing connector until approximately 10 – 20 mL of Elution Buffer have been pulled through the cartridge. Release the vacuum from the cartridge so that no further liquid is pulled through the resin. Let stand for 1 minute without agitation. Then, switch on the vacuum source again and draw the remaining liquid from the resin into the receiver bottle. Keep the vacuum on until all liquid has drained from the resin. NOTE: The final DNA yield can be increased by approximately 10% if a second elution step with another 50 mL of Elution Buffer is carried out as described. 11. DNA Precipitation: Precipitate the DNA with 0.7 volumes of isopropanol. Centrifuge at 4°C and > 12,000 x g for at least 30 minutes. Wash the precipitated DNA with 20 mL of 70-80% ethanol per tube and re-centrifuge for 5 minutes. Air dry the DNA pellet for 10 minutes and redissolve it in a suitable volume of TE Buffer. NOTE: Plasmid DNA may spread over the whole wall of the centrifuge tube if a fixed angle rotor is used. Therefore, we suggest the use of a swing-out rotor that allows centrifugal forces of > 12,000 x g (HB-4 or HB-6 for Sorvall centrifuges), or, if such a rotor is not available, the siliconization of the centrifuge tubes with a repellent silane (i.e., dimethyldichlorosilane). The DNA pellet is easily dislodged when washing with 70% ethanol. It is best to pipet off the isopropanol supernatant and ethanol wash to remove these liquids from the pellet. 15 GIGAPREP PROTOCOL BEFORE BEGINNING: Verify that RNase A has been added to Cell Suspension Buffer and that no precipitate has formed in Cell Lysis Solution (See Advance Preparations). 1. Setup: Screw the Gigaprep Lysate Filtration Cartridge onto a clean 1000 mL Stericup Receiver flask. NOTE: Do not overtighten the filtration cartridge on the bottle neck, since the filtration cartridge plastic may crack. 2. Cell Harvesting: For high copy-number plasmids (>2 µg DNA/mL culture), pellet 2.5 L of an overnight culture. For low copy-number plasmids (~2 µg DNA/mL culture), pellet 2.5 to 5 L of an overnight culture. Thoroughly remove all medium. 3. Cell Suspension: Add 125 mL of Cell Suspension Buffer (containing RNase A) to the pellet and suspend the cells until homogeneous. Be sure that no cell clumps are visible. 4. Cell Lysis: Add 125 mL of Cell Lysis Solution. Mix gently but thoroughly by inverting at least five times until a homogeneous solution is obtained. The mixture is very viscous at this stage due to the release of genomic DNA. DO NOT VORTEX! Incubate at room temperature for exactly 5 min. 5. Neutralization: Add 125 mL of Neutralization Buffer and mix immediately by inverting the tube at least five times until the solution is homogeneous. A white flocculent precipitate made of proteins, cellular debris, genomic DNA and detergent will form. When large cell pellets have been processed, more vigorous shaking may be required. However, DO NOT VORTEX! 6. Lysate Filtration: Pour the bacterial lysate from Step 5 directly into the prepared Gigaprep Lysate Filtration Cartridge from Step 1. Let stand at room temperature for at least 2 minutes without agitation. Then attach a vacuum source to the tubing connector and apply vacuum. Collect the clear flow-through into the bottle. Keep the vacuum on until all liquid has drained from the unit. Then switch off the vacuum source. IMPORTANT NOTE: It is very important to let the lysate stand for at least 5 minutes after the transfer into the cartridge. This allows the precipitate to float and form a layer on top of the lysate and ensures convenient filtration without clogging. As a rule of thumb, one can expect to recover up to 330 mL of filtrate. 7. Cleared Lysate Collection: Add 50 mL of Wash Buffer to the Gigaprep Lysate Filtration Cartridge and gently stir the precipitate with a sterile spatula. Connect the vacuum source again and apply vacuum until all liquid has been pulled through completely. Gentle agitation of the precipitate improves the flow of liquid through the filter unit. The bottle now contains the filtered lysate containing the plasmid DNA. Remove the Gigaprep Lysate Filtration Cartridge from the 1000 mL Stericup Receiver flask and decant the cleared lysate into a new sterile container. 8. DNA Binding: Screw the Gigaprep DNA Binding Cartridge containing the ion exchange resin onto the 1000 mL Stericup Receiver flask and add 200 mL of Equilibration Buffer. Apply vacuum to the cartridge through the sidearm with the tubing connector and keep the vacuum on until all liquid has drained from the resin. Discard the flowthrough. Add the filtered cleared lysate from Step 7 into the Gigaprep DNA Binding Cartridge with the equilibrated resin and apply vacuum to the cartridge through the side-arm with the tubing connector. Keep the vacuum on until all of the lysate has passed through the resin. 9. Column Wash: Add 275 mL of Wash Buffer into the cartridge and apply vacuum to the cartridge through the sidearm with the tubing connector. Repeat the wash with an additional 275 mL of Wash Buffer. Keep the vacuum on until all liquid has drained from the resin. 10. DNA Elution: Remove the Gigaprep DNA Binding Cartridge from the 1000 mL receiver flask and screw it onto a clean, sterile 150 mL Stericup Receiver flask. Add 100 mL of Elution Buffer into the Gigaprep DNA Binding Cartridge. Apply a soft vacuum (–5 to –8 in. Hg) to the cartridge through the side-arm with the tubing connector until approximately 10 – 20 mL of Elution Buffer have been pulled through the cartridge. Release the vacuum from the cartridge so that no further liquid is pulled through the resin. Let stand for 1 minute without agitation. Then, switch on the vacuum source again and draw the remaining liquid from the resin into the receiver bottle. Keep the vacuum on until all liquid has drained from the resin. NOTE: The final DNA yield can be increased by approximately 10% if a second elution step with another 100 mL of Elution Buffer is carried out as described. 11. DNA Precipitation: Precipitate the DNA with 0.7 volumes of isopropanol. Centrifuge at 4°C and > 12,000 x g for at least 30 minutes. Wash the precipitated DNA with 20 mL of 70-80% ethanol per tube and re-centrifuge for 5 minutes. Air dry the DNA pellet for 10 minutes and redissolve it in a suitable volume of TE Buffer. Note: Plasmid DNA may spread over the whole wall of the centrifuge tube if a fixed angle rotor is used. Therefore, we suggest the use of a swing-out rotor that allows centrifugal forces of > 12,000 x g (HB-4 or HB-6 for Sorvall centrifuges), or, if such a rotor is not available, the siliconization of the centrifuge tubes with a repellent silane (i.e., dimethyldichlorosilane). The DNA pellet is easily dislodged when washing with 70% ethanol. It is best to pipet off the isopropanol supernatant and ethanol wash to remove these liquids from the pellet. 16 TROUBLESHOOTING GUIDE Problem Possible Cause Suggested Solution Low yield of plasmid DNA Temperature of buffers too low Store all buffers except Cell Suspension Buffer with RNAse A at room temperature. Lysate centrifuged at 4ºC Ensure that rotor and centrifuge are at room temperature for lysate centrifugation step. Low copy-number plasmid Increase the number of cells processed. Lysate at improper pH or salt concentration Carefully remove all medium before suspending cells. Plasmid DNA pellet overdried Air dry the plasmid DNA pellet so that it will fully dissolve. Do not dry the pellet with a vacuum system. DNA pellet lost during ethanol wash It is easy to lose the DNA pellet during the ethanol wash, especially for the miniprep size. Pipet the ethanol from the tube prior to drying. Slow column flow (Mini/Midi/Maxi) Column clogged Pipette lysate supernatant onto column. Pouring lysate can result in precipitate particles entering the column. Chromosomal DNA contamination Genomic DNA sheared in handling Invert tubes when adding Cell Lysis and Neutralization Buffers. Do not vortex. Additional plasmid forms present Plasmid DNA permanently denatured Incubate the lysate at room temperature for a maxiumum of 5 minutes. Permanently denatured DNA will appear as a band electrophoresing just ahead of the supercoiled plasmid DNA. This material will not be digested by restriction endonucleases. RNA contamination Lysate at improper pH, salt concentration, or temperature for binding to column Carefully remove all medium before suspending cells. Ensure that excess Neutralization Buffer is not added when neutralizing the lysate. Ensure that the lysate has not warmed above room temperature during the centrifugation. Sample left on column too long Once the lysate has been loaded on the column or cartridge, avoid delays in processing. Lysate droplets remaining on walls of column at elution Wash droplets of lysate from walls of column or cartridge when adding wash buffer. RNase A digestion incomplete Use recommended volume of Cell Suspension Buffer. Ensure that Cell Suspension Buffer with RNase A is stored at 4ºC and is less than 6 months old. 17 ACCESSORIES CAT. NO. SIZE PowerPrep™ HP BAC Buffer Kit Each RELATED PRODUCTS SIZE NP100003 CAT. NO. PowerPrep™ Express Plasmid Miniprep Kits 50 reactions 250 reactions NP100010 NP100011 PowerPrep™ Express PCR Purification Kits 50 reactions 250 reactions NP100015 NP100016 4 x 96 reactions 12 x 96 reactions NP100018 NP100019 PowerPrep™ Express Gel Extraction Kits 50 reactions 250 reactions NP100012 NP100013 PowerPrep™ Matrix Gel Extraction Kit 150 reactions NP100014 PowerPrep™ Express 96 PCR Purification Kits For additional product information, protocols and troubleshooting information, visit our website at www.OriGene.com. Contact Information: OriGene Technologies, Inc. 9620 Medical Center Drive Suite 200 Rockville, MD 20850 [email protected] [email protected] (888) 267-4436 (phone) (301) 640-9254 (fax) 18


