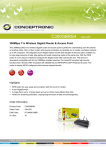
Download CONCEPTRONIC C300GBRS4 802.11n Wireless Gigabit
Transcript
CONCEPTRONIC C300GBRS4
Version 1.0
802.11n Wireless Gigabit
Broadband Router
User Manual
Conceptronic C300GBRS4
User Manual
Table of Contents
About This Manual ........................................................................................... 4
Before You Start ........................................................................................... 4
Installation Overview ..................................................................................... 4
Requirements for Installation ........................................................................... 5
WLAN Ethernet Adapter .................................................................................. 5
Operating System ......................................................................................... 5
Web Browser ............................................................................................... 5
Packing List ................................................................................................... 6
Wireless LAN .................................................................................................. 6
Radio Transmission........................................................................................ 7
Range........................................................................................................ 7
SSID .......................................................................................................... 7
Front Panel LED Display..................................................................................... 8
Rear Panel Cable Connections ............................................................................. 9
Hardware Installation ......................................................................................10
Wireless LAN Performance and Environment ........................................................10
WAN Connection..........................................................................................11
LAN / Wireless LAN Connection ........................................................................11
Computer Configuration ...................................................................................12
Configure your IP address ...............................................................................12
Checking your connection with the C300GBRS4 .....................................................14
Configuring Router Settings ...............................................................................15
HOME - WIZARD ...........................................................................................17
HOME - WIRELESS.........................................................................................23
WEP Encryption ........................................................................................24
WPA Encryption ........................................................................................24
WPA/WPA2 Encryption with Radius Server ........................................................25
WPA/WPA2-PSK With Passphrase Encryption .....................................................25
WPS Security ...........................................................................................26
HOME - WAN...............................................................................................29
Static IP Address .......................................................................................30
Dynamic IP Address....................................................................................32
PPPoE....................................................................................................34
PPTP .....................................................................................................36
L2TP .....................................................................................................37
HOME - LAN................................................................................................40
HOME - DHCP..............................................................................................41
Use the Router for DHCP .............................................................................42
Disable the DHCP Server..............................................................................42
Create Static DHCP Server rules ....................................................................42
2
Conceptronic C300GBRS4
User Manual
Advanced .....................................................................................................43
ADVANCED – VIRTUAL SERVER ..........................................................................43
ADVANCED - APPLICATIONS .............................................................................45
ADVANCED - FIREWALL ..................................................................................46
ADVANCED - DMZ .........................................................................................47
ADVANCED – IP FILTERS..................................................................................48
ADVANCED – MAC FILTERS...............................................................................49
ADVANCED – URL BLOCKING ............................................................................50
ADVANCED – DOMAIN BLOCKING........................................................................51
ADVANCED - PERFORMANCE ............................................................................52
ADVANCED - DDNS ........................................................................................53
Tools ..........................................................................................................54
TOOLS - ADMIN............................................................................................54
TOOLS - TIME..............................................................................................55
TOOLS – SCHEDULE .......................................................................................55
TOOLS - SYSTEM ..........................................................................................56
TOOLS - FIRMWARE.......................................................................................57
TOOLS - MISC..............................................................................................58
TOOLS – WAKE ON LAN ..................................................................................59
Status .........................................................................................................60
STATUS - LOG .............................................................................................60
STATUS – WIRELESS CLIENTS ............................................................................60
STATUS - STATISTICS.....................................................................................61
Technical Specifications ...................................................................................62
3
Conceptronic C300GBRS4
User Manual
About This Manual
This manual provides descriptions of the Conceptronic C300GBRS4 802.11n Wireless Gigabit
Broadband Router, its hardware and software features, and how to set up and use the device
on your small office or home network.
Before You Start
Please read and make sure you understand all the prerequisites for proper installation of your
new Wireless Broadband Router. Have all the necessary information and equipment on hand
before starting the installation. A packing list is included at the end of this section.
Installation Overview
The procedure to install the Wireless Broadband Router can be described in general terms in
the following steps:
1. Gather information and equipment needed to install the device. Check the contents of the
package to be certain that everything listed on the packing list is included. A packing list
is included at the end of this section. The information you will need includes the account
name or number and the password used to gain access to your service provider’s network,
and ultimately to the Internet.
2. Install the hardware, that is, connect the Ethernet cables to the device to establish the
necessary network links to your computer and connect the power adapter to power on the
Wireless Broadband Router.
3. Check the IP settings on your computer and change them if necessary so the computer can
access the web-based software built into the Wireless Broadband Router. Without the
correct IP settings your computer will not be able to communicate with the device or
access the software used to configure the Wireless Broadband Router. Without compatible
IP settings on your computer, you will not be able to use a web browser to access the
Internet.
4. Use the web-based management software to configure the device. Many users can install
the Wireless Broadband Router with the Setup Wizard. Some users may not need to change
any of the device settings that establish and maintain the network connection. Follow the
instructions of your service provider to find out what is required for your account.
4
Conceptronic C300GBRS4
User Manual
Requirements for Installation
To install and use the Wireless Broadband Router you need a computer equipped with an
Ethernet port (such as an Ethernet NIC) and a web browser.
WLAN Ethernet Adapter
Any computer that uses the Wireless Broadband Router must be able to connect to it through
the Wireless Ethernet (WLAN) on the Wireless Broadband Router. This connection is a Wireless
Ethernet (WLAN or WiFi) connection and therefore requires that your computer be equipped
with a Wireless Ethernet Adapter as well. Many notebook computers are now sold with a
Wireless Ethernet Adapter already installed. There is also a Wired Ethernet port that is used
to connect the WLAN adapter to your wired network. This port can be used to configure the
Wireless Broadband Router. Most fully assembled desktop computers come with an Ethernet
NIC adapter as standard equipment. If your computer does not have an Ethernet port, you
must install an Ethernet NIC adapter before you can configure the Wireless Broadband Router.
If you must install an adapter, follow the installation instructions that come with the Ethernet
NIC adapter.
Operating System
The Wireless Broadband Router uses an HTML-based web interface for setup and
management. The web configuration manager may be accessed using any operating system
capable of running web browser software.
Web Browser
Any common web browser can be used to configure the Wireless Broadband Router using the
web configuration management software. The program is designed to work best with more
recently released browsers such as Microsoft Internet Explorer® version 6.0, Netscape
Navigator® version 6.2.3, or later versions. The web browser must have JavaScript enabled.
JavaScript is enabled by default on many browsers. Make sure JavaScript has not been
disabled by other software (such as virus protection or web user security packages) that may
be running on your computer.
5
Conceptronic C300GBRS4
User Manual
Packing List
Open the shipping carton and carefully remove all items. Make sure that you have the items
listed here.
• One Conceptronic C300GBRS4 - 802.11n Wireless Gigabit Broadband Router
• Three Antennas for C300GBRS4
• One CD-ROM containing this User’s Guide
• One Straight-through Ethernet cable
• One Power Adapter, 5V, 3A DC
• One Quick Installation Guide
• One Warranty Card
Wireless LAN
A Wireless LAN is a cellular computer network that transmits data using radio signals instead
of cables. Wireless LAN technology is commonly used for home, small office and large
corporate networks. Wireless LAN devices have a high degree of mobility and flexibility that
allow network to be quickly set up or dismantled and allow them to roam freely throughout
the network.
The IEEE 802.11n Wireless LAN standard is an improvement on the IEEE 802.11g standard. The
802.11n embedded Wireless LAN access point is fully compatible with legacy IEEE 802.11b and
IEEE 802.11g devices.
Some basic understanding of wireless technology and terminology is useful when you are
setting up the Wireless Broadband Router or any wireless access point. If you are not familiar
with wireless networks please take a few minutes to learn the basics.
For home users who will not incorporate a RADIUS server in their network, the security for the
Conceptronic C300GBRS4, used in conjunction with other WPA-compatible 802.11 products,
will still be much stronger than ever before. Utilizing the Pre-Shared Key mode of WPA, the
Wireless Broadband Router will obtain a new security key every time it connects to the 802.11
network. You only need to input your encryption information once in the configuration menu.
No longer will you have to manually input a new WEP key frequently to ensure security. With
the Wireless Broadband Router, you will automatically receive a new key every time you
connect, vastly increasing the safety of your communication.
The Wireless Broadband Router is an ideal solution for quickly creating and extending a
wireless local area network (WLAN) in offices or other workplaces, trade shows and special
events. The 802.11n standard is backwards compatible with 802.11b and 802.11g devices.
The Wireless Broadband Router has the newest, strongest, most advanced security features
available today. When used with other 802.11n WPA (WiFi Protected Access) compatible
products in a network with a RADIUS server, the security features include:
WPA: WiFi Protected Access, which authorizes and identifies users, based on a secret key
that change automatically at regular intervals. WPA uses TKIP (Temporal Key Integrity
Protocol) to change the temporal key every 10,000 packets (a packet is a kind of message
transmitted over a network.) This insures much greater security than the standard WEP
security. (By contrast, the previous WEP encryption implementation required the keys to be
changed manually.)
6
Conceptronic C300GBRS4
User Manual
Radio Transmission
Wireless LAN devices use electromagnetic waves within a broad, unlicensed range of the radio
spectrum to transmit and receive radio signals. When a wireless access point is present, it
becomes a base station for the Wireless LAN nodes in its broadcast range. Wireless LAN nodes
transmit digital data using FM (frequency modulation) radio signals. Wireless LAN devices
generate a carrier wave and modulate this signal using various techniques. In this way, digital
data can then be superimposed onto the carrier signal. This radio signal carries data to
Wireless LAN devices within range of the transmitting device. The antennae of Wireless LAN
devices listen for and receive the signal.
Range
Range should not be a problem in most homes or small offices. If you experience low or no
signal strength in some areas, consider positioning the device in a location between the
Wireless LAN devices maintaining a roughly equal straight-line distance to all devices that
need to access the Wireless Broadband Router through the wireless interface. Adding more
802.11n access points to rooms where the signal is weak can improve signal strength.
SSID
Wireless networks use an SSID (Service Set Identifier) to allow wireless devices to roam within
the range of the network. Wireless devices that wish to communicate with each other must
use the same SSID. Several Wireless Broadband Routers or access points can be set up using
the same SSID so that wireless stations can move from one location to another without losing
connection to the wireless network.
The Wireless Broadband Router operates in Infrastructure mode. It controls network access on
the wireless interface in its broadcast area. It will allow access to the wireless network to
devices using the correct SSID after a negotiation process takes place. The Conceptronic
C300GBRS4 broadcasts its SSID so that any wireless station in range can learn the SSID and ask
permission to associate with it. Many wireless adapters are able to survey or scan the wireless
environment for access points. An access point in Infrastructure mode allows wireless devices
to survey that network and select an access point with which to associate.
7
Conceptronic C300GBRS4
User Manual
Front Panel LED Display
Place the Router in a location where the LED indicators on the front panel can be viewed. The
LED indicators on the front panel include the Power, Status, WAN, WLAN and WPS indicators.
Each Ethernet LAN port displays an indicator for monitoring link status and activity
(Link/Act).
7
Nr
1
Description
Power LED
2
Status
3
WAN LED
4
WLAN LED
5
LAN LEDs
(1, 2, 3, 4)
6
WPS/Status LED
7
WPS Button
6
5
Status
OFF
ON
4
3 2
1
Status Explanation
The device is turned off.
The device is turned on successfully.
The device is turned off or there is system
failure.
BLINK
The device is turned on and ready for use.
OFF
No WAN Connection is created.
ON – BLINK GREEN
Data is sent or received through the WAN
Port.
ON – STEADY GREEN
A WAN Connection is created.
OFF
Wireless interface is disabled.
ON – BLINK GREEN
Data is sent or received through Wireless
interface.
ON – STEADY GREEN
Wireless interface is enabled.
OFF
No Network Link is created to the LAN Port.
ON – BLINK GREEN
Data is sent or received with the speed
under 1000 Mbps through the LAN Port.
ON – STEADY GREEN
A 1000 Mbps Network Link is created on the
LAN Port.
ON – BLINK ORANGE
Data is sent or received with the speed
under 100 Mbps through the LAN Port.
ON – STEADY ORANGE A 100 Mbps Network Link is created on the
LAN Port.
ON – BLINK BLUE
When the WPS Button is pressed, the WPS
LED will blink while searching for WPS
Clients.
ON – STEADY BLUE
When the authentication of WPS Client is
succeeded, the WPS LED will light blue for
300 seconds.
ON –RED
If there is any error, the WPS LED will light
red.
Press the WPS Button to activate the WPS feature. The router will
search for WS Clients.
8
Conceptronic C300GBRS4
User Manual
Rear Panel Cable Connections
Connect the power adapter cord and network cables on the rear panel. The power switch and
reset button are also located on the back of the device. Connect the antennas to the antenna
posts.
1
Nr
1
2
3
4
5
6
Description
Antenna Connection
LAN Ports
Antenna Connection
WAN port
Reset Button
Power Connection
7
Antenna Connection
2
3
4
5
6
7
Explanation
Reverse-SMA Connector for Wireless Antenna
Connect computer(s) to the Router
Reverse-SMA Connector for Wireless Antenna
Connect broadband connection to the Router
Reset the router to the Factory Default Settings
Connect the Power Adapter included in the package to the
Router
Reverse-SMA Connector for Wireless Antenna
9
Conceptronic C300GBRS4
User Manual
Hardware Installation
Place the Wireless Broadband Router in a location where it can be easily connected to the
wired interface (Ethernet link to a broadband modem, for example) as well as function
effectively as a Wireless LAN access point. Make sure the Wireless Broadband Router is near a
suitable power source.
Connect the bundled power supply to the power connection on the back of the C300GBRS4
and to a free wall power outlet. The Power LED of the C300GBRS4 will turn on.
Wireless LAN Performance and Environment
Many environmental factors can affect the effective wireless function of the Wireless
Broadband Router. If this is your first time setting up a wireless network device, read and
consider the points listed below.
The Wireless Broadband Router can be placed on a shelf or desktop, ideally you should be
able to see the LED indicators on the front if you need to view them for troubleshooting.
The Wireless Broadband Router lets you access your network within range of the device.
However, walls, ceilings, or other objects that the wireless signals must pass through can
limit signal range. Typical ranges vary depending on the types of materials and background RF
noise in your home or business. For maximum range and signal strength, use these basic
guidelines:
1. Keep the number of walls and ceilings to a minimum:
The signal emitted from Wireless LAN devices can penetrate through ceilings and walls.
However, each wall or ceiling can reduce the range Wireless LAN devices from 1 to 30M.
Position your wireless devices so that the number of walls or ceilings obstructing the signal
path is minimized.
2. Consider the direct line between access points and workstations:
A wall that is 0.5 meters thick, at a 45-degree angle appears to be almost 1 meter thick.
At a 2-degree angle, it is over 14 meters thick. Be careful to position access points and
client adapters so the signal can travel straight through (90º angle) a wall or ceiling for
better reception.
3. Building Materials make a difference:
Buildings constructed using metal framing or doors can reduce effective range of the
device. If possible, position wireless devices so that their signal can pass through drywall
or open doorways, avoid positioning them so that their signal must pass through metallic
materials. Poured concrete walls are reinforced with steel while cinderblock walls may
have little or no structural steel.
4. Keep the Wireless Broadband Router away (at least 1-2 meters) from electrical
devices:
Position wireless devices away from electrical devices that generate RF noise such as
microwave ovens, monitors, electric motors, etc.
5. Position antenna for best reception:
Adjust the antenna position to see if the signal strength improves. Some adapters or
access points allow the user to judge the strength of the signal. Use this method, if
available, to test signal strength.
10
Conceptronic C300GBRS4
User Manual
WAN Connection
Use a LAN Cable to connect the C300GBRS4 to your Broadband Gateway (Cable Modem, DSL
Modem, Fiber Gateway, etc.)
The WAN LED on the front side of the C300GBRS4 will turn on.
Note: If the WAN LED on the front side does not turn on, make sure that:
- The C300GBRS4 is powered (the Power LED should be on).
- The Broadband Gateway is turned on.
- The LAN cable between both devices is connected correctly.
LAN / Wireless LAN Connection
For LAN Cable Users:
Connect the LAN Cable to 1 of the 4 LAN ports on the back panel of the C300GBRS4 and to the
Network Card in your computer.
The LAN LED of the used LAN port will turn on, indicating that the computer is connected.
(Your LAN Connection must be enabled and your computer turned ON).
For Wireless Users:
You can connect wireless to the C300GBRS4 in 2 different ways:
- Manually, without encryption.
- Automatically with the WPS feature, with encryption.
If you have 1 or more clients which do not support WPS, it is advised to manually connect to
the C300GBRS4, or secure the wireless connection manually before you connect to the
C300GBRS4. You can secure your connection manually with the configuration wizard,
explained in the chapter ‘Configuring Router Settings’.
In this chapter you will find the steps how to connect manually to your unsecured network.
For more information about the WPS feature and the configuration steps, see the chapter
‘Configuring Router Settings’ of this Manual.
A. Right click the Wireless
Network Icon in your System
tray and select View
Available Wireless Networks.
11
Conceptronic C300GBRS4
B. Select the Network
C300GBRS4 from the list of
available wireless networks
and click Connect.
User Manual
C. You will receive a warning
about connecting to an
unsecured wireless network.
Click Connect anyway to
proceed with the connection.
D. When the connection is built,
you will see the active
wireless icon in the system
tray. If you move your mouse
over the icon you will receive
an information popup (about
the speed, signal strength and
status of your connection).
Computer Configuration
Configure your IP address
The C300GBRS4 is equipped with a build-in DHCP Server. The DHCP Server will automatically
assign an IP address to a connected computer if the connected computer is set to Obtain an
IP address automatically.
To configure your computer for Automatic IP follow the instructions below:
A. Click Start Æ Run.
B. Enter the command
“NCPA.CPL” and click OK.
The Network Connections window will appear.
12
Conceptronic C300GBRS4
C. Right click your Local Area
Connection (Wired or
Wireless, depending on the
connection you use) and
select Properties.
User Manual
The Properties window of your Local Area Connection will appear.
D. Select the Internet Protocol
(TCP/IP) and click Properties.
The Properties window of the Internet Protocol (TCP/IP) will appear.
E. Set the properties to Obtain
an IP address automatically
and click OK to save the
settings.
F. Press OK in the properties
window of the Local Area
Connection to save the
settings.
13
Conceptronic C300GBRS4
User Manual
Checking your connection with the C300GBRS4
With the Command prompt of Windows you can verify if you have received a correct IP
address on your Local Area Connection:
A. Click Start Æ Run.
B. Enter the command “cmd” and click OK.
The Command Prompt will appear.
C. Enter the command “ipconfig” and press Enter.
You should see the following information
IP Address
Subnet Mask
Default Gateway
: 192.168.0.xxx (Where xxx can vary between 100 ~ 199).
: 255.255.255.0
: 192.168.0.1
If the information shown above matches your configuration you can continue the
configuration of the device in Chapter 5.
If the shown information above does not match your configuration (i.e. your IP address is
169.254.xxx.xxx) please check the options below:
1. Power OFF and Power ON the device.
2. Reconnect the LAN Cable to the device and to your computer.
3. Renew the IP address of your computer with the following commands:
- “IPCONFIG /RELEASE” to release the wrong IP address.
- “IPCONFIG /RENEW” to receive a new IP address from the device.
If above steps do not solve the IP address problem, you can reset the device to the factory
default settings with the Reset Button on the back of the device.
Press and hold the Reset Button for +/- 15 seconds to load the Factory Default Settings. When
the Status LED is active again, repeat step C to renew your IP address.
14
Conceptronic C300GBRS4
User Manual
Configuring Router Settings
This chapter describes how to configure the Wireless Broadband Router the first time you use
it or if you are configuring it after resetting the device to the factory default settings. The
following sections describe how to configure the router through the Web based configuration.
The configuration of your C300GBRS4 is web based. You will need a web browser for the
configuration of the device.
Note: For configuration of the router it is advised to use a LAN Cable connection to the device
instead of a Wireless connection.
A. Start your web browser (like: Internet Explorer, FireFox or Safari).
B. Enter the IP address of the device in the address bar of your web browser (By default:
http://192.168.0.1/).
The Login page of the C300GBRS4 will be shown.
C. Enter the Username and Password (Default: ‘admin’ & ‘admin’) and click Submit to
enter the configuration pages.
The Device Settings overview shows all configured settings for the LAN, WAN and Wireless
part of the router.
The Home menu of the configuration contains the following configuration options: Wizard,
Wireless, WAN, LAN and DHCP.
15
Conceptronic C300GBRS4
User Manual
Device Settings Overview
16
Conceptronic C300GBRS4
User Manual
HOME - WIZARD
You can setup the C300GBRS4 through the build-in Wizard. This Wizard will help you
configuring the basic settings of the C300GBRS4 step by step.
To use the Setup Wizard, click the Run Wizard button.
Setup Wizard window
Note: Before you begin with the Wizard Configuration, make sure you have all information for
the Internet settings available. (For example: Account information, connection type,
etc.)
A. The welcome screen lists five steps of the
wizard. Click Next to continue.
B. You are recommended to set an admin
password here. Enter the new password
and re-enter it for confirmation.
When completed, click Next.
17
Conceptronic C300GBRS4
C. For system management purpose, a
correct time setting is critical to have
accurate time stamps on the system logs.
User Manual
Set an appropriate Time Zone in this step.
When completed, click Next.
D. Select the Internet Connection method
which corresponds with your provider
settings.
If you don’t know which option you need
for your internet connection, please check
the documentation of your provider or
contact your provider helpdesk.
When completed, click Next.
Connection - Static IP
E. When your provider requires a Static IP
connection, select the Static IP option.
Enter the requested information:
•
IP Address
•
Subnet Mask
•
ISP Gateway Address
•
Primary DNS
•
Secondary DNS (Optional)
When completed, click Next.
18
Conceptronic C300GBRS4
User Manual
F. When your provider requires a Dynamic IP
connection, select the Dynamic IP option.
Some providers require a specific
Hostname for their connections. If your
provider requires a specific Hostname,
enter the Host Name in the field.
Connection – Dynamic IP
Some providers only allow 1 specific MAC
address to connect to the Internet. If your
PC Network Card works with the specific
required MAC address, click the Clone
MAC Address button or enter the MAC
Address manually.
When completed, click Next.
G. When your provider requires a PPPoE
connection, select the PPPoE option.
Connection - PPPoE
Enter the requested information:
•
User Name
•
Password
•
Retype Password
When completed, click Next.
H. When your provider requires a PPTP
connection, select the PPTP option.
Connection - PPTP
Enter the requested information:
•
Server IP
•
PPTP Account
•
PPTP Password
•
Retype Password
When completed, click Next.
19
Conceptronic C300GBRS4
User Manual
I. When your provider requires a L2TP
connection, select the L2TP option.
Connection – L2TP
Enter the requested information:
•
Server IP
•
L2TP Account
•
L2TP Password
•
Retype Password
When completed, click Next.
When the WAN configuration is complete, the Wizard will continue with the Wireless
configuration:
J. You can change the SSID of the router.
The SSID is the name which will be
broadcasted through the Wireless part.
You can change the channel between
channel 1 and 13. If you experience slow
connections or break-downs, there can be
another access point in your area which
can interfere with your wireless channel.
In that case, you can try another channel.
When completed, click Next.
You can secure your Wireless Connection with encryption. By default, the Wireless Connection
is not secured. To prevent unauthorized access to your network, set a security level through
the Setup Wizard.
If you want to use the WPS feature of the C300GBRS4, you can skip the wireless configuration
and continue the Setup Wizard without encryption. To setup your WPS security, please
proceed to the section ‘HOME – WIRELESS’ of this chapter.
Note: All security options of the Setup Wizard are explained, but it is advised to secure your
network with “WPA-PSK/WPA2-PSK” security if your Clients do not support WPS. This
is the highest WPA2 security level, with backwards compatibility to WPA only clients.
Note: Remember or write down the entered wireless security information. You will need it
when you want to configure a Wireless Client to connect to the C300GBRS4!
20
Conceptronic C300GBRS4
K. Select a security level for your Wireless
Network.
When a security level is chosen, the
Wizard will show fields for the required
information.
User Manual
L. If you want to secure your network with
WEP encryption, select WEP from the
drop-down list. Enter the WEP key in ASCII
format (input: A-Z, 0-9).
Note: Through the Wizard you can only
configure WEP 64Bits.
Security – WEP Encryption
M. If you want so secure your network with
WPA or WPA2 (with Radius Server), select
WPA or WPA2 from the drop-down list.
Enter the IP Address of the Radius Server,
the Shared Key and confirm the Shared
Key in the second field.
Security – WPA / WPA2 Encryption
N. If you want to secure your network with
WPA-PSK or WPA2-PSK, select WPA-PSK,
WPA2-PSK or WPA-PSK/WPA2-PSK from
the drop-down list.
Enter the Passphrase for your encryption
and confirm the Passphrase in the second
field.
Security – WPA-PSK / WPA2-PSK
O. When all Wireless settings are made, click Next to continue.
21
Conceptronic C300GBRS4
P. The Setup Wizard is now complete. If you
want to apply your settings, click Save &
Take Effect.
If you want to change any setting, click
Back to return to the previous screen.
User Manual
If you want to close the Setup Wizard
without any changes, click Exit.
When you select Save & Take Effect, the router will apply the configured settings. Please
wait for the message Save Complete.
Q. The configuration is now complete. Click Close to exit the Setup Wizard.
You will return to the Device Settings overview which will show you the configured settings
for your WAN and Wireless connection.
22
Conceptronic C300GBRS4
User Manual
HOME - WIRELESS
To configure the Router’s basic configuration settings without running the Setup Wizard, you
can access the windows used to configure Wireless, WAN, LAN, and DHCP settings directly
from the Setup directory. To access the Wireless Settings window, click the Wireless button
on the left side of the first window that appears when you successfully access the web
manager.
Wireless Settings window
Click one of the radio buttons in the Set Wireless Mode section to allow the router to operate
in the wireless environment.
The SSID identifies members of the Service Set. Accept the default name or change it to
something else. If the default SSID is changed, all other devices on the wireless network must
use the same SSID.
Enable SSID Broadcast if you want users to be able to join your wireless network based on the
SSID information broadcast by the Router. If this is disabled, each new user will have to be
manually configured.
What channels are available for use by the access point depends on the local regulatory
environment. Remember that all devices communicating with the device must use the same
channel (and use the same SSID). Use the drop-down menu to select the Channel used for
your 802.11n wireless LAN. Click Apply.
23
Conceptronic C300GBRS4
User Manual
WEP Encryption
WEP (Wireless Encryption Protocol) encryption can be enabled for security and privacy. WEP
encrypts the data portion of each frame transmitted from the wireless adapter using one of
the predefined keys. The router offers 64- or 128-bit encryption with four keys available.
To bring up the Wireless Settings window for WEP, click the WEP radio button in the Set
Wireless Security Mode section.
Wireless Settings window for WEP
1.
2.
3.
4.
5.
Select an Authentication type, Open System or Shared Key.
Select the desired level of WEP Encryption, 64Bits or 128Bits.
Select the desired key input format, ASCII or HEX (hexadecimal).
Select a key by clicking a radio button on the left and then enter the proper-length key.
Click Apply.
Note: If encryption of any kind, at any level is applied to the Wireless network, all devices on
the network must comply with all security measures.
WPA Encryption
Wi-Fi Protected Access was designed to provide improved data encryption, perceived as weak
in WEP, and to provide user authentication, largely nonexistent in WEP. There are two
versions, WPA and WPA2; both are supported by the Access Point. WPA includes the option of
using a Pre-Shared Key similar to WEP, or a RADIUS server can be used for verification. In
addition, WPA2-Auto is offered for user convenience.
24
Conceptronic C300GBRS4
User Manual
WPA/WPA2 Encryption with Radius Server
Wireless Settings window for WPA and WPA2
1.
2.
3.
4.
Select the type of WPA encryption for your Radius Server, WPA or WPA2.
Select the desired Cipher Type, TKIP, or AES.
Enter the RADIUS Server IP address and the RADIUS Port for your Radius Server.
Enter the Shared Key (between 1 and 64 characters) which is needed for the Radius
server.
5. Re-enter the Shared Key in the second field.
6. Enter a time in Key Renewal (300 ~ 1800 seconds).
7. Click Apply.
Note: The values needed for RADIUS authentication can be obtained from your Internet
Service Provider (ISP).
WPA/WPA2-PSK With Passphrase Encryption
Wireless Settings window for WPA-PSK, WPA2-PSK and WPA-PSK/WPA2-PSK
1. Select the type of WPA encryption for use with your Passphrase, WPA-PSK, WPA2-PSK or
WPA-PSK/WPA2-PSK.
Note: If you select WPA-PSK/WPA2-PSK, the router will work with the highest WPA2-PSK
encryption. If clients try to connect which do not support WPA2-PSK, the router will
automatically authorize the client on WPA-PSK Level.
2. Select the desired Cipher Type, TKIP or AES.
3. Select the Key Type, ASCII or HEX (Hexadecimal).
4. Enter the Passphrase you want to use for your WPA-PSK encryption (8 ~ 63 characters
ASCII, or 64 characters HEX).
5. Enter a time in Key Renewal (300 ~ 1800 seconds).
6. Click Apply.
25
Conceptronic C300GBRS4
User Manual
WPS Security
The Conceptronic C300GBRS4 supports WPS (Wi-Fi Protected Setup). WPS is a standard for
easy and secure establishment of a wireless network. With WPS you can setup and protect
your wireless network in just a few easy steps.
Note: To use WPS with the C300GBRS4, you need to have Wireless Clients which supports
WPS. If you have 1 or more Wireless Clients without WPS support, it is advised to
secure your network manually using the Setup Wizard.
Note: For more (technical) information about WPS, you can visit the following website:
http://en.wikipedia.org/wiki/Wi-Fi_Protected_Setup
The C300GBRS4 supports 2 ways to activate and establish a WPS connection:
Push Button technology
Pin Code technology
WPS – Push Button technology
The WPS Push Button technology requires a (virtual) button on your Wireless Client to
establish a connection between the C300GBRS4 and your Wireless Client.
Some Wireless Clients work with a real button to activate the WPS Push Button technology;
some Wireless Clients use a software-based virtual button.
Follow the steps below to activate and establish a WPS connection with the Push Button
technology:
A. Press the WPS Button at the front of the C300GBRS4 until the WPS LED blinks.
B. Press the WPS Button at your Wireless Client. This can be a hardware button or a
virtual button in the software of your Wireless Client.
The C300GBRS4 will activate WPA security over your wireless network and accepts the
wireless connection of your Wireless Client.
Note: The C300GBRS4 will keep the WPS authentication active for 120 seconds. During this
process, the WPS LED will blink. If there is no connection in these 120 seconds, the LED
will turn off and the WPS authentication process is stopped.
If the WPS feature is not used earlier, the wireless network will still be unencrypted.
If the authentication of the Wireless Client is succeeded, the WPS LED will burn steady blue
for 5 minutes. After these 5 minutes, the LED will turn off.
Your Wireless Client is now connected to the C300GBRS4 and your network is secured with
WPA Encryption.
You can add more Wireless WPS Clients without loosing the connection to previous Wireless
WPS Clients.
If you want to add more Wireless WPS clients, repeat step A & B.
Note: The WPA Key generated by the C300GBRS4 is random.
26
Conceptronic C300GBRS4
WPS – Pin Code technology
User Manual
At the bottom of the Wireless Configuration page, you can find the “Wi-Fi Protected Setup”
section.
A. Click the Add Wireless Device Wizard button on the screen.
The WPS Wizard will be shown on your screen:
In this Wizard, you can activate the Pin Code feature. To start with the Pin Code
authentication, you need the Pin Code generated by your Wireless Client.
B. Select the WPS Pin Code feature in the software of your Wireless Client. The Wireless
Client will generate a Pin Code and shows it on your screen.
[Wireless Client Software]
[C300GBRS4 WPS Wizard]
C. Enter the Pin Code given by your Wireless Client in the WPS Wizard of the C300GBRS4 and
click Connect.
The C300GBRS4 will activate WPA security on your wireless network and accepts the wireless
connection of your Wireless Client with the entered Pin Code.
27
Conceptronic C300GBRS4
User Manual
The C300GBRS4 will keep the WPS authentication active for 120 seconds. During this process,
the WPS LED will blink. If there is no connection in these 120 seconds, the LED will turn off
and the WPS authentication process is stopped.
Click Continue to return to the WPS Wizard screen.
Note: If the WPS feature is not used earlier, the wireless network will still be unencrypted.
If the authentication of the Wireless Client is succeeded, the Wizard will show “WPS - Adding
Wireless Device Success”. The WPS LED will burn steady blue for 5 minutes. After these 5
minutes, the LED will turn off.
Click Continue to return to the Wireless Configuration page.
Your Wireless Client is now connected to the C300GBRS4 and your network is secured with
WPA Encryption.
If you want to add more Wireless Clients with the WPS feature, repeat step A to C.
28
Conceptronic C300GBRS4
User Manual
HOME - WAN
To access this window click the WAN button in the left menu of the web manager.
You can configure the C300GBRS4 as Router, or as Switch/Access point.
• When you select the Router Mode option, you can configure a connection for your
provider which is described further in this manual.
• When you select the Bridge Mode function, the C300GBRS4 will disable all router functions
and will work as a 5 ports switch with access point. This can be useful if you want to use
the C300BSRS4 just as a switch and access point, instead of all the router functions.
WAN – Bridge or Router Mode
Note: If you select the “Bridge” option, the DHCP Server also will be disabled. You cannot
access the configuration pages of the C300GBRS4 anymore on 192.168.0.1, but you
need to check the DHCP Server in your network which IP Address is assigned to the
C300GBRS4.
29
Conceptronic C300GBRS4
User Manual
Static IP Address
When the Router is configured to use Static IP Address assignment for the WAN connection,
you must manually assign a global IP Address, Subnet Mask and Gateway IP Address used for
the WAN connection. Follow the instruction below to configure the Router to use Static IP
Address assignment for the WAN connection.
To configure a Static IP Address connection, perform the steps listed below. Some of the
settings do not need to be changed the first time the device is set up, but can be changed
later if you choose. See the table below for a description of all the settings available in this
window.
WAN Settings window for Static IP Address
To configure a Static IP type connection for the WAN, follow these steps:
1. Click the Static IP radio button in the WAN Mode Settings section.
2. Enter an IP Address, Subnet Mask, ISP Gateway Address, Primary DNS address, and (if
available) Secondary DNS address as instructed by your ISP. These are the global IP
settings for the WAN interface. This is the “visible” IP address of your account. Your ISP
should have provided these IP settings to you.
3. Some ISPs record the unique MAC address of your computer’s Ethernet adapter when you
first access their network. This can prevent the Router (which has a different MAC
address) from being allowed access to the ISPs network (and the Internet). To clone the
MAC address of your computer’s Ethernet adapter, press the Clone MAC Address button or
enter the MAC Address manually.
4. Leave the MTU value at the default setting (default = 1500) unless you have specific
reasons to change this (see table below).
5. When you are satisfied that all the WAN settings are configured correctly, click the Apply
button.
30
Conceptronic C300GBRS4
User Manual
6. The new settings must be saved and the Router must be restarted for the settings to go
into effect. To save and reboot the Router, click the Tools button in the top menu and
select the System button in the left menu. In the System Management window, click the
Save button under Save Device Settings to Your Local Hard Drive and then click the
Reboot button to reboot the C300GBRS4.
7. The Router will save the new settings and restart. Upon restarting the Router will
automatically establish the WAN connection.
Additional settings for Static IP Address connections:
Static IP Parameters
IP Address
Subnet Mask
ISP Gateway Address
MAC Address
Primary DNS
Secondary DNS
MTU
Description
This is the permanent global IP address for your account. This is
the address that is visible outside your private network. Get this
from your ISP.
This is the Subnet mask for the WAN interface. Get this from your
ISP.
This is the IP address of your ISP’s Gateway router. It provides the
connection to the Router for IP routed traffic that is outside your
ISP’s network. That is, this will be the primary connection from
the Router to most of the Internet. Get this IP address from your
ISP.
To use the Clone MAC Address feature, simply click the Clone MAC
Address button.
This is the IP address of the first choice for Domain Name Service
(DNS) used to match the named URL web address used by most
browsers with the actual global IP address used for a web server.
Usually this will be a server owned by the ISP. Get this IP address
from your ISP.
This is the second choice for a DNS server. Get this IP address
from your ISP.
The Maximum Transmission Unit size may be changed if you want
to optimize efficiency for uploading data through the WAN
interface. The default setting (1500 bytes) should be suitable for
most users. Some user may want to adjust the setting to optimize
performance for wireless traffic or when low latency is desired
(such as with Internet gaming). It is highly recommended that the
user research how adjusting the MTU may affect network traffic
for better or worse.
31
Conceptronic C300GBRS4
User Manual
Dynamic IP Address
A Dynamic IP Address connection configures the Router to automatically obtain its global IP
address from a DHCP server on the ISP’s network. The service provider assigns a global IP
address from a pool of addresses available to the service provider. Typically the IP address
assigned has a long lease time, so it will likely be the same address each time the Router
requests an IP address.
To configure a Dynamic IP Address connection, perform the steps listed below. Some of the
settings do not need to be changed the first time the device is set up, but can be changed
later if you choose. See the table below for a description of all the settings available in this
window.
WAN Settings window for Dynamic IP Address
To configure a Dynamic IP Address connection for the WAN, follow these steps:
1. Click the Dynamic IP radio button in the WAN Mode Settings section.
2. Some ISPs record the unique MAC address of your computer’s Ethernet adapter when you
first access their network. This can prevent the Router (which has a different MAC
address) from being allowed access to the ISPs network (and the Internet). To clone the
MAC address of your computer’s Ethernet adapter, press the Clone MAC Address button or
enter the MAC Address manually.
3. Enter the Primary DNS address. This information should be available from your ISP.
4. Enter the Secondary DNS address (if available from your ISP).
5. Leave the MTU value at the default setting (default = 1500) unless you have specific
reasons to change this (see table below).
6. When you are satisfied that all the WAN settings are configured correctly, click the Apply
button.
7. The new settings must be saved and the Router must be restarted for the settings to go
into effect. To save and reboot the Router, click the Tools button in the top menu and
select the System button in the left menu. In the System Management window, click the
Save button under Save Device Settings to Your Local Hard Drive and then click the
Reboot button to reboot the C300GBRS4.
8. The Router will save the new settings and restart. Upon restarting the Router will
automatically establish the WAN connection.
32
Conceptronic C300GBRS4
User Manual
Additional settings for Dynamic IP Address connections:
Dynamic IP Parameters
Host Name
MAC Address
Primary DNS
Secondary DNS
MTU
Description
This is the name that point to the dynamic IP. You may leave the
field as it is unless it is required by your ISP.
This is not always necessary, but may be required for some ISPs.
To clone the MAC address of your computer’s Ethernet adapter,
simply click the Clone MAC Address button. This will copy the
information to a file used by the Router to present to the ISP’s
server used for DHCP. Some ISPs record the unique MAC address of
your computer’s Ethernet adapter when you first access their
network. If you want to replace the cloned MAC address with the
factory default setting later on, type in all zeros in the fields and
click the Clone MAC Address button.
Enter the Primary DNS Address. This information should be
provided to you by your ISP.
The Secondary DNS Address is optional. See your ISP for further
information.
The Maximum Transmission Unit size may be changed if you want
to optimize efficiency for uploading data through the WAN
interface. The default setting (1500 bytes) should be suitable for
most users. Some user may want to adjust the setting to optimize
performance for wireless traffic or when low latency is desired
(such as with Internet gaming). It is highly recommended that the
user research how adjusting the MTU may affect network traffic
for better or worse.
33
Conceptronic C300GBRS4
User Manual
PPPoE
Follow the instructions below to configure the Router to use a PPPoE for the Internet
connection. Make sure you have all the necessary information before you configure the WAN
connection.
WAN Settings window for PPPoE
To set up a PPPoE connection:
1. Click the PPPoE radio button in the WAN Mode Settings section to see the Set PPPoE
Settings section.
2. Select the PPPoE Mode, Static PPPoE or Dynamic PPPoE.
3. Type the User Name and Password used for your ADSL account. A typical User Name will
be in the form [email protected]. The Password may be assigned to you by your ISP or
you may have selected it when you set up the account with your ISP.
4. Typically the globally IP settings (i.e. IP address for the WAN interface) for a PPPoE
connection will use Dynamic IP assignment from the ISP. Some accounts may be assigned a
specific global IP address.
5. Leave the MTU value at the default setting (default = 1492) unless you have specific
reasons to change this (see table below).
6. Choose the desired Connect Mode Select setting. Select from: Always on, Manual, or
Connect on demand. Most users will want to choose the default connection setting, Always
on.
7. When you are satisfied that all the WAN settings are configured correctly, click the Apply
button.
34
Conceptronic C300GBRS4
User Manual
8. The new settings must be saved and the Router must be restarted for the settings to go
into effect. To save and reboot the Router, click the Tools button in the top menu and
select the System button in the left menu. In the System Management window, click the
Save button under Save Device Settings to Your Local Hard Drive and then click the
Reboot button to reboot the C300GBRS4.
9. The Router will save the new settings and restart. Upon restarting the Router will
automatically establish the WAN connection.
Additional settings for PPPoE connections:
PPPoE Parameters
User Name
Password
Retype Password
IP Address
MAC Address
Primary DNS
Secondary DNS
Maximum Idle Time
MTU
Connect Mode Select
Description
For PPP connections, a User Name and Password are used to
identify and verify your account to the ISP. Enter the User Name
for your ADSL service account. User names and passwords are
case-sensitive, so enter this information exactly as given to you by
your ISP.
Together with the User Name, this is used to verify your account
to the ISP. Enter the Password exactly as given to you by your ISP.
Retype the password entered in the Password field.
If you have selected the Static PPPoE option, type in the global IP
address used for your WAN interface. Your ISP should provide this
IP address to you.
To use the Clone MAC Address feature, simply click the Clone MAC
Address button.
Enter the Primary DNS Address. This information should be
provided to you by your ISP.
The Secondary DNS Address is optional. See your ISP for further
information.
A value of 0 means that the PPP connection will remain
connected. If your network account is billed according to the
amount of time the Router is actually connected to the Internet,
enter an appropriate Idle Time value (in minutes). This will
disconnect the Router after the WAN connection has been idle for
the amount of time specified.
The Maximum Transmission Unit size may be changed if you want
to optimize efficiency for uploading data through the WAN
interface. The default setting (1492 bytes) should be suitable for
most users. Some user may want to adjust the setting to optimize
performance for wireless traffic or when low latency is desired
(such as with Internet gaming). It is highly recommended that the
user research how adjusting the MTU may affect network traffic
for better or worse.
Select the desired option: Always on, Manual, or Connect on
demand. Most users will want to choose the default connection
setting, Always on.
35
Conceptronic C300GBRS4
User Manual
PPTP
The Point to Point Tunneling Protocol (PPTP) is used to transfer information securely between
VPNs (Virtual Private Routers). Encryption methods are employed in the transfer of
information between you and your ISP using a key encryption. This option is specific for
European users whose ISPs support the PPTP protocol for the uplink connection. To connect to
your ISP’s server using this protocol, the information in this window must be provided to you
by your ISP and then properly implemented.
WAN Settings window for Others (PPTP)
PPTP Parameters
IP Address
Subnet Mask
ISP Gateway Address
DNS
Server IP
User Name
Password
Retype Password
Description
Enter the IP address for your Router based on the information
provided to you by your ISP.
Enter the Subnet Mask for your Router based on the information
provided to you by your ISP.
Enter the Gateway IP address based on the information provided
to you by your ISP.
Enter the Domain Name Server IP address.
Enter the IP address of the ISP server with which your router will
be conveying encrypted information. This field is based on
information provided to you by your ISP.
Enter the name of the PPTP account as provided to you by your
ISP.
Enter the PPTP password as provided to you by your ISP.
Retype the password entered in the Password field.
36
Conceptronic C300GBRS4
Maximum Idle Time
MTU
Connect Mode Select
User Manual
A value of 0 means that the PPP connection will remain
connected. If your network account is billed according to the
amount of time the Router is actually connected to the Internet,
enter an appropriate Idle Time value (in minutes). This will
disconnect the Router after the WAN connection has been idle for
the amount of time specified.
The Maximum Transmission Unit size may be changed if you want
to optimize efficiency for uploading data through the WAN
interface. The default setting (1400 bytes) should be suitable for
most users. Some user may want to adjust the setting to optimize
performance for wireless traffic or when low latency is desired
(such as with Internet gaming). It is highly recommended that the
user research how adjusting the MTU may affect network traffic
for better or worse.
Select the desired option: Always on, Manual, or Connect on
demand. Most users will want to choose the default connection
setting, Always on.
L2TP
Some ISPs may require the user to uplink using the Layer 2 Tunneling Protocol (L2TP) method.
L2TP is a VPN protocol that will ensure a direct connection to the server using an
authentication process that guarantees the data originated from the claimed sender and was
not damaged or altered in transit. Once connected to the VPN tunnel, it seems to the user
that the client computer is directly connected to the internal network. To set up your L2TP
connection, enter the following data that was provided to you by your ISP.
37
Conceptronic C300GBRS4
User Manual
WAN Settings window for Others (L2TP)
L2TP Parameters
IP Address
Subnet Mask
ISP Gateway Address
DNS
Server IP
User Name
Password
Retype Password
Maximum Idle Time
Description
Enter the IP address for your Router based on the information
provided to you by your ISP.
Enter the Subnet Mask for your Router based on the information
provided to you by your ISP.
Enter the Gateway IP address based on the information provided
to you by your ISP.
Enter the Domain Name Server IP address.
Enter the IP address of the ISP server with which your router will
be conveying encrypted information. This field is based on
information provided to you by your ISP.
Enter the name of the L2TP account as provided to you by your
ISP.
Enter the L2PT password as provided to you by your ISP.
Retype the password entered in the Password field.
A value of 0 means that the PPP connection will remain
connected. If your network account is billed according to the
amount of time the Router is actually connected to the Internet,
enter an appropriate Idle Time value (in minutes). This will
disconnect the Router after the WAN connection has been idle for
the amount of time specified.
38
Conceptronic C300GBRS4
MTU
Connect Mode Select
User Manual
The Maximum Transmission Unit size may be changed if you want
to optimize efficiency for uploading data through the WAN
interface. The default setting (1400 bytes) should be suitable for
most users. Some user may want to adjust the setting to optimize
performance for wireless traffic or when low latency is desired
(such as with Internet gaming). It is highly recommended that the
user research how adjusting the MTU may affect network traffic
for better or worse.
Select the desired option: Always on, Manual, or Connect on
demand. Most users will want to choose the default connection
setting, Always on.
39
Conceptronic C300GBRS4
User Manual
HOME - LAN
You can configure the LAN IP address to suit your preference. Many users will find it
convenient to use the default settings together with DHCP service to manage the IP settings
for their private network. The IP address of the Router is the base address used for DHCP. In
order to use the Router for DHCP on your LAN, the IP address pool used for DHCP must be
compatible with the IP address of the Router. The IP addresses available in the DHCP IP
address pool will change automatically if you change the IP address of the Router. See the
next section for information on DHCP setup.
LAN Settings window
To change the LAN IP Address or Subnet Mask, type in the desired values and click the Apply
button. Your web browser should automatically be redirected to the new IP address. You will
asked to login again to the Router’s web manager.
In addition, the Router can be configured to relay DNS from your ISP or another available
service to workstations on your LAN. When DNS Relay is Enabled, the Router will accept DNS
requests from hosts on the LAN and forward them to the ISP (or alternative) DNS servers.
Alternatively, you may also disable the DNS relay and configure hosts on your LAN to use DNS
servers directly. Most users, who are using the Router for DHCP service on the LAN and are
using DNS servers on the ISP’s network, will leave DNS relay enabled.
40
Conceptronic C300GBRS4
User Manual
HOME - DHCP
The DHCP server is enabled by default for the Router’s Ethernet LAN interface. DHCP service
will supply IP settings to workstations configured to automatically obtain IP settings that are
connected to the Router though the Ethernet port. When the Router is used for DHCP it
becomes the default gateway for DHCP client connected to it. Keep in mind that if you
change the IP address of the Router the range of IP addresses in the pool used for DHCP on
the LAN will also be changed. The IP address pool can be up to 253 IP addresses.
DHCP window
To display this window, click the DHCP button in left menu. Any active DHCP Clients appear
at the top of the window in the DHCP Clients List. The IP address and MAC address for active
DHCP clients are displayed in the list.
The two options for DHCP service are as follows:
- You may use the Router as a DHCP server for your LAN.
- You can disable DHCP service and manually configure IP settings for workstations.
Follow the instructions below according to which of the above DHCP options you want to use.
When you have configured the DHCP Settings as you want them, click the Apply button to
commit the new settings.
41
Conceptronic C300GBRS4
User Manual
Use the Router for DHCP
To use the built-in DHCP server, click the Enabled radio button under the DHCP Server option
if it is not already selected. The IP Address Pool settings can be adjusted. The Start IP
address is the lowest available IP address. If you change the IP address of the Router this will
change automatically to be 1 more that the IP address of the Router.
The End IP address is the highest IP address number in the pool. Select the desired Lease
Time from the drop-down list. This is the amount of time that a workstation is allowed to
reserve an IP address in the pool if the workstation is disconnected from the network or
powered off.
Disable the DHCP Server
To disable DHCP, click the Disabled radio button under the DHCP Server option and then
click the Apply button. Choosing this option requires that workstations on the local network
must be configured manually or use another DHCP server to obtain IP settings.
If you configure IP settings manually, make sure to use IP addresses in the subnet of the
Router. You will need to use the Router’s IP address as the Default Gateway for the
workstation in order to provide Internet access.
Create Static DHCP Server rules
You can also create static DHCP Server rules to assign the same IP address every time to the
same network client. To create a static DHCP Server rule, click Enabled under Static DHCP,
and enter the Host Name and the IP Address you want to use for the network client. Enter
the MAC Address of the network client in the MAC Address field, or select it from the DHCP
Client drop-down list if it is connected and click the Clone button. Click Apply to save the
static DHCP rule.
Note: If you want to use the Wake-on-LAN feature of the router, make sure you have defined
the network clients you want to wake in the Static DHCP Server rules.
42
Conceptronic C300GBRS4
User Manual
Advanced
The Advanced menu contains main windows for Virtual Server, Special Applications, Firewall
Rules, DMZ, IP Filters, MAC Filters, URL Blocking, Domain Blocking, Wireless Performance, and
Dynamic DNS.
ADVANCED – VIRTUAL SERVER
Use this window to set up forwarding rules applied to inbound (WAN-to-LAN) traffic. The
Virtual Server function allows remote users to access services on your LAN such as FTP for file
transfers or SMTP and POP3 for e-mail. The Wireless Broadband Router will accept remote
requests for these services at your Global IP Address, using the specified TCP or UDP protocol
and port number, and then redirect these requests to the server on your LAN with the LAN IP
address you specify. Remember that the specified Private IP Address must be within the
useable range of the subnet occupied by the Router.
UDP/TCP port redirection is used to direct inbound traffic to the specified servers or
workstations on your private network. Port redirection can also be used to direct potentially
hazardous packets to a proxy server outside your firewall. For example, you can configure the
Router to direct HTTP packets to a designated HTTP server in the DMZ. You can define a set
of instructions for a specific incoming port or for a range of incoming ports. Each set of
instructions or rule is indexed and can be modified or deleted later as needed.
Below you will find a list of some common used ports and their corresponding application:
Port
20
21
22
23
25
Application
FTP Data (FTP Server)
FTP (FTP Server)
SSH (Secure Shell)
Telnet
SMTP (Mail Server – Outgoing)
Port
80
110
2000
5800
5900
Application
HTTP (Web Server)
POP3 (Mail Server – Incoming)
Remotely Anywhere
VNC
VNC
For more ports and their corresponding applications, see:
http://portforward.com/cports.htm
Note: When you are using an application which supports UPnP Port Mapping, the router can
be automatically configured by the application when needed. In that case, you don’t
need to setup your port mappings manually.
Note: When using Virtual Server rules, it is advised to configure the computer(s) with a Fixed
IP Address instead of a Dynamic IP Address.
Note: In the next picture you will see an example of a Virtual Server configuration.
43
Conceptronic C300GBRS4
User Manual
Virtual Server window
1.
2.
3.
4.
Click the Enabled radio button under Virtual Server.
Enter a name for your Virtual Server Rule in the Name field.
Enter the IP Address of your computer/server which needs the Virtual Server rule.
Select the Protocol for your Virtual Server rule: TCP, UDP or Both.
Note: If you do not know which protocol you need for your Virtual Server Rule, select “Both”.
This option will pass both TCP and UDP traffic to the configured IP Address of your
computer/server.
5. Enter the desired Port of your computer/server which needs the Virtual Server rule.
6. Enter the port which must be visible on the outside of your internet connection.
7. Click Apply to apply the created Virtual Server rule.
When the Virtual Server rule is saved, it will be shown in the Virtual Server List. To create
more Virtual Server rules, repeat step 1 to 7. To remove a Virtual Server entry in the list,
click the corresponding
button. To modify a virtual server entry, click the corresponding
button, make the desired changes, and then click the Apply button.
44
Conceptronic C300GBRS4
User Manual
ADVANCED - APPLICATIONS
Use this window to run special applications that require multiple connections. To use the
Special Applications feature, enter the requested information for your application and click
the Apply button.
Special Application window
To configure a new application triggered port forwarding rule, follow these steps:
1. Click the Enabled radio button under Special Application.
2. Type a Name for the rule being created.
3. Type the Trigger Port or port range used for the rule.
4. Select the Trigger Type used for the rule, TCP, UDP or Both.
5. Type the Public Port number normally used for the application.
6. Select the Public Type used for the rule, TCP, UDP or Both.
7. Choose an available Schedule for the rule to be applied. Schedules can be created in Tools
Æ Schedule.
8. Click the Apply button to put the rule into effect. The newly created forwarding rule
appears listed in the Special Applications List.
To remove a rule in the list, click the corresponding
entry, click the corresponding
button.
button. To modify a virtual server
button, make the desired changes, and then click the Apply
45
Conceptronic C300GBRS4
User Manual
ADVANCED - FIREWALL
This window allows the user to allow or deny traffic from passing through the Wireless
Broadband Router. Once you have completed your Firewall settings, click Apply to save your
changes.
Firewall Rules window
Configure the filter rules as desired and click the Apply button to create the rule. The newly
created rule appears listed in the Firewall Rules List.
To configure a new application triggered port forwarding rule, follow these steps:
1.
2.
3.
4.
Click the Enabled radio button under Firewall Rules.
Type a Name for the rule being created.
Choose the Action to be applied, Allow or Deny (block) the traffic to pass through.
For the Source interface of the traffic, choose LAN, WAN or Any and type an IP address
range to which to action specified in the rule.
5. For the Destination interface of the traffic, choose LAN, WAN or Any and type an IP
address range to which to action specified in the rule. There is an option to specify the
protocol, ALL, TCP, UDP or ICMP. For TCP and UDP traffic, a port or port range must be
specified.
6. Choose an available Schedule for the rule to be applied. Schedules can be created in Tools
Æ Schedule.
7. Click the Apply button to put the rule into effect. The newly created forwarding rule
appears listed in the Firewall Rules List.
To remove a rule in the list, click the corresponding
click the corresponding
button.
button. To modify a rule in the list,
button, make the desired changes, and then click the Apply
46
Conceptronic C300GBRS4
User Manual
ADVANCED - DMZ
Since some applications are not compatible with NAT, the Router supports use of a DMZ IP
address for a single host on the LAN. This IP address is not protected by NAT and will
therefore be visible to agents on the Internet with the right type of software. Keep in mind
that any client PC in the DMZ will be exposed to various types of security risks. If you use the
DMZ, take measures (such as client-based virus protection) to protect the remaining client
PCs on your LAN from possible contamination through the DMZ.
DMZ window
To designate a DMZ IP address, click the Enabled radio button, type in the IP Address of the
server or device on your LAN, and click the Apply button. To remove DMZ status from the
designated IP address, click the Disabled radio button and click Apply. It will be necessary to
save the settings and reboot the Router before the DMZ is activated.
47
Conceptronic C300GBRS4
User Manual
ADVANCED – IP FILTERS
This window allows the user to allow or deny LAN IP addresses access to the Internet. Rules
are based on IP address and TCP/UDP port. Configure the filter rules as desired and click the
Apply button to create the rule. The newly created rule appears listed in the IP Filters List at
the top of the window.
IP Filters window
Configure the filter rules as desired and click the Apply button to create the rule. The newly
created rule appears listed in the IP Filters List.
To configure a new IP Filter rule, follow these steps:
1.
2.
3.
4.
Click the Enabled radio button under IP Filters.
Type a Name for the rule being created.
Type the IP Range of address to which the rule applies.
(Optional) Select the Protocol used for the rule, TCP, UDP or Both, and type the Port or
port range to which the rule is applied.
5. Choose an available Schedule for the rule to be applied. Schedules can be created in Tools
Æ Schedule.
6. Click the Apply button to put the rule into effect. The newly created IP filter rule appears
listed in the IP Filters List.
To remove a rule in the list, click the corresponding
click the corresponding
button.
button. To modify a rule in the list,
button, make the desired changes, and then click the Apply
48
Conceptronic C300GBRS4
User Manual
ADVANCED – MAC FILTERS
MAC filters are used to block or allow various types of packets through the WAN interface.
This may be done for security or to improve network efficiency. The rules are configured for
individual devices based on MAC address. Filter rules can be set up for source, destination or
both. You can set up filter rules and disable the entire set of rules without loosing the rules
that have been configured. Configure the MAC filter rules as desired and click the Apply
button to create the rule.
MAC Filters window
Configure the MAC filter rules as desired and click the Apply button to create the rule. The
newly created rule appears listed in the MAC Filters List.
To configure a new IP Filter rule, follow these steps:
1. Click one of the options in the Set MAC Filters section to allow or deny access to the MAC
filters on the list.
2. Type a Name for the rule being created.
3. Type the MAC Address to which the rule applies or select an active client from the DHCP
Client drop-down list and click the Clone button to select the client, the MAC address will
appear.
4. Choose an available Schedule for the rule to be applied. Schedules can be created in Tools
Æ Schedule.
5. Click the Apply button to put the rule into effect. The newly created MAC filter rule
appears listed in the MAC Filters List.
To remove a rule in the list, click the corresponding
click the corresponding
button.
button. To modify a rule in the list,
button, make the desired changes, and then click the Apply
49
Conceptronic C300GBRS4
User Manual
ADVANCED – URL BLOCKING
URL blocks are used to block or allow access to specific websites. Enter the URLs in the URL
Keyword field and click the Apply button to add the Website to be blocked.
URL Blocking window
Configure the URL blocking rules as desired and click the Apply button to create the rule. The
newly created rule appears listed in the URL Blocking List.
To configure a new URL blocking rule, follow these steps:
1. Click one of the options in the Set URL Blocking Action section to allow or deny access to
the URL in the URL Blocking List.
2. Type a Name for the rule being created.
3. Type the URL Keyword to which the filter is applied.
4. Choose an available Schedule for the rule to be applied. Schedules can be created in Tools
Æ Schedule.
5. Click the Apply button to put the rule into effect. The newly created URL blocking rule
appears listed in the URL Blocking List.
To remove a rule in the list, click the corresponding
click the corresponding
button.
button. To modify a rule in the list,
button, make the desired changes, and then click the Apply
Note: The URL keyword blocking is applied to all forms of the word whether or not it appears
separated in the URL. For example, blocking any URL with the word “sex” would block
a URL with “sex” as part of it, so websites with “essex” or “sextant” in the URL would
be blocked.
50
Conceptronic C300GBRS4
User Manual
ADVANCED – DOMAIN BLOCKING
Domain blocks are used to block or allow access to specific domains. Enter a domain in either
the Blocked Domains field or the Permitted Domains and click the Apply button to either add
or subtract the domain to be blocked.
Domain Blocking window
Configure the Domain blocking rules as desired and click the Apply button to create the rule.
The newly created rule appears listed in the Domain Blocking List.
To configure a new Domain blocking rule, follow these steps:
1. Click one of the options in the Set Domain Blocking Action section to allow or deny access
to the Domain in the Domain List.
2. Type a Name for the rule being created.
3. Type the Domain to which the filter is applied.
4. Choose an available Schedule for the rule to be applied. Schedules can be created in Tools
Æ Schedule.
5. Click the Apply button to put the rule into effect. The newly created domain blocking rule
appears listed in the Domain Blocking List.
To remove a rule in the list, click the corresponding
click the corresponding
button.
button. To modify a rule in the list,
button, make the desired changes, and then click the Apply
51
Conceptronic C300GBRS4
User Manual
ADVANCED - PERFORMANCE
This window allows the user to change wireless performance features pertaining to the Access
Point portion of the Wireless Broadband Router. Click Apply to save your changes.
Wireless Performance window
Option
Beacon Interval
RTS Threshold
Fragmentation
Threshold
DTIM Interval
CTS Mode
WMM Function
Transmission Rate
Transmit Power
Description
Beacons are packets sent by an access point to synchronize a network.
Specify the beacon value for the selected device(s) here. The default
value of 100 is recommended.
The RTS value should not be changed unless you encounter inconsistent
data flow. Only minor modifications to the value range between 256
and 2,346 are recommended. The default value is 2346.
This sets the fragmentation threshold (specified in bytes) and
determines whether packets will be fragmented. Packets exceeding
the byte setting will be fragmented before transmission. The default is
2346 bytes.
Delivery Traffic Indication Message is a countdown informing clients of
the next window for listening to broadcast and multicast messages.
The default value is 1.
The Clear To Send mode is designed to minimize collisions among
wireless devices. Most users will want to keep the setting as Auto.
Enable or disable the Wireless Multi Media function.
A drop-down list for selecting the transmission rate: Auto.
A drop-down list for selecting the transmit power of the device. You
can choose among: Full, Half, Quarter, Eighth, Min.
52
Conceptronic C300GBRS4
User Manual
ADVANCED - DDNS
The Router supports DDNS (Dynamic Domain Name Service). The Dynamic DNS service allows a
dynamic public IP address to be associated with a static host name in any of the many
domains, allowing access to a specified host from various locations on the Internet. This is
enabled to allow remote access to a host by clicking a hyperlinked URL in the form
hostname.dyndns.org, Many ISPs assign public IP addresses using DHCP, and this can make it
difficult to locate a specific host on the LAN using standard DNS. If for example you are
running a public web server or VPN server on your LAN, this ensures that the host can be
located from the Internet if the public IP address changes. DDNS requires that an account be
set up with one of the supported DDNS providers.
Dynamic DNS window
Please note that DDNS requires that an account be setup with one of the supported DDNS
servers prior to engaging it on the Router. This function will not work without an accepted
account with a DDNS server. Enter the required DDNS information and click Apply to set this
information in the Router.
Option
Server Address
Host Name
User Name
Password
Description
Select one of the DDNS registration organizations form those listed in
the drop-down list. Available servers include DynDns.org and No-IP.com
Enter the host name of the DDNS server.
Enter the username given to you by your DDNS server.
Enter the password or key given to you by your DDNS server.
53
Conceptronic C300GBRS4
User Manual
Tools
TOOLS - ADMIN
If you click on Tools menu and then Admin, the following page will open.
Administrator Settings window
Enter your new password in the New Password field and then type it again in the Confirm
New Password field.
The Administration window is also used to enable remote management access to the Router.
To enable remote management of the Router, click the Enabled radio button and type the IP
Address of the remote network used for management. Click the Apply button to activate
remote management from the chosen IP address. Be sure to save the new setting.
54
Conceptronic C300GBRS4
User Manual
TOOLS - TIME
The Router provides a number of options to maintain current date and time including SNTP.
Time window
To configure system time on the Router, select the method used to maintain time. The
options available include Automatic (Simple Network Time Protocol), Your computer’s clock
or Manual (Enter your own settings) by default. If you opt to use SNTP, you must select the
NTP Server URL from the drop-down list. Click the Apply button to set the system time.
TOOLS – SCHEDULE
Schedule window
The Schedule configuration option is used to manage scheduled rules for various firewall and
parental control features.
Enter the information needed for your schedule setting and click Apply to add it to the
Schedule List.
To remove a rule in the list, click the corresponding
click the corresponding
button.
button. To modify a rule in the list,
button, make the desired changes, and then click the Apply
55
Conceptronic C300GBRS4
User Manual
TOOLS - SYSTEM
Once you have configured the Router to your satisfaction, it is a good idea to back up the
configuration file to your computer. To save the current configuration settings to your
computer, click the System button in the Tools directory to display the System Settings
window. Click the Save button to Save Device Settings to Your Local Hard Drive. You will be
prompted to select a location on your computer to put the file.
To load a previously saved configuration file, click the Browse button and locate the file on
your computer. Click the Restore button to Load Settings from Your Local Hard Drive to
Device. Confirm that you want to load the file when prompted and the process is completed
automatically. The Router will reboot and begin operating with the configuration settings that
have just been loaded.
To reset the Router to its factory default settings, click the Reset button. You will be
prompted to confirm your decision to reset the Router. The Router will reboot with the
factory default settings including IP settings (192.168.0.1) and Administrator password
(admin).
To simply restart the Router, click the Reboot button.
System Settings window
56
Conceptronic C300GBRS4
User Manual
TOOLS - FIRMWARE
Use this window to load the latest firmware for the device. Note that the device
configuration settings may return to the factory default settings, so make sure you save the
configuration settings with the System Settings window described above.
Firmware Upgrade window
To upgrade firmware to the router, type in the name and path of the file, or click the Browse
button to search for the file. Click the Apply button to begin copying the file. The file will
load and restart the Router automatically.
Performing a Firmware Upgrade can sometimes change the configuration settings. Be sure to
back-up the Router’s configuration settings before upgrading the firmware.
57
Conceptronic C300GBRS4
User Manual
TOOLS - MISC
To perform a standard Ping test for network connectivity as well as a number of
miscellaneous network tasks, click the Misc. button in the Tools menu to view the
Miscellaneous Configuration window.
Miscellaneous window
Ping Test
The Ping test functions on the WAN and LAN interfaces. Type the Host Name or IP Address
you want to check in the space provided and click the Ping button. Read the Ping test result
in the space immediately below.
Block WAN Ping
The Block WAN Ping feature allows the user to block hackers who may be trying to test
whether your WAN IP address is valid.
SPI mode
Stateful Packet Inspection mode is an active firewall the user can enable to keep track of the
state of network connections.
UPnP Settings
UPnP supports zero-configuration networking and automatic discovery for many types of
networked devices. When enabled, it allows other devices that support UPnP to dynamically
join a network, obtain an IP address, convey its capabilities, and learn about the presence
and capabilities of other devices. DHCP and DNS service can also be used if available on the
network. UPnP also allows supported devices to leave a network automatically without
adverse effects to the device or other devices on the network. UPnP is a protocol supported
by diverse networking media including Ethernet, Firewire, phone line, and power line
networking.
58
Conceptronic C300GBRS4
User Manual
VPN Pass-Through
This feature allows VPN connections to pass through the Router. It is enabled by default.
TOOLS – WAKE ON LAN
To wake LAN Clients in your network, you can use the Wake On LAN page in the router
configuration. This page shows all active DHCP leases and the created Static DHCP entries.
Wake On LAN window
If there are clients present in the Wake Up list, you can awake them by pressing the Wake Up
button behind the client.
When you click this button, the router will send a Magic Packet to the client. If Wake On LAN
is supported and activated on the LAN Client, the system will turn on automatically after
receiving such package.
59
Conceptronic C300GBRS4
User Manual
Status
Use this window to quickly view basic current information about the LAN, WAN, and wireless
interfaces and device information including Firmware Version and MAC address.
STATUS - LOG
The system log displays chronological event log data. Use the navigation buttons to view or
scroll log pages.
View Log window
You may also save a log by sending it to an admin e-mail address.
Complete the information on this window and then click the Apply button.
STATUS – WIRELESS CLIENTS
This window displays all the wireless clients currently connected to the AP portion of the
Wireless Broadband Router.
Connected Wireless Client List window
60
Conceptronic C300GBRS4
User Manual
STATUS - STATISTICS
Use this window to monitor traffic on the WAN, LAN, and Wireless connections.
Traffic Statistics window
Click Refresh to view traffic information.
Click Reset to reset the traffic information.
61
Conceptronic C300GBRS4
User Manual
Technical Specifications
Standards
• IEEE 802.11b/g
• IEEE 802.11n Draft 2.0
• IEEE 802.3
• IEEE 802.3u
Device Management
Web-Based – Internet Explorer v6 or later;
Netscape Navigator v6 or later; or other
Java-enabled browsers.
Data Rate
For 802.11n:
• MCS - 0 ~ 15 at 20MHz & 40MHz
mode.
• 64 data rates supported in
C300GBRS4.
• (Max data rate: 300Mbps)
For 802.11g:
• 108, 54, 48, 36, 24, 18, 12, 9 and
6Mbps
For 802.11b:
• 11, 5.5, 2, and1Mbps
Security
• 64- and 128-bit WEP
• WPA – WiFi Protected Access (WPATKIP/PSK/AES)
• 802.1x (EAP-MD5/TLS/TTLS/PEAP)
• MAC Address Access Control List
Wireless Frequency Range
• 2.412 GHz to 2.4672 GHz (2400 ~
2483.5MHz ISM band)
Wireless Operating Range
• 802.11n (Full Power with 2x 2dBi
gain diversity dipole antenna)
• Indoors up to 100 meters (328 feet)
• Outdoors up to 400 meters (1312
feet)
• 2x Dipole antenna with 2dBi gain
Antenna Type
• 3x Dipole antenna with 2dBi gain
Operating Voltage
• 5VDC, 3A
Radio and Modulation Type
For 802.11n:
• BPSK, QPSK, 16QAM, 64QAM, OFDM
For 802.11g:
• BPSK, QPSK, 16QAM, 64QAM, OFDM
For 802.11b:
• DQPSK, DBPSK, DSSS, and CCK
LEDs
• Power
• Status
• WLAN
• LAN
• Internet
• WPS
Temperature
Operating: 32ºF to 113ºF (0ºC to 45ºC)
Storing: -4ºF to 149ºF (-20ºC to
Humidity
Operating: 10%~95% (non-condensing)
Storing: 5%~95% (non-condensing)
Certifications
FCC Class B
CE Class B
C-Tick
UL
TUV
Dimensions
L = 199mm
W = 118mm
H = 35mm
Weight
313.5g
62
Conceptronic C300GBRS4
User Manual
Licensing Information
This Conceptronic product C300BRS4A includes copyrighted third-party software licensed
under the terms of the GNU General Public License.
Please see The GNU General Public License for the exact terms and conditions of this license.
Specially, the following parts of this product are subject to the GNU GPL:
1. Linux kernel 2.4.25
2. buildroot
3. busybox-1.00
4. vconfig
5. iptable-1.2.9
6. mathopd
7. pppd-2.4.2
8. dnrd-2.10
9. klogd
10. syslogd
11. telnetd
12. wireless tools
13. bpalogin
14. hostapd-0.3.7
15. smtpclient
16. ntpclient
All listed software packages are copyright by their respective authors. Please see the source
code for detailed information.
Availability of source code
Conceptronic. has exposed the full source code of the GPL licensed software, including any
scripts to control compilation and installation of the object code. All future firmware updates
will also be accompanied with their respective source code. For more information on how you
can obtain our open source code, please visit our web site.
63
Conceptronic C300GBRS4
User Manual
GNU GENERAL PUBLIC LICENSE
Version 2, June 1991
Copyright (C) 1989, 1991 Free Software Foundation, Inc.
Temple Place, Suite 330, Boston, MA 02111-1307 USA
Everyone is permitted to copy and distribute verbatim copies
of this license document, but changing it is not allowed.
Preamble
The licenses for most software are designed to take away your freedom to share and change
it. By contrast, the GNU General Public License is intended to guarantee your freedom to
share and change free software--to make sure the software is free for all its users. This
General Public License applies to most of the Free Software Foundation's software and to any
other program whose authors commit to using it. (Some other Free Software Foundation
software is covered by the GNU Library General Public License instead.) You can apply it to
your programs, too.
When we speak of free software, we are referring to freedom, not price. Our General
Public Licenses are designed to make sure that you have the freedom to distribute copies of
free software (and charge for this service if you wish), that you receive source code or can
get it if you want it, that you can change the software or use pieces of it in new free
programs; and that you know you can do these things.
To protect your rights, we need to make restrictions that forbid anyone to deny you these
rights or to ask you to surrender the rights. These restrictions translate to certain
responsibilities for you if you distribute copies of the software, or if you modify it.
For example, if you distribute copies of such a program, whether gratis or for a fee, you
must give the recipients all the rights that you have. You must make sure that they, too,
receive or can get the source code. And you must show them these terms so they know their
rights.
We protect your rights with two steps: (1) copyright the software, and (2) offer you this
license which gives you legal permission to copy, distribute and/or modify the software.
Also, for each author's protection and ours, we want to make certain that everyone
understands that there is no warranty for this free software. If the software is modified by
someone else and passed on, we want its recipients to know that what they have is not the
original, so that any problems introduced by others will not reflect on the original authors'
reputations.
Finally, any free program is threatened constantly by software patents. We wish to avoid
the danger that redistributors of a free program will individually obtain patent licenses, in
effect making the program proprietary. To prevent this, we have made it clear that any
patent must be licensed for everyone's free use or not licensed at all.
The precise terms and conditions for copying, distribution and modification follow.
64
Conceptronic C300GBRS4
User Manual
GNU GENERAL PUBLIC LICENSE
TERMS AND CONDITIONS FOR COPYING, DISTRIBUTION AND MODIFICATION
0. This License applies to any program or other work which contains a notice placed by the
copyright holder saying it may be distributed under the terms of this General Public License.
The "Program", below, refers to any such program or work, and a "work based on the Program"
means either the Program or any derivative work under copyright law: that is to say, a work
containing the Program or a portion of it, either verbatim or with modifications and/or
translated into another
language. (Hereinafter, translation is included without limitation in the term "modification".)
Each licensee is addressed as "you".
Activities other than copying, distribution and modification are not covered by this License;
they are outside its scope. The act of running the Program is not restricted, and the output
from the Program is covered only if its contents constitute a work based on the Program
(independent of having been made by running the Program). Whether that is true depends on
what the Program does.
1. You may copy and distribute verbatim copies of the Program's source code as you receive
it, in any medium, provided that you conspicuously and appropriately publish on each copy an
appropriate copyright notice and disclaimer of warranty;
keep intact all the notices that refer to this License and to the absence of any warranty; and
give any other recipients of the Program a copy of this License along with the Program.
You may charge a fee for the physical act of transferring a copy, and you may at your option
offer warranty protection in exchange for a fee.
2. You may modify your copy or copies of the Program or any portion of it, thus forming a
work based on the Program, and copy and distribute such modifications or work under the
terms of Section 1 above, provided that you also meet all of these conditions:
a) You must cause the modified files to carry prominent notices stating that you changed
the files and the date of any change.
b) You must cause any work that you distribute or publish, that in whole or in part contains
or is derived from the Program or any part thereof, to be licensed as a whole at no charge to
all third parties under the terms of this License.
c) If the modified program normally reads commands interactively when run, you must
cause it, when started running for such interactive use in the most ordinary way, to print or
display an announcement including an appropriate copyright notice and a notice that there is
no warranty (or else, saying that you provide a warranty) and that users may redistribute the
program under these conditions, and telling the user how to view a copy of this License.
(Exception: if the Program itself is interactive but does not normally print such an
announcement, your work based on the Program is not required to print an announcement.)
65
Conceptronic C300GBRS4
User Manual
These requirements apply to the modified work as a whole. If identifiable sections of that
work are not derived from the Program, and can be reasonably considered independent and
separate works in themselves, then this License, and its terms, do not apply to those sections
when you distribute them as separate works. But when you distribute the same sections as
part of a whole which is a work based on the Program, the distribution of the whole must be
on the terms of this License, whose permissions for other licensees extend to the entire
whole, and thus to each and every part regardless of who wrote it.
Thus, it is not the intent of this section to claim rights or contest your rights to work written
entirely by you; rather, the intent is to exercise the right to control the distribution of
derivative or collective works based on the Program.
In addition, mere aggregation of another work not based on the Program with the Program (or
with a work based on the Program) on a volume of a storage or distribution medium does not
bring the other work under the scope of this License.
3. You may copy and distribute the Program (or a work based on it, under Section 2) in
object code or executable form under the terms of Sections 1 and 2 above provided that you
also do one of the following:
a) Accompany it with the complete corresponding machine-readable source code, which
must be distributed under the terms of Sections 1 and 2 above on a medium customarily used
for software interchange; or,
b) Accompany it with a written offer, valid for at least three years, to give any third party,
for a charge no more than your cost of physically performing source distribution, a complete
machine-readable copy of the corresponding source code, to be distributed under the terms
of Sections 1 and 2 above on a medium customarily used for software interchange; or,
c) Accompany it with the information you received as to the offer to distribute
corresponding source code. (This alternative is allowed only for noncommercial distribution
and only if you received the program in object code or executable form with such an offer, in
accord with Subsection b above.)
The source code for a work means the preferred form of the work for making modifications to
it. For an executable work, complete source code means all the source code for all modules
it contains, plus any associated interface definition files, plus the scripts used to control
compilation and installation of the executable. However, as a special exception, the source
code distributed need not include anything that is normally distributed (in either source or
binary form) with the major components (compiler, kernel, and so on) of the operating
system on which the executable runs, unless that component itself accompanies the
executable.
If distribution of executable or object code is made by offering access to copy from a
designated place, then offering equivalent access to copy the source code from the same
place counts as distribution of the source code, even though third parties are not compelled
to copy the source along with the object code.
66
Conceptronic C300GBRS4
User Manual
4. You may not copy, modify, sublicense, or distribute the Program except as expressly
provided under this License. Any attempt otherwise to copy, modify, sublicense or distribute
the Program is void, and will automatically terminate your rights under this License.
However, parties who have received copies, or rights, from you under this License will not
have their licenses terminated so long as such parties remain in full compliance.
5. You are not required to accept this License, since you have not signed it. However,
nothing else grants you permission to modify or distribute the Program or its derivative works.
These actions are prohibited by law if you do not accept this License. Therefore, by
modifying or distributing the Program (or any work based on the Program), you indicate your
acceptance of this License to do so, and all its terms and conditions for copying, distributing
or modifying the Program or works based on it.
6. Each time you redistribute the Program (or any work based on the Program), the recipient
automatically receives a license from the original licensor to copy, distribute or modify the
Program subject to these terms and conditions. You may not impose any further restrictions
on the recipients' exercise of the rights granted herein. You are not responsible for enforcing
compliance by third parties to this License.
7. If, as a consequence of a court judgment or allegation of patent infringement or for any
other reason (not limited to patent issues), conditions are imposed on you (whether by court
order, agreement or otherwise) that contradict the conditions of this License, they do not
excuse you from the conditions of this License. If you cannot distribute so as to satisfy
simultaneously your obligations under this License and any other pertinent obligations, then
as a consequence you may not distribute the Program at all. For example, if a patent license
would not permit royalty-free redistribution of the Program by all those who receive copies
directly or indirectly through you, then the only way you could satisfy both it and this License
would be to refrain entirely from distribution of the Program.
If any portion of this section is held invalid or unenforceable under any particular
circumstance, the balance of the section is intended to apply and the section as a whole is
intended to apply in other circumstances. It is not the purpose of this section to induce you to
infringe any patents or other property right claims or to contest validity of any such claims;
this section has the sole purpose of protecting the integrity of the free software distribution
system, which is implemented by public license practices. Many people have made generous
contributions to the wide range of software distributed through that system in reliance on
consistent application of that system; it is up to the author/donor to decide if he or she is
willing to distribute software through any other system and a licensee cannot impose that
choice.
This section is intended to make thoroughly clear what is believed to be a consequence of the
rest of this License.
8. If the distribution and/or use of the Program is restricted in certain countries either by
patents or by copyrighted interfaces, the original copyright holder who places the Program
under this License may add an explicit geographical distribution limitation excluding those
countries, so that distribution is permitted only in or among countries not thus excluded. In
such case, this License incorporates the limitation as if written in the body of this License.
67
Conceptronic C300GBRS4
User Manual
9. The Free Software Foundation may publish revised and/or new versions of the General
Public License from time to time. Such new versions will be similar in spirit to the present
version, but may differ in detail to address new problems or concerns.
Each version is given a distinguishing version number. If the Program specifies a version
number of this License which applies to it and "any later version", you have the option of
following the terms and conditions either of that version or of any later version published by
the Free Software Foundation. If the Program does not specify a version number of this
License, you may choose any version ever published by the Free Software Foundation.
10. If you wish to incorporate parts of the Program into other free programs whose
distribution conditions are different, write to the author to ask for permission. For software
which is copyrighted by the Free Software Foundation, write to the Free Software
Foundation; we sometimes make exceptions for this. Our decision will be guided by the two
goals of preserving the free status of all derivatives of our free software and of promoting the
sharing and reuse of software generally.
NO WARRANTY
11. BECAUSE THE PROGRAM IS LICENSED FREE OF CHARGE, THERE IS NO WARRANTY FOR THE
PROGRAM, TO THE EXTENT PERMITTED BY APPLICABLE LAW. EXCEPT WHEN OTHERWISE
STATED IN WRITING THE COPYRIGHT HOLDERS AND/OR OTHER PARTIES PROVIDE THE
PROGRAM "AS IS" WITHOUT WARRANTY OF ANY KIND, EITHER EXPRESSED OR IMPLIED,
INCLUDING, BUT NOT LIMITED TO, THE IMPLIED WARRANTIES OF MERCHANTABILITY AND
FITNESS FOR A PARTICULAR PURPOSE. THE ENTIRE RISK AS TO THE QUALITY AND
PERFORMANCE OF THE PROGRAM IS WITH YOU. SHOULD THE PROGRAM PROVE DEFECTIVE,
YOU ASSUME THE COST OF ALL NECESSARY SERVICING, REPAIR OR CORRECTION.
12. IN NO EVENT UNLESS REQUIRED BY APPLICABLE LAW OR AGREED TO IN WRITING WILL
ANY COPYRIGHT HOLDER, OR ANY OTHER PARTY WHO MAY MODIFY AND/OR REDISTRIBUTE
THE PROGRAM AS PERMITTED ABOVE, BE LIABLE TO YOU FOR DAMAGES, INCLUDING ANY
GENERAL, SPECIAL, INCIDENTAL OR CONSEQUENTIAL DAMAGES ARISING OUT OF THE USE OR
INABILITY TO USE THE PROGRAM (INCLUDING BUT NOT LIMITED TO LOSS OF DATA OR DATA
BEING RENDERED INACCURATE OR LOSSES SUSTAINED BY YOU OR THIRD PARTIES OR A FAILURE
OF THE PROGRAM TO OPERATE WITH ANY OTHER PROGRAMS), EVEN IF SUCH HOLDER OR
OTHER PARTY HAS BEEN ADVISED OF THE POSSIBILITY OF SUCH DAMAGES.
END OF TERMS AND CONDITIONS
68
Conceptronic C300GBRS4
User Manual
How to Apply These Terms to Your New Programs
If you develop a new program, and you want it to be of the greatest possible use to the
public, the best way to achieve this is to make it free software which everyone can
redistribute and change under these terms.
To do so, attach the following notices to the program. It is safest to attach them to the
start of each source file to most effectively convey the exclusion of warranty; and each file
should have at least the "copyright" line and a pointer to where the full notice is found.
, 1 April 1989
Ty Coon, President of Vice
This General Public License does not permit incorporating your program into proprietary
programs. If your program is a subroutine library, you may consider it more useful to permit
linking proprietary applications with the library. If this is what you want to do, use the GNU
Library General Public License instead of this License.
69


