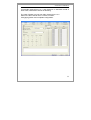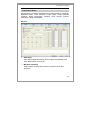
1
<<Contents>>
Installation Manual
-Hardware Installation
-Software Installation
User Manual
-Surveillance Mode
-Search Mode
-AVI Backup Manager Mode
-Backup Manager
-NetClient Mode
-WebClient Mode
Compatible / Incompatible
Appendix-1
-Server Setup
Appendix-2
-Server Function
-NetClient/WebClient Function
1
Hardware Installation
When you purchase DVR, you have to install DVR board in user’s PC
or DVR system. This is installation guide for Capture board among DVR
board. In case of installing Live series board, please refer to Live series
manual.
Minimum Requirement
CPU
Intel Celeron™ 1.7Ghz or higher
RAM
256 MB or higher
HDD
80 GB 7200rpm or higher
Intel i845 Chipset built-in motherboard
Motherboard
Ref In case of using analog audio, we recommend to
use Intel i865 Chipset built-in motherboard.
VGA
Refer to 115page
OS
Only Windows 2000™, Windows XP™
Direct X
DirectX 8.1 or higher
2
Hardware Installation
1
□
DVR board & Extension video cable installation
Insert the DVR board to an empty PC slot in DVR system.
2
□
Video & Audio connection
Video input installation
DVR board: You connect to DVR board with 4ch video extension
cable or 8ch video extension cable.
Audio input installation
In case of connection MIC to MIC IN port of motherboard.
MIC connect to MIC IN port of motherboard.
In case of connection MIC to Audio IN port of DVR board.
MIC connect to Audio IN port of DVR board.
3
Hardware Installation
* Connection to MIC (over 4ch)
Each DVR board supports various MIC input channel according to
model. When you use over 2ch MIC input, please connect
additional audio extension cable.
Board
Analogue audio
Digital audio
Sound Card
S
1 ch
-
1 ch
SP
2 ch
4 ch
1 ch
H
4 ch
-
1 ch
HP
8 ch
-
1 ch
RD
X
-
1 ch
Live 120
X
4 ch
1 ch
Live 480
X
8 ch
1 ch
- S board
S board supports only 1ch MIC input.
4
Hardware Installation
- SP board
SP board supports 2ch MIC
input. Please refer to below
picture. Actual used MIC input in
audio extension cable is 2 ports.
- H board
H board supports 4ch MIC input.
Please refer to below picture.
5
Hardware Installation
- HP board
HP board supports 8ch
MIC input. Like below
picture, a part in DVR
board connects to B
part in audio extension
cable.
Digital audio installation
Audio quality of digital audio board is superior to quality of analogue
audio cable. You have to purchase digital audio board. Digital audio
board is compatible with SP board and Live series board.
6
Hardware Installation
3
□
P/T/Z Installation
Some cameras support pan/tilt/zoom/focus function. In order to use
P/T/Z camera, you need to connect P/T/Z cable.
[A] connecter: Connect P/T/Z cable to COM port of DVR systems
[B] connecter: Connect P/T/Z cable to DVR board.
[C] part: Connect to receiver (camera). When you install a few
cameras, you use cable like picture.
7
Hardware Installation
Ref P/T/Z cable Connection for each board.
4
□
RD(Real Display) board installation
When you install RD board with capture board, you are able to view
camera image in real-time speed. (30fps display per channel / total
480fps display) You install RD board in empty slot in DVR system. You
connect RD board and capture board with IDE cable.
8
Hardware Installation
Notice RD board has to be installed S, H, HP board together. (RD
board is only displaying board)
Ref How to connection TV out in RD board.
When you use RD board, TV out is connected to TV out port of
RD board.
5
□
I/O board installation
When you install I/O board in DVR system. You are able to connect
various sensors and alarms.
I/O board supports total 8 IN / 8 OUT with both extension I/O board and
basic 4 IN / 3 OUT. When you connect 2 set I/O board, maximum I/O
function is 16 IN / 16 OUT.
9
Hardware Installation
Back panel connection port in industrial case.
In case of industrial system with back panel connection, you are
able to use I/O IN/OUT separately.
Connection port of I/O extension board cable.
It is connected to I/O extension board.
DVR board connection port
It is connected to DVR board in DVR system.
Master/Slave connection port
When you install I/O board (2EA, 16 IN / 16 OUT)
10
Hardware Installation
Master/Slave setup dip jumper
It designates Master/Slave part at each board.
(Master: Jumper install / Slave: Jumper uninstall)
E.g. Disconnection between DVR board and I/O board
(Extension board)
11
Software Installation
Software installation manual introduction
Server
It is software to execute DVR system.
It is fundamental software against other software provides and you
have to install it in system.
NetClient
DVR system connects to DVR system at remote site and record
transferred image in client system.
It is software which connects to DVR system at remote site through
20408 port and monitors and control.
WebClient
DVR system is able to connect to DVR system at remote site and
monitor and control P/T/Z camera in Web (Internet Explorer)
It is software to monitor and control DVR system at remote site in
Web. When it is installed in DVR system, user does not need to
install additional software to monitor DVR at remote site by installing
WebClient installation file automatically through 26540 port after auto
downloading.
Notice This is used for Apache Web server.
User has to change 80 port into 26540 port to use WebClient with
Apache port change software in CD. Usually, most of communication
companies close 80 ports.
12
Software Installation
Software
Installation
You are able to install Server software by using CD-ROM which is
provided by us.
Software CD consists of Server Package (Main program, WebClient
program, Apache server, Netclient, AVI codec. User manual is also
available from S/W CD
1. DVR Server Package Installation
Insert DVR System Plus CD into CD-ROM drive or run DvrSetup.exe file;
the following installation screen will appear.
Click the first button, DVR Server package will be proceeded.
Installation step : Web Applet(Apache) -> WebClient -> Server
13
Software Installation
Web(Apache Web Server) installation
Click Install Server Package button in provided CD, installation will be
proceeded.
Installation wizard tool will appear. Click [Next]
14
Software Installation
Read the License Agreement and if you agree to the contents, select [I
accept…] and click [Next].
Click [Next] after checking server information of Apache server.
15
Software Installation
Insert Network Domain, Server Name, Administrator’s E-mail Address.
In case there is not any specific info, please insert as below.
Network Domain: somenet.com
Server Name: www.somenet.com
Administrator’s Email Address: [email protected]
Select [Run as a service for All Users – Recommended] and click [Next]
16
Software Installation
Select Setup Type as [Complete] and click [Next]
Click [Next] without change of setting.
Notice Please do not change the directory
17
Software Installation
After the setting is finished, click [Install] and start installation.
After the installation is done, click [Finish] to end the installation
program.
18
Software Installation
Confirm whether the apache server port has been changed to
26540 after the apache installation is finished.
Notice Default port is 80 for apache web server. If the port is not
changed after apache web server is installed, you would not be
able to use WebClient program from external environment.
Therefore port must be changed.
WebClient Installation
After the Installation Wizard Tool is appeared, click [Next].
19
Software Installation
Check the contents of License Agreement; if you agree to the contents,
click [Yes].
After the installation is done, click [Finish].
20
Software Installation
Server Installation
After Installation Wizard Tool is appeared, click [Next].
Check the details of License Agreement; if you agree to the contents,
click [Yes].
21
Software Installation
Check the added or fixed functions of currently installed DVR Server
version and click [Next].
After choosing [Destination Folder] for installation, click [Next].
22
Software Installation
After the installation is done, click [Finish].
Driver Installation: Wizard automatically installs drivers according to
each board type.
Please reboot PC after all the installation is finished.
23
Software Installation
DVR System Plus Uninstallation
In case of Up-grade DVR System Plus program in new version, or there
is problem in setup version, please remove by method as below.
Notice To keep stability of DVR system, DVR System Plus and other
program need to be deleted and removed certainly as below
click control panel after clicking beginning button of windows.
(It can be in different position according to kind of OS)
Click [Add/Remove Program] .
After choosing DVR System Plus by mouse, click [Add/Remove
Program]
2. NetClient Installation
If click Install Client Package button of setup program in offered CD,
NetClient setup will be proceeded.
24
Software Installation
After Installation Wizard Tool is appeared, click [Next].
After choosing [Destination Folder] for installation, click [Next].
25
Software Installation
After the installation is done, click [Finish].
NetClient Plus Uninstallation
In case of Up-grade NetClient Plus in new version, or there is problem
in setup version, please remove by method as below.
Notice To keep stability of DVR system, NetClient Plus and other
program need to be deleted and removed certainly as below
Click control panel after click [beginning] button of windows.
(It can be in different position according to kind of OS)
Click [Add/Remove Program]
After choosing NetClient Plus by mouse, click [Add/Remove Program]
26
Software Installation
3. AVI Codec Installation
When wish to watch image that backed up by AVI Backup Manager in
DVR system or other computer, user can see though setup our AVI
Codec certainly.
If click Install AVI Codec button, AVI Codec setup will be proceeded.
AVI Codec Installation
27
Software Installation
After the installation is finished, click [Finish].
Ref: SP Digital Audio Installation
In case of using digital audio in SP60 DVR system with only Windows
2000 OS, Digital Audio Driver must be setup manually.
Clicks the [Beginning] button-[Control panel]-[System-Hardware][Device administrator] and executes device administrator.
28
Software Installation
After choosing [WDM DVR Audio Driver] by mouse, choose the [Drive
Up-date] and click right button
Ref If see the screen as below, choose the [Yes, this time only] and
then click [Next] button
After choose [Advanced setting] at list or specification position, click
[Next] button.
After select [Driver search (S)] that is the most suitable at this position,
select [when search, includes next position] and specifies path as follows
29
Software Installation
C:\Program Files\DVRS\Driver\9x2k\SPLUS
Click [Search] button
If finish installation as below, click [next] button and proceed to next step
Choose [WDM LIVE Audio Driver] and then click [Next] button
30
Software Installation
If the information that Digital Audio Driver is placed normally,
Click [Finish] button
After finishing installation, if confirm [device administrator] again, it will
be seen as below
Progress remaining [WDM DVR Audio Driver] again in same process.
31
Software Installation
If digital audio driver installation is finished normally, [WDM LIVE Audio
Driver] item as following is registered 2pcs.
Reboot the computer to operate driver normally.
After rebooting computer, confirm [Configuration>General] running DVR
program
If it is installed normally, confirm that Audio Device is placed from 1to 4
as below.
32
Software Installation
If use audio channel from1 to 4, and channel 5 is used MIC monad of
audio card, install audio channel as following.
The case of below is to just use video channel from 1 to 5
When use video channel until 1-5 below occasion,
Click [apply] button and completes configuration.
33
DVR System Plus is the main program which takes part as the most
important role in DVR System, and acts as the Server role for other
additionally supported program.
DVR System Plus supports maximum 16 video channels and 1~9
audio channels according to board. Low resolution(less storage) and
high resolution (more storage) for each channel is supported and 9
audio channels can be adjusted freely. By various split-screen display
modes and color adjustment, optimized image can be realized
according to the environment.
Existing analog CCTV equipments such as Sensor & Alarm, P/T/Z
camera, Video Out, etc. are perfectly compatible. Image or E-mail
can be transmitted over the network for user’s to observe from
remote site without having the inconvenience to stand in front of the
DVR System. Max. 30 user accounts can be created to grant
authorization by user-level, and real time monitoring is available by
connection over the network.
34
Minimum Requirement
CPU
Intel Celeron™ 1.7 GHz or higher
RAM
256 MB or higher
HDD
80 GB 7200rpm or higher
Motherboard
Intel i845 Chipset or higher
VGA
Refer to 115page
OS
Windows 2000™, Windows XP™
(Windows 98™ and ME is not supported.)
Direct X
DirectX 8.1 or higher
Min. Required
Space when
installation
30 MB
Others
Graphic Driver and Sound Card are required as
compulsory.
35
Surveillance Mode
Surveillance Mode
1
□
2
□
3
□
4
□
5
□
6
□
Control Panel
Screen Partition Panel
P/T/Z Control Panel
Channel Type Selection Panel
Real Time Audio Volume Control Panel
DVR Status Information Panel
36
Surveillance Mode
1
□
Control Panel
User’s can run search program, record images, open configuration
screen, etc. from control panel.
Search Button: You can run search program.
Configuration Button: You can open configuration mode to
change system setup.
Lock Button: Lock function is supported to prevent program setup
changes or search program run.
REC Button & All Button:
To record specific channels – Click left mouse button on specific
channel and click REC button.
To record all channels – Click ALL buttons and click REC button.
2
□
Screen Partition Panel
You can select 7 types of various display modes and
use full screen mode, auto-switching display, etc.
to setup the screens to change automatically.
3
□
P/T/Z Control Panel
You can control the cameras if P/T/Z camera is connected to the DVR
System. First use left mouse button to click on the channel you wish to
control, and use the buttons in P/T/Z Control Panel to support various
functions.
37
Surveillance Mode
4
□
Channel Type Selection Panel
Click a specific channel to enlarge the screen.
5
□
Real-Time Audio Volume Control Panel
If audio input setup is done by each channel
from [Configuration] - [General], you can use audio
volume control bar to control the real-time audio volume.
6
□
DVR Status Information Panel
Indicates the number of channels connected by Internet( TCP ) or
Modem ( MODEM ). If there are no free space available in
recording HDD, Disk Full will be indicated in red color.
38
Surveillance Mode
Configuration Setup
Configuration is consisted of detailed items characterized by functional /
applicable aspect. Video resolution, image quality, motion detection
recording, digital input/output, schedule, P/T/Z receiver protocol,
network etc. setup are available.
General
① Start Setup
Auto Start at Windows starting: DVR program automatically runs
when DVR system is turned on.
② Max Size at Starting
DVR Program is setup as full screen to prevent use of other
programs.
39
Surveillance Mode
③ Exit Setup
When shutting down DVR System Plus program, setup to shut
down DVR System Plus program only or shut down DVR System
power or auto-reboot system.
④ Audio Setup
Setup the gain of Audio Input. AUD1 ~ AUD8 is gain control for
Audio channel supported from DVR Board or Digital Audio Board.
Set the gain to minimum (0) when use of amplified mic. (E.g.:
model with built-in amplifier circuit)
Sound Card controls the Sound Card volume for audio input.
⑤ Video / Audio Setup
Input Camera Type Setup
NTSC: Korea, USA, Japan, Australia (some region), North America
(some region)
PAL: Other regions excluding NTSC (China, Europe, South
America, etc.)
Channel Selection
Select the channel for surveillance. Do not select the camera which
is not connected to DVR System.
Video Resolution Setup
Setup the recording resolution for video images. There is standard
resolution and high resolution.
Ref NTSC – 320X240, 640X480 / PAL – 360X288, 720X576
40
Surveillance Mode
Channel Configuration
① Channel Caption Input
Insert the description of the area that is under camera surveillance.
② Caption Setup
Surveillance Mode
Setup to indicate the channel number and surveillance area on
the video images from main program.
Search Mode
Setup to indicate the channel number and recording time on
the video images from search program.
③ Caption Font and Color Setup
You can setup caption font & color of caption according to
channel number, camera surveillance area recorded time etc.
④ Video Source
You can setup brightness, contrast, hue, saturation and
sharpness to optimize video quality.
41
Surveillance Mode
Store Configuration
① Store Disk
Indicates HDD which is installed to DVR system. (Movable disk is
not included.)
(Check(√) HDD to use as recording device.)
Notice In case camera image is stored in hard-disk which has
operating system, if hard-disk will be full, system can be shut down
or repeat rebooting.
② Disk Information
Indicates selected HDD information from Store Disk.
③ Overwrite
The oldest image data will be erased and new image data will be
recorded when the free HDD space is lesser than the minimum
free space (Default: 1024 MB).
42
Surveillance Mode
Notice You can use the HDD with no shortage in space if you use
overwrite function. However this means that the oldest data will be
automatically erased. Therefore it is recommended to backup
important data in advance by using Backup Manager Program for
your preservation purpose.
④ Recording Quality and Recording Frame Rate setup
Max. recording frame rate and image quality can be setup by each
channel.
Ref Recording size of 1 frame by image quality and resolution is as
below.
Image Quality
Resolution
Recording Size(KB)
Low
Low Resolution
2.5 KB
Low
High Resolution
6.0 KB
Medium
Low Resolution
3.7 KB
Medium
High Resolution
10.0 KB
High
Low Resolution
5.0 KB
High
High Resolution
15.0KB
⑤ Watermark
Image tampering can be prevented by inserting watermark in
every frame.
Normal: Watermark by the form of DVR will be inserted.
User Define Mark: Any type of watermark can be inserted by
designing your own.
43
Surveillance Mode
Network Configuration
① Server function setup
Enable TCP/IP server
This enables the system to act as a server for remote surveillance
through internet connection. Remote surveillance using Client
program and Web Browser is available when private line is used to
connect to internet.
Enable the Modem Server
This enables the system to act as a server for remote surveillance
through PSTN network. (General modem using telephone line)
Remote surveillance through Client program is available when
modem is installed in the system to connect PSTN network. Please
notify remote surveillance by Web Browser is not available.
44
Surveillance Mode
② Network Information
You can check the system IP address & MAC address.
Ref It is likely that the DVR System is using dynamic IP if the IP is
frequently changed without noticing or when DVR System is
rebooted. Our DHS Service is recommended for dynamic IP users
who connected to DVR System for remote surveillance.
③ User Limit
Network connection port
You can change the connection port for remote surveillance
function. (20408 port is setup as basic.).
Max. Connection no
Maximum number of connection to the DVR System for remote
surveillance function can be limited.
User of Sharing IP
Use this option when network is connected by internet router to
DVR system.
④ IP Manager Setup
Remote surveillance for specific IP can be enabled or disabled.
⑤ Dynamic IP ID authentication & registration
Insert the ID you have registered to our DHS Service and receive
authentication. (Refer to 114p)
45
Surveillance Mode
Schedule Configuration
① Schedule Chart
You can setup the schedule of each channel using the left mouse
button click or drag.
You can remove the schedule by using right mouse button click or
drag.
Clear: Schedule setup of current channel will be removed.
Apply All: Schedule setup of current channel will be applied to all
channels.
② Set Schedule Function
Schedule will be enabled only when the check box is initialized.
③ Schedule Type
After selecting from the 3 schedule types, use your mouse to setup
the schedule in schedule chart.
46
Surveillance Mode
Maintenance configuration
① Windows Info
You can check the Windows and system information of DVR
System.
② DVR Version Info
You can check the DVR System’s each version and board type.
③ DVR System
You can check the version and size of DVR System Plus program.
④ System Maintain
This is a function which checks the DVR System & video data files
for any errors when starting DVR System Plus program.
Normal Check Mode: This checks for video data index and
program files.
Full Check Mode: System integrity is added from the normal
check mode so the duration time can be slow.
47
Surveillance Mode
⑤ System Auto Reboot
You can setup to re-boot DVR System regularly.
This is recommended for stable Windows operation and data
verification.
⑥ System Log- You can run system log viewer.
Event Recording Setup
① Sensor
You can use by clicking enable the sensors. Click to initialize the
installed sensor of each channel and select sensor type.
Ref Sensor Type
NO (Normal Open)
NO type sensor will be closed when there is detection. You do not
need to setup additionally from our setup configuration.
NC (Normal Close)
NC type sensor will be opened when there is detection. You need
to initialize by clicking the NC button below the sensor number
button.
48
Surveillance Mode
② Action / Digital Output
You can setup the automatic action which DVR will carry out when
sensor is triggered.
Enable the Event Recording
You can record the channel for [Duration: setup from ⑤] when
sensor is triggered.
Enable the Warning Sound
Previously setup wave file will be run from [Warning Sound: setup
from ④].
Send E-mail at Detection
Still image will be transmitted to the e-mail address which can be
setup from [Configuration>E-mail] when sensor is triggered.
③ Enable the Digital Output
Various output devices (warning light, siren, warning speaker, etc.)
will be activated when sensor is triggered.
④ Warning Sound
You can freely setup the warning sound that will be activated when
sensor is triggered.
⑤ Duration
You can setup the duration time of warning sound or recording
when sensor is triggered. For example if you setup 10sec, the DVR
will record and make warning sound for 10sec.
⑥ Motion Detection
This function will be activated when there is motion detection in
specific area of image.
You can either record or send still image by e-mail.
Detection Area Setup
You can setup the area you wish to detect motion by using mouse
drag on preview image.
Set Motion
The channel where motion is occurred will be indicated in blue
color from surveillance screen.
Motion Recording
Image will be recorded when motion is detected.
Draw Small MD Box
The area where motion is detected will be indicated in small green
boxes.
49
Surveillance Mode
Pop-Up at MD
The channel which has motion detection will be viewed in full
screen mode for the duration time(⑧pop-up time).
E-mail transmission at motion detection
The motion detected image will be transmitted to the e-mail
address which is setup from [Configuration>E-mail]. For more
detailed information, please refer to [Configuration>E-mail] function
description in this manual.
⑦ Sensitivity setup
You can setup the sensitivity for motion detection. Detailed
movements can be detected if you increase the sensitivity.
⑧ Duration Time
You can setup the duration time for [Pop-up channel at MD]
function.
Receiver Configuration
50
Surveillance Mode
① Port
Select the serial port where P/TZ camera or receiver is connected.
② Receiver Address
Setup the P/T/Z camera or receiver address according to video
channel.
Ref Most of the P/T/Z cameras which are used in the market have
camera address. Camera address can be setup by the deep switch
in the camera or OSD menu.
If the address you have setup from DVR and the camera address is
not the same, P/T/Z function will not be operated so make sure
that the setup is same.
③ Device Type
You can select various P/T/Z camera or receiver protocol by using
your mouse.
The protocol should be one and equal even though you install
various kinds of P/T/Z camera or receiver.
④ Extend Function
Swap vertical command (Up/Down)
Vertical command which is transmitted to the P/T/Z camera will be
opposite.
Swap horizontal command (Left/Right)
Horizontal command which is transmitted to the P/T/Z camera will
be opposite.
51
Surveillance Mode
Preset Configuration
Single Mode
You can select the video channel which is connected to the preset
camera.
Preset can be setup additionally by each channel.
① Scenario List
Presets which have been setup will be composed into one order
diagram.
When [④Scenario RUN], it will be run by the order in scenario list
and preset.
② Preset Setting
Scenario No- Scenario number you have selected will appear.
Preset No- Preset which is under add/modify will appear.
Delay Time
You can setup the delay time for the current preset location which
is under add/modify.
52
Surveillance Mode
Control Panel
Setup the current preset location by using P/T/Z button.
Add Button
You can record the current location in editing Preset and also apply
to scenario list at the same time.
Modify Button
Selected preset location and delay time can be modified to the
information that you have changed to.
Delete Button
Selected preset from the scenario list will be deleted.
But, camera location which is saved in the preset camera will not
be deleted.
③ Reverse Scan
Scenario list will be run in round circulation.
예) Preset 1 Æ Preset 2 Æ Preset 3 Æ Preset 4 Æ Preset 3 Æ
Preset 2…
④ Scenario RUN and PAUSE
Scenario RUN: Preset will be run from the top scenario list to the
bottom. Scenario will be stopped if you click the left mouse button
again.
PAUSE: Scenario which is being run will be paused.
53
Surveillance Mode
Video Output
You can use video output function if you use with additional analog monitor.
Notice It has no relation with [Configuration>General], switching
display function.
① Enable the TV Out Rotation
You can setup the images to be automatically displayed in
sequence when analog monitor (CCTV Monitor) is connected to DVR.
② Single Mode
You can select specific channel to be viewed one at a time if you
do not wish to view by display in sequence from analog monitor.
③ Rotation Mode Time Gap
If you use automatic display sequence function, you can setup the
converting time to channel.
④ Rotation Mode Channel
You can select channels to display in sequence. For example if 1, 5,
7, 8, CH is selected,1, 5, 7, 8CH will be displayed in sequence from
analog monitor.
54
Surveillance Mode
E-mail Function Configuration
① Mail Server
Insert mail server address of the sender.
Ref E-mail function supports most of the mailing service but some
mailing services are not supported. Please refer to next page for
information regarding supported mail server list.
② Sender
Insert the name and e-mail address of the person who sends the
mail.
③ Message Recipients
To - Insert the e-mail address of the person who receives.
Cc - Input e-mail addresses of other recipients.
Bcc - Input e-mail address for blind carbon copy.
④ E-mail Timer Setting
Setup e-mail response time after motion is detected or sensor is
triggered.
55
Surveillance Mode
User Management configuration
① User List
Display list of user account had stored at present.
Select empty account that it is written [Not used]
If correct or erase user account, after select account by using
mouse, correct or erase.
② User information
Display selected user's ID, password etc.
User information renewal: Click at user account creation or
alteration
Account delete: Erase selected account at present.
③ Accessible local function
It is power establishment connected with function use in DVR
System
Can use in function checked in check box in case of loge in to
relevant user account in network
56
Surveillance Mode
④ Accessible Network function
Establish power that can connect using NetClient or WebClinet in
remote.
⑤ Accessible channel
Establish access privilege that user account can see. Only,
because DVR System Plus Search is excepted in setting, user
account that establish channel access privilege persuades search
power revocation.
Ref Screen configuration in RD(Real Display) Board
After click right button of mouse, if select [Display Setting] Menu,
Can do display setting of RD Board in monitoring screen of DVR
System which is attached RD Board
Notice This setting is related only for image that is seen in
monitoring mode,, and control about actuality stored image
existent environment establishment > that do in channel setting
desire .
Auto Gain Control: control Gain of inputted video signal
automatically.
Gain Control: in case of check [Enable Auto Gain Control], user
directly can control Gain.
Edge Control: It is function that handle line of guard of screen
more clearly. Can see image of clearer boundary line by checking
[Enable Edge Control], but there are a lot of noises so much.
Display Color Setting: control Bight / Contrast saturation for the
better monitoring.
57
Surveillance Mode
Application use
Kind and resolution establishment of camera
When DVR System Plus S/W is installed, DVR
System has activated one channel. So, User must do
early set depending on used environment.
Click environment establishment button and
selects [general] tap.
① Video Auto Setting
NTSC: Korea, the United States of America,
Japan, Australia (some area), South America
(some area) etc.
PAL: Area (China, Europe, South America etc.)
except NTSC area.
② Activate channel of Linked camera.
Ref Cancel channel that is not connected to
camera.
③ Establish resolution of each channel.
Can select High resolution mode (NTSC: 640x480 , PAL
720x576)and low resolution mode. (NTSC: 320x240, PAL:
360x288 ) High resolution mode has good picture quality, but file
size is bigger, low resolution mode has average quality but file size
is smaller.
Image picture quality configuration
User can establish picture quality of image
of each channel according to user’s environment.
Click configuration button and selects [channel] tap.
Setup each image picture quality in [image quality] below right side
after select channel to setup using [channel selection combo box] such
as left side picture.
58
Surveillance Mode
Audio establishment
When DVR System Plus S/W is installed, all audios become inactivation.
Therefore, in order to use audio, user must set audio per channel.
Each channel different audio channel assignment
Click configuration button and selects
[general] tap
① Establish audio in channel which
has audio or is close camera.
Only, audio of each channel can not
establish overlap
Audio input control
Click configuration button and selects [general] tap.
Change audio input establishment according to actuality use
environment. Only, in case of setting amplification microphone which
has amplification circuit, built-in usually by 0
Motion detection setup
It is function that act in case of motion was detected in specific area
that user defines.
If establish in motionless place averagely, holding period can increase
because storage capacity of image decreases.
Click [event] tap after click configuration button.
By another method, click [present, channel setup] after click mouse
right button in channel to establish motion watch in monitoring screen.
59
Surveillance Mode
Do drag by a mouse on preview
screen and designates motion watch
area.
② Click [motion setup] button and
activates motion watch function.
If do not activate [motion setup] button
motion watch function does not act.
③ Establish DVR Systems action in case of motion was detected.
①
Save Motion perception
When motion happens, establish to
store picture.
To paint small MD box
In case of motion was detected in
selected zone, small green box traces
movement.
Channel extension at motion detection.
It is function that shows channel which is detected in full screen
during appointed time (⑤ reference : continuance time)
E-mail transmission at motion detection
Transmit display of when motion is detected to E-mail address that
detected in [configuration> e-mail] in case of motion was detected
in selected zone. More detailed contents can get from back
[configuration> e-mail] function representation.
④ Sensitivity By raising responsiveness, user can detect small motion.
⑤ set channel extension time of [channel extension when sense
motion] function.
60
Surveillance Mode
Sensor and digital output Configuration
Establish Linked sensor and digital output to DVR System.
Supply maximum 16 sensors and 16 digital outputs in this DVR System.
(Only, it is function that can use though I/O Board)
Can be acted organically connecting each sensor or digital output
device (alarm, lighting, warning sound etc.) to camera channel.
Sensor establishment
① Move to [configuration> event]
First, select image channel that
adjoin with sensor
② Check [sensor use] check box.
③ Select port number connected to sensor.
Notice Sensor that is not image channel is Linked channel. Refer
to Sensor/Digital Output SETUP of 9page if sensor gets a line for
Linked channel.
④ Setup Sensor’s kind.
Sensor can classify by two types.
NO (Normal Open)
NO type of sensor is kind that is short-circuited when was sensed
at normal times. Need not to establish apart in this setup.
NC (Normal Close)
NC type of sensor is kind that is short-circuited at normal times.
When connect NC type of sensor, use after activate clicking NC
button of sensor number button under.
⑤ Set of sensor was completed.
61
Surveillance Mode
Digital output Configuration
① Move to [configuration>event’.
② Check [Enable the digital output] check.
③ Digital output device selects Linked port number.
Notice It is channel connected
digital output device not image
channel. Refer to Sensor/Digital
Output SETUP of 9page if want
to get information of channel
that linked digital output device.
④ Establish kind of digital output device..
Digital output device can be classified by two types greatly.
NO (Normal Open)
NO type of digital output device is kind that is short-circuited when
was sensed at normal times.
Need not to establish apart in setup.
NC (Normal Close)
NC type of digital output device is kind that is short-circuited at
normal times.
When connect NC type of sensor, use after activate clicking NC
button of digital output device number button under.
⑤ Set of digital output device was completed.
E-mail setup
If use together E-mail and motion watch or sensor watch, can receive
still image of relevant channel by E-mail in case of motion or sensor is.
① Input mail server address of side of sender.
E.g. www.yahoo.co.kr
② Input information of side of sending mail.
62
Surveillance Mode
Only, E-mail site that is recorded to E-mail address should be
equal with ①'s [mail server].
E.g.
E-mail server: yahoo.com
/ E-mail: [email protected]
③ Input email address of recipient
TO: E-mail address of recipient
CC: input E-mail address of other
recipients
BCC: input E-mail address for Blind
④ Setup E-mail response time after sensor
has been triggered.
Ref E- Mail function does not support
mailing. Therefore, encourage test
certainly after establish E- mail function.
If set time so shortly in case of watching continuous motion, too
many mails can be transferred to a recipients.
Also, encourage that setup to channel that can get action less and
clean image if is possible.
User account Configuration
Because DVR System Plus creates user account of maximum 30, each
user particularly can use different authorization levels.
Move to [configuration > user management].
①
Select segment that is written [Not used] in user list BY mouse
click.
63
Surveillance Mode
② Input ID and password that
want to make new user
information and input
password equally
in [password confirm].
③ Click [modify user information]
button creates user account.
④ Accessible local function
Setup DVR System’s
authorization level. When
connect in remote,
act according to user
authorization level.
⑤ Setup authorization levels
that can watch and search
with connecting in remote control
⑥ Establish authorization that can Watch-screen by particularly
channel in monitoring screen or remote monitoring.
Receiver Configuration
Setup in case of connected camera that includes P/T/Z function to DVR
System.
Move to [configuration>receiver]
①
②
③
1. Offered P/T/Z Cable establishes Linked COMPORT.
Usually, setup to Com1 or Com2
64
Surveillance Mode
2. Select P/T/Z camera or receiver's kind.
3. If actuality value does not coincide with established value, P/T/Z
does not act.
4. Setup receiver address.
Establish address value by 8 if connected camera that have
address 8 to channel 1.
Receiver address is different according to P/T/Z camera or
receiver’s kind, setup with reference relevant manual
Preset Configuration
Setup when camera that has preset function connects to DVR System.
Camera move automatically according to appointed coordinates and
can watch several points.
Notice All P/T/Z cameras do not support preset function. Refer camera
manual about support availability of preset function or inquires it
manufacturing company,
Move to [configuration> preset]
① Select channel to setup scenario in one
output mode.
② Indicate preset number to save or change
present Position.
③ Setup camera position to use P/T/Z buttons.
④ Using addition button
(in left side scenario list register)
Use correction / delete button in case of correct
or Erase preset that is already registered.
65
Surveillance Mode
⑤ Click (if click scenario list preview
screen move automatically to
camera position stored in preset)
scenario beginning button after
confirm whether was registered
properly in left side scenario list.
⑥ If repeat same process moving
by again 2times, user can
Register preset of maximum 32.
Network setup
It is service that can see image in remote place using specification ID
without necessity to make sure IP changed continuously in DVR
System which linked in dynamic IP.
Move to [configuration> network].
Make sure whether was
checked to [TCP/IP server use]
or not. Please check if was
not checked.
① Input ID that subscribed for
DHS service and clicks
[register Dynamic IP User ID]
button.
66
Search Mode
Search Mode
DVR System Plus Search allows users to search by time/date & play
recorded images and audio. Support saving of still image by .bmp
format, printing of still image, watermarked .bmp file of each image.
1
□
2
□
3
□
4
□
5
□
Control Panel
Playback Control Panel
Screen Partition Panel
Data Search Process Panel
Audio Volume Control Panel
67
Search Mode
1
□
Control Panel
Control panel supports function that convert to watch mode or call data
or do various backup function.
Surveillance Mode Button: Converts to surveillance mode.
Date Search Button: Search recorded image of other date by
pening calendar
Save Button: Save still images of selected channels (bmp)
Print Button: Print image of selected channels.
Watermark Viewer Button: Run Watermark Viewer to view
watermark of recorded original image.
AVI Backup Manager Switch Button: Switch over AVI Backup
Manager Mode Refers to 73page for more detailed operation.
Backup Manager Switch Button: Switch over backup Manager
Mode that can backup important data to Hard or CD
Convert to Backup Manager Mode that can backup important data
to HDD OR CD.
68
Search Mode
2
□
Playback Control Panel
Playback Button: Playback
Pause Button: Pause playing
Reverse Playback Button: playback reversely
2x Playback Button: Playback 2x speed.
4x Playback Button: Playback 4x speed
2x Reverse Playback Button: Playback reversely 2x speed.
Play Next frame Button: Playback frame by frame
Previous frame Reverse Button: Reverse Playback frame by frame
Playback Mode supports 4 channels or 1 channel viewing mode.
3
□
Screen Partition Panel
Support 8 kinds of various screen partition display.
4
□
Data Search Process Panel
Hour Select Button
In recorded data of selected hour is indicated in red color.
Daily Search Bar:
Recorded data is indicated in red. Daily search (0h:0m~23h:59m)
69
Search Mode
Search point indication icon
By moving your mouse with left house button pressed, you can
conduct quick searches with search bar.
Hour
Indicate time to search at present.
Ref To search data quickly, drag Search point icon to left or right after
clicking pause button.
5
□
Audio Volume Control Panel
Control audio volume when replay of recorded data.
In case of recording audio on many channels, volume
control must be set individually.
Calendar
Click the button of Search [Load Data].
Red Color: Indicate date having recorded data
Blue Color: Indicate date that mouse clicks
Gray Color: indicate not having recorded data
MD ONLY Button: Load Motion Detected data only.
LOAD Button: Load data of selected date from calendar.
70
Search Mode
Method of print current image
Click Button [Print] of Search.
Print Channel: Select channel for printing images.
Option: Print image with Caption or select Print Option. Caption
indicates Channel number and recorded time, place is not be indicated.
Print Type: Setup Print layout.
Watermark Viewer ICON
Open saved .bmp file to check if there is any image tampering & check
if watermark is identical with original image.
Ref Watermark is the skill to prevent illegal-copy and to protect
effectively license and ownership of data owner. This digital watermark
does not interrupt to watch image and use s/w at all. Also, watermark
is very effect to find the source of original copy and the course of
reprint.
71
Search Mode
①
Click search's [WaterMark
watermark viewer.
Viewer]
button
and
executes
② Click [file> Open] and call image which is stored to DVR System.
Ref (image must be .bmp file format)
③ Click WM Detect to check if the image has been tampered.
An image that has been tampered will illustrate an “X” in User
Defined Mark as shown below.
72
Search Mode
Digital Zoom function
Digital Zoom is function that can expand specific part of image that is
revived in DVR System Plus Search.
① Select clicking specific part of recorded image in DVR System
Plus Search.
② If you roll mouse wheel, image is maximized up to x4 zoom.
(wheel mouse must be used).
73
AVI Backup Manager Mode
AVI Backup Manager Mode
AVI Backup Manager converts the recorded data into AVI file format to
replay the
Image conveniently using Windows Media Player.
Click [AVI Backup Manager] from DVR System Plus Search Mode or
desktop.
1
□
2
□
3
□
4
□
5
□
Playback Control Panel
Channel Panel
AVI Convert Control Panel
Audio Volume Control Panel
Data Search Process Panel
74
AVI Backup Manager Mode
1
□
Playback Control Panel
Playback Button: Playback
Pause Button: Pause playing
Reverse Playback Button: playback reversely
2x Playback Button: Playback 2x speed.
4x Playback Button: Playback 4x speed
2x Reverse Playback Button: Playback reversly 2x speed.
Play Next frame Button: Playback frame by frame
Previous frame Reverse Button: Reverse Playback frame by frame
Playback Mode supports 4 channels or 1 channel viewing mode.
2
□
Channel Panel
Select channel you wish to convert into AVI File using mouse. Click one
more to cancel the selection.
75
AVI Backup Manager Mode
3
□
AVI Convert Control Panel
Selected channel data is converted into AVI File.
Setup Backup Time: Setup backup time to AVI File. Click [A->B] icon
to setup start time and click one more to setup end time..
Convert into AVI File: AVI File backup starts
4
□
Audio Volume Control Panel
Control audio volume when playback of recorded data.
If various channels have recorded, only selected channel
can be replayed.
5
□
Data Search Process Panel
Hour Button: Recorded data of selected hours is indicated in red color.
Minute Bar: Minute of recorded data is indicated 0~59min and
recorded data is indicated in red color.
Search Mark Icon: It points the time on-searching.
Time: It indicates the time on-searching.
76
AVI Backup Manager Mode
Application
Backup to AVI File
Click [AVI Backup Manager] from DVR System Plus Search or desktop
to operate AVI Backup Manager.
① Click [Load Data] icon then Calendar
window appears.
② Select the date you wish to back up, and
click [LOAD] icon.
③ Select the channel you wish to back up in
Channel Icon. Channel icon turns green
when selected.
④ Enter the time you wish to start backup from Time Bar. Recorded
data is indicated in red.
⑤ Click the start time and click [AÆB] icon. Then start time will
automatically appear.
⑥ Click the end time and click [AÆB] icon.
Then end time will automatically appear.
⑦ Click [Converting] icon after entering the limits of the
backup time in reference.
Start Backup to AVI File after selecting the location
of the directory to backup data and clicking [OK].
Windows prompt message indicating AVI Converting End will
automatically appear. You have successfully converted your data
for storage.
77
AVI Backup Manager Mode
Ref The backup time converted by AVI Backup Manager is less than
one hour. Therefore, when the time between start and end is less than
one hour, backup data time indicates.
Play Backup Data using Windows Media-Player
AVI File which is backup with AVI Backup Manager uses our own
codec. Accordingly, if playing backup data in uninstalled DVR Software
computer, it requires installing our own codec the first. Our installation
CD includes this codec. If you don’t’ have installation CD, please
contact DVR dealer.
Notice Please Install our own codec at the end. It may cause problem
to play if other codec is installed.
① AVI Replay all AVI format data using your Windows Media Player.
② Media Player should replay stored data as seen below.
78
AVI Backup Manager Mode
79
Backup Manager
Backup Manager
Recorded images from DVR System Plus can be managed efficiently or
quickly backup to CD or Hard Disk.
REF CD Backup is supported in minimum Windows XP.
1
□
2
□
3
□
4
□
Data List
Control Panel
Backup List
Backup and Progress
80
Backup Manager
1
□
Data List
Recorded data from DVR System indicates in the
order of [Record location>Record Date>Record
Channel>Record Time].
2
□
Control Panel
This panel can control backup data. Backup data can
be added or removed.
① Transfer selected data from Data List to Backup
List.
② Remove selected data in Backup.
③ Remove all selected data in Backup List.
④ Start [AVI Backup Manager].
⑤ Start [DVR System Plus Search].
⑥ Start or Stop to backup
3
□
Backup List
It lists backup data. Name of data
file will be formed into as follows,
please refer to when add or
remove data.
00 - 200501281533-0000.IVA
Ch Year/Mon/Date/Hour/Min File
No
Ref Channel will be marked as
00ch~15ch.
81
Backup Manager
4
□
Backup and Progress
It indicates backup folder directory and backup progress.
① Select folder to backup data.
② If backup to CD, select CD-RW device and set up option. For more
information, please refer to 87page.
③ Indicates folder to backup data.
④ Indicates total size of backup List data.
Ref One CD can storage maximum 700MB, so when backup to CD,
need to check backup size.
⑤ Indicates free size of Hard Disk.
⑥ Indicates backup progress when click [Start Backup] to start
Application
Backup to HDD using Backup Manager
Click [Backup Manager] from DVR System Plus Search or desktop to
operate backup manager.
① Select the date and time you wish to backup from Data List.
E.g. Indicates 2005/ 01/ 28/ CH 1 15o’clock.
Click [>>] button and move selected
data to Backup List.
③ Check Backup Size and click [Select
Backup Folder] button and set up folder
to backup.
④ Click [Start Backup] button, then start
backup.
Ref Backup data is not able to
overwrite in DVR System, and then it is saved with occupied Hard
Disk storage. Therefore, the record time would be shorter.
②
82
Backup Manager
Backup to CD using Backup Manager
Click [Backup Manager] from DVR System Plus Search or desktop to
operate backup manager..
Notice CD Backup can be supported in minimum Windows XP.
Select the date and time you wish to
backup from Data List.
E.g. Indicates 2005/ 01/ 28/ CH 1
15o’clock.
② Click [>>] button and move selected
data to Backup List.
③ Check backup size and click [CD
Backup] button.
①
④ From Select CD Backup Device(Picture ①), select CD-R or CD-RW
device.
⑤ Check [Contain Backup Player] option.
Ref [Contain Backup Player] is an option for including Backup
Player when backup to CD. This is necessary for playing CD at the
other place. Therefore, we recommend checking [Contain Backup
Player]..
⑥ Click [Start Backup] button, then start backup.
Ref Error Message.
There is no medium in the burner
There is no CD inside CD-RW drive
If you want to backup CD. Please reboot or end process
‘imapi.exe’
Reboot PC or stop ‘imap.exe’ by force from Windows Task
Manager.
Set CD recorder failed - Conflict with CD-RW settings
83
Backup Manager
Not Enough HDD Disk Free Space to Create CD IMAGE
HDD must have enough free space to CD backup data onto
CD.
The call failed because IMAPI has not bean opened with Open.
Your Operating System (OS) does not support issues, please
contact your local DVR dealer.
84
NetClient Mode
NetClient Mode
NetClient Program is able to receive images from DVR Server using the
Internet. NetClient functions: Display & recording, camera control from
remote site and other features that we will illustrated in this document.
1 Control Panel
□
2 Screen Partition Panel
□
3 P/T/Z Control Panel
□
4 Channel Type Selection Panel
□
5 Other Panel
□
85
NetClient Mode
1
□
Control Panel
The Control Panel can search program, open connection setup and
record server image from remote PC where NetClient is installed.
Search Button: Runs search program
Connection Setup Button:
Run [Connecting & Configuration Management] used for internet
access. Run [Modem Connection] used for internet access.
Remote Connection Setup Button:
Connect with DVR System and set up from remote site.
Recording Button: Save selected channels.
All Button: Select all channels to record.
2
□
Screen Partition Panel
Support 7 kinds of various screen partition,
also can establish function such as
full-screen and sequence rotation display mode.
86
NetClient Mode
3
□
P/T/Z Control Panel
When DVR Server is using P/T/Z camera,
select channel you wish to control and click various
buttons from P/T/Z Control Panel to control camera.
Also, it enables to control play speed of image using
below drag panel.
Ref Only broadband Internet users [LAN Mode] can
use P/T/Z control.
Modem users [Modem Mode] cannot use this feature
4
□
Channel Type Selection Panel
Click specific channel from Camera Selection
Panel to enlarge and view image
5
□
Other Panel
Modem: Select [MODEM] when using Modem
LAN: [LAN] when using ADSL, VDSL, Cable, LAN etc. and network
speed is rapid
Record Image: Save one frame image from on-playing image.
Print: Print image from on-playing image.
Connection Setup for LAN Users
If users PC have already connected with LAN, it will
automatically setup LAN.
Click [LAN] icon from NetClient Main Screen to
connect from remote site using LAN.
87
NetClient Mode
Connection Setup for Modem Users
Click [MODEM] icon from NetClient Main Screen to
connect from remote site using Modem.
Click [Configuration] button to run [Modem Connect]
window
[[Modem Connect] window is initialized. Insert
Telephone No.(Insert the number assigned to DVR Server. Insert
‘w’ and Telephone No. to add the waiting time while the line is
being dialed.
E.g. (w0232851525), ID
& Password, (Insert the
ID & Password which is
registered in the Server
Program, [User
Management].) Select
the camera channel
number and click
[Connect].
Ref you can only access one channel at just one time using
Modem. In order to change into different channel, click
[Disconnect] and try to connect the other channel again.
Configuration
The modem model
name will appear
when you click
[Configuration].
During initial setup,
the Model Name
needs to be confirmed to complete registration, thereafter, this step
will be bypassed.
Click [Properties] to view General/Advanced default setup. Use
default when use of modem.
88
NetClient Mode
DVR System Fixed IP Registration
If DVR System has fixed IP, it is able to connect
with DVR System directly.
① Click [Configuration] from NetClient Main Screen.
② Click [Fixed IP] Tap.
③ Insert Server Name and IP Address.
Users can make Server name.
Port is [20408] if default port has not changed.
④ Put an IP account which is registered to DVR System.
For information of Registration and Management, please refer to
89
NetClient Mode
45page.
90
NetClient Mode
⑤ Register inserted DVR System to fixed IP List.
⑥ Registered DVR System content appears.
DVR System DHS Service Registration
If DVR System has Dynamic IP, DHS Service is required
to use
① Click [Configuration] from NetClient Main Screen.
② Click [Dynamic IP] Tap.
③ Insert DHS ID and Port.
DHS Service ID means specified ID which is registered to DHS
Service.
It is not related with DVR System accounts.
Port is [20408] if default port has not changed.
91
NetClient Mode
④ Put an IP account which is registered to DVR System.
⑤ Register inserted DVR System to fixed IP list.
Ref Summary of DHS Service
All computers have their own addresses and we call them IP. Our DVR
System Plus supports remote control by using IP of Internet. On the
same principle as mail delivery after sorting according to address in
Post Office, many computers are able to communicate through IP
address using Internet. Using this feature of Internet, our DVR System
Plus supports various network function for search and setup
configuration from remote site etc.
There is a problem that IP can changeable. Due to short of IP address
worldwide, most of all telecommunication companies use procedure
that sharing IP address with many computer in order of connection.
Therefore it is highly possible that computer IP address change every
time they connect Internet. If IP address changes, we can lose the
address to contact DVR System..
DHS Service is the one System to overcome this Internet environment.
DHS is checking the IP per 10 minutes to maintain the remote control
regardless of DVR System IP Changing. Even though remote users
don’t know DVR System IP address, they can connect with DVR
System using DHS Service which is like mediating between remote
users and DVR System. So they can use network functions from any
where without any interference by changing IP address. This is DVR
Network Service.
92
NetClient Mode
Connecting & configuration Management
① Connect Management
Set up each channel to connect.
② Connect Button
Click [Connect] button to connect with each channel
[Server Name] indicates registered DVR Systems to Fixed IP /
Dynamic IP.
③ All Connect Button
Connect all channels of DVR System.
④ Information
Indicates information of selected DVR System.
⑤ Indicates statues of connection.
93
NetClient Mode
Management of group
Group Connection enables users to connect to various DVR Systems
with one click.
① Group List
Indicates registered group list.
② Server List
Lists registered DVR System to Fixed IP / Dynamic IP Tap.
③ Channel
It indicates channels which are able to connect with selected DVR
System from Server List. Users can set up directly.
④ Add server in Group.
Add selected channel from server in selected group.
94
NetClient Mode
Advanced
① Store Disk List
Check (√) HDD to use as recording device
Notice If data is recorded on HDD (Operating System installed), it
may cause unstable status by lack of store space. Recommend to
disable C drive (Operating System installed) as recording device
and use other drives (D, E).
② Overwrite
Setup overwrites to delete the oldest data when free HDD is lesser
than minimum free space allowed.
95
NetClient Mode
③ Screen Mode
Dual Monitor: Setup this option when use of Dual Monitor function
supported from some graphic card.
YUV/RGB: Setup YUV or RGB. YUB Mode is fewer loads than
RGB Mode. If you are not able to view the images using YUV
Mode, update the Graphics Card Driver and if problem persists
check whether the Graphics Card supports YUV Mode.
Transmission Mode
① Setup Image Quality transmitted from DVR Server.
Network transmission speed will be decreased as you increase the
image quality due to file size.
96
NetClient Mode
② Transmit Mode
Remote Mode: Setup when use of NetClient from external network.
Frame is decreased to improve transmission speed.
Local Mode: Setup when use of NetClient from internal network.
Image is displayed regardless of frame speed.
Application
Record image from NetClient
It enables to record images from NetClient PC during surveillance.
① Log in DVR System you wish to surveillance.
② Click mouse left button on the screen you wish
to record and click REC button to record.
Record captured image from NetClient
It enables to save captured images as JPEG File from NetClient
PC during surveillance.
However, WaterMark cannot be supported.
① Connect with DVR System you wish to surveillance.
② Select the image you wish to save with mouse left button and click
[Save] Icon.
③ From [Record File] window, select directory to save and
click [Save] button.
Print captured image from NetClient
It enables to print captured images during surveillance from
NetClient PC. Max 8ch print is available.
① Connect with DVR System you wish to surveillance.
② Select the image you wish to print with mouse left button
and click [print] Icon
③ Setup print shape and channel, click [Print] button.
97
NetClient Mode
Local Search
1
□
2
□
3
□
4
□
Control Panel
Playback Control Panel
Screen Partition Panel
Search Data Process Panel
98
NetClient Mode
1
□
Control Panel
Consist of [Surveillance Mode] icon, [Load Data] icon, [Save Still
Image] icon, [Print Still Image], [WaterMark Viewer] icon.
Surveillance Mode Button: Converts to Surveillance Mode.
Load Data Button: Shows recorded date in calendar.
WaterMark Viewer Button: Runs WaterMark Viewer.
Save Button: Save captured image as Bitmap File.
Print Button: Print captured image using printer.
2
□
Playback Control Panel
Playback Button: Playback
Pause Button: Pause playing
Reverse Playback Button: playback reversely
2x Playback Button: Playback 2x speed.
4x Playback Button: Playback 4x speed
2x Reverse Playback Button: Playback reversely 2x speed.
Play Next frame Button: Playback frame by frame
Previous frame Reverse Button: Reverse Playback frame by frame
Playback Mode supports 4 channels or 1 channel viewing mode.
99
NetClient Mode
3
□
Screen Partition Panel
Support 8 kinds of various screen partitions,
full –screen and sequence rotation display
mode etc.
4
□
Search Data Process Panel
Hour Button: Recorded data of selected hours is indicated in red color.
Minute Bar: Minute of recorded data is indicated 0~59min and
recorded data is indicated in red color.
Search Mark Icon: Points the time on-searching.
Time: It indicates the time on-searching.
Search Data
Click [Load Data] icon from NetClient Search.
Red Color: Indicates that there is recorded data.
100
NetClient Mode
Blue Color: Indicates date that mouse click.
Grey Color: Indicates that there are no data.
MD ONLY Button: Search only motion record data.
LOAD Button: Load recorded data from selected date.
Remote Search
Remote Search using LAN
①
②
.
Click [Search] icon from NetClient.
Click [Remote search] from NetClient Main Screen
③ Select DVR System you wish to connect from [Remote Search]
window.
④ IP and Port will be setup automatically as registered as to
[Configuration>Fixed IP & Dynamic IP].
⑤ Insert ID and Password.
⑥ Select channel you wish to connect. Max 4ch search & playback is
available from remote site using LAN.
⑦ Click [Connect] button.
⑧ If connects properly, indicates the date in red which is recorded in
DVR System.
101
NetClient Mode
⑨ Select the date you wish to search from the above calendar and
click [Load Data] button.
Click hour button in red to load data. The loading time depends on the
bandwidth. It takes 30sec to max 1min
Remote search using Modem
① Click search icon from NetClient.
② Click [Remote Search] from NetClient Main Screen.
③ Insert Phone No. from [Remote Search] window.
④ Insert ID and Password.
⑤ Select channel you wish to connect. Only 1ch search & playback is
available from remote site using Modem.
⑥ Click [Connect] button.
⑦ If connects properly, indicates date which is recorded in DVR System.
⑧ Select date you wish to search from the above calendar and click
[Load Data] button. The loading time depends on the bandwidth.
102
NetClient Mode
Remote Search Main Screen
Remote Search Main Screen is the most same both LAN Mode and
Modem Mode.
(Only1ch search & playback is available from remote site using Modem
1
□
2
□
3
□
4
□
Control Panel
Playback Control Panel
Screen Partition Panel
Search Data Process Panel
103
NetClient Mode
1
□
Control Panel
Surveillance mode Button: Converts to surveillance mode of
NetClient
Local search Button: Search recorded images at NetClient system.
Remote search Button: Search recorded images at DVR System
Save Button: Save images of present selected channel as BMP
Watermarking function is not available.
2
□
Playback control Panel
Pause/Playback Button: Supports pause and playback of
images.
Ref In remote search, 2X, frame by frame playback does not
supported.
Playback speed control: Controls playback speed.
3
□
Screen partition panel
Supports various screen partition.
Ref In remote search, Only 1ch & 4ch
screen partition is supported.
104
NetClient Mode
4
□
Data search process Panel
Hour Button: Recorded data of selected hour is indicated in red color.
Minutes search bar: Minute of recorded data is indicated 0 ~ 59min.
Recorded data is indicated in red color.
Present search time icon: It indicates time to search at present.
Remote configuration
When you click [Remote configuration]
button at main screen of NetClient,
[Remote setting] windows appears.
Click [Connection] button after inserting
information of server system to connect
105
NetClient Mode
Remote configuration>General
① Start Section
Auto start : DVR program is automatically executed when systems
is turned on.
② Max size at starting
DVR program is setup as the exact size of monitor resolution to
prevent display of other program..
③ Exit
Only DVR program shuts down after closing DVR program or the
complete systems shuts down. (Computer power off).
④ Video / Audio setup
Setup camera input type (NTSC/PAL)
NTSC: Korea, USA, Japan, Australia (some region), North America
(some region) etc
PAL: NTSC Regions excluding NTSC area (China, Europe, South
America, etc)
106
NetClient Mode
Channel selection
Select channel for surveillance. Generally, be off channel not to
connected to camera.
Resolution setup
Setup resolution of image. There are low resolution and high
resolution.
Ref NTSC – 320X240, 640X480
PAL – 360X288, 720X576
Remote configuration>Store
① Store disk
Indicates installed HDD drive to record (removal HDD is not
indicated)
(Check (√) HDD to use as recording device)
Notice In case of picture is stored in hard-disk which has operating
system, if hard-disk will be full, system can be shut down or repeat
rebooting.
107
NetClient Mode
② Disk information
Indicates information of HDD selected in store disk.
③ Overwrite
Setup overwrite to delete the oldest data and record new data
when free HDD is lesser than minimum free space (default: 1024
MB) allow.
Notice In case of using Overwrite function, the oldest data will be
deleted without any warning notice about lack of disk capacity.
It is important to store important recorded data after backup
through [Backup Manager] program.
④ Record setup
It supports record or non-record per channel.
Remote configuration>Network
It displays network configuration status of server system.
Ref Change of configuration is not available.
108
NetClient Mode
Remote configuration> Maintenance
① Windows information
It displays information Windows and system of DVR System
② DVR version information
It displays board model and version of DVR System.
③ System maintain
When DVR System Plus starts, it checks file and image data of
DVR System
Normal Check Mode: This check for video data index and
program files.
Full Check Mode: System integrity is added from the normal
check mode so the duration time can be slow.
④ System auto reboot
It setup specific time to automatically reboot system for checking
system maintenance or Windows stability.
109
NetClient Mode
Remote configuration>Event
① Sensor input
Check [Enable the sensors] and configure the channel of camera
and sensor input channel.
Ref Sensor type
NO (Normal Open)
Switch of NO type sensor is usually opened. When motion is
detected, sensor works by closure of switch. There does not
need to configuration at this configuration..
NC ( Normal Close)
Switch of NC type sensor is usually closed. When motion is
detected, senor works by open of switch. When you use NC
type sensor, click [NC] button below sensor number.
② Action
When sensor is triggered, it supports operation of DVR
automatically.
110
NetClient Mode
Enable event recording
⑤ When sensor is triggered, images of selected channel are
recorded by [duration time: establish in ⑤].
Enable the warning sound
When sensor is triggered, sound of selected wave file rings which
is established in ④]
Send e-mail at detection
When sensor is triggered, detected image is transferred to e-mail
address which configured at [Configuration>E-mail] in DVR server
system.
③ Enable the digital output
When sensor is detected, various output devices such as warning
light, siren, warning speaker works.
Remote configuration>E-mail
111
NetClient Mode
① Mail server
Input IP address at of sender.
Ref Although E-mail function supports almost all mailing service,
some mailing service is not available for E-mail function.
② Sender
Input name and e-mail address of sender.
③ Message recipients
To: Input e-mail address of recipient.
CC: Input e-mail address of other recipient
BCC: Input e-mail address for Blind Carbon Copy.
④ E-mail time setup
Setup email response time after sensor has been triggered
112
WebClient Mode
WebClient Mode
WebClient can receive the images from remote site & view through the
internet without installing any other program.
1
□
Display mode
There are two modes available: [YUV Mode]
& [RGB Mode].
Ref If you are not able to view the images
using [YUV Mode], update Graphics card
driver and if problem persists, check whether the Graphics card
supports [YUV Mode] and if not , select [RGB Mode].
113
WebClient Mode
2
□
Screen Mode (Ch Split)
There are 7 variation of screen partitioning
that is supported according to camera number
.
3
□
P/T/Z Control panel
When you use P/T/Z camera at remote site,
select channel to monitor. You are able to
control P/T/Z function clicking each P/T/Z
button. When you control drag bar at below of
control panel, you are able to setup play
speed of image.
4
□
Connection
All connect: It is available to connect all channel at one time.
If you wish to specific channel from server, you click channel you want
to view.
Connection to DVR systems (Static IP)
Insert the Server IP address in
Internet Web browser.
E.g.
Insert
http://61.107.32.82:26540 if
the server IP address is
61.107.32.182.
114
WebClient Mode
Message as above will appear if this is your first time connecting
through Internet Web browser. Click [Yes] button and it will take a few
seconds to load the WebClient program.
When [Log-in] windows executes, insert ID and Password setup at
server and click [Connect] butt.
115
WebClient Mode
Connection to DVR system which is registered DHS Service
Click [Log in] button after inserting DHS ID at [ID]. DHS ID has to be as
same as used at registration of DHS service.
REF Message as above will appear if this is your first time connecting
through Internet Web browser. Click [Yes] button and it will take a few
seconds to load the WebClient program.
After program is installed, IP and port is
inserted automatically. Insert ID and
Password at [Log in] and [Connect] button.
ID and Password is as same as used at
registration of DHS service.
116
Compatible / Incompatible
Compatible / Incompatible
DVR System Specification
Minimum Spec
Select
S
H
HP
Recommendation Spec
CPU
RAM
CPU
RAM
1.7Ghz or
higher
1.7Ghz or
higher
2.4Ghz or
higher
128 MB
or higher
256 MB
or higher
512 MB
or higher
1.7Ghz or
higher
2.4Ghz or
higher
2.4Ghz or
higher
256 MB or
higher
512 MB or
higher
512 MB or
higher
DVR System Plus
Compatible
CPU
Mother
board
Intel Pentium Process
(x86, 1.7Ghz Over)
- Intel Celeron 1.7Ghz or
Higher
- Intel Pentium IV
- AMD Athlon XP
With one or more PCI slot,
supporting Intel Pentium
processor
- Intel 81x Chipset
- Intel 84x Chipset
- Intel 85x Chipset
- Intel 86x Chipset
- VIA KM400
<Mother board name>
- Chaintech CT-9LIF3
- Chaintech CT-9LIF7
- Chaintech CT-9EJL2 SE
- Chaintech M845GV
- Albatron PX865PE Pro
- GigaByte GA-8GE800Pro
- GigaByte GA-8GEM667
- Gigabyte GA-8IG1000MK
Incompatible
Lower than Intel Pentium
1.7Ghz Process
- Other than x86
Intel CPU/ Via Chipset
(694x & 694tx Series…etc)
Intel CPU/ SIS Chipset
- Gigabyte 81845GVM-RZ
(Intel 845 Chipset)
- Cyrix C3 Motherboard
- MSI Neo2
(Intel 865 Chipset)
117
Compatible / Incompatible
- ASUS P4P800
VGA
(Graphi
c Card)
Sound
Card
HDD
OS
With 16MB or higher
memory, Supporting 32Bit
Color and YUY2 DirectX
Mode
- ATI Expert 2000 32MB
SDRAM
- ATI Radeon Series
- nVidia Riva TNT2 Series
- nVidia Geforce Series
- Intel 845G/GL Graphics
controller(OnBoard)
- Intel 865G Graphics
controller(Onboard)
- Intel 81x Graphics
Controller (On Board) or
Intel i740
- VIA Chipset Onboard
Graphic Controller
- SIS Chipset Onboard
Graphic Controoler
- GeForce 4 MX440 AGP8X
- ATI Radeon 7000, 9600
Intel CPU/ Via Chipset
Board
- Gigabyte 81845GVM-RZ
(Intel 845 Chipset)
HDD 5400RPM or higher
Windows XP(Professional,
Home)
Windows 2000
Series=(Real Display DVR
driver must be installed
manually)
Windows 98 Series
Windows ME
Mac OS
OS/2
118
Compatible / Incompatible
NetClient
Compatible
CPU
Motherb
oard
VGA
(Graphi
c Card)
Sound
Incompatible
All CPU Compatible
All Motherboard compatible
excluding the noncompatible part
SiS, Via chipset
motherboard
All Graphic Card compatible
excluding the noncompatible part
-When use of Onboard SiS
or Via chipset motherboard
- SiS, Via chipset
motherboard
Card
All PCI slot and Onboard
type
HDD
All 5400RPM or higher HDD
OS
Windows XP
recommend(Professional,
Home)
Windows 2000 Series
Windows 98 Series
Windows ME
* Direct x8.0 or higher is
necessary
Mac OS, OS/2
119
Appendix-1
Before operating DVR System Plus…
After installing DVR System Plus, there will be shown Easy Setting
window which help basic setup.
1) Camera Setup: Set up cameras which are being connected
with DVR System.
A. Video Mode: Select Video Mode of connected
cameras.
Ref NTSC: North America, Korea, Japan
PAL: Europe, other countries
B. Camera Resolution: Select camera resolution.
Generally, high resolution (640x480 or 720x576) has
good quality but occupy more space of store disk.
C. Connected Camera Setup: Check the channels which
are connected with camera.
120
Appendix-1
2) Recording Device Setup: Check HDD to use as recording
device.
Be sure to check the HDD which has free space to record.
Avoid checking HDD which have Operating System.
If checking HDD which have Operating System, it will be
unstable due to lack of storage.
Notice If not check any HDD, [C:Drive] will be default.
We recommend to make 2 more partition in HDD.
3) Enable Windows Lock: Check when wish to restrict some
window shortcut or the other function except DVR Program
due to security reason.
If check this function, it is unable to use following functions.
Windows Function
Enable
Windows Lock
Screen
Hide
Start Button
Hide
Desk Bar
Hide
System Clock
Hide
Alt+Tab
Task Switching Keys(Alt +
Tab)
Unable to use
Unable to use
Task Manager
Unable to use
Ctrl+Alt+Del
Unable to use
Ctrl+Shift+Esc
Unable to use
4) After completing setup, click [Next] button at the bottom of
right.
Start operating DVR System, Plus.
121
Appendix-1
Windows Lock
It is enable to setup [Windows Lock] at [Configuration>General].
If check this function, it is unable to use following functions
Windows Function
Enable
Windows Lock
Screen
Hide
Start Button
Hide
Desk Bar
Hide
System Clock
Hide
Alt+Tab
Unable to use
Task Switching Keys(Alt + Tab)
Unable to use
Task Manager
Unable to use
Ctrl+Alt+Del
Unable to use
Ctrl+Shift+Esc
Unable to use
122
Appendix-1
Setup PTZ
DVR System Plus support PTZ Camera.
It is enable to setup Protocol and Camera Address for each
channel.
① Select the channel which is connected with PTZ Camera.
② Setup Camera Address of the PTZ Camera. General Camera
Address can be controlled among 0~255. Refer to Camera manual
for the method of setup camera address as it is different from
manufacturer and kind of cameras.
③ Select Serial Port which is connected with PTZ Camera.
④ Select Protocol of PTZ Camera.
⑤ If coordinate of camera move as left/right or up/down, check
option and correct it.
⑥ Click [Apply] button and complete PTZ Setup.
⑦ If wish to set up PTZ Camera which is connected to other
channel, repeat the same step as above ①~⑤.
123
Appendix-2
Dial-up
In case event occurs, DVR System Plus can achieve action that call to
telephone number that is selected
Only, DVR System has Modem that should be support Windows XP or
Windows 2000.
Caution In case this function is acted, telephone charges are
added.
① Input telephone number without ' - '.
② Specify interval of transmission.
In case event occurs, according to interval that is setup call phone.
③ In case it is inter phone, must use outside line number. Outside line
number is different in each inter system, it needs to ask to administrator.
④ If choose [Enable the Dial Up] In the
[configuration>event>motion detection],
according to appointed time, interval and
telephone number, call phone.
Ref Voice warning and statement do not
delivery.
124
Appendix-2
Smart Search
It is function that motion has searched time that is for movement of the
segment when user selects specific segment in recorded image.
① When use Smart search, after
press the Pause button in the
channel you want to use, click the
right button of mouse and then click
the Enable Smart Search.
Ref Return to Search mode again by
click 'Disable Smart Search' by
same method after using SMART
search.
② Designate area to sense motion by click left button of mouse.
(If click right button of mouse, designated area is canceled)
③ Move Time Point to time zone to search.
125
Appendix-2
④ After move Time Point to time to begin search, click “Start file”
⑤ After move Time Point to time to end search, click “Last file”
⑥ Select sensitivity to sense motion. Sensitivity is divided into 20 steps
and it is getting higher as number
⑦ Select option that stops searching whenever motion is detected and
then show relevant screen.
In case of not being selected, search screen from beginning-time to
end-time in regularly.
⑧ Start Smart Search.
⑨ when setup the Stop Mode, use Smart Search.
⑩ After end of search finally, when wish to watch screen which is
already searched in Search Mode, use Smart Search.
Support the time that motion is sensed with function such as Playback /
2xPlayback search and Reverse Playback so on in Search Mode.
126
Appendix-2
Auto-reconnection function
When the server is shut down and re-booted again, the Netclient
program is automatically reconnected. The interval of reconnection trial
and the trial number can be configured.
This function is applicable in circumstance such as below.
9 When camera off in moment due to disconnection of camera cable in server
9 Disconnection of network in moment by change IP in dynamic IP system.
9 When network is disconnected frequently in Server or Client due to not good
the condition of network
127
Appendix-2
9 When Server system is reboot or off
① Decide to use Auto reconnection function or not.
② Setup frequency to try Auto reconnection.
③ Control time interval when try Auto reconnection
Ex In case of setup 1mitute, try to Auto reconnection in every 1minute.
④ In case of disconnection, Auto reconnection is executed
automatically according to time interval designated.
128
Appendix-2
Auto-switching display function
It is function that switches image which is connected in Remote
Surveillance Mode of Net Client. Auto-switching display has the method
same as server function.
① Click the button of Switching Display and
then image is showed by switching according to
designated time.
② Can setup time interval of switching display
by second in [Connecting&Configuration Management>Advanced]
129
Appendix-2
AVI Backup
AVI Backup function is added new in NetClient v3.1 build 0715a.
Using method and composition are that click AVI
Backup Manager Button after getting into search
mode by clicking DVR System Plus's Search
button.
130
Appendix-2
Web Client Change (Windows XP Service Pack 2)
The WebClient of v3.1 build 0715a Version gets the Certification from
Thawte which is certificating company of ActiveX.
So, WebClient program can be freely accessed without any additional
procedure when using Windows XP SP2.
① when connect to DHS Service or DVR Server at first time in
Client PC which is setup Windows XP Service Pack 2, can see the
warning of setup Active X like above picture. Click the yellow bar of
top portion and select 'Install ActiveX Control ...'.
② Ask to you install s/w or not with message “ActiveX that is
certificated with WebClient like above. Click Install and setup WebClient.
131