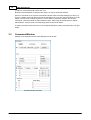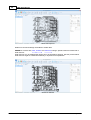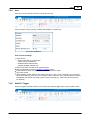
1
DMC User Manual
© 2015 Direct Machining Control
DMC User Manual
DMC - Software For Laser Machines
by Direct Machining Control
Direct Machining Control provides software to control laser machines. It is
an all-in-one solution where you can:
Draw simple laser machining recipes or import CAD files
Create complex automated recipes for your laser machine
Control the hardware including galvo scanners and stages
Use camera for sample view and recognition
Once you are ready, click RUN and DMC will direct hardware according to
you recipe.
DMC User Manual
© 2015 Direct Machining Control
All rights reserved. No parts of this work may be reproduced in any form or by any means - graphic, electronic, or
mechanical, including photocopying, recording, taping, or information storage and retrieval systems for any other
purposes than use together with DMC software - without the written permission of the publisher.
"Direct Machining Control" and "DMC" are trademarks of MB "Cognitio".
While every precaution has been taken in the preparation of this document, MB "Cognitio" assume no responsibility
for errors or omissions, or for damages resulting from the use of information contained in this document or from the
use of programs and source code that may accompany it. In no event shall the MB "Cognitio" be liable for any loss of
profit or any other commercial damage caused or alleged to have been caused directly or indirectly by this
document.
Updated: May 2015
4
DMC User Manual
Table of Contents
Foreword
0
Part I Introduction
7
Part II Activation
9
12
Part III User Interface
1 Ribbon
...................................................................................................................................
Menu
12
Hom e Tab......................................................................................................................................................... 13
Cam era/Vision
......................................................................................................................................................... 14
2 Recipe
...................................................................................................................................
Window
15
3 Command
...................................................................................................................................
Window
16
4 Preview
...................................................................................................................................
Window
17
5 Recipe
...................................................................................................................................
Selection Bar
19
6 Status
...................................................................................................................................
Bar
20
22
Part IV Configuration and Set Up
1 Positioning
...................................................................................................................................
Stages
22
2 Galvo
...................................................................................................................................
Scanners
24
3 Camera
................................................................................................................................... 26
Part V Formulas And Constants
30
Part VI Main Principles
33
Part VII Tools
35
1 Virtual
...................................................................................................................................
Joystick
35
2 Geometry
................................................................................................................................... 39
Im port CAD
......................................................................................................................................................... 39
CAD Object
......................................................................................................................................................... 39
3D Object ......................................................................................................................................................... 40
Slice Repair
.................................................................................................................................................. 42
Gerber Fill......................................................................................................................................................... 45
Gerber Cut
......................................................................................................................................................... 48
NC Drill ......................................................................................................................................................... 49
Line
......................................................................................................................................................... 51
Circle
......................................................................................................................................................... 52
Arc
......................................................................................................................................................... 54
Rectangle ......................................................................................................................................................... 55
Polyline ......................................................................................................................................................... 57
Jum p To ......................................................................................................................................................... 59
Text
......................................................................................................................................................... 59
Points
......................................................................................................................................................... 61
Com m and.........................................................................................................................................................
Settings
62
© 2015 Direct Machining Control
Contents
5
Size
.................................................................................................................................................. 63
Object Position
.................................................................................................................................................. 63
Transform.................................................................................................................................................. 68
Hatching .................................................................................................................................................. 71
Process .................................................................................................................................................. 72
3 Recipe
...................................................................................................................................
Flow
74
Variable ......................................................................................................................................................... 74
3D Printing......................................................................................................................................................... 76
Loop
......................................................................................................................................................... 78
IF
......................................................................................................................................................... 79
Process Param
.........................................................................................................................................................
eters
80
Pause
......................................................................................................................................................... 81
Alignm ent......................................................................................................................................................... 82
Find Focus......................................................................................................................................................... 85
Z Map
......................................................................................................................................................... 87
4 Status
................................................................................................................................... 89
5 Devices
................................................................................................................................... 89
Output
......................................................................................................................................................... 89
Serial Port......................................................................................................................................................... 90
Stiching ......................................................................................................................................................... 91
Axis
......................................................................................................................................................... 93
Wait For Trigger
......................................................................................................................................................... 93
6 View
................................................................................................................................... 94
7 Selected
...................................................................................................................................
Camera
95
8 Camera
...................................................................................................................................
Controls
95
Adjust Cam
.........................................................................................................................................................
era View
96
Autofocus......................................................................................................................................................... 97
Track View
......................................................................................................................................................... 98
Cam era Calibration
......................................................................................................................................................... 98
Part VIII How To..?
102
1 Use
...................................................................................................................................
Camera Alignment
102
Part IX Support
Index
© 2015 Direct Machining Control
115
0
DMC User Manual
Software For Laser Machines
Part
I
Introduction
1
7
Introduction
DMC software created by MB "Cognitio" working under trademark Direct Machining Control is
dedicated to be a single control center for your laser machine. You can design your motion path for
positioning stages and galvo scanners, control laser parameters as well as other devices like power
meters, motorized objective lens turrets, I/Os, serial port devices and others.
All this is done without using G-code. And by skipping the G-code conversion step, everything can
be done quickly and visually.
You are welcome to blast your creativity with DMC, because adapting, fixing, changing and creating
things is easier than ever.
Main features of DMC:
Direct hardware control
WYSIWYG (What You See Is What You Get) window for machining preview.
Support for both: positioning stages and galvo scanners.
Support for stitching (infinite field of view) with galvo scanners and stages.
Import of CAD files (DXF, DWG, STL, Gerber).
Special GUI for a specific task-optimized machine.
Ability to write plug-ins to support your hardware.
© 2015 Direct Machining Control
DMC User Manual
Software For Laser Machines
Part
II
Activation
2
9
Activation
There are several versions of DMC:
DMC PRO (full functionality, except Machine Vision)
DMC Trial (full functionality, limited license time and/or times to run)
DMC Demo (full functionality, hardware works only in simulation mode)
DMC OEM
MV Lite module (camera view integration, manual alignment, autofocus)
MV PRO (MV Lite + automatic alignment)
Demo version does not require any registration or licenses.
All other versions requires license key, file or USB dongle key issued by Direct Machining Control.
On the first run of DMC a Activation window appears.
DMC Activation Window
Please select one of the options:
If you already have purchased a license of DMC with a USB dongle key, select "I have a USB
dongle key" and insert the key. USB dongle key has to be inserted all the time while DMC is
running.
If you already have purchased a license of DMC with a license key:
o Copy your ID key and send it to [email protected]
o When you have received your license key, select "I have a license key" and enter the key.
If you are using DMC for evaluation purposes, send your ID key to
[email protected] to request for a trial license file. When you have received a trial
license file, select "I have a Trial license file" and select the file. On each start you will be
reminded about the remaining duration of the trial license. To upgrade it to full version, contact
© 2015 Direct Machining Control
10
DMC User Manual
[email protected]
© 2015 Direct Machining Control
DMC User Manual
Software For Laser Machines
Part
III
12
3
DMC User Manual
User Interface
A default user interface in DMC is divided in several sections:
DMC User Interface
1. Ribbon menu. In the ribbon menu you can find all the tools available for your configuration.
2. Recipe window. In the recipe window the list of commands in the recipe are displayed in
sequence.
3. Command window. In the command window settings of the selected command are displayed. For
some commands settings are divided to tabs (like SHAPE, HATCHING, PROCESS).
4. Preview window. In preview window the visual representation of the recipe is displayed.
5. Recipe selection bar. In recipe selection bar an active recipe may be selected.
6. Status bar. In the status bar additional information like zoom ratio, mouse position on the preview
window is displayed.
3.1
Ribbon Menu
Ribbon menu. In the ribbon menu you can find all the tools available for your configuration.
Ribbon m enu w hen not connected to hardw are.
© 2015 Direct Machining Control
User Interface
13
Ribbon m enu w hen connected to hardw are.
Ribbon m enu during m achining
Ribbon menu is divided to different tabs:
Home, where most frequently used tools are placed.
Camera/Vision, where camera related tools are placed (only when MV module is installed and at
least one camera is enabled in the settings).
Control, where device control tools are placed, like laser control, measurement device control, etc.
Help where support, bug report and help tools are placed.
In each tab, tools are grouped by their use.
3.1.1
Home Tab
In Home Tab in the Ribbon Menu most frequently used tool groups are displayed.
Ribbon m enu w hen connected to hardw are.
In the Home tab there are following tool groups and tools:
Process
o Connect To Hardware / Disconnect. This tool initializes connection to the hardware enabled in
the settings.
o Compile tool compiles existing recipe commands and displays them in the Preview window.
o Run (available only when connected to hardware). Runs the compiled recipe on the machine.
o Stop (available only when connected to hardware). Stops the running recipe.
o Joystick. Turns on Virtual Joystick, where manual motion of the axes can be performed. For
more information see Virtual Joystick.
Geometry. In Geometry group tools for creating motion path for the recipe are displayed. For more
information see Geometry.
Recipe Flow. In Recipe Flow group recipe logic tools are displayed. For more information see
Recipe Flow.
Status. In Status group current coordinates of positioning axes are displayed. For more
information see Status.
Devices. In Devices group tools directly controlling hardware are displayed. For more information
see Devices.
View. In View group tools controlling preview window are displayed. For more information see
View.
© 2015 Direct Machining Control
14
3.1.2
DMC User Manual
Camera/Vision
Camera/Vision tab in the Ribbon Menu contains camera controls and is available only when MV
module is installed and at least one camera is enabled in the settings.
Cam era/Vision tab, w hen tw o cam eras are enabled
In the Camera/Vision tab there are following tool groups:
Selected Camera. Shows available cameras, zooms to selected camera view and indicates which
camera is selected for control and calibration.
Controls. In Controls group tools to control camera view are located.
Calibration. Calibration group contains tool to calibrate camera view position and size, so it would
match with fabrication trajectories in Preview Window.
© 2015 Direct Machining Control
User Interface
3.2
15
Recipe Window
In the recipe window the list of commands in the recipe are displayed in sequence.
All the commands are executed during machining in the same sequence as displayed in Recipe
Window.
In Recipe Window you can:
© 2015 Direct Machining Control
16
DMC User Manual
Select a command with left mouse click on it.
Move command up/down or delete it with buttons on the top of Recipe Window.
Some of commands act as a parent commands and have child commands belonging to them (e.g.
Cycle is a parent command and all commands included in the cycle are child commands to Cycle).
Parent command has a triangle symbol to it, which allows to expand or subtract view of child
commands. Child commands are also indented to right. There might be several layers of Parent Child relations, with one child command being parent command for others.
To make command a child command, move it up/down below the parent command until it has right
indent.
3.3
Command Window
Settings of the selected command are displayed in this window.
Com m and w indow w ith tabs
© 2015 Direct Machining Control
User Interface
Com m and w indow w ithout tabs
Command settings window may come with some tabs for a more complex commands e.g. 3D
Object. For more information see Command Settings.
3.4
Preview Window
In preview window the visual representation of the recipe is displayed.
DMC Preview w indow
© 2015 Direct Machining Control
17
18
DMC User Manual
DMC Preview w indow
DMC Preview w indow w ith 3D object im ported
Preview window is a WYSIWYG (What You See Is What You Get) window displaying the motion
path of the machining. In some cases additional information like 3D models may be displayed for
better visual reference.
© 2015 Direct Machining Control
User Interface
19
Display
Red lines in the window marks limits of your machining are.
Black lines marks motion trajectories where laser will be firing (marking lines). For 3D Object
command, marking lines are displayed differently for better visual distinction. Orange lines and
cyan lines in 3D Object will be marked as well.
Blue arrows represents jump trajectories, where laser is off and no machining is performed.
Grey dot represents current laser position. When no motion is performed it is in 0;0;0 position.
Red dot represents current laser position and that laser fire is on.
Coordinate system axes are represented by red (X), green (Y) and blue (Z) lines of 1 mm.
Controls
Preview window is controlled with tools in Ribbon menu View group or mouse and keyboard.
To select an object, click on it with left mouse button.
To move the view, drag it with right mouse button or use keyboard arrow keys.
To rotate the view, click middle mouse button and rotate view while holding it.
To zoom in/out use mouse wheel or use Page Up / Page Down keys.
To zoom to object press Home key.
To reset view, press End key.
Select and drag
Objects can be selected and dragged (repositioned) with mouse. Select object by clicking left
mouse button on it. Mouse pointer will be moved to the closest snapping point of the object.
Move mouse pointer while keeping the left mouse button down and release at desired position.
Snapping works only for the selected point of the object.
3.5
Recipe Selection Bar
Recipe selection bar allows navigation between opened recipes and creating new ones.
Recipe Selection Bar
Each open recipe is represented by a separate tab. After selecting different recipe, press compile to
see it in the preview window.
New recipes can be created by pressing
© 2015 Direct Machining Control
New tab.
20
3.6
DMC User Manual
Status Bar
In the status bar additional information like zoom ratio, mouse position on the preview window is
displayed.
DMC Status Bar
Click on expandable list to see the last notifications.
© 2015 Direct Machining Control
DMC User Manual
Software For Laser Machines
Part
IV
22
4
DMC User Manual
Configuration and Set Up
DMC configuration is available at File>Settings.
4.1
Positioning Stages
To configure positioning stages, firstly, enable and configure appropriate motion controller (A3200
from Aerotech or ACS).
Positioning stages can be configured in File>Settings>Hardware>Positioning Stages.
Positioning Stages Settings Window
You can enable axis by checking Enable box.
Generic settings for stages:
Axis letter (name).
Acceleration Mode allows to select whether stage acceleration cure will be linear (even
acceleration) or sinusoidal (slower start and end with steeper increase of acceleration in the
middle).
Max acceleration for jump sets maximum acceleration for jump (no laser firing) mode in mm/s 2
Default acceleration for jump sets a default jump acceleration value which is used for jump
motions.
Max speed sets maximum available speed for that axis in mm/s. If higher value is entered in the
recipe an error message will be provided.
Default jump speed sets a default value in recipes for jump speed in mm/s.
Min/Max position sets the limits of the axis travel. both positions can be positive, negative or zero.
Value is set in mm.
© 2015 Direct Machining Control
Configuration and Set Up
23
Invert axis direction inverts coordinate direction comparing to hardware settings. E.g. if in controller
settings coordinate increases when moving from left to right, with Invert direction checked it will
increase moving right to left.
Home offset sets a new Home position. After homing axes go to a location defined by offset and
sets it as 0;0 coordinates.
Relative motion before homing moves stages a defined distance before homing action.
Home priority sets homing priority for each axis. Axes will be homed starting with priority no. 1
and then moving down the list. In some configurations different homing priorities are necessary to
avoid crashes, e.g. lowering Z axis to not damage focusing lens.
© 2015 Direct Machining Control
24
4.2
DMC User Manual
Galvo Scanners
Galvo Scanner can be configured in File>Settings>Hardware>Galvo Scanner.
Galvo Scanner Settings Window
To enable gavo scanners check Enable at the top of settings window.
© 2015 Direct Machining Control
Configuration and Set Up
25
Settings
Controller Type: set the controller you are using (RTC4/5 or virtual controller).
RTC Card Number: select number of RTC card if more than one is used.
Laser Mode: set the laser mode.
Field Settings:
o SWAP XY Axes, changes X axis to Y and vice versa.
o Invert X, Y direction inverts axis direction (changes positive values to negative and vice versa)
o bits/mm sets your field size / resolution.
o Size X,Y, sets field size in X and Y directions.
o Offset X,Y, offsets 0;0 position by set values.
o Scale X,Y,
o Field Rotation, rotates field around 0;0 position.
Select Lens Correction File sets a lens correction file to use for this scanner.
Default Speed:
o Default Mark Speed sets a default motion speed when laser is on.
o Default Jump Speed sets default motion speed when laser is off.
Delays. See Controller card manual for galvo scanner delay information.
VarioSCAN Settings
o Check Enable VarioSCAN to enable it.
o Min Coordinate sets a minimum VarioSCAN coordinate.
o Max Coordinate sets a maximum VarioSCAN coordinate.
o Invert Z Direction inverts axis direction for VarioSCAN (changes positive values to negative and
vice versa).
RTC5 sets specific RTC5 settings.
© 2015 Direct Machining Control
26
4.3
DMC User Manual
Camera
Camera(s) is configured in File>Settings>Hardware>Camera1(2,3)
Cam era configuration settings General param eters.
Firstly, setup General settings:
1. Check Enable checkbox.
2. Select camera device from drop-down menu. If your camera is not found, check if it is not used by
some other software. DMC supports all cameras with DirectShow drivers and cameras from IDS
(uEye), Basler, Mightex manufacturers.
3. Enter camera name, that will be seen in the commands and Ribbon menu.
4. Select whether to see a cross in the view center.
5. Click Connect to connect to camera.
Next go to Calibration tab to setup Calibration settings:
1. Check camera view, and mark Flip and Rotate checkboxes to adjust camera view to match your
coordinate system.
2. If distance from camera center to laser is known enter it in Camera to Laser Offset.
3. If View Size (mm per pixel) parameters are known enter them as well.
4. If Camera to Laser Offset and View Size parameters are not known, follow calibration procedure.
© 2015 Direct Machining Control
Configuration and Set Up
27
Cam era configuration settings Calibration param eters.
Go to View tab to set camera view default parameters. They can be changed in the Ribbon
menu, but on DMC start, default settings set here are restored. Settings available in this menu is
defined by camera manufacturer.
© 2015 Direct Machining Control
28
DMC User Manual
Cam era configuration settings View param eters
© 2015 Direct Machining Control
DMC User Manual
Software For Laser Machines
Part
V
30
5
DMC User Manual
Formulas And Constants
DMC allows user to enter parameters using mathematical expressions and constants.
Available expressions:
Type
Function
Mathematic +, -, *, /, ^
al
<, >, =
%
sqrt()
abs()
trunc()
round() ; round(value;digits)
min(value1;value2) ; min
(value1;value2;value3)
max(value1;value2) ; max
(value1;value2;value3
ceil()
lg()
ln()
sign(value)
Trigonometr sin(value_in_degrees)
y
cos(value_in_degrees)
tan(value_in_degrees)
asin()
acos()
atan()
atan2(value1;value2)
Unit
inch_to_mm()
conversion
mm_to_inch()
deg_to_rad()
rad_to_deg()
Logical
If(condition;result if true;result if
false)
rand()
swap
(variable_name1;variable_name
2)
Constants pi
e
Description
Add, subtract, multiply, divide, exponent
Less, more, equals
Mod. value1%value2=value1-trunc(value1/value2)
*value2
Positive square root
Returns absolute value
Returns integral part of specified value
Rounds floating point to a specified number of digits or
integer part if not specified.
Returns minimum value of entered
Returns maximum value of entered
Returns the smallest integral number that is greater or
equal to specified
Returns the base 10 logarithm of a specified value
Returns the base e logarithm of a specified value
Returns -1 if value is less than 0 and 1 if value is more
than 0. Returns 0 if value is 0.
Returns sine of specified angle in degrees
Returns cosine of specified angle in degrees
Returns tangent of specified angle in degrees
Returns the angle (in degrees) whose sine is the
specified value
Returns the angle (in degrees) whose cosine is the
specified value
Returns the angle (in degrees) whose tangent is the
specified value
Returns the angle whose tangent is the quotient of two
specified numbers.
Converts inches to milimeters
Converts milimeters to inches
Converts degrees to radians
Converts radians to degrees
Condition is true if value is more than 0. Result can be
any number or mathematical expression.
Returns random number lower than specified value.
Swaps values of two variables
3.141592653589793238
2.71828182846
© 2015 Direct Machining Control
Formulas And Constants
Type
System
Variables
Function
slice_position
© 2015 Direct Machining Control
31
Description
Power value measured by power meter in W
Current X, Y, Z coordinate position of stage (or galvo if
there is no stage)
Z position of current slice
DMC User Manual
Software For Laser Machines
Part
VI
Main Principles
6
33
Main Principles
Recipe creation in DMC is both: feature rich and simple at the same time.
For simple recipes, such as common marking tasks, you can either import CAD file or draw objects
by hand with simple geometrical tools like circle, line, arc, rectangle. Each tool when used becomes
a command in Recipe window. For better precision you can set parameters such as position and
size in Command window.
Motion paths (trajectories) for stages and galvoscanners are created w ith Geom etry tools
For more advanced tasks recipe may be created in a high level logical programming way with Recipe
Flow commands. You can import CAD files or add geometrical objects, set parameters for each.
You can also easily repeat the path by adding cycle command. For more flexibility and automation
Variables can be used for values of the parameters, that can be changed during the flow of the
recipe.
Add Recipe Flow com m ands to create com plex and flexible recipes
All the commands in the recipe are executed in the order top to down.
Some of commands act as a parent commands and have child commands belonging to them (e.g.
Cycle is a parent command and all commands included in the cycle are child commands to Cycle).
Parent command has a triangle symbol to it, which allows to expand or subtract view of child
commands. Child commands are also indented to right. There might be several layers of Parent Child relations, with one child command being parent command for others.
© 2015 Direct Machining Control
DMC User Manual
Software For Laser Machines
Part
VII
Tools
7
Tools
Tools section describes the tools available in the Ribbon Home tab.
Geometry, Recipe Flow and Devices tools adds a command to when used.
Tools:
Virtual Joystick
Geometry
Recipe Flow
Devices
View
7.1
Virtual Joystick
Virtual Joystick (Joystick) is a tool allowing manual control of positioning stages.
Joystick can be accessed through a button in a Home tab in a Ribbon menu.
© 2015 Direct Machining Control
35
36
DMC User Manual
Features of Joystick
Control of X and Y positioning stages. That can be done by clicking X and Y arrows. When
positioning stages are moving arrows turns green. Also it can be done by keyboard: Left/Right
arrow keys for X and Up/Down arrow keys for Y. (See all Joystick Hot Keys)
Control of Z positioning stage. Z positioning stage is controlled the same way as X and Y, just its
keyboard shortcuts are PageUp/PageDown.
Control of Rotary or other linear stages. Rotary stage is controlled by clicking clockwise counter
clockwise arrow buttons on Joystick or by , / . keyboard keys.
© 2015 Direct Machining Control
Tools
37
Controlling speed of positioning stages. Motion speed [mm/s] for the axes can be set in a field
'Freerun/Speed' at the bottom of each axis control. It can be changed by entering a new value,
increasing/decreasing by 1 mm/s by clicking on a small arrow on the right of the field or
increasing/decreasing x10 by clicking on x10 /10 buttons or also using +/- keyboard keys for the
same action.
o Freerun/Speed setting sets a continuous velocity for the motion while motion button is pressed.
o Jog Distance moves axis a defined distance per motion button click with a speed set it Freerun/
Speed field.
Go To allows to move stages to a specific position. By default each axis interface in Joystick has
a white numerical field displaying its current position at the top. When value is changed by user,
field turns blue. Value can be reset to current axis position by pressing Esc on the keyboard.
Motion to given coordinates is executed only when Go To button is clicked. When in motion
position fields turn yellow.
Camera to Laser button moves positioning stages so, that position currently in the center of
camera view would be moved to laser firing position. This function works only when Camera and
Laser source are configured on the system and are not coaxial. If there is more than one camera
configured, a selection of camera used for this function has to be made in Joystick Settings.
Laser to Camera button moves positioning stages so, that position currently under the laser firing
position would be moved to center of the camera view. This function works only when Camera and
Laser source are configured on the system and are not coaxial. If there is more than one camera
configured, a selection of camera used for this function has to be made in Joystick Settings.
Back to Start moves positioning stages to a position in which they were before starting Joystick.
© 2015 Direct Machining Control
38
DMC User Manual
Position buttons (P1, P2, P3, P4) allows user to store some specific frequently used positions
e.g. loading/unloading position. Motion to predefined positions can be executed by clicking on
P1...P4 buttons or pressing position number (1..4) on keyboard for 1.5 s.
Current position can be assigned to button by pressing Ctrl+ position number on keyboard (1, 2,
3, 4) or can be set manually in Joystick settings. In Joystick settings each axis can be enabled or
disabled for each position e.g. if rotary axis is disabled for P1, it will not rotate when P1 is clicked.
Laser Fire button starts triggering laser to fire with current power/frequency parameters. When
laser is firing button turns red. Please wear safety goggles and comply to other system specific
safety requirements when firing the laser.
Home button homes selected axes.
Settings button provides quick access to Joystick settings.
Joystick control Hot Keys:
Action
Keyboard keys
Move X axis
Left / Right
Move Y axis
Up / Down
Move Z axis
Page Up / Page Down
Move R1 axis
,/.
Move R2 axis
Shift+ , / .
Increase motion Speed/Jog Distance x10
*
Decrease motion Speed/Jog Distance /10
/
Increase motion Speed/Jog Distance twice
+
Decrease motion Speed/Jog Distance twice
Camera to Laser
Ctrl+ Q
Laser to Camera
Ctrl+ W
Back to Start
Ctrl+ E
Move to Position 1 (2, 3, 4)
1 (2, 3, 4)
Assign current position to Position 1 (2, 3, 4)
Ctrl+ 1 (2, 3, 4)
Fire Laser
F
Home Axes
Home
Go To
Enter
Move to next Go To coordinate field
Tab
Exit Joystick
Esc
Note: Joystick control Hot Keys are active only when Joystick window is active.
Joystick Settings
Joystick settings allow to set predefined positions for Position 1, Position 2, etc.
Each axis can be enabled or disabled for each position e.g. if rotary axis is disabled for P1, it will not
rotate when P1 is clicked.
© 2015 Direct Machining Control
Tools
7.2
39
Geometry
Geometry tools are used to create motion trajectory commands for positioning stages, galvo
scanners or other motion devices.
Geom etry Tools Group
Geometry commands are added one by one by clicking on the tool in the ribbon menu.
Line, Circle, Arc, Rectangle, Polyline tools allows user to draw shapes by hand. Commands appears
in Recipe Window after drawing it or pressing enter.
Each added command has its own settings that appear in the Command Window.
Geometry tools:
Import CAD
CAD Object
3D Object
Gerber Fill
Gerber Cut
NC Drill
Line
Circle
Arc
Rectangle
Polyline
Jump To
Text
7.2.1
Import CAD
Import CAD command allows user to import DXF, DWG, Gerber, NC Drill, STL, STP, IGS files.
Click on Import CAD button to add CAD file to Recipe. You will be asked to select file to be
imported. Multiple files can be selected and imported.
DXF and DWG files add CAD command to the recipe. More information on CAD Object command.
STL files add 3D Object command to the recipe. More information on 3D Object command.
7.2.2
CAD Object
CAD Object command handles imported DXF and DWG files.
© 2015 Direct Machining Control
40
DMC User Manual
CAD Object com m and w ith a DXF file im ported
Settings for CAD Object command
File. Shows currently imported file path. Click Browse to select a different file.
Size X,Y,Z shows size [mm] of the imported object and allows user to change size for each of the
coordinates. Original size is displayed on the right for the user's reference.
Position X,Y,Z shows position [mm] of the object.
o Absolute sets position in absolute coordinates.
o Relative sets a distance to the last position.
o Original sets position to absolute coordinates position stored in CAD file.
o Reference point determines what part of object (center, top, bottom, left, right, corners) is set by
Position.
Transform allows user to
o Flip object according to selected axis.
o Rotate object [deg] around selected axis.
To hatch an object click on HATCHING tab in Tool Parameters menu. See Hatching for more
information.
To set individual Process Parameters click on PROCESS in Tool Parameters menu. See Process
for more information.
Samples
Open File>Samples>CAD_Object.rcp to see how Absolute/Relative/Original, Reference Point and
Transform settings changes the end result.
7.2.3
3D Object
3D Object command handles imported 3D objects e.g. STL, STP, IGS files. Object can be imported
by clicking on Import CAD button.
© 2015 Direct Machining Control
Tools
41
3D Object command settings are divided into tabs.
3D Object Im ported
To prepare for machining 3D object is automatically sliced along Z axis. Default slicing distance is 1
mm. Please note, that if STL model is not prepared properly, some errors may occur especially in
features that are inside (in the volume of) the model (e.g. not closed contours, single lines). Potential
errors are marked with red dots. See Slice Repair for more information.
SHAPE tab contains File, Size, Position and Transform settings.
SLICING tab contains 3D object slicing settings. 3D objects can be sliced along Z axis to prepare
them for 2.5D machining like engraving or 3D printing.
SLICING settings:
Slice Whole Object, slices whole object when selected.
Slice Part of Object slices selected part of the object. When Slice Part of Object is selected, two
additional parameters appear for:
o Start sets position to start slicing. It is defined by object height in Z direction by millimeters
(mm);
o End sets position to end slicing. It is defined by object height in Z direction by millimeters (mm).
When End of slicing is selected higher than height of the object, whole object from Start to its
top will sliced.
Slicing distance sets the distance between slices in millimeters (mm). First slice is done at the
Slicing height (there is no slice at the very bottom or very top of the object).
Repeat Slice repeats slice including hatching a set number of times. If Repeat parameter in
Process is more than 1, repeat times are multiplied.
Change Hatching Angle by rotates hatching lines by set value in degrees (deg) between each
repetition of slice.
Reset Hatching Angle / Continue From Last defines whether next slice will be started with
hatching angle reset to original value or with the last value of current slice + Change Hatching
Angle by value.
Deleted Slices menu shows a list of slices that are deleted (slices can be deleted in PREVIEW
tab). Selected slice may be restored by clicking Restore Selected Slice button.
To hatch an object click on HATCHING tab in Tool Parameters menu. See Hatching for more
© 2015 Direct Machining Control
42
DMC User Manual
information.
Single slice view w ith hatching enabled.
PREVIEW tab contains model and slices preview menu and allows to repair or delete slices.
Model view button enables and disables Model view.
Multiple Slices view show all of the slice contours, but no more than number set in Max Slices to
Show value. This helps to reduce number of lines displayed and therefore RAM usage. Hatching is
not displayed in Multiple Slices view.
Single Slice view show single slice with its hatching (if enabled). Single Slice view is automatically
enabled when a specific slice is selected either on slider or in Show Slice No.: field.
Show Slice No.: field displays number of currently displayed slice, or lets user enter the number of
slice to display.
Slice Z (mm) shows height of a slice in an object.
Slider and +/- buttons allows user to scroll through slices (mouse wheel or up/down keaboard
keys may be used as well).
Delete Slice deletes current slice from the list and marks it grey.
Restore Slice restores deleted slice if it is selected.
Edit Slice allows user to repair the slice.
To set individual Process Parameters click on PROCESS in Tool Parameters menu. See Process
for more information.
7.2.3.1
Slice Repair
When working with 3D objects, they are sliced and hatched for machining. However, those features
heavily rely on STL model being created properly. There should be no open contours, single line
walls, etc.
In DMC Preview Window, potential errors are marked with red dots.
© 2015 Direct Machining Control
Tools
Sliced STL. Note the red dots in the inside contour in the third slice from top.
To help with badly prepared models DMC has a Slice Repair function.
To Repair the slice:
1. select
plane view, select PREVIEW tab and then select the slice with an error.
Sliced STL. Note the red dots in the inside contour.
2. Zoom in to the error.
© 2015 Direct Machining Control
43
44
DMC User Manual
Slice error
3. Click Edit Slice in the Command Window
a) If it is not closed contour as in example above, click left mouse button on the red dot of the line
you want to change and drag it to the other one or click on the other one. The angle and length of
the selected line will be changed or a new line between too dots will be added to close the contour.
To see contour properly hatched, select a different slice and then get back to current one.
b) If it is a single line, that should be deleted, select one of the red dots and drag it to another.
Since, there is no contour, the line will be deleted.
© 2015 Direct Machining Control
Tools
45
Slice error fixed
4. To restore slice, press Restore or R key.
5. To delete selected line press Delete key.
7.2.4
Gerber Fill
Gerber Fill command handles Gerber files (for PCB production). With Gerber Fill tool Gerber files can
be imported and hatched.
Gerber Fill com m and can be added from Ribbon m enu
To prepare for etching / exposure, object usually has to be hatched.
© 2015 Direct Machining Control
46
DMC User Manual
Gerber file im ported
Gerber Fill command settings are divided to several tabs.
SHAPE tab contains File, Size, Position and Transform settings. Specific feature for Gerber Fill is
Outer Contour.
Outer Contour may be needed when object has to be inverted for hatching. See the pictures below.
Outer Contour might be created automatically or imported as a separate file.
Gerber file hatched
© 2015 Direct Machining Control
Tools
Gerber file hatched (zoom ed)
Gerber file hatched using inversion. An Outer Contour is checked
© 2015 Direct Machining Control
47
48
DMC User Manual
Gerber file hatched w ith inversion (zoom ed)
To hatch an object click on HATCHING tab in Tool Parameters menu. See Hatching for more
information.
To set Process parameters click on PROCESS tab. See Process for more information.
7.2.5
Gerber Cut
Gerber Cut command handles Gerber files (for PCB production). With Gerber Cut tool Gerber files
can be imported and prepared for PCB cutting.
Gerber Cut command settings are divided to tabs.
© 2015 Direct Machining Control
Tools
49
Gerber Cut com m and
SHAPE tab contains File, Size, Position and Transform settings.
CUTTING tab contains cutting settings:
Depth (mm) defines how much Z axis should be moved in total.
dZ (mm) defines Z step size. Note that at each Z position contour will be repeated a number of
times set in the Process tab.
Offset (mm) generates a new contour with a set offset to compensate beam spot diameter. Offset
might have positive or negative values.
To set Process parameters click on PROCESS tab. See Process for more information.
7.2.6
NC Drill
NC Drill command is used to import NC Drill / Excellon files (usually used for PCB drilling) and
prepare them for laser drilling. Only files coded in ASCII are supported (no support for binary coded
files, yet).
NC Drill command settings are divided to tabs.
SHAPE tab contains File, Size, Position and Transform settings.
© 2015 Direct Machining Control
50
DMC User Manual
NC Drill file im ported
NC Drill com m and w ith layer drilling
© 2015 Direct Machining Control
Tools
51
NC Drilling file w ith Helix drilling set
DRILLING tab sets parameters for drilling:
Drilling Type:
o Layer type drills holes step by step (circle by circle) moving Z axis a distance set in dZ between
each layer. In each layer circle is repeated a number of time set in Process.
o Helix type drills holes constantly moving Z axis so a helical pattern is achieved.
Depth (mm) a total depth of the hole (a distance Z axis will be moved).
dZ (mm) a step between to layers in Layer type or a Z distance in which pattern goes 360 degrees
in Helix type drilling.
Offset (mm) defines an ofset for the contour for beam spot compensation. Offset can have positive
and negative values.
To set Process parameters click on PROCESS tab. See Process for more information.
7.2.7
Line
Line tool generates a linear motion command for positioning stages or galvo scanners.
Settings for Line command
Start Position:
o Absolute. Line starts at the position defined in the X1, Y1, Z1 Coordinate fields below. Jump to
that position is generated automatically.
o Relative. Line starts at the current position of the device. No Jump is generated in between. This
option lets easily join different motion commands into one line.
X1, Y1, Z1 Coordinate defines start position of the Line. Available only when Start Position
Absolute is selected.
End Position:
© 2015 Direct Machining Control
52
DMC User Manual
o Absolute. Line ends at the position defined in the X2, Y2, Z2 Coordinate fields below.
o Relative. Line end is set to a distance in X, Y, Z directions from the Line starting point set by X2,
Y2, Z2 Coordinate fields.
Line Com m and Window
Line Com m and. Note the Relative coordinates used.
Samples
Open File: Samples>Lines.rcp
7.2.8
Circle
Circle tool generates a circular motion path command for positioning stages or galvo scanners.
© 2015 Direct Machining Control
Tools
53
Circle command can be added by clicking Circle on a Geometry section in Home tab in Ribbon
menu. It can be drawn manually and/or by entering specific values.
To draw a circle click on a Circle tool and click on selected center point on the preview screen. Size
the radius and click second time to fix the Radius.
To enter command by parameters click Circle tool and press Enter. Enter Position of circle and
Radius in the Tool Parameters menu.
Circle Com m and
Settings for Circle command
Position X, Y, Z sets a position [mm] of the circle.
o Absolute sets position [mm] in absolute coordinates.
o Relative sets a distance [mm] to the last position.
o Reference point determines what part of circle (center, top, bottom, left, right) is set by Position.
Radius sets the radius of the circle.
Start Angle sets the starting position of the motion (0 to 360 deg)
To hatch a circle click on HATCHING tab in Tool Parameters menu. See Hatching for more
information.
© 2015 Direct Machining Control
54
DMC User Manual
Circle Hatching Settings
To drill a hole click on DRILLING tab in Tool Parameters menu.
Drilling Type:
o Layer type drills holes step by step (circle by circle) moving Z axis a distance set in dZ between
each layer. In each layer circle is repeated a number of time set in Process.
o Helix type drills holes constantly moving Z axis so a helical pattern is achieved.
Depth (mm) a total depth of the hole (a distance Z axis will be moved).
dZ (mm) a step between to layers in Layer type or a Z distance in which pattern goes 360 degrees
in Helix type drilling.
Offset (mm) defines an ofset for the contour for beam spot compensation. Offset can have positive
and negative values.
To set individual Process Parameters click on PROCESS in Tool Parameters menu. See Process
for more information.
Samples
Open File>Samples>Circle.rcp to see how Absolute/Relative and Reference Point settings changes
the end result.
7.2.9
Arc
Arc tool generates an arc (part of the circle) motion path command for positioning stages or galvo
scanners.
Arc command can be added by clicking Arc on a Geometry section in Home tab in Ribbon menu. It
can be drawn manually and/or by entering specific values.
To draw an arc click on an Arc tool and click on selected start position on the preview screen.
© 2015 Direct Machining Control
Tools
55
Select and click to set end of arc and its radius.
To enter command by parameters click Arc tool and press Enter. Enter Start Position, Radius and
Start and End Angles in the Tool Parameters menu.
Arc com m and in use
Settings for Arc command
Position Start X, Y, Z sets starting point of the arc.
o Absolute sets position [mm] in absolute coordinates.
o Relative sets a distance [mm] to the last position.
Clockwise/Counter Clockwise allows user to select motion direction
Radius [mm] sets the radius of the arc.
Start Angle [deg] sets starting position of an arc in a circle. 0 deg is on positive X axis.
End angle [deg] sets end position of the arc in a circle.
To set individual Process Parameters click on PROCESS in Tool Parameters menu. See Process
Parameters for more information.
Samples
Open File>Samples>Arc.rcp to see how Absolute/Relative Clockwise/Counter Clockwise and Start/
End angle settings changes the end result.
7.2.10 Rectangle
Rectangle tool generates a rectangle motion path command for positioning stages or galvo
scanners.
© 2015 Direct Machining Control
56
DMC User Manual
Rectangle command can be added by clicking Rectangle on a Geometry section in Home tab in
Ribbon menu. It can be drawn manually and/or by entering specific values.
To draw a rectangle click on a Rectangle tool and click on selected position for one corner on the
preview screen. Click the second time to set the size and position of second corner of rectangle.
When Rectangle is drawn, Reference Point is automatically selected as the first corner.
To enter command by parameters click Rectangle tool and press Enter. Enter Size and Position of
Rectangle in the Tool Parameters menu.
Rectangle com m and in use
Settings for Rectangle command
Size X, Y [mm] sets size of the rectangle in X and Y directions.
Position X, Y, Z sets a position [mm] of the circle.
o Absolute sets position [mm] in absolute coordinates.
o Relative sets a distance [mm] to the last position.
o Reference point determines what part of rectangle (center, top, bottom, left, right, corners) is set
by Position. Default reference point is your starting corner.
Rotate allows to rotate [deg] rectangle around selected axis and reference point.
To hatch a rectangle click on HATCHING tab in Tool Parameters menu. See Hatching for more
information.
To set individual Process Parameters click on PROCESS in Tool Parameters menu. See Process
Parameters for more information.
Samples
Open File>Samples>Rectangle.rcp to see how Absolute/Relative and Reference Point settings
changes the end result.
© 2015 Direct Machining Control
Tools
57
7.2.11 Polyline
Polyline tool generates a joined linear motion path commands for positioning stages or galvo
scanners.
Polyline can be drawn by clicking on the tool and then selecting the end points for each line. To
finish drawing press Enter. Then a command Polyline in Recipe window appears.
Polyline com m and w ith open polygon
In SHAPE tab, a shape can be edited.
A list of points in absolute coordinates are displayed in the SHAPE tab. New points can be added
before selected point by clicking Insert button. Selected point can be deleted by clicking Delete
button.
Coordinates of each point can be edited by double-clicking on the the value.
Closed Polygon, joins last point of the polyline to the first one to create a closed polygon. Closed
polygon can be hatched.
© 2015 Direct Machining Control
58
DMC User Manual
Polyline com m and w ith Close Polygon checked
Polyline com m and w ith Close Polygon checked and hatching enabled
© 2015 Direct Machining Control
Tools
59
7.2.12 Jump To
Jump To sets an absolute or relative position for system to move with laser not firing.
This is usually used to move to some specific positions, e.g. unload position, camera position etc.
Jum p To com m and
7.2.13 Text
Text tool generates text motion path.
Text command can be added by clicking 'More' in Geometry section in Home tab and clicking 'Text'.
To add a text move mouse cursor to the place where should appear. Mouse cursor represents
bottom left corner of the text box.
Enter text in the Text box in Command window. See input rules here.
Select Font.
Select font parameters:
o Bold
© 2015 Direct Machining Control
60
DMC User Manual
o Italic
o Underline
o Strikethrough
Set font height in mm
Set Position
Set Transformation
Set Hatching parameters
Set Process parameters
Text Com m and Window
Text input rules
Text field can contain
Plain text
Variables
Math formulas and constants
Variables, math formulas and constants are entered in braces { }.
E.g. text "Speed = {speed} mm/s" will return following result "Speed = (value of variable 'speed') mm/
s". If we have a variable 'speed' with value 30 at that moment, result will be "Speed = 30 mm/s".
© 2015 Direct Machining Control
Tools
Other possible entries might be:
{speed+1} returns value of 'speed'+1 (31)
{speed*pi^2} returns value of 'speed' times square of pi
Text com m and w ith entered variable
7.2.14 Points
Points command creates a matrix of points with selected size and pitch.
To add a Points command click on it in the Ribbon menu Home tab, Geometry group.
Settings for Points command:
Position of the Points matrix.
Number Of Points In X
Number Of Points In Y
Pitch X (mm) sets distance between two points in X direction.
Pitch Y (mm) sets distance between two points in Y direction.
No. Of Pulses sets how many pulses laser should fire per one point.
To set individual Process Parameters click on PROCESS in command window. See Process
Parameters for more information.
© 2015 Direct Machining Control
61
62
DMC User Manual
7.2.15 Command Settings
Command Settings section describes main settings available for each command in command
window.
Typical Com m and Window
Command Settings section include:
Size
Object Position
Transform
Hatching
Process
© 2015 Direct Machining Control
Tools
63
7.2.15.1 Size
Size settings sets the size of the object in milimeters (mm).
For drawn objects, e.g. Rectangle, X and Y size can be changed independently, aspect ratio can be
changed.
For imported objects e.g. DXF, STL files, aspect ratio is locked. After changing size in one
dimension others are recalculated accordingly.
Original size of the imported object is shown on the right.
7.2.15.2 Object Position
Each object that is drawn or imported has its position settings. Position settings are displayed in
Command window (default position on the right side of the screen).
Depending on the object, position settings can be displayed with or without reference point:
© 2015 Direct Machining Control
64
DMC User Manual
SHAPE settings for DXF com m and
© 2015 Direct Machining Control
Tools
65
Position settings for Line com m and
When Reference Point option is available, Position represents the position of the selected reference
point of the object e.g. center or top left corner.
When Reference Point option is not available, Position represents position of the Start or End of the
object, e.g. Start and End coordinates of the Line.
Absolute, Relative and Original Position of the object
Position of the object can be described in Absolute and Relative coordinates or Original coordinates
of the imported object (DXF, STL files).
Absolute coordinates describes object's position in relation to 0;0 of your coordinate system.
Relative coordinates describes object's position in relation to:
the reference point of the last object that was done before it (Relative R.)
or to the last laser position (Relative L.)
Original coordinates position object in the coordinates set in the CAD (DXF, STL, Gerber) file. It is
convenient, when multiple objects are imported, that needs to be position precisely in relation to one
another, e.g. Gerber file with trace marks and NC drill file with via holes in PCB.
© 2015 Direct Machining Control
66
DMC User Manual
Relative position settings
Z Position
Since most of the trajectories are machined at the same height, Z position is by default disabled.
When disabled (check box is not checked, field is inactive), Z position of the object is at the
current Z position.
When enabled (check box is checked, field is editable), Z position of the object works the same
way as X and Y positions.
Please see an example of absolute and relative coordinates of a line below.
First Line command is set to start at absolute 0;0;0 and end at absolute 1;1;0 coordinates (X;Y;Z).
Second Line command is set to start at 0;0;0 and end at 1;2;0. See how second line changes
depending on Absolute and Relative Start and End position settings. Also open Lines.rcp in
Samples folder to try the changes.
1. Start Position Absolute, End Position Absolute
2. Start Position Relative, End Position Absolute
© 2015 Direct Machining Control
Tools
3. Start Position Relative, End Position Relative
© 2015 Direct Machining Control
67
68
DMC User Manual
7.2.15.3 Transform
Transform settings allows user to flip and rotate objects.
Flip option inverts object's coordinates along selected axis (see pictures below).
Rotate option, rotates object around selected axis and selected reference point.
Important: all transformations are done in following order:
1. Position and Size of the object.
2. Flip X, Flip Y, Flip Z.
3. Rotate around X axis, rotate around Y axis, rotate around Z axis.
When some of the parameters are changed, all the parameters are recalculated again in the order
above.
Samples:
1. Original DXF file
© 2015 Direct Machining Control
Tools
2. Object Flipped along X axis
2. Object Flipped along Y axis
© 2015 Direct Machining Control
69
70
DMC User Manual
2. Object Flipped along X and along Y axes
2. Object Flipped along X axis and rotated -30 degrees
© 2015 Direct Machining Control
Tools
71
7.2.15.4 Hatching
Hatching is a tool to fill the volume of an object. Hatching is available for following commands:
Circle
Rectangle
Import CAD
Hatching tool can be accessed by clicking on a HATCHING in Circle/Rectangle/Import CAD Tool
Parameters menu.
Check Enable Hatching to use Hatching tool.
Settings for Hatching tool
Leave Original Contour allows user to leave or delete original contour of the object. If it is
unchecked motion trajectories will be generated only for hatching.
© 2015 Direct Machining Control
72
DMC User Manual
Make Contour First / Make Hatching First sets whether contour or hatching lines are machined
first (when hatching is enabled).
Hatching Type allows to select different hatching modes used for different applications/effects.
o Lines hatches object with lines.
o Grid hatches object with a grid of perpendicular lines.
o Dots fills object with dots distributed at even distances in X and Y direction.
o Hexagon Dots fills object with dots distributed in Hexagon pattern.
o Contour hatches object by creating contours with a specified offset.
Spacing sets a distance [mm] between hatches (lines, dots, contours).
Hatching angle rotates [deg] hatching pattern.
Offset to Contour generates a new contour with a set distance to original one. Original contour is
deleted. Offset values can be positive or negative.
Offset to Hatching sets an offset distance so hatching is started not at the contour but by some
offset. This is usually used for beam spot compensation. Note, that if Offset to Contour is used,
Offset to Hatching is calculated from the new offset contour.
Process parameters selects a different Process parameters for hatching.
7.2.15.5 Process
Process sets the Process Parameters for a specific command.
Default value of Process Preset is -inherited- , which uses the same settings that are used in
previous command. If there is no previous command, default preset is used.
Process param eters w ith -inherited- preset
A different parameter preset can be selected from a drop down menu. If there are no user saved
presets, only "default" preset will be available.
© 2015 Direct Machining Control
Tools
73
Process param eters w ith user created preset "PCB
Drilling" selected
Changed parameters can be saved on top of existing preset by pressing "Save" or as a new preset
by pressing "Save As...".
Also current parameters can be set as "Default" by pressing "Set As Default".
Settings
Color. Draws lines machined with selected Process Parameters with selected color.
Device. Select a device that will perform the motion. Usually positioning stages or galvo scanners.
Repeat. Repeats trajectories a set number of times. If object has depth, it is repeated layer by
layer - all repetitions are done for one layer and then next layer is machined.
Laser Triggering:
o Laser Triggering Mode sets a mode for laser triggering. Available options are:
Position Based (PSO), sets laser firing trigger based on current position. Must be supported
by the motion hardware. PSO allows maintaining uniform laser pulse distribution in space
during stages acceleration or deceleration.
Time Based (Frequency), sets laser firing trigger at a specific frequency. Must be supported
by the laser source.
Time Based (Frequency Divider), sets laser firing frequency by dividing default laser frequency
by integer value (1, 2, 3, etc.). It allows through every, every second, every third, etc. pulse of
the laser.
No Triggering will not trigger laser at all.
o Pulse Pitch (only in Position Based mode) sets the distance between two laser pulses (or laser
© 2015 Direct Machining Control
74
DMC User Manual
firing positions to be precise) in mm.
o Pulse Burst (only in Position Based mode) sets how many pulses are shot per laser firing
position.
o Triggering Frequency (only in Time Based (Frequency) mode) sets laser triggering frequency in
kHz.
o Frequency divider (only in Time Based (Frequency Divider) mode) sets divider for default laser
frequency.
Speed
o Jump Speed X, Y, Z sets jump (when laser is not firing) motion speed for each axis in mm/s.
o Mark Speed sets combined marking (when laser is firing) motion velocity for all the axes in mm/
s. Speed is determined as a total linear speed along motion trajectory.
Constant Velocity Between Segments will keep motion when angle between two consequent
trajectories is smaller than set in "Decelerate When Angle More Than". This allows to speed up
the process as no deceleration and acceleration occurs.
Wobble enables galvo scanner wobbling perpendicular to motion path with set Amplitude and
Frequency.
7.3
Recipe Flow
Recipe Flow section describes usage of tools/commands in the Recipe Flow group in Home tab
Recipe Flow commands affects behavior of other commands during execution of recipe.
Recipe Flow Commands includes:
Variable (creates a variable to be used instead of value in Command Parameters)
3D Printing (combines 3D objects to control all printing process)
Cycle (repeats commands included in cycle for defined number of times)
IF (executes included commands under defined conditions)
Process Parameters (sets parameters for speed and laser triggering for section until next Process
Parameters command)
Pause (adds a pause in the recipe)
7.3.1
Variable
Variable is a Recipe Flow command allowing to create a variable which can be used instead of any
value in the recipe.
Each variable has its name and default value of 1.
© 2015 Direct Machining Control
Tools
75
Default Variable Com m and settings
Variable w ith value entered
Variable w ith value calculated in a form ula
Value of the variable can be changed within the recipe.Value of the variable can be calculated from a
math formula. E.g. Variable "c" value: sqrt(a^2+b^2), where "a" and "b" is names of another variables
will return length of a triangle side, where "a" and "b" are another two sides.
Variable itself can be included in formulas use for variable value calculation. E.g. Value of variable
with name "a" and default value 0 later in recipe can be calculated as a+1 retuning value 1.
Description may be added in each variable explaining what variable does for other users or for
© 2015 Direct Machining Control
76
DMC User Manual
creators future reference.
Cycle Index Variable Name is also considered a Variable and the same rules and functions apply to
it.
Cycle Index Variable Nam e is also considered a variable
7.3.2
3D Printing
3D Printing command simplifies control and preparation of STL files in 3D Objects command.
3D Printing combines all 3D Object commands with imported STL files so they would be machined
together layer by layer.
3D Printing Com m and Window
Select if Hatching and Process parameters are set in 3D Printing command for all 3D Objects or
individually for each object in 3D Object command.
Actions
For some additive manufacturing technologies specific actions are required before and after each
layer (e.g. distributing the material, moving platform, etc.). To perform actions before or after each
© 2015 Direct Machining Control
Tools
77
layer save them as a separate recipes and select them in the "Before Each Slice" and "After Each
Slice" fields.
Settings
Slicing for the imported objects are performed together with a single slice distance, to prevent
different height and hitting obstructions or destroying objects.
Whole height or custom section might be sliced.
Z position of the objects may be adjusted by half slicing distance, so that no part of the object would
be lost when slicing is started not at usual position.
Set Hatching and Process parameters if they are controlled from 3D Printing command.
3D Printing Com m and in use
PREVIEW tab contains model and slices preview menu and allows to repair or delete slices.
Model view button enables and disables Model view.
Multiple Slices view show all of the slice contours, but no more than number set in Max Slices to
Show value. This helps to reduce number of lines displayed and therefore RAM usage. Hatching is
not displayed in Multiple Slices view.
Single Slice view show single slice with its hatching (if enabled). Single Slice view is automatically
enabled when a specific slice is selected either on slider or in Show Slice No.: field.
Show Slice No.: field displays number of currently displayed slice, or lets user enter the number of
slice to display.
Slice Z (mm) shows height of a slice in an object.
Slider and +/- buttons allows user to scroll through slices (mouse wheel or up/down keyboard
keys may be used as well).
© 2015 Direct Machining Control
78
DMC User Manual
Individual slice view w ith Preview tools in 3D Printing Com m and
7.3.3
Loop
Loop command allows user to put all included commands in a loop where they will be repeated
defined number of times.
Number of Loop is defined by Loop Count parameter. This parameter can be either user entered
integer value, result of a math function or a variable.
Default Cycle Com m and settings
© 2015 Direct Machining Control
Tools
79
Cycle w ith a value entered
Cycle w ith num ber of cycles calculated by a form ula
Loop Index Variable Name is a name for a specific variable, value of which is a number of current
loop. Loop Index Variable can be used within the loop for calculations (see example).
Commands included in Loop are shown with an indent.
7.3.4
IF
IF is a logical command allowing to execute included commands under certain conditions.
IF condition can be written as a mathematical function including variables.
Commands executed are shown with an indent.
© 2015 Direct Machining Control
80
7.3.5
DMC User Manual
Process Parameters
Process Parameters command sets process parameters like speed and laser triggering for the next
section of recipe. Section continues until next Process Parameters command. If different process
parameters are set in one of geometry commands, it will override parameters set by Process
Parameters command.
Process Param eters Preset selected by user
Changed parameters can be saved on top of existing preset by pressing "Save" or as a new preset
by pressing "Save As...".
Also current parameters can be set as "Default" by pressing "Set As Default".
Settings
© 2015 Direct Machining Control
Tools
81
Device. Select a device that will perform the motion. Usually positioning stages or galvo scanners.
Laser Triggering:
o Laser Triggering Mode sets a mode for laser triggering. Available options are:
Position Based (PSO), sets laser firing trigger based on current position. Must be supported
by the motion hardware. PSO allows maintaining uniform laser pulse distribution in space
during stages acceleration or deceleration.
Time Based (Frequency), sets laser firing trigger at a specific frequency. Must be supported
by the laser source.
Time Based (Frequency Divider), sets laser firing frequency by dividing default laser frequency
by integer value (1, 2, 3, etc.). It allows through every, every second, every third, etc. pulse of
the laser.
No Triggering will not trigger laser at all.
o Pulse Pitch (only in Position Based mode) sets the distance between two laser pulses (or laser
firing positions to be precise) in mm.
o Pulse Burst (only in Position Based mode) sets how many pulses are shot per laser firing
position.
o Triggering Frequency (only in Time Based (Frequency) mode) sets laser triggering frequency in
kHz.
o Frequency divider (only in Time Based (Frequency Divider) mode) sets divider for default laser
frequency.
Speed
o Jump Speed X, Y, Z sets jump (when laser is not firing) motion speed for each axis in mm/s.
o Mark Speed sets combined marking (when laser is firing) motion velocity for all the axes in mm/
s. Speed is determined as a total linear speed along motion trajectory.
Constant Velocity Between Segments will keep motion when angle between two consequent
trajectories is smaller than set in "Decelerate When Angle More Than". This allows to speed up
the process as no deceleration and acceleration occurs.
Wobble enables galvo scanner wobbling perpendicular to motion path with set Amplitude and
Frequency.
7.3.6
Pause
Pause tool adds a pause before next command.
Pause (idle) time is entered in [ms] and is usually used to when some external action must be taken
or to allow some hardware to settle.
© 2015 Direct Machining Control
82
7.3.7
DMC User Manual
Alignment
Alignment tool uses camera view to align all motion paths of the recipe to the sample. It is usually
used to position machining trajectories on a specific position on the sample.
Before using Alignment tool make sure, that:
1. Machine Vision (MV) module is installed and licensed.
2. Camera is set up. See more about camera setup here.
To insert Alignment click on Alignment button in Recipe Flow group in Home tab in the Ribbon
(visible on when MV module is installed).
Insert Alignment command in the specific place in the recipe. Recipe part before the alignment will
not be aligned.
The basic sequence of actions for Alignment command is following:
1. User defines the position where command should look for the 'Object' (specific mark or view to
which everything is aligned). X, Y, Z coordinates are entered.
2. Object is defined (see Alignment Modes).
3. Camera view goes to the position defined by user in step 1.
4. Alignment command finds Object automatically or user defines it manually. X, Y coordinates and
rotation angle is found.
5. All the following recipe is transformed by:
a. Translating it in X and Y coordinates by the difference between acquired object position (in step
4) and user defined position (in step 1).
b. Rotating it around the Object center (found in step 4) by angle (found in step 4).
6. Following recipe commands are executed.
There are three Alignment Modes:
1. Simple. A camera view is selected by operator or loaded from image file. Alignment command
looks for that image in a specified field.
2. Manual. Operator manually selects position and angle.
3. Advanced. Specific recognition algorithms are used to find objects in camera view (cross, circle,
track, corner, etc.).
Settings for Alignment command
© 2015 Direct Machining Control
Tools
83
General Settings for Alignm ent Com m and
in GENERAL tab user can select:
Alignment Mode:
o Simple. A camera view is selected by operator or loaded from image file. Alignment command
looks for that image in a specified field.
o Manual. Operator manually selects position and angle.
o Advanced. Specific recognition algorithms are used to find objects in camera view (cross, circle,
track, corner, etc.).
Number of Patterns
o One. Everything is aligned to a single Object.
o Two. Position of two Objects are defined by used and two objects are found. Translation and
rotation are then calculated using both objects. This mode takes more time, but is more
accurate, especially when detecting rotation of sample.
Actions:
o After Error. User can select and action in case automatic Alignment Modes (Simple and
Advanced) does not find an Object:
Align Manually. A pop up window appears and user can select center of Object and angle
manually (also use Joystick to move sample if Object does not appear in camera view) or
stop the recipe.
Continue. Recipe will continue without any transformation.
o After Detection:
Continue. Recipe is transformed and continues further.
Ask for Confirmation. A pop up window appears and user can confirm the recognition results,
realign manually or stop the recipe.
Alignment. User selects whether recipe should be transformed to align it to Object.
Test. A test can be executed to see whether Objects are found and recipe aligned correctly.
© 2015 Direct Machining Control
84
DMC User Manual
Pattern 1 settings for Alignm ent Com m and in Sim ple
Alignm ent Mode
PATTERN 1 sets the setting for the first Object that will be used for alignment.
Camera. Select camera which will be used to look for this Object.
Position. Enter the position where command should look for the object. Note, that in every other
command Position is defined for laser, but in Alignment command Position is defined for selected
camera. That means that if camera is not coaxial, but parallel to laser beam, the calibrated offset
will be automatically taken into account.
Image selection for Simple Alignment mode (visible only Simple Alignment Mode is selected in
© 2015 Direct Machining Control
Tools
85
GENERAL tab).
Match Threshold (visible only Simple Alignment Mode is selected in GENERAL tab). It is a
threshold when a found Object is accepted as correct.
Test. Runs PATTERN 1 part of the Alignment command only.
Results. Results display where the Object is found and it's rotation angle. Also these values can
be exported to a set Variable to use later in the recipe. Also Vote value shows the comparison
results for Simple and Advanced modes. It is recommended to use a bit lower value in Match
Threshold.
PATTERN 2 sets the settings for the second Object. Available only when Number of Patterns is set
to Two in GENERAL tab. All the settings are the same as in PATTERN 1.
Alignm ent results preview in Alignm ent Com m and
RESULTS shows the final results of the alignment: how much object is translated and rotated.
7.3.8
Find Focus
Find Focus command uses camera or special sensor (e.g. laser height sensor from Keyence) to find
position of the surface at a certain point.
Camera use with Find Focus command is available only if MV Light or MV Pro module is enabled.
Settings for Find Focus command
© 2015 Direct Machining Control
86
DMC User Manual
Find Focus com m and properties
Device selects which device is used to find surface. It can be camera or some dedicated sensor.
Position sets at which point surface should be looked for. When Z coordinate is used (checkbox
marked) focus will be looked at that height (enter aproximate focus position). When Z is disabled,
focus will be searched around current Z position.
There are two modes for focus search:
o Adjust Mode scans Range step by step, stopping after each Z motion by Step Size and
capturing focus value. If focus values are decreasing, then motion direction is changed to
opposite. Scanning goes on until focus value starts to decrease again or full Range is scanned.
This mode is slower, but better for precise focus finding.
o Scan Range mode scans full range without stopping while constantly measuring focus value.
This mode scans whole range faster than Adjust mode, but accuracy is not as good. When
moving constantly focus value is not always refreshed quick enough due to hardware limitations
(e.g. fps value for camera).
o Both mode combines both modes mentioned above. Firstly, Scan Range is done, then Adjust is
done from the best focus position found on Scan Range mode.
Range sets what range (+/-) should be scanned.
Step size sets at what distance interval focus value is measured.
Export Value To Variable exports measured focus position to a variable with a set name.
Move Axis To Measured Position moves axis to best found focus position when enabled.
© 2015 Direct Machining Control
Tools
7.3.9
87
Z Map
Z Map command is used to create surface flatness map and to compensate for it.
Z Map compensates for surface flatness in the recipe starting with Z Map command and finishes at
the end of the recipe or at next Z Map command. Height of commands is compensated in following
manner:
Each object/command is moved in Z direction by the difference between entered Z coordinate in Z
Map command and actual measured value. Value for compensation is taken at the center of the
command.
When Stitching command is used, compensation is done for Stitching tiles instead of single
objects/commands.
Between measuring positions Z Map values are extrapolated.
Settings for Z Map command
© 2015 Direct Machining Control
88
DMC User Manual
Z Map com m and properties w indow .
GENERAL tab sets Z Map command settings:
Turn Mapping On/Off sets action for the Z Map. Add Z Map command with Turn Mapping Off
selected, when you want to stop compensating Z deviations.
Operation:
o Create measures Z position at set points and exports data to selected file. This file is then used
for compensation.
o Import uses already generated file for Z position values. It is a txt file which can be also created
by external software or user.
Position sets where Z Map should be created (position of center or corner of Z Map depending on
reference point set). Difference between entered Z position and actual measured position is used
for compensation.
Number Of Points X/Y sets how many points is in the measurement matrix in each direction.
Pitch X/Y sets distance between points in each direction in mm.
Max Errors Allowed sets how many errors are allowed before error message appears and
operation is stopped. Error happens when sensor used for measuring fails to return a value for set
position. In that case position is extrapolated from the neighboring positions.
Allowed Z Deviation sets how big difference should be to compensate it. E.g. entered value 0.05
compensate Z deviations only larger than 50 micrometers.
Z FIND tab sets parameters for measurement of the Z position. Settings are similar with Find Focus
© 2015 Direct Machining Control
Tools
command.
7.4
Status
Status shows current position of the positioning axes.
Additional status information may be displayed on custom versions for specific systems.
7.5
Devices
Devices section describes the use of tools/commands in the Devices group in Home tab.
Device commands controls device behavior during the execution of recipe.
Output (controls digital output)
Serial Port (controls Serial Port)
Stitching (combines galvo scanner and linear stages motion)
Axis (moves, homes, enables, disables specific axis)
Wait For Trigger (adds a pause in the process until specific digital input is triggered)
7.5.1
Output
Output Command sets selected digital output on the selected device to low or high value.
To add Output Command click on Output in Devices group in Home tab.
© 2015 Direct Machining Control
89
90
DMC User Manual
Output Com m and Window
Check the "Change Value" checkbox to set value for specific output. Click on Change Value to
check all the boxes.
Set whether the value should be set to high or low.
Settings for this command can be saved as a presets for easier use in the future.
7.5.2
Serial Port
Serial Port Command send messages to devices through the serial port.
To add a serial port command click on Serial Port in Devices group in Home tab.
© 2015 Direct Machining Control
Tools
91
Serial Port Com m and param eters
Select the appropriate serial port number.
Set the parameters described in the user's manual of your device.
For message parameters please see user's manual of your device.
7.5.3
Stiching
Stiching is a command that combines galvo scanner and linear stages motion.
Stitching command divides trajectories in your recipe to smaller fields (tiles) that are then performed
with galvo scanners and motion between tiles is performed by positioning stages.
This allows to perform machining at speeds available only with galvo scanners in the field available
only with positioning stages.
To add Stitching Command click on Stitching in Devices group in Home tab.
© 2015 Direct Machining Control
92
DMC User Manual
Stiching Com m and settings
Turn Stitching ON for the Recipe section after the command. If you do not want to use stitching for
whole recipe, turn it off by adding Stitching command at desired place and marking Turn Stitching
OFF.
Settings for Stitching command:
Stitching type:
o Grid. Divides all trajectories to rectangular tiles of set size (in Galvo Scanner Field (Tile) Size).
Recipe ir machine tile by tile.
o Object Centering. Centers all objects smaller than tile size at the center of galvo scanner.
Usually used when great accuracy is needed and field distortion is too big to achieve accuracy
at the outer areas of the field. Objects larger than set Tile size are divided to Tiles same as in
Grid mode.
Galvo Scanner Field (Tile) Size sets the size of the tiles into which the trajectories are divided. Set
it smaller than your maximum galvo scanner field size to ensure precision.
Stage Motion Speed (mm/s) sets motion speed for X and Y linear positioning stages when moving
between tiles.
Move Z After:
o Single Tile. When object has some depth in Z direction, whole depth is machined for each tile
separately. One tile is machined at whole depth and them next tile is machined.
o Whole Field. When object has some depth in Z direction, depth is achieved for whole object
layer by layer. At first all tiles are machined at one Z position, then Z is moved to next position
and again all tiles are machined.
Z direction. Sets starting point and direction of Z.
Z Stage Motion Speed (mm/s) sets motion speed for Z axis.
© 2015 Direct Machining Control
Tools
7.5.4
93
Axis
Axis tool is used to add an action for a single specific axis.
Axis tool allows moving, homing, enabling and disabling a specific axis.
Axis Com m and Window
Axis command settings
Select Action
o 'Move' moves axis to a set position
o 'Home' homes selected axis
o 'Enable' enables selected axis
o 'Disable' disables selected axis
Select Axis Name from the list of configured axes
Select Coordinate Type for an Absolute or Relative motion
Enter position to which axis should move if selected action is 'Move'
Set motion speed
Select whether system waits for the action to be done or not. If 'Yes' is selected, next command
will be executed only when this one is finished. If 'No' is selected, next command will be executed
immediately after action command is given for this command (e.g. while rotary is still turning to
set position).
7.5.5
Wait For Trigger
Wait For Trigger tool adds a pause to the recipe until a specific digital input is set to high/low value.
© 2015 Direct Machining Control
94
DMC User Manual
Select a device which inputs will be monitored.
Select which inputs will be monitored and on which value recipe should continue.
Settings for this command can be saved as a presets for easier use in the future.
Wait For Trigger Com m and Window
7.6
View
View tools controls the preview window.
Available tools are:
Fit Screen: zooms to the view of whole recipe.
Reset: returns to default top (X;Y) view of full machining area.
Zoom In: zooms in view in the preview window.
Zoom Out: zooms out view of the preview window.
Measure: measures distance between two points. To measure a distance click on the tool,
click on the first point on the preview screen and then on the second point. Result is displayed at
the bottom of the window in status bar. This tool only works in X;Y view.
View modes:
o
is a default top view of X;Y plane.
o
view displays view of X;Z plane.
o
view displays view of Y;Z plane.
© 2015 Direct Machining Control
Tools
95
Show Jumps: this tool sets whether to show or not jump motion trajectories (when laser is not
firing).
7.7
Selected Camera
Selected camera tool in Camera/Vision tab.
In the Selected Camera tool, all configured cameras are shown by configuration order in Settings
(Camera 1, Camera 2, etc.) and with their defined names.
Selected Camera tool has two functions:
Clicking on camera button, zooms view of that camera to take full Preview Window.
Active camera (orange background) indicates which camera is controlled with tools in Controls
and Calibration tools.
7.8
Camera Controls
Camera Controls group contains tools for camera use and control.
Camera Control group has following tools:
Adjust View to control camera view settings (exposure, brightness, etc.).
Autofocus to automatically find best camera focus position by moving one of the stages, usually Z
axis.
Track View to keep Preview Window always centered on camera view.
Save Image to save current camera image.
Advanced to access advanced camera and vision settings.
© 2015 Direct Machining Control
96
7.8.1
DMC User Manual
Adjust Camera View
Adjust View tools controls camera view (picture) settings.
Adjust View tools for cam era view control
Available settings depends on the controls allowed by specific camera drivers.
Default values are stored in File>Settings>Hardware>Camera X> View
© 2015 Direct Machining Control
Tools
7.8.2
97
Autofocus
Autofocus tool finds best camera focus by moving positioning stage, usually Z axis.
Autofocus tool
Focus Modes
There are two focusing modes:
Scan Range. This mode scans full range set in Scan Range field by continuously moving selected
axis. Axis is then moved to the best found position. This mode is usually used to find an
approximate focus position.
Adjust Focus. This mode moves axis by a set step (Step Size parameter) to one direction. If focus
quality (defined by Focus Value parameter) decreases, then scan is aborted and continued to
opposite direction. Scan continues until Focus Value starts to decrease again or Scan Range limit
is reached. Axis is then moved to the best found focus position. This mode is usually used to find
the best focus position.
Focus values found during scanning are displayed in the graph on the right of the window. Vertical
axis represents stage position, horizontal axis represents Focus Value. Best Focus value is the
right most one.
Settings
Camera parameter, sets which camera will be used for finding focus. Default selection is camera
selected in Selected Camera tool.
Axis sets which axis is moved during scanning.
Approximate position sets the middle of the scanning range. When check box is not checked, a
current position is used. Check box to set a different position.
Scan Range sets limits for scanning to positive and negative directions. A value '1 mm' means that
axis will be moved from +1 to -1 mm in relation to Approximate position.
© 2015 Direct Machining Control
98
DMC User Manual
Step Size sets how often focus position is evaluated when scanning. In Adjust Focus mode, axis
is moved in steps of this size as well.
7.8.3
Track View
Track View when enabled, centers camera view in Preview Window.
In Track View mode view of Selected Camera is centered when axis moves and when zooming as
well.
7.8.4
Camera Calibration
Calibration tools allows to calibrate camera view to match fabrication trajectories.
Click Set View Size/Position and then click on camera view and drag it to a desired position and
click on camera view corners to set camera view size (to match some fabrication lines). Click Enter
to confirm.
Iterate between actions to calibrate camera view.
© 2015 Direct Machining Control
Tools
Cam era view before calibration. Drag and change scale to m atch cam era view w ith fabrication
trajectories.
© 2015 Direct Machining Control
99
100
DMC User Manual
Cam era view after calibration.
© 2015 Direct Machining Control
DMC User Manual
Software For Laser Machines
Part
VIII
102
8
DMC User Manual
How To..?
This section of the manual is a step by step guide for some of the functions in DMC software.
8.1
Use Camera Alignment
In this section we are describing an Alignment procedure with camera, using Machine Vision (MV)
module in DMC.
To understand the Alignment principles and procedure, please read through the following sections:
1. Coaxial and off-axis cameras in DMC
2. Camera view in Preview window
3. Manual alignment by dragging objects
4. One point Manual alignment
5. One point Simple alignment
6. Two points alignment
To use cameras in DMC software a MV module should be installed. Steps 1-3 can be done with MV
Lite and MV Pro, steps 4-6 require MV Pro module. MV Lite module can be upgraded to MV Pro.
Coaxial and off-axis camera view.
1. Firstly, connect camera(s) to DMC and configure them in the File>Settings. For more information
on it check Camera configuration in this manual.
2. Calibrate your cameras. For more information check Camera calibration in this manual.
© 2015 Direct Machining Control
How To..?
103
Calibrated cam era view
Camera can be of two types:
Coaxial camera is a camera that shares focusing optics with a laser beam, usually the same
microscopic objective lens or F-Theta lens when using galvo scanners. Using camera to look
through galvo scanners requires a special adapter to compensate distortion by F-Theta lens.
Coaxial camera displays current laser position in the center of its field.
Note, that even a camera using coaxial scheme, might be a little off and center of camera view
might not match the laser spot precisely. That might happen due to some missalignment in the
optical path. While that is not critical, it is easier and more intuitive when camera and laser are
aligned as good as possible.
Off-axis camera is a camera that does not look through the same focusing optics used by laser
beam. Usually it is used to avoid looking through the galvo scanners, to have a bigger field of view
or when several optical paths are used for the laser on the system.
In the off-axis case, camera is set up with a known offset to laser beam spot. This offset is found
precisely during Camera calibration procedure. The offset is used for Joystick Camera to Laser
and Laser to Camera actions and for FindFocus and Alignment commands as well. All the
positions that are given for the camera in the Alignment, FindFocus has to be provided in the laser
coordinate system and no offsets needs to be calculated by the user.
When several cameras are connected, they can be at any combination, one being coaxial, one offaxis or two off-axis or even two coaxial cameras, even though that is unlikely.
Camera view in the Preview window.
Camera view is displayed in the preview window at its calibrated position. For Camera calibration
procedure check the manual.
© 2015 Direct Machining Control
104
DMC User Manual
When camera is calibrated, its position matches machining trajectories on the screen. So
machining trajectories that are displayed over the camera, will be machined on the sample at the
place they are seen.
Off-axis cam era view m atches m achining trajectories.
Use Track View function and Joystick to see where machining trajectories will be placed on the
sample.
When several cameras are connected, they are all shown on the Preview window. When cameras
are looking at the same spot (i.e. a wide view camera and a microscopic camera) the view of a
camera with higher number in Settings is displayed on top (Camera 2 is displayed on top of Camera
1 view). So configure cameras starting with the one having the biggest field of view.
View between cameras can be changed with the buttons in the Ribbon menu Camera/Vision tab. A
selected camera is also used by default when using Autofocus tool.
Manual alignment by dragging objects.
A simplest way to align machining trajectories on the sample is to drag them in Preview window with
a mouse until they are in a wanted position on the camera view. It can be precisely adjusted using
Position and Transform parameters in the Command window for each object. Compile the recipe to
make sure that all the objects are in the wanted positions.
© 2015 Direct Machining Control
How To..?
105
One point Manual alignment with Alignment command.
For Alignment command special objects called fiducials are used. In DMC a fiducial can be any
object visible on the sample: some corner, cross, edge, etc.
The basic principle of using Alignment is this:
1. User defines where fiducial should be (original position).
2. Alignment command looks for fiducial in the original position.
3. Real position of fiducial is acquired (it is usually a little different than position set in step 1) and
difference between is calculated as well as rotation of fiducial.
4. The following recipe is transformed accordingly. Objects are translated by the difference of set and
real positions of fiducials and rotated by fiducial rotated angle.
5. When two fiducials are used, transformation is calculated from both of them.
Schem atic view of sam ple (blue) placed on m achine. Red and green arrow s represents m achine
coordinate system . There are w hite fiducial crosses on top right and bottom left corners, those fiducials
w ill be used as alignm ent patterns.
© 2015 Direct Machining Control
106
DMC User Manual
Machining trajectories (black) that should be laser-scribed on the w hite pattern existing on the w afer.
Red cross represents fiducial described for Alignm ent com m and.
© 2015 Direct Machining Control
How To..?
Sam ple is rotated and displaced (i.e. taken aw ay and put back in the m achine)
© 2015 Direct Machining Control
107
108
DMC User Manual
There is translation difference betw een original fiducial position (red cross) and real fiducial position
found by Alignm ent com m and (red dashed cross) and rotational difference (angle betw een red
dashed cross and black lines).
© 2015 Direct Machining Control
How To..?
System autom atically or m anually finds a set fiducial.
© 2015 Direct Machining Control
109
110
DMC User Manual
Machining trajectories are transform ed to m atch the displacem ent of the fiducial.
For one point Manual alignment insert Alignment command in the recipe before the commands you
want to align. Click on Alignment in the Ribbon menu Home tab Process Flow group.
1. Go to PATTERN 1 tab and set position for the first fiducial. If you don't know where fiducial should
be, use joystick to move to a position on the sample, align camera view center with fiducial or
move mouse pointer over it and use the respective coordinates displayed in Status bar.
2. Click Run to start the Recipe.
3. When Alignment command is executed, camera will be driven over the set position and a pop up
window will appear. Click Select to select center of your fiducial and click right mouse button,
select rotation of the fiducial and click again. If the fiducial is not visible in the camera view, use
Joystick to move camera view to find the fiducial.
Note: you can also use Relative position for following commands to machine at the position the
fiducial is found.
One point Simple alignment using Alignment command.
In Simple mode of Alignment fiducial is a user set image (usually a picture made with a system
camera). After creating the picture, no further user interference is needed.
1. Go to PATTERN 1 tab and set position for the first fiducial.
2. Move with Joystick so that fiducial would be visible in the camera field.
3. Click Set Image and mark an area on the camera view. Selected area is then a fiducial which
should be found. If camera view has many details(i.e. uneven surface with scratches) use Adjust
© 2015 Direct Machining Control
How To..?
111
View to adjust camera view. Use a configuration where your fiducial is seen with best contrast and
as few as possible other details are visible. That will help when looking for fiducials in different
locations on the sample or on different samples.
4. When Alignment command is executed, camera is driven to a set position and camera view is
compared with set image. If part of camera view matches set image fiducial is found.
There is a Match Threshold parameter in the PATTERN tab, which regulates how similar set image
should be to camera view.
© 2015 Direct Machining Control
112
DMC User Manual
User can select action in case fiducial is not found or after it is found. That can be done in
GENERAL tab of Alignment command.
Two points alignment using Alignment command.
Two points aligment is similar to a single point alignment. The only difference is that PATTERN 2 tab
is active, where parameters for second fiducial should be set. After finding both fiducials,
transformation of the recipe is calculated according to both of them. Two poitns alignment is mostly
used when small rotation errors needs to be compensated.
Tw o alignm ent fiducials are described in Alignm ent com m and for tw o point alignm ent.
© 2015 Direct Machining Control
How To..?
Machining trajectories are transform ed to m atch fiducial displacem ent.
© 2015 Direct Machining Control
113
DMC User Manual
Software For Laser Machines
Part
IX
Support
9
Support
For support on DMC software please contact [email protected].
© 2015 Direct Machining Control
115
© 2015 Direct Machining Control