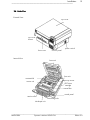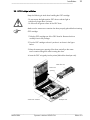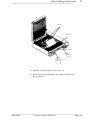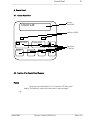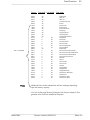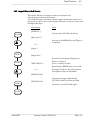
1
---------------------------------------------------------------------------------------------------------------------------------------------------------------------
SOLID F24
Operator’s Manual
Edition 5.0
_______________________________________________________________________________________________
---------------------------------------------------------------------------------------------------------------------------------------------------------------------
_______________________________________________________________________________________________
Table of Contents
---------------------------------------------------------------------------------------------------------------------------------------------------------------------
3
Table of Contents
Chapter
Page
1. Introduction
7
1.1.
1.2.
1.3.
1.4.
1.5.
1.6.
7
7
9
9
9
9
General Description
Conventions
CE - Conformity
FCC - Instructions
Laser Safety Regulations
General Safety Instructions
2. Installation
13
2.1.
2.2.
2.3.
2.4.
2.5.
2.6.
2.7.
2.8.
2.9.
2.10.
2.11.
13
15
16
17
18
19
21
22
23
24
25
Checking List
Printer View
Printer Installation
Installation Instructions
Developer Unit Installation
Starter Toner Fill up
Ozone Filter Installation
Waste Toner Container Installation
OPC Cartridge Installation
Cleaner Felt Installation
Paper Guide Installation
3. Paper Handling and Operation
26
3.1.
3.2.
3.3.
26
29
30
Paper Loading
Attaching the Printer to a Computer
Turning the Printer on
4. Control Panel
31
4.1.
4.2.
4.3.
4.4.
4.5.
31
31
35
36
39
Control Panel View
Function of the Control Panel Elements
Configuration via the Control Panel
Menu Structure
Syntax of Diagrams
Chapter
Page
_______________________________________________________________________________________________
MICROPLEX
Operator’s Manual SOLID F24
Edition 5.0
4 Table of Contents
--------------------------------------------------------------------------------------------------------------------------------------------------------------------5. Panel Functions
40
5.1.
5.2.
5.3.
5.4.
5.5.
5.6.
5.7.
5.8.
5.9.
5.10.
5.11.
5.12.
5.13.
5.14.
5.15.
5.16.
5.17.
5.18.
5.19.
5.20.
5.21.
5.22.
5.23.
40
42
43
44
45
46
47
48
49
50
51
53
54
55
56
57
60
61
62
63
65
67
68
Printing the Status Sheet
Printing the Font List
Hexdump-Mode Activation
Normal Print Mode Activation (incl. FORM FEED)
Clearing the Input Buffer (Cancel Job)
Printing the Menu Page
Generating Testsheets (Sliding Pattern)
Page Length Adjustment
Paper Width Adjustment
Data - Interface Selection
Emulation Selection
Display Language Selection
Transparent Code Adjustment
Selection of Memory Distribution (Input Buffer)
Setting to Factory Default
Font Selection
Text Orientation Selection
Symbol Code Selection
Configuration of Text Margins
Image Shifting to the X-Direction
Image Shifting to the Y-Direction
Fuser Temperature Changing
Configuration of Network Parameters (f.e. IP Address)
6. Maintenance
71
6.1.
6.2.
6.3.
6.4.
6.5.
6.5.1.
6.6.
6.7.
71
72
74
76
78
79
80
81
Printer Cleaning
Toner Refilling
Cleaner Felt Replacing
Waste Toner Container Replacing
OPC Cartridge Replacing
Charger Wire Cleaning
Ozone Filter Replacing
Developer Unit Replacing
Chapter
Page
7. Troubleshooting
84
7.1.
7.2.
84
86
Error Messages
Paper Jam
_______________________________________________________________________________________________
MICROPLEX
Operator’s Manual SOLID F24
Edition 5.0
Table of Contents
--------------------------------------------------------------------------------------------------------------------------------------------------------------------8. Specifications
89
9. Index
93
5
_______________________________________________________________________________________________
MICROPLEX
Operator’s Manual SOLID F24
Edition 5.0
6 Table of Contents
---------------------------------------------------------------------------------------------------------------------------------------------------------------------
_______________________________________________________________________________________________
MICROPLEX
Operator’s Manual SOLID F24
Edition 5.0
Introduction
---------------------------------------------------------------------------------------------------------------------------------------------------------------------
7
1. Introduction
1.1. General Description
The SOLID F24 is a continuous forms laser printer for pin-fed computer paper. It
unites the reliability of classic mechanical matrix printers with the speed and
high print quality of modern laser technology.
User friendly engineering makes the handling of consumables such as toner, the
OPC drum and the developer unit especially easy on the SOLID F24.
The paper handling capabilities of the SOLID F24 are exceptional. It accepts a
wide range in paper and label weights and sizes, making it suitable for many
bar code and forms applications.
Due to its use of MICROPLEX controller technology, the SOLID F24 overcomes
a major disadvantage of conventional impact printers: the inability to make
copies. The SOLID F24 produces copy-adequate ″multiple-originals″ or
MOPIES (multiple original printouts) on demand. MOPIES offer special benefits.
Unlike simple copies, they can contain variable content. One common
application is to include the names of “copy“ receivers on each print out.
In order to regulate temperatures within the printer, the SOLID F24 separates its
fuser rollers and reduces the heat-roller temperature after each print job. This
prevents discoloration of the paper remaining inside the printer and other heatrelated problems. Because this process must be reversed before printing the
next job (i.e., the fusing temperature must be increased and the fuser rollers must
be joined) there is a brief pause of a few seconds before a new print job can
start.
After each print job has been completed, the printer drives the paper back to
the "print starting position." This feature ensures that no paper will remain
unprinted during a job. Exception: If the first job is detached after fusing, the
printer will not drive the paper all the way back to the print starting position.
Instead, one sheet (minimum length: 10 inches) will remain unprinted.
1.2. Conventions
To find the requested informations more quickly and to understand
instructions more easily the following conventions are used:
This symbol refers to a possible source of danger. If you do not pay
attention to this information injuries might result, the function of the printer
could be reduced or the device could be damaged.
_______________________________________________________________________________________________
MICROPLEX
Operator’s Manual SOLID F24
Edition 5.0
8 Introduction
---------------------------------------------------------------------------------------------------------------------------------------------------------------------
)
ONLINE
This symbol refers to important hints and suggestions on using the
printer. Disregarding these hints might cause defects of the printer or
within the environments.
This symbol shows a key of the control panel. It will be used, if an
isolated key is pushed to activate a certain function.
Link to another chapter or a different document. By clicking the blue
colored text you'll enter the concerning chapter or document.
blue colored text
This symbol is used to show the messages of the display.
[Menu Level 1 ?]
_______________________________________________________________________________________________
MICROPLEX
Operator’s Manual SOLID F24
Edition 5.0
Introduction
---------------------------------------------------------------------------------------------------------------------------------------------------------------------
9
1.3. CE - Conformity
The manufacturer hereby declares that the equipment complies with the
guideline RL 89/336/EWG for information technology devices.
The product norm stipulations concerning high frequency interferences
of information technology devices EN 55022, class A/DIN VDE 0878
(electromagnetic interference) are complied.
Also the generic standard EN 50082-1/DIN VDE 0839 for interference
strength is complied.
1.4. FCC - Instructions
This device causes, employs and possibly radiates high frequency
energy. Because of that, incorrect installation can disturb radio
communications.
This device complies with FCC-rules and regulations, class B
(subject
J, part 15) corresponding to high frequency interferences.
1.5. Laser Safety Regulations
This printer is certified as a Class 1 laser product under the U.S.
Department of Health and Human Services (DHHS) Radio Performance
Standard.
No radiation is emitted because the laser beam is sealed during all
customers printing and maintenance processes.
By carrying out certain operations some caution labels will be seen
located on the machine covers.
Please do not remove these signs on no account.
All handling or procedures that differ from the ones being described in
this manual are to be omitted.
Disregarding might release dangerous laser radiation.
1.6. General Safety Instructions
_______________________________________________________________________________________________
MICROPLEX
Operator’s Manual SOLID F24
Edition 5.0
10 Introduction
--------------------------------------------------------------------------------------------------------------------------------------------------------------------This MICROPLEX printer and the consumables are designed and tested
according to strict safety standards.
Regarding the following conditions ensures a permanently secure
operation.
- Please pay attention to an appropriate grounding of the
electricity source.
- Install the device onto a solid and level ground.
- Only trained staff is authorized to transport the gear
considering the printer characteristics.
- Only use consumables being specially developed for this
device.
- Using unsuitable consumables may cause a reduction of
output quality or damages.
- Ensure no liquids get on or into the device.
- Do not remove any cover or safety device fastened by screws.
_______________________________________________________________________________________________
MICROPLEX
Operator’s Manual SOLID F24
Edition 5.0
Introduction
---------------------------------------------------------------------------------------------------------------------------------------------------------------------
11
- Do not bridge a safety device.
- Do not push anything into the ventilation apertures.
- Never carry out installations, cleanings or maintenance
operations being not described in this manual. These
operations should only be done by MICROPLEXauthorized service personnel.
To be able to disconnect the printer quickly from the main power in
case of emergency please regard the following hints:
- For pluggable connected printers, the power-outlet should
be installed near the printer and it should be within easy
reach.
- For permanently connected printers, an easily accessible
emergency power-off switch should be installed close to the
printer.
- Please do not conceal the disconnect devices with the printer
or other things.
_______________________________________________________________________________________________
MICROPLEX
Operator’s Manual SOLID F24
Edition 5.0
12 Introduction
---------------------------------------------------------------------------------------------------------------------------------------------------------------------
- Please regard all the information and hints being directly
attached to the device or being described in this manual.
_______________________________________________________________________________________________
MICROPLEX
Operator’s Manual SOLID F24
Edition 5.0
Installation
---------------------------------------------------------------------------------------------------------------------------------------------------------------------
13
2. Installation
2.1. Checking List
First of all place the printer and the accessories onto a level surface until
the definitive location is chosen.
Please make sure there are no transportation damages and everything is
complete.
Damages should be reported to the supplier immediately. Open the
cartboard box carefully and check the contents using the following list.
SOLID F24 Printer Box:
- MICROPLEX SOLID F24 laser printer
- Power Cord (230 V, 50 Hz)
- Entry (front) Paper Guide
- Exit (rear) Paper Guide
- CD containing:
•
Operator’s Manual SOLID F24
•
Print drivers
Starter Kit Box:
- OPC Drum Kit
- 1 OPC Drum
- Toner Kit
- 2 Toner Bottles
- 1 Spout for the Toner Bottle
- 2 Waste Toner Containers
- 2 Cleaner Felts
- Developer Kit
- 1 Developer Unit
- 1 Starter Toner Bottle (Carrier/Toner)
- 1 Spout for the Starter Toner Bottle
- 1 Ozone Filter
- 1 Cleaning Kit
_______________________________________________________________________________________________
MICROPLEX
Operator’s Manual SOLID F24
Edition 5.0
14 Installation
---------------------------------------------------------------------------------------------------------------------------------------------------------------------
developer kit
toner kit
OPC kit
starter kit
box with entry and
exit paper guide
and power cord
SOLID 24E
printer and starter kit
banded together
)
Keep all the packing materials for a later transport if necessary.
_______________________________________________________________________________________________
MICROPLEX
Operator’s Manual SOLID F24
Edition 5.0
Installation
---------------------------------------------------------------------------------------------------------------------------------------------------------------------
15
2.2. Printer View
External View:
top cover
top cover
button
front cover
control panel
power switch
Internal View:
laser unit
fuser unit
contrast dial
paper top sensor
OPC drum
cartridge
tractor unit
ozone filter
control panel
tension roller
toner filling hole
developer unit
_______________________________________________________________________________________________
MICROPLEX
Operator’s Manual SOLID F24
Edition 5.0
16 Installation
--------------------------------------------------------------------------------------------------------------------------------------------------------------------2.3. Printer Installation
- The chosen location should be clean, dry and well ventilated .
- Damaging environment factors like metal vapors, oil mist,
corrosive leaches or things like that must not affect the printer.
- Place the printer on a horizontal, firm and solid surface.
- The printer environment has to be free of shocks and
vibrations.
- Behind the printer there has to be enough space to allow the
paper to leave the printer without problems.
- Allow at least 3 cm of clearance on both sides of the printer to
guarantee necessary ventilation.
- Printer and socket have to be in reach easily.
- The printer should not be located near valatile or combustible
materials (a curtain e.g.).
- Please regard the following environment conditions to
operate the printer at full reliability:
Temperature: +10°C to +35°C
Relative atmospheric humidity: 20% to 80%
- Do not expose the printer to abrupt temperature changes
(heating, window or air condition).
- The printer should not be exposed to direct sunlight.
- The printer must be connected to an appropriate AC power
source 115V AC/60 Hz (North America) or 230V/50 Hz
(Europe, United Kingdom e.g.). The power source must be
properly grounded. Socket and power cord must not be
damaged.
- Use the printer only within the allowed fluctuation range of
±10%.
- The power source must be ”noise-free”, not subjected to surges
or noise (generated by big machines e.g.).
_______________________________________________________________________________________________
MICROPLEX
Operator’s Manual SOLID F24
Edition 5.0
Installation
---------------------------------------------------------------------------------------------------------------------------------------------------------------------
17
2.4. Installation Instructions
Follow the instructions below in the same chronological order to install
the consumables:
- Developer unit
- Starter toner
- Ozone filter
- Waste toner container
- OPC drum
- Cleaner felt
- Paper guides
Open the printer:
- Open the top cover by pressing the button on the left firmly.
- Pull up the top cover while pressing the button.
Do not force the top cover over an 80 degree angle to avoid damaging
the printer.
_______________________________________________________________________________________________
MICROPLEX
Operator’s Manual SOLID F24
Edition 5.0
18 Installation
--------------------------------------------------------------------------------------------------------------------------------------------------------------------2.5. Developer Unit Installation
front cover
lock down clamp
lock down clamp
developer unit
1. Open the printer’s front cover (approx. 45°). The front cover
is locked with two clamps.
2. Take the developer unit out of the developer kit. Remove the
developer kit from its foil package.
3. Turn the developer unit so that its position is the same as
shown in the figure above.
4. Slide the developer unit along the plastic rails completely into
the printer.
5. Lock it down with the two green clamps.
6. Close the printer’s front cover.
_______________________________________________________________________________________________
MICROPLEX
Operator’s Manual SOLID F24
Edition 5.0
Installation
---------------------------------------------------------------------------------------------------------------------------------------------------------------------
19
2.6. Starter Toner Fill up
1. Take the starter toner bottle out of the developer kit (the starter
toner bottle is smaller than the standard toner bottles).
2. Shake it several times to mix the carrier and the toner together.
3. Open the bottle. Puncture the seal with a needle.
Compressive differences between the bottle interior and the
environment are equalized this way and a toner dust blow-out
will be avoided.
4. Remove the seal of the bottle completely.
5. Attach the added spout carefully to the starter toner bottle.
6. Now open the cover of the developer unit and disseminate the
starter toner carefully into the developer unit.
developer unit cover
developer unit
_______________________________________________________________________________________________
MICROPLEX
Operator’s Manual SOLID F24
Edition 5.0
20 Installation
---------------------------------------------------------------------------------------------------------------------------------------------------------------------
starter toner bottle
Do not squeeze the toner bottle while filling in the toner to avoid
contaminating the printer.
)
7. Close the cover of the developer unit.
You should hear a ″click″ that indicates the cover is completely closed.
If the cover is not completely closed the message [Cover Open !] is
displayed.
With this starter toner filling you can start printing now. Toner has not to
be refilled until the message [Toner Empty !] is displayed (see chapter
6.2).
_______________________________________________________________________________________________
MICROPLEX
Operator’s Manual SOLID F24
Edition 5.0
Installation
---------------------------------------------------------------------------------------------------------------------------------------------------------------------
21
2.7. Ozone Filter Installation
1. Take the ozone filter out of the developer kit.
2. Remove the foil packing.
3. Insert the ozone filter into the slot behind the control panel
(see also figure below).
_______________________________________________________________________________________________
MICROPLEX
Operator’s Manual SOLID F24
Edition 5.0
22 Installation
--------------------------------------------------------------------------------------------------------------------------------------------------------------------2.8. Waste Toner Container Installation
1. Take the waste toner container out of the toner kit.
2. Put the green cap onto the cap holder of the waste toner
container. It will be used later to close the full waste toner
container.
3. Place the waste toner container into its opening on the inner
left side of the printer as shown in the figure below.
cap
filling hole
cap holder
waste toner container
OPC
drum unit
Future position of the
waste toner container
_______________________________________________________________________________________________
MICROPLEX
Operator’s Manual SOLID F24
Edition 5.0
Installation
---------------------------------------------------------------------------------------------------------------------------------------------------------------------
23
2.9. OPC Cartridge Installation
Keep the following in mind when handling the OPC cartridge:
- Do not expose the light-sensitive OPC drum to electric light or
sunlight any longer than 5 minutes.
- Do not touch the green surface of the OPC drum.
)
Make sure the waste toner container has been properly placed before inserting
OPC cartridge.
1. Take the OPC cartridge out of the OPC drum kit. Remove the drum
carefully from its foil package.
2. Turn the OPC cartidge so that it’s position is as shown in the figure
below.
3. Keep the waste toner opening of the drum vertically to the waste
toner container filling hole when inserting the drum.
4. Insert the OPC unit gently into the printer (behind the developer unit).
OPC drum unit
waste toner
opening
waste toner container
developer unit
_______________________________________________________________________________________________
MICROPLEX
Operator’s Manual SOLID F24
Edition 5.0
24 Installation
--------------------------------------------------------------------------------------------------------------------------------------------------------------------2.10. Cleaner Felt Installation
1. Pick one of the cleaner felts out of the toner kit. Remove its foil
package.
2. Open the upper cleaner felt cover. This cover is located at the
top of the fuser, the fusing unit is located in the printer’s rear
part (see figure below).
cleaner felt
cleaner felt cover
)
3. Insert a new cleaner felt into the opening.
4. Close the fuser unit cover.
Don’t worry if the cover of the fuser unit does not seem completely
closed, the printer top cover will provide the necessary pressure to retain
the cleaner felt cover.
5. Close the printer’s top cover.
_______________________________________________________________________________________________
MICROPLEX
Operator’s Manual SOLID F24
Edition 5.0
Installation
---------------------------------------------------------------------------------------------------------------------------------------------------------------------
25
2.11. Paper Guide Installation
1. Remove the entry (front) and exit (rear) paper guides from the starter
kit box.
2. Insert the larger entry paper guide into the front of the printer so that
the plastic hooks fit inside the right and left edges of the paper
entry slot.
3. Insert the smaller exit paper guide into the rear of the printer so that
the plastic hooks fit inside the right and left edges of the paper exit
slot.
_______________________________________________________________________________________________
MICROPLEX
Operator’s Manual SOLID F24
Edition 5.0
26 Paper Handing and Operation
---------------------------------------------------------------------------------------------------------------------------------------------------------------------
3. Paper Handling and Operation
3.1. Paper Loading
)
The printer processes 4” to 10” edge-to-edge continuous-form media
(incl. punched margins).
1. Open the printer’s top cover.
With the button on the center front of the printer you can release the
paper rollers for paper loading.
2. Press and hold the button while loading the paper (as shown
in figure below).
3. While holding the button slide the continuous paper through
the slot at the front cover until it comes out behind the OPC
unit near the tractors.
4. Release the button on the center front.
_______________________________________________________________________________________________
MICROPLEX
Operator’s Manual SOLID F24
Edition 5.0
Paper Handling and Operation
---------------------------------------------------------------------------------------------------------------------------------------------------------------------
27
tractors
OPC unit
button
5. Open the two paper holders of the tractor unit.
6. Unlock the tractors by moving the two green locking levers to
their up position.
_______________________________________________________________________________________________
MICROPLEX
Operator’s Manual SOLID F24
Edition 5.0
28 Paper Handing and Operation
---------------------------------------------------------------------------------------------------------------------------------------------------------------------
loading edge of paper
paper top sensor
unlocked
front of
printer
locked
paper holders
right locking lever
7. Place the paper with one side onto the pins of the tractor
roller.
)
8. Adjust the width of the tractors so the paper can be placed
easily between the tractors.
Make sure the leading edge of the paper does not extend beyond the
tractors and the paper top sensor. If the paper is installed across this
sensor, the printer is not able to set the top-of-page automatically and
correctly.
9. Lock the tractors with the two green levers.
10. Close the paper holders.
11. Close the printer’s top cover.
_______________________________________________________________________________________________
MICROPLEX
Operator’s Manual SOLID F24
Edition 5.0
Paper Handling and Operation
---------------------------------------------------------------------------------------------------------------------------------------------------------------------
29
3.2. Attaching the Printer to a Computer
1. Make sure the printer, computer, and any other attached devices are
turned off and unplugged.
2. Use a proper interface line to connect the printer to the computer or to
attach the printer to the network.
The printer SOLID F24 is provided with several interfaces;
see chapter 8 Specifications for more information.
_______________________________________________________________________________________________
MICROPLEX
Operator’s Manual SOLID F24
Edition 5.0
30 Paper Handing and Operation
--------------------------------------------------------------------------------------------------------------------------------------------------------------------3.3. Turning the Printer on
1. Remove the power cord from the printer box.
2. Connect the printer to an appropriate external power source.
on / off switch
power cord
power cord receptacle
3. Press the toggle switch on the right side of the printer to the
ON position.
The printer will now perform automatic diagnostic procedures and feed
paper in preparation for printing. It takes approximately 3 minutes.
The warm-up is finished when the green READY LED shines.
_______________________________________________________________________________________________
MICROPLEX
Operator’s Manual SOLID F24
Edition 5.0
Control Panel
31
________________________________________________________________________________________________
4. Control Panel
4.1. Control Panel View
Display
(two-lined)
SOLID 24E
Indicators (LEDs)
READY
ON LINE
RESET
DATA
FORM FEED
MENU
STORE
Panel keys
(7 pieces)
4.2. Function of the Control Panel Elements
Display
The printer is provided with a 2 x 16 character LCD front panel
display. This display is used to show the printer’s status messages,
e.g..
________________________________________________________________________________________________
MICROPLEX
Operator’s Manual SOLID F24
Edition 5.0
32
Control Panel
____________________________________________________________________________________________
____
LEDs
The printer is provided with 3 LEDs (Light Emitting Diode).
The meaning of these LEDs is described in the following text:
ON LINE
The printer is ready to receive data from the host (ON LINE).
All control panel keys except the ON LINE key are ineffective.
The printer is not ready to receive data from the host (OFF LINE). The
control panel keys are active.
READY
The printer is warmed up and ready to print.
The printer is not ready.
________________________________________________________________________________________________
MICROPLEX
Operator’s Manual SOLID F24
Edition 5.0
Control Panel
33
________________________________________________________________________________________________
DATA
The printer receives or contains data.
The input buffer contains printable data, but the printing process is
interrupted. This situation is caused for example if the printer is warmingup.
There are no printable data in the input buffer.
________________________________________________________________________________________________
MICROPLEX
Operator’s Manual SOLID F24
Edition 5.0
34
Control Panel
____________________________________________________________________________________________
____
Panel Keys
Now the individual control panel keys are described:
ON LINE
FORM FEED
Pressing the ON LINE key activates the ON LINE/OFF LINE mode.
In the OFF LINE mode the FORM FEED key is used to transport the
paper forward by one page length.
This key is used to clear an error message in the display, after the error
is fixed.
RESET
MENU
These keys are used for working within the different levels of the menu
structure described in the following chapters.
STORE
________________________________________________________________________________________________
MICROPLEX
Operator’s Manual SOLID F24
Edition 5.0
Control Panel
35
________________________________________________________________________________________________
4.3. Configuration via the Control Panel
You can use the control panel to change the printer configuration and
customize your printer to meet your specific needs.
In addition a software (called MPConfig) will be available for the printer
SOLID F24 to allow a printer configuration via Ethernet.
The controller has its integrated website with information on the printer
status and the printjob status.
Chapter 5 (Panel Functions) describes how to reach the particular printer
functions via the control panel.
T e m p o r a r y changes in printer configuration are effective only as
long as the printer stays turned on. To select such changes temporarily, the
user must terminate the change of function by pressing the STORE key one
single time.
P e r m a n e n t changes in printer configuration are active each time the
printer is turned on again. To select such changes permanently, the user
must terminate the change of function by pressing the STORE key three
times.
An output of the current printer values can be generated using the
”Printing the Status Sheet” panel function (see chapter 5.1).
________________________________________________________________________________________________
MICROPLEX
Operator’s Manual SOLID F24
Edition 5.0
36
Control Panel
____________________________________________________________________________________________
____
4.4. Menu Structure
Access to the menu structure is possible as soon as the printer is turned OFF LINE.
The SOLID F24 menu structure is arranged in different levels:
ON LINE mode
È OFF LINE
Menu Level 1
Paper Menu
Status Sheet
Page Length
Font List
Paper W idth
Hexdum p
Norm al Print/FF
Cancel Job
Menu Page
Configuration
Netw ork
Im age X-Pos.
O ff
O rientation
Im age Y-Pos.
DHCP
Off
Sym bol Code
Fuser Tem p.
Manual
Tim eout
Line Spacing
Retract Mode
IP A ddress
Centronics
Char. Spacing
Pow . Sav.Tim e
Subnet Mask
RS 232
Line Term ination
SIA
in m m
Tw o-Up Mode
RS 232 Protocol
Sliding Pattern
Buffer Dum p
Engine
Font Num ber
Interface
in inch
in dot
Page Menu
Print Direction
RTS/ CTS
Left
XON/ XO FF
Right
None
Top
Baudrate
RS 232 Form at
Gatew ay
Margin
Bottom
PCL Y-O ffset
MP-BUS
Em ulation
Language
Transparent Code
Input Buffer
Config. W ord
User Config.
Select
Define
Factory Default
RFM
Key lock
Key tone
Extended Menu
Tim e setting
Date setting
This panel function allows the user to choose a reduced menu instead
of the extended menu shown above.
________________________________________________________________________________________________
MICROPLEX
Operator’s Manual SOLID F24
Edition 5.0
Control Panel
37
________________________________________________________________________________________________
Selecting positions in the menu structure
ON LINE
This symbol shows the ON/OFF LINE key. If the printer is turned OFF
LINE with this key you get automatically into the first menu level.
By pressing this ARROW keys you can move within the menu levels.
Each menu item/sub-item within a menu level is displayed in the display
of the control panel.
["Menu Level"]
Pressing the STORE key has two main functions. It gives the user access
to a particular menu and, once in the menu, it allows the user to select a
particular function.
STORE
["Function"]
________________________________________________________________________________________________
MICROPLEX
Operator’s Manual SOLID F24
Edition 5.0
38
Control Panel
____________________________________________________________________________________________
____
Functions / Changing of function values:
Within one function the value can be changed by pressing the ARROW
keys.
The digit to change can be selected by pressing the ARROW UP key, if
need be (this moves you to the next position of the function value).
STORE
3x
STORE
Pressing the STORE key the function values currently displayed are
confirmed resp. the selected function is activated (the changes are stored
temporary).
To select such changes permanently, the user must terminate the change
of function by pressing the STORE key three times.
This permanent changes in printer configuration are active each time the
printer is turned on again.
Return to the ON LINE mode:
MENU
Pressing the MENU key takes the user back to the respective menu level
above.
ON LINE
The ON LINE key switches the user directly to the ON LINE mode from
any menu position.
________________________________________________________________________________________________
MICROPLEX
Operator’s Manual SOLID F24
Edition 5.0
Control Panel
39
________________________________________________________________________________________________
4.5. Syntax of Diagrams
Specified functions of the operating panel will be shown in diagrams.
These diagrams describe the course to the variaty of functions.
First the elements of the diagrams are explained:
A sequence is described vertically. That means, keys
have to be pressed one after another.
Key A
In this example key A has to be pressed first. Then key A is released
and key B has to be pressed. Finally key B is released and key C has to
be pressed.
Key B
Key C
A combination is described horizontally.
In this case two keys have to be pressed.
First key A has to be pressed. While holding down key A additionally
key B has to be pressed.
Key A
+
Key B
The ″Panel display″ column shows the display messages
corresponding to the sequences listed on the left.
["Message"]
In the column ″Notes″ explanations to particular operational steps are
given.
________________________________________________________________________________________________
MICROPLEX
Operator’s Manual SOLID F24
Edition 5.0
40
Panel Functions
_______________________________________________________________________________________________
5. Panel Functions
)
For the panel functions described in the following text, the printer is
presumed to be turned on and in the ON LINE mode.
5.1. Printing the Status Sheet
This function generates a status sheet.
The status sheet contains information about the current printer
configuration and the available fonts.
Panel display
Notes
[SOLID F24 ]
Turn the printer OFF LINE with this key.
ON LINE
[Menu Level 1 ]
Press the STORE key, by that
Menu level 1 is selected.
STORE
[Status Sheet ]
STORE
Press the STORE key again.
The data LED begins to flash and the
status sheet is printed.
[Status Sheet ]
After pressing the ON LINE key the
printer returns to normal printing.
ON LINE
_______________________________________________________________________________________________
MICROPLEX
Operator’s Manual SOLID F24
Edition 5.0
Panel Functions
41
_______________________________________________________________________________________________
Status Sheet contents:
The first lines, entitled SERVICE INFORMATION, contain
hexadecimal coded configuration parameters.
Printed in plain text:
- Controller version / memory / serial number
- Firmware release
- Interface
parameters of Parallel, Serial, USB, Network (Ethernet)
- Printer emulation
- User-RAM / free User-RAM
- Input data buffer
- Transparent code
- Paper size
- Default margins
top / left
bottom / right
- Default character code
- Options
- Fonts installed (Font banks)
Note:
Use the panel function Printing the Font List to show the fonts installed (see the
following chapter).
_______________________________________________________________________________________________
MICROPLEX
Operator’s Manual SOLID F24
Edition 5.0
42
Panel Functions
_______________________________________________________________________________________________
5.2. Printing the Font List
This function generates a list of all fonts installed to the printer.
The font list shows demo prints of all fonts and, in addition, the
concerning PCL selection commands. These commands contain
information on font width and font hight (see chapter 5.16 Font
Selection, too).
Panel display
Notes
[SOLID F24 ]
Turn the printer OFF LINE with this key.
[Menu Level 1 ]
Press the STORE key, by that
Menu level 1 is selected.
ON LINE
STORE
[Status Sheet ]
Press one of the ARROW keys until [Font
List ] is displayed.
yyy
[Font List ]
The font list is printed.
STORE
[Font List ]
The printer is turned ON LINE again.
ON LINE
_______________________________________________________________________________________________
MICROPLEX
Operator’s Manual SOLID F24
Edition 5.0
Panel Functions
43
_______________________________________________________________________________________________
5.3. Hexdump-Mode Activation
Within the Hexdump-Mode the printer prints all characters received via
interface without any interpretation (hexadecimal coded).
This mode helps with error diagnosis. The Hexdump-Mode can be activated
only temporarily.
Panel display
Notes
[SOLID F24 ]
Turn the printer OFF LINE with this key.
ON LINE
[Menu Level 1 ]
Menu level 1 is selected.
STORE
[Status Sheet ]
Press one of the ARROW keys until
[Hexdump ] is displayed.
yyy
[Hexdump ]
STORE
[Hexdump ]
The Hexdump-Mode is activated.
The printer is turned ON LINE again.
ON LINE
Note: By activating the normal print mode (see next chapter) or by
turning the printer and controller off and on again the printer
can be taken out of Hexdump-Mode.
_______________________________________________________________________________________________
MICROPLEX
Operator’s Manual SOLID F24
Edition 5.0
44
Panel Functions
_______________________________________________________________________________________________
5.4. Normal Print Mode Activation (incl. FORM FEED)
The normal print mode suspends the Hexdump-Mode.
This function is activated, when a print job must be continued without
turning the printer off and on again. In addition to that the normal print
mode activation is used to produce a FORM FEED.
Panel display
Notes
[SOLID F24 ]
Turn the printer OFF LINE with this key.
ON LINE
[Menu Level 1 ]
Menu level 1 is selected.
STORE
[Status Sheet ]
Press one of the ARROW keys until
[Normal Print/FF ] is displayed.
yyy
[Normal Print/FF ]
STORE
[Normal Print/FF ]
The normal print mode is activated.
The printer is turned ON LINE again.
ON LINE
Note:
After activating the normal print mode a FORM FEED is released
automatically and one sheet is put out. This is necessary because
after a test in the Hexdump-Mode it is possible that data can
remain in the input buffer unintentionally (cause: in the Hexdump
-Mode no control characters are evaluated and no FORM FEED
is effected).
_______________________________________________________________________________________________
MICROPLEX
Operator’s Manual SOLID F24
Edition 5.0
Panel Functions
45
_______________________________________________________________________________________________
5.5. Clearing the Input Buffer (Cancel Job)
This function permits the resumption of a print job at a particular page
after a print interruption (e.g. paper jam). The data contained in the
input buffer before the interruption are cleared.
Panel display
Notes
[SOLID F24 ]
Turn the printer OFF LINE with this key.
ON LINE
[Menu Level 1 ]
Menu level 1 is selected.
STORE
[Status Sheet ]
Press one of the ARROW keys until
[Cancel Job ] is displayed.
yyy
[Cancel Job ]
STORE
[Cancel Job ]
All data contained in the input buffer will
be cleared.
The printer is turned ON LINE again.
ON LINE
_______________________________________________________________________________________________
MICROPLEX
Operator’s Manual SOLID F24
Edition 5.0
46
Panel Functions
_______________________________________________________________________________________________
5.6. Printing the Menu Page
This function prints a survey of the available panel functions.
Note: When printing the menu page please use a large paper.
Panel display
Notes
[SOLID F24 ]
Turn the printer OFF LINE with this key.
ON LINE
[Menu Level 1 ]
Menu level 1 is selected.
STORE
[Status Sheet ]
Press one of the ARROW keys until
[Menu Page ] is displayed.
yyy
[Menu Page ]
STORE
[Menu Page ]
A menu structure presentation of the
SOLID F24 (see chapter 4.4) is printed
out.
The printer is turned ON LINE again.
ON LINE
_______________________________________________________________________________________________
MICROPLEX
Operator’s Manual SOLID F24
Edition 5.0
Panel Functions
47
_______________________________________________________________________________________________
5.7. Generating Testsheets (Sliding Pattern)
This function generates a series of test prints without sending data to the
printer.
These test prints facilitate error analysis.
Panel display
Notes
[SOLID F24 ]
Turn the printer OFF LINE with this key.
ON LINE
[Menu Level 1 ]
Menu level 1 is selected.
STORE
[Status Sheet ]
Press one of the ARROW keys until
[Sliding Pattern ] is displayed.
yyy
[Sliding Pattern ]
STORE
[Sliding Pattern ]
A series of test prints is generated.
The printer is turned ON LINE again.
ON LINE
)
The printing out of test prints can be stopped by pushing the MENU key.
_______________________________________________________________________________________________
MICROPLEX
Operator’s Manual SOLID F24
Edition 5.0
48
Panel Functions
_______________________________________________________________________________________________
5.8. Page Length Adjustment
After inserting new material (e.g. paper) this function is used to adjust the
printer to the new page length. The default page length value is 12 inches.
Panel display
Notes
[SOLID F24 ]
ON LINE
Turn the printer OFF LINE with this key.
[Menu Level 1 ]
yyy
Press one of the ARROW keys until [Paper
Menu ] is displayed.
[Paper Menu ]
STORE
STORE
[Page Length ]
Press the STORE key to adjust the page
length.
[Digit1 12 1/8]
yyy
[Digit1 12 1/6]
STORE
Press the STORE key to select the paper
menu.
[Digit1 12 1/6]
Pressing the ARROW DOWN key changes
the value of the current position (Digit 1 = last
position, in this example: 1/8). Pressing the
ARROW UP key moves you to the next
position. Values from 3 to 33 inches are
adjustable.
The page length is changed to 12 1/6
inches.
The printer is turned ON LINE again.
ON LINE
Note
If the option ‘Paper Request’ is chosen (by the following change of
configuration: CONFIG 32: Bit 2 set to 1), the printer goes OFF LINE
not only in case of paper end, but also after every printer turn on and
after every paper size adjustment, too.
The panel display shows the message [Load Paper ] ... .
After loading the corresponding paper the printer is turned ON LINE
by using the RESET key.
_______________________________________________________________________________________________
MICROPLEX
Operator’s Manual SOLID F24
Edition 5.0
Panel Functions
49
_______________________________________________________________________________________________
5.9. Paper Width Adjustment
This function is used to adjust the paper width (print width) according to the
currently used format.
Panel display
ON LINE
Notes
[SOLID F24 ]
Turn the printer OFF LINE with this key.
[Menu Level 1 ]
Press one of the ARROW keys until [Paper
Menu ] is displayed.
yyy
[Paper Menu ]
STORE
Press the STORE key to select the paper
menu.
[Feeder Select ]
Press one of the ARROW keys until [Paper
Width ] is displayed.
yyy
[Paper Width ]
Press the STORE key to select the paper
width.
STORE
[in inch
]
Inch = currently selected unit. (By pressing the
ARROW keys the units mm and dot can be
selected alternatively).
[Digit1 8.51]
Press the ARROW DOWN key to change the
value of the current position (Digit1 = last
position, in this example: 1). Pressing the
ARROW UP key moves you to the next
position. Values up to 8.53 inches are
adjustable.
yyy
STORE
yyy
[Digit1 8.53]
[Digit1 8.53]
STORE
The paper width is changed to 8.53 inches.
The printer is turned ON LINE again.
ON LINE
Note
Information about the option ‘Paper Request’ is given in the
previous chapter Page Length Adjustment.
_______________________________________________________________________________________________
MICROPLEX
Operator’s Manual SOLID F24
Edition 5.0
50
Panel Functions
_______________________________________________________________________________________________
5.10. Data - Interface Selection
This function is used to determine the interface for print data transfer.
Panel display
Notes
[SOLID F24 ]
Turn the printer OFF LINE with this key.
ON LINE
[Menu Level 1 ]
yyy
Press one of the ARROW keys until
[Configuration ] is displayed.
[Configuration ]
STORE
[Interface ]
STORE
[SIA ]
yyy
Press one of the ARROW keys until the
selected interface (e.g. Centronics) is
displayed.
[Centronics ]
[Centronics ]
STORE
The Centronics interface is selected.
The printer is turned ON LINE again.
ON LINE
_______________________________________________________________________________________________
MICROPLEX
Operator’s Manual SOLID F24
Edition 5.0
Panel Functions
51
_______________________________________________________________________________________________
5.11. Emulation Selection
This function helps to determine which printer emulation must be active.
Panel display
Notes
[SOLID F24 ]
Turn the printer OFF LINE with this key.
[Menu Level 1 ]
Press one of the ARROW keys until
[Configuration ] is displayed.
ON LINE
yyy
[Configuration ]
STORE
[Interface]
Press one of the ARROW keys until
[Emulation ] is displayed.
yyy
[Emulation ]
STORE
[SOLID Standard ]
yyy
Press one of the ARROW keys
until the desired emulation
(e.g. HP PCL 5) is displayed.
[HP PCL 5 ]
[HP PCL 5 ]
STORE
The emulation HP PCL 5 is selected.
The printer is turned ON LINE again.
ON LINE
_______________________________________________________________________________________________
MICROPLEX
Operator’s Manual SOLID F24
Edition 5.0
52
Panel Functions
_______________________________________________________________________________________________
Available emulations:
Standard:
MICROPLEX IDOL,
HP LaserJet (PCL 5),
Epson FX,
IBM Proprinter,
Diablo 630
Optional:
Kyocera Prescribe,
Express,
Printronix IGP/PGL,
HPGL (7475A),
QMS Magnum Code V,
DEC LN03+,
Tektronix 4010/4014,
Tally MT 6xx,
TIFF (CCITT group 4),
Bull MP6090,
XEROX XES
Notice:
The brand names mentioned are registered trademarks of the
enterprises named above.
_______________________________________________________________________________________________
MICROPLEX
Operator’s Manual SOLID F24
Edition 5.0
Panel Functions
53
_______________________________________________________________________________________________
5.12. Display Language Selection
This function enables the user to determine the language for the display
messages, the status sheet and the font list.
Panel display
[SOLID F24 ]
ON LINE
[Menu Level 1 ]
Notes
Turn the printer OFF LINE with this key.
Press one of the ARROW keys until
[Configuration ] is displayed.
yyy
[Configuration ]
STORE
[Interface ]
Press one of the ARROW keys until
[Language ] is displayed.
yyy
[Language ]
STORE
[German ]
yyy
Press one of the ARROW keys until the
desired language (e.g. English) is
displayed.
[English ]
The display language English is selected.
[English ]
The printer is turned ON LINE again.
STORE
ON LINE
_______________________________________________________________________________________________
MICROPLEX
Operator’s Manual SOLID F24
Edition 5.0
54
Panel Functions
_______________________________________________________________________________________________
5.13. Transparent Code Adjustment
This function configures the transparent code. Using the transparent code
enables you to initiate the commands of the page description language
IDOL by printable characters. The transparent code pre-setting is 2625.
These are the ASCII character codes (hexadecimal) for the characters & %.
Panel display
ON LINE
[SOLID F24 ]
Notes
Turn the printer OFF LINE with this key.
[Menu Level 1 ]
yyy
Press one of the ARROW keys until
[Configuration ] is displayed.
[Configuration ]
STORE
[Interface ]
yyy
Press one of the ARROW keys until
[Transparent Code ] is displayed.
[Transparent Code ]
STORE
[Digit1 2625]
yyy
[Digit1 2626]
[Digit1 2626]
STORE
The hexadecimal number for & % is preset.
Pressing the ARROW DOWN key changes the
value of the current position (Digit 1 = last
position, in this example: 5). Pressing the
ARROW UP key moves you to the next
position.
2626 is selected as transparent code.
From now on use the characters & &
before programming the IDOL commands.
The printer is turned ON LINE again.
ON LINE
_______________________________________________________________________________________________
MICROPLEX
Operator’s Manual SOLID F24
Edition 5.0
Panel Functions
55
_______________________________________________________________________________________________
5.14. Selection of Memory Distribution (Input Buffer)
This function enables the user to choose the distribution of the available RAM
memory between input buffer and macro/download memory.
Panel display
[SOLID F24 ]
ON LINE
[Menu Level 1 ]
yyy
Notes
Turn the printer OFF LINE with this key.
Press one of the ARROW keys until
[Configuration ] is displayed.
[Configuration ]
STORE
[Interface ]
Press one of the ARROW keys until [Input
Buffer ] is displayed.
yyy
[Input Buffer ]
STORE
[32 kB ]
yyy
Press one of the ARROW keys until the
desired memory distribution is displayed.
The input buffer size is specified in kilobyte
(kB) or in percent of the installed memory.
[100 kB ]
[100 kB ]
STORE
100 kB is selected as input buffer.
The printer is turned ON LINE again.
ON LINE
_______________________________________________________________________________________________
MICROPLEX
Operator’s Manual SOLID F24
Edition 5.0
56
Panel Functions
_______________________________________________________________________________________________
5.15. Setting to Factory Default
This function back-outs all configurations to factory defaults.
Panel display
[SOLID F24 ]
Notes
Turn the printer OFF LINE with this key.
ON LINE
[Menu Level 1 ]
Press one of the ARROW keys until
[Configuration] is displayed.
yyy
[Configuration ]
STORE
[Interface ]
Press one of the ARROW keys until
[Factory Default] is displayed.
yyy
[Factory Default ]
STORE
[Factory Default ]
The configuration is back-outed to
factory defaults.
The printer is turned ON LINE again.
ON LINE
5.16. Font Selection
_______________________________________________________________________________________________
MICROPLEX
Operator’s Manual SOLID F24
Edition 5.0
Panel Functions
57
_______________________________________________________________________________________________
This function selects the active font. Select font number out of the list of
available fonts.
Panel display
[SOLID F24 ]
ON LINE
[Menu Level 1 ]
Notes
Turn the printer OFF LINE with this key.
Press one of the ARROW keys until
[Page Menu] is displayed.
yyy
[Page Menu ]
STORE
[Font Number ]
STORE
[Font 600 ]
Press one of the ARROW keys until the
desired font number (5507 Langeoog
e.g.) is displayed.
yyy
[Font 5507 ]
[Font 5507 ]
STORE
The font number 5507 is selected.
The printer is turned ON LINE again.
ON LINE
_______________________________________________________________________________________________
MICROPLEX
Operator’s Manual SOLID F24
Edition 5.0
58
Panel Functions
_______________________________________________________________________________________________
The SOLID F24 standard equipment contains the following fonts:
Font-no.
0600
0602
0610
1710
4508
4510
4714
5507
5508
5509
6610
9210
9310
2000
9900
Font width Font height
10
10
12
12
P
P
P
20
16.6
15
10
P
P
P
P
12
12
10.1
10.1
8.1
10
14.4
7
7.9
9.1
10.1
10.1
10.1
SC
SC
Font name
Kurilen
Kurilen Italic
Kurilen
Kurilen Italic
Helgoland
Helgoland
Helgoland Bold
Langeoog
Langeoog
Langeoog
Juist Monosp.
Tasmanien
Tasmanien Italic
Tasmanien
Neuwerk
Resumption of this standard font list see next page.
Explanations:
Font width:
Character distance in CPI (Characters Per Inch).
P = proportional, (meaning that each character has an individual width).
Font height:
Font height from the lowest descender to the upper edge of the highest
character, measured in graphical points (1/72 inch).
SC = scalable.
_______________________________________________________________________________________________
MICROPLEX
Operator’s Manual SOLID F24
Edition 5.0
Panel Functions
59
_______________________________________________________________________________________________
Font-no.
PCL 5 compatible
Notes:
0050
0590
0591
6600
0699
1700
1800
1900
5500
5600
5700
5800
2100
2200
2300
9800
9500
9600
0060
9501
9601
9801
9901
0530
5100
5200
5300
7500
7700
7800
7900
9199
9299
9399
9499
Font width Font height
SC
SC
SC
SC
SC
SC
SC
SC
SC
SC
SC
SC
P
P
P
P
P
P
SC
P
P
P
P
P
P
P
P
P
P
P
P
P
P
P
P
SC
SC
SC
SC
SC
SC
SC
SC
SC
SC
SC
SC
SC
SC
SC
SC
SC
SC
SC
SC
SC
SC
Font name
Plakatschrift
OCR /B
OCR /A
Juist Monospaced
Kurilen
Kurilen Italic
Kurilen Bold
Kurilen Bold Italic
Langeoog
Langeoog Bold
Langeoog Italic
Langeoog Bold Italic
Texel Bold
Texel Italic
Texel Bold Italic
Neuwerk Italic
Neuwerk Bold Italic
Neuwerk Bold
Plakatschrift
Neuwerk-II Condensed Italic
Neuwerk-II Condensed Bold Ital.
Neuwerk-II Condensed BoId
Neuwerk-II Condensed
PiktoWin
Amrum
Amrum Bold
Amrum Italic
Antigua
Antigua Bold
Antigua Italic
Antigua Bold Itali
Tasmanien-II Bold Italic
Tasmanien-II
Tasmanien-II Italic
Tasmanien-II Bold
Additional fonts can be selected from the font catalogue depending
upon the memory capacity.
You can use the panel function Printing the Font List (see chapter 5.2) to
generate a list of all fonts installed to the printer.
_______________________________________________________________________________________________
MICROPLEX
Operator’s Manual SOLID F24
Edition 5.0
60
Panel Functions
_______________________________________________________________________________________________
5.17. Text Orientation Selection
This function selects the active text orientation.
Panel display
ON LINE
[SOLID F24 ]
[Menu Level 1 ]
Notes
Turn the printer OFF LINE with this key.
Press one of the ARROW keys until
[Page Menu] is displayed.
yyy
[Page Menu ]
STORE
[Font Number ]
Press one of the ARROW keys until
[Orientation] is displayed.
yyy
[Orientation ]
STORE
[Orientation 0 ]
Press one of the ARROW keys until the
desired orientation is displayed.
yyy
[Orientation 1 ]
[Orientation 1 ]
The orientation 1 = landscape is
selected.
The printer is turned ON LINE again.
STORE
ON LINE
Orientation assignment:
Orientation
Orientation
Orientation
Orientation
0 = Portrait (upright format)
1 = Landscape (horizontal format)
2 = Portrait upside down
3 = Landscape upside down
_______________________________________________________________________________________________
MICROPLEX
Operator’s Manual SOLID F24
Edition 5.0
Panel Functions
61
_______________________________________________________________________________________________
5.18. Symbol Code Selection
This function selects the active symbol code.
Panel display
[SOLID F24 ]
ON LINE
[Menu Level 1 ]
Notes
Turn the printer OFF LINE with this key.
Press one of the ARROW keys until
[Page Menu] is displayed.
yyy
[Page Menu ]
STORE
[Font Number ]
Press one of the ARROW keys until
[Symbol Code] is displayed.
yyy
[Symbol Code ]
STORE
[902, IBM PC-II ]
Press one of the ARROW keys until the
desired symbol code is displayed.
yyy
[901, IBM PC-I ]
[901, IBM PC-I ]
STORE
The symbol code 901, IBM PC-I is
selected.
The printer is turned ON LINE again.
ON LINE
_______________________________________________________________________________________________
MICROPLEX
Operator’s Manual SOLID F24
Edition 5.0
62
Panel Functions
_______________________________________________________________________________________________
5.19. Configuration of Text Margins
This function sets text margins. Margins are expressed in dots at
the upper left edge of the paper.
Panel display
Notes
[SOLID F24 ]
Turn the printer OFF LINE with this key.
[Menu Level 1 ]
Press one of the ARROW keys until
[Page Menu] is displayed.
ON LINE
yyy
[Page Menu ]
STORE
[Font Number ]
Press one of the ARROW keys until
[Margin] is displayed.
yyy
[Margin ]
STORE
[Left ]
Press one of the ARROW keys until the
desired margin is displayed.
yyy
[Right ]
[Digit1 02381]
STORE
yyy
[Digit1 02387]
[Digit1 02387]
Pushing the ARROW DOWN key
changes the value of the current position
(Digit 1 = last position, in this example:
1).
Pushing the ARROW UP key moves you
to the next position.
The right margin is changed to 2387
dot.
The printer is turned ON LINE again.
STORE
ON LINE
_______________________________________________________________________________________________
MICROPLEX
Operator’s Manual SOLID F24
Edition 5.0
Panel Functions
63
_______________________________________________________________________________________________
5.20. Image Shifting to the X-Direction
This function shifts the print image in relation to the paper to the
x-direction (crosswise the print direction).
The SOLID F24 paper input always leads the paper centered into the printer, so
this function is useful in case of special paper dimensions to shift your x-zero to the
left edge of the paper.
Panel display
Notes
[SOLID F24 ]
Turn the printer OFF LINE with this key.
ON LINE
[Menu Level 1 ]
yyy
Press one of the ARROW keys until [Engine ]
is displayed.
[Engine ]
STORE
STORE
[Image X-Pos. ]
The panel function Image shifting to the xdirection is selected.
[ 000/300 Inch ]
yyy
0 Inch = currently set value.
By pressing the ARROW keys you can shift
the image in relation to the paper (positive
and negative values are adjustable).
[-008/300 Inch ]
STORE
[-008/300 Inch ]
Now the print image is shifted totally
-8/300 Inch (about 0.68 mm) to the left.
The printer is turned ON LINE again.
ON LINE
_______________________________________________________________________________________________
MICROPLEX
Operator’s Manual SOLID F24
Edition 5.0
64
Panel Functions
_______________________________________________________________________________________________
Example for shifting the image to the X-direction:
Image shifting to the X-direction
Printout after the image shifting to
the X-direction.
In this example the value of the
Image X-Position was increased
(ARROW UP V key).
Feed
direction
(print
direction)
Previous position of the
printout margin (prior to the
image shifting)
_______________________________________________________________________________________________
MICROPLEX
Operator’s Manual SOLID F24
Edition 5.0
Panel Functions
65
_______________________________________________________________________________________________
5.21. Image Shifting to the Y-Direction
This function shifts the print image in relation to the paper to the
y-direction (print direction).
Panel display
Notes
[SOLID F24 ]
Turn the printer OFF LINE with this key.
ON LINE
[Menu Level 1 ]
yyy
Press one of the ARROW keys until [Engine ]
is displayed.
[Engine ]
STORE
[Image X-Pos. ]
yyy
Press one of the ARROW keys until [Image YPos. ] is displayed.
[Image Y-Pos. ]
STORE
[ 100/300 Inch]
yyy
1/3 inch = currently set value.
By pressing the ARROW keys you can shift
the image in relation to the paper (positive
and negative values are adjustable).
[ 300/300 Inch]
[ 300/300 Inch]
STORE
Now the print image is shifted by totally
300/300 inch = 1 inch opposite to the print
direction.
The printer is turned ON LINE again.
ON LINE
_______________________________________________________________________________________________
MICROPLEX
Operator’s Manual SOLID F24
Edition 5.0
66
Panel Functions
_______________________________________________________________________________________________
Example for shifting the image to the Y-direction:
Image shifting to the Y-direction
Printout after the image shifting to
the Y-direction.
In this example the value of the
Image Y-Position was increased
(ARROW UP V key).
Feed
direction
(print
direction)
Previous position of the
printout margin (prior to the
image shifting)
_______________________________________________________________________________________________
MICROPLEX
Operator’s Manual SOLID F24
Edition 5.0
Panel Functions
67
_______________________________________________________________________________________________
5.22. Fuser Temperature Changing
This function enables the user to change the temperature of the fuser unit. Please
wait about 15 minutes after the setting before printing again. The parts of the fuser
unit need about this time to achieve the new temperature.
Attention: In order to prevent the fuser unit from damages temperatures
higher
than 185°C are only allowed in case of printing on thick paper (>100 g/m²,
Card Stock -Version).
Panel - Anzeige
[SOLID F24 ]
ON LINE
[Menu Level 1 ]
yyy
Bemerkungen
Turn the printer OFF LINE with this key.
Press one of the ARROW keys until
[Engine ] is displayed.
[Engine ]
STORE
[Image X-Pos. ]
Press one of the ARROW keys until [Fuser
Temp. ] is displayed.
yyy
[Fuser Temp. ]
STORE
[Fuser Temp. 185 ]
yyy
The currently set value is displayed. Press
one of the ARROW keys until the desired
value is displayed.
Adjustments can be made in steps of
5°C. Please pay attention to the safety
instructions above !
[Fuser Temp. 180 ]
[Fuser Temp. 180 ]
STORE
Now the fuser temperature will be
adjusted to 180°C.
The printer is turned ON LINE again.
ON LINE
_______________________________________________________________________________________________
MICROPLEX
Operator’s Manual SOLID F24
Edition 5.0
68
Panel Functions
_______________________________________________________________________________________________
5.23. Configuration of Network Parameters (f.e. IP Address)
The functions of the submenu Network are used to set the parameters for
connecting the printer to a network (Ethernet).
Setting the IP address manually:
ON LINE
Panel display
Notes
[SOLID F24 ]
Turn the printer OFF LINE with this key.
[Menu Level 1 ]
Press one of the ARROW keys until [Network
] is displayed.
yyy
[Network ]
The currently set configuration is displayed.
STORE
[Off ]
Press one of the ARROW keys until [Manual ]
is displayed.
yyy
[Manual ]
STORE
STORE
[IP Address ]
[192.168.002.002 ]
yyy
[192.168.010.123 ]
STORE
[192.168.010.123 ]
Press the STORE key to set the IP address
manually.
Pushing the ARROW UP key changes the
value of the current position (left digit first, in
this example: 1). Pushing the ARROW
DOWN key moves you to the next position.
The new IP address is stored.
The printer is turned ON LINE again.
ON LINE
_______________________________________________________________________________________________
MICROPLEX
Operator’s Manual SOLID F24
Edition 5.0
Panel Functions
69
_______________________________________________________________________________________________
Notes:
If your network is using DHCPc , an address can be automatically assigned
(select the subitem DHCP from the network menu).
The parameters Subnet Mask and Gateway are configured in the same way
as described above. Please select the concerning panel functions for this
(compare chapter 5.6 Menu Structure).
Select the subitem Off from the network menu to switch off the network
access.
c
Dynamic Host Configuration Protocol: offers among other things
a centralized address management.
_______________________________________________________________________________________________
MICROPLEX
Operator’s Manual SOLID F24
Edition 5.0
70
Panel Functions
_______________________________________________________________________________________________
_______________________________________________________________________________________________
MICROPLEX
Operator’s Manual SOLID F24
Edition 5.0
Maintenance 71
---------------------------------------------------------------------------------------------------------------------------------------------------------------------
6. Maintenance
6.1. Printer Cleaning
Periodic cleaning will keep your printer in top condition so that it will
always provide an optimal performance.
- Use a neutral detergent or water solution on a soft cloth to
clean dirt and grease from the cabinet of the printer.
- Do not use an abrasive cloth, alcohol, paint thinner or similar
agents, because they may cause discoloration and scratching.
- Be especially careful to avoid damaging the electronical and
mechanical components.
)
Make sure that the printer has been turned off for at least 15 minutes
before starting any cleaning operation.
_______________________________________________________________________________________________
MICROPLEX
Operator’s Manual SOLID F24
Edition 5.0
72 Maintenance
--------------------------------------------------------------------------------------------------------------------------------------------------------------------6.2. Toner Refilling
)
Refill toner when the message [Toner Empty !] is displayed. The average
amount of printed pages is 10000 at a 4 % print density.
1. Take the toner bottle out of the toner kit.
2. Open the bottle. Puncture the seal with a needle.
Compressive differences between the bottle interior and the
environment are equalized this way and a toner dust blow-out
will be avoided.
3. Remove the seal of the toner bottle completely.
4. Attach the added spout to the toner bottle.
5. Now open the cover of the developer unit and disseminate
the toner carefully into the developer unit.
developer unit cover
developer unit
top up the toner to this edge
_______________________________________________________________________________________________
MICROPLEX
Operator’s Manual SOLID F24
Edition 5.0
Maintenance 73
---------------------------------------------------------------------------------------------------------------------------------------------------------------------
Do not squeeze the toner bottle as you fill in the toner to avoid
contaminating the printer.
toner bottle
)
6. Close the cover of the developer unit.
You should hear a ″click″ which indicates the cover is completely
closed.
7. Close the printer’s top cover.
_______________________________________________________________________________________________
MICROPLEX
Operator’s Manual SOLID F24
Edition 5.0
74 Maintenance
--------------------------------------------------------------------------------------------------------------------------------------------------------------------6.3. Cleaner Felt Replacing
)
After having printed approximately 10000 pages the cleaner felt should
be replaced.
1. Open the printer’s top cover (see chapter 2.4).
If the printer has been running the fuser components may be extremely
hot. They have to cool down for approximately 15 minutes before you
can install the cleaner felt.
2. Open the cleaner felt cover. This cover is located at the top of
the fuser, the fusing unit is located in the printer’s rear part
(see figure below).
3. Remove the old cleaner felt.
4. Pick one of the new cleaner felts out of the toner kit. Remove
its foil package.
5. Insert a new cleaner felt into the opening of the fusing unit.
cleaner felt
cleaner felt cover
6. Close the cleaner felt cover.
_______________________________________________________________________________________________
MICROPLEX
Operator’s Manual SOLID F24
Edition 5.0
Maintenance 75
---------------------------------------------------------------------------------------------------------------------------------------------------------------------
)
Don’t worry if the cleaner felt cover does not seem completely closed,
the printer top cover will provide the necessary pressure to retain the
cleaner felt cover.
7. Close the printer’s top cover.
_______________________________________________________________________________________________
MICROPLEX
Operator’s Manual SOLID F24
Edition 5.0
76 Maintenance
--------------------------------------------------------------------------------------------------------------------------------------------------------------------6.4. Waste Toner Container Replacing
)
Replace the waste toner container when the message [Waste Toner !] is
displayed. The average amount of printed pages is 10000, then the
container will be filled.
1. Open the printer’s top cover.
2. Take the OPC cartridge out of the printer.
Keep the following in mind when handling the OPC cartridge:
- Do not expose the light-sensitive OPC drum to electric light or
sunlight any longer than 5 minutes.
- Do not touch the green surface of the OPC drum.
3. Take the old waste toner container out of the printer.
cap
filling hole
cap holder
waste toner container
OPC
drum unit
4. Close the old waste toner container with the cap (take the cap
_______________________________________________________________________________________________
MICROPLEX
Operator’s Manual SOLID F24
Edition 5.0
Maintenance 77
---------------------------------------------------------------------------------------------------------------------------------------------------------------------
)
from the cap holder).
Be careful to avoid toner blowing out of the container.
The toner is easily combustible and should never come in contact with
fire. Disposal is carried out by your service engineer. Until disposal
please keep the waste toner container inside a plastic bag.
5. Pick the new waste toner container out of the toner kit.
6. Put the green cap onto the cap holder.
7. Insert the new waste toner container with its filling hole
pointing back into the printer as shown in the figure.
8. Now insert the OPC cartridge into the printer firmly (compare
chapter 6.5).
9. Close the printer’s top cover.
_______________________________________________________________________________________________
MICROPLEX
Operator’s Manual SOLID F24
Edition 5.0
78 Maintenance
--------------------------------------------------------------------------------------------------------------------------------------------------------------------6.5. OPC Cartridge Replacing
)
Replace the OPC cartridge when the message [Photo Drum !] is
displayed. The average amount of printed pages is 20000.
Keep the following in mind when handling the OPC cartridge:
- Do not expose the light-sensitive OPC drum to electric light or
sunlight any longer than 5 minutes.
- Do not touch the green surface of the OPC drum.
1. Open the printer’s top cover (see chapter 2.4).
2. Take the old OPC drum out of the printer and put it into a
plastic bag.
OPC drum unit
waste toner
opening
waste toner container
developer unit
Disposal is carried out by your service engineer. Until disposal please
keep the cartridge inside the original cartboard box.
)
Please check if a new waste toner container has to be installed before
inserting the new OPC cartridge.
_______________________________________________________________________________________________
MICROPLEX
Operator’s Manual SOLID F24
Edition 5.0
Maintenance 79
---------------------------------------------------------------------------------------------------------------------------------------------------------------------
3. Pick the new OPC cartridge out of the OPC drum kit.
Remove the drum carefully from its foil package.
4. Turn the OPC cartridge so that its position is the same as
shown in the figure above.
5. Keep the waste toner opening of the drum vertical to the
waste toner container filling hole when inserting the drum.
6. Insert the OPC unit gently into the printer (behind the
developer unit). Make sure it is completely down.
7. Close the printer’s top cover.
6.5.1. Charger Wire Cleaning
)
This maintenance operation should only be performed by a MICROPLEX
trained person if there is any print quality deterioration.
1. Remove the OPC cartridge (see chapter 6.5).
2. Clean the wire by wiping it gently with the wire cleaner.
3. Insert the OPC cartridge gently into the printer (see chapter
6.5).
_______________________________________________________________________________________________
MICROPLEX
Operator’s Manual SOLID F24
Edition 5.0
80 Maintenance
--------------------------------------------------------------------------------------------------------------------------------------------------------------------6.6. Ozone Filter Replacing
)
After having printed approximately 100000 pages the ozone filter
should be exchanged.
1. Open the printer’s top cover.
2. Take the old ozone filter out of the printer (see figure).
3. Pick the new ozone filter out of the developer kit. Remove the
foil package.
4. Insert the new ozone filter into the slot directly behind the
control panel (see also figure below).
5. Close the printer’s top cover.
_______________________________________________________________________________________________
MICROPLEX
Operator’s Manual SOLID F24
Edition 5.0
Maintenance 81
--------------------------------------------------------------------------------------------------------------------------------------------------------------------6.7. Developer Unit Replacing
)
After having printed approximately 100000 pages the developer unit
should be exchanged.
1. Open the printer’s top cover.
front cover
lock down clamp
lock down clamp
developer unit
2. Open the printer’s front cover (approx. 45°). The cover is
locked with two clamps.
3. Open the green lock down clamps at both sides of the
developer unit.
4. Pull the old developer unit out of the printer.
5. Take the new developer unit out of the developer kit. Remove
the developer unit from its foil package.
6. Turn the developer unit so that ist position is the same as
shown in the figure above.
7. Slide the new developer unit completely along the plastic rails
into the printer.
8. Lock it down with the two green clamps.
9. Close the printer’s front cover.
)
Please note that you only have to fill starter toner into the developer unit
if the developer unit is replaced.
_______________________________________________________________________________________________
MICROPLEX
Operator’s Manual SOLID F24
Edition 5.0
82 Maintenance
---------------------------------------------------------------------------------------------------------------------------------------------------------------------
10. Take the starter toner bottle out of the developer kit. The
starter toner bottle is smaller than the standard toner bottles.
11. Shake the starter toner bottle several times to mix the carrier
and the toner together.
12. Open the bottle. Puncture the seal with a needle.
Compressive differences between the bottle interior and the
environment are equalized this way and a toner dust blow
-out will be avoided.
13. Remove the seal of the starter toner bottle completely.
14. Attach the added spout to the starter toner bottle.
15. Now open the cover of the developer unit and disseminate
the starter toner carefully into the developer unit.
developer unit cover
developer unit
_______________________________________________________________________________________________
MICROPLEX
Operator’s Manual SOLID F24
Edition 5.0
Maintenance 83
---------------------------------------------------------------------------------------------------------------------------------------------------------------------
Do not squeeze the starter toner bottle as you fill in the toner to avoid
contaminating the printer.
starter toner bottle
)
16. Close the cover of the developer unit.
You should hear a ″click″ which indicates the cover is completely
closed.
17. Close the printer’s top cover.
With this starter toner filling you can start printing now. Toner has not to
be refilled until the message [Toner Empty !] is displayed (see chapter
6.2).
_______________________________________________________________________________________________
MICROPLEX
Operator’s Manual SOLID F24
Edition 5.0
84 Troubleshooting
---------------------------------------------------------------------------------------------------------------------------------------------------------------------
7. Troubleshooting
7.1. Error Messages
Each error message appearing on the display is described in the
following systematic manner:
[Panel error message]
Short description
Correction
[Toner Empty !]
There is no more toner in the cartridge.
Insert a new toner cartridge.
[Paper Jam !]
Paper jam inside the printer.
Open the printer and remove the jammed paper. Insert the paper
again.
[Photo Drum !]
The OPC unit is defective or its lifetime is expired.
Replace the OPC unit.
[Paper End !]
There is no more paper in the printer.
Insert paper.
[Cover Open !]
The printer cover has not been completely closed .
Please close it completely.
[Toner Waste !]
The waste toner container is full.
Insert a new waste toner container.
[Service Call ″X″ !]
Serious printer fault.
Inform your service engineer and report the value ″X″.
_______________________________________________________________________________________________
MICROPLEX
Operator’s Manual SOLID F24
Edition 5.0
Troubleshooting
---------------------------------------------------------------------------------------------------------------------------------------------------------------------
85
[Paper Justif. !]
Paper is not correctly set on the tractors or the paper format settings
have been changed.
Remove the paper and insert it again.
In case the following error messages are displayed please call your
service engineer and inform him precisely about these display
messages:
[Fuser Error !]
[STATUS ″X″]
[HEATER ERROR ″X″]
[FUSER CAM E ″X″]
[LSU ERROR ″X″]
[EEPROM ERROR ″X″]
[Image Data Err !]
_______________________________________________________________________________________________
MICROPLEX
Operator’s Manual SOLID F24
Edition 5.0
86 Troubleshooting
--------------------------------------------------------------------------------------------------------------------------------------------------------------------7.2. Paper Jam
This section explains what to do if the printer does not work correctly in
case of a paper jam.
- The fuser unit and its surrounding components get very hot, so
let the printer cool down first.
- Be careful to avoid getting toner on your clothing because it
could cause stains.
1. Paper jam at the outlet of the fuser unit.
a. Open the printer’s top cover.
b. Open the paper guide at the rear of the printer.
c. Remove the jammed paper by pulling it out from between
the two rollers.
Caution! The upper roller gets very hot.
d. Close the paper guide.
e. Reset the paper (compare chapter 3.1).
f. Close the printer’s top cover.
g. Press the ON LINE key to restart printing.
2. Paper jam at the inlet of the fuser unit.
a. Open the printer’s top cover.
b. Pull out the jammed paper and tear off the paper at the
perforation near to the OPC unit. The toner on
the paper is not fused and is still powdery.
c. Reset the paper (compare chapter 3.1).
d. Close the printer’s top cover.
e. Press the ON LINE key to restart printing.
_______________________________________________________________________________________________
MICROPLEX
Operator’s Manual SOLID F24
Edition 5.0
Troubleshooting
---------------------------------------------------------------------------------------------------------------------------------------------------------------------
87
3. Tractor feed strip rolled around the fuser unit.
a. Open the printer’s top cover.
b. Open the paper guides at the rear of the printer.
c. Remove the tractor feed strips by pulling them out from
between the rollers of the fuser unit. Tear off the paper at
the next perforation.
Caution! The upper roller gets very hot.
d. Close the paper guide.
e. Reset the paper (compare chapter 3.1).
f. Close the top cover.
g. Press the ON LINE key to restart printing.
4. Paper is torn inside the printer.
a. Open the printer’s top cover.
b. Remove the paper between the torn section and the outlet of
the printer.
c. Reset the paper (compare chapter 3.1).
d. Close the top cover.
e. Press the ON LINE key to restart printing.
5. Paper is wrinkled or skewing inside the printer.
a. Open the printer’s top cover.
b. Remove the paper between the OPC drum and the output of
the printer.
c. Reset the paper and make sure the paper is set on the
tractor pins correctly.
d. Close the top cover.
e. Press the ON LINE key to restart printing.
)
Data is kept in the printer’s memory, and after the paper jam has been
corrected, the last page will be reprinted together with all previous pages.
_______________________________________________________________________________________________
MICROPLEX
Operator’s Manual SOLID F24
Edition 5.0
88 Specifications
---------------------------------------------------------------------------------------------------------------------------------------------------------------------
_______________________________________________________________________________________________
MICROPLEX
Operator’s Manual SOLID F24
Edition 5.0
Specifications
---------------------------------------------------------------------------------------------------------------------------------------------------------------------
89
8. Specifications
Print technology:
Laser, OPC, heat-/pressure-fixing
Print speed:
24 pages per minute
Printing resolution:
300 dpi (dots per inch, horizontal and vertical)
Warm-up time:
less than 3 minutes
Paper type:
60 - 120 g/m²
in suitable quality 160 g/m²
Paper size:
Width: 4” (10 cm) up to 10” (25.4 cm)
Length: 3” (7.62 cm) up to 33” (83.82 cm)
and fractions 1/6”, 1/8”, ...
Interfaces:
parallel: IEEE 1284 (Centronics), (MP-BUS, Second Centronics, optional)
serial: RS232C, (RS422 optional)
LAN:
Optional:
USB 1.1
Ethernet 10/100 Mbit (TCP-IP)
LAN: Ethernet (SPX-IPX, LAT), Token Ring
Host: IBM SCS / IPDS (Twinax/Coax), Siemens (BAM/SS-97)
Dimensions:
Weight:
Noise level:
Environment:
Mains connection:
Power admission:
462 mm (W) x 248 mm (H) x 490 mm (D)
21.5 kg without consumables
25 kg with consumables
printing: < 53 dB(A)
standby: < 47 dB(A)
temperature:
+10°C to +35°C
relative atmospheric humidity: 20% to 80%
AC 120 V / 60 Hz North America
AC 230 V / 50 Hz Europe, United Kingdom
about 0.85 kW effective power input
_______________________________________________________________________________________________
MICROPLEX
Operator’s Manual SOLID F24
Edition 5.0
90 Specifications
--------------------------------------------------------------------------------------------------------------------------------------------------------------------Costs per Page for MICROPLEX Print Systems
The term "costs per page" is the most frequently used one in connection with the purchase of a printer.
Nevertheless this term is the one with the biggest lack of definition.
The distributors normally attach great importance to having small values for the costs per page. The user normally
wants to have a value that is as realistic as possible.
There isn’t any generally valid rule to calculate the costs per page. Therefore values given by different manufacturers
are very often not comparable.
The values given by MICROPLEX are based on the utilization time of the so-called consumables of the printer. There
isn’t any generally valid rule for this calculation, either. Therefore MICROPLEX has fixed the definition of
consumables as follows:
1. Consumables
Consumables are parts or substances which the user can exchange or refill
without tools.
MICROPLEX understands by this definition that the user can decide by visible
criteria when he should exchange or refill consumables. The working steps can
be done by the user in accordance with the manual without the usage of tools.
Consumables can be different depending on the printer type.
The most important consumable for example is toner.
Usually the utilization time of these materials is given as a number of pages (DIN A4). These values often refer to the
print density (3%, 4%, or 5%) which is given as an application specific parameter.
Usually a value of 5% print density is defined, very seldom is 4% used.
In the case of a low print density (e.g. 3%) the utilization time increases, in the case of a high print density (e.g. 10%)
the utilization time is decreased.
Therefore the utilization time is strongly dependant upon the application.
Experience proves that in professional applications a print density of higher than 5% is usually reached. For a
delivery note containing a form and some bar codes a print density of 8 - 10% is quite normal.
There are further parts that must be exchanged in addition to the consumables during the life time of a print system.
MICROPLEX divides these additional parts into two categories:
2. Application specific wearing materials
Application specific wearing materials are parts which have to be exchanged
by a service engineer or a trained operator. The criterias for the exchange aren’t
always easily recognizable for a user. Some of the criterias require measuring
techniques or the experience of a service engineer or operator.
In a normal application, parts of this category are:
- fuser unit
- process unit (drum, OPC)
- ozone filter
_______________________________________________________________________________________________
MICROPLEX
Operator’s Manual SOLID F24
Edition 5.0
Specifications
---------------------------------------------------------------------------------------------------------------------------------------------------------------------
3. Spare parts
91
Spare parts are exchanged by the service engineer, when they fail.
Examples for spare parts are:
- couplings
- electronic assemblies
- rollers
Depending on the application some parts may change categories under certain circumstances. If for example very
rough paper is used, the rollers can become an (application specific) wearing part.
It’s a fact, that the right time to exchange a component depends not only on the failure of a component but also on a
possible loss of print quality in the printouts.
MNPSQ = Mean Number of Prints with Specified Quality (SQ).
This value is often associated with "Lifetime". This term is not correct. MNPSQ describes the period of time in which a
defined print quality is maintained.
The print quality is determined by the values for
- print density
- background darkness
- homogeneity
The value IQ (Initial Quality) is used to designate the print quality that is reached with a new printer.
CAQ (Customer Acceptable Quality) is a purely subjective lower limit which a respective customer is willing to
accept the print quality. An exchange of parts is only then necessary even if the MNPSQ is already exceeded.
quality
IQ
SQ
Utilization time
exchange
exchange
CAQ
MNPSQ
MNPCAQ
pages
_______________________________________________________________________________________________
MICROPLEX
Operator’s Manual SOLID F24
Edition 5.0
92 Specifications
---------------------------------------------------------------------------------------------------------------------------------------------------------------------
_______________________________________________________________________________________________
MICROPLEX
Operator’s Manual SOLID F24
Edition 5.0
Index
--------------------------------------------------------------------------------------------------------------------------------------------------------------------emulations 51
environment 16, 89
error messages 84
extended menu 36
9. Index
A
F
ARROW keys 38
B
buffer 45
C
cancel job 45
cap 22, 76
CE - conformity 9
charger wire 79
checking list 13
clamps 18, 81
cleaner felt 24, 74
cleaning 71
configuration 40
configuration via control panel 35
connect, printer to a PC 29
consumables 14, 17, 72, 90
control panel elements 31
control panel functions 46
control panel keys 31
conventions 8
costs per page 90
Cover Open ! 20, 84
D
data - interface 50
developer kit 14
developer unit 15, 18, 81
diagrams 39
dimensions 89
display 31
display language 53
93
factory default 56
FCC - instructions 9
font bank 41
Font List 42
fonts 40, 57
FORM FEED 34, 44
FORM FEED key 34
front cover 15
functions 38
FUSER CAM E ″X″ 85
Fuser Error ! 85
fuser temperature 67
fuser unit 15, 67
H
HEATER ERROR ″X″ 85
hexdump 43
humidity, rel. atmospheric 16, 89
I
IDOL 54
Image Data Err ! 85
image shifting 63, 65
input buffer 45, 55
installation 13
installation instructions 17
interfaces 50, 89
IP address 68
K
key sequence 39
L
E
EEPROM ERROR ″X″ 85
laser safety regulations 9
LCD display 31
LEDs 31
Load Paper 48
loading paper 26
_______________________________________________________________________________________________
MICROPLEX
Operator’s Manual SOLID F24
Edition 5.0
94 Index
--------------------------------------------------------------------------------------------------------------------------------------------------------------------locking levers 27
LSU ERROR ″X″ 85
paper type 89
paper width 49
permanent configuration changes 35, 38
Photo Drum ! 84
power admission 89
print density 91
print quality 91
print speed 89
print technology 89
print width 49
printer components 15
printing resolution 89
M
mains connection 89
maintenance 71
margin 62
material width 49
memory 45
memory distribution 55
MENU key 38
menu page 46
menu structure 36, 46
R
N
reduced menu 36
RESET key 34
network parameters 68
noise level 89
normal print mode 44
O
ON LINE key 38
OPC cartridge 15, 23, 78
OPC kit 14
ozone filter 15, 21, 80
S
P
page description language 54
page length 48
panel display 39
panel functions 40
panel keys 31, 34, 37
Paper End ! 84
paper guide 25
paper handling 26
paper jam 86
Paper Jam ! 84
Paper Justif. ! 85
paper request 48
paper rollers 26
paper size 89
paper top sensor 15, 27
safety instructions 10
Service Call ″X″ ! 84
sliding pattern 47
spare parts 91
specifications 89
starter kit box 13
starter toner 19
starter toner bottle 20, 83
STATUS ″X″ 85
status sheet 40
STORE key 38
symbol code 61
syntax 39
T
temperature 16, 89
temporary configuration changes 35
tension roller 15
test prints 47
text margins 62
text orientation 60
_______________________________________________________________________________________________
MICROPLEX
Operator’s Manual SOLID F24
Edition 5.0
Index
---------------------------------------------------------------------------------------------------------------------------------------------------------------------
95
toner bottle 73
Toner Empty ! 84
toner kit 14
toner refilling 72
Toner Waste ! 84
top cover button 15
tractor roller 28
tractor unit 15, 27
transparent code 54
troubleshooting 84
turning on 30
U
utilization time 90
W
warm-up time 89
waste toner container 22, 76
weight 89
_______________________________________________________________________________________________
MICROPLEX
Operator’s Manual SOLID F24
Edition 5.0
96 Control Panel
---------------------------------------------------------------------------------------------------------------------------------------------------------------------
_______________________________________________________________________________________________
MICROPLEX
Operator’s Manual SOLID F24
Edition 5.0