1
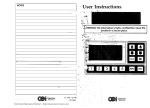
www.uniquecomm.com
1800-265-9605
DESTINY OWNER’S MANUAL
DESTINY
You have made a wise decision to protect your family and property with the DESTINY Security System.
The DESTINY has been designed to provide you with a maximum level of security while being as simple
as possible to understand and operate.
Your DESTINY Security System consists of:
1.
2.
3.
4.
Control Panel
Detection Devices
Your Telephones
Keypads
CONTROL PANEL
The control panel is the heart of the security system and includes a communicator, which transmits
information to the central station. The control panel is housed in a metal cabinet, which should only be
opened by a qualified security system technician.
DETECTION DEVICES
The detection devices continually monitor the status of the premises. Switches will alert the control panel
of an open door or window. A transmitter, or wireless device, will do the same as a switch, plus it will
indicate when it has a weak battery or has lost contact with the panel. The glass break detector is exactly
what the name implies; it picks up the frequency of breaking glass and instantly alerts the control panel. A
motion detector is used as a second line of defense to detect intruders within a protected area. The
DESTINY system also incorporates several “24-hour” features such as the smoke detector, gas and heat
detectors, ‘panic pendants’, and keypad panic buttons. “24-hour” devices are always active regardless of
the arming status of the panel.
TELEPHONE AND KEYPADS
Your telephones and keypads are used to send commands to and receive information from your security
system. Because your phones and keypads are your access to operating the security system, the main
emphasis of the user’s manual is to help you understand their operation.
The DESTINY control panel provides many “convenience related” features and options that greatly
enhance the system’s specific configuration; you may or may not have the following options integrated into
your control panel.
NOTE: PLEASE CONSULT YOUR INSTALLER ON AVAILABLE FEATURES FOR SELECTED
DESTINY SERIES PANEL
ENHANCED FEATURES AND OPTIONS:
x automatic arming/disarming based on time of day
x 2-way voice with central station for alarm verification
x homeowner listen-in from local or remote phones
x homeowner global paging from local or remote phones
x automatic control of lights and appliances based on time of day, sunrise/sunset, or system event
triggers
x manual control of lights and appliances from keypads, local or remote telephones and keyfobs
x complete energy management functions
x spoken temperature upon request from keypads, local and remote phones
x automatic and manual thermostat setback/forward operation
1
x thermostat control by time of day, or system event trigger
SPECIALIZED “CONVENIENCE” FEATURES AND OPTIONS:
x electric garage door operation from keypads, phones or keyfobs
x front door visitor-to-homeowner communications without opening door
x motion activated lighting
x vehicle activated driveway annunciation
RK-36 LED / RKLCD / 6160AP– LED’s
POWER
On when AC or back-up battery power is present. If AC power is lost, the STATUS LED will flash, the
system will speak “POWER OFF” one time, and the system will emit a trouble beep every few seconds
until the power is restored or the STATUS key is pressed to silence it.
STATUS
Yellow LED will be flashing when new information is available, solid after status has been asked for and
spoken, and off when no information is present. WHEN THE SYSTEM CONTINUOUSLY BEEPS
(indicating a system trouble), PRESS THE STATUS KEY TO SILENCE THE BEEPING AND
SPEAK A DESCRIPTION OF THE TROUBLE.
HOME
Red LED is on when armed to HOME. Press H to arm to HOME. Will also be on during NIGHT mode.
AWAY
Green LED is on when armed to AWAY. Press A to arm to AWAY. Will also be on during NIGHT mode.
NIGHT
While there is not a dedicated “NIGHT” LED, when the system is armed in the NIGHT mode, both the
HOME and AWAY LED’s will be on simultaneously. Press H any time the system is already armed to
HOME to change to NIGHT. Pressing H when system is armed to NIGHT will change the arming back to
HOME. For example: You are at home and do not plan on leaving the house anytime soon so you arm the
system to the HOME mode. Several hours later you go to bed and simply press the H button again arming
your system to the NIGHT mode for greater protection while you are sleeping. When you wake up in the
morning simply press the H button again and you are able to walk around your house without fear of setting
the alarm off.
NOTE: Some model keypads may have a single “ARMED” LED, which is illuminated if the system is
armed in any mode (AWAY, HOME, or NIGHT).
RK-36 LED / RKLCD / 6160AP KEYPADS – SPECIAL KEYS
STATUS
Pressing this key will cause the system to immediately speak the system status. This will include the
arming status, any zones showing open, alert, or trouble, and any other available panel information.
MONITOR
Pressing this key toggles the system between three possible monitor conditions.
MONITOR ON – System will announce doors and windows when opened
MONITOR OFF – System will not announce doors and windows when opened
MONITOR TONE – System will beep instead of speak when doors and windows are opened. Commonly
called “chime”.
2
F1 AND F2
These key functions are programmable and will be explained by your installer.
At default these keys will:
F1: Enter Remote Control Mode (Controls home automation features)
F2: Speaks Time and Date
Choose from the following list for the functions of your F1 and F2 keys:
Speak Time
Set Time
Speak Long Term Memory
Enter Remote Control
Light/Appliance Control
Relay Output
Enter Bypass Mode
Silence Day Zone
New Functions for Keys:
F1__________________
F2__________________
KEYPAD KEY-COMBINATION ALARM ACTIVATIONS
Simultaneously pressing certain key combinations on the keypad will result in the following events:
3 and STATUS- FIRE Alarm
1 and STATUS for 6160AP
6 and MONITOR – EMERGENCY (Medical) Alarm
4 and MONITOR for 6160AP
9 and F1 – PANIC Alarm
7 and F1 for 6160AP
The following 2-digit functions are only available from the system keypads and not from the phones:
(Both of the indicated keys must be pressed simultaneously).
x
x
2 & 8 changes time of day and date in the system clock
4 & 7 changes keypad backlighting intensity
CHANGING THE CLOCK TIME
To set or change the system time, press the 2 & 8 keys simultaneously from a hardwired keypad. The
system will respond by speaking “enter four-digit time.” Simply enter the time in a 12-hour format. After
the time is entered, the system will say “enter 1 for AM, 2 for PM.” After selecting AM or PM, the system
will confirm the entered time. If an invalid entry is made, the system will speak “error” and wait for a valid
entry. It will then prompt you to enter the day: 1 SUNDAY, 2 MONDAY… simply enter the appropriate
number for the corresponding day. It will then ask you to enter the two-digit month, followed by two-digit
date, and the two-digit year. After entering the values the system will speak the month day and year,
followed by “exit”.
BACKLIGHT INTENSITY
You can control the brightness level of the key backlighting. The simultaneous depression of the 4 and 7
keys will step the backlighting through seven different levels of brightness. Press 4 and 7 simultaneously a
number of times until the backlighting is totally off. We define all backlighting off as level 1. Levels 2
through 6 will take the key backlighting through 5 progressively brighter levels. One step beyond the
brightest level will take the backlighting to half intensity.
3
RKLCD / 6160AP KEYPAD DISPLAY
The RKLCD keypad has a 2-line LCD display. This will display system arming status as well as any other
existing zone or panel conditions. The following abbreviations are used in the LCD display:
AL – Alert – The associated device has caused an alarm
TR – Trouble/Tamper – Most likely a wireless transmitter cover has been removed
BP – Bypass – The associated device is temporarily out of the system
LB – Low Battery – A wireless transmitter’s battery needs replacement
The rate at which the LCD display cycles through its reports is adjustable. Pressing the 5 and 8 keys
simultaneously will advance to the next one of four speed levels.
ARMING
When referring to the operation of the phone, the following instructions will assume that access to the
system has already taken place. (See local and remote phone access) Remember, your installer has
programmed a one to four digit code which you will enter when you pick up the on premise phone to get
access to the system.
How to TURN ON (ARM) the alarm system to provide protection:
1.
Arming the system to AWAY:
Press the A key on a system keypad,
Or
Press the * key during local or remote phone access,
Or
Press the appropriate button on a wireless keyfob.
If no zones are open, the green AWAY LED will light and the system will say “ARMED TO AWAY”
over the phone or through the speaker.
The security system is now on, or armed. When armed in the AWAY mode, all interior zones
including motion detectors, become active, as well as all perimeter zones. If any zone is open while
attempting to arm the system, the AWAY LED will not light and the system will say “Zones open”
over the phone or through the speaker, indicating that the system did NOT arm because a door, or
window is OPEN. (See FORCE ARM to continue)
After you have ARMED the system, you must leave through the designated entry/exit door within the
specified exit delay time. Your installer can program the exit delay time you desire.
NOTE: If a zone is opened before the exit delay time expires, or the system is forced armed, then that
zone will NOT be part of the system until that zone is closed. EXAMPLE: You force arm the system
to “AWAY” with the front door open, and forget to close that door when you leave. The front door is
NOT protected. If the door is closed while the system is still armed, it will rejoin the system and will
be protected.
2.
Arming the system to HOME:
Push the H key on a system keypad,
Or
Press the # key during local or remote phone access,
Or
Press the appropriate button on a wireless keyfob.
4
If no zones are open, the red HOME LED will light and you will hear the system say “ARMED TO
HOME” over the phone or through the speaker.
The security system is now on, or armed. When armed to the HOME mode, only the exterior, or
perimeter, zones are armed. This will allow you to move about freely within your home. If any zone
is open while attempting to arm the system, the HOME LED will not light and you will hear the
system say “ZONES OPEN” over the phone or through the speaker, which indicates that the system
did NOT arm. (See FORCE ARMING to continue)
3.
Arming the system to NIGHT: (optional)
Push the H key twice on a system keypad,
Or
Press the # key twice during local or remote phone access,
The green AWAY LED will light with the red HOME LED and the system will say “ARMED TO
NIGHT” over the phone or through the speaker. When armed to the NIGHT mode, the perimeter entry
delay zones become instant (no entry or exit delay) and your installer may program some interior zones
to be active. If you wish to return to the HOME mode, simply push the # or H key any time the system
is in the NIGHT mode.
4. Force arming the system:
If you attempt to arm the system to either HOME or AWAY but you hear “ZONES OPEN” over the
phone or through the speaker and notice that neither the HOME LED nor the AWAY LED has come
on, the system is NOT armed. However, the system can be FORCED ARMED.
Push the appropriate button for the type of arming you want again, # or H for HOME, * or A for
AWAY, within ten seconds. If arming to HOME, the RED LED will now light and “FORCE ARMED
TO HOME” will be heard indicating that the system is now ARMED to HOME. If arming to AWAY,
the green AWAY LED will now light and “FORCE ARMED TO AWAY” will be heard. When
FORCE ARMED either to HOME or AWAY, the yellow STATUS LED will be lit. You can find out
which zones are open by requesting system status.
NOTE: When you FORCE ARM your system, security is compromised because the open zone will be
ignored by the system. Check with your installer to determine how the open zone will again be part of
the system.
QUICK REFERENCE GUIDE:
ARMING MODE
HOW TO…
EXIT DELAY ENTRY DELAY PERIMETER ARMED INTERIOR ARMED
AWAY
* OR A
YES
YES
YES
YES
HOME
# OR H
YES
YES
YES
NO
NIGHT
# OR H x 2
NO
NO
YES
NO *
* Some interior zones can be programmed by the installer to be active in the NIGHT mode.
NOTE: Some model keypads may have a single “ARMED” LED.
5
5. Preventing accidental arming:
If you want to prevent anyone from accidentally arming the system, your installer can program the
alarm system to require your disarm code to also serve as an arming code. When programmed to this
option, you must enter your code before you press the * or A key (AWAY mode) or # or H key
(HOME mode) to arm the system.
DISARMING
How to TURN OFF the alarm system
Enter your disarm code.
When the system is disarmed, you will hear “CONTROL IS DISARMED” over the phone or through
the speaker and the red HOME LED and/or green AWAY LED will go out.
When you open an entry door while the system is armed to AWAY, you may hear a “PRE-ALARM”
spoken instead of hearing the tone. The PRE-ALARM is “ENTRY DETECTED” followed by a brief
description of the zone that has been violated. For example: After opening the front door while the
system is armed to the AWAY mode the system will speak, “ENTRY DETECTED FRONT DOOR”.
This will continue until you enter your disarm code or entry delay expires. You have 20 seconds to
disarm the system before the BURGLAR alarm activates. Your installer can increase or decrease this
time at your request.
If an alarm activation has occurred while you were away, each pre alarm “Entry Detected”
annunciation will be preceded by a “SYSTEM SHOWING ALERT” announcement. In addition, the
yellow STATUS LED will be flashing. Pressing the status key on the keypad will cause the system to
announce which zone(s) are showing ALERT.
In the unlikely event of a “FALSE” or “ACCIDENTAL” ALARM, enter your code to disarm the
system and stop the audible alarms. Check with your installer and/or central station to determine the
proper procedure for dealing with false or accidental alarms. Depending on the structure of your
central station, you may need to notify the central station or they may call you. In either event, be
prepared to recite your central station account number or abort code to verify your identity.
CLEARING ALERT STATUS FROM KEYPAD DISPLAY
After the system has been disarmed following an alarm activation, the STATUS LED will be flashing
and the system status will display (or speak if requested) the violated zone’s description followed by
“ALERT”. This is useful for determining which zone(s) were activated after the alarm has been
silenced. To clear the ALERT status, simply re-arm the panel and disarm.
BYPASS
To BYPASS a zone is to temporarily remove that zone from the system. To enter BYPASS mode,
your system must be disarmed. Make sure the system is disarmed and follow the steps below:
1.
Enter your disarm code and immediately press the 9 key to gain entry into BYPASS mode. You
will hear “BYPASS MODE, ENTER ZONE NUMBER.”
6
2.
Enter the two digit number of the zone (use a leading zero if necessary, 01,02…) you wish to
bypass. (Your installer can provide you with a zone list, if needed). You will hear a description
of the selected zone, followed by, BYPASSED ON or OFF. Only zones that exist in the system
can be bypassed. If an invalid number is entered, refusal will be signaled by three beeps.
3.
Press the * or A key to toggle between on and off. (A “BYPASSED ON” condition indicates that
the zone is bypassed). The yellow STATUS LED will light to indicate that the zone is bypassed.
The RKLCD keypad will display the zone descriptor in the LCD display. A second push of the *
or A key within 10 seconds will remove the zone from bypass and the yellow STATUS LED will
clear as well as the zone descriptor on the LCD display.
4.
Pressing 00 while in BYPASS mode will clear (unbypass) all bypassed zones.
5.
Press the # or H key to exit BYPASS mode, or the system will exit in 5 seconds. You will hear
the system speak “EXIT”.
EXAMPLE:
Assuming primary code is 1,2,3,4, and zone number 1 is the front door:
Enter 1,2,3,4 & 9
“BYPASS MODE, ENTER ZONE NUMBER”
Enter 01 (Zone number one)
“FRONT DOOR BYPASS OFF” (Currently not bypassed)
Press * or A key to turn zone bypass ON
“FRONT DOOR BYPASS ON” (Zone is now bypassed)
Press # or H; system will speak EXIT.
Zone one is now bypassed. This gives you the ability to have the system armed but open and
close the front door without setting off the BURGLAR alarm. Follow the same steps to remove
that door from the bypass mode and return it to normal activation.
PHONE ACCESS
LOCAL PHONE ACCESS
Using your Phones as Keypads
The system is programmed to allow you the use of your home telephones as keypads. You will notice that
the keypad duplicates the keys of your phone. The * replaces the A key and the # replaces the H key.
Throughout this manual we will refer to both types of keys. Your installer will let you know which key or
keys allow you to access the system from the phones. The local phone access code must be entered within
5 seconds of picking up the telephone. If the correct code is entered within 5 seconds, you will hear the
system acknowledgement tone or system status. At this point you can control the system just like you
would any hardwired keypad. Have the installer demonstrate this feature so you become familiar with the
different characteristics of your system.
EXAMPLE
Assuming the local phone access code is *, #: (Default)
1.
2.
Pick up phone and press the * key and then the # key.
Panel will respond with an acknowledgement tone.
Now you are into the keypad mode. Also see: KEYPAD AND PHONE DIGIT QUICK REFERENCE
7
NOTE: If your regular phone line is out for any reason you will not hear a dial tone when you pick up a
phone, however, you will hear a series of tones indicating the line is gone. If this is the case, there is no
need to access the system because the phone will already be a system keypad when it is picked up. Press
any key and the tones will stop. Now you may use the phone as a keypad. If your system reports to a
central monitoring station, and there is an activation, you can pick up a phone while the panel is
communicating and simply enter your disarm code. The system will recognize the phone as a keypad as
soon as you pick it up.
NOTE: When you access the system from your home phone, your normal incoming phone line is
disconnected. In case of an incoming call you will hear one-second tones similar to call waiting. To
answer the call, simply hang up to terminate telephone keypad access.
PANIC FROM YOUR LOCAL PHONE
Your installer can program the panel to allow a panic activation from any local phone. Once enabled,
anytime you have accessed your system from an on-site phone, pressing the 0 key five times in a row will
initiate a PANIC alarm.
NOTE: Never program a disarm code with all zeroes.
REMOTE PHONE ACCESS
You can gain access to the system from any touch-tone phone when you are away from home. If you use
an answering machine, your installer will program an override digit, which you will use to bypass the
answering machine and get directly into the system. (Default is #). Note: The override digit will not allow
you to bypass an off-site answering service. If you have a phone company answering service (no
answering machine on site), your installer may enable an optional override-callback feature, which will
allow you to bypass the voice mail and access the panel.
Following is a step-by-step description of phone access:
1.
2.
Dial home phone number from any touch tone phone.
a. The system will answer after a programmed number of rings (default is 10 rings) and you will
hear an acknowledgement tone indicating that your system is ready and waiting.
b. If you have an answering machine, wait for it to answer, then press the programmed override digit
immediately and you will then hear the acknowledgement tone indicating that your system is
ready and waiting. The override digit can be pressed more than once if the panel does not
recognize the first attempt.
c. If you have an off-site answering service, your installer can enable an optional answering service
override-callback feature. To use this feature, dial your residence and wait for 2 rings. Hang up
after the second ring. Call the panel back within 25 seconds and it will pick up after the first ring
and respond with the acknowledgement tone indicating the system is ready.
3.
You must now enter your disarm code and the system will “speak” your system status. If you do not
enter an acceptable code within 15 seconds of the tone you heard in step 2, the system will
automatically hang up.
4.
Now that you have entered your code and have received the system status, your telephone can be used
as a keypad. To hear the status of your system again, press the first digit of your disarm code and wait
three seconds. The system status will be repeated through your telephone receiver.
8
To disarm the system simply enter your disarm code. To arm it press either the * to arm to AWAY or the #
to arm to HOME. When finished simply hang up, and your system will automatically hang up at the other
end. If you do not press any keys for 15 seconds your system will automatically hang up.
NOTE: Your installer can increase or decrease this inactivity time for your convenience.
What can you do from your phone?
Arm/Disarm system
Check Status
2 Way/Listen in Mode
Lights and Appliance Control
Panic (From Local Phone Only)
Change User Codes
GENERAL INFORMATION
CHANGING/DELETING USER CODES
The Destiny allows 32 different disarm codes. Check with your installer to find out how many codes you
have enabled.
Assuming your primary code is 1,2,3,4:
1.
Enter your primary user code followed by “7”. Example: 1,2,3,4,7.
2.
The system will speak “ENTER USER NUMBER”.
3.
Enter 2 digit user number, (01-32). The system will speak “ENTER CODE XX” (XX=01-32)
4.
Enter the new 4 digit code or hit the A key to delete the user code from step 3. If a new 4-digit code is
entered the system will speak “EXIT” after the 4th digit. If a code is deleted the system will speak
“CODE OUT, EXIT”.
Your auxiliary (non-primary) codes can be programmed by your installer with different properties:
a. Authority levels:
A user code has 1 of 2 authority levels. A full-function or “master” code can arm/disarm the
system as well as access all the user code + digit functions listed below:
(Standard user codes can only arm/disarm the system).
User Code +1…speaks time
User Code +2…toggles monitor mode (on, off, tone)
User Code +3…toggles extended monitor A (on/off)
User Code +4…toggles extended monitor B (on/off)
User Code +5…silences day zone speech after activation
User Code +6…resets hardwire smoke detector
User Code +7…user code entry/delete mode (add/remove codes)
User Code +8…speaks long term memory (last 8 alarm activations)
User Code +9…manual bypass mode
User Code +0…Immediate communicator test / user test mode (no siren)
b. Disappearing codes:
One or more of your auxiliary codes can be programmed for a certain number of uses before it
stops functioning. This is useful for domestic workers, repairmen, or houseguests who only
need a limited number of times to arm/disarm the system. Your installer will program the
number of uses a disappearing code has before it stops working. Once it expires, a
disappearing code may be re-activated by re-assigning a code to it using the above code
changing procedure.
9
c.
Duress codes:
One or more of your auxiliary codes can be programmed as a duress or “hold-up” code. If
entered while the system is disarmed, the panel will not give any audible or visible indication,
but will send a duress report to Central Station. If entered while the system is armed, the
panel will appear to disarm normally, but the panel will still send a duress report to Central
Station.
RESETTING AN ACTIVATED SMOKE DETECTOR
Whenever any of your wired (non-battery powered) smoke detectors activate the system, they will latch
“ON” until you reset them. To do so, enter your primary code followed by 6. The system will say
“SMOKE POWER”. This will signify that the smoke detectors have been reset.
EXAMPLE: (Assuming that your primary code is 1,2,3,4)
Enter: 1,2,3,4,6
System speaks: “SMOKE POWER”
NOTE: After a smoke alarm activation and system disarm, you will need to re-arm the system and disarm
to clear the ALERT condition from the keypad.
SILENCING STATUS TONES/BEEPING
During a ‘trouble’ situation, (such as loss of phone line, low battery) the system will emit a tone or beep to
notify you that there is a problem. To stop this beeping simply press the STATUS key. Contact your alarm
company to assist with any problems or failures.
OPTIONAL EQUIPMENT
LIGHTING OPTIONS:
The DESTINY security system gives you the ability to control many day to day functions manually, based
on alarm or zone events, time of day, and even sunrise/sunset. Through the system you have the ability to
control lights, appliances, garage door, and even your HVAC. Different lights could be activated for an
alarm condition, for a entry / exit delay, or simply because you walked into a room. Imagine pulling into
your driveway and having your front lights turn on without touching a single button. All these ‘Home
control’ features can be controlled from your keypads, local phones, and remote phones, including cellular
and cordless phones. Note: phone control must be from a touch-tone phone.
LIGHTS AND APPLIANCE CONTROL ACCESS:
To control the lighting/appliance features from your phone access the system as you normally would (see
local or remote phone access) and enter 8,8,8,8. From a keypad, the F1 or F2 keys may be used instead of
8,8,8,8. After entering 8,8,8,8 or F1, the system will speak the remote control list, naming the active list of
remote controls in your system. Your installer can program names or words to each remote control unit,
which can be used to describe the feature or area. At this point, enter a two-digit channel number from 0156. Your installer will let you know what channels control which lights or appliances. After entering the
desired channel number, the system will echo your choice by speaking the programmed word descriptions
for that channel, if words are programmed, if not the system will speak the channel number. To activate
the channel, the A or * key will turn the unit on, and the H or # key will turn the unit off. (The A or * can
be used to toggle between on and off). If the dimming option is enabled, then the A or * key will step
through six different levels of dimming (from full on to very dim). To exit remote control mode, enter 0,0
or any F key. If no digit is entered within 20 seconds, the system will automatically exit, returning to
normal operation (keypad mode).
10
2 WAY AND LISTEN IN:
If your panel is equipped with microphones, any local or remote phone can be used for 2-way (talk/listen)
communication with anyone in your residence.
1.
Access the system from a local or remote phone. (See Local Access or Remote Access)
2.
Press 9,9,9,9 to enter “Listen” mode.
3.
Press “#” to talk; “*” to listen.
4.
When done, press 0 to return to keypad mode and then hang up. Not pressing any buttons for 120
seconds will cause the panel to automatically hang up (time is installer programmable).
NOTE: When in 2-way mode, the following key functions apply:
Digit: 1= turns on microphone # 1
2= turns on microphone # 2
3= turns on microphone # 3
4= turns off microphone # 1
5= turns off microphone # 2
6= turns off microphone # 3
7= changes to “high microphone sensitivity”
8= changes to “normal microphone sensitivity”
9= all microphones on
0= Exit to keypad mode/or will hang up
*= Listen
#= Talk
NOTE: Some Central stations may designate other key functions when in 2-way mode. If this is the case,
the homeowner “listen in” will follow the new key assignments.
NEW DIGIT: 1._____ 2._____ 3._____
4._____ 5._____ 6._____
7._____ 8._____ 9._____
*._____ 9._____ #._____
GLOSSARY
Below is a summary of terms and definitions used in this manual.
ALERT- The “alert” status indicates the system has been tripped, or activated. The system will remember
the “alert” status until cleared. To clear the “alert” status, simply re-arm the panel.
ANNUNCIATION- Beep or speech emitted over the phone or through system speakers to announce
activity or report system status.
11
ARM- To turn the security system ON to detect intrusion or protect the house. There are three available
modes, or levels, of arming: AWAY, HOME, NIGHT.
AWAY- Arming mode for use when you are “AWAY” from the premises. All interior and perimeter
devices are armed; intrusion and/or movement within the premises will activate the alarm.
BYPASS- To temporarily remove a device or zone from the system that would normally be active when
the system is armed. If a zone is bypassed, it is not part of the system, and will not initiate an alarm.
CENTRAL STATION-If your security system is monitored, this is the agency that receives the incoming
burglary or emergency message from the security system and reports it to the proper authorities.
COMMUNICATOR- The device in the security panel that reports all burglary and emergency alarms to
the central station via the phone lines.
CONTROL PANEL- The heart of the security system. Only a qualified security system technician should
open the container that houses the control panel.
DAY ZONE- A zone that will speak upon activation when the system is not armed, but will become an
“instant” zone when the system is armed. The DAY ZONE will annunciate for a specified amount of time,
or until it is silenced by the homeowner. This is accomplished by entering your disarm code followed by 5.
EXAMPLE: A door leading to a pool area will announce when someone opens the door without the system
armed, and will activate the alarm only when the system is armed.
DISARM- To turn the security system OFF or to silence alarm activation, including fire alarms, that may
occur while the system is armed.
DISARM CODE- The three or four-digit number you enter to disarm the security system. The system will
accept 32 different disarm codes, including disappearing and duress codes. Your disarm code allows you
to control the alarm system from system keypads, local phones, and remote phones. Have your installer
give you a list of the different codes.
ENTRANCE DELAY- Time permitted to enter the armed premises and disarm the security system before
the alarm is activated. A 20-second delay is automatically set at the factory, but your installer can increase
or decrease this amount of time as desired.
EXIT DELAY- Time permitted to leave the premises after arming the system. A 30-second delay is
automatically set at the factory, but your alarm installer can increase or decrease this amount of time as
desired.
EXTENDED MONITOR- Allows a zone to speak continuously or for a programmable time period when
tripped. EXAMPLE: “Pool door open, pool door open…”
FORCE ARM- To override the security system’s initial refusal to arm because of an open zone. When a
system is forced armed it will disregard or ignore any open zones until they have been closed.
HOME- Arming mode for use when you are at “HOME”. Only perimeter devices are armed allowing you
to move about freely within the premises without fear of setting off the alarm. The system can be
programmed to eliminate all entrance delays when armed to home. This might be preferable to individuals
who live alone.
INTERIOR ZONES- Zones consisting of motion detectors and other devices that are located within the
premises.
LCD- Liquid Crystal Display. Will display all system status in English text.
12
LED- Light Emitting Diode. These are used as indicators of the system conditions on keypads.
NIGHT- Arming mode used specifically for when everyone is in for the “NIGHT”. All perimeter zones
become instant, there is no entry/exit delay, and some interior zones can be active.
PERIMETER ZONES- Zones consisting of door and window contacts and glass break detectors which
will detect an intruder before he gains entry into the premises.
PREALARM SPEECH- When the system is armed, and someone enters the premises through a “delay”
door, the system speaks “ENTRY DETECTED” followed by the word description programmed for that
door. EXAMPLE: “ENTRY DETECTED, FRONT DOOR…ENTRY DETECTED, FRONT DOOR”.
This speech will be heard for the duration of the entrance delay. If the disarm code is not entered within
the programmed amount of time, the BURGLAR ALARM will sound. If an alarm took place while you
were gone, then the system would speak “system showing alert”, followed by the pre-alarm speech.
PREALARM TONE- If prealarm speech is not programmed, there will be a steady, low volume sound
emitted through the speakers when the entry delay door is opened. This tone will continue until the disarm
code is entered to disarm the system. If the disarmed code is not entered within the programmed time, the
BURGLAR ALARM will sound. A pulsing pre-alarm tone indicates there was activation while you were
gone.
ZONE- Any area or point of protection in the security system such as doors, windows, and all other areas
covered by detection devices.
13