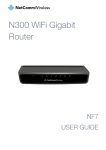
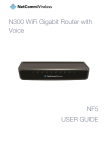
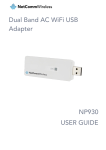
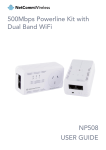
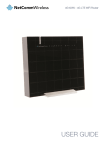
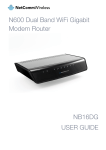
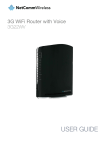
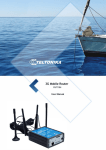
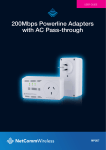
Download 3G/4G Dual Band AC WiFi Router 4GM3W USER GUIDE
Transcript
3G/4G Dual Band AC WiFi Router 4GM3W USER GUIDE Copyright Copyright©2013 NetComm Wireless Limited. All rights reserved. The information contained herein is proprietary to NetComm Wireless Limited. No part of this document may be translated, transcribed, reproduced, in any form, or by any means without prior written consent of NetComm Wireless Limited. Note: This document is subject to change without notice. Save Our Environment When this equipment has reached the end of its useful life, it must be taken to a recycling centre and processed separately from domestic waste. The cardboard box, the plastic contained in the packaging, and the parts that make up this device can be recycled in accordance with regionally established regulations. Never dispose of this electronic equipment along with your household waste. You may be subject to penalties or sanctions under the law. Instead, ask for disposal instructions from your municipal government. Please be responsible and protect our environment. This manual covers the following products: NetComm Wireless 4GM3W 3G/4G Dual Band AC WiFi Router DOCUMENT VERSION 1.0 - Initial document release www.netcommwireless.com DATE November 2013 NetComm Wireless 4GM3W User Guide 2 Table of Contents Overview.........................................................................................................................................................................................5 Introduction ................................................................................................................................................................................................... 5 Target Audience ............................................................................................................................................................................................ 5 Prerequisites ................................................................................................................................................................................................. 5 Notation ........................................................................................................................................................................................................ 5 Product Introduction ......................................................................................................................................................................6 Product Overview .......................................................................................................................................................................................... 6 Package Contents ......................................................................................................................................................................................... 6 Product Features ........................................................................................................................................................................................... 6 Physical Dimensions and Indicators .............................................................................................................................................7 LED Indicators ............................................................................................................................................................................................... 7 Physical Dimensions ...................................................................................................................................................................................... 8 4GM3W Default Settings................................................................................................................................................................................ 8 Interfaces .......................................................................................................................................................................................9 Safety and Product Care .............................................................................................................................................................10 Transport and Handling ...............................................................................................................................................................10 Installation and Configuration of the 4GM3W.............................................................................................................................11 Placement of your 4GM3W .......................................................................................................................................................................... 11 Avoid obstacles and interference.................................................................................................................................................................. 11 Cordless Phones ......................................................................................................................................................................................... 11 Choose the “Quietest” Channel for your Wireless Network ............................................................................................................................ 11 Hardware installation ................................................................................................................................................................................... 12 Connecting via Ethernet cable ...................................................................................................................................................................... 12 Connecting wirelessly .................................................................................................................................................................................. 12 Web Based Configuration Interface ............................................................................................................................................13 First-time Setup Wizard ............................................................................................................................................................................... 13 Basic View .................................................................................................................................................................................................. 18 Status ................................................................................................................................................................................................. 18 Wireless 2.4GHz / 5GHz ...................................................................................................................................................................... 19 Mobile Broadband ............................................................................................................................................................................... 20 Advanced configuration ............................................................................................................................................................................... 21 Network Setup .................................................................................................................................................................................... 23 DHCP Server ....................................................................................................................................................................................... 26 Wireless 2.4GHz .................................................................................................................................................................................. 28 Wireless 5GHz ..................................................................................................................................................................................... 29 Forwarding Rules................................................................................................................................................................................. 31 Port Triggering..................................................................................................................................................................................... 32 Miscellaneous...................................................................................................................................................................................... 33 Security Settings ......................................................................................................................................................................................... 34 Status ................................................................................................................................................................................................. 34 Packet Filters....................................................................................................................................................................................... 34 Domain Filters...................................................................................................................................................................................... 36 URL Blocking ...................................................................................................................................................................................... 37 MAC Control ....................................................................................................................................................................................... 38 Miscellaneous...................................................................................................................................................................................... 39 Advanced Settings ...................................................................................................................................................................................... 40 Status ................................................................................................................................................................................................. 40 System Log ......................................................................................................................................................................................... 41 Dynamic DNS ...................................................................................................................................................................................... 42 QoS .................................................................................................................................................................................................... 43 SNMP ................................................................................................................................................................................................. 48 Routing ............................................................................................................................................................................................... 49 System Time ....................................................................................................................................................................................... 50 Scheduling .......................................................................................................................................................................................... 51 IPv6 .................................................................................................................................................................................................... 52 NAS Settings ............................................................................................................................................................................................... 53 Disk Utility ........................................................................................................................................................................................... 53 File Sharing ......................................................................................................................................................................................... 53 Access Control .................................................................................................................................................................................... 54 Download Assistant ............................................................................................................................................................................. 55 NetComm Wireless 4GM3W User Guide 3 www.netcommwireless.com Download Status ................................................................................................................................................................................. 57 Web HDD ............................................................................................................................................................................................ 57 Toolbox ....................................................................................................................................................................................................... 58 System Info ......................................................................................................................................................................................... 58 Routing Table ...................................................................................................................................................................................... 58 Restore Settings .................................................................................................................................................................................. 58 Firmware Upgrade ............................................................................................................................................................................... 59 Backup Settings .................................................................................................................................................................................. 59 Reset to Default ................................................................................................................................................................................... 59 Reboot ................................................................................................................................................................................................ 59 Startup Wizard .................................................................................................................................................................................... 59 Miscellaneous...................................................................................................................................................................................... 59 Logout ................................................................................................................................................................................................ 59 Additional Product Information ...................................................................................................................................................60 Establishing a wireless connection ............................................................................................................................................................... 60 Windows XP (Service Pack 3)............................................................................................................................................................... 60 Windows Vista ..................................................................................................................................................................................... 60 Windows 7 .......................................................................................................................................................................................... 60 Mac OSX 10.6 ..................................................................................................................................................................................... 60 Troubleshooting........................................................................................................................................................................................... 61 Using the indicator lights (LEDs) to Diagnose Problems ......................................................................................................................... 61 Technical Data .............................................................................................................................................................................62 Electrical Specifications................................................................................................................................................................................ 62 Environmental Specifications / Tolerances .................................................................................................................................................... 62 Legal & Regulatory Information ...................................................................................................................................................63 Intellectual Property Rights ........................................................................................................................................................................... 63 Customer Information .................................................................................................................................................................................. 63 Consumer Protection Laws .......................................................................................................................................................................... 63 Product Warranty ........................................................................................................................................................................................ 64 Limitation of Liability ..................................................................................................................................................................................... 64 Contact .........................................................................................................................................................................................65 www.netcommwireless.com NetComm Wireless 4GM3W User Guide 4 Overview Introduction This guide provides information related to the installation, operation, and use of the 4GM3W. Target Audience The individual reading this guide is presumed to have a basic understanding of telecommunications terminology and concepts. Prerequisites Before continuing with the installation of your 4GM3W, please confirm that you comply with the minimum system requirements below. An activated ADSL, activated 3G/4G, or configured WAN connection. Computer with Windows, Macintosh, or Linux-based operating systems with a working Ethernet adapter with TCP/IP Protocol installed. A Web Browser such as Internet Explorer, Netscape Navigator, Mozilla Firefox, Opera, Safari etc. Wireless Computer System Requirements: Computer with a working 802.11b, 802.11g or 802.11n wireless adapter. Notation The following symbols are used in this guide: Indicates a note requiring attention. Indicates a note providing a warning. Indicates a note providing useful information. NetComm Wireless 4GM3W User Guide 5 www.netcommwireless.com Product Introduction Product Overview Stylish and compact mobile broadband router Creates an instant WiFi hotspot to share the Internet connection of a 3G/4G USB modem or DSL/Cable modem 1 Supports 802.11ac WiFi with data speeds up to 433Mbps1 Supports 802.11n WiFi standard with data speeds up to 300Mbps1 1 x Gigabit Ethernet port that can operate as a WAN or LAN port USB 2.0 host port supports 3G and 4G modems Supports file sharing from a USB hard drive Ensures connectivity and business continuity with auto Internet failover from WAN port to 3G/4G USB modem Package Contents The 4GM3W package consists of: 1 x 4GM3W 3G/4G Dual Band AC WiFi Router 1 x Power supply 1 x Ethernet cable 1 x WiFi security card 1 x Warranty sheet 1 x Quick start guide If any of these items are missing or damaged, please contact NetComm Wireless Support immediately by visiting the NetComm Wireless Support website at: http://www.netcommwireless.com/contact-forms/support Product Features The pocket-sized 4GM3W is packed with the latest connection, sharing and security features for reliable broadband access without boundaries. Ideal for travel, the device offers flexible 3G/4G or ADSL2+ broadband Internet connection options. Sharing the connection is easy. Create a fast, instant and portable dual band WiFi zone for multiple devices such as laptops, PCs, gaming consoles, tablets and smart phones from public areas using a 3G/4G USB modem; or connect to an in-room service via the Ethernet port. When connecting your USB modem you are able to position the router in your home where you get the best possible signal and can also share the connection with multiple devices with the WiFi capability. This router, with its small size and ability to work with the fastest available mobile broadband modems will appeal to many users. Some practical applications include: Ideal for sharing with family and friends on holidays Share a 3G/4G connection with colleagues on a business trip Temporary Internet connectivity at events and functions Use the Ethernet port to connect to a hotel room cable to create your own WiFi hotspot . 1 Maximum wireless signal rate and coverage values are derived from IEEE Standard 802.11g, 802.11n and 802.11ac specifications. Actual wireless speed and coverage are dependent on network and environmental conditions included but not limited to volume of network traffic, building materials and construction/layout. www.netcommwireless.com NetComm Wireless 4GM3W User Guide 6 Physical Dimensions and Indicators LED Indicators The 4GM3W has been designed to be placed on a desktop. All of the cables exit from the rear for easy organization. The display is visible on the front of the 4GM3W to provide you with information about network activity and the device status. See below for an explanation of each of the indicator lights. FRONT PANEL ICON COLOUR Router is powered on Blinking Quickly Device is in WPS mode None Off Router is powered off Red Solid Power on with connection configuration problem Green Solid Connected to internet successfully None N/A Power off POWER NetComm Wireless 4GM3W User Guide 7 DEFINITION Blinking Slowly Green WWW ACTIVITY www.netcommwireless.com Physical Dimensions The following table lists the physical dimensions of the 4GM3W. Height Width Length 4GM3W DIMENSIONS Length 98 mm Width 68 mm Height 20.5 mm Weight 74 grams 4GM3W Default Settings The following tables list the default settings for the 4GM3W. LAN (MANAGEMENT) Static IP Address 192.168.20.1 Subnet Mask 255.255.255.0 Default Gateway 192.168.20.1 WIRELESS (WIFI) SSID (Refer to the included Wireless Security Card) Security WPA2-PSK (AES) Security Key (Refer to the included Wireless Security Card) 4GM3W WEB INTERFACE ACCESS www.netcommwireless.com Username admin Password admin NetComm Wireless 4GM3W User Guide 8 Interfaces BOTTOM PANEL 1 Reset button (not pictured) DESCRIPTION By using a paper clip, hold this button down for more than 10 seconds to reset to factory defaults. 2 REAR PANEL 3 4 5 DESCRIPTION 2 DC IN Power connector, connects to a DC 5V 2.0A Power Adapter 3 4G/WAN switch Toggles the function of the Ethernet port between LAN and WAN mode. Switch to 4G for LAN connection or to WAN for WAN connection 4 WPS Hold this button down for 3 seconds and then release to enable the WPS push-button connect function. 5 Ethernet port RJ45 LAN port for wired Ethernet clients (computers, laptops, etc) NetComm Wireless 4GM3W User Guide 9 www.netcommwireless.com Safety and Product Care With reference to unpacking, installation, use and maintenance of your electronic device, the following basic guidelines are recommended: Do not use or install this product near water to avoid fire or shock hazard. For example, near a bathtub, kitchen sink, laundry tub, or near a swimming pool. Also, do not expose the equipment to rain or damp areas (e.g. a wet basement). Do not connect the power supply cord on elevated surfaces. Allow it to lie freely. There should be no obstructions in its path and no heavy items should be placed on the cord. In addition, do not walk on, step on or mistreat the cord. To safeguard the equipment against overheating, make sure that all openings in the unit that offer exposure to air are unobstructed. WARNING Disconnect the power line from the device before servicing. Transport and Handling When transporting the 4GM3W, it is recommended to return the product in the original packaging. This ensures the product will not be damaged. In the event the product needs to be returned, ensure it is securely packaged with appropriate padding to prevent damage during courier transport. www.netcommwireless.com NetComm Wireless 4GM3W User Guide 10 Installation and Configuration of the 4GM3W Placement of your 4GM3W The wireless connection between your 4GM3W and your WiFi devices will be stronger the closer your connected devices are to your 4GM3W. Your wireless connection and performance will degrade as the distance between your 4GM3W and connected devices increases. This may or may not be directly noticeable, and is greatly affected by the individual installation environment. If you have concerns about your network’s performance that might be related to range or obstruction factors, try moving the computer to a position between three to five meters from the 4GM3W in order to see if distance is the problem. Note: While some of the items listed below can affect network performance, they will not prohibit your wireless network from functioning; if you are concerned that your network is not operating at its maximum effectiveness, this checklist may help. If you experience difficulties connecting wirelessly between your WiFi Devices and your 4GM3W, please try the following steps: In multi-storey homes, place the 4GM3W on a floor that is as close to the centre of the home as possible. This may mean placing the 4GM3W on an upper floor. Try not to place the 4GM3W near a cordless telephone that operates at the same radio frequency as the 4GM3W (2.4GHz). Avoid obstacles and interference Avoid placing your 4GM3W near devices that may emit radio “noise,” such as microwave ovens. Dense objects that can inhibit wireless communication include: Refrigerators Washers and/or dryers Metal cabinets Large aquariums Metallic-based, UV-tinted windows If your wireless signal seems weak in some spots, make sure that objects such as those listed above are not blocking the signal’s path (between your devices and the 4GM3W). Cordless Phones If the performance of your wireless network is impaired after considering the above issues, and you have a cordless phone: Try moving cordless phones away from your 4GM3W and your wireless-enabled computers. Unplug and remove the battery from any cordless phone that operates on the 2.4GHz band (check manufacturer’s information). If this fixes the problem, your phone may be interfering with the 4GM3W. If your phone supports channel selection, change the channel on the phone to the farthest channel from your wireless network. For example, change the phone to channel 1 and move your 4GM3W to channel 11. See your phone’s user manual for detailed instructions. If necessary, consider switching to a 900MHz or 5GHz cordless phone. Choose the “Quietest” Channel for your Wireless Network In locations where homes or offices are close together, such as apartment buildings or office complexes, there may be wireless networks nearby that can conflict with your wireless network. Use the Site Survey capabilities found in the Wireless Utility of your wireless adapter to locate any other wireless networks that are available (see your wireless adapter’s user manual), and switch your Router and computers to a channel as far away from other networks as possible. Experiment with more than one of the available channels, in order to find the clearest connection and avoid interference from neighbouring cordless phones or other wireless devices. NetComm Wireless 4GM3W User Guide 11 www.netcommwireless.com Hardware installation 1. Connect the power adapter to the Power socket on the back of the 4GM3W. 2. Plug the power adapter into the wall socket and switch on the power. 3. Wait approximately 60 seconds for the 4GM3W to power up. Connecting via Ethernet cable 1. Connect the yellow Ethernet cable provided to the port marked ‘WAN/LAN’ at the back of the 4GM3W. 2. Connect the other end of the yellow Ethernet cable to your computer. 3. Wait approximately 30 seconds for the connection to establish. 4. Open your Web browser, and enter http://192.168.20.1 into the address bar and press enter. 5. Follow the steps to set up your 4GM3W. Connecting wirelessly 1. Ensure Wi-Fi is enabled on your device (e.g. computer/laptop/smartphone). 2. Scan for wireless networks in your area and connect to the network name that matches the Wireless network name configured on the 4GM3W. Note: Refer to the included Wireless Security Card for the default SSID and wireless security key of your 4GM3W 3. When prompted for your wireless security settings, enter the Wireless security key configured on the 4GM3W. If you have already configured your 4GM3W and changed the WiFi password, enter it here instead of the default password provided on the wireless security card. 4. Wait approximately 30 seconds for the connection to establish. 5. Open your Web browser, and enter http://192.168.20.1 into the address bar and press Enter. 6. Follow the steps to set up your 4GM3W. www.netcommwireless.com NetComm Wireless 4GM3W User Guide 12 Web Based Configuration Interface First-time Setup Wizard Please follow the steps below to configure your 4GM3W Wireless router via the web based configuration wizard. Open your web browser (e.g. Internet Explorer/Firefox/Safari) and type http://192.168.20.1/ into the address bar at the top of the window. At the login screen, type admin in the username and password field, then click the Login button. Note: admin is the default username and password of the router. Click Yes, let’s get started with the wizard to begin configuring your 4GM3W router. Step 1 Use the drop down menus to select the country and service provider with which you will be using your router. In the PIN and Confirm PIN fields, enter the PIN number provided to you by your carrier to unlock the SIM card. Note: If you are using the BigPond service in Australia, you are required to enter the username and password provided to you by BigPond to access the service. Click the Next button to continue. NetComm Wireless 4GM3W User Guide 13 www.netcommwireless.com Step 2 In this step, you are able to configure the 2.4GHz WiFi network. By default, the 2.4GHz wireless radio is on but you may turn it off by setting the Wireless 2.4GHz (WiFi) option to Off. If you intend to use the wireless function, set the SSID Broadcast option to Enable if you want the wireless network to show up when devices perform a network scan when in range, or set it to Disable to hide the network from scans. Finally, if you wish to customise the network name, enter it into the SSID Broadcast Name field. The network name may not exceed 32 characters. Click the Next button to continue. www.netcommwireless.com NetComm Wireless 4GM3W User Guide 14 Step 3 The router is preconfigured with wireless security on the 2.4GHz radio but if you wish to change these settings use the Security Key Type drop down menu to select a wireless security key type and then enter a security key in the Security Key field. Click the Next button to continue. Step 4 In this step, you are able to configure the 5GHz WiFi network. By default, the 5GHz wireless radio is on but you may turn it off by setting the Wireless 5GHz (WiFi) option to Off. If you intend to use the wireless function, set the SSID Broadcast option to Enable if you want the wireless network to show up when devices perform a network scan when in range, or set it to Disable to hide the network from scans. Finally, if you wish to customise the network name, enter it into the SSID Broadcast Name field. The network name may not exceed 32 characters. Click the Next button to continue. NetComm Wireless 4GM3W User Guide 15 www.netcommwireless.com Step 5 The router is preconfigured with wireless security on the 5GHz radio but if you wish to change these settings use the Security Key Type drop down menu to select a wireless security key type and then enter a security key in the Security Key field. Click the Next button to continue. Step 6 For security, we recommend that you change the username and password used to access the administration settings of the router. Enter the desired username and password. Remember to make a note of your chosen username and password and click the Next button to continue. www.netcommwireless.com NetComm Wireless 4GM3W User Guide 16 Step 7 A summary of the settings you have chosen is displayed. If you are happy with these settings, click the Finish button, otherwise, click the Back button to make the necessary changes or to cancel the wizard, click the Exit button. The Internet light on the router illuminates green indicating a successful connection to the Internet. If the Internet light is red or not illuminated, check your settings and try again. The router setup is complete. NetComm Wireless 4GM3W User Guide 17 www.netcommwireless.com Basic View When you have completed the First time setup wizard, you are presented with the login screen. If you have not changed the administrator account details, type admin in the Username and Password fields then click the Login button, otherwise, enter your new login credentials and click the Login button. The Basic view of the web configuration interface gives you a summary of the most important information about your router and its connections. Status When you log in to the router, the Status page is displayed in Basic view, displaying WAN type, IP Address, Subnet Mask, Gateway, 3G/4G Status. 3G/4G Signal Strength and the number of clients connected to both the 2.4GHz and 5GHz wireless networks. www.netcommwireless.com NetComm Wireless 4GM3W User Guide 18 Wireless 2.4GHz / 5GHz The Wireless 2.4GHz and Wireless 5GHz tabs in Basic view display the status of the WiFi radio, the status of SSID Broadcasting, the WiFi network name and the Wireless security key. You can enable or disable the WiFi radio, broadcast/hide the SSID of your network, set the wireless network name and set the wireless security key using these tabs. If you make any changes to the Wireless configuration, Click the‚ Save and apply the changes button to make these changes active. NetComm Wireless 4GM3W User Guide 19 www.netcommwireless.com Mobile Broadband The Mobile Broadband tab in Basic view allows you to configure the country, service provider and network name (APN) options of your mobile broadband connection. If your SIM is PIN locked, you can also use this page to unlock it with the PIN. You should contact your mobile broadband carrier for the correct APN and PIN if you do not know them. When you have made changes to the settings on this tab, remember to click the Save and apply the changes button to store the new settings on the router. www.netcommwireless.com NetComm Wireless 4GM3W User Guide 20 Advanced configuration To access the advanced configuration pages, you must first log in to the router and change to the Advanced view. Click on the Switch to advanced view link at the bottom of the basic view screen. NetComm Wireless 4GM3W User Guide 21 www.netcommwireless.com www.netcommwireless.com NetComm Wireless 4GM3W User Guide 22 ITEM DESCRIPTION IPv4 System Status IP Address The current WAN IP address of the router Subnet Mask The current subnet mask in use by the router Gateway The gateway in use by the router to access the internet Domain Name Server The Domain name server converts Connection Time The time the current connection to the internet has been active IPv6 System Status WAN Link-Local Address The current WAN IPv6 address Global IPv6 Address The current IPv6 subnet mask in use LAN IPv6 Link-Local Address The current LAN IPv6 address of the 4GM3W Link Status The current IPv6 WAN connection status Wireless Modem Information Card Info The name of the 3G USB modem connected to the 4GM3W Link Status The current status of your connection to a 3G Broadband service Signal Strength The current available 3G signal strength Network Name The name of the 3G network you are connecting to Wireless 2.4GHz Status Wireless 2.4GHz mode The current status of the 2.4GHz wireless network (enabled or disabled) SSID The current 2.4GHz wireless network name is use by the router Channel The current 2.4GHz wireless channel in use on your wireless network Security The currently selected 2.4GHz wireless security in use on your wireless network Wireless 5GHz Status Wireless 5GHz mode The current status of the 5GHz wireless network (enabled or disabled) SSID The current 5GHz wireless network name is use by the router Channel The current 5GHz wireless channel in use on your wireless network Security The currently selected 5GHz wireless security in use on your wireless network Statistics Information Octets The number of data packets which have passed into and out of the router Unicast Packets The number of unicast packets which have passed into and out of the router Multicast packets The number of multicast packets which have passed into and out of the router. Network Setup Network Setup This page allows you to configure the WAN (Wide Area Network) connection. You can select from the following types of WAN connection: Mobile Broadband WiFi Hotspot Note: If you are using an Ethernet WAN connection, please ensure the “4G/WAN” switch is set to “WAN”. NetComm Wireless 4GM3W User Guide 23 www.netcommwireless.com Mobile Broadband OPTION DEFINITION WAN Type Select from Mobile Broadband or Wi-Fi Hotspot Country Select your country from the list. This will shorten the APN list to those in your selected country. Select Your Service Provider Select your 3G/4G service provider from the list. This will then enable you to select the correct APN for the 3G/4G service in use. APN Enter the APN for your 3G/4G service. This should be automatically filled in after selecting your country and 3G provider name. If the wrong APN is shown, enter the correct APN for your 3G/4G service PIN Code Enter the Pin Code for your SIM card (if required). Dial Number This number is required to connect to your 3G service. (Unless advised otherwise by NetComm Technical Support, this setting should not be changed) Username The username provided by your 3G/4G service provider to enable access to your 3G/4G service. Password The password provided by your 3G/4G service provider to enable access to your 3G/4G service. Authentication Type Choose the appropriate authentication type for your 3G/4G service. Primary DNS Manually assign a Primary DNS Server. Secondary DNS Manually assign a Secondary DNS Server. Connection Control There are 3 modes to select from: Connect-on-demand: The 4GM3W will connect to the internet when a client sends outgoing packets. Auto Reconnect (Always-on): The 4GM3W will automatically reconnect to the internet until the connection is manually disconnected. Manually: The 4GM3W will not connect to the internet until someone clicks the connect button on the Status-page. www.netcommwireless.com NetComm Wireless 4GM3W User Guide 24 Keep Alive There are three keep alive options to select from: Disable: Disable the keep alive function. LCP Echo Request: The 4GM3W will automatically verify the connection is active. Set the interval and Max. number of failures to determine when the connection is up or down. Ping Remote Host: The 4GM3W will ping the chosen host IP to verify the connection is active. Set the host IP address and the interval between ping tests. Multicast Allows you to select the method of multicast or disable it. IGMP Snooping Allows you to enable or disable IGMP Snooping. IGMP Snooping configures the router to listen to IGMP conversations between hosts and routers and maintain a map of the links that need IP multicast streams. VLAN TAG VLAN tagging is primarily used in virtual networks which span over multiple switches. VLAN tagging involves the router inserting a VLAN ID into a packet header in order to identify which CLAN the packet belongs to. You may enable VLAN tagging and specify the ID with a value between 1 and 4094. WiFi Hotspot This WAN type turns the router into a repeater. The 4GM3W connects to a wireless access point and wireless clients connect to the 4GM3W for internet access. Follow the few steps below to turn the 4GM3W into a WiFi Hotspot. If choosing WiFi HotSpot WAN type, the channel of the wireless network will be set to the same channel as used on the remote access point. Step 1: Click the Choose other Wi-Fi HotSpot button to search for any available WiFi hotspots or WiFi Access Points nearby. Step 2: After searching, a list of the all available WiFi Access Points around you is shown. Select the appropriate Wireless network and click the Select button to start the connection or press Refresh button to search again. Step 3: If required, enter the Wireless security for the remote wireless network in the Pre-shared key field. Click the Save button to save your selected settings. The router reboots so that the new setting can take effect. NetComm Wireless 4GM3W User Guide 25 www.netcommwireless.com DHCP Server This Page allows you to change the Dynamic Host Configuration Protocol (DHCP) server settings on the 4GM3W. The DHCP Server enables computers or devices connecting to the 4GM3W to automatically obtain their network configuration settings. By default, the DHCP server is enabled. OPTION DHCP Server DEFINITION Enable or disable the DHCP server. LAN IP Address Subnet Mask IP Pool Starting/Ending Address Whenever there is a request, the DHCP server will automatically allocate an unused IP address from the IP address pool to the requesting computer. You must specify the starting / ending address of the IP address pool Lease Time Length of the DHCP lease time Domain Name Optional, this information will be passed to the client Primary DNS Primary DNS Optional, this information will be passed to the client Secondary DNS Optional, this information will be passed to the client Primary WINS Optional, this information will be passed to the client Secondary WINS Optional, this information will be passed to the client Gateway Optional, this information will be passed to the client TFTP Server Name (Option 66) Click Save to save these settings or Undo to cancel. You can also check the DHCP client list by clicking the Clients List button. Note: See the section “DHCP Client List” below for more information The Fixed Mapping… button allows you to map a specific IP address to a MAC address. Note: See the section “DHCP Fixed Mapping” below for more information www.netcommwireless.com NetComm Wireless 4GM3W User Guide 26 DHCP Client List This is the list of currently connected devices utilising DHCP. If you wish to set a permanent IP address for a particular DHCP client (or device), select the appropriate DHCP client by clicking in the Select box. This will ensure the client’s current IP address is always assigned to it. DHCP Fixed Mapping DHCP Fixed Mapping allows you to reserve a specific IP address for a specific device. The DHCP Server will reserve a specific IP for a device based on that devices unique MAC address. You can enter a new Fixed Mapping by entering the MAC address of the device and the IP address you wish to allocate to it. Click on the Enable checkbox to activate the DHCP fixed mapping entry. NetComm Wireless 4GM3W User Guide 27 www.netcommwireless.com Wireless 2.4GHz The Wireless 2.4GHz LAN settings page allows you to configure the 2.4GHz wireless network features of the router. OPTION DEFINITION Wireless Module Select to enable or disable the Wireless network function of the 4GM3W. Network ID (SSID) Network ID is used for identifying the Wireless LAN (WLAN). Client stations can roam freely over this product and other Access Points that have the same Network ID. (Please refer to the included Wireless Security Card insert for your default SSID) Wireless Turns on or off the 2.4GHz wireless radio. AP Isolation When enabled, this isolates the wireless clients from other clients of the router so that they are inaccessible to each other. SSID Broadcast The router will broadcast the SSID so that wireless clients can find the wireless network. Channel The wireless radio channel in use by your network. Wireless Mode Choose B/G Mixed, B only, G only, and N only, G/N Mixed or B/G/N mixed. (The factory default setting is B/G/N mixed) Authentication You may select from the following authentication types to secure your wireless network: Open Shared Auto WPA WPA-PSK WPA2 WPA2-PSK WPA/WPA2 WPA-PSK/WPA2-PSK. WPA-PSK/WPA2-PSK is a newer type of security. This type of security gives a more secure network compared to WEP. Use TKIP Encryption Type for WPA-PSK and AES for WPA2-PSK. Please enter the key in the “Preshare Key”. The key needs to be more than 8 characters and less than 63 characters. It can be any combination of letters and numbers. (Please refer to the included Wireless Security Card insert for your default WPA-PSK2 key) Encryption The type of encryption to use on the wireless network. This may be AES, TKIP or AES/TKIP. Pre-shared Key The password to use for access to the 2.4GHz wireless network. Note: The configuration for WPA-PSK and WPA2-PSK is identical After configuring wireless security, you also need to configure your wireless adapter to use the same security settings before you can connect wirelessly. Not all wireless adapters support WPA-PSK/WPA2-PSK/WPA/WPA2 security. Please refer to your wireless adapter user guide for more information. We strongly recommended that you set up wireless security such as WPA-PSK (when the wireless client supports WPA) in order to secure your network. Click Save to save these settings or click Undo to cancel. www.netcommwireless.com NetComm Wireless 4GM3W User Guide 28 Wireless 5GHz The Wireless 5GHz LAN settings page allows you to configure the 5GHz wireless network features of the router. OPTION DEFINITION Wireless Module Select to enable or disable the Wireless network function of the 4GM3W. Network ID (SSID) Network ID is used for identifying the Wireless LAN (WLAN). Client stations can roam freely over this product and other Access Points that have the same Network ID. (Please refer to the included Wireless Security Card insert for your default SSID) Wireless Turns on or off the 5GHz wireless radio. AP Isolation When enabled, this isolates the wireless clients from other clients of the router so that they are inaccessible to each other. SSID Broadcast The router will broadcast the SSID so that wireless clients can find the wireless network. Channel The wireless radio channel in use by your network. Wireless Mode Choose A only, N only, A/N mixed or A/AN/AC mixed. (The factory default setting is A/AN/AC mixed) Authentication You may select from the following authentication types to secure your wireless network: Open Shared Auto WPA WPA-PSK WPA2 WPA2-PSK WPA/WPA2 WPA-PSK/WPA2-PSK. WPA-PSK/WPA2-PSK is a newer type of security. This type of security gives a more secure network compared to WEP. Use TKIP Encryption Type for WPA-PSK and AES for WPA2-PSK. Please enter the key in the “Preshare Key”. The key needs to be more than 8 characters and less than 63 characters. It can be any combination of letters and numbers. (Please refer to the included Wireless Security Card insert for your default WPA-PSK2 key) Encryption The type of encryption to use on the wireless network. This may be AES, TKIP or AES/TKIP. Pre-shared Key The password to use for access to the 5GHz wireless network. Note: The configuration for WPA-PSK and WPA2-PSK is identical After configuring wireless security, you also need to configure your wireless adapter to use the same security settings before you can connect wirelessly. Not all wireless adapters support WPA-PSK/WPA2-PSK/WPA/WPA2 security. Please refer to your wireless adapter user guide for more information. We strongly recommended that you set up wireless security such as WPA-PSK (when the wireless client supports WPA) in order to secure your network. Click Save to save these settings or click Undo to cancel. NetComm Wireless 4GM3W User Guide 29 www.netcommwireless.com Change Password This page allows you to change the 4GM3W web configuration password. Please type in the old password or username (the factory default username and password is admin) and then type in the new password. Type the same new password in the Reconfirm field and click Save. www.netcommwireless.com NetComm Wireless 4GM3W User Guide 30 Forwarding Rules The Forwarding Rules page allows you to configure the port forwarding management on the router. Click on any of the menu items on the left to access the respective settings page. Forwarding rules are a necessary feature as by default NAT (Network Address Translation) will automatically block incoming traffic from the Internet to the LAN unless a specific port mapping exists in the NAT translation table. Because of this, NAT provides a level of protection for computers that are connected to your LAN. However this also creates a connectivity problem when you want to make LAN resources available to Internet clients. For example, to play network games or host network applications. There are three ways to work around NAT and to enable certain LAN resources available from the Internet: Port Forwarding (available in the Virtual Server page) Port Triggering (available in the Special AP page) DMZ Host (available in the Miscellaneous page) Virtual Server A virtual server is defined as a Service Port, and all requests to this port will be redirected to the computer specified by the Server IP. Virtual Servers can also work with Scheduling Rules, and give you more flexibility on Access control. Please note: For further instructions on scheduling rules, please refer to the “Scheduling” section later in this guide For example, if you have an FTP server (the default port is 21) at 192.168.20.10, a Web server (the default port is 80) at 192.168.20.40, and a VPN server (the default port is 1723) at 192.168.20.60, then you would need to specify the following virtual server mappings: NetComm Wireless 4GM3W User Guide 31 www.netcommwireless.com Please note: At any given time, only one IP address can bind to a particular Service Port. SERVICE PORT SERVER IP ENABLE USE RULE# 21 12.168.1.10 (0) Always 80 192.168.20.40 (0) Always 1723 192.168.20.60 (0) Always Click Save to save the settings or Undo to cancel. Port Triggering Some applications like On-line games, Video conferencing and Internet telephony require multiple connections to the internet. As such, these applications cannot work with a pure NAT router such as the 4GM3W. The Port Triggering feature allows some of these applications to work with this router. Note: If this fails to make the application work, try to set up that computer as the DMZ host instead. (For further instructions on setting up a DMZ host, please refer to the “Miscellaneous” section below) OPTION DEFINITION Trigger The outbound port number that will be triggered by the application.. Incoming Ports When the trigger packet is detected, the inbound packets sent to the specified port numbers will be allowed to pass through the firewall. Enable Select to enable or disable the configured special application entry. The 4GM3W also provides predefined settings for some popular applications. To use the predefined settings, select your application from the Popular application pull down list, select an unused ID from the list and then click Copy to. The predefined settings will then be added to the list. Click Save to save the settings or Undo to cancel. www.netcommwireless.com NetComm Wireless 4GM3W User Guide 32 Miscellaneous A Demilitarized Zone (DMZ) Host is a computer without the protection of firewall. It allows that particular computer to be exposed to unrestricted 2-way communication to the internet. It is mostly used for Internet games, Video conferencing, Internet telephony and other special applications. To enable DMZ, enter the IP address of the computer you want to be live on the internet and click on Enable. Note: This feature should be used only when necessary as it exposes the selected machine to the internet without protection. OPTION DEFINITION IP Address of DMZ Host Enter the IP address of the computer you wish to put in the DMZ. UPnP Setting The device also supports UPnP. If the DMZ host operating system supports this function enable it to automatically configure the required network settings. Click Save to save the settings or Undo to cancel. NetComm Wireless 4GM3W User Guide 33 www.netcommwireless.com Security Settings The Security Settings pages allow you to configure the security management on the router such as Packet filters and MAC Control. Status The Status page lists any currently configured filtering for the Outbound, Inbound and Domain filters. Packet Filters The Packet Filter enables you to control what packets are allowed to pass through the router. There are two types of packet filter, Outbound Packet Filter which applies to all outbound packets and the Inbound Packet Filter which only applies to packets that are destined for a Virtual Server or DMZ host only. Note: For further instructions on setting up MAC Level Filtering, please refer to the “MAC Control” section below Outbound Filter: To enable an Outbound Filter, tick the Enable tick box at the top of the page. www.netcommwireless.com NetComm Wireless 4GM3W User Guide 34 There are two types of filtering policies: Allow all data traffic to pass except those that match the specified rules. Deny all data traffic to pass except those that match the specified rules. You can specify up to 48 filtering rules for each direction (Inbound or Outbound). For each rule you will need to define the following: Source IP address Source port Destination IP address Destination port Protocol: TCP or UDP or both. Use Schedule Rule# For source or destination IP address, you can define a single IP address (192.168.20.1) or a range of IP addresses (192.168.20.100-192.168.20.200). Leaving these fields empty implies all IP addresses are matched. For source or destination port, you can also define a single port (80) or a range of ports (1000-1999). Use the prefix "T" or "U" to specify either the TCP or UDP protocol e.g. T80, U53, U2000-2999. No prefix indicates both TCP and UDP are defined. Leaving this field empty implies all ports are matched. The Packet Filter also works with Scheduling Rules, and gives you more flexibility on Access control. Note: For further instructions on scheduling rules, please refer to the “Scheduling” section later in this guide Click Save to save the settings or Undo to cancel. Inbound Filter: To access the Inbound Packet Filter page, click on the Inbound Filter button on the bottom of the Outbound Filter page. All the settings on this page are the same as those for the Outbound Filter shown on the previous page. Click Save to save the settings or Undo to cancel. NetComm Wireless 4GM3W User Guide 35 www.netcommwireless.com Domain Filters Domain Filters enable you to prevent users from accessing specific domain addresses. To enable the Domain Filter, tick the Enable tick box at the top of the page. OPTION DEFINITION Domain Filter Select to enable or disable domain filtering. Log DNS Query Enable this if you want to log when someone accesses filtered URLs. Privilege IP Addresses Range Set a group of computers that has unrestricted access to the internet To set a Domain Filter, you need to specify the following: OPTION DEFINITION Domain Suffix Please type the suffix of the URL that needs to be restricted. For example, ".com", "xxx. com". Action The router action that you want when someone is accessing a URL that matches the specified domain suffix. Select Drop to block the access and/or select Log to log this access. Enable Tick to enable the rule. Click Save to save the settings or Undo to cancel. www.netcommwireless.com NetComm Wireless 4GM3W User Guide 36 URL Blocking URL Blocking will block LAN computers from connecting to a pre-defined website. The major difference between the Domain Filter and URL Blocking is that Domain Filtering require users to input a suffix (e.g. xxx.com, yyy.net) while URL Blocking only requires you to input a keyword. To enable URL Blocking, select the Enable option at the top of the page. To set a URL Blocking rule, you need to specify the following: OPTION DEFINITION URL If any part of the Website’s URL matches the pre-defined word then the connection will be blocked. For example, you can use pre-defined word "sex" to block all websites if their URLs contain the pre-defined word "sex". Enable Tick to enable the rule. Click Save to save the settings or Undo to cancel. NetComm Wireless 4GM3W User Guide 37 www.netcommwireless.com MAC Control MAC Control allows you to assign different access rights for different users and to assign a specific IP address to a specific MAC address. To enable MAC Address Control, select the Enable option at the top of the page. Two types of MAC Control are available: OPTION DEFINITION Connection control (C column) Use this to control which clients (wired and wireless) can connect to the unit. If a client is denied access to connect to this device, it means the client cannot access the Internet either. Choose to allow or deny clients with MAC addresses that are not in the list to connect to this device. Association control (A column) Check Association Control to control which wireless client can associate with the unit. If a client is denied access to associate with the unit, it means the client cannot send or receive any data via this device. Choose to allow or deny the clients with MAC addresses that are not in the list to associate to the wireless LAN. Note: Click the Next >> or the << Previous buttons to see the entire list Click Save to save the settings or Undo to cancel. www.netcommwireless.com NetComm Wireless 4GM3W User Guide 38 Miscellaneous This page allows you to change various miscellaneous security settings on the unit. OPTION DEFINITION Administrator Time-out The period of time with no activity in the web configuration page to logout automatically, set this to zero to disable this feature. Remote Administration Normally only Intranet users can browse the built-in web pages to perform administration tasks. This feature enables you to perform administration tasks from a remote host. If this feature is enabled, only the specified IP address can perform remote administration. Discard PING from WAN side When this feature is enabled, your router will not respond to ping requests from remote hosts. DoS Attack Detection When this feature is enabled, the router will detect and log where the DoS attack comes from on the Internet. Keep WAN in stealth mode When this feature is enabled, the router will not respond to some other requests initiated by remote hosts from the internet. Note: If the specified IP address is 0.0.0.0, any host can connect to the router to perform administration tasks. You can also use a subnet mask (/nn) to specify a group of trusted IP addresses for example, "10.1.2.0/24". When Remote Administration is enabled, the web server port will be shifted to 80. You can also change the web server port. When enabled, the router can detect the following (and more) DoS attack types: SYN Attack WinNuke Port Scan Ping of Death Land Attack Click Save to save the settings or Undo to cancel. NetComm Wireless 4GM3W User Guide 39 www.netcommwireless.com Advanced Settings The Advanced Settings page allows you to configure the advanced settings on the router such as the System log, Dynamic DNS and SNMP options. Click on any of the menu items on the left to configure the access the respective setting page. Status The Status page displays the current System time, and lists any configured Dynamic DNS (DDNS) accounts, any Static or Dynamic Routes added or any Quality of Service (QoS) rules in place. www.netcommwireless.com NetComm Wireless 4GM3W User Guide 40 System Log This enables you to set up the system log features of the router. You can also choose to send the system log to a remote syslog server (via a UDP connection) or email a copy to a recipient. OPTION DEFINITION IP Address for remote System Logs (syslog) The IP address of the syslog server where the system log data will be sent. Click the "Enable" checkbox to enable this function. Email address to send syslog to Click the “Enable” checkbox to enable this function. SMTP Server : port Enter the IP address or fully qualified domain name (FQDN) and port for the selected email server. SMTP Username The SMTP username required to send email (if required). SMTP Password The SMTP password required to send email (if required). Email Addresses Enter the email addresses to send a copy of the current syslog to. Email Subject Enter the email subject to show on any sent emails. View Log… View the current system log. Email Log Now Email the current syslog to the entered email addresses. NetComm Wireless 4GM3W User Guide 41 www.netcommwireless.com Dynamic DNS The Dynamic DNS feature enables you to set a static domain name for their internet connection even when the ISP only provides a dynamic IP address. By mapping the host name to the current public IP address of the router, users who want to connect to the router or any services behind the router from the internet can just use the Dynamic DNS hostname instead of the IP Address which might change every time the router connects to the Internet. Before you can use Dynamic DNS service, you need to register an account on one of the many supported Dynamic DNS providers such as DynDNS.org, TZO.com or dhs.org. After registering the account, the Dynamic DNS provider will provide you with the following details: Host Name Username/Email Password/Key To enable the Dynamic DNS feature on the unit, click the Enable check box, choose the appropriate Dynamic DNS Provider and enter the details supplied by your Dynamic DNS provider. Click Save to save the settings or Undo to cancel. www.netcommwireless.com NetComm Wireless 4GM3W User Guide 42 QoS Quality of Service (QoS) is a collection of network technologies which allow configuration of different priorities for different applications, users or data flows in order to guarantee a certain level of performance. The ultimate goal of QoS is to guarantee that the network delivers predictable results for availability, throughput, latency and error rate. QoS is especially important in ensuring the smooth operation of real-time streaming applications such as Voice over IP (VoIP), IPTV and online games. As part of a strategy to provide Quality of Service, the 4GM3W supports Type of Service (ToS), the Differentiated Services (DiffServ) architecture and IEEE P802.1p priority tags (specified in the IEEE 802.1Q standard). DiffServ is a mechanism for classifying and managing network traffic by marking each packet on the network with a Differentiated Services Code Point (DSCP) which is a field in an IP packet used for classification purposes and operates at the IP layer. The 4GM3W also supports 802.1p priority tags which operate at the media access control (MAC) level. ToS, like DSCP, is a field in the header of IP packets that marks packets with different types of service such as minimize delay, maximize throughput, maximize reliability, minimize cost or normal service. OPTION DEFINITION QoS Use the drop down list to Enable or Disable QoS. WAN Interface Use the drop down list to select the interface to which QoS should apply. QoS Mode Use the drop down list to select the type of QoS to apply. Smart-QoS lets the router decide on the best settings based on the types of service you select below and the percentage setting assigned to each type of service. Higher percentages give a higher quality of service for that service type. Bandwidth of Upstream Enter the upstream bandwidth in Kilobits per second of your connection so that the router can calculate the best QoS settings. Bandwidth of Downstream Enter the downstream bandwidth in Kilobits per second of your connection so that the router can calculate the best QoS settings. Flexible Bandwidth Management In Smart-QoS mode, when Flexible Bandwidth Management is enabled, you are able to select certain types of traffic to prioritise. The bandwidth allocated to each type of traffic is automatically divided by the number of types selected, for example, if you select “Game”, “VoIP” and “Video”, the router reserves 10% of bandwidth for other types of traffic and splits the remaining 90% of bandwidth equally among the 3 selected types, allowing each type 30% of bandwidth when each type of traffic is concurrently in use. If, for example, only two types of that traffic are in use, the 30% bandwidth allocated to the type of traffic not in use is re-distributed to other applications. When Flexible Bandwidth Management is disabled, you are able to manually specify the percentage of bandwidth to allocate to each type of traffic, however, you must still allow for 10% of bandwidth to be reserved for other types of traffic. NetComm Wireless 4GM3W User Guide 43 www.netcommwireless.com Basic QoS configuration To configure QoS: 1. Set the QoS item to Enable. 2. The WAN Interface item displays the current WAN interface in use by the router and therefore to which interface the configuration applies. 3. Use the QoS Mode drop down list to set the QoS mode to Smart-QoS. 4. In the Bandwidth of Upstream field, enter the total upstream bandwidth of your broadband connection in Kilobits per second. 5. In the Bandwidth of Downstream field, enter the total downstream bandwidth of your broadband connection in Kilobits per second. 6. The Flexible Bandwidth Management option, when enabled, stipulates that you would like the router to manage the prioritisation of the selected traffic types on your behalf. When it is disabled, you have a greater degree of control by specifying a percentage of bandwidth that should be dedicated to a particular type of traffic. Choose whether you want it enabled or disabled and then select the types of traffic you want to give priority to. If you chose to disable flexible bandwidth management, in the Setting column you must also specify the percentage of bandwidth you wish to allocate for each type of traffic. Note: The Setting column’s percentage figures must add up to 90%. The remaining 10% of bandwidth is reserved for other types of network traffic. Advanced QoS configuration To configure QoS: 1. Set the QoS item to Enable. 2. The WAN Interface item displays the current WAN interface in use by the router and therefore to which interface the configuration applies. 3. Use the QoS Mode drop down list to select User-defined QoS Rule to display the QoS rules table. 4. 5. 6. In the Bandwidth of Upstream field, enter the total upstream bandwidth of your broadband connection in Kilobits per second. In the Bandwidth of Downstream field, enter the total downstream bandwidth of your broadband connection in Kilobits per second. The Flexible Bandwidth Management option, when enabled, stipulates that you would like the router to manage the prioritisation of the selected traffic types automatically. When it is disabled, you have a greater degree of control by specifying a percentage of bandwidth that should be dedicated to a particular type of traffic. Choose whether you want it enabled or disabled and then select the types of traffic you want to give priority to. If you chose to disable flexible bandwidth management, in the Setting column you must also specify the percentage of bandwidth you wish to allocate for each type of traffic. Note: The Setting column’s percentage figures must add up to 90%. The remaining 10% of bandwidth is reserved for other types of network traffic. www.netcommwireless.com NetComm Wireless 4GM3W User Guide 44 7. Click the Add A New Rule button. A new screen to configure a QoS rule is displayed. 8. For the Rule item, check the Enable option. Use the descriptions in the table below to complete the rest of the settings for the rule. When the Class field is set to TCPPORT, UDPPORT, MAC, TOS or VLANPRI, you are able to add a conjunction rule. Click the Add A Conjunction (AND) Rule button that appears at the bottom of the page to add a conjunction rule. OPTION DEFINITION Rule Select to enable or disable the QoS rule. Class Select the class of traffic you would like to prioritise. This may be IP, TCP Port, UDP Port, MAC address, DSCP, ToS or VLAN Priority field. Class Info This field is only displayed when you select the Class field to be IP, TCPPORT, UDPPORT, MAC or VLANPRI. Enter the appropriate details for the class you have chosen e.g. an IP address, a TCP or UDP port number, a MAC address or a VLAN Priority flag. IP mask Only displayed when Class is set to IP. Enter the subnet mask of the IP address specified in the Class Info – IP field. Protocol Use the drop down list to select the protocol to which the rule should apply. This may be TCP, UDP or ICMP. DiffServ CodePoint Use the drop down list to select the DiffServ CodePoint that will be marked in the header of IP packets. There are 7 IP Precedence classes which are used in Type of Service headers but are also backwards compatible with DiffServ routers. The IP Precedence codes mark priority traffic. Assured Forwarding (AF) marks are also available. AF marks assign a drop precedence to each packet which defines the likelihood that a packet is dropped if traffic exceeds the subscribed rate. The last type of code is the Expedited Forwarding (EF) code. Packets marked EF have the properties of low delay, low loss and low jitter. This makes EF packets desirable for real-time streaming services for voice and video. Service Type This field is only displayed when the Class field is set to DSCP. The Service Type field specifies the type of packets to which the rule should apply. Use the drop down list to select the service type. The TCP/UDP port numbers are listed in brackets after each item. Type of Service The Type of Service field is only displayed when Class is set to TOS. Use the Type of Service drop down list to specify whether the QoS rule should minimize delay, maximize throughput, maximize reliability, minimize cost or just provide normal service. Function Select the function of the rule. You can select from Priority, Marking, Max Rate, Min Rate, Session, Drop, Log or Alert. Function data This field changes depending on the selected function. When Function is set to PRI (Priority), the Function data field should contain a priority value from 1 to 6 with 1 being the highest priority. When Function is set to MARKING, the Function data field allows you to specify a DiffServ Code Point marking for the packets. When the Function field is set to MAXR (Max Rate) or MINR (Minimum Rate), the Function data field should contain a data transfer rate in either Kilobits per second (KBps) or Megabits per second (MBps). This represents the minimum or maximum rate that the packet should expect to achieve on the network. When the Function field is set to SESSION, the Function data field should contain an integer representing the maximum number of sessions. Direction Select the direction of traffic to prioritise. Available options include In, Out or Both. Schedule Select a schedule for the new rule to apply. Previously created schedules are visible here or you can select the rule to always apply. And Rule – Class This field is displayed only when you have selected to add a conjunction rule. A conjunction rule allows you to add a second set of criteria with which the packets will be marked. Use the drop down list to select a second class of traffic for the rule. The only classes that will show up are MAC, TCPPORT, UDPPORT, TOS or VLANPRI. And Rule – Class Info This field is only displayed when you select to add a conjunction rule. Enter the appropriate details for the class you have chosen e.g. a MAC address, a TCP or UDP port number, a Type of Service or a VLAN Priority flag. Note: For further instructions on scheduling rules, please refer to the “Scheduling” section later in this guide NetComm Wireless 4GM3W User Guide 45 www.netcommwireless.com Click on Save to store your setting or Undo to discard your changes. QoS configuration examples Example 1. To limit downstream bandwidth on LAN port 1 (IP address 192.168.20.2) to 100 KBps: Click the Add a New Rule button. Enter the settings as below. When the direction is set to “IN”, the QoS function checks packets coming from the WAN side to the LAN side. The QoS rule is displayed in the QoS Rules Table at the bottom of the screen. The machine on LAN port 1 is now always restricted to a maximum download speed of 100 KBps at all times. To disable the rule, remove the check from the checkbox on the left. To delete the rule, click the X in the box after the rule number. www.netcommwireless.com NetComm Wireless 4GM3W User Guide 46 Example 2 To limit the number of sessions (per port) that can be made in an outbound direction from the machine on LAN port 1 (192.168.20.2) to 4 sessions: Click the Add a New Rule button. Enter the settings as below. When the direction is set to “OUT”, the QoS function checks packets going from the LAN side to the WAN side. The QoS rule is displayed in the QoS Rules Table at the bottom of the screen. The machine on LAN port 1 will not be able to make more than 4 simultaneous outbound connections to a server. To disable the rule, remove the check from the checkbox on the left. To delete the rule, click the X in the box after the rule number. NetComm Wireless 4GM3W User Guide 47 www.netcommwireless.com SNMP SNMP (Simple Network Management Protocol) is a protocol designed to give a user the capability to remotely manage a computer network by polling and setting terminal values and monitoring network events. OPTION DEFINITION Enable SNMP You must check Local, Remote or both to enable SNMP function. If Local is checked, this device will only respond to requests from LAN connected hosts. If Remote is checked, this device will respond to requests from the WAN connection. Get Community Sets the community string your device will respond to for Read-Only access. Set Community Sets the community string your device will respond to for Read/Write access. IP 1, IP 2, IP 3, IP 4 Input your SNMP Management host IP here. You will need to configure the address where the device should send SNMP Trap messages to. SNMP Version Please select proper SNMP Version that your SNMP Management software supports. WAN Access IP Address You can limit remote access to a specific IP address by entering it here. Note: If "Remote" access is enabled, the default setting of 0.0.0.0 means any IP obtain SNMP protocol Information. Click on Save to store your setting or Undo to discard your changes. www.netcommwireless.com NetComm Wireless 4GM3W User Guide 48 Routing Routing tables allow you to determine which physical interface address to use for outgoing IP data. If you have more than one router and subnet, you will need to configure the routing table to allow packets to find the proper routing path and allow different subnets to communicate with each other. These settings are used to setup the static and dynamic routing features of the 4GM3W. Dynamic Routing: Routing Information Protocol (RIP) will exchange information about different host destinations for working out routes throughout the network. Note: Only select RIPv2 if you have a different subnet in your network. Otherwise, please select RIPv1. Static Routing: For static routing, you can specify up to 8 routing rules. You need to enter the destination IP address; subnet mask, gateway, and hop for each routing rule, then enable the rule by clicking the Enable checkbox. Click on Save to store your setting or Undo to discard your changes. NetComm Wireless 4GM3W User Guide 49 www.netcommwireless.com System Time This page allows you to change the System time setting on the 4GM3W. OPTION DEFINITION Time Zone Select the time zone where this device is located. Auto-Synchronization Select the "Enable" checkbox to enable this function. Time Server Select a NTP time server to obtain the current UTC time from. Sync with Time Server Select if you want to set Date and Time by NTP Protocol. Sync with my PC Select if you want to set Date and Time using your computers Date and Time Click Save to save the settings or Undo to cancel. www.netcommwireless.com NetComm Wireless 4GM3W User Guide 50 Scheduling You can use scheduling to enable or disable a service at a specific time or on a specific day. Select Enable and then click the Add New Rule button. Select a name for the rule and enter the details such as the day, start time or end time and click the Save button In the example below, the rule is called “Work Hours” and it is only active between 08:00 and 17:30. You are then able to select the scheduling rule name specified from the Packet Filter configuration section to perform the configured filtering at the scheduled time as per the screenshot below. This example would prevent any access to the IP address 66.102.11.104 from any device connected to the router, 7 days a week, only between the hours of 08:00 and 17:30. Click the Save button to save the settings or the Undo button to cancel. NetComm Wireless 4GM3W User Guide 51 www.netcommwireless.com IPv6 The IPv6 page enables you to configure the settings used for an IPv6 connection (if supported by your Internet Service Provider). OPTION IPv6 DEFINITION Select to enable or disable IPv6 functionality. Select the type of IPv6 connection to utilise for your service. You can select from: IPv6 Connection 6 to 4 IPv6 in IPv4 Tunnel Select the type of connection as required by your Internet Service Provider for their IPv6 service. DNS Setting Select whether to automatically obtain DNS Server addresses or use the ones you manually specify. Primary DNS Address Enter the Primary DNS Address for the IPv6 connection. Secondary DNS Address Enter the Secondary DNS Address for the IPv6 connection. LAN IPv6 Address The IP Address to use for the IPv6 service connection. LAN IPv6 Link-Local Address The current local LAN IPv6 address of the NF5. Autoconfiguration Select to enable or disable IPv6 auto configuration (if supported by your Internet Service Provider). Autoconfiguration Type Select the appropriate type of auto configuration mode as required by your Internet Service Provider for their IPv6 service. Router Advertisement Lifetime Enter the length of time between the router advertising its availability on the IPv6 connection. www.netcommwireless.com NetComm Wireless 4GM3W User Guide 52 NAS Settings The NAS Settings page enables you to configure the network area storage (NAS) function of the 4GM3W. This function can be used to remotely access files stored on an attached USB hard drive. Click on any of the menu items to access the respective configuration page. Disk Utility The Disk Utility function enables you to check any attached USB storage for errors. The 4GM3W will scan the attached storage and determine if there are any file system errors present. File System errors can prevent you being able to access stored content. You can also format (erase) any attached storage if needed. Simply click the appropriate button to perform either task. File Sharing The File Sharing function enables the 4GM3W to take part in a Windows networking environment. Once configured, the attached USB Storage can be viewed from Windows by typing: \\<Configured Name of the 4GM3W>\Storage\ Files can then be dragged and dropped onto the attached USB storage. OPTION DEFINITION Computer Name Enter the computer name the 4GM3W is to use on the network. WorkGroup Enter the network workgroup the 4GM3W is to be a member of. Server Comment Enter the comment to be displayed when a list of network hosts is shown. The File Sharing configuration also enables you to enable the built-in FTP server function and the associated settings: OPTION DEFINITION FTP Select to enable or disable the FTP server function. FTP Port Enter the network port the FTP server should run on. FTP Max Connections per IP Enter the maximum number of concurrent connections which can be used by a particular IP address. FTP Max Clients Enter the maximum number of clients which can connect to the FTP concurrently. Client Support UTF8 Enable Unicode support for connected clients. NetComm Wireless 4GM3W User Guide 53 www.netcommwireless.com Access Control The Access Control function provides control over which users can access any attached USB Storage. By default, the 4GM3W is in “Guest Mode” which means anyone can access the attached hard drive. Enabling “Authorization Mode” allows the creation of specific user accounts with a password to further control access permissions. To enable this, click on the Authorization Mode radio button and click Save. You can then click on the User Configuration button in order to create the required user accounts. Add the user name and password and then click the Add button. Alternatively, to remove a user, click on the radio button to the right of the username and then select Delete. www.netcommwireless.com NetComm Wireless 4GM3W User Guide 54 Download Assistant The Download Assistant enables you to schedule the 4GM3W to perform a download from an Internet host. You are able to select from two download types: FTP HTTP Each type of download job requires different configuration options. FTP OPTION DEFINITION Job Name A name to identify the download job. URL The address to download from. Port The port required for the FTP server (This would usually be left as 21). Save To The location on the 4GM3W to save the downloaded file to. Login Method Select the type of authentication required by the FTP server (Selecting anonymous means a username and password are not required). Username The username required to access the FTP server. Password The password required to access the FTP server. Start Time Select to either schedule a time for the download to begin or start the download immediately. NetComm Wireless 4GM3W User Guide 55 www.netcommwireless.com HTTP OPTION DEFINITION Job Name A name to identify the download job. URL The address to download from. Save To The location on the 4GM3W to save the downloaded file to. Start Time Select to either schedule a time for the download to begin or start the download immediately. www.netcommwireless.com NetComm Wireless 4GM3W User Guide 56 Download Status The Download Status page enables you to monitor previously scheduled Download Assistant jobs. From this page you are able to Start, Pause, Resume or Delete any Download Assistant jobs. The View drop-down list enables you to select whether currently running jobs, waiting jobs or scheduled jobs are displayed. Once listed, click on the checkbox on the left hand side of the listed jobs and then click the appropriate function button. Web HDD The Web HDD function provides a web page based Windows Explorer type view of the content of any attached USB storage. Using this interface you are able to upload, download or delete files and folders as well as create directories. Click through the displayed folders to show any stored files. Left click on any items to select them and click the appropriate button or double click folders to view any content. To upload files to your Web HDD, click the Upload button. You can then click the Browse button and then navigate to the file you would like to upload. Once selected, this file will be copied to the Web HDD and become available to download by connected devices. NetComm Wireless 4GM3W User Guide 57 www.netcommwireless.com Toolbox The toolbox menu provides access to various settings and maintenance functions of the router. System Info The System Info screen displays the general settings on the router, such as the WAN type, the date and time, the log types and the log data. Routing Table The Routing table displays the current routes in place on the router. Click the Refresh button to update this list. Restore Settings The Restore settings page allows you to restore a previously saved configuration of the router. This is handy for reverting to a working configuration when making changes to the router’s settings. To restore the router configuration, click the Browse button, select the saved configuration file and then click the Restore button. www.netcommwireless.com NetComm Wireless 4GM3W User Guide 58 Firmware Upgrade This page lets you upgrade the firmware of the router. The firmware is the system running on the router. New firmware updates are regularly made available and can fix bugs and add new features. Backup Settings Click the Backup Settings menu item to save the current configuration of the router to a file for safe-keeping. Reset to Default Click the Reset to Default menu item to set the configuration of the router to the factory default settings. Note: This will erase all configuration settings. Ensure you have a backup of your configuration before proceeding to reset to default settings. Reboot Click the Reboot menu item to restart the router. Startup Wizard Click the Startup Wizard menu item if you want to run the initial wizard that showed the first time you installed your router. Miscellaneous The miscellaneous page provides the ability to ping a domain name or IP address which can be useful for verifying the router’s internet connection. Logout The Logout menu item logs you out of the router. NetComm Wireless 4GM3W User Guide 59 www.netcommwireless.com Additional Product Information Establishing a wireless connection Windows XP (Service Pack 3) 1. 2. 3. 4. 5. Open the Network Connections control panel (Start -> Control Panel -> Network Connections): Right-click on your Wireless Network Connection and select View Available Wireless Networks: Select the wireless network listed on your included wireless security card and click Connect. Enter the network key (refer to the included wireless security card for the default wireless network key). The connection will show Connected. Windows Vista 1. 2. 3. 4. 5. 6. 7. Open the Network and Sharing Center (Start > Control Panel > Network and Sharing center). Click on "Connect to a network". Choose "Connect to the Internet" and click on "Next". Select the wireless network listed on your included wireless security card and click Connect. Enter the network key (refer to the included wireless security card for the default wireless network key). Select the appropriate location. This will affect the firewall settings on the computer. Click on both "Save this network" and "Start this connection automatically" and click "Next". Windows 7 1. 2. 3. 4. 5. 6. 7. 8. 9. Open the Network and Sharing Center (Start > Control Panel > Network and Sharing center). Click on "Change Adapter settings" on the left-hand side. Right-click on "Wireless Network Connection" and select "Connect / Disconnect". Select the wireless network listed on your included wireless security card and click Connect. Enter the network key (refer to the included wireless security card for the default wireless network key). You may then see a window that asks you to "Select a location for the 'wireless' network". Please select the "Home" location. You may then see a window prompting you to setup a "HomeGroup". Click "Cancel" on this. You can verify your wireless connection by clicking the "Wireless Signal" indicator in your system tray. After clicking on this, you should see an entry matching the SSID of your 4GM3W with "Connected" next to it. Mac OSX 10.6 1. 2. 3. 4. Click on the Airport icon on the top right menu. Select the wireless network listed on your included wireless security card and click Connect. On the new window, select “Show Password”, type in the network key (refer to the included wireless security card for the default wireless network key) in the Password field and then click on OK. To check the connection, click on the Airport icon and there should be a tick on the wireless network name. Note: For other operating systems, or if you use a wireless adaptor utility to configure your wireless connection, please consult the wireless adapter documentation for instructions on establishing a wireless connection. www.netcommwireless.com NetComm Wireless 4GM3W User Guide 60 Troubleshooting Using the indicator lights (LEDs) to Diagnose Problems The LEDs are useful aides for finding possible problem causes. Power LED The Power LED does not light up. STEP CORRECTIVE ACTION 1 Make sure that the 4GM3W power adaptor is connected to the device and plugged in to an appropriate power source. Use only the supplied power adaptor. 2 Check that the 4GM3W and the power source are both turned on and device is receiving sufficient power. 3 Turn the 4GM3W off and on. 4 If the error persists, you may have a hardware problem. In this case, you should contact technical support. Web Configuration I cannot access the web configuration pages. CORRECTIVE ACTION STEP CORRECTIVE ACTION 1 Make sure you are using the correct IP address of the 4GM3W. You can check the IP address of the device from the Network Setup configuration page. 2 Check that you have enabled remote administration access. If you have configured an inbound packet filter, ensure your computer’s IP address matches it. 3 Your computer’s and the 4GM3W’s IP addresses must be on the same subnet for LAN access. You can check the subnet in use by the router on the Network Setup page. 4 If you have changed the devices IP address, then enter the new one as the URL you enter into the address bar of your web browser. The web configuration does not display properly. STEP CORRECTIVE ACTION Delete the temporary web files and log in again. In Internet Explorer, click Tools, Internet Options and then click the Delete Files ... button. When a Delete Files window displays, select Delete all offline content and click OK. (Steps may vary depending on the version of your Internet browser.) 1 CORRECTIVE ACTION Login Username and Password I forgot my login username and/or password. STEP CORRECTIVE ACTION 1 Press the Reset button for ten seconds, and then release it. When the Power LED begins to blink, the defaults have been restored and the 4GM3W restarts. You can now login with the factory default username and password “admin” (without the quotes) 2 It is highly recommended to change the default username and password. Make sure you store the username and password in a safe place. S CORRECTIVE ACT WLAN Interface I cannot access the 4GM3W from the WLAN or ping any computer on the WLAN. STEP 1 CORRECT ACTION If you are using a static IP address for the WLAN connection, make sure that the IP address and the subnet mask of the 4GM3W and your computer(s) are on the same subnet. You can check the routers configuration from the Network Setup page. NetComm Wireless 4GM3W User Guide 61 www.netcommwireless.com Technical Data The following table lists the hardware specifications of the 4GM3W. MODEL 4GM3W Wireless LAN 1x1 Internal WiFi (IEEE 802.11ac) 2x2 Internal WiFi (IEEE802.11b/g/n) Ethernet WAN/LAN port 1 x WAN/LAN port (10/100/1000Mbps) Connectivity 1 x USB 2.0, 1 x 10/100/1000Mbps WAN/LAN, WLAN Power, Internet LED Indicators Operating Temperature Power Input Dimensions & Weight Regulatory Compliance Operating temperature: 0-40°C, Humidity 10%-90% non-condensing Storage temperature: -10-70°C, Humidity: 0%-95% non-condensing DC Input Voltage 5V/2A 98mm (L) x 68mm (W) x 20.5mm(H), 74 grams RCM Electrical Specifications It is recommended that the 4GM3W be powered by the supplied 12V DC, 2A power supply. A replacement power supply is available from the NetComm Wireless Online shop. Environmental Specifications / Tolerances The 4GM3W housing enables it to operate over a wide variety of temperatures from 0˚C - 40˚C (operating temperature). www.netcommwireless.com NetComm Wireless 4GM3W User Guide 62 Legal & Regulatory Information Intellectual Property Rights All intellectual property rights (including copyright and trade mark rights) subsisting in, relating to or arising out this Manual are owned by and vest in NetComm Wireless (ACN 002490486) (NetComm Wireless Limited) (or its licensors). This Manual does not transfer any right, title or interest in NetComm Wireless Limited’s (or its licensors’) intellectual property rights to you. You are permitted to use this Manual for the sole purpose of using the NetComm Wireless product to which it relates. Otherwise no part of this Manual may be reproduced, stored in a retrieval system or transmitted in any form, by any means, be it electronic, mechanical, recording or otherwise, without the prior written permission of NetComm Wireless Limited. NetComm, NetComm Wireless and NetComm Wireless Limited are a trademark of NetComm Wireless Limited. All other trademarks are acknowledged to be the property of their respective owners. Customer Information The Australian Communications & Media Authority (ACMA) requires you to be aware of the following information and warnings: 1. This unit may be connected to the Telecommunication Network through a line cord which meets the requirements of the AS/CA S008-2011 Standard. 2. This equipment incorporates a radio transmitting device, in normal use a separation distance of 20cm will ensure radio frequency exposure levels complies with Australian and New Zealand standards. 3. This equipment has been tested and found to comply with the Standards for C-Tick and or A-Tick as set by the ACMA. These standards are designed to provide reasonable protection against harmful interference in a residential installation. This equipment generates, uses, and can radiate radio noise and, if not installed and used in accordance with the instructions detailed within this manual, may cause interference to radio communications. However, there is no guarantee that interference will not occur with the installation of this product in your home or office. If this equipment does cause some degree of interference to radio or television reception, which can be determined by turning the equipment off and on, we encourage the user to try to correct the interference by one or more of the following measures: 4. i. Change the direction or relocate the receiving antenna. ii. Increase the separation between this equipment and the receiver. iii. Connect the equipment to an alternate power outlet on a different power circuit from that to which the receiver/TV is connected. iv. Consult an experienced radio/TV technician for help. The power supply that is provided with this unit is only intended for use with this product. Do not use this power supply with any other product or do not use any other power supply that is not approved for use with this product by NetComm Wireless. Failure to do so may cause damage to this product, fire or result in personal injury. Consumer Protection Laws Australian and New Zealand consumer law in certain circumstances implies mandatory guarantees, conditions and warranties which cannot be excluded by NetComm and legislation of another country's Government may have a similar effect (together these are the Consumer Protection Laws). Any warranty or representation provided by NetComm is in addition to, and not in replacement of, your rights under such Consumer Protection Laws. If you purchased our goods in Australia and you are a consumer, you are entitled to a replacement or refund for a major failure and for compensation for any other reasonably foreseeable loss or damage. You are also entitled to have the goods repaired or replaced if the goods fail to be of acceptable quality and the failure does not amount to a major failure. If you purchased our goods in New Zealand and are a consumer you will also be entitled to similar statutory guarantees. NetComm Wireless 4GM3W User Guide 63 www.netcommwireless.com Product Warranty All NetComm Wireless products have a standard one (1) year warranty from date of purchase, however, some products have an extended warranty option (refer to packaging and the warranty card) (each a Product Warranty). To be eligible for the extended warranty option you must supply the requested warranty information to NetComm Wireless Limited within 30 days of the original purchase date by registering online via the NetComm Wireless web site at www.netcommwireless.com. For all Product Warranty claims you will require proof of purchase. All Product Warranties are in addition to your rights and remedies under applicable Consumer Protection Laws which cannot be excluded (see Consumer Protection Laws Section above). Subject to your rights and remedies under applicable Consumer Protection Laws which cannot be excluded (see the Consumer Protection Laws Section above), the Product Warranty is granted on the following conditions: 1. the Product Warranty extends to the original purchaser (you / the customer) and is not transferable; 2. the Product Warranty shall not apply to software programs, batteries, power supplies, cables or other accessories supplied in or with the product; 3. the customer complies with all of the terms of any relevant agreement with NetComm and any other reasonable requirements of NetComm including producing such evidence of purchase as NetComm may require; 4. the cost of transporting product to and from NetComm’s nominated premises is your responsibility; 5. NetComm Wireless Limited does not have any liability or responsibility under the Product Warranty where any cost, loss, injury or damage of any kind, whether direct, indirect, consequential, incidental or otherwise arises out of events beyond NetComm’s reasonable control. This includes but is not limited to: acts of God, war, riot, embargoes, acts of civil or military authorities, fire, floods, electricity outages, lightning, power surges, or shortages of materials or labour; and 6. the customer is responsible for the security of their computer and network at all times. Security features may be disabled within the factory default settings. NetComm Wireless Limited recommends that you enable these features to enhance your security. Subject to your rights and remedies under applicable Consumer Protection Laws which cannot be excluded (see Section 3 above), the Product Warranty is automatically voided if: 1. you, or someone else, use the product, or attempt to use it, other than as specified by NetComm Wireless Limited; 2. the fault or defect in your product is the result of a voltage surge subjected to the product either by the way of power supply or communication line, whether caused by thunderstorm activity or any other cause(s); 3. the fault is the result of accidental damage or damage in transit, including but not limited to liquid spillage; 4. your product has been used for any purposes other than that for which it is sold, or in any way other than in strict accordance with the user manual supplied; 5. your product has been repaired or modified or attempted to be repaired or modified, other than by a qualified person at a service centre authorised by NetComm Wireless Limited; or 6. the serial number has been defaced or altered in any way or if the serial number plate has been removed. Limitation of Liability This clause does not apply to New Zealand consumers. Subject to your rights and remedies under applicable Consumer Protection Laws which cannot be excluded (see the Consumer Protection Laws Section above), NetComm Wireless Limited accepts no liability or responsibility, for consequences arising from the use of this product. NetComm Wireless Limited reserves the right to change the specifications and operating details of this product without notice. If any law implies a guarantee, condition or warranty in respect of goods or services supplied, and NetComm Wireless’s liability for breach of that condition or warranty may not be excluded but may be limited, then subject to your rights and remedies under any applicable Consumer Protection Laws which cannot be excluded, NetComm Wireless’s liability for any breach of that guarantee, condition or warranty is limited to: (i) in the case of a supply of goods, NetComm Wireless Limited doing any one or more of the following: replacing the goods or supplying equivalent goods; repairing the goods; paying the cost of replacing the goods or of acquiring equivalent goods; or paying the cost of having the goods repaired; or (ii) in the case of a supply of services, NetComm Wireless Limited doing either or both of the following: supplying the services again; or paying the cost of having the services supplied again. To the extent NetComm Wireless Limited is unable to limit its liability as set out above, NetComm Wireless Limited limits its liability to the extent such liability is lawfully able to be limited. www.netcommwireless.com NetComm Wireless 4GM3W User Guide 64 Contact Address: NETCOMM WIRELESS LIMITED Head Office PO Box 1200, Lane Cove NSW 2066 Australia Phone: +61(0)2 9424 2070 Fax: +61(0)2 9424 2010 Email: [email protected] [email protected] NetComm Wireless 4GM3W User Guide 65 www.netcommwireless.com


